
hedotwo
-
Posts
1,551 -
Joined
-
Last visited
Content Type
Profiles
Forums
Events
Gallery
Everything posted by hedotwo
-
Totally agree with the Corvair rear bumper. But, not so sure about C being a C2 Vette rear. I think the C2's were split bumpers front and rear?
-
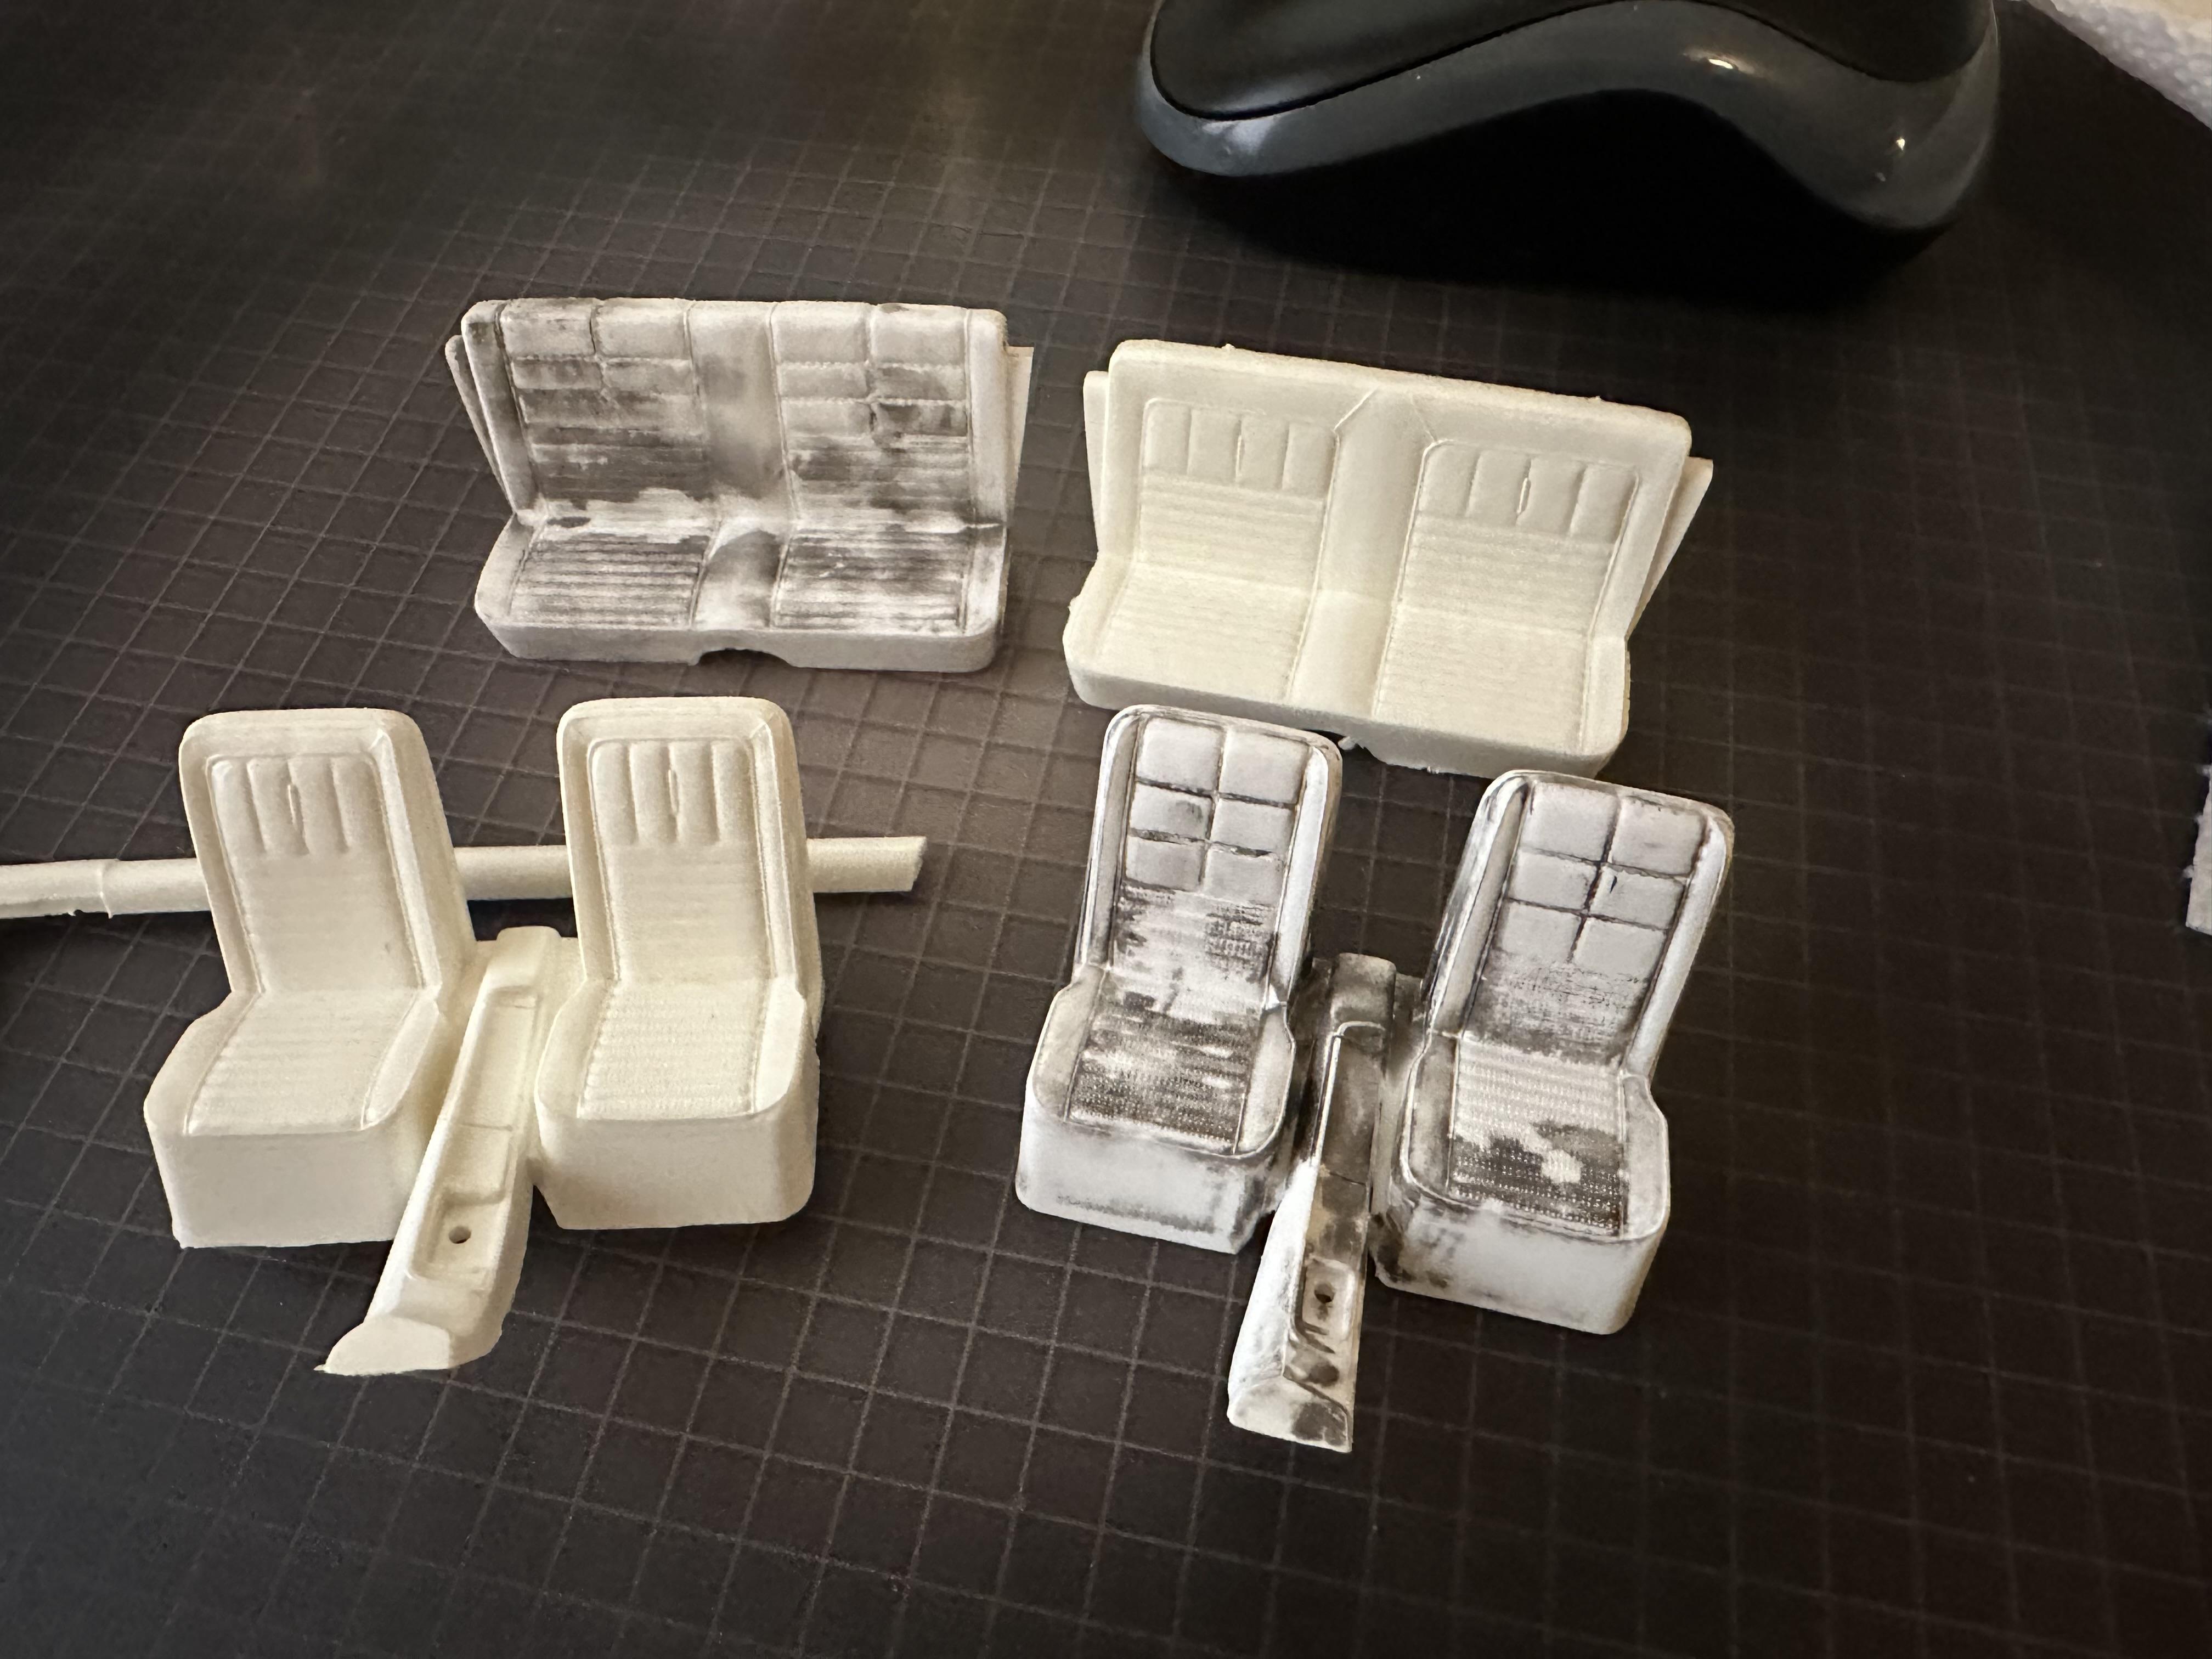
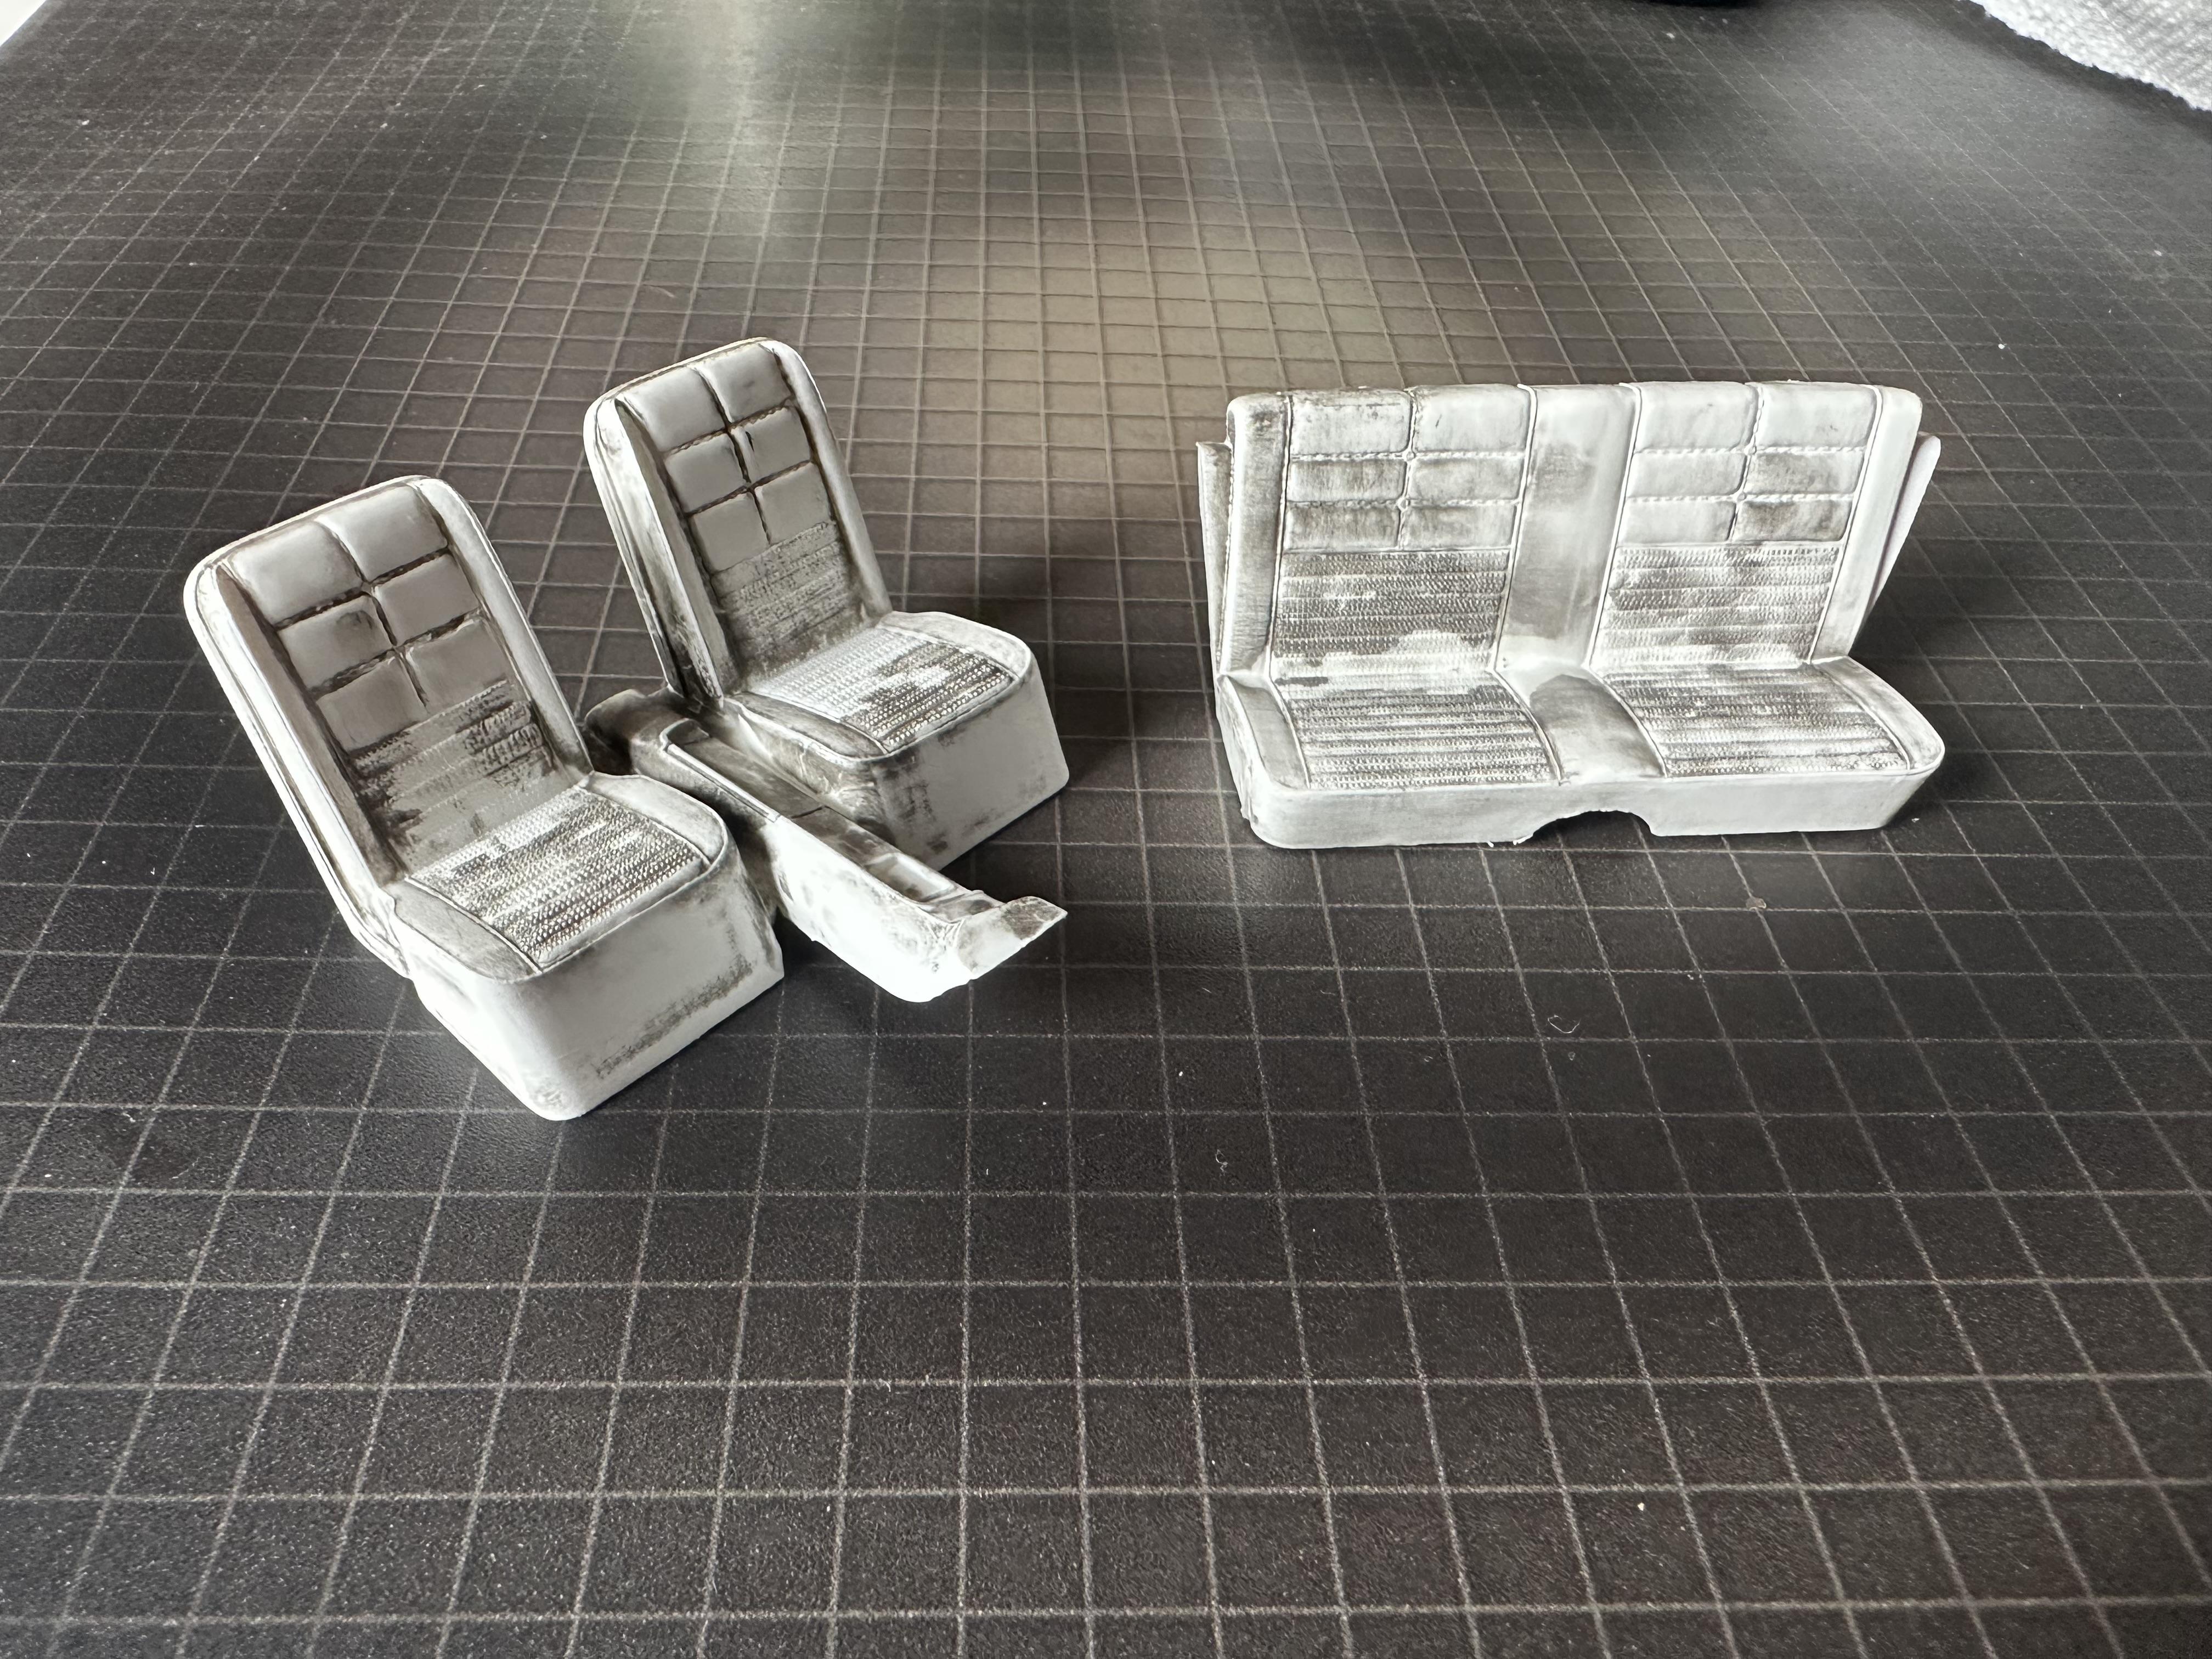
Hopefully these photos aren't too confusing. I'm sorting out my spare parts and these have me stumpted. Any ideas? Thanks!

-
I agree with Greg. Their PE saws are great and I'd be lost without them.
-

DiOlex resin 77 Caprice four door
hedotwo replied to hedotwo's topic in Model Building Questions and Answers
Been busy with summer so I haven't had a chance to do much more than prep and prime the 3d body. I have time to look for the '91 kit, but I don't want to spend too much on a kit just to use the running gear and chassis. It's going to end up in my display case anyway. But, if I do find one that isn't too much I'll maybe do it. I already modded that spare '65 Riviera chassis that I've had lying around so worst case I use that. It fits nicely, but obviously isn't correct for the Caprice. Definitely not going to open up the engine bay though. The hood looks great right now and generally when I cut out a hood (even with a really thin PE saw) it never looks that good. And again, it'll be in a case for the remainder of my lifetime, likely never wanting to open the hood anyway ? -
You win! Thanks ?
-
I have 66 and 67 Cyclone annuals that I can check later when I get home. I think we're getting close.... ?
-
I have an annual and these are close but not exact ?♂️
-
Any ideas what this interior is to? Thanks!
-
Got started sanding on the 3D printed 1977 Caprice 4dr, but still lots to do. First time working with a 3D resin but so far, so good. I was also able to find a suitable chassis/running gear for the build. It's from the often repopped '65 Riviera. Minor tweeking made it fit nicely. First thing is I needed to deepen the panel lines before sanding to make sure I didn't lose them. Ok, so it's not correct for the Caprice, and it's a generic metal axle chassis. But.... I'm good with it.
-
Confused about 3d printing
hedotwo replied to jeffp60's topic in Truck Aftermarket / Resin / 3D Printed
I'll second all the positive comments on buying the 3d's from Ukraine. I found the quality execptional and the wait wasn't as long as I'd expected. -
DiOlex resin 77 Caprice four door
hedotwo replied to hedotwo's topic in Model Building Questions and Answers
Thanks for the suggestions... hopefully I'll begin work on the Caprice soon and maybe post some pics as I go. -
DiOlex resin 77 Caprice four door
hedotwo replied to hedotwo's topic in Model Building Questions and Answers
I'll see if I can't find the Johan Caddy. If not, I have a 65 Riviera that fits actually pretty well with only minor trimming. Obviously it won't resemble the Caprice but sacrifices sometimes need to be made ? And, the Riv stock wheel covers aren't way far from the Caprice stock covers. Edit.... after posting I looked at ebay for those Johan Caddy snappers and after seeing the prices I guess I'd have to pass on trying to find one just to donate the running gear. I'll likely just go with the 65 Riv in that case. Thanks Steve -
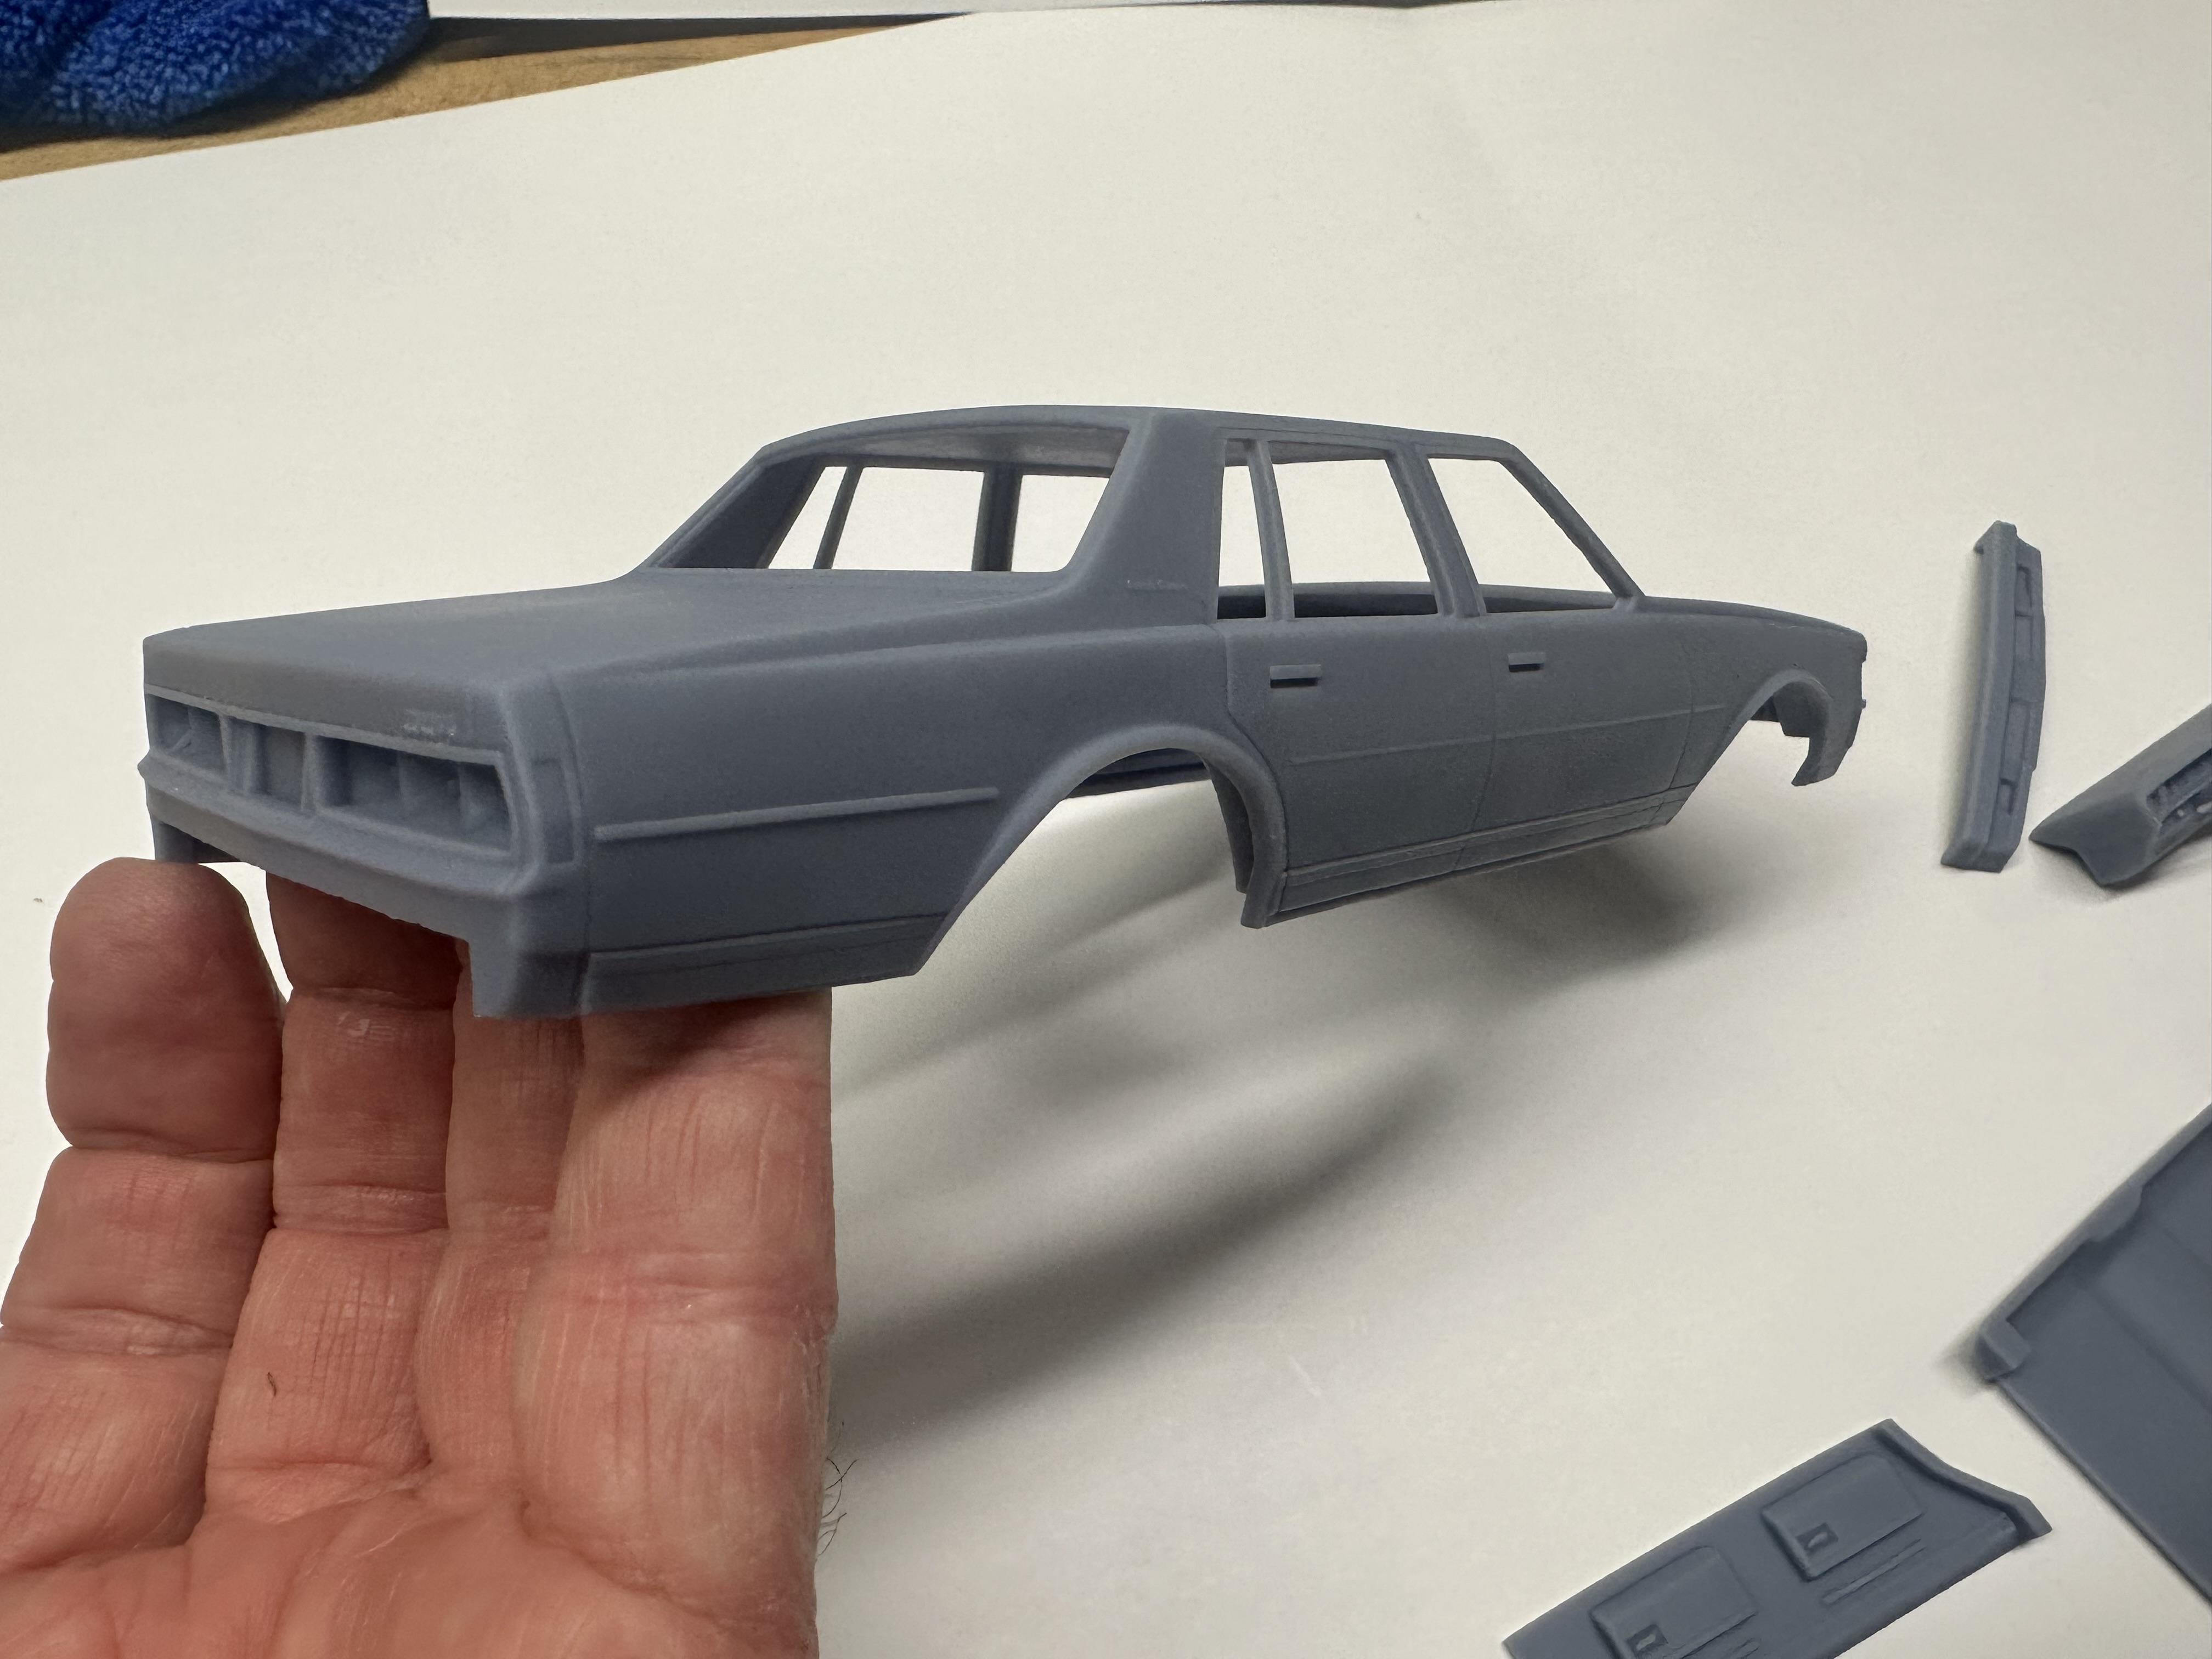
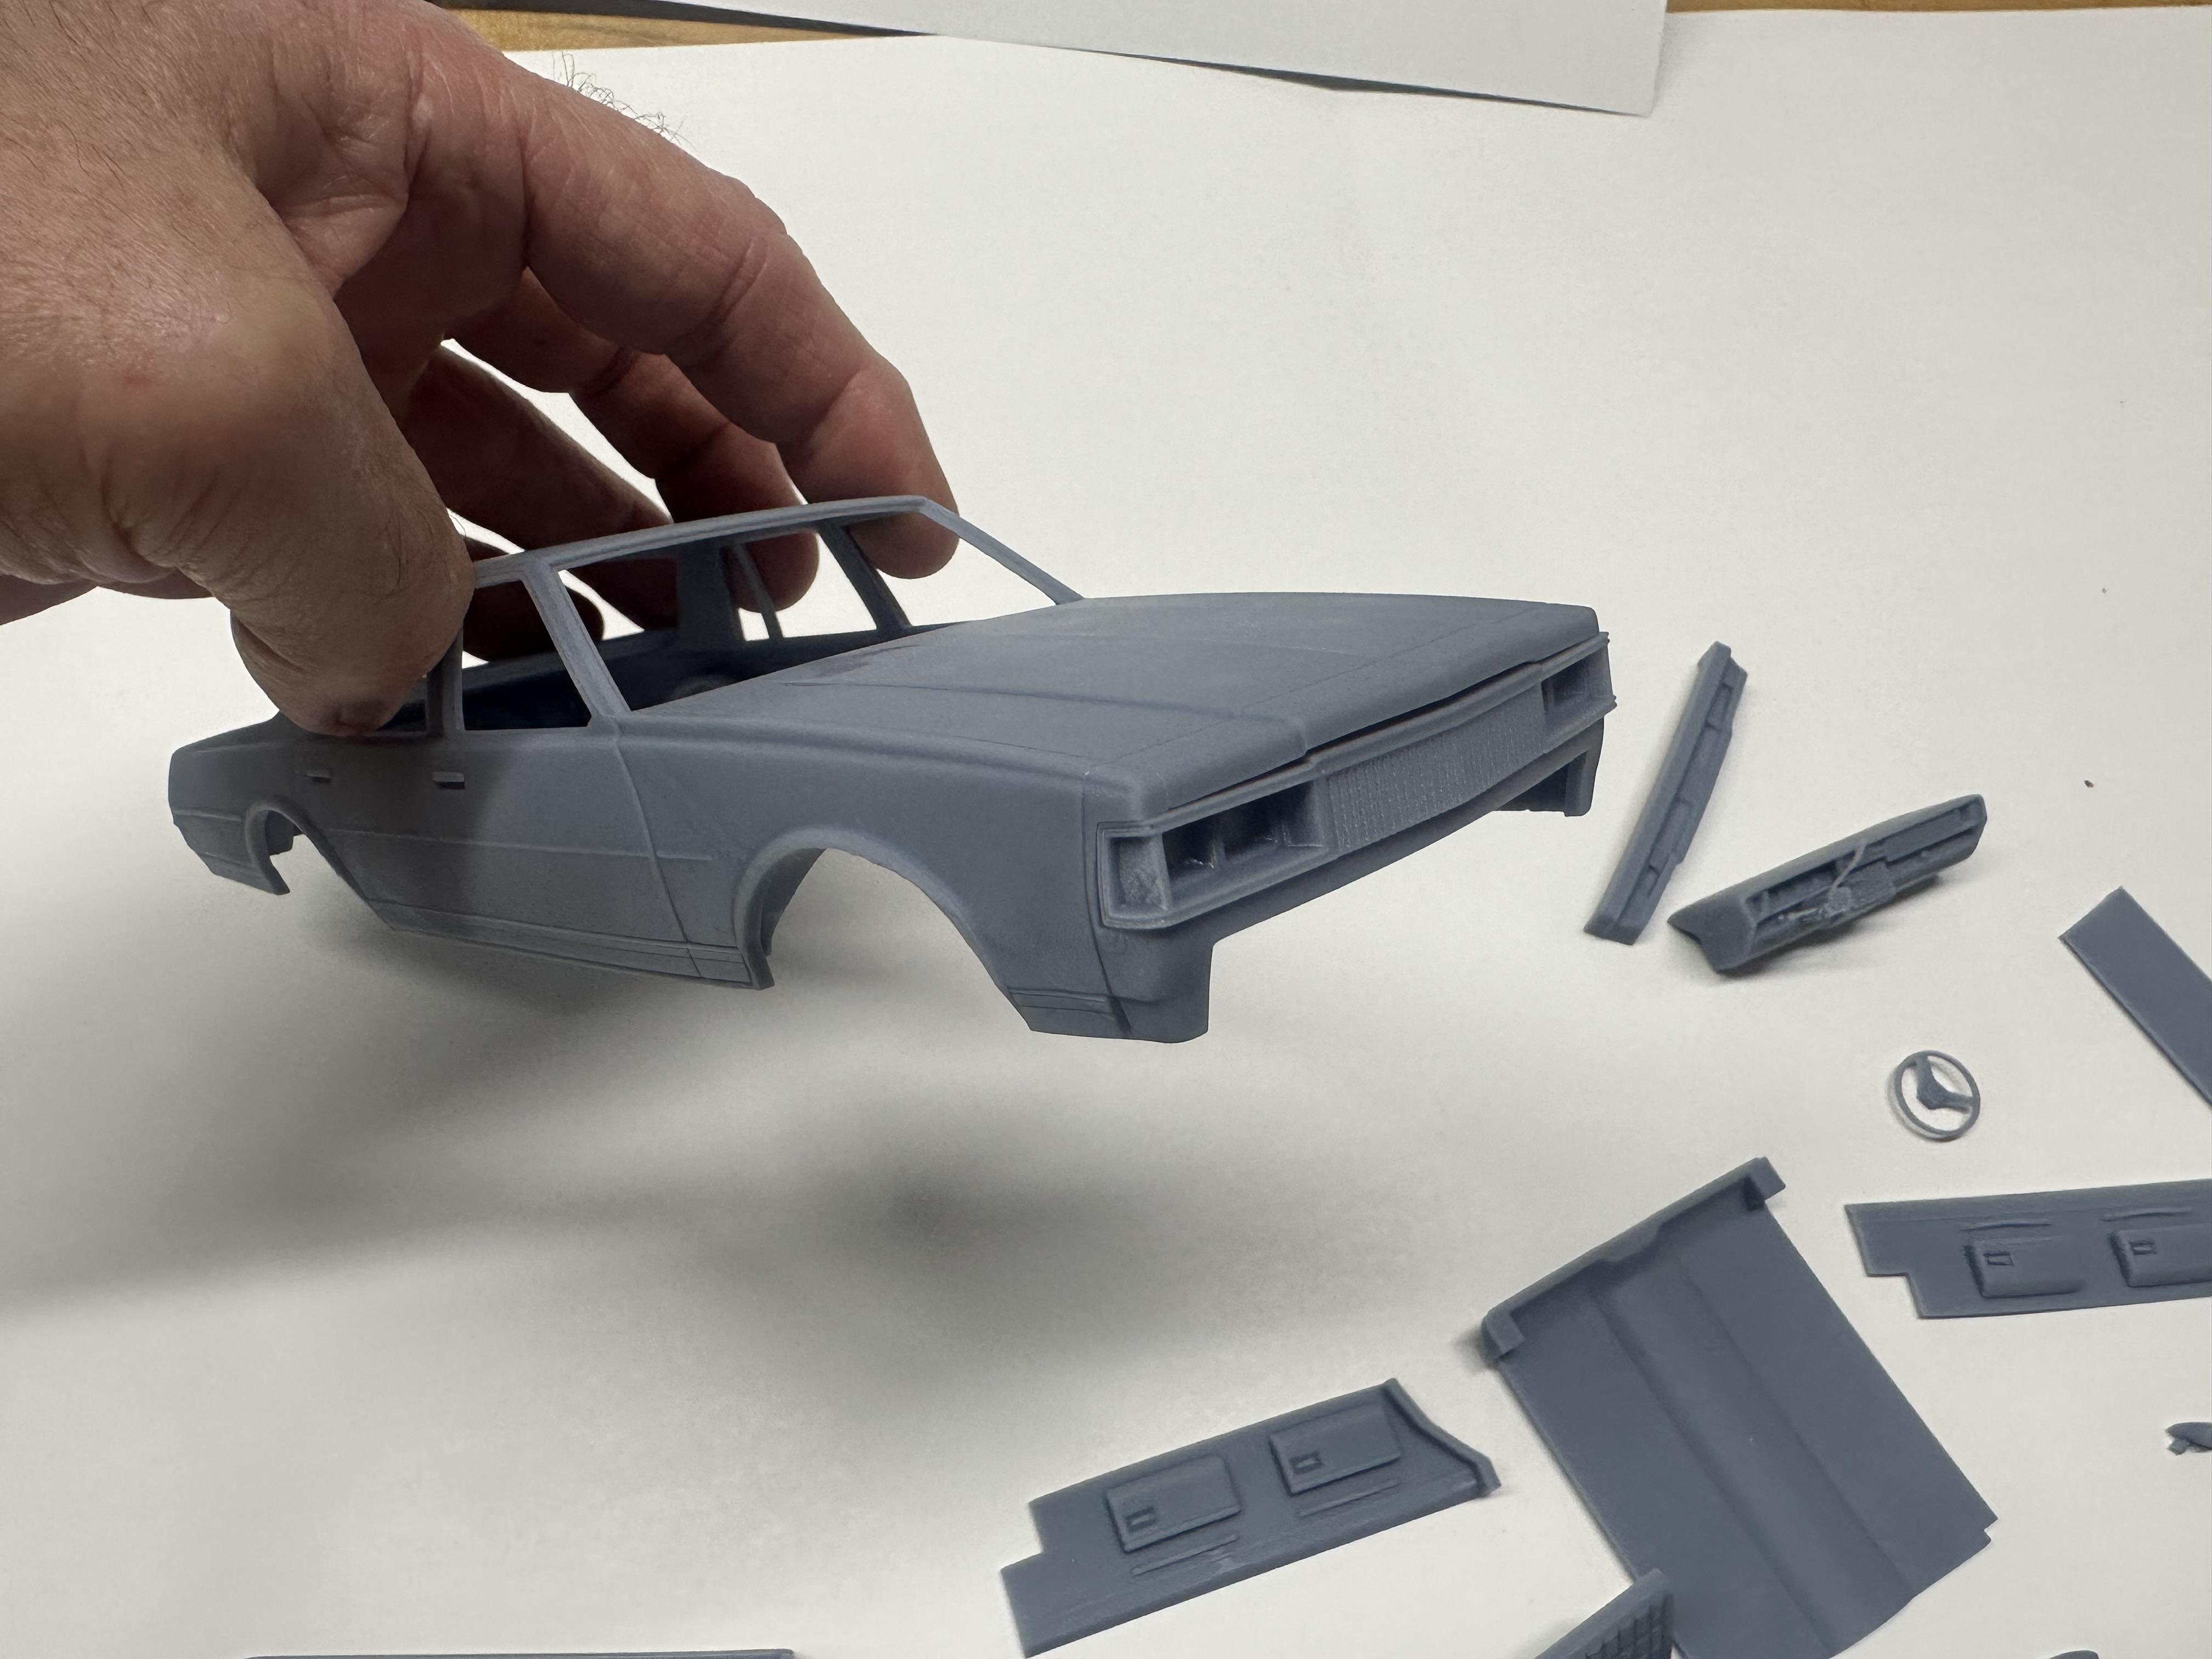
I finally received the 77 Caprice after just a couple days short of a month wait. Not bad considering how far it came, and that it came from Ukraine, by way of Germany. Overall happy with the quality, the parts appear to have good detail (other than the C pillar emblems are somewhat light, but no biggie). This is my first 3D resin and I'm surprised at how thick and sturdy the body is. Not thick in a bad way, just thicker than I expected. So, take a look at the pics for a better look. I forgot to include the vacuum formed front and rear glass in these pics. Would anyone have any suggestion for a donor for the running gear? A promo style would be fine as would a metal axle chassis. I guess as long as I'm asking would anyone have suggestions for wheel covers that might be a close match?
-
3D printed resin from DiOlex Production
hedotwo replied to SfanGoch's topic in Car Aftermarket / Resin / 3D Printed
I'm hoping so... I bought a 77 Caprice 4 door a couple of weeks ago. I'll try and remember to post a short review when it arrives. He seems very responsive to messages also. -
Goes to show you that curbsides can look just as nice as a kit build. Great job... it's beautiful!
-
Well, reinstalling Chrome didn't change anything. When Chrome goes to this site it warns me that it isn't secure but I always just go ahead anyway. Lots of times it's just an expired certificate or something. The site then loads, but I have this page changing problem. And I have a second computer that has the same issue when using Chrome.
-
First thing I did.. cleared Chrome's cache. I'll run the Windows anti virus and see what happens, but I have it set to check regularily and it hasn't come up with anything. I guess I could try deleting Chrome and do a reinstall ?♂️
-
Yes, that works Les. Pain in the butt tho... I looked at my Chrome settings and nothing seems out of the ordinary. Maybe it's just Chrome objecting to something on this site? I know I've used Chrome off and on with Firefox and never saw any issues like this. Thanks
-
Admittedly, I've been absent here for a few months and I previously used Firefox as my browser. I've been using Chrome now and lately when I do come here to view a message I've searched for I can see the page it takes me to but from there when I click on another page (in the same thread) it doesn't move. I see the new page url show at the bottom of the page but nothing happens. I went on to Firefox again and all is well there. Any ideas?
-
Wrapped up another great trade with Khils. Thanks Kev!
-
Beautiful Al! Great job!
-
I have the same resin kit, just haven't gotten around to it yet. I got mine through his Facebook page and if you search for Decko Car Company you should find him. Top quality and he has many different kits and parts. Good guy also ?
-
The body is still literally like rubber... that soft. So, it's off to the trash. As you said Mark the remainder of the parts I was able to save are styrene and I removed them prior to the super clean bath. So at least I have something to work with in the future.
-
It was the white I was trying to remove as the green was the mold color. It started to lift the white by the time this happened but it would have taken longer to lift all of it. In hindsight I should have tried ELO (not soaking in it though). Oh well, the remainder of everything is good so maybe someday I'll find a discarded body... preferably not a promo body.
-
Super Clean and 50's promos don't mix. At least if you forget they're in the pond for any length of time. This one was probably in it a week ?♂️
.jpg.3bb59fdfbcc1cfb0aaf6c740e110d998.jpg)
.jpg.a4fce7b24888566a73c5bce8caa23090.jpg)
.jpg.69d5ab636f505cc871bd74489e704f82.jpg)
.jpg.22b0841c975c01f6f7410f76ac37913d.jpg)
.jpg.66eb9f85e8a7786ec344243bf37d9959.jpg)
.jpg.4fc912342994066a810cf24b1184c202.jpg)
.jpg.97daedb993c853076b536a4a3d4b3609.jpg)
.jpg.e49e610bf08969b30e1b2f764d411c86.jpg)
.jpg.cd6851432f9b96201826e6103828572d.jpg)

.jpg.061cbc5696505e99071588c9d025755d.jpg)
.jpg.26d8392ccc4b281d1092927c065ffe3f.jpg)
.jpg.48870186069a6aa124943d0d38f7bb2c.jpg)
.jpg.0c8200a599e3efd0657441c5239798c0.jpg)
.jpg.8814fcbc01e59f03bf604e84b11ffdfb.jpg)


.JPG.1206c5cfe67d87e03191d207bb5b6527.JPG)