hedotwo
-
Posts
1,551 -
Joined
-
Last visited
Content Type
Profiles
Forums
Events
Gallery
Everything posted by hedotwo
-
 Picked up a trio of 60's over the past few months. I also picked up resin taillights for the Dodge from Acme Resin and they're great.
-
Great '62 Steve! Love the detail and paint!
-
Can I see your guys model stashs' ?
hedotwo replied to Ctmodeler's topic in Model Building Questions and Answers
Like minds....... ? -
Can I see your guys model stashs' ?
hedotwo replied to Ctmodeler's topic in Model Building Questions and Answers
My older stash that I've been accumulating for some time. I have newer kits but nothing special.
-
Thanks!
-
Going through some misc parts, trying to generally sort. Can you help with these? I'm thinking B is from a mopar and C is a Lincoln rear step-up? F's are hood scoops?
-
I got my discount code too... trying to decide how to spend it now ?
-
Nice! Great having a dedicated space to work in and you did it right!
-
Great build Anders!
-
Finished a '57 Ford Ragtop
hedotwo replied to Bill Anderson's topic in Model Building Questions and Answers
Great job Bill! Always nice to do builds that have special memories. -
Good job Tom!
-
Love these restorations. Following ?
-
Welcome aboard Gary!
-
I have a '62 Bird convertible kit and I tried the glass on the Continental HT and it was too narrow to fit. Not sure if a T-Bird HT glass would be any different, or if that would fit my sedan Lincoln. I'm in need of the glass, passenger side skirt, and the hood ornament. I'll put a post in the Trading or Wanted section in the next few days maybe. Thanks Steve
-
Have a nice '62 Continental sedan that is lacking a couple of parts including glass. Am I correct in seeing that the '61-64's are pretty much the same? It even looks like the '65's are close. If the '65's work then there are some cheaper choices to get what I need. Also, it looks as though the convertible front glass may work with the sedan? I have a '61 convertible that I haven't disassembled yet to restore so I can't try the glass in the sedan, but it looks like it might work.
-
Just completed a good trade with Khils and I'd like to say he went above and beyond to help me with some parts I needed along with a sweet '71 Impala convertible. Thanks again Kev
-
I think there are many of us like you here Steve, including myself. The past couple of years my dexterity for small detail work has left me (which I truly miss) and I've found myself drawn to doing restorations that only require body repair/fab, prep and painting. I've found that this change has helped my continue my love of the hobby while lessening the frustration of being unable to detail like I used to. My detailing was never to your level, for sure, but I loved it. Keep up your fantastic stuff Steve, we love seeing your posts!
-
AMT '61 Impala windshields
hedotwo replied to hedotwo's topic in Model Building Questions and Answers
Thanks Roger. -
AMT '61 Impala windshields
hedotwo replied to hedotwo's topic in Model Building Questions and Answers
Is the Lindberg convertible from the same mold as the old AMT convertible annual do you think? -
Does anyone know if the '61 bubbletop front windshield could be used on a '61 Impala convertible?
-
13 years on MCM, & 10,000 post
hedotwo replied to Greg Myers's topic in General Automotive Talk (Trucks and Cars)
Congrats Greg! -
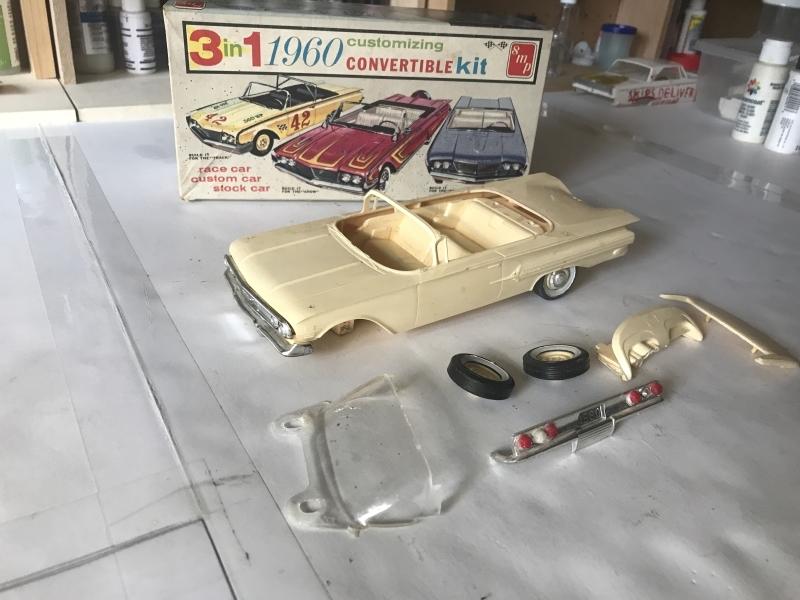
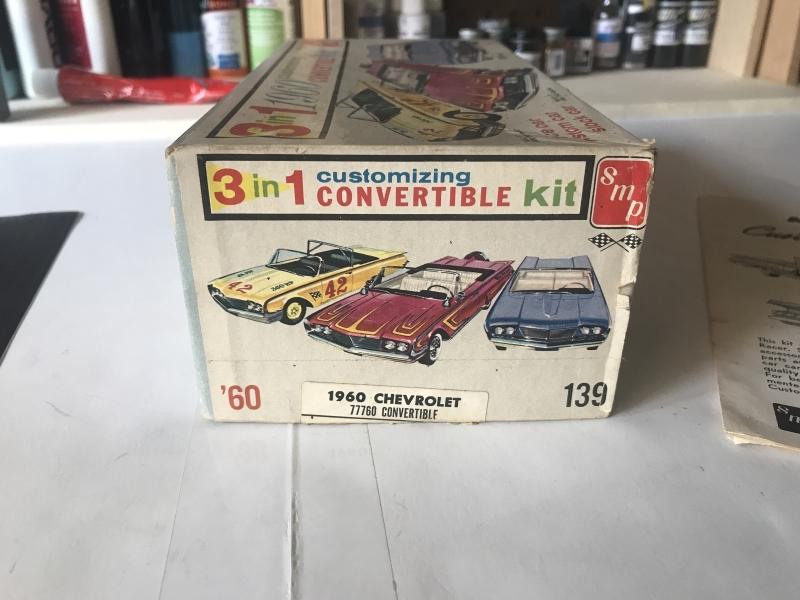
Three more off my want list. The '62 Monterey convertible is in better shape than most I try and pick up, but got a great deal on it just the same. I'll need to try and find the two front fender ornaments however. The '59 Bird should be a good project and the '60 Impala convertible was my most wanted of the three on this list. The decent box was a nice bennie too.
-
Generally not a fan of such big hoops, but these look nice ?! Great build!
-
Great build and lovin' that gold!
-
Nice and clean! Great job!