goodguyinar416
-
Posts
55 -
Joined
-
Last visited
Content Type
Profiles
Forums
Events
Gallery
Everything posted by goodguyinar416
-
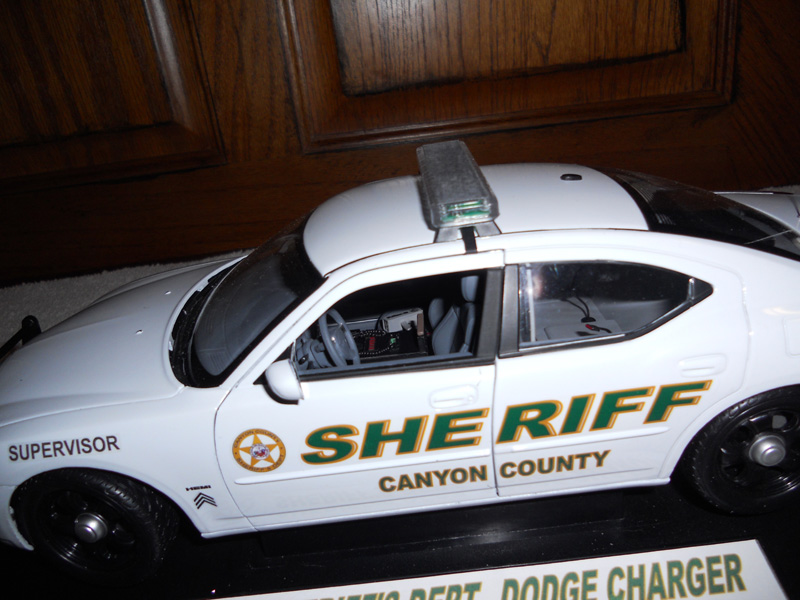
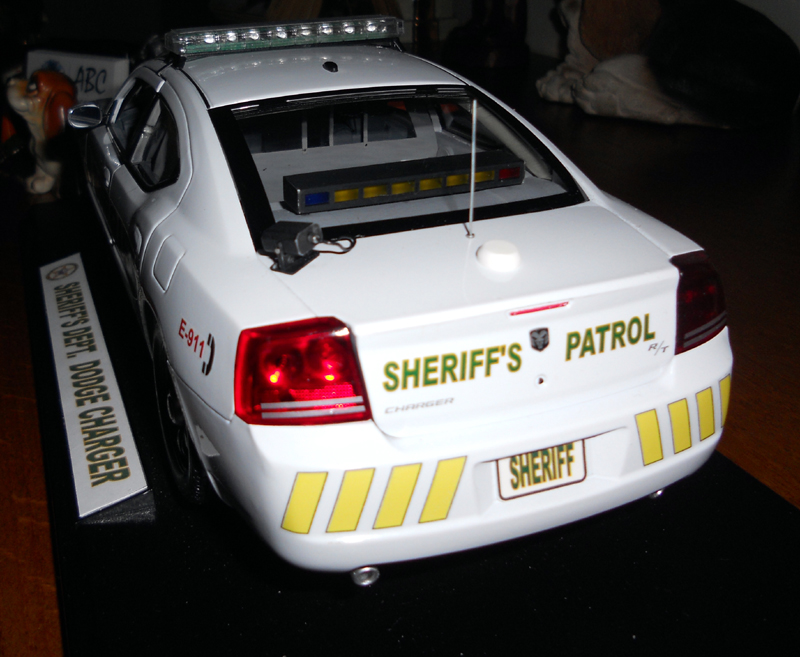
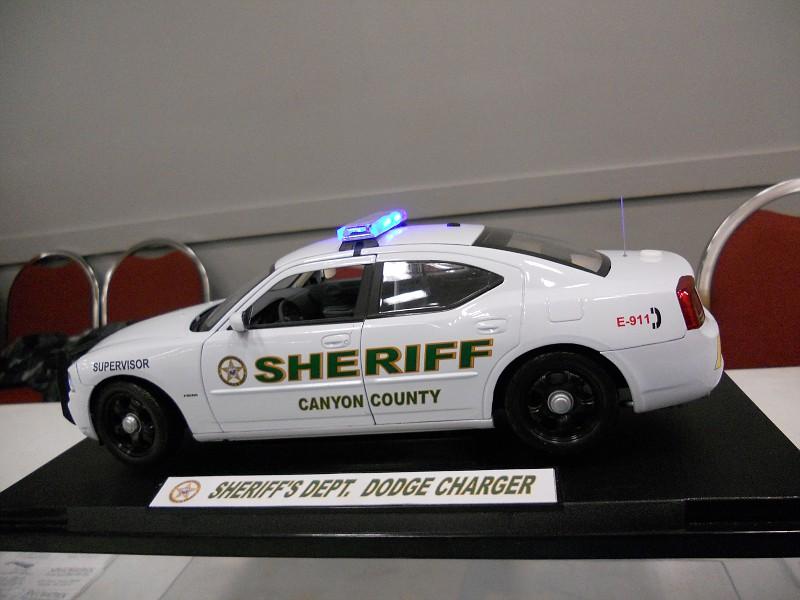
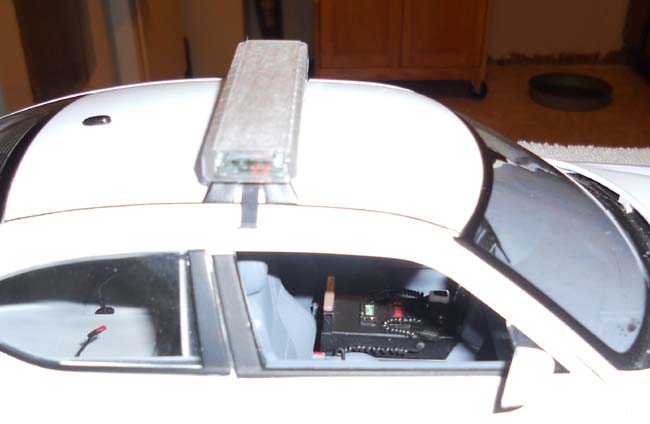
I started doing models years and I mean years ago. I started out and still do 1/24th, but got into doing diecast and have been kinda hooked. Since I am a recently retired police officer I started doing the police diecast and really enjoy since they can be detailed so much. This unit started out as a 1/18th Welly Dodge Charger, the Graphics were designed and done by me along with console, radios, mics. switch box, siren and then resin casted. The back prisoner partition was highly detailed that the partition has an actual sliding glass, cable type seat belts. The dome light really works, as does the strobe head/tail lights, rear deck traffic adviser and a strobe LED light bar with multiple patterns. * If you look you can see the resin casted hand held radar gun (#2 Photo) on passenger seat. The detailed console (#3 Photo) I did along with the trunk mounted LPR (License Plate Reader) (#4 Photo) * Checkout the video on my website of these units, working lights, etc. AWESOME! http://public.fotki.com/Goodguyinar416/ Art

-
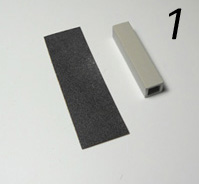
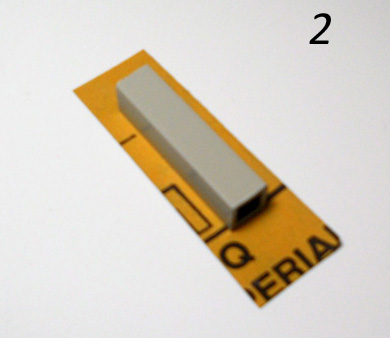
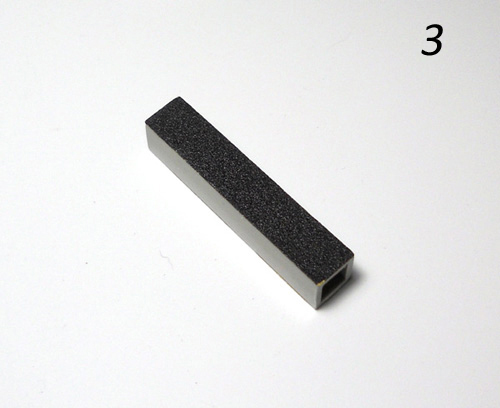
I'm going to show for those that are not aware of, a little tip on how to make a cheap and very useful sanding block using a piece of plastic struct square tubing and whatever grit of sandpaper. I have used this trick for many many years. First off get yourself some plastic struct square tubing. It comes in different sizes and follow these tips and you'll havesanding blocks for sanding small items that will last for some time. * Also when one side wears out, just flip it over and use another side. * Checkout attached photos of this tip. Good luck! 1. Pick a couple sizes of plasticstruct that suit you. 2. Sand one side of the plasticstruct your using a little flatter then it is. 3. Get some sand paper and use whatever grit that you suits you. 4. Use super glue, put it on tubing and spread around with a toothpick covering the bottom completely. 5. Lay the plasticstruct down on the sanding block and wait a few minutes. 6. Trim around the sanding block with exacto knife. 7. Homemade sanding block. 8. You can also use a piece of metal tubing?
-
Welcome Tony! I also am a newbie and this site is great. I have been building models for so many years, but I know I can learn from some of the new stuff....Looking forward to being here and welcome again. Art Arkansas
-
casting resin parts
goodguyinar416 replied to CrazyGirl's topic in Car Aftermarket / Resin / 3D Printed
I have been casting for approx. 15 years. I started out by talking with the master of resin casting Norm from Replicas and Minitures and he gave me so much advise. I owe him for getting me started. He took the time to explain how to's, doing 2 part molds, etc. and I have never forgot it. I do it for myself and the model clubs I'm a member of. I don't use any vaccum or anything like that and my parts turn out great. I have bought my rubber/resin from the same two companys over the last 15 years. Here are a few things of mine I have casted. Click on photo below to check out. Thanks, Art
-
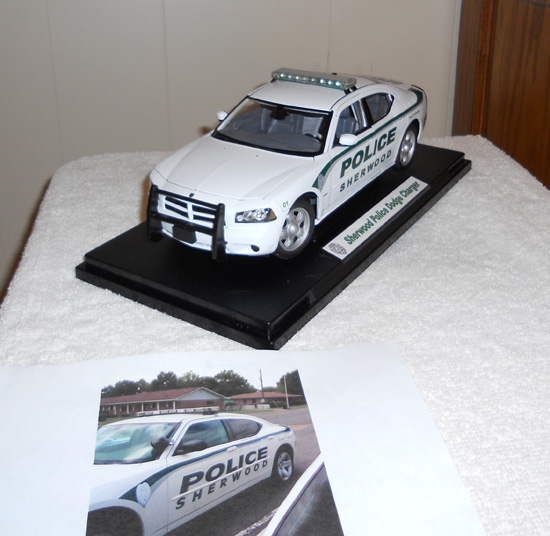
I am a recently retired Police Sergeant from Arkansas and have been modeling for more years than I can remember. I started doing models when I was 16 and am an older generation now. I enjoyed building Nascar and then switched over to 1/24th and 1/18th diecast police cars with real working lights and a highly detailed inside. I do Resin Casting professionally and have done it for approx. 15 years. I still enjoy Nascar, but really enjoy the police diecast builds. I build and repair computers part time also. * The Canyon Co. Charger Interior was heavily modified. Prisoner back seat was hand made out of sheet plastic. Cage partition was hand made then resin cast. *Real working sliding partition glass. Cable type prisoner seat belts. Console, radios, mics, switch boxes, siren, were hand made and resin cast. Ignition & key along with a dash mounted shift lever added. A trunk mounted GPS hand made then resin cast. * Interior dome light really works. Front interior was painted two-tone Charger Gray. Real working LED light bar and rear deck traffic advisor light bar. Working Strobe Headlight/Taillights. LPR (License Plate Reader) on trunk was added later. Graphics were designed by me. Sherwood PD Charger was also done by me, as were Graphics and design. A detailed interior, similar to the Canyon Co. Charger was added.