Straightliner59
-
Posts
5,815 -
Joined
-
Last visited
Content Type
Profiles
Forums
Events
Gallery
Everything posted by Straightliner59
-
 That would be cool! I'm hoping to make the local Fall show, with it. I should be able to finish it, by then.
 -
For bolts/nuts, I generally use model railroad hex castings--either brass or plastic, depending on the size needed, or what the application is and what I have on-hand. If the bolt goes through, and requires a nut, I use either bored out hex styrene, or small bits of wire insulation. Thank you, my friend!
-
You're really making some good progress, Marcos. Well done!
-
I'm trying to get a little bit done, every day. Today was the clutch pedal. Pretty basic stuff--.015" brass strip with a pedal of 3/64" brass tube. I just kind of threw the actuator arm/cross shaft together. I want to do some more work to them. All the controls are white glued in place. I wanted to see how it looked with the panels on. I still need to make the butterfly, and the clutch blow-back rods, along with a few other little items. Thanks for for your comments and thanks for looking!

-
1932 ford saltlake car
Straightliner59 replied to charlie libby's topic in WIP: Other Racing: Road Racing, Land Speed Racers
Excellent job on the sheet work! I did the nose and tail of my Nostalgia Dragster with tin. most of my stuff is aluminum, but, I haven't gotten the hang of soldering it, yet. Your bead roller is great, too! There will have to be one of those in my future. -
Yessir! Nice work, Joe!
-
’72 Dodge Demon Drag Racer 1/25 scale
Straightliner59 replied to AmericanMuscleFan's topic in WIP: Drag Racing Models
Francis, I always love the details you do, my friend. These look excellent! As you know--like you, I enjoy the tny parts! -
Throttle pedal built--it fits...clutch pedal, next! Thanks for looking!
-
That's exactly right. .040"=1", .080"=2", etc. It's easy to do the conversions for buying stock.
-
I use 1/16", generally. It looks good. To be certain, the best bet is to find out the diameter of the pipe in your subject.
-
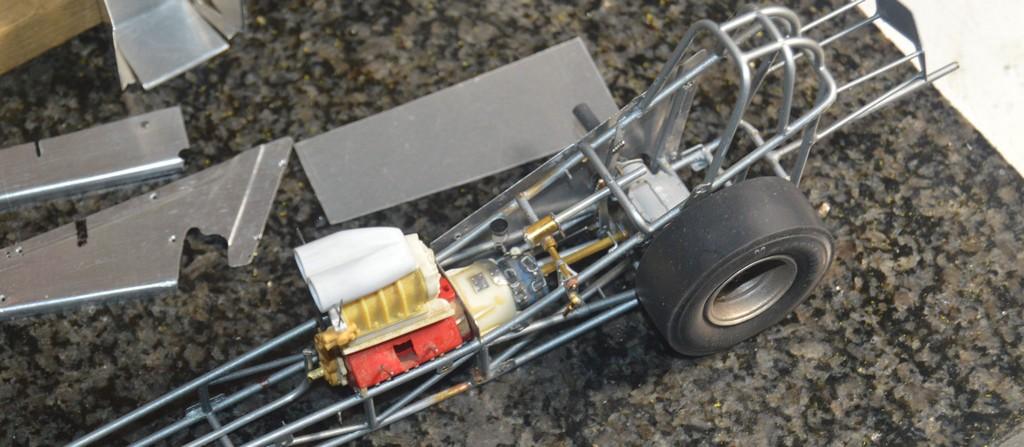
I truly appreciate your kind words, Francis. I enjoy sharing the things I've learned, over the years, whether it's of the many, many things others have taught me, or stuff I've figured out, because I wanted to know if I could... I wanted to know a lot of it--rudimentary moldmaking and casting, especially, because I knew that would save me money on buying kits, just for parts! Not to mention, it gives me a great deal of satisfaction to look at parts I just made from raw materials! You know how that is! I got the powertrain installed. That all fits. The third-member is sitting at an angle, because it's loose! That's a fine thing! Once I make and install the clutch and throttle pedals, I can take all that apart, again. Then I can repair the chassis and repaint it. I'm pretty happy with the way this thing's going, so far. Shouldn't be more than a couple of weeks from building a motor.
-
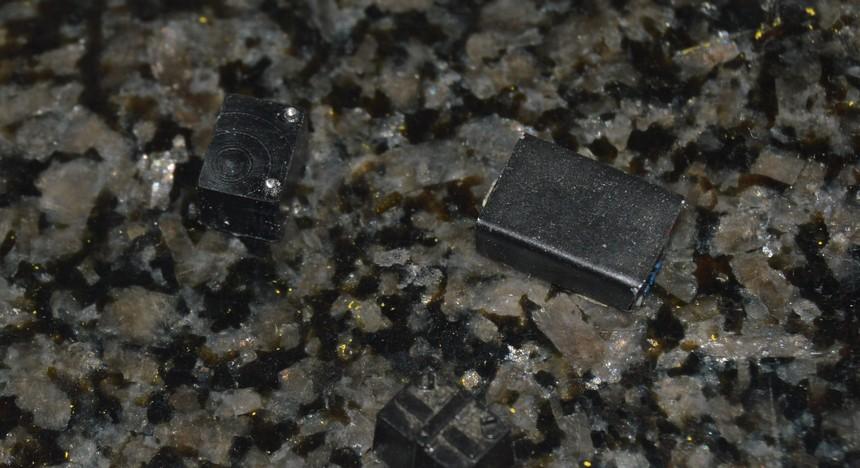
Thank you, my friend! I started working on a battery. I milled it out of a piece of Delrin I bought a while back, for making 1/43 scale tires. I still need to add the cell caps. Now, most of these seem to be using dry-cell batteries, but, in the '90s, wet-cells were fairly common. I still haven't started on the throttle pedal, either. All this little stuff needs to be addressed, anyway! Comments are always welcomed. Thanks for looking!
-
That delay box looks right at home, alongside that shifter! This thing is looking, and coming along great, Ian.
-
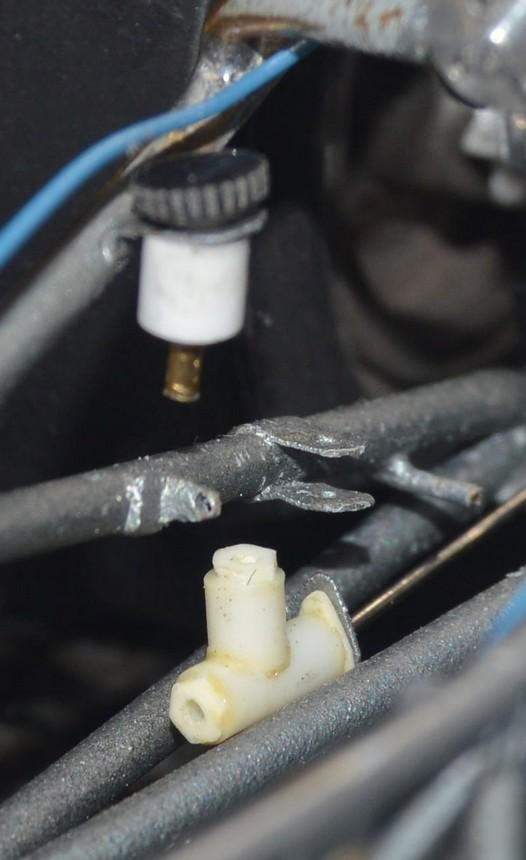
I got the master cylinder in place, along with the reservoir. Both are temporarily white glued, thus the crooked cap on the reservoir. The brass fitting on the bottom of the reservoir will get filed down shorter. I made the reservoir and cap from plastic, and will not paint them since the prototypes are plastic, although the tank itself should be a bit less opaque. Next up, I'll build a throttle pedal--or something!?
-
Marcos, I saw your Color Me Gone car in the latest issue. Congratulations, man! Nice job!
-
I think Tiddlywinks could be used for headlight covers for a vintage NASCAR racer! Maybe some smooth backing plates?? Seriously, though, thank you, Joe! I appreciate that! Thanks, John. I'm having a lot of fun, with it!
-
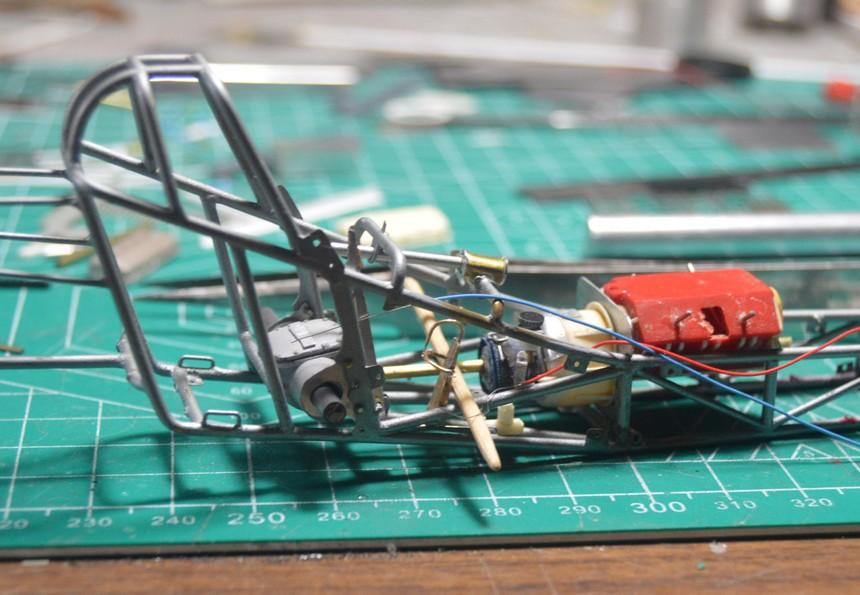
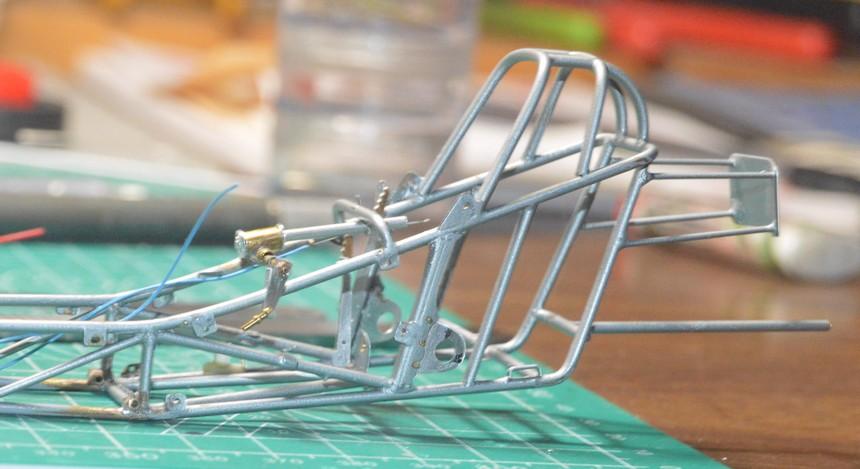
I started temporarily hanging some of the cockpit details. I need to make a new brake fluid reservoir. White glued in place are the brake handle (wood grip), the fuel shutoff (aluminum handle, next to brake) and the reverser handle (wood grips--shorter, under dash pipe). I also cut a piece of wire for the fuel shutoff cable. I noticed a chassis upright tube that needs to be replaced, as well. I need to build the loud pedal, and replace the pin that mounts the handles for the chute release and (I guess? I'll have to go back to my old research) the high-speed leanout. Still quite a way to go, but, maybe not as far as I originally thought! I apologize for the photos. It's hard to get a good focus, with so much going on, and without the tripod. Thanks for looking!
-
I like it. That's what I was thinking about it, as well. I can never leave well enough alone! Nice job!
-
Wow! That's fantastic! Thanks for that link, Bernard. It's very cool to see this stuff in color.
-
I just found this thread. Excellent work, Bob! I love cars from that era of NASCAR. The houndstooth seat cover is a very cool, unique feature. Looking forward to watching the rest of this project!
-
Indeed, it does. Due to its flexibility, probably easier to work with, as well. Excellent idea!
-
Thank you, Ian. I think, other than covering it, it's done. It doesn't need cement. Once it's in, the chassis tubes hold it perfectly together! That seat worked out maybe as well as anything I've ever built. I'm still amazed! It was just "BAM!", done. ? I'll take it!
-
I don't think I want any of that, Pierre!? I don't think I'd want to be in Dustin Hoffman's shoes, at that point! Marathon Man. I just remember my Mom talking about how she cringed, when she saw that scene.
-
’72 Dodge Demon Drag Racer 1/25 scale
Straightliner59 replied to AmericanMuscleFan's topic in WIP: Drag Racing Models
I never bought a kit that wasn't meant to be built (or even raided for parts!), if the mood struck. That's what they're for, right?!? -
I just found these photos of applying them. I filed/sanded one corner of the stock, so that it wasn't a sharp "V".