Straightliner59
-
Posts
5,815 -
Joined
-
Last visited
Content Type
Profiles
Forums
Events
Gallery
Everything posted by Straightliner59
-
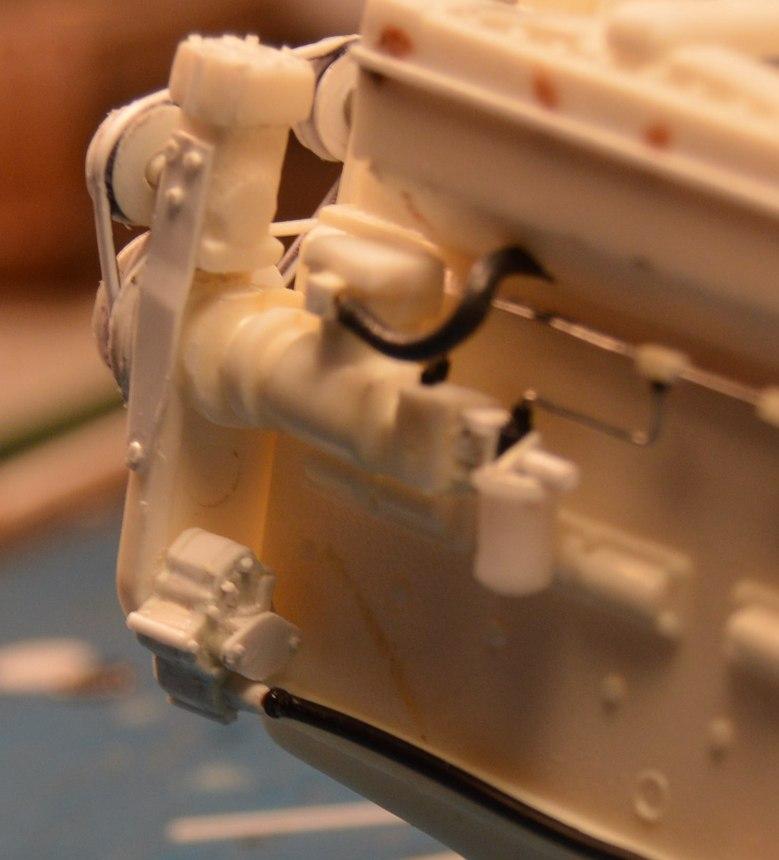
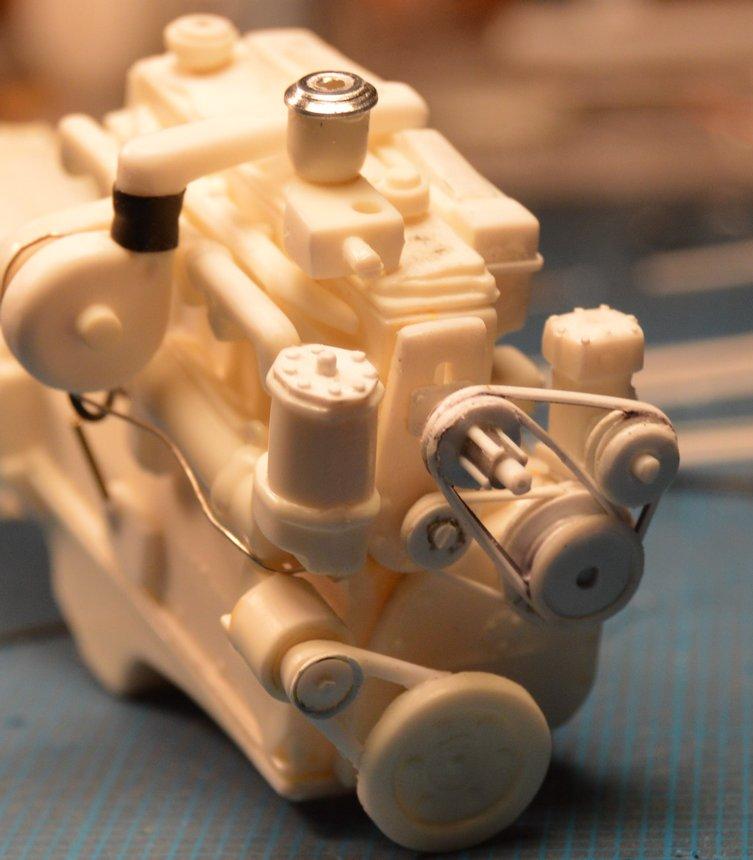
 I used Evergreen triangular stock to make the v-belts on this Cummins. It worked out, pretty well.
-
I bought one of those a while back, too. I bought one of the 911 Turbos, as well. They are such beautiful kits that enjoyment can be had, just looking at the parts on the trees! I would probably build the 356, first. Mine's exactly the same boxing as yours.
-
How to: Magnetic Alignment Board
Straightliner59 replied to Joe Nunes's topic in Tips, Tricks, and Tutorials
They provide a vertical "fence", and a 90 degree angle in the corner, that also provide alignment for cementing two pieces at right angles. I hope that made sense!? -
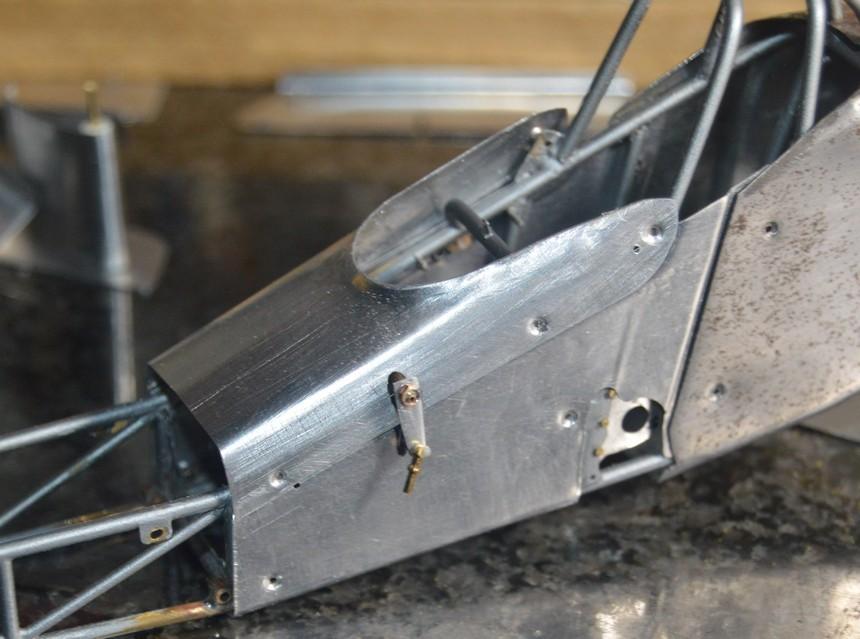
Thanks, Marcos! I did some more work to the seat. I cut it out, for the lap belts, and did some finishing to the leading edges of the seat, by lightly hammering them over a piece of 1/16" tube. That should slightly curve them out, around the support tubes. I also cut the cowl to clear the steering, so, that's done! It feels like I've made some decent progress, over the last couple of days. As always, comments, questions and critiques are welcomed. Thanks for looking!
-
I'm running Windows 10, 64 bit, and it works on my machine.
-
Thank you, Francis. It really does fit, beautifully--first try. ? Doesn't seem to happen too often, but, it sure is nice, when it does! The flashing lists as .011", but, once the protective coating is sanded off, it's about .0075". It's become one of my favorite building materials, for sure. Step flashing is available at hardware stores and lumberyards, generally. I've even seen it on Ebay. I know a lot of guys who've used printers' plate, and they swear by it. I've never tried it, because I'm too lazy to call around to print shops who still do offset printing, to find it. I would be interested to know its properties, though. The more materials you know, and have, the better equipped you are to overcome an obstacle in a project, no? ? Yes--I love using the stuff! I acquired mine, for free, one day when I was driving a truck back to the lumberyard, after we'd done an insulation job. It was a hot Minnesota late-afternoon, and the truck wasn't air-conditioned, so both cab windows were down. Unbeknownst to me, there was an open bundle of 5"X7" step flashing under the seat. I hit a crosswind that started the air swirling around, inside the cab, carrying aluminum blades around the cab, with it! I swatted one that was flying at my face, as I was stopping the truck. The modeler in me said, "Hmm...this tried to kill me! I guess I'll have to take it home and cut it, and beat it, and burn it!" It took a little while to really get a feel for it, but, the learning path was always fun and interesting! There are many instances where annealing it is unnecessary, but to form compound curves, it's a must!
-
You are really making some great progress on this, Ian! I'm hoping it's not too long before I'm hanging stuff in the cockpit. Excellent work, as always, my friend.
-
’72 Dodge Demon Drag Racer 1/25 scale
Straightliner59 replied to AmericanMuscleFan's topic in WIP: Drag Racing Models
That's some beautiful bodywork, Francis. Looking much better! -
Is it safe?
-
I made a new seat. That was easy! Every once in a while, the universe throws you a bone. Although I used the original seat to make most of the outline for the new seat, I changed a couple of cuts on the new one. Luckily, it still fit, first try! I need to get it out, so that I can do the cutouts for the harness. I am also going to make a liner, for it. I'm trying to decide if I'll use leather, or thin, dense foam rubber. I think this is the last of the major components that needed fabrication, before the big mockup--once I remember/figure out what all these tabs were/are for! A lot of the other stuff is built--brake handle, master cylinder, chute releases, fuel shutoff...those were all built during the original construction period. Thanks for looking!
-
Thank you, my friend! The whole body, now that it's made from the flashing, is worlds stronger. It does look better, too! Thanks, Joe! I had them on there, originally, but the supports broke off. I redesigned those, and built new canards from step flashing. It's sold as being .011", but, once it's stripped of its protective coating, it goes about .008", or so. I seem to use a lot of it! Not all of it successfully.?
-
I had to see!
-
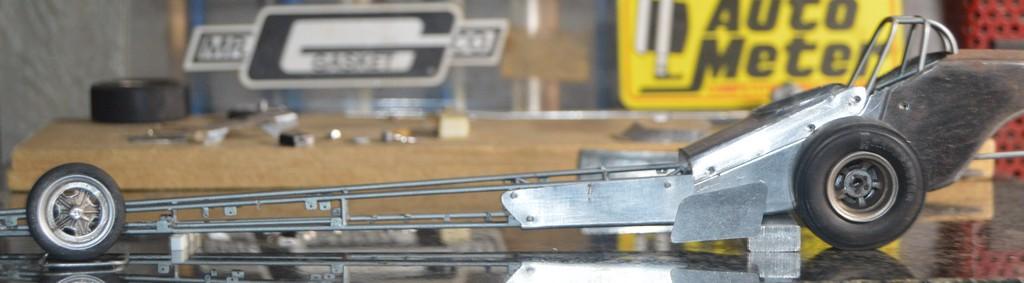
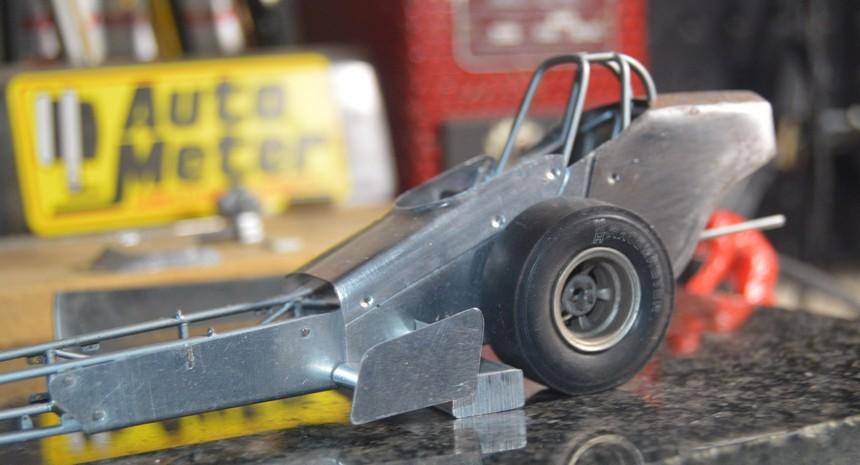
I've built new canards, and changed the design for mounting them. Once I had cut and stripped a section of flashing (5/8"X1-5/8"), it was annealed. Once that was done, I took apart my Incra T-square, and used it to lay out the rows of rivets, and guide the tip of the scriber. What a piece of cake, that was! After the rivets were made, I flipped the sheet and rolled the handle of the scriber over the rivets, which kind of flattened them. I like the way that looks! I decided to glue a length of 1/8" Plastruct tubing into the leading edge of the wing, for two purposes: First, it helps to hold the wing's shape. Second, it provides a larger area to apply cement, to attach the end plates. Next, I began forming the wing around various pieces of round metal, increasingly working toward the final shape of a proper-looking y-type airfoil. I soldered a length of .032" brass rod into a length of 1/16" brass tube, which was then cemented into leading-edge form tube. The entire assembly can then be inserted into the receiver tubes, soldered into place at the base of the motor plate. I sense a mockup may be coming soon! You'll notice that the wings aren't perfectly straight, just yet. That's okay! It's one of the advantages of metal. As always, questions, critiques and comments are welcomed. Thanks for looking!
-
Testors Aluminum plate.
Straightliner59 replied to Mike 1017's topic in Model Building Questions and Answers
Undoubtedly it's the same molds.? I'm not sure what color the newer releases are. Mine came from a double-kit boxing Monogram did back in the late '80s-early '90s. It was the Kurtis Kraft Indy car and the Don Edmonds Supermodified. Finally, last year, I completed the Supermod, so both have made it to the display case after 30 years, or so! -
Testors Aluminum plate.
Straightliner59 replied to Mike 1017's topic in Model Building Questions and Answers
Thank you, David! Even though I am a tad young to have caught these kits, originally, the early Monogram car kits have come to be some of my favorites. It becomes obvious, when one sees the contents of my display case!? -
I got some Milliput, and issue 217! Friday, I was able to swing by a local shop and pick up a couple of packages of K&S brass rod and the "other's" contest issue.
-
How to: Magnetic Alignment Board
Straightliner59 replied to Joe Nunes's topic in Tips, Tricks, and Tutorials
Excellent idea, Joe! I may have to go pick up some of that angle stock. I have everything else, here, already. Good thinking, buddy! -
The set up blocks have proven to be more helpful than I ever expected. When I marked the hat, since it's 1/4" rod, I just laid the 1/8" block on a piece of granite, and used a mechanical pencil to draw the marks across the front, and front sides. It was super-simple, compared to trying to measure! Yes, I am pretty excited by the possibilities, once I've learned a few more things about the mill. At least I finally made something that looks like something! It's too big to be of any use, but, it does, like you say, show some promise. I decided to try it, so I could use the new toy, for the mill. I just got the rotating angle column attachment. Now, I can drill at an angle, and milling angles is easier than setting up the angle milling table. Not a bad $100 spent! Thank you, Ian. Thanks, Francis! That's good advice, regarding the flange. I will keep that in mind, once I decide to mill some "real" ones. Who knows? That may happen sooner, rather than later. I just ordered four 12" lengths of 1/4"X1/2" bar stock. Not that I needed four, it's just that's how the guy sells them! That will be a good size for heads and valve covers. And a ton of other small parts. I have several short lengths of 1" square bar stock that will work for engine blocks, if I want to do like Tim! ? Yeah, like I even could! Maybe in a couple of decades...
-
Ian, I knew a guy who "hard-faced" the blade on an AMT bulldozer. He used a brush to apply beads of paint, to simulate weld beads. They were amazing! You can see some of it on the blade arm, here. Sorry I don't have a better picture. That might be worth a try. I made welds for my Supermodified's injection manifold by rolling the knurled end of a cap screw over .010" plastic rod. That worked out, pretty well.
- 352 replies
-
- 2
-

-
- brass
- tube chassis
- (and 2 more)
-
Testors Aluminum plate.
Straightliner59 replied to Mike 1017's topic in Model Building Questions and Answers
That was exactly how, and why I tried it the first time. I wanted to paint the old Monogram Indy Car kit yellow, and it was molded in red. I didn't even know if it would stop the bleed-through. Anyway, I shot it with the metallizer, then followed that with whatever primer I had, at the time. It worked. I even taped over it to paint the scallop on the nose. I've seen other instances where even primer doesn't really adhere to the metallizer. It's kind of a hit-and-miss proposition, it seems. Now, I just use Zinsser Bin 1-2-3 from the spray can. It worked beautifully on my S/G Vega, which is a promo body that I painted Mulsanne Blue, with no bleed-through, or damage to the promo body plastic, which, I've discovered can be a bit sensitive to solvents.
-
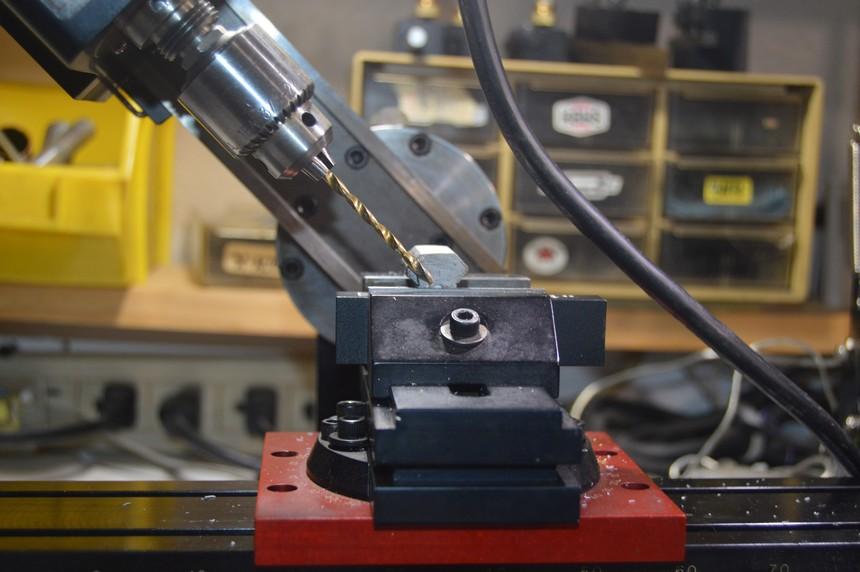
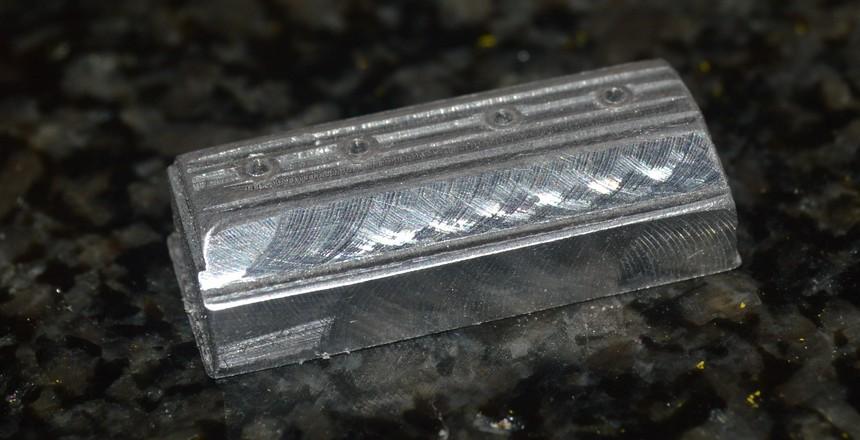
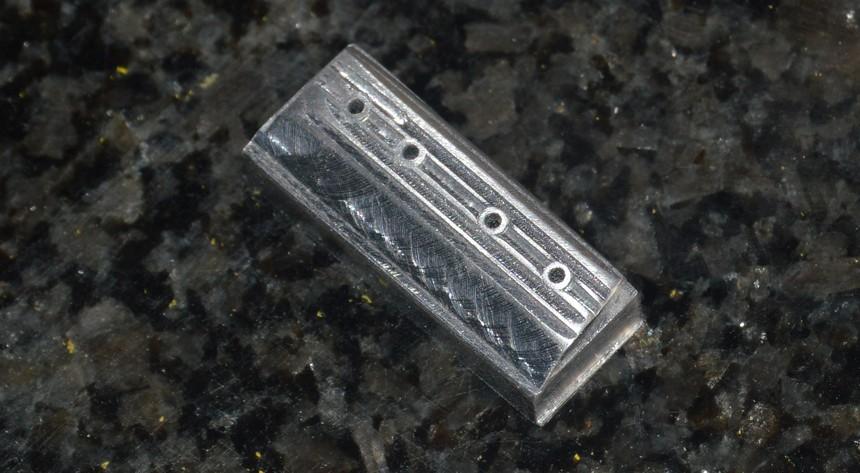
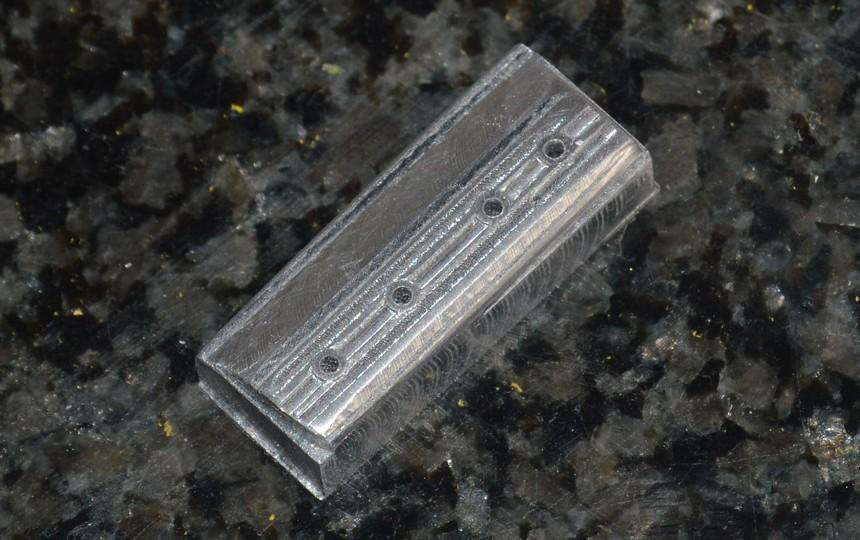
I didn't get a lot done to this, today. I got new supports and end plates made for the canards. Then, I got sidetracked: I decided to see if I could get through the steps needed to make a valve cover on the mill. I didn't try to make accurate measurements, and note them, so that I could duplicate it. This isn't about that--yet. It's not done, but I did get it drilled for the plug tubes, along with a general overall shape, and some milled ribs on top. I still need to mill the reliefs for the mounting bolts, and the flange. You can see that it shifted in the vise on me, and is therefore not square. Nonetheless, it's a learning experience. The plug tubes are lengths of 1/16" aluminum tube, pressed into drilled holes. Afterward, they were filed and finish-sanded smooth, flush with the top surface of the ribs. Finally, I bought these setup blocks a couple of months back. I used a few sizes of them, during the aforementioned millwork. The 1/8" block was useful in marking the injector hat for the butterfly shaft. I really wasn't sure what I'd use them for, when I bought them. I just had an idea they'd come in handy. They have! Even more so than I expected. Thanks for looking!
-
Save on sandpaper AND have precise control.
Straightliner59 replied to Bills72sj's topic in Tips, Tricks, and Tutorials
Excellent idea! -
T.R.O.G. beach racer digger rail 'The Sand Flee'
Straightliner59 replied to Rocking Rodney Rat's topic in Drag Racing
Sweet little digger! Nice work! -
A REALLY rear engine Corvair - unsafe at any depth!
Straightliner59 replied to mr moto's topic in Model Cars
So very cool! A great manifestation of an excellent and unique idea. Kudos! -
Thanks, Scott.