Straightliner59
-
Posts
5,815 -
Joined
-
Last visited
Content Type
Profiles
Forums
Events
Gallery
Everything posted by Straightliner59
-
Thank you, Bill! The two door cars are fixed into position. The Supermod is poseable. I build straight axles, based on photos of whatever I am trying to duplicate. They're very straightforward. I use HO scale handrail stanchions for the moving (heim) joints. Doll house nails usually serve as the kingpins, and styrene channel or square/rectangular tube for the knuckles.
-
I appreciate it, Phil! That's my favorite of the three, as well.
-
Thank you, gentlemen! Glad you like them! Thanks, guys. I'm glad to have a completed Vega in the display case, after all these years! Thanks, Tom. I would say that is a good thing! Thanks, Bill. I appreciate it!
-
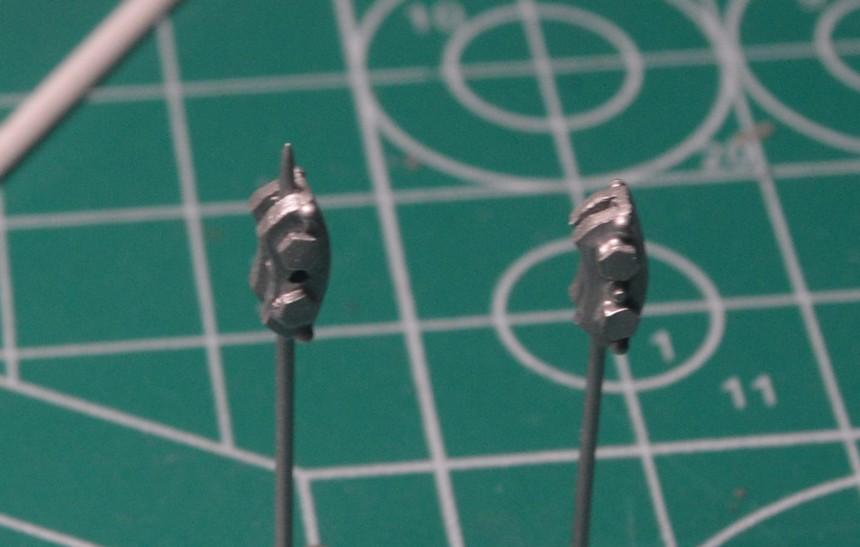
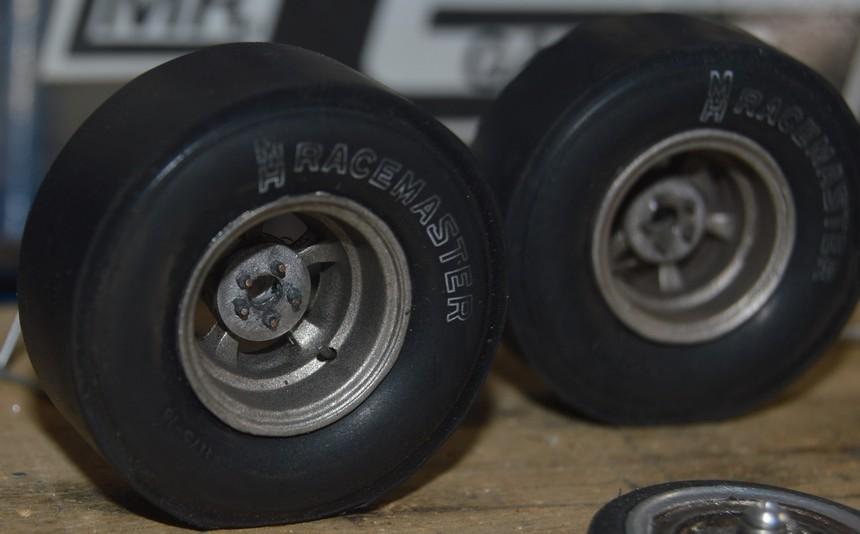
 I threw some brakes together. I punched a "donut" of .030" sheet, and sectioned it, to make the caliper bodies. I rolled a short length of .010"X.100" strip, to create the "tops" of the calipers. I then cut some thin pieces of styrene hex stock (.080") to make the piston housings/cylinders. I finished them up with a model RR hex bolt head and some model RR rivet heads. They're not replicas of anything, but are loosely based on one of Strange's sets. I also added some brake dust to the rear wheels, and made a mixture of some silver Rub-N-Buff and some deep gold metal powder, and lightly swabbed it on the front wheels, to give them a slightly more used look. That's all, for now! Welcome to 2023. Questions, comments and critiques are always welcome. Thanks for looking!
-
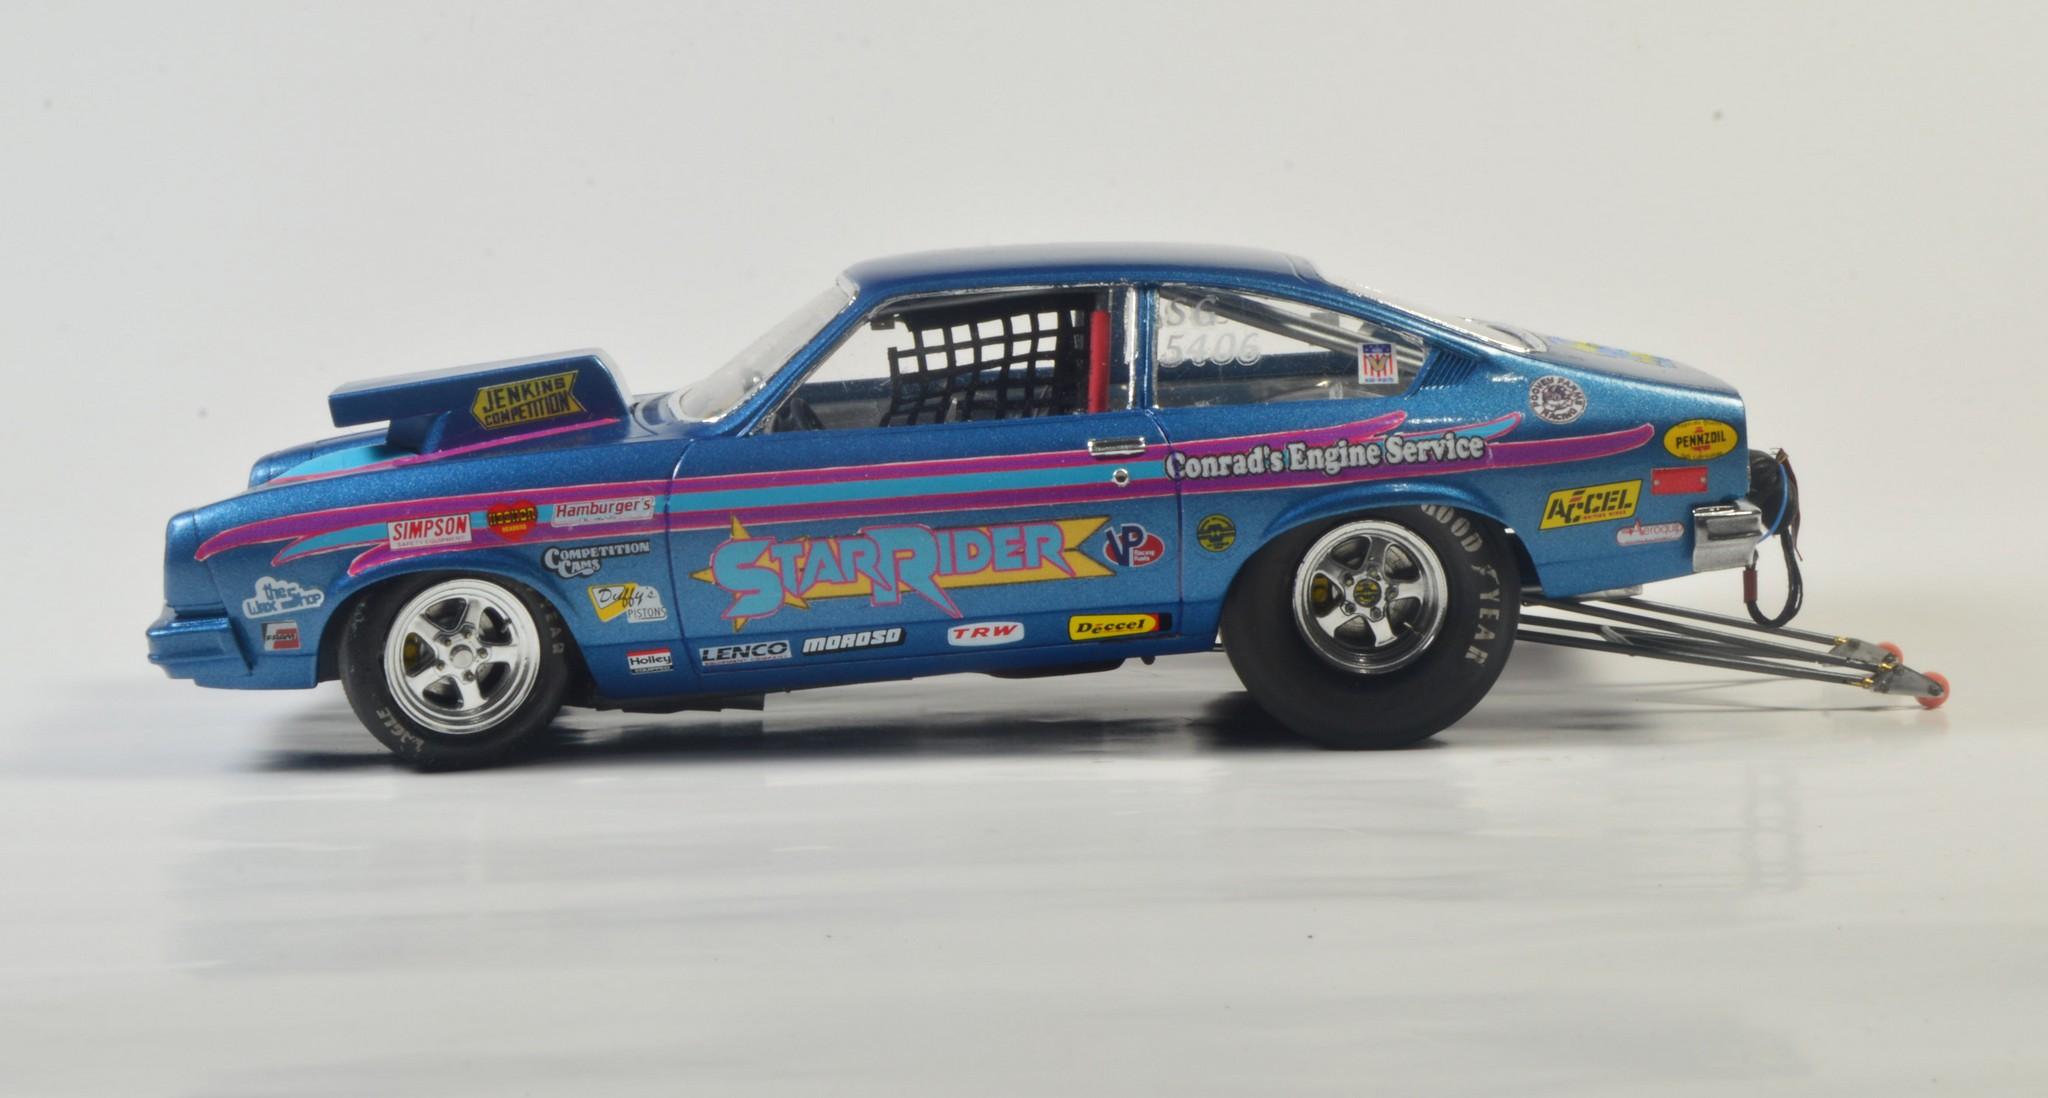
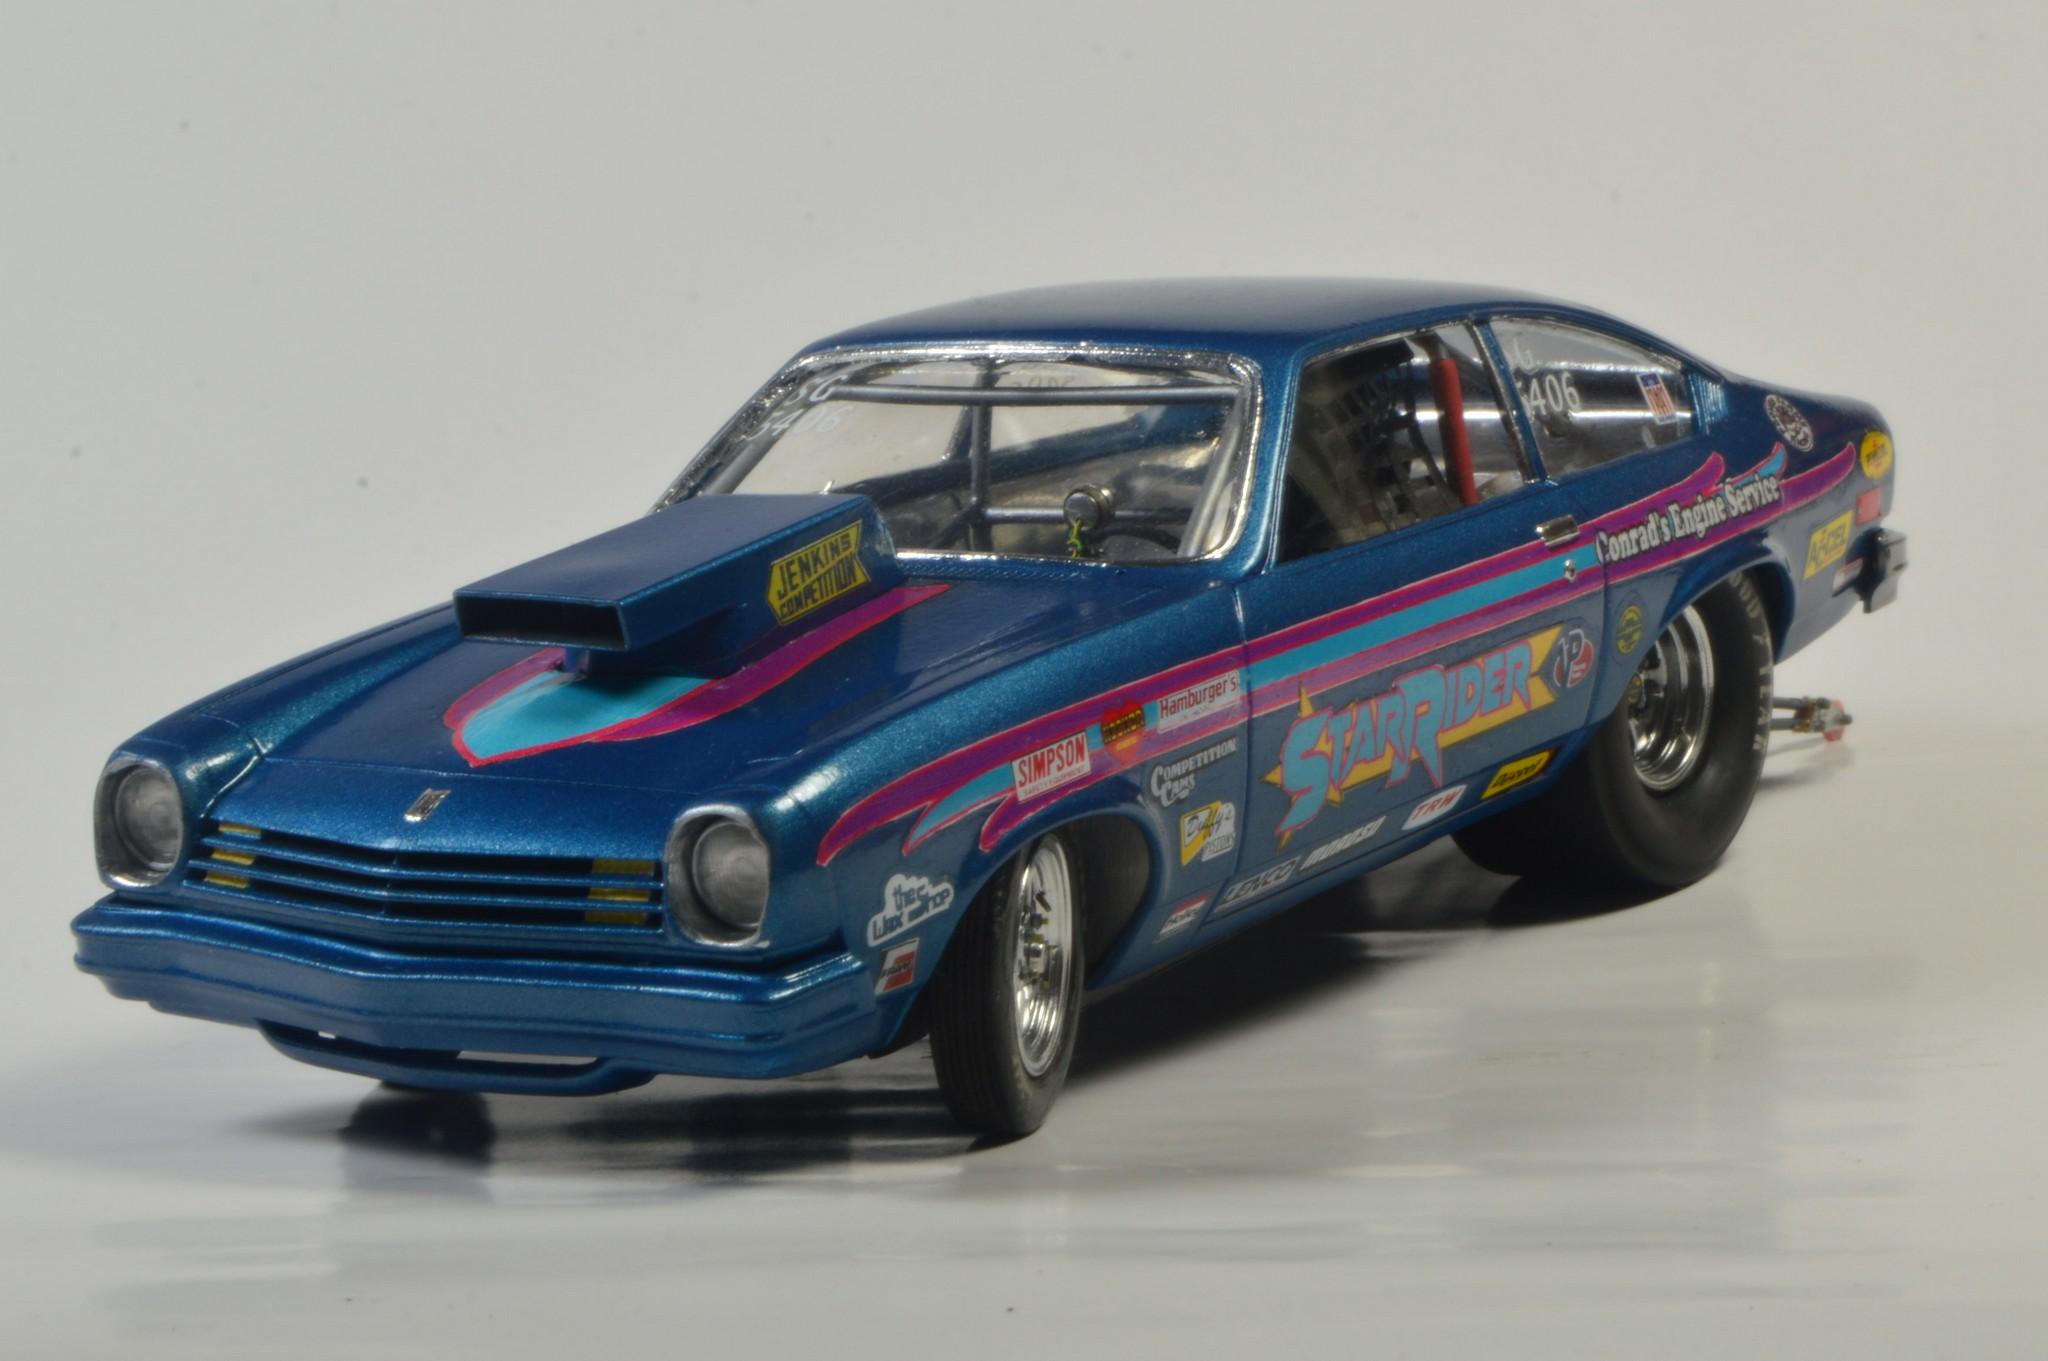
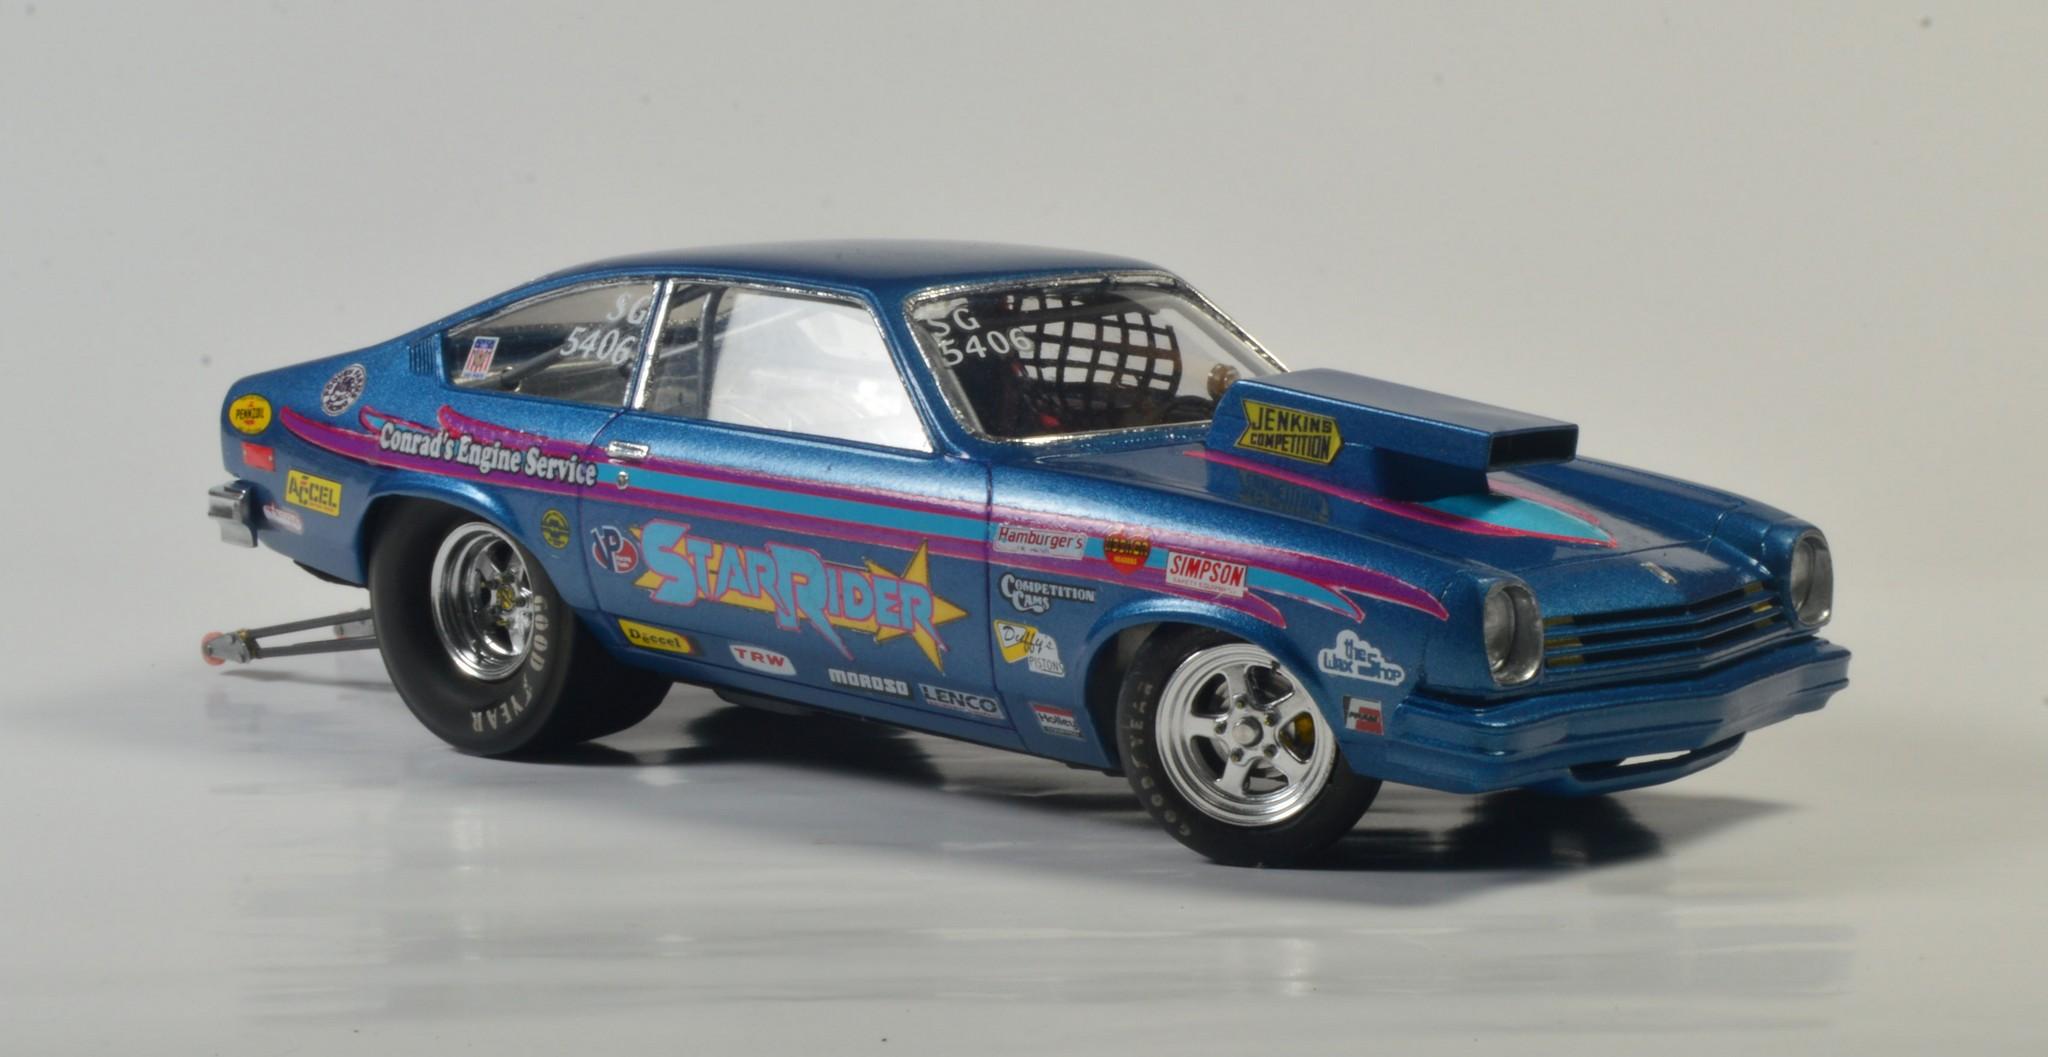
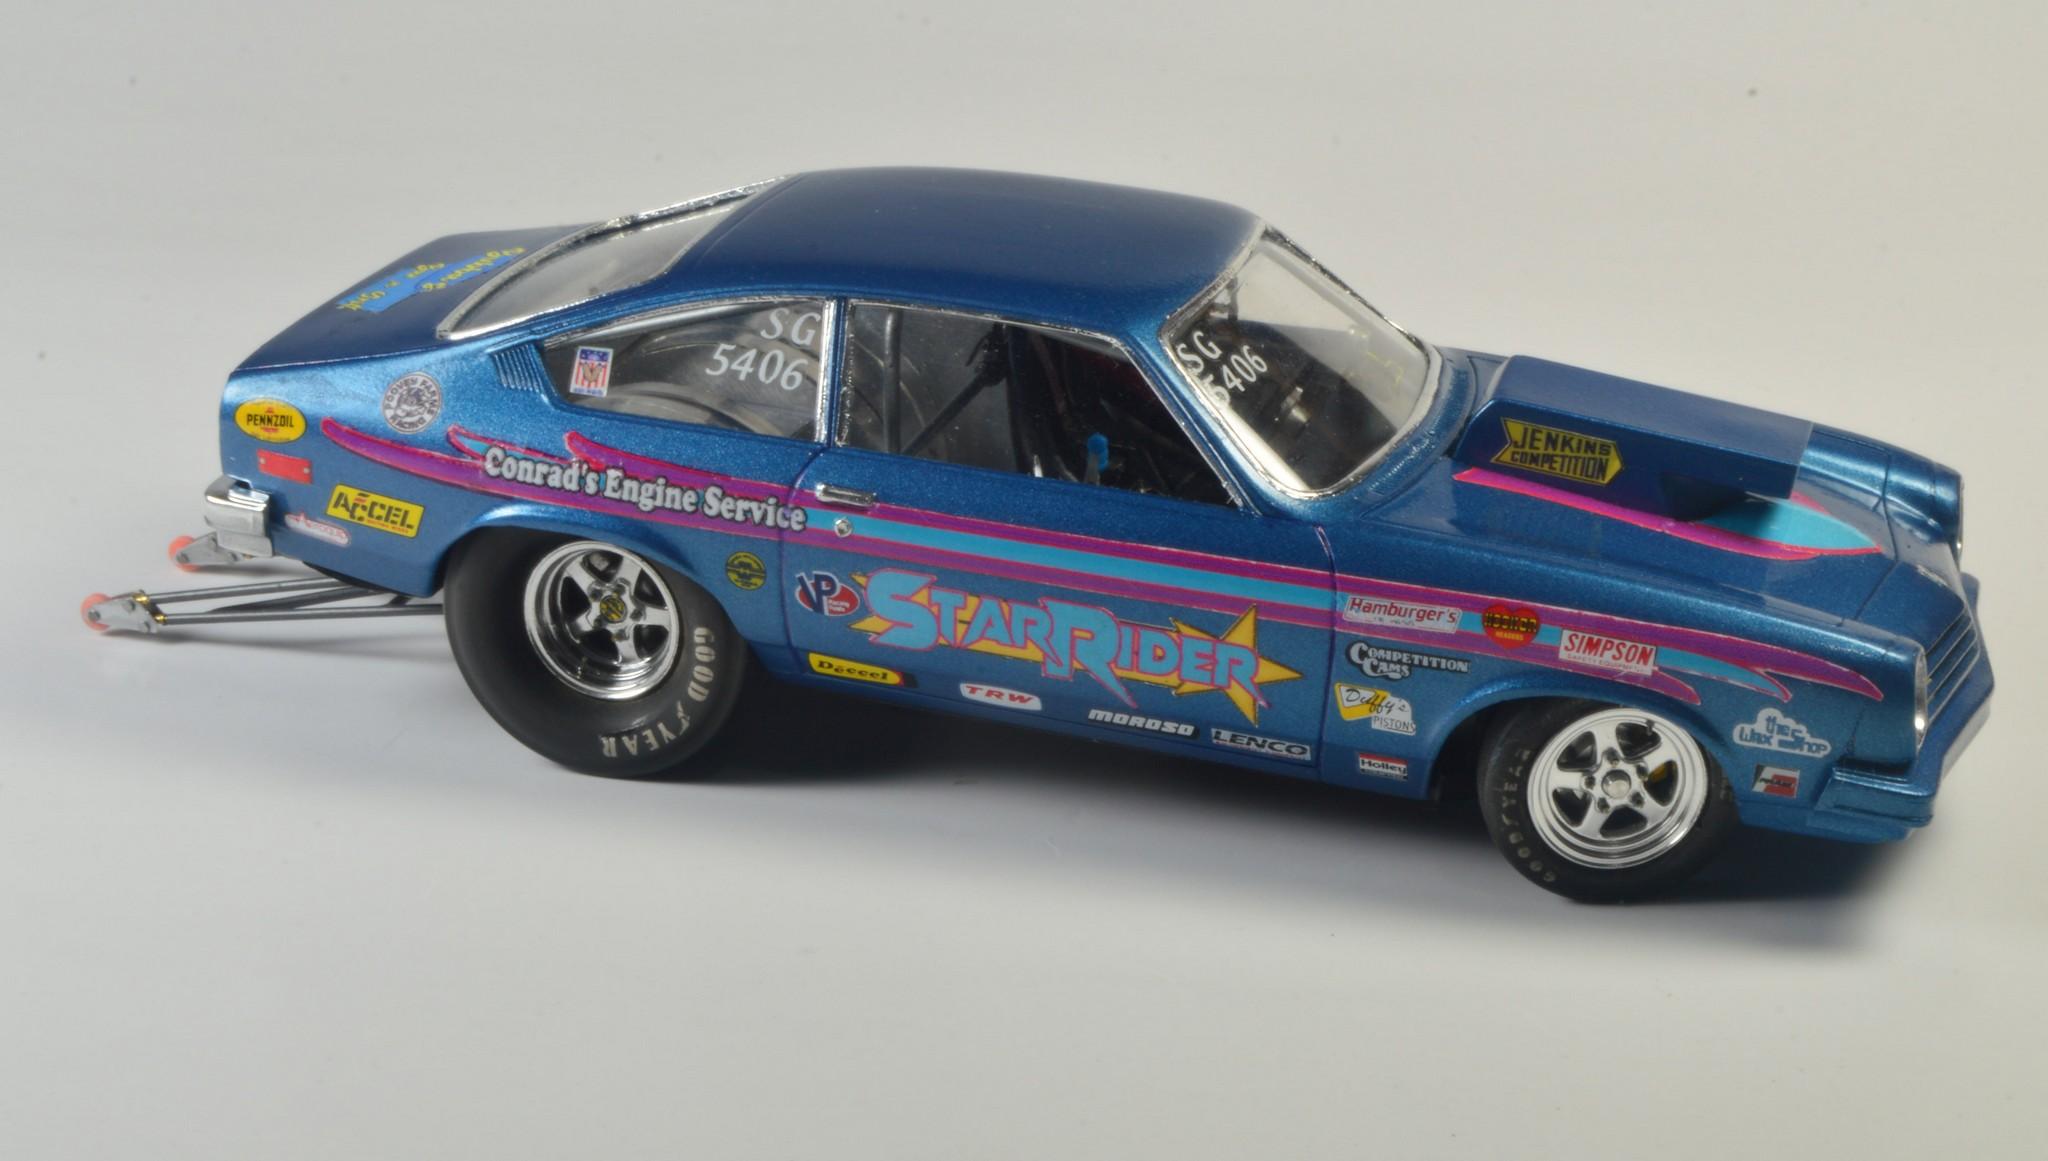
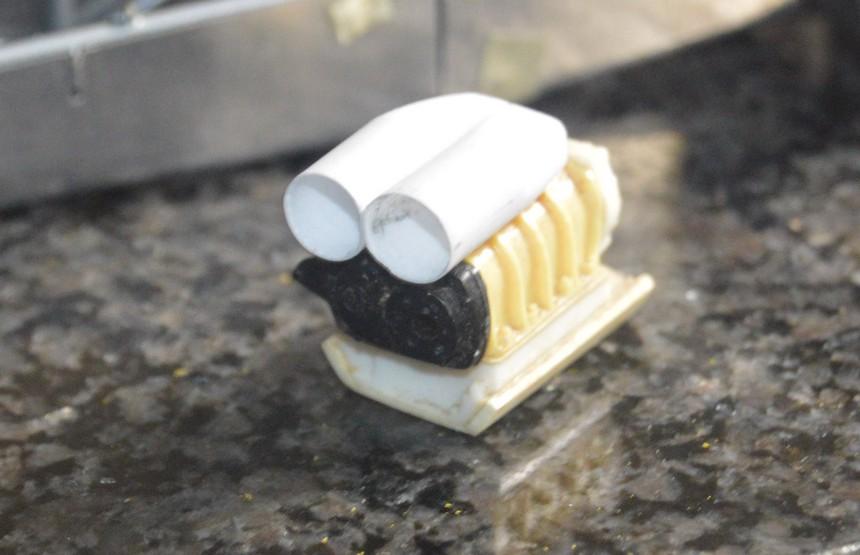
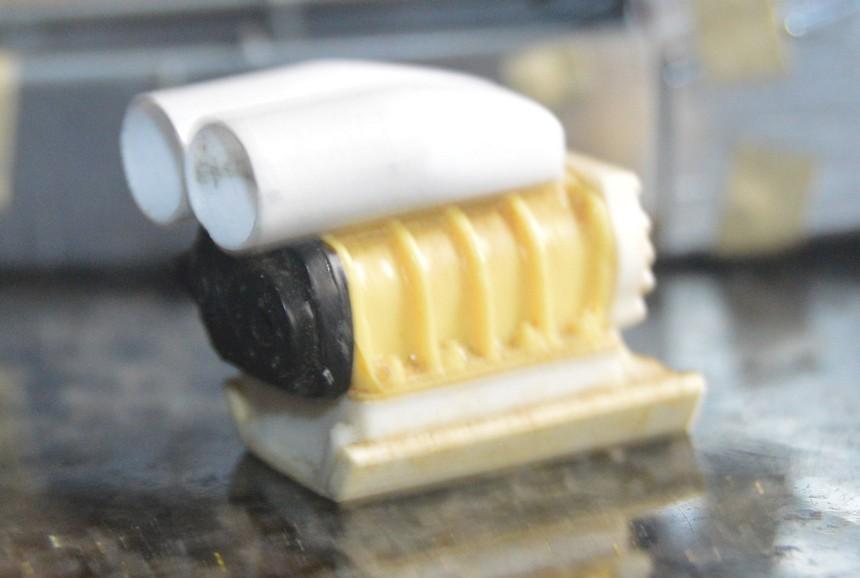
That's horrible, if you're a QB or a basketball player. However, that equates to a helluva good year, for me! I finished a Monogram Don Edmunds Supermodified. That was a project that had been sitting for quite a few years--around 20. I scratchbuilt a "homebuilt" injection setup for the small block Chevy. The car is meant to represent a speedway Supermod from the mid-'70s. The hood, firewall, wing, seat and dash are all aluminum. Wheels are scratchbuilt from castings. In January, I built the '63 Chevy II from a re-released AMT Craftsman kit. I painted it like my first car was, except mine was a four-door, but not a wagon. I need to take some better glamour shots of this one. Finally, the Super Gas Vega was built from an MPC Promo model. I just felt like I needed a Vega, since I love those H-Bodies! I built a roll cage, and lined the interior with tooling aluminum. The Lenco shifters are all scratchbuilt. I printed the graphics on an inkjet printer, and laid them over Mulsanne Blue paint. Questions, and comments are always welcomed. Thanks for looking!
- 20 replies
-
- 10
-

-
It's all great! I especially like the fit of the radiator. Excellent work, as always, Ian.
-
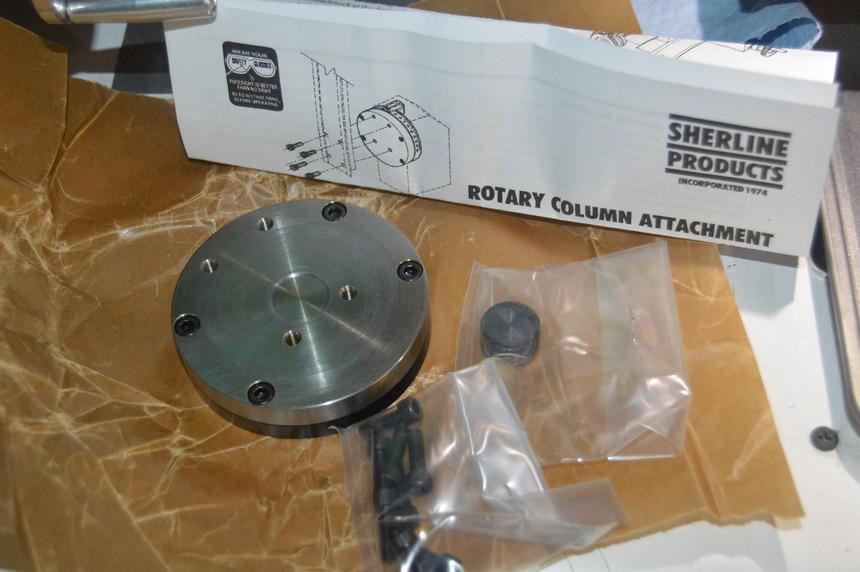
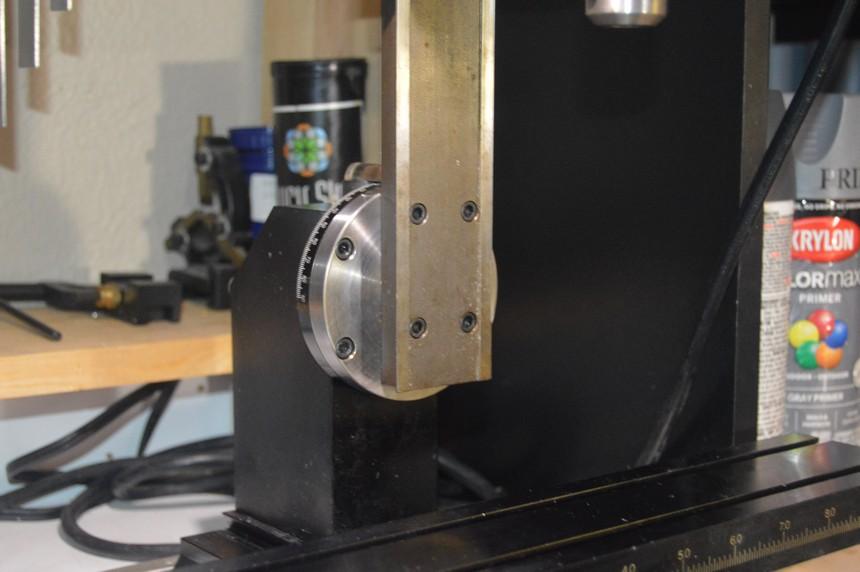
I got a rotating column attachment for the mill. It should make "angled" operations easier than installing the angle milling table. I also picked up one of the reissued Pepper Shaker kits. The vintage box, pictured here is from one of the very first kits I got, once I knew I was a car modeler, back in 1972! I also want to get one of AMT's '53 Ford pickups, but, I'm not married to the same box as my first one (Street Rods). I want to build both of them fairly basically--just a little dressed up.
- 39,076 replies
-
- 2
-
-
- johan
- glue bombs
- (and 1 more)
-
I've always just used a dryer vent. Never had a problem.
-
Please delete.
-
Paint flames the clean ‘n’ easy way
Straightliner59 replied to OldNYJim's topic in Tips, Tricks, and Tutorials
Thanks, Mikey! I have seen the potential of the Cricut machines, since before they really were of much use to modelers, due to the fact that only their cartridges could be used to program the machines (2004-2005?). I told my then girlfriend, who got an early model, "If they ever make these, so that people can use their own artwork, they will open their market to modelers. I can think of a million things we could do with them!" I've had mine for over five years, now, and have yet to learn to use it! I'm such an idiot, sometimes! Every project I've worked on, over those last few years, I tell myself will be the one I finally use the Cricut to do my decals. Nope, not yet!? -
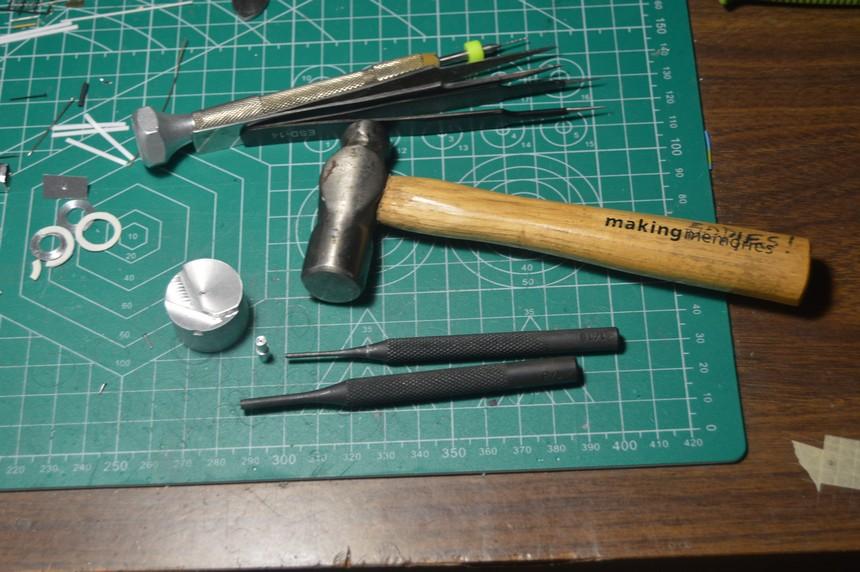
I had to make a separate dimpling tool, so that I could do the cowl. Photos below. Also shown are the tools I used to dimple all the panels. I ended up using a second, larger punch, after the smaller one, because it flattens the metal back out, and makes for a crisper recess. All the panels are now ready for smoothing and installation (final will be much later). I'm thinking that next, I will finalize the canard mounts, then build a new seat. I think those are the last of the major components, other than the canards themselves. There are a couple of things that need to be removed from the chassis, and a couple of small repairs, and an addition, or two. Once all the major components can be pinned together, finish work and assembly can commence. Shouldn't be too long. I'll take a short break, at some point, for the 24 hour build. This year will be a Monogram Long John. That should give me a reasonable shot at getting it done! I digress... As always...Thanks for looking!
-
That's right! He won the March Meet, last year!
-
Thank you, Ian. Glad you find the Dzus deal useful! Maybe just borrow it, so others can use it, too! ?Thank you, as well, Bob. I'm always happy when someone else finds any of this stuff useful. I am going to build the shotgun hat. First, like you said, Ian, it's not just another Enderle. That's probably why I was drawn to it, for this car, originally. Besides, I went to all that trouble to build the front wheels. It would be a shame to not complete my vision, I think. Thank you, Joe. I appreciate you following along!
-
Again, I'd like to say what a cool project this is. I forgot to mention that I have a very good, long-time friend who's pretty heavily involved in Funny Car Chaos. A lot of folks know him as Shaggy Racer. Lyle Greenberg is also a friend.
-
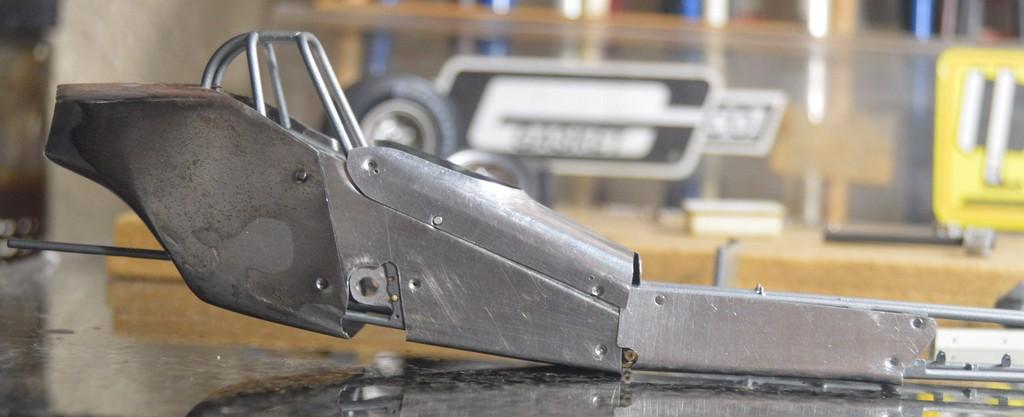
Here's one under engine panel mounted. The pins hold them in place, via friction. Once the thing is painted, I'll add a dab of cement to each mounting point. I've since completed the other panel, as well. The first two photos show the panel before and after being snapped into place.
-
And a lot more thyme...
-
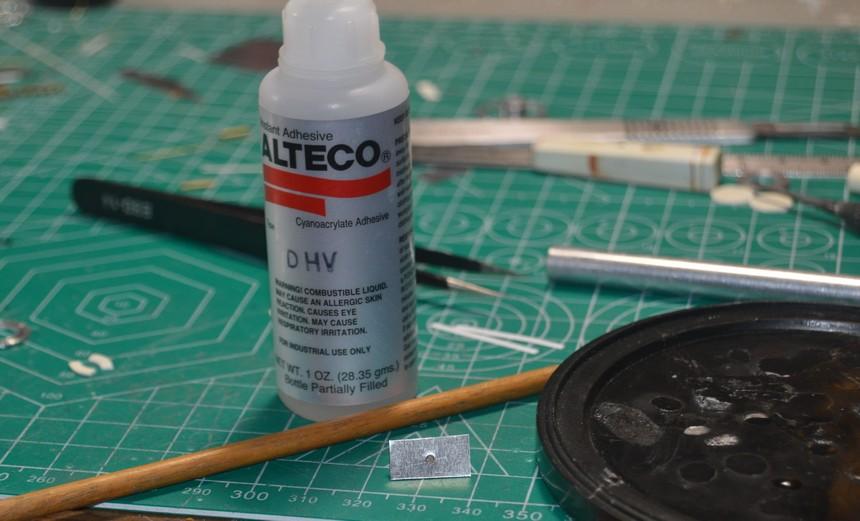
I think I finally got the body panels properly fitted--I say "think" because, you know how that goes! ? Now, an idea I've wanted to try, for a while...I used this little die I made and a 1/16" punch, along with one of the nails I'll be using to mount the panels, to dimple them, so that the nails are flush with the surface of the body. I can then cement them into the panels with this Alteco CA, that is supposed to be formulated to repair metal dental work, so, I'm hoping it will work well, here. Once the nails are installed, I will cement a PE Dzus fastener, over the top of that. I've created a sample piece. I think this'll work! I had to mill the top of the die, so that I could use it, near the rolled edges. I don't have photos of that. I wanted to get this posted, because the power is flirting with going out! As always, comments questions and critiques are welcomed. Thanks for looking!
-
Excellent job on a difficult kit. Congratulations!
-
Digital Caliper Modification
Straightliner59 replied to NOBLNG's topic in Tips, Tricks, and Tutorials
I will join the chorus of voices singing the praises of this! Excellent thinking! -
Thank you, my friend! And, you're welcome. It's been slower, the last few days, due to some "fiddly" work with the panels.
-
You've got some excellent work going on, here, Mike. Looking forward to seeing it progressing.
-
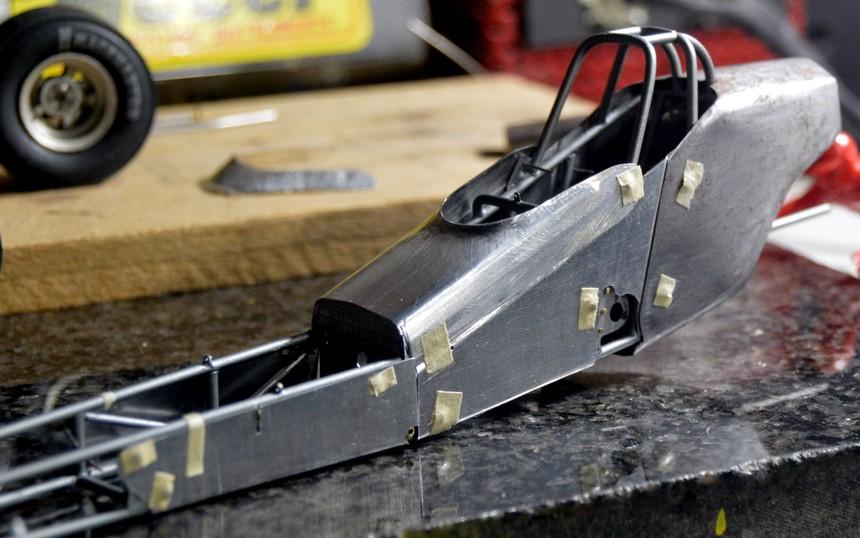
Thank you, Ian. I've given some thought to a 3-D printer, but, I tell myself to lear to use my Cricut, first! That will open a ton of possibilities, as well, especially where decals are concerned. I agree, though--anything that gives us a greater opportunity to manufacture our own parts efficiently, is definitely the way to go. It's been a few days since my last update. I've been doing some fiddly stuff--drilling and doing final fitting of the body, which involves a lot of fitting, taping, drilling, refitting, pinning, re-taping, flexing, pushing and pulling panels into place, lather, rinse, repeat...and we're slowly getting there. I use the pictured doll house nails to do most of my pins. They're a nice size, if not always easy to find. There are a lot of options as far as the 1/4" nails go, but, most of them don't have the flat, thin heads these do. It's important to look closely at planned purchases, to be certain. Once the body is finalized, I will look for, and begin to make final adjustments to the chassis, and complete construction and trial installation of the rest of the major components. Here's a look at the fitting process. The tape is used to hold the pins in place, so they aren't eaten by the carpet monster, or catapulted into the great beyond! I'm considering scratching a Hilborn Shotgun injector--I have kind of wanted it as part of the concept, since inception (like the front wheels), but, I am not as married to it, as I was the wheels. I always appreciate your comments, but, I'd be especially interested in them, regarding the two-holer. Thanks for looking!
-
"Tricky" Rickie Smith Stroh's Light Firebird Pro Stock
Straightliner59 replied to chris coller's topic in Drag Racing
That looks great! Nice job getting the car to sit lower. That's not particularly easy, with those kits. -
I remember a Pay N Pak...
-
Who doesn't?!