Straightliner59
-
Posts
5,816 -
Joined
-
Last visited
Content Type
Profiles
Forums
Events
Gallery
Everything posted by Straightliner59
-

Cam driven accessories. Help.
Straightliner59 replied to Tarkmucker's topic in Model Building Questions and Answers
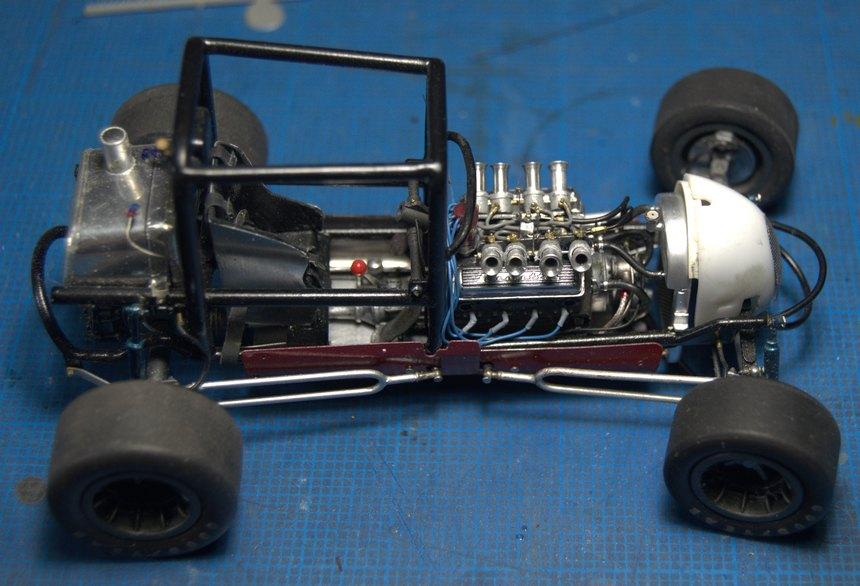
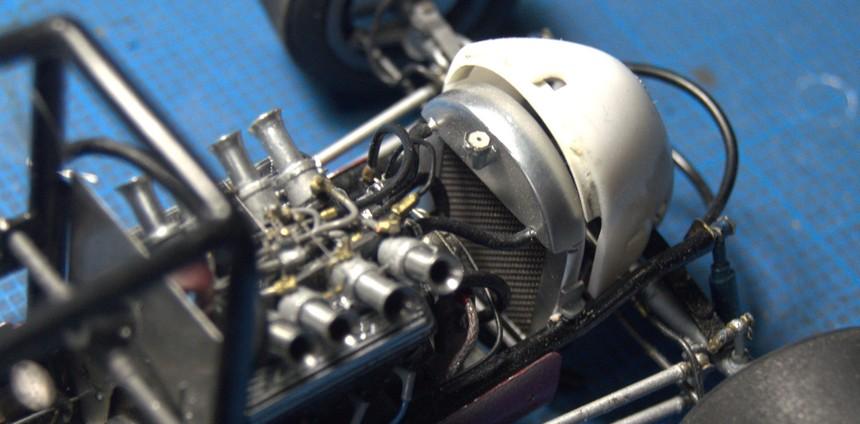
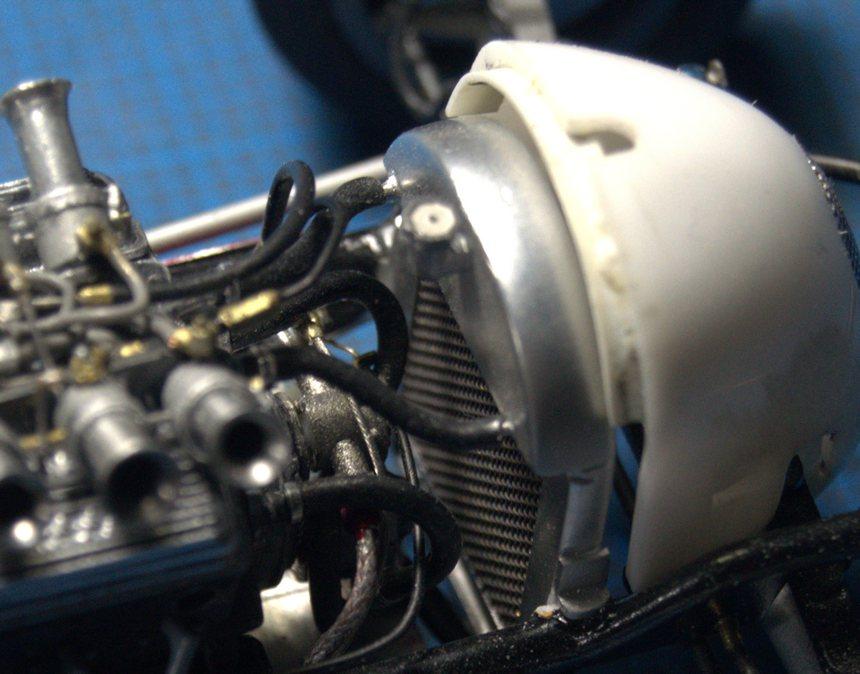
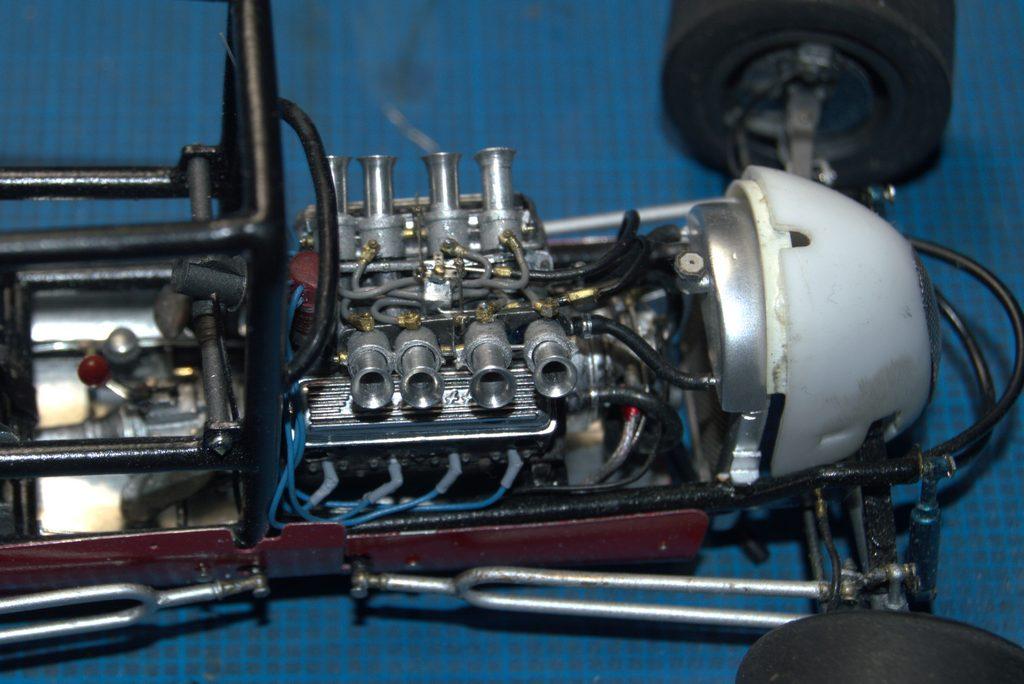
My Supermodified uses the same water pump, only crank driven. The hoses from the open ends of the pump connect to the bosses on the block where the original water pump mounted. The hoses to the radiator are as usual. Here are some photos that may help--I hope!
-
Thank you, sir!
-
That's coming along, beautifully! Indeed, the more stuff we add, the more critical the build order!
-
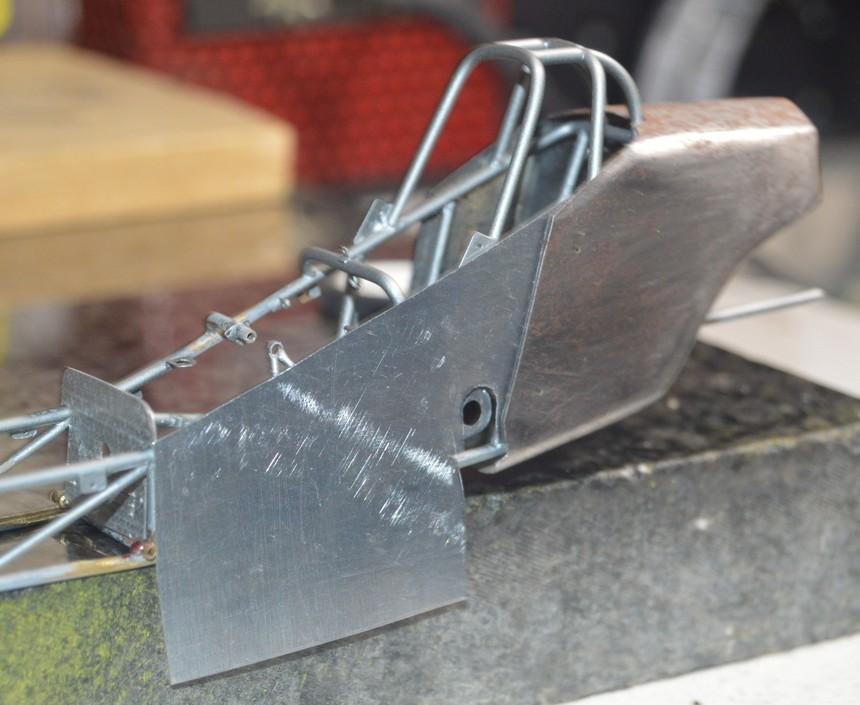
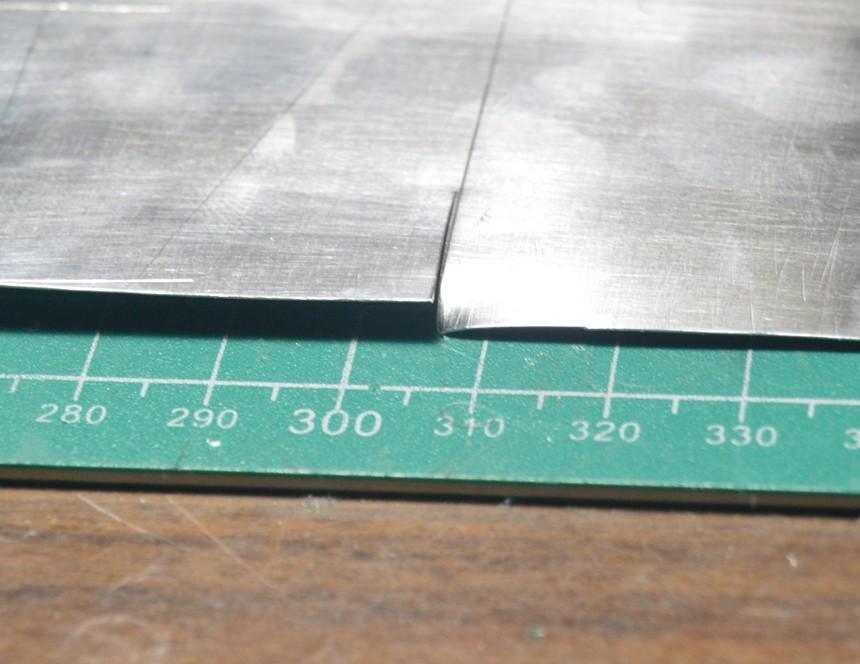
I first experimented with this technique, a few months ago. This is the perfect project in which to employ it. Dragsters typically have a few lap joints, in their body panels. Most commonly, these places are along the upper edge of the side panels, where the top panels (cowl) overlap the side panels. To create a smooth transition between these panels, one of the must be "stepped". I did this simply by gluing two strips of brass strip to the inside of the jaws of this sheet metal hand-bending "brake". I was careful to leave enough clearance for my stock. Then, I taped my side panel to the outer strip, with the bend line at the edge of the strip. I then carefully closed the brake, then gave the tool a few raps on the anvil with the ball-peen hammer. It made a nice, crisp lap joint! I will use this technique, as well, to create the lap at the top of the cockpit side panels. That one, however, will be a custom-cut set of dies, to create a nice, curved lap line! I have to say that I am (so far--knock on wood) very happy with the way this car is progressing! Also shown with this group of photos are a selection of collected (some fabricated) items I use for shaping and working metal sheet. The clear box is mostly wooden bucks and forms. Thanks for looking...again!
-
There was a series called "Campus Friends". I don't recall who made them Fujimi, maybe? A Google search for 1/24 scale figures should provide a lot of sources, I'd think. Sorry I'm not more help, I've never done much research into figures.
-
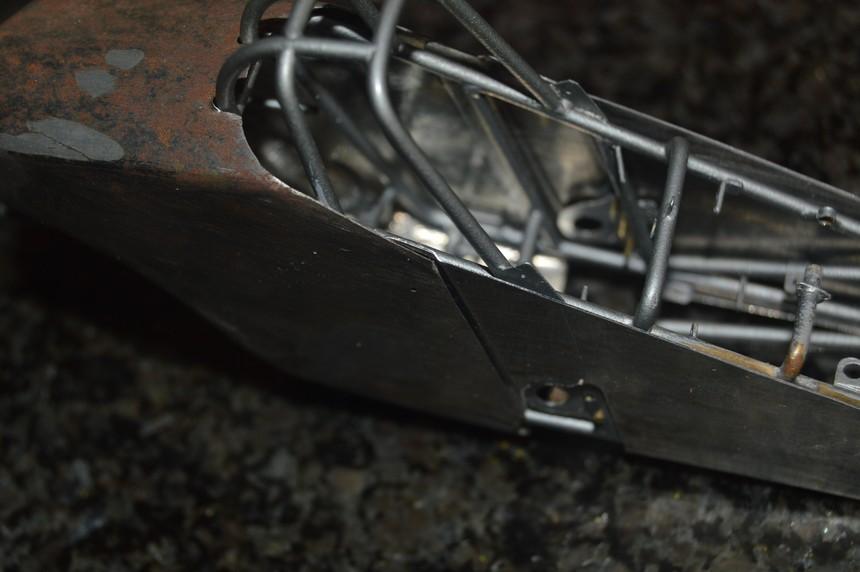
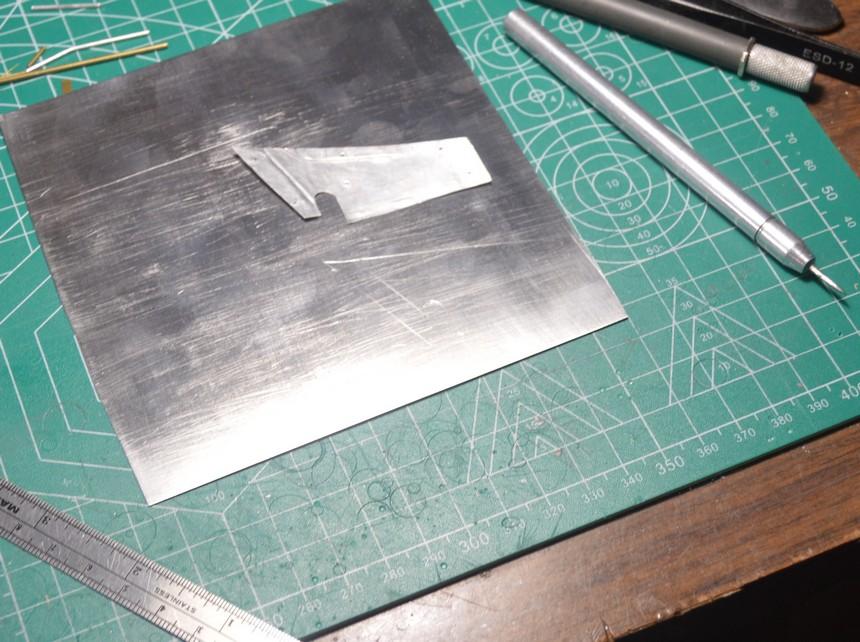
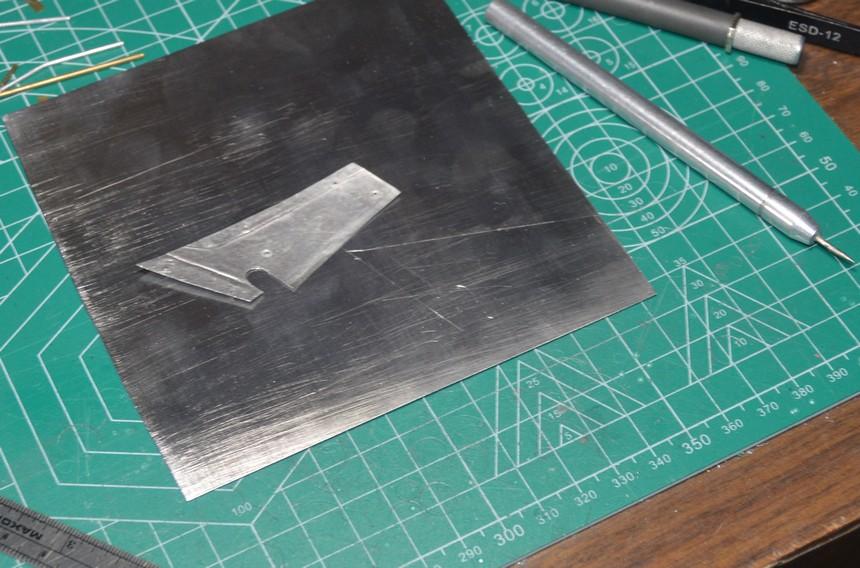
Once the aluminum is annealed, I cut out the rough outline of the panel. I used a punch from a set I got at Harbor Freight, to punch the rounded opening for the diff. An added advantage of using the punch, for this, is that you end up with small, slightly domed discs of aluminum. These look like they'd make excellent headlamp covers for a 1/32 scale model! Next, I straighten the edges with a 6" mill bastard, right on the edge. Once the edges/sides are straight, I clean them up with a medium-fine sanding board. Now, I trace the outline of one panel, to begin the opposite panel. Next I cut and dress that panel, as well. Now that I have two identical side panels, I can begin fine-tuning the fit. Slipping the tail on helps to position the panels properly. Through trial-and-error, I cut and file the panel to fit around the bolts that mount the third-member. At this time, I also mark the panel for the step, where the tail overlaps. I will be using a new technique to create all the laps for this body. As you can see, the body panels are quite long at the bottom. I left them that way, until I determine whether or not I am going to roll them under, to create the floorboard, or simply add a floor panel inside the chassis bottom, in which case I will cut them. Other notes: While I have acquired many specialty tools for doing sheet work, over the years, virtually all of it can be done with basic stuff we all have on hand. I use a length of 1" dowel, as a rolling pin, to flatten the sheet, as it curls, during work. A small ball-peen hammer is indispensable. I'd recommend a dedicated one, so that the face and ball-end remain smooth--they're much less likely to mar your work. A decent pair of good old Fiskars orange-handled scissors will handle most cutting needs. I'll expand on tool selection, as it arises, or as it occurs, to me!? Once these are fitted, I'll be on to the cowl. I plan to use the windscreen from the existing cowl, as it has a successful engine-turned finish. Your questions and comments are always welcomed. Thanks for looking! Stay tuned!
-
Neil Peart Dodge D50
Straightliner59 replied to ybsluos's topic in Model Trucks: Pickups, Vans, SUVs, Light Commercial
Thank you, kindly, Mark. The Vega's my most recent completion. Glad to share! -
Neil Peart Dodge D50
Straightliner59 replied to ybsluos's topic in Model Trucks: Pickups, Vans, SUVs, Light Commercial
Indeed, he did! I've seen it mentioned, several times. There's an article, somewhere, in which he talks about it. Model cars, I believe, would have been an ideal way to meet him. Of course, you'd still have to avoid acting like a doddering fanboy! A few months before he died, I had bought an old Ideal kit of a BMW racing bike, because I enjoy building old, oddball stuff. I intended to build it, and ship it to their management's offices, in hopes that they would get it to him. Alas, he was gone, before I even started on it. The day we learned that was a real punch in the gut. -
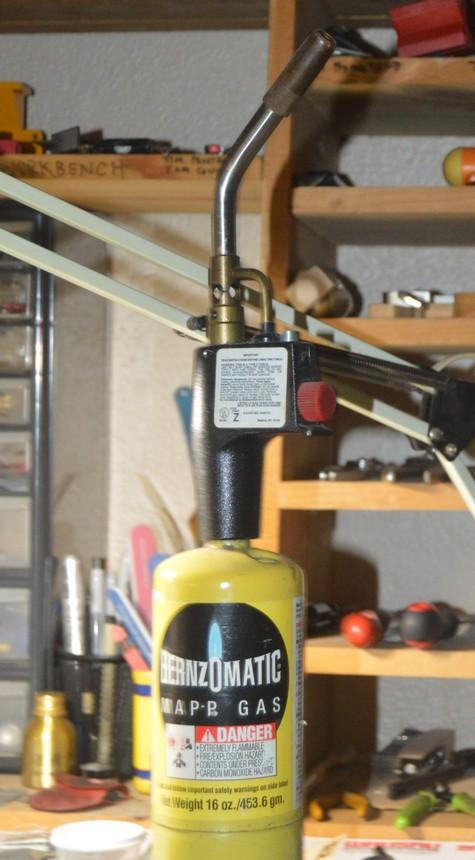
I want to clarify that the torch needn't be MAPP gas, it's just what I have, on hand. The torch does, however, need to be large enough to heat a significant area of sheet. I'm pondering a propane torch, with a fan tip, but, it's not critical, since I've been using the MAPP gas torch for over ten years.
-
Thank you, my friend! It actually feel like it is, to me, too--for now! Except for the front wheels. Turned out that I only had one of the front Halibrands left, so I was left without the option of simply building a set of wheels. I built a new new wheel, that's much better, and, it's in rubber, now. I'll be pouring the second side of the mold later today. Thank you, Joe. I have been lucky enough to have had some friends who were always willing to teach me, and, I really like to share what I've learned, too! I have never understood why anyone would maintain any secrets about this stuff! But, they're out there! Thanks, Ian. Thank you, as well!
-
Neil Peart Dodge D50
Straightliner59 replied to ybsluos's topic in Model Trucks: Pickups, Vans, SUVs, Light Commercial
They're not. But, those are awesome! I wanted to do the actual graphics that Neil used for it. but I couldn't get them resized to fit, properly, so I ended up just winging something! Here's the art I did for the Supermod, too.
-
I only have the capability, in that I have the equipment!? I'm working on it, though.
-
And, he's been around for decades! You have to wonder just how!
-
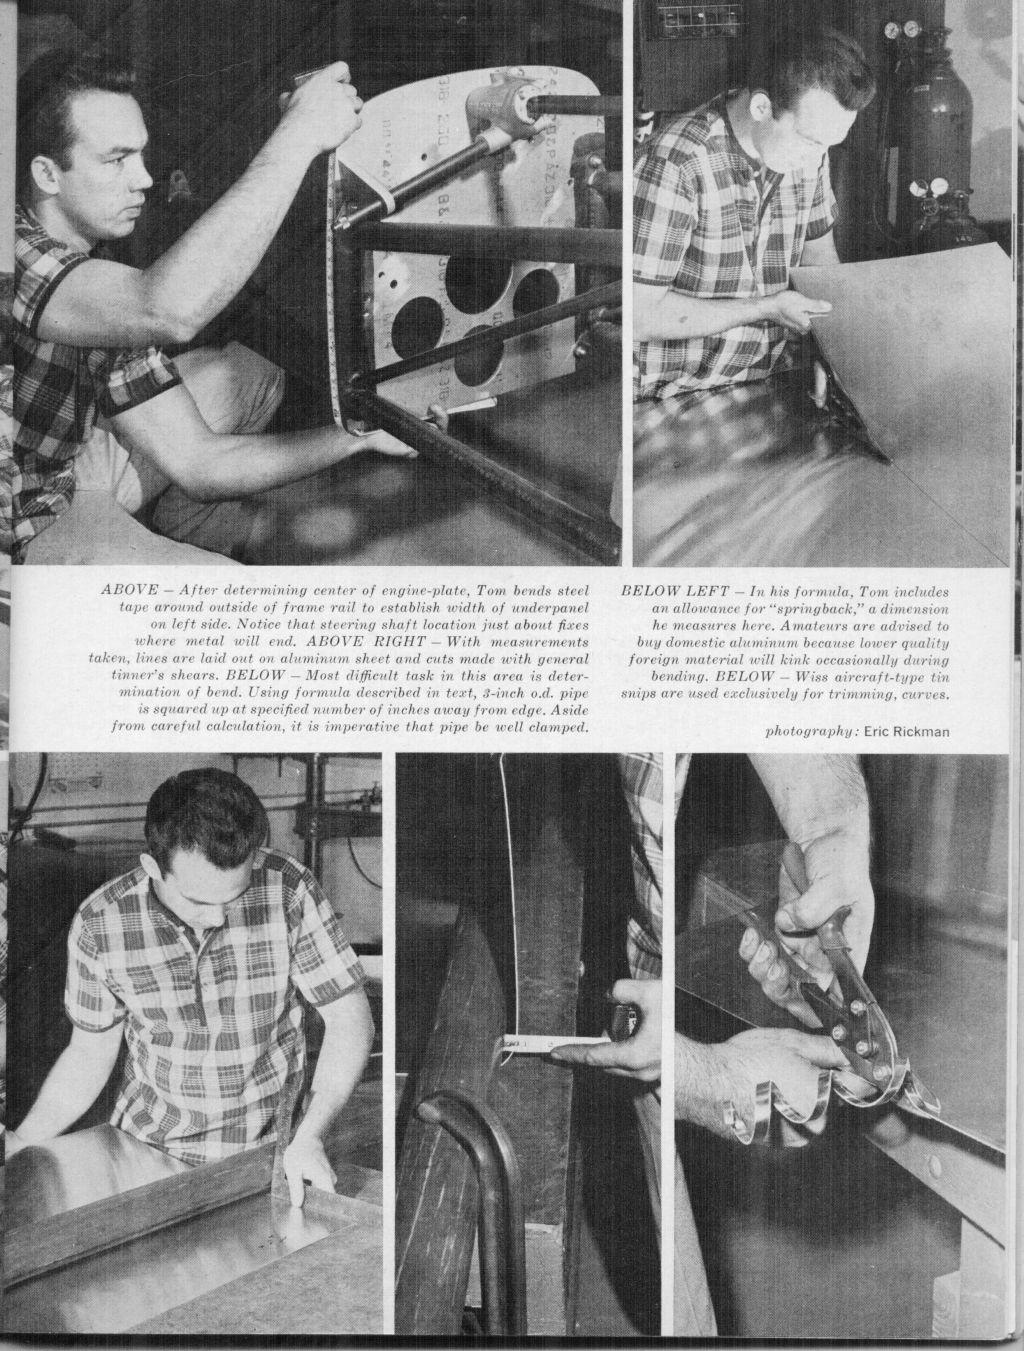
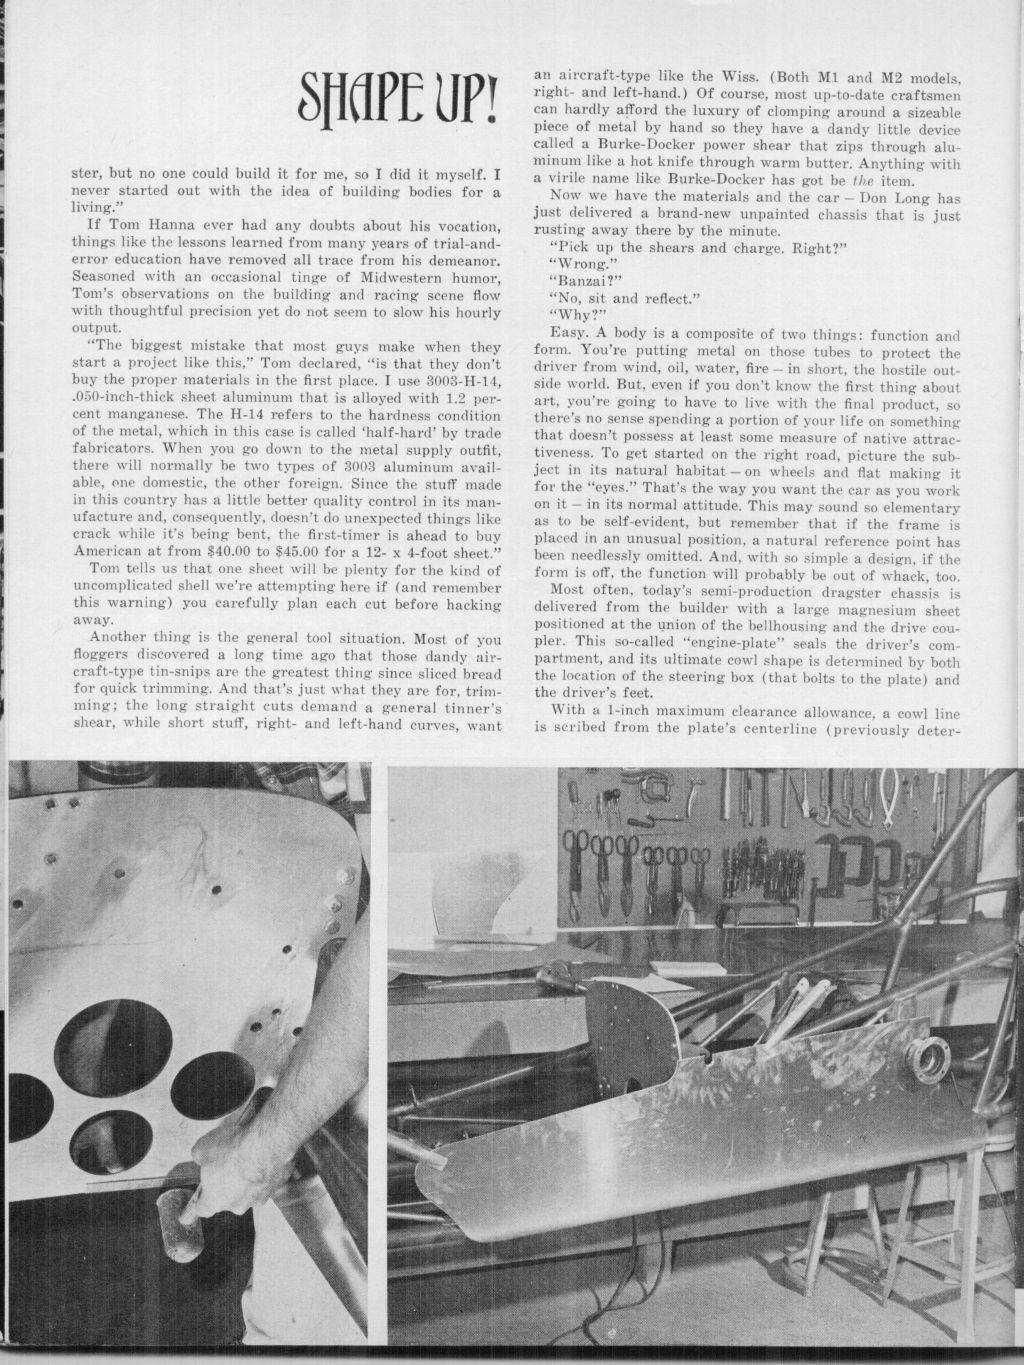
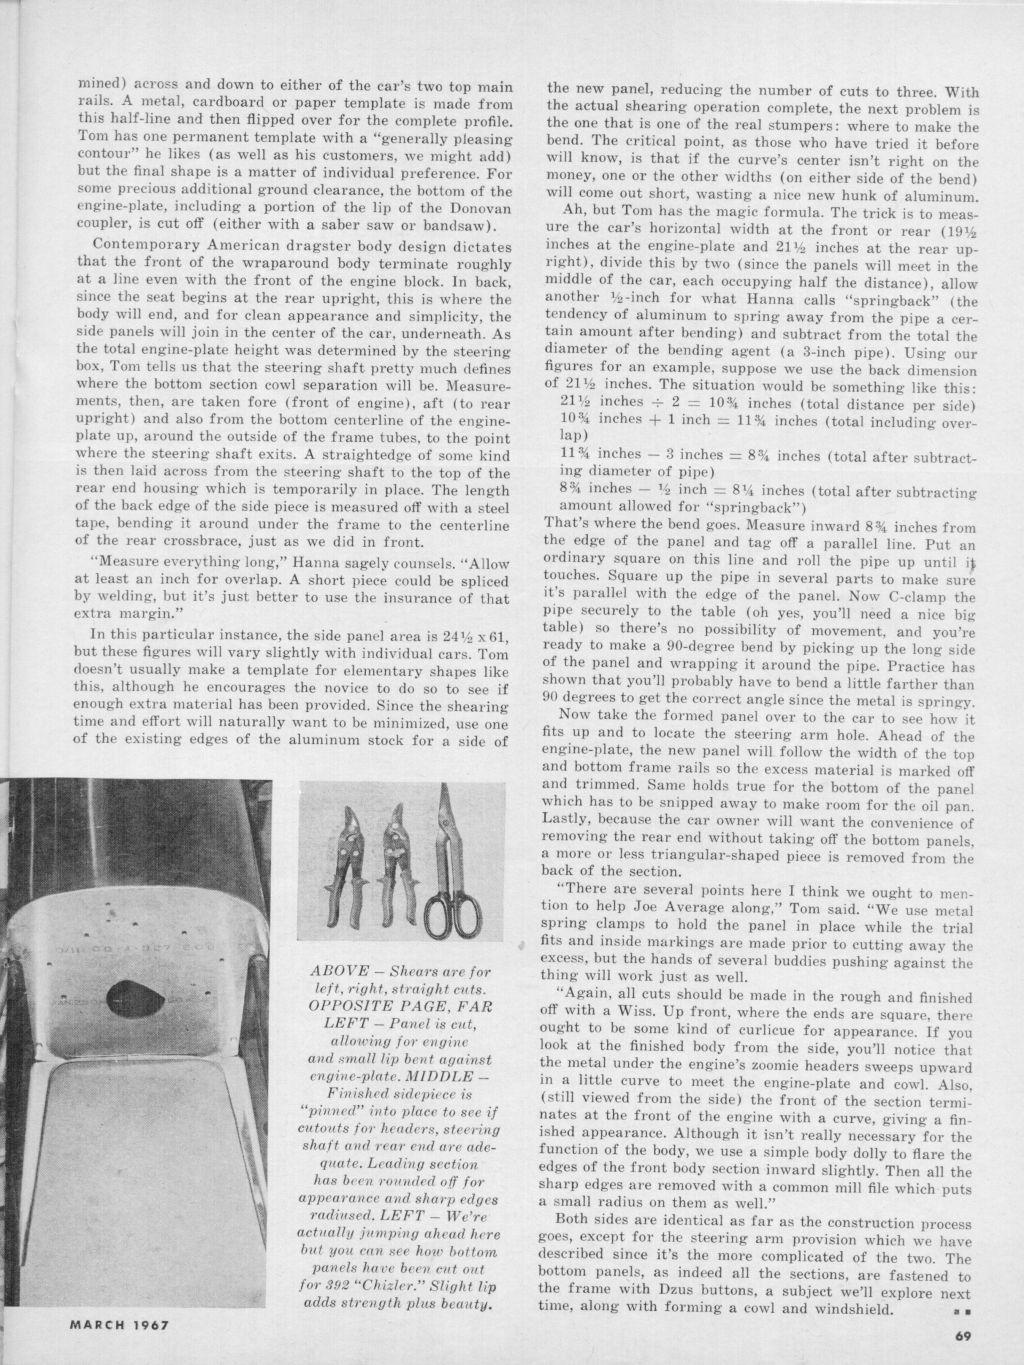
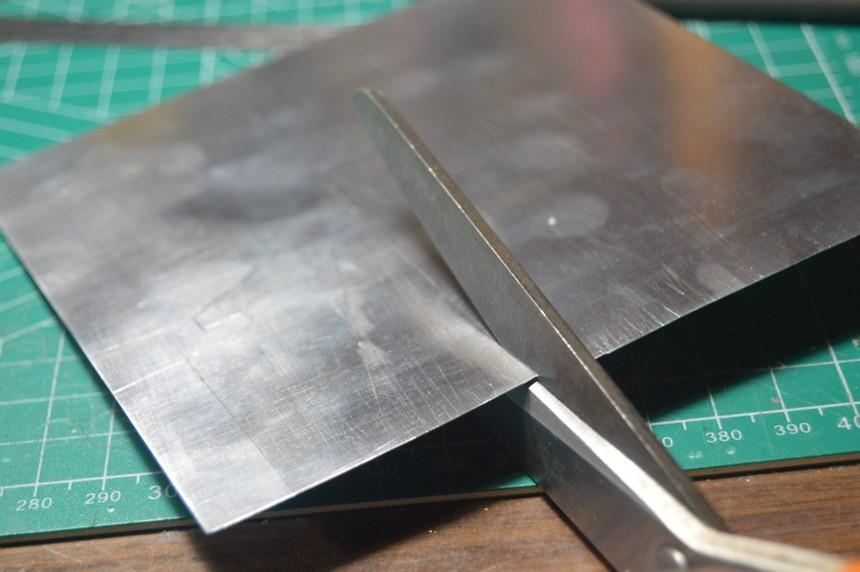
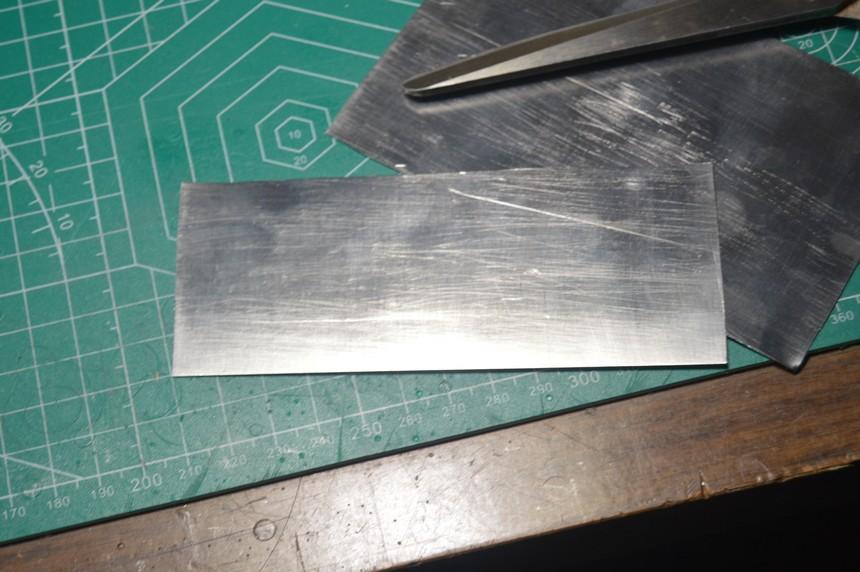
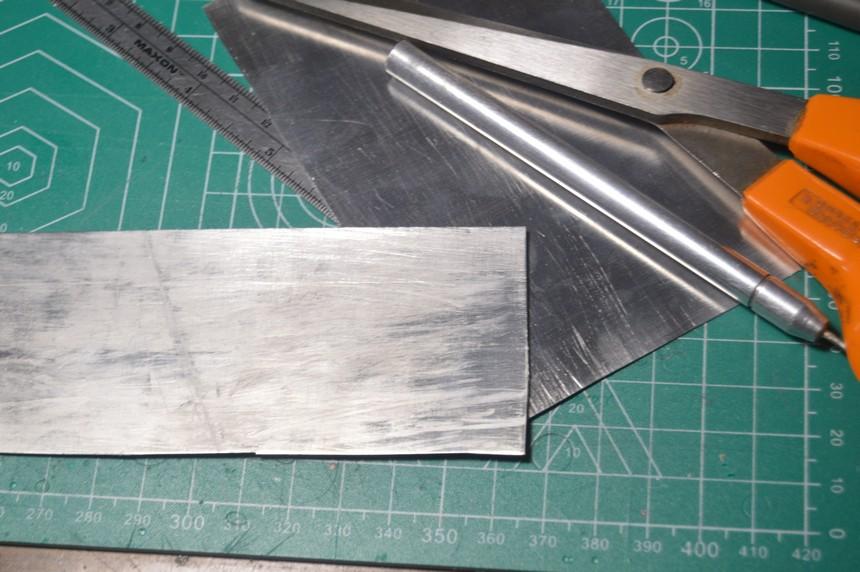
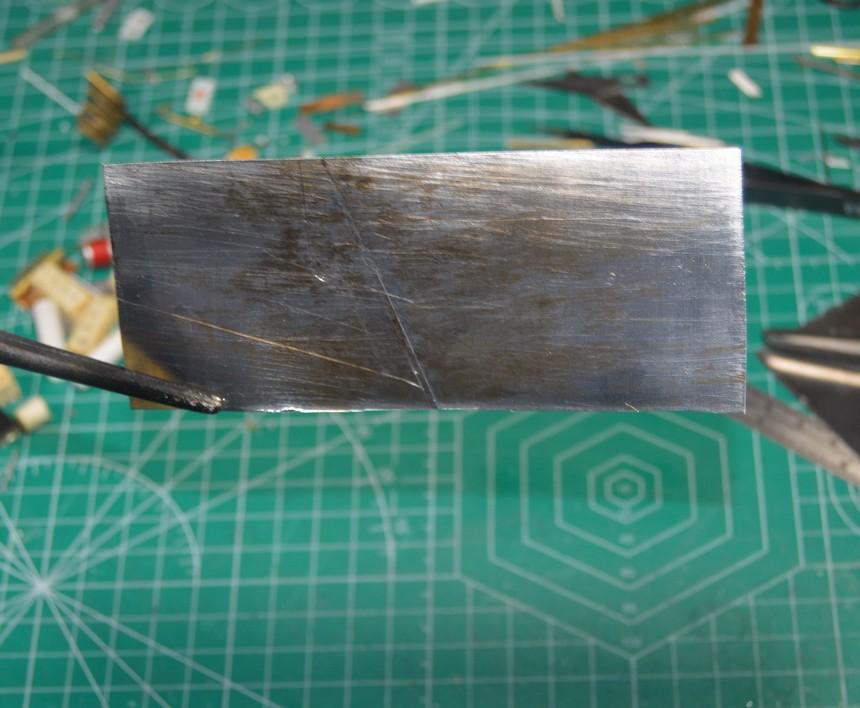
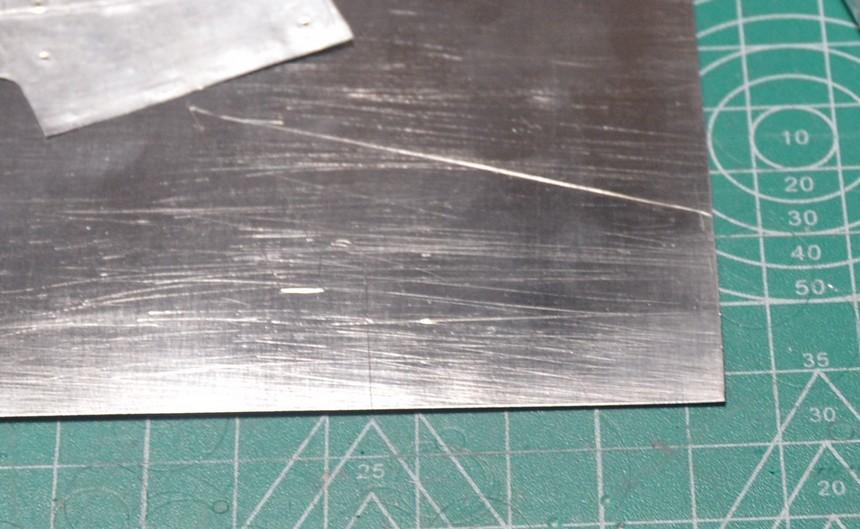
Okay. I have been meaning to do this, since I was running the old SLM website. Since this dragster needs a new body, now seems as good a time as any. It'll take a few installments, but, if you're interested in building aluminum dragster bodies, you'll at least have a few ideas, to get started. First and foremost, I would suggest reading and familiarizing yourself with the information Tom Hanna (Hey! Who better ya' gonna' learn from?) imparts in the following articles: A couple of quick thoughts and photos of annealing. First, because of the torch I have on hand, I cut a two-inch strip off the end of the flashing that I drew the body lines on. This provides enough annealed sheet to make both sides of the cockpit section of the body, yet, this section of sheet is small enough to heat quickly enough to anneal, without burning it. That happens, quickly! Anyhoo...simply apply Ivory soap to the sheet by rubbing it on. Get close to a source of water, or a vessel large enough to hold water enough to easily submerge your heated sheet. This needs to happen quickly! Apply heat with the torch until the soap "flashes" black (dark brown), and quench it, immediately. Your sheet is now annealed. In the photo, here, the sheet has (of course) been quenched, which rinses most of the soot from the material. My second note regards cutting the sheet. Lay the side of the sheet you'll be using, flat, atop the blade of the scissors. Cutting in this manner maintains a flat edge on the "good" side, and curls the falloff. I think the photos will be sufficient to illustrate. Questions, comments are always welcomed. Thanks for looking!
-
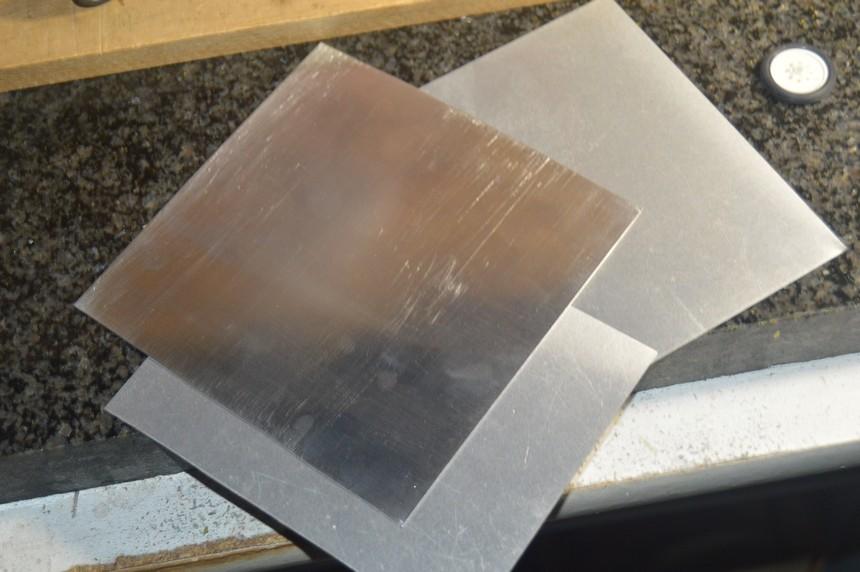
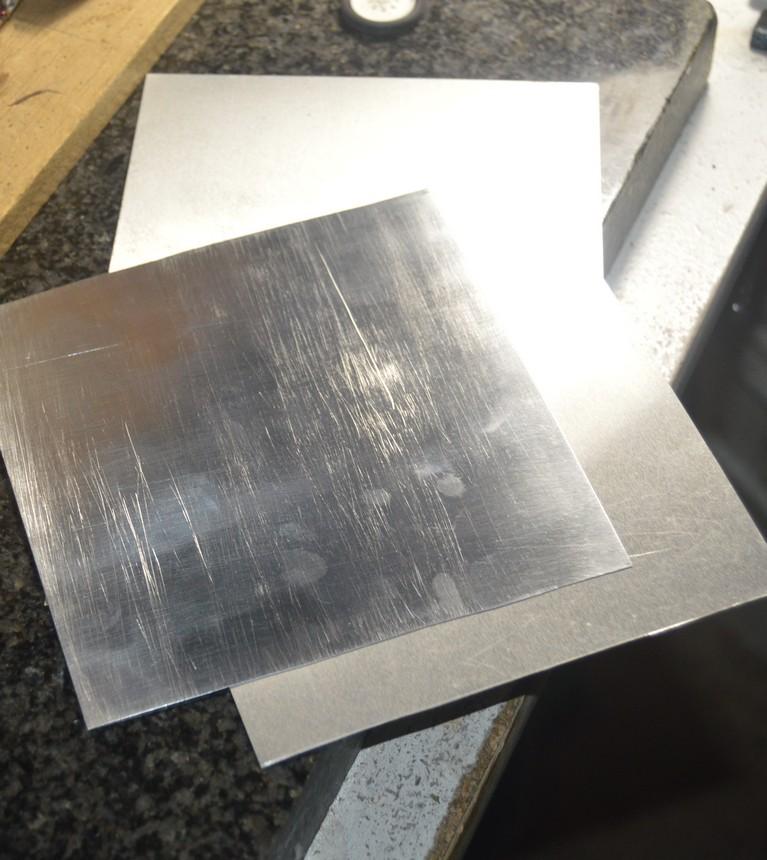
Well...I am having a helluva struggle with my front wheel. I wasn't happy with the first mold--or wheel, so I made a new wheel. I am in the process of making a second mold, as well. While that cures, I started scrubbing the plastic coating from a sheet of flashing. It's pretty hard work, and pretty messy--it's gotta be done, however! All I have, now, are photos of the "cleaned" sheet, along with the untreated sheets. Also included, are a couple of photos of the basic outline of the cockpit side panels (which will now include a roll-under, to form the floor). Next, the sheet will be annealed. Photos of that process, once it's happened...stay tuned!
-
Lamination is an excellent way to build stuff like that. I did the pan, and the valve covers for the NFD, that way. Although, I am giving some thought to machining them from aluminum--some.?
-
Right on! Don't get mad, get even! I believe that's what Theune was doing. He's a complete a-hole.
-
Thanks, so kindly, for your comments, Ian! I agree--getting a model on the wheels is kind of a big moment. When I set it aside, I think I knew that I was waiting for the day that I felt my skills had progressed to the point where I could do it, properly. I feel like I am there, for sure. The steering works flawlessly, and the rest of the parts are satisfying, to me. I'm not particularly looking forward to using all my "elbow grease", sanding the coating off the aluminum flashing, but, that's not terribly far off, now. As to the third member--I also have a photoetched Strange logo for it. I had one on, but, it went flying to, well...wherever parts go, when they fly away! I have a question--what data collection points did you install for the box on your altered? I'm just curious as to how many might be used. I know on the current (NHRA) fuel cars, there are a bazillion of them, even things like exhaust temps. I'm guessing I'll want engine RPM, output shaft RPM and wheel speed, at least. Thanks, Marcos! You're doing just fine, just keep working it, man! Don't worry about me--I'm pretty sure that I can't help myself!?
-
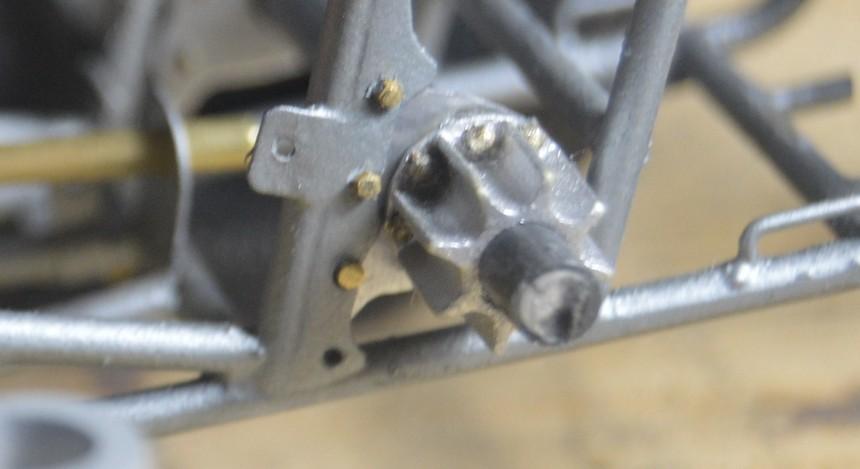
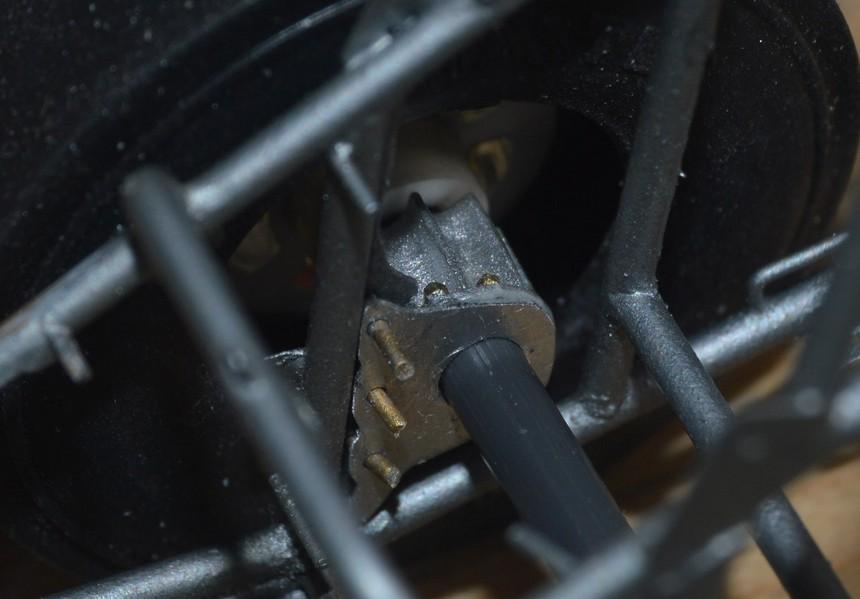
I did some work to the axle ends. I drilled them, and added studs, in the form of Grandt Line Hex Nut/Bolt castings. I also soldered a nut to the outboard side of the steering arm. Once the shaft is cut to the proper length, I will solder the inner section of brass tube to the shaft, and the steering arm will be snugly trapped between them. That will keep the movement tight, and not sloppy. That's about it, for now. I'm just trying to get something done, every day. Thanks for looking!
-
Amazing that he's maintained 100% positive feedback. I've heard that he somehow kind of blackmails people into it, but have no experience. I do know that I have heard nothing but bad things about him and his products for over 20 years! I also had the misfortune of talking to him on the phone, once. Struck me as a complete phony.
-
Neil Peart Dodge D50
Straightliner59 replied to ybsluos's topic in Model Trucks: Pickups, Vans, SUVs, Light Commercial
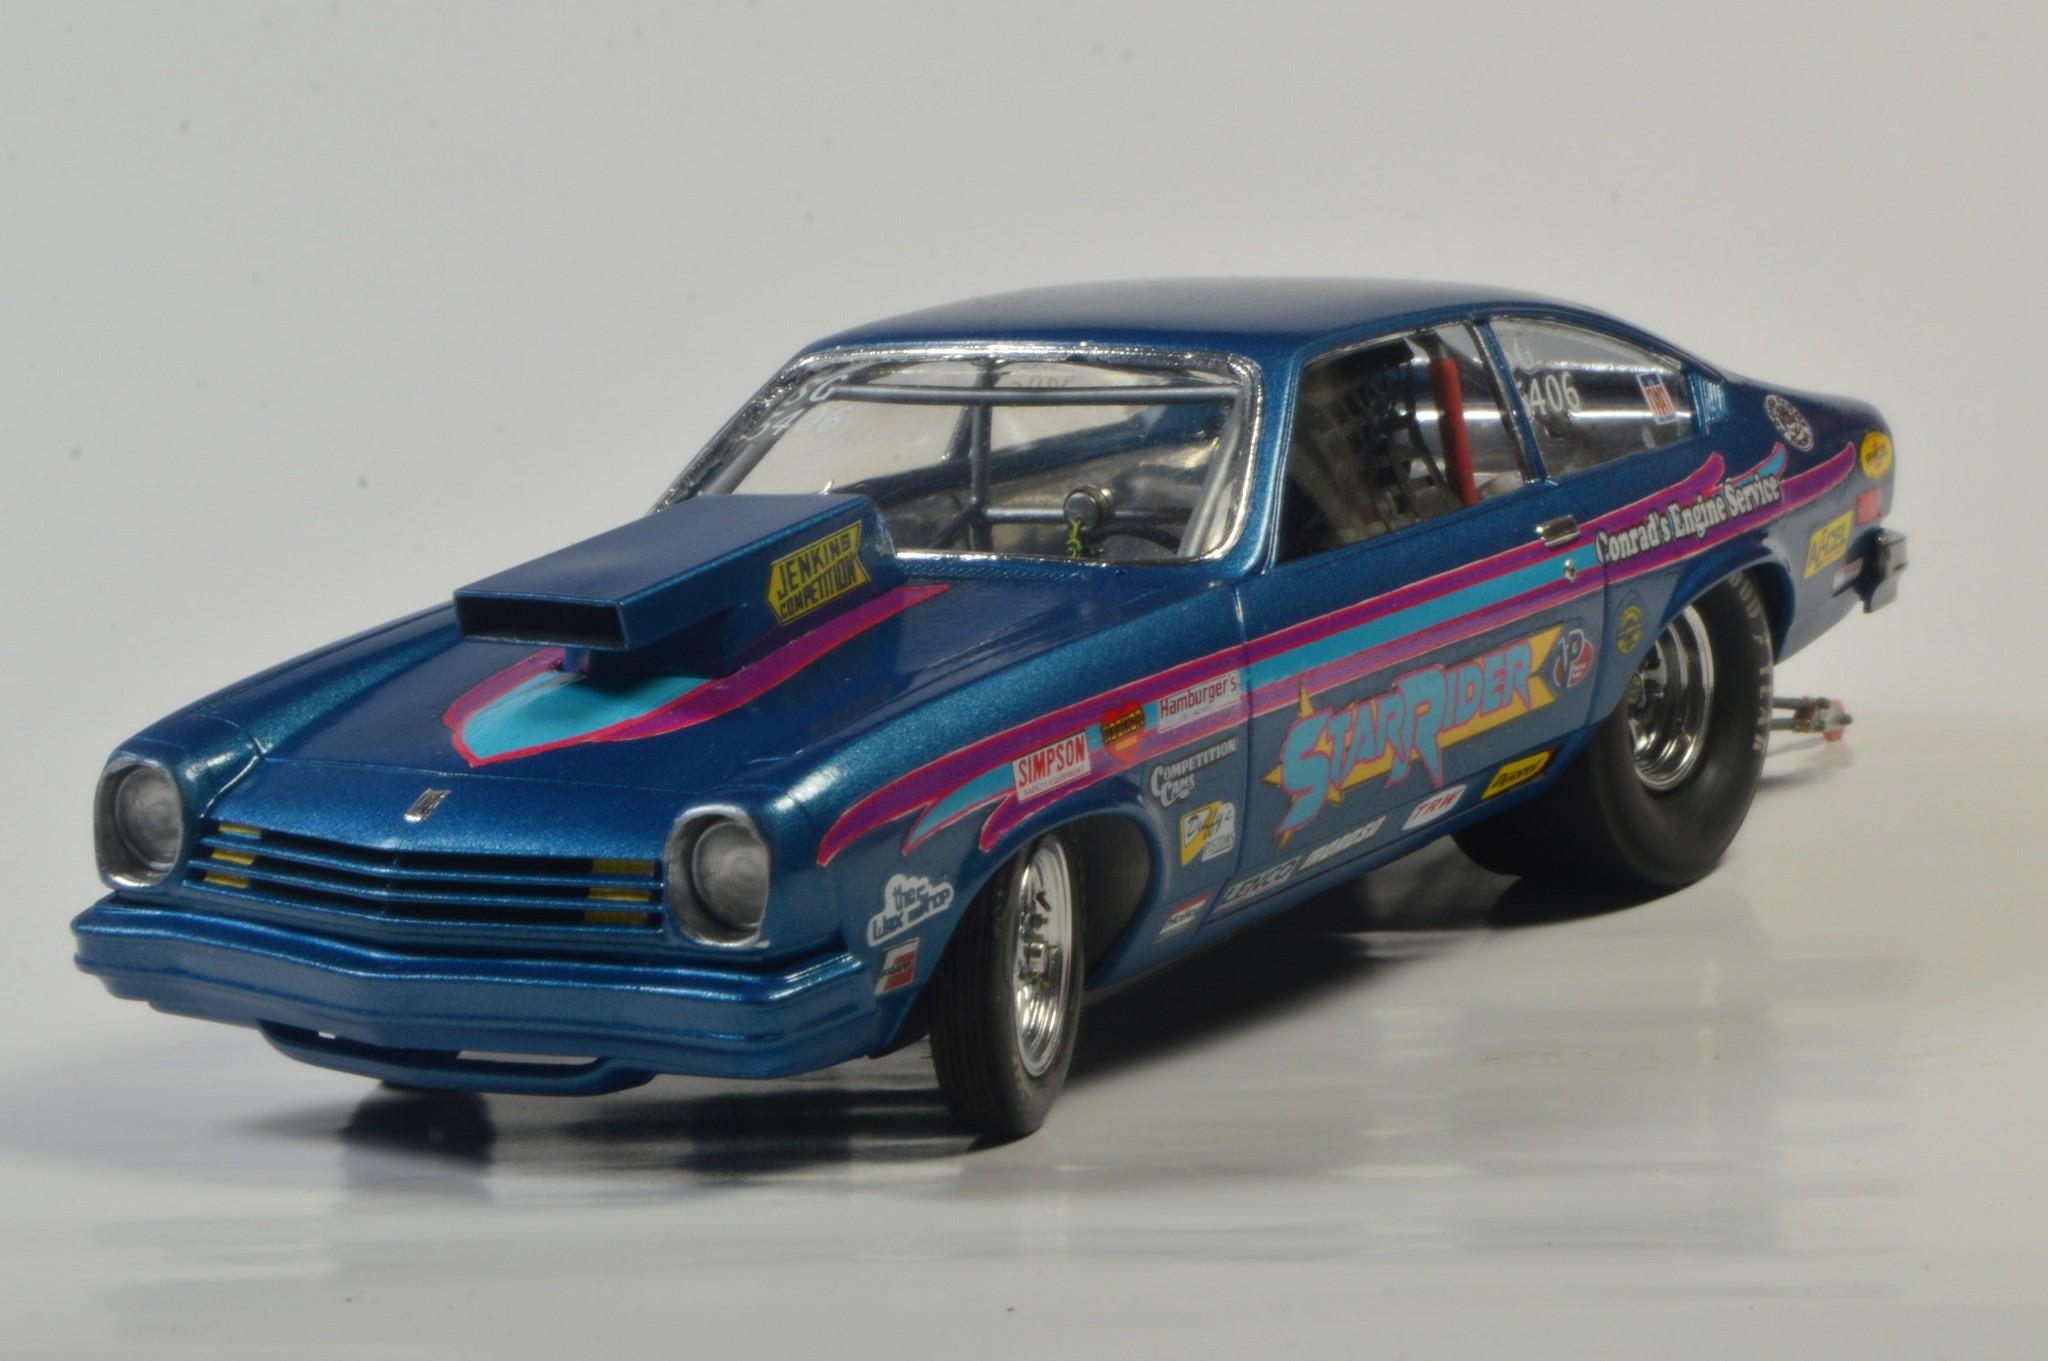
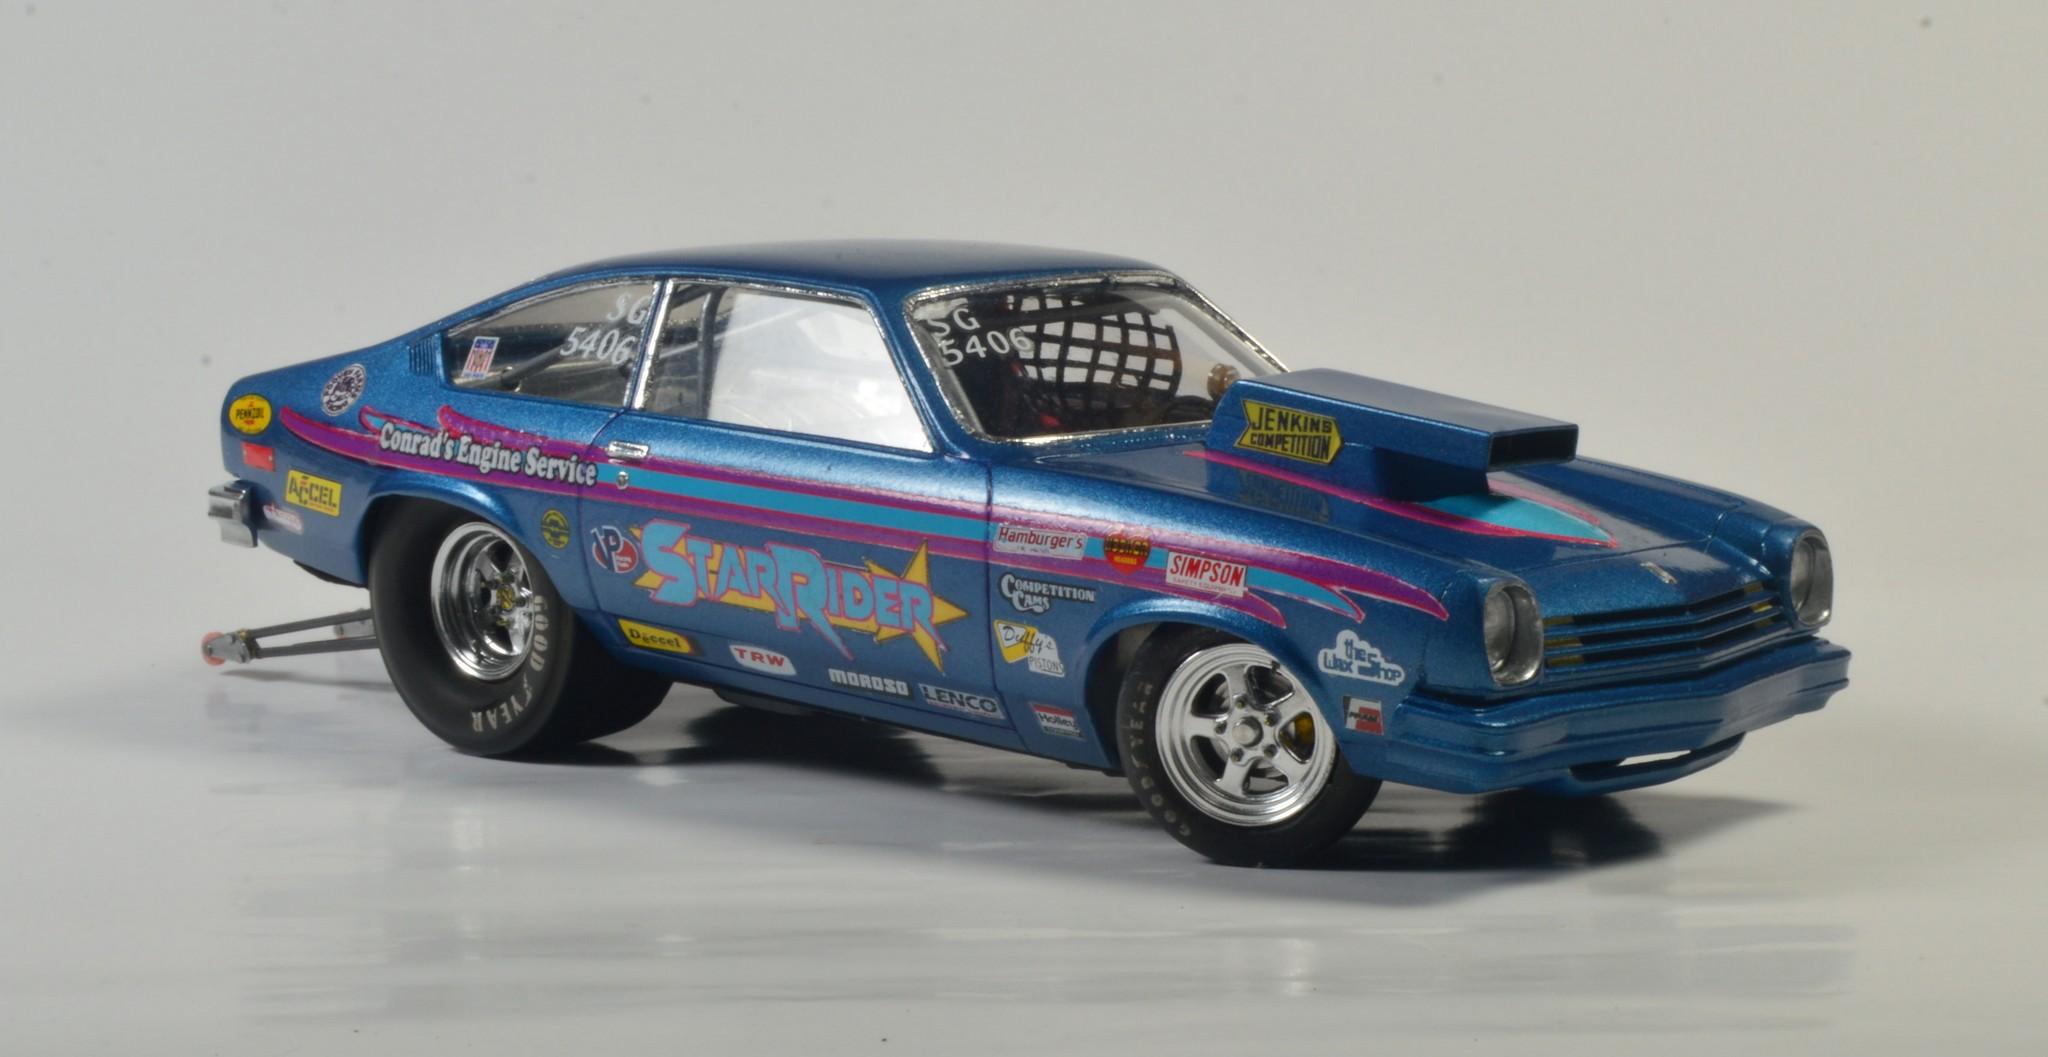
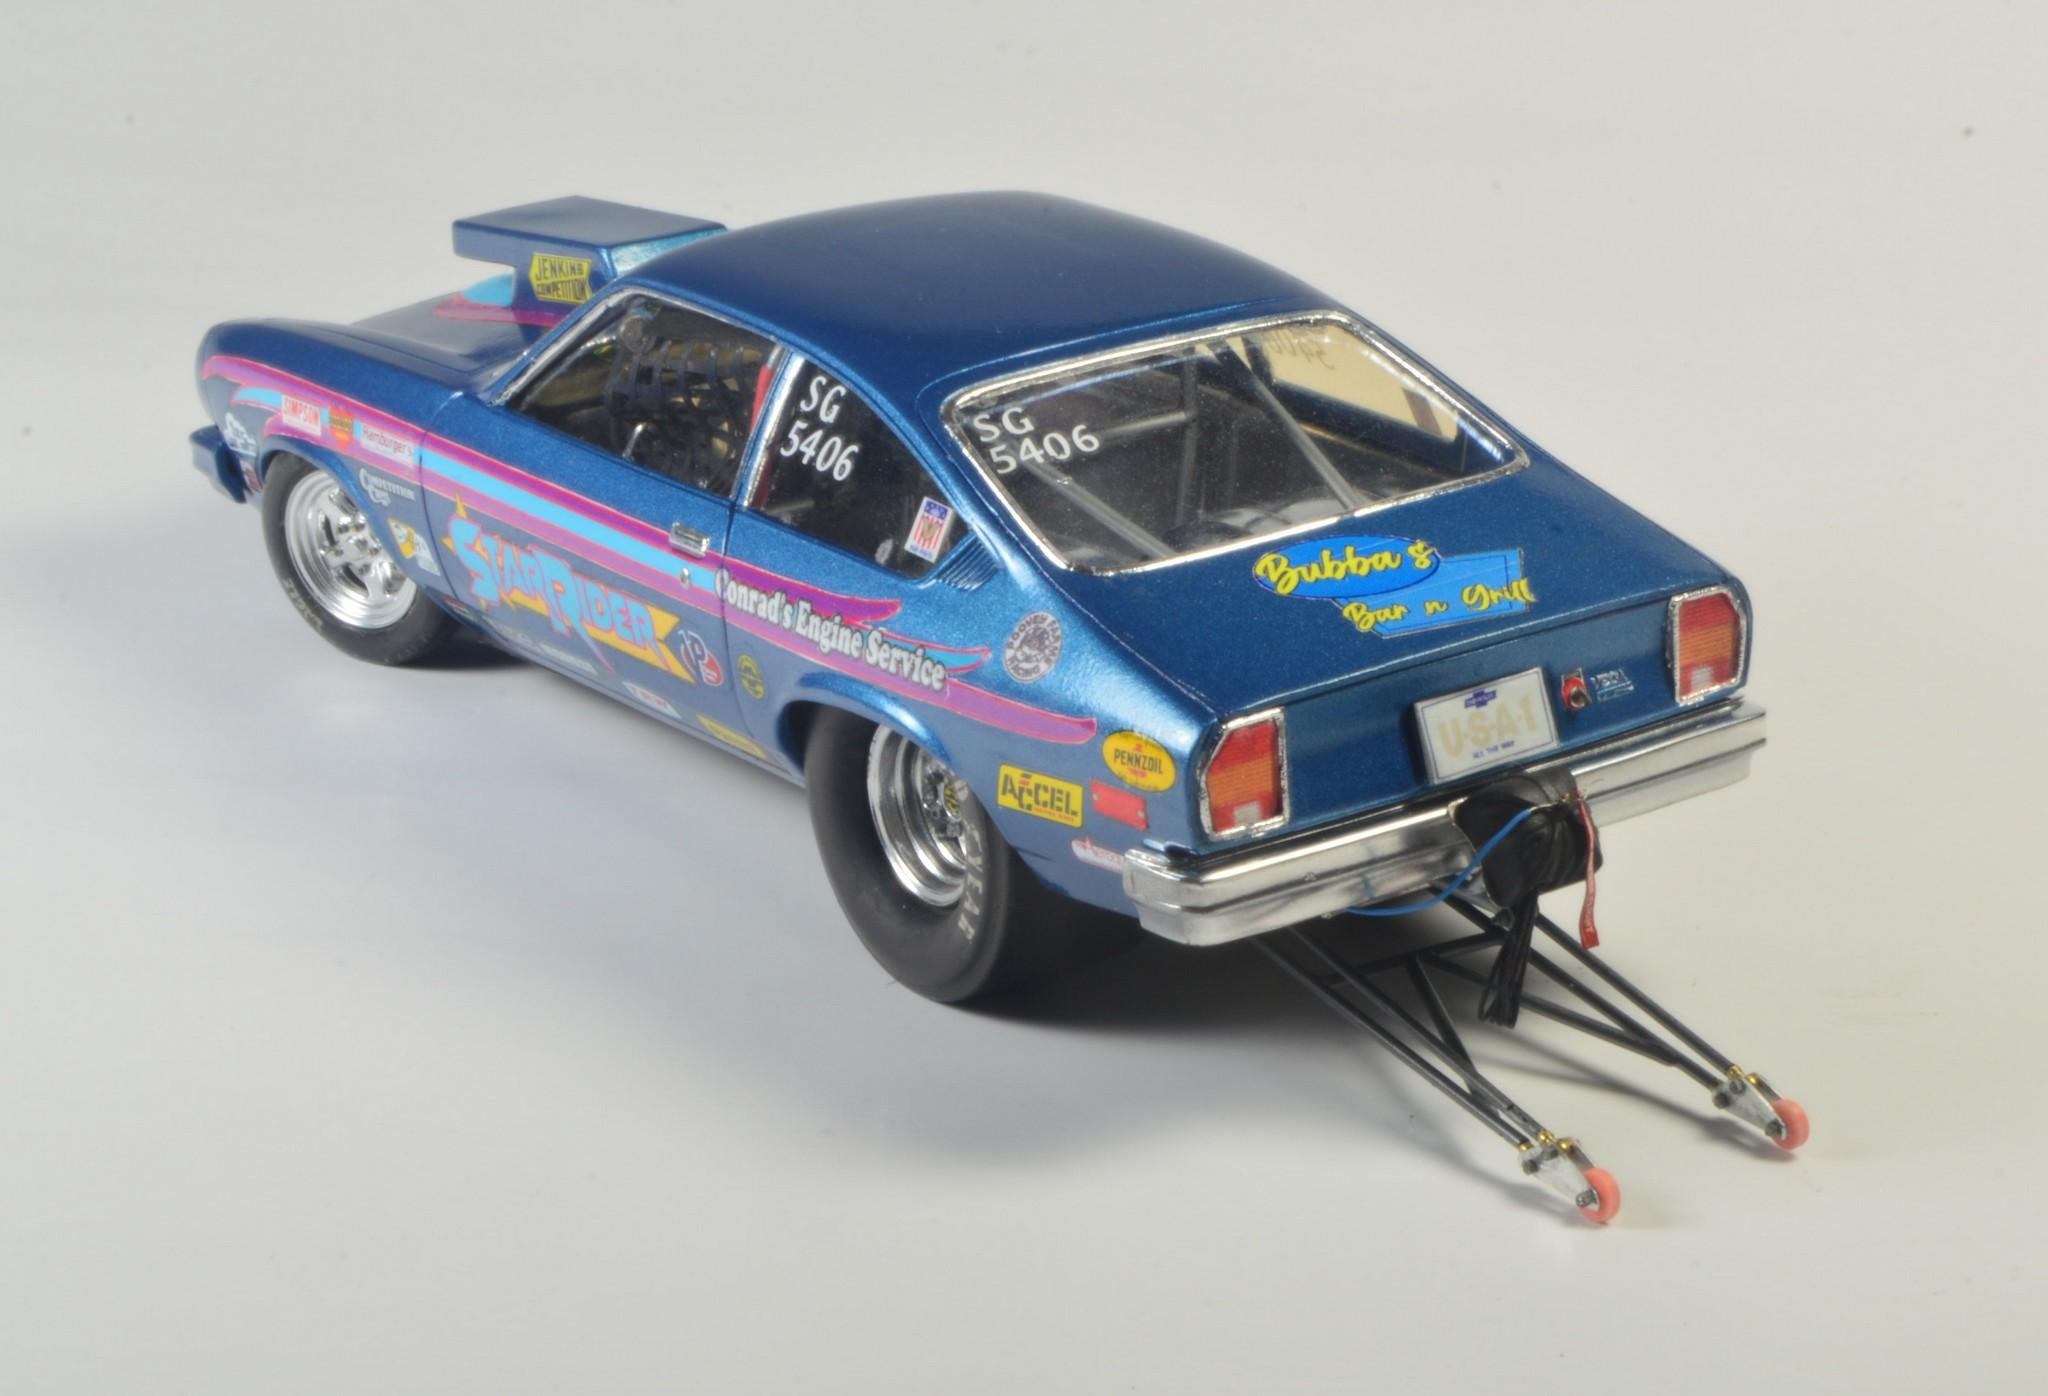
Rush is my all-time favorite band. My two most recent completions have tributes to Neil, as well. My Supermodified has "Pratt's Olde English Inn", and my Vega Super Gas racer, "Bubba's Bar And Grille." Saw them first in May, 1978, and finally, in May 2015, with 11 other times, between. -
Now, there's a thought! Hmmm...
-
’72 Dodge Demon Drag Racer 1/25 scale
Straightliner59 replied to AmericanMuscleFan's topic in WIP: Drag Racing Models
Thank you, sir. I think most of the end mills I've bought are two-flute. I have been using the mill, more and more frequently, lately. Don't worry! I have a long, long way to go, before my skills will impose any threat, to yours!? There really are some excellent builders, around! -
Thanks, man. 1/25 is what I (mostly) build. Go for it, Marcos! I'm happy to help, in any way I can. Thank you, Joe!
-
’72 Dodge Demon Drag Racer 1/25 scale
Straightliner59 replied to AmericanMuscleFan's topic in WIP: Drag Racing Models
Francis, my friend! That rear trunk panel is a thing of beauty! What size mill are you using, to get the corners so rectangular? Keep up the fantastic work!