Straightliner59
-
Posts
5,816 -
Joined
-
Last visited
Content Type
Profiles
Forums
Events
Gallery
Everything posted by Straightliner59
-

Any ideas on scratchbuilding headers?
Straightliner59 replied to charlzrocks's topic in Tips, Tricks, and Tutorials
Ismael, you might want to look at aluminum armature wire. It's dead-soft, and comes in a variety of sizes. I haven't, yet, because I only recently ran across the stuff, but, my next set of headers will be built with it. It bends like solder, but, it's much lighter. -
Never Say Never about old kits. "New Era Modeling"
Straightliner59 replied to stavanzer's topic in Car Kit News & Reviews
I hear you, Jesse. Over the last few years, I've gravitated a lot toward curbside stuff. Besides, it's not that difficult, if one is so inclined, to open the hood and put an engine in. -
Curtis Turner SCCA 1966 Mustang
Straightliner59 replied to Leo64's topic in Other Racing: Road Racing, Salt Flat Racers
Very nicely done! -
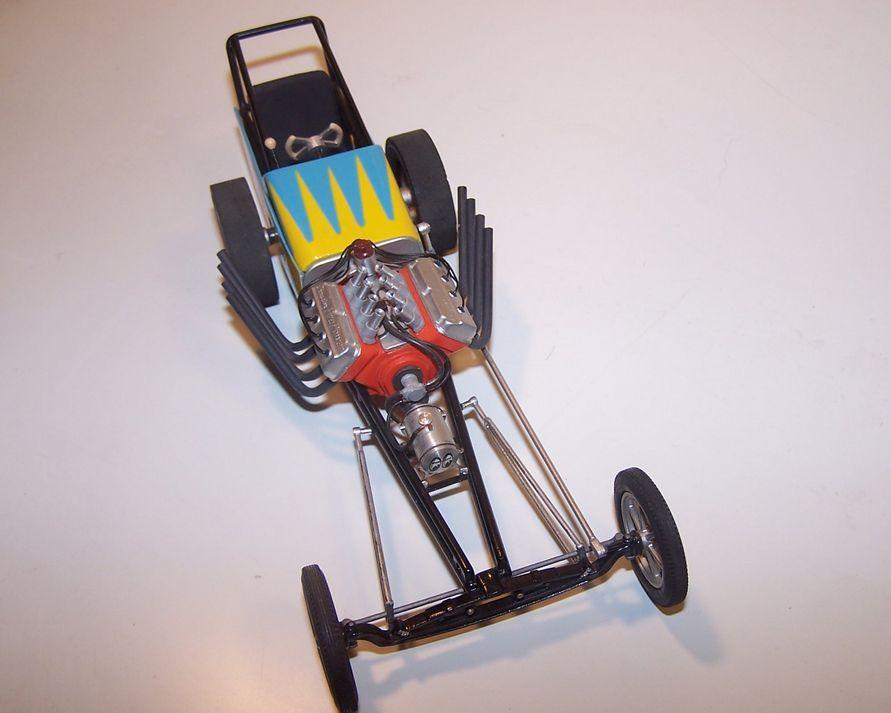
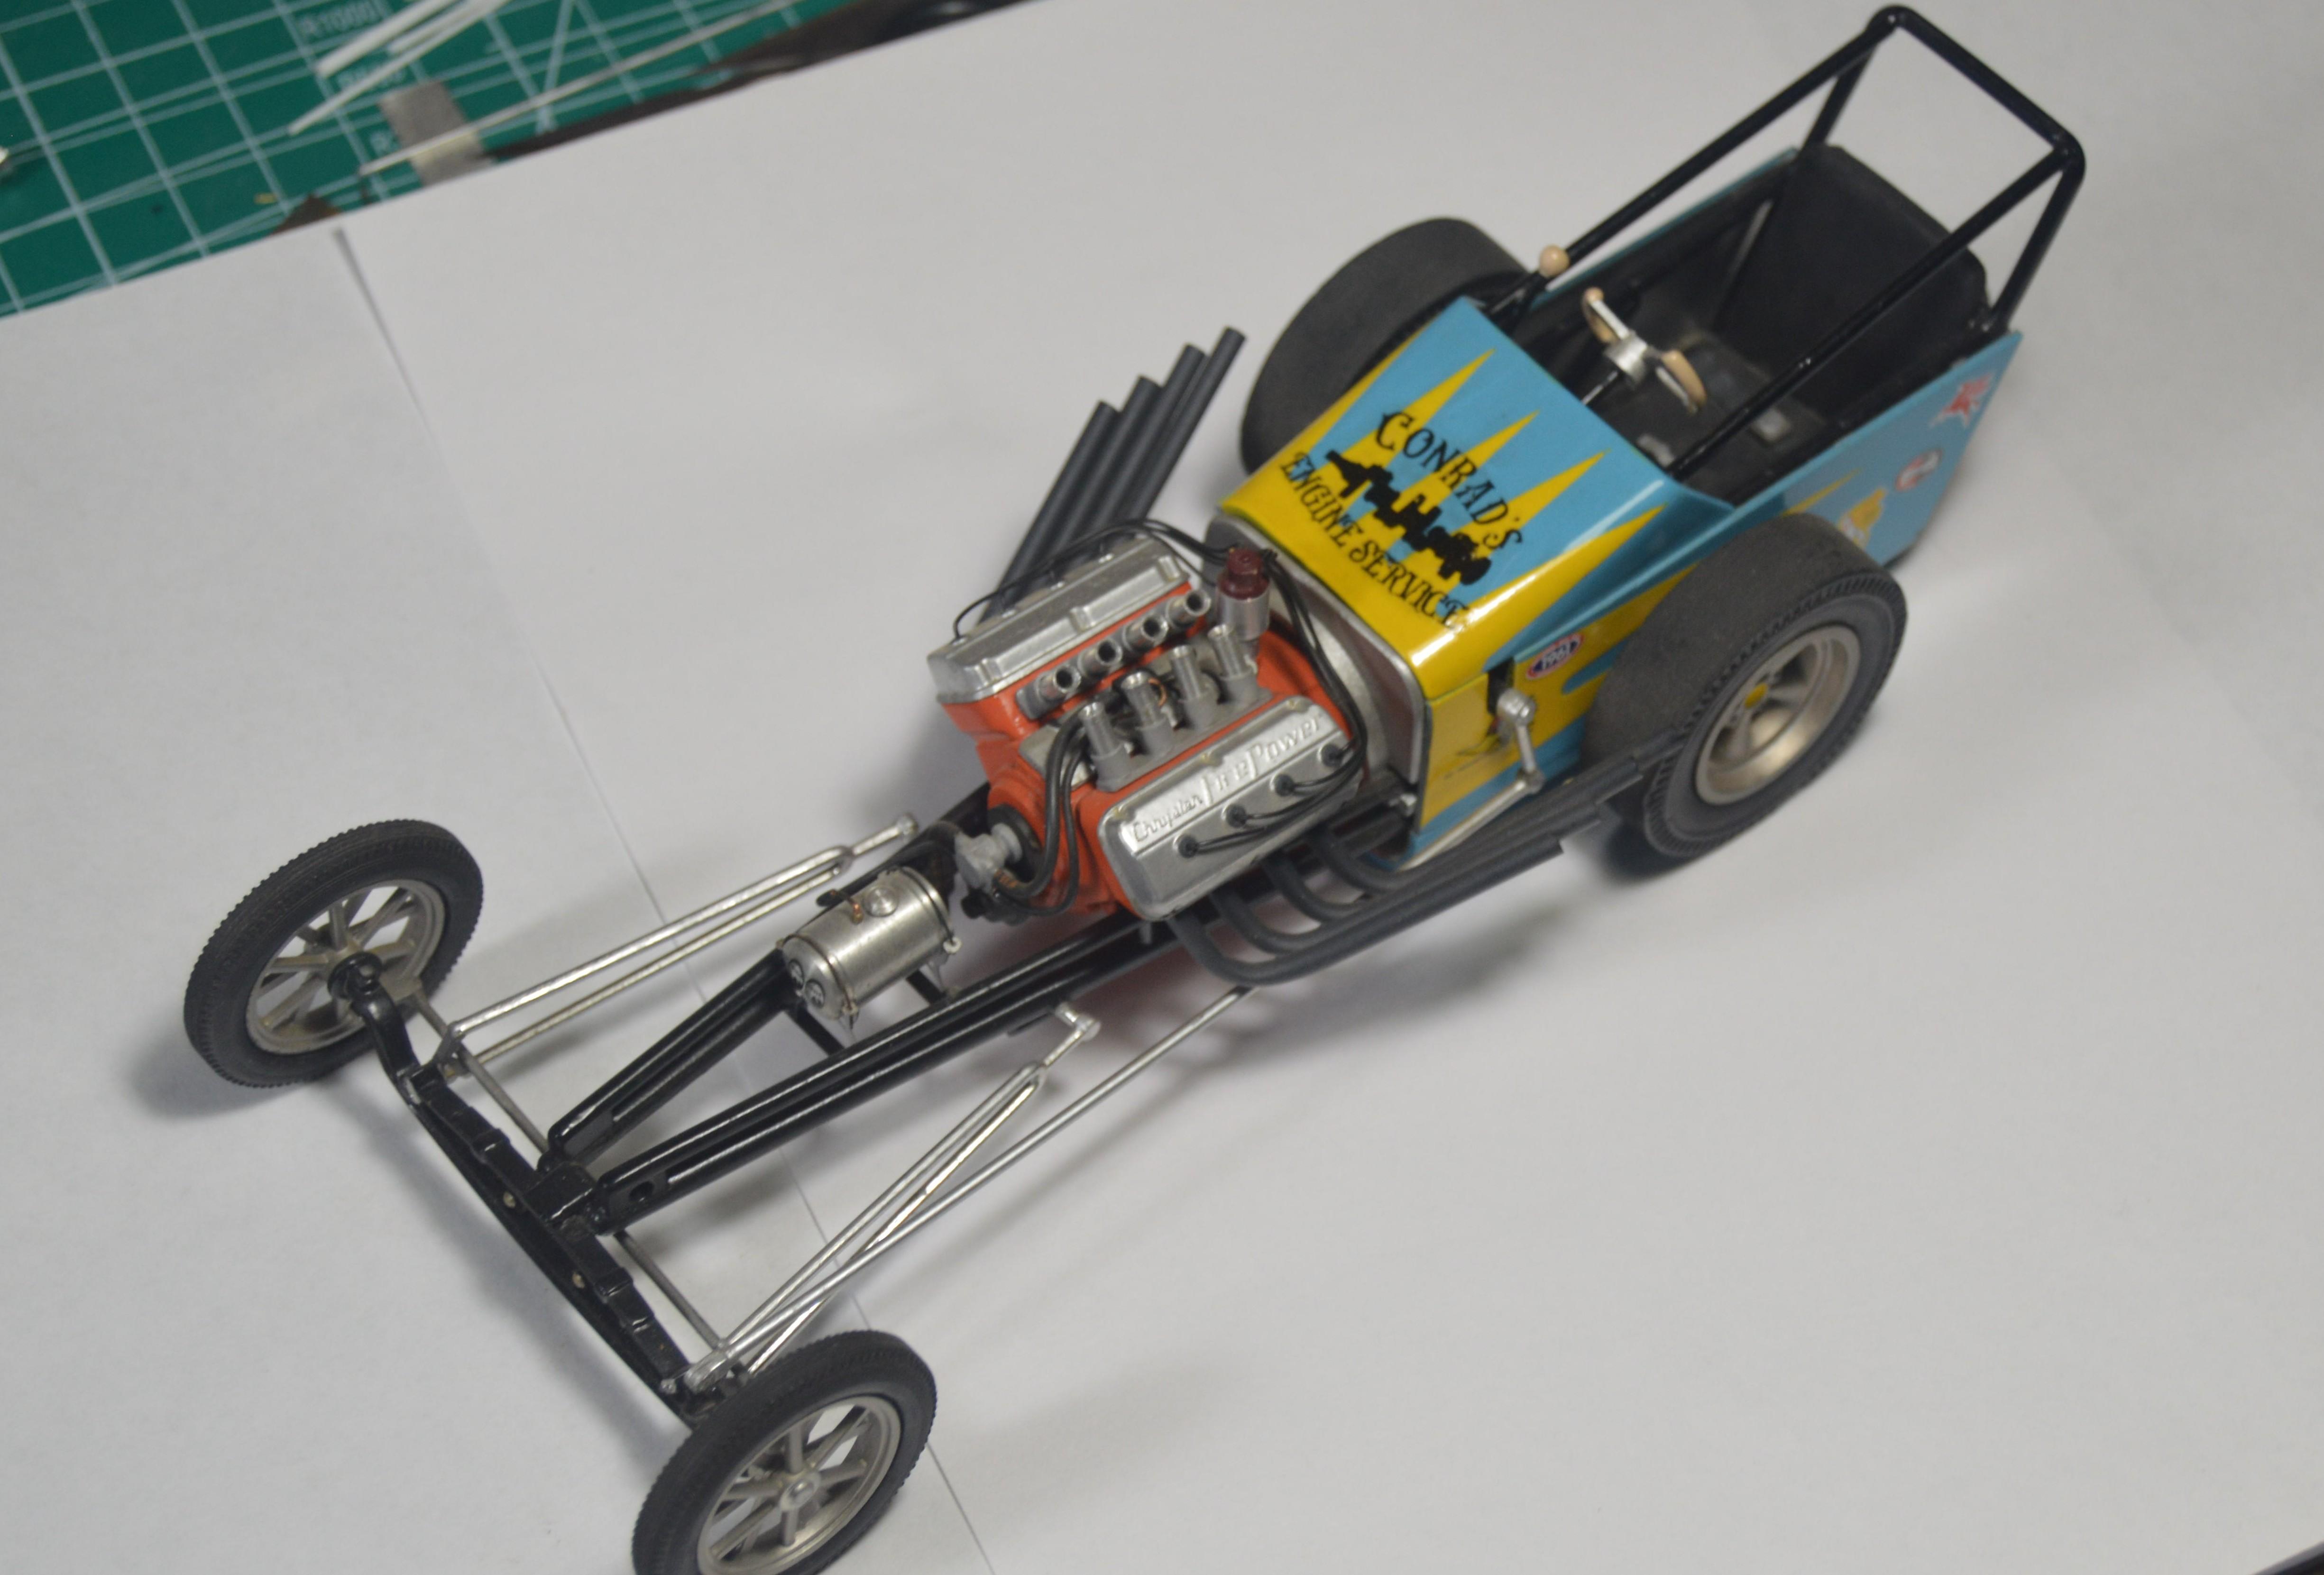
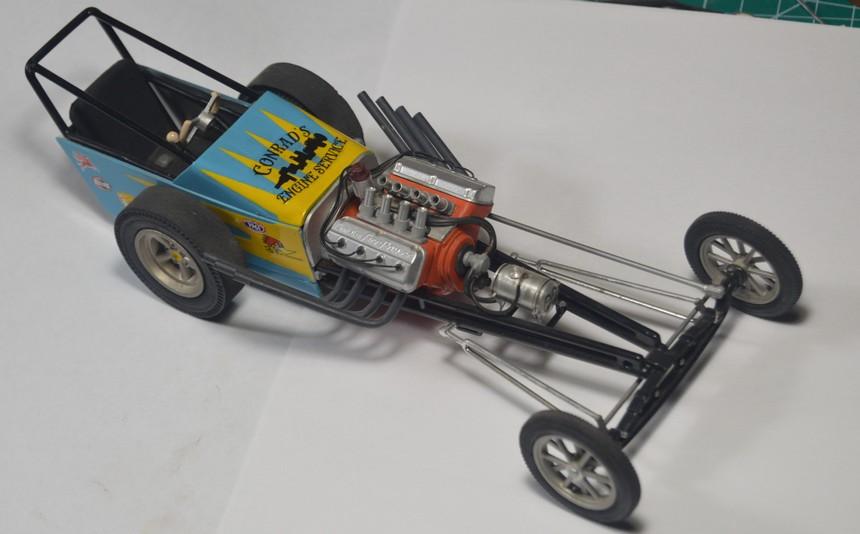
This model is somewhere back down the thread, somewhere, but, I've added some markings to it. Here it is, in both states. I've been wanting to add a "Conrad's Engine Service" marker to this model, for some time. It somehow slipped through the cracks, and didn't get the ongoing tribute to my dad. I try to get it, in some form on all my race car models (that aren't replicas). I built this about 30 years ago. A guy I was working with brought it in, to show me--it was a bagger. I asked him if I could build it for him, because I knew he didn't really build. I kept trying to talk him into letting me do that. Finally, probably just to get me to shut up, he sold it to me for $2! I did this, with it, and offered it to him. Nope. Anyway, all these years later, I finally got around to adding the tribute, and a few other little decals.

-
Well, thanks to you, for your comment, when I posted it in my Vega thread. I'd been thinking about getting back on this, and that comment was the impetus! Don Fahrni first discovered them, back in the early-mid '80s. I've been using them, ever since. Yes, go pay those guys a visit!
-
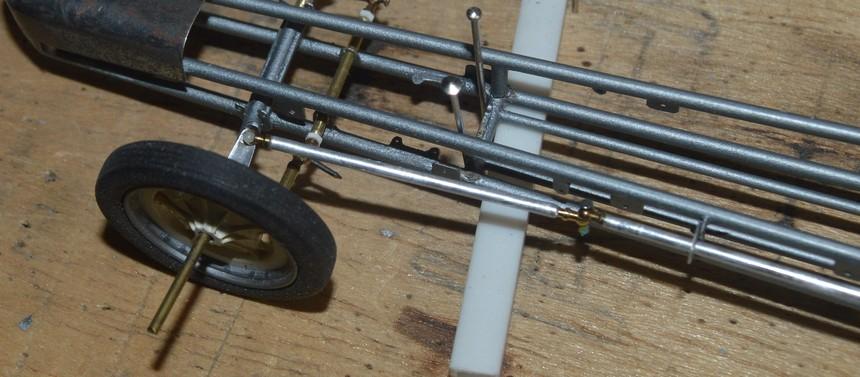
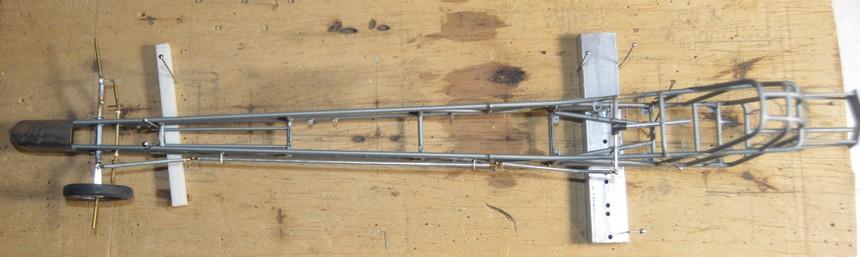
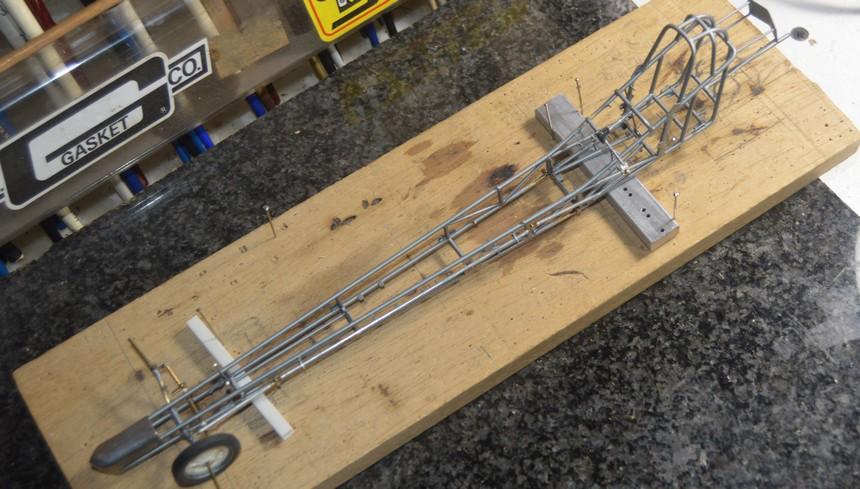
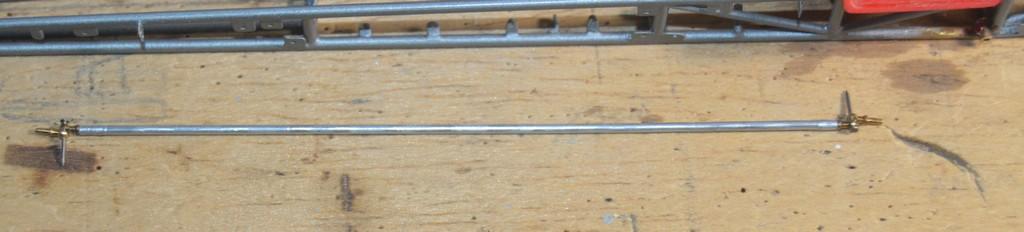
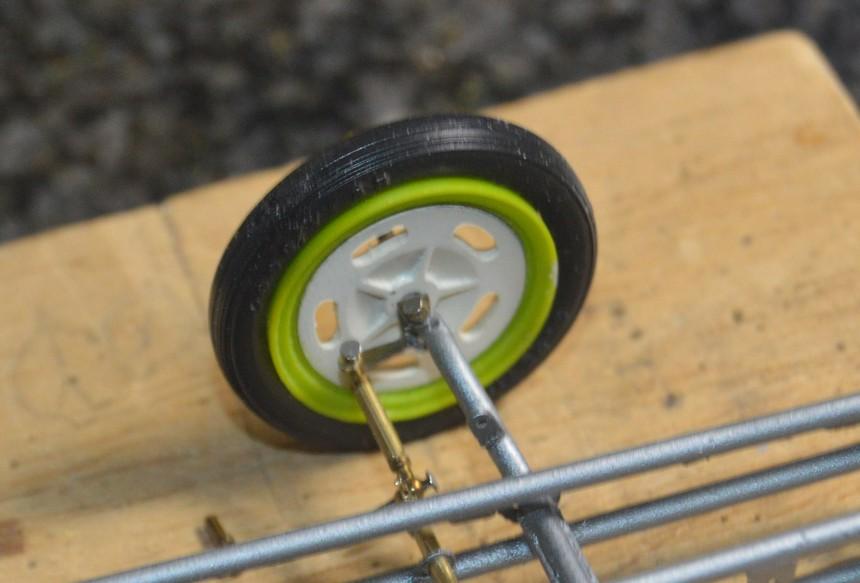
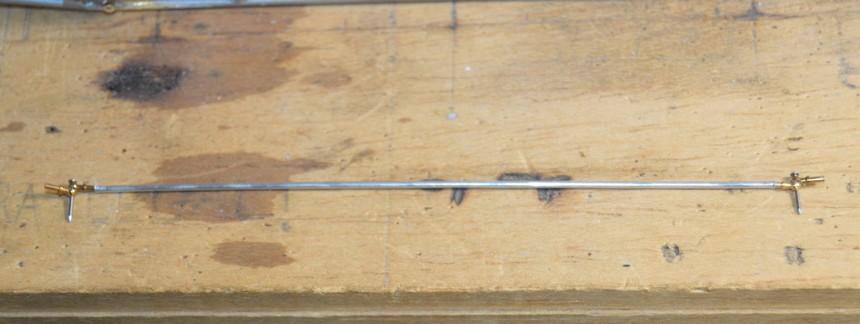
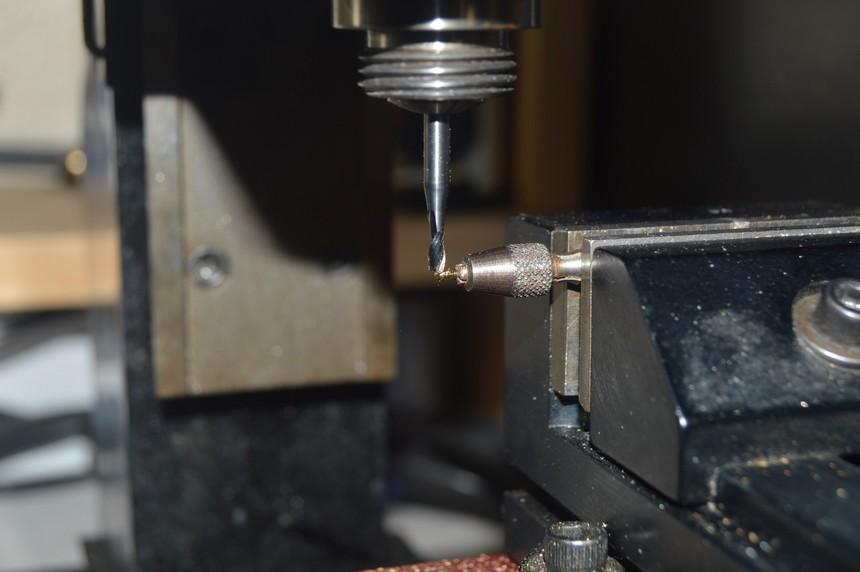
The steering is all roughed-in. Once everything is glued solid, it will stay aligned. It's something of a mess, in that regard, now. The steering rods are .052" dead-soft aluminum. It straightens easily, by rolling it under the steel block, atop the cutting pad. I drill the ends on the lathe, to accept the handrail stanchions. Just a couple of small tweaks to make, on final assembly, and this is done. I'm looking forward to building the body! Questions and comments are welcomed. Thanks for looking!
-
Thanks so kindly, Joe. Your words are inspiring. I appreciate them! I apologize for the tardiness of my response. I was attempting to get the steering all pieced together, before bed, yesterday morning. I didn't make it!? I did make a decal for one of my (very) old projects, and added a couple of others to it. Thanks again! I hope you'll keep following!
-
That's where I go for most of my contingency decals, for sure! I've had some of these sheets for almost 30 years, and they've never given me a problem.
-
Trying to identify these built ups
Straightliner59 replied to Jonathan's topic in Model Building Questions and Answers
At least I had the brands correct!? I knew those, based on the tires. -
Super Gas '77 Vega--Completed! (11/12)
Straightliner59 replied to Straightliner59's topic in WIP: Drag Racing Models
I appreciate it, Ian! Thanks for following this along, and for your words of encouragement. -
Trying to identify these built ups
Straightliner59 replied to Jonathan's topic in Model Building Questions and Answers
The McLaren's Heller. I just picked up one of those, recently. The lotus is probably MPC, I believe. -
Sink marks on wheels?
Straightliner59 replied to NOBLNG's topic in Model Building Questions and Answers
Maybe from Monogram's '57 Chevy? The sink marks are definitely sink marks. That's a drag. Those are good-looking wheels. -
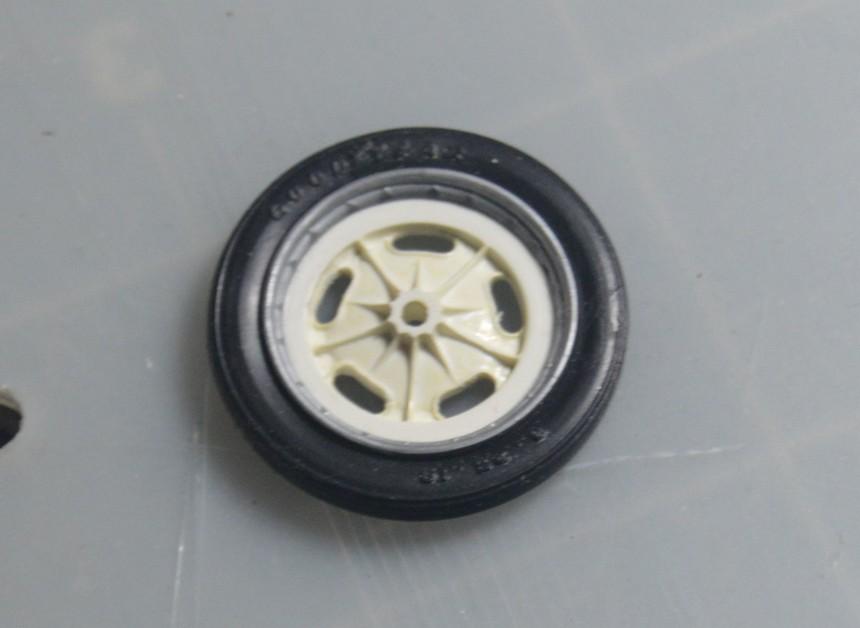
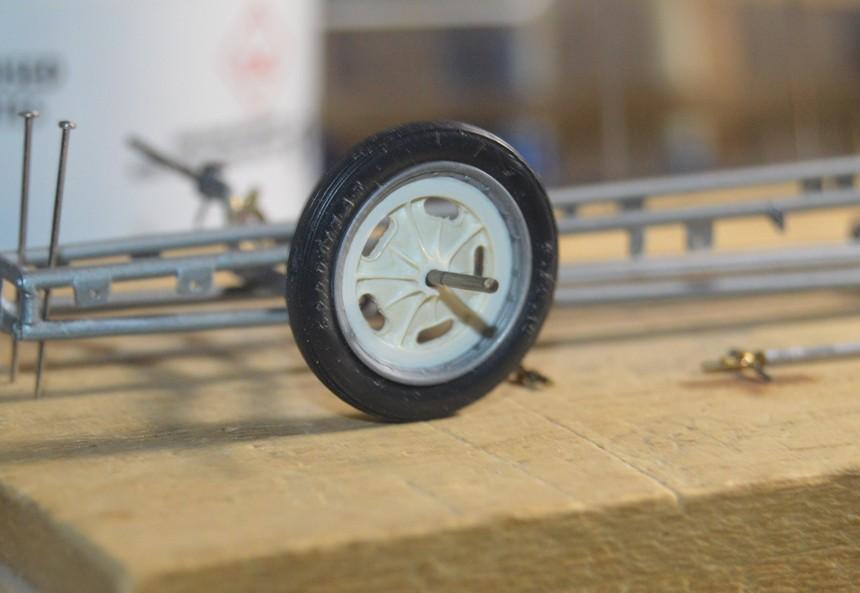
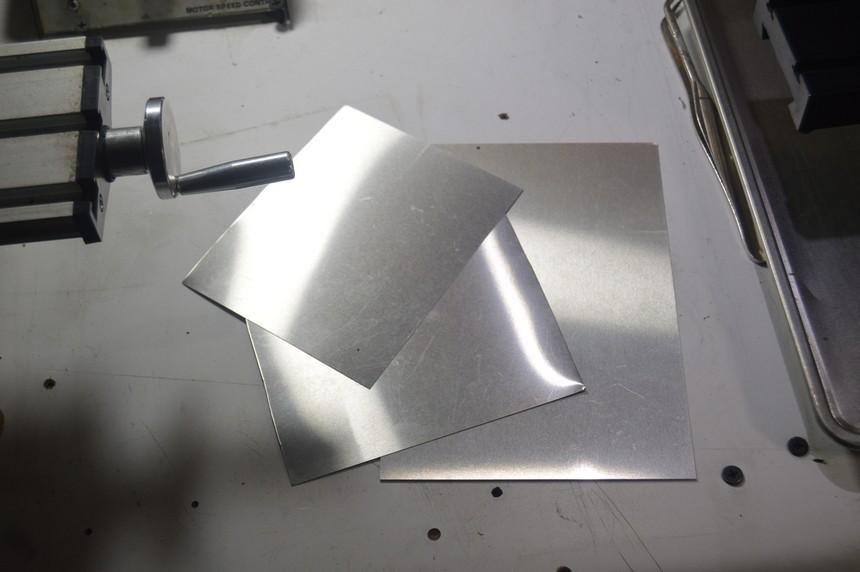
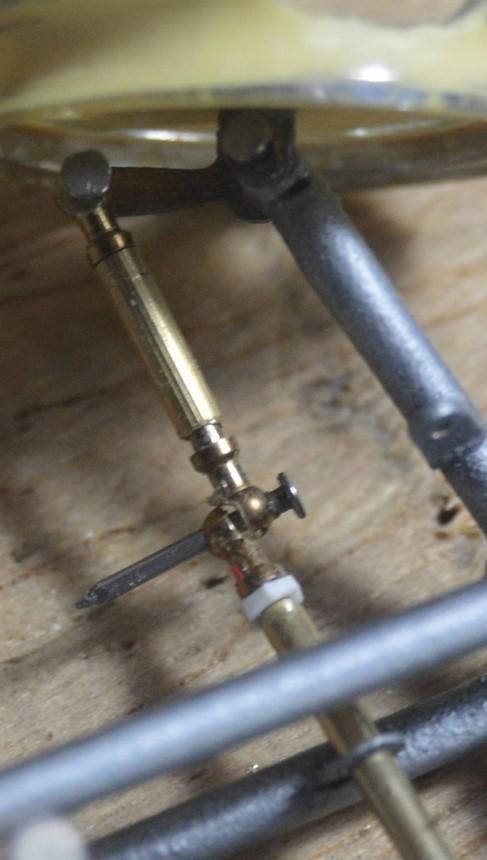
I did some more work with the wheel. I got it all ready to mold, tacky glued it into a mold box, and found that my rubber was bad. Got that ordered...The drag link I had was a tad too small to work with the handrail stanchions--the wall was so thin, it was tearing. I straightened a length of .052" aluminum wire, and drilled the ends of it, to replace the .040" wire. I have some slightly smaller Special Shapes tubing that would work, but I really don't want to use that much of it, here, if I can find an alternative. The front tires I had planned to use don't fit the wheels satisfactorily, so I found a pair from one of Revell's later Top Fuel kits that I'll go with. While there aren't prototypes, I like these wheels, and think they look feasible enough, as a retro-modern design. Once the steering is worked out, I'll be expending a lot of elbow grease, scrubbing the plastic coating off these aluminum sheets, so that work can commence on the new body. I have a couple of new tricks that I am looking forward to employing, here.
-
Glad to have you along, Trevor. Thank you for your kind words!
-
’72 Dodge Demon Drag Racer 1/25 scale
Straightliner59 replied to AmericanMuscleFan's topic in WIP: Drag Racing Models
Looking forward to watching this, my friend! Welcome back to the workbench! -
Thank you, Claude! Your words are too kind.? The FEDs do have a certain grace, about them, for sure! The thing to remember about working metal, is that it's just like plastic, only harder!? I appreciate that, Joe. Thanks so much!
-
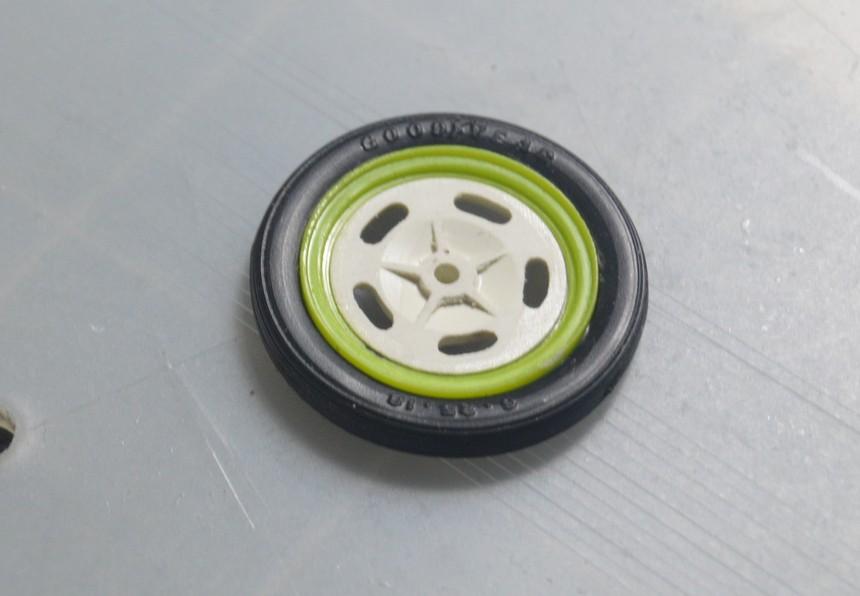
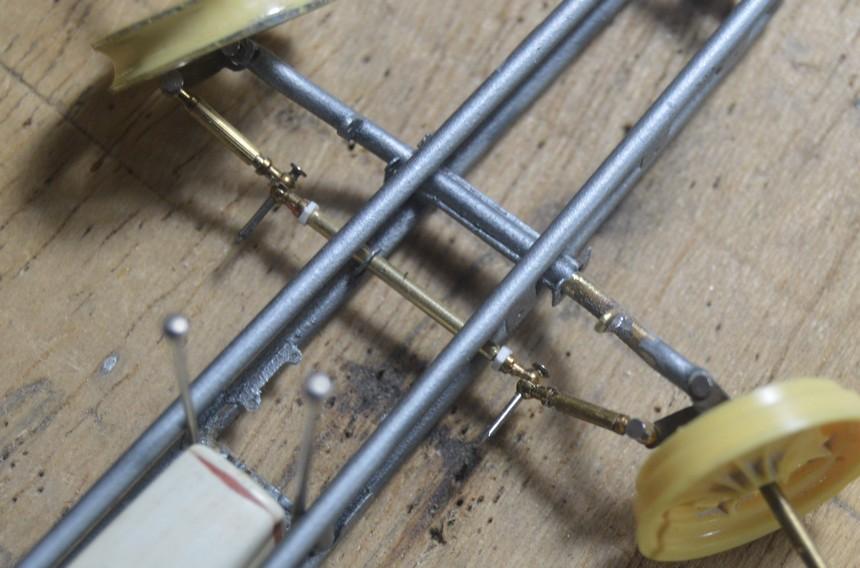
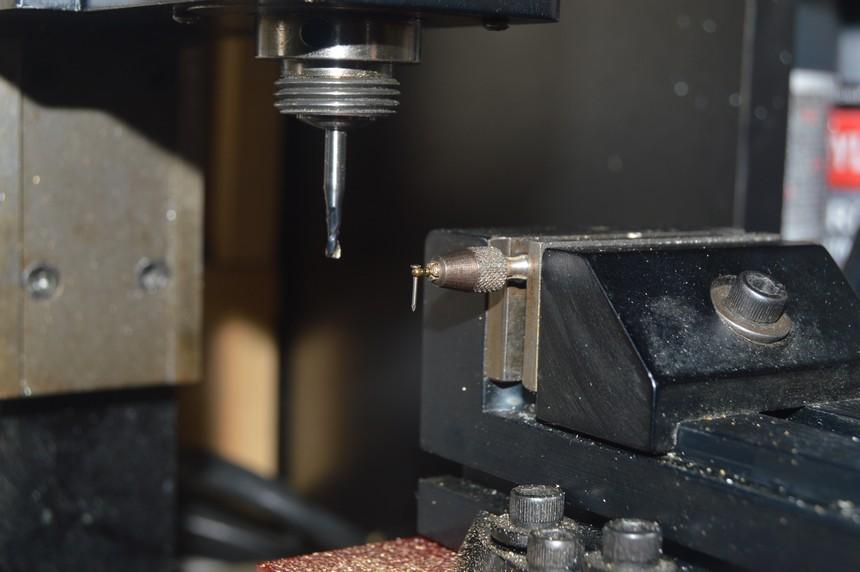
More steering stuff. I milled six more handrail stanchions into rod ends. All of those are done, now (for the steering, anyway). I need to make the support tabs for the long steering rod. They'll "bolt" to the tabs already soldered to the chassis. I also need to make the steering arm for the box-end of the steering, and for the crank, at the spindle end. I really like the way the milled stanchions look! They could easily be done with a file and a pin vise (I've done it that way, before). I used the mill because, well, it's here, and it's more accurate, and way faster! As you can see, based upon my precision setup, accuracy is extremely important, to me!? Well, it doesn't need to be uber-precise, in this instance... Since this project's inception, back in 1997, or 1998, I have wanted to incorporate a wheel design, based on classic Halibrands. I think I've come up with something that works. I cut the (broken, even) rim from a Johan (P.L.?)wheel from the parts box, down, on the lathe. I then removed the spokes from one of the wheels from a Tony Nancy 22 Jr. kit. That rim just sits along the edge of the Johan wheel. The remaining, widened flat area of the Johan wheel gives the whole thing a retro-modern look, which is what I have been looking for! I'd really appreciate your thoughts, regarding this. Thanks for looking!
-
34 Ford 3W Coupe
Straightliner59 replied to ModWrench's topic in WIP: Other Racing: Road Racing, Land Speed Racers
Those crimp beads look like they'll work, very nicely! Gonna have to keep that in mind. -
I always knew that it was just awaiting its time! I am very happy with the work I did, in those days of yore.? I reached the point at which I was afraid that all I could do, was screw it up, from there. It needed to wait until I no longer felt that way. Very happy to have you along, my friend!
-
Erm...I'll try to remember that! I might tend to get carried away, at times, with numbers, although I generally try to keep most of my photos under 100KB, so they don't take forever to load. In a recent editorial, Gregg mentioned that a lot of great stuff was being seen on the forums, that would be good for "Forum Finds", but that photos were too small to be effectively used for publication. There is so much fantastic work on display, and being performed here, that there's no way it could ever all be featured in the magazine, but, if a modeler's photos are too small, there is no chance, at all. What's a good "physical size" for a photo to be used for publication? 2048 pixels wide? 1700?
-
Not a bad idea! I will definitely consider that, or something in that (ahem) "spirit".
-
Thank you, very kindly, my friend! I think you'll find my new endeavor interesting, as well. It doesn't even have a hood!?
-
Yer killin' it with this project, Mr. Sapiro! Wheels and tires are magnifico!
-
I was looking around for some variety in window lettering for class designations, in addition to the Gofer Racing sheets I've been using--and am perfectly happy with! I ran across these, on Ebay, from K4 Supply. They look beautiful! I guess I'll have to figure out what I am going to try them on!
- 39,076 replies
-
- 1
-

-
- johan
- glue bombs
- (and 1 more)
-
I was thinking, Paul--you can attest to how old this thing actually is!