Straightliner59
-
Posts
5,817 -
Joined
-
Last visited
Content Type
Profiles
Forums
Events
Gallery
Everything posted by Straightliner59
-

'66 Shelby Mustang Group II
Straightliner59 replied to afx's topic in WIP: Other Racing: Road Racing, Land Speed Racers
That would be my guess. It was the photo of your chassis that caused me to notice they were asymmetrical, and I immediately thought that it must be to clear the starter. They look excellent! Nice work! -
'66 Shelby Mustang Group II
Straightliner59 replied to afx's topic in WIP: Other Racing: Road Racing, Land Speed Racers
Idiot that I am, I didn't even notice they were asymmetrical, until just now! Looks like you nailed 'em, JC! -
64 Dodge D100 Pickup Pro Street
Straightliner59 replied to AmericanMuscleFan's topic in WIP: Drag Racing Models
I have known more than one person who "retired from modeling"! Retire? From a hobby?! Hobbies are what we should retire TO, aren't they? It seems to me, that if you "retire from a hobby", then you were doing it for all the wrong reasons, to begin with. That's not what any of this should be about! Carry on, my friend. The work that makes you happy, like Mike said, above, makes many of us smile, too! -
Hi, Richard. Here's what I came up with, and my explanation of it, based on your comments: I am calling the throttle bodies early Hilborn. My mechanic/garage engineer welded rectangular tube to the plate flanges, but went ahead and incorporated the valley cover into the piece. Next, using 1-1/2" steel tube, he formed the injector runners (which would be split, on the 1:1 item), and welded them to the intake runners, mounted to the flange/valley cover assembly. I think it sounds and looks feasible. Thoughts? I still have some mounting hardware to make, and I intend to add some "welds" to the manifold assembly, once I have the injector runners mounted to the lower manifold assembly. I still need to drill the throttle bodies for the injectors, and sort the linkage and throttle (barrel?) valve. I am interested in comments from anyone who happens to be looking, regarding what you think of the manifold, and the feasibility of the whole idea! I'll be adding the bolts, water outlets and oil filler to the manifold, as well. Thanks for looking! More photos, once I get it all loosely assembled...

-
Cool project! Shirley is one of my heroes.
-
'66 Shelby Mustang Group II
Straightliner59 replied to afx's topic in WIP: Other Racing: Road Racing, Land Speed Racers
This is really looking great, JC. Great choice of subject, too. Been watching, and will continue to do so! -
64 Dodge D100 Pickup Pro Street
Straightliner59 replied to AmericanMuscleFan's topic in WIP: Drag Racing Models
I absolutely love seeing the things you do with machines! Simply beautiful work. As I have mentioned, before--your work has inspired me to actually use my mill, more often. I'm taking baby steps, but, those are better than no steps! I thank you for that, my friend! -
Oh, h e l l, yeah! The alternator and its accessories are excellent, as well. Nicely done, sir!
-
Cosworth Vega!
Straightliner59 replied to George Bojaciuk's topic in Car Aftermarket / Resin / 3D Printed
Well, now... -
Thank you, Richard. This injection setup is/has been a real challenge! Trying to make it look like something someone could weld up, in their own shop, and get it so the injectors align, and I can set up the linkage has had me pretty constantly scratching my head! I'm close with something now, that I figure could be built from plate, and rectangular and round pipe. Once I have it sorted, I'll post a few photos, and look forward to your feedback. Thanks for looking and for your comments. They're always appreciated.
-
Have you seen shipping costs on model railroad items (nut/bolt/washer castings, etc.)? An item that will easily fit into a standard, letter-sized envelope costs about $6. It seems to be standard, with them, no matter where you get it from.
-
Issue 211
Straightliner59 replied to Dave Ambrose's topic in Model Cars Magazine News and Discussions
Earlier this year, I decided that I liked what I was seeing, so I bought a subscription for a year. I am about halfway through that, and will be renewing, soon! Great job, by everyone! -
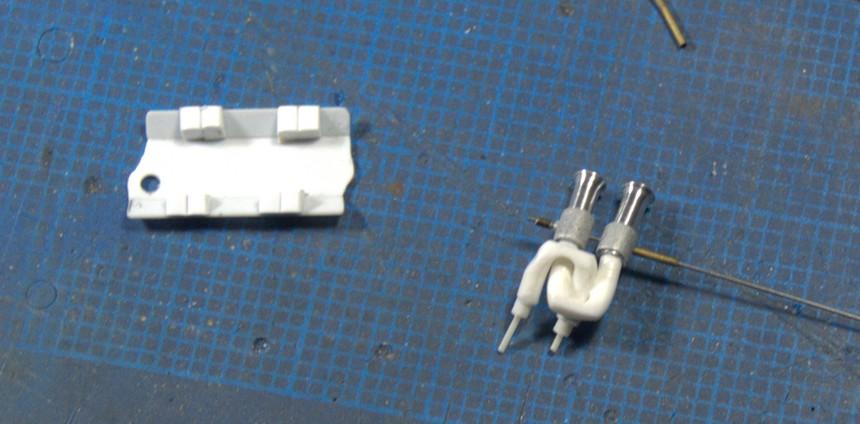
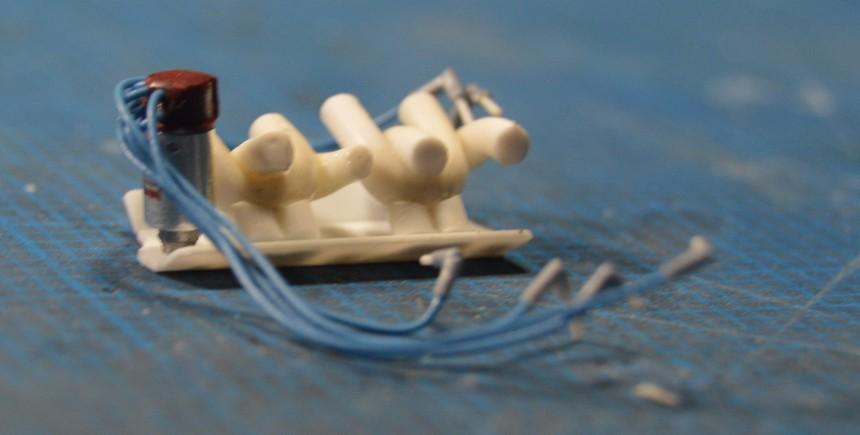
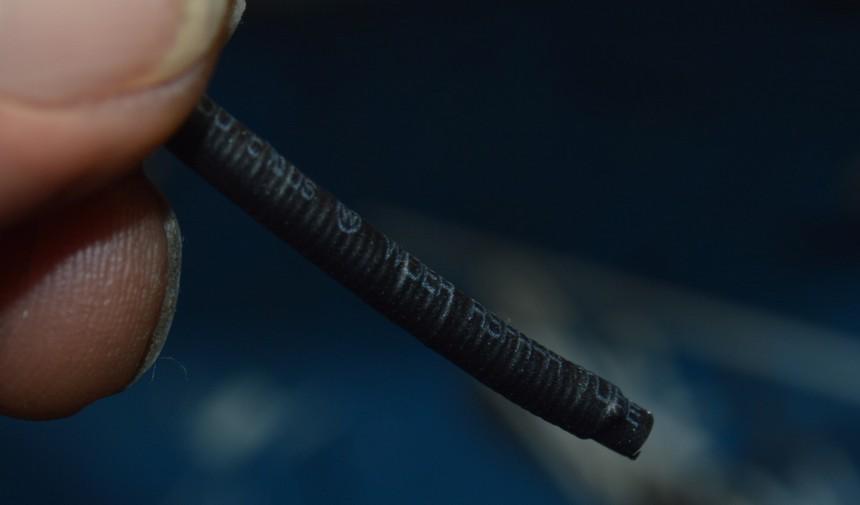
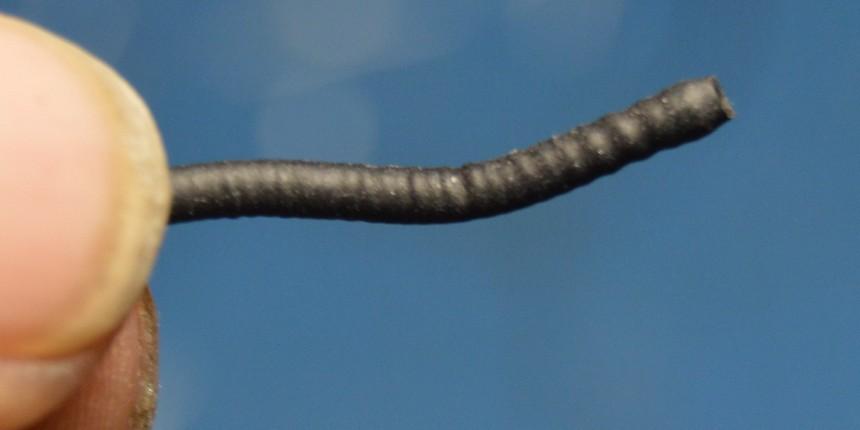
I learned a bit, and started again. After these photos were taken. Just keep inching closer to what I am expecting. This is one of the valve covers I'll be using. They're shot with Krylon Original Chrome. I was messing around with craft wire, and heat shrink tubing--I'm going to need a lower radiator hose. I'll make it the size of the smaller one, here. Thanks for looking!
-
That ought to work beautifully!
-
Sorry. Nothing to see, here, folks. Just wanted to let anyone who cares know that I have been struggling to build a new manifold. A very knowledgeable friend asked me what manufacturer's setup it was; Enderle, Hilborn, or another, I know, but am drawing an absolute blank on, at the moment. When I replied that it was supposed to represent somebody's home-built unit, it dawned on me, that the manifold didn't look very home-built. Therefore, here, I am! I think I finally have it worked out, and I am fairly well into construction. Hope to have photos, later!
-
Or would even care to. Some of us are just a bit more "touched" than others!?
-
Yes, that is very cool! I would have to try to build it from aluminum, just because it would look, well, like it ought to! I'm really looking forward to watching you bring this together.
-
What can be said, but, you nail it, again, and again. It's a pleasure to watch you build.
-
I'll take The Angels! Two Minute Warning.
-
Mooneyes Dragster reference pictures
Straightliner59 replied to sflam123's topic in WIP: Drag Racing Models
I have that issue, as well, now that you've reminded me! -
I have gotten more patient, and more willing to redo stuff that I may not have, earlier in my apprenticeship. I have found myself not dreading mundane stuff like sanding, etc. I use weathering, and try to impart a sense of use.
-
Beautiful work, Charlie! Look on Ebay for bookbinding leather. You'll want 1oz. Or 1.5oz. weight. I bought some 1.5oz. It's about .015" thick.
-
1"=.040", 1.5"=.060", 2"=.080". You can punch discs from the appropriate sheet!
-
If I ever find my heart back in it, I might. It ain't there, now, though. I'm not sure what I will build, once the Supermodified is done. I appreciate everyone's comments! Thanks!
-
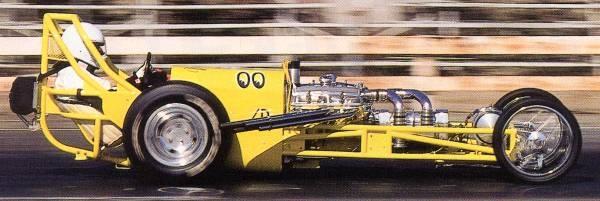
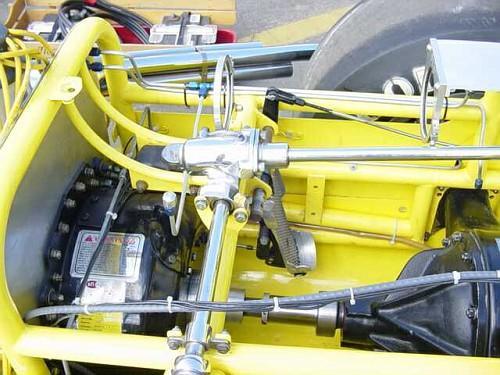
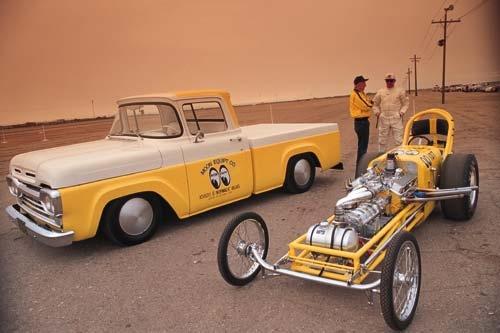
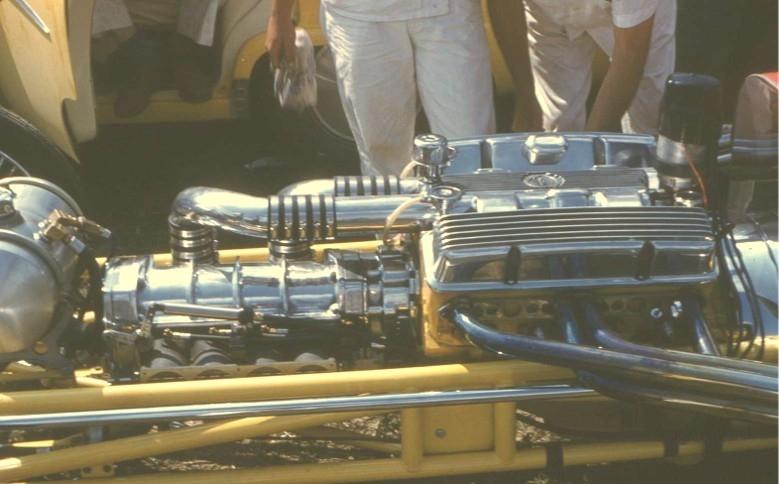
Mooneyes Dragster reference pictures
Straightliner59 replied to sflam123's topic in WIP: Drag Racing Models
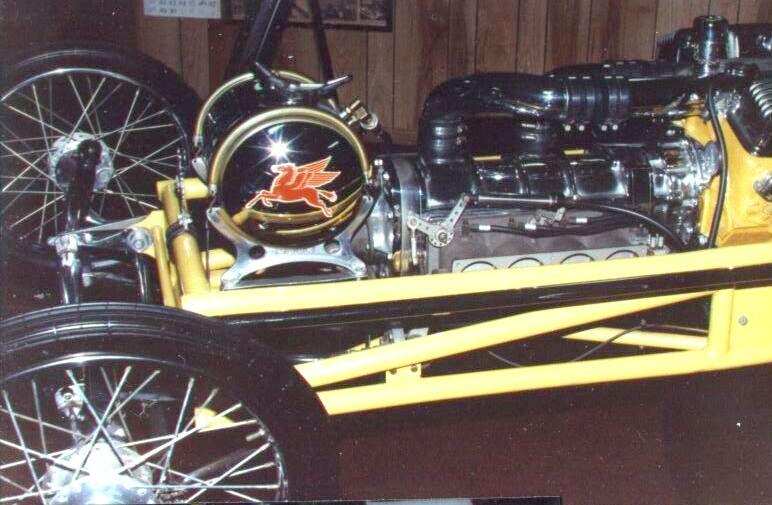
Here are some photos I've collected, over the years. Some of these are scans of photos a friend of mine took at Garlits' museum. I had asked him to get me some photos of "The Bug", when I was building that model. Since access was limited, he didn't need the whole roll of film, for that.