Straightliner59
-
Posts
5,814 -
Joined
-
Last visited
Content Type
Profiles
Forums
Events
Gallery
Everything posted by Straightliner59
-
 The rear suspension is together, once again, after breaking one of the plastic "batwings" that mount the hairpins, as I was attempting to assemble them. I remade them, this time from aluminum. I also got the shocks made, overnight. There are seven pieces in each shock. the eyes and center "pistons" are soldered brass. Model railroad bolts will be used to mount them. As always, critiques, comments and questions are welcome. Thanks for the look-see!
-
Hakan, excellent analysis! Look for anything you can find, online, from Tom Jobe, as well. I once read that some famous fuel guru explaining nitromethane said that it is more detonation than burn. To illustrate, he said you can pour some onto a steel bench top. Throw matches at it, all day, and nothing will happen. He then advised against hitting it with a hammer.
-
Fresh from the factory. I ordered this on Friday! Sherline had the best price on it, and, obviously, customer service is as good as it gets. This adds a ton of versatility to my mill.
-
I will stick with Krylon Crystal Clear. I mostly build racers anyway, so high gloss isn't a necessity.
-
Thank you, Francis. I hope the leather will maintain its texture. That's how they do 1:1 leathercrafting. I hope I can get the suspension put back together on my next day off.
-
This stuff would probably poke through. It's very thin. About .015". I have to be careful with the dulled brass!
-
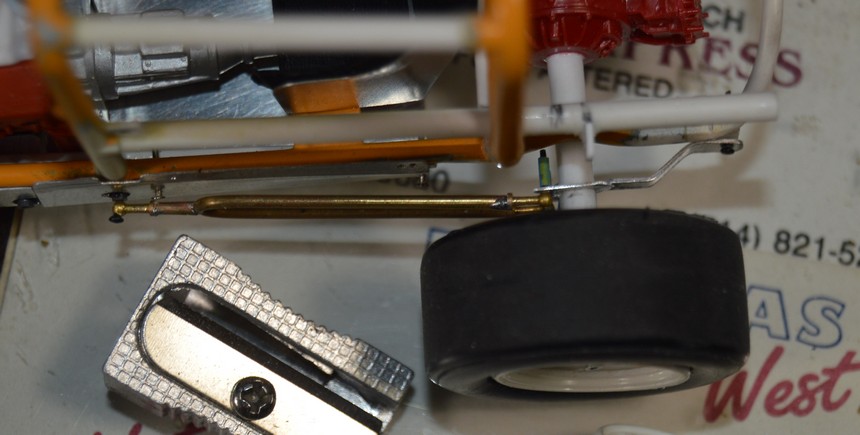
I almost have the rear suspension sorted. The brass wires that run from the trailing arms to the tabs on the upper chassis tubes are stand-ins for the shocks. Once I have this together, I will reassemble the front suspension, and build shocks for both ends. I got the Goodyear markings from Joseph, at Fireball, yesterday. I had to buy a set of both scales (1/24, 1/25) because of the difference in tire sizes, front to rear. I also took a (poor) shot of the new mag cap, and a more clear shot of the seat padding. Questions, comments and critiques are, as always, welcome! Thanks for looking!
-
I used a short length of brass strip, that I eased the edges on, and a small crafting hammer, to tap the pattern in.
-
Experimenting With Leather
Straightliner59 replied to Straightliner59's topic in Tips, Tricks, and Tutorials
Trevor, thanks for your comments. I used Alene's Tacky Glue, diluted with water. While it was still damp, I conformed it to the seat pan. When I got back around to it, it peeled right out. I laid the pattern out on the same paper I used to cut the leather, marked it, dampenedit, again and tapped the pattern in! The leather needed no cleanup, as the glue dries clear, and semigloss. -
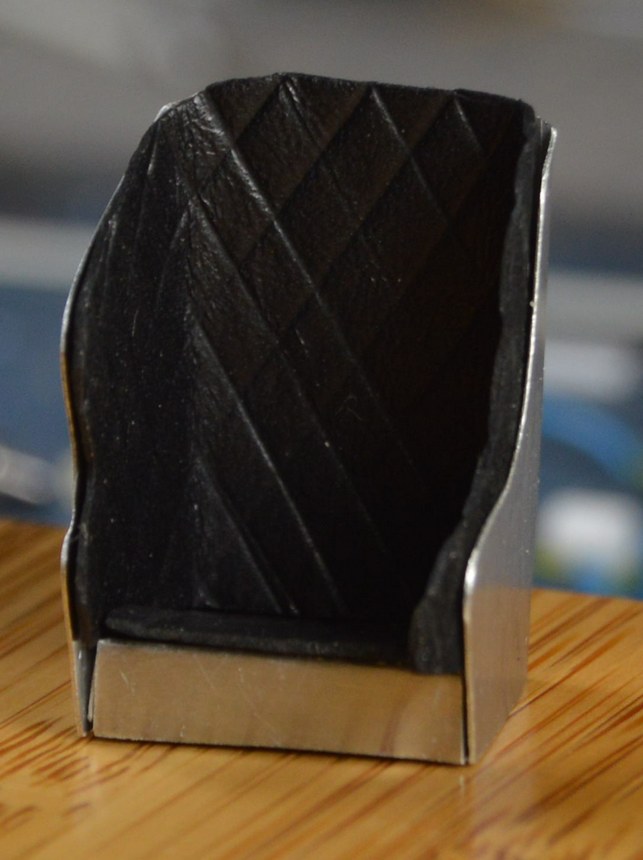
I got the leather seat pads embossed. A couple of bobbles. I have plenty more leather, should I feel the need...
-
Experimenting With Leather
Straightliner59 replied to Straightliner59's topic in Tips, Tricks, and Tutorials
Yes. I got this on Ebay. It's called "bookbinding leather". This is 1.5 oz. weight (which I guess is the weight, per square foot?). It's .015" thick, roughly--obviously, its thickness varies. -
Experimenting With Leather
Straightliner59 replied to Straightliner59's topic in Tips, Tricks, and Tutorials
I finally got around to embossing this thing. Not bad for a first attempt!
-
Your work is very much appreciated, Dave. Thank you, sir!
-
Thank you, kind sir! I agree, it will be more comfortable, with a bit of padding!
-
That was my first thought. I couldn't find any information to confirm it, though.
-
A few new items to report: I bought some bookbinding leather for the seat. It measures about .015" thick. I used a paper pattern to shape it, then soaked it in diluted tacky glue, to conform it to the seat. I am going to emboss a pattern in it using basic leather working techniques. The kit's "steering box" was a rectangular blob, molded to the firewall. Obviously, that went away, along with the molded-in firewall. I couldn't find a steering box I liked, that fit, so, I scratched one up. Looks better, and actually fits where it needs to! I also didn't fully appreciate my selection of Vertex mags, either. I have a drawing of a Vertex mag in my files that is dimensioned. That turned out to be quite handy! I made a new one of steel, aluminum and plastic. The cap looks too rounded, in these photos (it's not so pronounced, to the naked eye). I am now considering a new cap. Thanks for looking. Questions, comments and critiques are always welcome!
-
Excellent work on a very cool project! I just love vintage race cars--of any type!
-
Experimenting With Leather
Straightliner59 replied to Straightliner59's topic in Tips, Tricks, and Tutorials
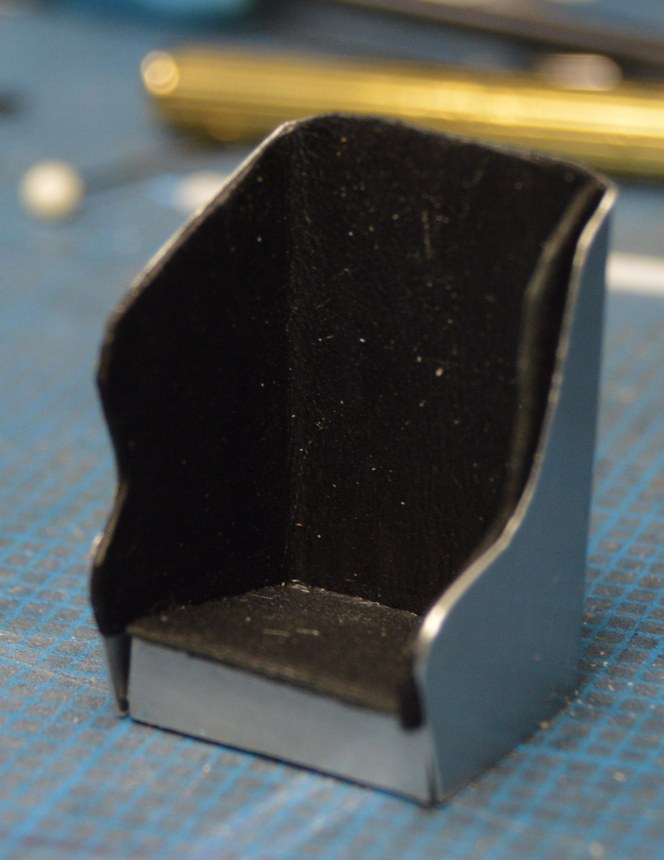
I used a paper pattern to cut out the leather for the seat. Once those were dry-fitted and I was happy with them, I diluted some tacky glue with water, and soaked the leather pieces in it for a few minutes. The fit is excellent, and it's all staying in place. Next, I will peel it from the seat, and begin tapping my pattern into it. Not sure when I'll get to that step, as I am working on several other aspects of this project, as well.
-
I got the leather fitted to the seat for the supermodified (now, I need to imprint it). I also turned a magneto from three materials: steel for the shaft, aluminum for the body, and plastic for the cap. I'll get some photos later.
-
As always, I appreciate your comments, my friend! I have been making those flaring tools for over twenty years. They work nicely, but they almost have to be custom made to suit the specific application. Thankfully, I have a lathe, for that! I now have installed the mounting tabs, and have the pans and body pinned together. The body will be removable,while leaving the belly pans in place, for display. I have ordered tire lettering from Joseph, at Fireball (His stuff is absolutely the best!). As soon as those decals arrive, I will begin working on the tires and wheels. I am about to upholster the seat bucket using a new technique I want to try--and a new material. As always, questions, comments and critiques are welcome! Thank you, folks, for kindly dropping in! ?
-
Experimenting With Leather
Straightliner59 replied to Straightliner59's topic in Tips, Tricks, and Tutorials
Yes. As tough as leather can be, it's pretty dang delicate, once it's this thin! -
Experimenting With Leather
Straightliner59 replied to Straightliner59's topic in Tips, Tricks, and Tutorials
I am, too! ? -
Get yourself a Nailhead and you can build Ivo's first dragster, with that chassis. Or a Hemi, and you can build Snake's first dragster--which Prudhomme bought from TV.
-
Experimenting With Leather
Straightliner59 replied to Straightliner59's topic in Tips, Tricks, and Tutorials
I suppose, if the knurl was large enough? It looks good for diamond tuck, and tuck &roll. At this time I am just using it for a basic pad with a simple pattern. It will surely work for that! This stuff is way too thin to score. Even the dull (I rounded the edges) brass strip wants to cut through. I'd bet, though, that with a bit thicker material, a combination of lightly scoring and "pressing" the material would look excellent! -
Experimenting With Leather
Straightliner59 replied to Straightliner59's topic in Tips, Tricks, and Tutorials
I found it on Ebay. There were other colors, but, I stopped looking, once I found black. It's very pliable.