Straightliner59
-
Posts
5,814 -
Joined
-
Last visited
Content Type
Profiles
Forums
Events
Gallery
Everything posted by Straightliner59
-
 Thank you, JC! I appreciate that!
 -
That's just the kind of guy he was. If he knew you were "serious" about modeling, he'd bend over backwards, to help you. It didn't matter if he'd known you a day, or a decade. I think I finished it in '84 or '85. There have been a couple of things about it that have bugged me, since soon after it was built, but, it was a part of my journey!
-
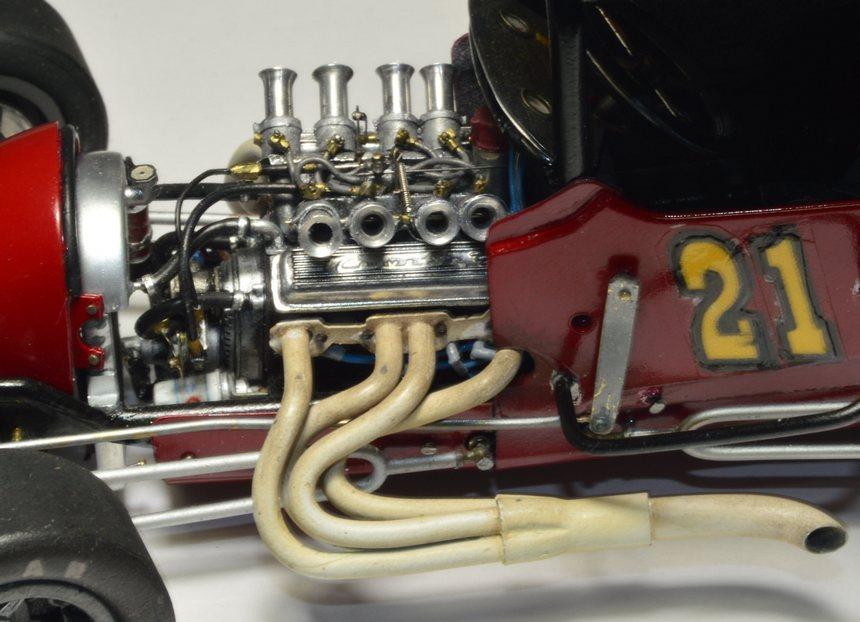
They pretty much do! Except the fuel and ignition systems are only half the work.? Thank you, Bob! I'm really having a blast, with it!
-
Better side exhaust pipes?
Straightliner59 replied to atomicholiday's topic in Model Building Questions and Answers
There are a couple of ways to bend the tubing. I cut a piece of 1/2" aluminum rod to a length to match the diameter of the tubing (if you're using 1/4" tubing, cut the rod 1/4" long), then clamped them both in a vise, and slowly bent the tubing around the rod. The vise keeps the tubing from crimping, as long as you work carefully. I think a section of dowel would be even easier, and just as effective as the aluminum rod. You can buy the tubing at a good hobby shop, or online, if you don't have one, close by. Hope this is helpful! -
I used Blingasm white inkjet paper for the decals above. I've had good luck, with it. Once they're printed, I shoot them with Krylon Crystal Clear.
-
This thing was very rare, for a long time! Don Fahrni gave me one back in the early-mid '80s that I built (I'm planning a rebuild of it, with a hemi, instead of the BB Chevy I used, then). I'd already removed the front axle, by the time this photo was taken. It's a pretty neat kit! Yours is looking way better than mine ever did.

-
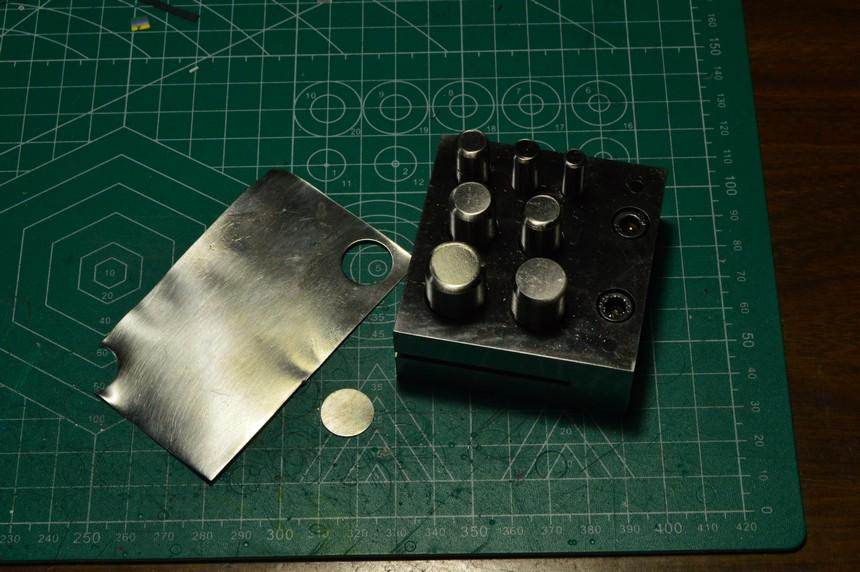
I got this circle punch, today. Works great! It punched a nice, clean disc from annealed aluminum sheet. I love me some tools!
- 39,075 replies
-
- 2
-

-
- johan
- glue bombs
- (and 1 more)
-
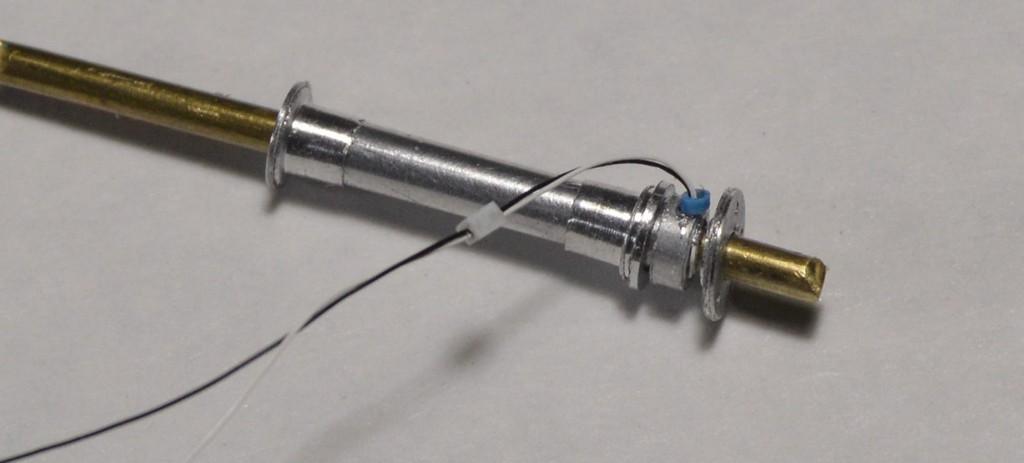
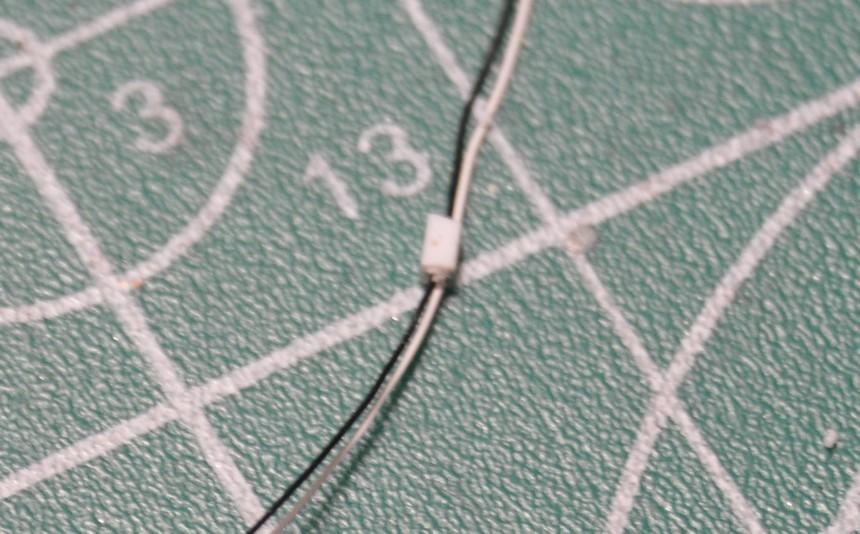
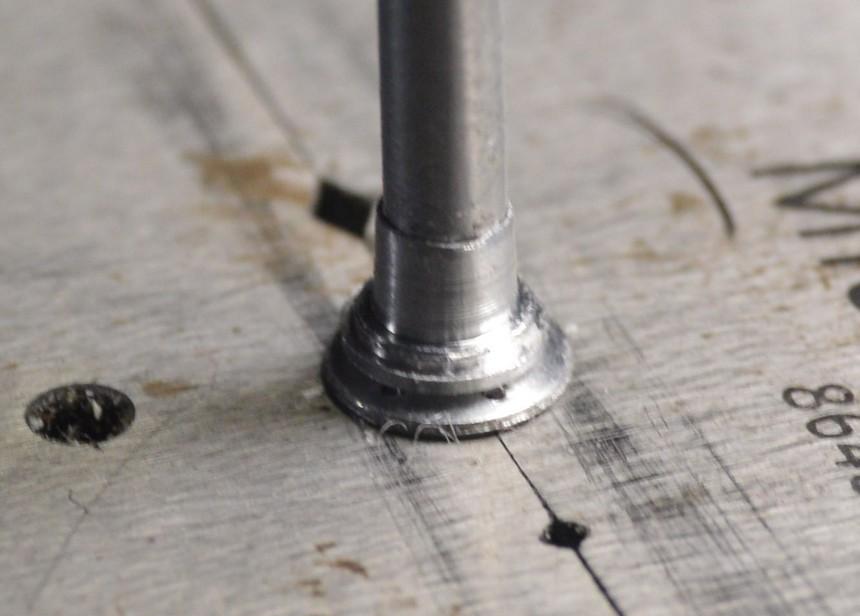
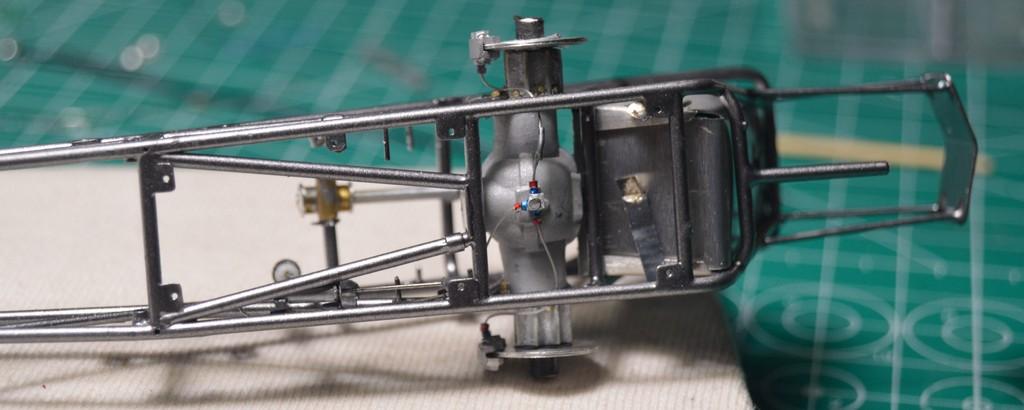
More work on the driveline. I detailed the speed sensor, and wired it. I'll paint the connectors and the fitting on the sensor body. Not pictured; I turned and drilled the mount for the back of the reverser. That completes the driveline tube, sans a few nut/bolt castings. Thanks for looking! Whaddya' know? The photos look decent, for a change!
-
Looks great, Bob. Fittings are excellent!
-
Better side exhaust pipes?
Straightliner59 replied to atomicholiday's topic in Model Building Questions and Answers
That's how I did these. Not sidepipes, but the same principle.
-
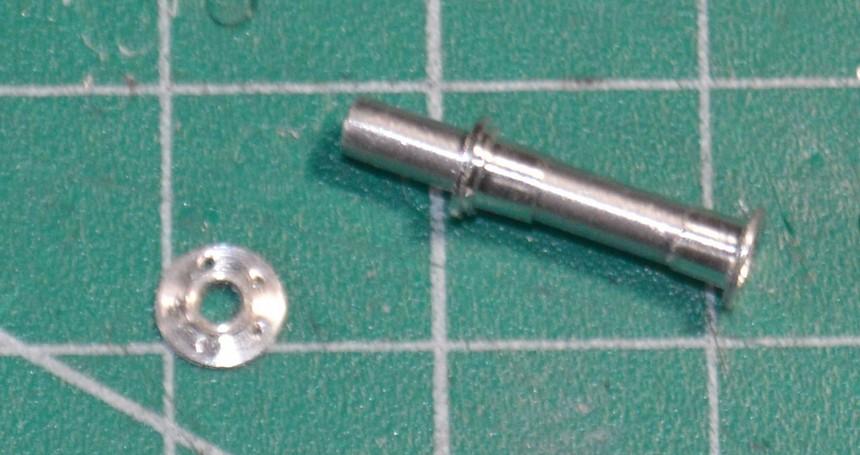
Some things I've been working on: First is something I picked up from Andy Sapiro; Parafilm is great for protecting finished surfaces, while you're working. It doesn't leave a residue, and it only sticks, lightly. It doesn't have any adhesive, so it removes, easily. I, too, would recommend it. Second is a pinion carrier. I think I just about have this driveline sorted out! I also was messing around with connectors for the data acquisition systems. This is .030"X.030" styrene strip, bored through. Wire is Detail master Detailing Wire. Comments are always welcomed and appreciated. Thanks for looking!
-
Thanks, Bob! I apprecaite it!
-
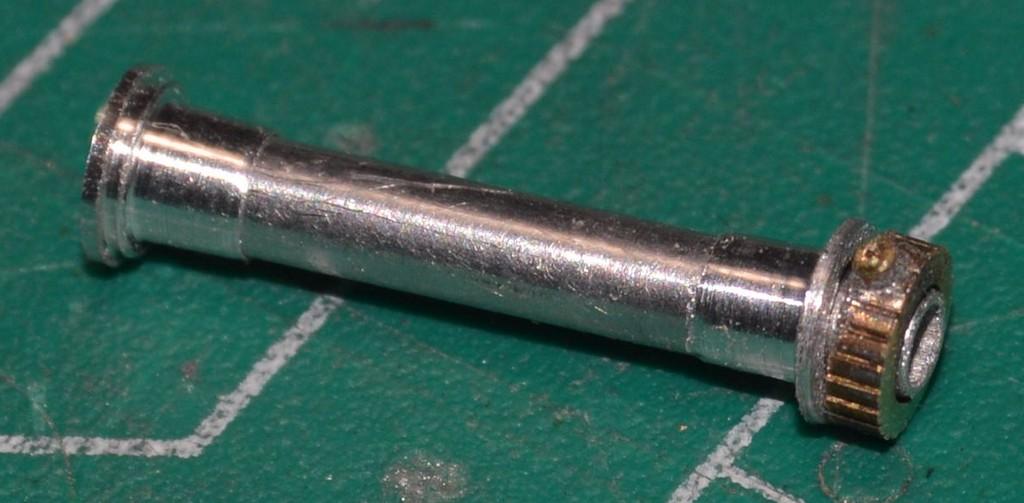
Thank you, my friend! I'm not sure if I am done with this, or not. I started working on the output shaft cover. It's what's called "adjustable length", in that the end pieces can be slid along the tube, to match the length needed. I'm still researching these things, because I am having difficulty finding proper dimensions. The brass piece is intended to be the shaft speed sensor for the computer, but I still haven't found a decent photo of that installation, either...
-
’72 Dodge Demon Drag Racer 1/25 scale
Straightliner59 replied to AmericanMuscleFan's topic in WIP: Drag Racing Models
The door jambs look excellent! As for photos, I don't worry, too much about their quality, until it's time for the "beauty shots". Until then, it's all about the model! -
1932 ford saltlake car
Straightliner59 replied to charlie libby's topic in WIP: Other Racing: Road Racing, Land Speed Racers
Oh, man! That is awesome! Great work, Charlie! Now, off to get some of that stuff! -
Rattle can "glop" leakage
Straightliner59 replied to plasticprime's topic in Model Building Questions and Answers
I have a few, too! I'll be all kinds of colors!? -
Rattle can "glop" leakage
Straightliner59 replied to plasticprime's topic in Model Building Questions and Answers
Just turn it upside down, as if you're clearing the nozzle, until no more propellant is escaping. Then, you can carefully punch a hole, however you choose! -
Who doesn't love a mock-up? Let's see yours!
Straightliner59 replied to Belairconvertable's topic in WIP: Model Cars
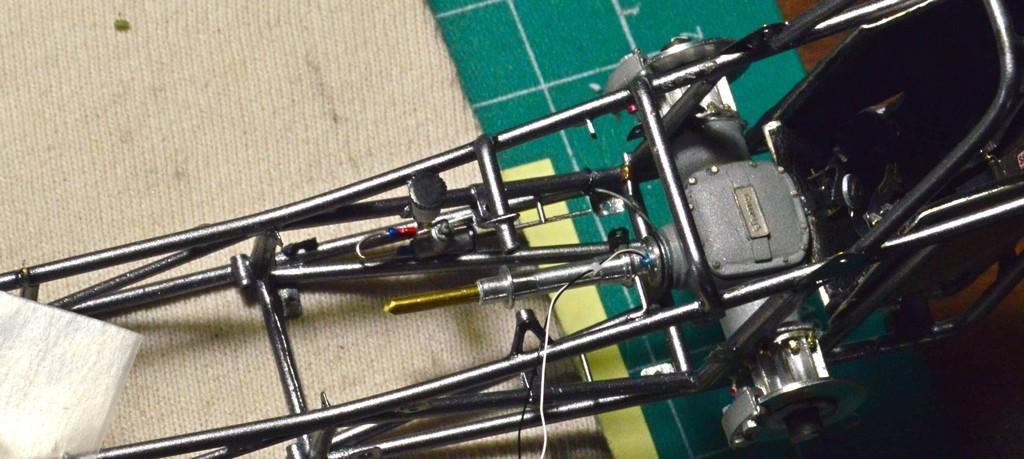
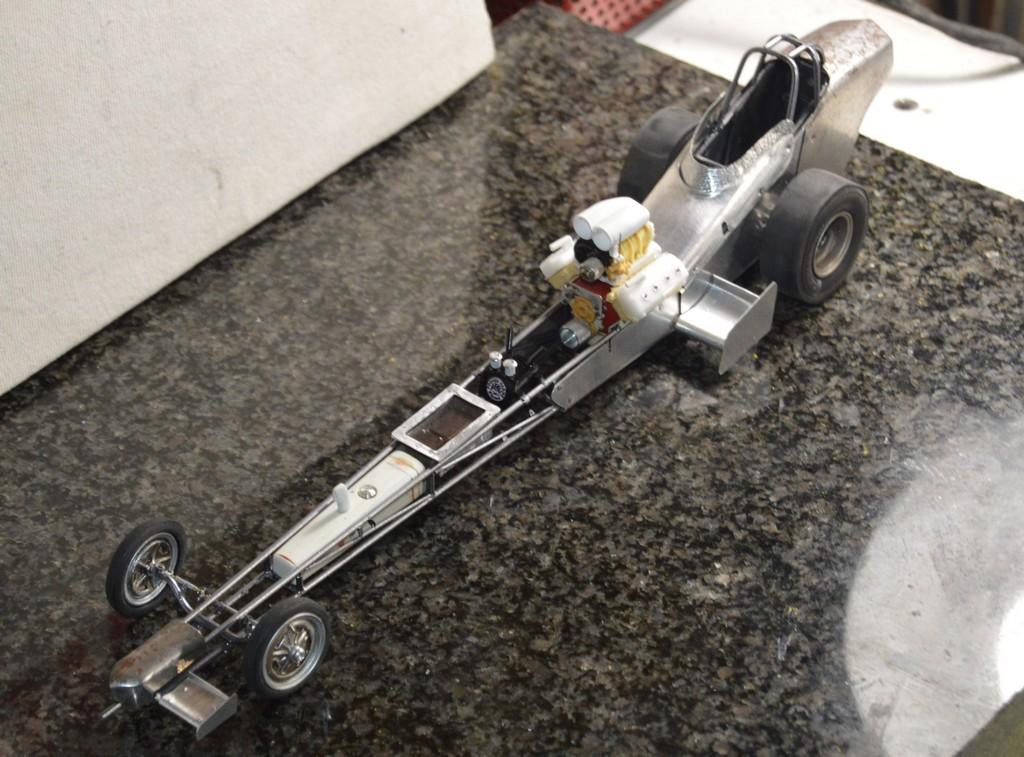
Got this thing mocked-up, again, on its way to completion...
-
Thank you, Marcos ! I think the bead wire worked out for the fine brake lines pretty well, too. For some reason, I decided to mockup the car. This is as close to seeing the overall "done" look, as I have got. I'm still trying to figure out the layout, for the paint, now that colors are determined. Questions comments and critiques are always appreciated. Thanks for looking!
-
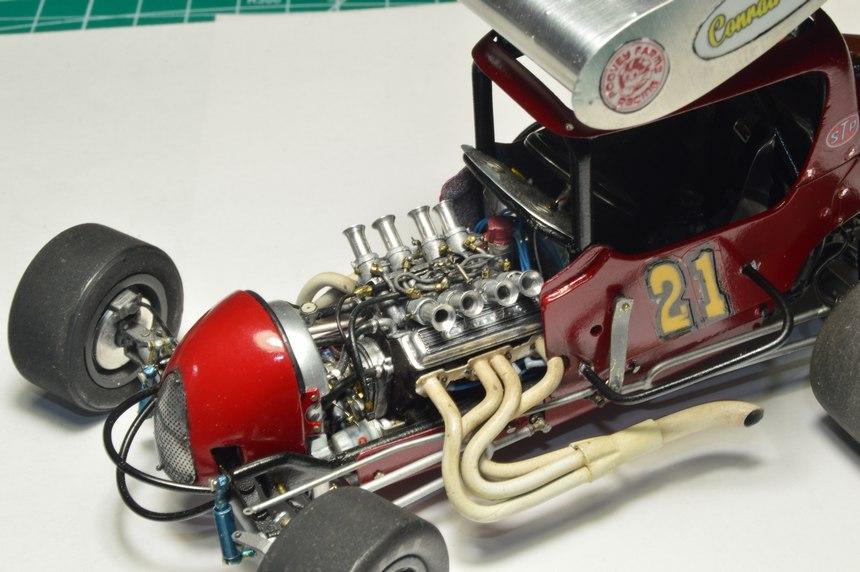
The brakes are plumbed. The material I used for the braided line is somewhat springy. Of course, it's wire. Wire tends to "springy". That quality caused a mishap on the left-hand side line. It moved, and left me about 1/16" short. To repair it, I cut it back farther, and spliced a new section on, using a piece of small-diameter wire insulation. I touched it up with some Dark Anodonic Grey metallizer. It's barely visible, here. It should be virtually undetectable, once the car's together. I appreciate your questions and comments. Thanks for looking!
-
Thank you, Tim. Yes, it's really none the worse, for wear. My sincerest condolences on the loss of your Mom. Glad modeling has provided something of a relief, for you. Take care, my friend.
-
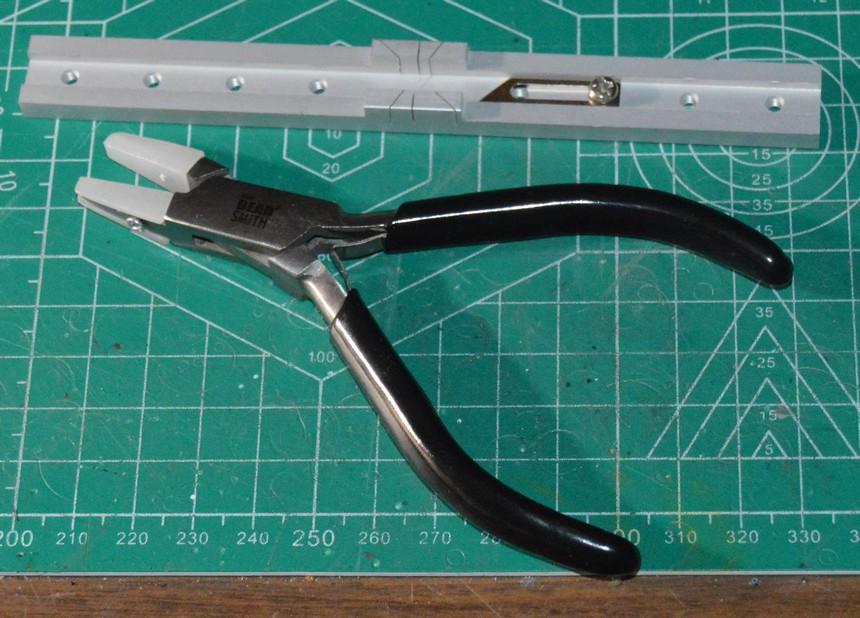
From Micro Mark. Nylon-jawed pliers, and a tiny miter box. And a few more issues of bathroom reading material in the form of their catalog; AKA the "Sears Christmas Wish Book" for modelers!?
- 39,075 replies
-
- 2
-
-
- johan
- glue bombs
- (and 1 more)
-
Off black paint for scale effect.
Straightliner59 replied to D.Pack's topic in Model Building Questions and Answers
Agreed! There are literally hundreds of options. Every one of those options is another tool with which to improve our work! -
Off black paint for scale effect.
Straightliner59 replied to D.Pack's topic in Model Building Questions and Answers
Great tips, Noel! Here's the article Frank Kokosza did. It has several of the same kinds of tips as yours--different ways to make the mundane, more interesting!
-
Off black paint for scale effect.
Straightliner59 replied to D.Pack's topic in Model Building Questions and Answers
I would say that it will be worth it. The main point of modeling, beyond personal satisfaction, I think, is creating visual interest. Anything that accomplishes that is beneficial.?