Straightliner59
-
Posts
5,814 -
Joined
-
Last visited
Content Type
Profiles
Forums
Events
Gallery
Everything posted by Straightliner59
-

’72 Dodge Demon Drag Racer 1/25 scale
Straightliner59 replied to AmericanMuscleFan's topic in WIP: Drag Racing Models
Thank you, Francis. I have always felt that anyone can to this to a very high level. The key is the "want to"; the drive to do it, and a willingness to do it over, when you're not right, with it. -
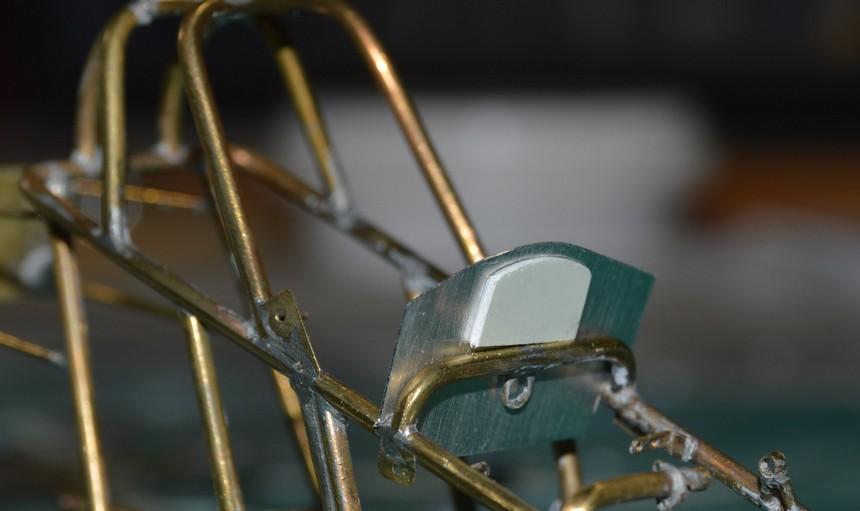
Well, Francis, my friend ?, thank you for your kind words. Also, your timing in asking is impeccable. Here it is, in its freshly-minted glory! This is Tamiya Light Gun Metal spray over Krylon grey primer. I haven't ever used an etching primer, that I recall. The first time I painted this I used Krylon primer, as well. It lasted 25 years! I didn't have any adherence issues. I think a clean surface is most important. Anyway, I really love the sheen of this paint! Now, I can use the area behind the seat, inside the tail section to determine whether, or not, I want to "discolor" the welds!?

-
Building more than one kit at a time.
Straightliner59 replied to ctruss53's topic in Model Building Questions and Answers
Truly. If your hobby isn't enjoyable and satisfying, then you need a new hobby. I mean--that's kind of the point!? -
Thank you, Ian. I'm hoping to get paint on it, today! It should warm up, nicely, this afternoon. It will be helpful to not have the space restrictions of my spray booth, given all the angles, and tight spaces involved.
-
Building more than one kit at a time.
Straightliner59 replied to ctruss53's topic in Model Building Questions and Answers
I generally concentrate on whatever captures my attention. I have a few projects above the bench that I started working on, before I was "got" by the "one". That one, currently, is my nostalgia fueler. Once I've found the right project, there's always plenty to keep me busy and interested! -
Thank you, my friend! I am going to rework/fix the hi/lo and manual hi-speed knobs, where they go through the dash. The drill slipped, and they aren't square, to each other. I've got a fix figured out.
-
Chaparral 2D
Straightliner59 replied to Pierre Rivard's topic in WIP: Other Racing: Road Racing, Land Speed Racers
They're perfect, for this, to be sure. So much so, that I would consider them for my own build, of it. I think these old Monogram kits are a load of fun! -
1932 ford saltlake car
Straightliner59 replied to charlie libby's topic in WIP: Other Racing: Road Racing, Land Speed Racers
I tried soldering aluminum flashing, with minor success. I say that, because I got it fused, in a few spots, but, I burned through, in more. I have some of the rods, but, I haven't got back around to experimenting, more. I think that, once I create the proper circumstances, I can make it work. The flashing I use is only about .007", so I wasn't really expecting to nail it, the first time. I used/have the rods from Harbor Freight, and a small butane torch. -
’72 Dodge Demon Drag Racer 1/25 scale
Straightliner59 replied to AmericanMuscleFan's topic in WIP: Drag Racing Models
As long as you work toward where you want to be, and remember that it's not a race, you'll do great, Marcos! -
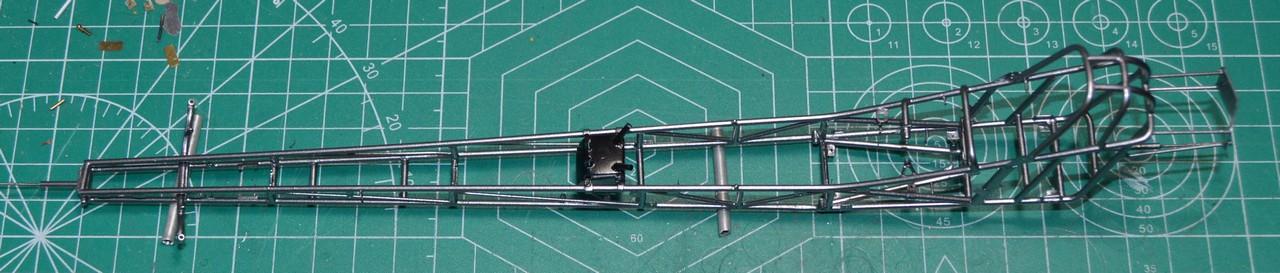
I have done more work to the dash. I made the 'T'-handle with .010" brass wire, soldered using my Weller iron. The iron works much better in these instances, because all it takes is a touch of the tinned tip, to heat the wire sufficiently to fuse. I plan to do some shaping, to it. I think I will use the black nails for the knobs for the hi-lo and manual hi-speed. Mag kill will go in the hole next to the fuel shutoff. I'm still collecting reference for the data collection/readout wiring. I don't anticipate it being too horribly difficult! I also made a draincock for the puke tank. It will go roughly one-third of the way across the rear-bottom of the tank--offset so that it doesn't dump on the main fuel line. It's a model railroad part, with a handle scratched from aluminum. The chassis is ready for paint. I'm going to paint it this weekend, as the weather's supposed to be beautiful. I would paint it in the booth, but, since I knew the nicer weather was coming, and because I can see and maneuver it better, out in the open, I've decided t wait. I'm also planning on entering a few things in a contest, this weekend. We'll see how that goes! Questions, critiques and comments are always welcomed. Thanks for looking!
-
Hot Rod December '72 has a four page article. There are three or four photos that should be useful. Likely some useful info in the text, as well. If you sign up at Motor Trend dot com, you can access it, for free. Hope this is some help.
-
Workbench Tool Storage and Organization
Straightliner59 replied to ctruss53's topic in Model Building Questions and Answers
Here's my main bench. I recently bought the angled storage "racks" from Temu, based on a recommendation from Jim Keeler. They really freed up some space! I was able to rid myself of three cans that were holding the sanding boards, pens and pencils and markers. I also freed up two of the large drawers, and four small ones from the cabinet next to them. I used a length of wire, a magnet and a thumbtack to secure the top four units from tipping forward while removing items. I had to buy eight of them, to reach the $10 minimum order.
-
Thank you, Mr. Sapiro! Thank you, my friend! Thanks, John. Thanks, Marcos. I just have to figure out what colour(s) it's going to be!?
-
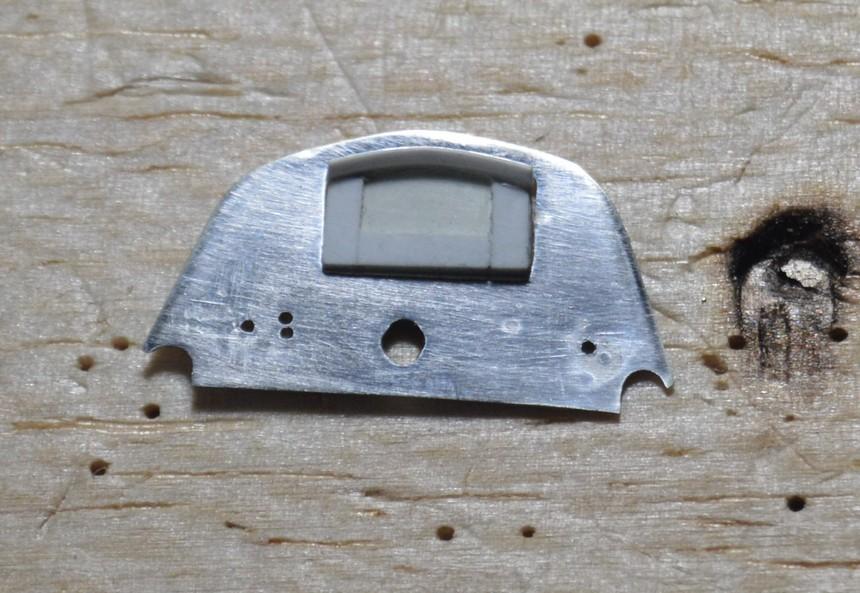
Okay. I got the final trimming done on the dash panel. I like it!
-
Thank you, Ray. I appreciate that!
-
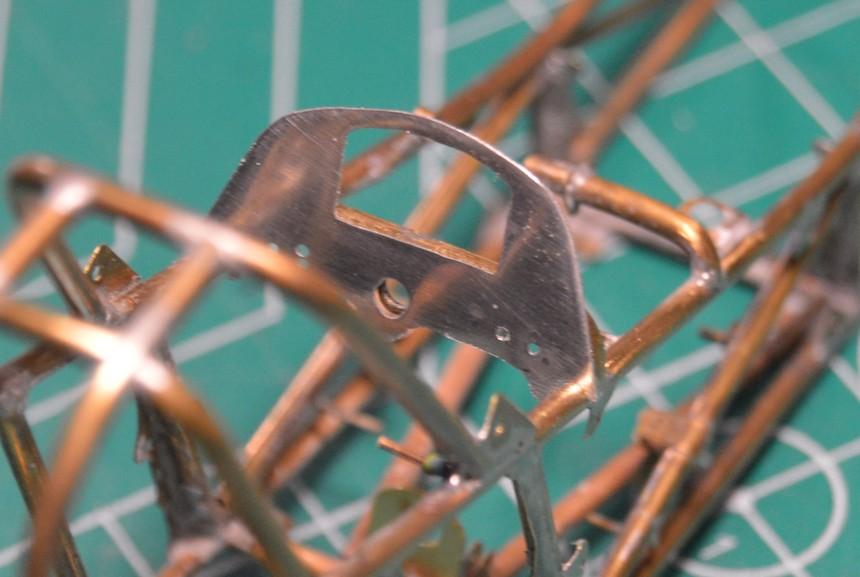
I trimmed the dash (I am going to do a tad more, I think). The two holes on the left will be the controls for the hi-lo idle control, and the hi-speed leanout. The one on the right, for the fuel shutoff. I think I will use the black pins for the former. Still planning on a "t"-handle for the latter (This one might be a tad out of scale!?). I added an "eyebrow" to the dash module. There are also a few details to add to the back of the unit, mostly involved with wiring it. I am about to knock off any tarnish on the chassis, using an abrasive rubber cone, and do any final cleanup I find, then the chassis will be off to the paint shop to be made to look like unpainted steel. I am thinking of gluing some test pieces, to see if I can figure out a way I am comfortable "discoloring" the welds. I'm considering making the inspection panel on the bellhousing removeable, and putting in a clutch assembly. I probably won't, but, it's been considered. As always, comments, critiques and questions are welcomed. Thanks for looking!
-
Thank you, Ian! That's all I needed to hear. I will stick with this one! I will be trimming off the bottom, next. One thing I am going to change is, instead of a lever to shut off the fuel, I am going to make a t-handle that comes through the dash panel. It already lines up perfectly with the tab for the cable. Thanks for your comments, my friend.
-
Static electricity
Straightliner59 replied to Racersonly's topic in Model Building Questions and Answers
I bought one for my records, then "discovered" that it worked on plastic models, to rid them of static. It has always seemed to work, pretty well! -
29 Ford Roadster - Dragster
Straightliner59 replied to SpeedShift's topic in WIP: Drag Racing Models
This is a very cool project. I've always dug the car, and I really prefer to build "inspired-by" stuff, because then I can incorporate items that I think are cool, that fit the time period, but aren't proper for a replica. Nice work, Jim! -
I got the dash cut, and cut out the opening for the data readout LCD. It matches the dimensions for a Racepak model I found on a speed company website. It'll be brought to a more proper thickness, once I start working on the backside of it. I've also found a schematic to wire it with. It really puts the top of the dash way up there, but, since it's no taller than the windscreen, it should be fine. That said, I found one by another company that's only roughly 4.5" tall, as opposed to the 9.5"-ish of the Racepak unit. There's a chance I may make another one!?
-
Looking good, Marcos. Keep it going, my friend!
-
I love this stuff. Tranny looks excellent, my friend!
-
WIP D/Gas 1956 Chevy from Monogram hardtop kit.
Straightliner59 replied to larman's topic in WIP: Drag Racing Models
Looking good, Larry! Stance is right. I'm always a sucker for yellow or orange, too! Nice work. -
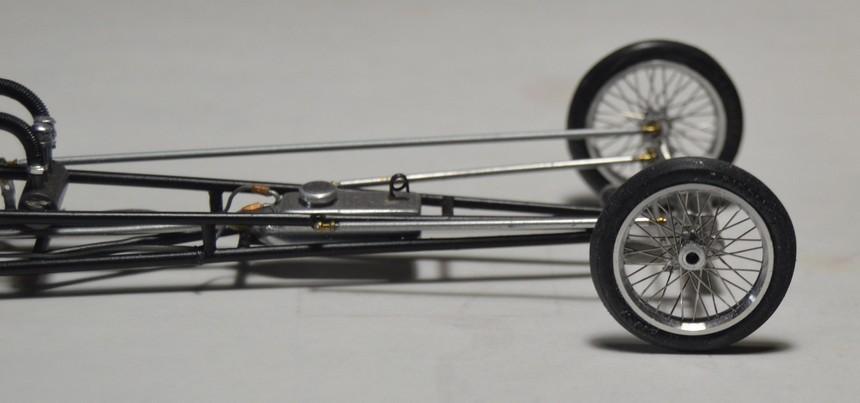
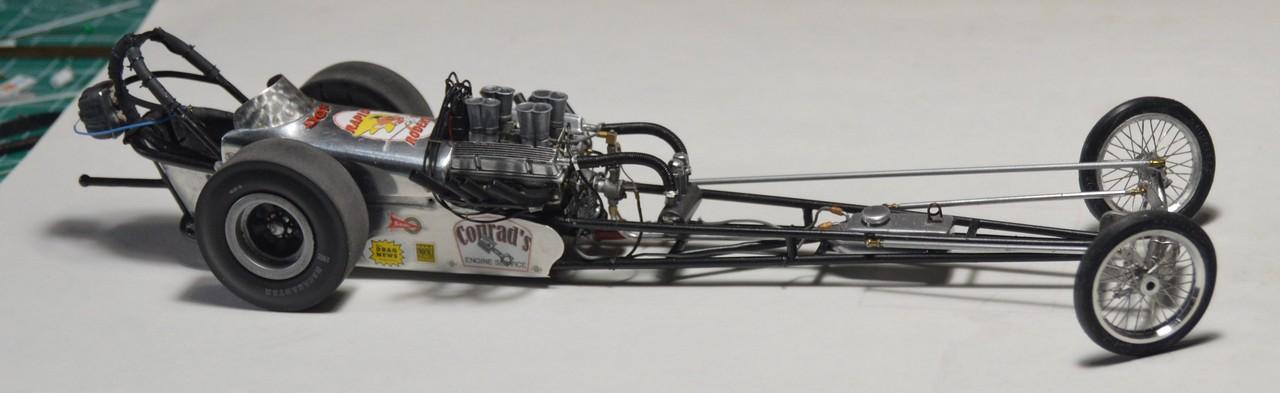
dragster wire wheels
Straightliner59 replied to noname's topic in Model Building Questions and Answers
I recently purchased a set for my Junior Fueler. I liked the ones I'd made, but one of them began to come apart. I always thought these looked best of the aftermarket wheels, so...
-
Wheels roll or not roll?
Straightliner59 replied to Biggu's topic in Model Building Questions and Answers
That is true.