Straightliner59
-
Posts
5,815 -
Joined
-
Last visited
Content Type
Profiles
Forums
Events
Gallery
Everything posted by Straightliner59
-

Wheels roll or not roll?
Straightliner59 replied to Biggu's topic in Model Building Questions and Answers
That is true. -
Chaparral 2D
Straightliner59 replied to Pierre Rivard's topic in WIP: Other Racing: Road Racing, Land Speed Racers
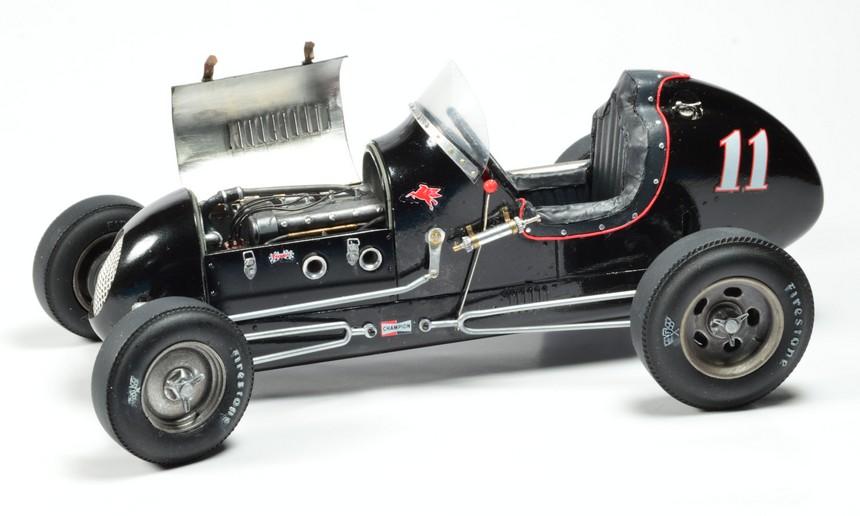
You are correct, sir. They are Cox. Your wheels look great! The color is perfect, too. need to get a proper set of tires, for mine--at least markings for them--then I can just sand off the molded-in detail. This is an excellent project, and I'm excited to watch it come together1 -
Chaparral 2D
Straightliner59 replied to Pierre Rivard's topic in WIP: Other Racing: Road Racing, Land Speed Racers
That looks fantastic! I'm fairly impressed with the plastic fuel lines. I have one of these planned, as well--you've surely given me something to aspire to. In case you're interested, on Ebay, I found vintage Chaparral wheels in magnesium, for slot cars. They were fairly reasonably priced, as I recall. It's hard to tell, in these photos, but I polished two of these--one front and one rear. Beautiful work, Pierre!
-
MPC Pro stock series are making a come back ?
Straightliner59 replied to Mr mopar's topic in Car Kit News & Reviews
To build the Duster, you'd be better off starting off with one of the later AMT kits. That car had an essentially stock-looking chassis, and the later kit's chassis is far superior to the old MPC one. In my opinion, anyway. -
AMT '32 Ford V-8 Engine question.
Straightliner59 replied to stavanzer's topic in Model Building Questions and Answers
But, it still looked cooler!? -
Wheels roll or not roll?
Straightliner59 replied to Biggu's topic in Model Building Questions and Answers
I don't know if I ever built a model that rolled. If I did, it was about 50 years ago, or so. I got into modifying and scratchbuilding suspensions pretty early on. One of the first guys who ever taught me anything about modeling told me "Toys roll. Models don't!" ? -
Issue 218
Straightliner59 replied to Dave Ambrose's topic in Model Cars Magazine News and Discussions
Arvada, CO, Friday! -
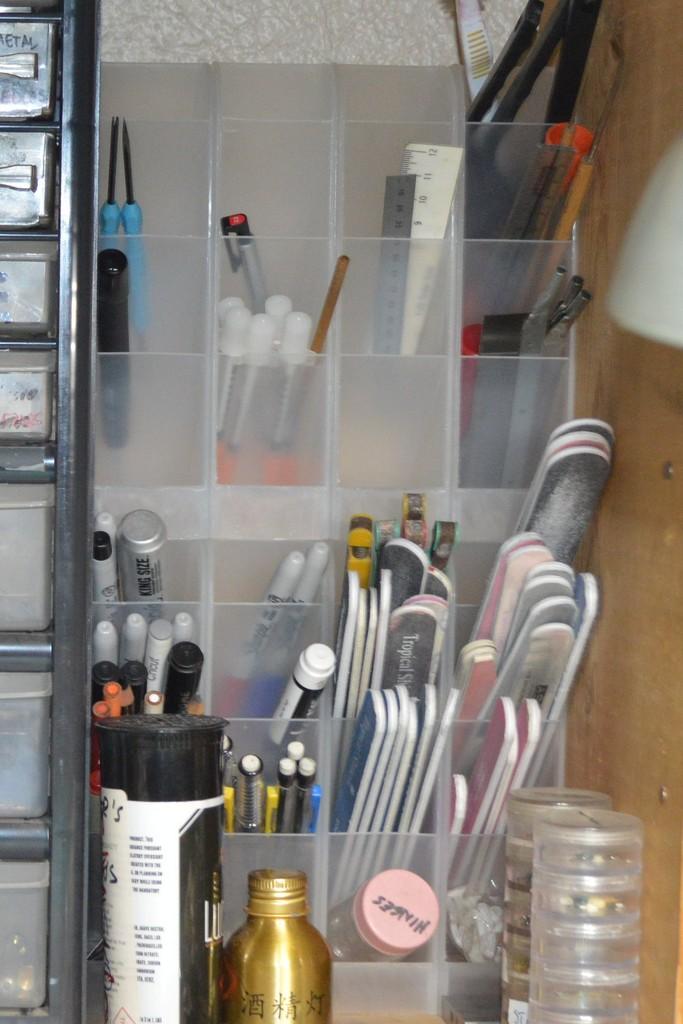
I got these plastic bins from Temu. I'd never heard of them, before, until Jim Keeler posted that he'd picked some up. I kinda like 'em! I also got Issue 218, today!
-
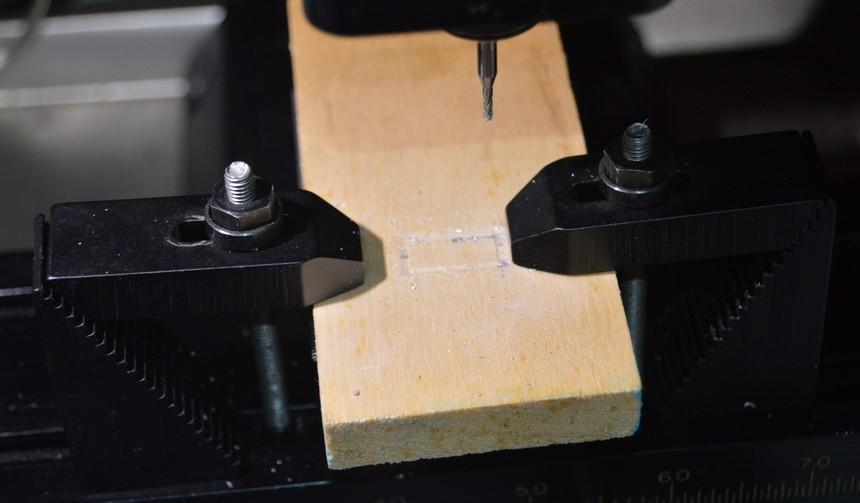
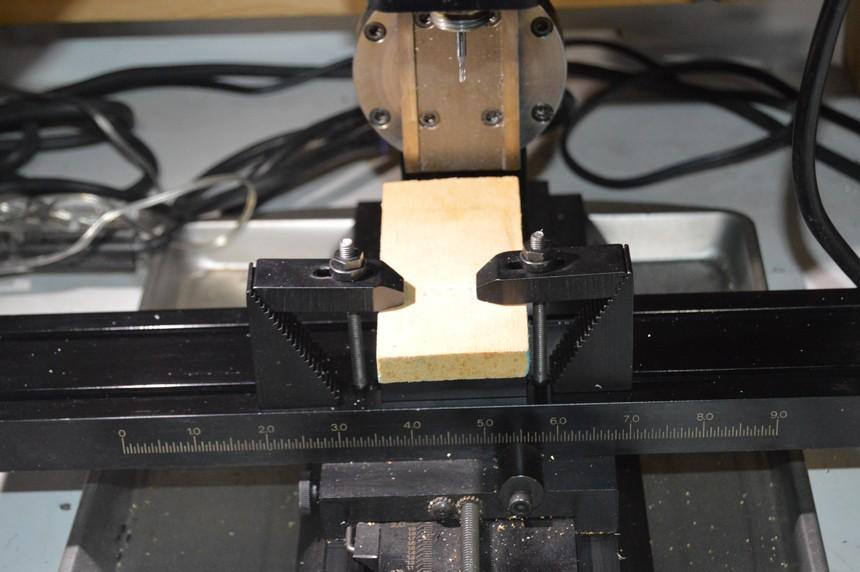
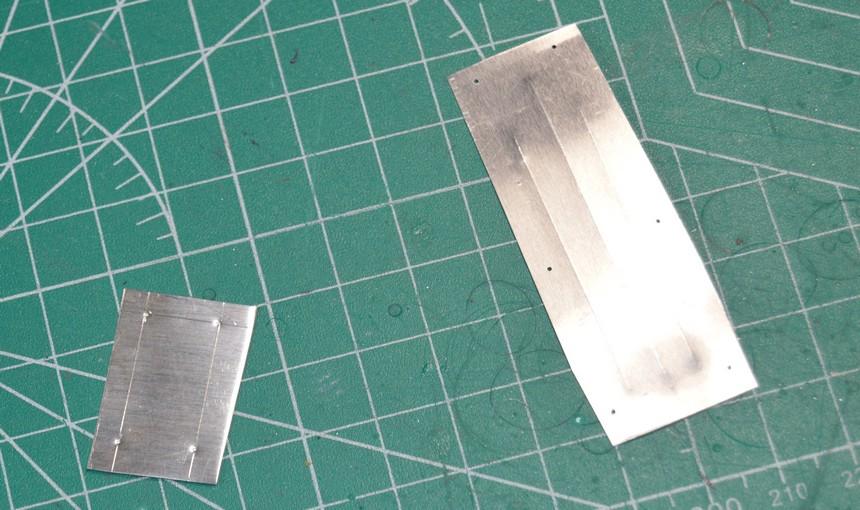
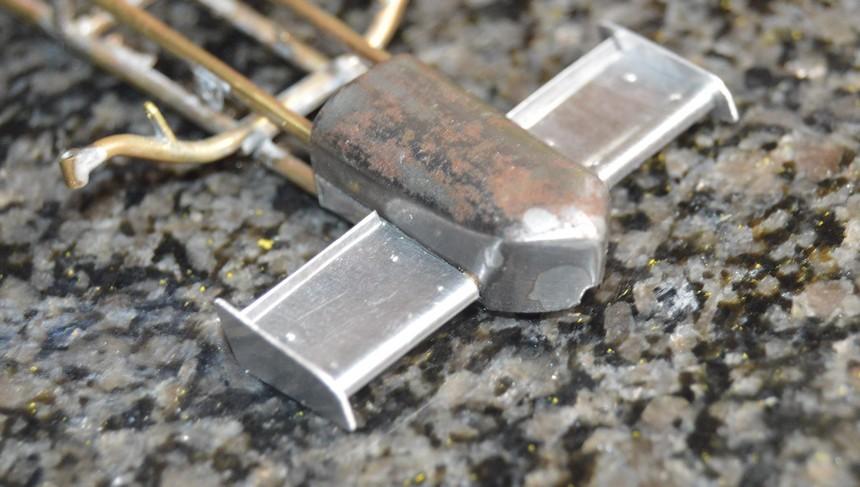
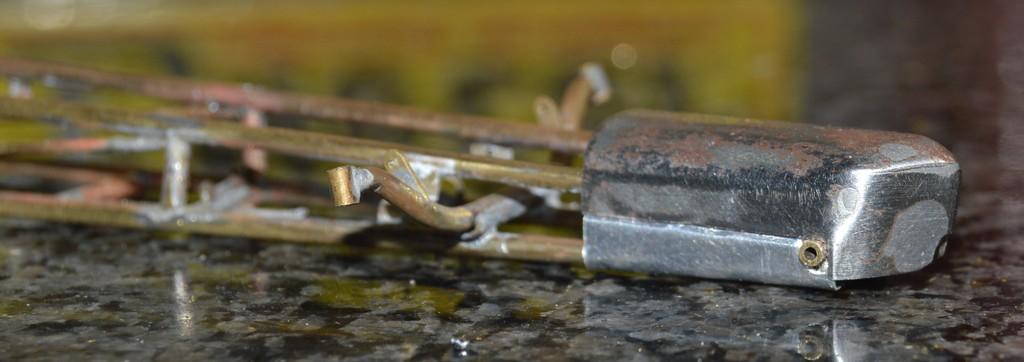
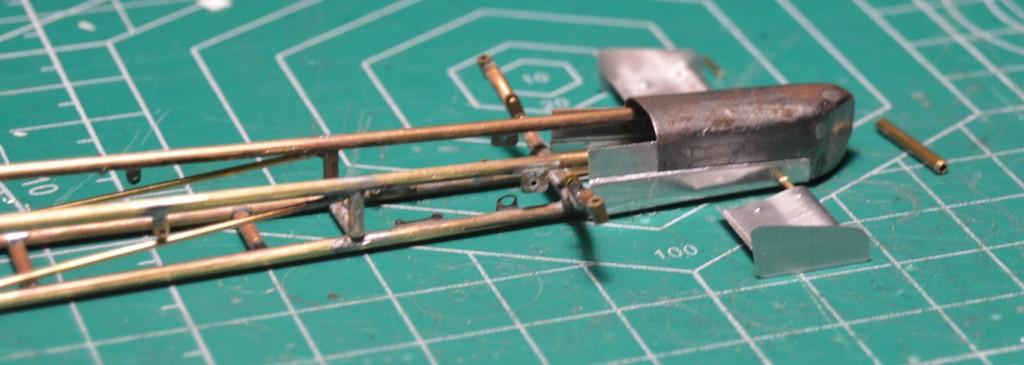
I set up the mill to open the interior of the electronics box lid frame. It could have easily been done, the old-fashioned way, but, since I am making a point to use the mill, more frequently...I used the 1-2-3 block from the set-up blocks I bought a while back to elevate the wood (I need to get some milling plate), and cut it out with a 1/32" end mill. The nails in these photos will be replaced with thumb-turn fasteners made from Tichy Train Group rivets. I will probably add some faux "blind" rivets to the frame, as well. I also made new tabs for the puke tank. The old ones just looked to bulky. I just keep picking away at stuff that needs to be done, while I procrastinate about the final cleanup on the chassis? Thanks for looking!
-
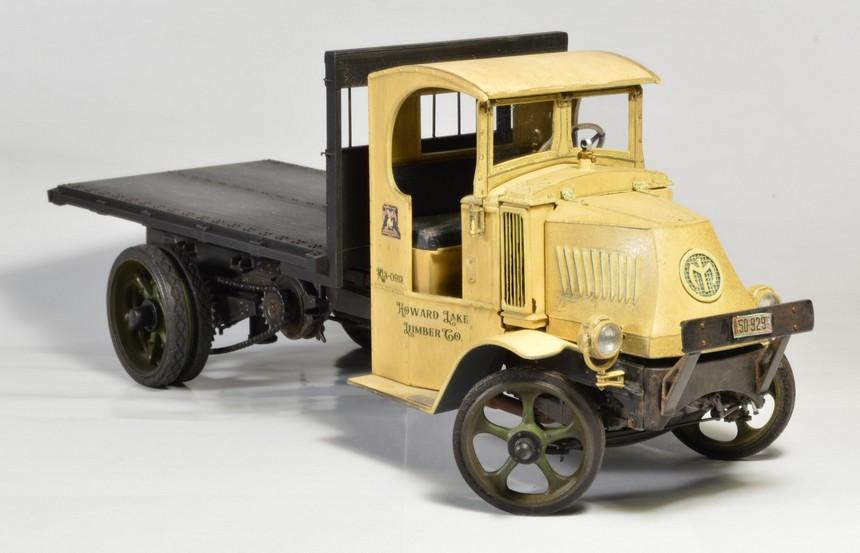
I have built quite a few of them, over the years. While the Midget and the Sizzler are a bit larger, I went ahead and included them. I have a cleanly-built, unpainted California Street Vette I plan to "fix" one of these days, too Ebay purchase).
-
Now you're sounding like me! ?
-
If you're looking for a challenge, male the front axle poseable! ? I only mess with my friends!
-
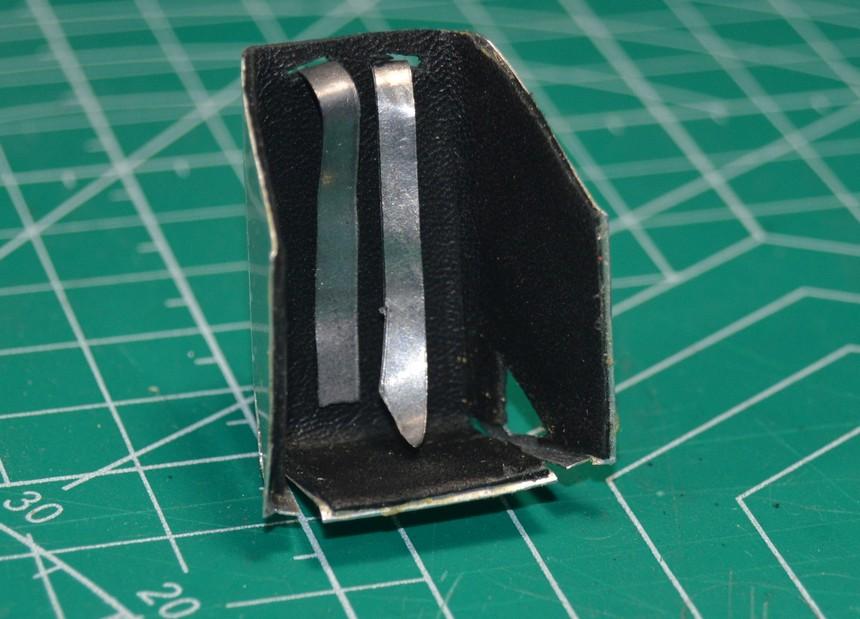
I made a leather pad for the seat. It's 1.5 oz. bookbinding leather. Foil strip inserted for effect. I'm not sure whether I posted photos of the floorboard, yet. I embossed the bead rolls a bit deeper using an awl, even if I did!? The rectangular piece is the new lid for the electronics box. It is currently clamped a atop a piece of wood on the mill. Thanks for looking!
-
Well, now, I guess you have to do the other one, since this one came out so nicely! Looks great, Ian!
-
Thanks so much, Joe! I have a blast, working the metal--especially sheet. It's great, having a place to share our work! Thank you, Ian. In researching them, I noticed something I hadn't, before. The front wings on these cars are much flatter, than the rear ones are. I still have no idea what colour I'm going to paint this thing!? Thank you, my friend! It's getting ever closer to paint!
-
I love what you're doing here, Joe. It's a lot of fun, to "fix up" one of these old, basic kits! Some of my favorite completions started with old Monogram kits. Keep up the great work, my friend!
-
GSL Common Kit: [revision] just another Model A Roadster
Straightliner59 replied to 89AKurt's topic in WIP: Model Cars
What a fine little hot rod! Beautiful work, Kurt! -
Got them mounted! I think they look sweet! I also trimmed the body tin, beneath the nose. I have an idea for the tow hook I'm going to try. As always, your questions and comments are welcomed. And appreciated. Thanks for looking!
-
Front wings are made, and mounting is figured out. I think they'll look pretty good!
-
’72 Dodge Demon Drag Racer 1/25 scale
Straightliner59 replied to AmericanMuscleFan's topic in WIP: Drag Racing Models
Awesome, Francis! Those look great! Like Edgar said--these are the kinds of operations that make me happy I have a mill. -
It is getting exciting! What I like the most about the resistance unit, is that it's set up, and ready to go. All I need to do it step on a switch! When all I had was the Weller iron, I would dread getting it out, plugging it in, finding some place to set the holder, and waiting for it to heat. It's much easier to talk myself into soldering something, now. As Francis mentioned, it heats the area quickly, so there's less likely to be damage to previous joints. I have only used mine with the tweezers handpiece, as I haven't got around to building the electrode/ground clamp setup, yet. I have a second power unit, so, once the other setup is built, I'll likely just leave them both at the ready. That said, I did have an easier time making some repairs with my Weller iron than the resistance unit. Thank you, Francis! I just discovered the armature wire, recently. I would say that price is my main reason for using it, although it does come in sizes that aren't available from either of the other sources. I use tubing I have on hand, when the size I need is available to me. I have several lengths of K&S/Special Shapes 1/32" and 3/64" brass tube that get used fairly regularly. I think you answered Ian's question pretty much as I would have! I have two power units. One has two power levels that are changed, dependent on which plugs are used. The other has a built-in rheostat. Both of mine are Wassco Glo-Melt units. They're made by the same company that makes the American Beauty brand. The power units can fairly regularly be found for less than $100, used. I put my first unit together for right about $100, as I found a killer price on a tweezers handset! I think I paid about $10 for the foot switch. For scratchbuilders like us, I'd say it's more than a worthwhile investment. So, there you go, Ian! Keep your eyes open, and piece it together. I think it's $400-$500 for a new American Beauty unit, if that's what you prefer, but, I would recommend making the investment!
-
I appreciate that, Marcos! It's getting closer! I got a bit more done, today. I made the radius rods using .052" aluminum armature wire. I just recently found this stuff. It's great, because it's dead-soft, and round. I cut it to length, then roll it under a steel block to straighten it. Then, I bore the ends to accept the handrail stanchions. I also began work on the front wings. The mount on the chassis is in place. Here, you can see the end plates, and the sheet for the skins. Once they're made, I will install the body panels one final time, and set it to "on the wheels" height, to get a look at the overall appearance, and finish the panels for under/behind the nose. Then, I can finally get some paint on it. Also shown are some tools I made for bending radii on panels--or, in this case, airfoils. They're sheet brass with tubing soldered, so that the metal, and the form can be placed in the vise, and the panel bent over the tubing. Tubing sizes are 1/16", 3/32" and 1/8", from bottom, to top. They've come in very handy, many times, over the years. Thanks for looking!
-
Since I was considering the front wings, I decided to make a test piece, to see how it looks. Yeah! Now, to make the actual parts...
-
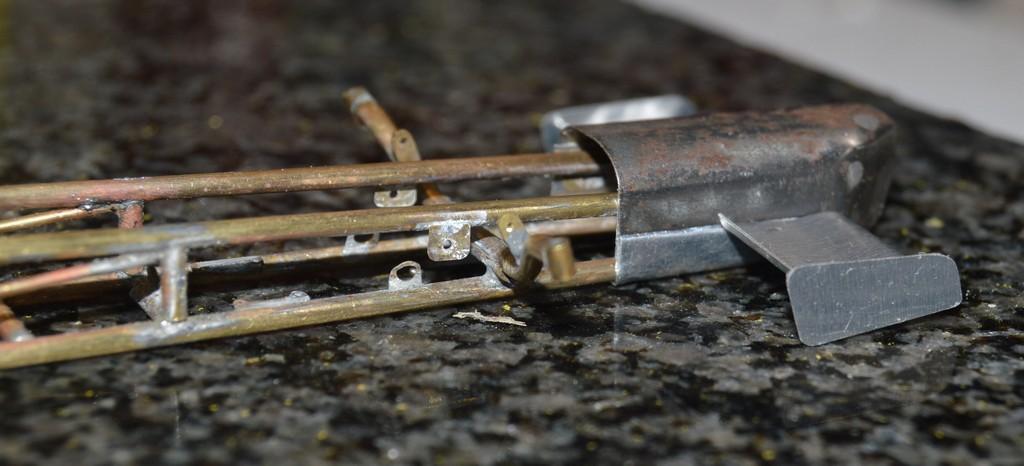
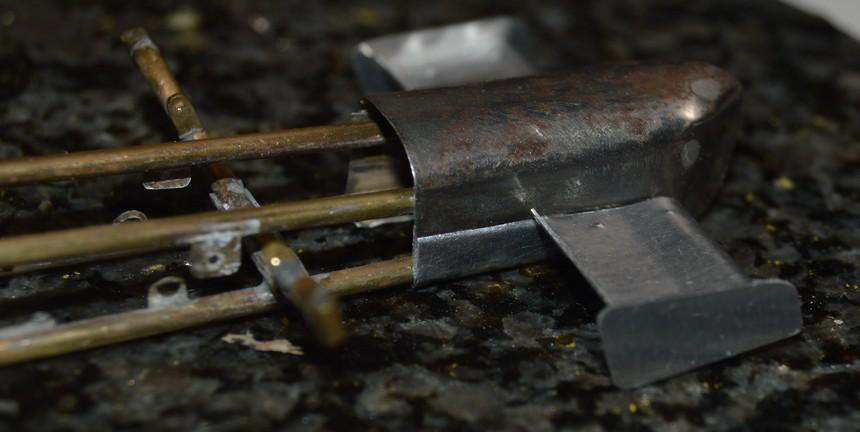
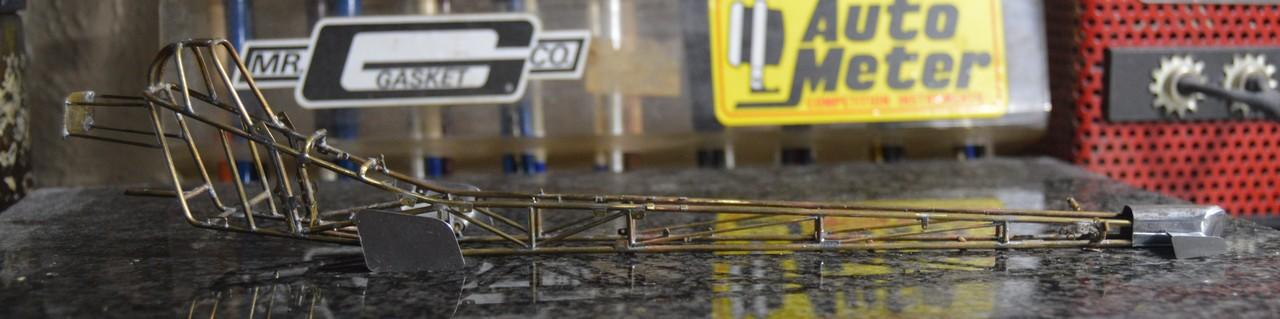
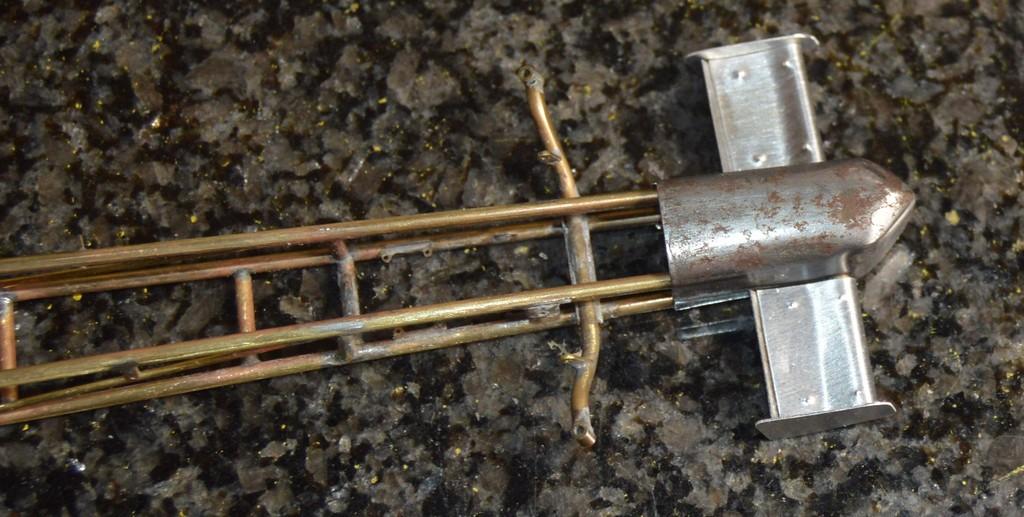
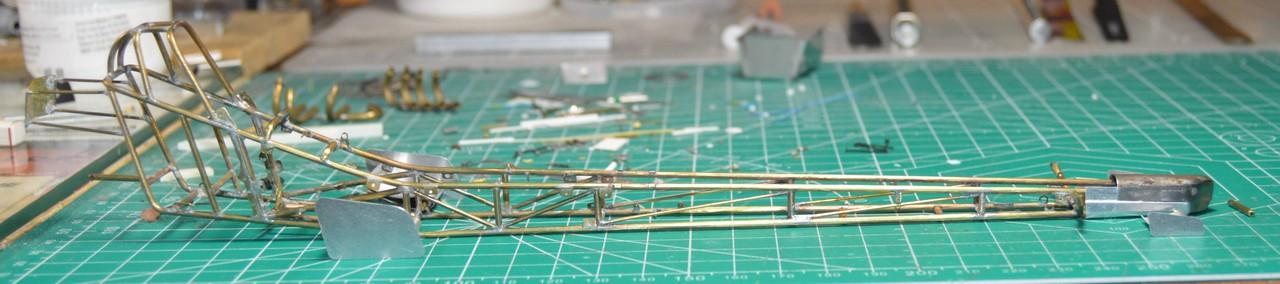
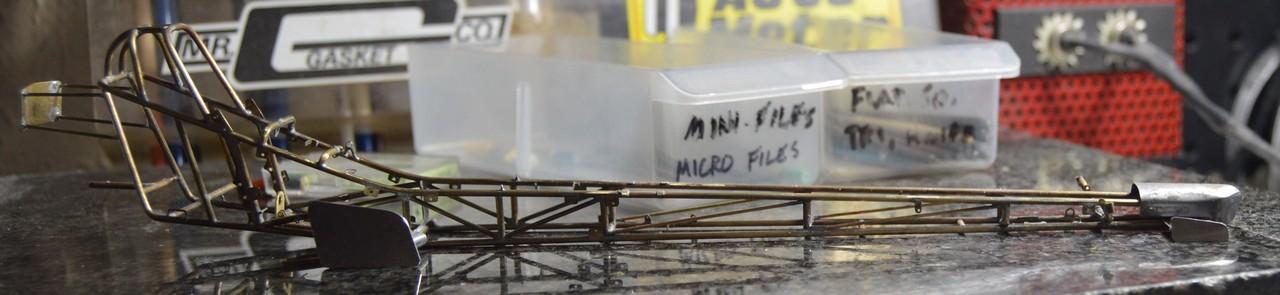
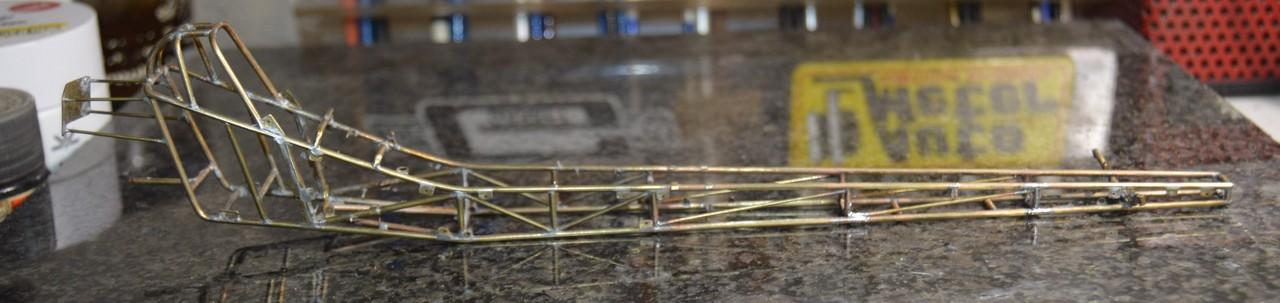
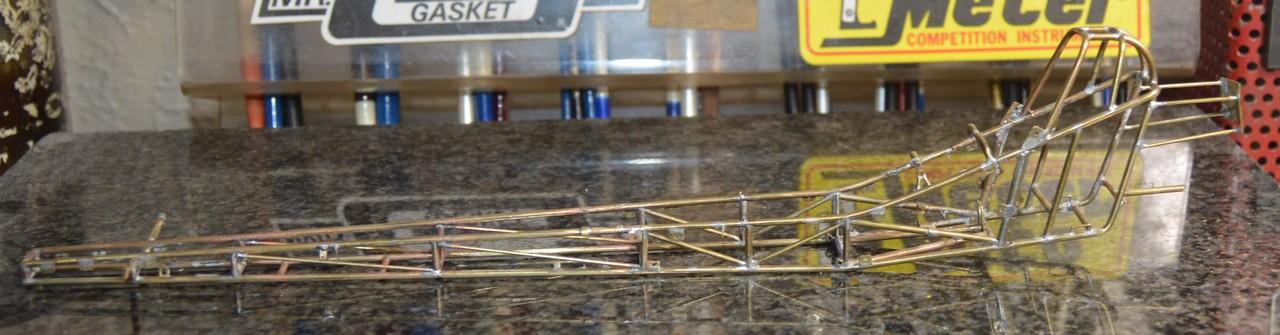
I think I have a completed chassis! I say "think", because I'm giving serious consideration to adding front wings to the sides of the nose. Those will require mounting points. While I love my resistance soldering unit, the good ol' Weller 40W iron works best for things like adding tabs, and other small pieces. You can see the new pinion support. In a couple of other photos, I can see that it's a tad crooked, so, it'll get straightened out. The original piece simply met the frame tube, thus made for a very weak joint. I added some body to this one, and filed it to fit between the chassis tubes, and over the cross-tube. That created a much more solid joint. Anyway, once I've added the front wing mounts, I'll be cleaning everything up, and shooting primer on it! Your comments, critiques and questions are welcomed. Thanks for looking!
-
I can't believe I didn't think of it, sooner!? It could not have been easier! I have wrestled and herded way too many of them. Thanks, kindly, my friend! Thank you, Francis. I am so close to having the chassis ready for paint. I thought I was going to get there, tonight. I have one tab to re-solder, and one chassis upright that I spent about an hour-and-a-half, trying to get replaced, before I had to make myself walk away. Grr! I made a new pinion support, and got that installed. It was frustrating to walk away, because I'm so close, but, sometimes...