Straightliner59
-
Posts
5,815 -
Joined
-
Last visited
Content Type
Profiles
Forums
Events
Gallery
Everything posted by Straightliner59
-
 I scratchbuilt it!? Thanks, Joe! I'm not sure I could see, to do that, anymore without improved magnification! The reading glasses ain't gonna cut it, for that!
 -
K&S Metals foil
Straightliner59 replied to Sidney Schwartz's topic in Model Building Questions and Answers
I think it's a dead-soft sheet, like Maid-O-Metal tooling aluminum. It has a ton of uses for modeling, but, it's much too thick for foiling. I used the Maid-O-Metal to line the interior tub of this Vega. The trans tunnel and wheel tubs are made from the same stuff.
-
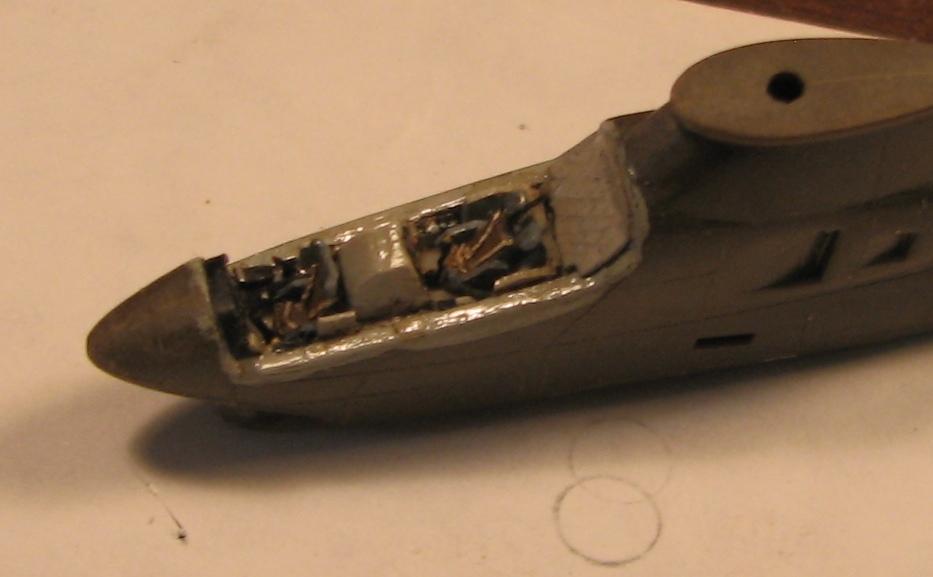
You're most welcome! Anything you can learn from Derek will be well-learned. He is probably the best all-around modeler I've known. He excelled at everything he built--which was mostly 1/72 scale WWII Japanese aircraft. The Rudd Thunderbird mentioned in this article is unbelievable, as well. Now, he chases trains with a camera! He and I used to "challenge" each other to build small. My stuff was never anywhere near as good as his, but, you can learn a thing or two putting a cockpit in a 1/600 Corsair! This 1/144 Cobra was also a product of those times. Part of one of the controls is missing, but, it's mostly intact.
-
Here you go! I hope they're legible.
-
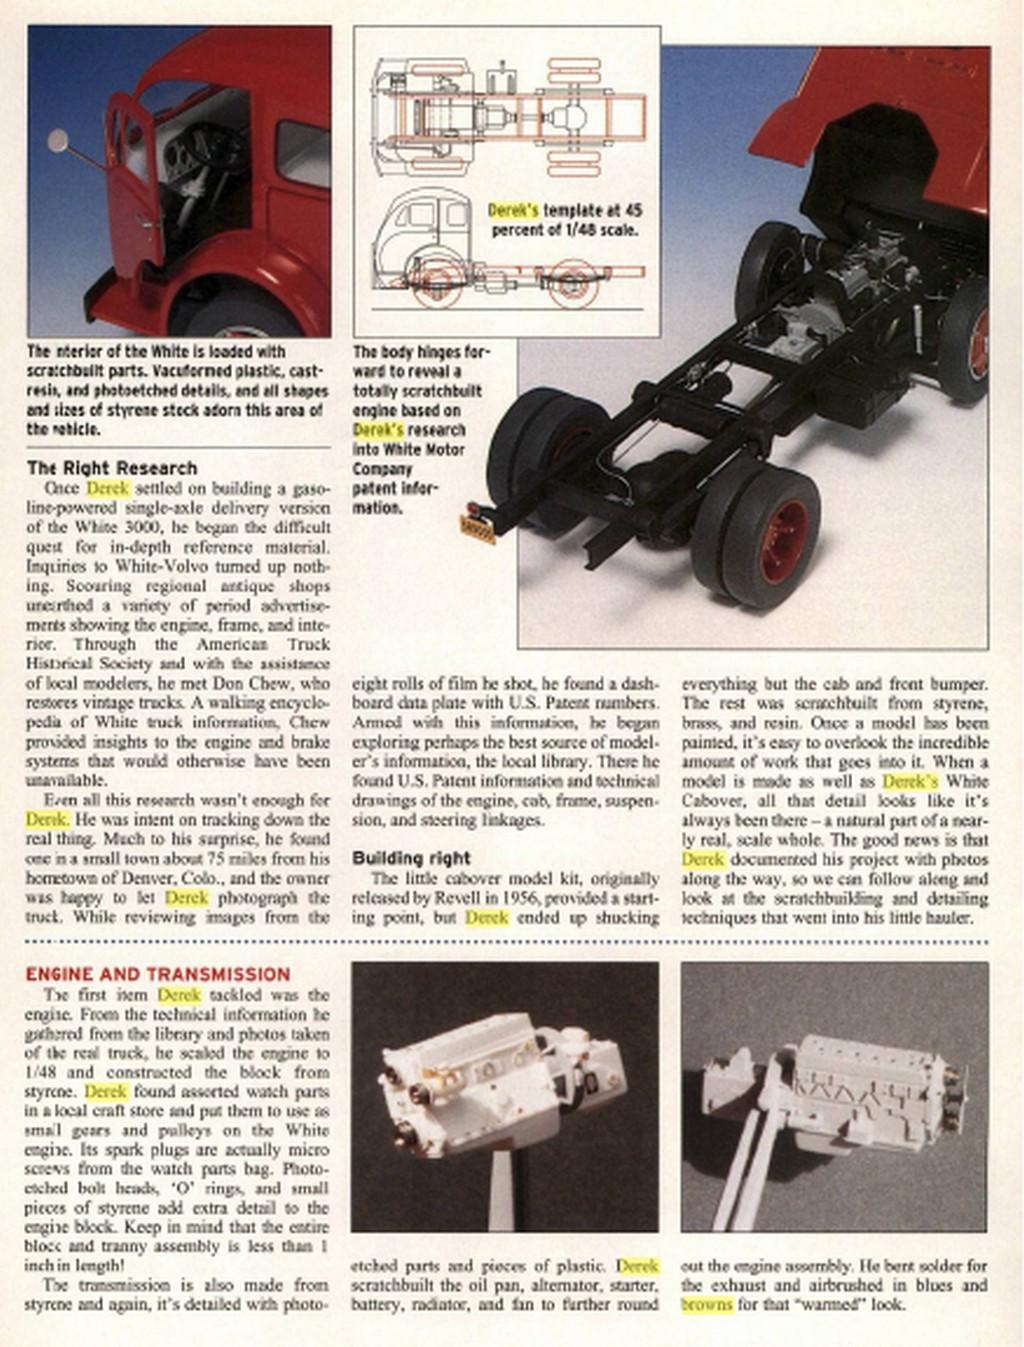
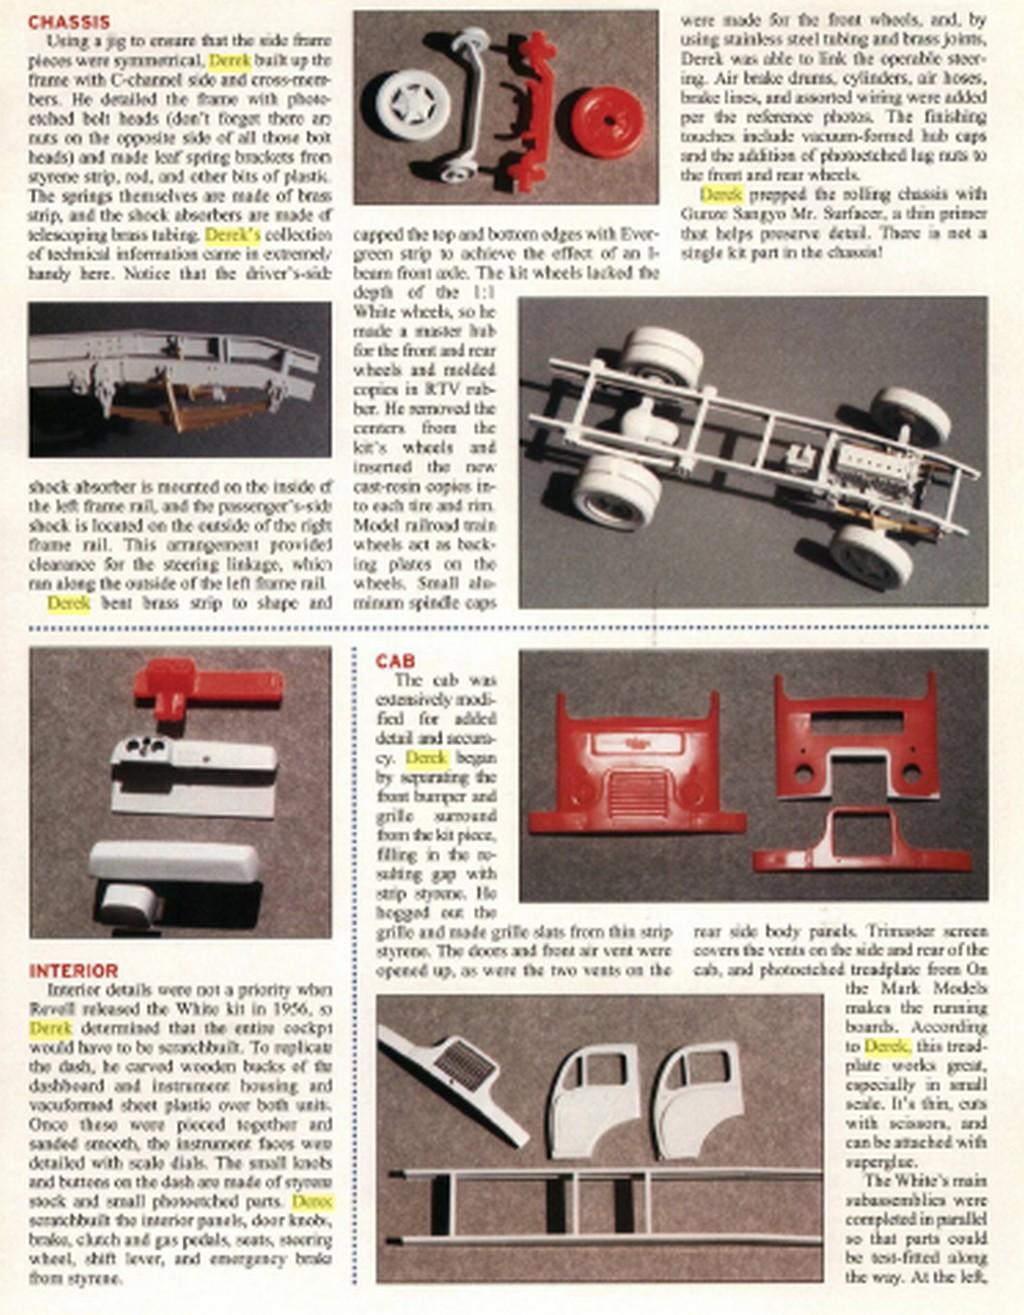
I have an article from the late, other mag of one a friend of mine build. It is absolutely amazing! It's in PDFs, though, so, I will have to screen cap the images. Give me a day or two. Here's a teaser...
-
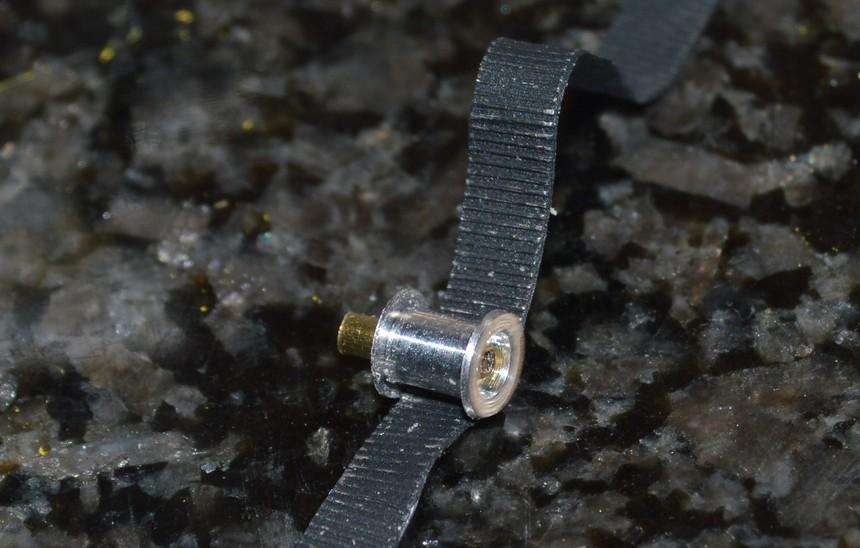
Thank you, Francis! That is much appreciated! Thank you, kindly, sir! I was happy that the paint came off as easily as it did! At least I knew it was safe for the Purple Tank, as long as I removed any aluminum parts.? I've been finding more and more uses for the lead foil. It really did work out, excellently, for the blower belt. Thanks again, for the kind words! Your Maserati is super-impressive! I love that project!
-
That's what we used empty parking lots for! Boy, that was some fun!
-
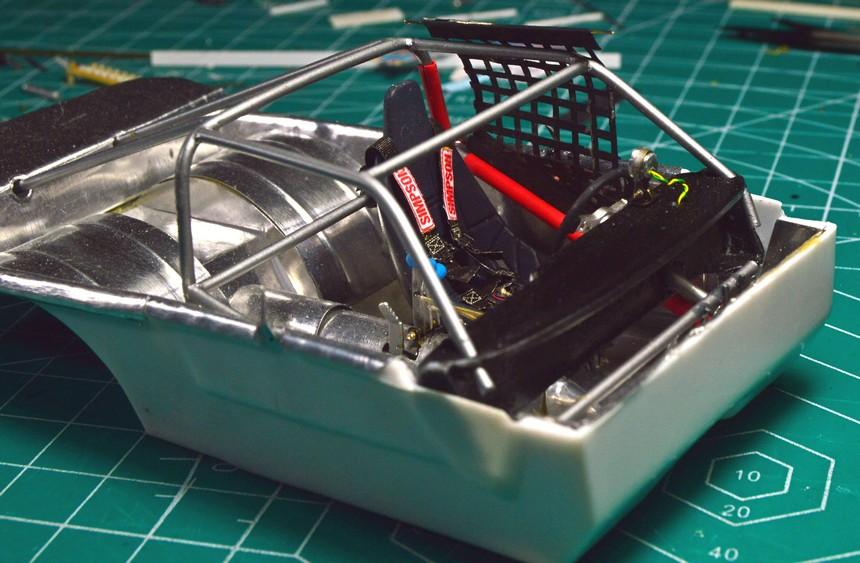
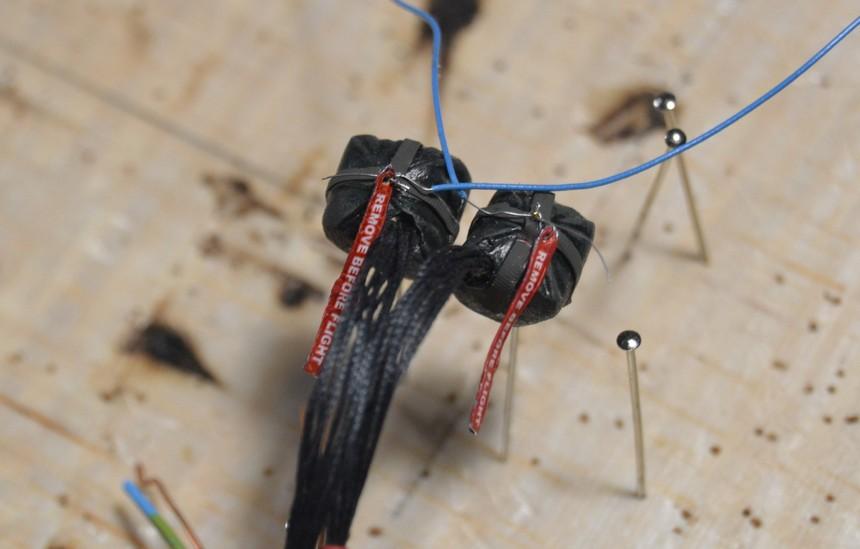
Thanks, man! I appreciate you following along. I try to keep it updated, and interesting, and informative. I got the chute packs done. I have a little bit of weathering to do. I want to get photos of them, in the car, but I need the paint to cure out, a bit. The chutes came from a Swamp Rat XXX kit. I used a needle, to hold the tags, and release cable. I made the straps on them with wine bottle foil that I laid atop my anvil, then laid a fine, straight mini file on top of that, and tapped it with a rubber mallet, to create a woven texture. The "Remove Before Flight" tags are decals I printed that I applied to wine bottle foil. That allows it to be posed to look more natural. The chute release cables are old MSC blue plug wire. As always, your questions, comments and critiques are welcomed. Thanks for looking!
-
Thanks, my friend! I've tried so many things for blower belts, over the years. Textured ribbon, masking tape with individual teeth of plastic strip...nothing ever looked right. This is small enough, and the teeth match! It should look great, once it's painted and installed! Thanks, Marcos. I haven't felt like it's been going anywhere, but, I guess I am making progress! I need to figure out what I am going to do for a puke tank, and where I'm going to put it, so I can get the mounting for it soldered to the chassis. I really want to get the chassis in paint. Things should really start to happen, then!
-
This thing looks so cool! Fantastic work, Ian!
-
’72 Dodge Demon Drag Racer 1/25 scale
Straightliner59 replied to AmericanMuscleFan's topic in WIP: Drag Racing Models
I think you should build with what you're comfortable using. Not all painters or sculptors use the same medium, and your work speaks its own quality! -
Thanks, Michael. You're right, Joe--they're gorgeous! Thanks, Robert! I appreciate it! They're beautiful wheels, Christopher. The best looking dragster wheels I've seen! I recommend them, highly!
-
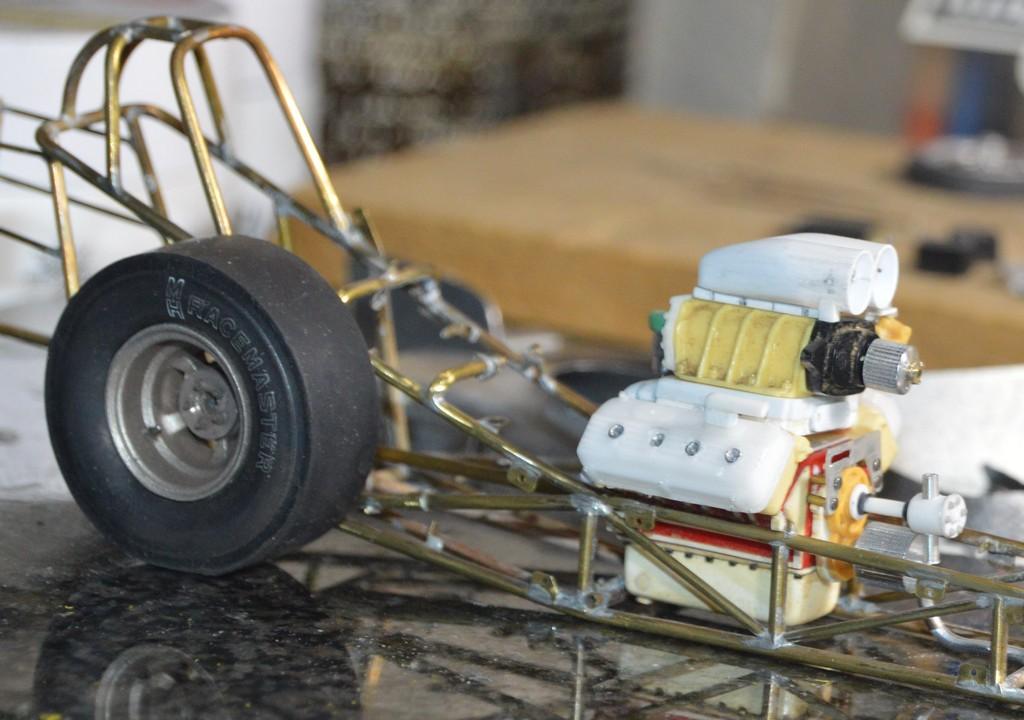
I was/am happy with the wire wheels I built for my Junior Fueler. Unfortunately, one of them began to fall apart. There's a local show, coming up in early March that I am considering entering the dragster in, but, knew I'd need new wheels. Bernard Kron had used some of Kurt Raitz's wires on at least one of his dragster models. Since I saw them, I really wanted to see a pair for myself. I ordered them over the past weekend from Ted's Modeling Marketplace. They arrived, yesterday. They perfectly fit the axles on my spindles. It could not have been any easier, making the swap! Here's a before and a couple of after images.
-
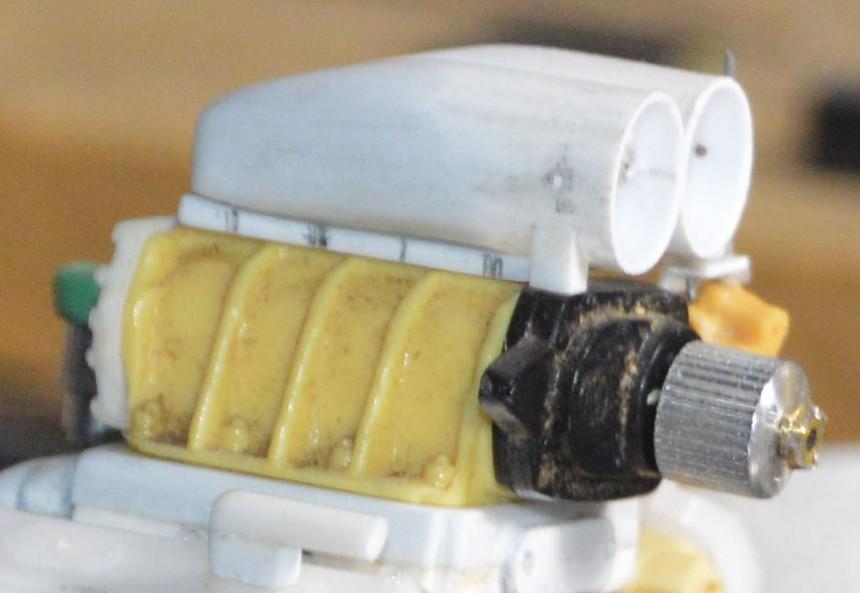
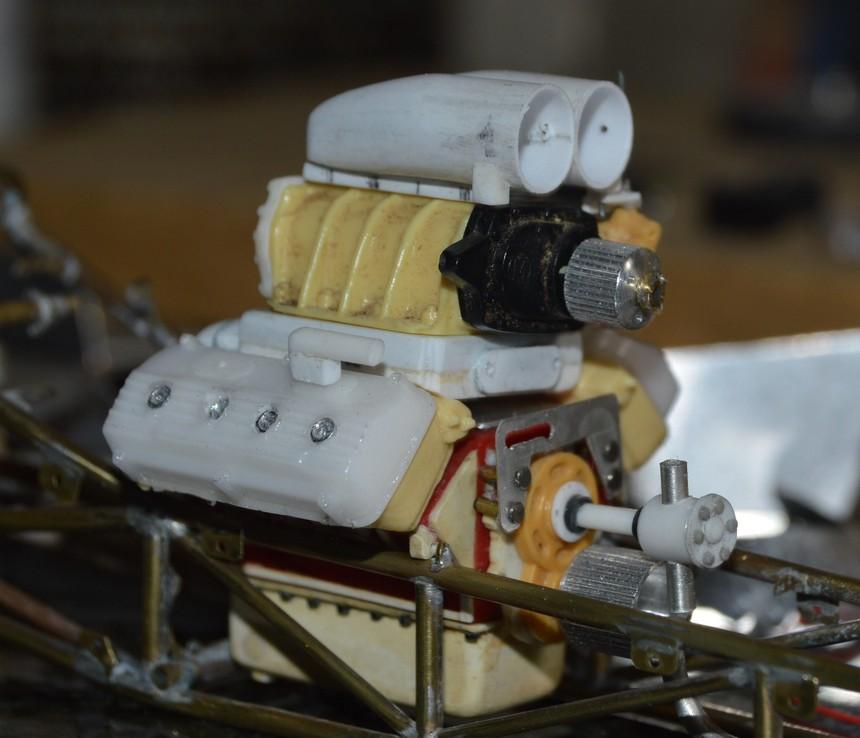
I got some .2 mm thick lead foil, to try for the blower belt. It's a little thicker, and, maybe a little softer. It took to the embossing...well...like a boss!? I've been fitting the 'chutes to the tail section. They're pretty close, now. I've fed the actuator cables just for effect. I cut and gathered the shroud lines. I need to cut off the "push bar" and make the bracket that mounts the shroud lines. That will attach to the newly-shortened bar. As always, questions, comments and critiques are always welcomed. Thanks for looking!
-
I got some .2mm lead foil to try for embossing blower belts. I think it's a tad thicker than the wine bottle foil I have, and may emboss more readily. Although I am happy with the wheels I built for my Junior Fueler, one of them was coming apart. Since I've been curious to get a first-hand look at Kurt Raitz's dragster wheels, I ordered a pair from Ted's Modeling Marketplace. They arrived, yesterday, in only three days. They look great on the car!
- 39,076 replies
-
- 1
-

-
- johan
- glue bombs
- (and 1 more)
-
Thank you, my friend! Yes, I am pretty happy with the way that looks!
-
Awesome! Nice work, Joe!
-
Thanks, bud! I'm working on all this little stuff, while I'm double-checking, in my head, everything that needs to be soldered to the chassis. I'm anxious to get it in paint, but don't want to get ahead of myself. So I think. And make little stuff like this snorkel tank vent...
-
No truer words have been spoken, regarding this artform. It took me forever (until the last few years, truly) to get to the place where I could accept some of my mistakes, and move on, rather than toss a project back in a box, and move it to the back of the pile--that's why the NFD is almost 26 years old!? Now that it's back on the bench, I am having a helluva good time, with it, and it feels like my best work. This is coming along very nicely, Marcos! The mag looks great!
-
Organizing styrene sheet strip stock.
Straightliner59 replied to LDO's topic in Tips, Tricks, and Tutorials
Back in the late '80s, I was working in a hobby shop/distributorship, and was lucky enough to get this, when we changed locations. It stores all my styrene rod, strip and sheet (except large sheets), and some metal sheet, and all my metal tube, rod and strip stock. The black drawer cabinets behind this also house scratchbuilding materials--flashing, mesh, wire, bar stock, etc.
-
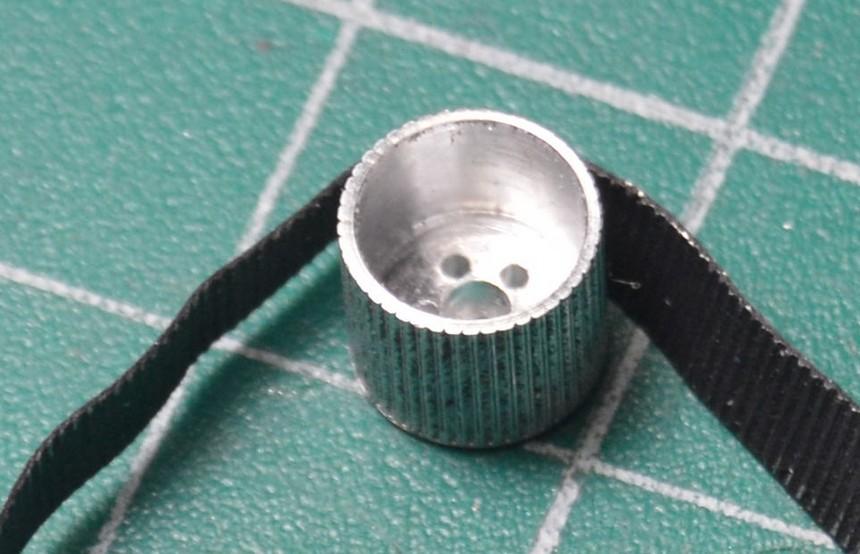
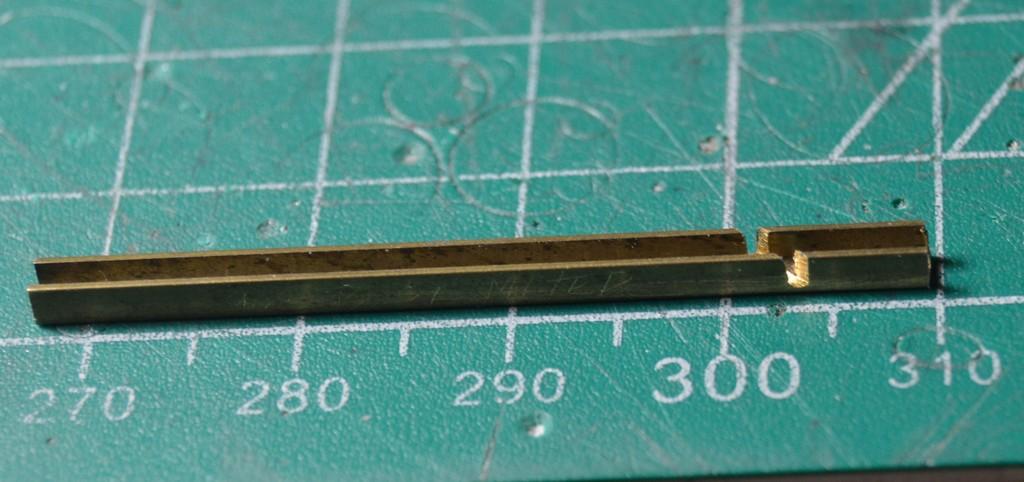
More work on the blower drive...I made the pulley for the blower, along with the starter dog. I also made an idler pulley. The belt will be 3.25", which matches the one on the wall in my shop. I made the fittings for the puke hoses. I do believe I can live with this!? Marcos, I've attached a photo of a tiny, 45-degree miter box I made from brass channel. I just tape a stop into it, so that my cuts are all the same length, and cut the material with a scalpel. Using the lathe, and carbide PC board bits, I bore .020" through .030" plastic rod to use for boots. Before I had the lathe, I used wire insulation, cut and superglued together. Gluing on wax paper helps release the boots. If it's cheapo wax paper, rub a little beeswax on it. Wax paper is also excellent to pin atop plans, when using styrene and superglue for building a chassis. As always, questions, comments and critiques are welcomed. Thanks for looking!
-
Thank you, Roger! It's a fun one, too!?
-
We'll be here, when you get back!?
-
I'm enjoying this thread! I have a very clean, unpainted built-up I want to redo. Nice work, Ismael!!
-
Sherline 80 TPI knurls on the lathe. Thank you, Marcos. It should look pretty cool, once it's done. I plan to make 90 degree boots, to fit under the retainer cap.