

sbvwfanatic
-
Posts
33 -
Joined
-
Last visited
Content Type
Profiles
Forums
Events
Gallery
Posts posted by sbvwfanatic
-
-
I picked up these Aoshima SSR's for a pro-touring look. The centers are now painted flat black.

-
C1 has a few options...
http://www.c1-models.com/wheels/
Eightyone also have some options that might work for you
http://www.eightyone81.com/category/products/rims/
And some of my favorites are from Scaleproductions
-
They are scale 18"s by C1 http://www.c1-models.com/wheels/
-
Not exact, but may be an option
-
Clearly scale just came out with these. Perfect timing...
-
Spotted a McLaren 12C Spider, yesterday, driving through my neighborhood. See quite a few exotics in Santa Barbara on a regular basis but the Mclaren is a rarity.
-
Nice work.
-
Though not listed on the site, you can get 16"-17" low profile tires. They are a little stiff but work well.
And From scaleproductions, these are of better quality, you're just going to pay a little more for shipping from Germany.
Here's a comparison of scale productions tires compared to kit tires
And here's there staggered set.
-
Thanks for sharing. Look forward to whats next.
-
Got a little work done this weekend but was thrown off when one of the neighbor hood kids spotted me in my garage, asking where my daughter was and if she could play. As kids are curious, asked what I was doing? Me: working on my model cars. Her: Your what? Me: My model cars. Her: You mean toys? Me: Yes, (laughing) toys. But then she starts picking up pieces from my work table, some w/recently glued/painted, asking what they are....
Tried to drop a few hints, politely, not to touch and that I wanted to be left alone, (I get so little time to build) but she didn't get it. So I had to stop working on my build, close the garage and act busy so she would go away. Funny, but frustrating at the same time.
Maybe next weekend.
-
Thanks gang.
The wheels are Aoshima SSR Professor MS3's w/Tamiya Tires.
-
Thanks guys. Most of the difficult work is done. I should be able to make much more progress in the coming months.
-
More Chassis work. Again the Shelby kit came through.
The puny Shelby disk breaks on the left, happen to fit perfectly, snap right on, and with the exact offset for the Aoshima wheels I finally decided on.
Glued them onto the back of some parts-bin Fujimi disk breaks.
And quick mock up of the wheels.
The wheel centers painted flat black and the disk breaks painted yellow like the valve covers. The car will be a light gray and I like the yellow gray contrast.
-
More mock-up of the motor/chassis. I recessed the cowl and will add more detail as the build moves along.
Not sure I like the stacks silver/aluminum. And I tried on the ARC valve covers.
Some paint on the motor. I had the headers on to test fit against the chassis but I actually like them white. I think I'll paint them flat white then use Tamiya weathering kit to add some heat detail.
And the stack painted black. It's harder to see them but I like the black better. I'll add fuel rails etc to bring more detail to the party.
-
And still leaning towards trying to do something different In stead of the ARC intake, I wanted something similar to this (its a BMW V10)
At the time I didn't have the extra money to purchase the various real aluminum velocity stacks, (close to $20 bucks as I'd need to purchase 3 sets) So I scavenged these from my parts bin.
You can see in this mock-up the V10 will sit back in the chassis, creating the need for more scratch building/modifying
-
My initial plan to just patch the small section of the grafted Shelby chassis went awry as it warped. So I glued a chunk of styrene, clamped down to a flat surface, then shaped it as it sits now.
At this point I stepped even further away from the quick build and ordered a Viper ARC to donate it's V10.
I grafted on the axle tunnel and rear trans-axle of the Shelby.
-
Did a quick test spray of the hood to see where I was at with shape/smoothness.
Some pin-holes to clean up but cleaner that expected.
I should have stopped here and finished the quick build but I still have the Shelby 1 box sitting there, making me think; "I can't go old school leaf-spring chassis with this cool hood...:"
The Shelby 1 chassis needed very little trimming.
Used 3 front panels from one Chassis, two from the rear of the second.
Extended Shelby chassis compared to the stock Challenger.
-
This build originally started as a quick build to get me motivated. I have been stalled on my VW builds.
Things quickly got out of hand when I came across this 1:1 Challenger.
The challenger kit came w/a spare hood for the super charger option and I planned on using it to make a heat extracting hood from scratch.
I then remembered I had two Revell Shelby Series 1 kits I'd purchased just for the wheels, and the hood had a great heat extractor that I could graft into the Challenger hood.
Time for some mock-up
And grafted on the rear section of the second hood.
And over kill on the putty...(i was in a hurry.)
-
Dang. You beat me to it. I'm currently building a Revell Challenger, Pro-touring, w/Viper ARC V10, and a high-tech chassis from Shelbhy Series 1 kit. While building this, I had the similar idea of going Pro-touring/tuner w/my Cuda kit but using a Ross Gibson Mopar slant six, and doing it up w/turbos/inter cooler etc.
Love your use of the 3D printer and cutter. Can't wait to see this build progress.
-
-
Very cool. Funny to find this post as I was just thinking about how cool it would be if a modern Capri was built. Always loved Capris.
-
I have to chime in here as well. Loaned Jeremy some Mopar seats so he could use them to develope his Pro-touring version. Didn't expect much in return other than @ most, maybe a discount on a future order. Jeremy sent me the originals back plus 3 sets of his cast seats. As I told him, they are the cleanest "cottage industry" casts I've ever purchased. I don't know how he does it for how low his prices are.
-
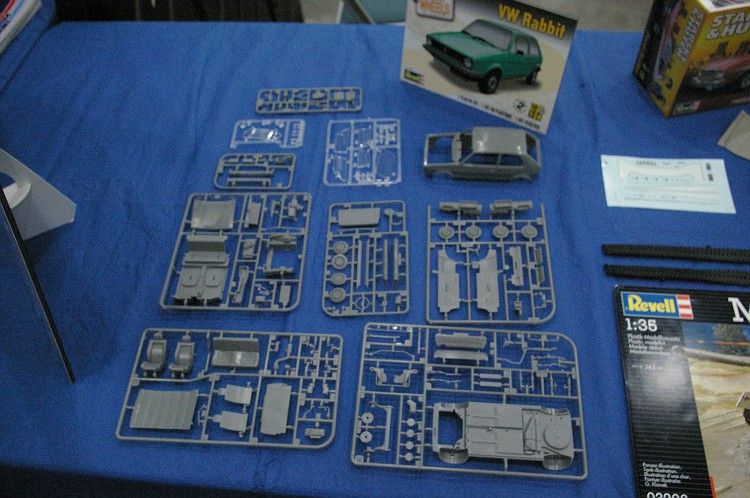
I don't remember who posted this photo but it was on this forum.
I think the parts look correct, (other than the box art stating it's a rabbit when w/the body had the GTI flares), and the NA Revell kit looks great. -
Iceracer1 is building up both the GTI and Cabro on automotiveforums.com both kits look great. If there is one reason alone to be excited by the North American Revell version, it's the $15-$19 price over the Revell Germany's $35-40. Some one on here did post pre-production photos of the NA version and it looks pretty good.


How About Some Stalled Projects?
in General Automotive Talk (Trucks and Cars)
Posted
Great idea for a post.
This build is 9 years old, was final assembly when while pulling the lid off my zap-ca, it spurted out on the paint and rear window.
I was so upset it sat in a box until last year when I finally sanded down the effected areas to re-spray.
This one 8 years old.
AMT Scirocco w/scratch build 16V running ITBs.
And this was supposed to be my quick build to get me motivated to finish the VWs
That is now 2+ years old
Modern heat extractor hood
Needed modern chassis
And motor...