
B-Ram
-
Posts
236 -
Joined
-
Last visited
Content Type
Profiles
Forums
Events
Gallery
Posts posted by B-Ram
-
-
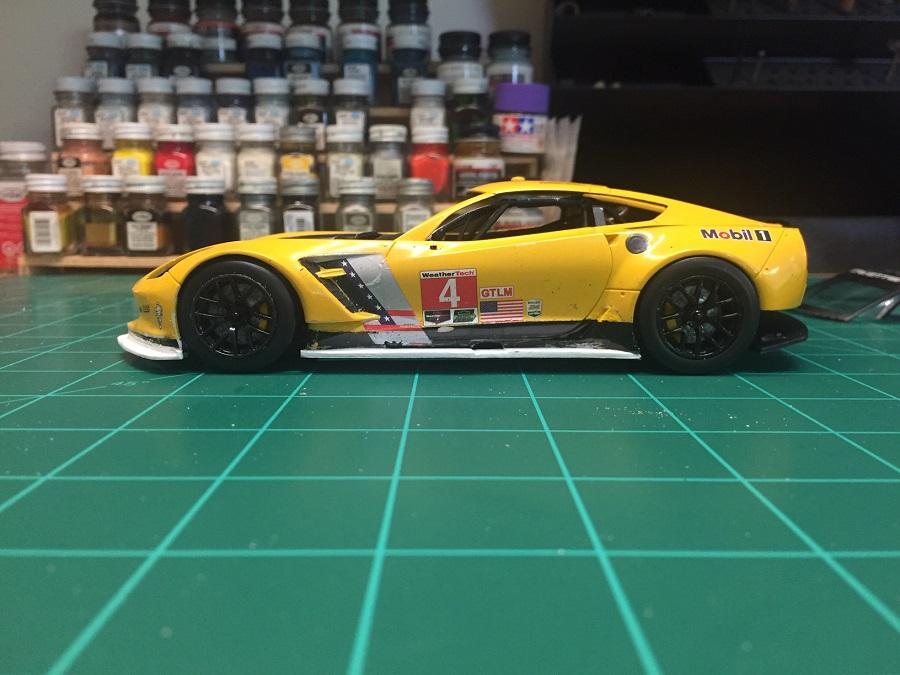
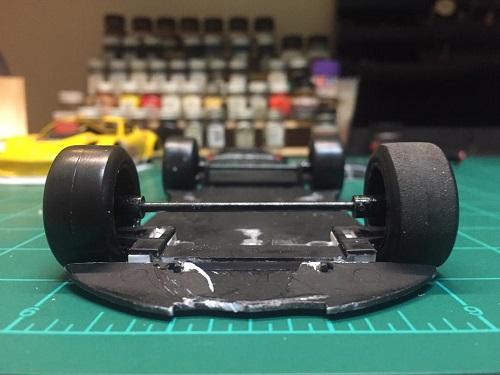
I've gotten more work finished. I built the new rear diffuser for the 2016 model. The area below the bumper and above the diffuser had to be reduced.
I started by cutting away the bottom pan behind the rear axle. Final sanding and adjustments are still required.
I think it's time to start on the new model.

-
Great looking work.
-
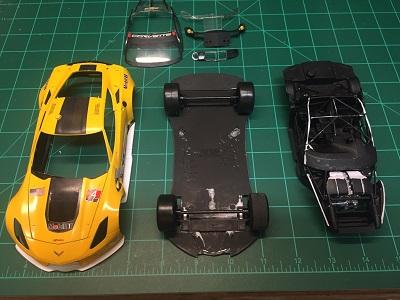
Did some more work to get the front end to sit lower. Had to move the wheel mounts back about 1/16" to allow the wheels sit in the center of the wheel wells. I found that I needed to cut away a bit of the chassis where it mounted to the front part of the bottom plate(sorry, I'm not sure what it is called). I had to trim away the back of the air boxes to clear the area in front of the windshield. Also, the top of the roll cage was cut away and the center section of the window assembly was removed. I think that's about as low as I will be able to get it to sit.
Bill
-
With the body on the stance is a lot lower.
Bill
-
I felt that the front end sat too high, so I modified the front suspension to lower it. Or I should say raise the wheels.
The front suspension is just a curbside version. I cut off the tabs that held the front axle and added shims (.100) to raise the front wheels into the fenders. You can see the white shims next to the wheels under the suspension plate.
Bill
-
I am going to make the modifications to my first model and once I am happy with the mods I will build the new model with the updated modifications.
Several problems I had with the first build was the fit of the body to the chassis and I felt the stance of the front end was too high.
This is where I am right now with the first model.
l
.
Bill
-
Hello All,
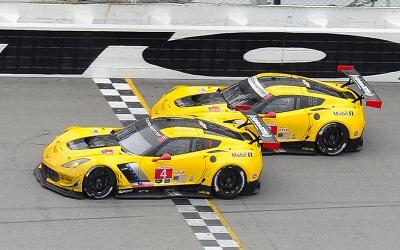
I have started work on the Revell C7R Corvette. I built this model several years ago, but I was not happy with the way it turned out. Also, I am going to update the model to the 2016 version that won the 24 hours of Daytona.
I am going to disassemble the model I built several years ago and do the modifications to it.
Bill
-
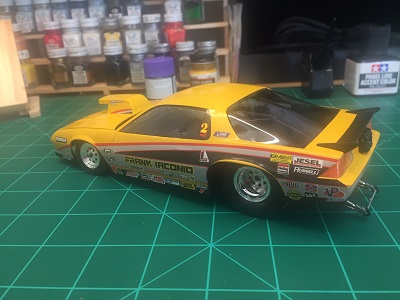
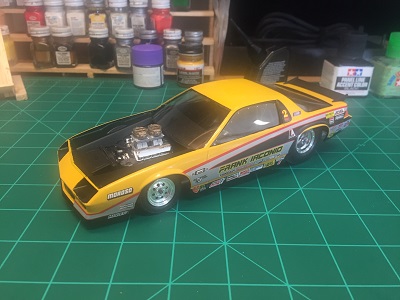
This one is about finished.
Bill
-
 1
1
-
-
Looking through the drag racing forum, there are always several fantastic scratch builds going on. What scale are these? They are truly pieces of art. (If this is the wrong forum please move it.)
Bill
-
Great idea. Now I have a good reason to buy cookies from the bakery.
Bill
-
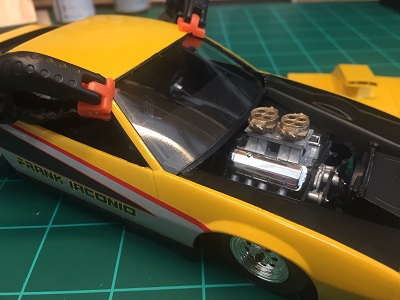
Pulled the Camaro back out. Cut a suitable piece of clear plastic and glued it in place. I used a piece of a plastic from a box that screws came in. Does anyone know a source of clear plastic that can be used for windshields?
Bill
-
Looking great. Great detail on the engine.
-
Thanks for the input and encouragement.
-
The wheels and tires came from my parts. Let me think about it. It will probably come to me around 3 in the morning.
-
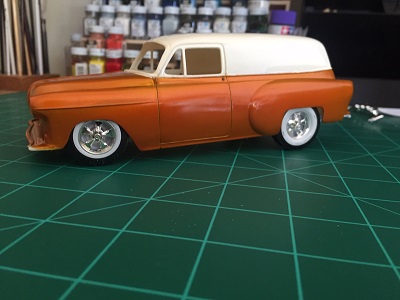
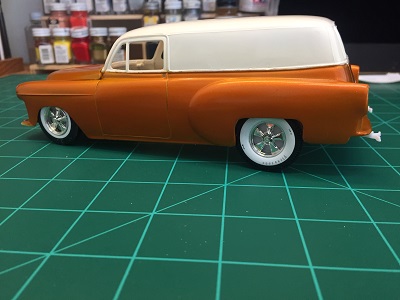
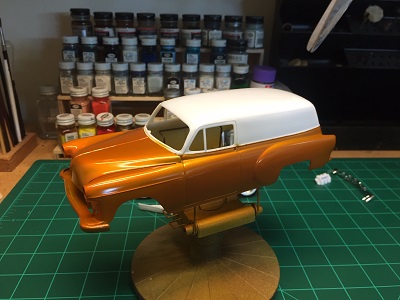
Finished the basic paint job. The off white paint turned out pretty good. I will need to clean up a few areas. You can see the front left corner of the bumper. When I removed the masking tape, the paint pulled off. I am also going to add trim to separate the two colors.
Bill
-
Got the main color on the body. The clear orange with a gold base turned out pretty good. Now I will get the off white on the upper part.
Bill
-
Thanks. I know what you mean about this kit. It is different.
Bill
-
Hi Rusty,
I agree about the pearl. I sprayed some white pearl on a spoon and it did not look good next to the orange.
Bill
-
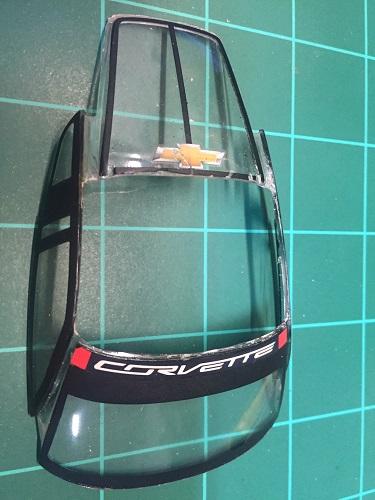
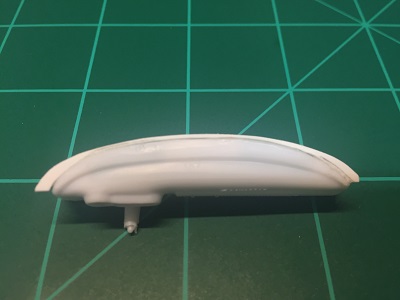
Here is the dash with some filler added so it will fit.
Bill
-
-
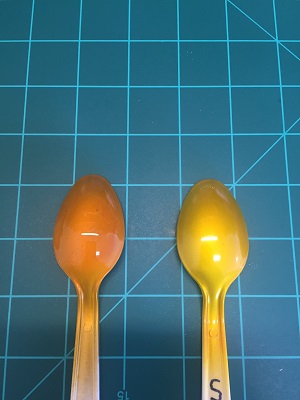
This first picture is the Chrome Yellow with the silver base on the left and gold base on the right. Don't think I like the color.
The second picture is Tamiya Clear Orange with a gold and a silver base.
I like the gold base on the left. I'm thinking the Clear Orange with the gold base and a pearl white with a silver base for the roof may look good.
Bill
-
For color, I’m thinking Tamiya Chrome Yellow on top of a gold or silver base. I may go two tone with a off white roof.
Bill
-
Here are the two grilles included with the kit. I will be using the one on the right.
Bill
-
Great work on a little car.
.jpg.e09d2b333552109a9859c1c715b0df4b.jpg)
.jpg.0911b83e096a299628c80802724bd7fc.jpg)
.jpg.e4a90292b790583072e284f3929a3286.jpg)
.jpg.62024b68a60604f988c4c90f3c0885c9.jpg)


 .
.


Corvette C7R 2016 Version
in WIP: Model Cars
Posted
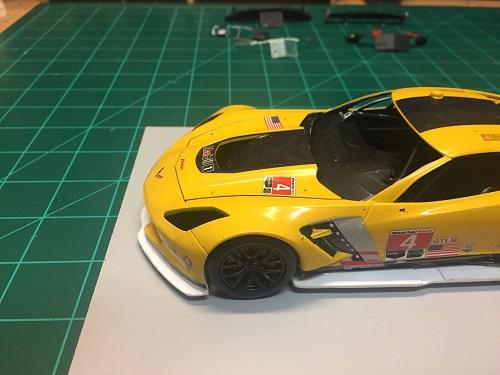
Got started on the new model.
I've have the rear diffuser grafted in and the suspension has been modified to lower the stance. Also, the inside edge of the rear wheel wells had to be shaved so the tires would sit down further.
Bill