peteski
-
Posts
9,226 -
Joined
-
Last visited
Content Type
Profiles
Forums
Events
Gallery
Everything posted by peteski
-
Problem with the can of propellant that comes in those airbrush kits is that you can't control pressure, and when spraying the can gets cold (due to the liquid inside changing to gas) so the pressure drops. A pressure-controllable steady source of compressed gas (air/CO2/nitrogen or whatever someone uses) is important for quality airbrushing.
-
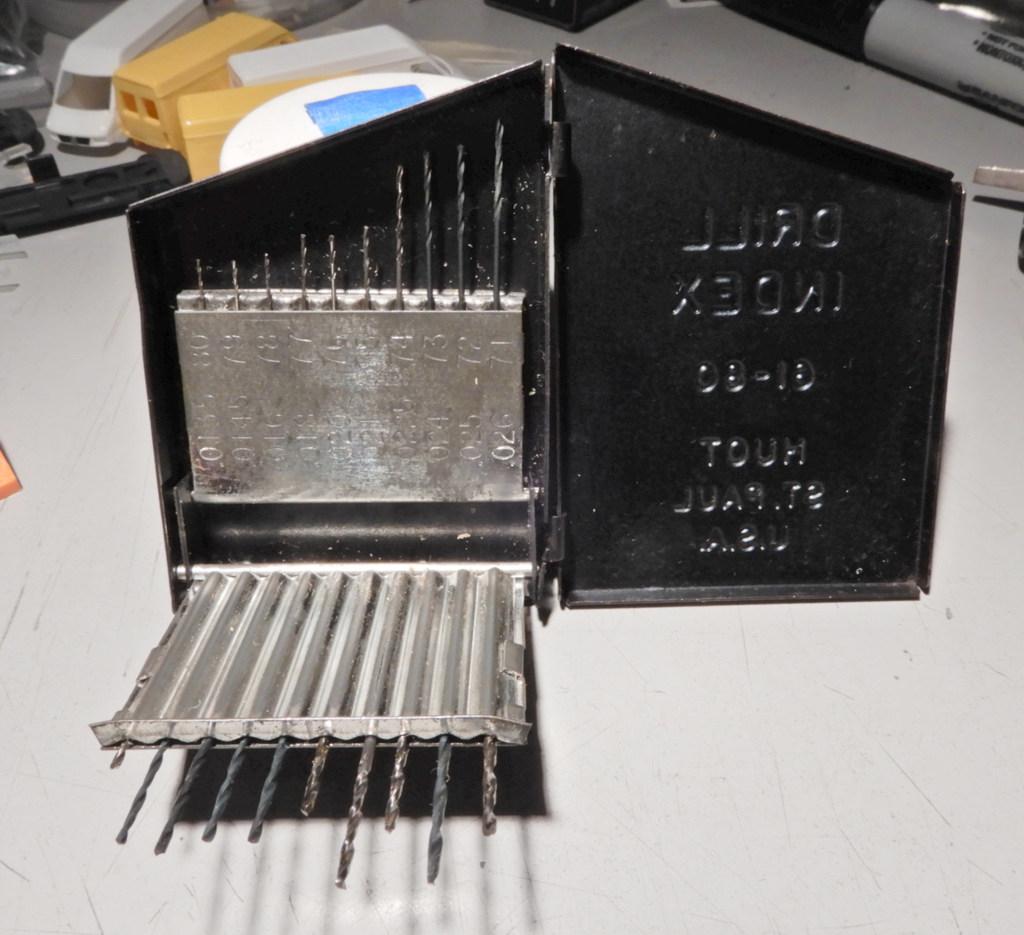
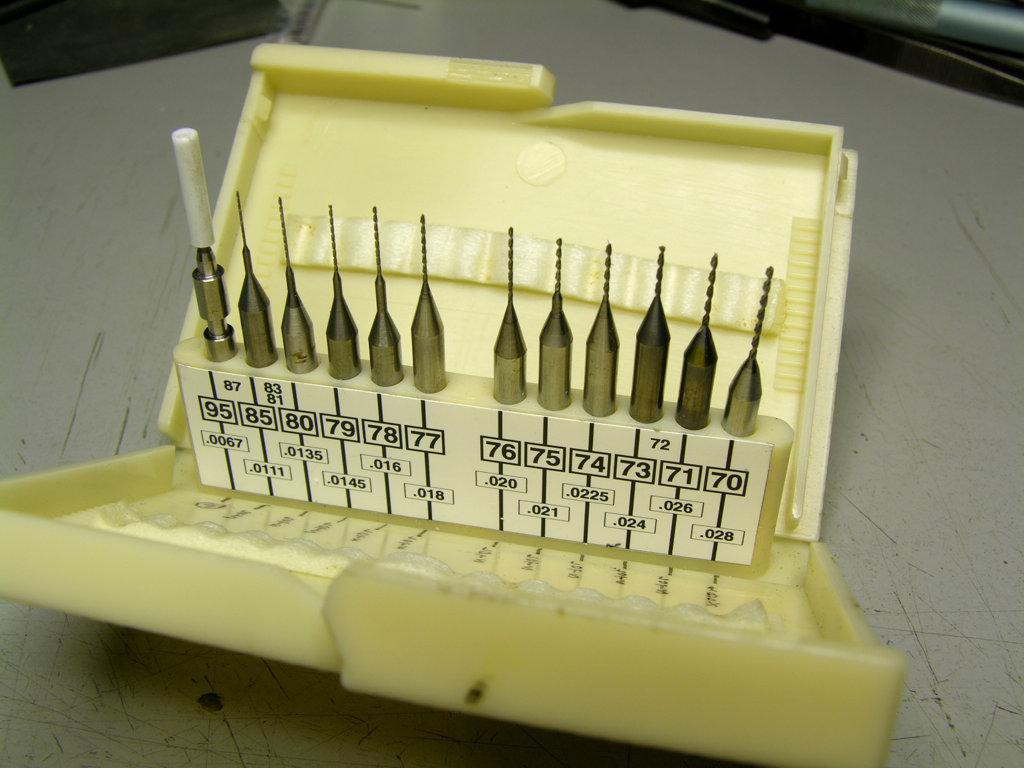
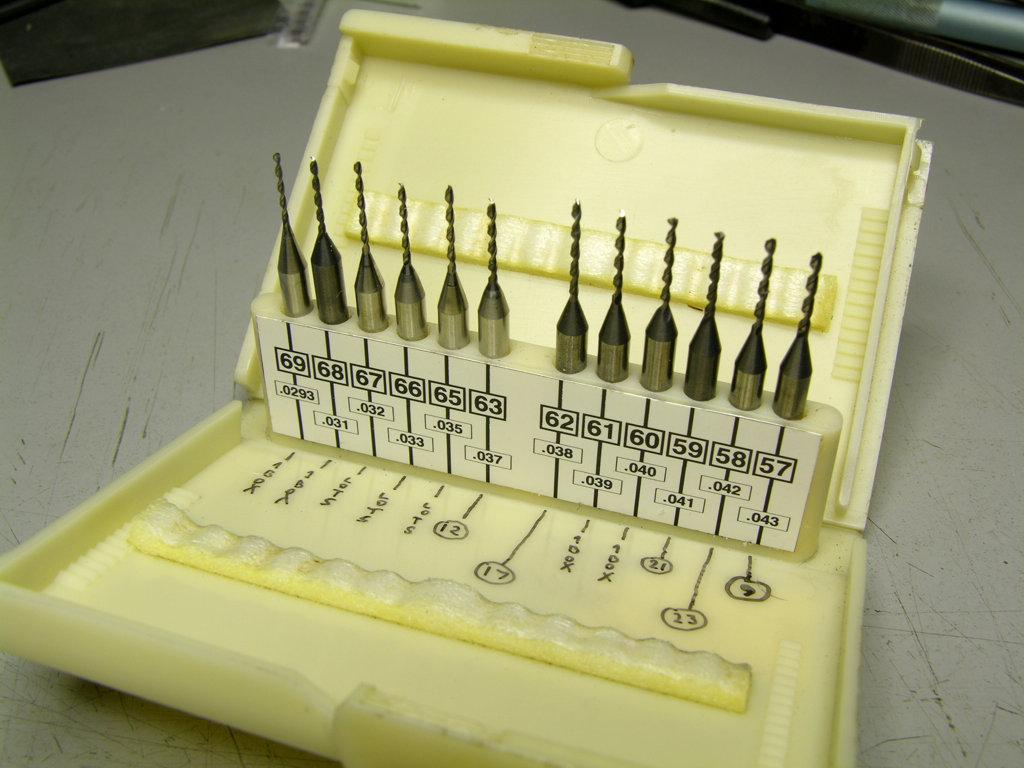
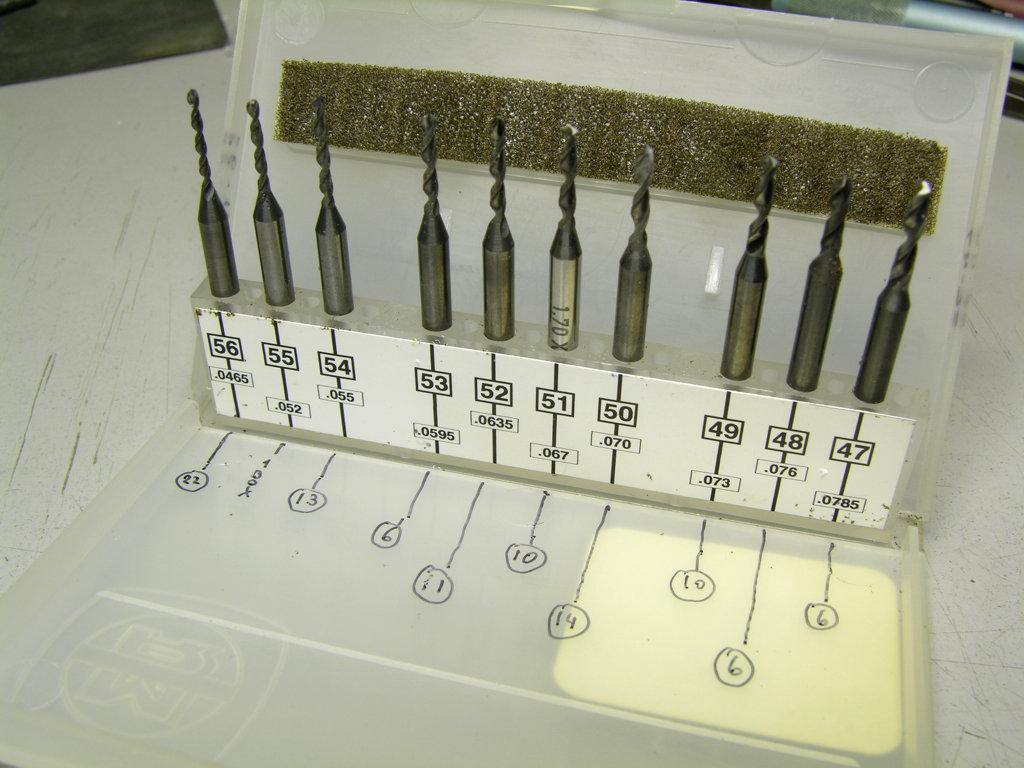
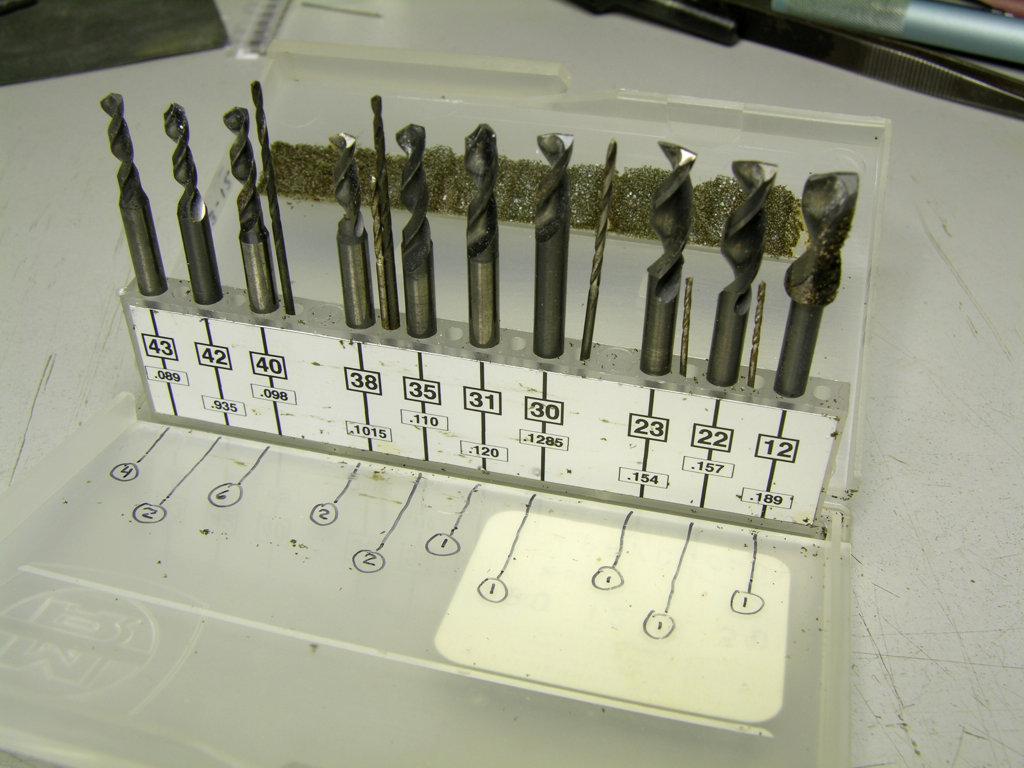
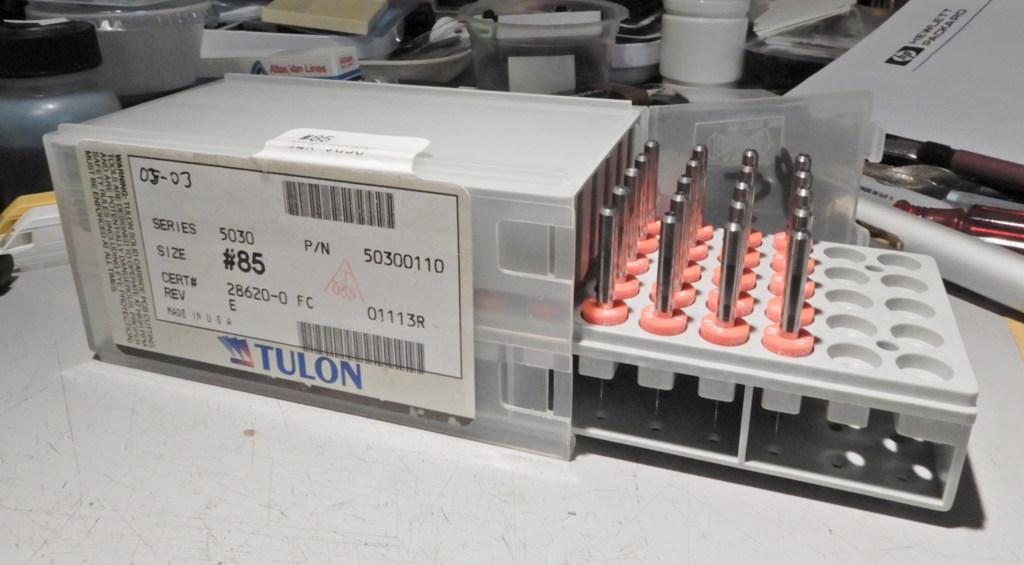
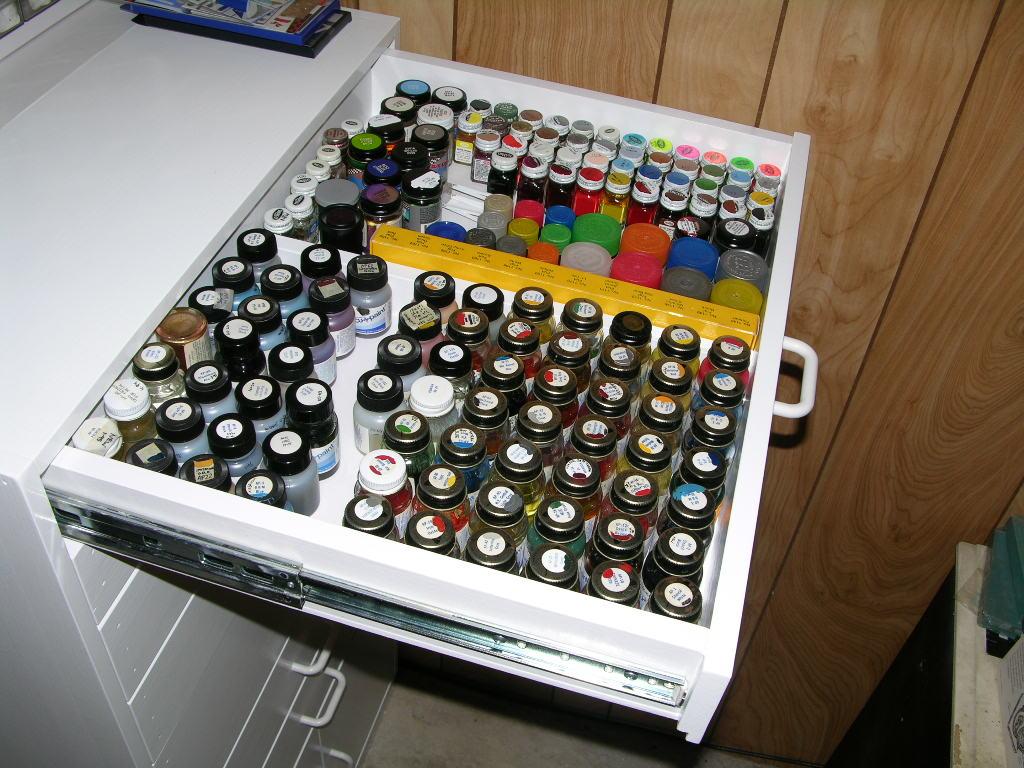
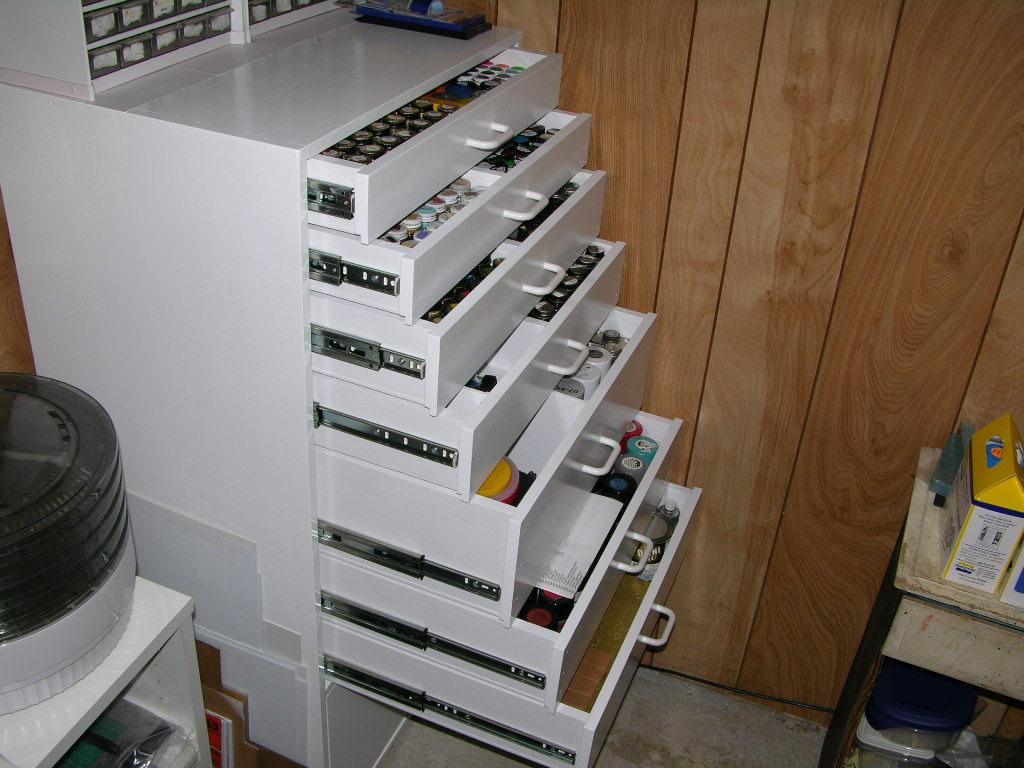
I have one of those drill indexes, but mine is probably a bit newer (to was bought new in the '80s). But I'm pretty sure that HUOT just makes the index box - the drills are put in by whoever sells the set. If that is the case then HUOT does not automatically mean "quality bits". IIRC, my set came from either Micro-Mark or possibly Walthers (not from one of the industrial suppliers). I do use (and sometimes break) these high-speed steel bits when I know that I will not be able to hold the drilled item steady. But I'm highly addicted to those PC board Tungsten Carbide bits with 1/8" shanks. Not only they are extremely hard, but that are sharpened to a split point, so they cut really fast and don't wander. They will drill anything from hard stainless steel through styrene, I use them in my Micro-Mark drill press, Sheline Mill, pin vise, and for the really small ones, I just hold the 1/8" shank in my fingers. Sometimes I use the larger ones in my Dremel). Not often. While I don't have all the consecutive sizes, I do have quite a range available. I made my own indexes. Since I know they do break, I do try to get them cheap in bulk. Like boxes of 50. I bought the ones above in 2003, and still have plenty left. I usually found bargains on eBay, but I'm not sure if that sill holds true today. I hyst searched for the size (like 80) and "PCB" or 'PC Board" drill bit .

-

Humbrol acrylic spray paints
peteski replied to Tesla's topic in Model Building Questions and Answers
I Actually prefer those little tin cans over standard bottles. It is much easier to wipe the lid and the rim of the can clean before re-closing the can than it is to wipe the seal inside of the bottle cap. I'm really anal about keeping the seal area clean. -
P.E. Callout!!! Bring out your Photoetched!!!
peteski replied to Plastic_Passion's topic in Model Cars
Thanks! Yes, tweezers and a stereo-microscope are in my tool arsenal. So is the Optivisor. Actually, I must be having senior moments - for my model RR hobby I built many photoetched kits in N scale (1:160). That is quite a bit smaller than the Cobra. Here are few of those models. The boom is a folded photoetched part, rest of the kit is a pewter casting. A 1915 Ford T - all photoetched brass. Well, I did add some styrene parts. The engine block (visible through the louvers) is a block of styrene, and to add depth to the flat headlight castings, I glued pieces of styrene rod to the back of the headlights. The brass parts also included a rudimentary interior. This is the most complex photoetched kit I've done: A 1914 Knox Chemical Fire Engine. On this one I added several brass parts I turned on a lathe, and I printed my own pinstripe decals for it. I suspect that when Jeremy started this thread he was expecting seeing models with some aftermarket photoetched pieces added on, but he ended up getting more than that.
-
Vespa scooter for my mom
peteski replied to Steve H's topic in All The Rest: Motorcycles, Aviation, Military, Sci-Fi, Figures
Your model looks great! Aoshima also had a 1:12 Vespa kit in their NAKED BIKES series. I have that kit. -
P.E. Callout!!! Bring out your Photoetched!!!
peteski replied to Plastic_Passion's topic in Model Cars
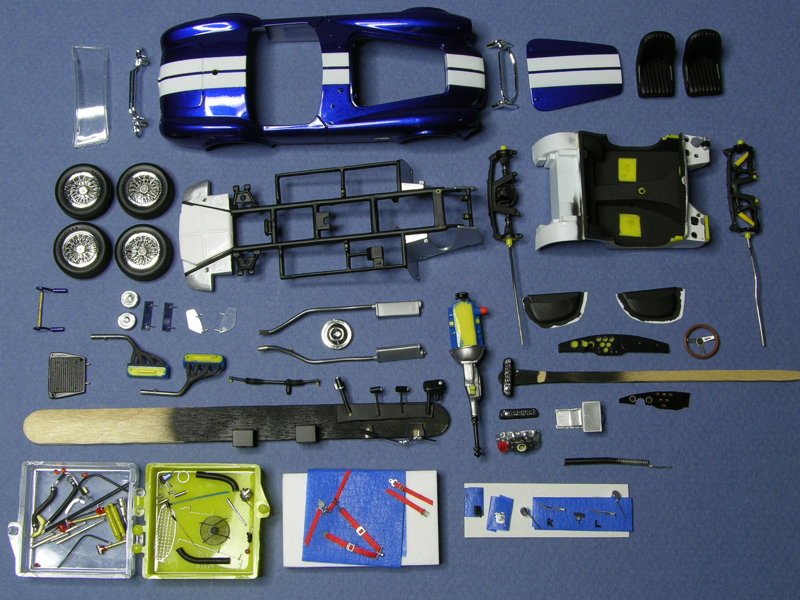
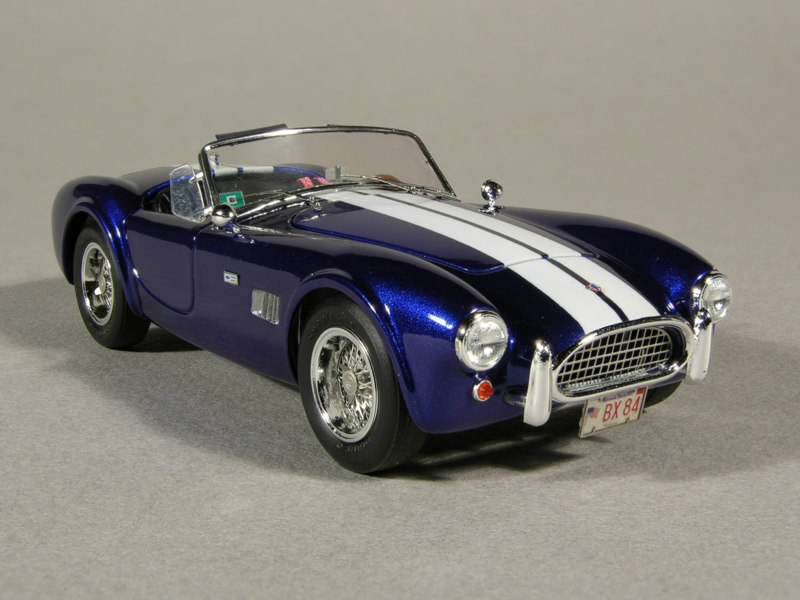
Here is my Monogram Ultimates 1:43 289 Cobra. This kit, when it came out, was way ahead of its time. It included a fret of photoetched parts. They were: Wire wheels and spinners, windshield wipers, hood latches, emblems, grille, rear view mirror, steering wheel spokes, and the dashboard. I also added few more aftermarket photoetched parts like some throttle linkages, a shifter boot bezel, license plate frames, and a cage for the electric cooling fan (actually a fan grille for an H0 model railroad locomotive). The seat belts also have photoetched buckles. Before final assembly. And the finished model. Remember, this is a 1:43 scale, so the parts are tiny!
-
‘72 to ‘76 Dodge Club Cab
peteski replied to tuffone20's topic in Truck Aftermarket / Resin / 3D Printed
Not at all - thanks Tom. I'm not up on all the pickup truck kits, so I didn't know. -
Anyone seen this engine kit?
peteski replied to randyc's topic in Model Building Questions and Answers
Make sure to use a disposable credit card number. -
‘72 to ‘76 Dodge Club Cab
peteski replied to tuffone20's topic in Truck Aftermarket / Resin / 3D Printed
That trans-kit looks great Marty! I have a question: when making masters how do you guys model the scripts, like the nice well-defined one on the bed? Are those photo-etched metal, or some other material? -
MCM Relaunch Update 08/2020
peteski replied to larrygre's topic in Model Cars Magazine News and Discussions
I've subscribed to FSM since the 80s. Was the fact that they will roll some of the automotive contents (from the defunct Scale Auto) into FSM officially mentioned somewhere (and where?), or is this just a speculation? -
That was just a photo from the Internet - I only bought one roll.
-
Aoshima Food Truck
peteski replied to BIGTRUCK's topic in Model Trucks: Pickups, Vans, SUVs, Light Commercial
Nice! -
This is very impressive Pico, especially knowing that you used SketchUp for designing the roof, which is a complex curved surface. I took SketchUp for a "spin" few years ago and I have no idea how I could have drawn such a complex surface as that roof. It is so impressive to see this hobby evolve into CAS and 3D printing at home. Now building a model provides even more fun time. You spend time on virtual modeling (CAD), and then on building and painting the model you just printed out. We live in interesting times.
-
I should have mentioned this earlier: Washi tape (available in craft stores like Michael's, or in some hardware stores - I got some at ACE hardware) is the same stuff as Tamiya tape, and much cheaper. Well, the rolls are more expensive than standard masking tapes, but you get much larger quantity than what Tamiya sells. You will have to put up with the cutesy decorations though.
-
Before using any sort of solvents try this trick I sometimes use: Take some regular tan-colored masking tape and use it to pick up the blue-tape adhesive residue stuck to the paint. The regular masking tape's residue is more aggressive tan the blue tape's so it might be able to lift it from the paint surface. You might have to dab and lift the tan tape several times to get all the adhesive lifted.
-
Jim, You never mentioned specifically which Tamiya paint you used, but alcohol might affect both the acrylics in the glass jars, and the TS spray lacquers. Are you sure that some of the tape's adhesive was leftover on the paint? Usually Tamiya and Scotch Blue Painter's tapes don't shed adhesive like that. Maybe what you are seeing is the tape leaving impression in the slightly soft paint? Naphtha (VM&P Naphtha from hardware store, or Ronsonol Lighter Fluid) which is a petroleum distillate is good for removing tape adhesive. But since it is a solvent, it might affect the paint. WD40 works because it contains petroleum distillates.
-
Wheel Arch Molding Foiling Tutorial
peteski replied to StevenGuthmiller's topic in Tips, Tricks, and Tutorials
Scalpels also work well. They are extremely sharp, and have very fine tip. -
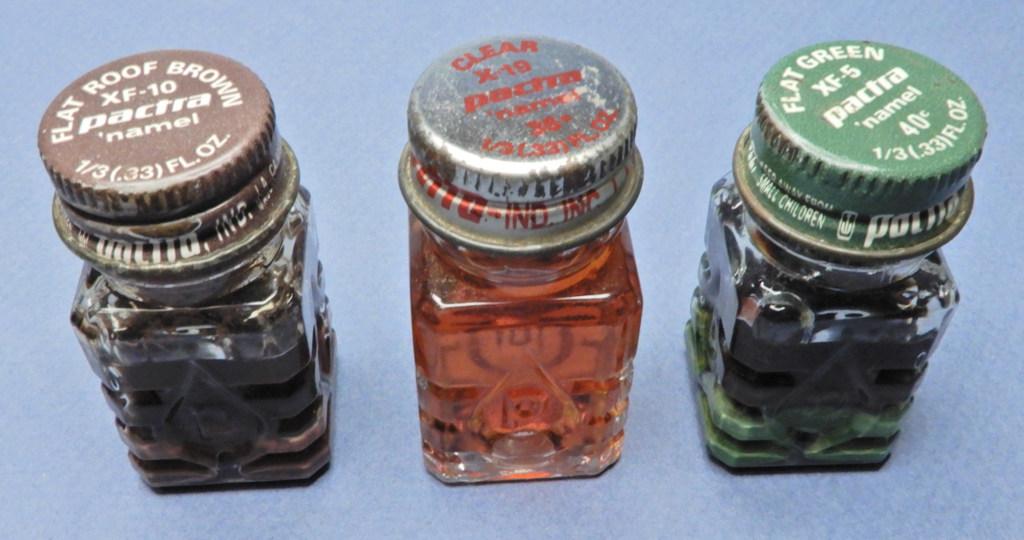
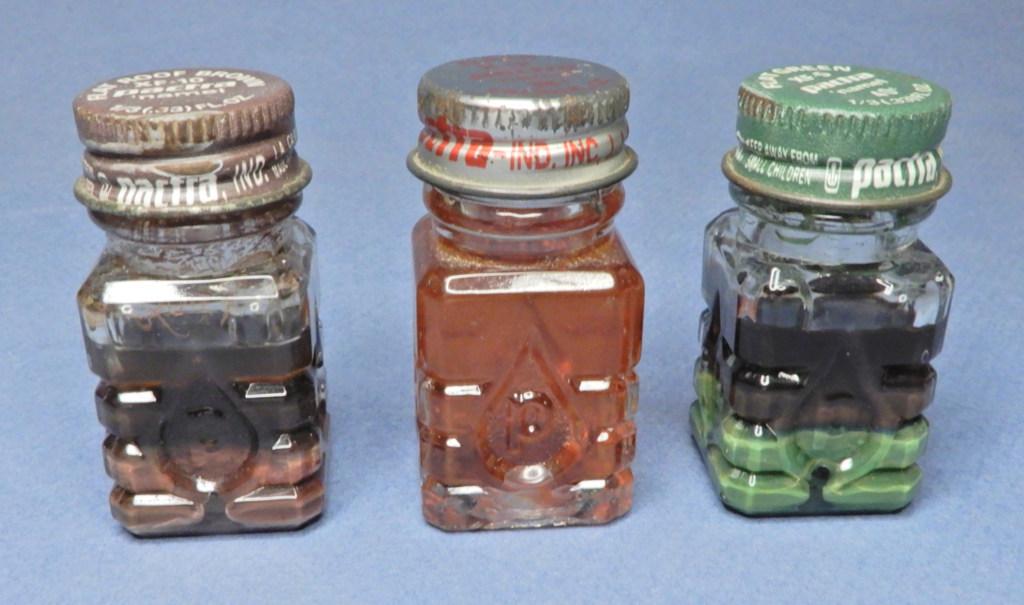
Pactra namel continued.
peteski replied to Brudda's topic in General Automotive Talk (Trucks and Cars)
That larger middle "T" in the newer logo has some similarity to the original "T" logo (which to me looks like a thumbtack) , but it also reminds me of an upside down ship's anchor. -
Not just for Testors - I've been doing something like that for years. Of course with Humbrol or Tamiya there is no need to do that. Pactra used to also show the paints color and its name on the caps.
-
Pactra namel continued.
peteski replied to Brudda's topic in General Automotive Talk (Trucks and Cars)
Here is my contribution to this thread. I hope it's ok to also show Testors hobby paints. These are newer (but still over 30-year-old) plastic bottles. Still liquid, although I haven't tried to use them recently. Having the cap show the color inside, and the name of the color was a nice feature. This set of Testors bottles shows different label types and different style logos, and prices on the caps. I arranged them by price. What do these tiny bottles cost today? Is is more than $2? Looking at the bottles, I found the slight name change interesting. They were made by Testor Corp., so they were named "Testor's". Make sense. But later on they have dropped the apostrophe, and they just became "Testors". Also, they originally used "LQ. OZ. NET" and later "FL. OZ." for units of measure.
-
There are decal printing companies out there, which use different types of printing (including the Alps printer), which will print your artwork. Unless it is some very simple text consisting of existing typeface (font), creating the print ready artwork is usually the most expensive part of printing custom decals. That way, you can design your decal and not worry about buying and maintaining your own printer.
-
Well, I'm not about to dish out few hundred dollars for the new version (which is probably in the "cloud" anyway). Like you said, I place the bitmap on a lower layer, lock it, then trace over it. I suppose that if was was doing repro-decals as a business, I might think of auto-tracing, but I just don't do this often enough to justify getting a new version of Corel.
-
I've been using Corel Draw since version 3, (I'm only up to version 12 now with no plans to go any higher). I have tried Corel Trace many times, but I have never been successful. Wither the tracings are too loose, or they have too many nodes. I have played quite a bit with the settings, and the resolutions of the scanned images, and I just gave up. It would take me more time to clean the traced images than to manually trace the bitmaps. I got quite good at manual tracing.
-
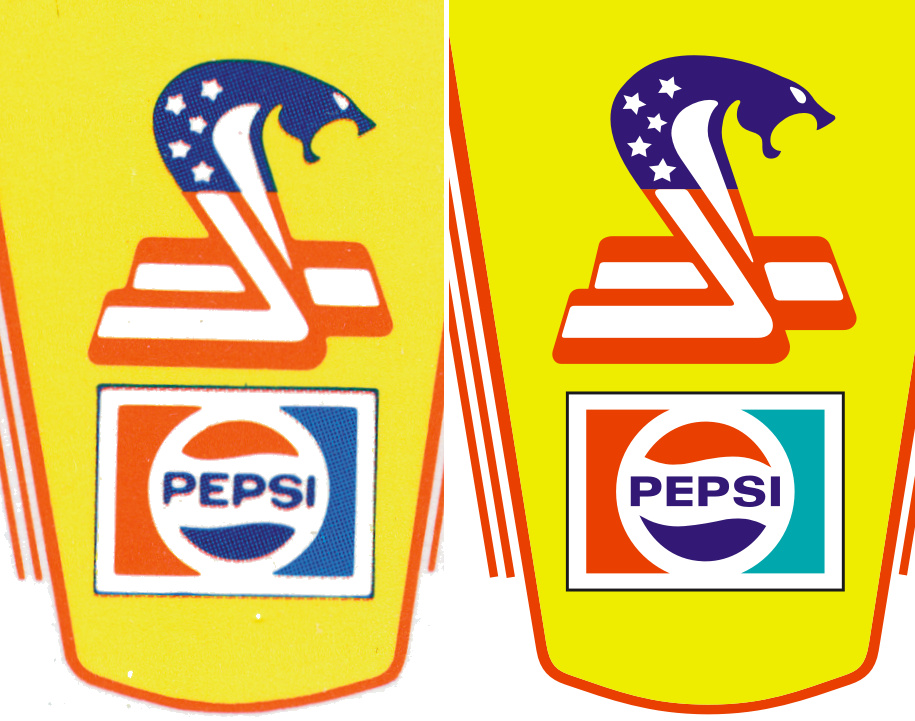
Regardless of how high the scan resolution was, converting it to vector graphic will result in the best possible quality. And yes, it takes lots of time to create good quality print-ready artwork. I also own an old ink jet printer (HP DeskJet 890C) for non-decal printing. Here is an example of a scanned decal (left), and the image I converted to vector format (right). Of course this image itself its a bitmap, but it still shows how much clearer and sharper the vector-based artwork can be. Even the colors can be easily manipulated (made richer).
-
Alps MicroDry printers are best printers for doing decals. They can print white, metallic inks, and they can overlay multiple inks while keeping the paper in perfect registration. Unfortunately they are no longer being made, and ink ribbons are getting really pricey. But they cant be beat for printing decals that are often better quality than factory printed decals. Alps printers are also rather pricey in the secondary market.. I had mine for about 20 years and I don't know what I would do without it. But remember that the printer is only half of the equation. Without quality artwork, even the best printer will only produce sub-par results. Scanning and printing will never be as good as converting the scans (or drawing artwork from scratch) in vector format. It is time consuming, but the results are well worth the time.