

stitchdup
-
Posts
6,543 -
Joined
-
Last visited
Posts posted by stitchdup
-
-
they obviously got sick of tickets for not indicating
-
 3
3
-
-
Expand
RE: 3D files above, there's even a twin Potvin-style reverse-flow setup for a flathead Ford available...

theres also this one which is scaled better but only a single blower. I added the belts and dynamo and the carbs aren't on it yet but it turns out much nicer. the one you posted is over wide and rescaling it throws everything off unforunatally. for flatheads 3d has loads of options

-
 1
1
-
 1
1
-
-
Expand
Because I could not leave well enough alone at gunpoint - are there 1/16 VW customizing parts to drop one of these on some Fuchs alloys, stab in a Porsche flat 6, etc? I've walked past the RoG big scales on a few occasions, but it would be fun to do one.
Second part of the question: Has there been a good solid recent summary of VW kits - Beetle, Golf/GTI, Van - that someone who likes the subjects but hasn't paid a lot of attention could use to get up to speed on them?
revell mk1 golf is one of the best detailed kits out there. revell mk2 feels off somewhere in the body but mechanicals are decent for the time. revell corrados the golf mk2 mechanics but it looks more right in the body. fujimi, tamiya fwd vw kits are all curbside but there are parts available to fix that. amt have their own old 1/25 mk1 golf version but are currently selling the equally old esci 1/24 kit instead. amt do a 1/25 scirocco too and there a 1/24 motorised kit too. the jettas are available as trans kits or 3d prints and almost all of them are in 3d now
-
Expand
Well that to me is a bummer and to me a stupid move. I have been "peteski" to family/friends/co-workers for close to 40 years. Software developers and designers seem to be on some weird kick to make our lives less fun, usually in a name something like security, or just because they think it is better their way. Same thing seems to be happening here.
Not too long ago user's profiles showed each members location (well, whatever they chose to use for it). With this forum hosting members from all over the world it was good to see that info. For example I wouldn't suggest that a member in Germany or Australia go looking for some chemical available in an American-based store or, use some local product which is not available abroad.
But that information was hidden, for our own safety. Pretty soon we will all have randomly assigned user names to protect our personal info. That's a 2-way street. Anonymity to me breeds misinformation. More and more fun is getting sucked out of our online presence.
oopsies, i missed a reply
-
Thats a shame, they have some cool old rally stuff. i was too late for the transit bits i wanted
-
Expand
I recently joined, and had a basic posting question that I could not find the answer to. Not being on any other forums, I may just not be up on the proper way of doing things.
When I post a new topic, my title text is not bold, and there is a star next to it vs a bold dot. Does this change at some point, or am I not doing something correctly when I post? I see you can do things with the actual text (like bold it), but I do not see the same feature for the title (unless I am just missing it). Thank you.
it happens automatically
-
try finks garage, they had some vw stuff
-
look maw, no glue
-
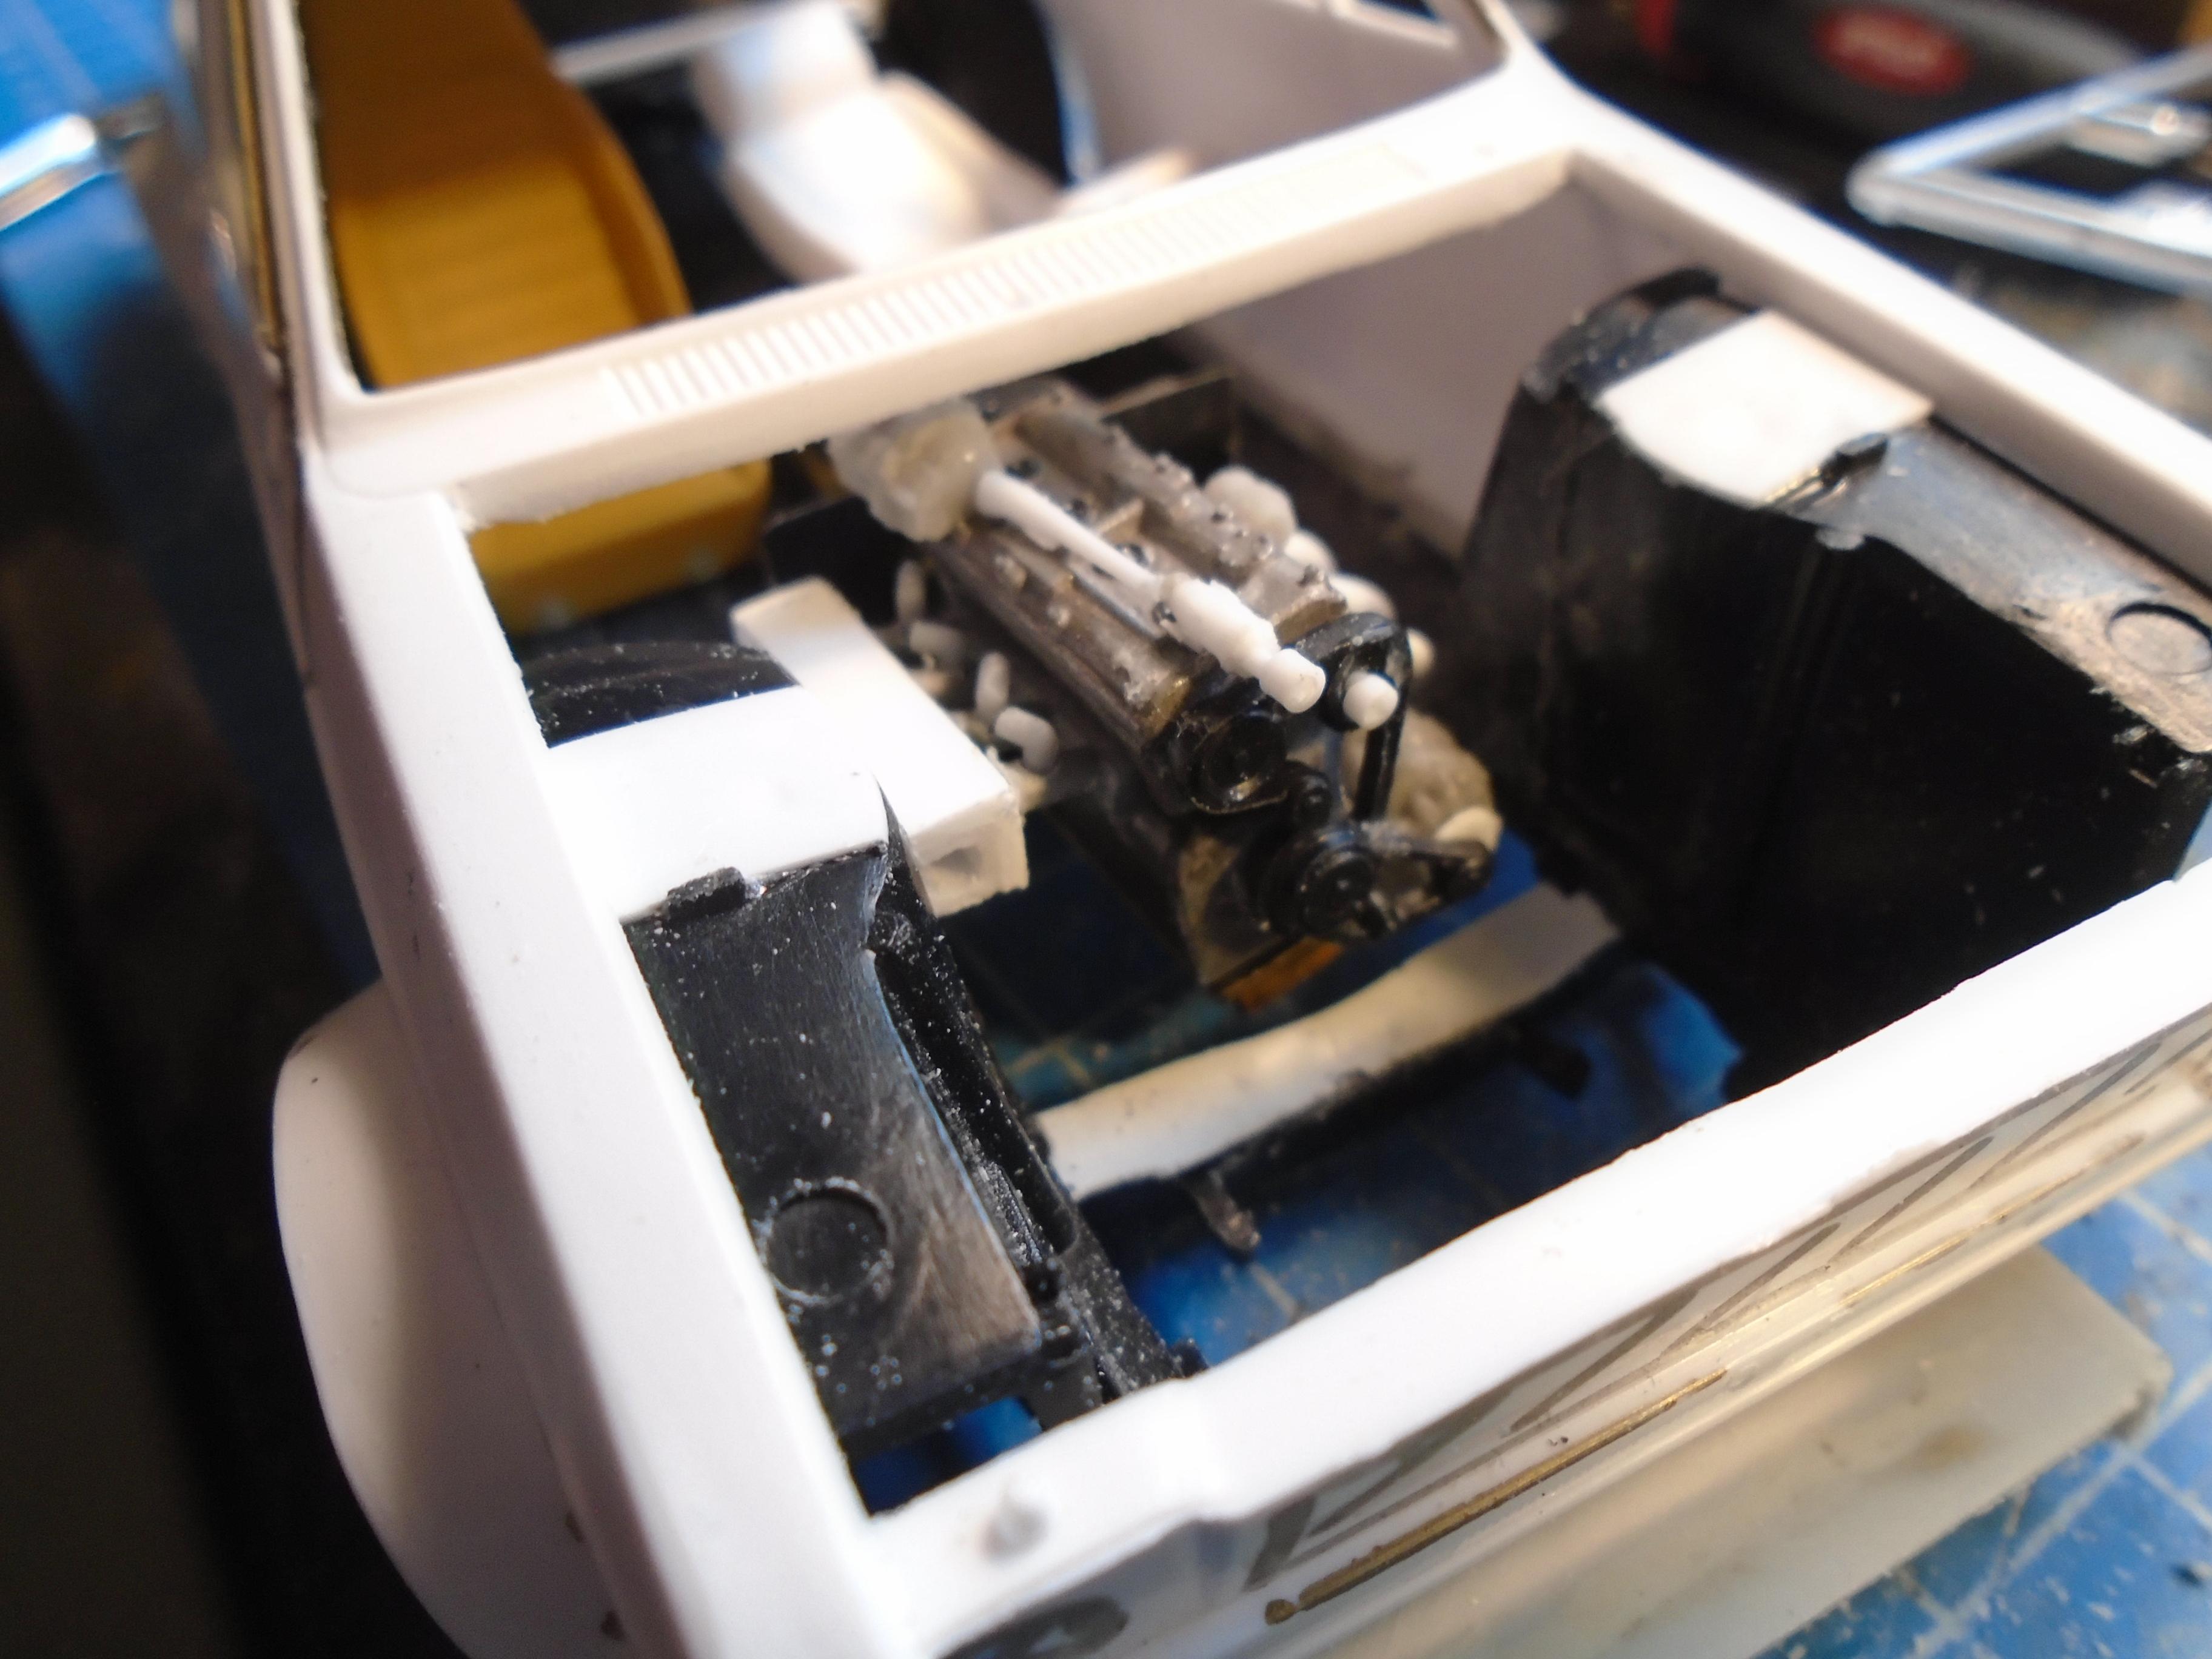
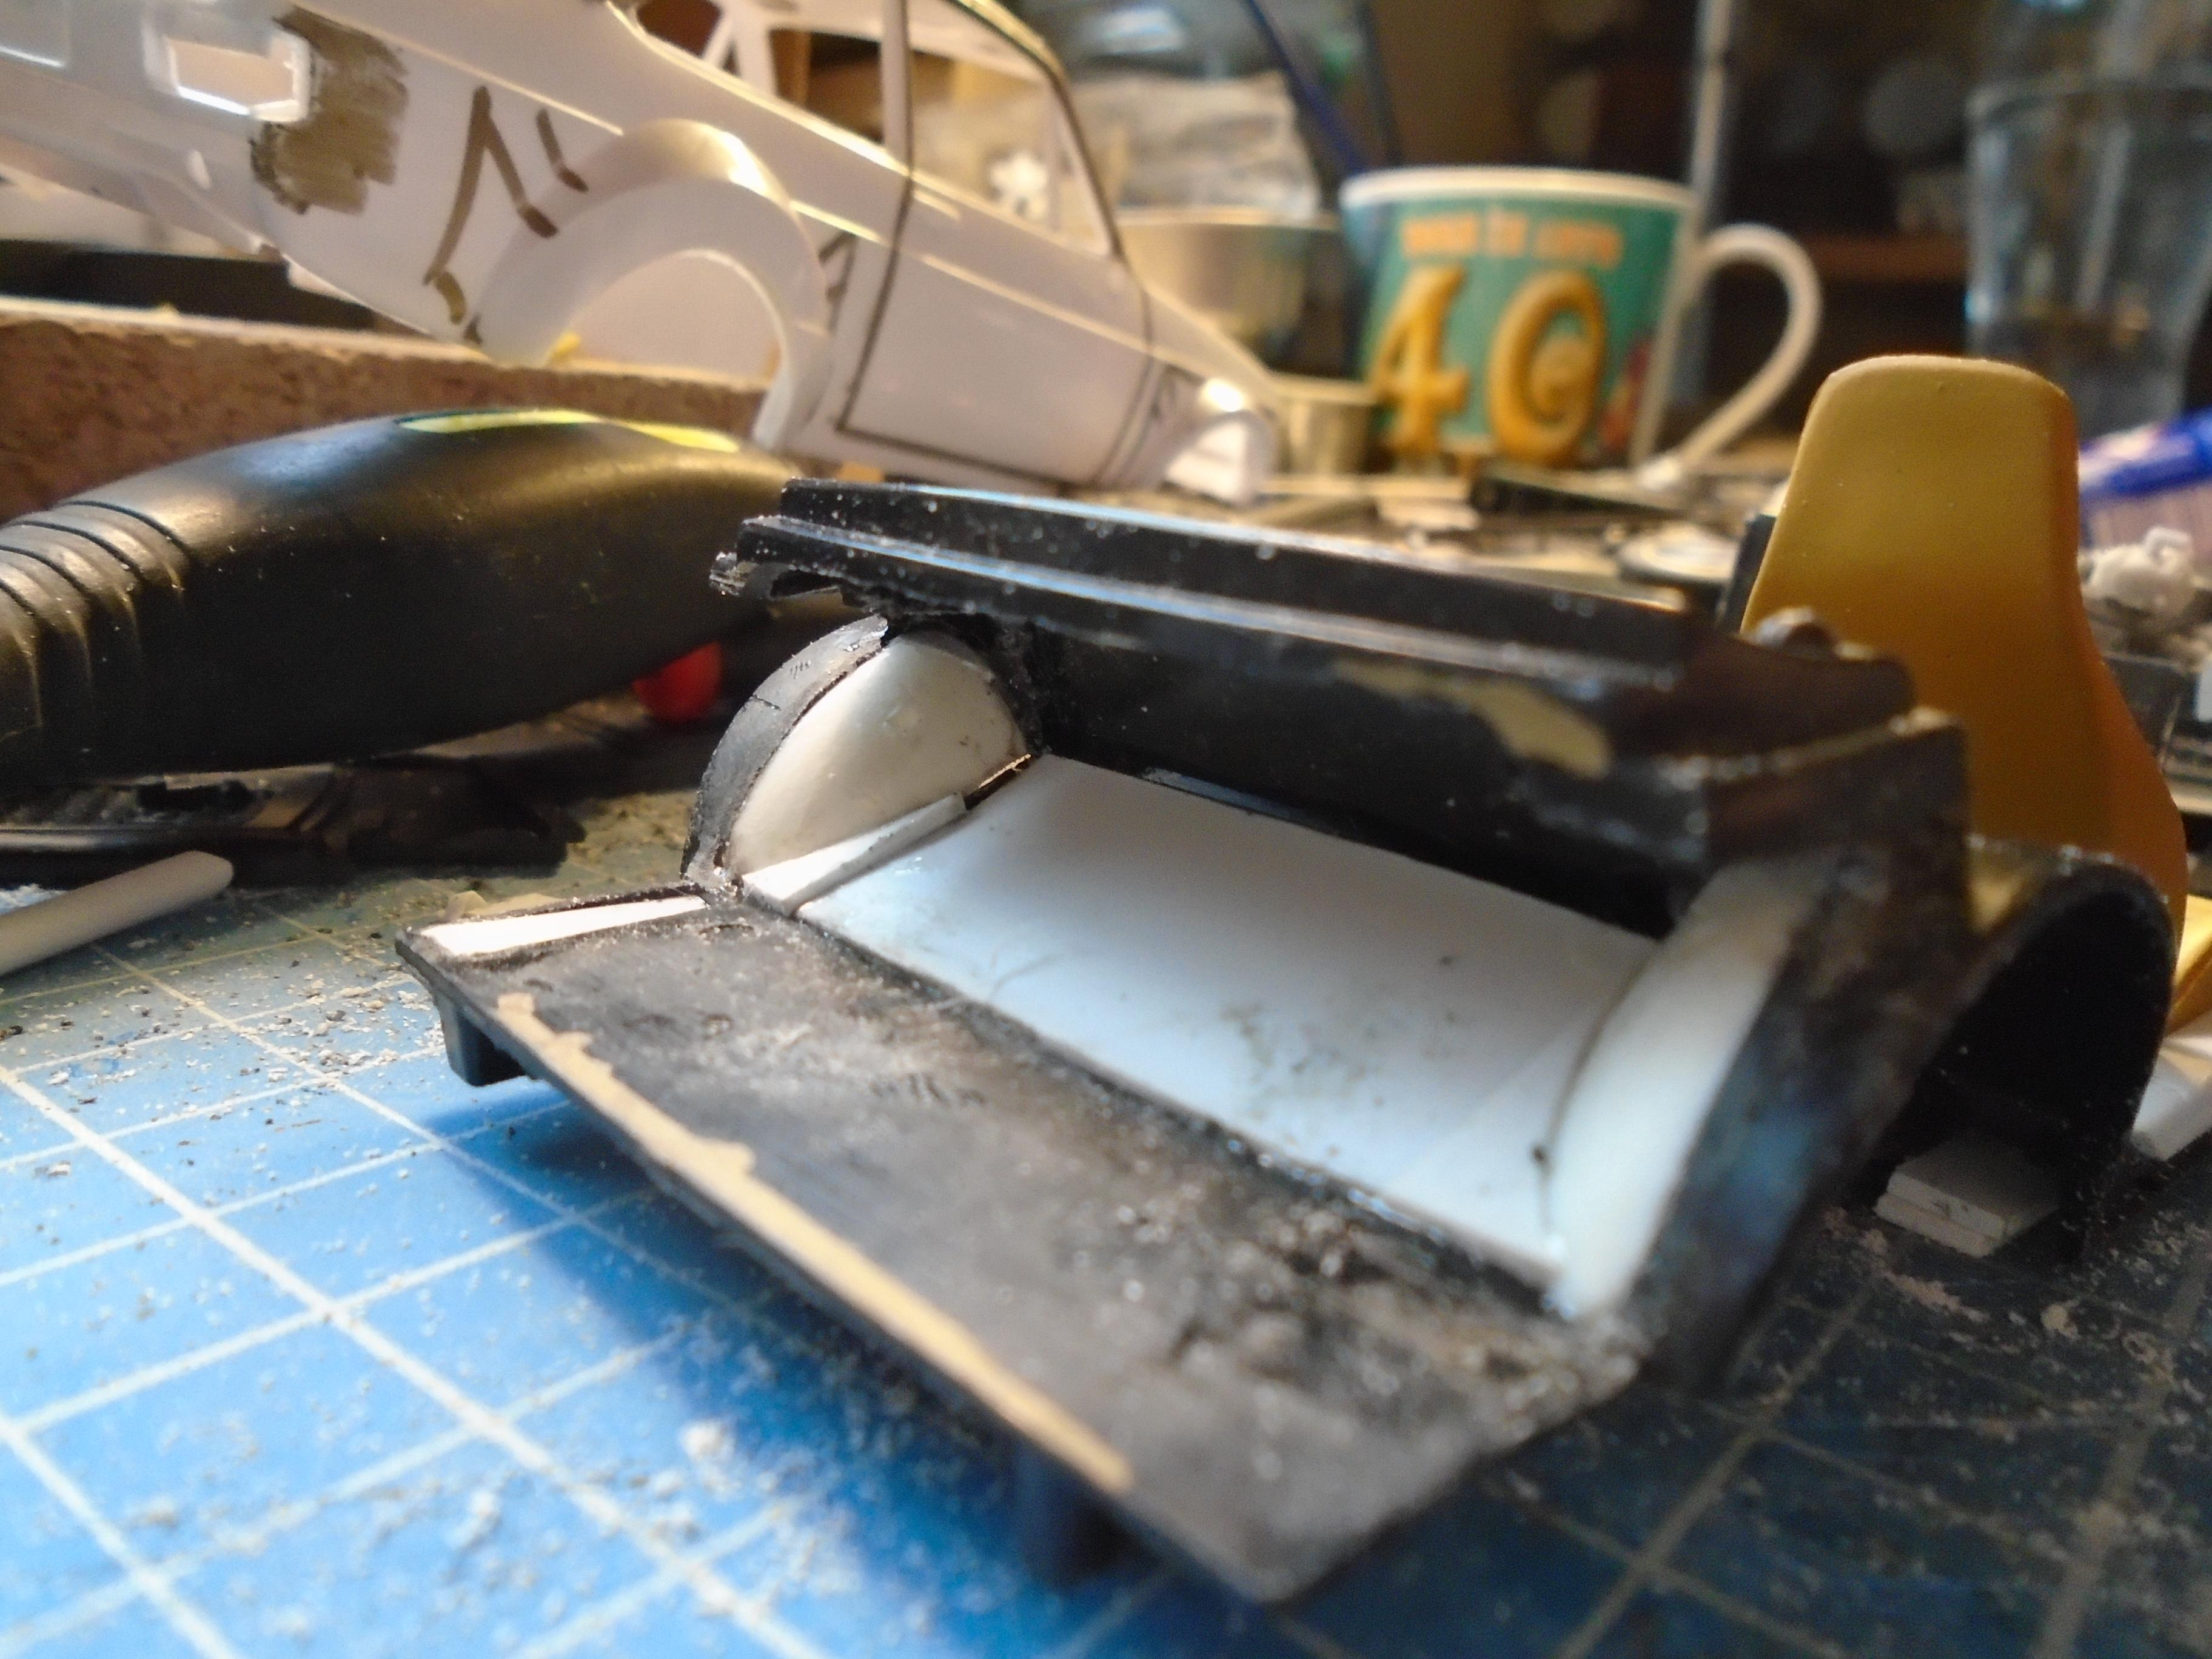
I've swapped to one of the rally car bodies as c1 have released an rs2000 and parts to convert the italeri kits. Since i want to use an rs front on the zackspeed body i swapped to this one. I've opened the boot and removed the cowl area but i still need to open the grille area up. theres another mod but i'll show it later as only one side is done (its not the wide arches). I've also swapped the carbs for the stock zakspeed engine part but have removed the joke of an airbox in place of a scratch built one. this will connect to the box under the radiator. I added some fittings to connect to the fuel block on top of the engine as well. it looks very simple but thats what zakspeed did. since i modified the front belts to add an alternator, the exhaust no longer fitted and wasn't going to work with the engine set back anyway so i scratched up a new one with the missing water intake also added. next since i opened the boot, i had to build up the inside as it was just a wall of plastic originaly. I cut most of this away, at times using a hole in the wheelarch, and then built up a floor and arches. its not even close to stock but its better than what was there, and once i add the rest of the fuel system most will be hidden anyway. speaking off, i also made a fuel tank. which will mean cutting out most of the remaining boot floor so it can be sunk in. this will hopefully leave space for some spare parts
-
2
-
-
-
i'd chop up some small evergreen rod and drill holes to stick them in. if your fussy you can always drill the centres when they are glued to the body
-
2
-
-
Expand
So, if my email address is correct, i don't need to do anything?
you should double check your passwords too.
-
-
it what the shops want. the smaller size means they can get 3 rows where they used to get 2 so can display more of them. you still get the larger size sometimes when there are free standing displays or a special edition.
-
very cool and custom, and very very close to an idea i haven't got around to yet. honestly the only difference is i was going to use a pagani engine and box!
-
Expand
First, a photo of the real thing.
So, now I have made the first print of the body. I think the exposure setting is close, but I need to add/adjust some supports, which I have marked with a black marker for my own reference. I want to focus on the body first before I move to the other parts.
One can see the drip rail is sagging in the upper side window area. Some other edges need more support to get straightened out better. Overall, not bad for my first car body design and print. Making my way up the learning curve.
Getting some horizonal lines on surfaces near vertical and haven't figured out how to reduce them. In previous prints of other subjects, adding more supports there did not improve them. They are fairly subtle and easy to sand out, so I may have to live with them and fix in post-processing.
Thanks for looking in.
your drip rails and straight edges will work better if you print the body at an angle. the printers struggle with edges parrallel to the print plate and a bit of angle avoids it. it will take longer to print but flat edges will turn out better
-
1
-
1
-
-
is it wheels for the 599?
-
It is being looked at but its not affecting everyone, and some are only affected intermitently. If it was affecting everyone it would be easier to find the cause but as it is now its like trying to find a grain of salt in a bag of sugar. If you could note when it happens in this thread it all helps Dave investigate it. the info that helps is time, time zone, the thread you were posting in, operating system and web browser.
-
i got tickets for ac/dc in august
-
3
-
-
Expand
As mentioned yesterday, I can't update due to a technical problem with the forum?
You can see in a previous post the screenshot of the error message I receive on each attempt.
I haven't seen an answer to my question on the thread How To Use This Board: (Can't seem to post to a thread?) and (Oops, That page can't be found.) about whether the admins are working on a solution but I know I'm not the only one having this problem.
I'm doing another try (test) with only 1 photo just out of curiosity but I don't know if I will be able to continue posting updates on this thread.
The build of the Demon continues but I may not be able to continue feeding this thread until the situation returns to normal.
Sorry for this inconvenience, this message could be outdated by the time you read it if whatever is blocking the pipe clears the way!
TEST
it is being looked into, if you keep a note of the time, time zone, operating system and browser it all helps Dave investigate the issue
-
1
-
1
-
-
Expand
We've been residents of our single dwelling home for 30 years, it's a HOA community with an increasing number of Hud homes over the past 10 years. Our police dept is great, but unfortunately their hands are tied for reasons that I shall refrain from mentioning..🤫 I've been thinking hard as how we the community can rid of the encampment legally. One thought is to contact the environment protection dept since there is a natural flowing stream running through the encampment. The last time I went back to take a look see I was horrified at the amount of trash thrown about the area. Maybe even contacting PETA, I'm sure the encampment is hindering the animal population from using the area and driving them from their natural habitat. At this point whatever it takes, I'm game.
🤔°°continual night time raids with loud banging on pots and pans?
vintage air raid sirens make great collectibles and still work
-
1
-
3
-
-
the admiral builds up nice but you should probably do a heller or euro truck kit first. the icm kits are multi piece everything and if a part is not in its exact, yet unclear from the instructions spot, it wont fit together. you can assemble the body before paint but it means gluing the front inner fenders to the outer fenders then very carefully removing the outer fenders from the rest of the body. Its best to follow the body assembly instructions up to the fenders as again even a slight mis alignment will cause problems later. Its also a big kit when its built, almost an inch and a half longer than the similar age monogram 39 chevy but they have lots of detail and a careful read through of the instructions can let you assemble most parts in advance to make it more like the car kits we're used to
-
-
masterbox have some though they may be more car show than bond girl. theres loads of them
/https://fbi.cults3d.com/uploaders/15015947/illustration-file/4d92c1e3-ec20-495f-bbf7-e093bd14a64b/Screenshot-(381).png)


Shining up some Oxidized Chrome
in Model Building Questions and Answers
Posted
just yse normal body polish. the chrome polish will take off more of the shine as its usually a mild abrasive polish