

midwest 1953
-
Posts
67 -
Joined
-
Last visited
Content Type
Profiles
Forums
Events
Gallery
Posts posted by midwest 1953
-
-
I have not looked at the models I brought to see if they survived.. We started last Monday from St Louis, and stopped at attractions, hobby shops and craft store on the way.. We traveled a lot of blue highways, and bumpy roads..
-
Is the show at the Exposition center the swapmeet for the NNL, or is this something different?
I will be there Saturday, but I have a very short window on Sunday, because we have to drive back to St Louis..
-
It comes down to.. the front fenders are attached to the body to make it easier to align the hood with both the body and fenders.
The rear fenders are separate, because it is easier to make the tool that way, and there is no alignment problem there..
-
Pre-build methods ? Something gives me an Idea ( MCMs new trailer contest) I daydream about it , going back and forth to work in the car ( which trailer? which dragster? could the sedan delivery pull the trailer? will the engine from car fit in the dragster?)
I spend about a week, studying this in my head..
Then I go to my stash, see what kits I have of the ones I picked out.
Spend next three months searching swapmeets for missing kits.
Open the boxes, lay the parts out, stare at them for 2 weeks.
Assemble the engines and chassis, prep the bodies
Then it sits on the bench another three months while I agonize over colors.
In the end.. build time to make the contest runs out, all the parts go in a plastic shoebox to be finished at a later date..
-
I would not really be interested.. I only build subjects that are pre-75.. I would like to see a kit of a 57 Studebaker 1 ton pickup though...
-
In the reviewers comments at the end of the review, he takes Revell/Monogram to task for not including redline tires.
The first car to have redline tires was the 67 GTO. They were introduced there, and exclusive to GTO for 67. Only available on the car or GTO replacements only at Pontiac dealers.
A 64 GTO would have come from the factory with 7.75 x 14 bias ply tires bw or narrow ww.
New cars did not receive radial tires until the late 70s or early 80s.
What this kit really needs is a decent set of headers..
-
Building one of these now...did not have problems with rear suspension. How ever I do have a problem with the back of the front fenders fouling with the battery boxes when you open or close. Bottom edge overlaps almost 1/16th of an inch. Thinking probably a spacer between grille and hood mounts.
-
back in the day( 1960s)..that was an advantage to being a subscriber...you got your magazine 2-3 weeks before the newstands..perhaps if you went back to that.. you would have more subscribers....
-
You would be far ahead starting with the AMT Autocar A64B and move the axle forward and build a new hood..
you could also use the Diamond Reo kit, or the White road boss as well with the dash from either of the autocar kits..and again ..build a new hood..
-
Dave, Did you ever finish this??
-
The box is the same in both kits.The frame in the C-600 box truck has long straight rails like the Louisville and a much longer wheel base than the C-600 Stake truck.
-
Dennis, that's coming along really nice..
-
double d had same prob with my L700 add a block between front axle and spring..
Back in the late sixties early 70s when that kit first came out, Phil Jensen did an article on lengthening the frame and making a flat bed stake truck. If I remember correctly he removed the helper spring and modified the rear main leaves to get a better stance...
-
I'll be there as well..would like to meet some folks
overweight gray haired guy who builds trucks.
Black bigfoot t-shirt, or red or blue hawaiian shirt or both...

-
I will be there. hoping to meet up with some people...
driving over from St Louis on saturday..
-
Ian just keep safety in mind. These kinds of DIY setups are best when you are not using flammable paints and reducers. I think they'd be fine for acrylics and water-based paints.
I built my booth with squirrel cage fan I bought at a local building materials salvage place, about ten years ago for 25.00.
About a year ago there was a thread on all the major forums and yahoo groups about a guy in Massachusetts who had an explosion from lacquer fumes, and a bathroom fan.. If I remember correctly it melted his contact lenses to his eyes, and he had 2nd and 3rd degree burns on his head.Lost most of his sight..
If your going to paint like this wear safetyglasses/goggles and a respirator mask..
Jim A.
-
However.. be careful of tires from the original Beatnik Bandit ( or any early sixties Revell Kit) as they were made from a different rubber compound.
They will melt your wheels over time...
-
Hey.. that's looking good.. those big round pods gonna be taillights, or jet exhaust?
-
I have a 6 gallon Sears pancake compressor, and a 0-100 regulator/ watertrap that is also from sears. I mounted the regulator on the side of the paint booth. has a male disconnect on the inlet, female on the outlet, all three of my airbrushes have their own hose, and male disconnect.....
most of the time the regulator is set on 20.....
Jim A.
-
Dave,
That is interesting.. is that the pumper chassis, or the ladder chief ?
I was considering using the chassis from the aerial, ( assumeing it is longer ) but for what I want, it might be easier to cut the frame off behind the cab, and scratchbuild the rear section.
From the look of that, the engine is going to be pretty close-coupled (maybe just a u-joint). My plans call for a turbocharged Detroit with automatic, I may mount the radiator,engine, trans, and rear axle in a single power pod, and airspring that..
Moving the engine out solves the main problem that I saw, lack of interior room. Original thought here was a luxury high speed autobahn cruiser set up for four persons...
Anyway...yours looks good, and it's nice that you have done most of the engineering for me
... Thanks..Jim A.
( most likely you won't see mine anytime soon.. too many projects on the bench now, and I'm slow...)
-
I believe this is what you want....
The hinge point is about 1/16-3/32 from the edge..basically I drilled a hole in the top and bottom of the door for a piece of 3/64 brass rod to extend from the holes about 3/32. on the top, I drilled a hole straight up into the body about 1/8th.
on the bottom, I cut a notch 3/16 wide, x 1/16 deep, starting at the edge of the door opening. I used a piece of plastic stripping to fill this hole.
I drilled a hole in the stripping to fit over the brass rod, then slid the upper pin in the upper hole, with the piece of stripping in place on the lower pin. this lower plug was then glued into place, and puttied over..
After you have cut your door out.. eyeball your hinge point carefully, so that when the pins are in place, the doors swing with out touching the opening... also.. before drilling holes, make sure the pins align, or the doors won't swing straight. drill the holes in the door edge first,install your pins, hold this up to the opening, to locate the top hole..
Hope this helps,
Jim A.
-
Dave,
Can you post a couple pictures without the bed?
Considering a similar idea for a tractor to pull a 38' 5th wheel galaxy trailer.
Jim A.
-
Good point that enabling shabby work isn't helpful. Guilty of posted shabby work myself, but I never expected praise and kind of raised an eyebrow why my ugly sins received compliments. Mind you, not too many responses which was a good indication that there was much needed improvement. On the other hand, it's hard to constructively criticize or advise when it's not asked for without sounding like a jerk, but like others have pointed out it should be expected in a forum dedicated to improving skills. Personally I would like some criticism and advice.
There are individuals who take criticism and advise as slander and humiliation. There are individuals who could stand to apply a little more tact as sometimes they come off as arrogant and belittling. Nobody's perfect. But if we all post our work with a little understanding that we need help, or others need help then those shabby builds will not long turn into nice looking pieces.
For those who feel their shabby work shouldn't be criticized because of skill level or the excuse that one doesn't want to build show quality models should know that nothing can be achieved in life with the attitude "good enough". Always do your best. Take pride in everything you do. Nothing is "good enough". Everything has room for improvement. Keep an open mind and push your self each and every time. With everything in life.
It basically boils down to this: If you can't run with the big dogs, stay on the porch.
I didn't read this whole thread.. but the above is a good answer..
I don't give praise for anything, unless it is over the top...
Perhaps what we should do is... those people who want constructive critisism should say so in their post ("critisism welcome" ). Personally when I post something, I want flaws pointed out.." bad paint choice" or "bad wheel choice" is not a flaw.. " right front wheel is off ground " and " paint is thin on edges " is...
I have noticed that this carries over into the advice needed sections of the Forum, people seem to be afraid to post an answer when you ask for it.. guessing this is due to being afraid of offending the asker....
Jim A.
-
The 1:1 car this kit is based upon is the original "Walt's Puffer". It used a combination mag/fuel pump drive at the rear of the motor. Unless you're doing a replica of said car, I'd just drill a hole in the front cover and call it good. If you're more ambitious than that, them cobble up the pump/magneto combo mentioned. Neither one is difficult to do. One is just waaaayyyy quicker than the other.
TimP
,
Thanks>> I'll do research on Walts puffer....The reason I can't use the front mount, is lack of room.. the tank is too close to the belt..
Maybe a right angle gear drive...


 ... Thanks..
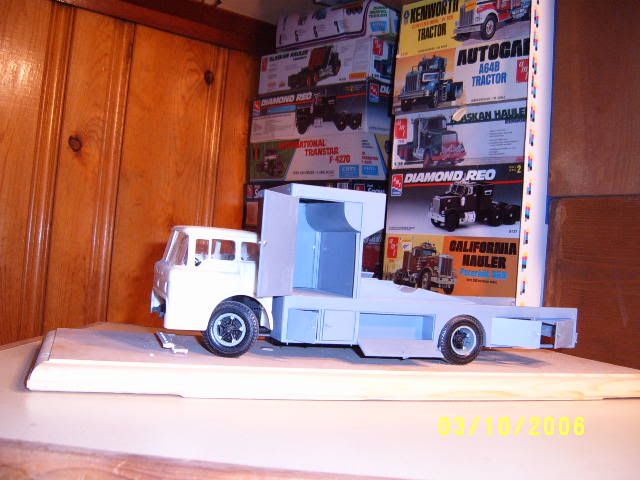

Galaxie Limited's '48 Chevy Coupe
in Car Kit News & Reviews
Posted
Hope this shows up soon, there were several of these at NNL 22 in Milwaukee over the weekend, but no one knew anything about them..