
Sidney Schwartz
-
Posts
418 -
Joined
-
Last visited
Content Type
Profiles
Forums
Events
Gallery
Posts posted by Sidney Schwartz
-
-

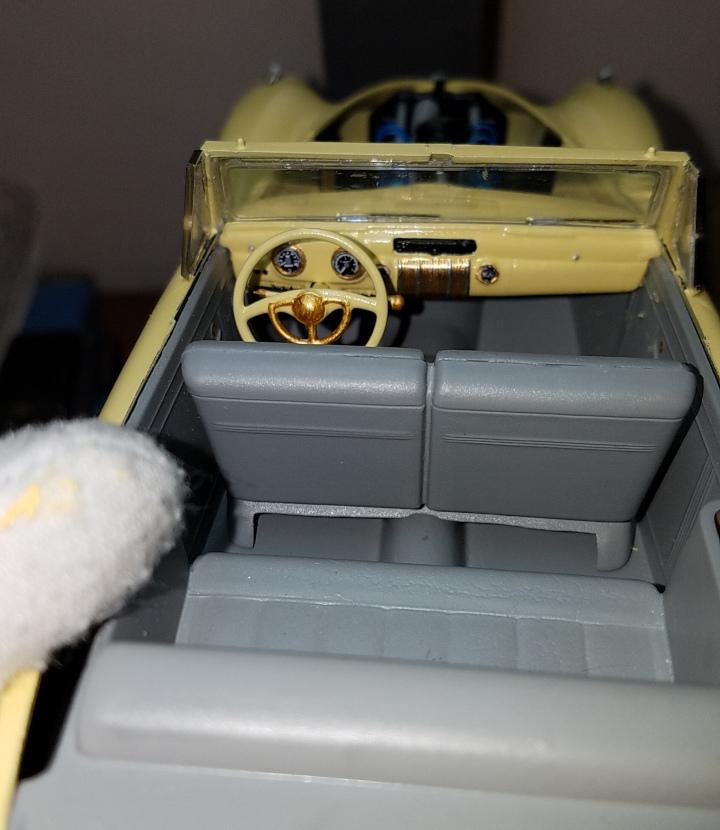
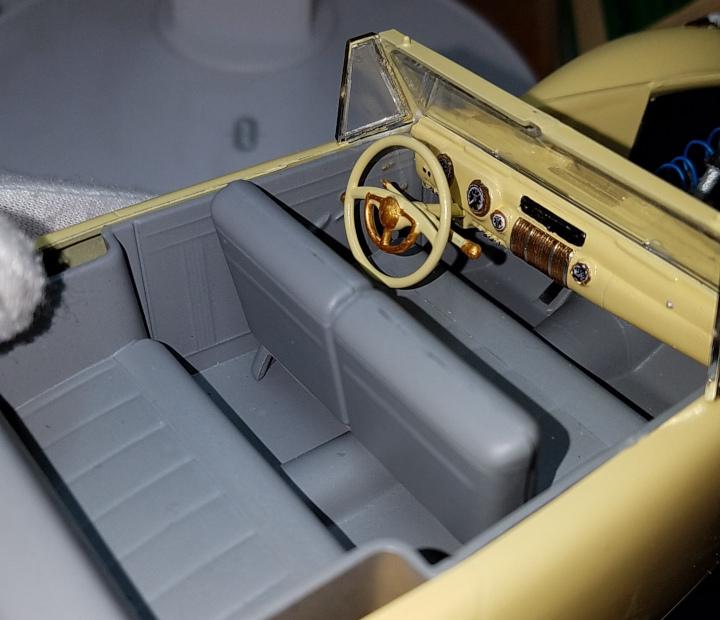
This kit is the devil's own dumpster fire...pretty much what you'd expect from a Lindberg kit. The body consists of 11 pieces, none of which fit very well. I had to tear it down and rebuild it several times before I could get it sort of OK. Chassis and engine detail are almost non-existant, and the interior is not much better. You've been warned. Enjoy and thanks for looking.
This will probalby be my last post here. I'm feeling that I've gone about as far as I want to with this hobby, and there are other things I want to try my hand at. Thanks to all the folks here who were so helpful and encouraging.
-
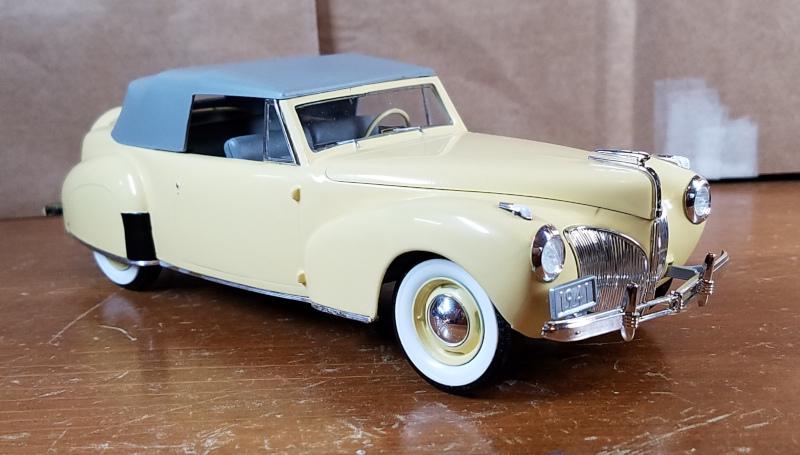
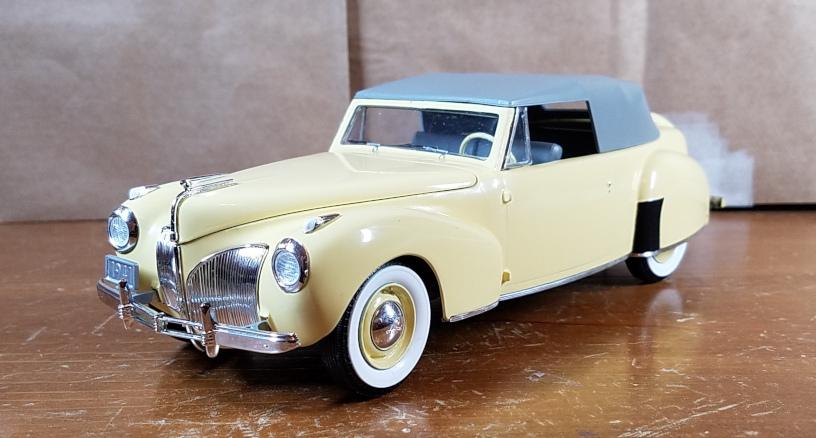
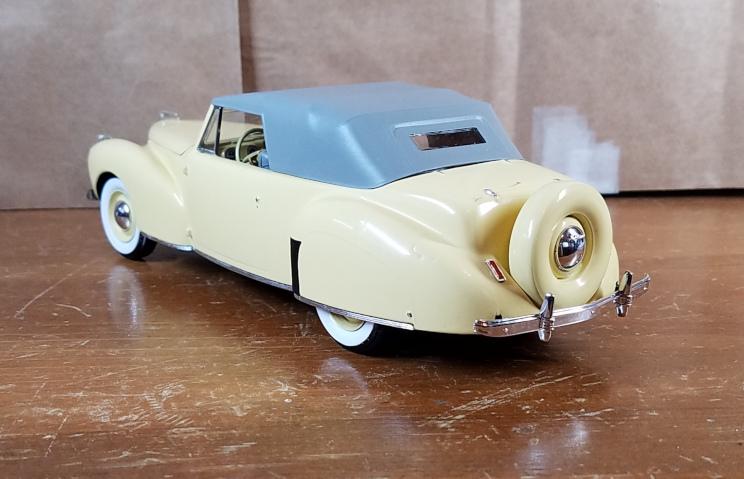
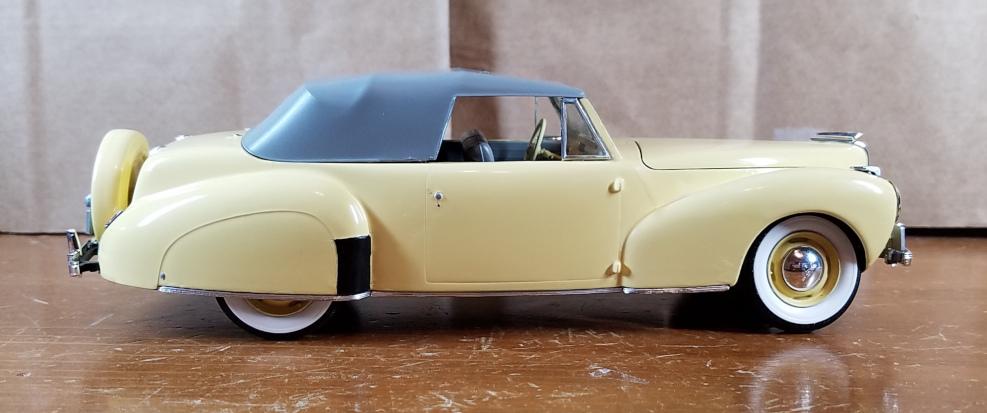
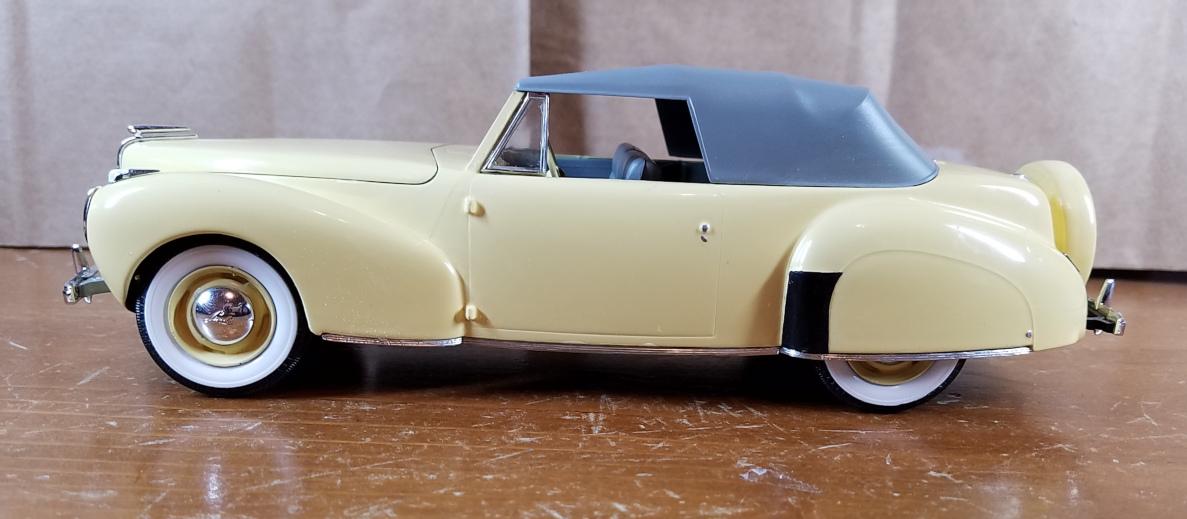
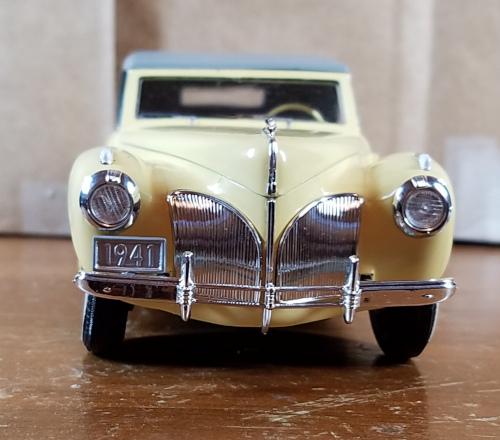
Thanks, all. I think Lincoln's design team really nailed it with this one. They probably thought so too since it remained almost unchanged that entire decade.
-
What are these "instructions" you speak of? 😄
-
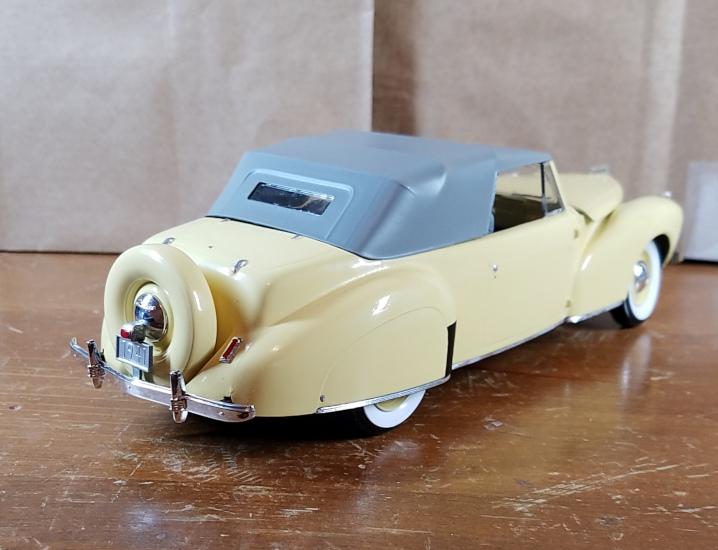
This is a very nicely designed kit...good detail and very good parts fit. Unfortunately, the kit was rather ancient and the plastic brittle, which meant frequent breakage of thin parts. You can see in the front shot that one of the wheels is crooked...it broke, again, as I was taking the pics. This was not a sealed box...maybe the plastic would have been in better shape if it was. It's all box stock except for the ignition wires and the tubes leading the wires from the distributor to the manifolds. The interior is pretty plain, but so is the real one. Enjoy, and thanks for looking and commenting.
-
 13
13
-
-
5 hours ago, ncbuckeye67 said:
That is absolutely beautiful! I love the two-tone. I'm guessing that's the "California Wheels" kit, that's still available at Hobby Lobby
Yes, that's the one.
-
1
-
-
16 hours ago, Dpate said:
What kind of tacky glue?
Aleenes Quick Dry Tacky Glue.
-
We've all had problems like this, or will. This is why I decided to "test build" every kit. Before painting or even priming I put it together using Tacky Glue, which holds well enough and comes off easily. Any problems encountered are corrected and the model is disassembled, painted and rebuilt. Test building takes time, but it's not a race, and may actually save time over having to fix something and repaint. It also prevents a lot of frustration.
-
1
-
-
Forgot to mention that the Colorshot stuff is acrylic. Also that I use Krylon Crystal Clear for finishing. Polishes up nicely.
-
You did a much better job with the foiling than I usually manage. Beautiful model.
-
-
1 hour ago, Bainford said:
Sidney, what primer and paint did you use on this build? I think this colour will be perfect for a ‘68 Charger project I’m planning. Cheers.
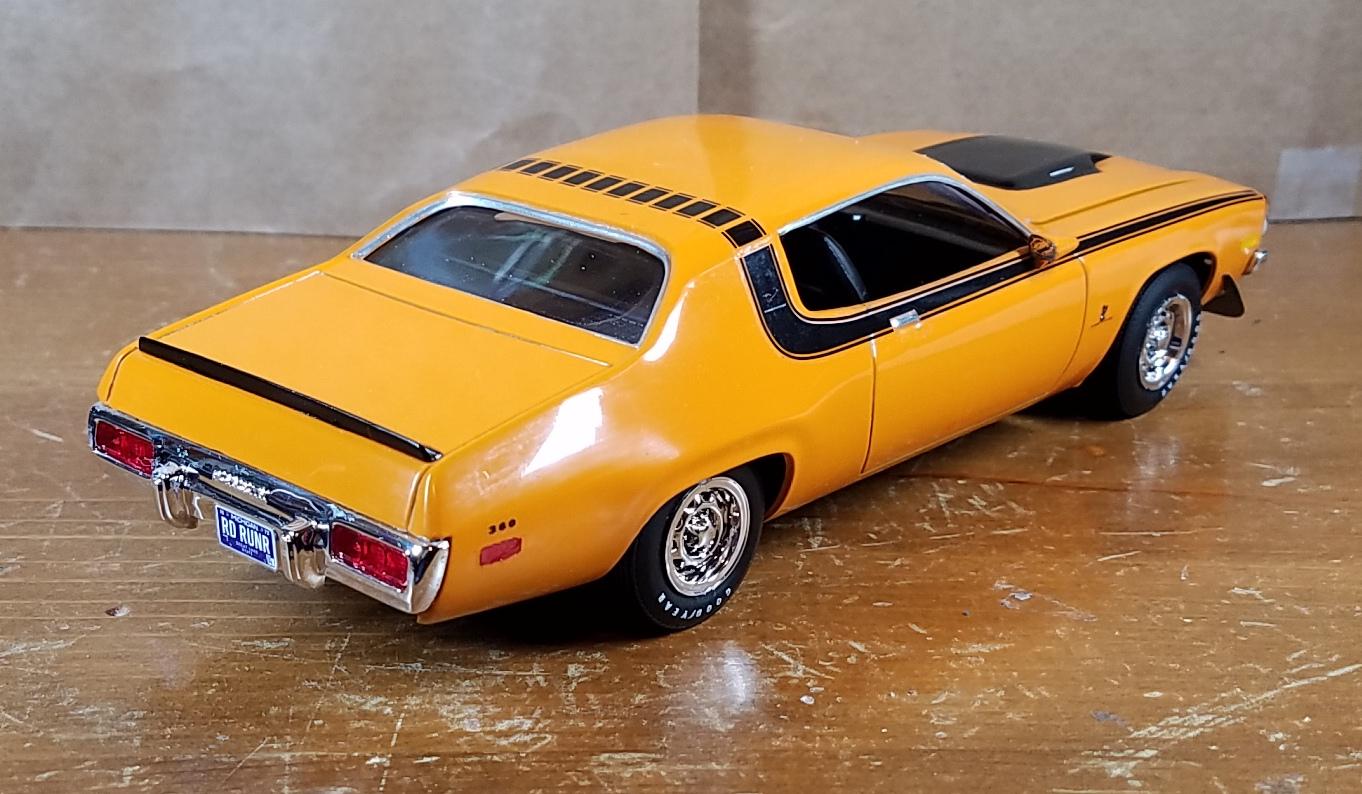
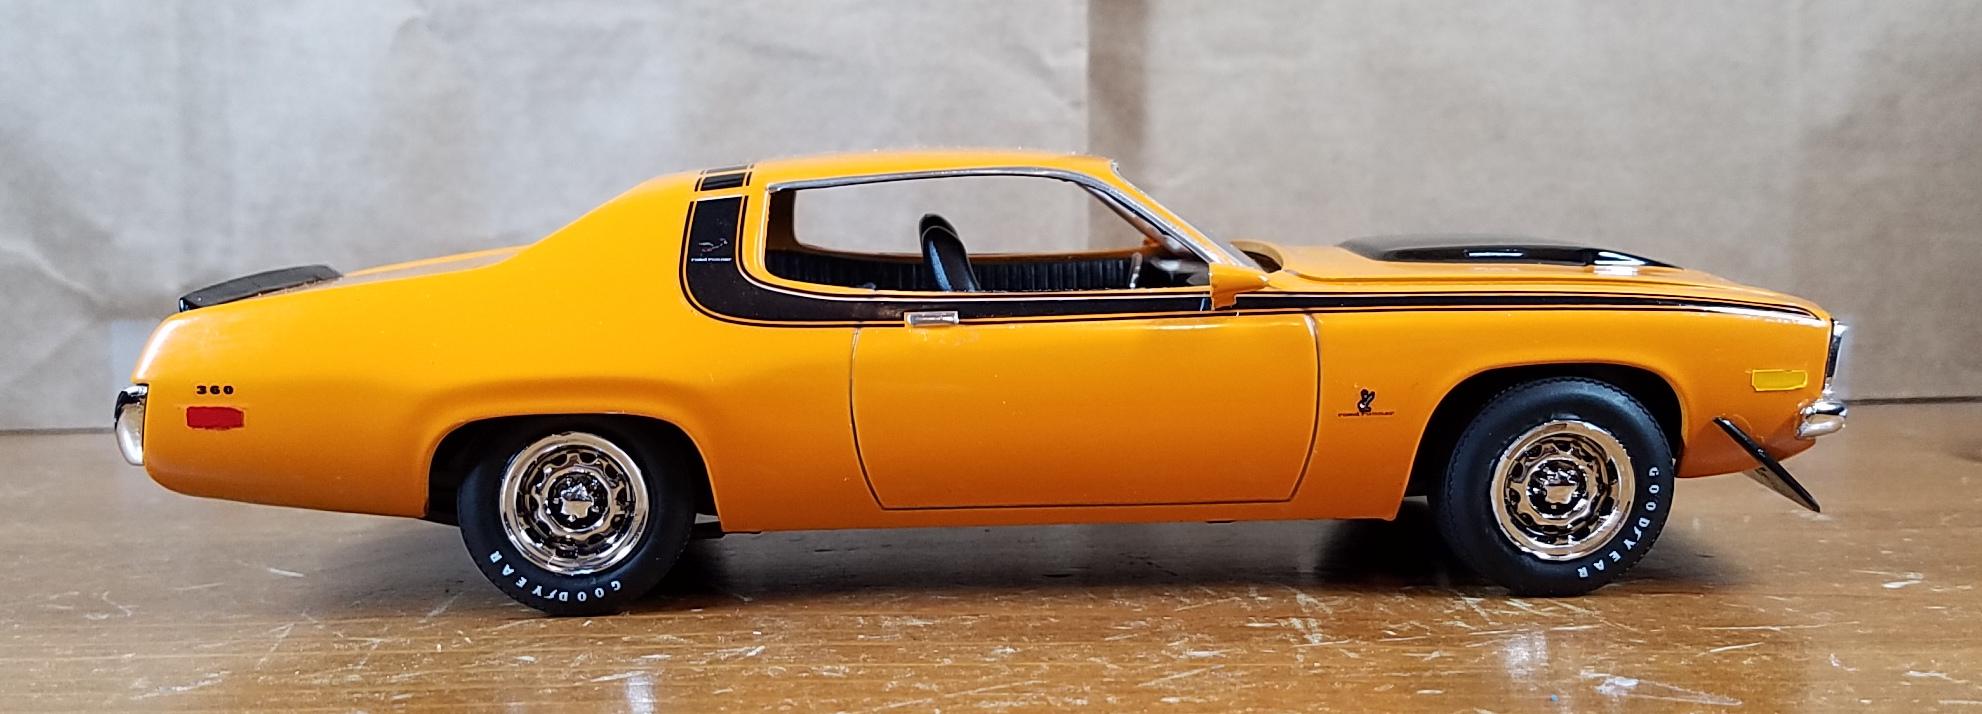
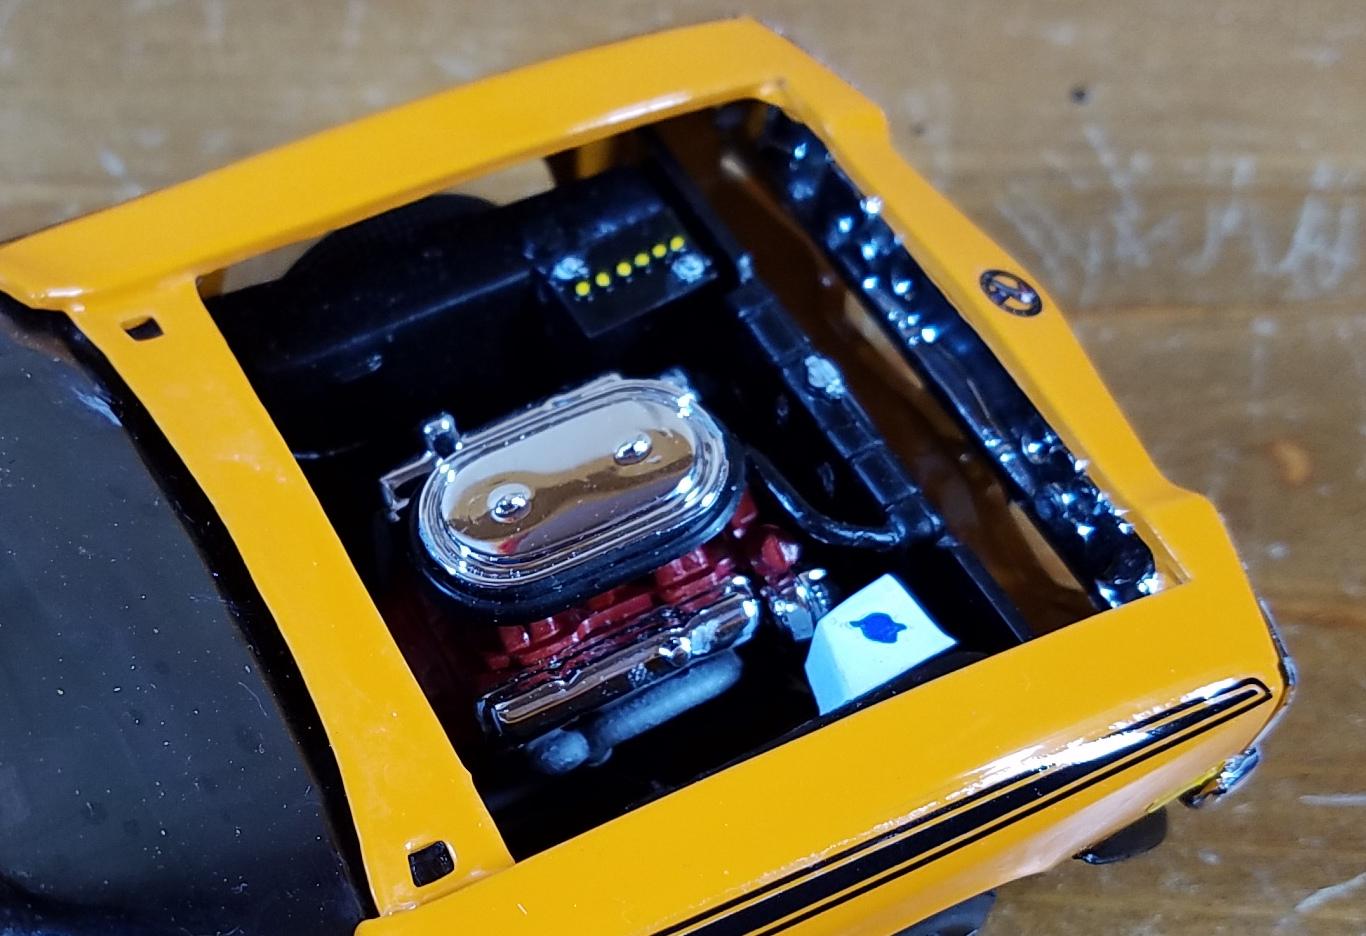
I pretty much always use Krylon Colormaxx gray primer. The body color is Orange Slice spray by Colorshot. This is the first time I've tried Colorshot for the body color and I really like it. Covers better than most spray paints I've tried, isn't overly heavy, and the color is very rich. The only place I've seen Colorshot paints locally is Michael's Crafts, but I've also seen it online. Their website is www.mycolorshot.com.
-
The folks on this forum are such a great resource! Thanks much. Now I can see that the distributor is molded into the engine. The wire routing tubes are also included, but may be too small to drill for wiring. Shouldn't be difficult to fabricate something more suitable. Cool!
-
2
-
-
Actually, where's the distributor on a 1941 Lincoln Continental engine? In the pics I've found you can see the wires are routed through two tubes that run along the top of the cylinder heads. I can't find a pic that shows the actual distributor, though. I'm guessing it's on the front of the engine somewhere? It's the Monogram kit I'm building, which doesn't come with a distributor, so I can't get the position from that. A pic of the 1:1 engine showing the distributor would be wonderful.
-
1
-
-
Great. Thanks, Joe.
-
From the product description on the Micro Mark website:
"Z-7 Debonder dissolves all brands of cyanoacrylate adhesives. Removes residues from hands, tools, clothing, workbenches, etc. Will not attack plastics. 1 oz. applicator bottle. "
Sound possibly "too good to be true", so I'm trying to confirm it before shelling out my quatloos.
-
Anybody try this stuff?
-
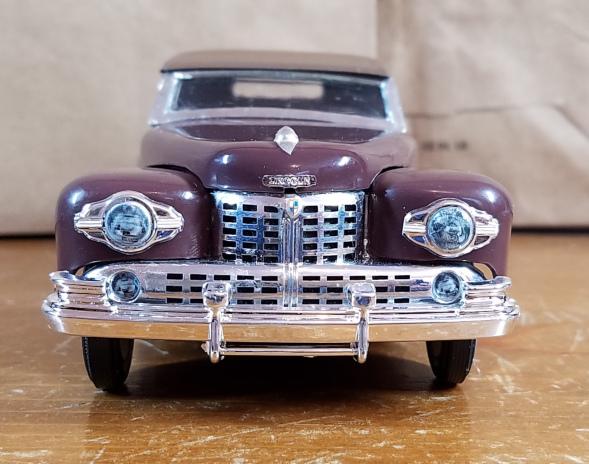
Now that I'm putting the '48 together, I'm amazed at what a nice job you managed to do. It's a blazing dumpster fire of a kit. Oh well, it's a good challenge...an opportunity to improve my puttying skills. 🙄
-
People like you are the reason I have so little talent. You got your share, and mine too. 😄
-
-
Thanks all for the nice comments. I forgot to mention the paint, which is something new to me. It's called Colorshot, website is www.mycolorshot.com. I saw the stuff at my local Michaels and decided to try it. I'm really liking it. Excellent coverage...better than other brands I've tried. Dries quite well in an hour or so. Nice variety of colors too. You can also buy the Colorshot paint in bottles, but I haven't tried those yet.
-
So nice! Beautifully elegant. Wish I could afford one.
-
An American classic for the 4th. Not a very good kit, but I think I managed to make it look decent. Engine and chassis detail is very lacking, interior is not bad. Rear spoiler is incorrect, as far as I could tell from the pics I looked at. Parts mostly fit pretty well. There's a bit on the end of the chassis that needs to be removed. It's already scored to make that easier, but it's not mentioned in the instructions. The side mirrors don't fit at all as supplied, but that was easy to fix. I also found it much easier to attach the front and rear bumpers after fitting the chassis to the body, rather than before as it shows in the instructions. I gave up on trying to get the hood decal to work and improvised with some paint. Enjoy and thanks for looking. Comments appreciated.
-
7
-
-
That is just ridiculous. Stop making the rest of us look bad. 😄
-

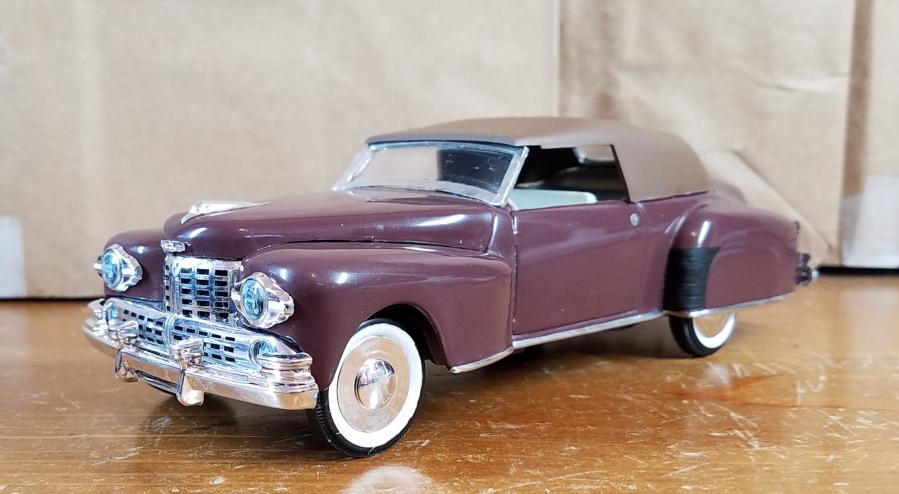
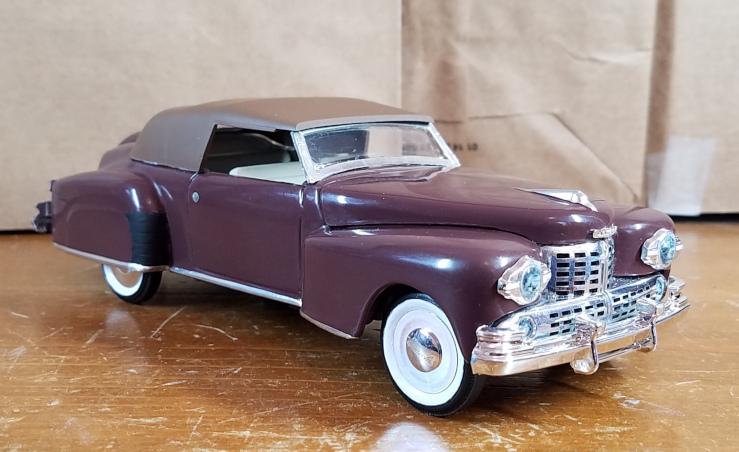

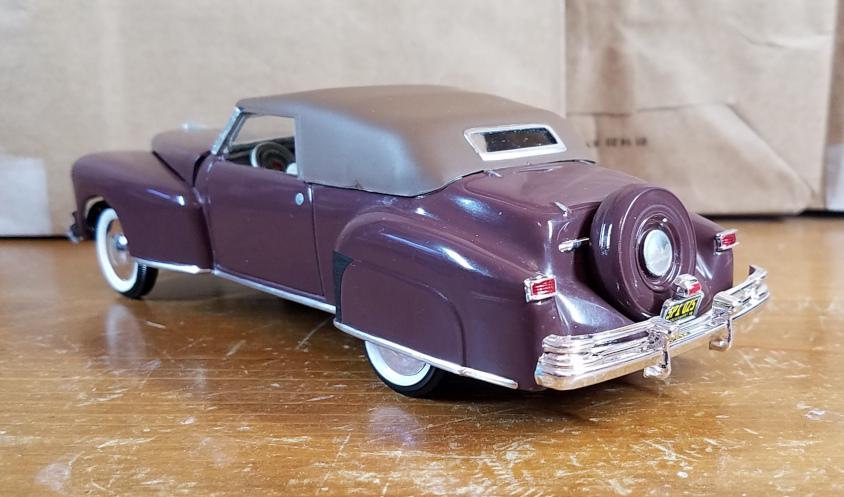


Lindberg 1948 Lincoln Continental
in Model Cars
Posted
That was my previous build.... 🙂