CabDriver
-
Posts
5,101 -
Joined
-
Last visited


Recent Profile Visitors
16,275 profile views


CabDriver's Achievements
MCM Ohana (6/6)
-
 Some BMF from Amazon. They shipped it in one of those bubble envelopes 🙄
- 35,983 replies
-
- 1
-

-
- johan
- glue bombs
- (and 1 more)
-
I’d drink that tea all day long…GREAT looking project! I’ll be following along!
-
Agreed! I hope there’s a follow-up community build too - I really enjoyed watching this one!! Also, still collecting parts for my contribution…getting closer to maybe thinking about starting 🤪
-
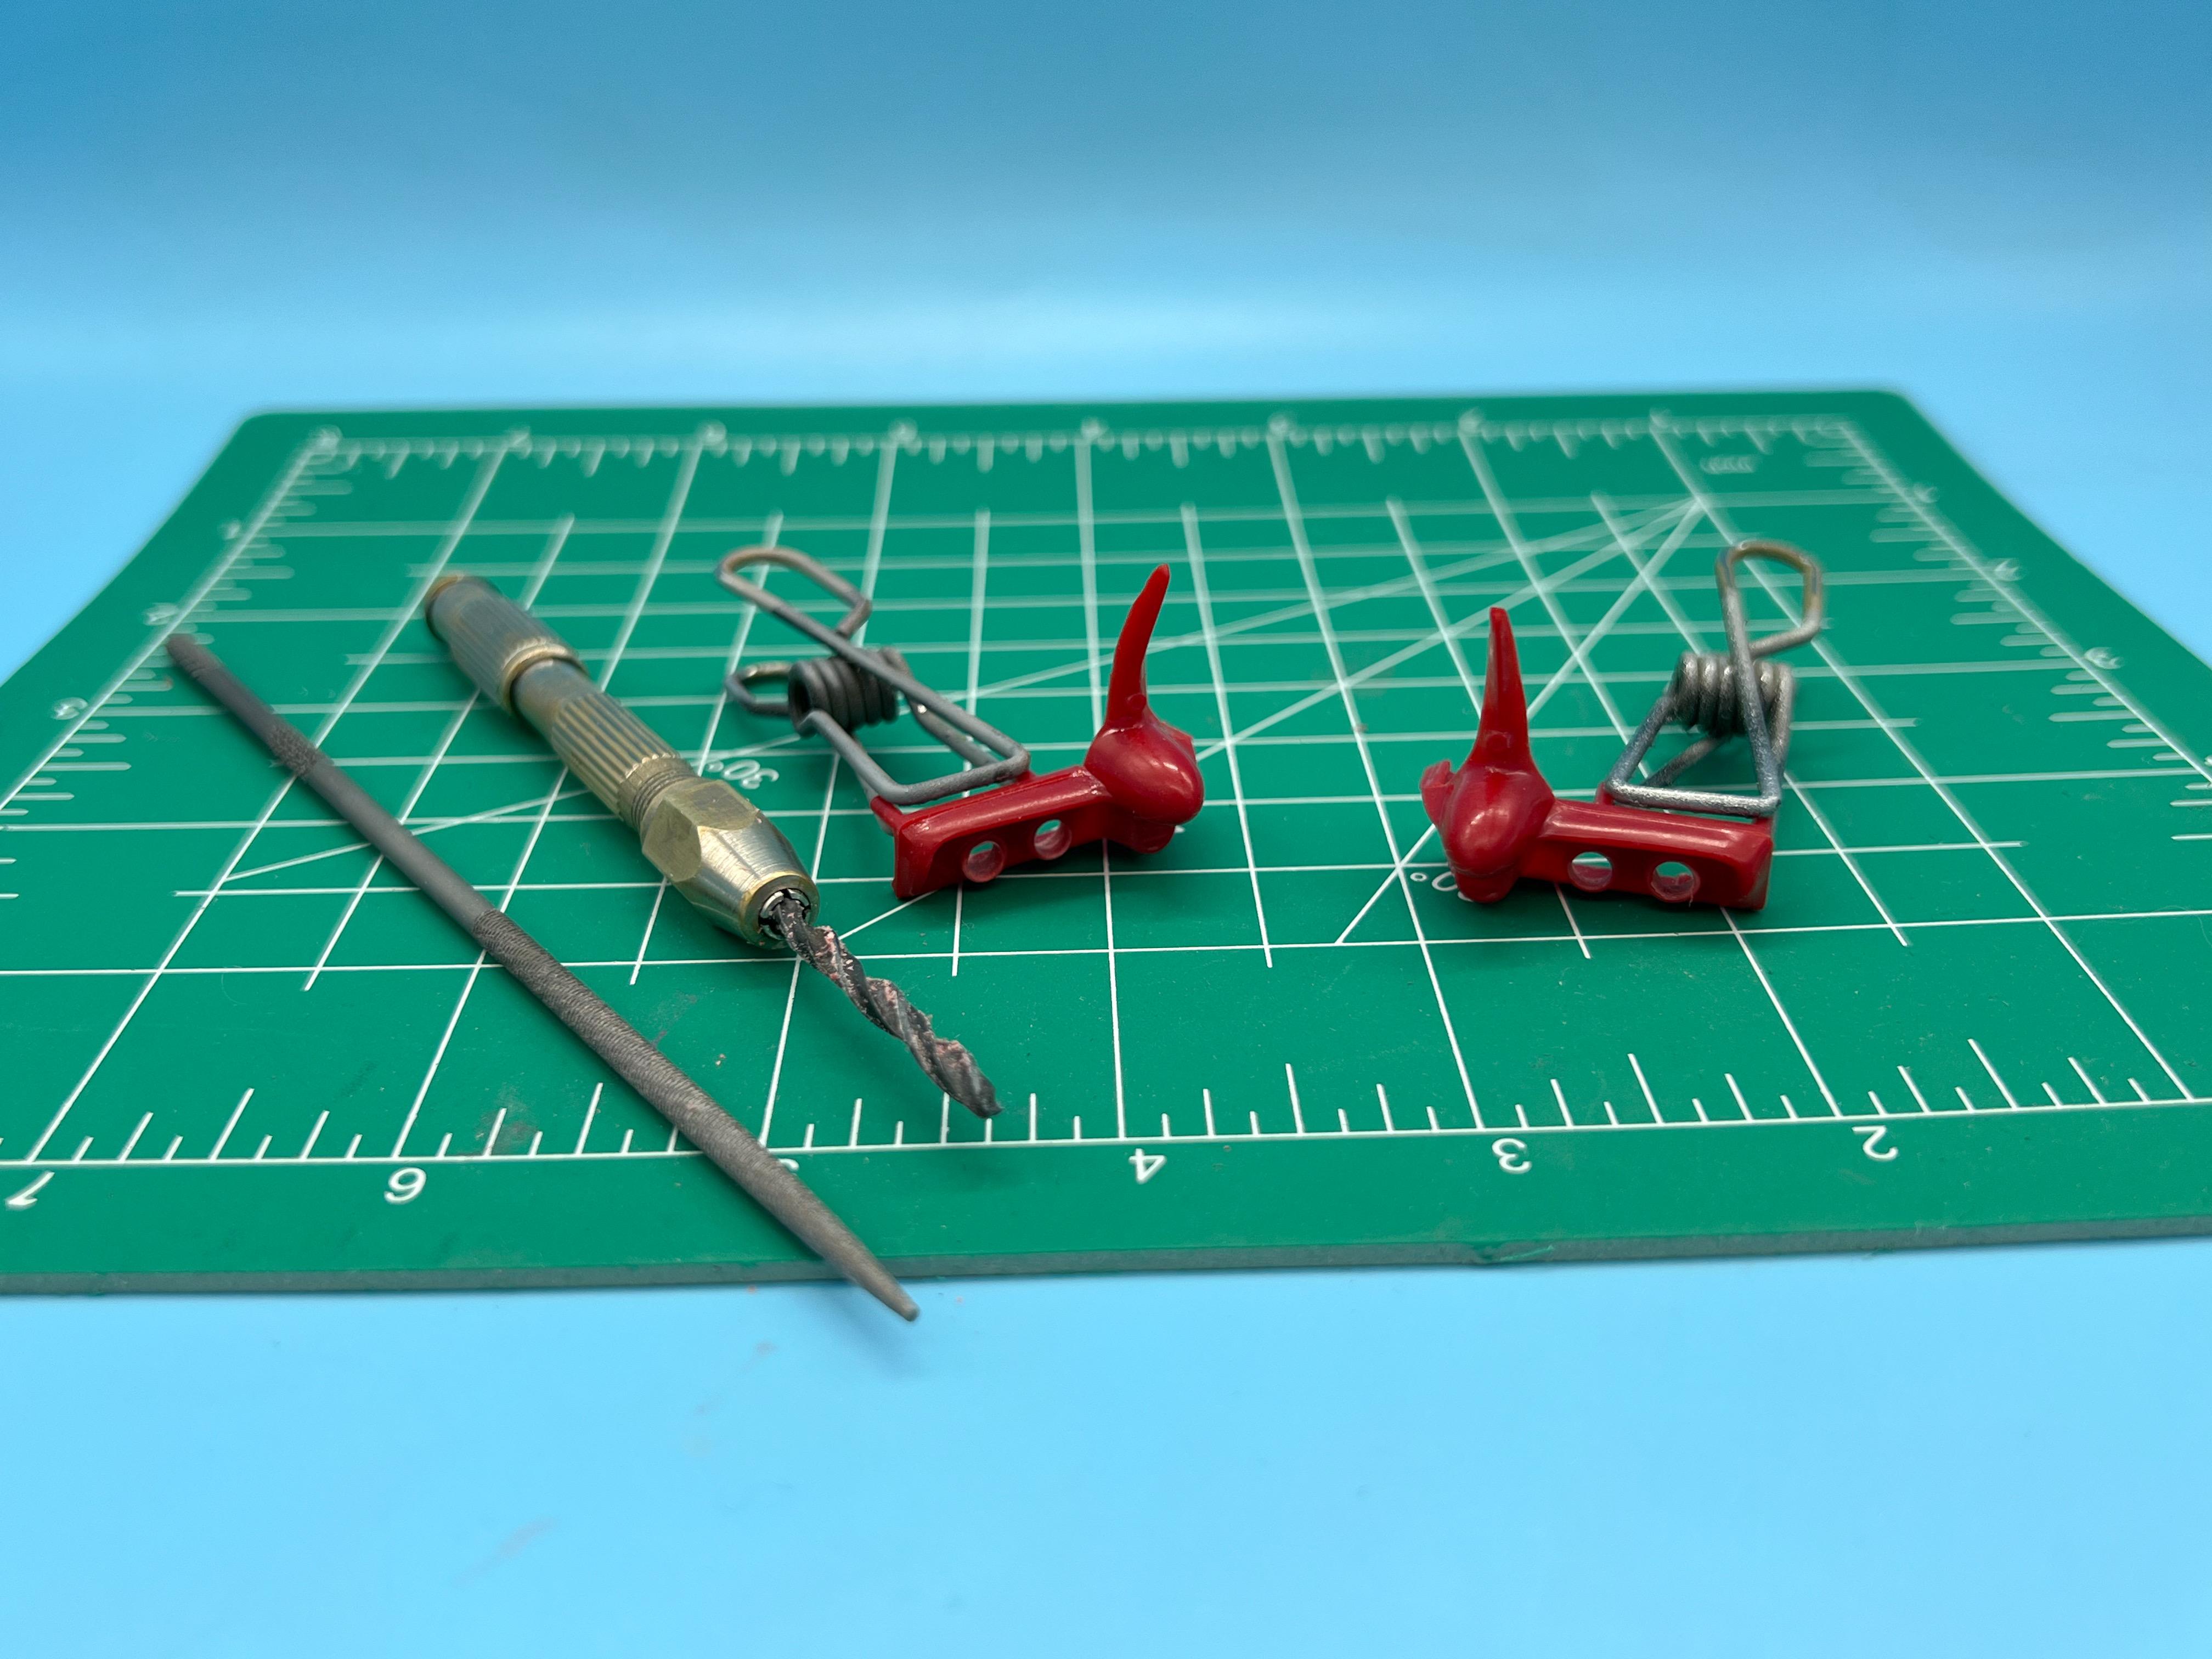
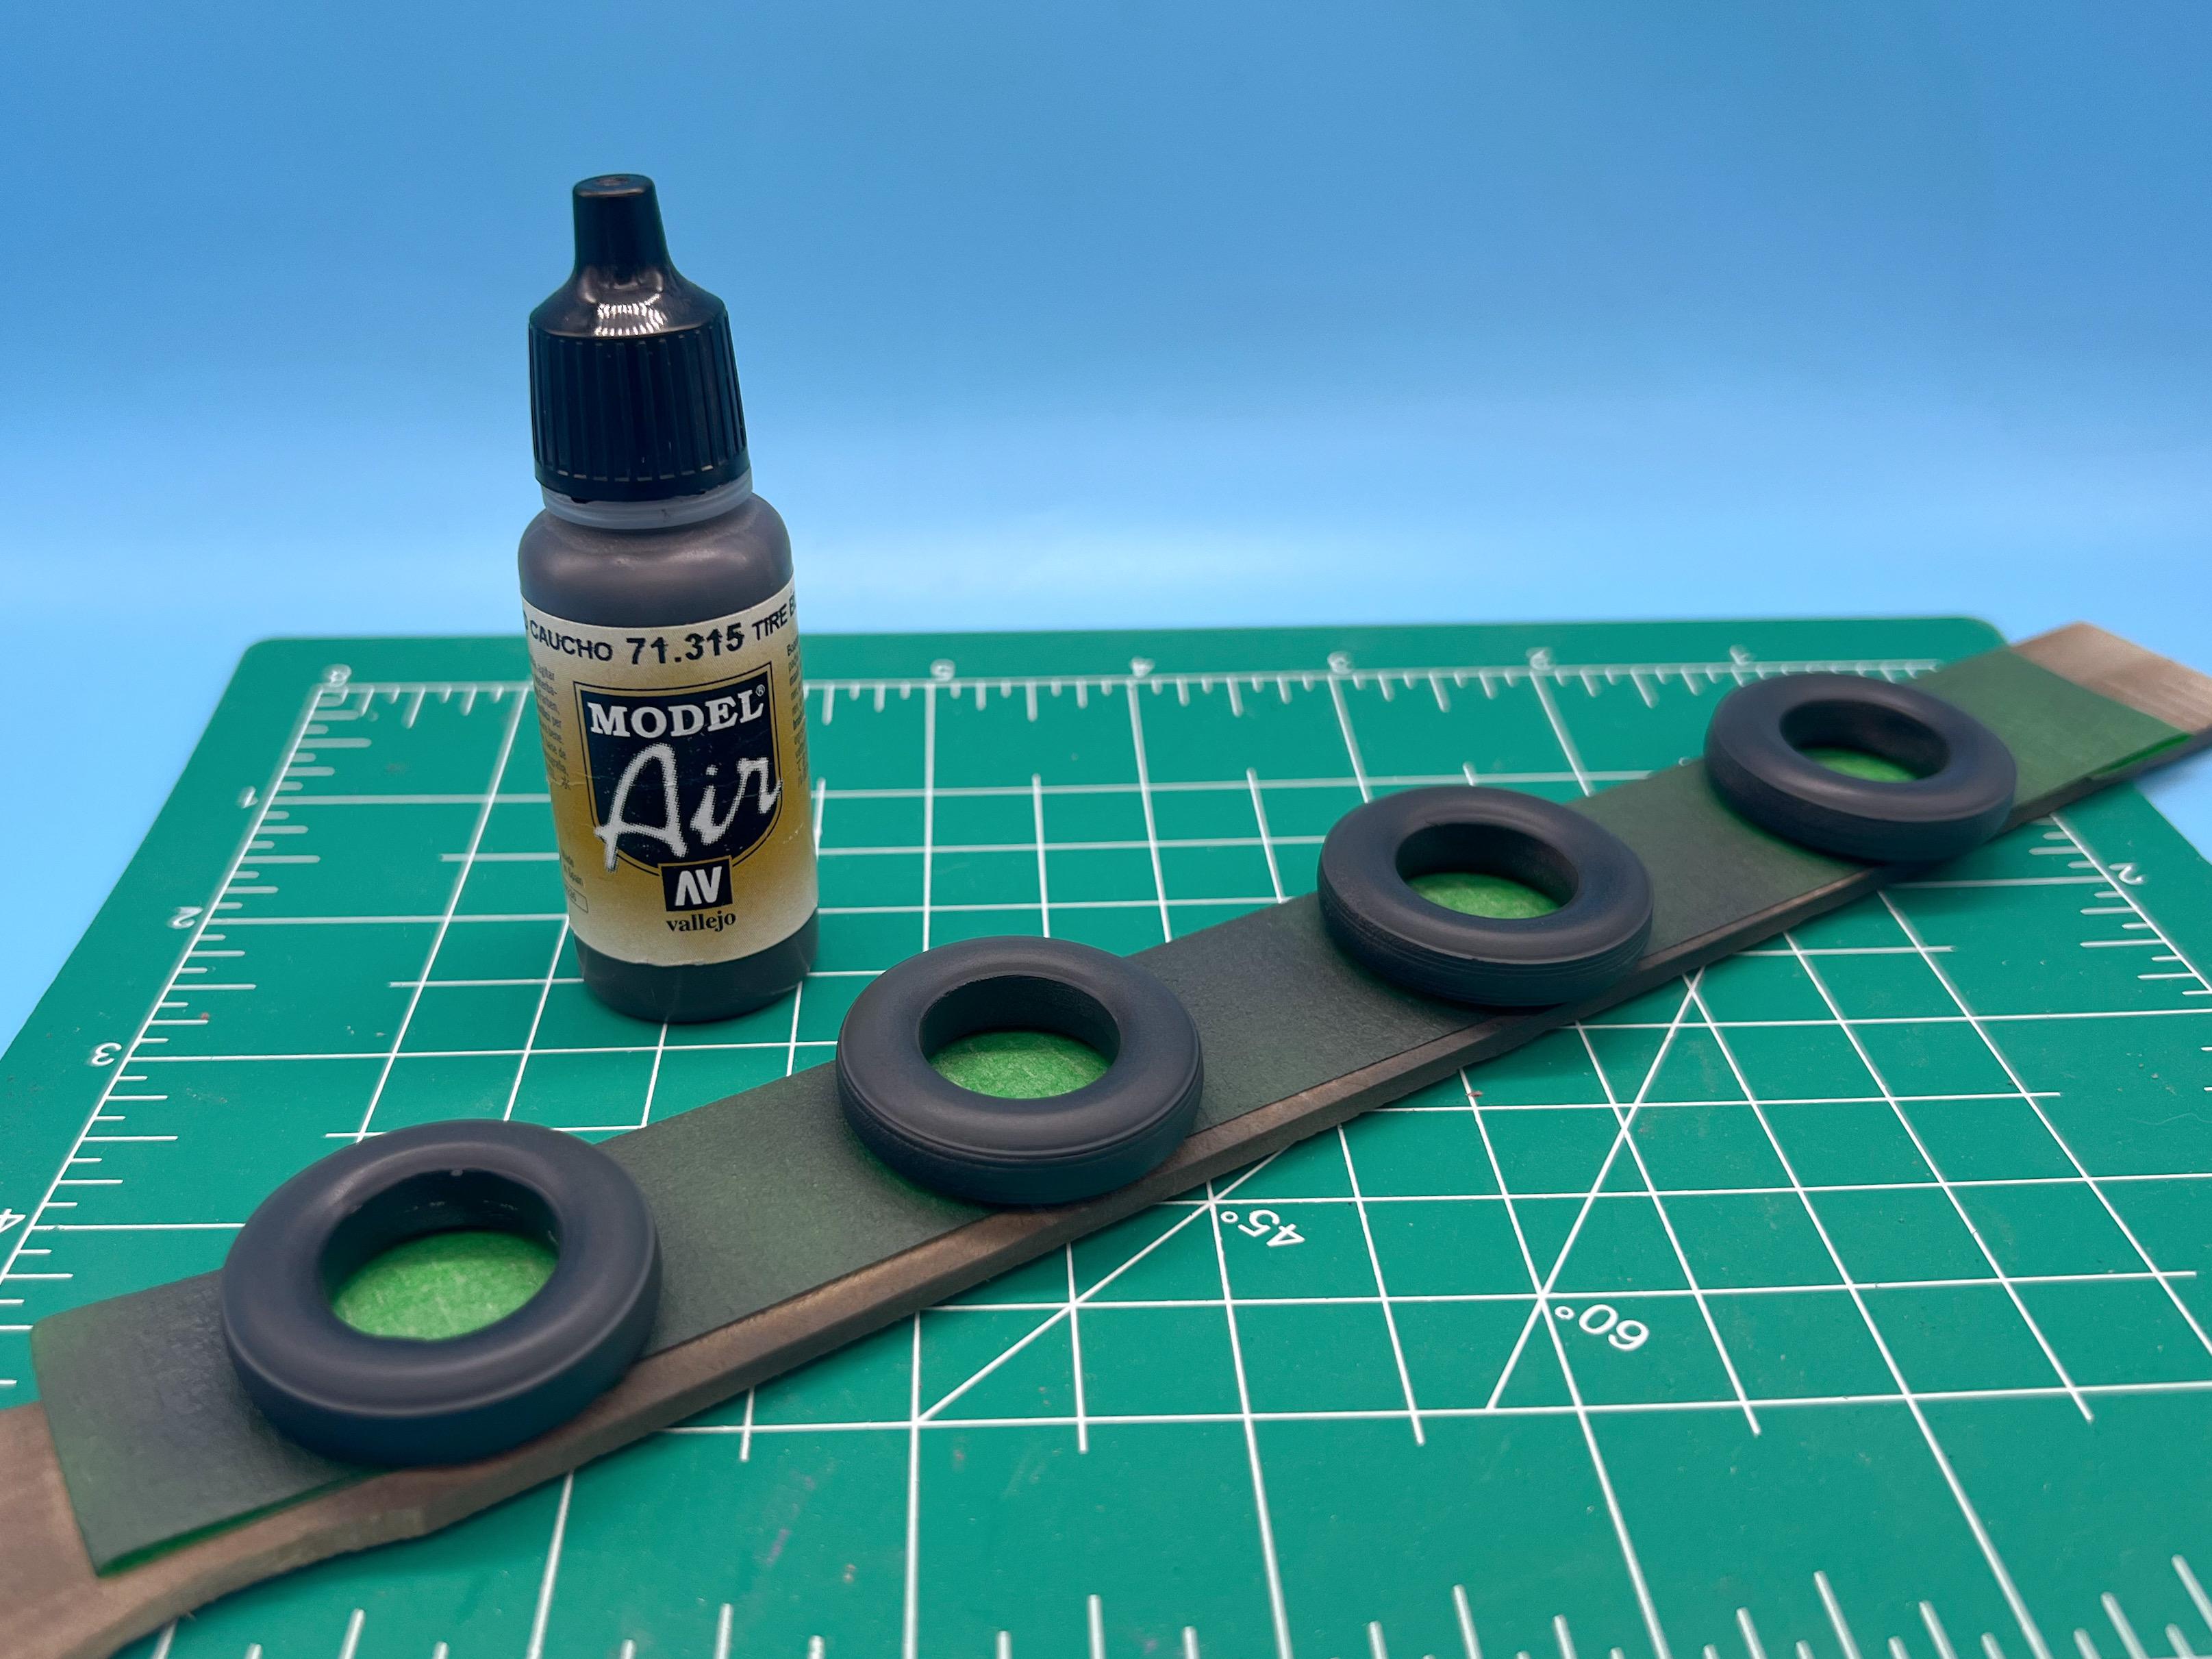
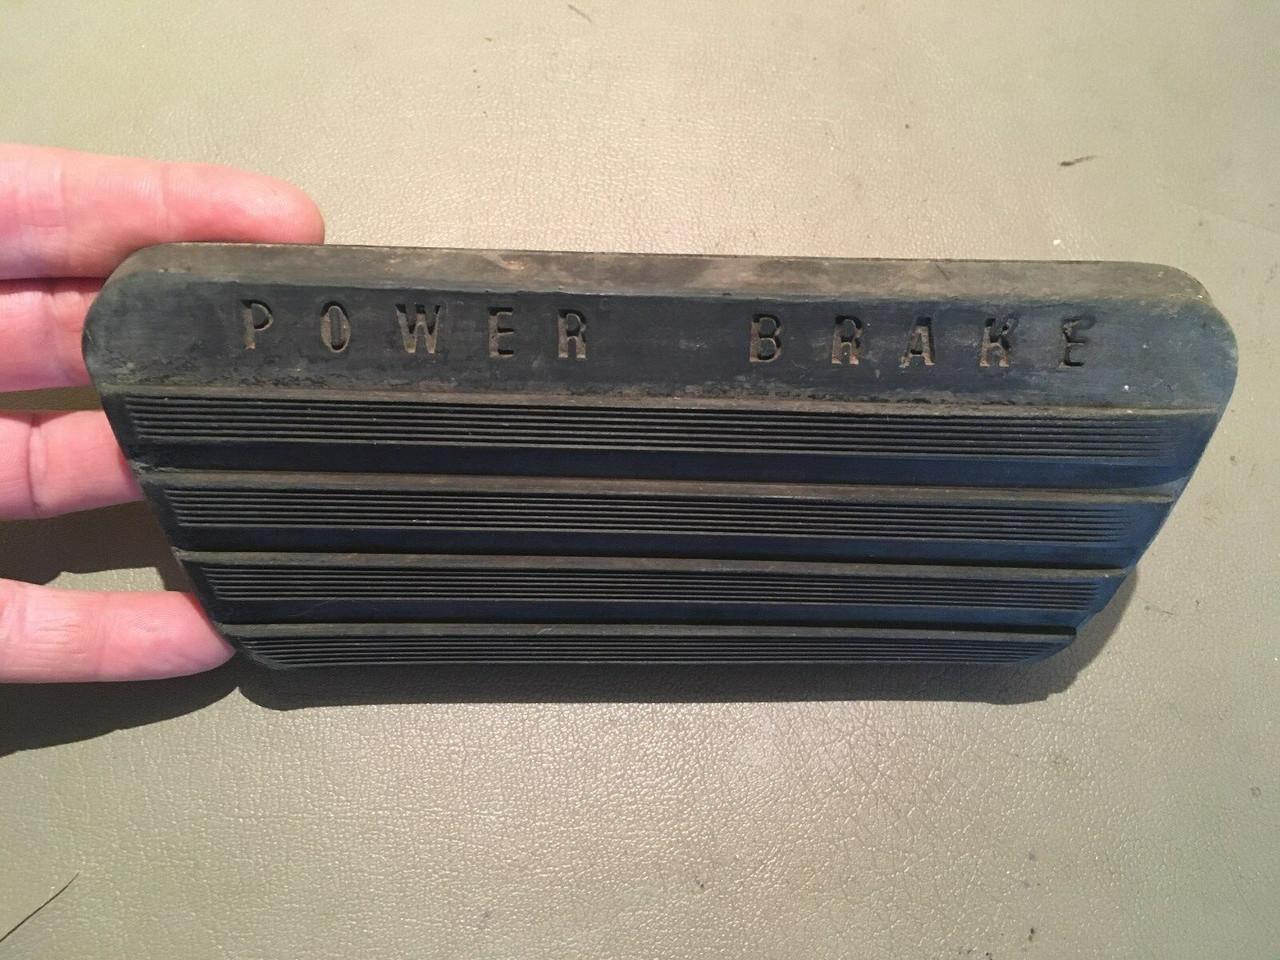
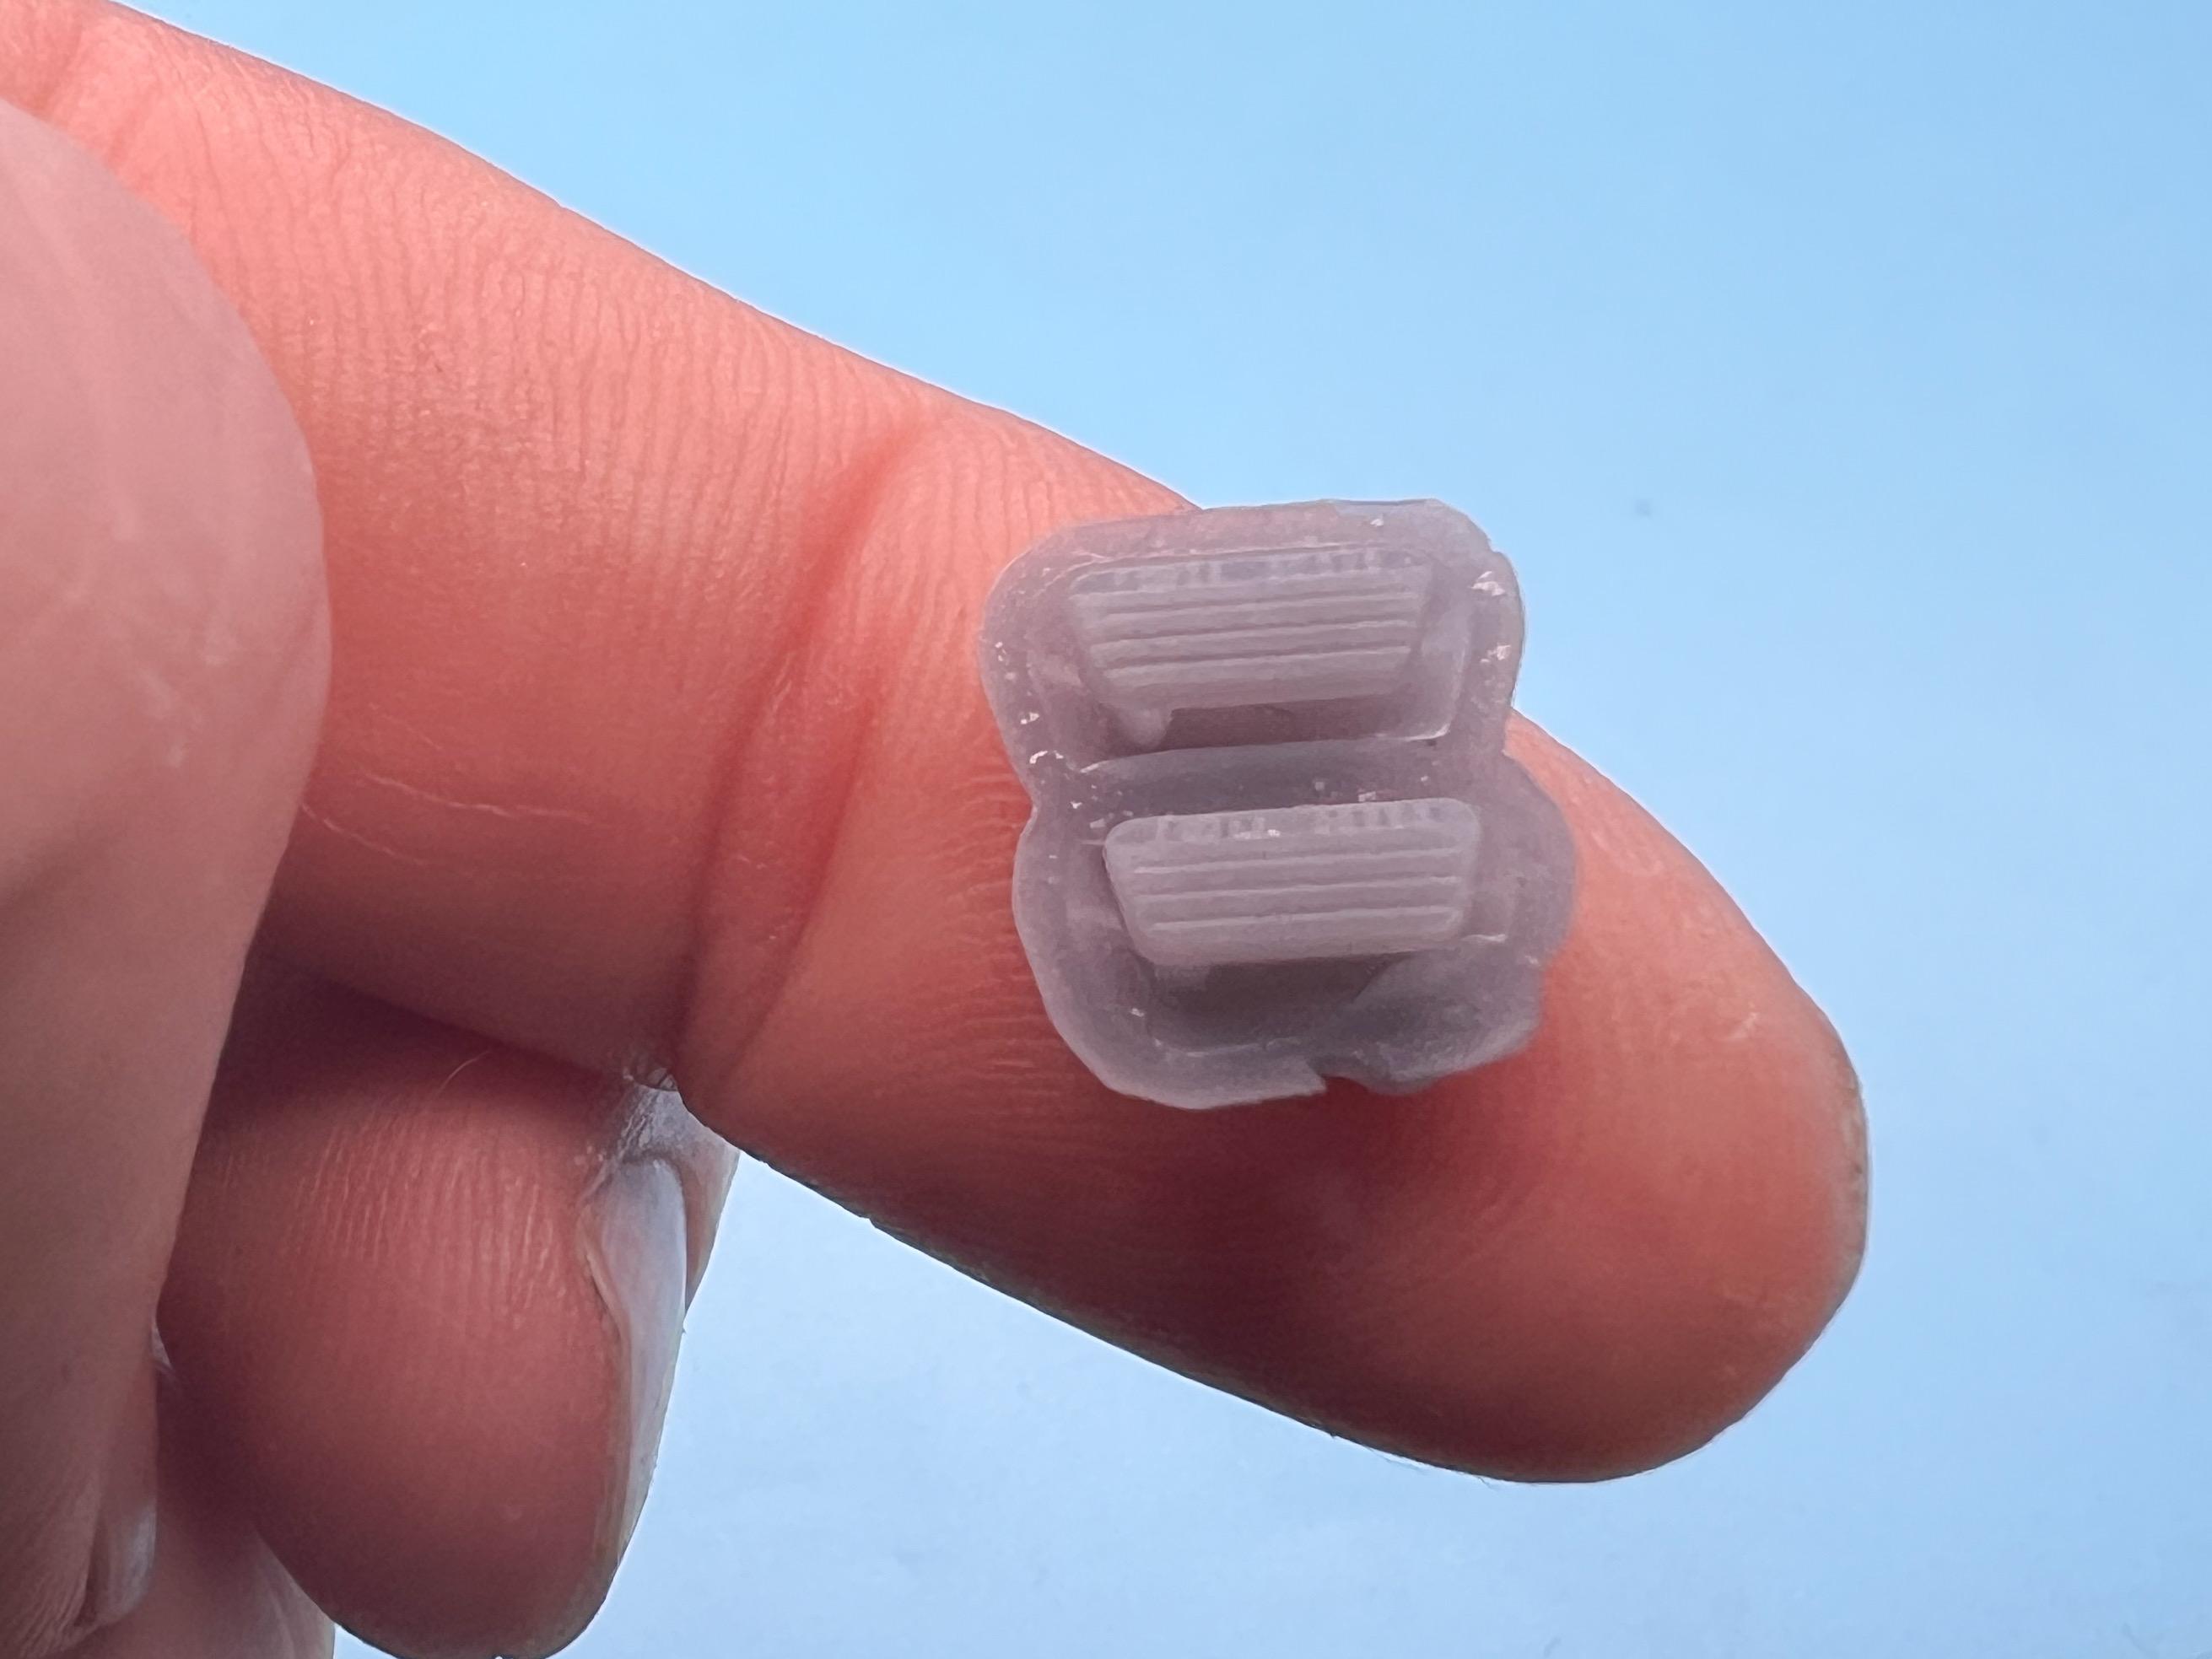
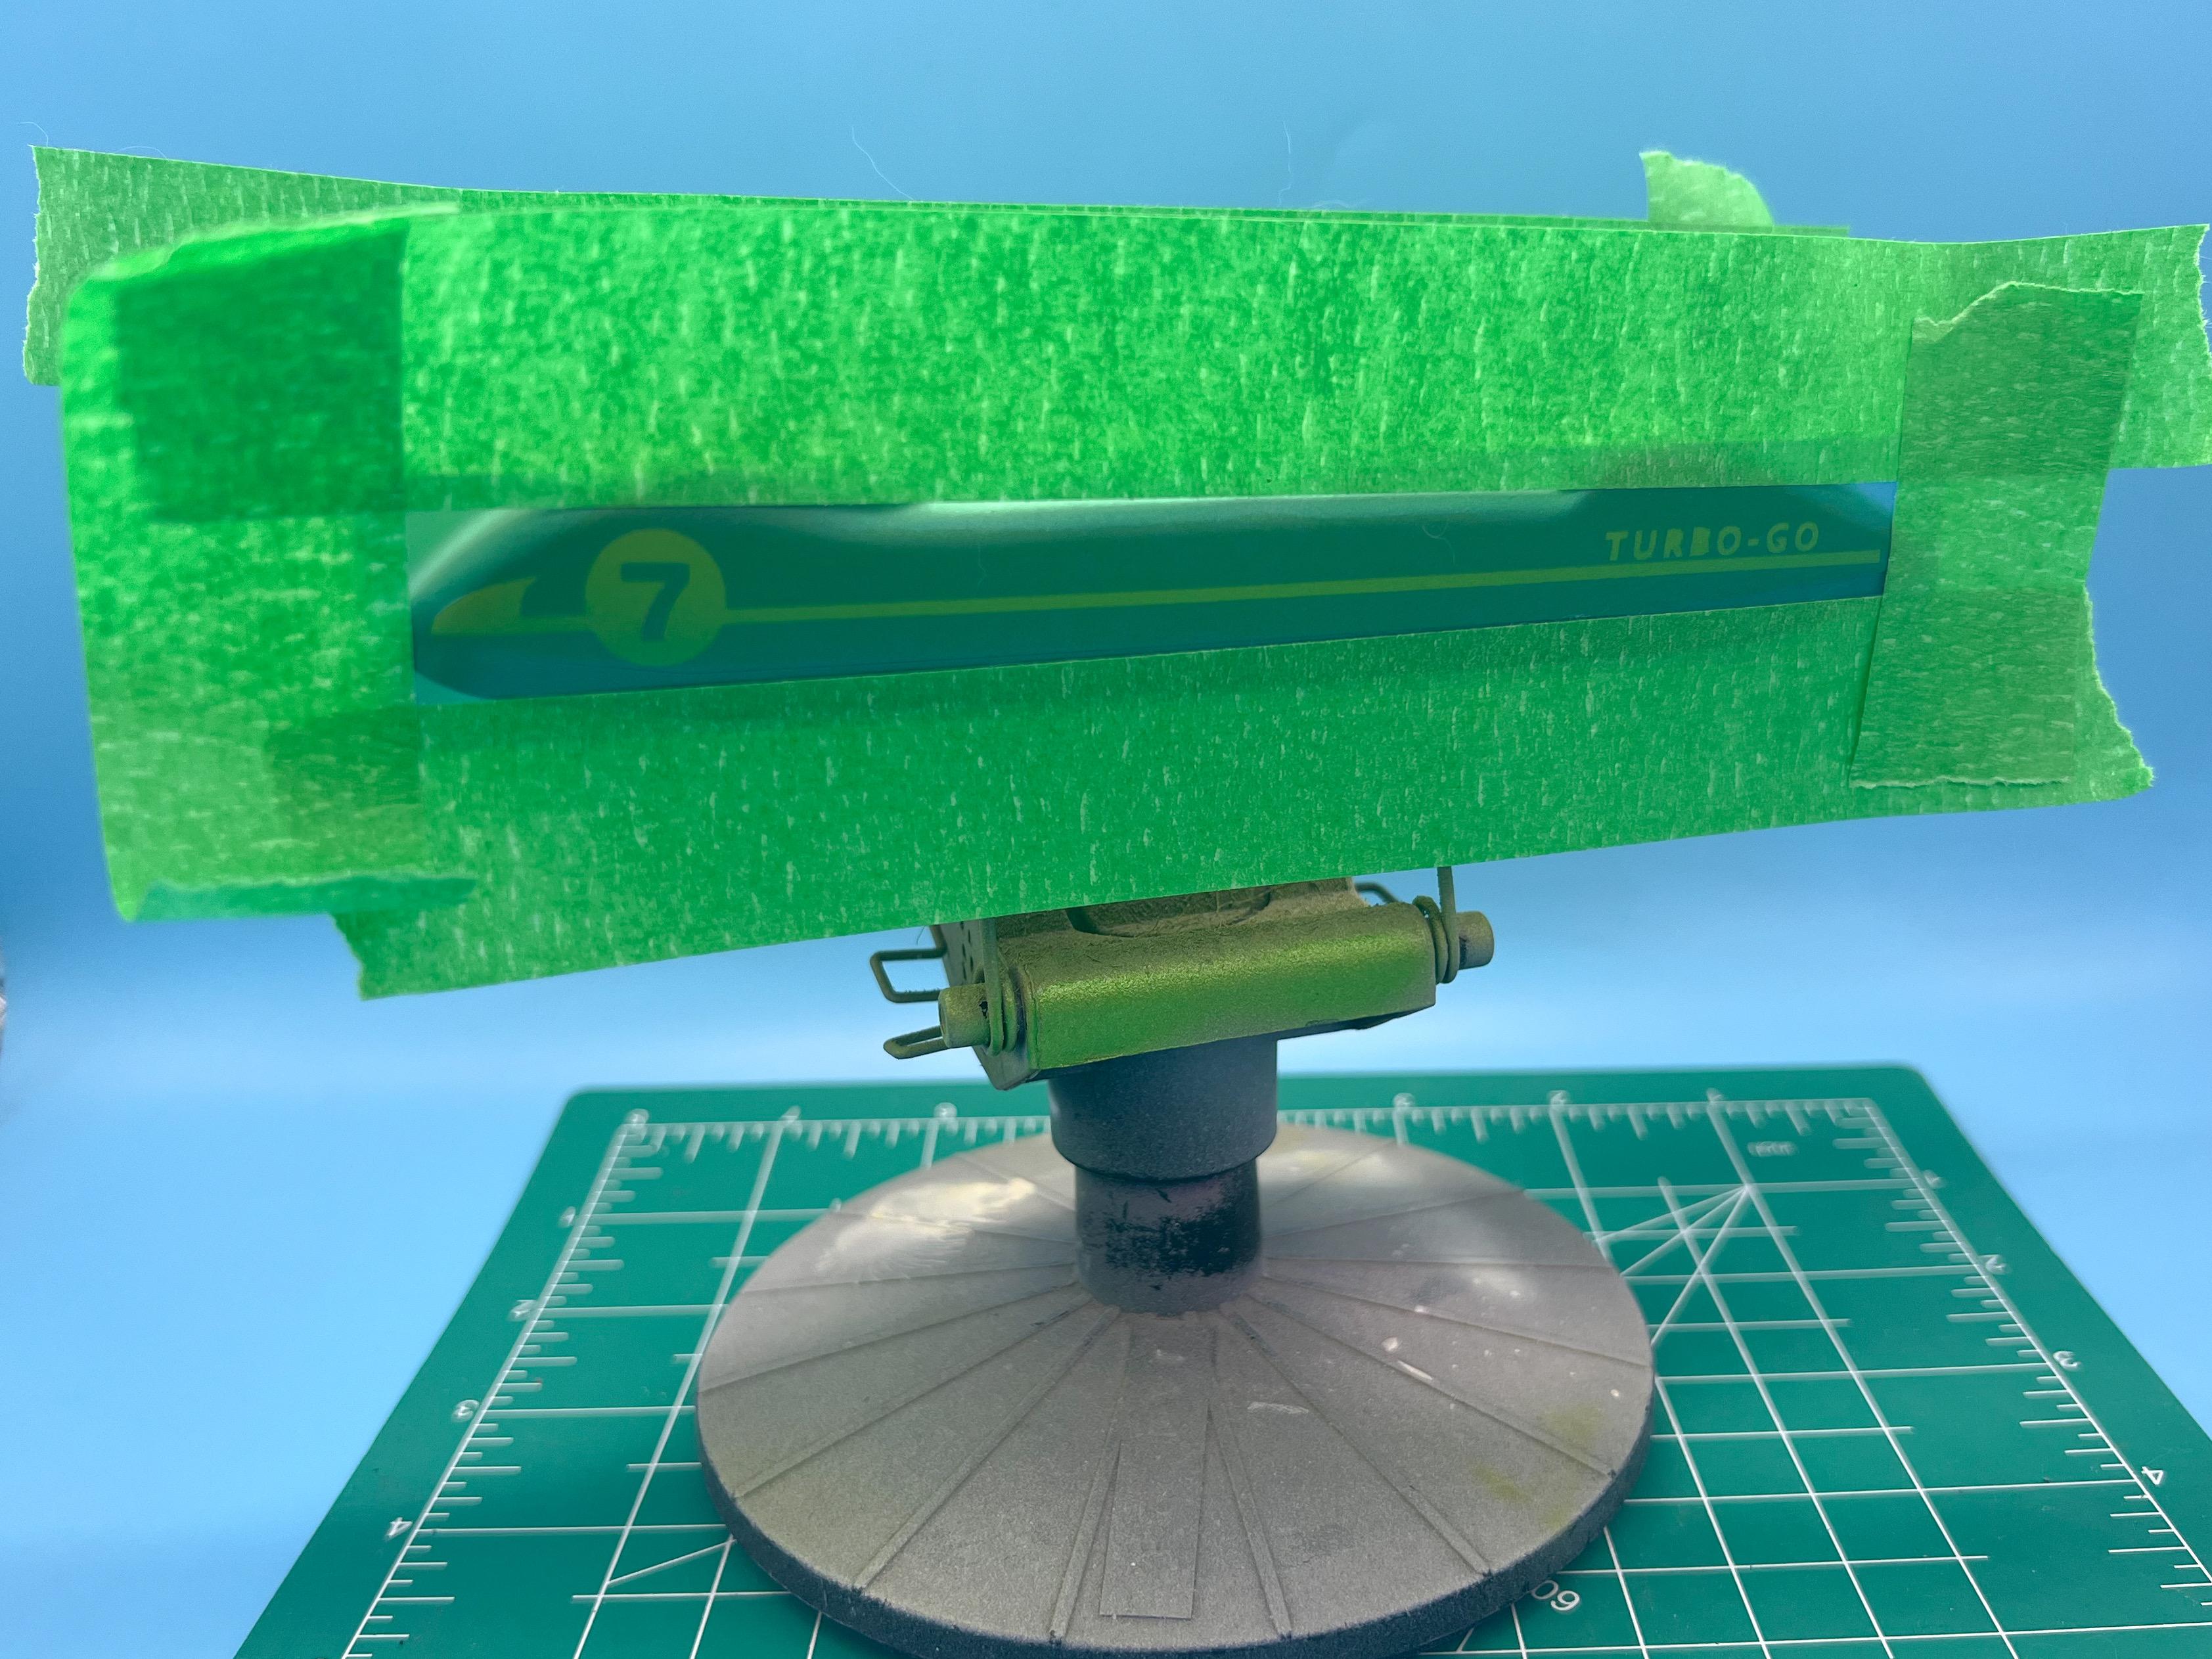
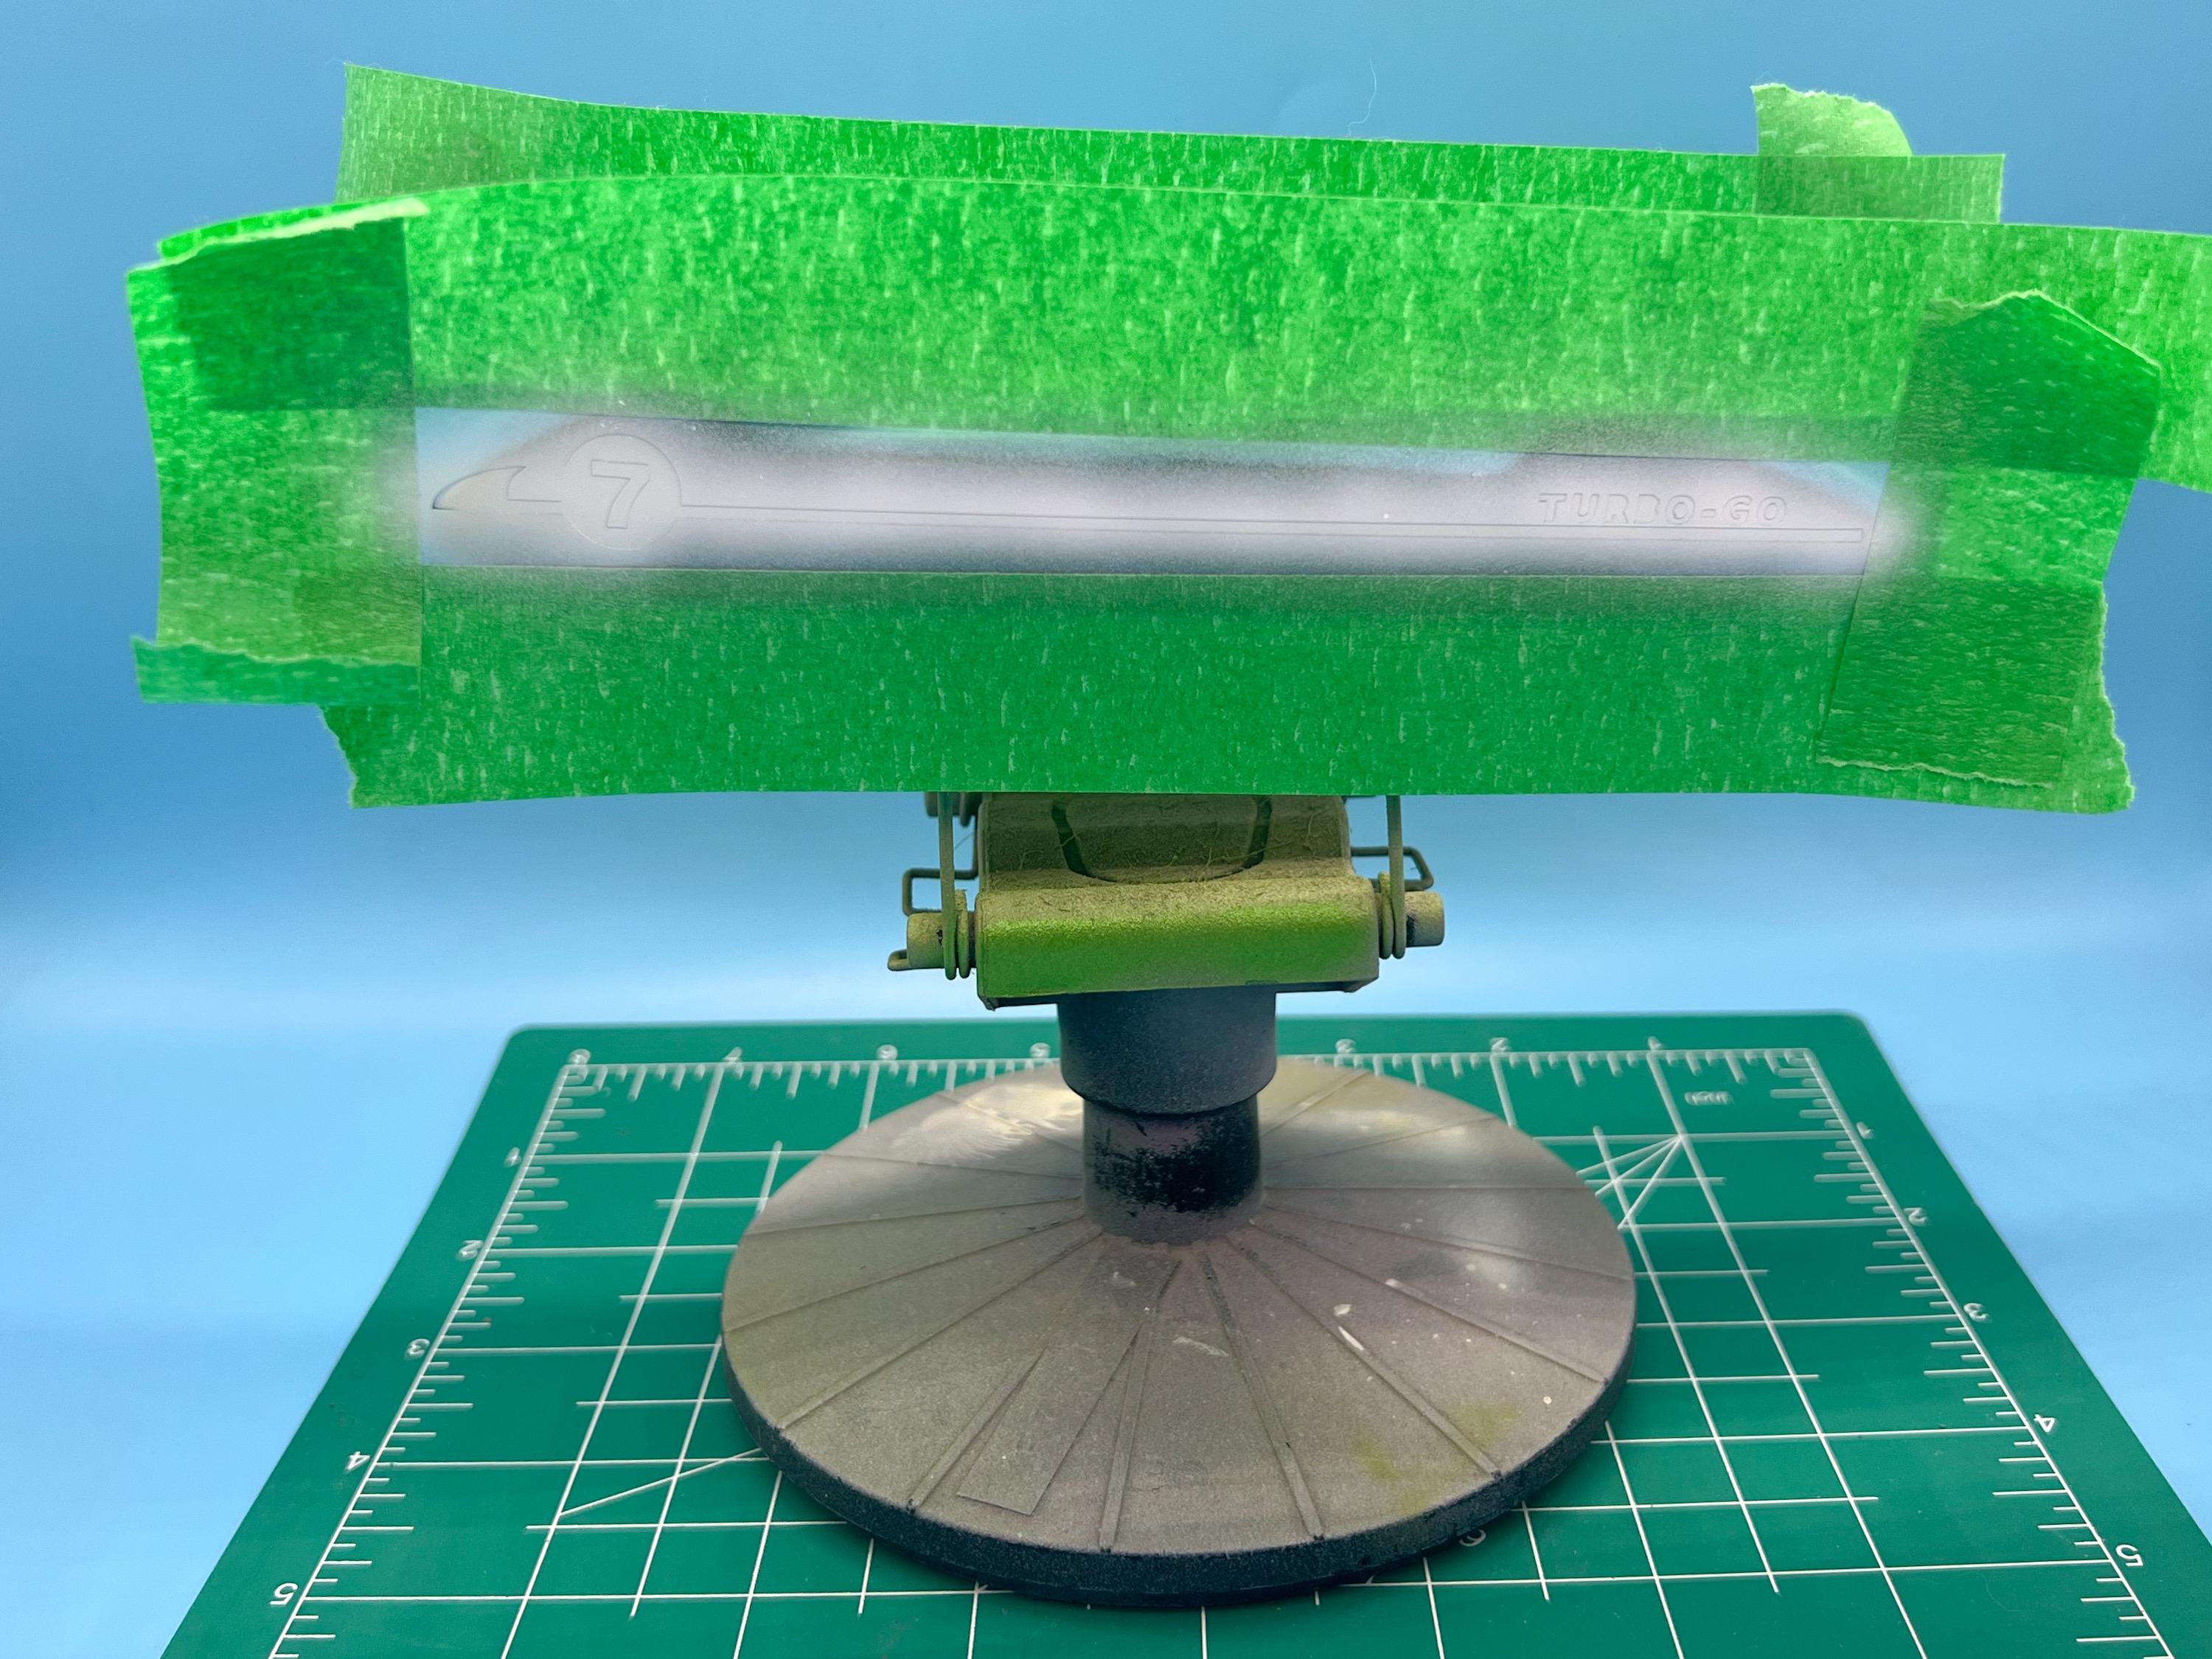
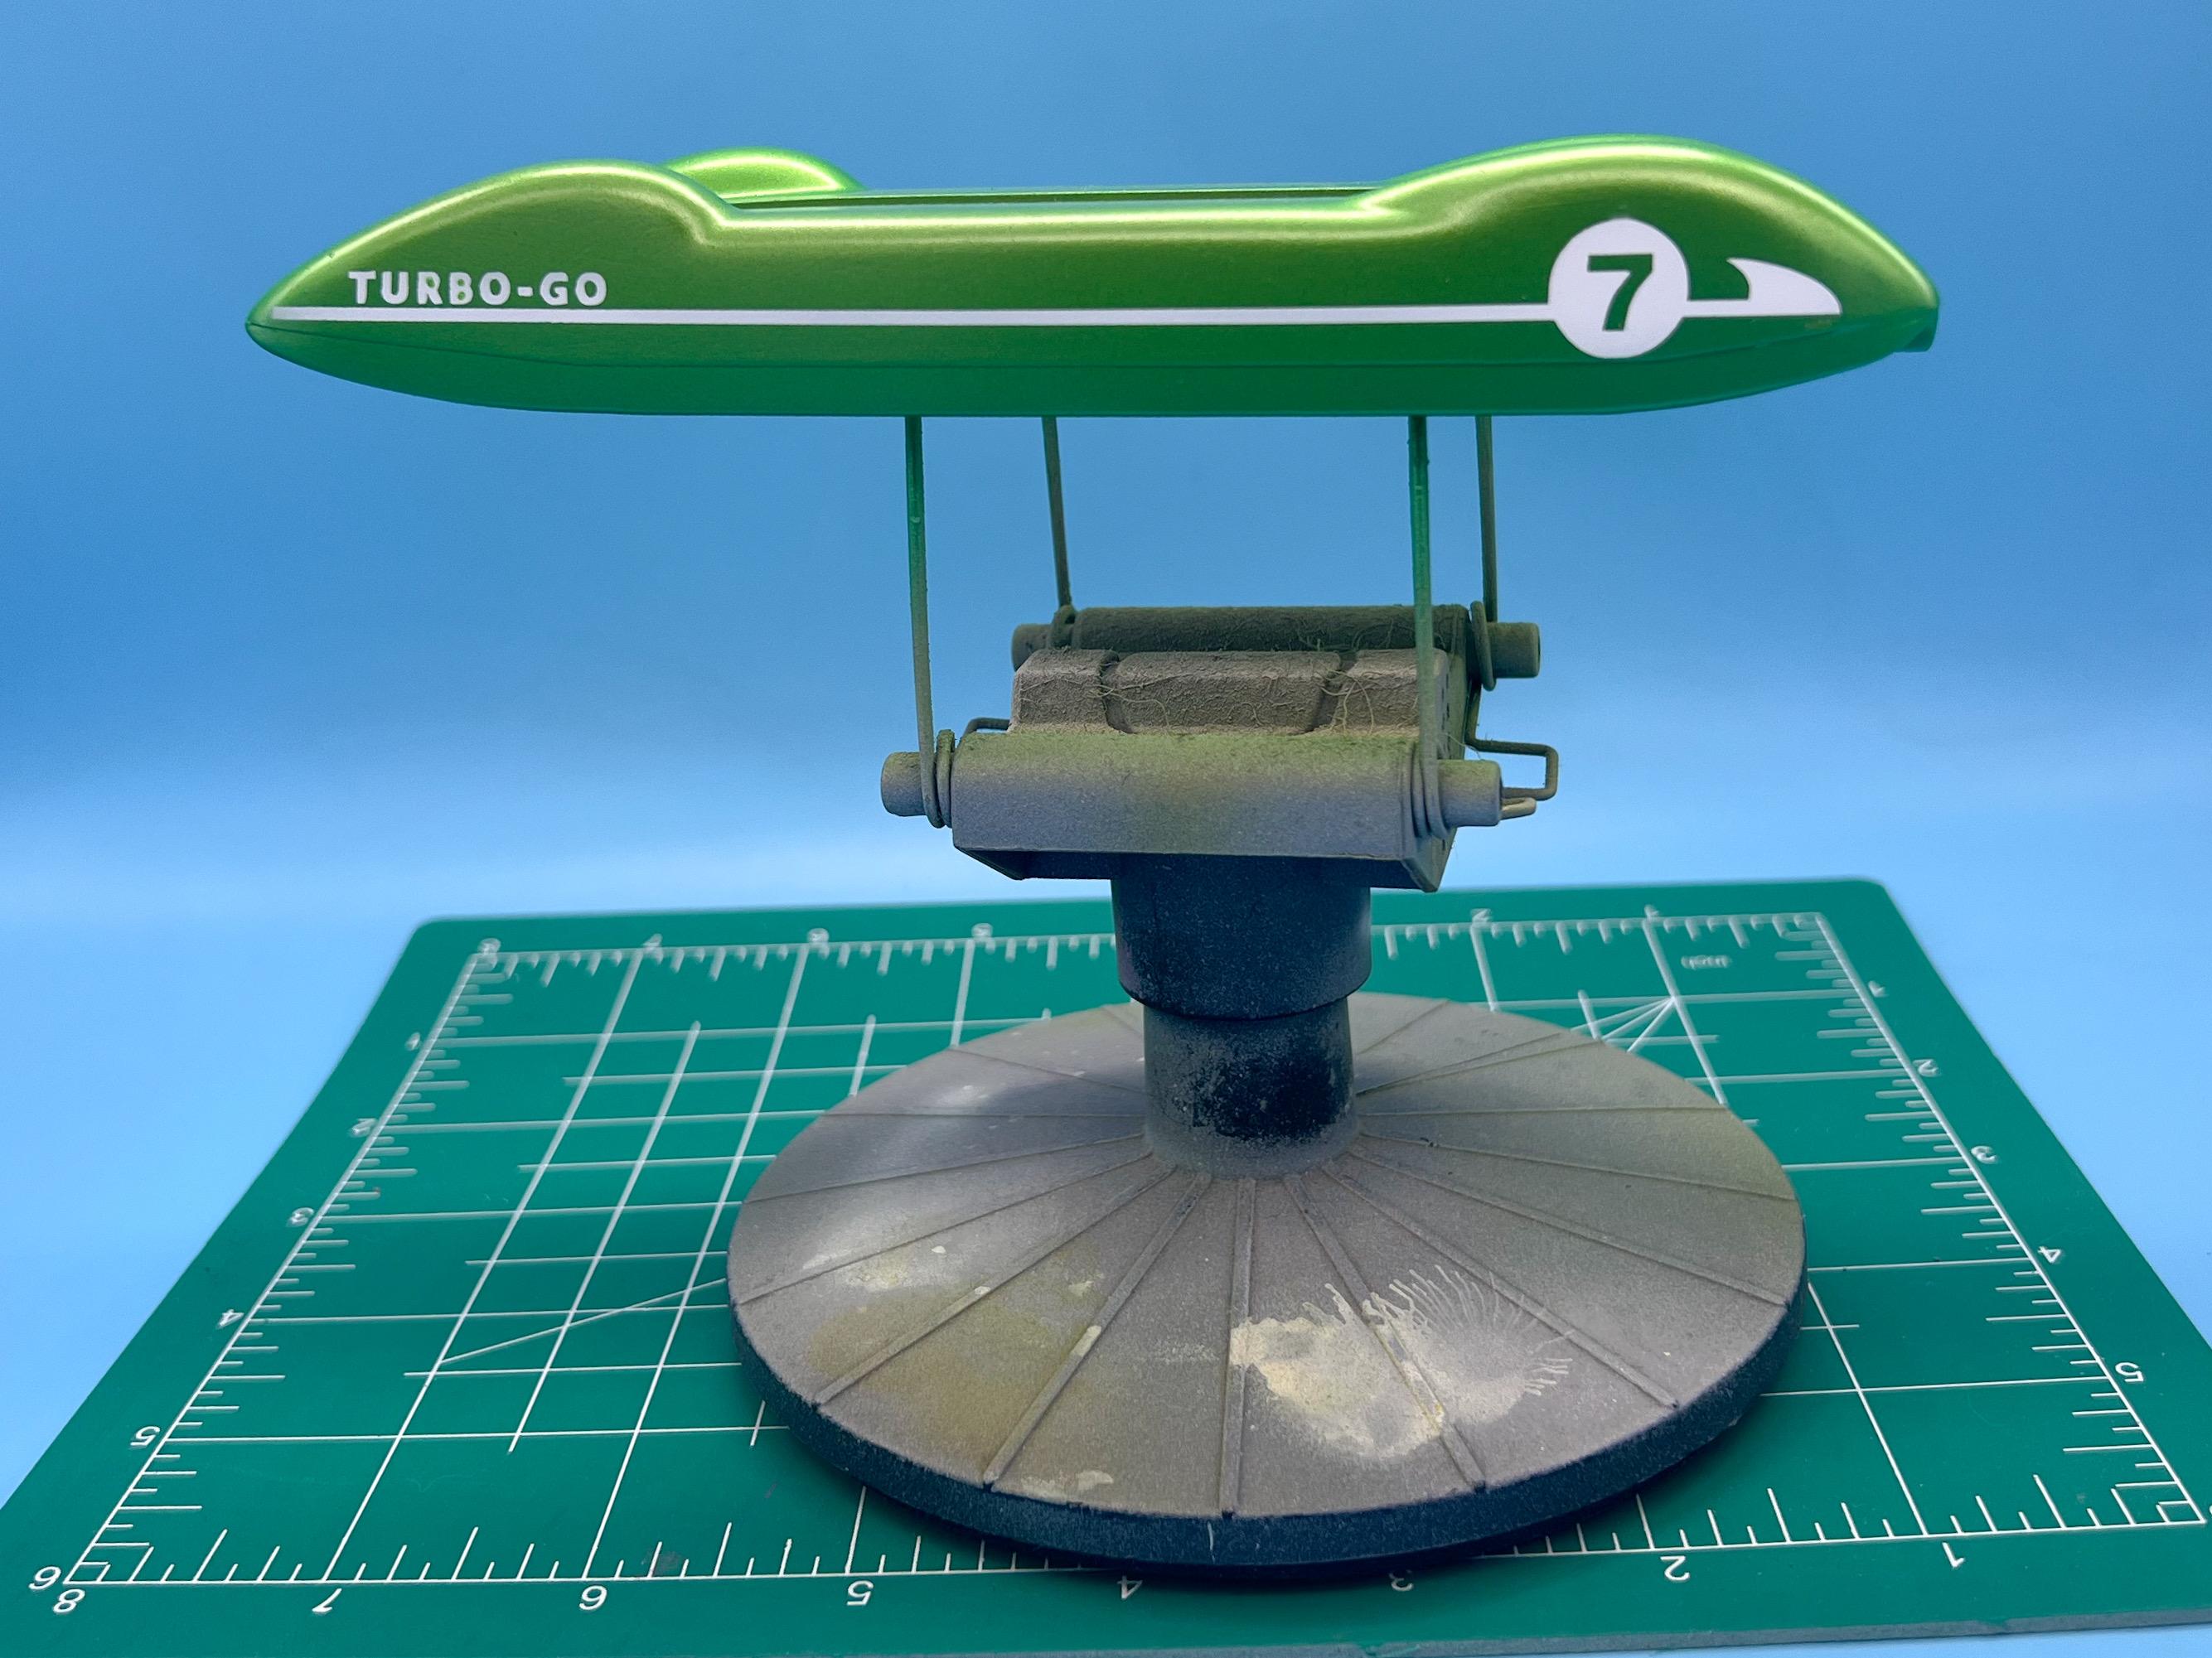
Thanks fellas! Hey Tim! Actually, an off-brand set I picked up on Amazon that had some brighter colors I wanted…but similar stuff, yeah! I tried a few different frames and found it wouldn’t be too much work to make one of them fit…decided to keep this one curbside though in the spirit of the original kit (even if I DID change a bunch of stuff for the sake of it…) A little progress this week…remasked the body and finished up the paint - last touch I wanted to add was a little light gradient fade along the body line: And I’m working on getting it into clearcoat now, which my current favorite lacquer: Started getting the chrome parts into shape too; apart from clean-up the only ones I’m modifying are the rear taillight / fin pieces, which I’ve drilled to take some separate lenses that I still need to make: Cleaned up the 2-piece plastic tires, got them into primer then some generic rattle-can black followed by some shading with Vallejo Tire Black: Then brush painted the whitewalls (I’d usually mask something like this, but I’m working on my brush-painting skills) then shot with matte coat: Ignore the ones in the background, they’re for something else… I needed some pedals so I designed them in CAD and printed them - didn’t get a perfect print of the gas pedal yet, but the brake pedal came out ok: I managed to get the lettering on there, even if it is only just barely legible…hard to photograph too… Tomorrow’s project is the rest of the interior…more soon, soon as I’ve done more! Thanks for looking!
-
Atlantis Models has bought another lot of tooling/molds.....
CabDriver replied to Dave Van's topic in Car Kit News & Reviews
Couple more teasers from Atlantis?
-
1934 Ford Pickup
CabDriver replied to Exotics_Builder's topic in WIP: Model Trucks: Pickups, Vans, SUVs, Light Commercial
This looks GREAT so far - nice detailing! -
Super modified
CabDriver replied to Vettegasser's topic in WIP: Other Racing: Road Racing, Land Speed Racers
Wow - that’s awesome! I hadn’t heard of Scale Speed Works before, but I’ll be checking them out - thanks for the heads-up! -
Nah, back home now…but did as much prep as I could in an Orlando hotel room 🤪 Im replicating the original Hawk box art for this one, but I don’t have a set of the original decals so had to cut a mask and lay some Tamiya white down… And the inspiration… I’ll do some touch-ups on the paint once it’s set up and then I can get the body in clear
-
Ha, those are both great! I love stuff like this! Thanks for sharing!
-
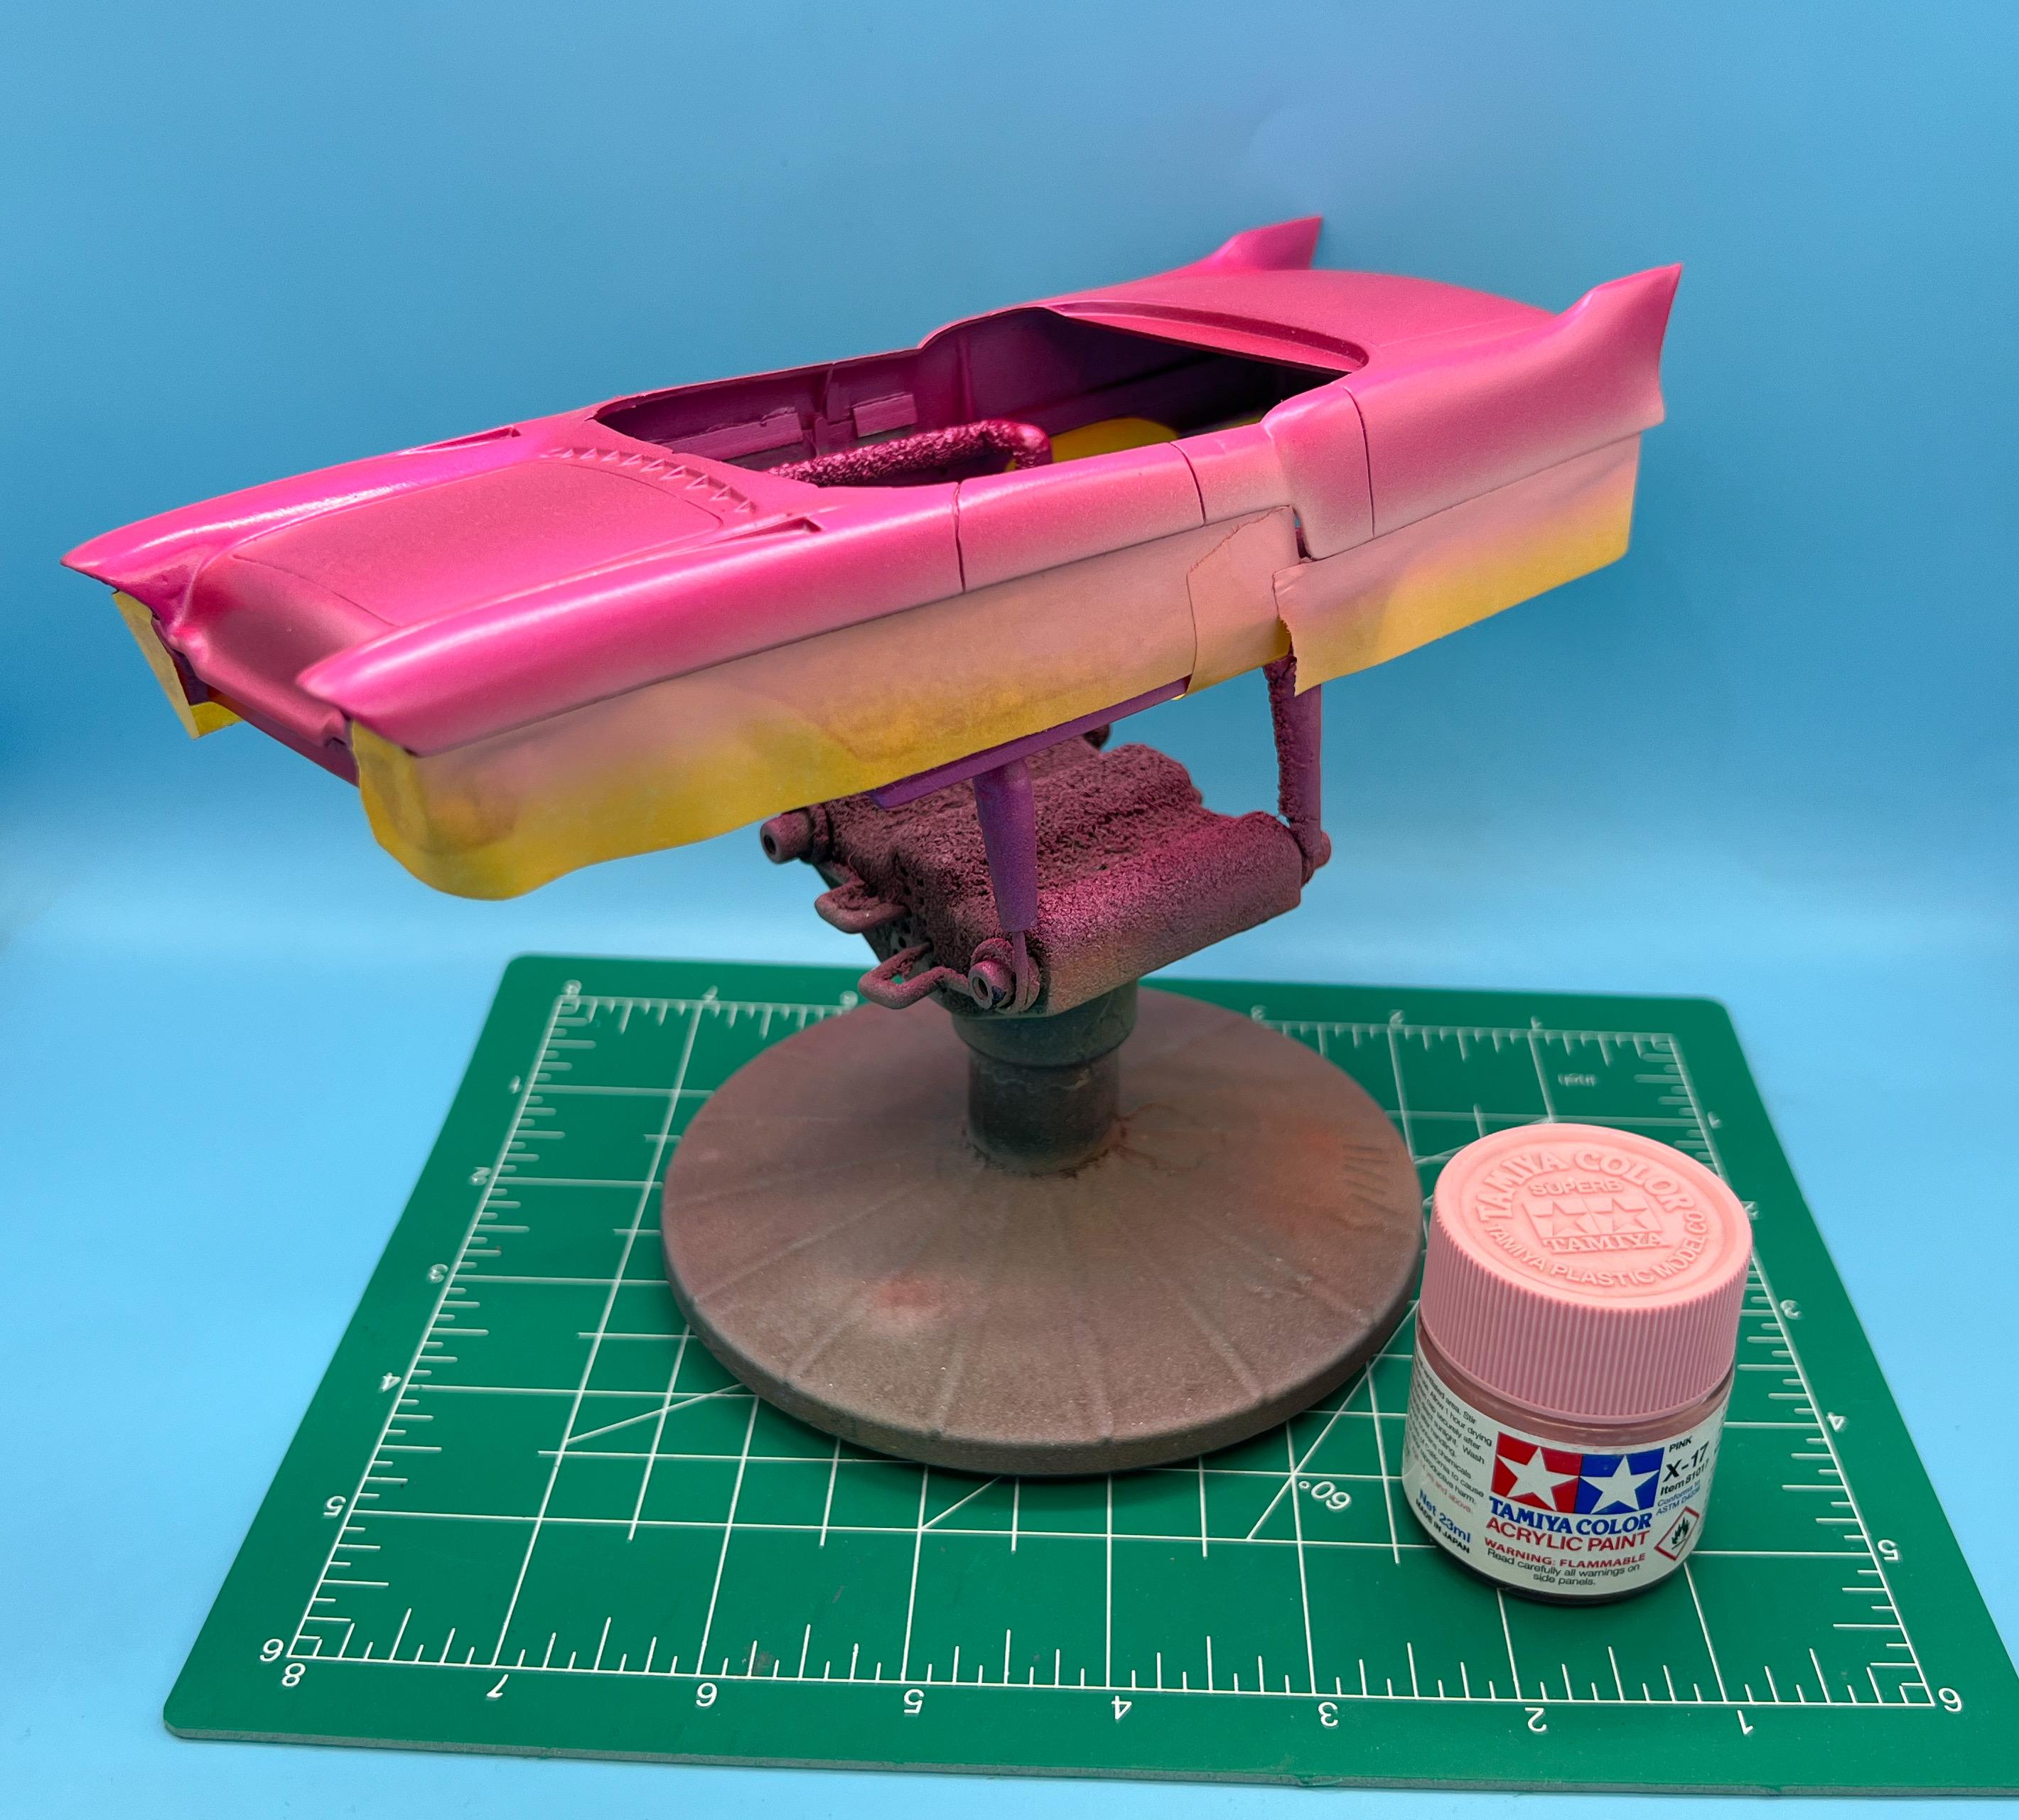
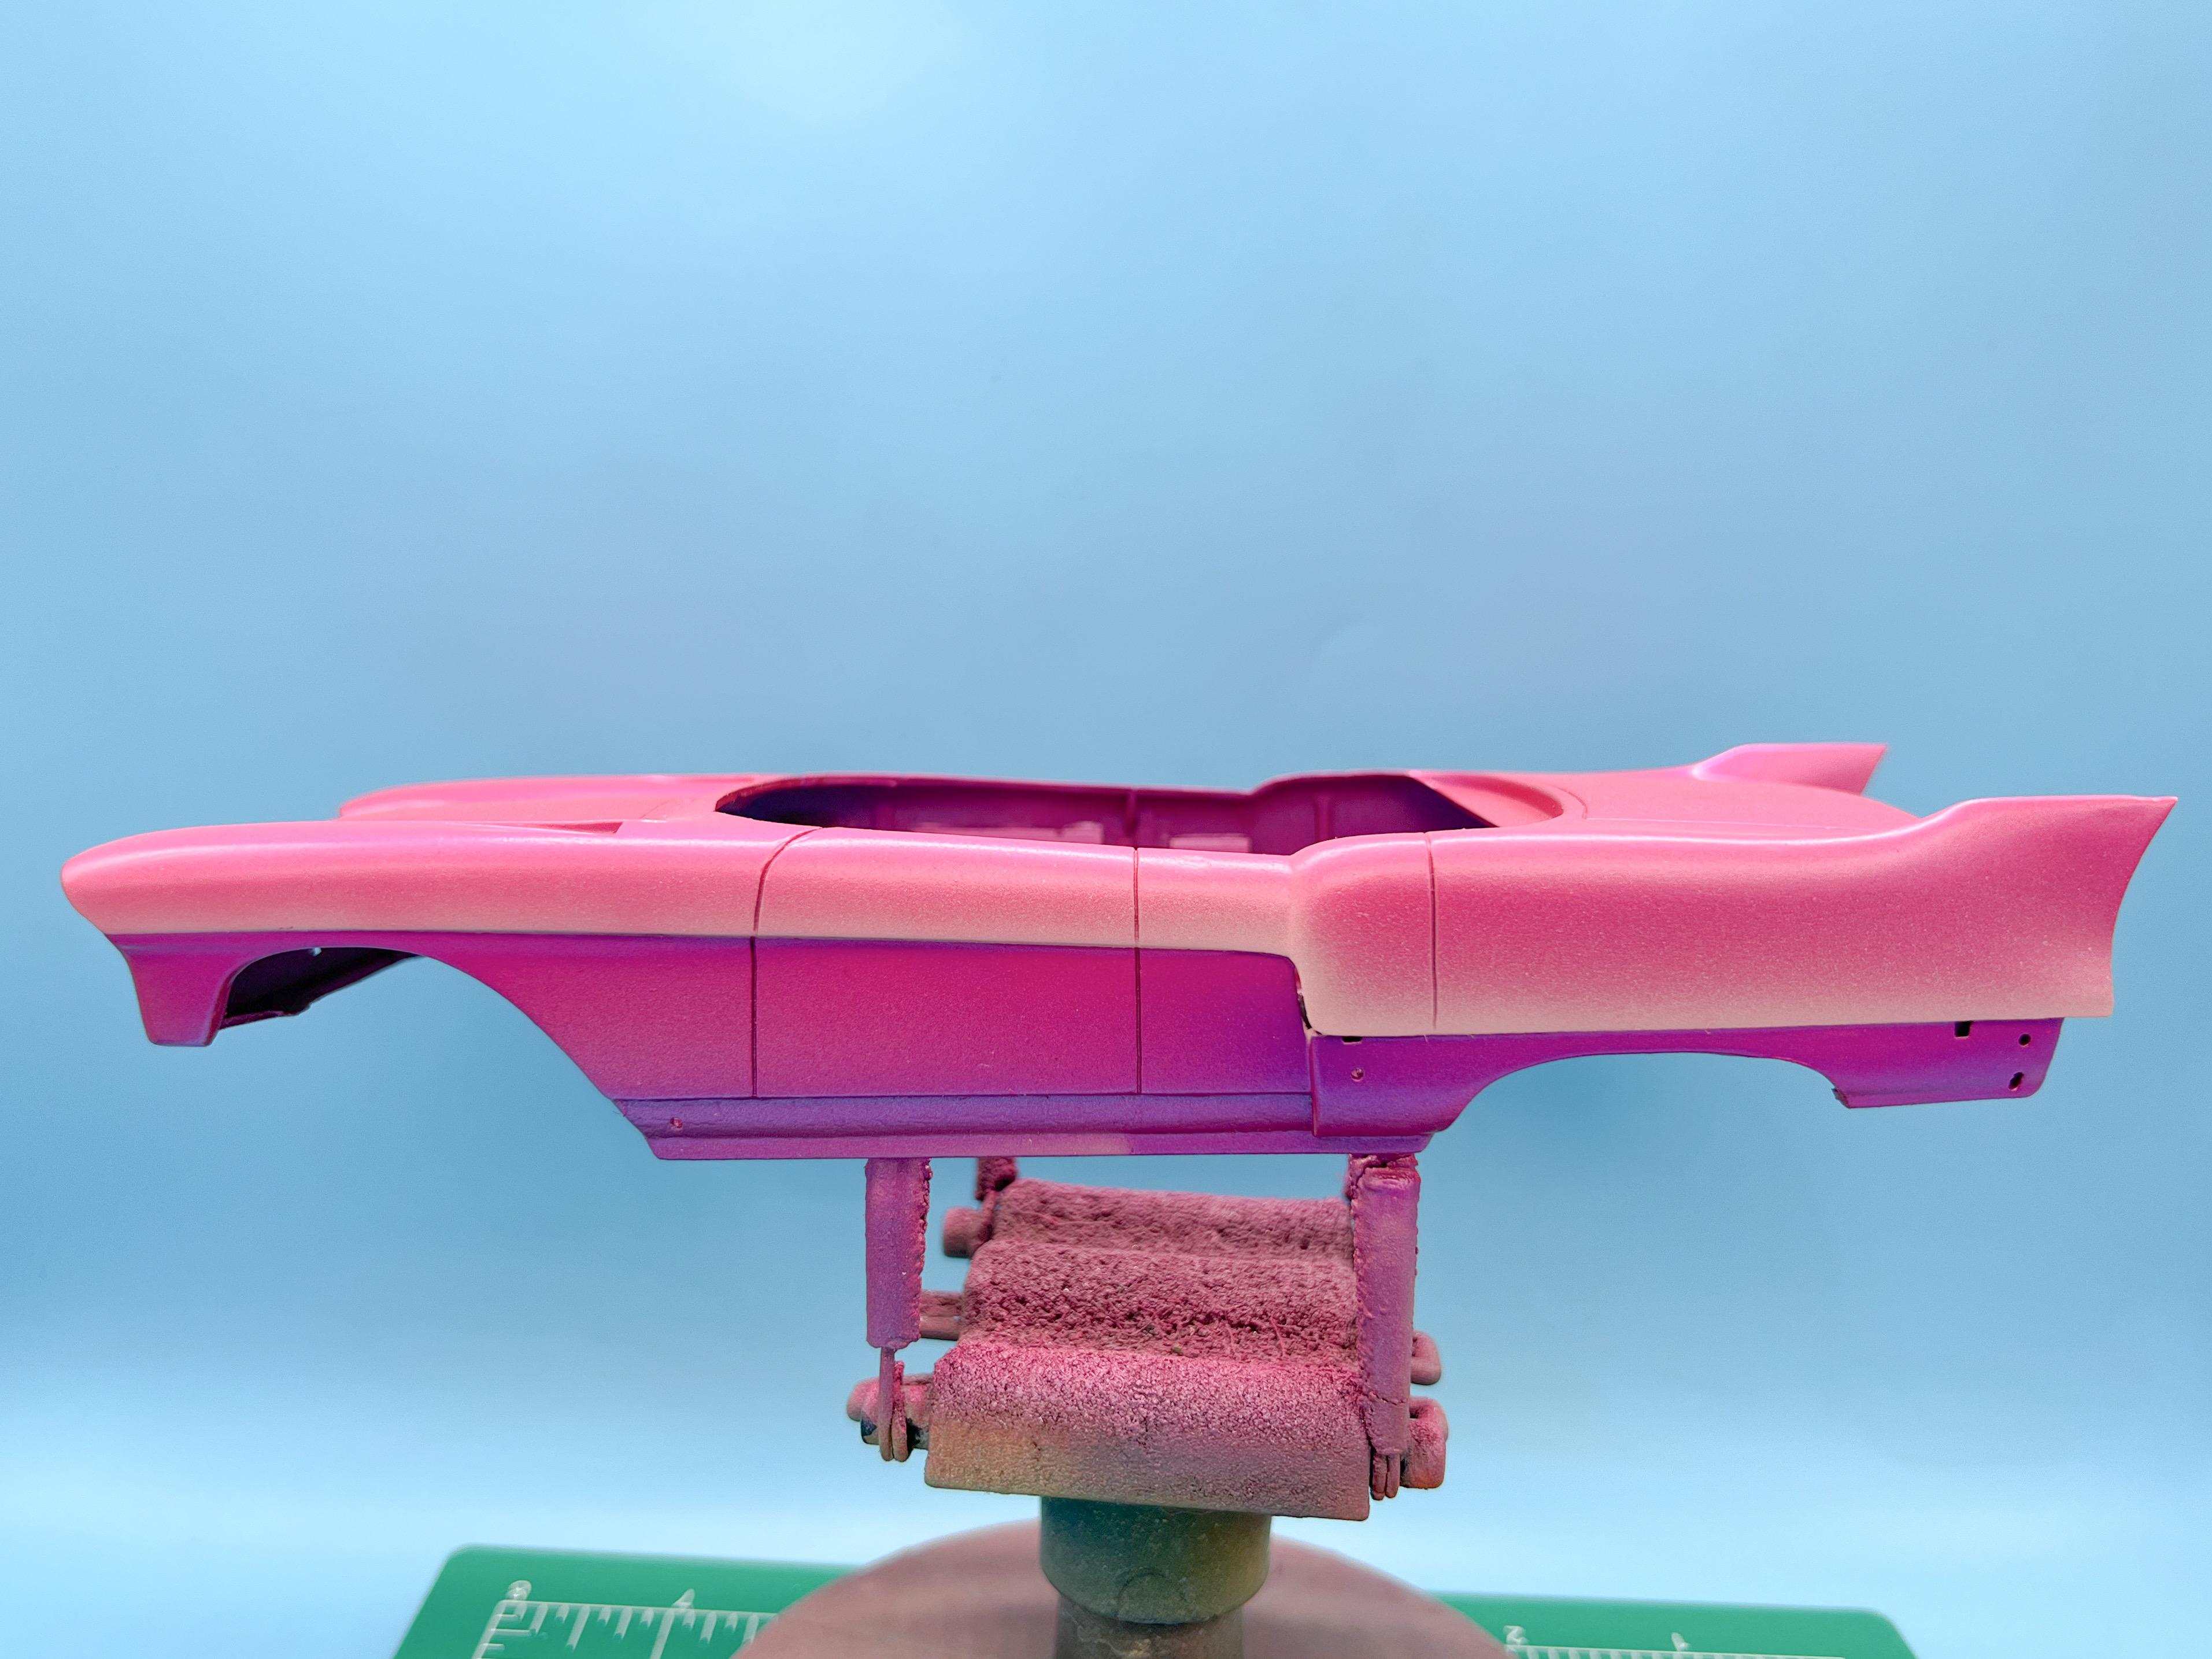
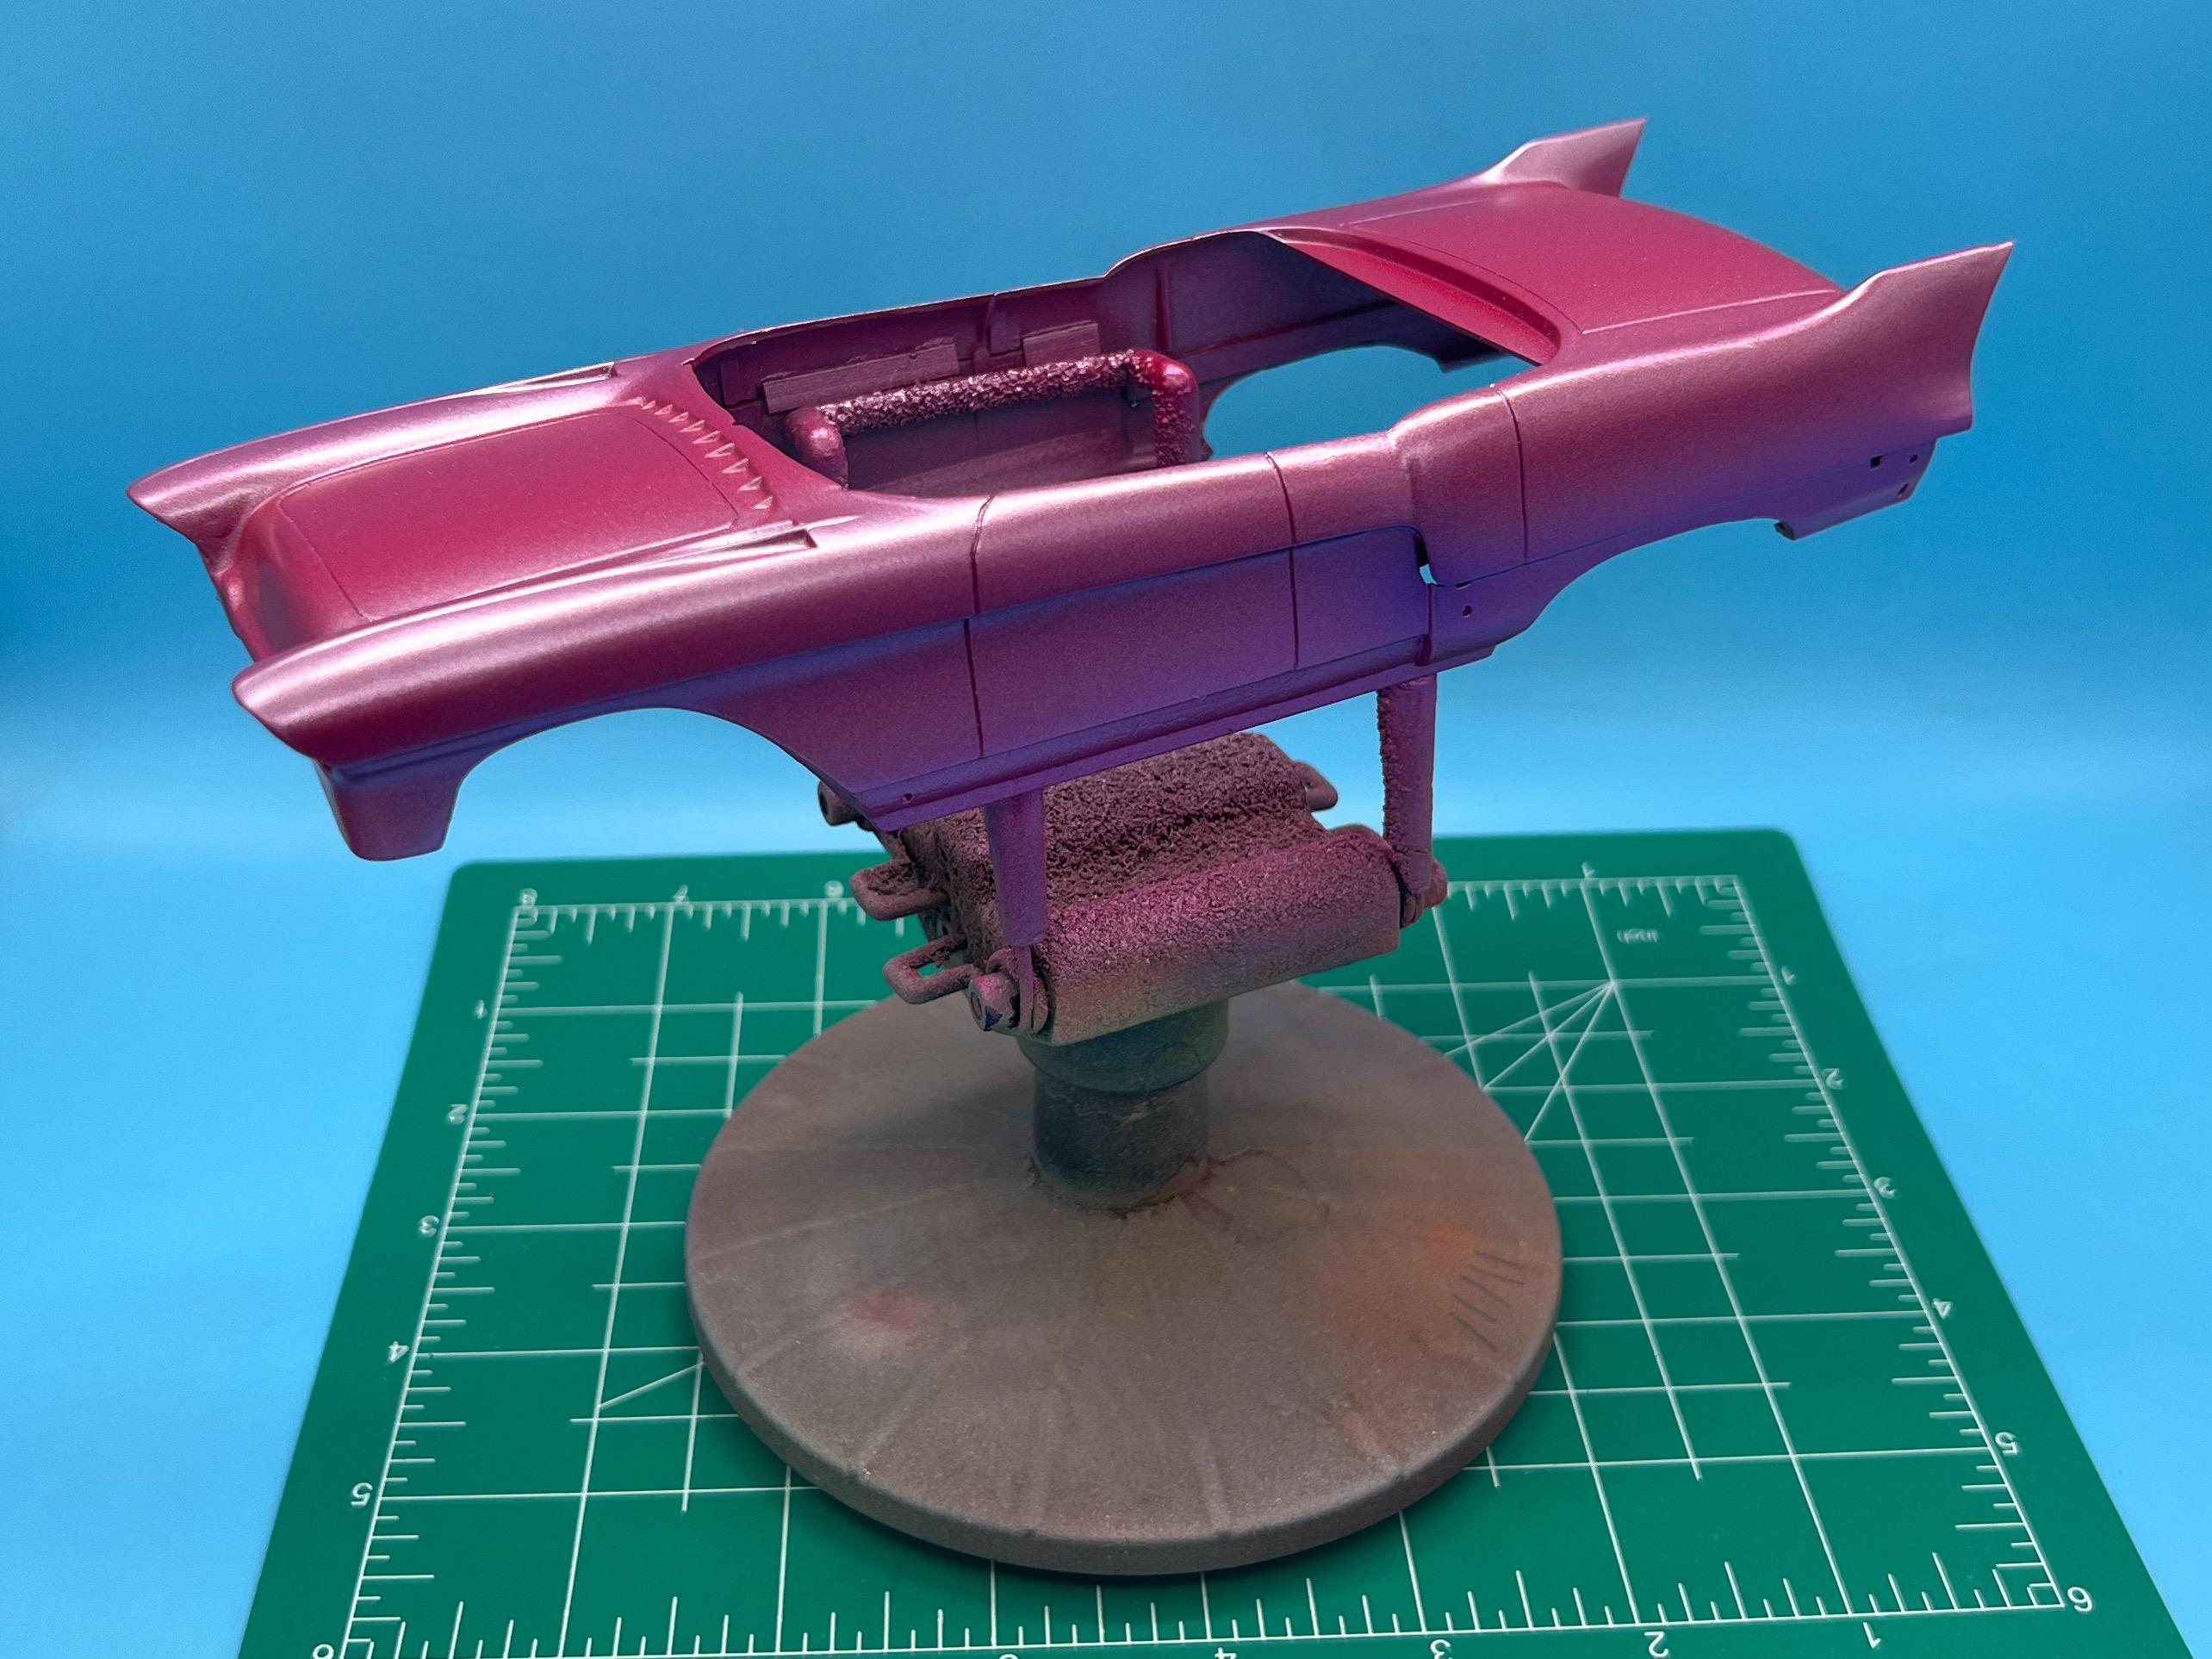
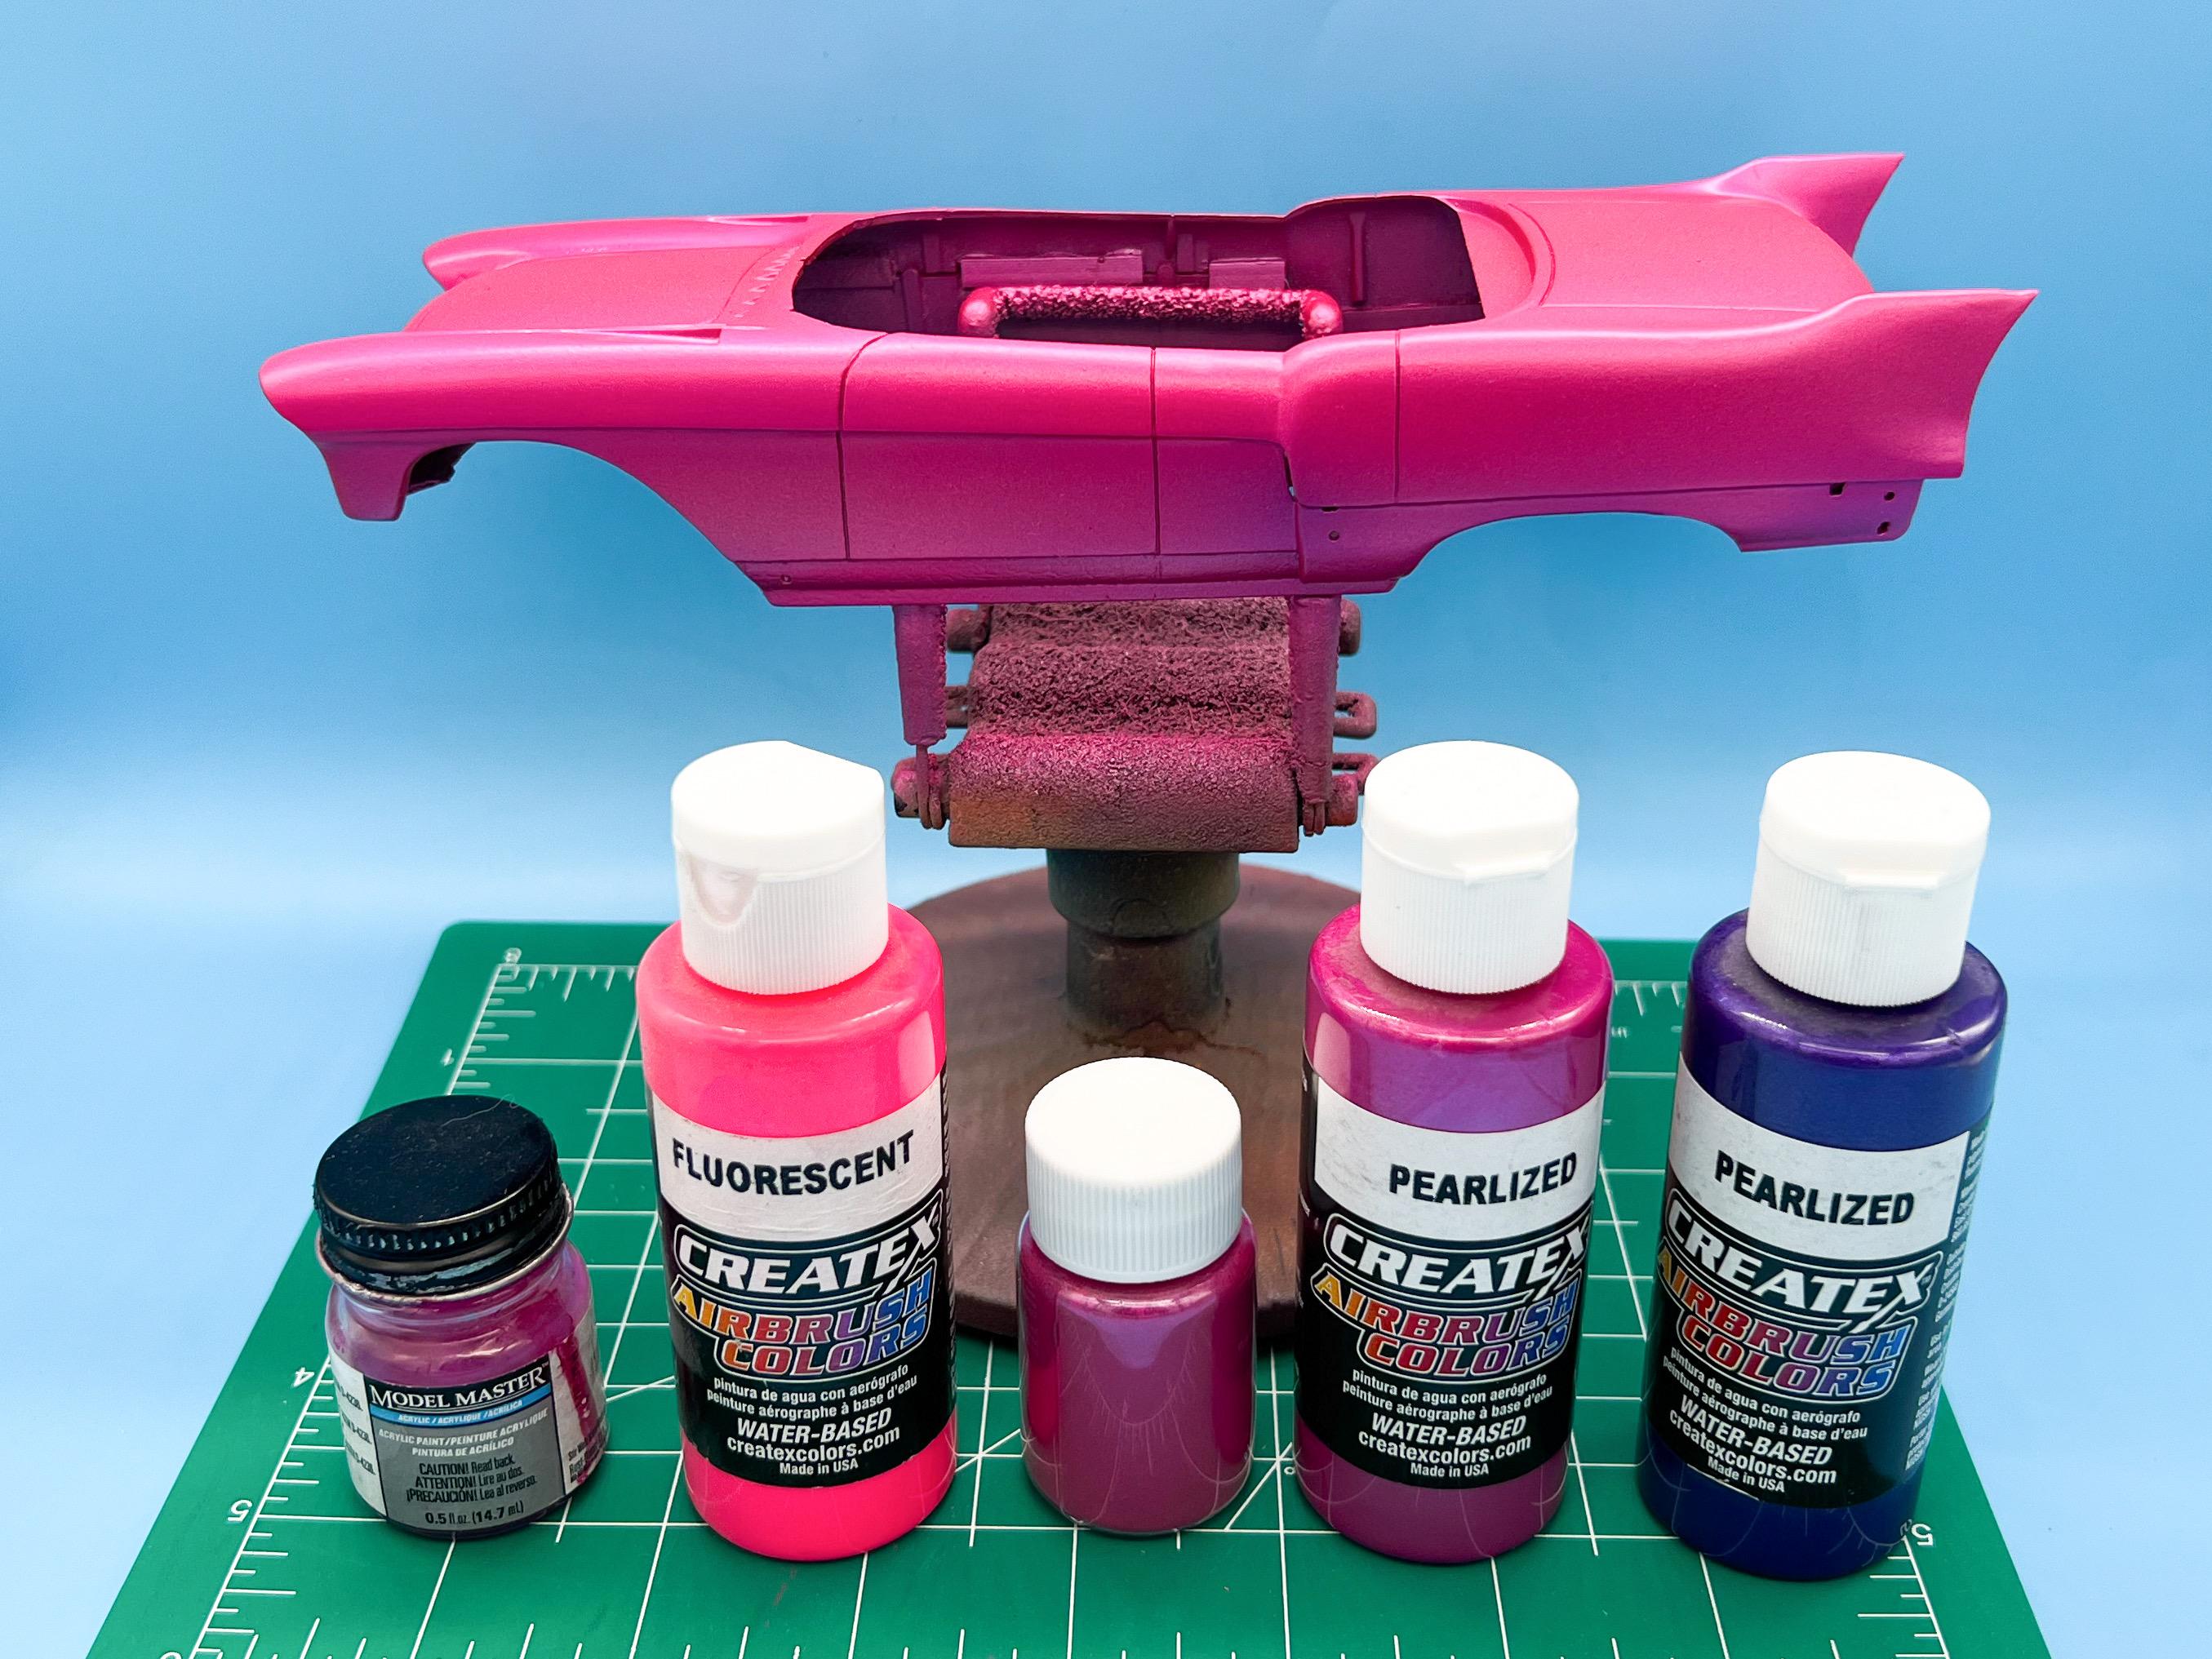
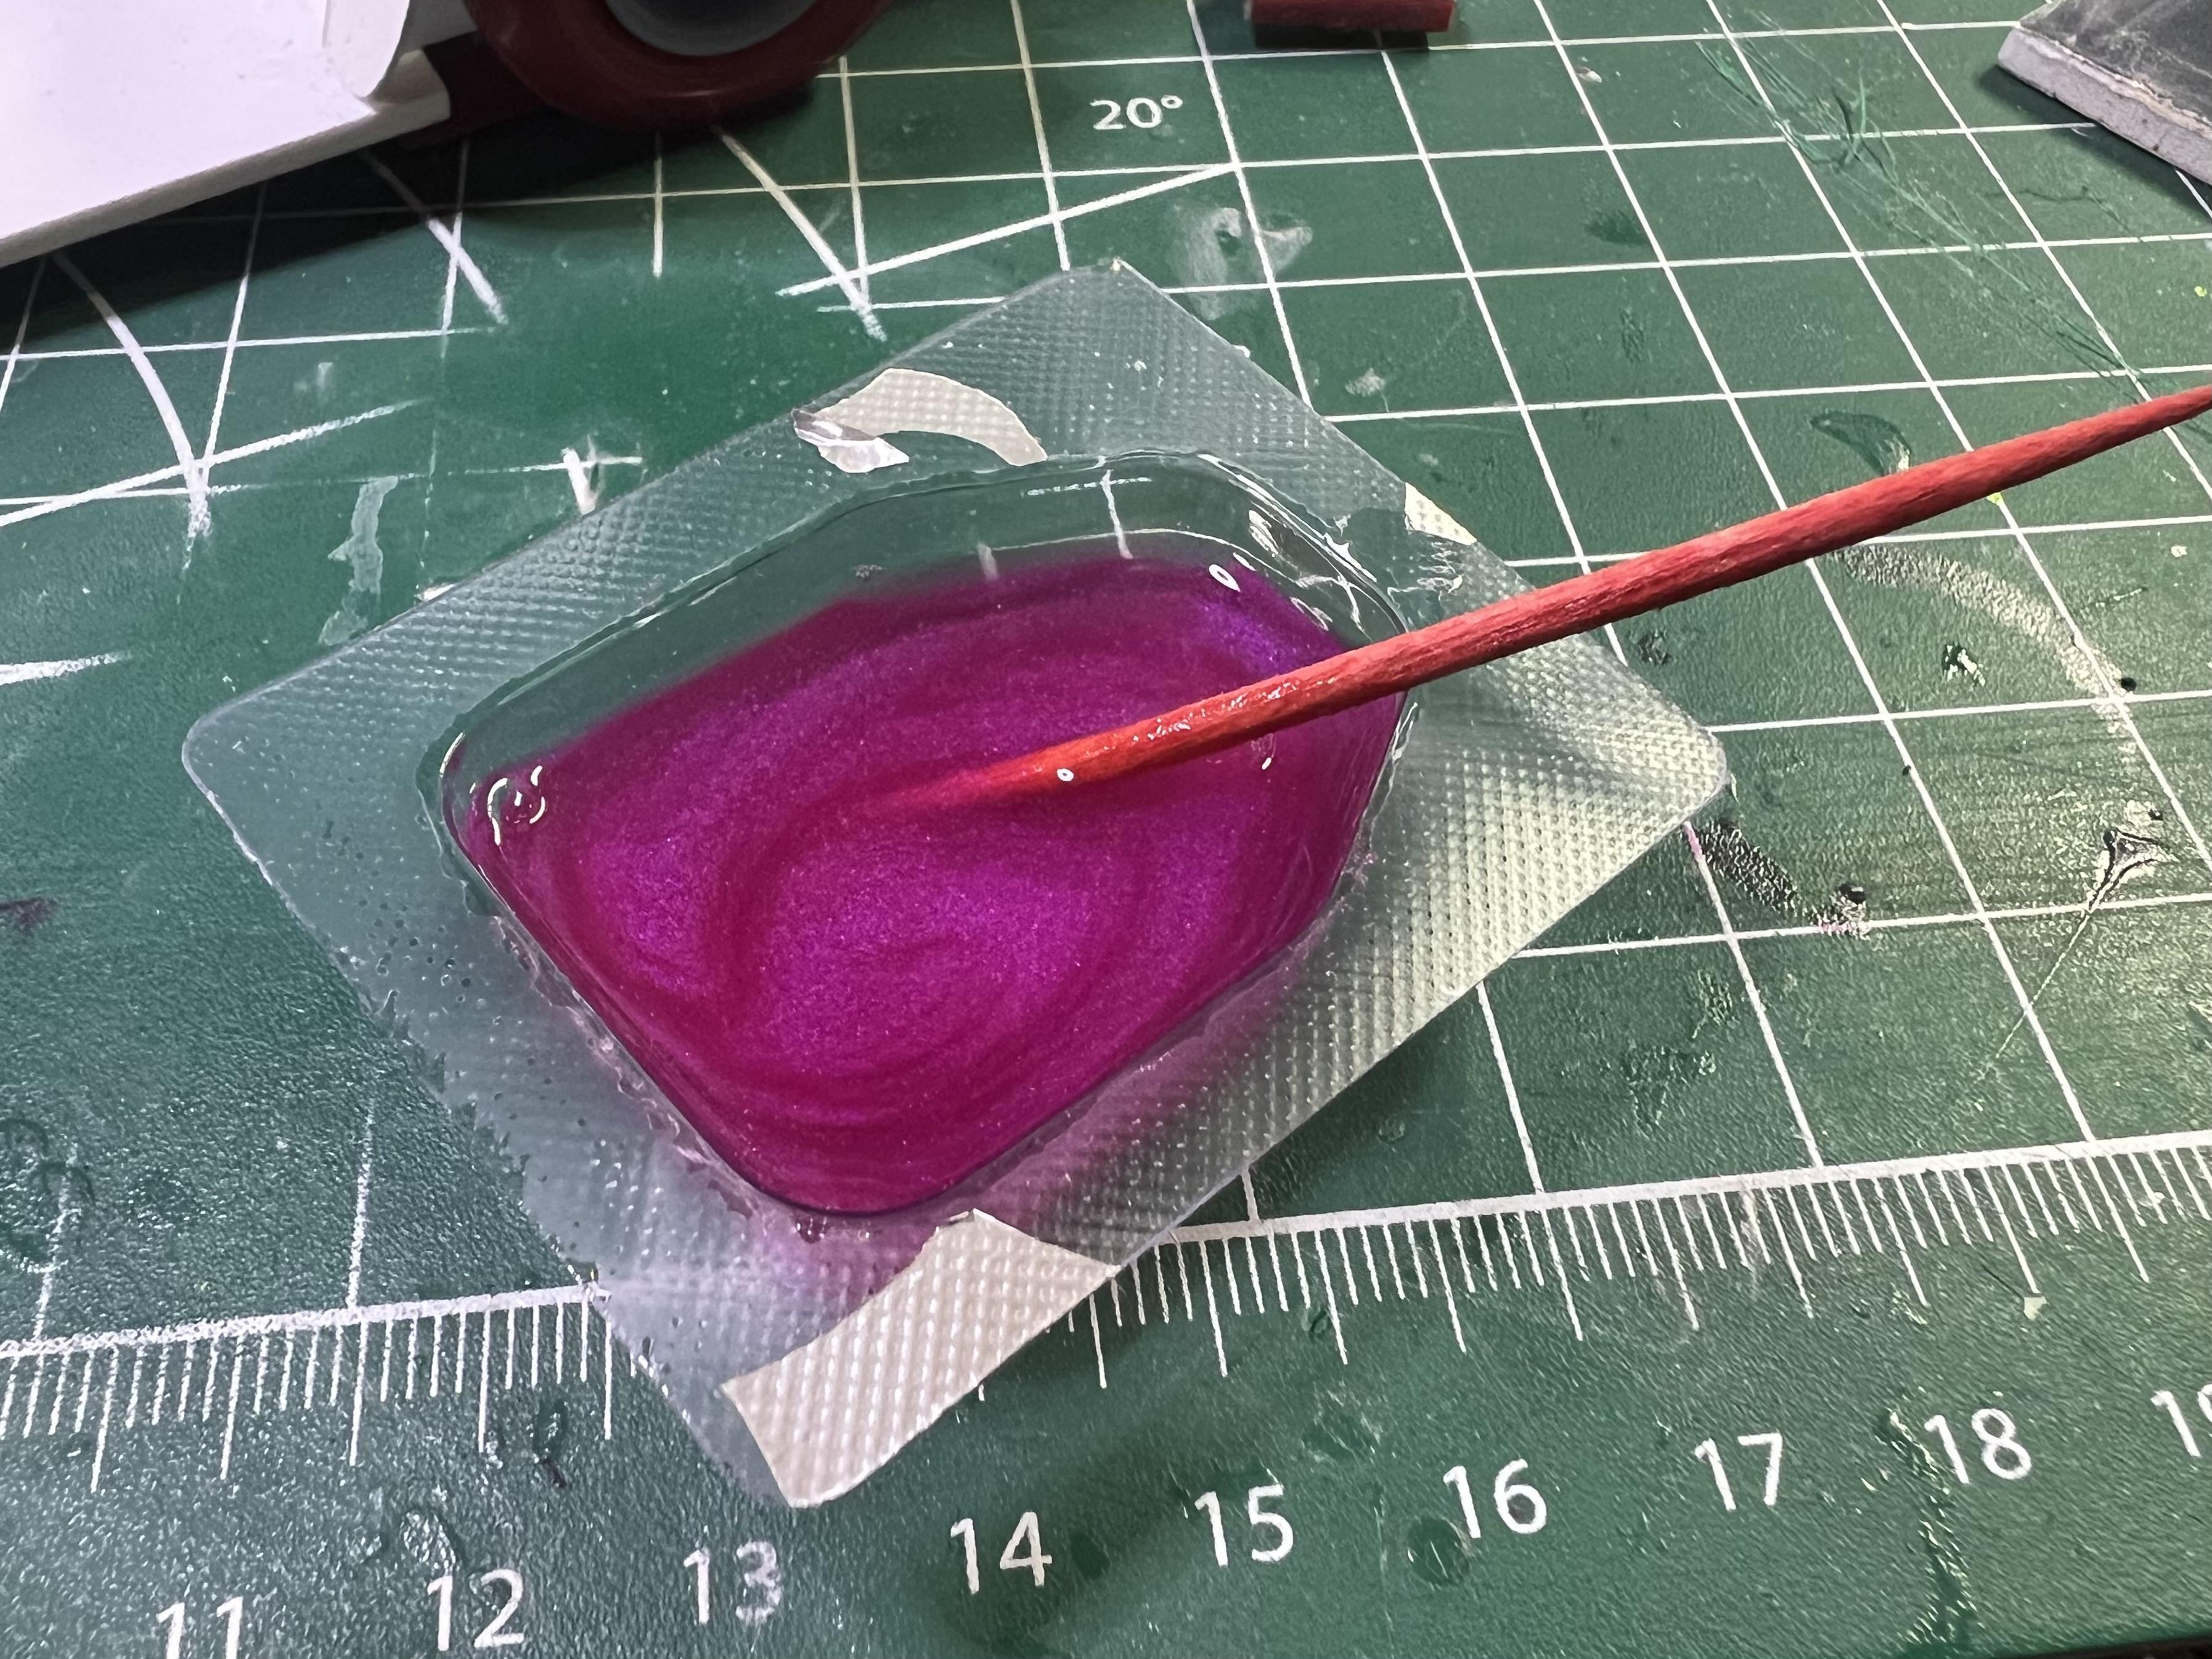
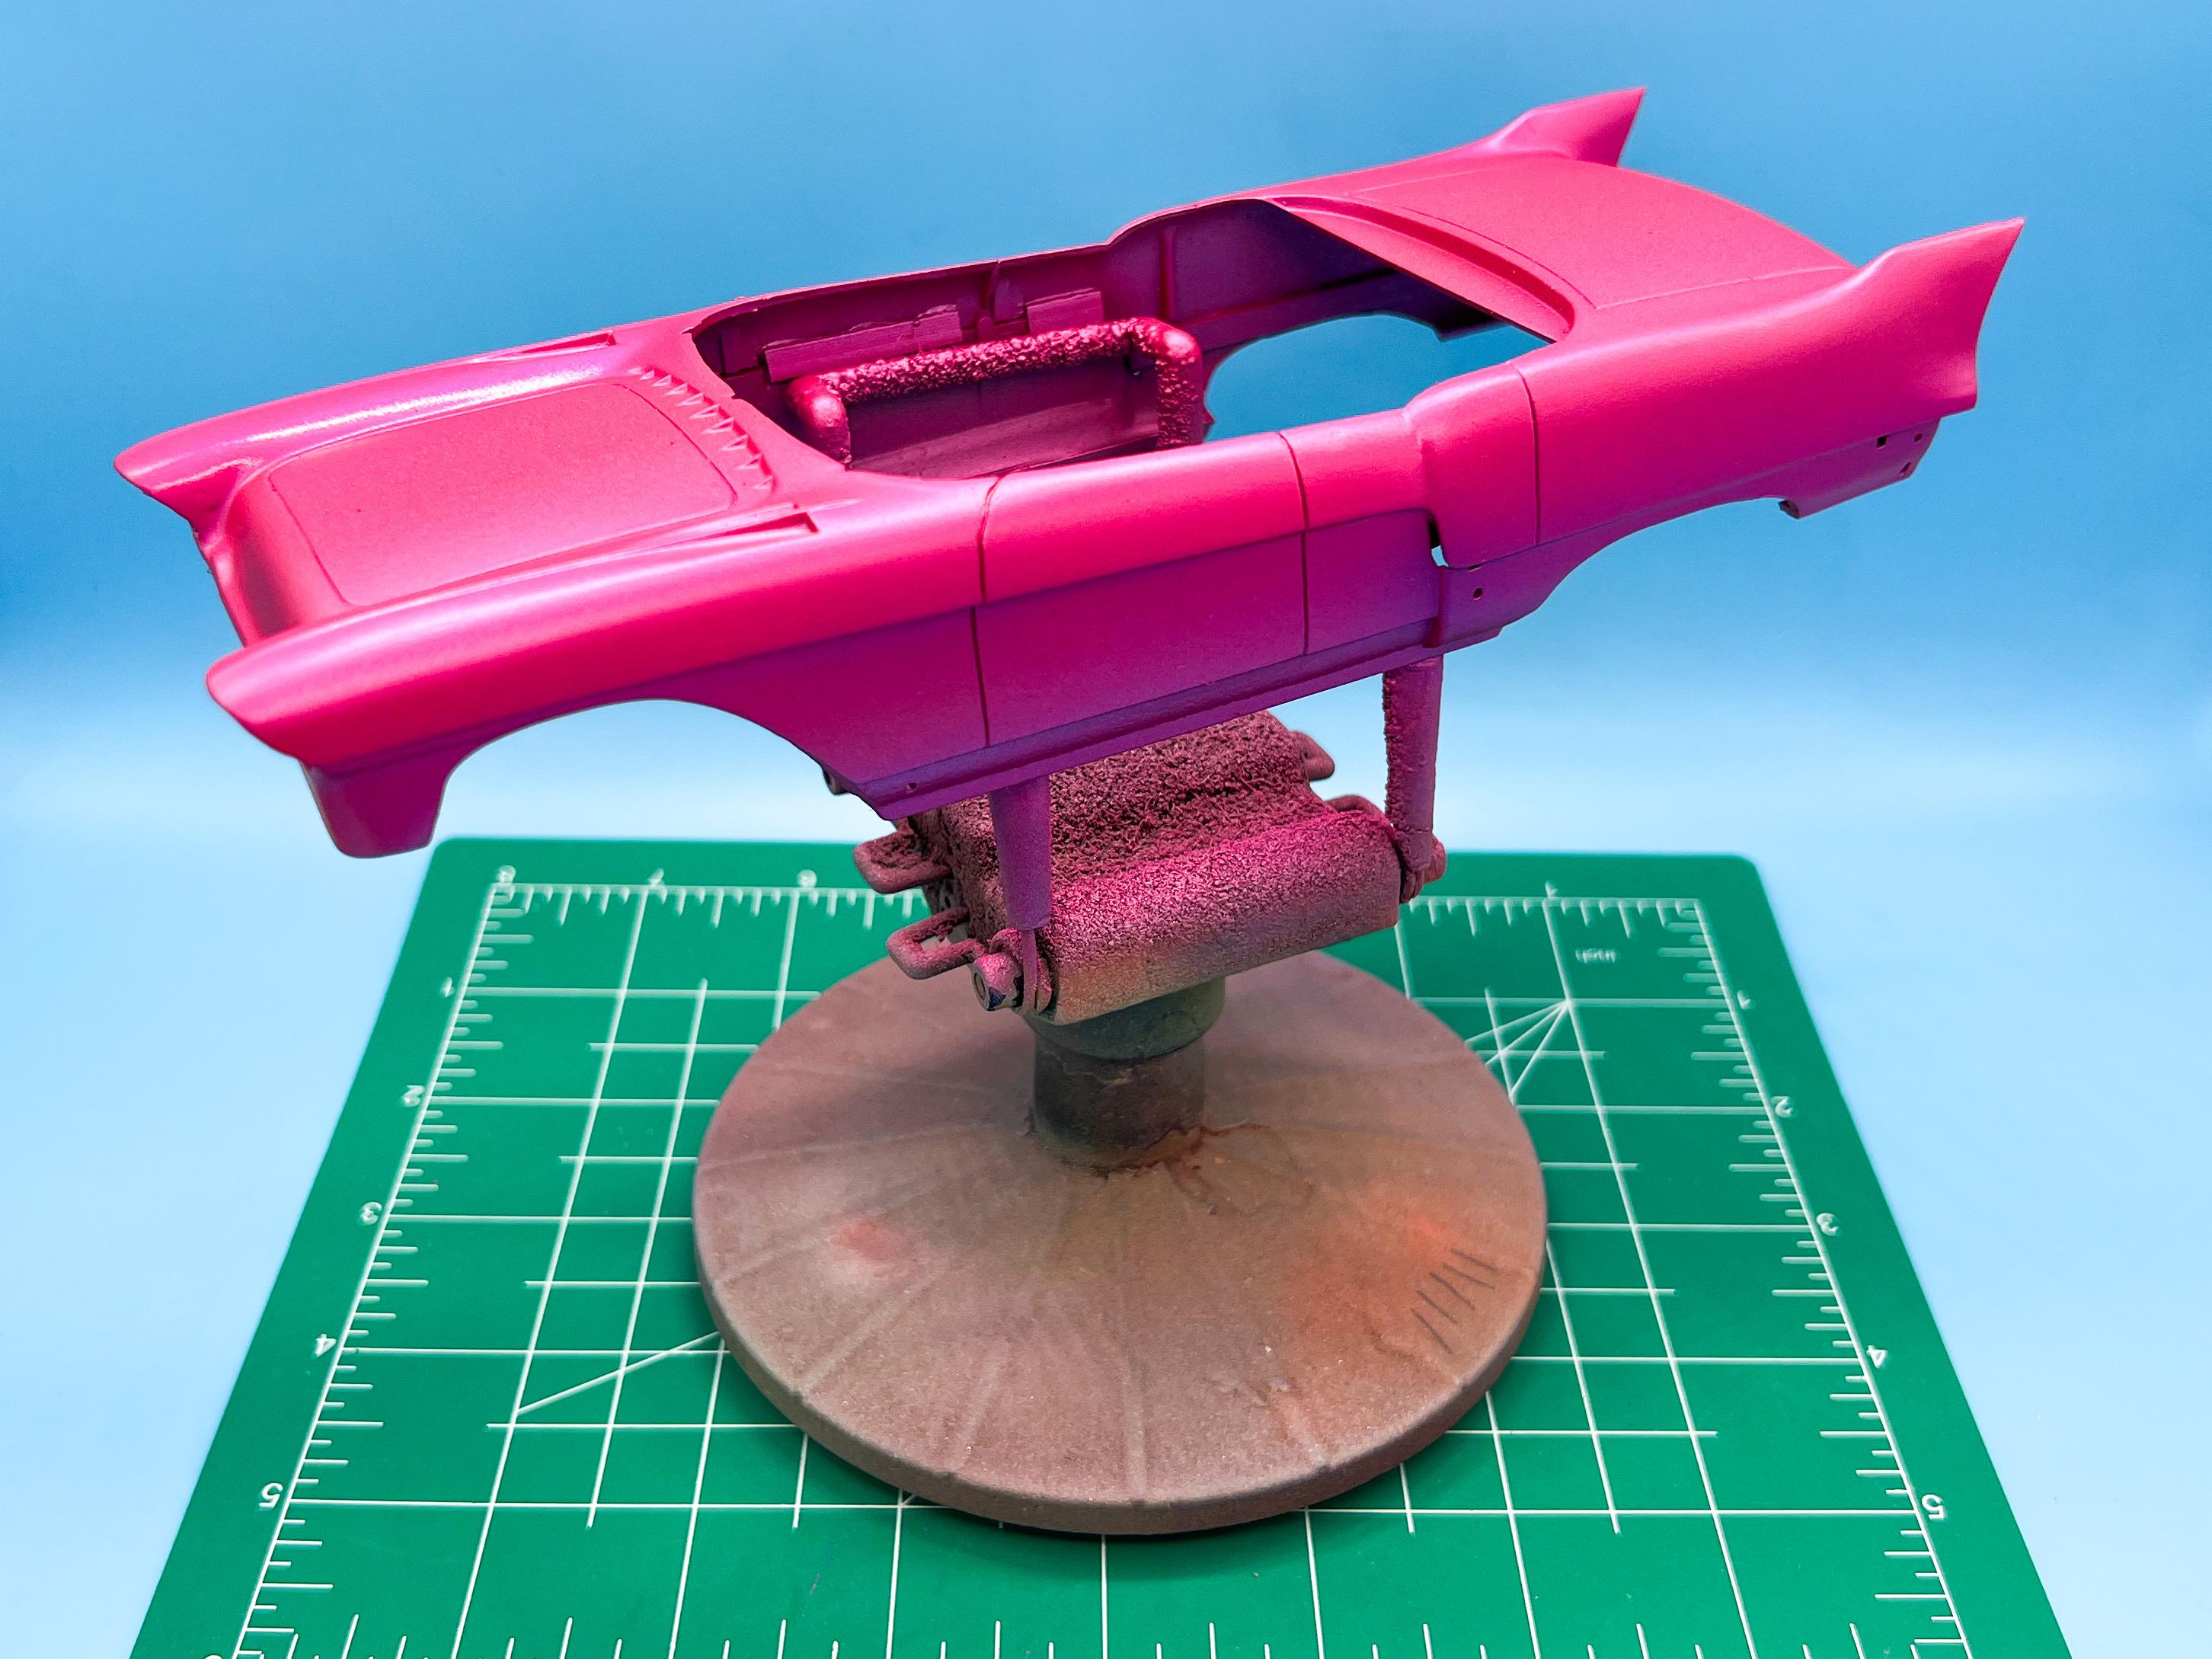
Had an AWESOME evening at the bench tonight…I had a vision of what I was trying to achieve and thought thru the steps to get there and went for it…wasn’t 100% sure it was going to work but I gave it my best shot. First up, my goal was to really accentuate those big long lines and curves by forcing some color variations with low and high spots - but nothing too rigid and inorganic looking. Worked thru a few darker tones to add some depth in the lower portions of the body, then some light pink and pearl white on the upper edges: That was kinda the scary step, because I liked how bright and rich the base color was and I hid a lot of that under some darker gradients. The darkest spots are Createx purple and magenta, the lightest are Testor’s Hot Pink and a Vallejo silver that is actually closer to white. I let that set up for twenty minutes or so and then shot some highlights in Createx neon pink…but an over reduced mix of it in clear carrier to make sure some of the flake in the layers below still comes thru: Then, final step (for now) was mixing up a hot pink pearl in some Future… This particular mica powder flips between pink red and purple and works well with the colors I’m already using, so I shot some mist coats of that over top the whole body, and ended up with this: I still have a little more to do, but I need to shoot a coat of intercoat to lock in all the lower layers so I can do a little masking without damaging all the flake and pearl…super pleased with the results so far tho! Thanks for looking - more soon, soon as I’ve done more!
-
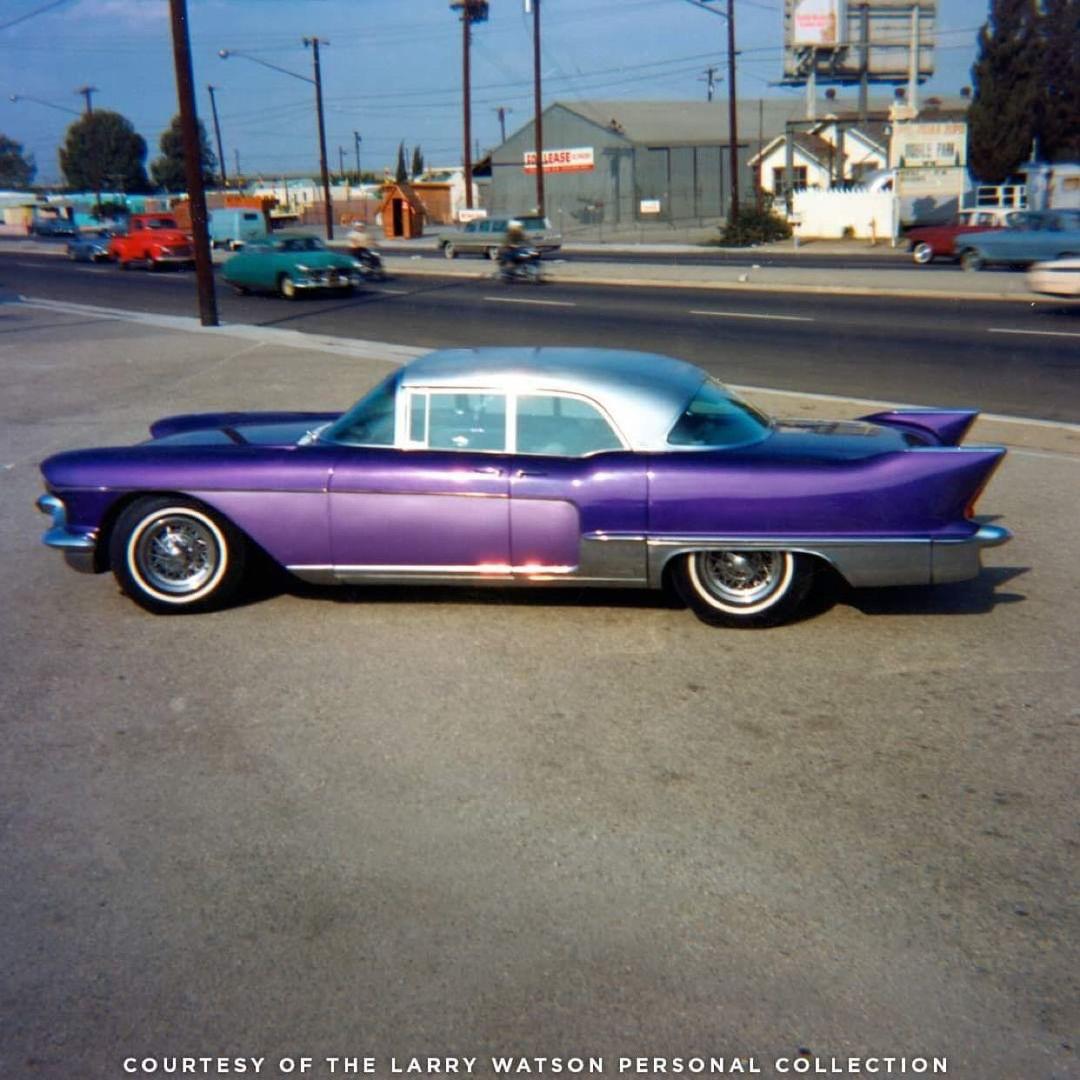
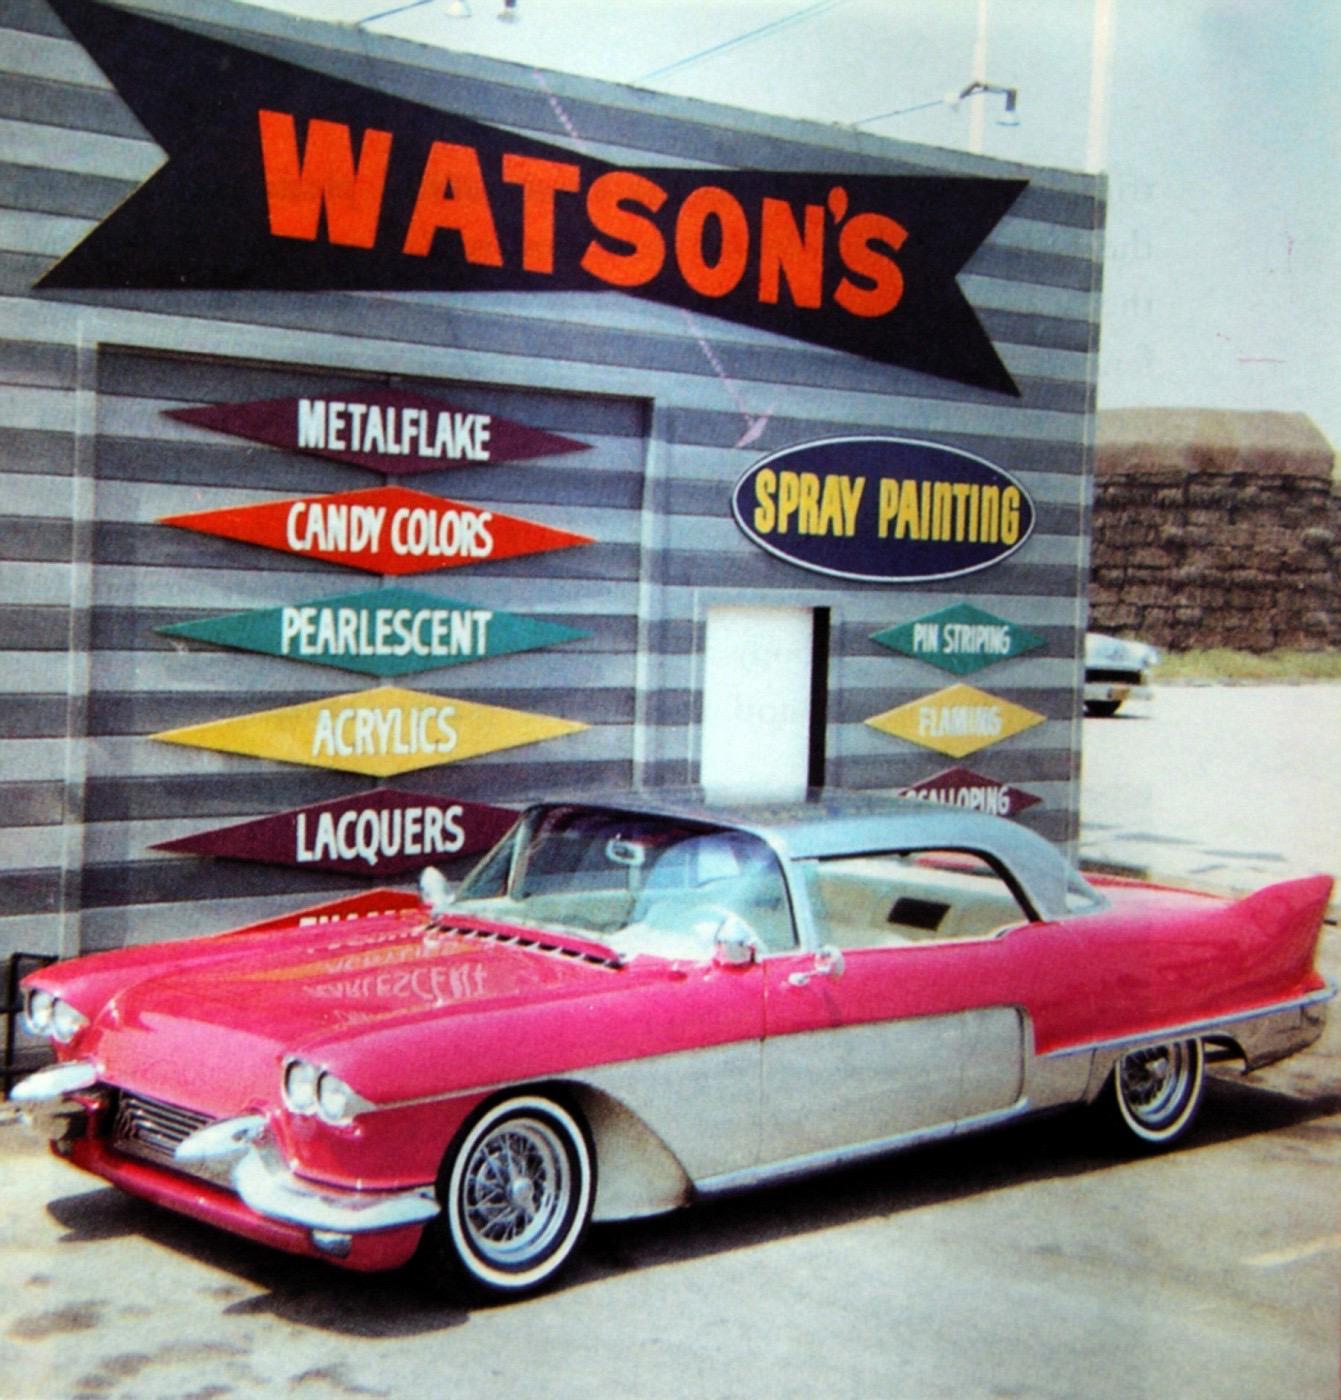
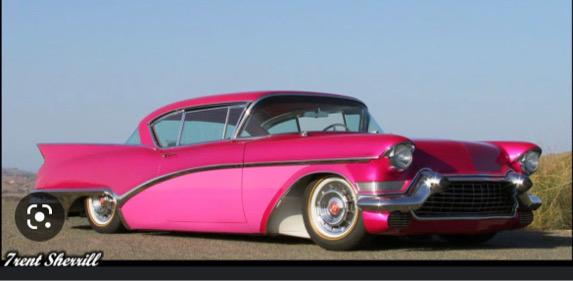
This reminds me of a build by the late Chopper Lear…but even more extreme: I don’t have any better pics of this one - but I love what you’ve done with yours so far! Nice work!
-
Who doesn't love a mock-up? Let's see yours!
CabDriver replied to Belairconvertable's topic in WIP: Model Cars
Ohhh, this will be a COOL project - will definitely be watching out for this one! -
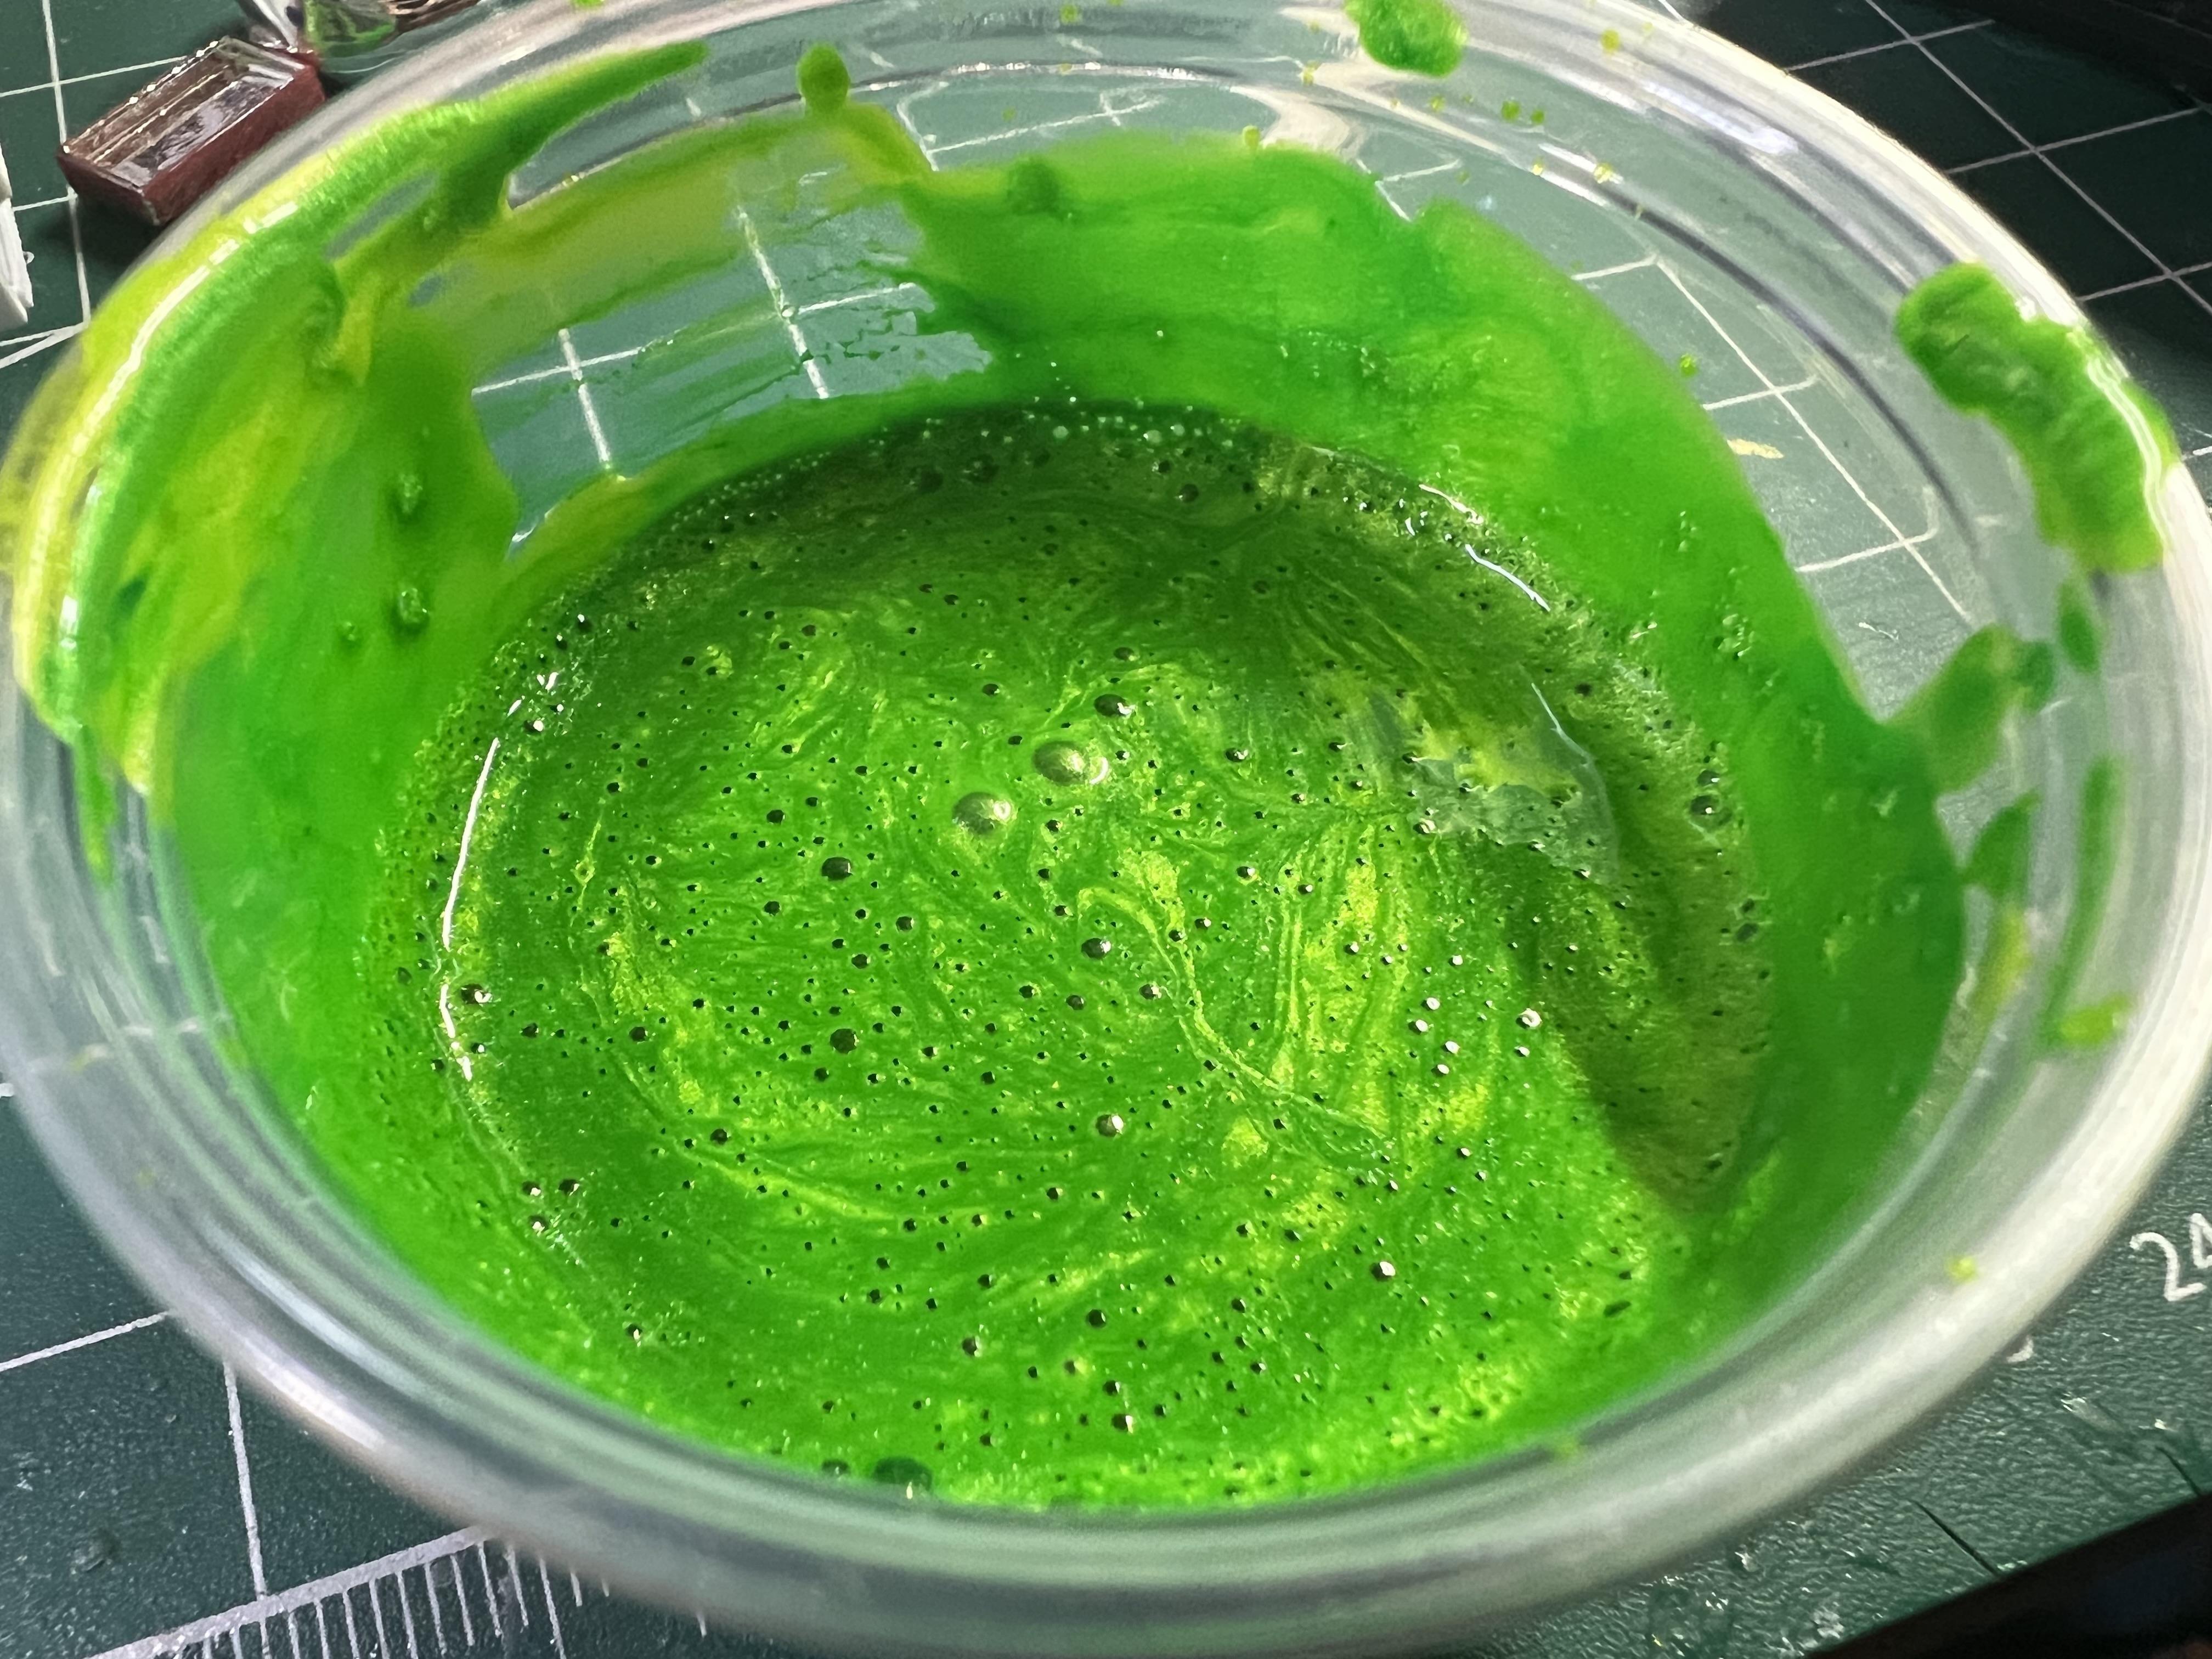
And, seamlessly continued from the last post…mixed up some Createx today… And shot a base color: I could maybe do a WIP thread for this one, but it only has like 2 more interesting steps left and then it’s finished 🤪
-
Or he’d call me a hack and tell me to quit copying 🤪 These things look good two-toned too, so I have some ideas to move this from ‘rip off’ territory to ‘inspired by’… Different model, same concept…
-
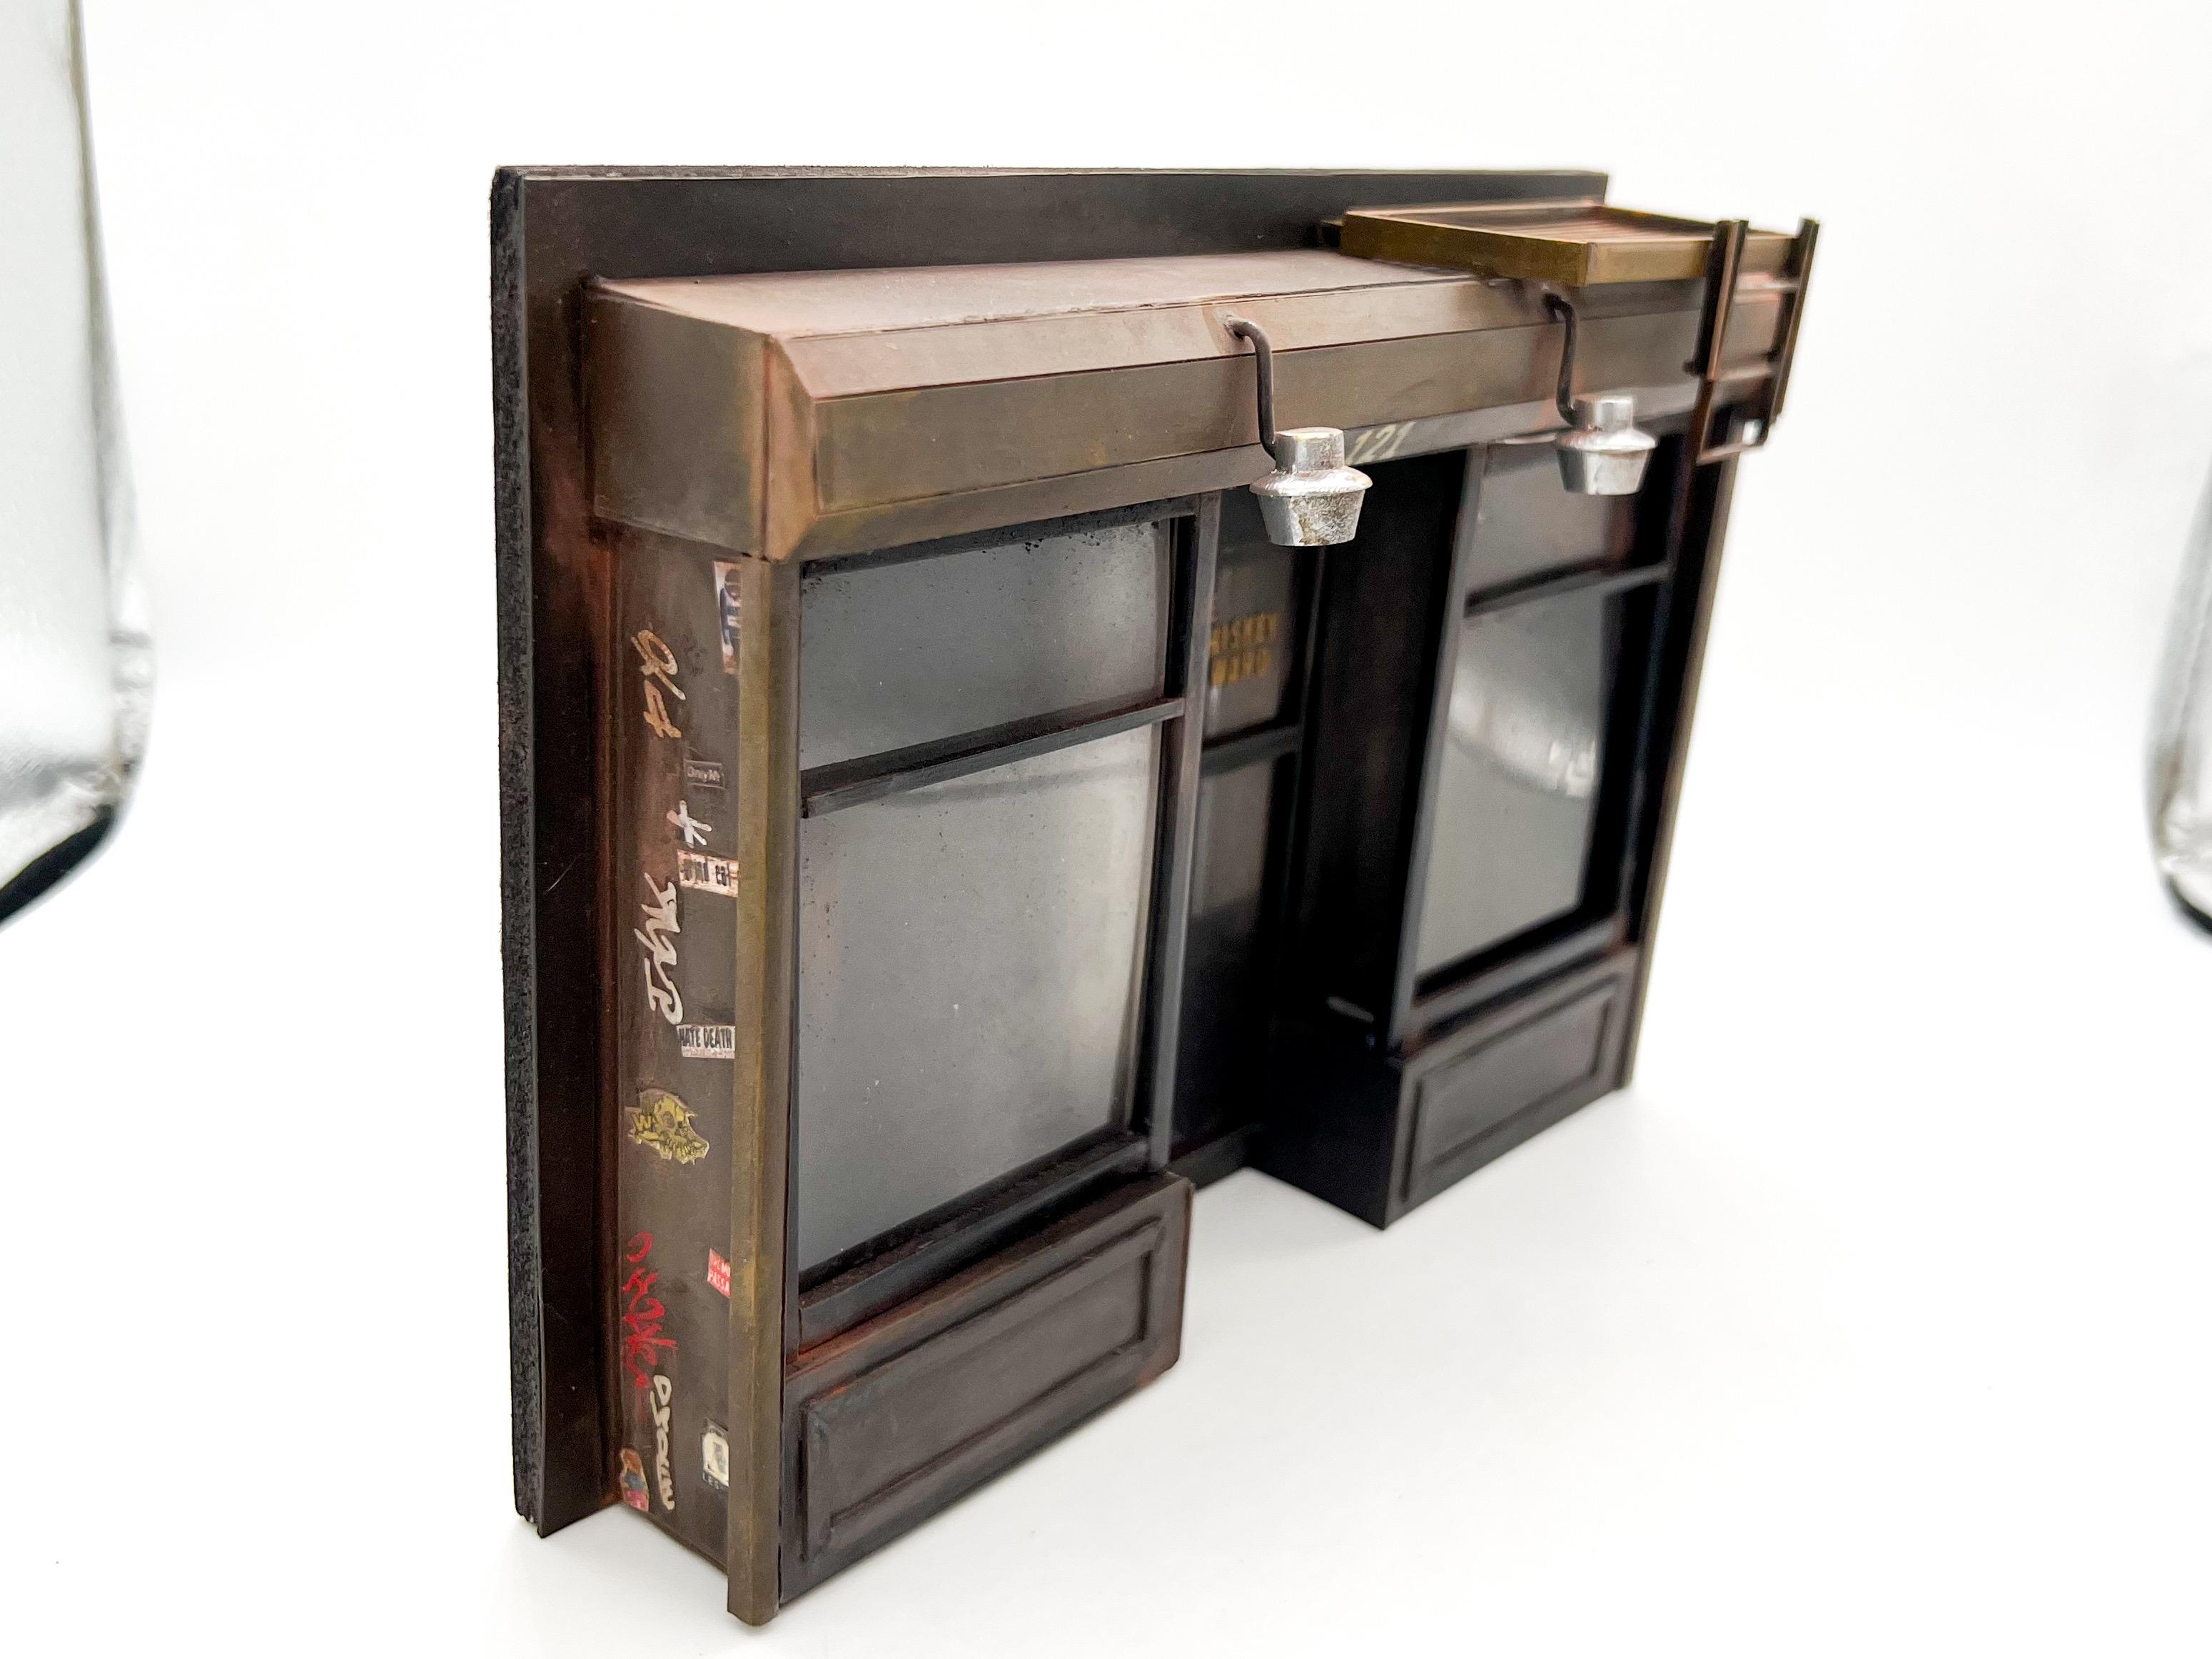
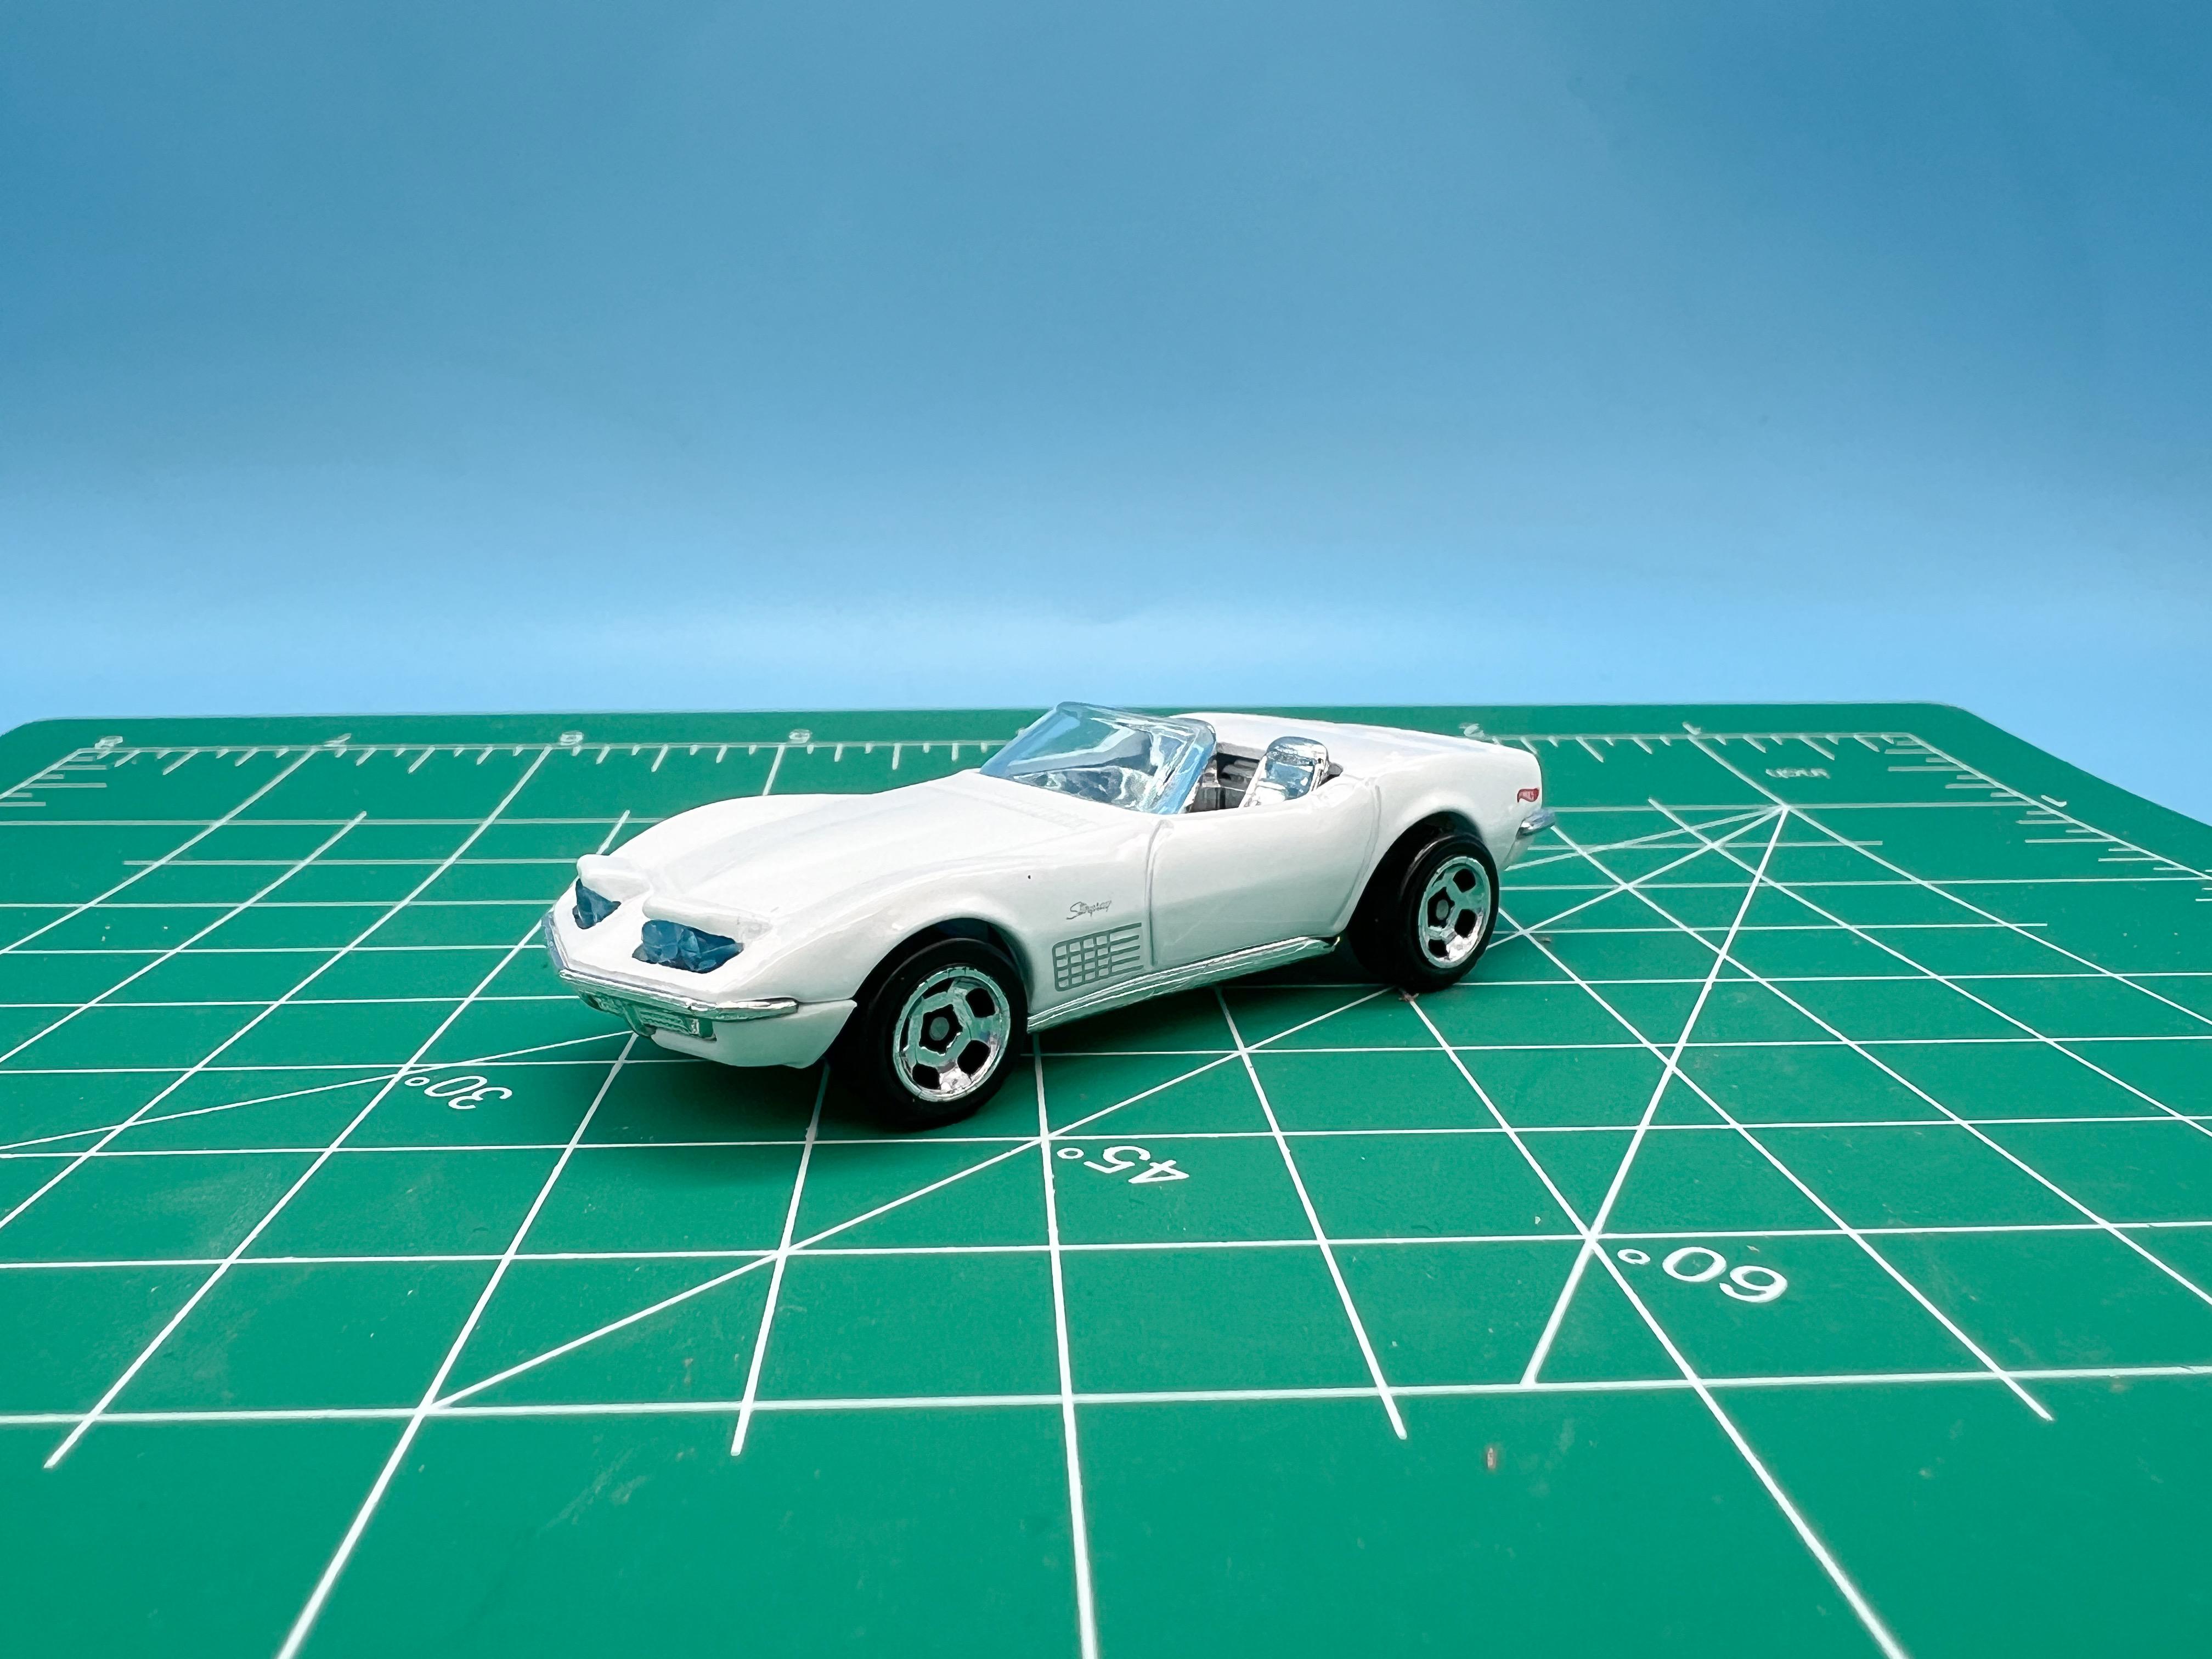
I’m a big fan of Hot Wheels, plus I’m a design nerd and I really like when designers put ‘easter eggs’ in their designs - little details and surprises to be noticed upon closer inspection. They do the same in movies and TV shows - little nods and details for knowledgable fans that might not be obvious on first viewing. For example, the Hot Wheels Porsche 944 has a stethoscope on the rear parcel shelf as a nod to the designer’s doctor who had the same model Porsche. Their Pontiac Aztec has a Heisenberg hat in the interior to reference the vehicles appearance in Breaking Bad…stuff like that. These well thought out little touches really make me want to do a better job of adding stuff like that to MY builds…I’d be interested to hear if anyone here adds fun little ‘in joke’ details to their projects too? I made a diorama piece for a friend a while back and added graffiti stickers and tags on the edges that were scale versions of actual ones in the subject’s neighborhood - they’re not actually visible when the finished piece is in it’s shadow box unless you shine a torch in there and view it from the right angle: Here’s a fun design feature I found on a Hot Wheels I picked up this past week - a HW Corvette: Instead of the usual rivet on the front of the base it has a clear plastic circle - and if you shine a light in there the headlamps illuminate! If anyone else knows of any other cool hidden details like this on diecasts (or in model kits?!) I’d love to hear them!