
Mahogany Rush
-
Posts
425 -
Joined
-
Last visited
Content Type
Profiles
Forums
Events
Gallery
Posts posted by Mahogany Rush
-
-
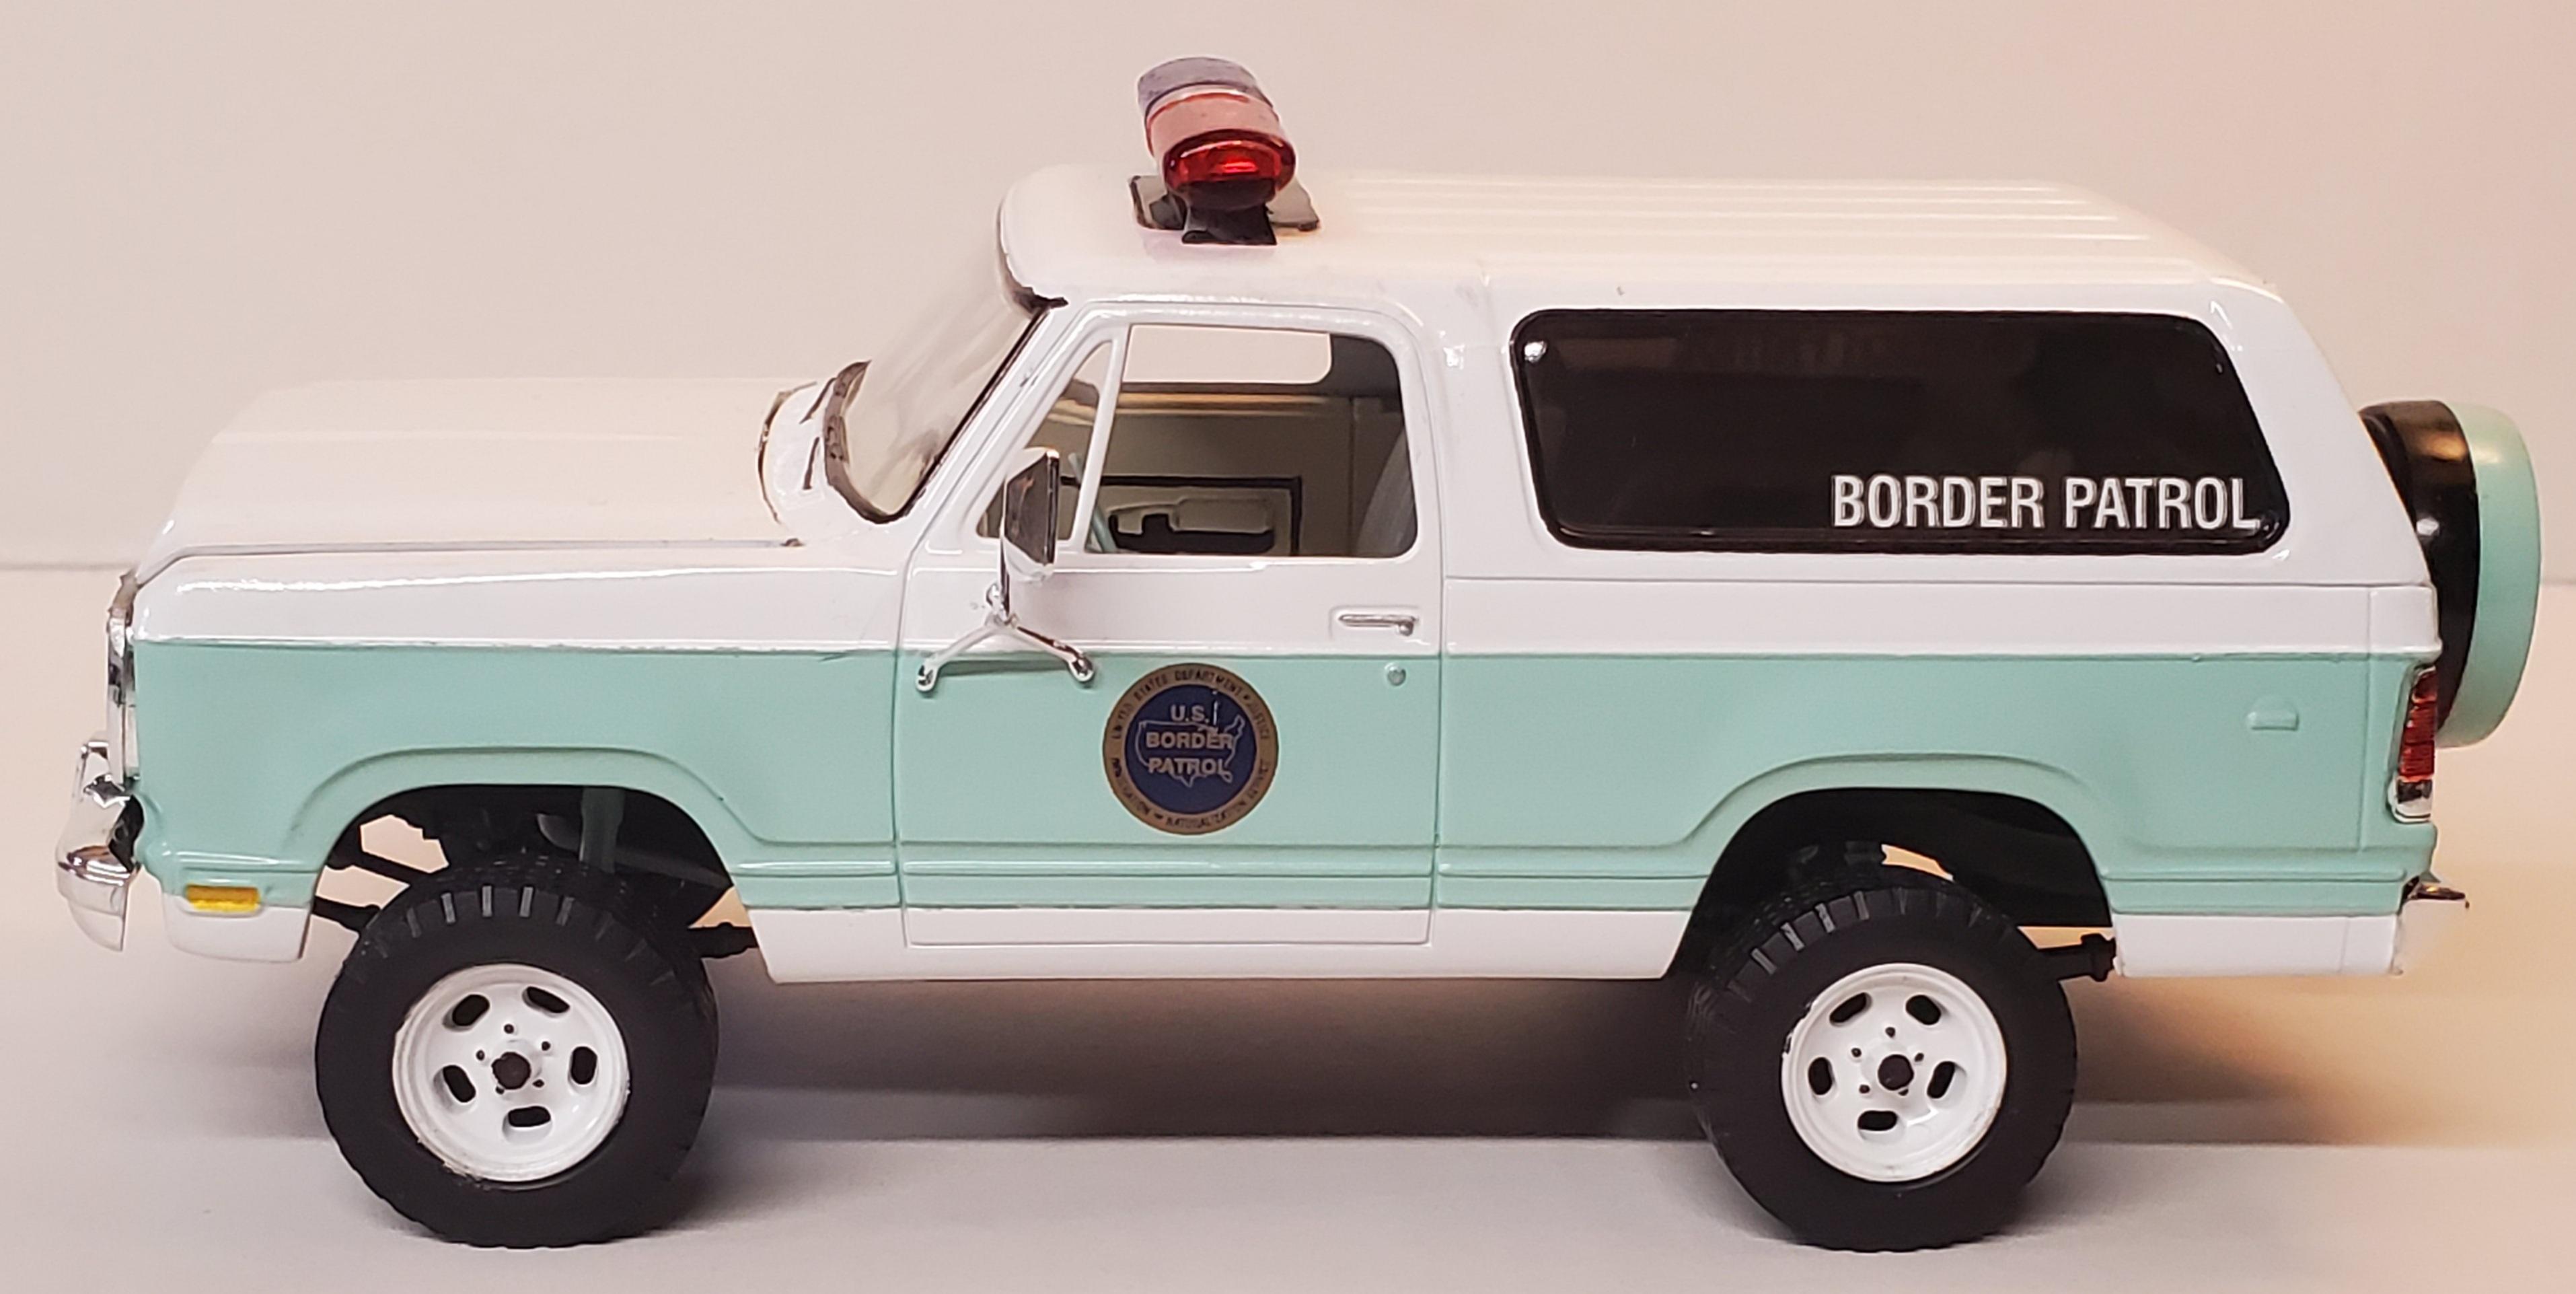
Just finished this tribute to by brother, retired Border Patrol Asst. Chief. Paint was Rustoleum Gloss White and Krylon Catalina Mist Satin. No clear coat. Decals provided by av405. Thanx.

-
S W E E T ! ! !
-
OMG! That is FANTASTIC!
-
Very nice and clean considering the glue bomb start. 2 questions. Where can I get the same door decals and what color paint did you use? Thanx
-
-
-
Absolutely stunning! Love the blown V-6 sitting in there. Great stance with huge tires. Not too high (like the ones I do...LOL) I want one.
-
Nice. Brings back many memories from my leadfooted childhood. ?
-
Nice. I used to own one.
-
OMG! That is EPIC!
-
Nice. I need those rear tires, where did you get them?
-
Built this mash-up because I always liked 4x4's and El Camino's. Color is florescent green (a bear to paint) Rustoleum. Many many light, mist coats to get it right. The hood was painted 5 times, but could never get it to match, so it's flat black. Wanted to do a Landau roof, but didn't want to order more paint. Donor kit was the Revell 1/24 1978 GMC Big Game Country and the '68 Elc was the yellow one with the soapbox car. Looked naked without a roll bar, so I made one. Engine and shocks are florescent orange. Hope you like it. Thanx for looking.
-
Finished this a month ago after getting the decals from the other side of the world from echoxrayniner. It is a tribute truck for my friend who passed away. We flew flight sims together for years and drove American Truck Simulator together as well. He was as solid as they come. The hood number represents his day of passing. The plate decal was the wrong size (my fault), but he would have laughed because he was bigger than life itself. The colors were ours from the old flying days. Turn indicators were not in the box. This was my first and last big rig. It was kinda tough. RIP my friend. Thanx for looking.
-
Magnum Force
-
Sweet!
-
Yes, that's the one I have.
-
Nice. I forgot about the Future as I use it for windows periodically. Thanx again for the tips.
-
Thanx for the replies. I used 2 different colors, one is glossy and the other is a flat fluorescent. I think I am going to clear the car (rattlecan Testors wet look) only and then apply the decals that came with the model without clearing over them as I do not want to chance ruining the decals.
-
I am building a Nascar model and I have a question about applying the decals.
Is it best to:
A: Clear coat, then apply the decals
B: Apply the decals, then clear coat
C: Clear coat, apply the decals, then clear coat again
Thanx
-
Simply awesome.
-
Very nice. Just starting one.
-
Very nice build. Great detail work. Impressive cage work.
-
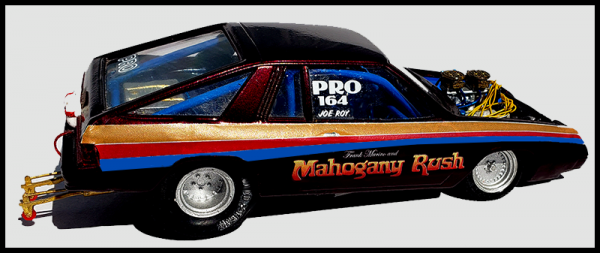
Finished up my tribute car of my friends Omni that he owned back in the early 80's. It was a kit bash of 3 models. I used an MPC Omni for the body, an MPC Pro-Stock "Firefighter" for the chassis and wheels, then used the Johan Sox & Martin 'Cuda for the dual-plug Hemi. I actually wired both distributors with the correct firing order, which was tough and something I wanted to do for myself, LOL. Used an aftermarket Lenco for the trans with the shifter. Built the roll cage and hood scoop from scratch best I could. The color of the original car was Candy Purple, so I painted it that from a rattle can, but it is more maroon than blueish of the original. I had 2 different sets of decals to use. Special thanx goes out to disconovaman and echoxrayniner from this board for the decals. I showed it to Frank Marino and he was floored. I was happy to capture a car from our past. Thanx for looking. Pics are of the 3 kits, the real car and my tribute model.
Original Album cover
Frank Marino with car at track
On the starting line
-
Outstanding job! Me likey.


'51 Jeep
in Model Trucks: Pickups, Vans, SUVs, Light Commercial
Posted
Another tribute. This was my dad's old Jeep. His was a '51 that had no split window, but I didn't cut out the post because the class was scored in the middle. I used the bubble headlights because that's what he had. Kit has both grilles included. His had a Buick 225 V-6, but I couldn't find one, so I put in the stock 4 banger. Used the Godzilla Jeep kit. Rustoleum Gloss Red and no clear coat. Custom full cage roll bar like his made to the best of my limited abilities. Thanx for looking.