Bilingham
-
Posts
72 -
Joined
-
Last visited
Content Type
Profiles
Forums
Events
Gallery
Everything posted by Bilingham
-
Please check out my new site on Facebook. Search: bilingham design
-
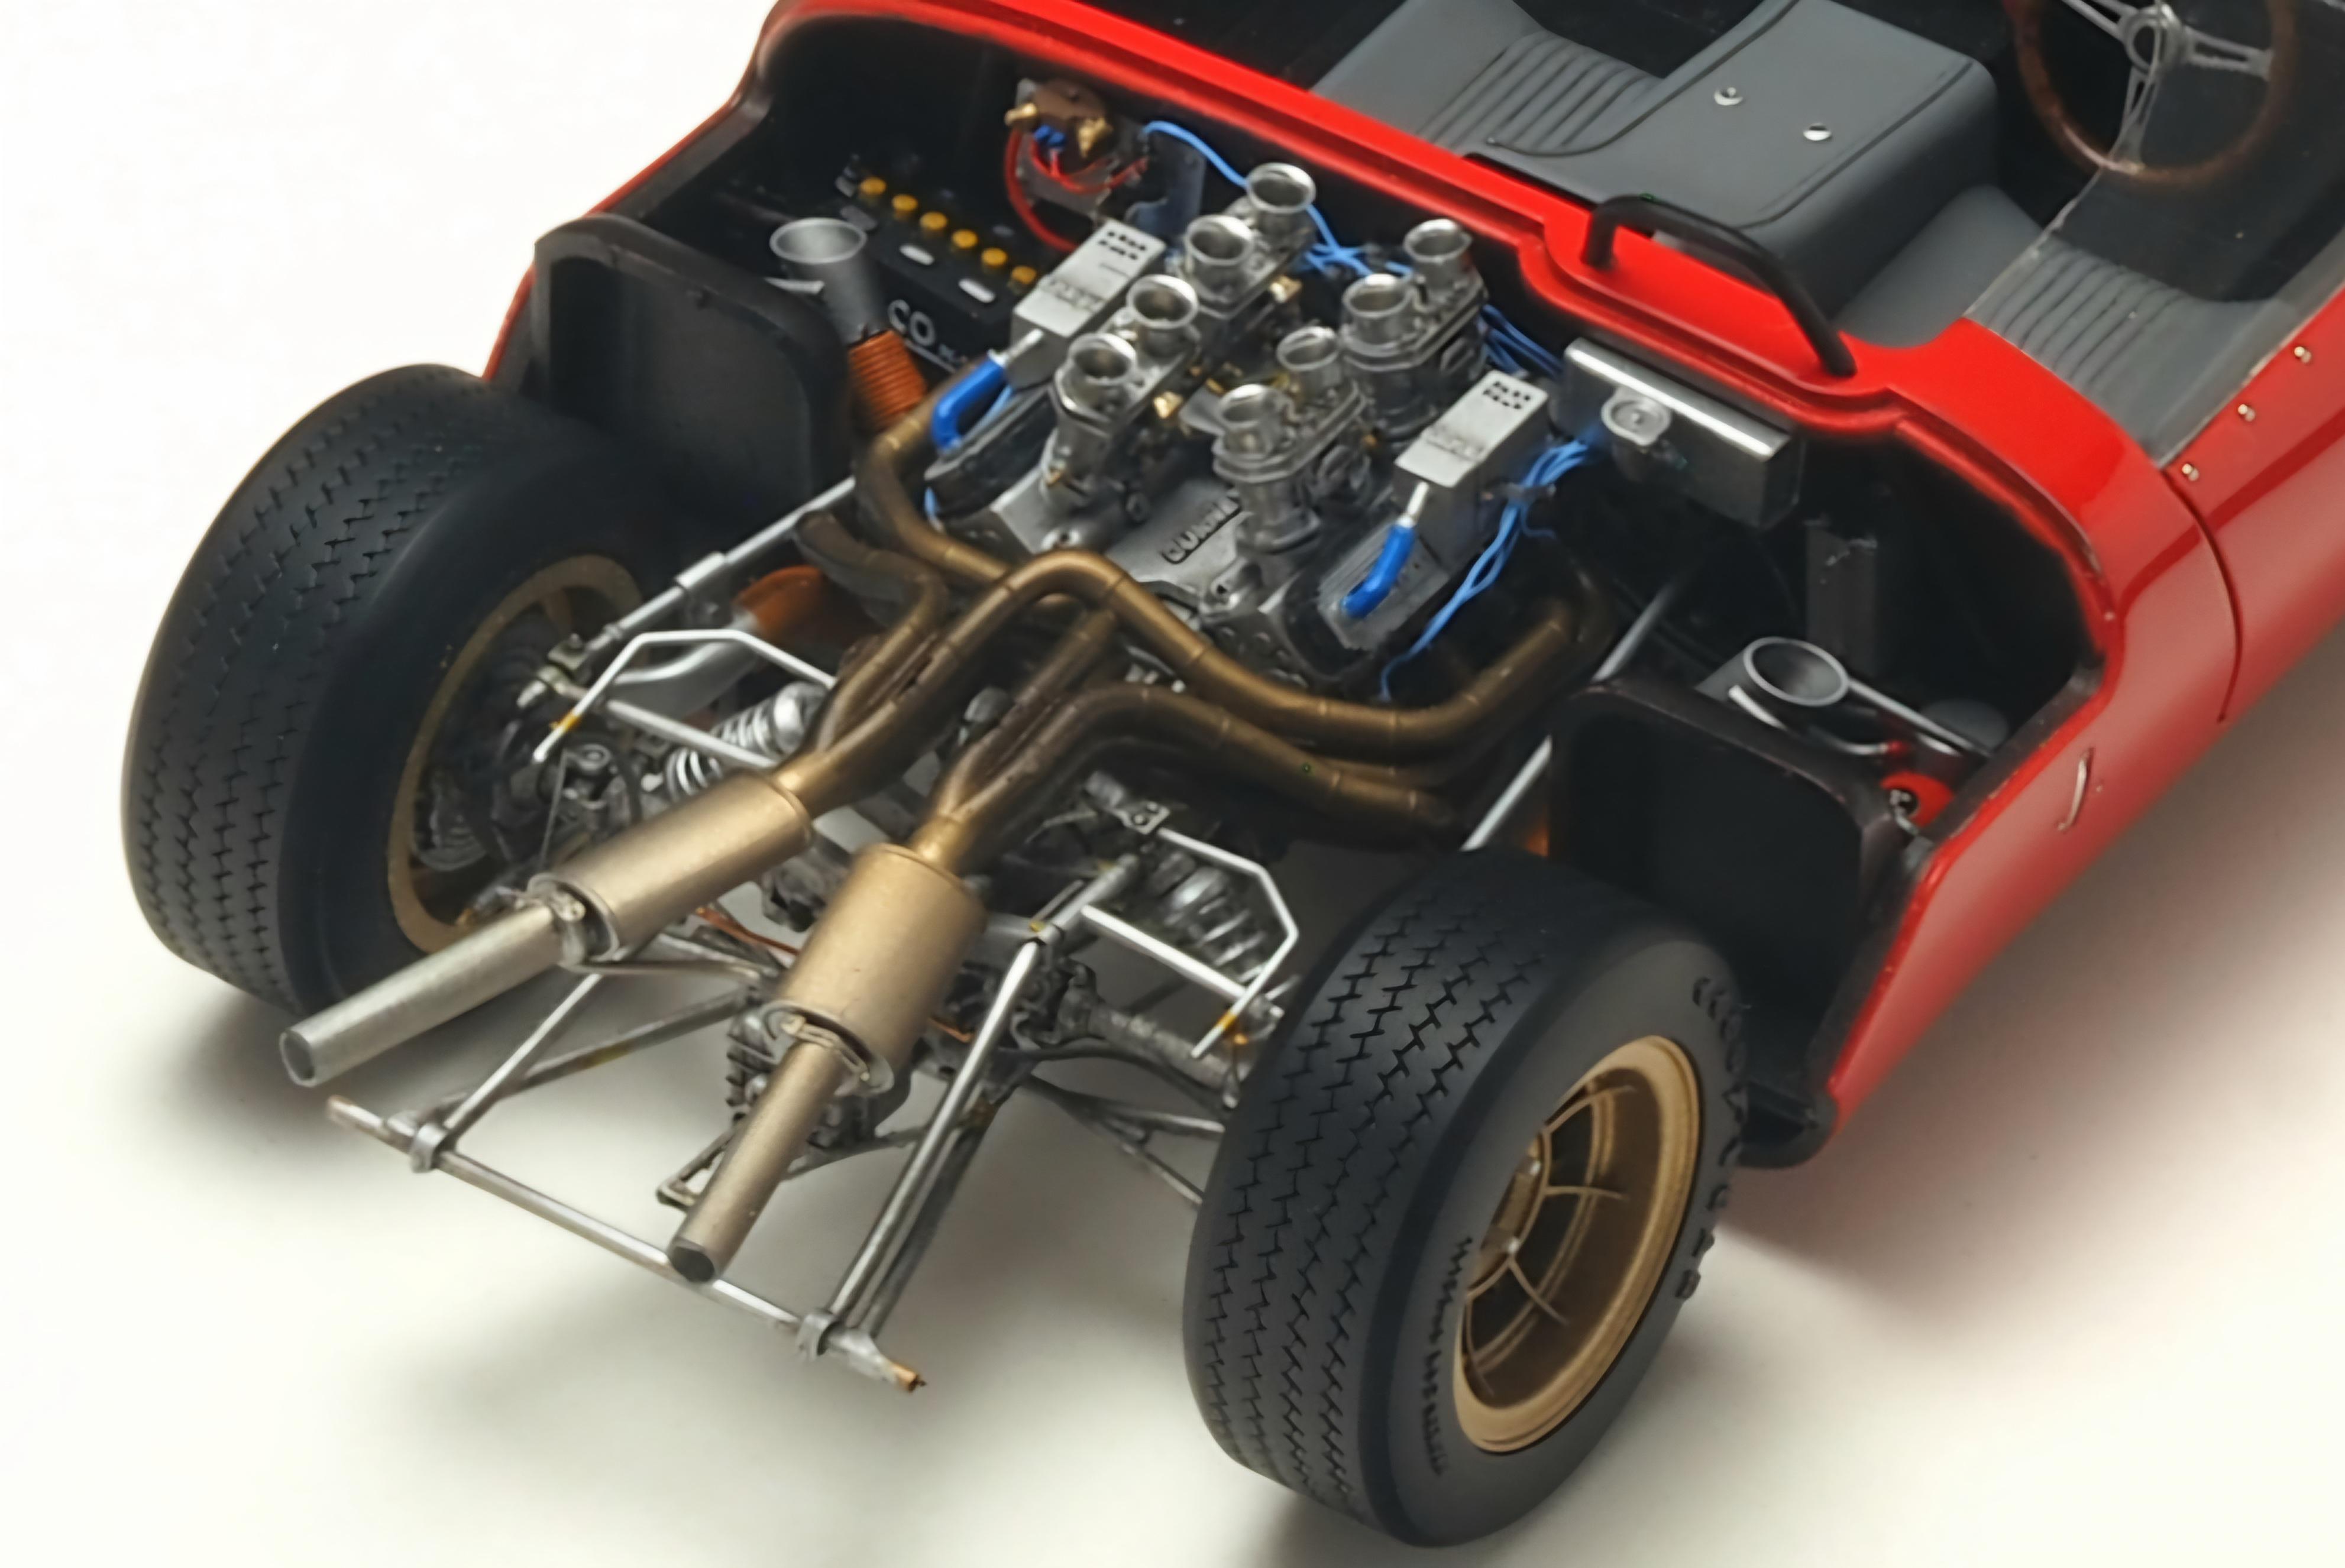
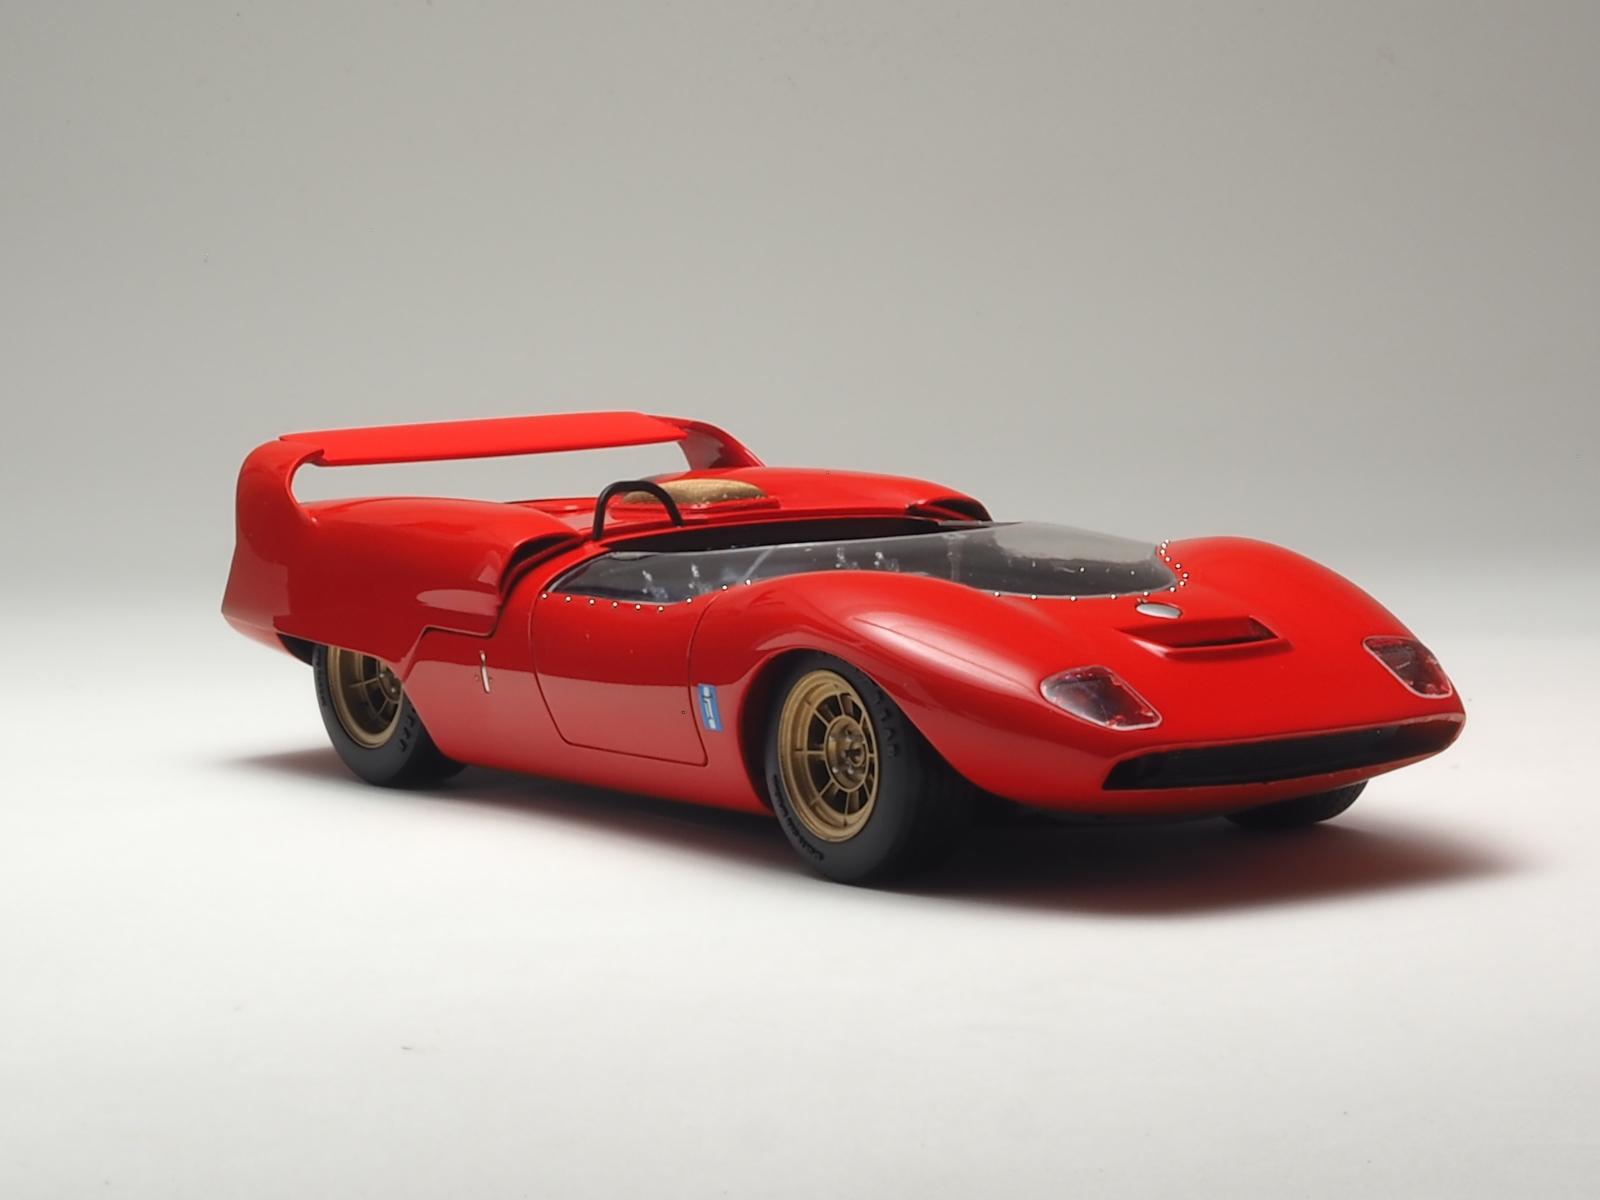
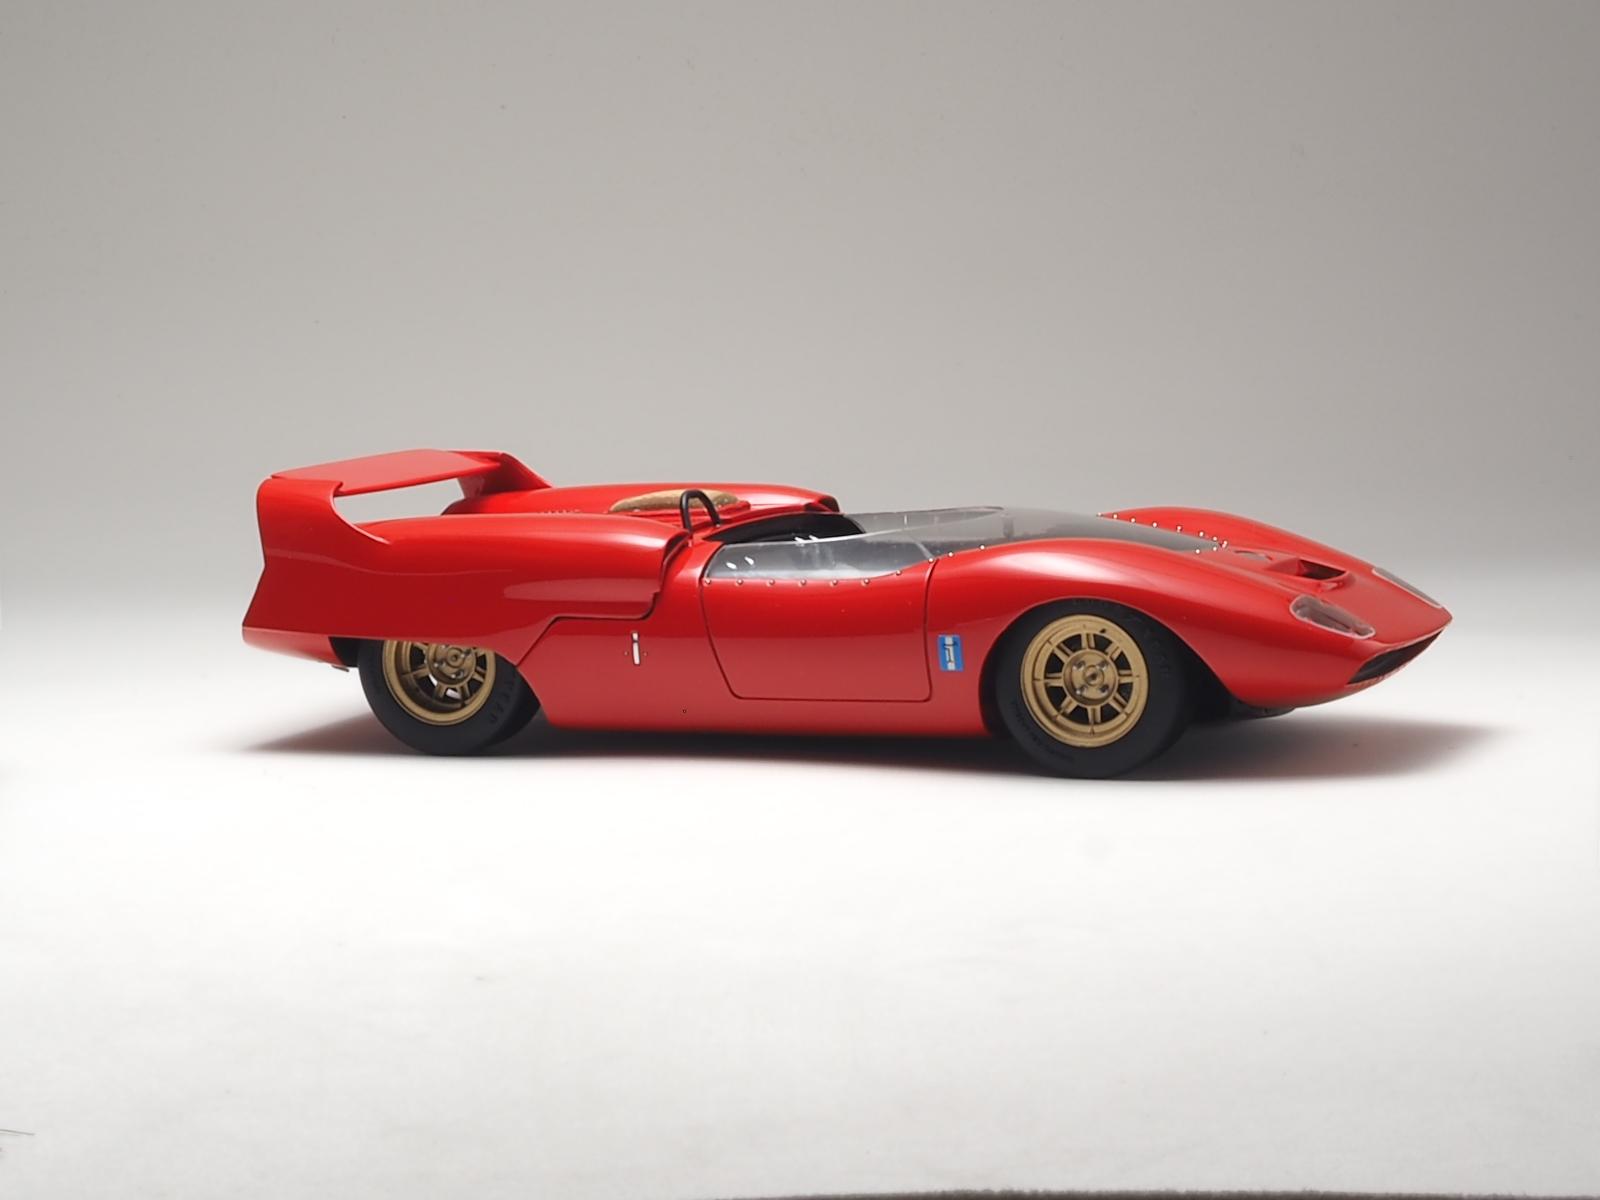
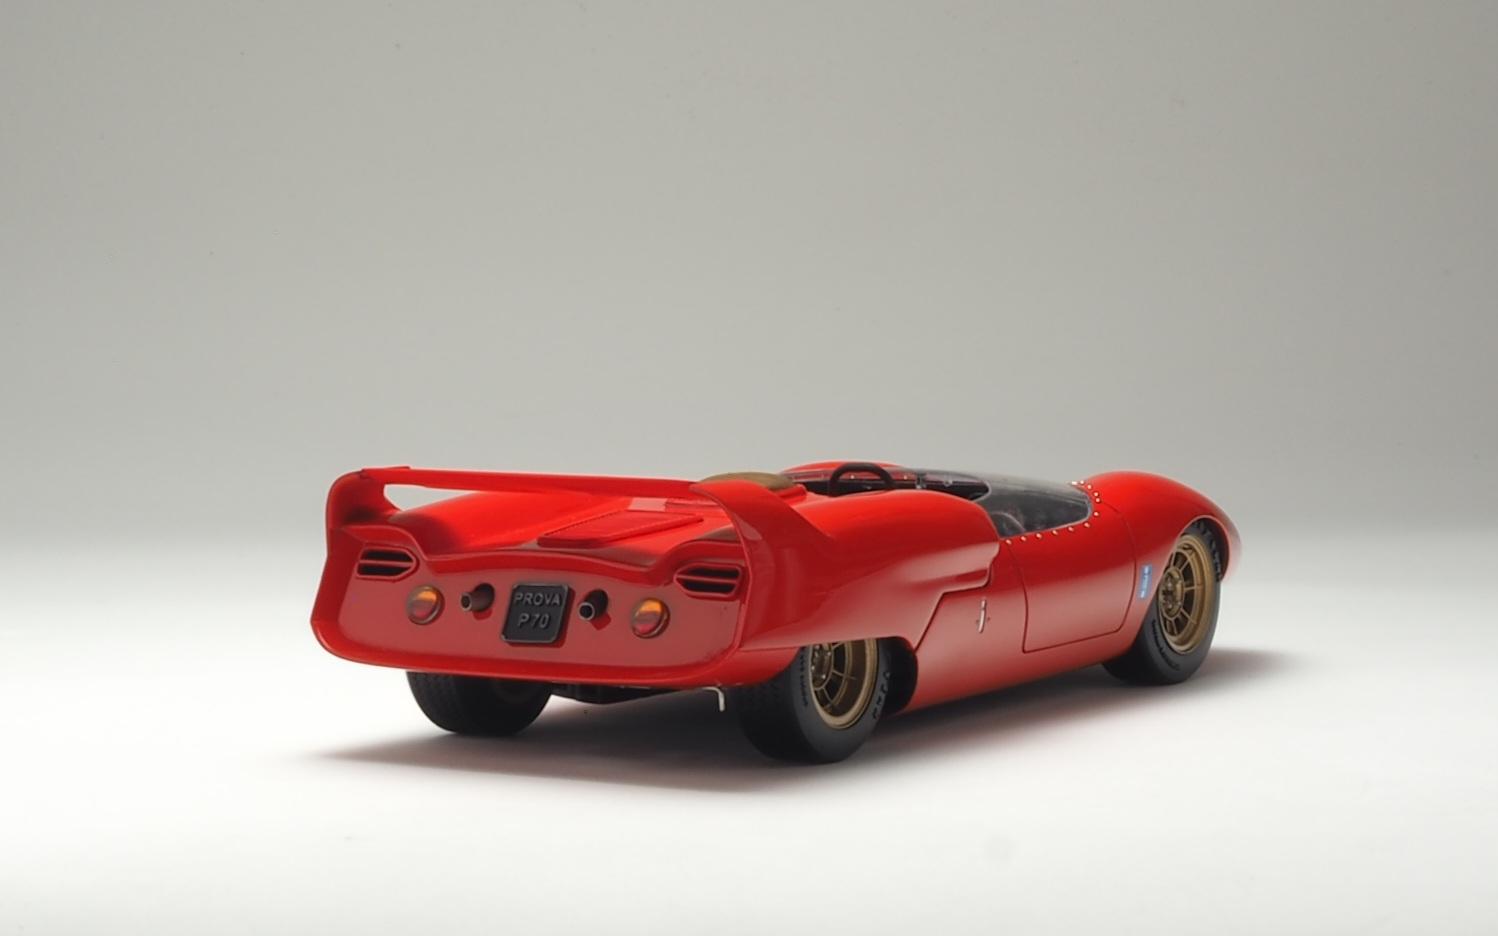
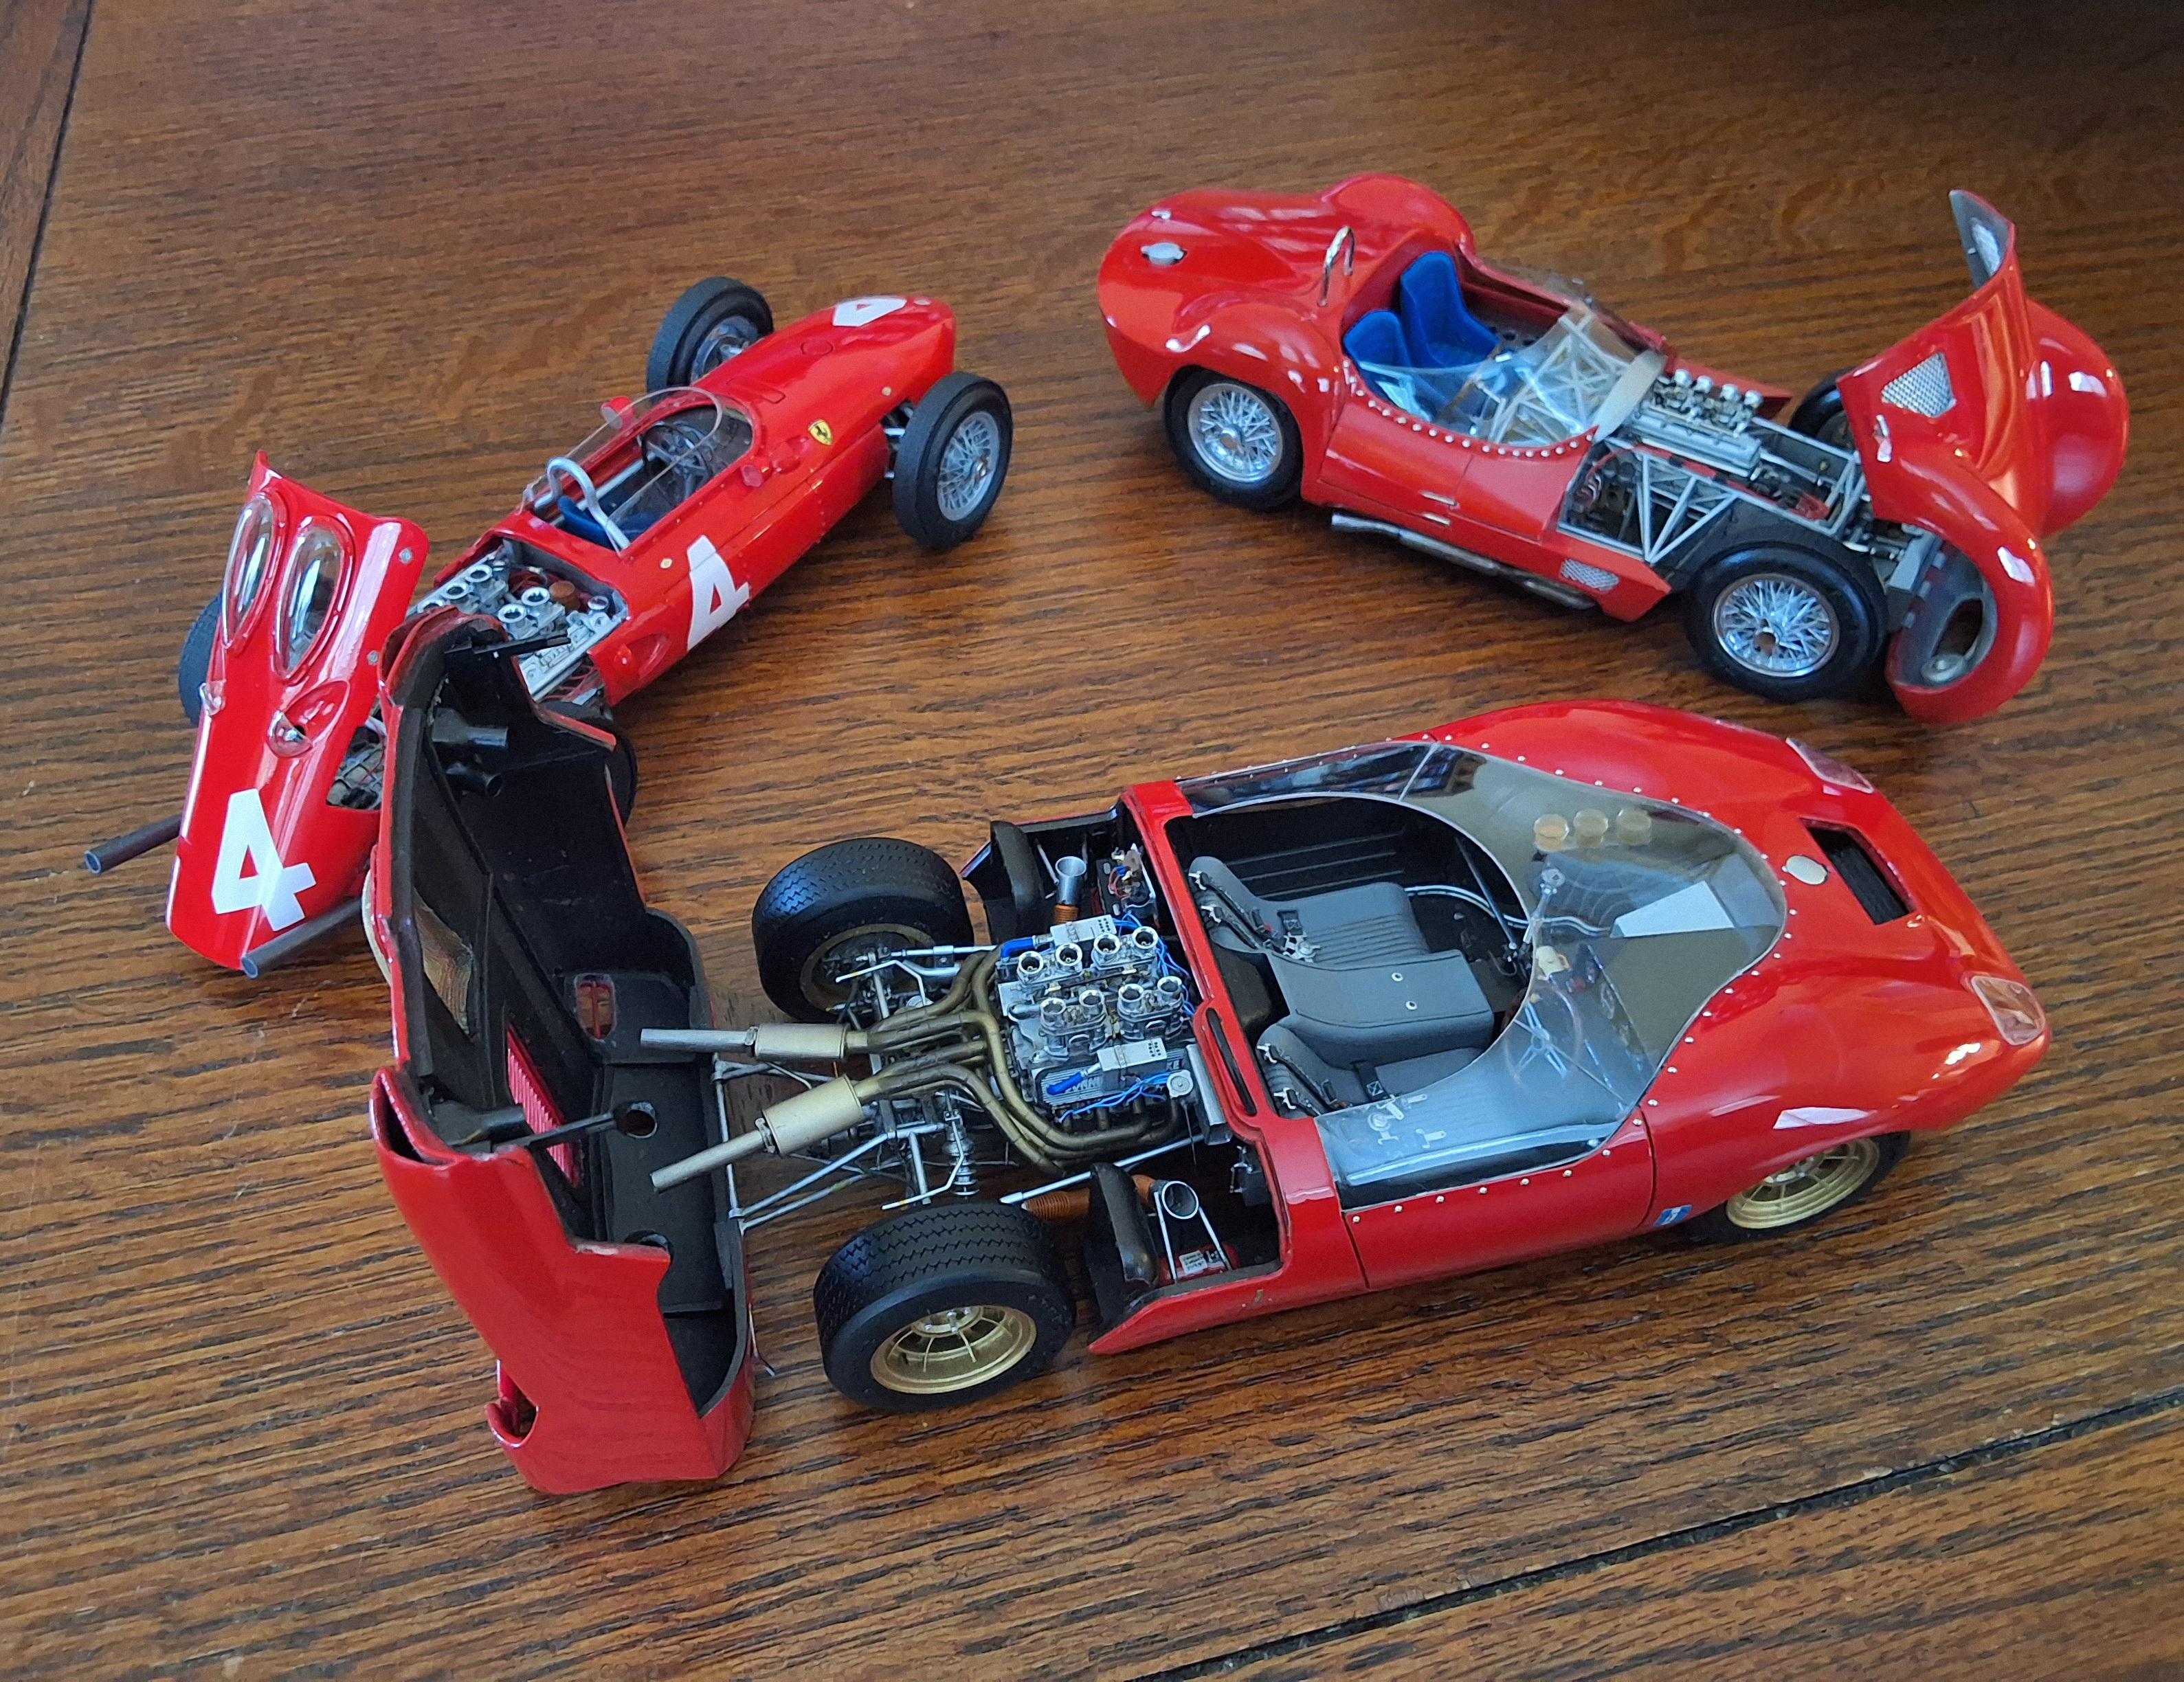
Here is my most recent build, the Shelby De Tomaso P70. The car is 1/24 scale and is an original CAD design I created using Autodesk Fusion. I worked on this car for 4 years, on and off, as I encountered and resolved various problems. Tha car is entirely 3d printed except for wires, clear parts, etc.

- 40 replies
-
- 28
-

-

-
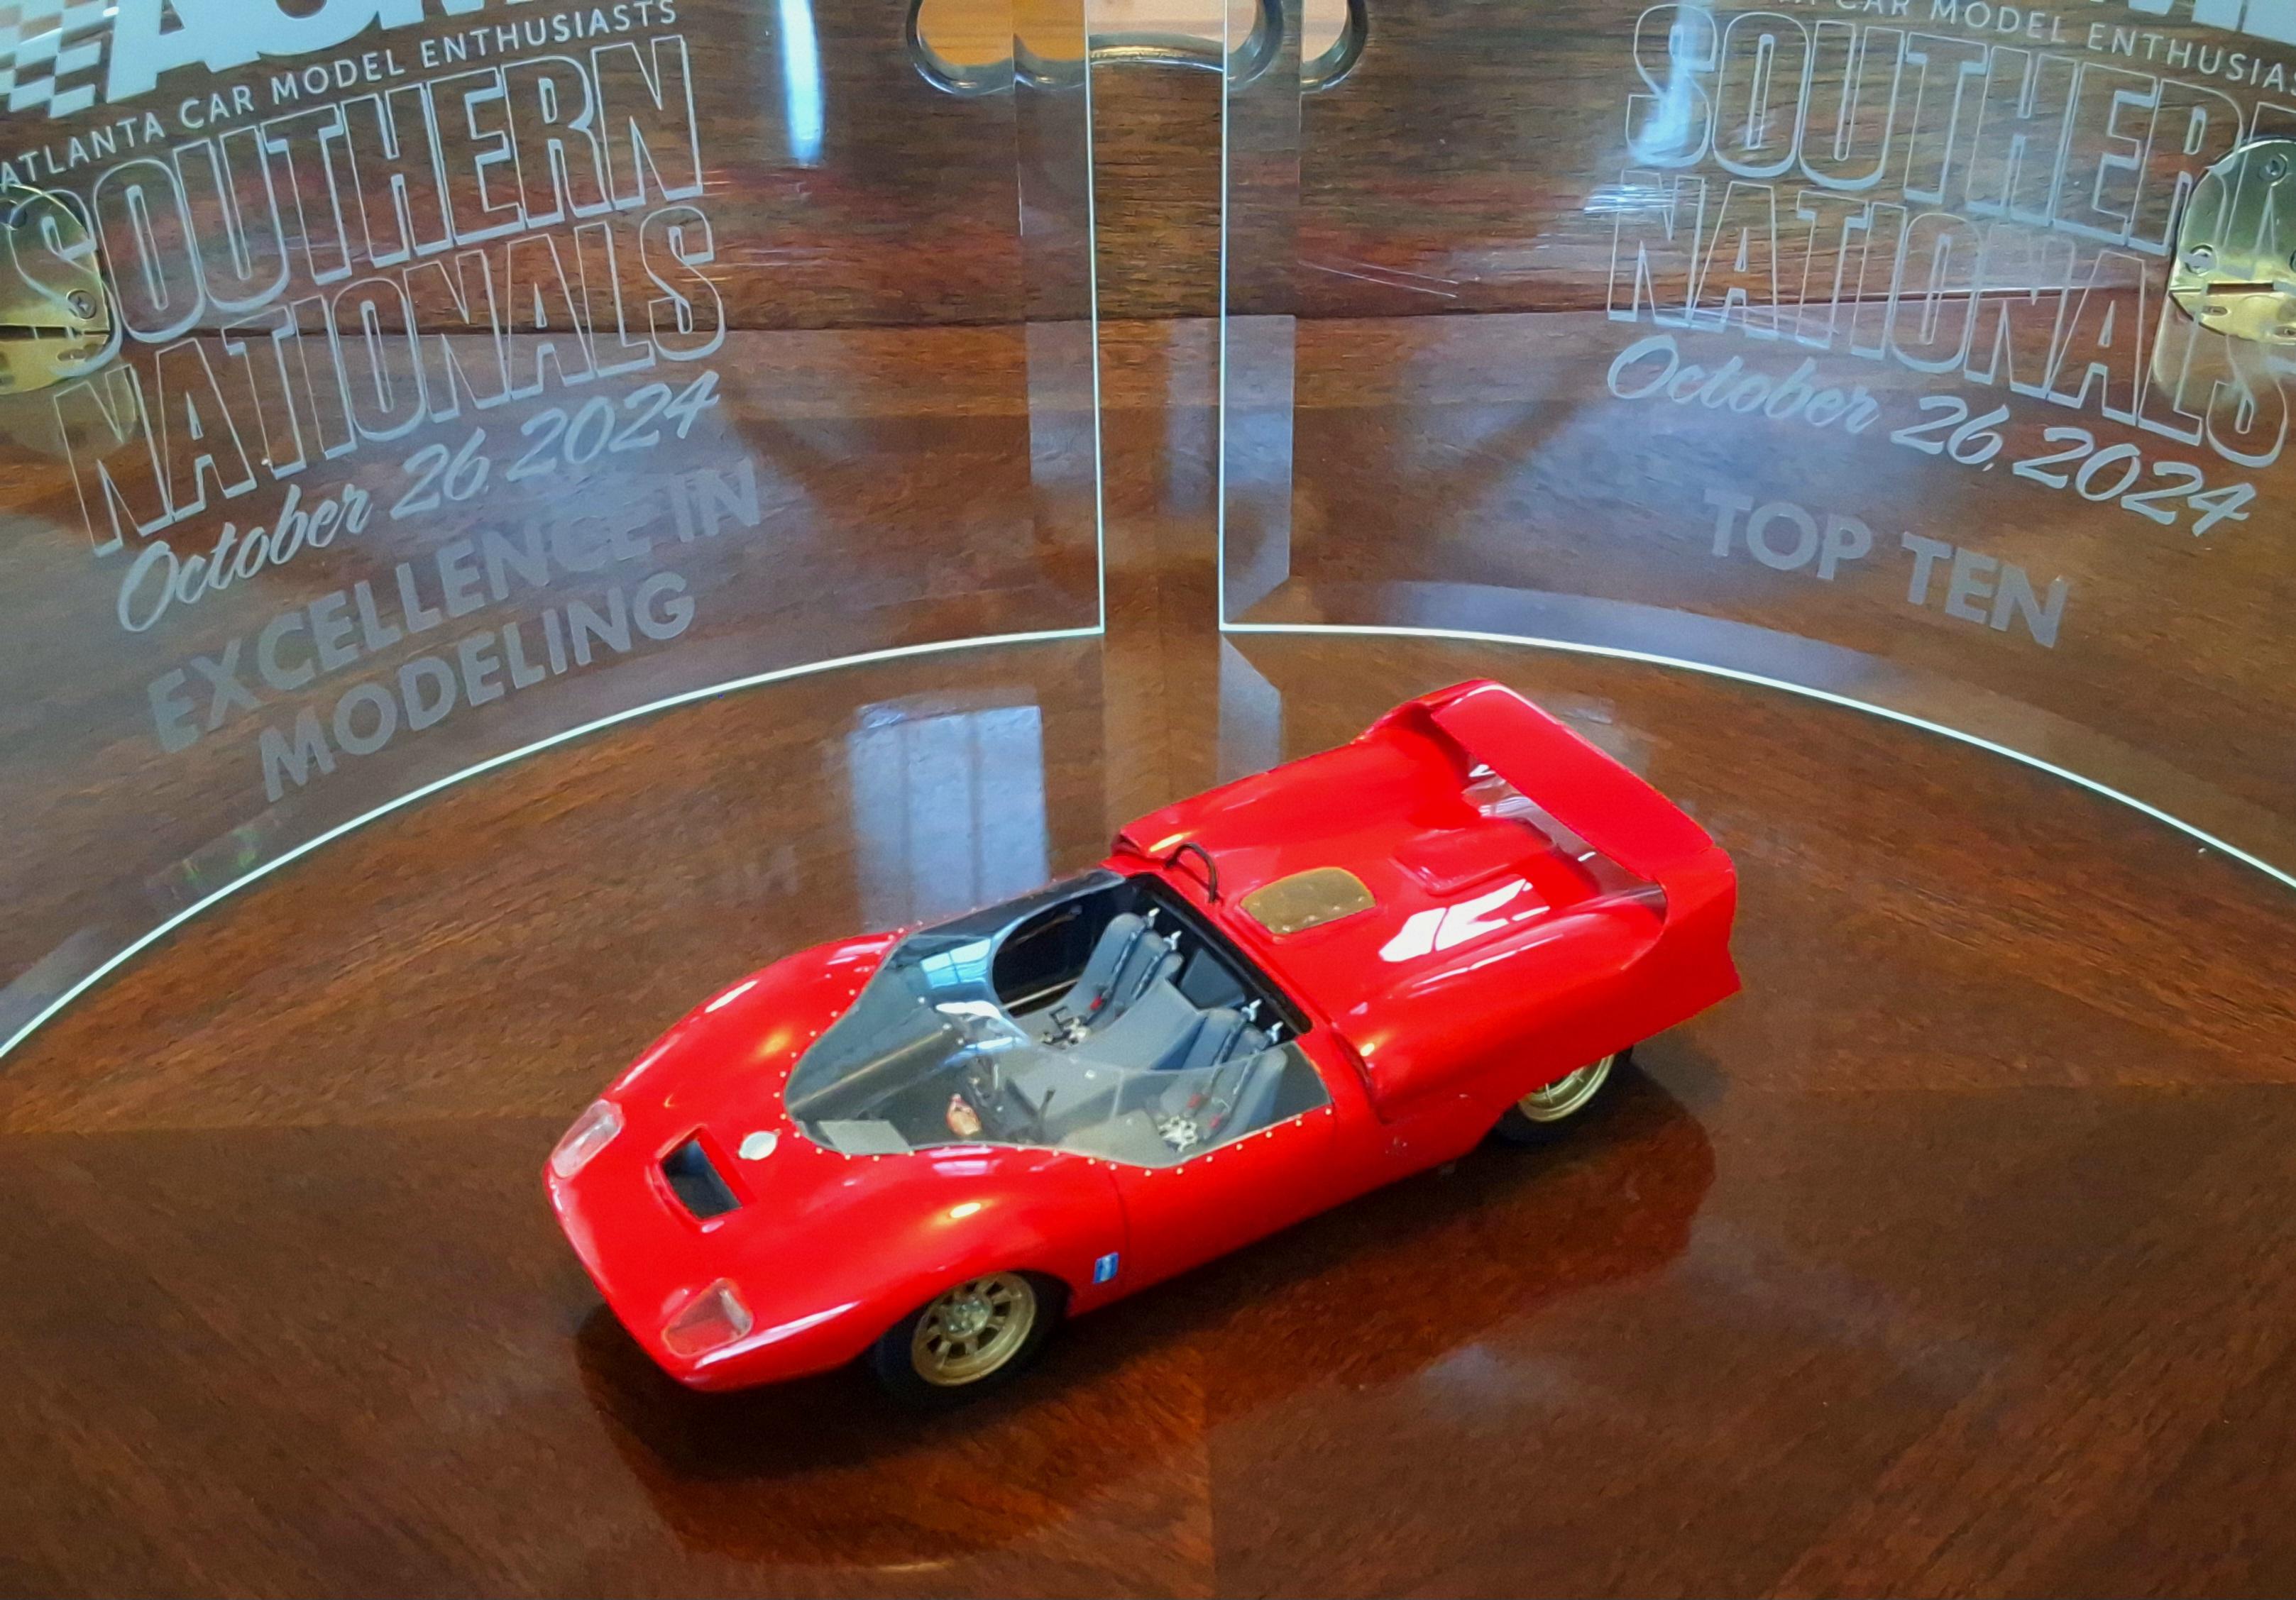
Did well at the ACME Southern Nationals last Saturday. Won a "TopTen" and "Excellence in Modelling" awards. Great show, over 900 models on the table.
-
Did well at the ACME Southern Nationals last Saturday. Won a "TopTen" and "Excellence in Modelling" awards. Great show, over 900 models on the table.
-
Well guys, I took the P70 to the ACME Southern Nationals on Saturday. I received a "top ten" award, and the "Excellence in Modelling" award. Very gratifying.
-
pretty much finished
-
Yep, I'll be there
-
The P70 is almost ready for it's debut at the ACME Southern Nationals in Atlanta. A couple of additional decals and it's finisned.
-
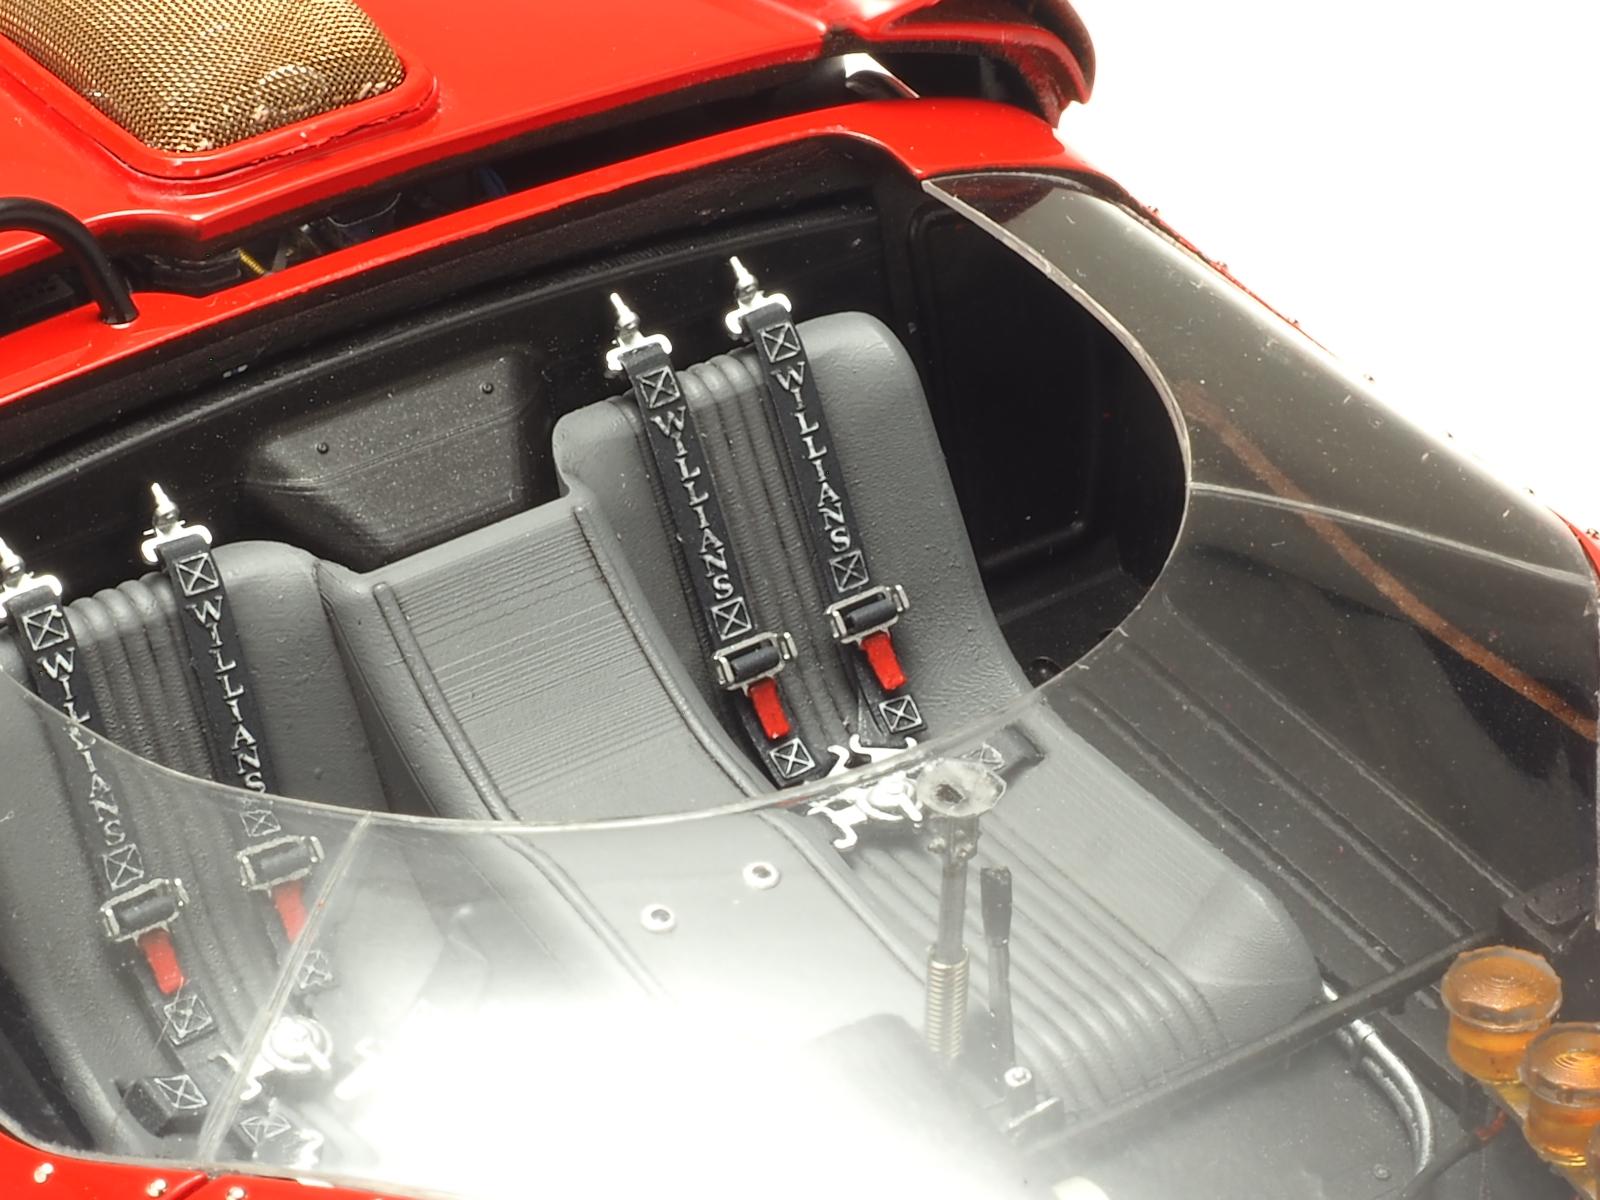
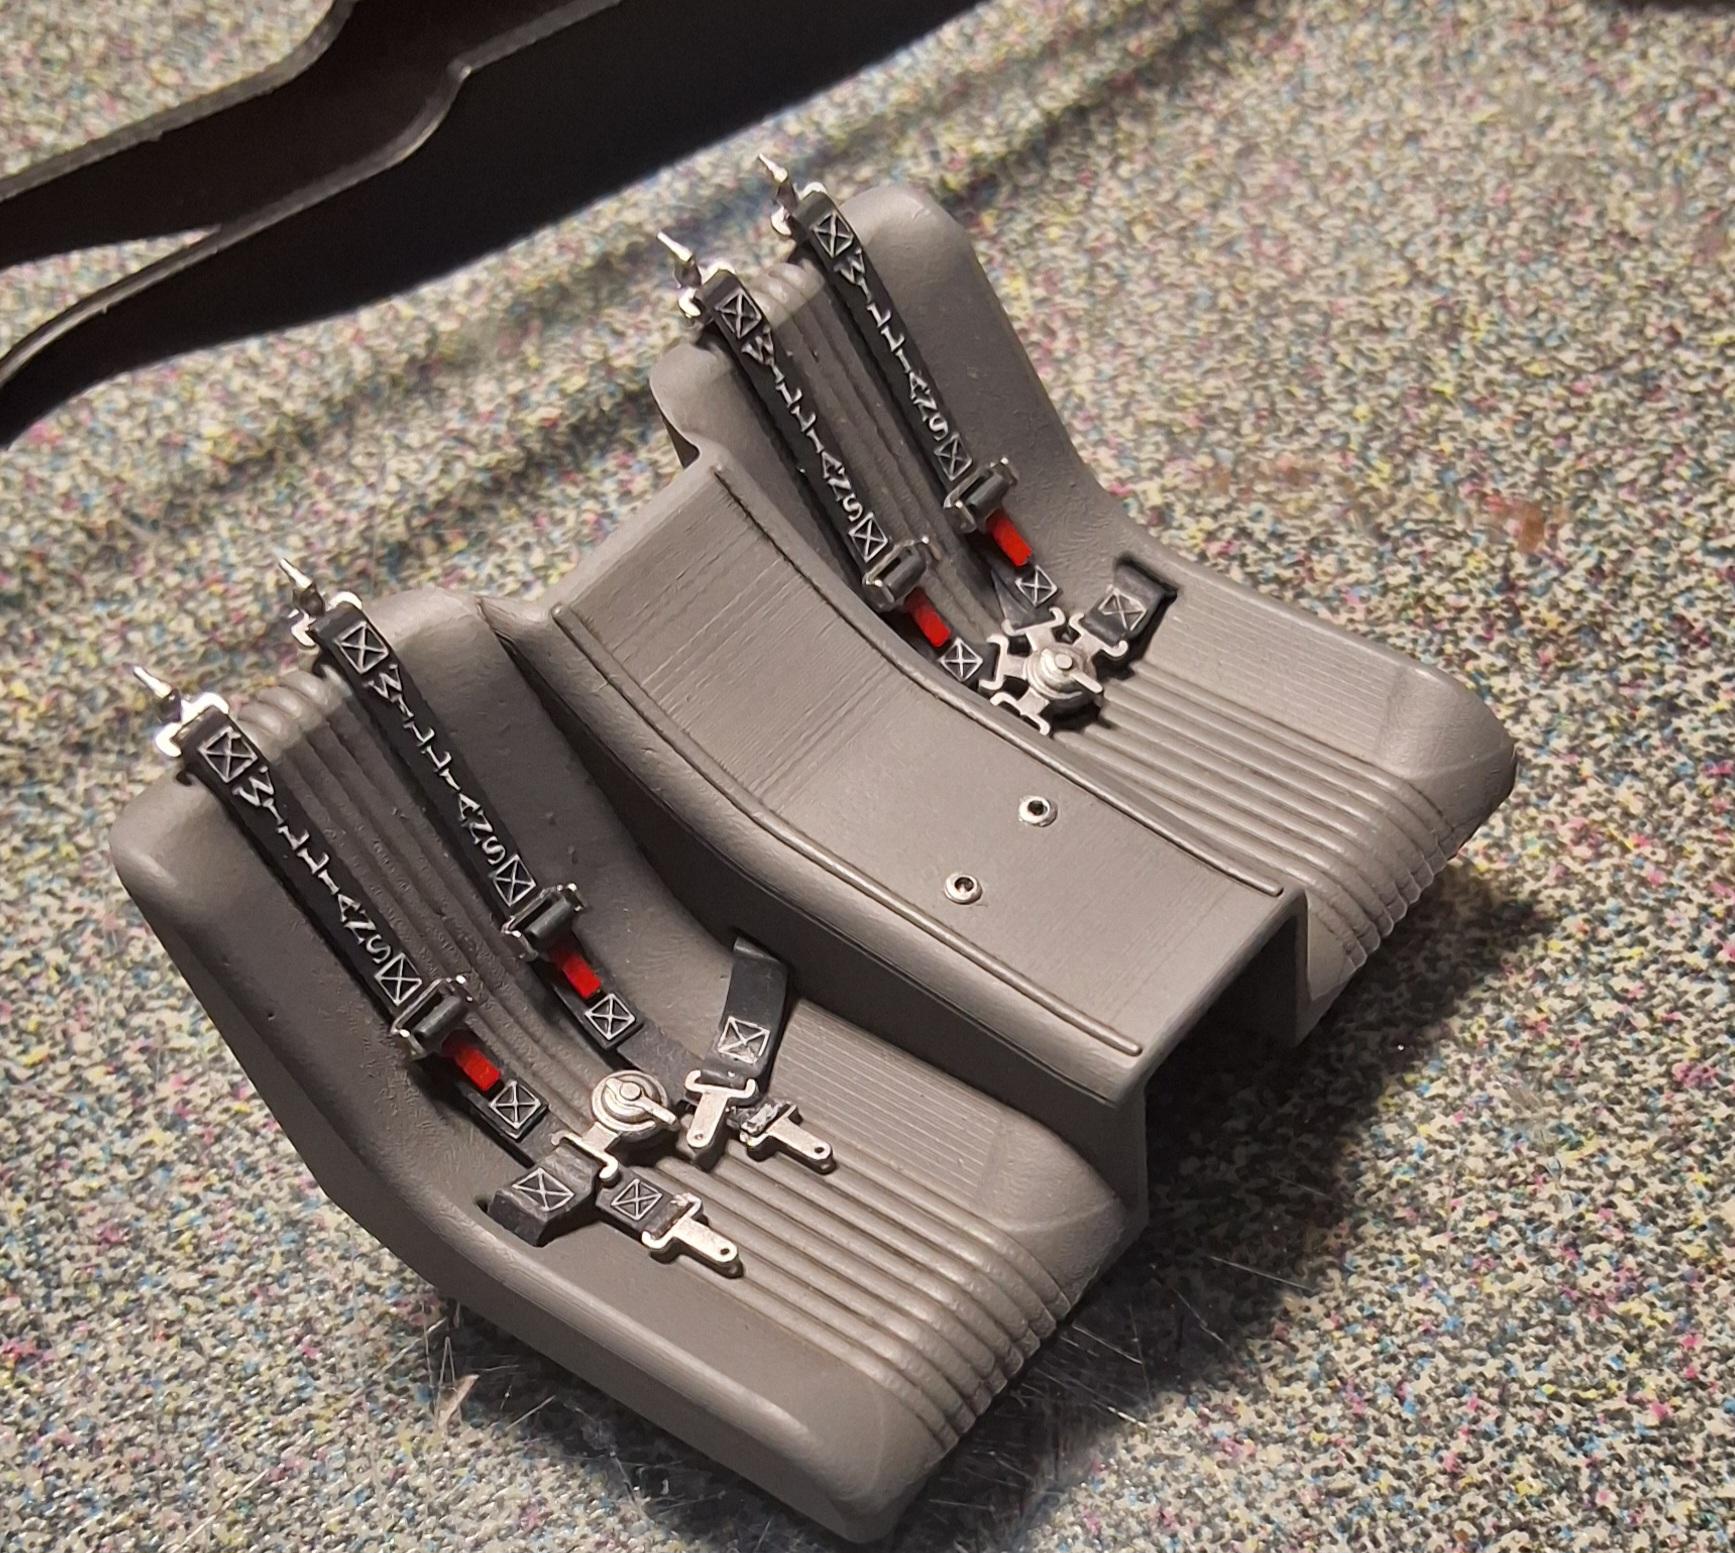
No, they were printed black, sprayed with white lacquer, spayed again with charcoal gray acrylic. When dry, rhe gray was selectively removed from the stitching and the lettering with alcohol and a Q-tip.
-
The seatbelts are prints. This is the first time I've tried this, and the results are pretty cool.
-
Details
-
No, the buckles don't work, but they are designed to have very realistic dimensions.
-
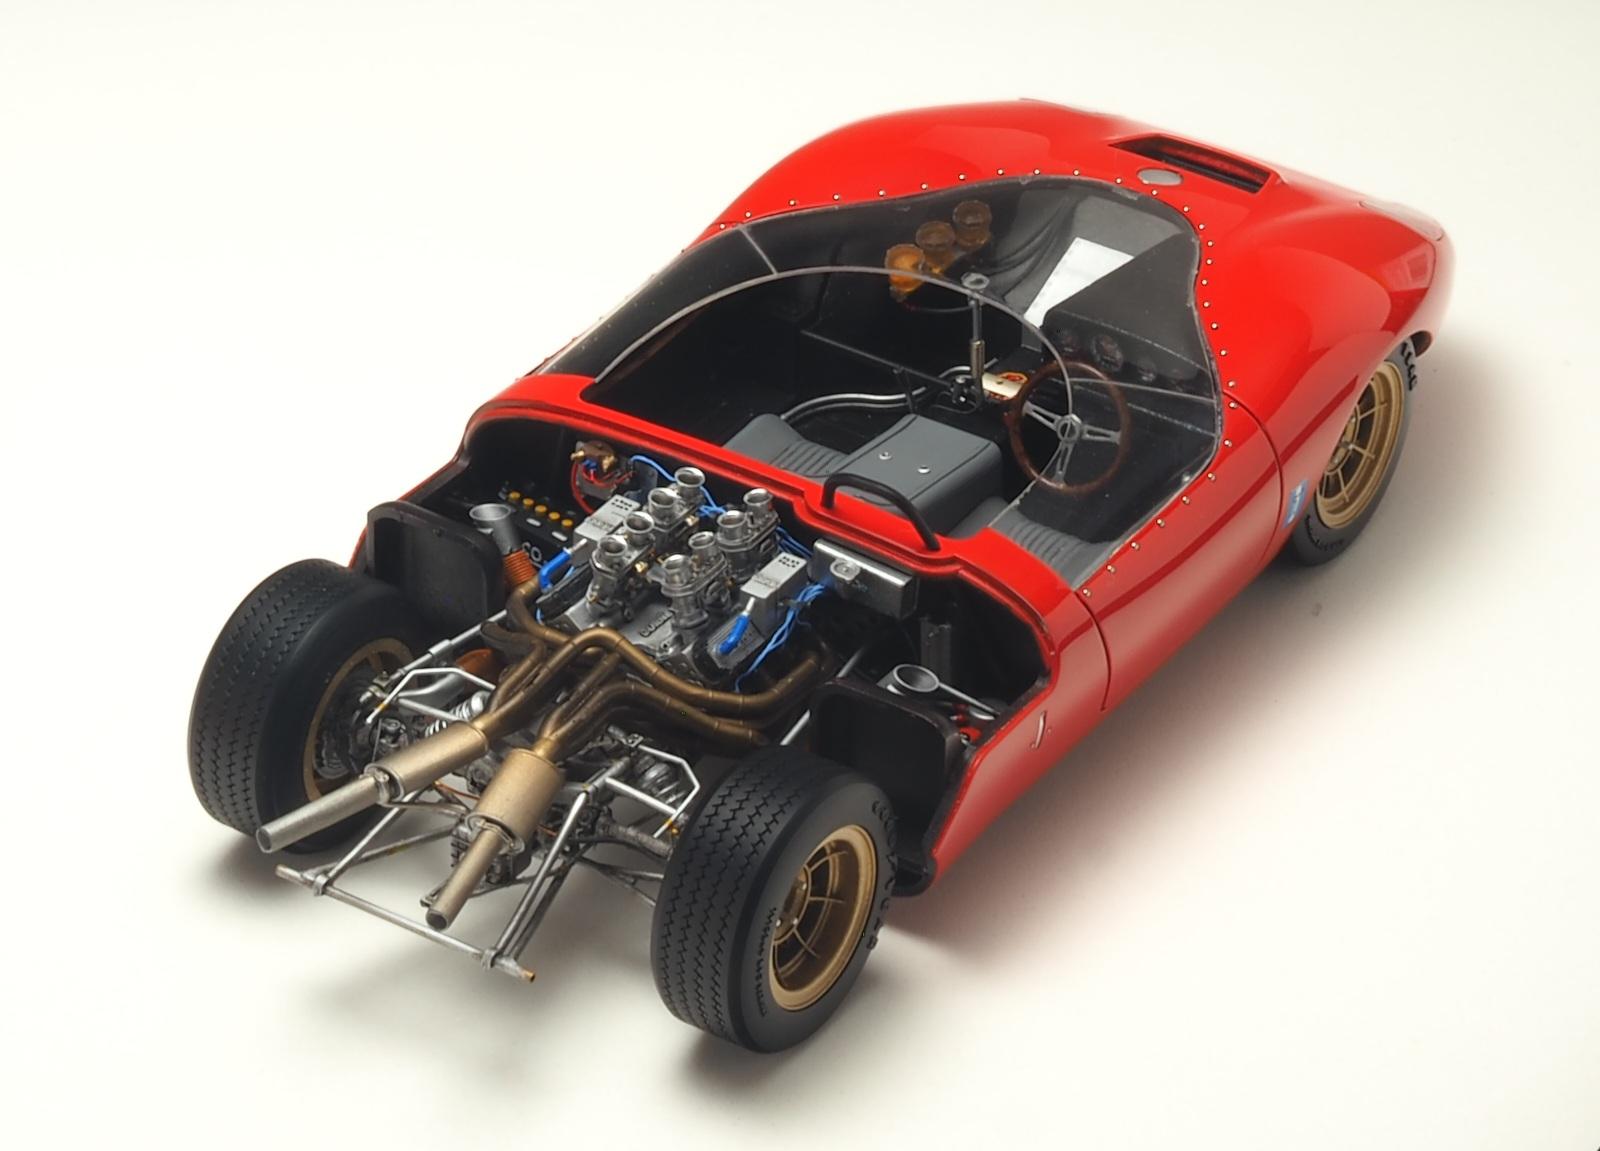
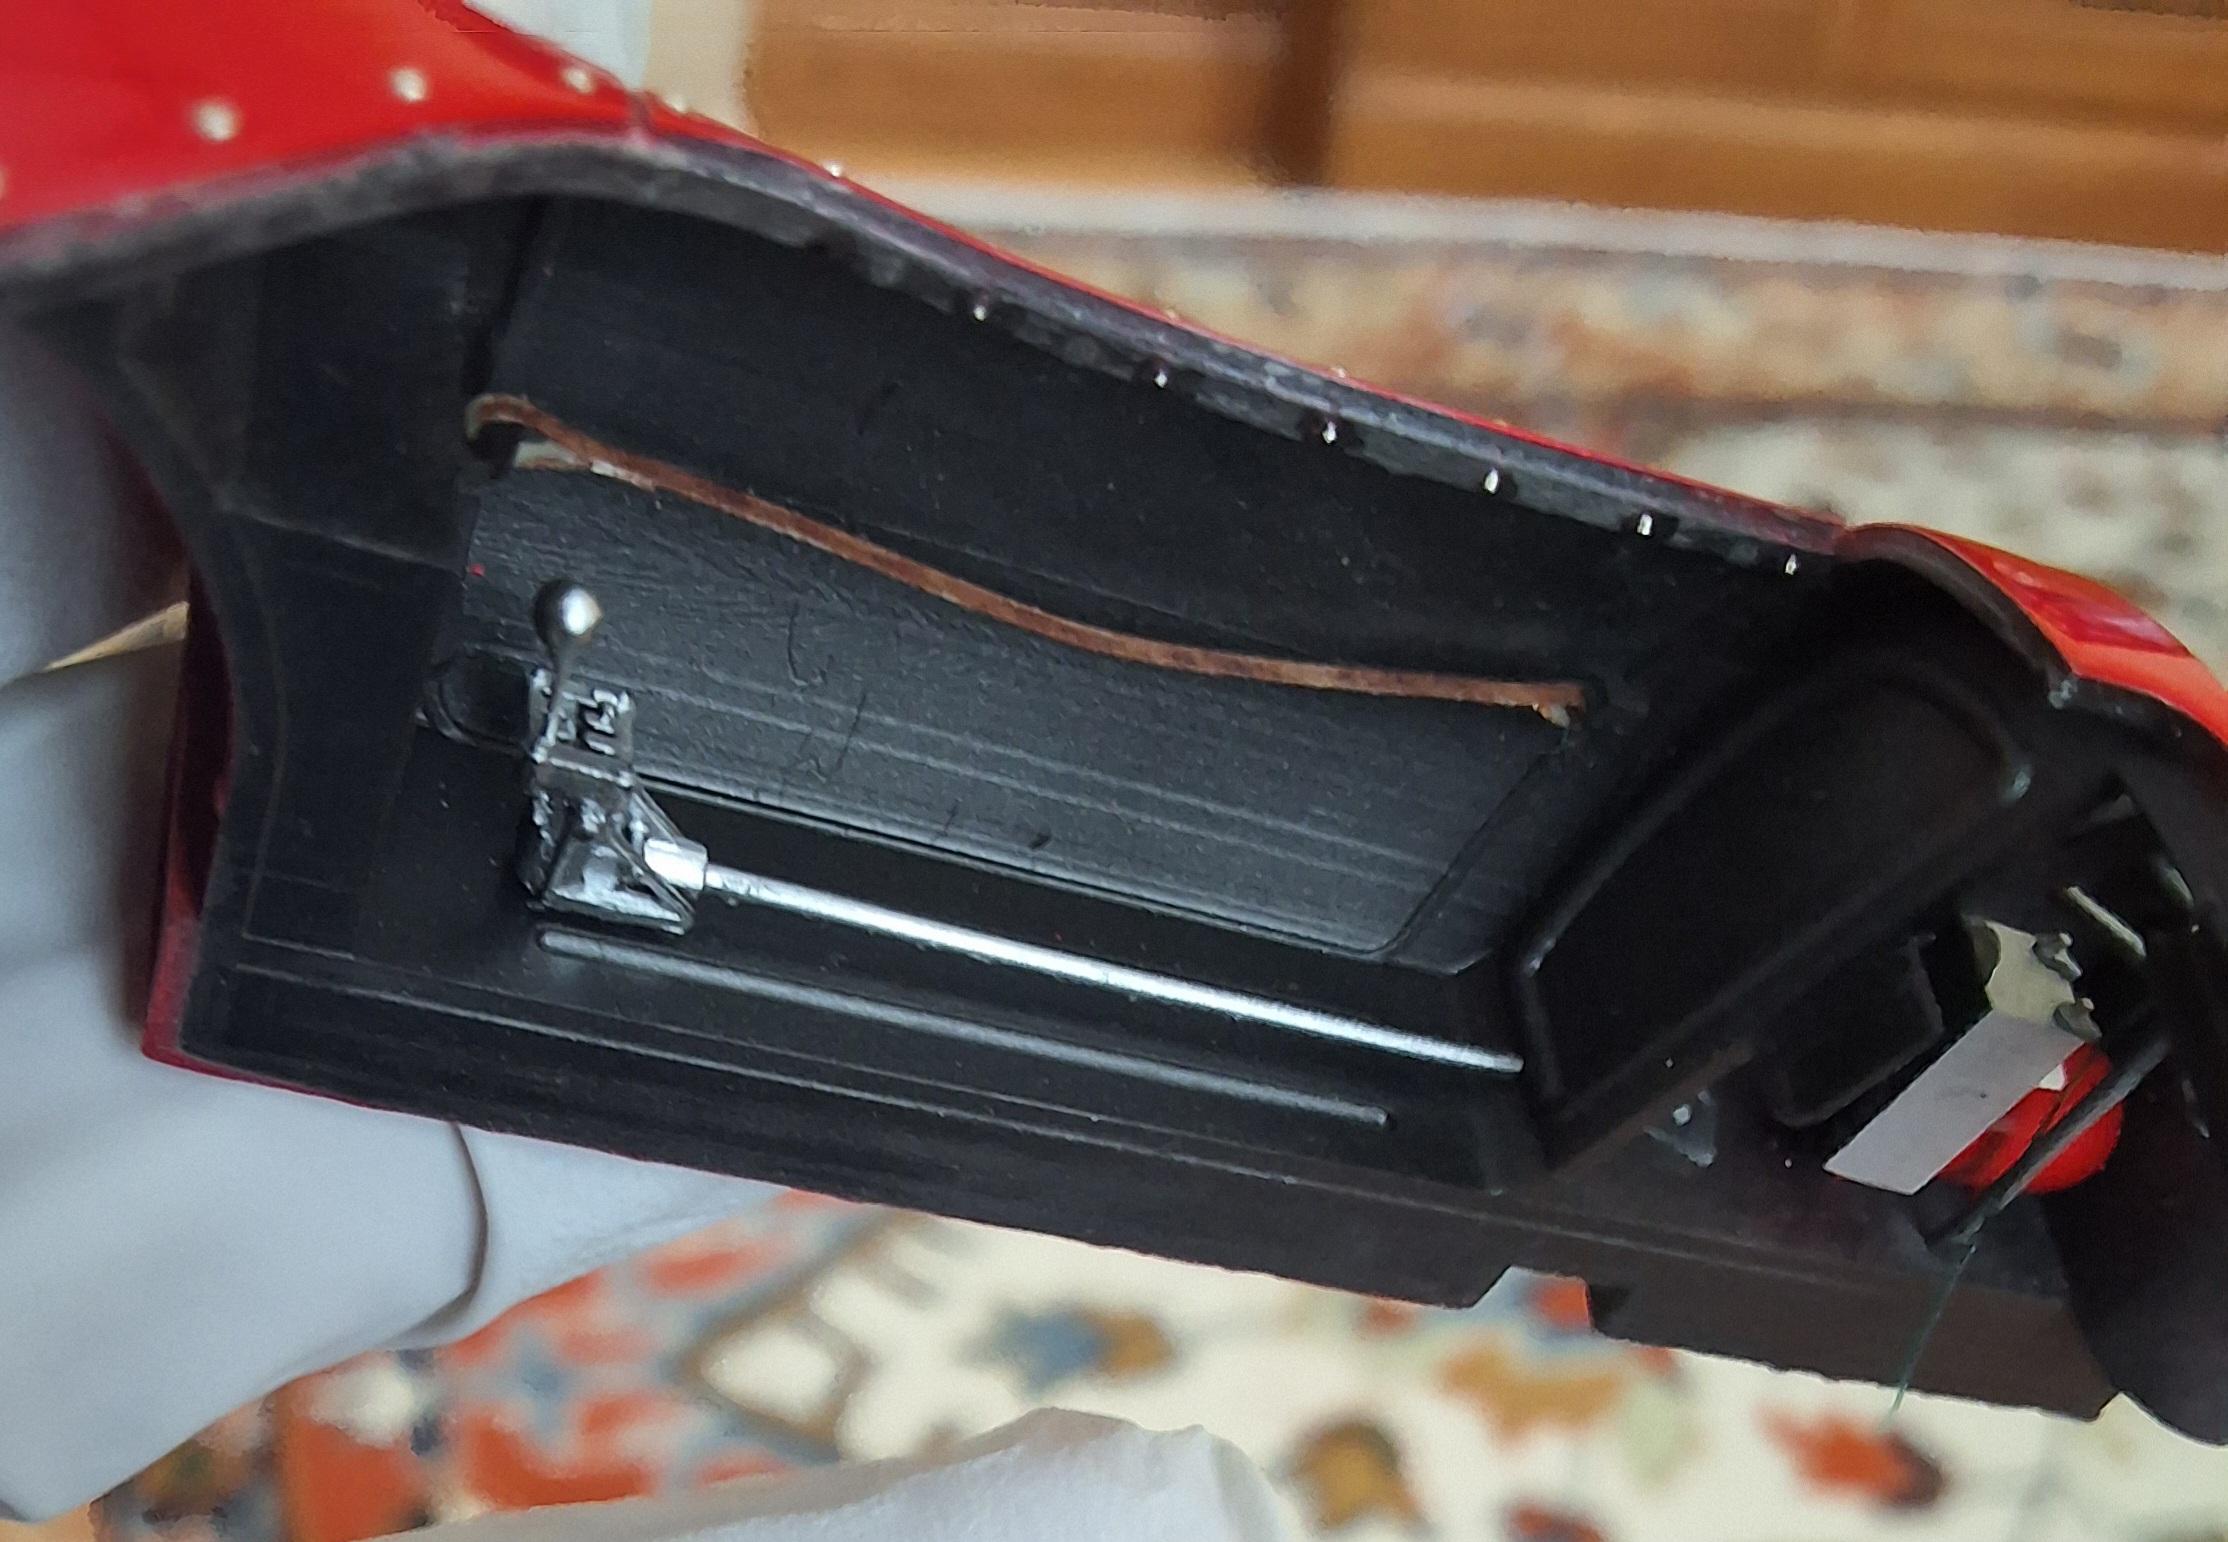
The dash in place. note the leather dood pulls, bizarre oil pipes snaking across the passenger foot well, the shifter. Really coming along.
-
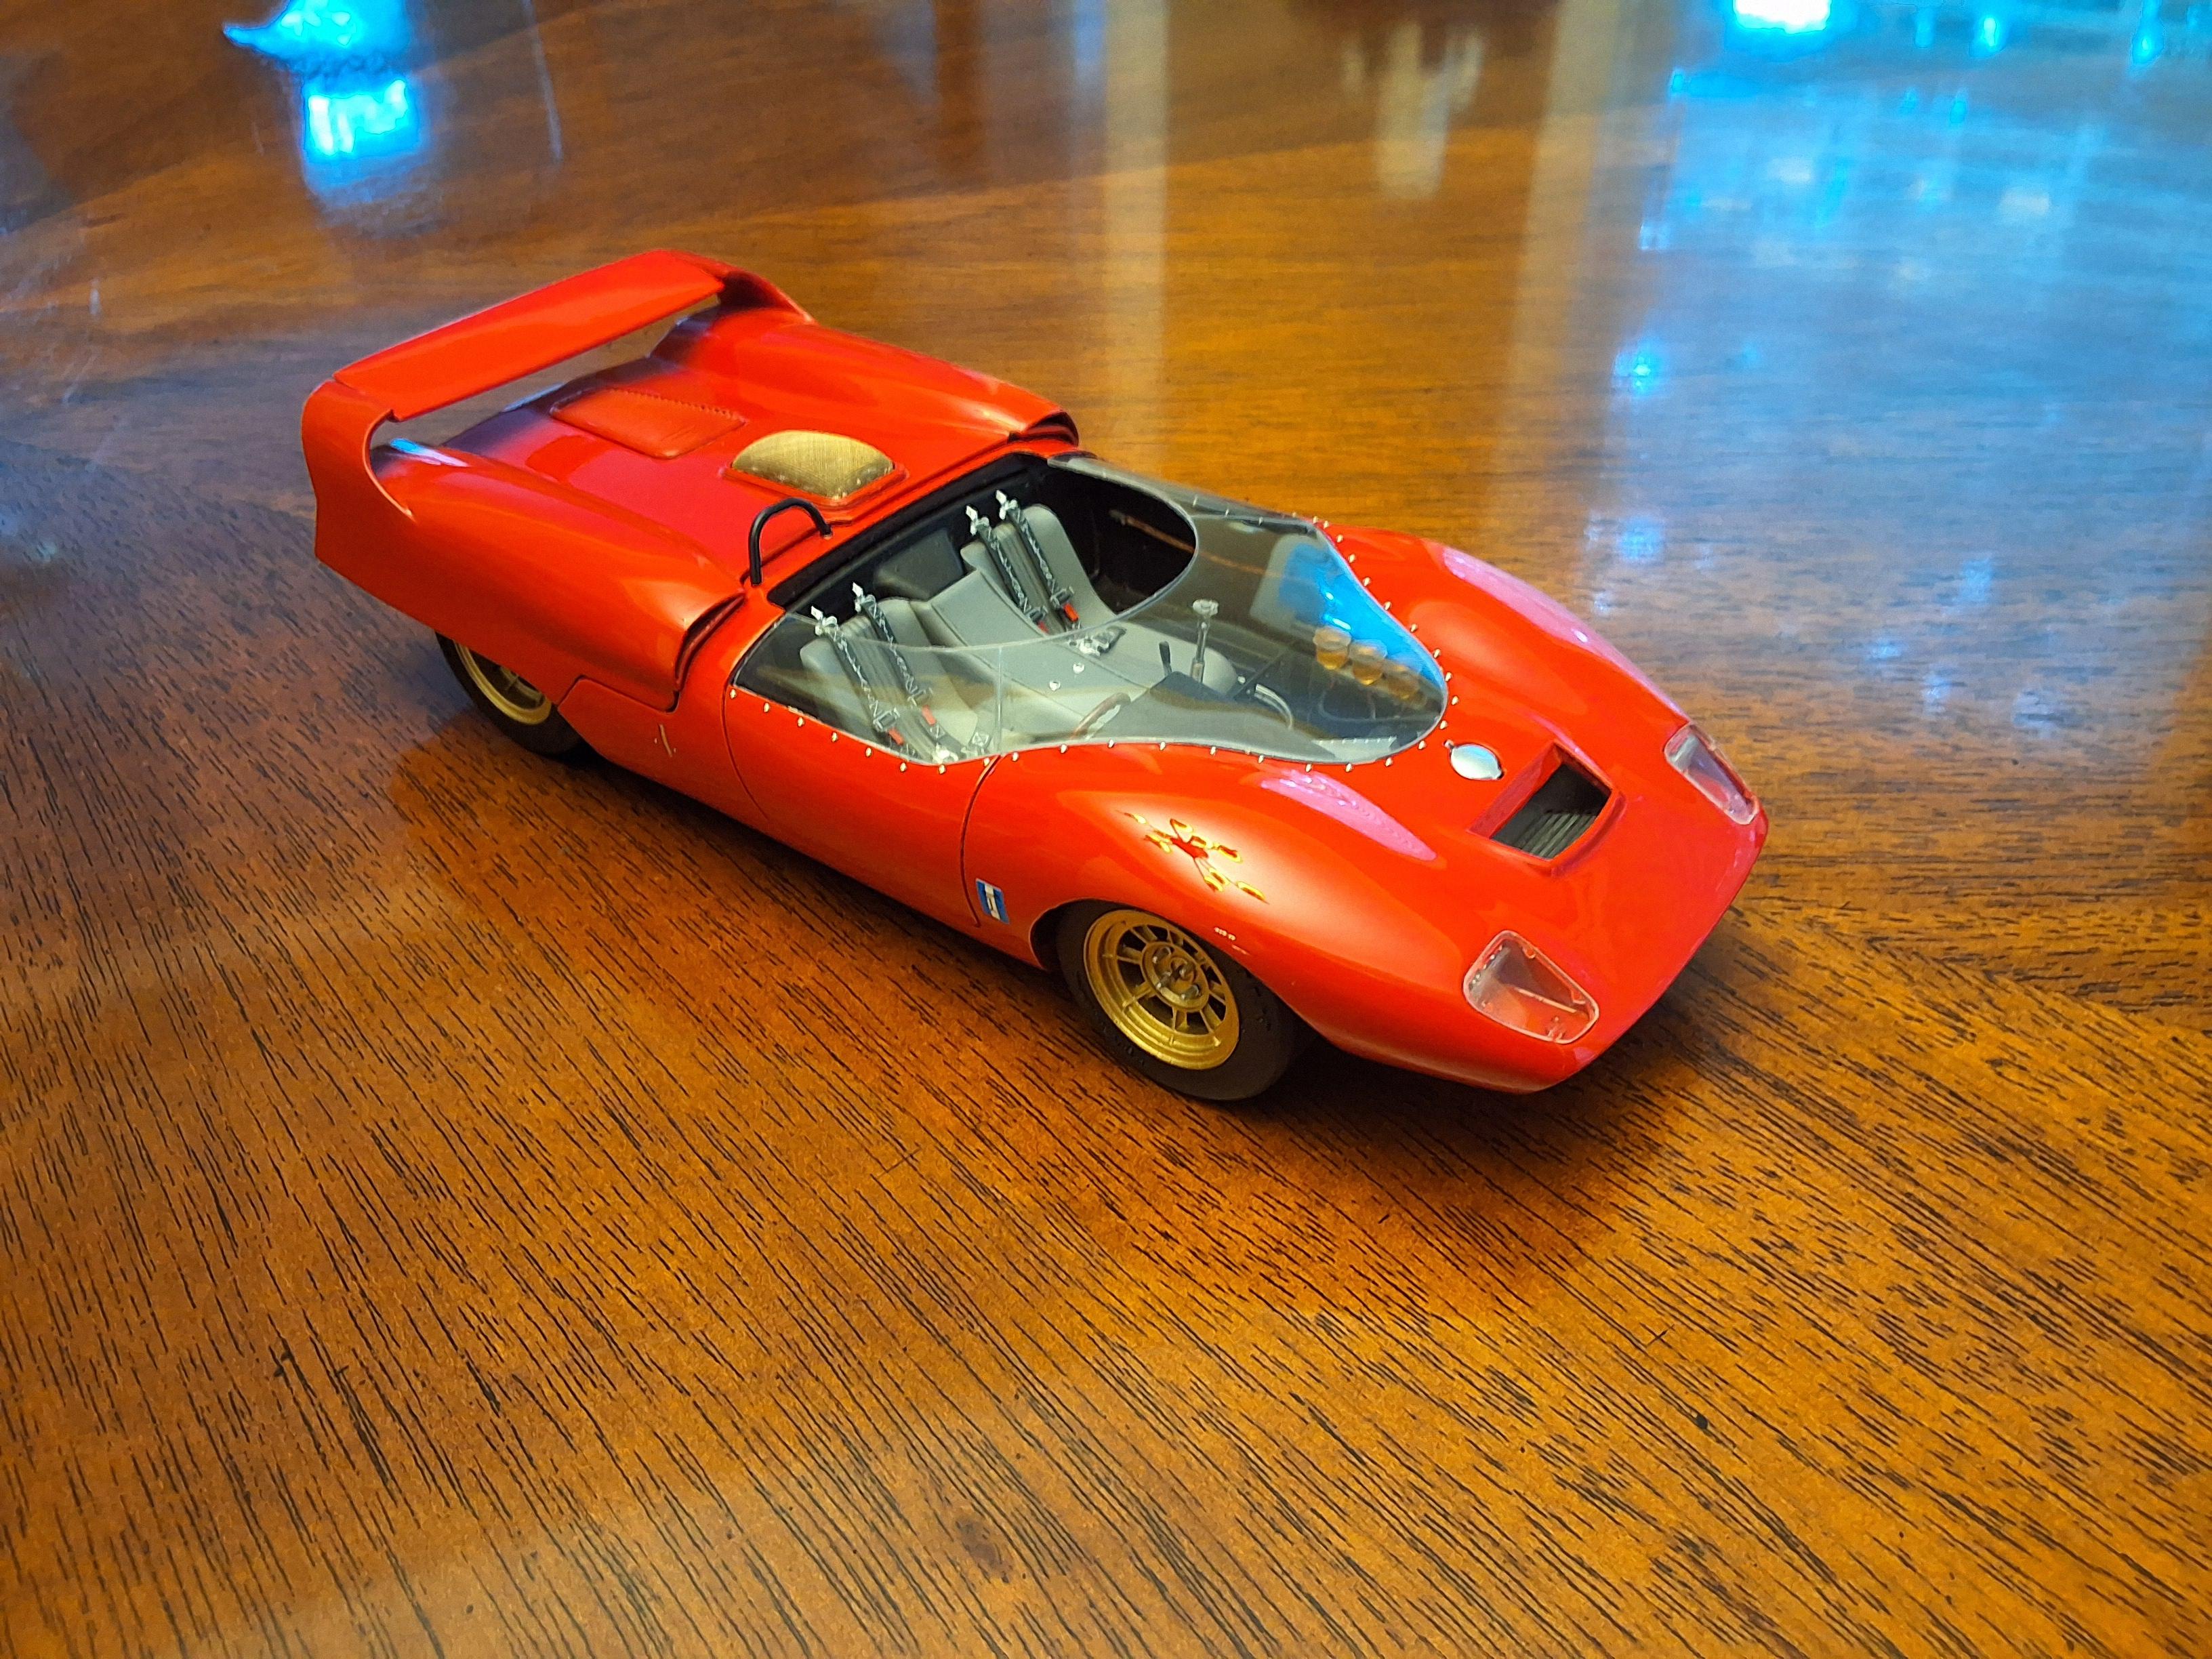
Headlights installed, 36 rivits around the cockpit
-
Yes indeed.
-
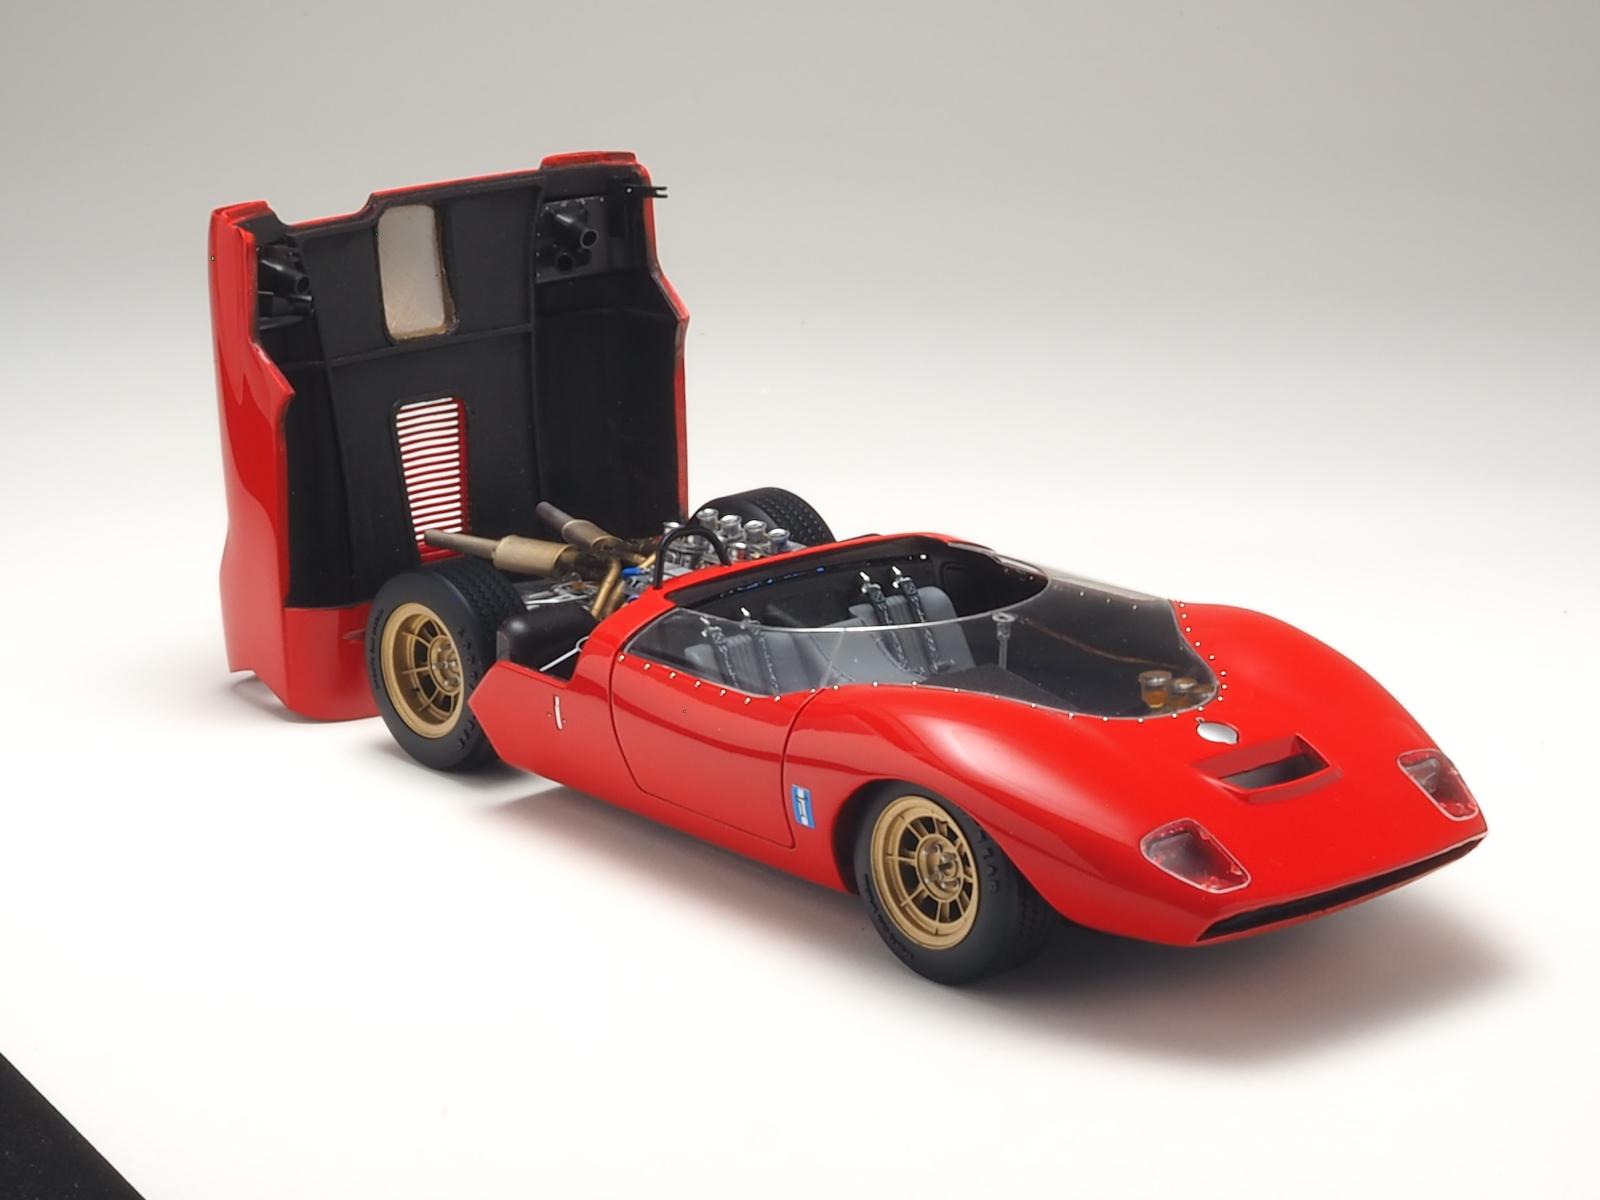
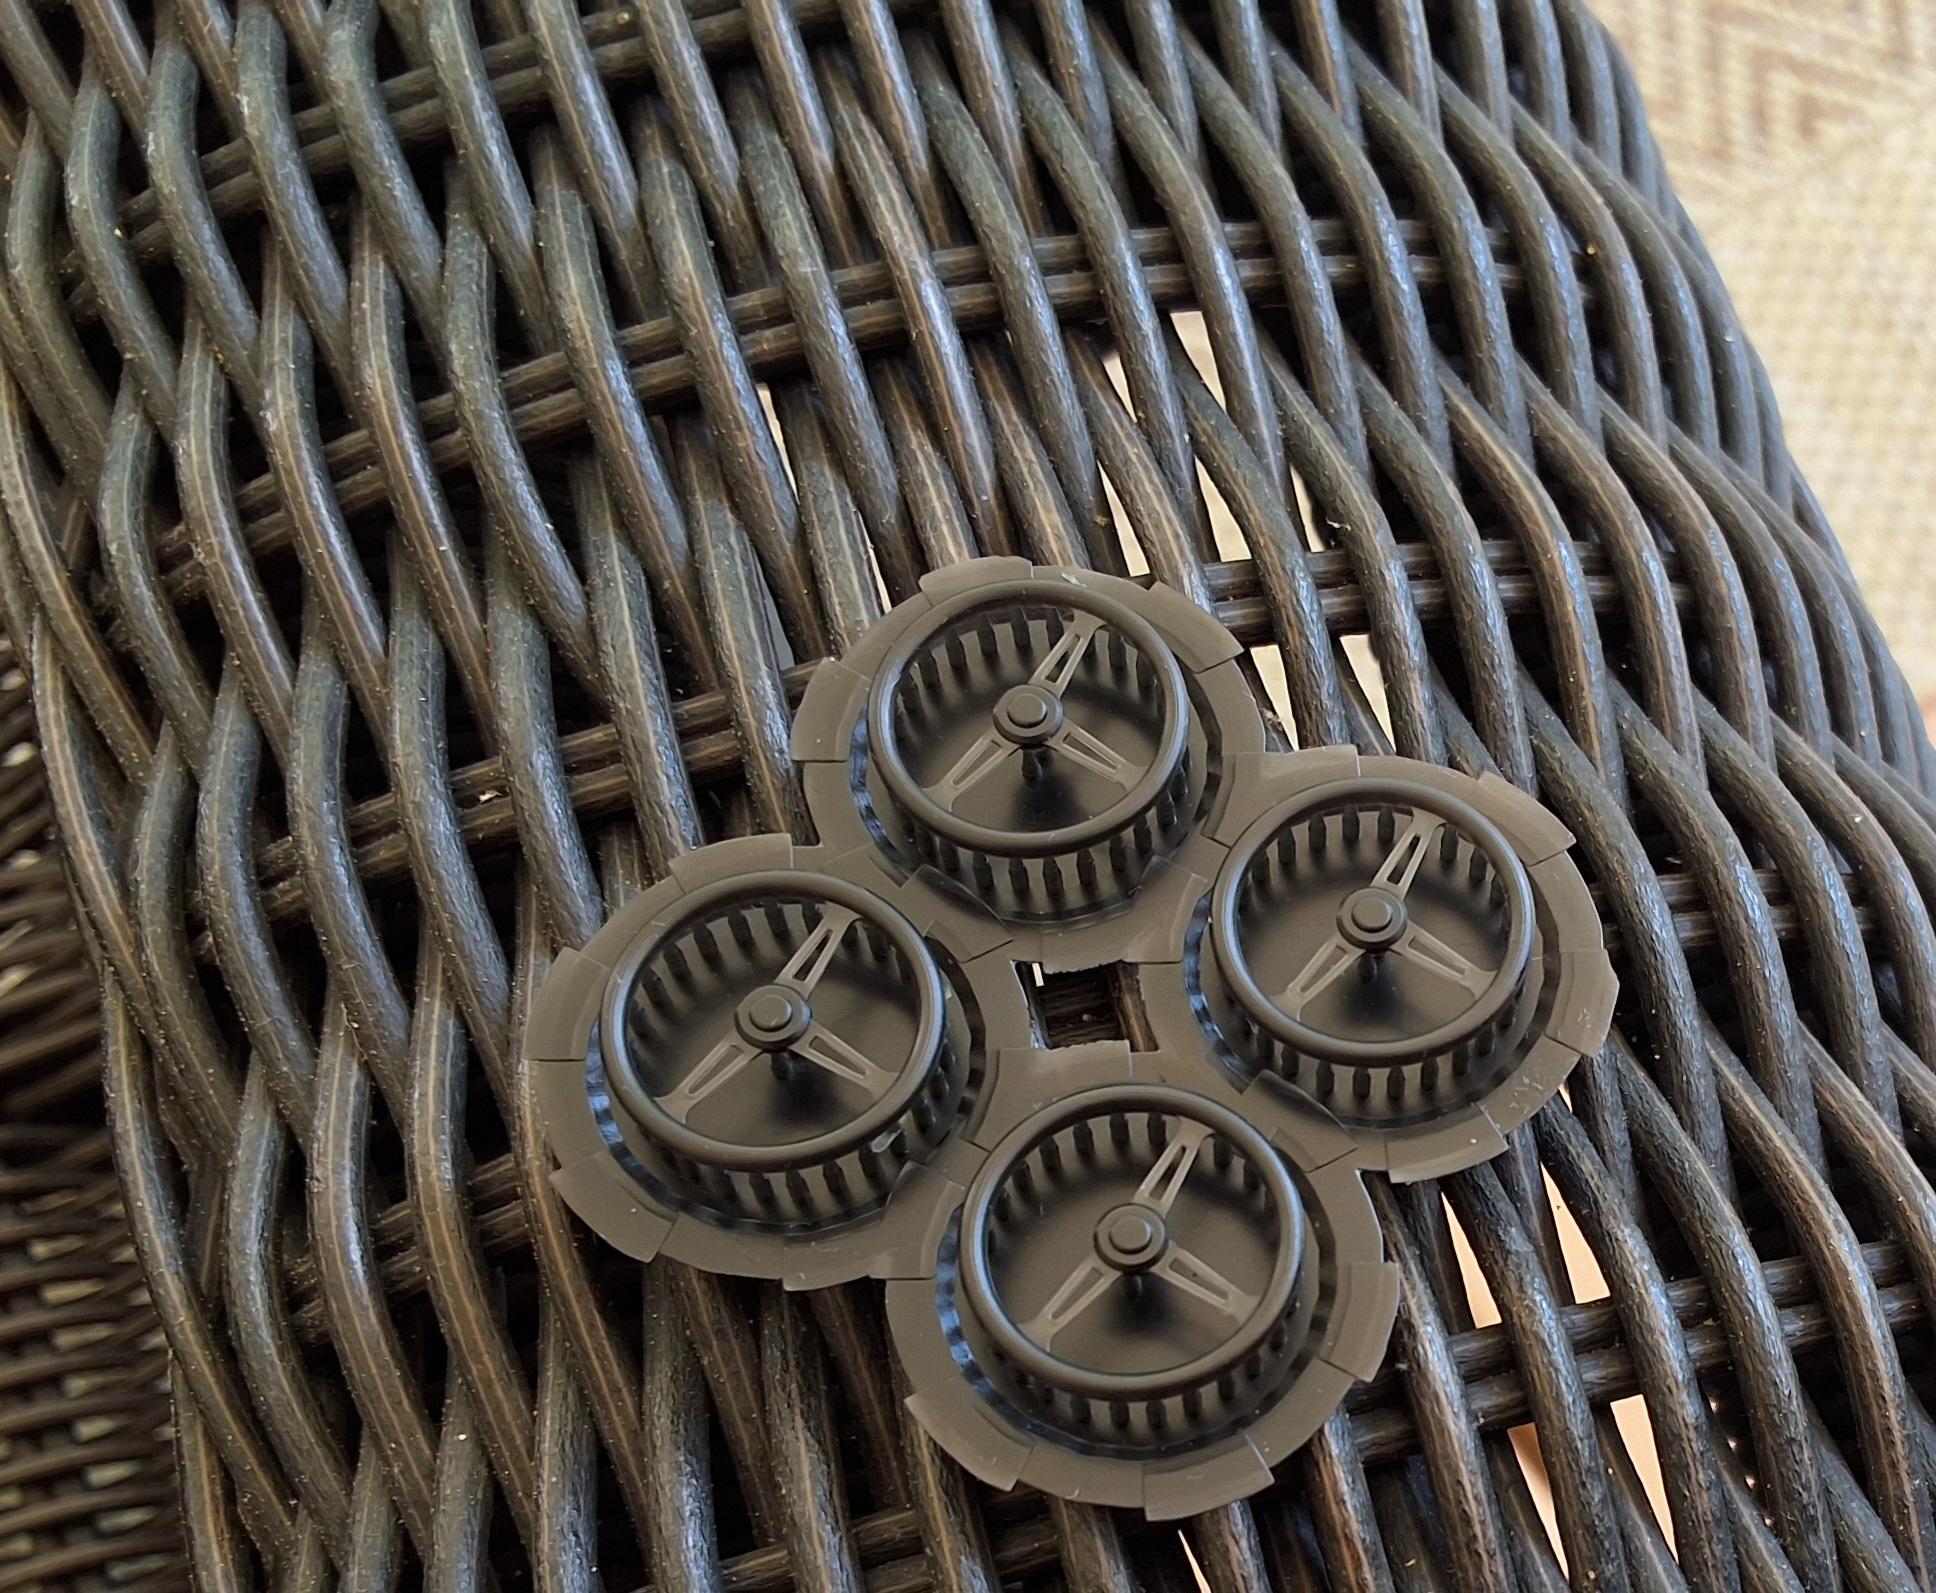
so here a few shots to update progress. Headlights, screening over carbs, tail lights,engine details.
-
I think that the new printer introduces some unknowns into the equation. I want to explore antialising and exposure times. The M5s Pro make astonishing prints of items without very complex compound curves. Carbs and wheels and tires, etc. Even the windshield mold is spot on. More to learn.
-
Polishing under way. The got the full Micro Mesh treatment followed by Maguires mirror glaze 3. I love the "burnished" look.
-
Paint underway.
-
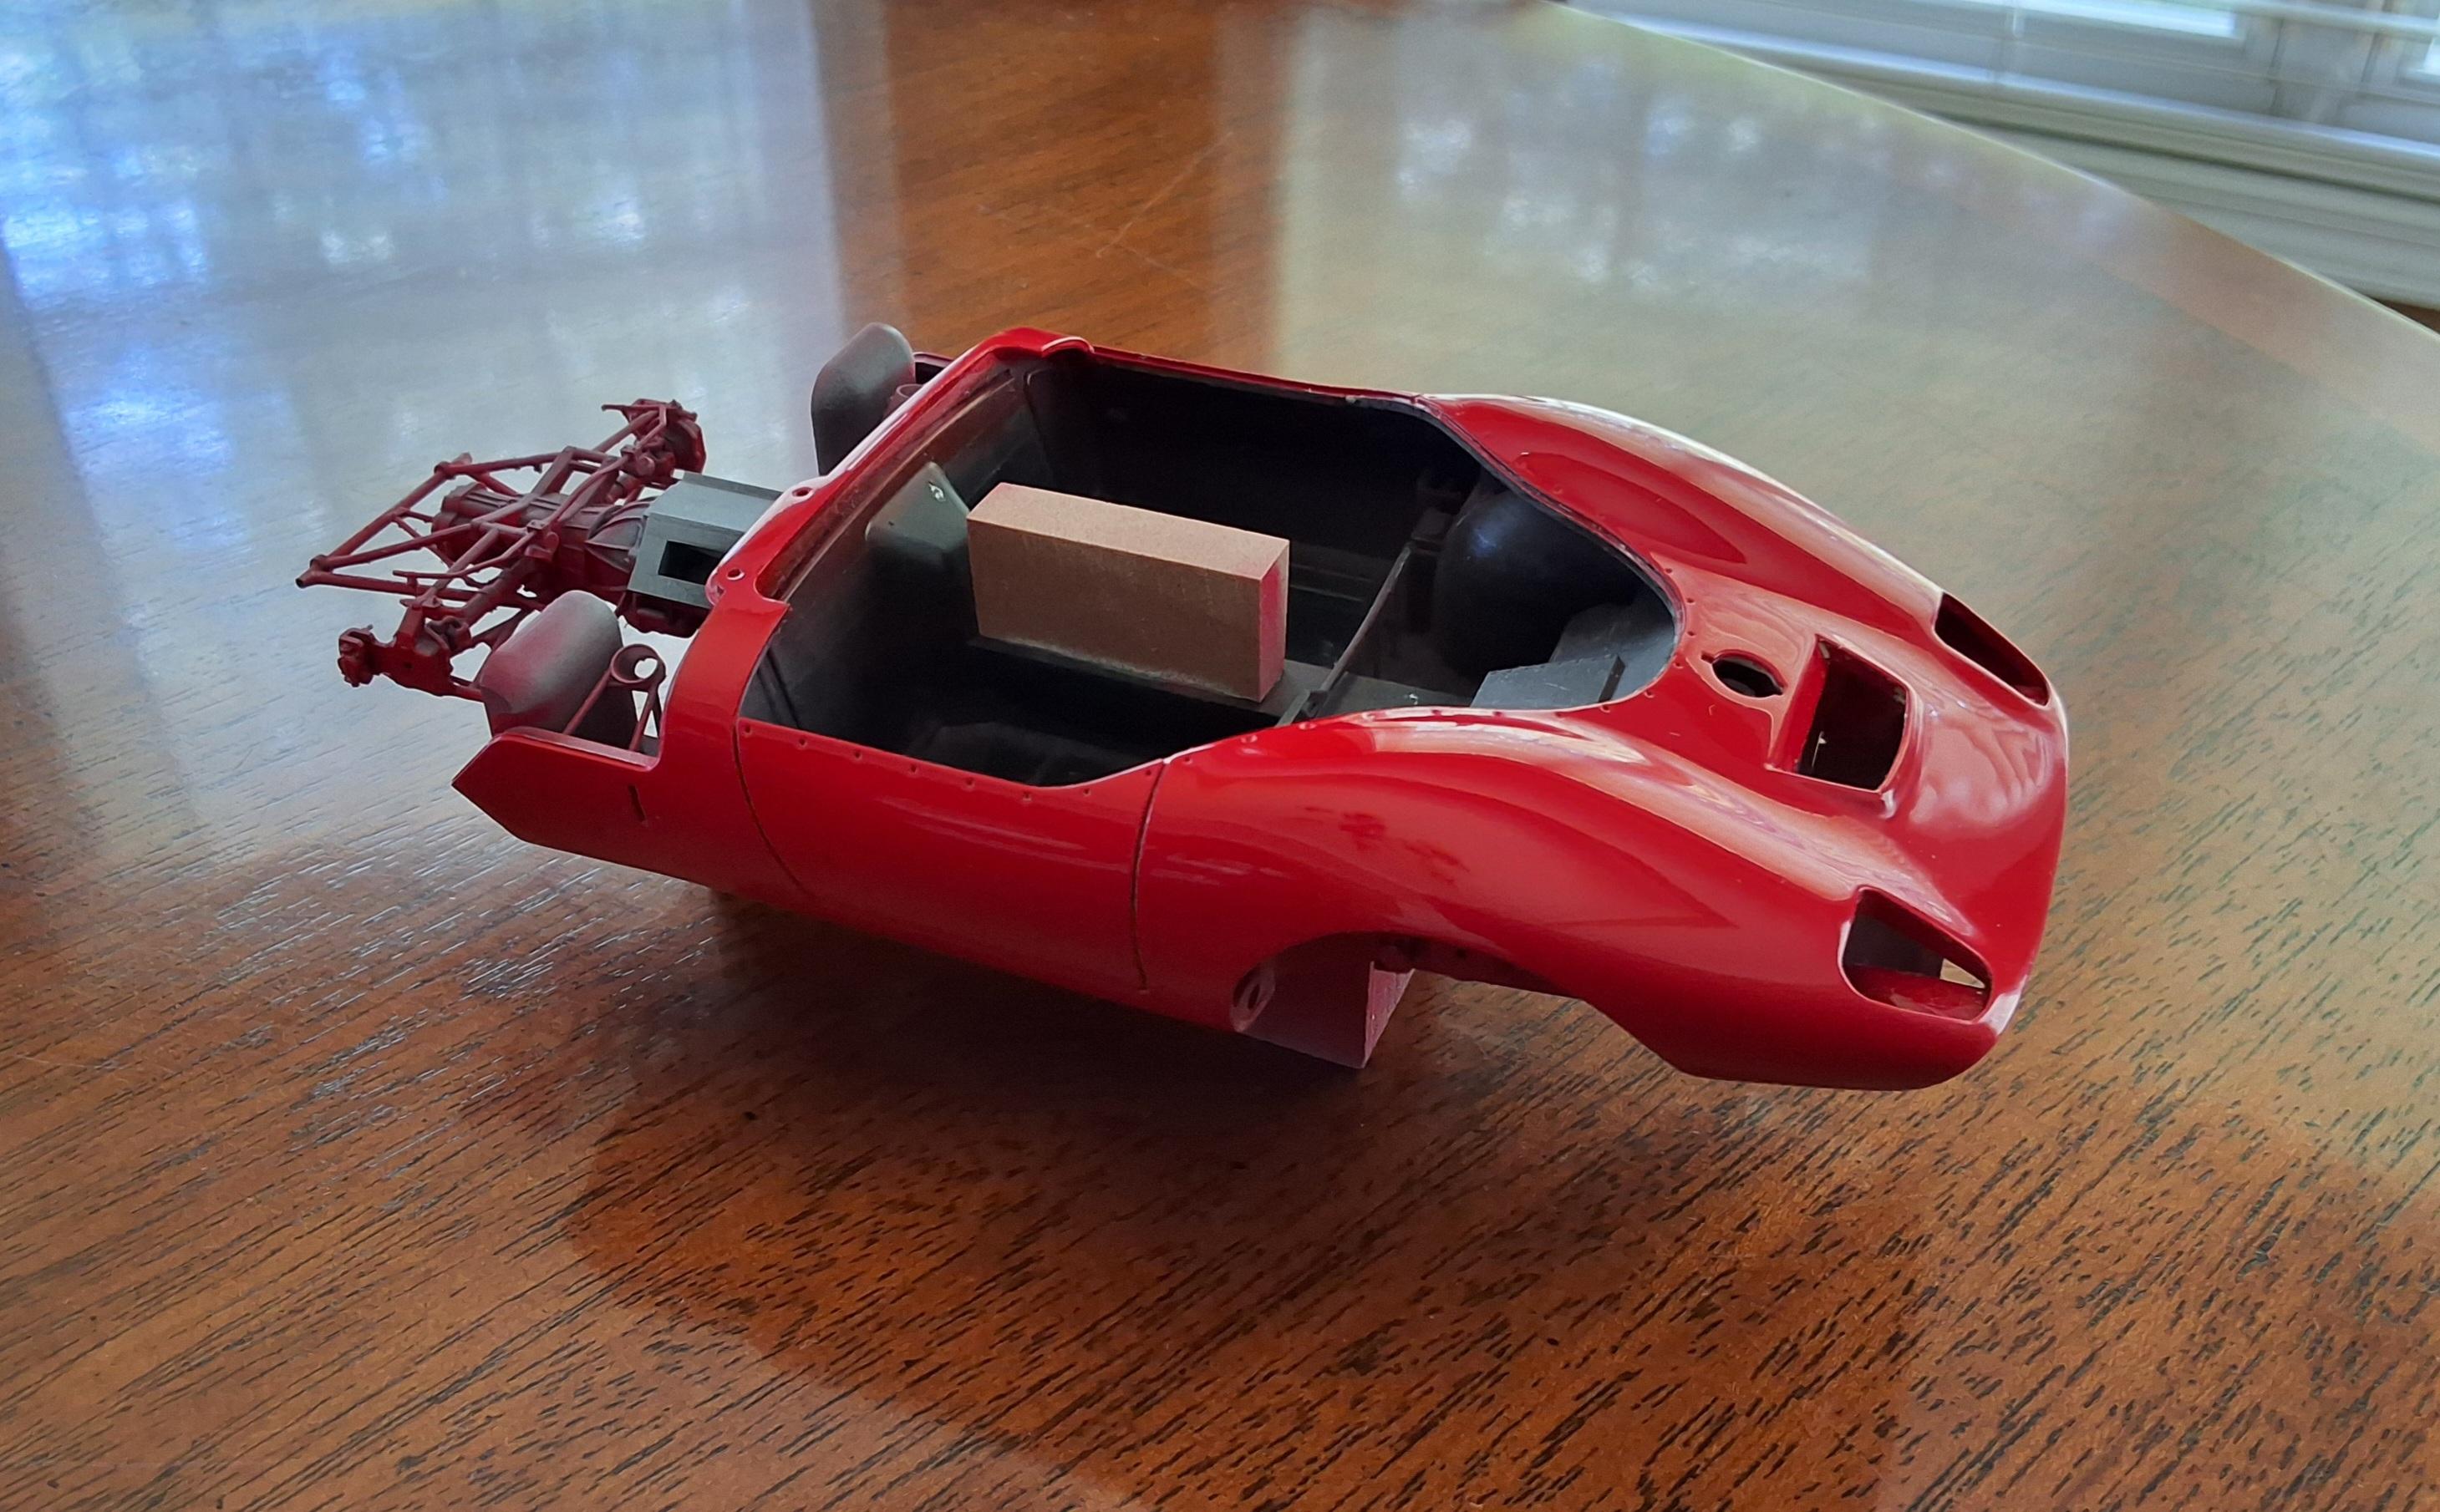
Hi Randy. The windshield is a vac formed piece as are the headlight covers. The molds for these parts was 3D printed. The chassis was printed with the engine and rear suspension attached for strength and accuracy. Parts like carbs, headers, interior details are separate prints.
-
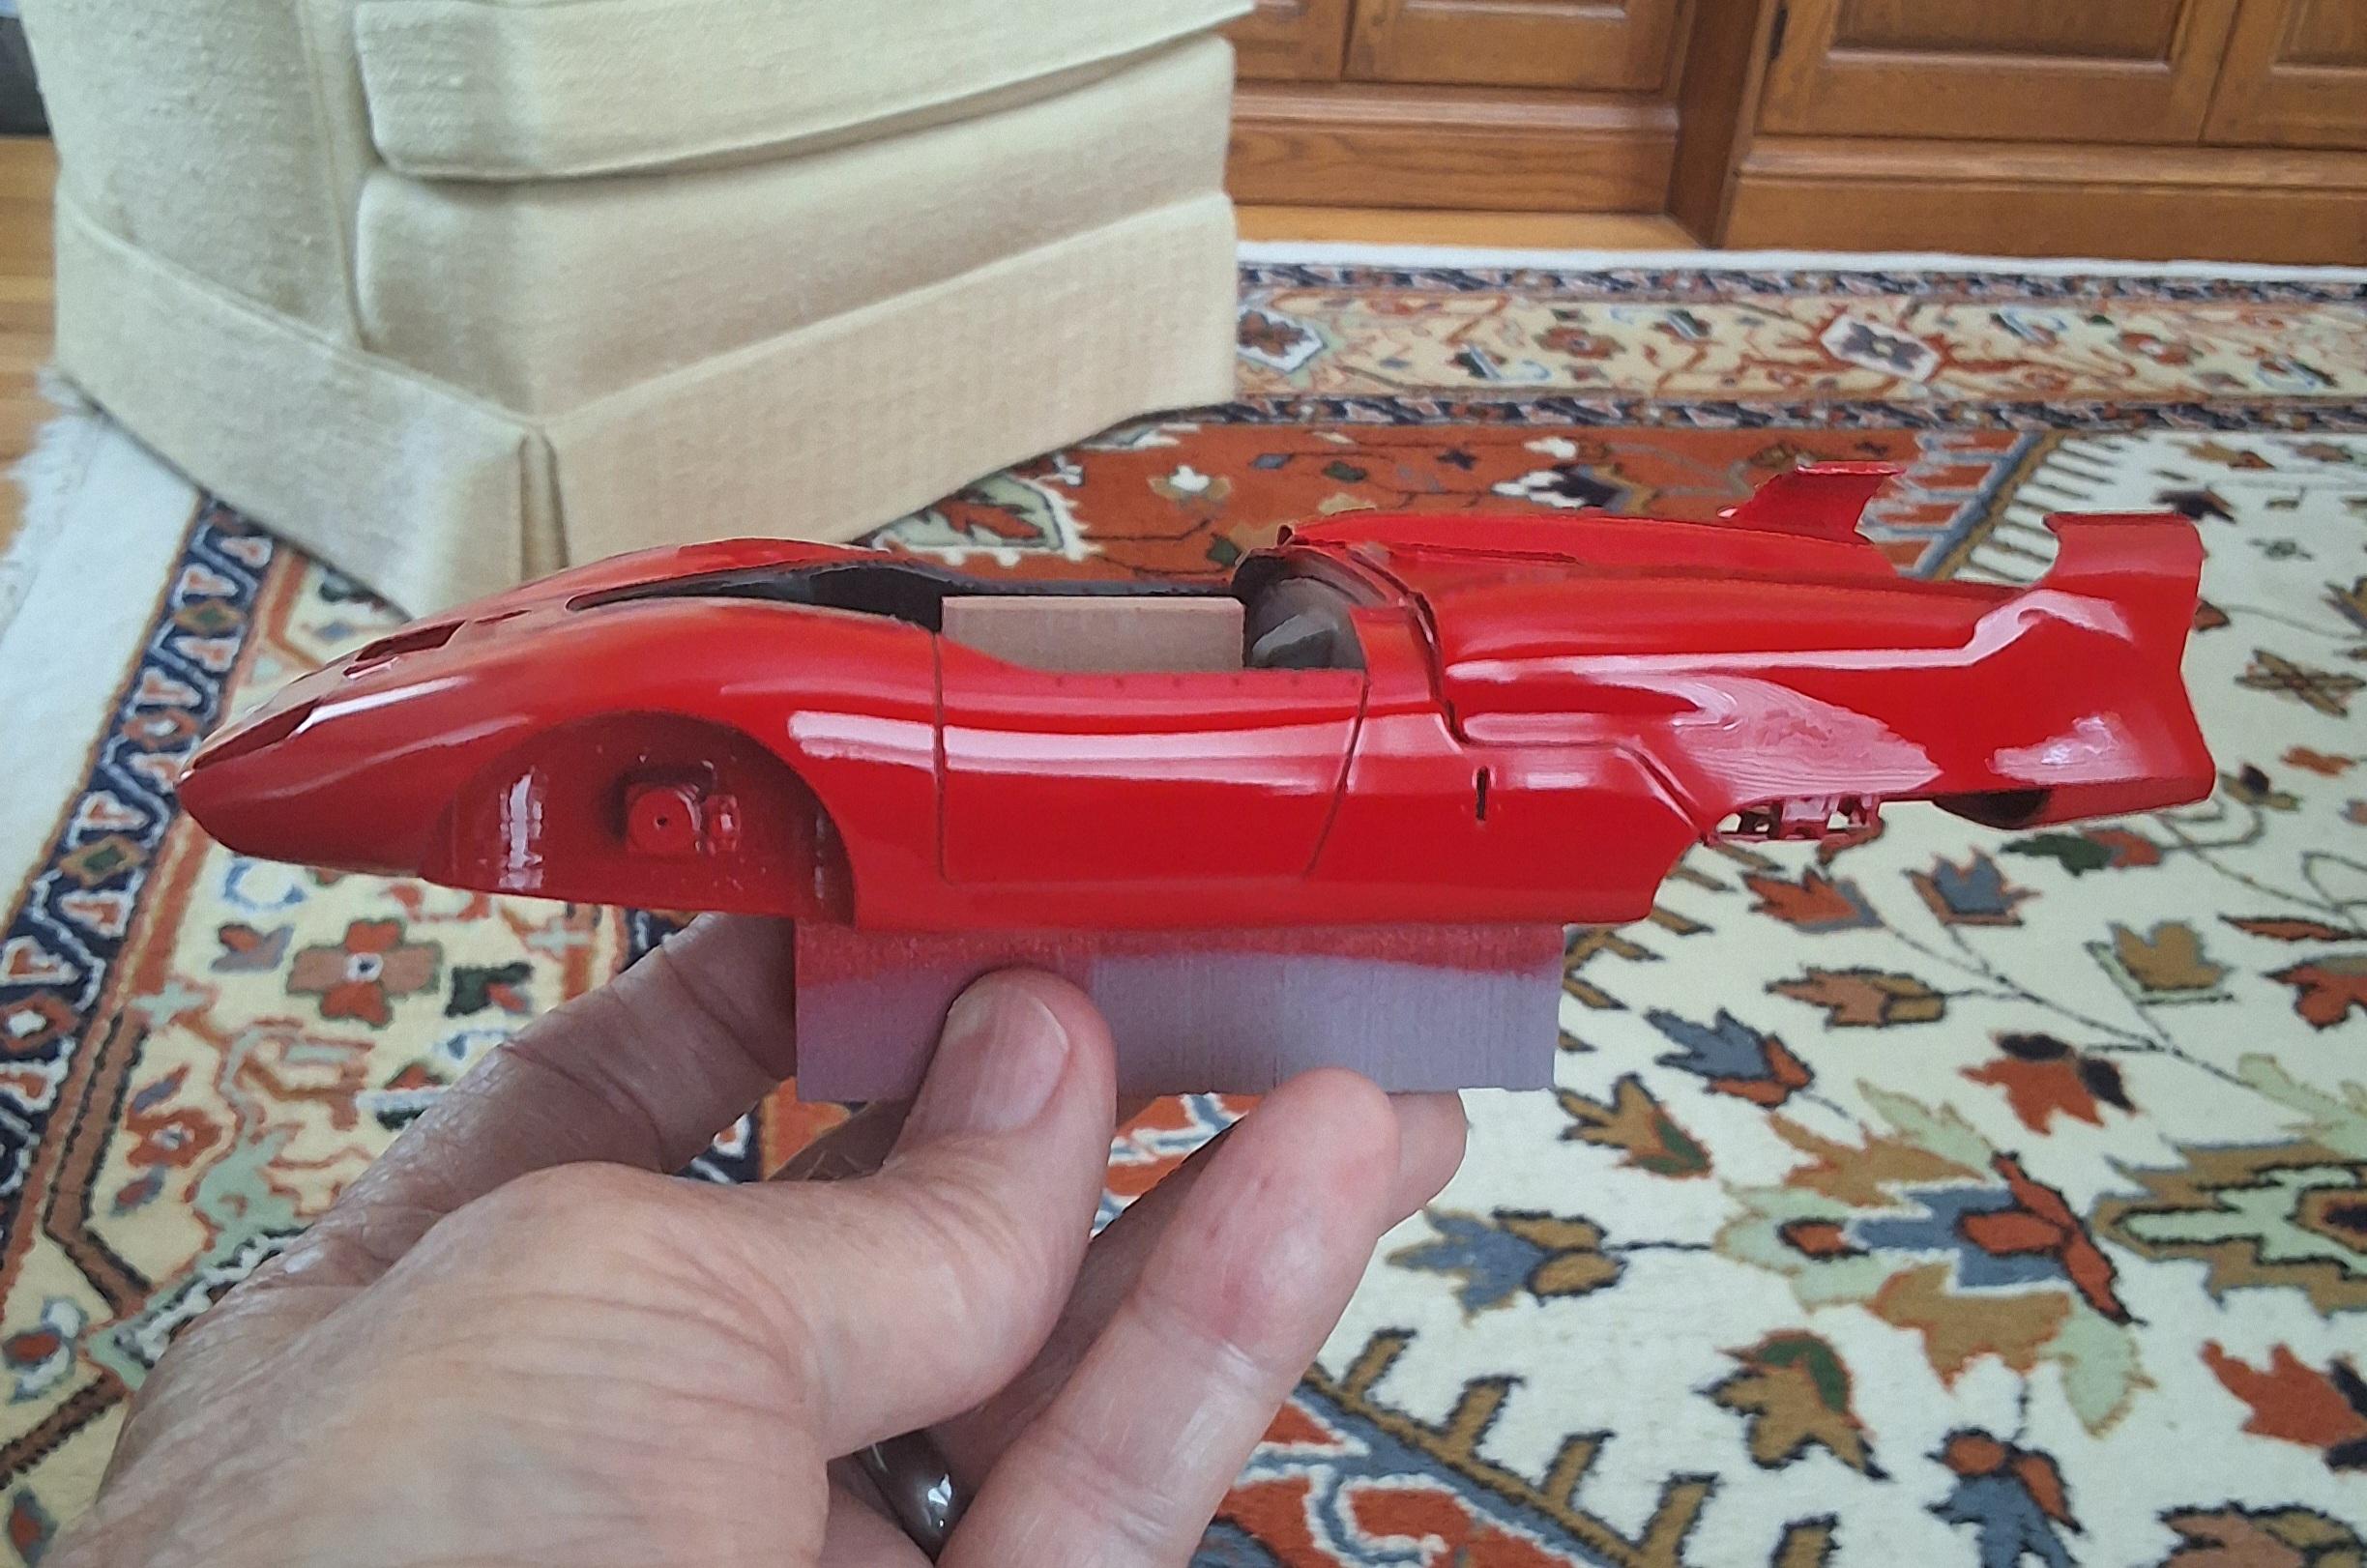
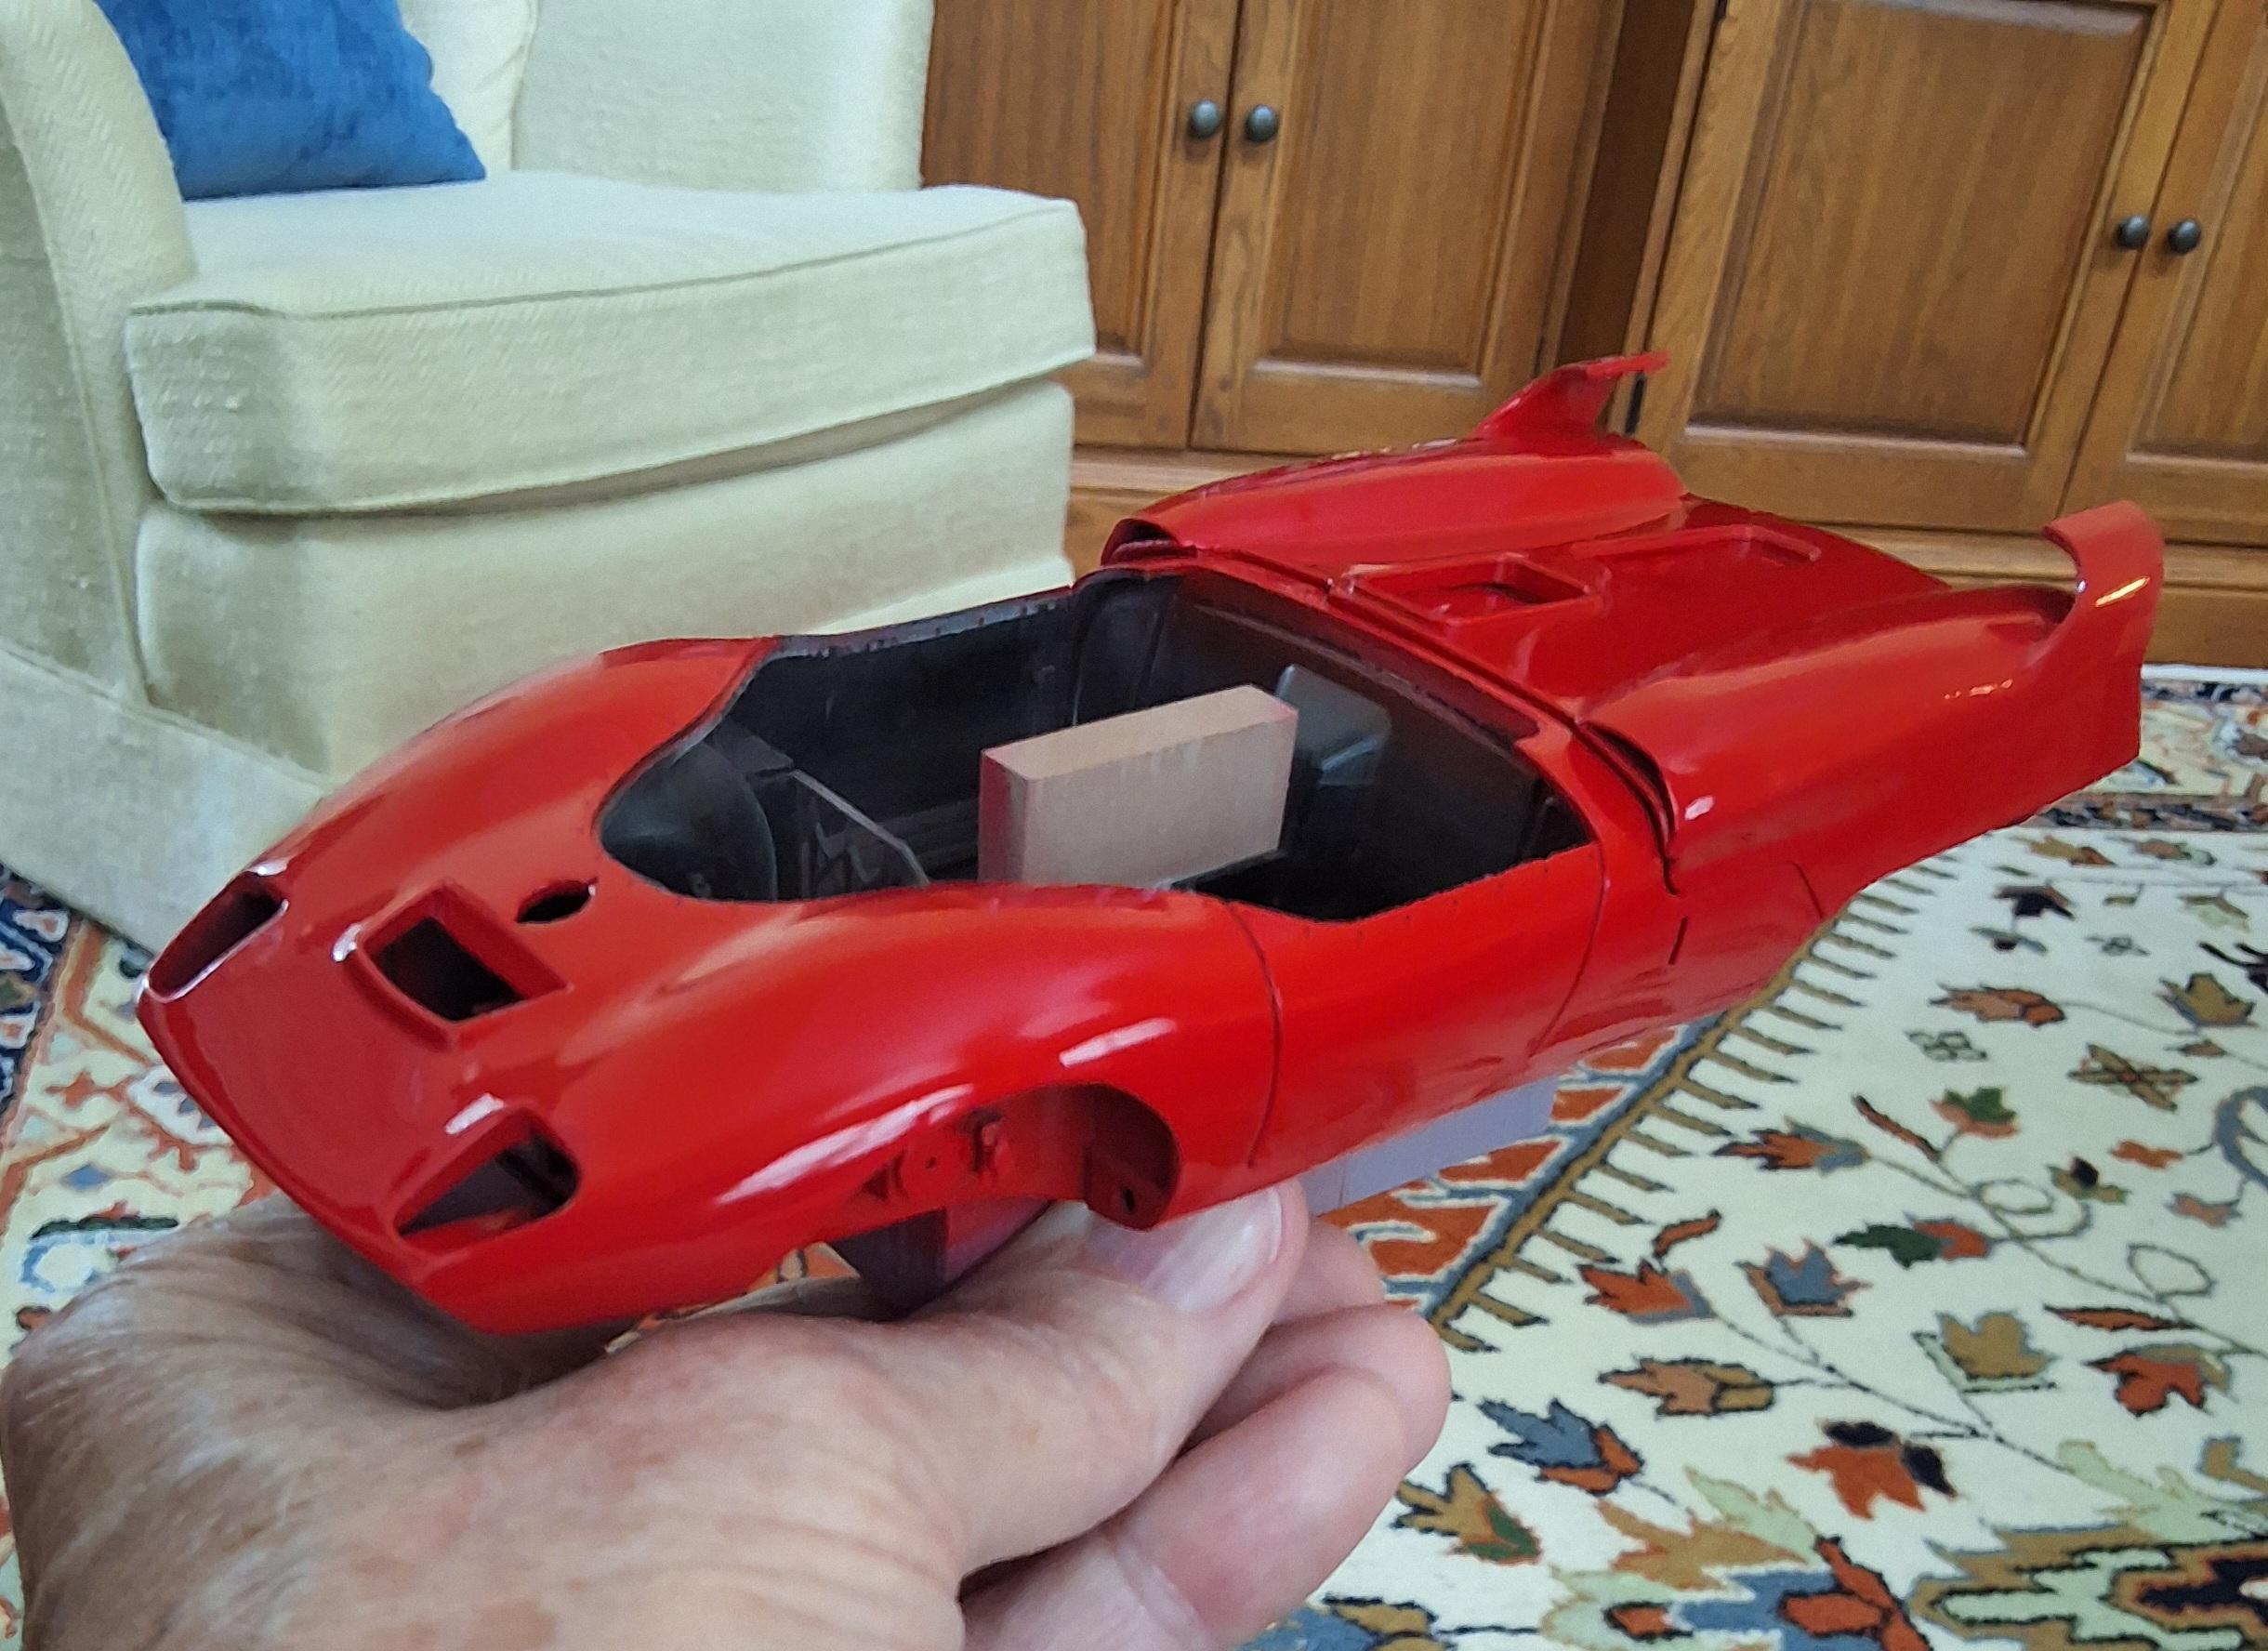
The painting and assembly is underway. This is the 4th and final body. Sitting on a dedicated chassis the has a large block glued to the bottom to make handling easy. The chassis is also getting work.
-
Nardi steering wheels for the P70. Always like a few spares. It's a wood rim wheel. Should be fun to paint.
-
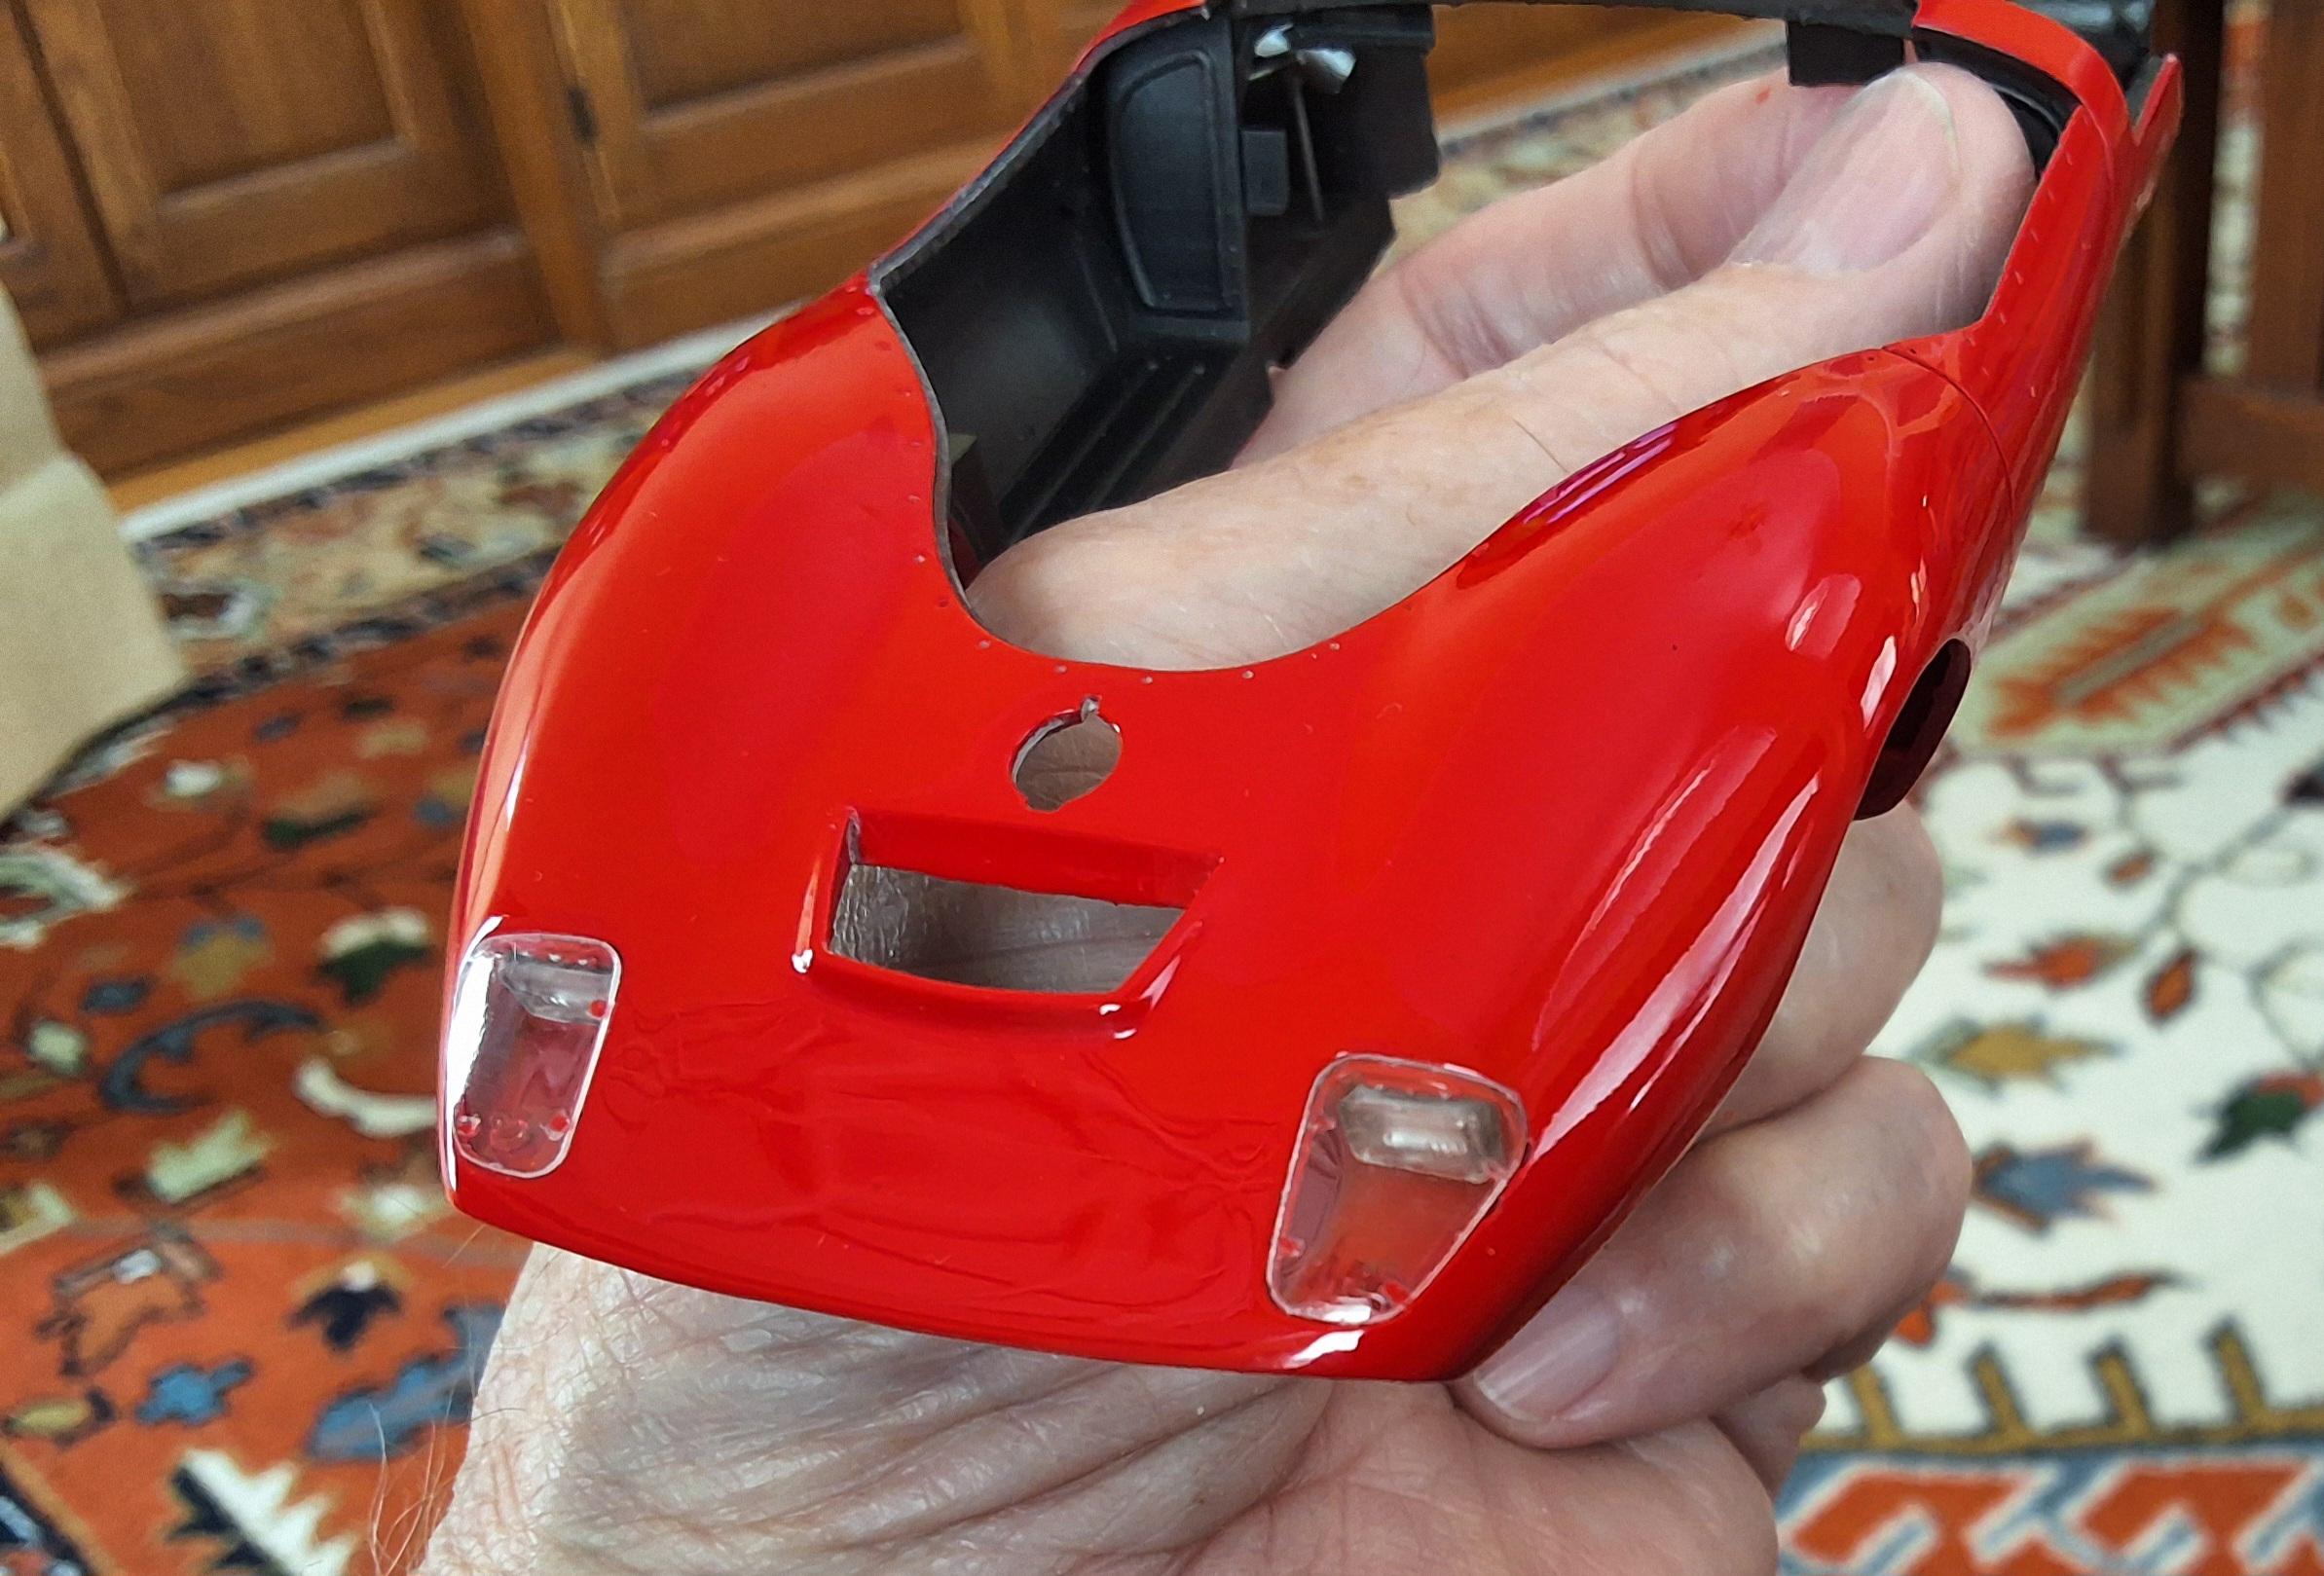
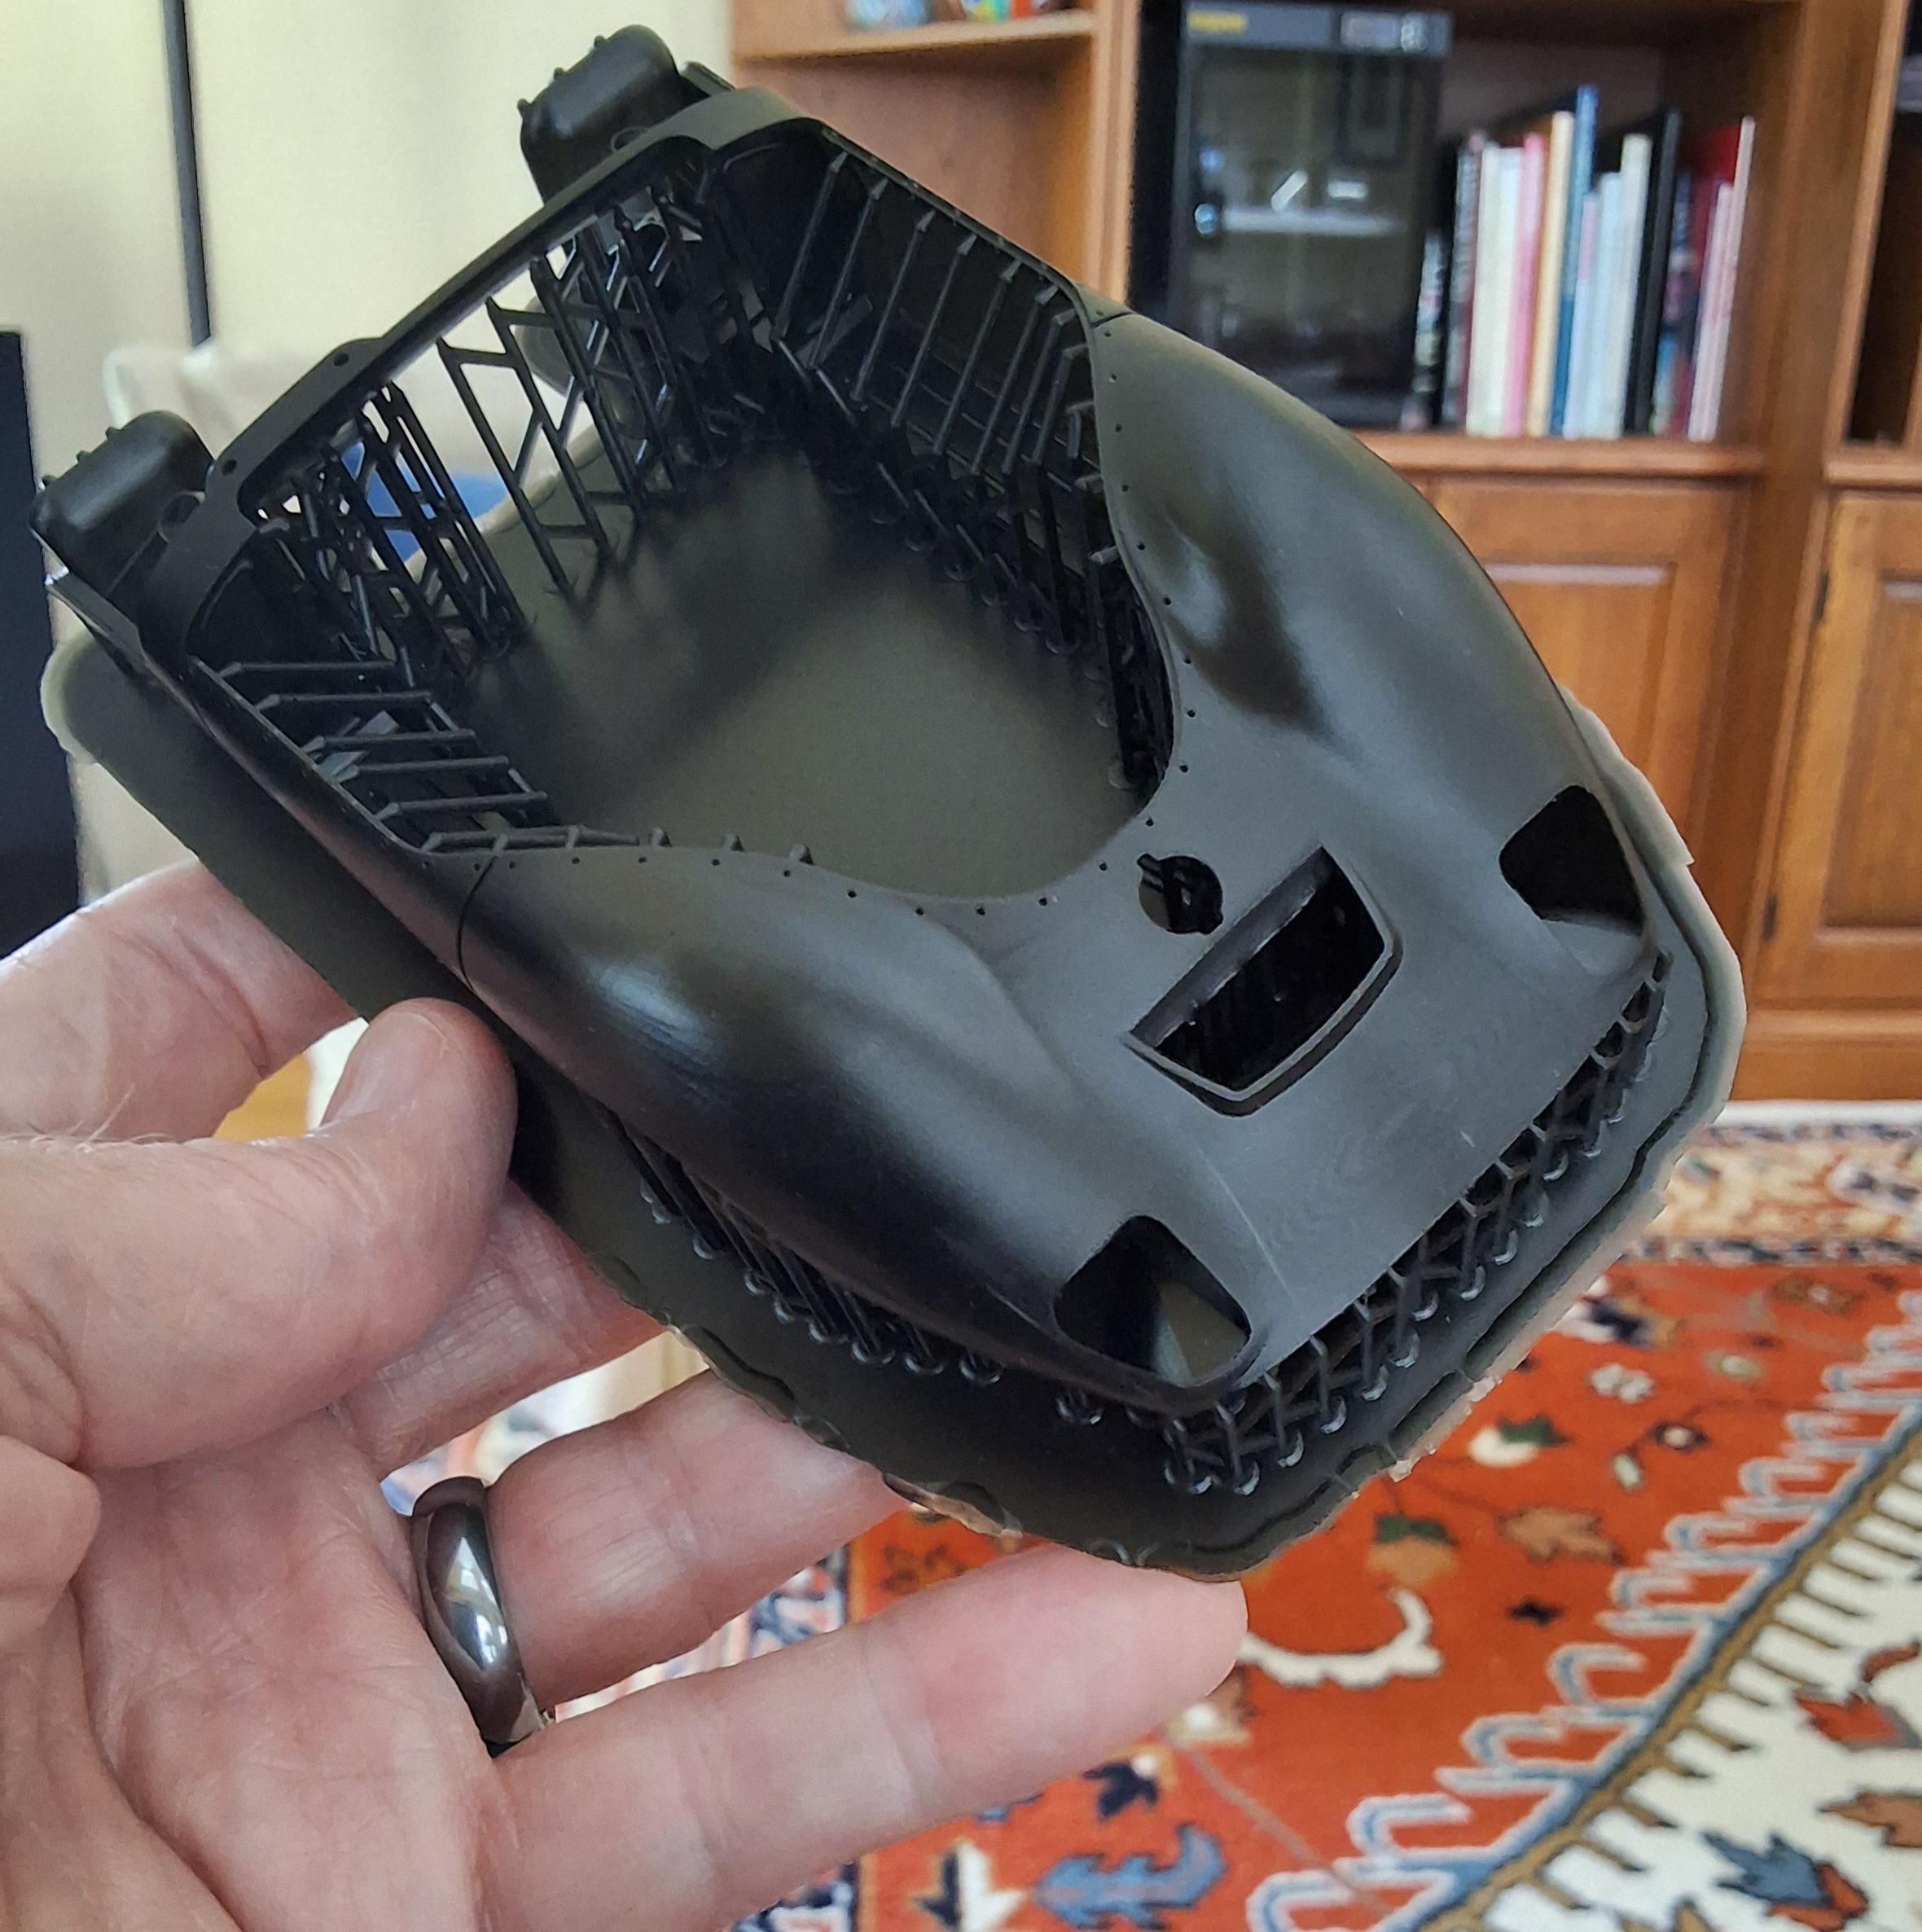
Lets talk about printing angles. It seems that everywhere you look it is recommended that best printing results come witn angled prints. I printed this body at 0°, 20°, and 44°. In my opinion the zero print is superior. Firstly, it printed in 5 hours as opposed to 10 or 15 hours. Also, there are fewer lines and flaws requiring sanding. The angled prints have obvious diagonal lines that require alot of work to fix as opposed to the horizontal line on the zero print. Certainly there are some situations where an angle makes a better print, but zero angle is my default setting.I continue to make improvements to the body. I recently intalled a firmware update on the printer and it seems to have improved the overall smoothness of the print. This is directly off the printer with no sanding. Using lots of resin, but making progress.
-
I continue to make improvements to the body. I recently intalled a firmware update on the printer and it seems to have improved the overall smoothness of the print. This is directly off the printer with no sanding. Using lots of resin, but making progress.
-
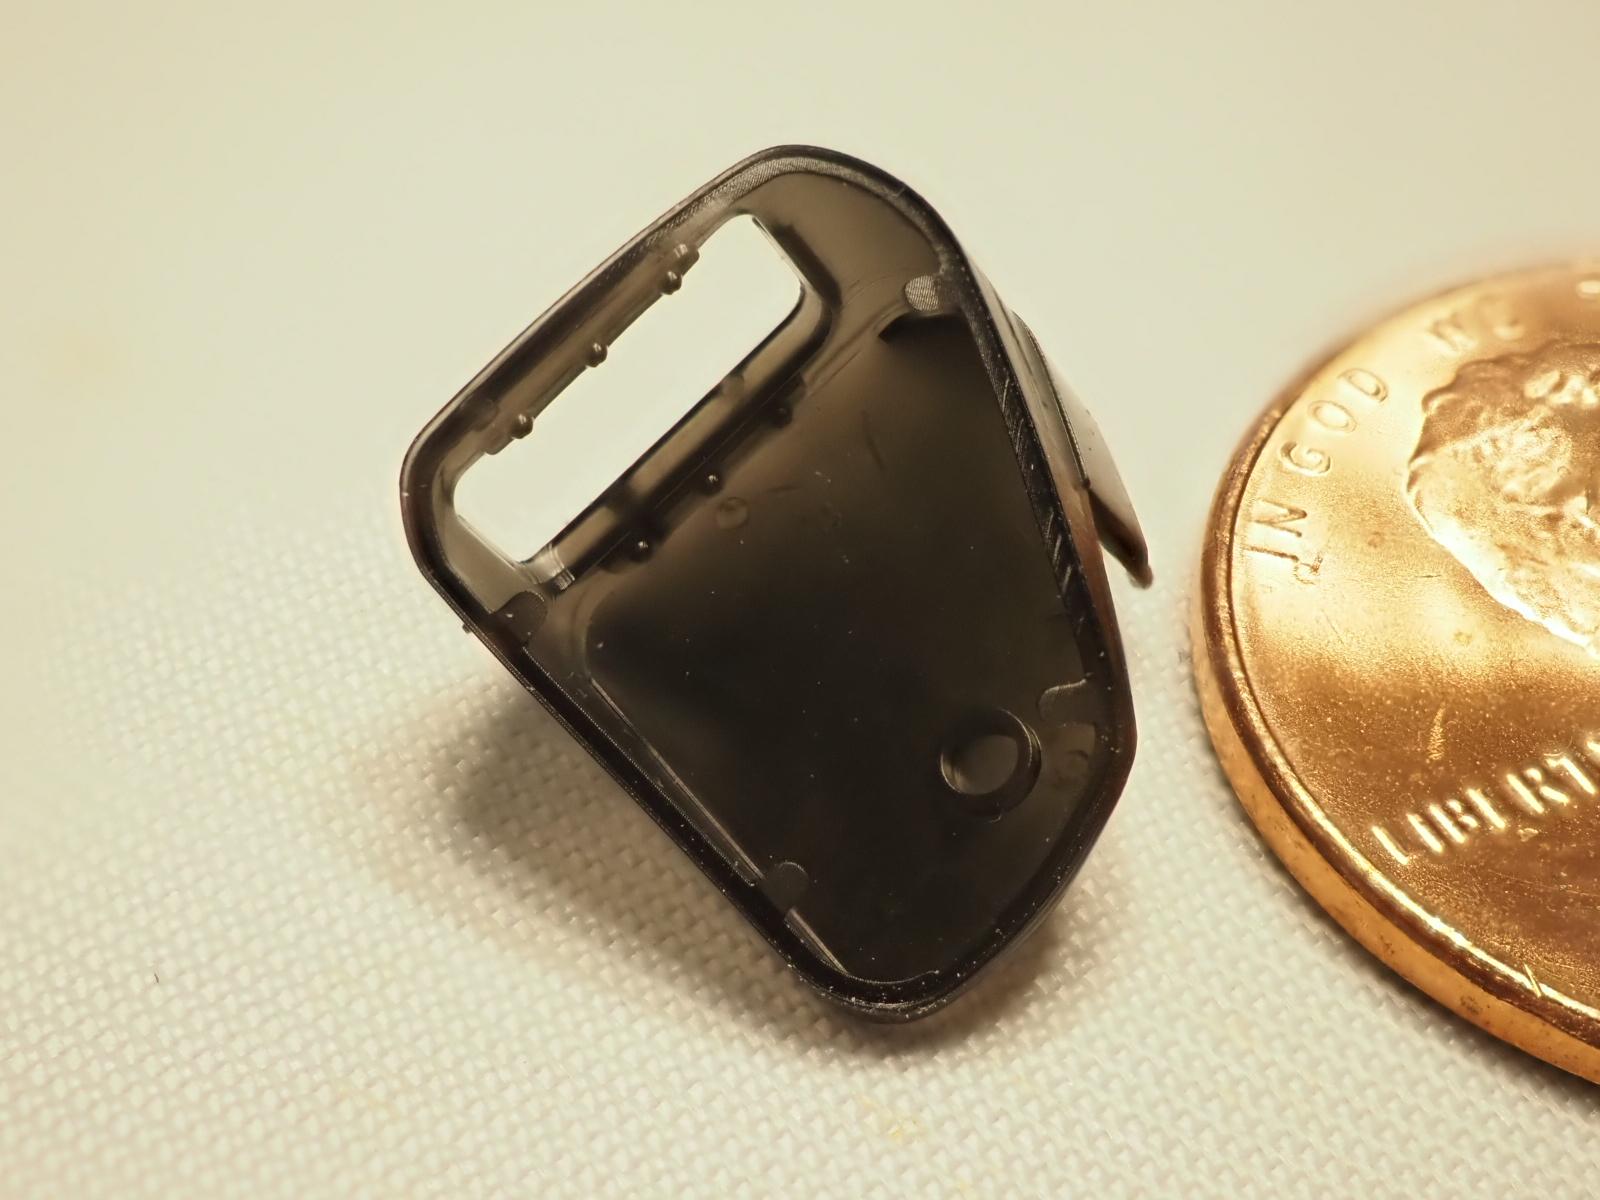
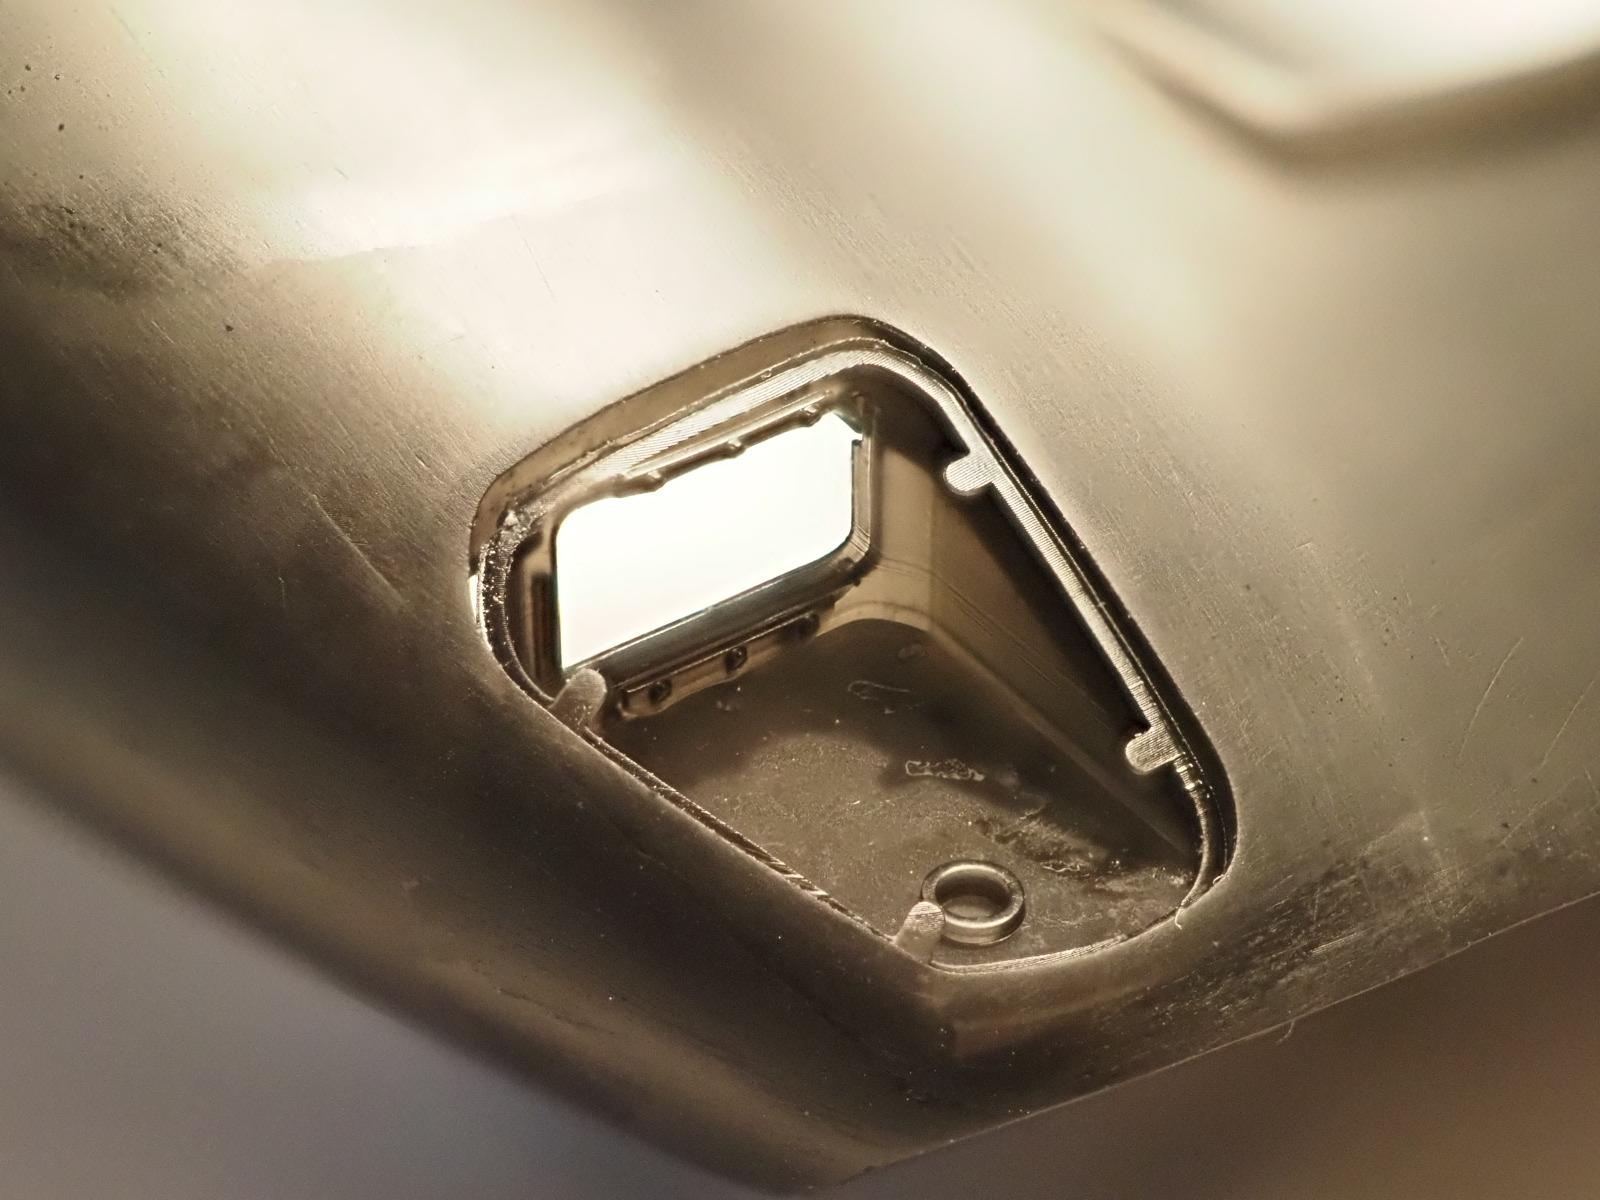
I've created some headlight buckets that fit down into the openings. This will allow me to finish all the detailing of the headlights and drop them in from above.