

capricorn71
-
Posts
44 -
Joined
-
Last visited
Content Type
Profiles
Forums
Events
Gallery
Posts posted by capricorn71
-
-
Chronicle part 5:
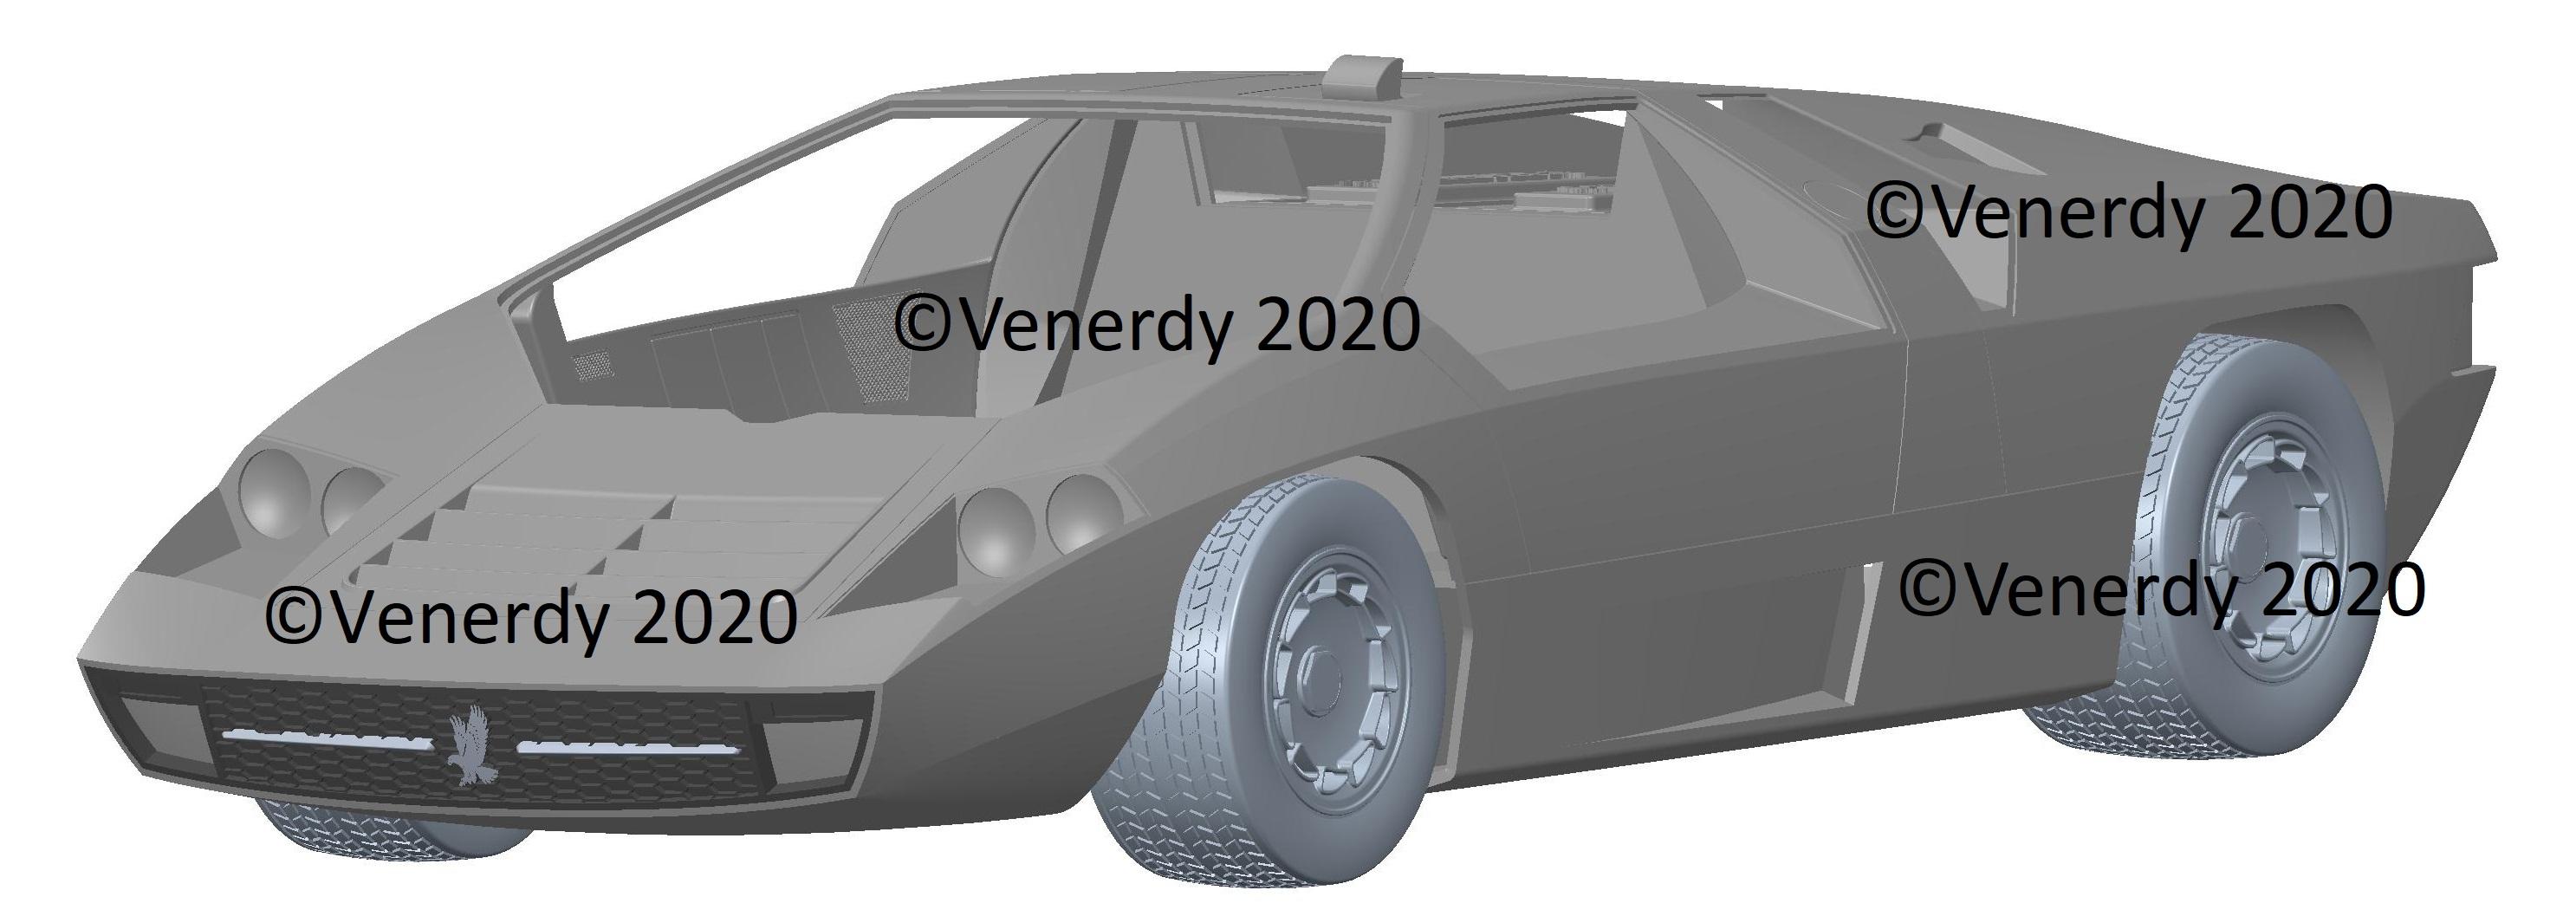
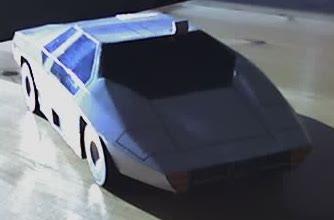
Many hours later the CAD Model has been finished:

-
Chronicle part 4:
After a more than 20 year break I started to work on this project again.
Meanwhile I hade the chance to use 3D CAD.This is the early stage of the CAD model:
-
Chronicle Part 3:
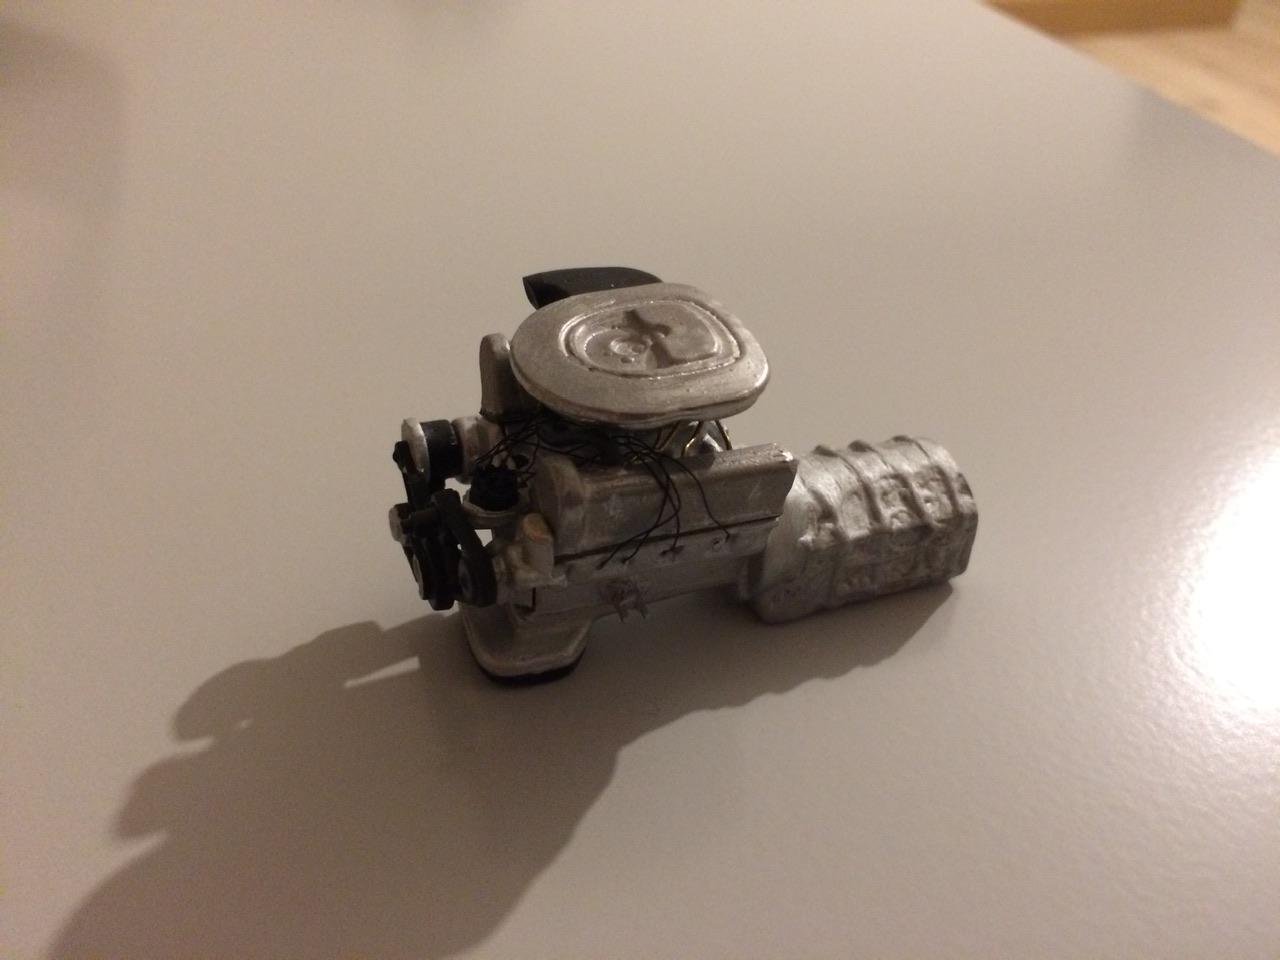
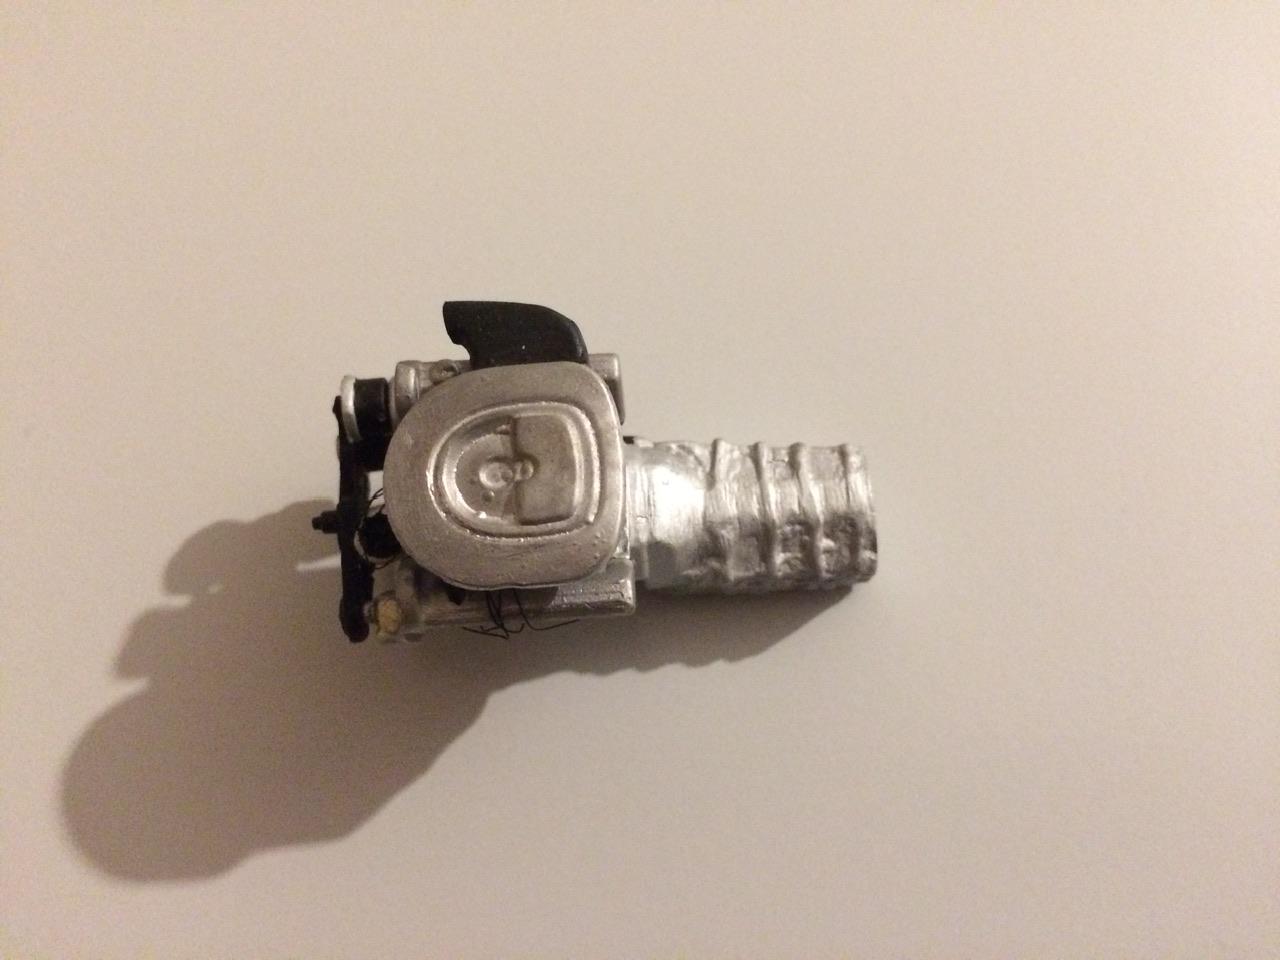
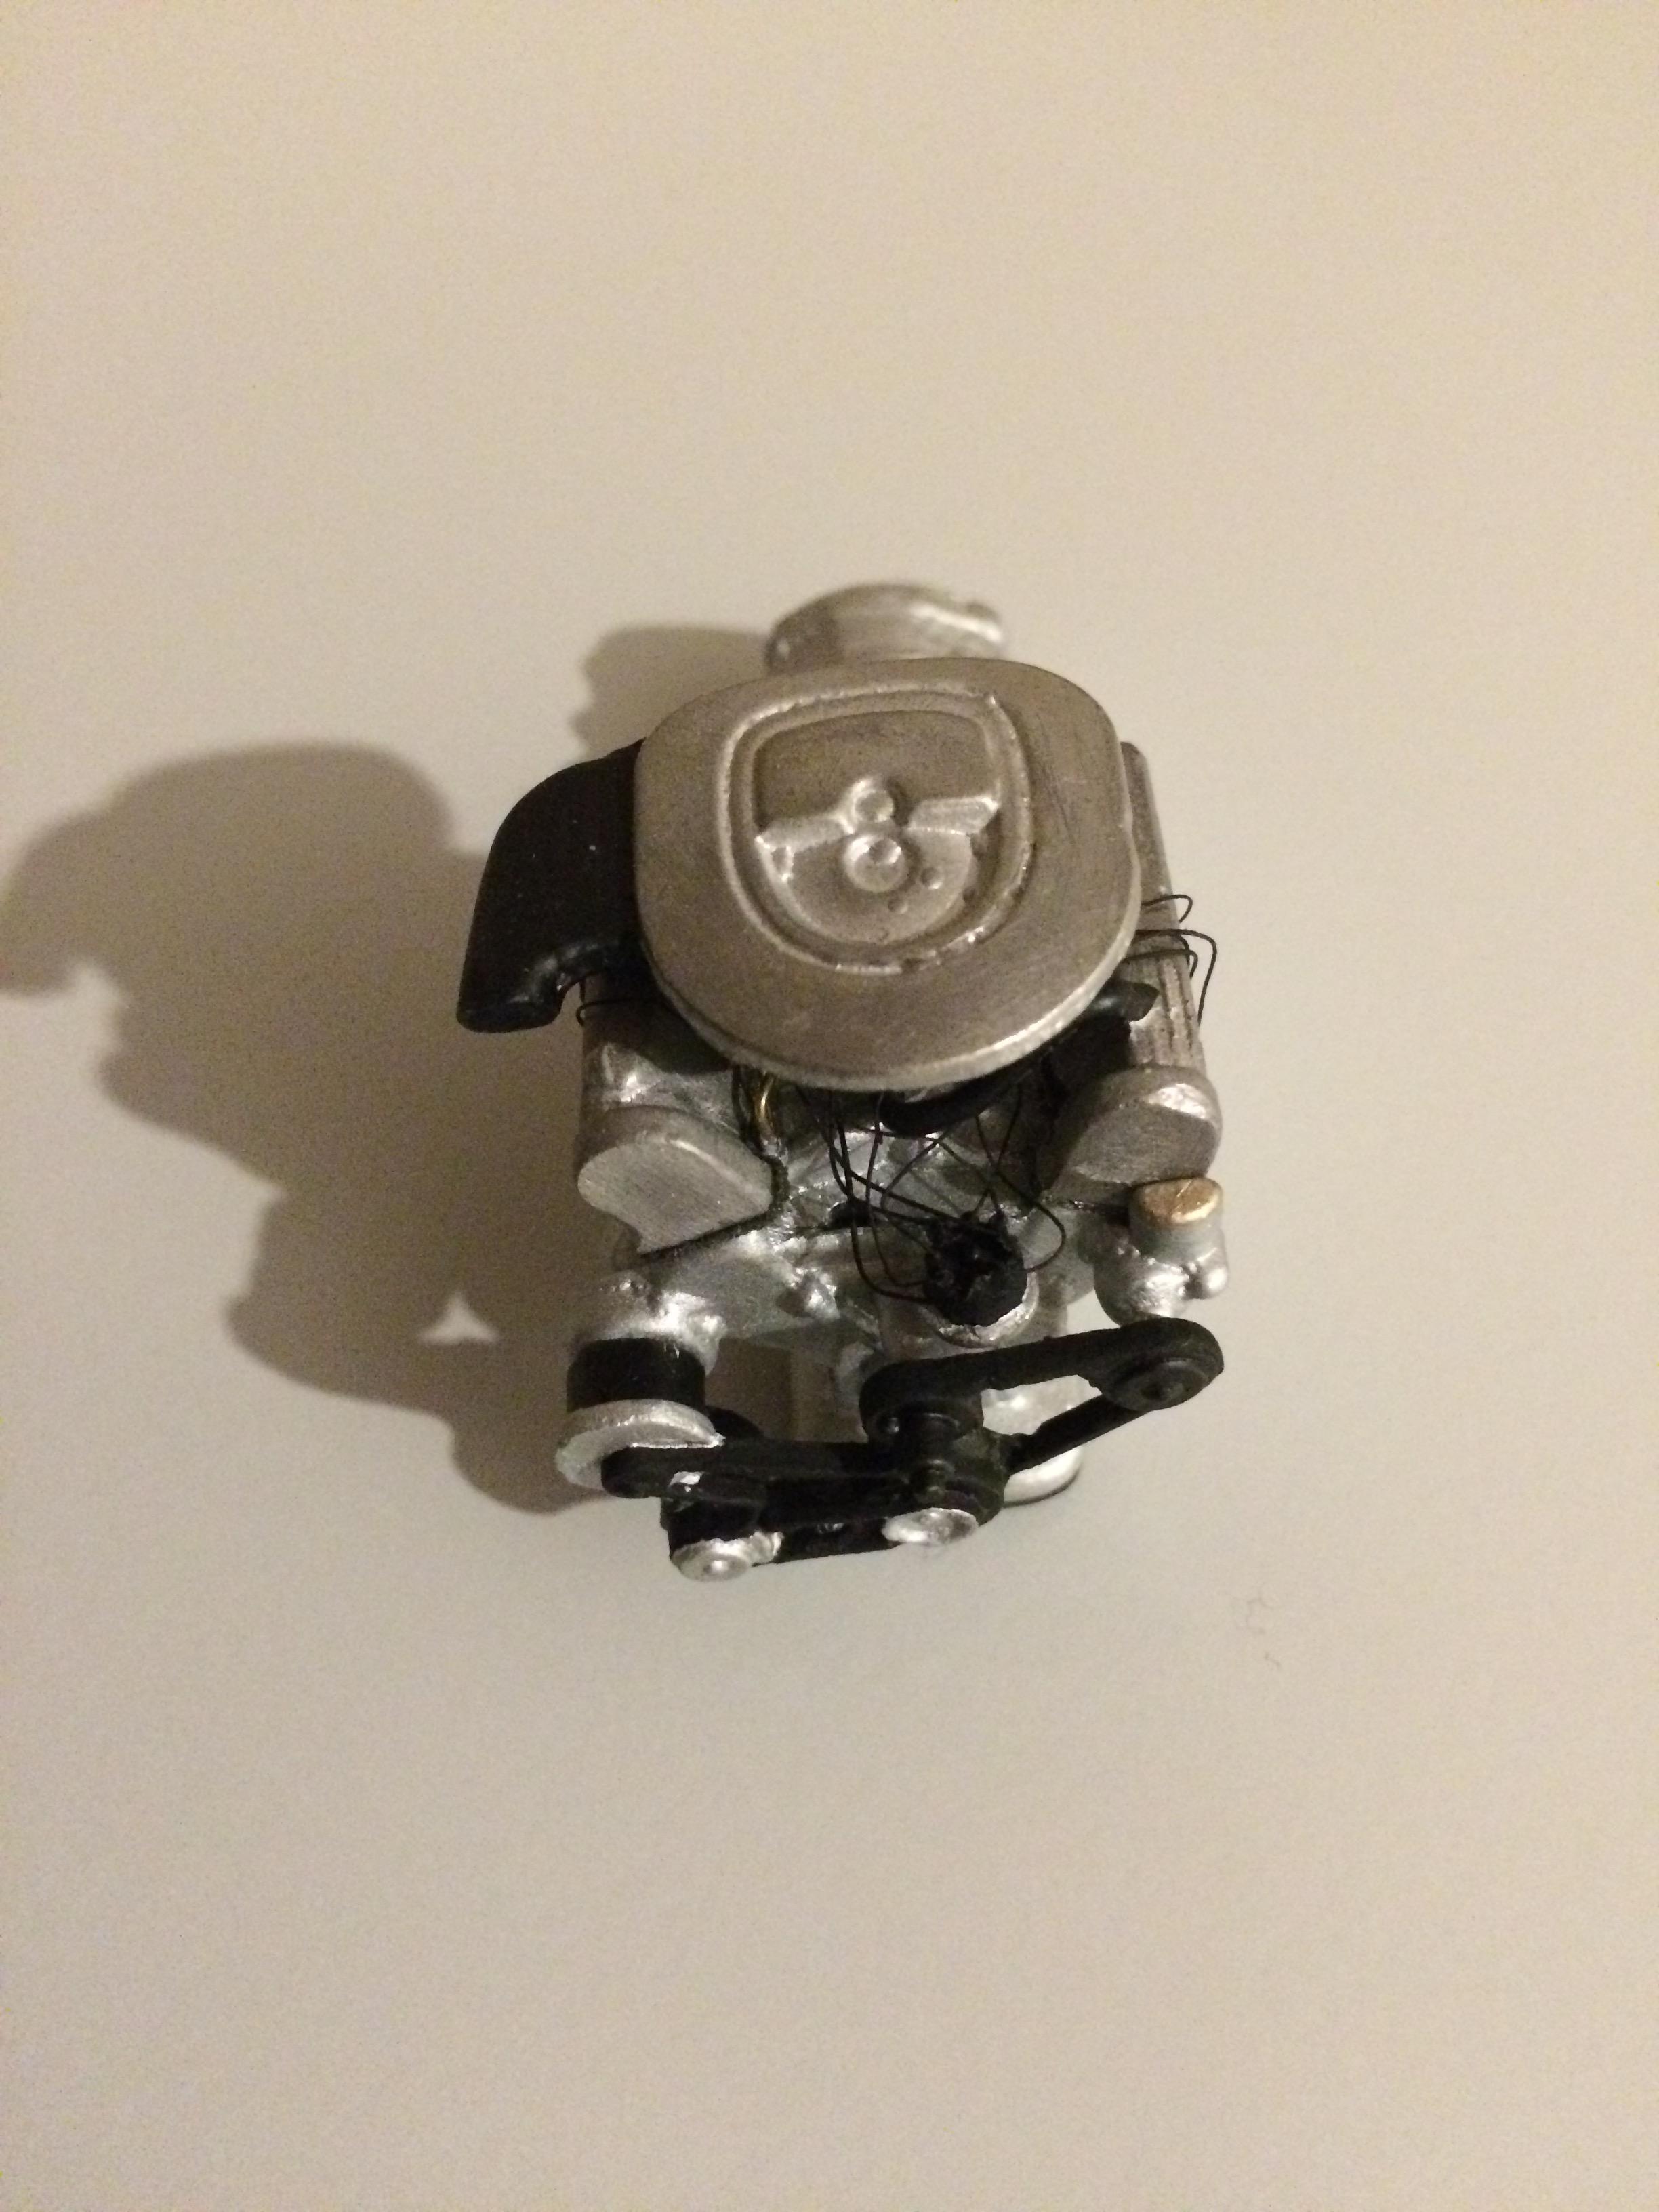
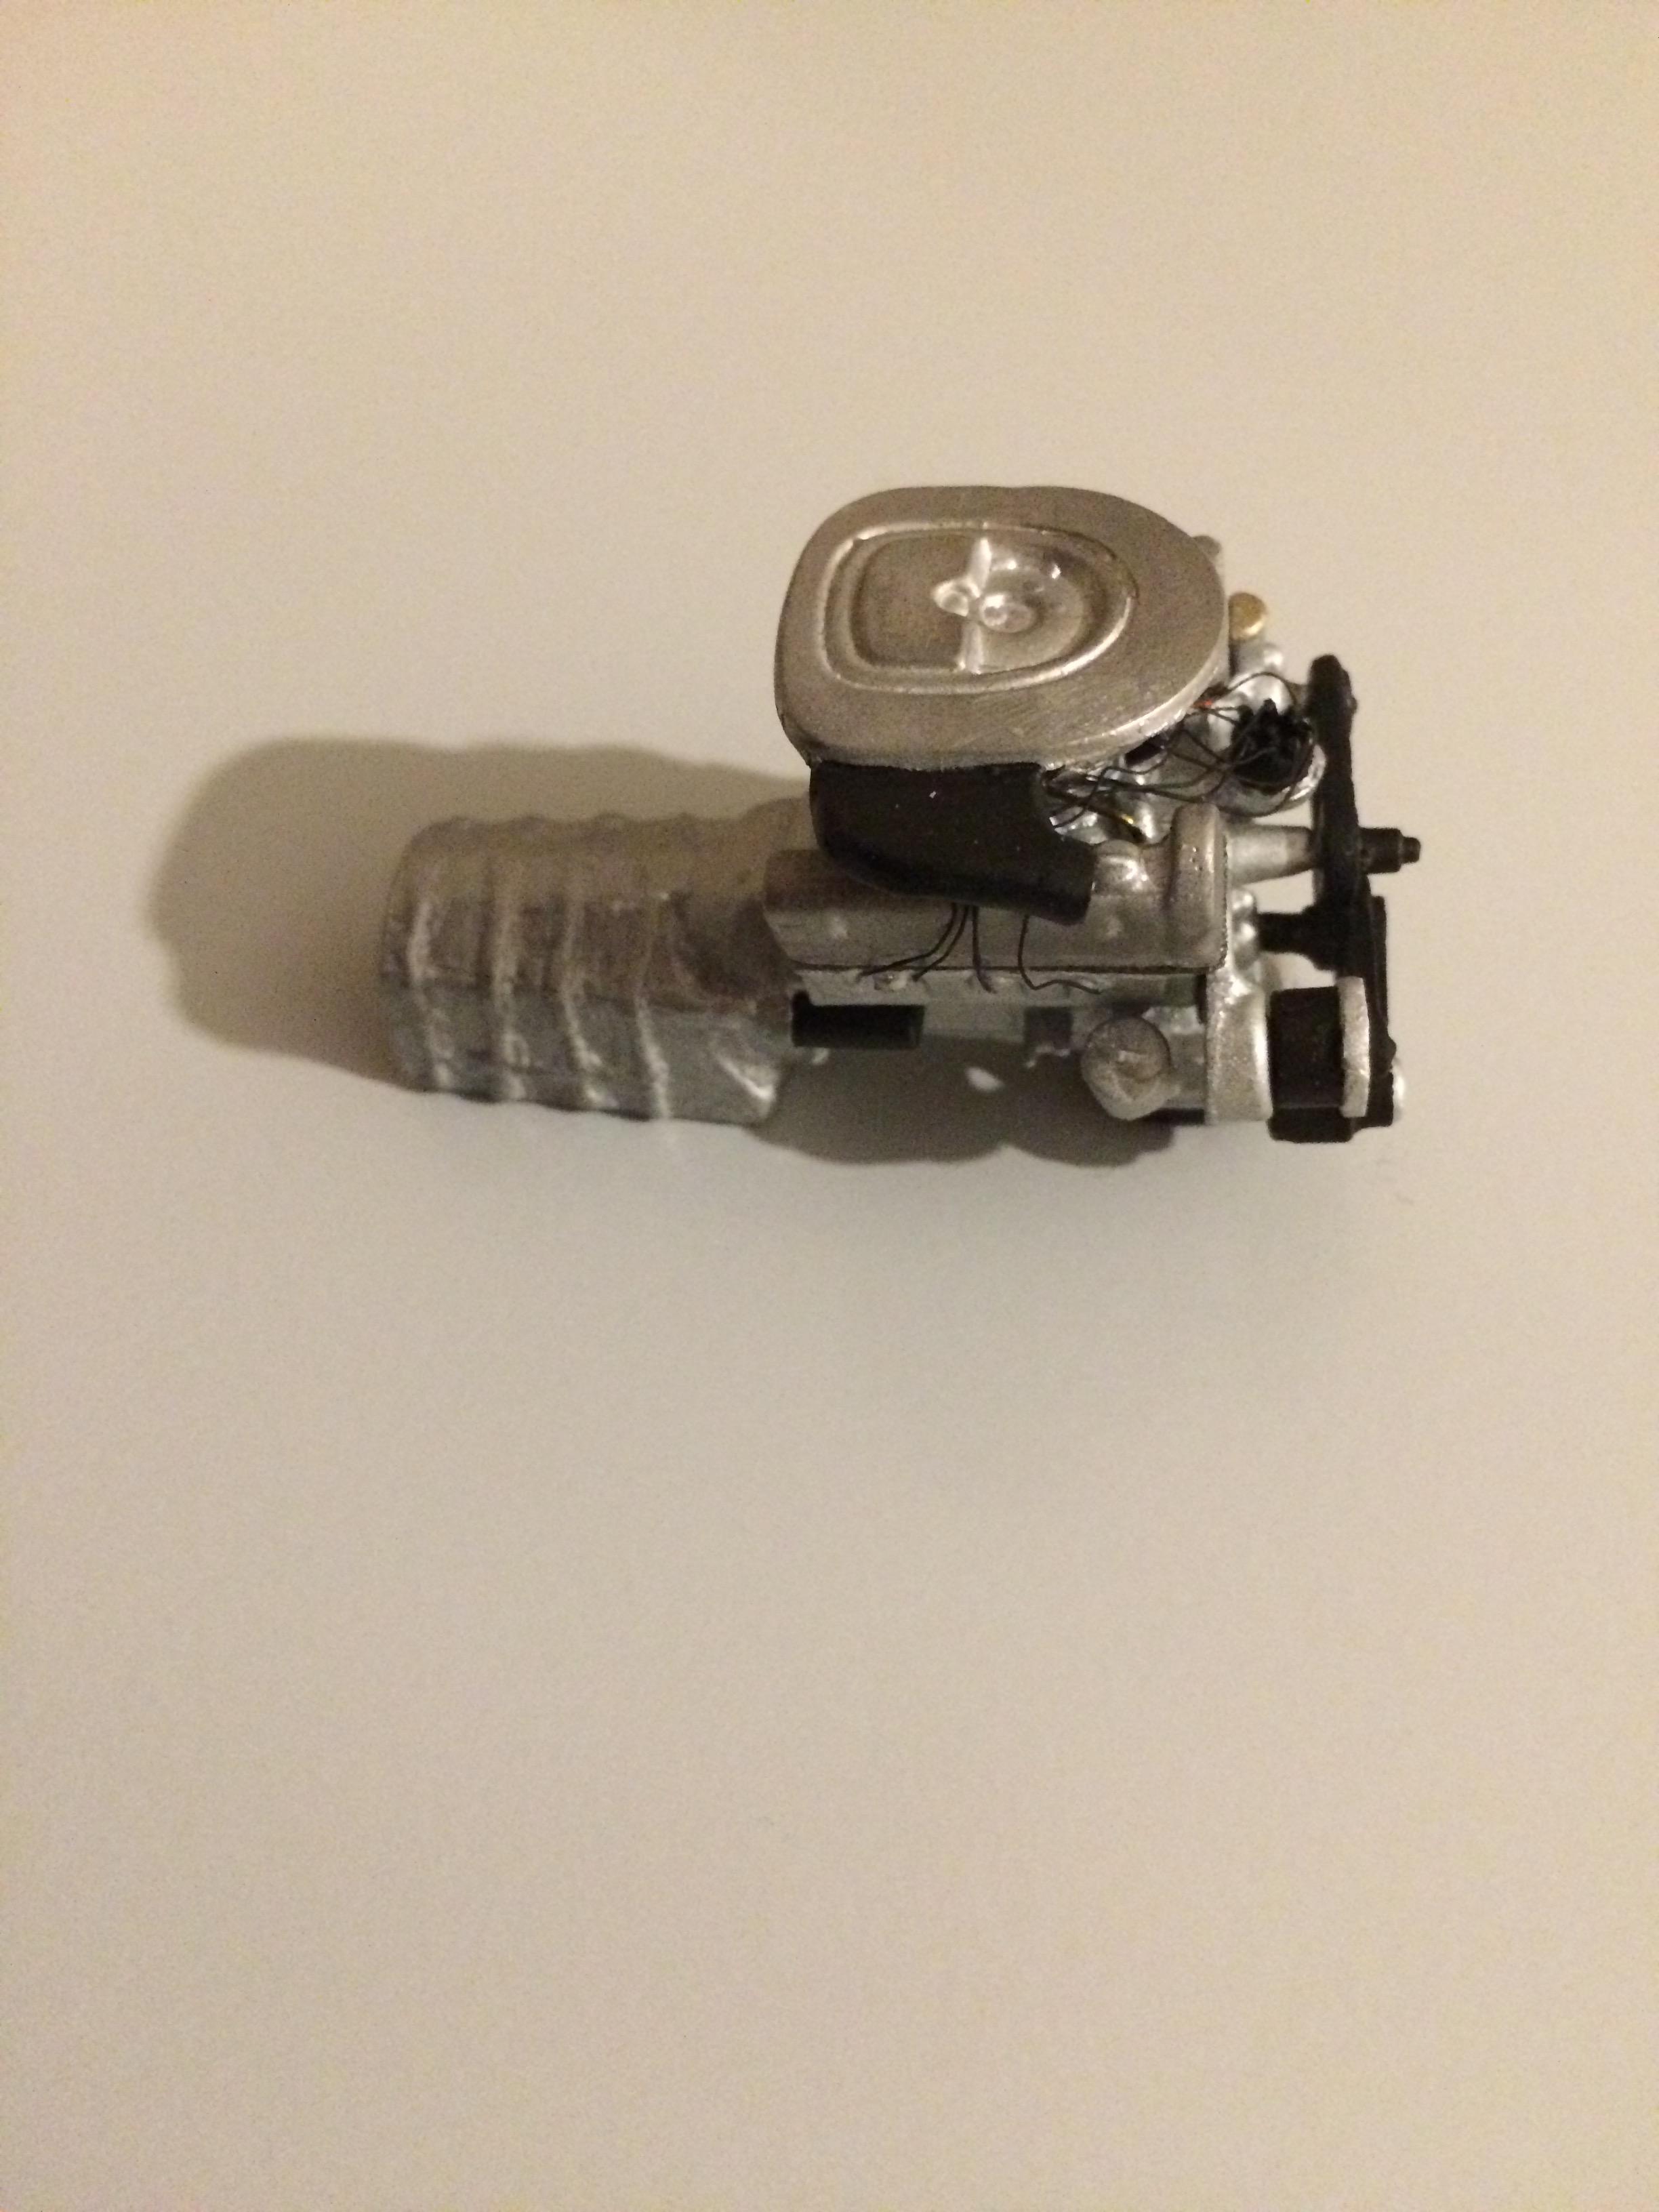
As the imperator has a Mercedes V8 engine and Recaro CS seats, I bought a Tamiya kit of the MB 500 SEC Lorinser.
Inspired by the GunzeSangyo Fiat 500D kit that my dad gave me for christmas I decided to do the engine and the seats with white metal. So I used the Tamiya parts to make casting forms out of plaster.
The parts look like this: -
Thank you, Happy New Year too.
Yes I am still - after more than 30 years - following this project.
The original plan has been to use the wooden model to form sheetmetall around it. But meanwhile I changed to something different.
Will post it soon. -
Thank you Joe.
I think a sculpture like this would be cool: Lamborghini sculptureBut for now I have something different in the works….
-
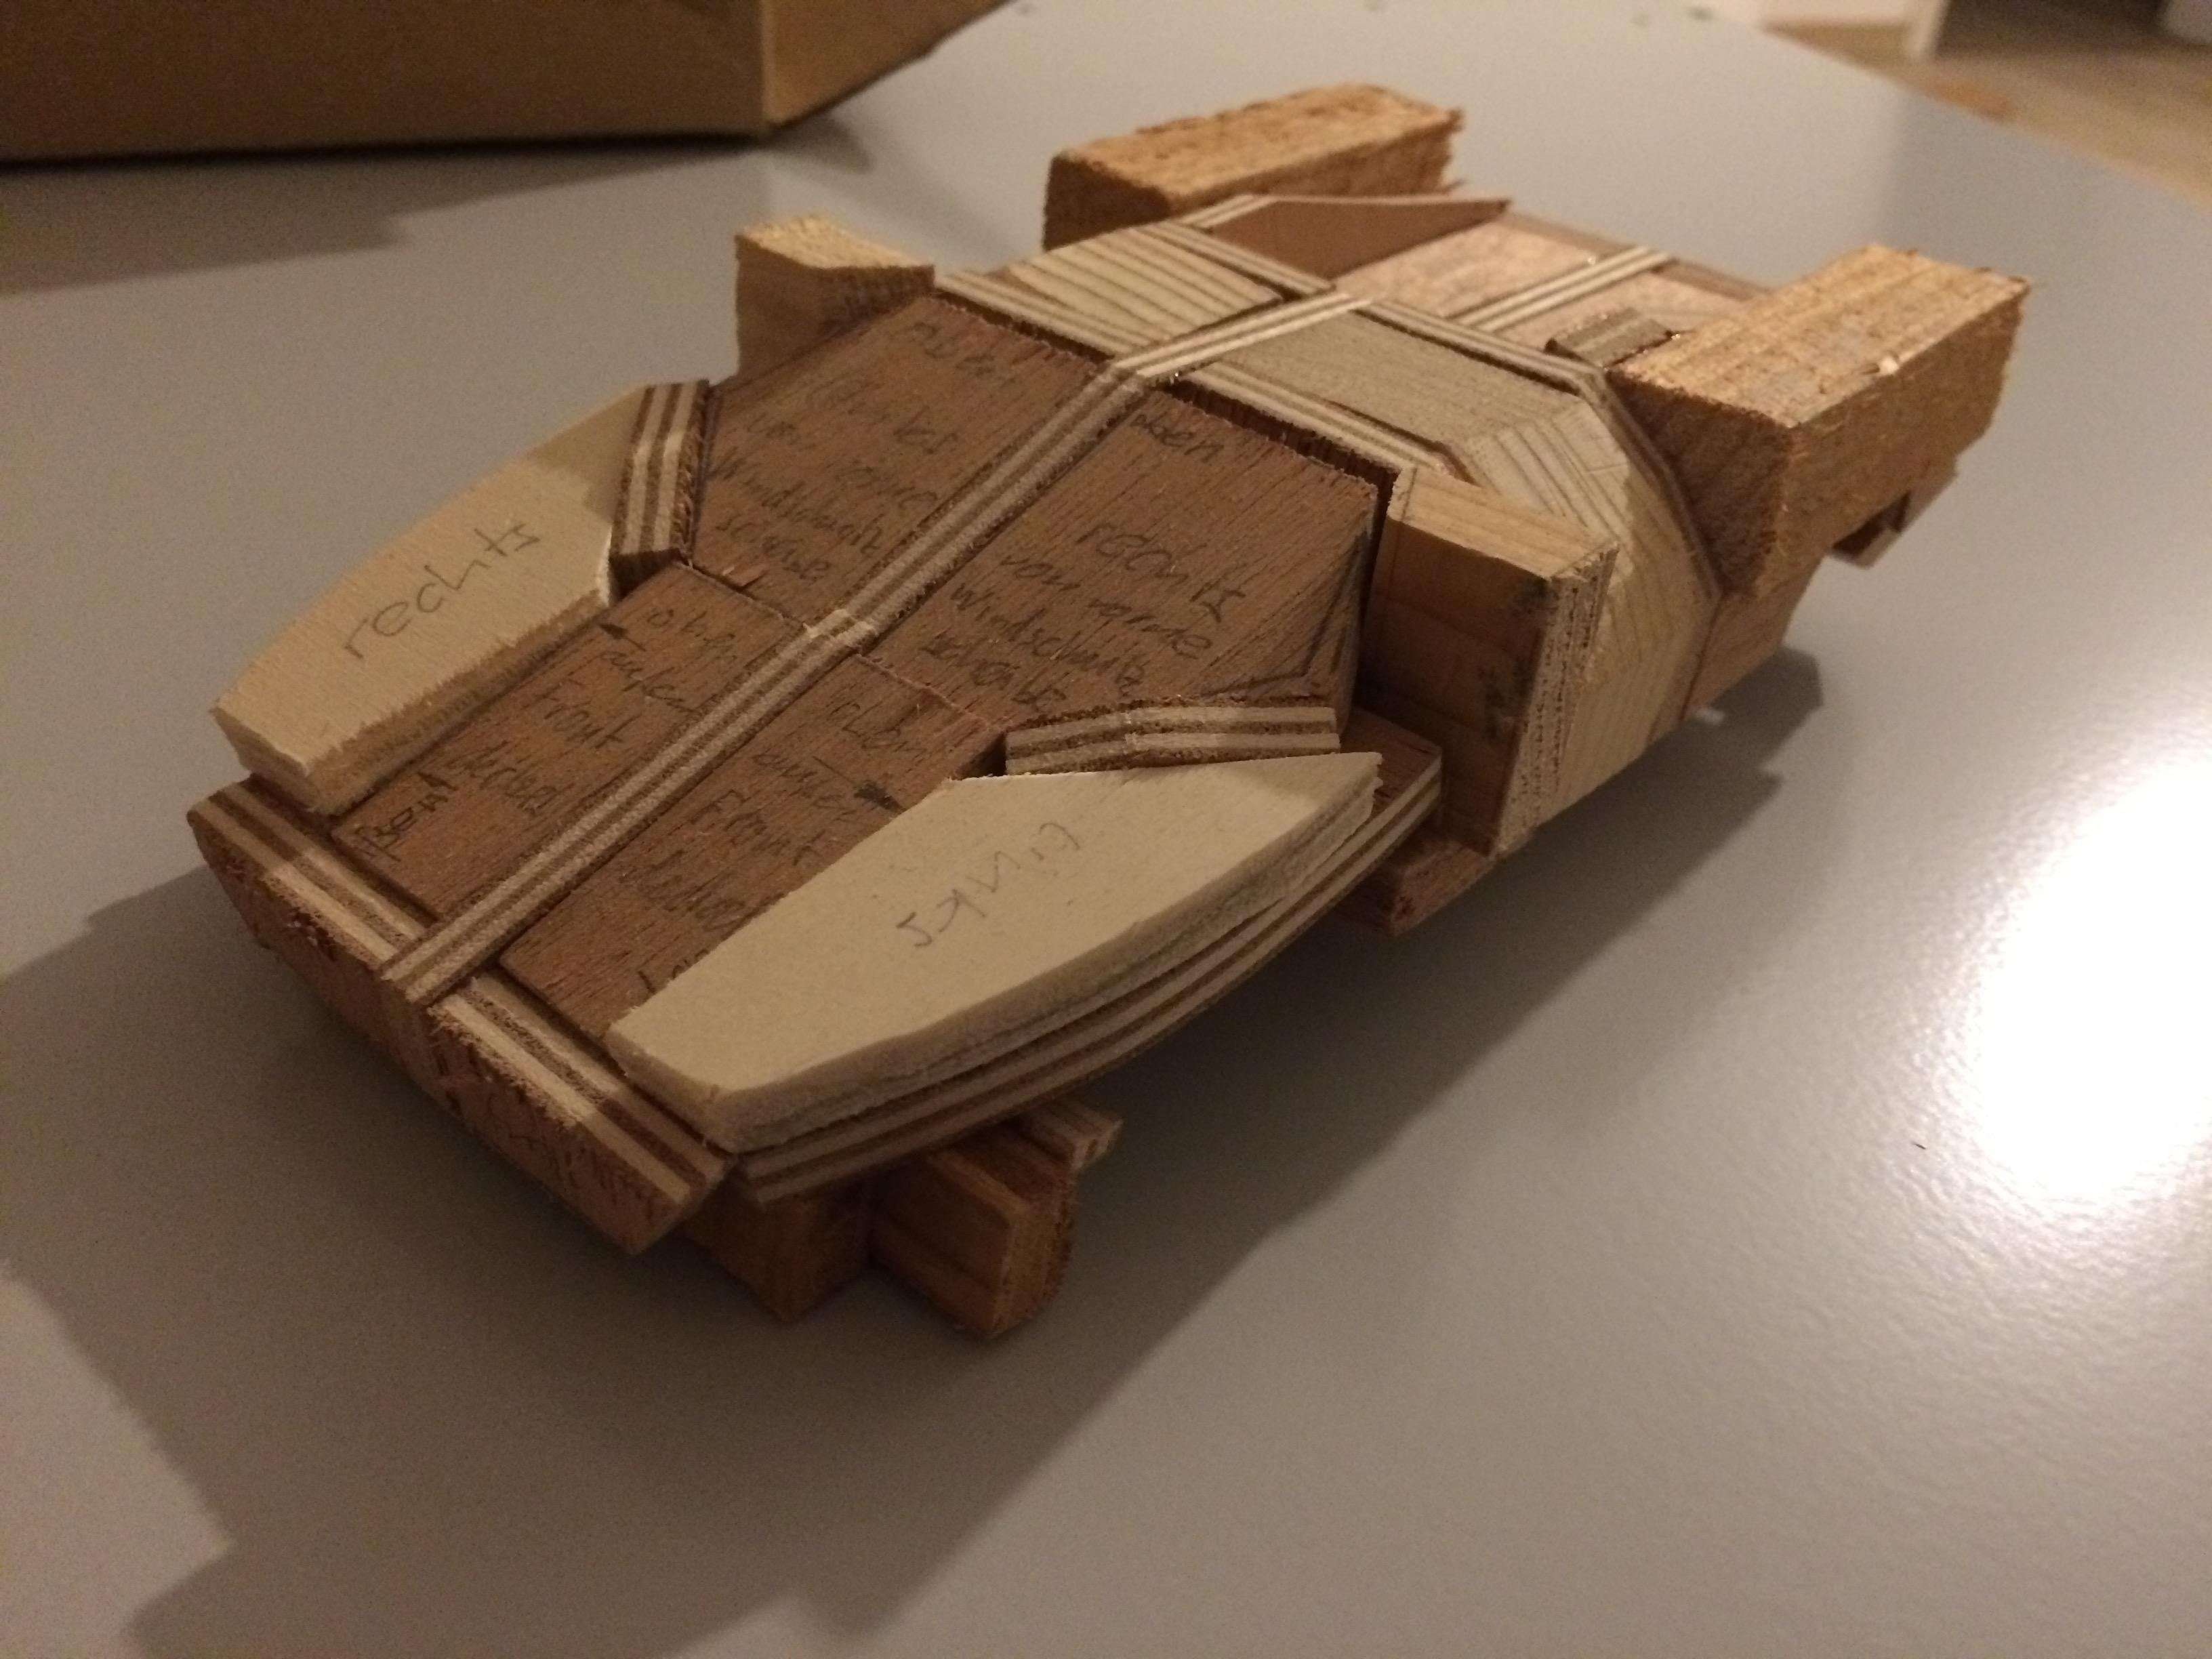
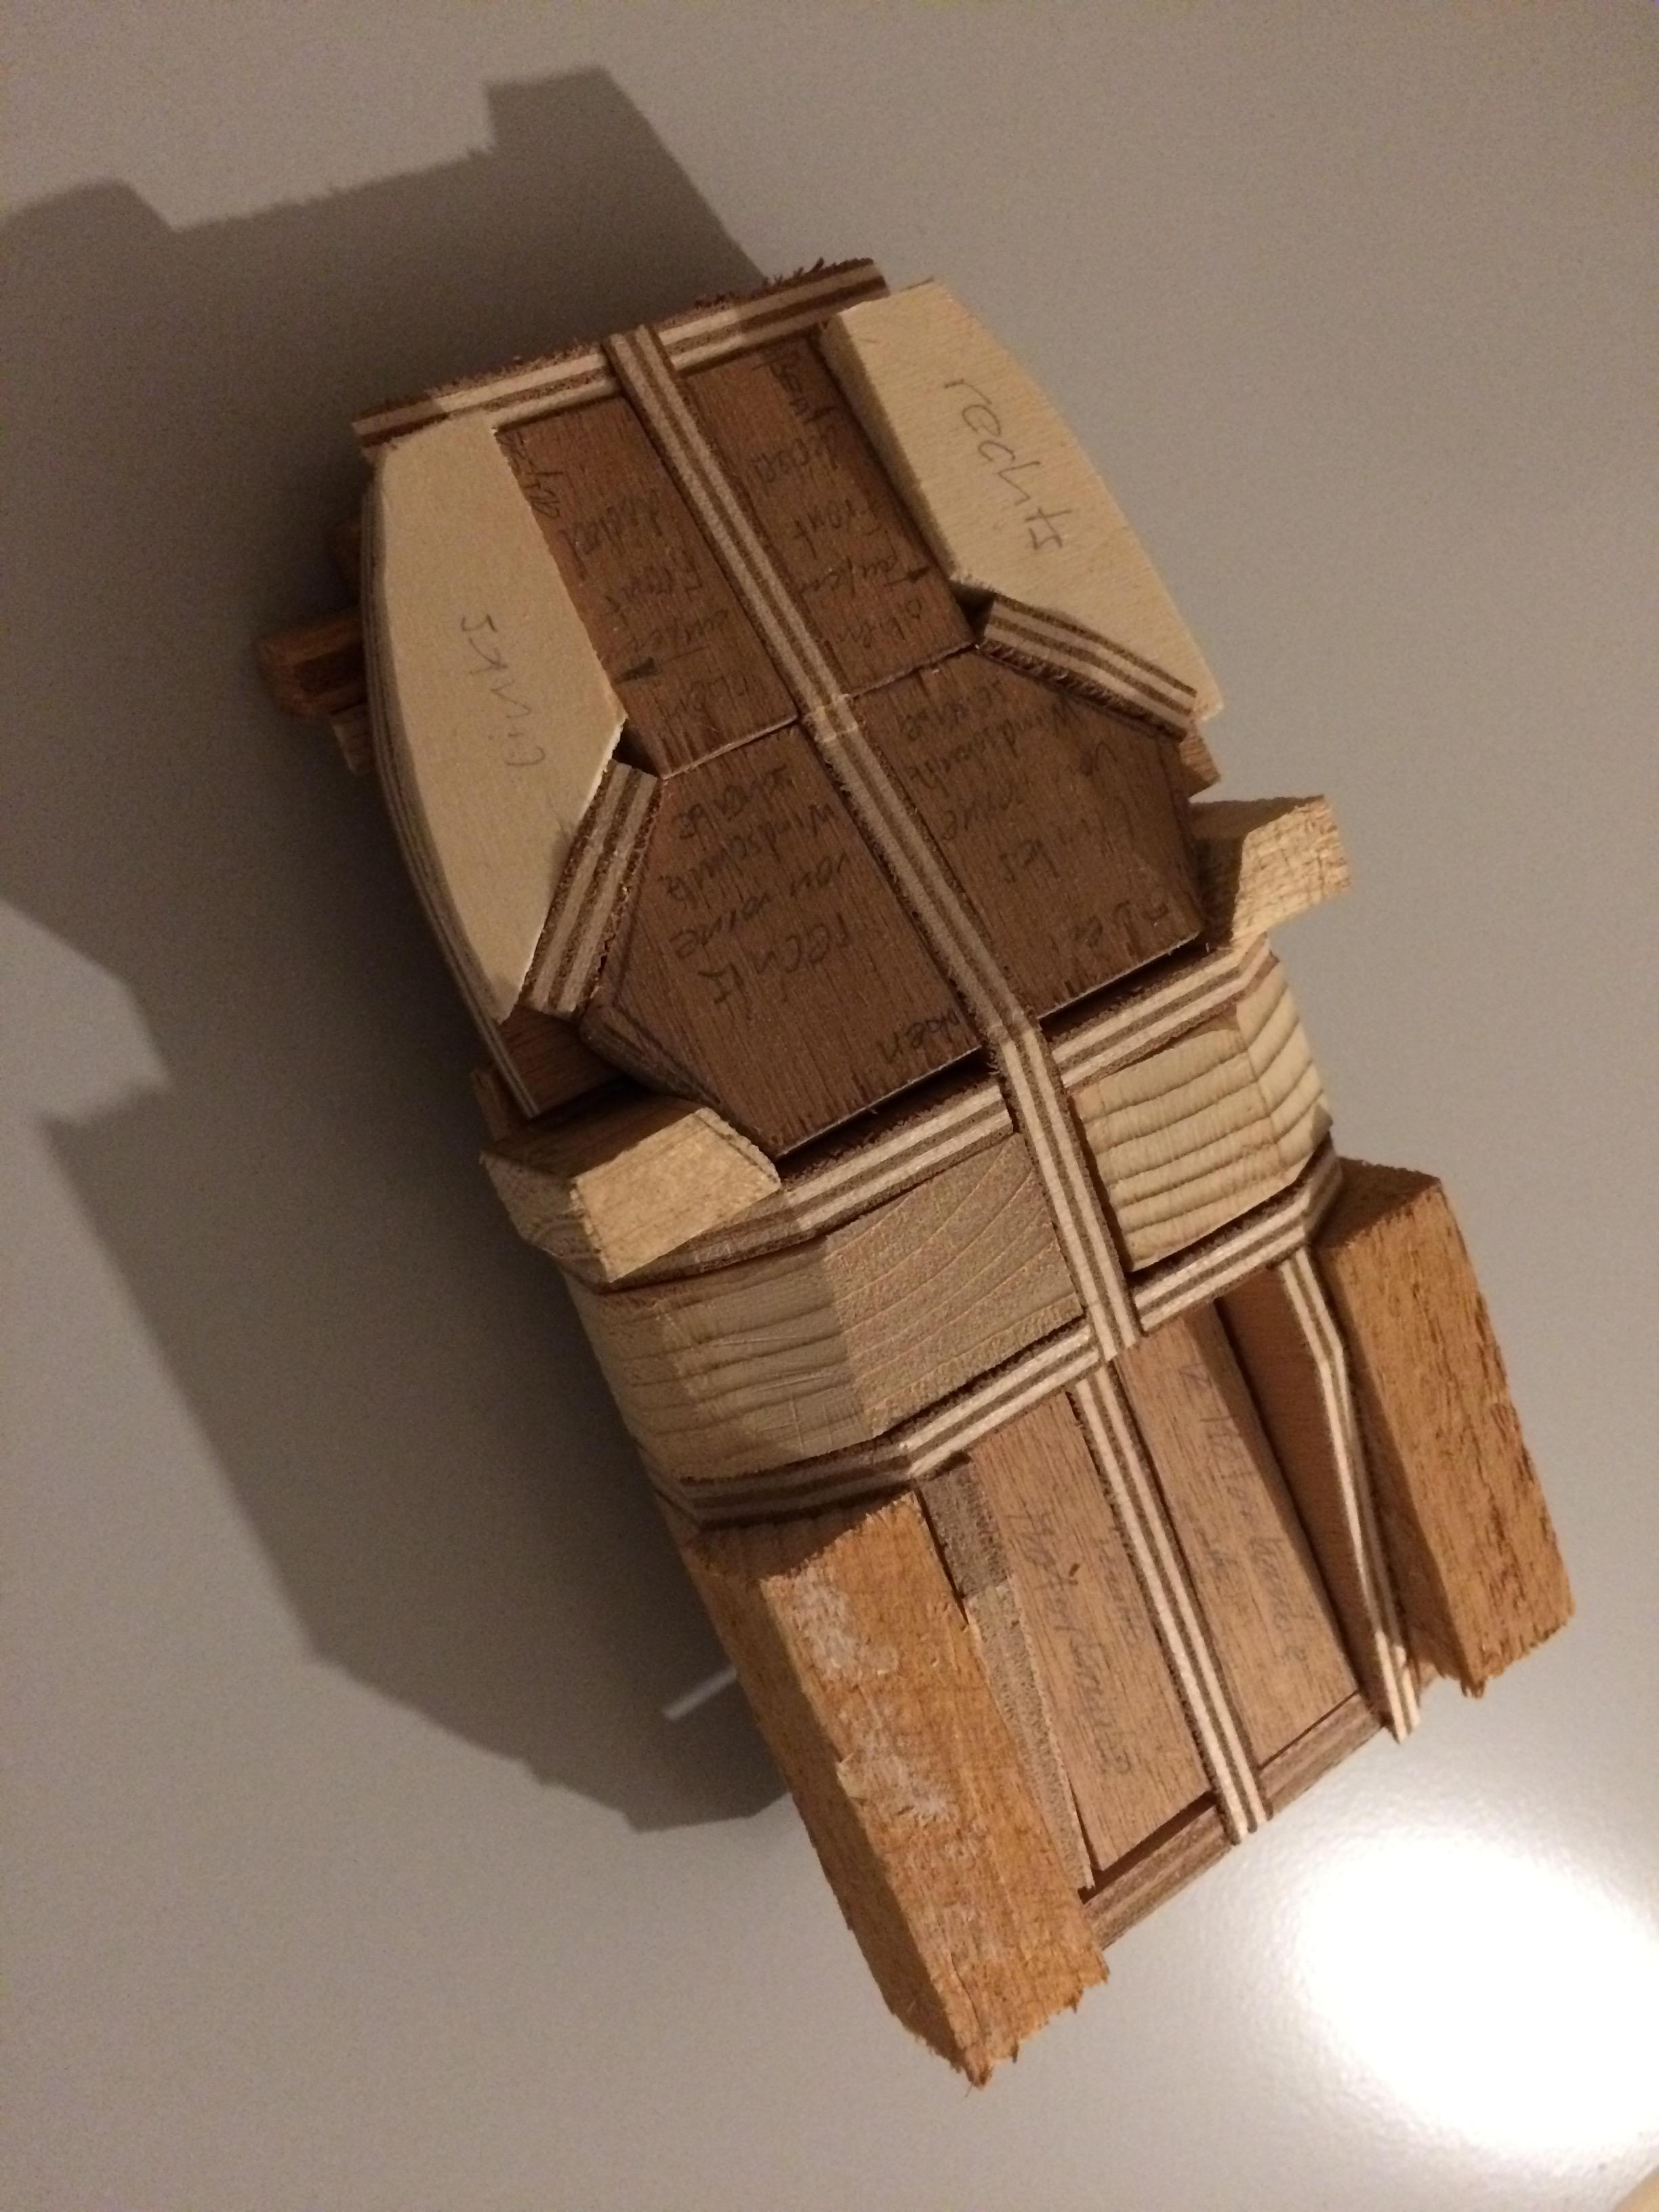
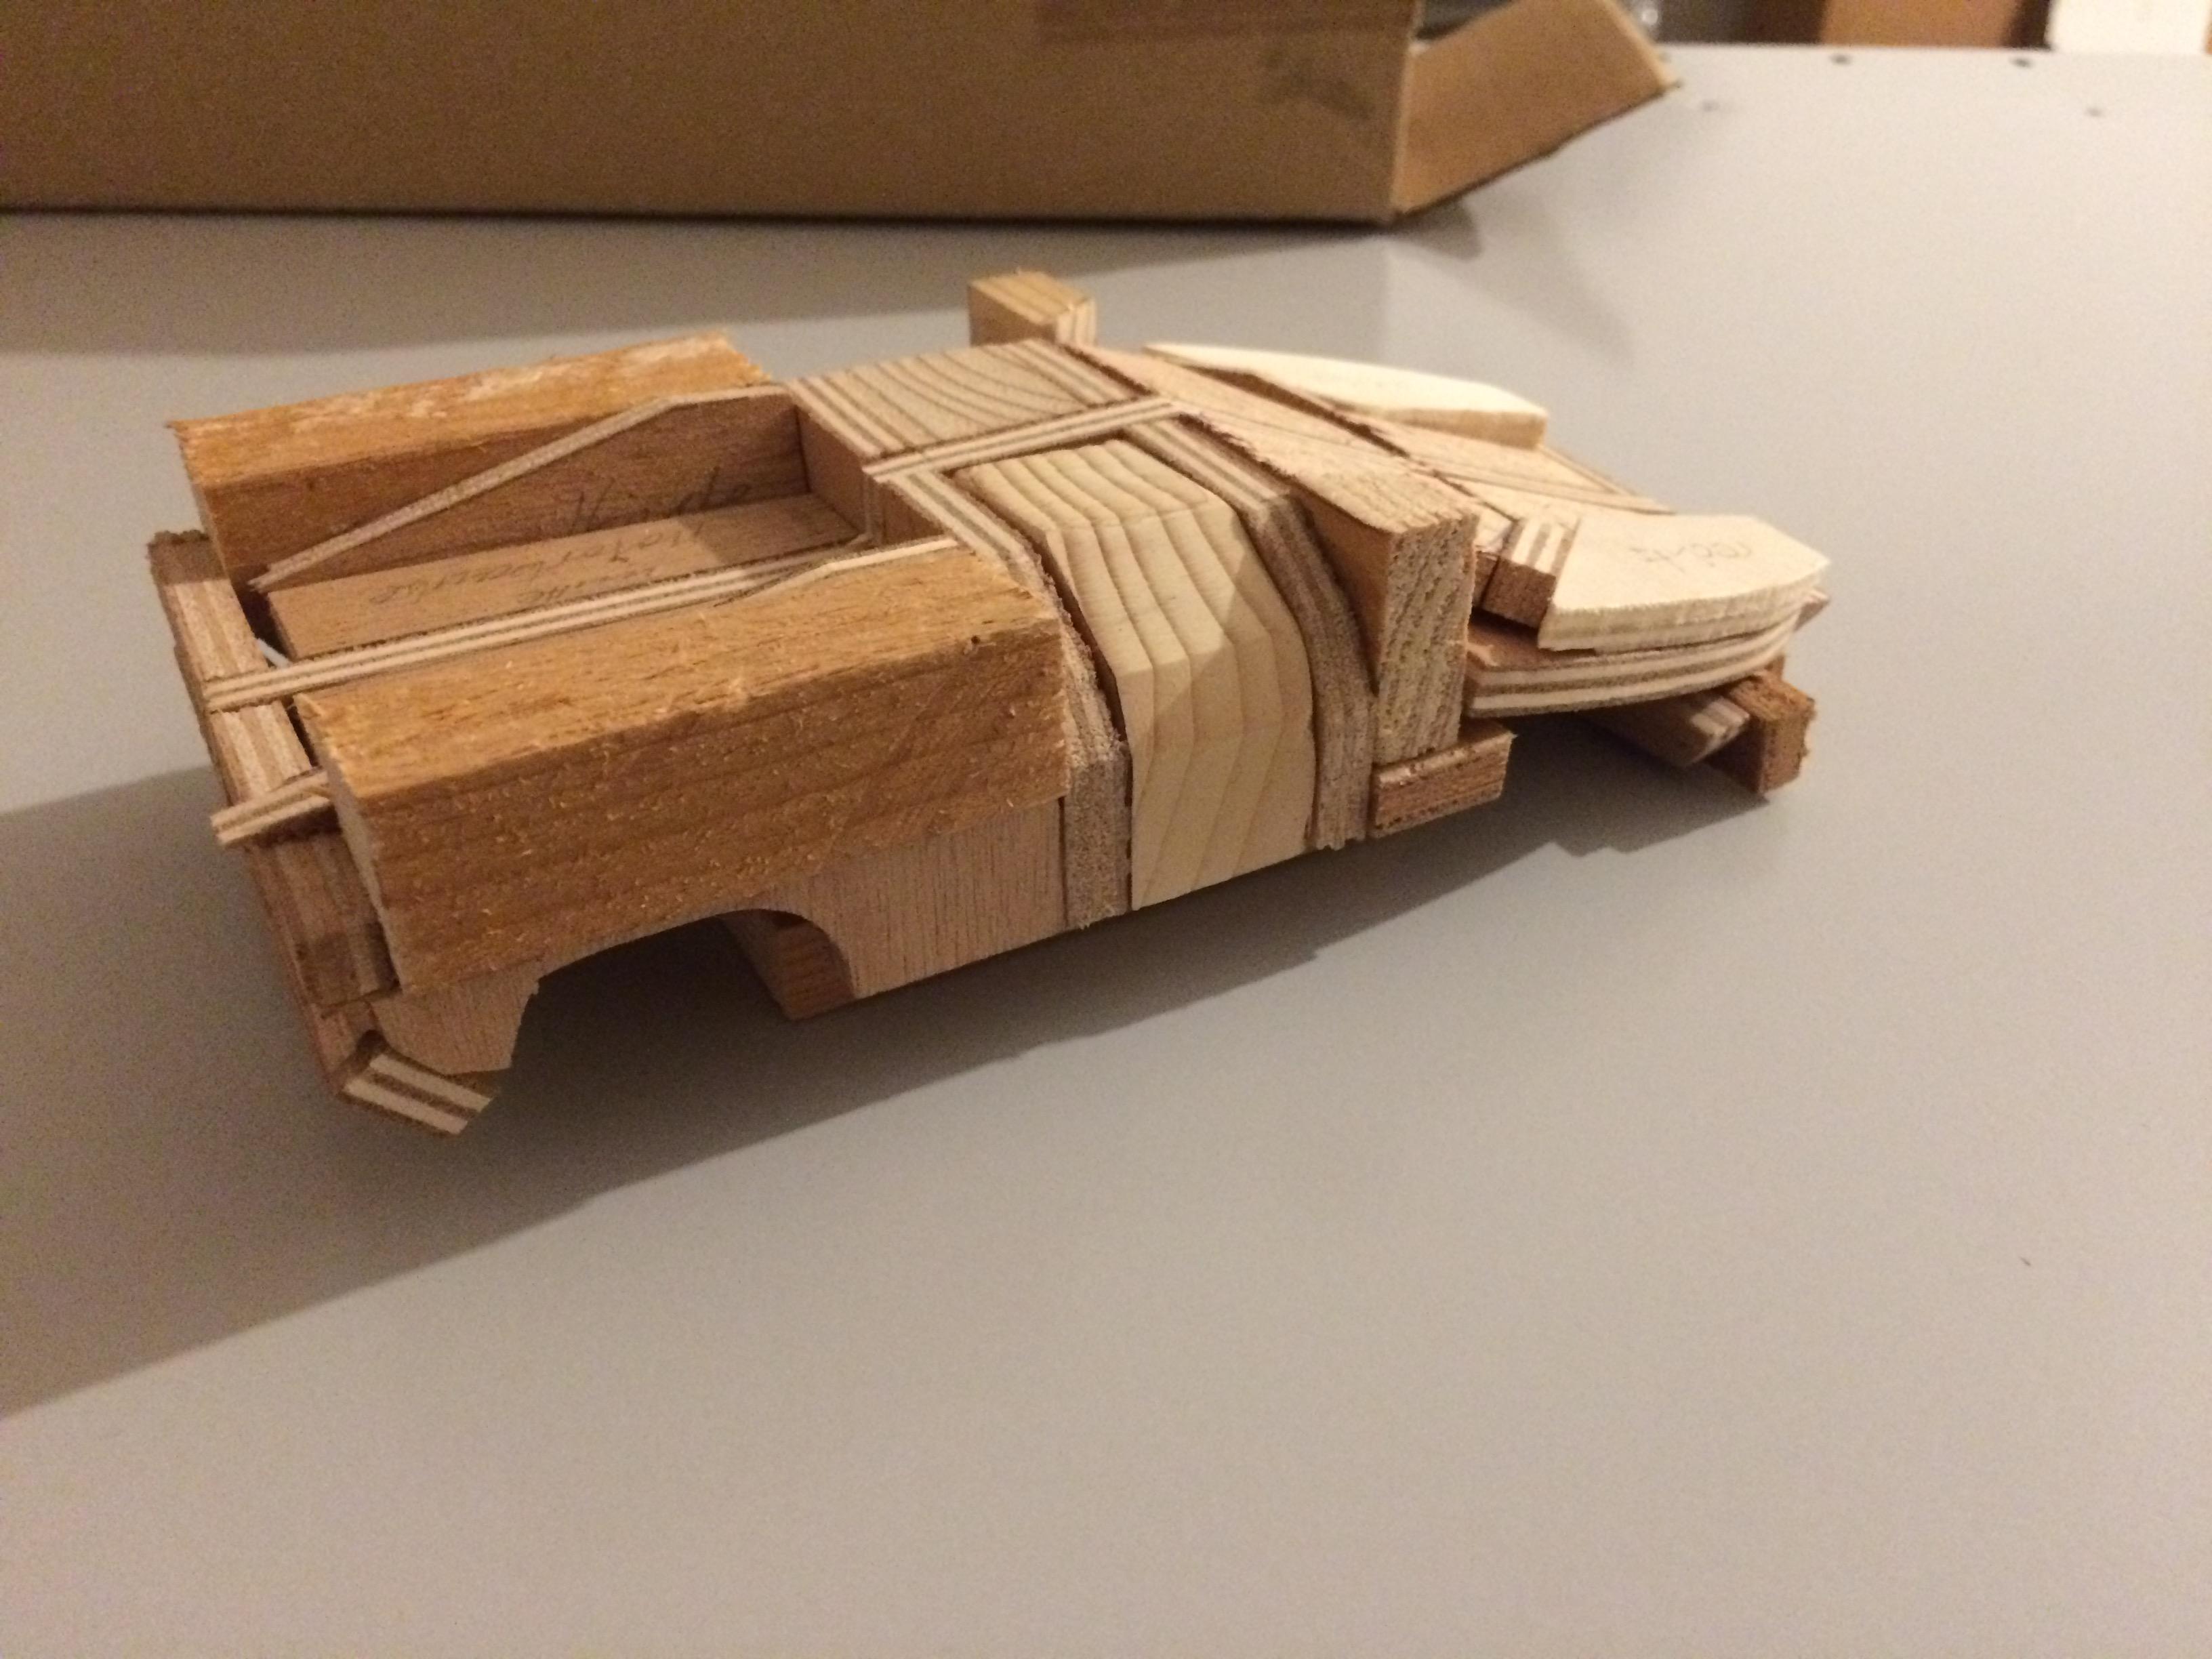
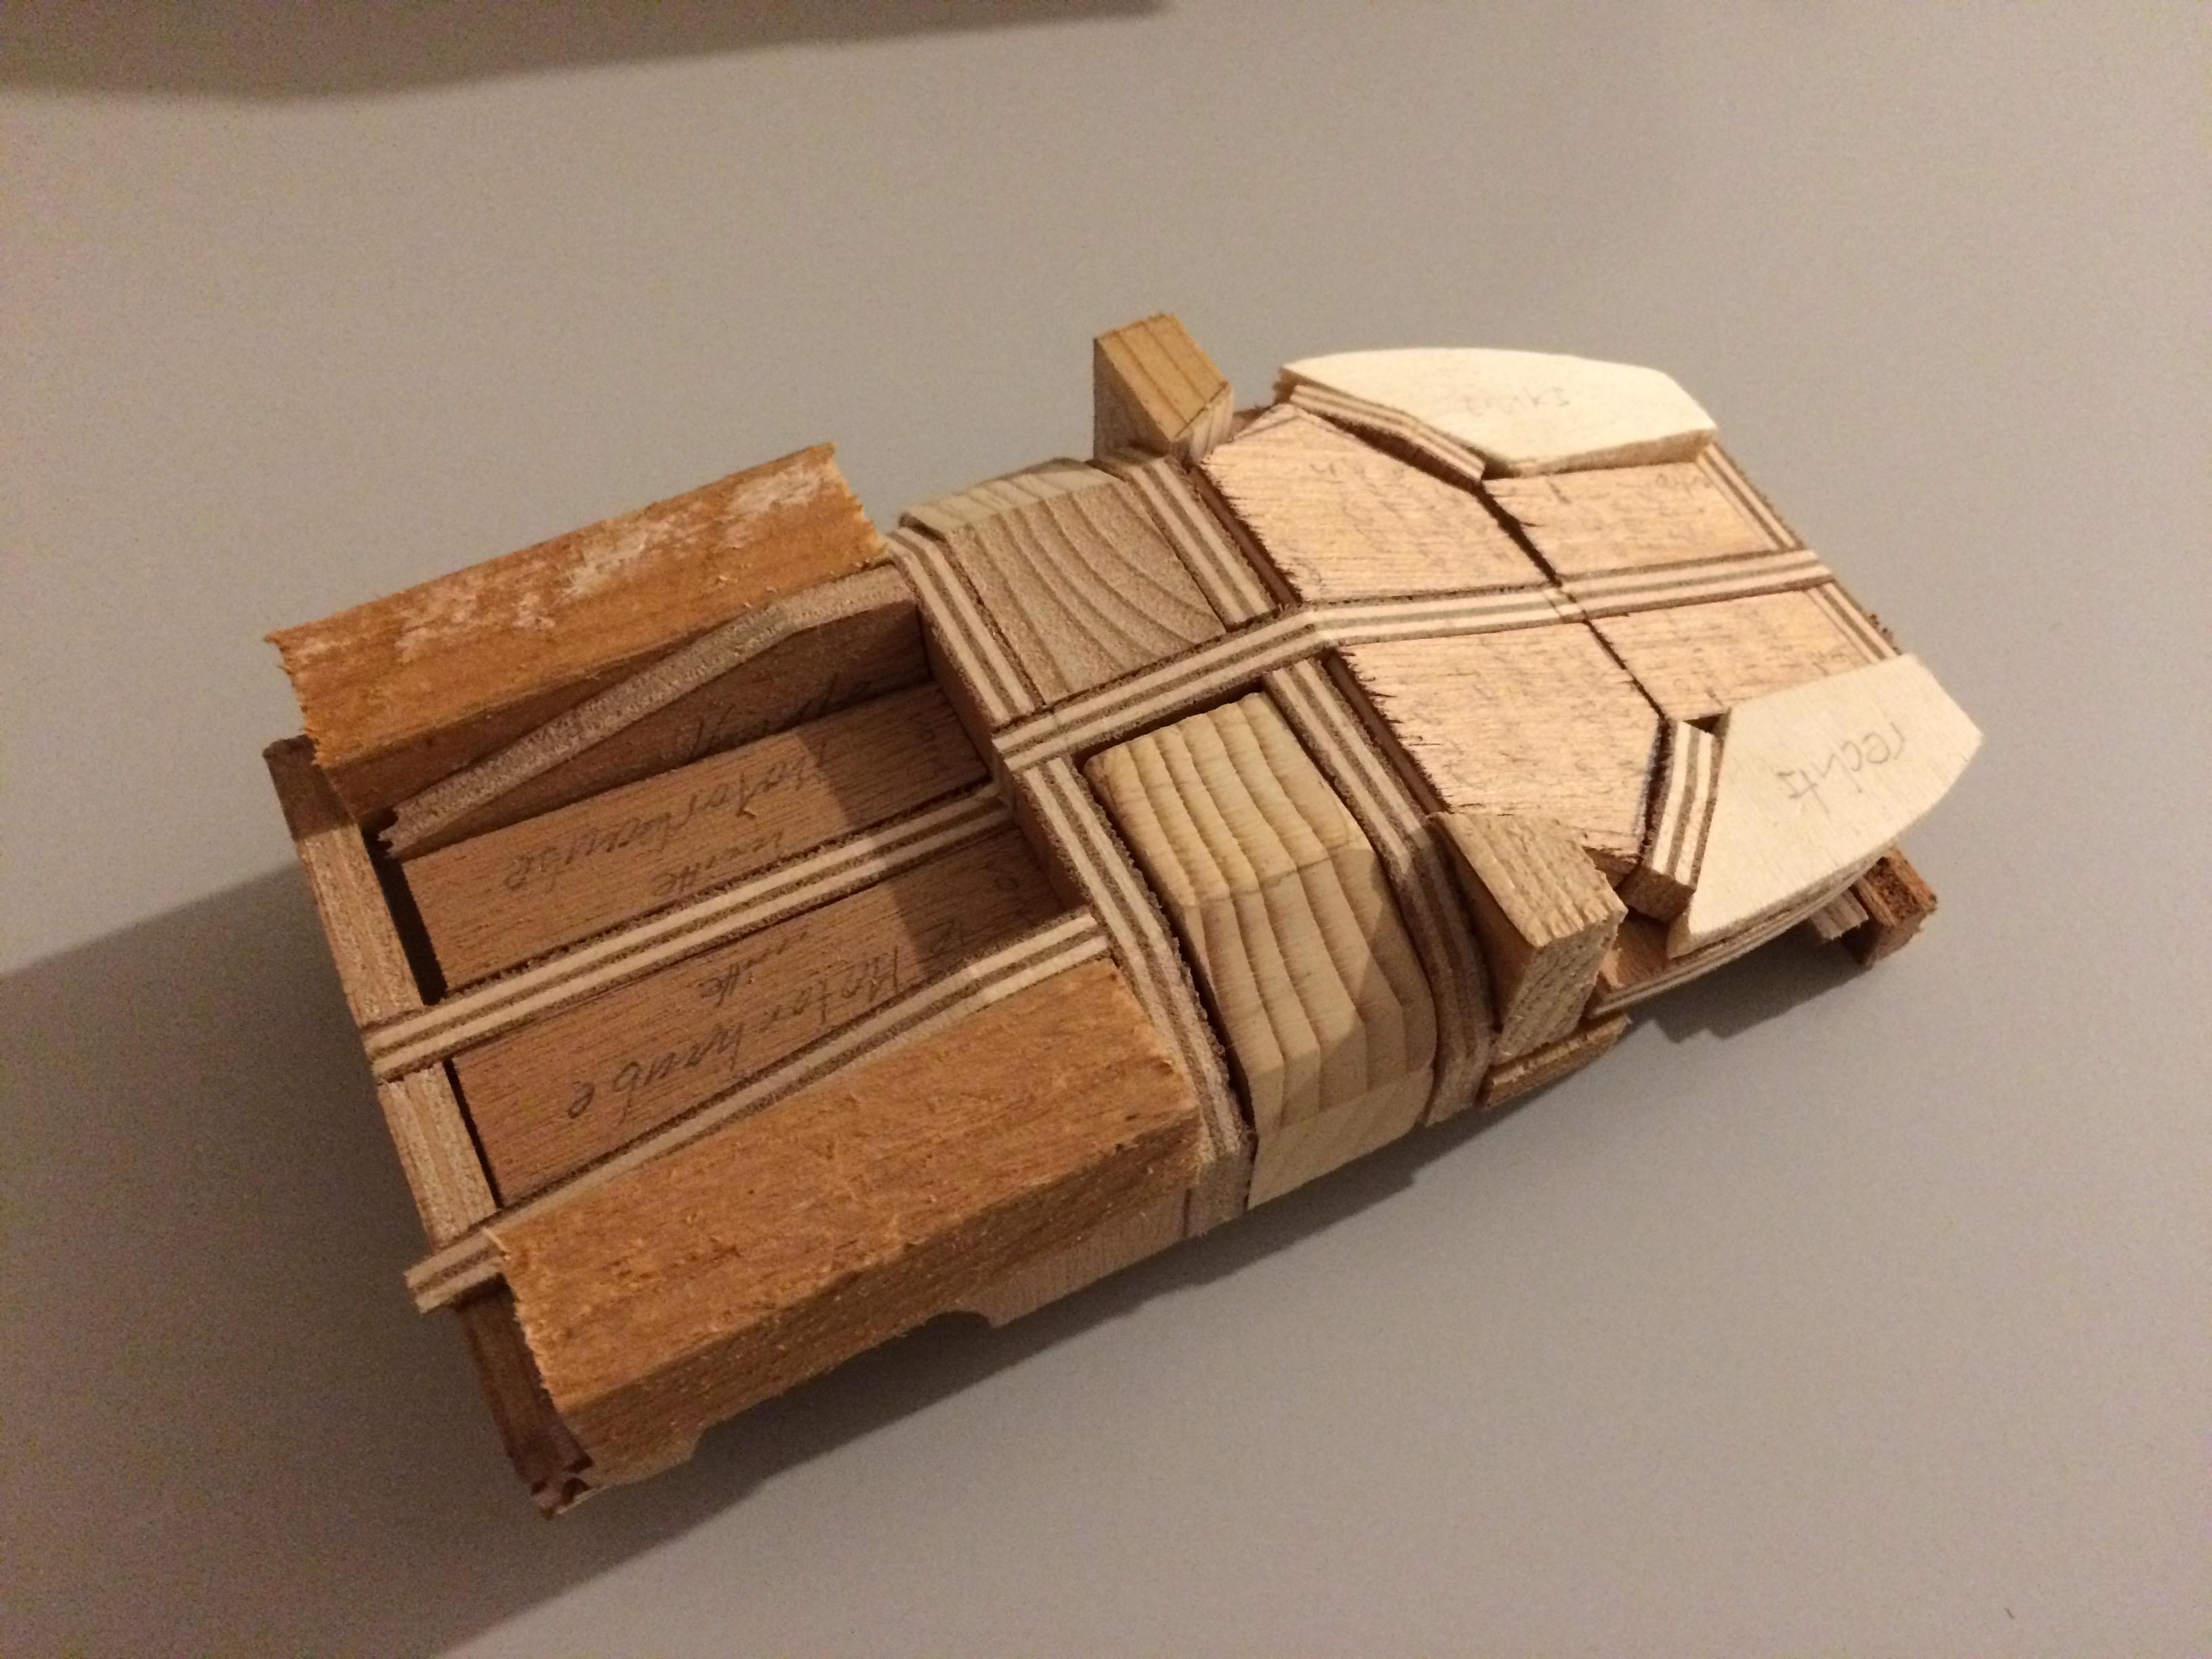
Chronicle Part 2:
After the cardboard model I startet to built a wooden model. But I never finished it…
-
Hello,
a few years ago I found a topic about a scratch built ISDERA imperator here on this forum ( imperator by Dann Tier )
To clean things up, I now start this topic to post about my build.My wish to have a modelcar scale 1/24 of the imperator started in 1984 when this car was unveiled. We can even go back to 1978 when the CW311 was shown at the international car fair (IAA = Internationale Automobil-Ausstellung) Frankfurt / Germany. I was a seven year old boy then.
I waited patiently many years for a model car kit to be made, I wrote a letter to Tamiya, but then in around 1990 I decided to build the model myself.
First I made a technical drawing w/ side / front / top view. Maybe I will find it again to post pictures here.
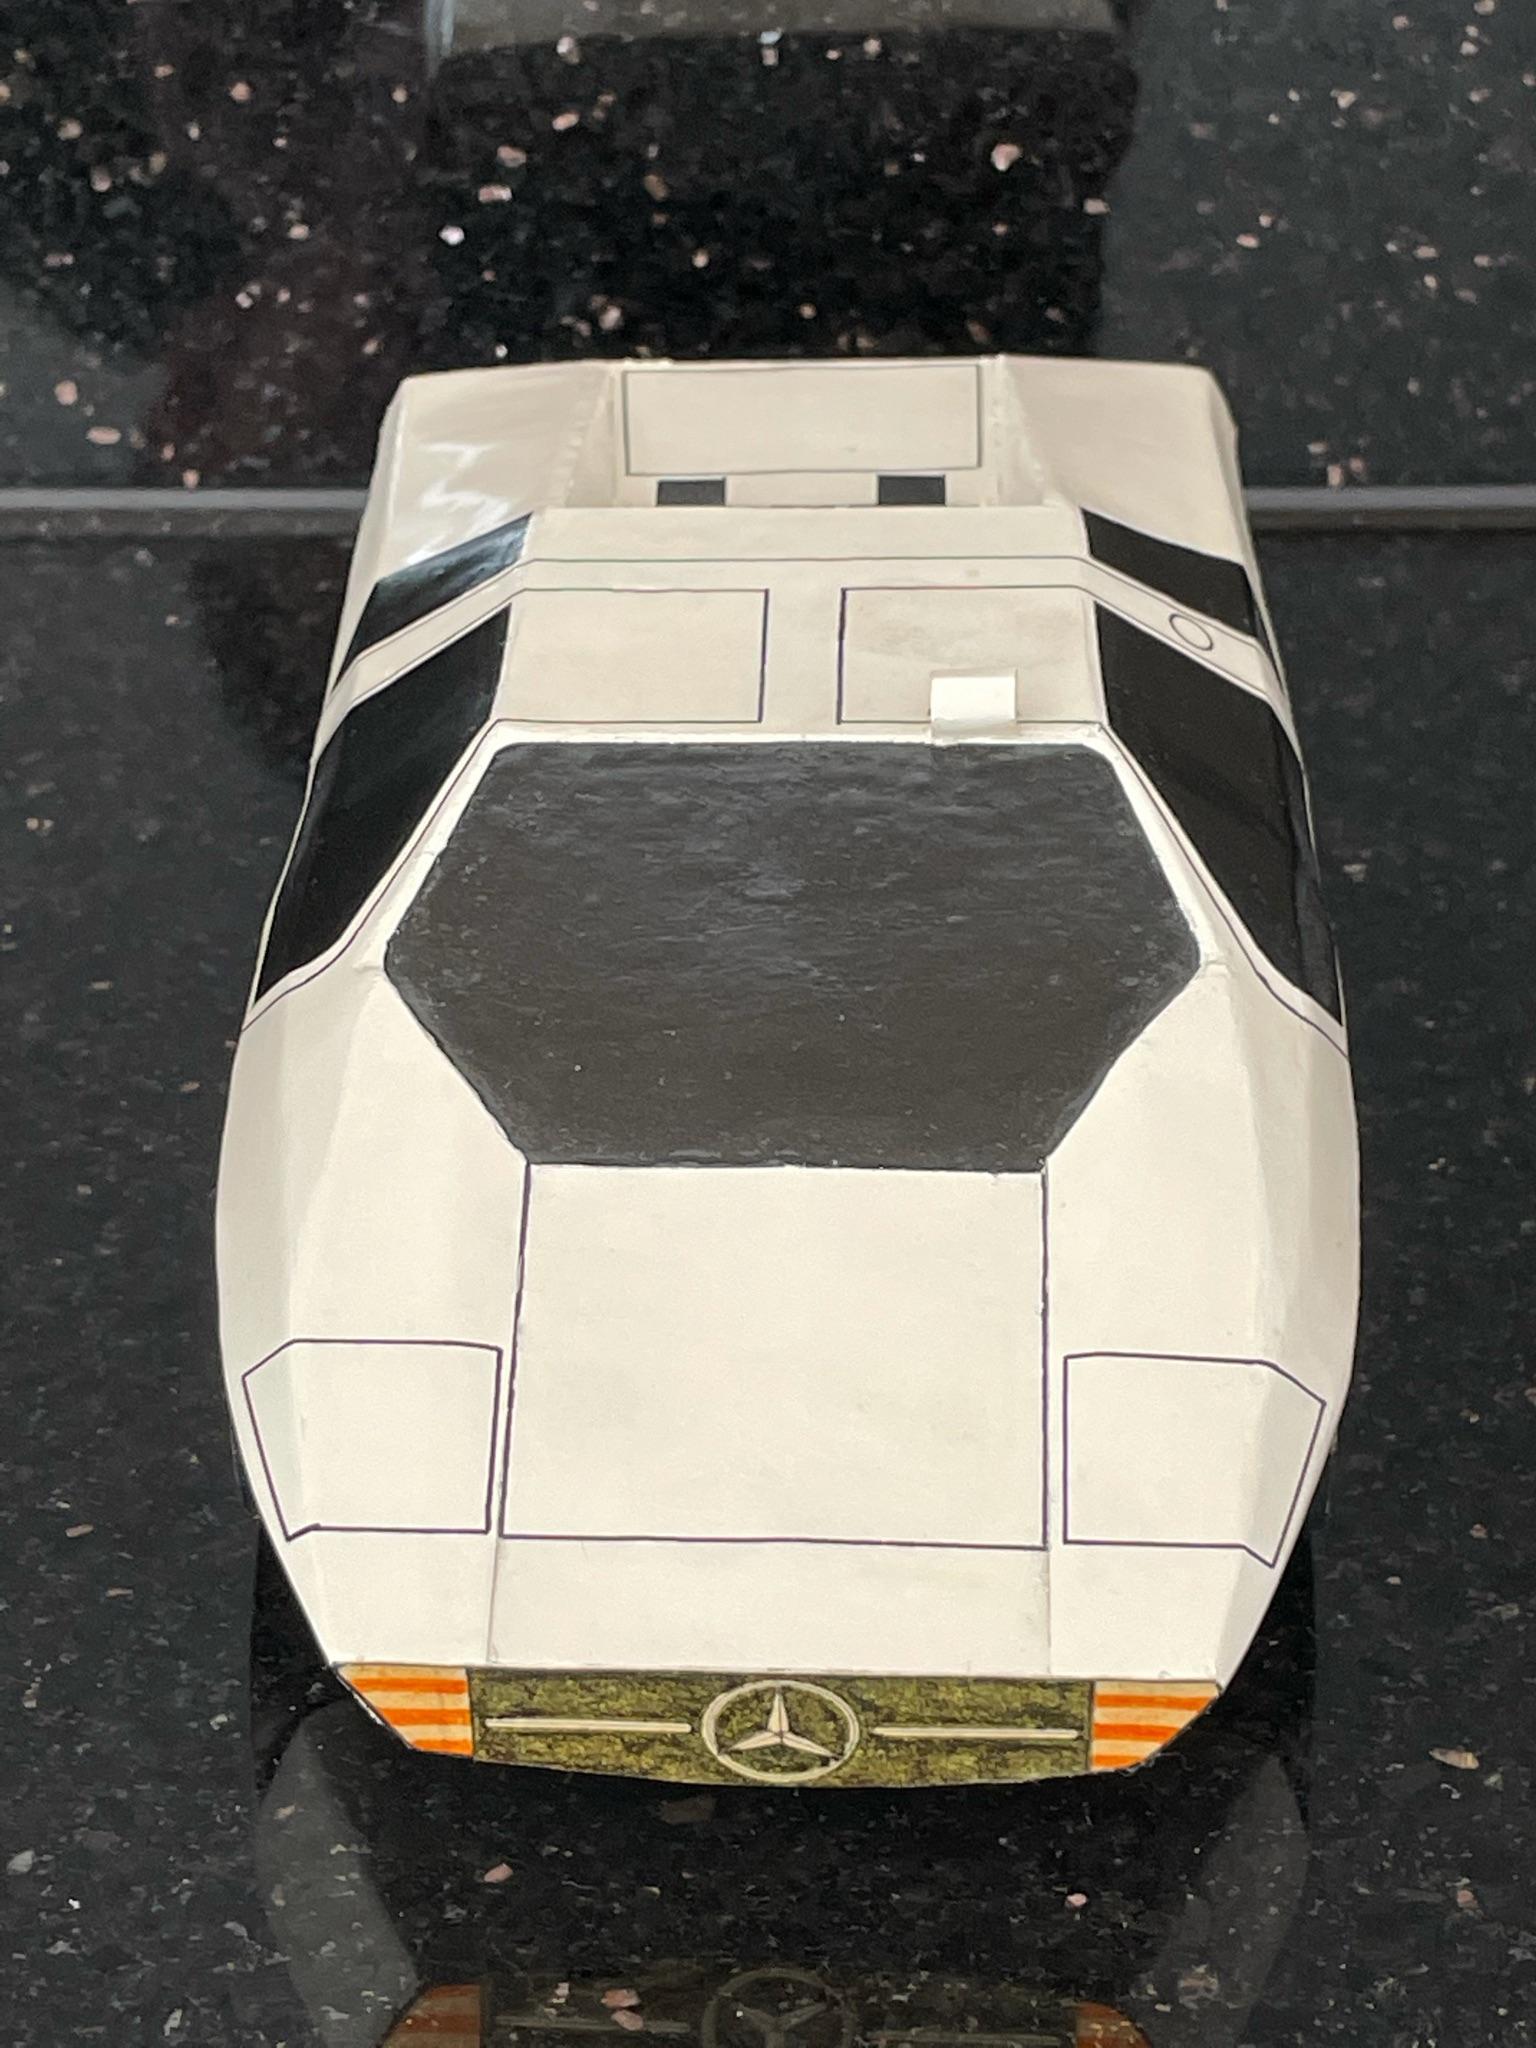
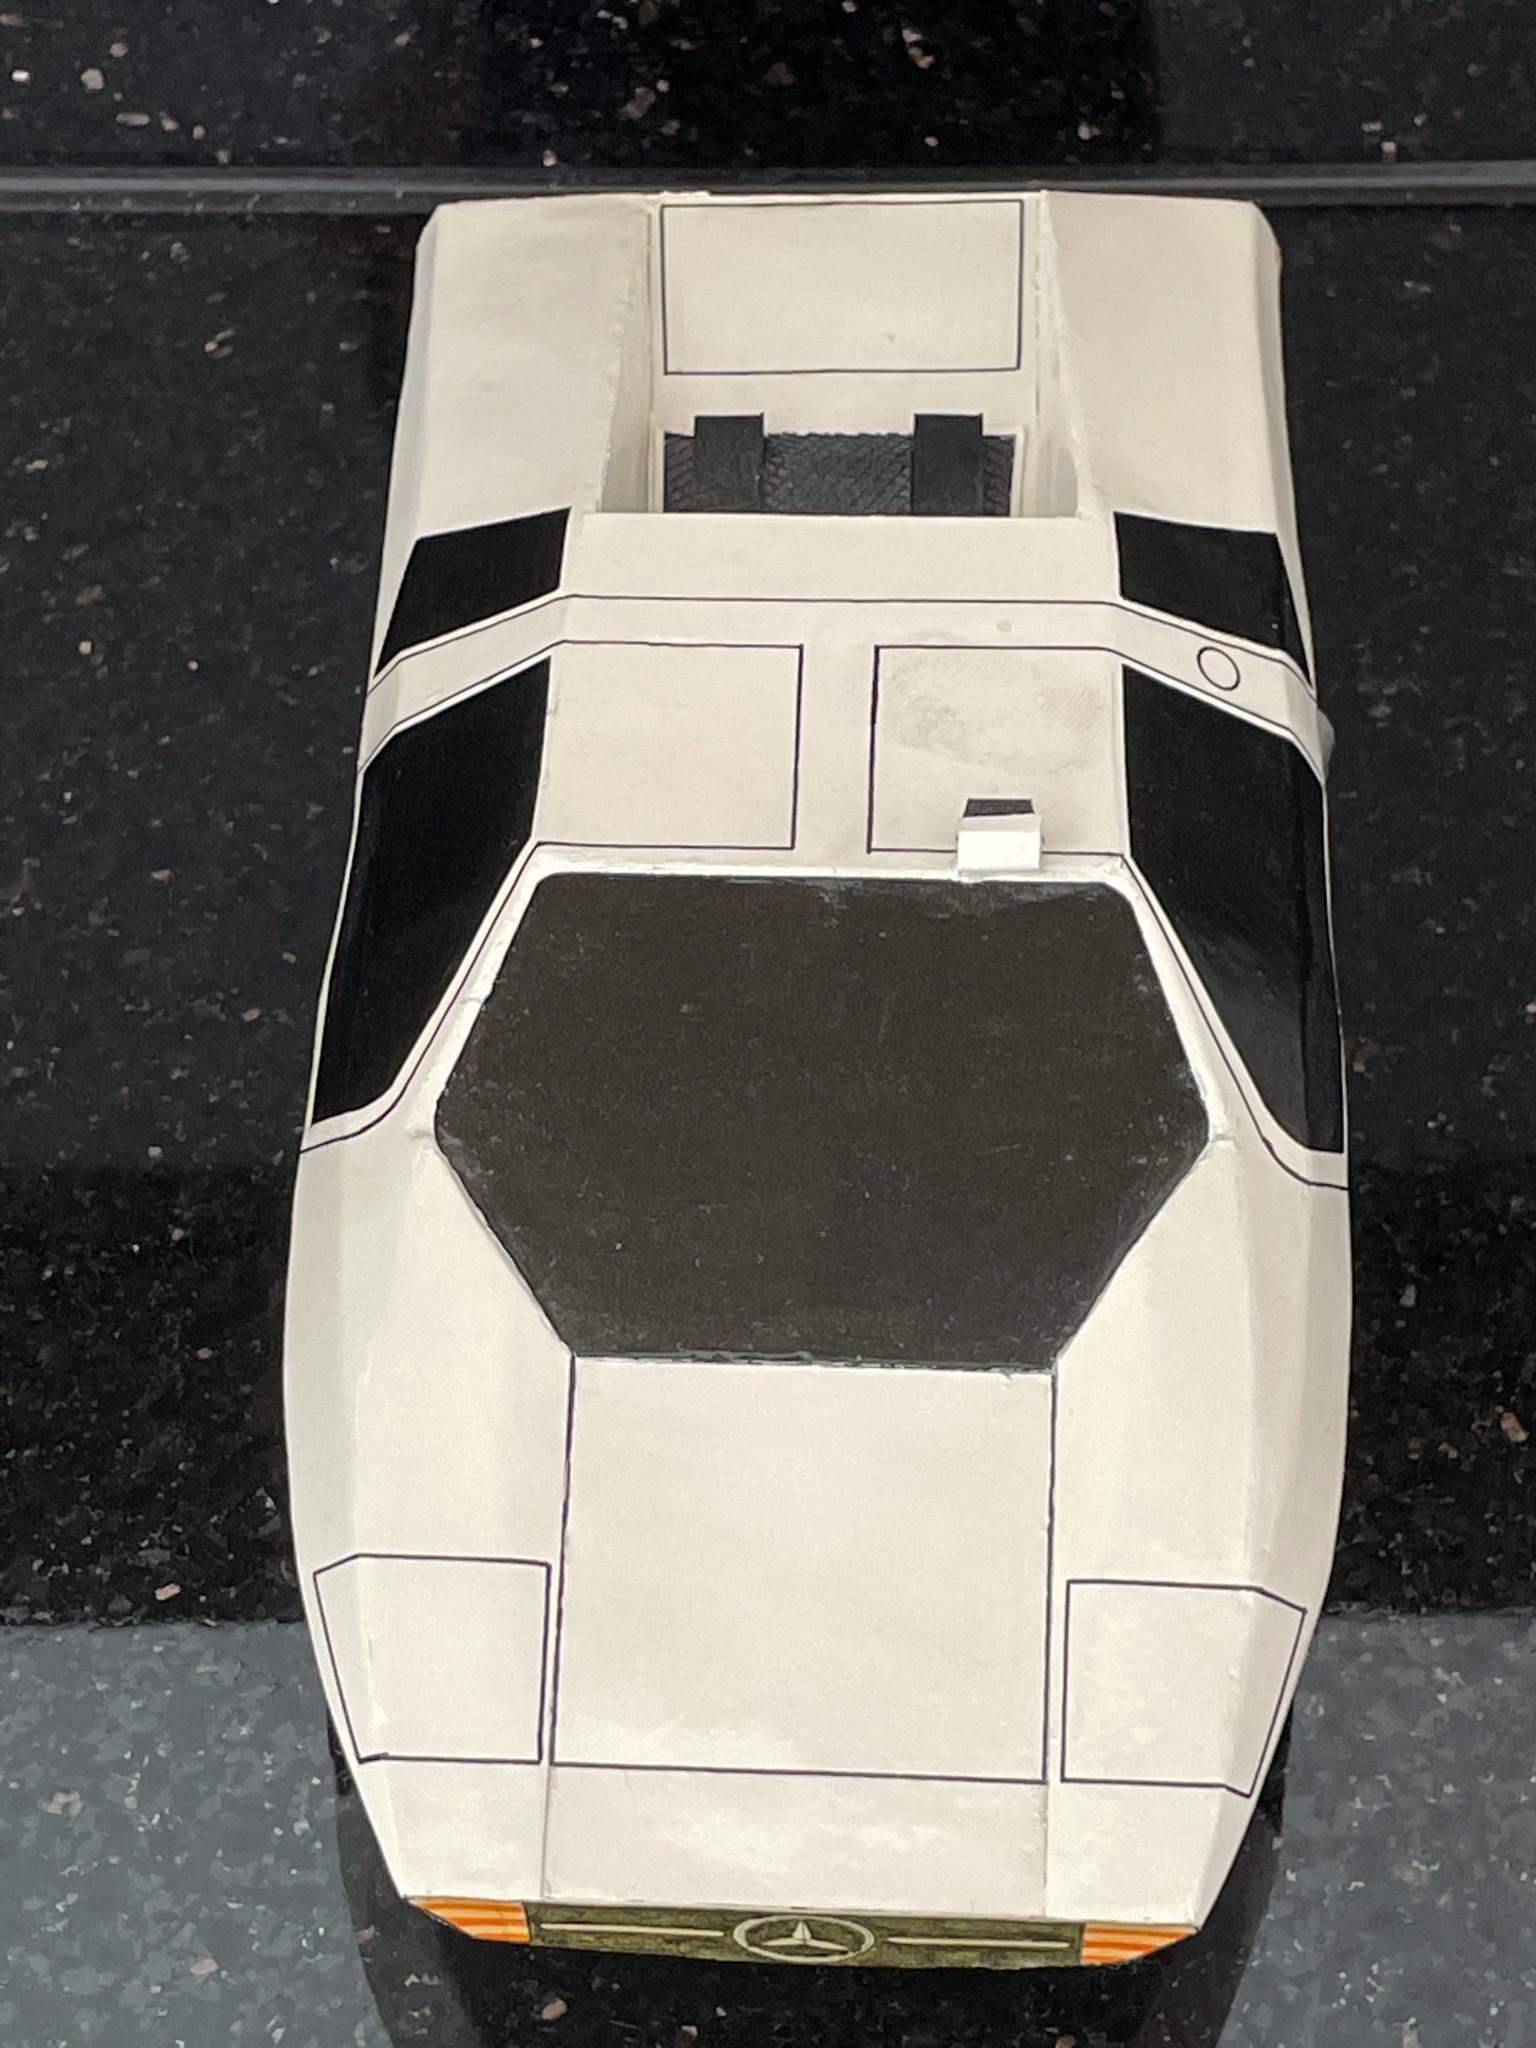
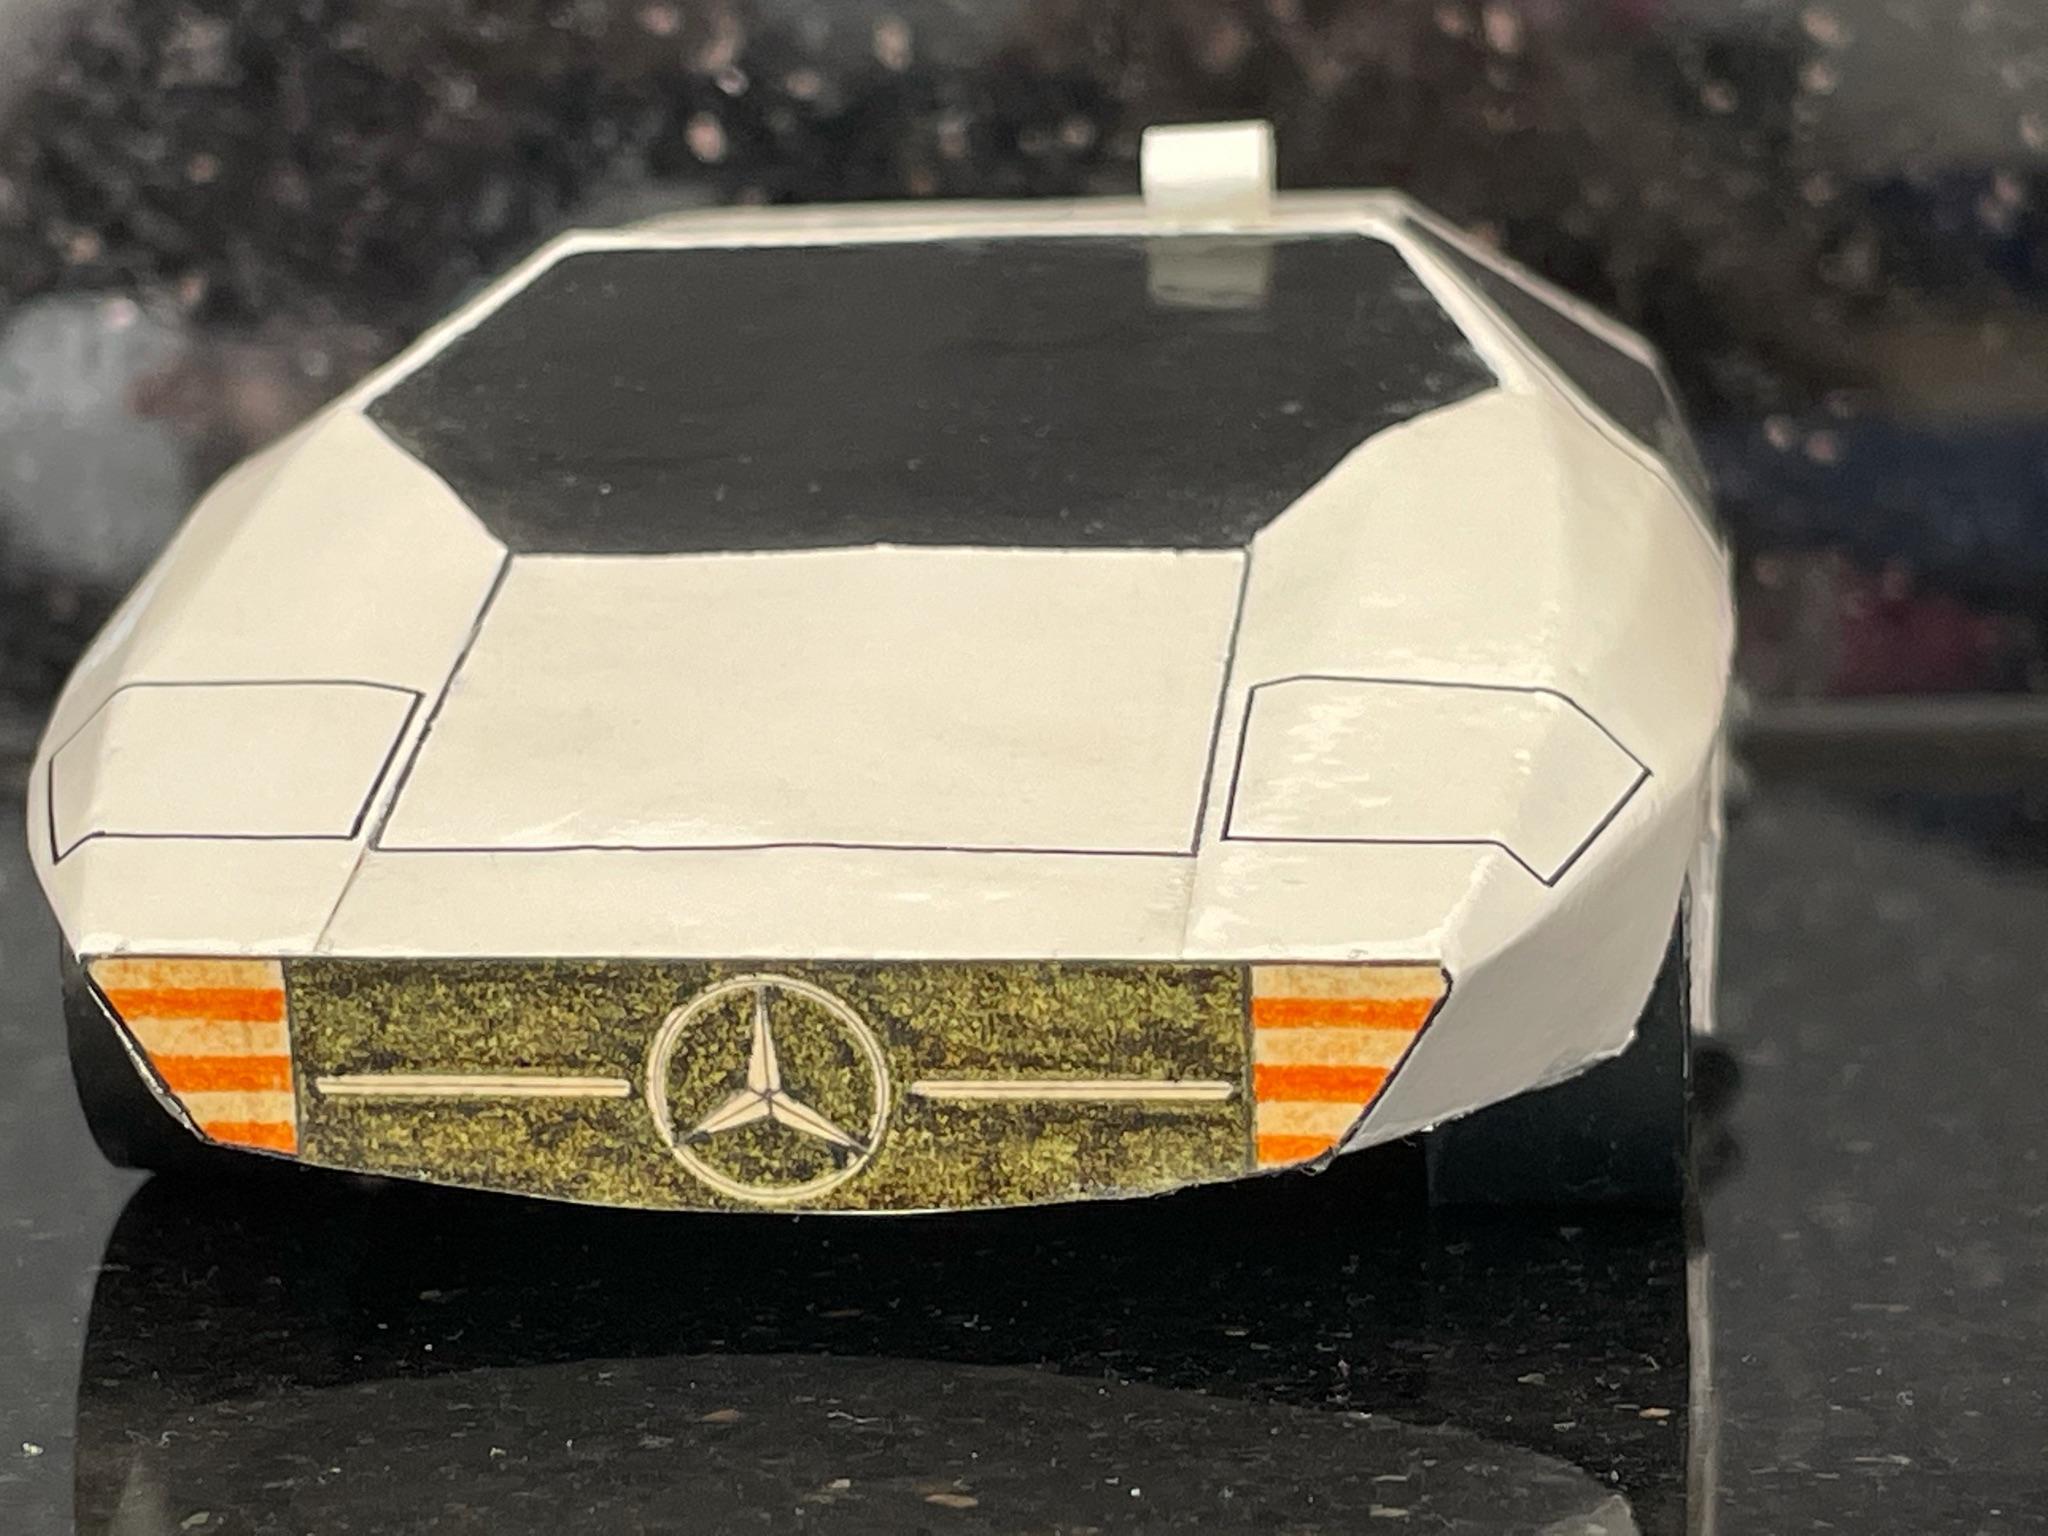
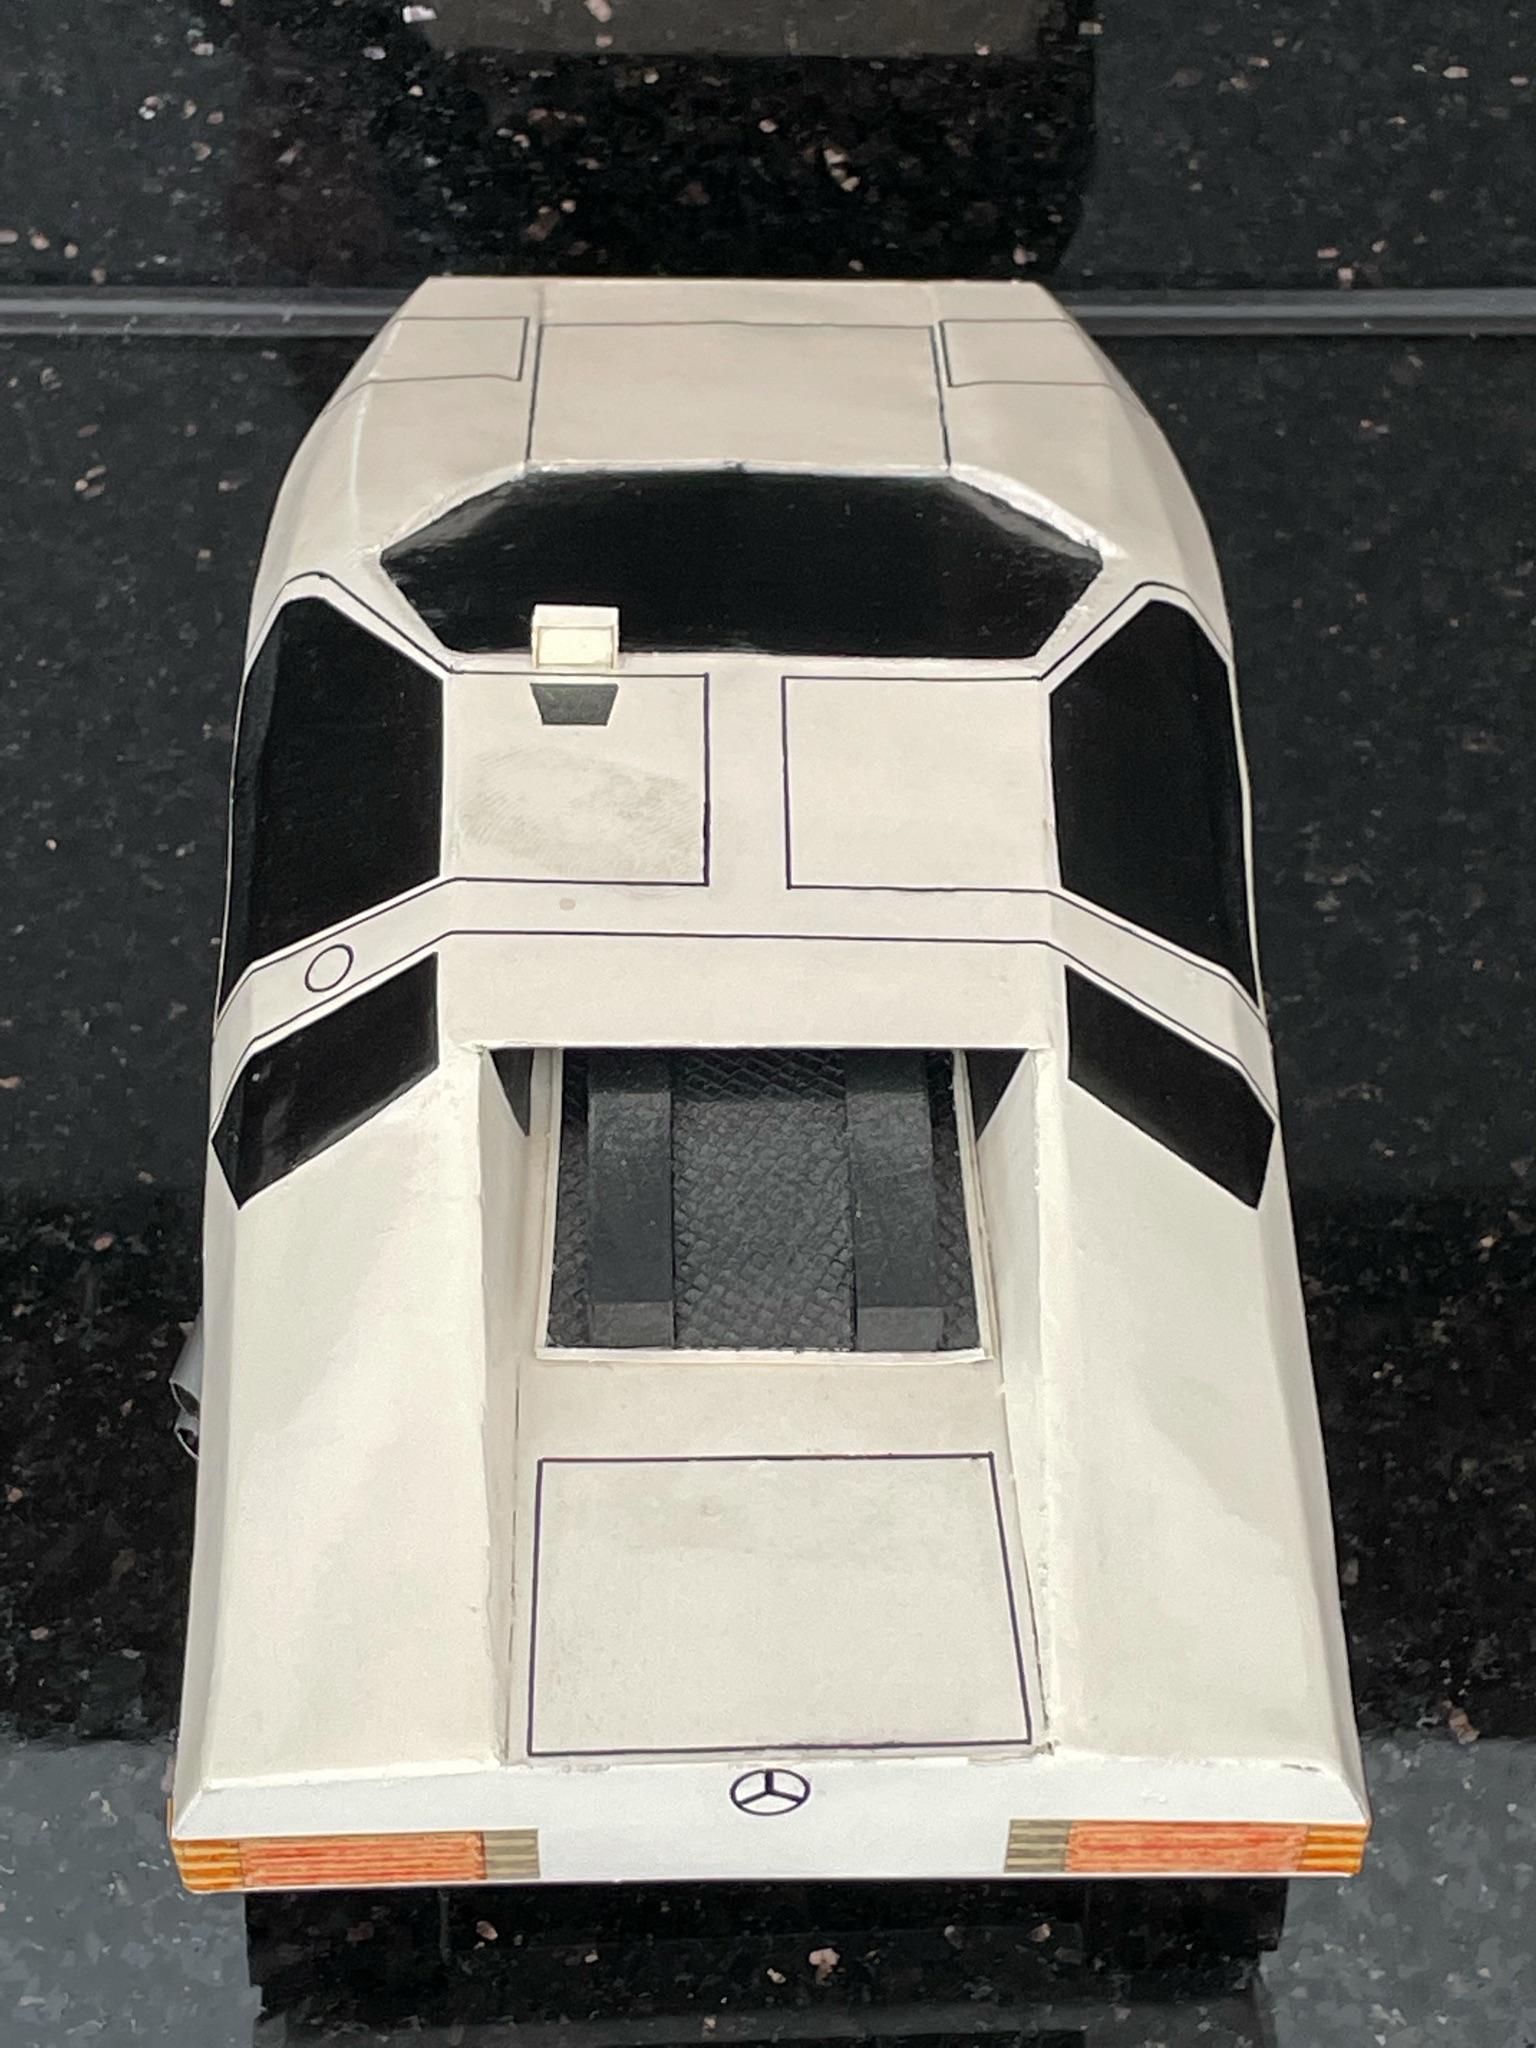
Then I made a cardboard model based on this drawing as a mock-up and to check the proportions. To have a early success, I painted and detailed this model to make it look like a CW311:

-
Hello,
I found this thread by chance and I can imagine how many hours and work went into this kit..
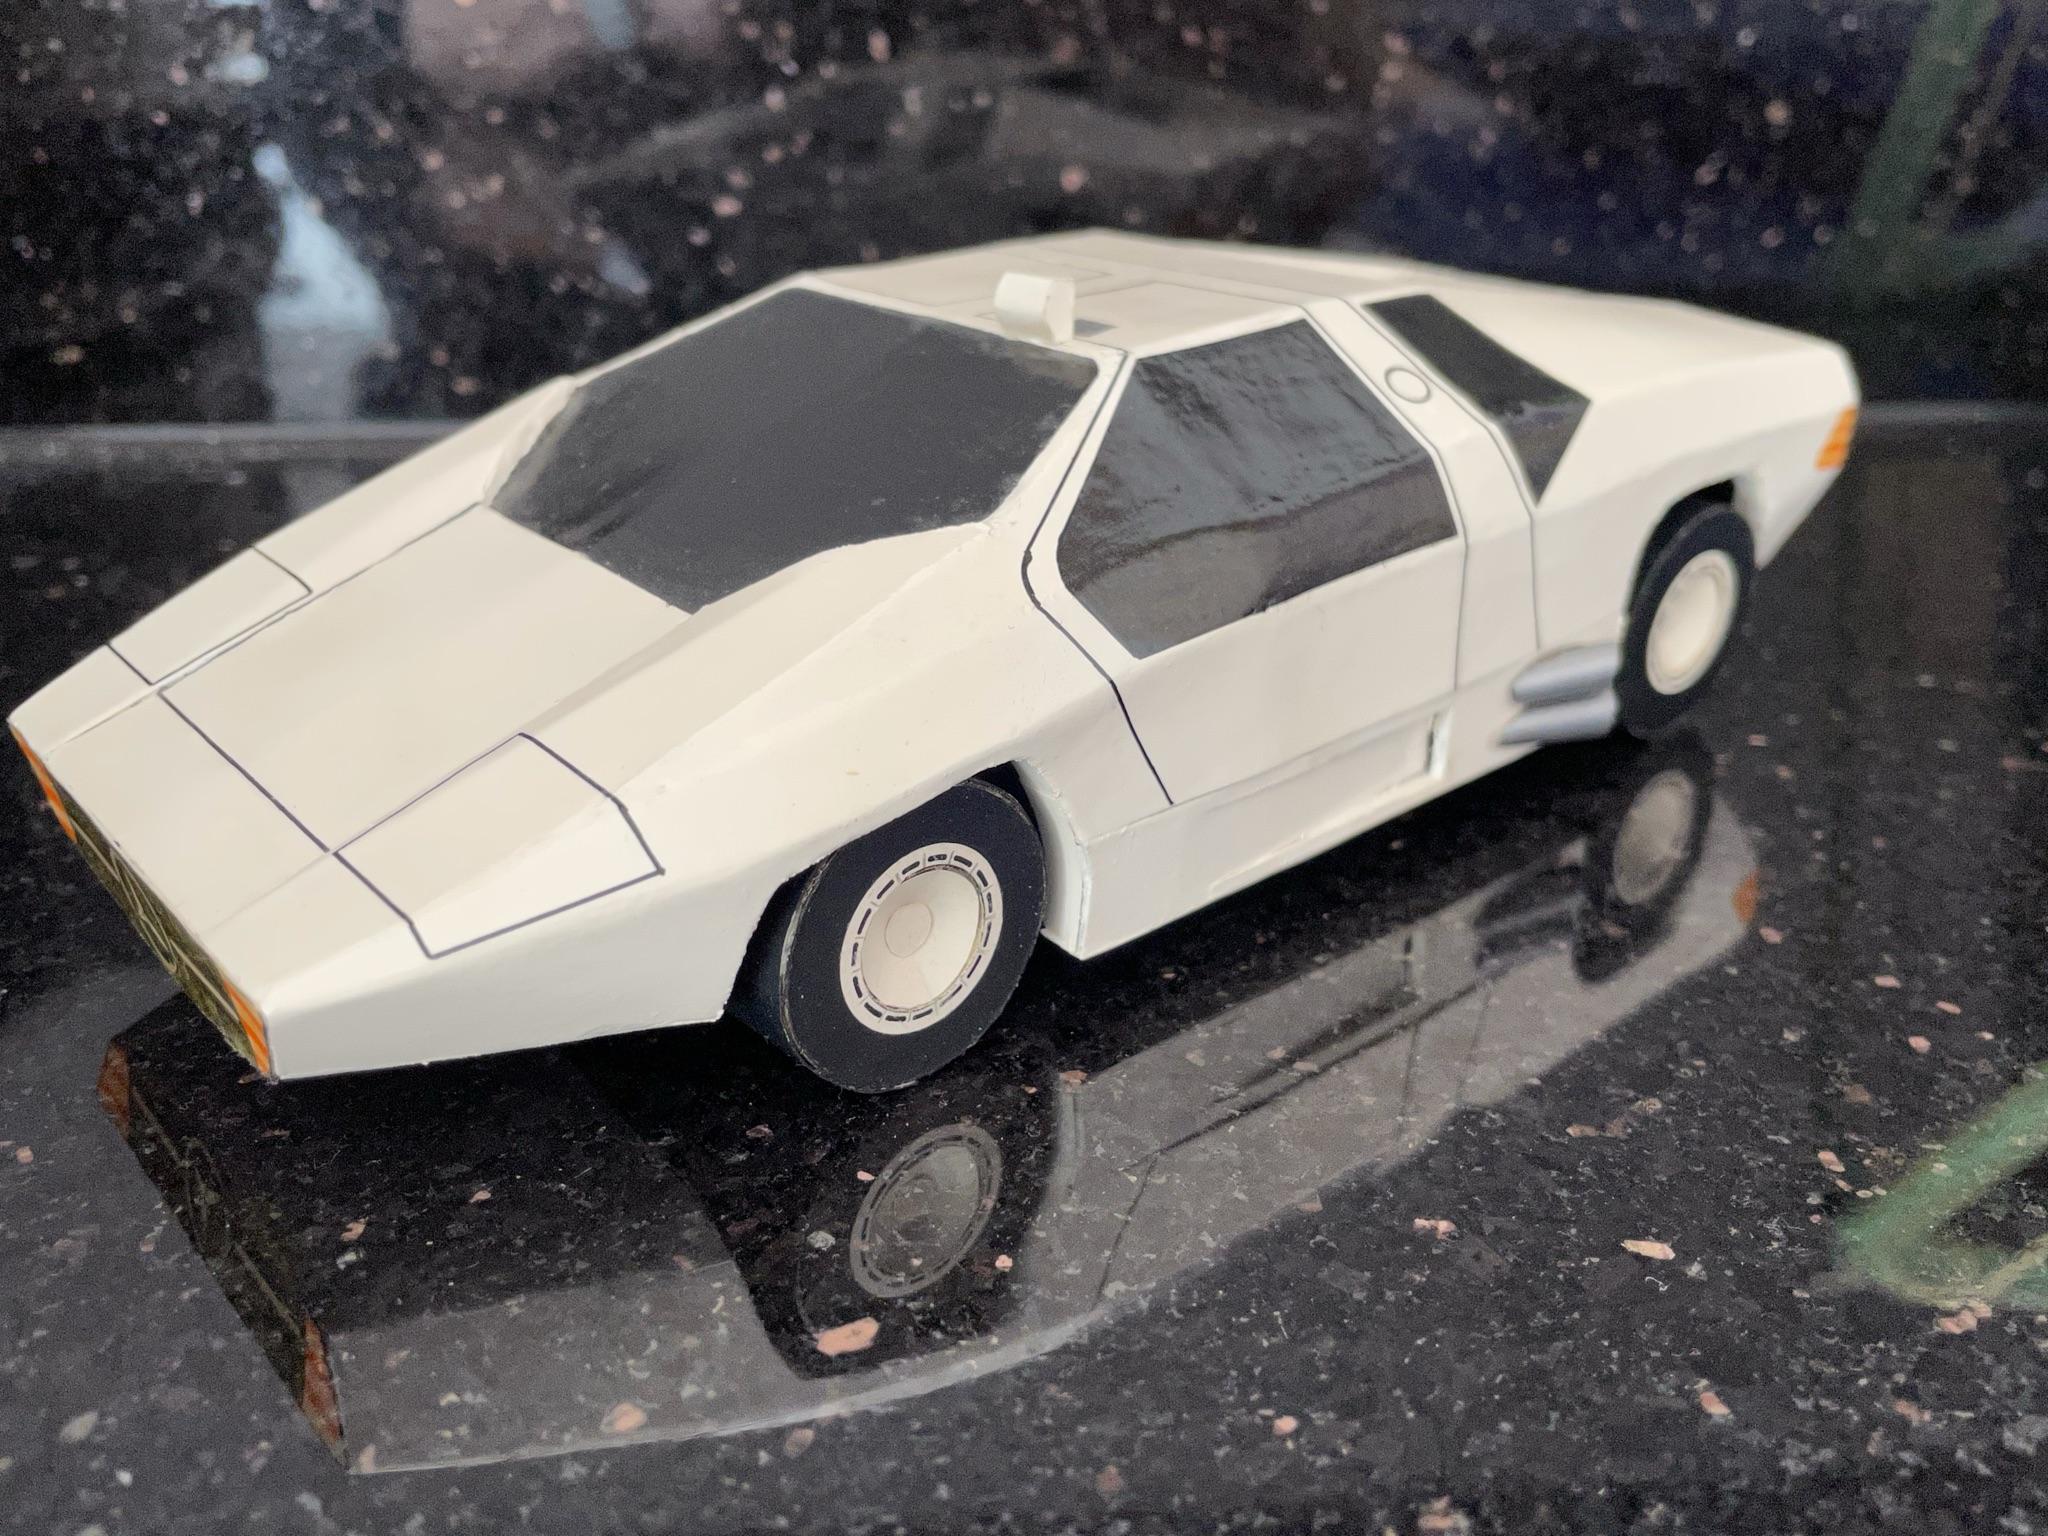
I built this model a few years ago. The only modification/ addition I made is the soft top cover.
Your built is amazing!
Greetings from Germany
Erich
-
 1
1
-
-
-
10 hours ago, Dann Tier said:19 hours ago, capricorn71 said:
...Wait!! -is this what you carved out of that wood??!!
Hello Dann,
that is the cardboard model I made with the same sections I used for the wood model I made afterwards.
It was meant to check the proportions. There are a view errors I would have corrected in the wood model.
BR
Erich
-
10 hours ago, Dann Tier said:
were you gonna make a buck out of the wood eventually?, and is that seat covered in real leather?
Hello Dann,
the wood really could be used to do a sculpture. Good idea.
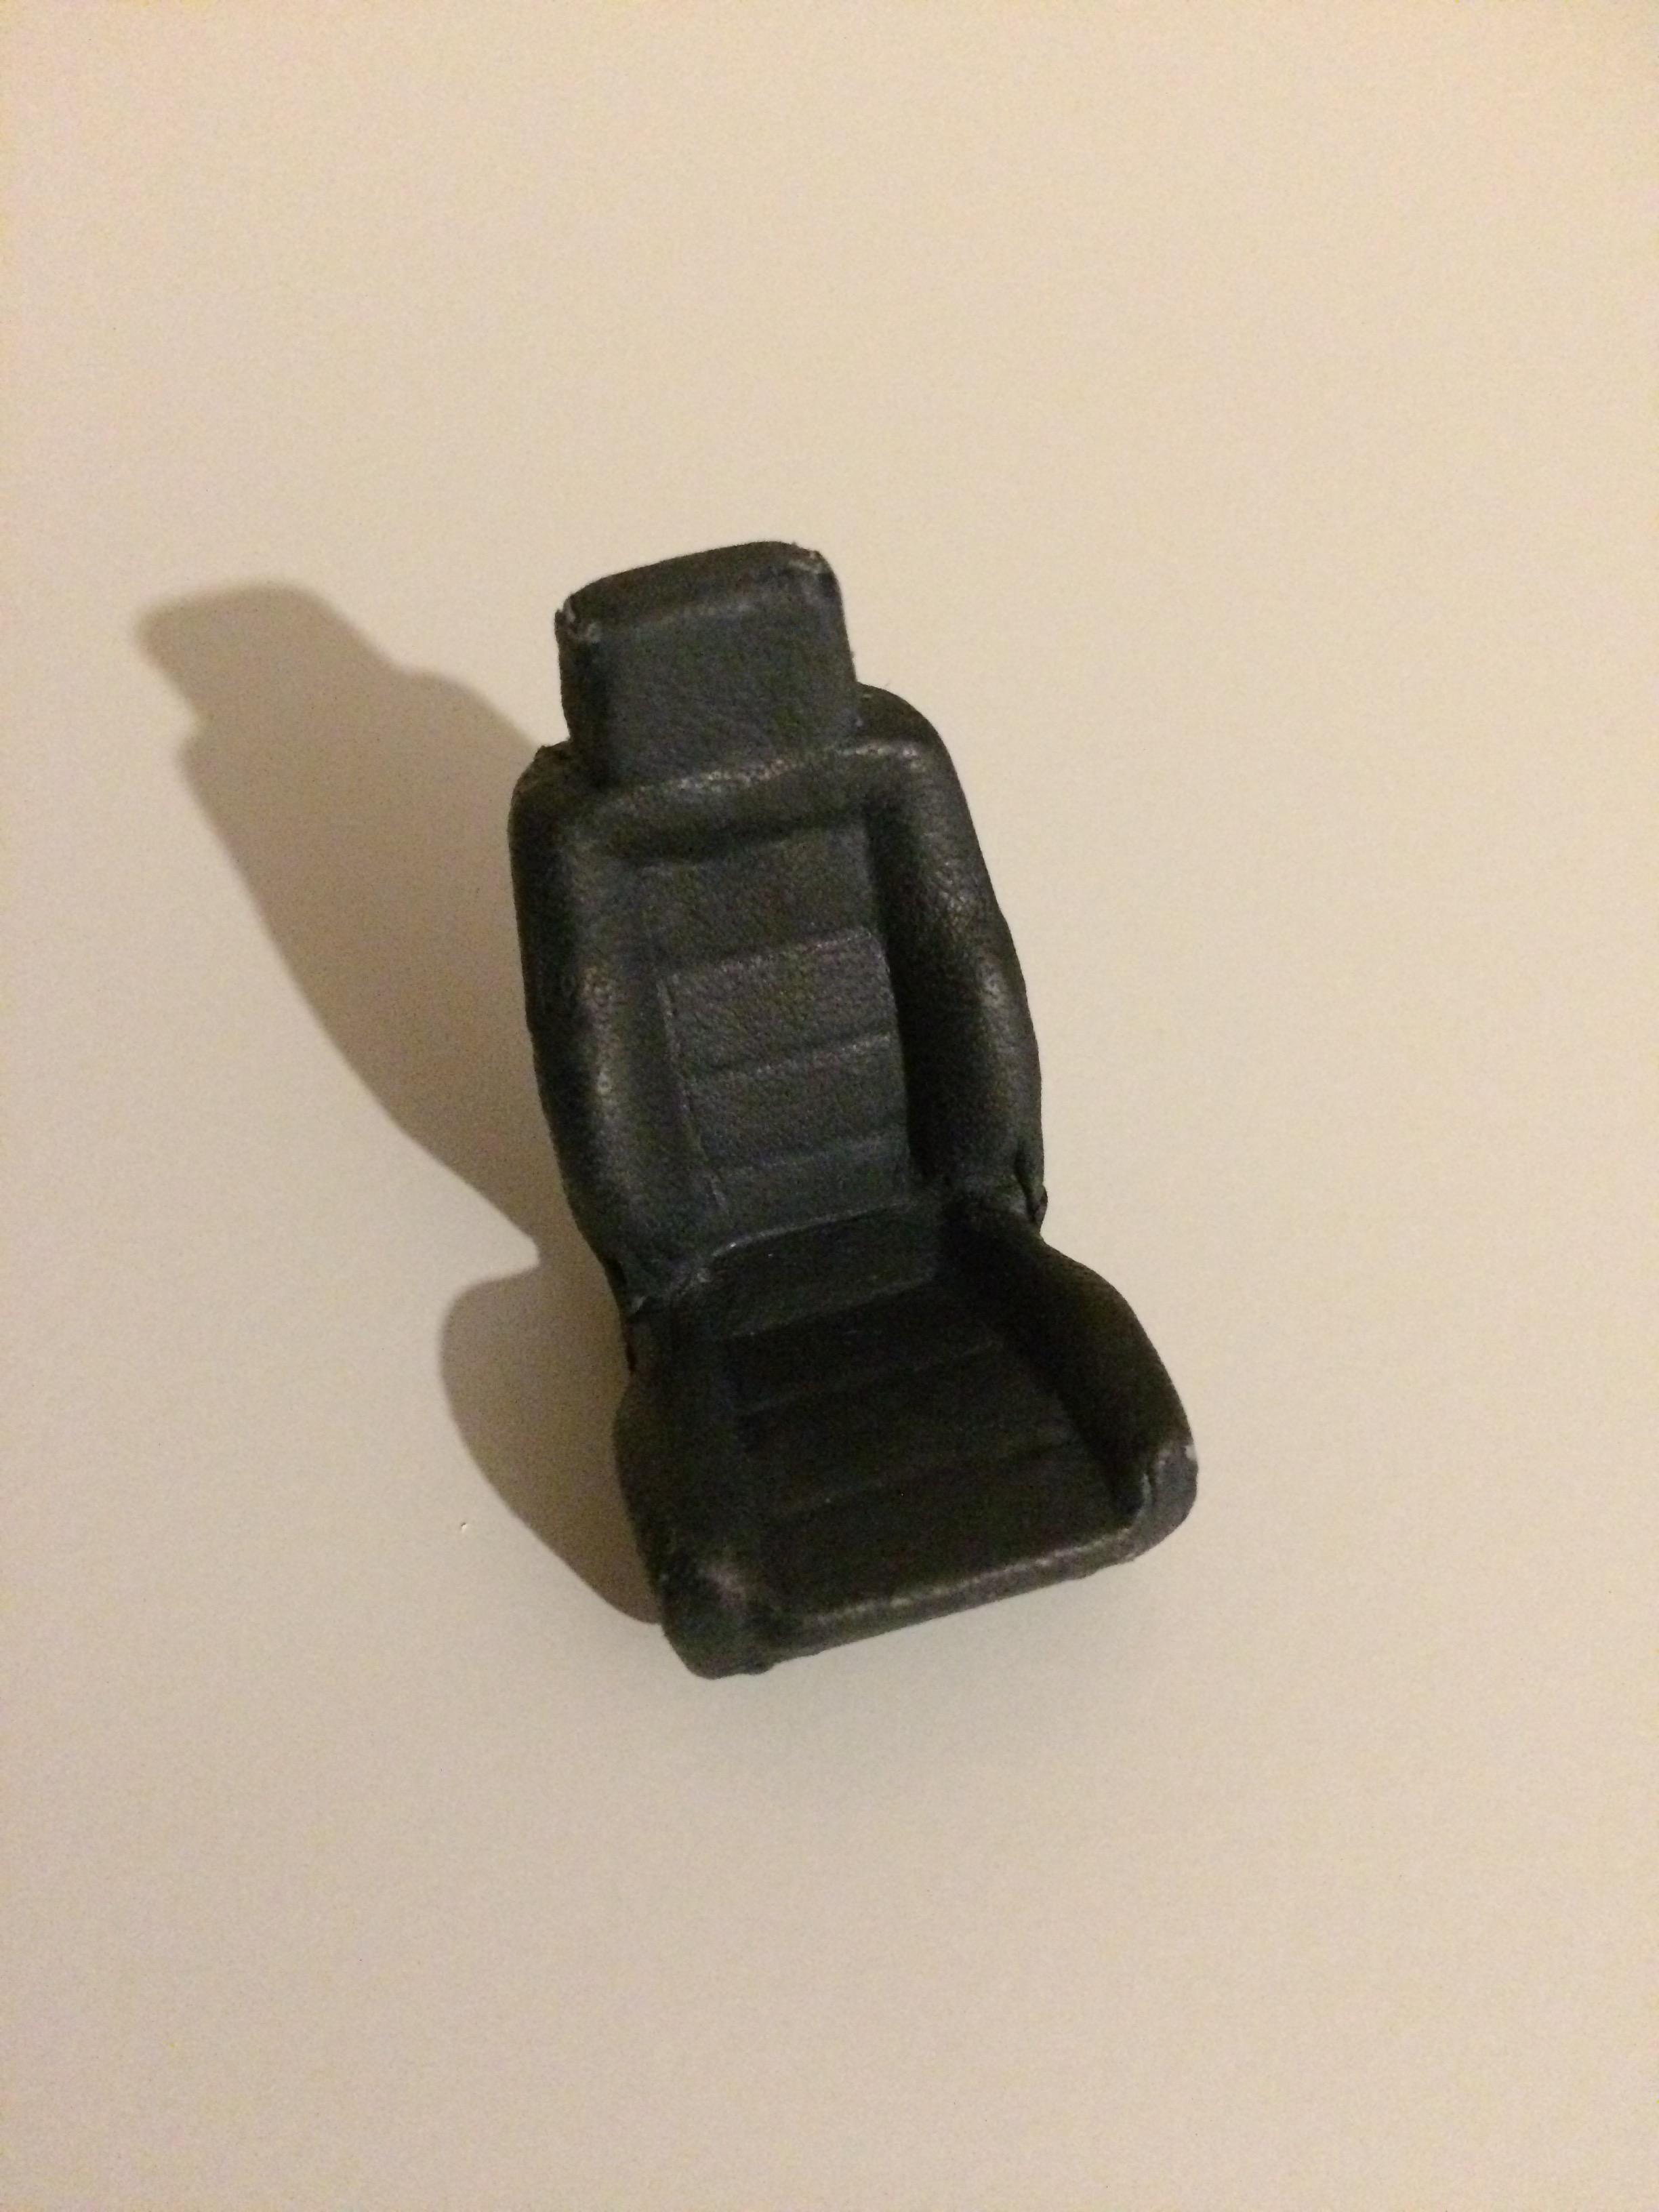
Yes the seat is covered in real leather. Bought it in a dedicated modelcar shop in Munich 20 years ago.
BR
Erich
-
Hello Dann,
what a fantastic work. You are totally crazy- Must be your age ( I am year 71 btw)
Best regards from Germany
Erich
-
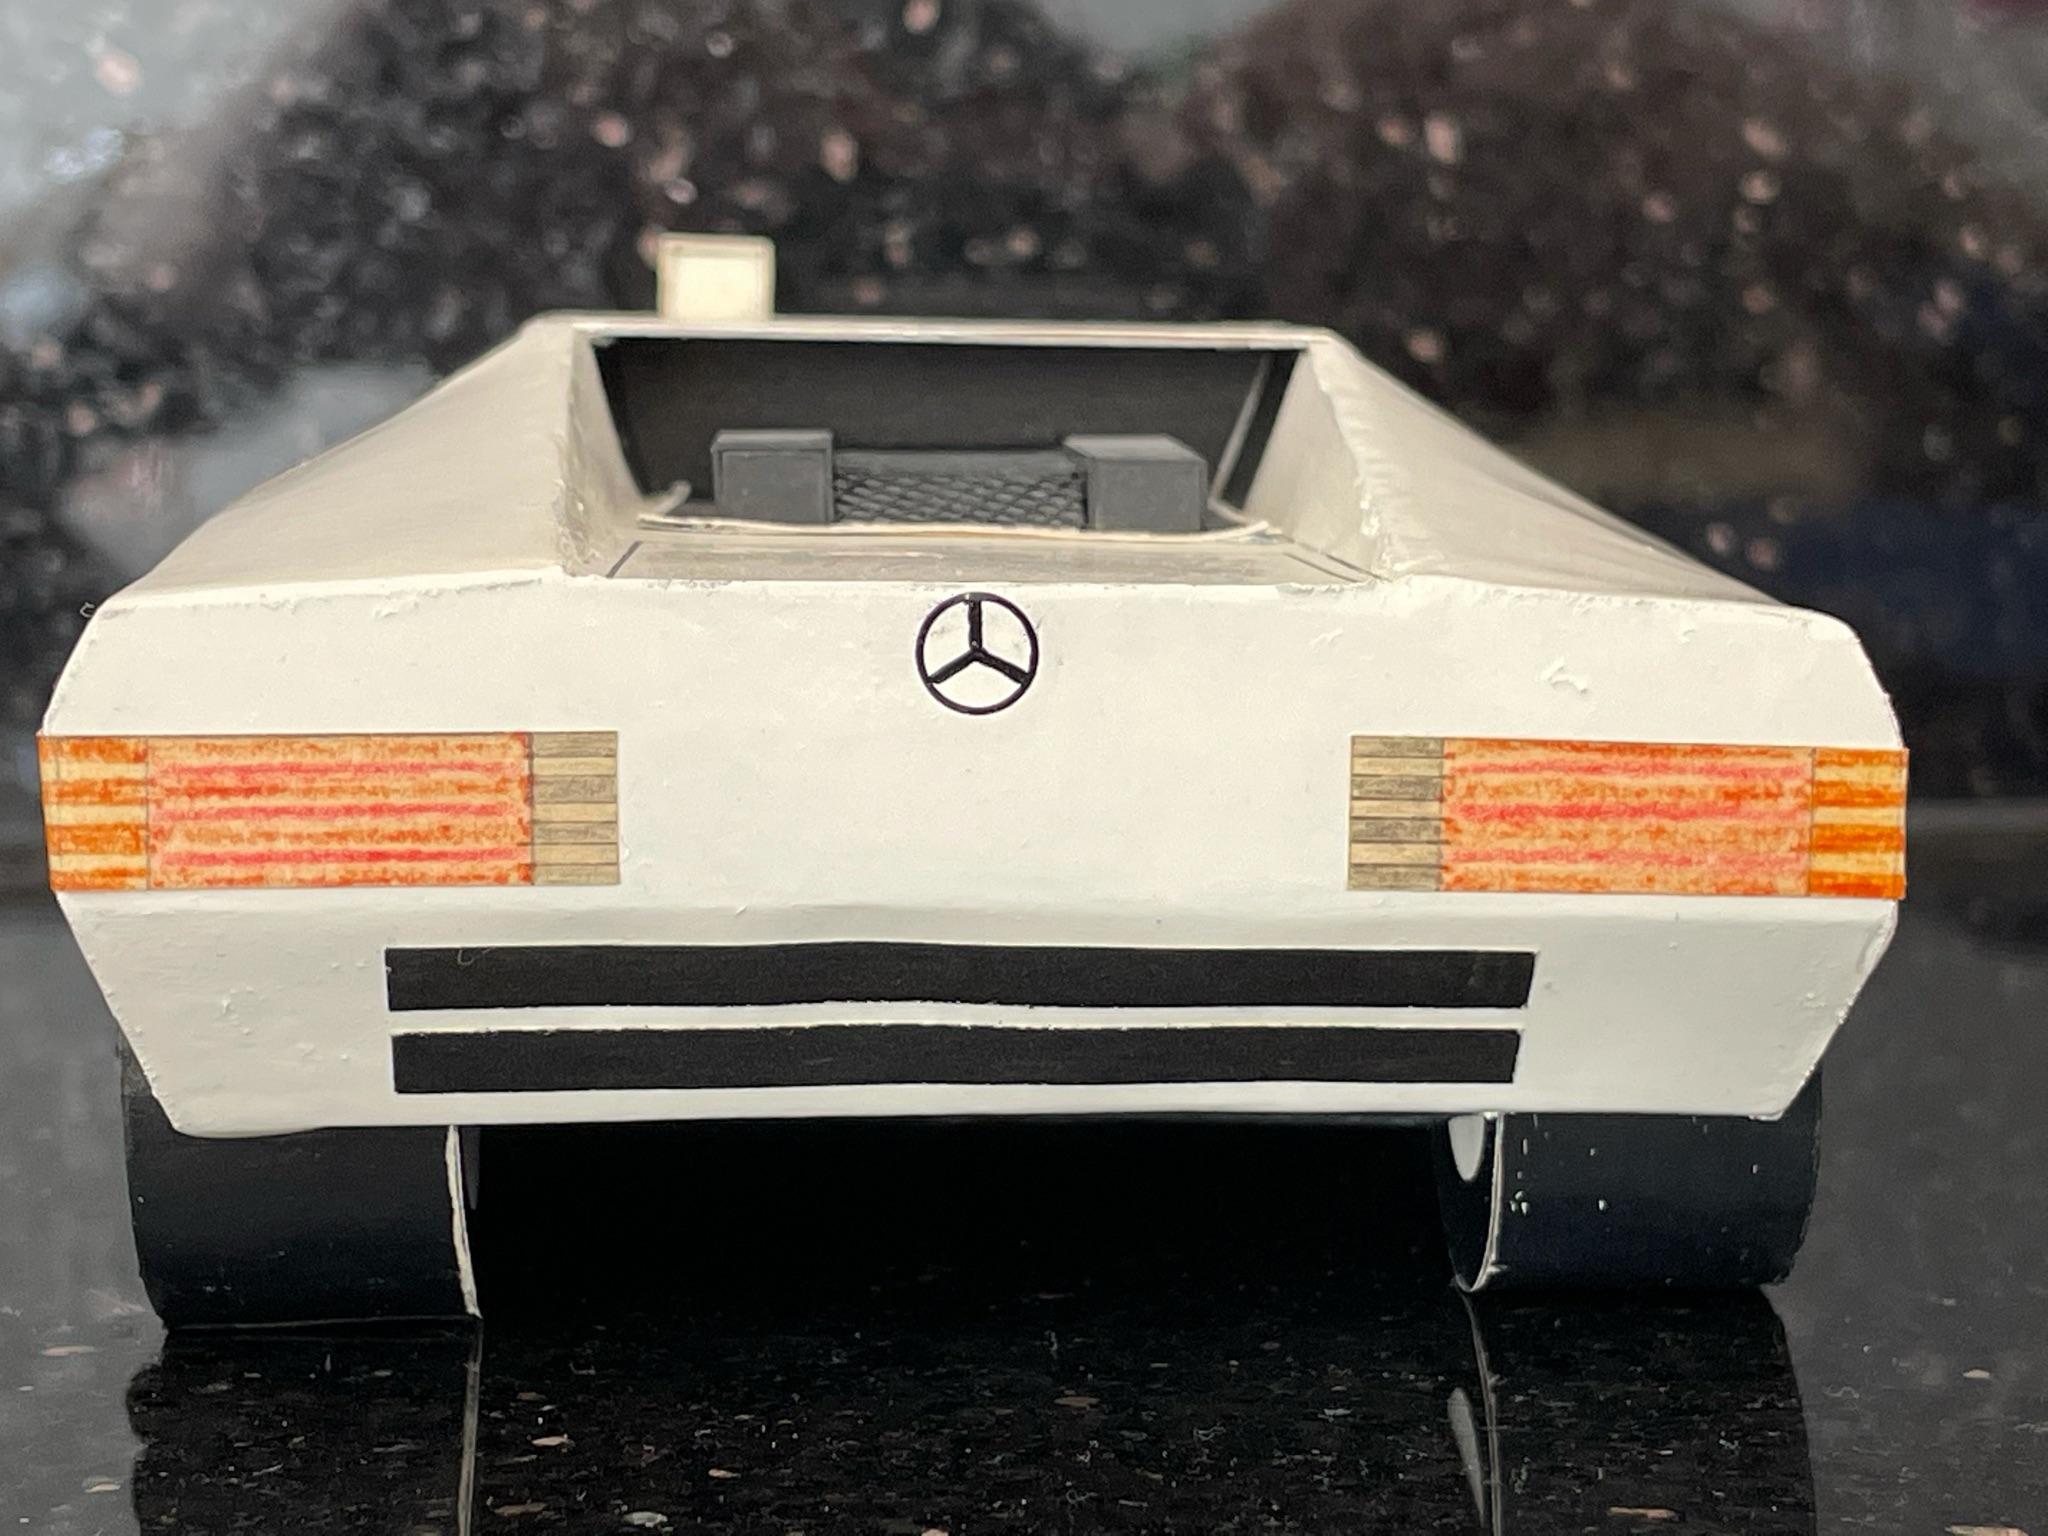
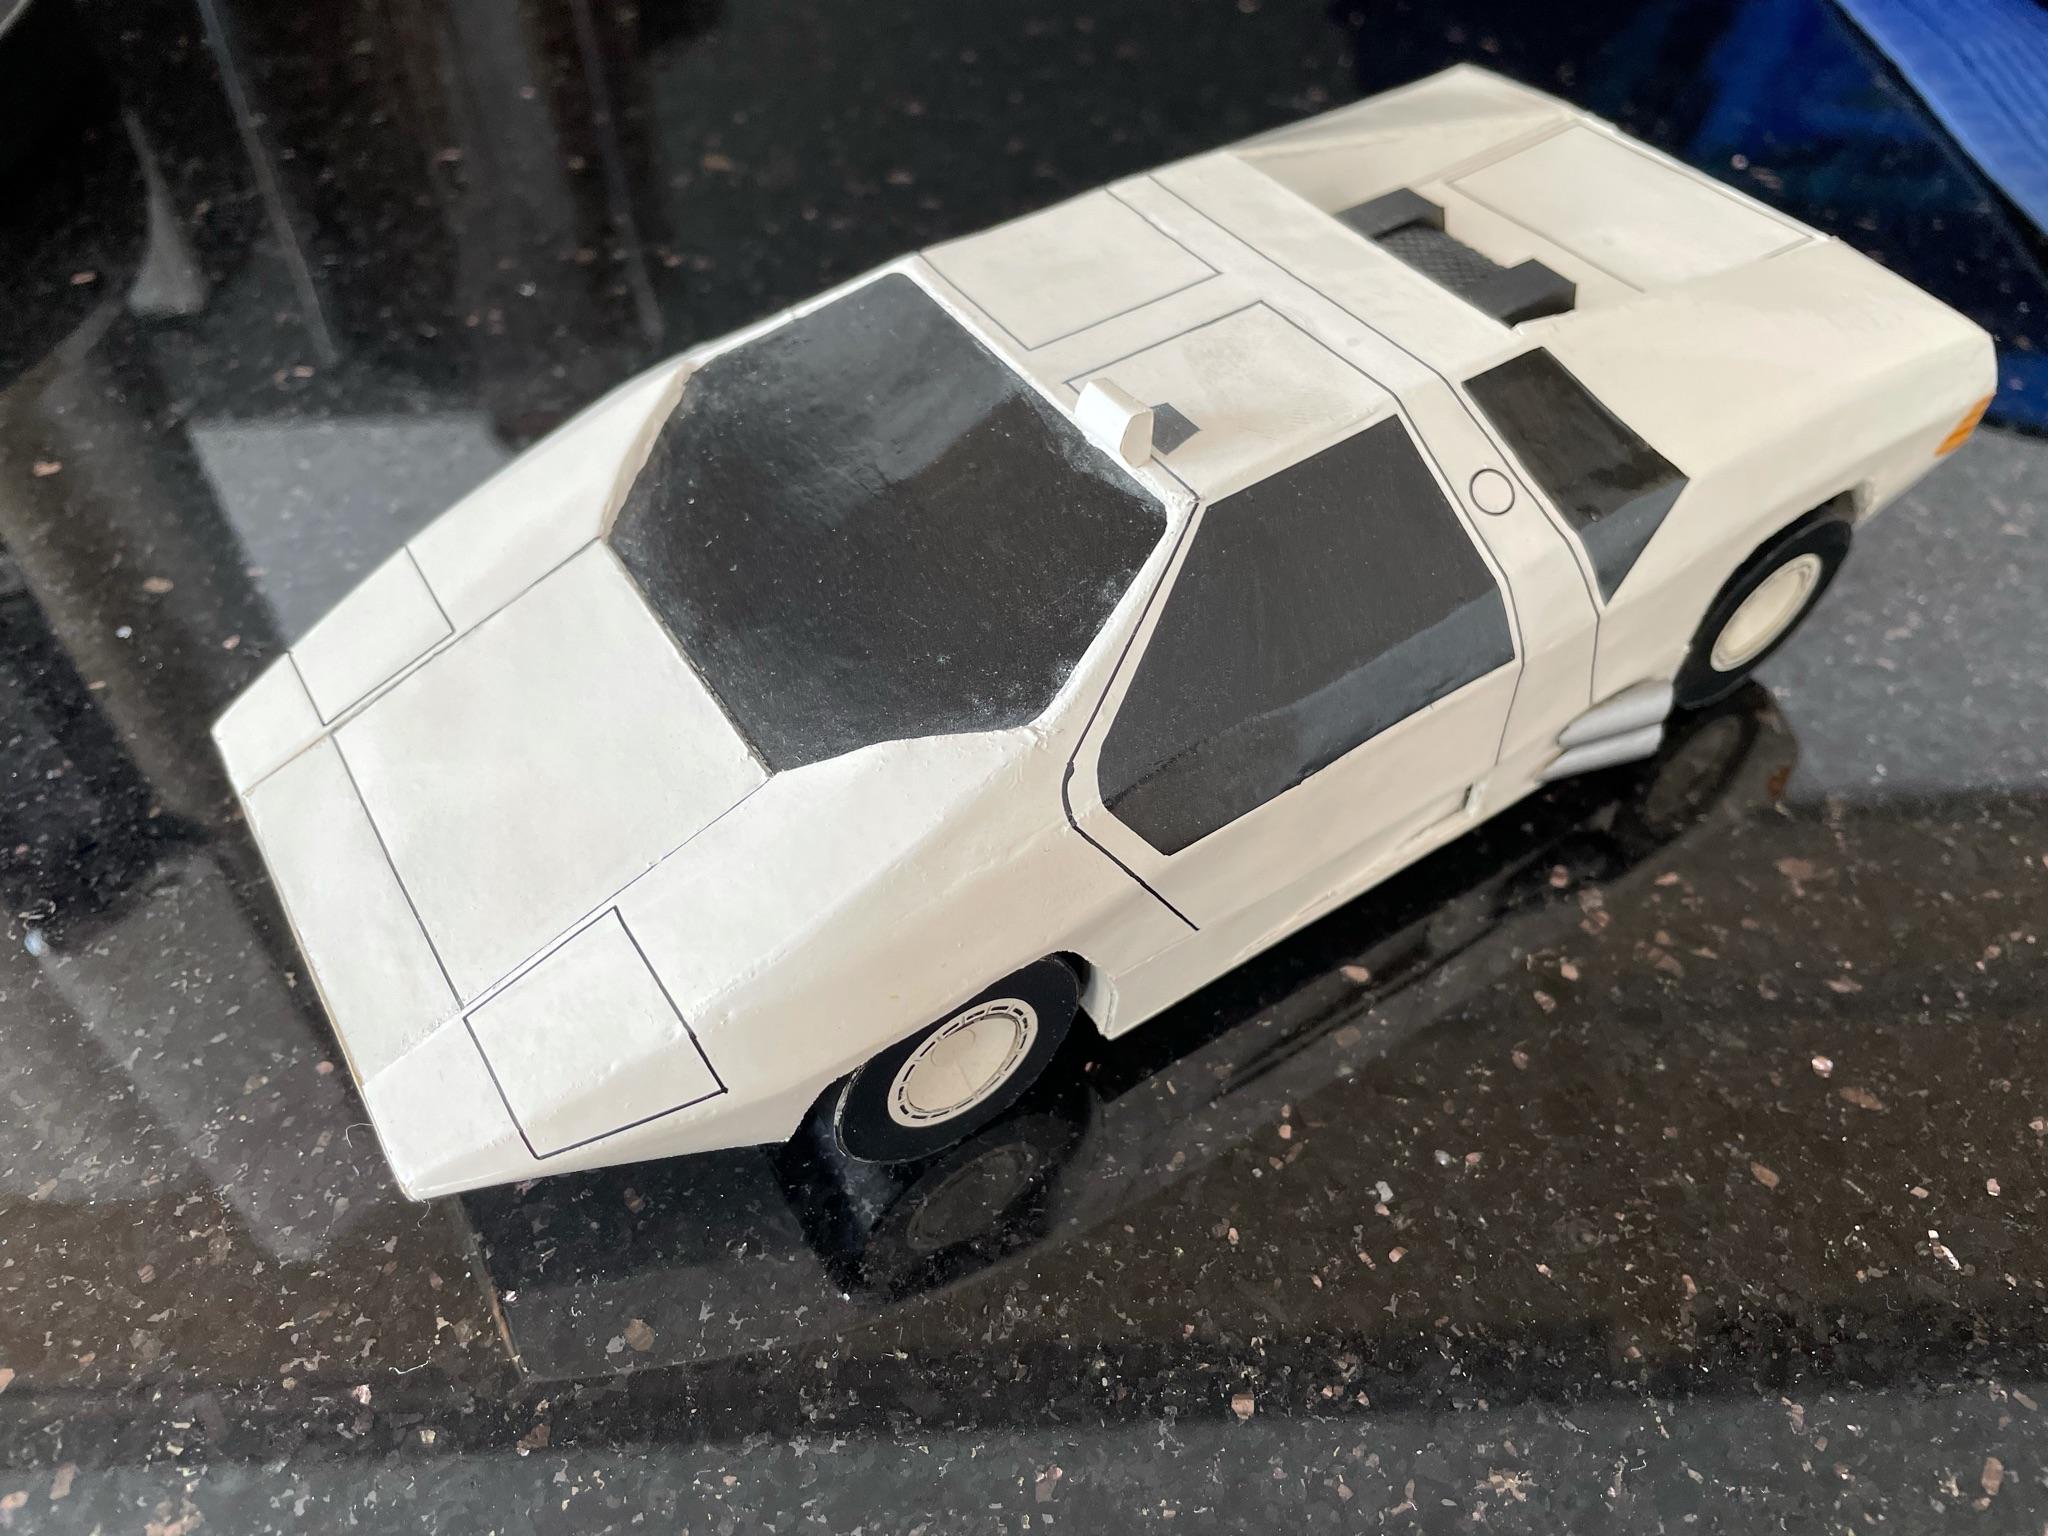
Hello everybody,
after one year in a moving box my CW311 is finally released and back in the display cabinet.
So I could do some better photos.
-
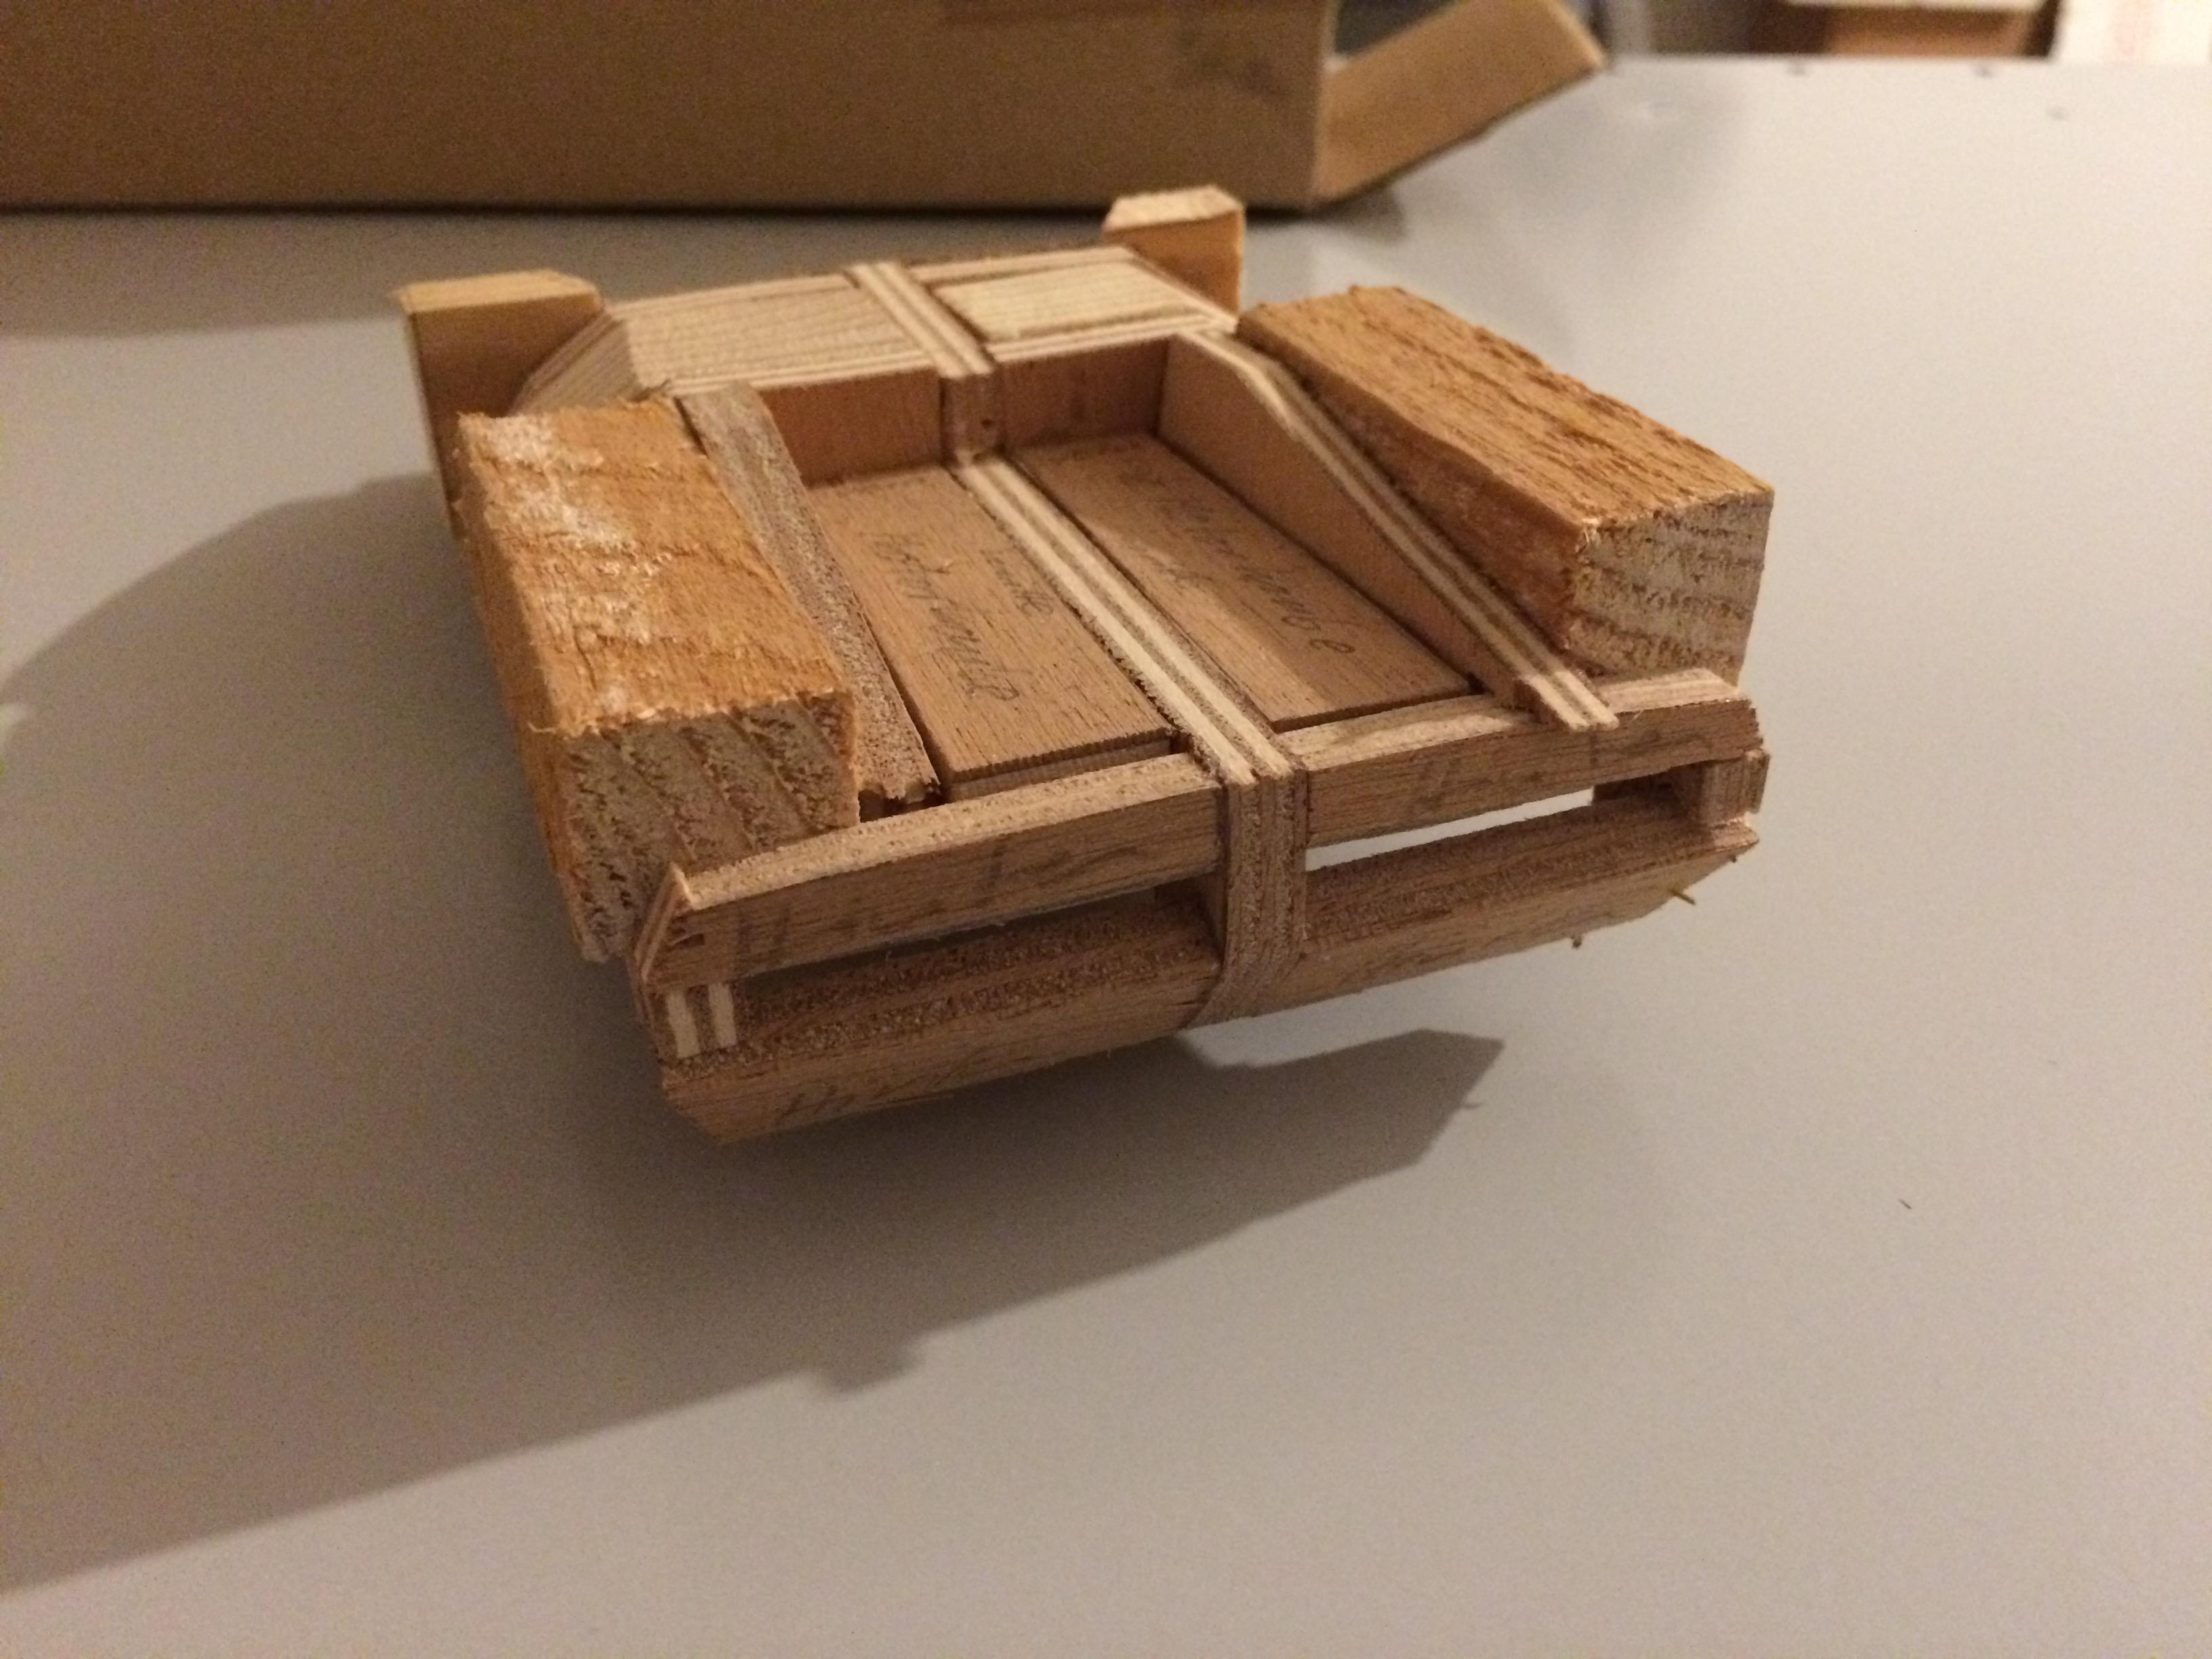
Yesterday I foundt the box with the parts I did for this project more than 20 years ago.
Take a look:
-
On 11/1/2020 at 4:20 PM, AmericanMuscleFan said:
It's so true Dann! 3D printing is such a fantastic technologie and the potential is endless (we do have a good example here of what can be done by a very talented designer like Erich). I was dealing with the idea of jumping on this side of the fence but the rendering is still not at the level that I would like (for 1/25 scale parts) at least without spending the big price for the most accurate 3D printer (SLA, SLS or FDM) on the market. I hope I'm wrong but I would like someone to prove me wrong...
By the way, impressive job done by both of you guys!!!
Thank you Francis.
My parts are done by a high end SLA printer. And as you can see even this parts have visible layers.
Vg
Erich
-
On 11/1/2020 at 11:20 AM, Dann Tier said:
LOL... i bet as long as you klean up afterwards she would be cool with it!...In a way, you have finished the model, since you started it from design to tangible reality...Its gonna be BEAUTIFUL as long as you can effectively sand away all the layer marks. So many 3D parts i've seen dont get finished properly, and i ask myself; "whats the point of all that realistic detail, if you can still see all the Unrealistic layers?" I guess what i'm saying is the obvious -you made this FANTASTIC...one of a kind car/model, please take your time to sand it, and turn it into a Complete Masterpiece -it will be BRILLIANT!!!! Ich lieben Duetschland!!
Dann, as you know from my very first post it‘s a long time ago since I started with this project. So I hope I will be patient enough to get the surface done properly.
The last time I built a modelcar is around 15 years ago. It was a Tamiya Ferrari 360. Back then I started with painting the body instead with the chassis. On older builds I often lost the patience at the end and the final painting of the body wasn ´ t perfect. So I learned from that.
Grüße aus Deutschland
?? Erich
-
On 10/30/2020 at 12:33 AM, Dann Tier said:
WOW!!!!!, there isnt a word for how impressed i am!!!!.....you should be so proud!!!.......lots of very fragile bits!.....you have ALOT of sanding ahead of you, but this is gonna be epic!!!! SEHR WUNDERBAR!!!!!!!!!!!!!!!!!!!
Thank you so much Dann!
When I started to do the model by CAD I didn‘t know if it really works well - although I use this program since 22 years. But I design mechanical parts, not styling surfaces.
Now I am in deed a little bit proud that I managed to get the model done.
And for the most I am very, very glad to be close to a nice model of the imperator eventually.
Unfortunately I don‘t have a workbench in my new home yet, so the final assembly has to be paused. Sanding at the kitchen table wouldn‘t be a good idea to my wife ;-)
Viele Grüße aus Deutschland
Erich
-
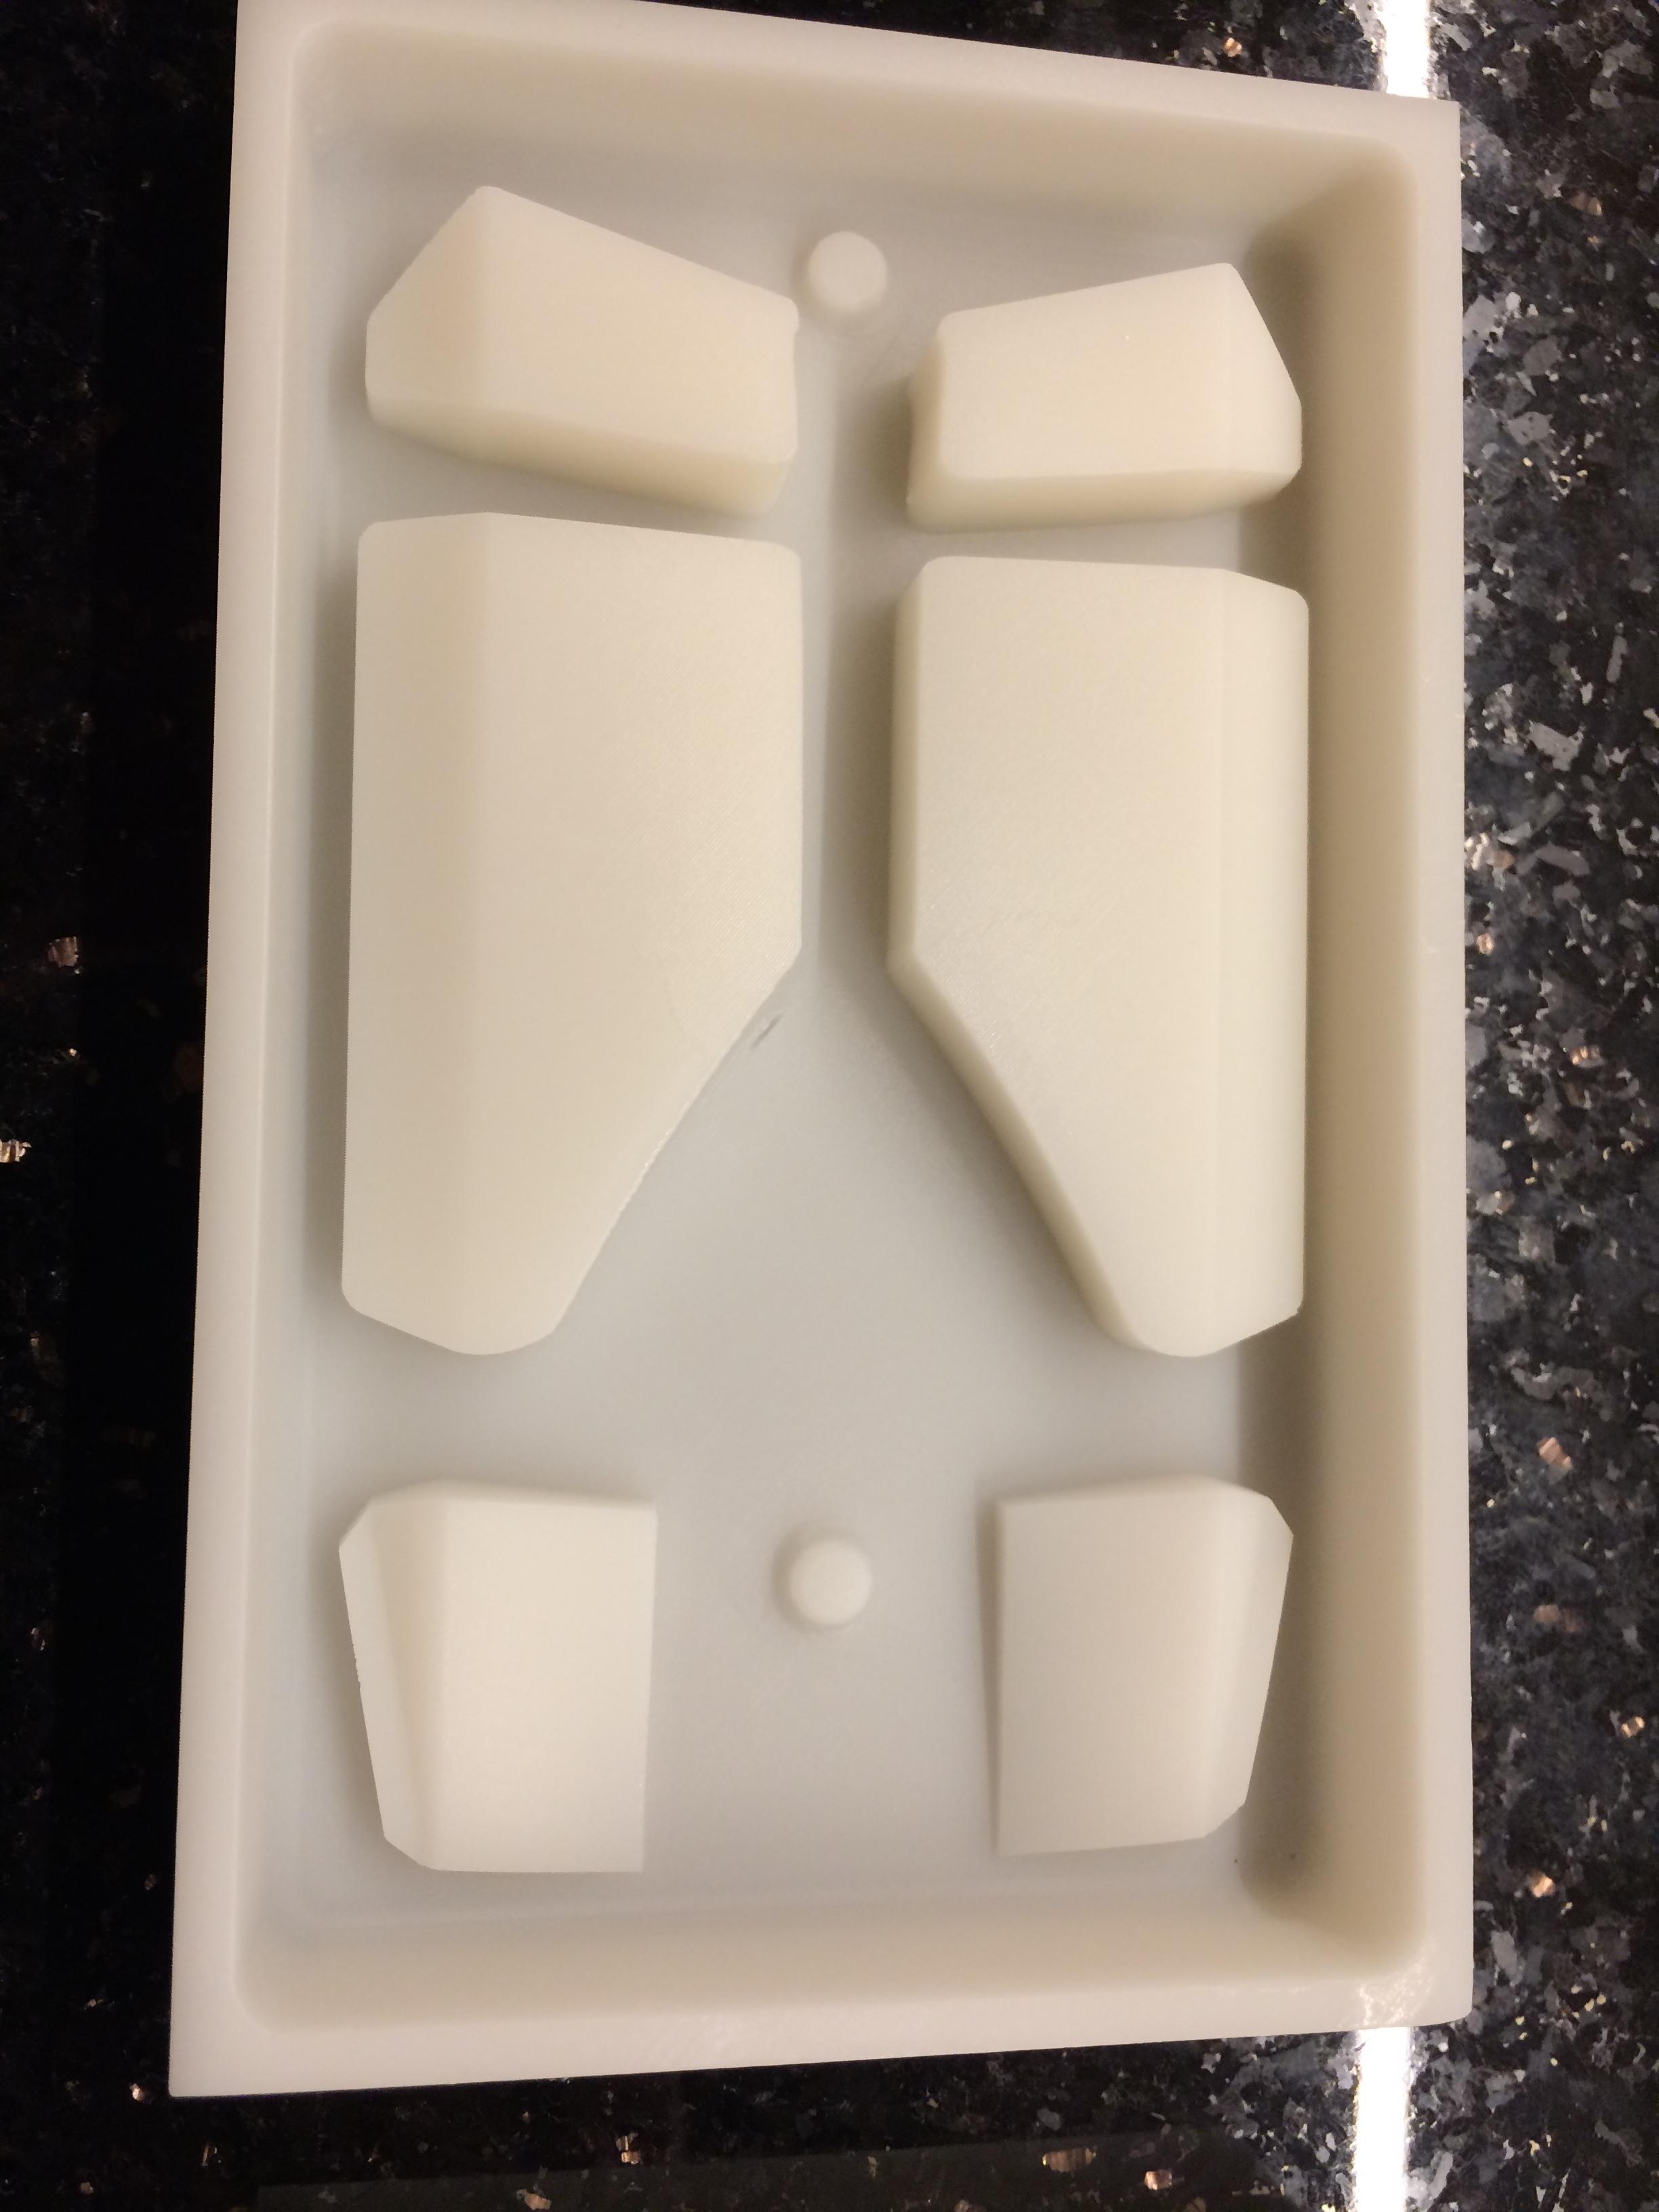
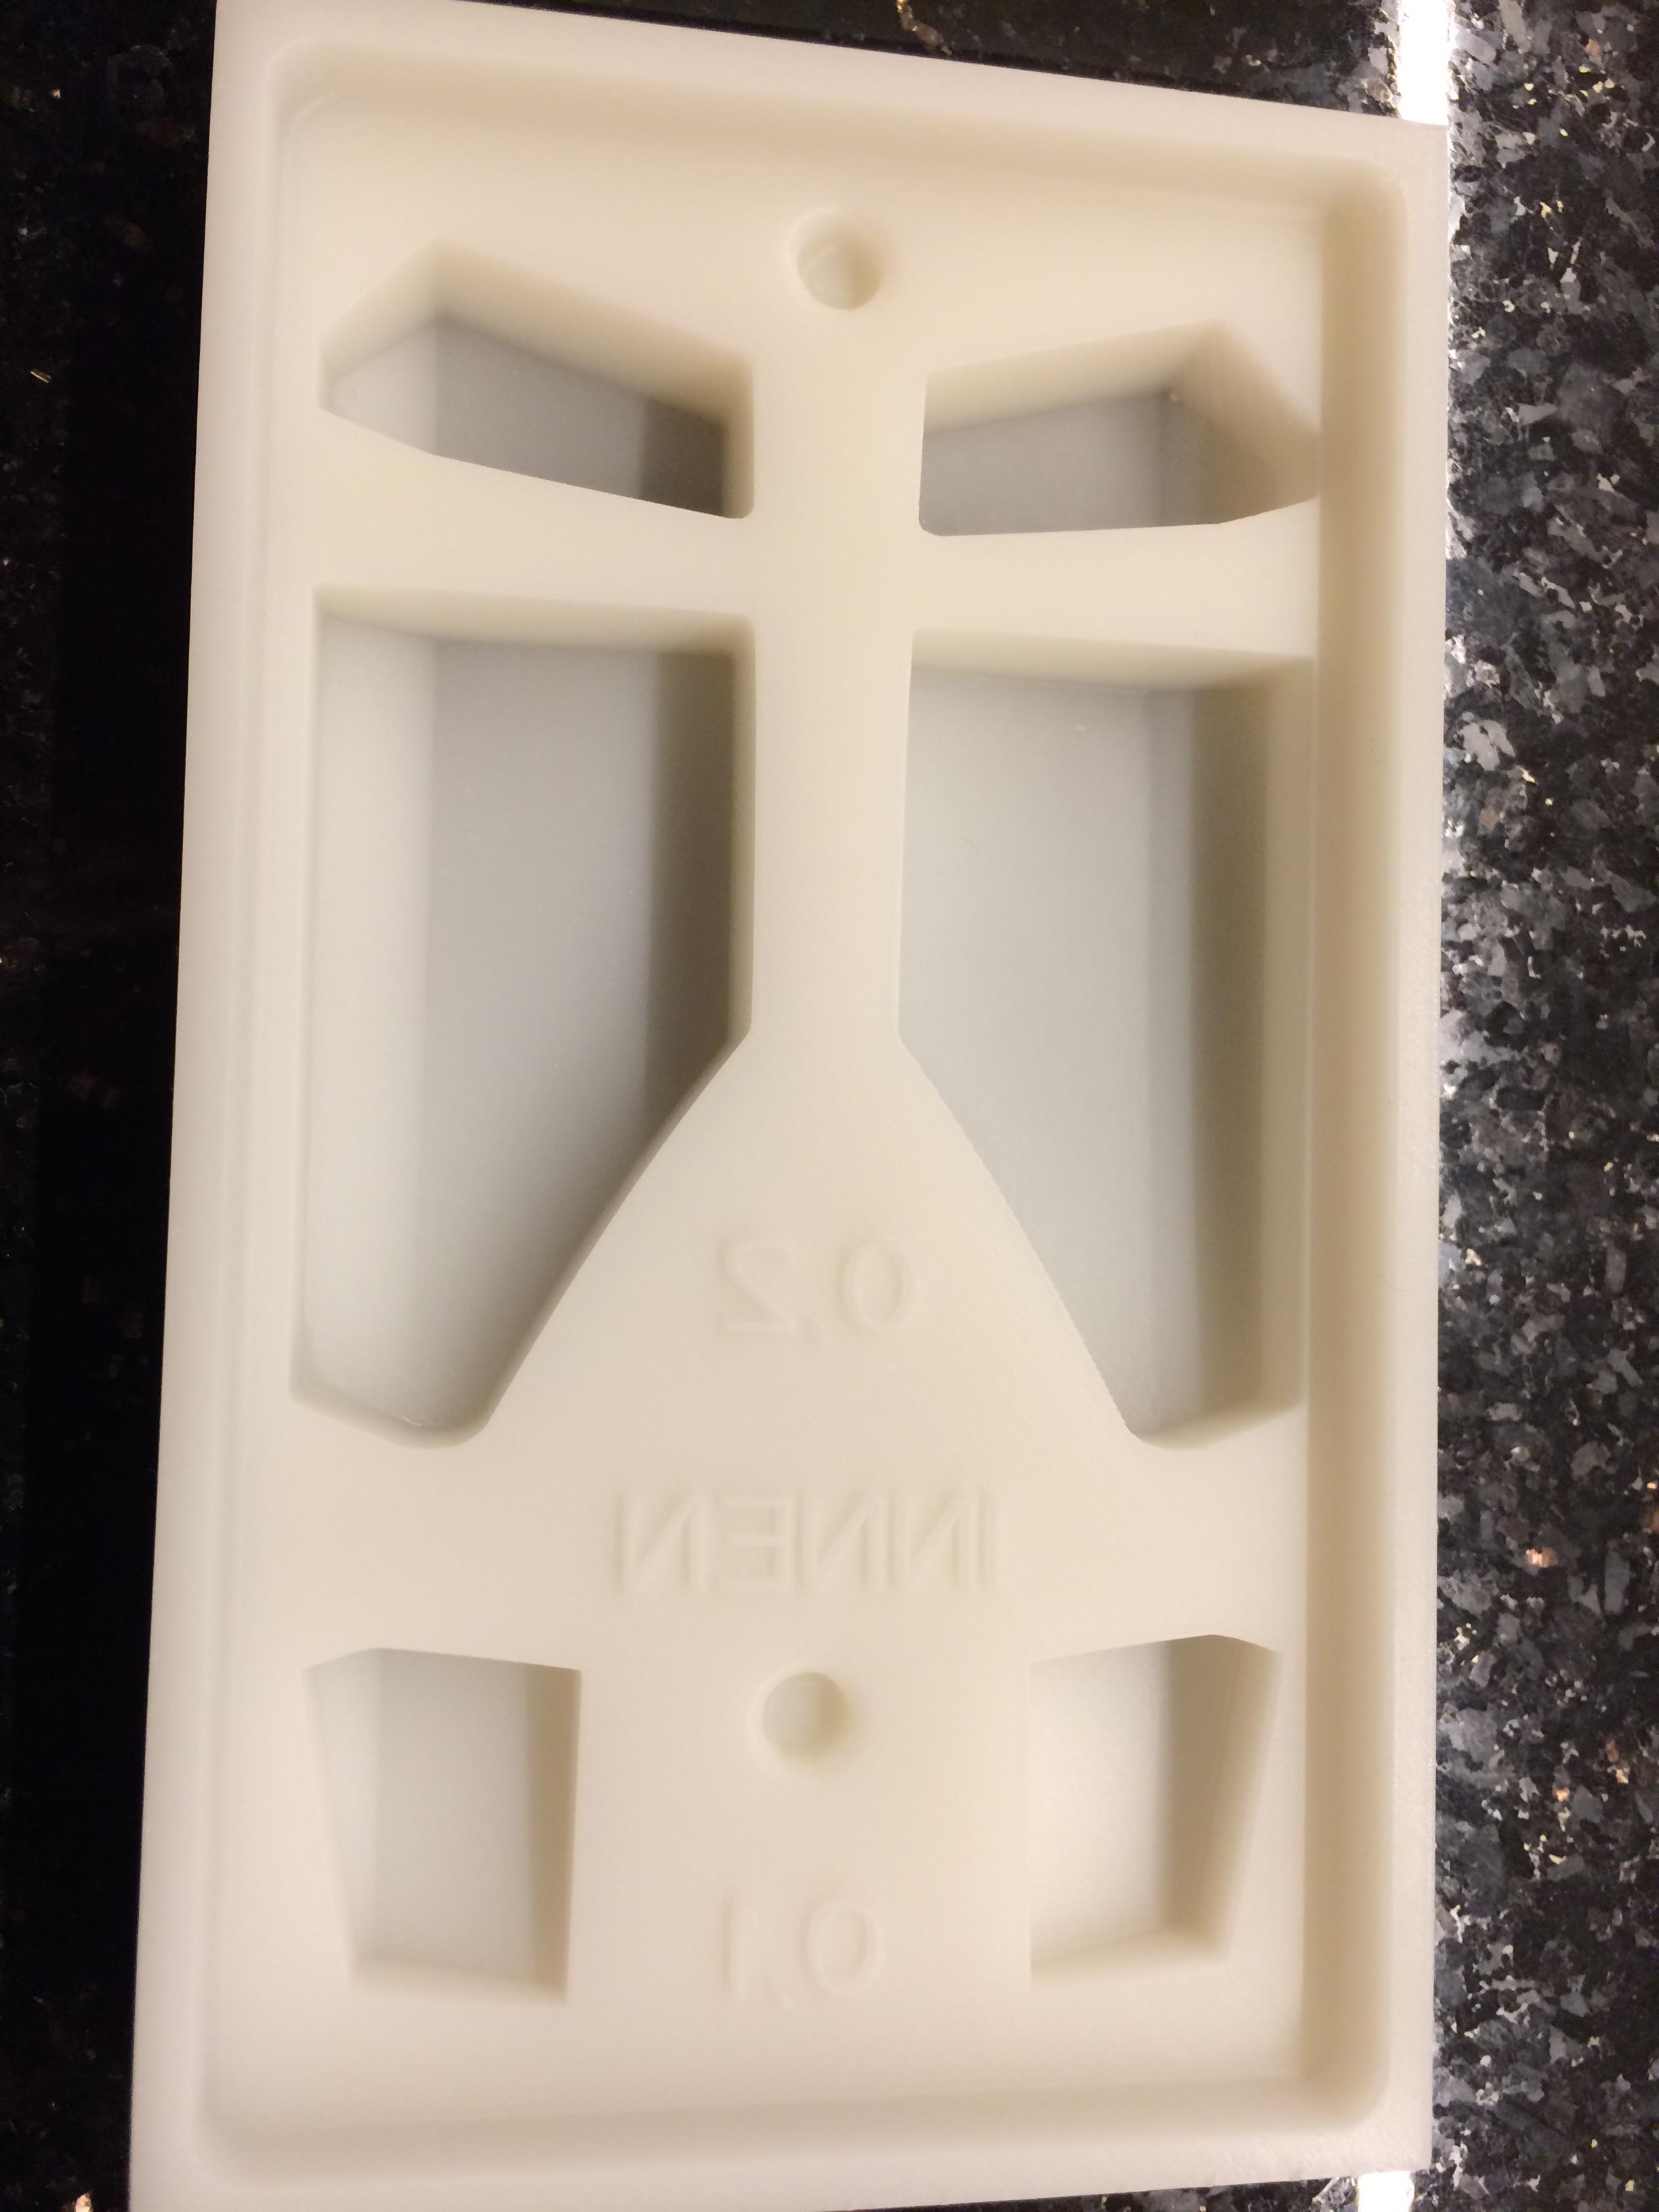
Hello together,
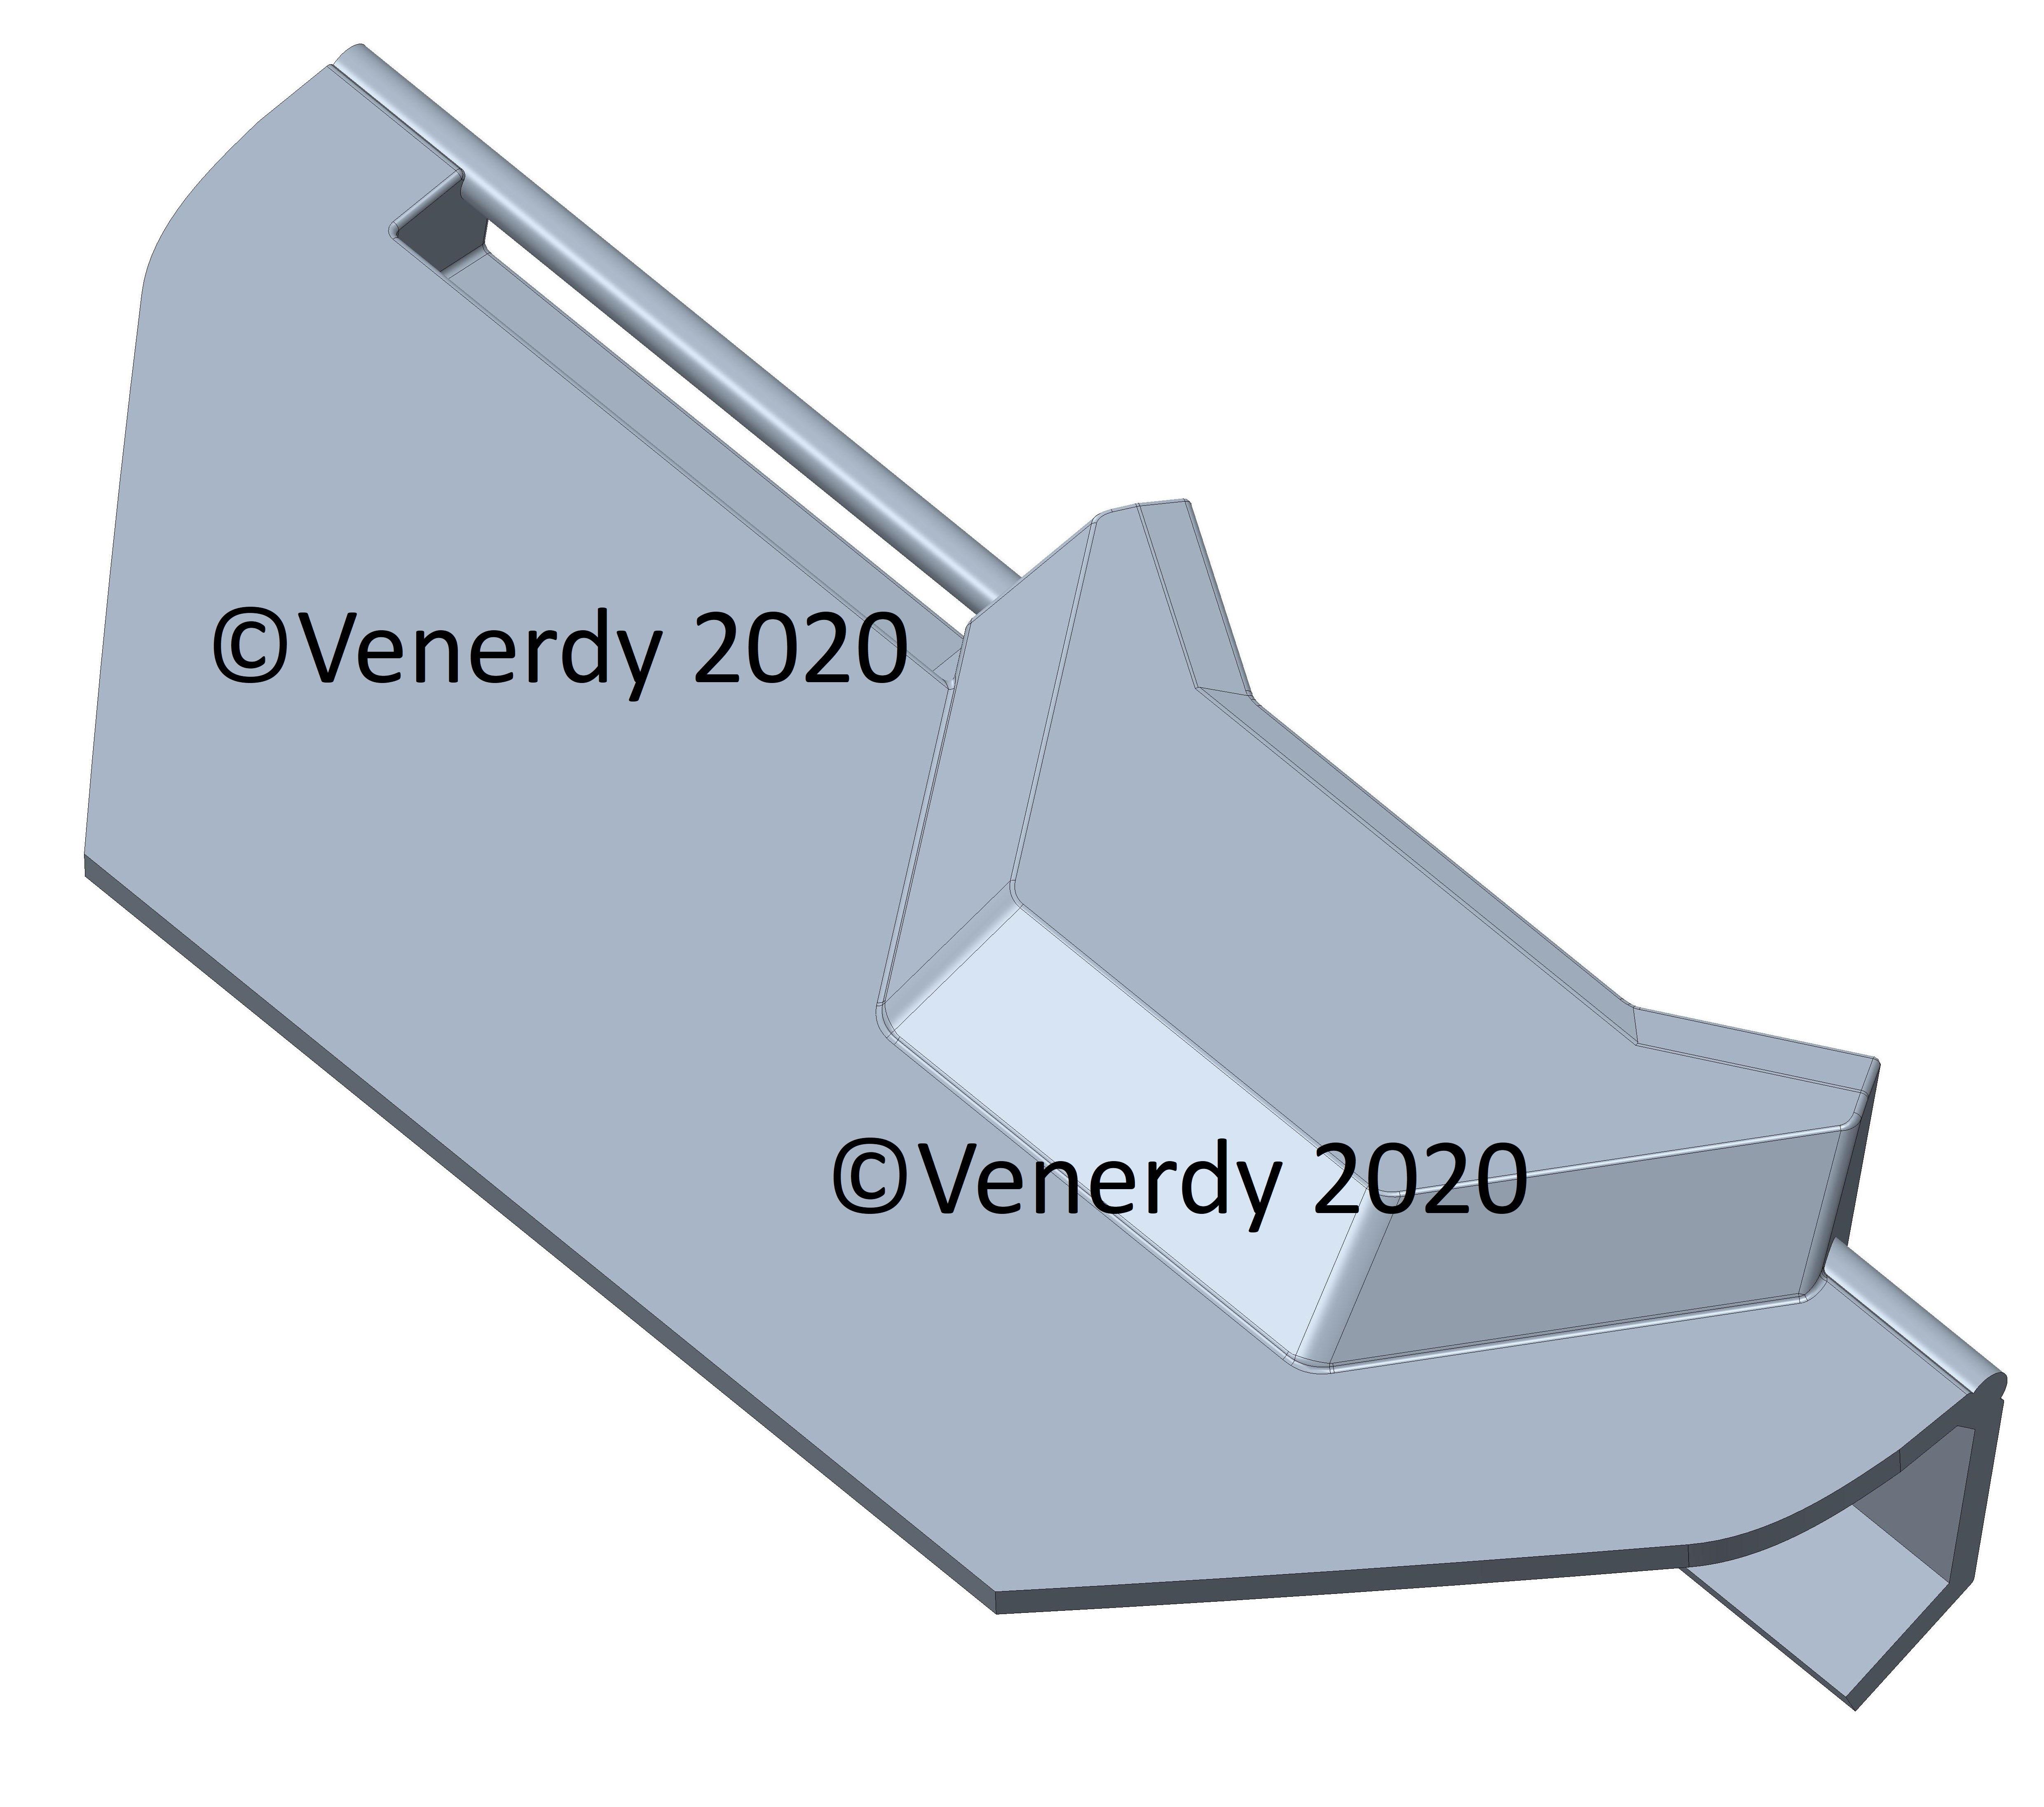
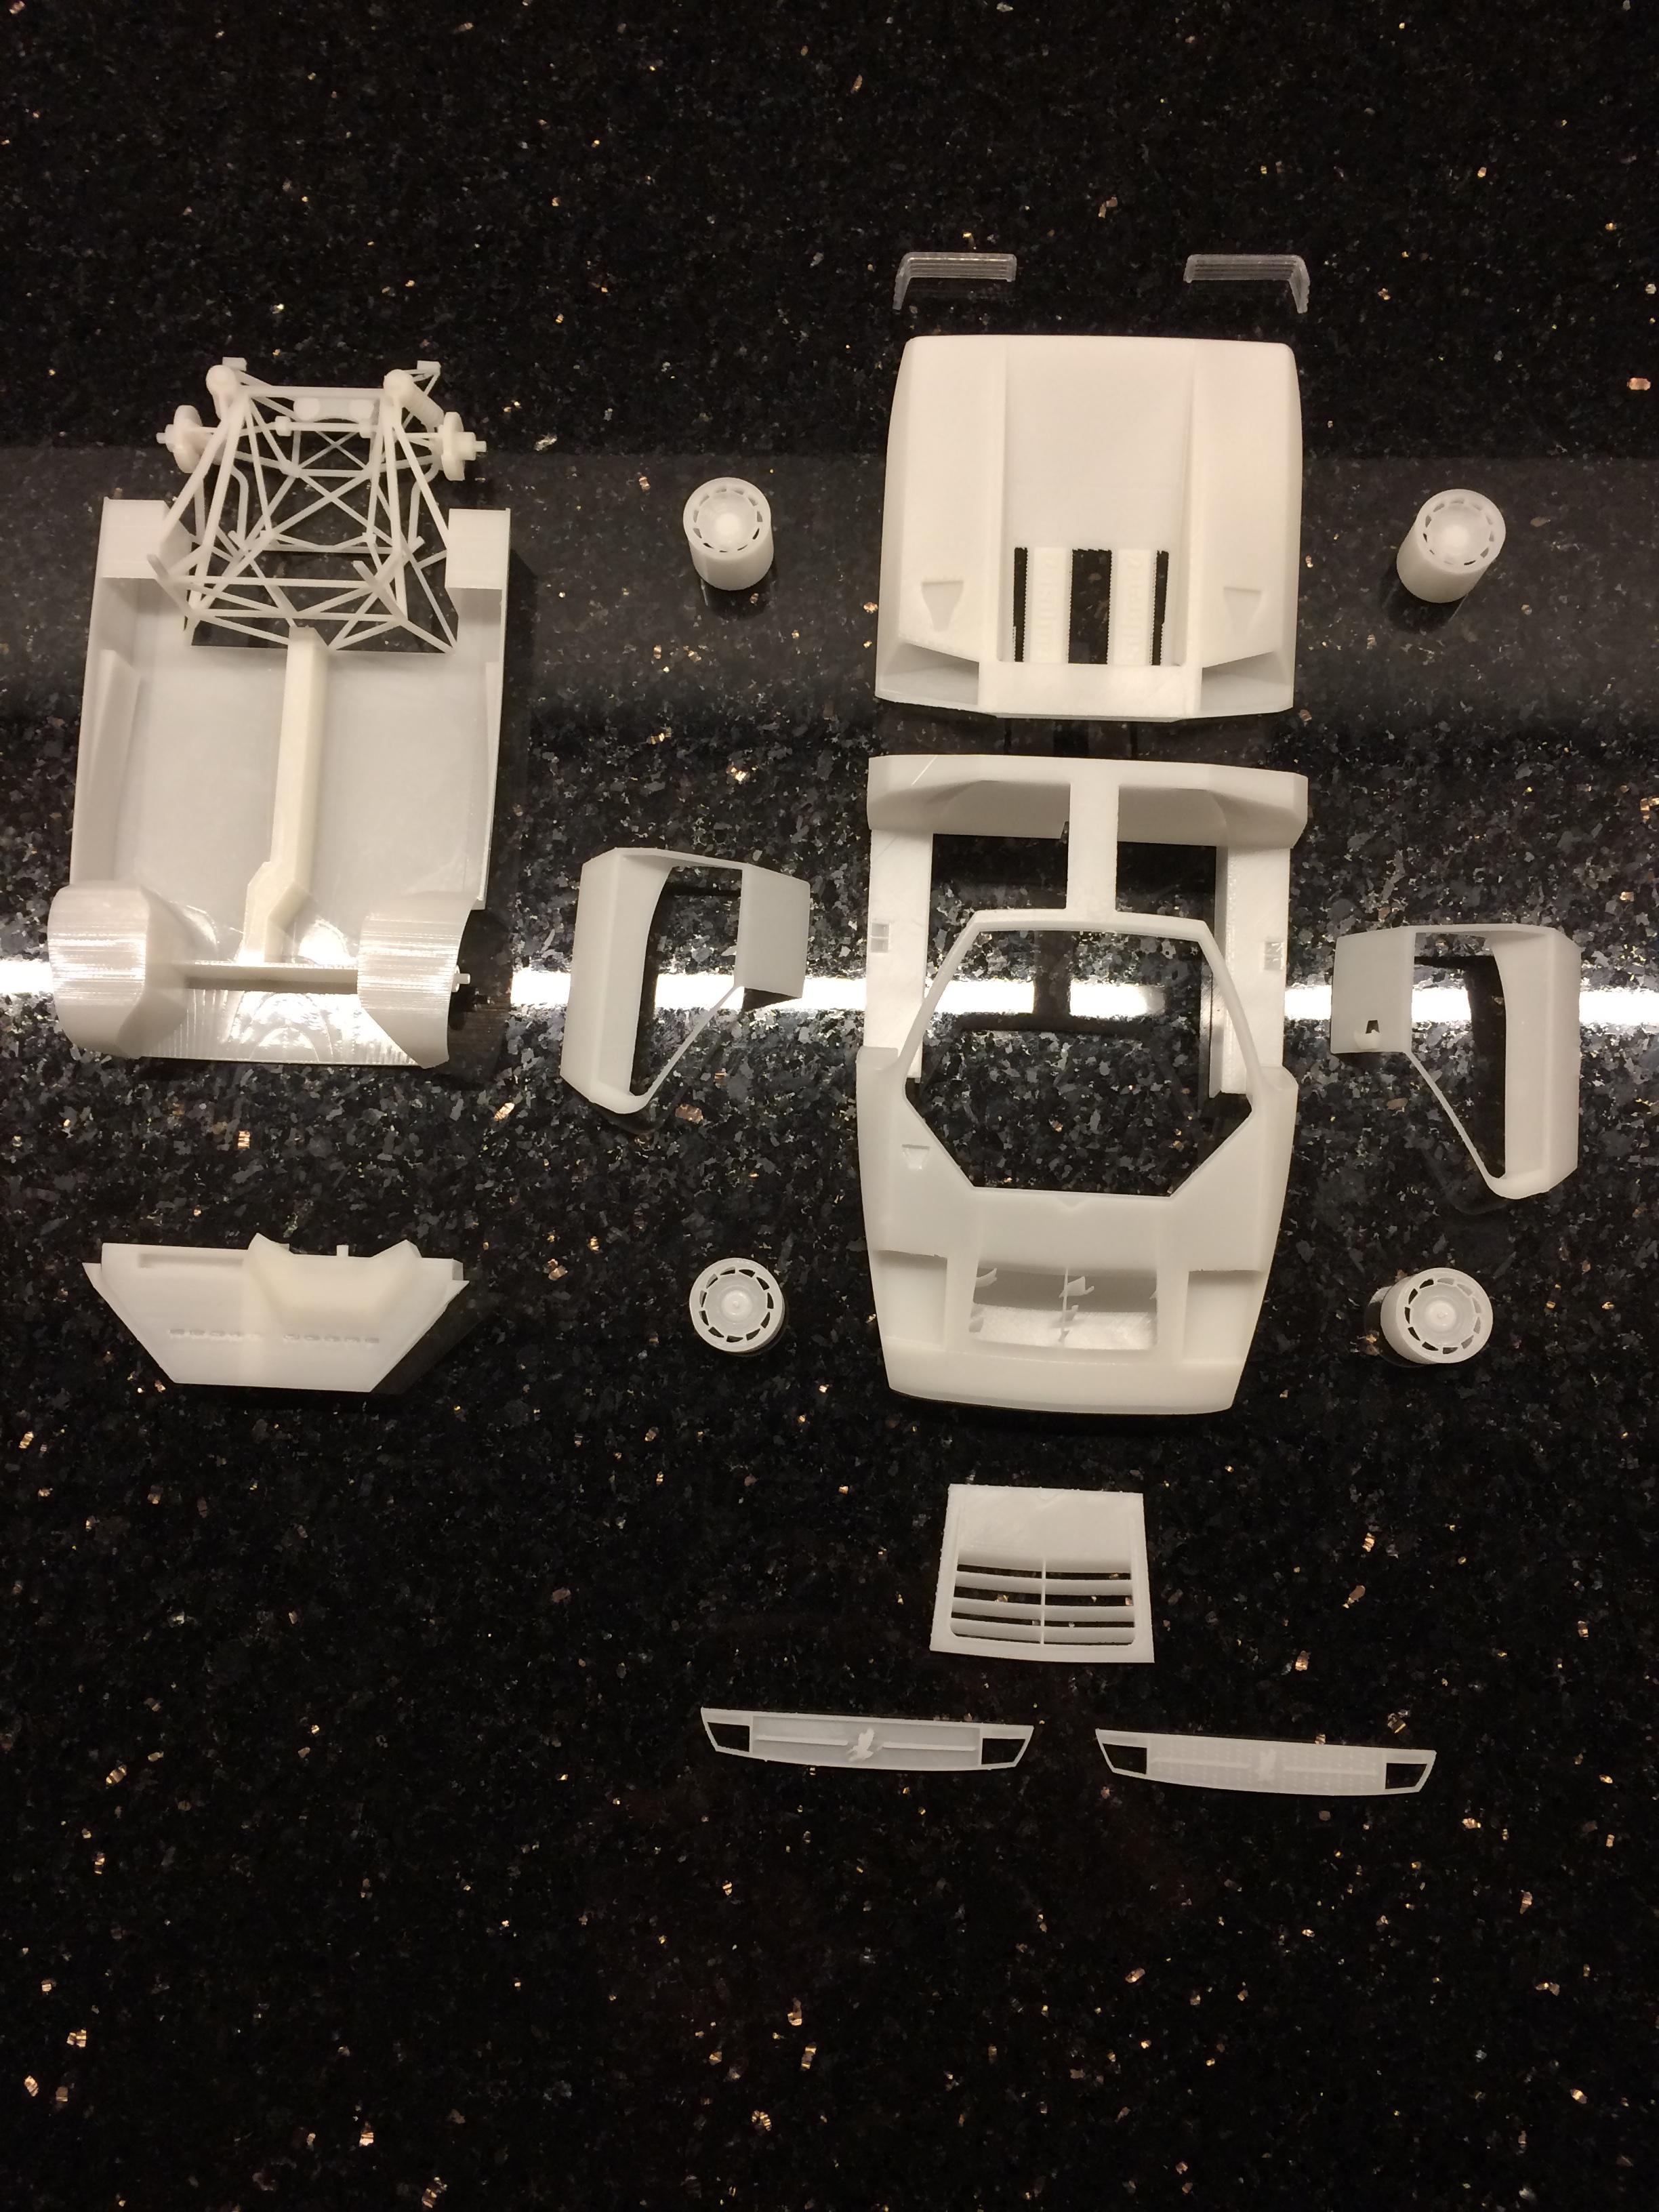
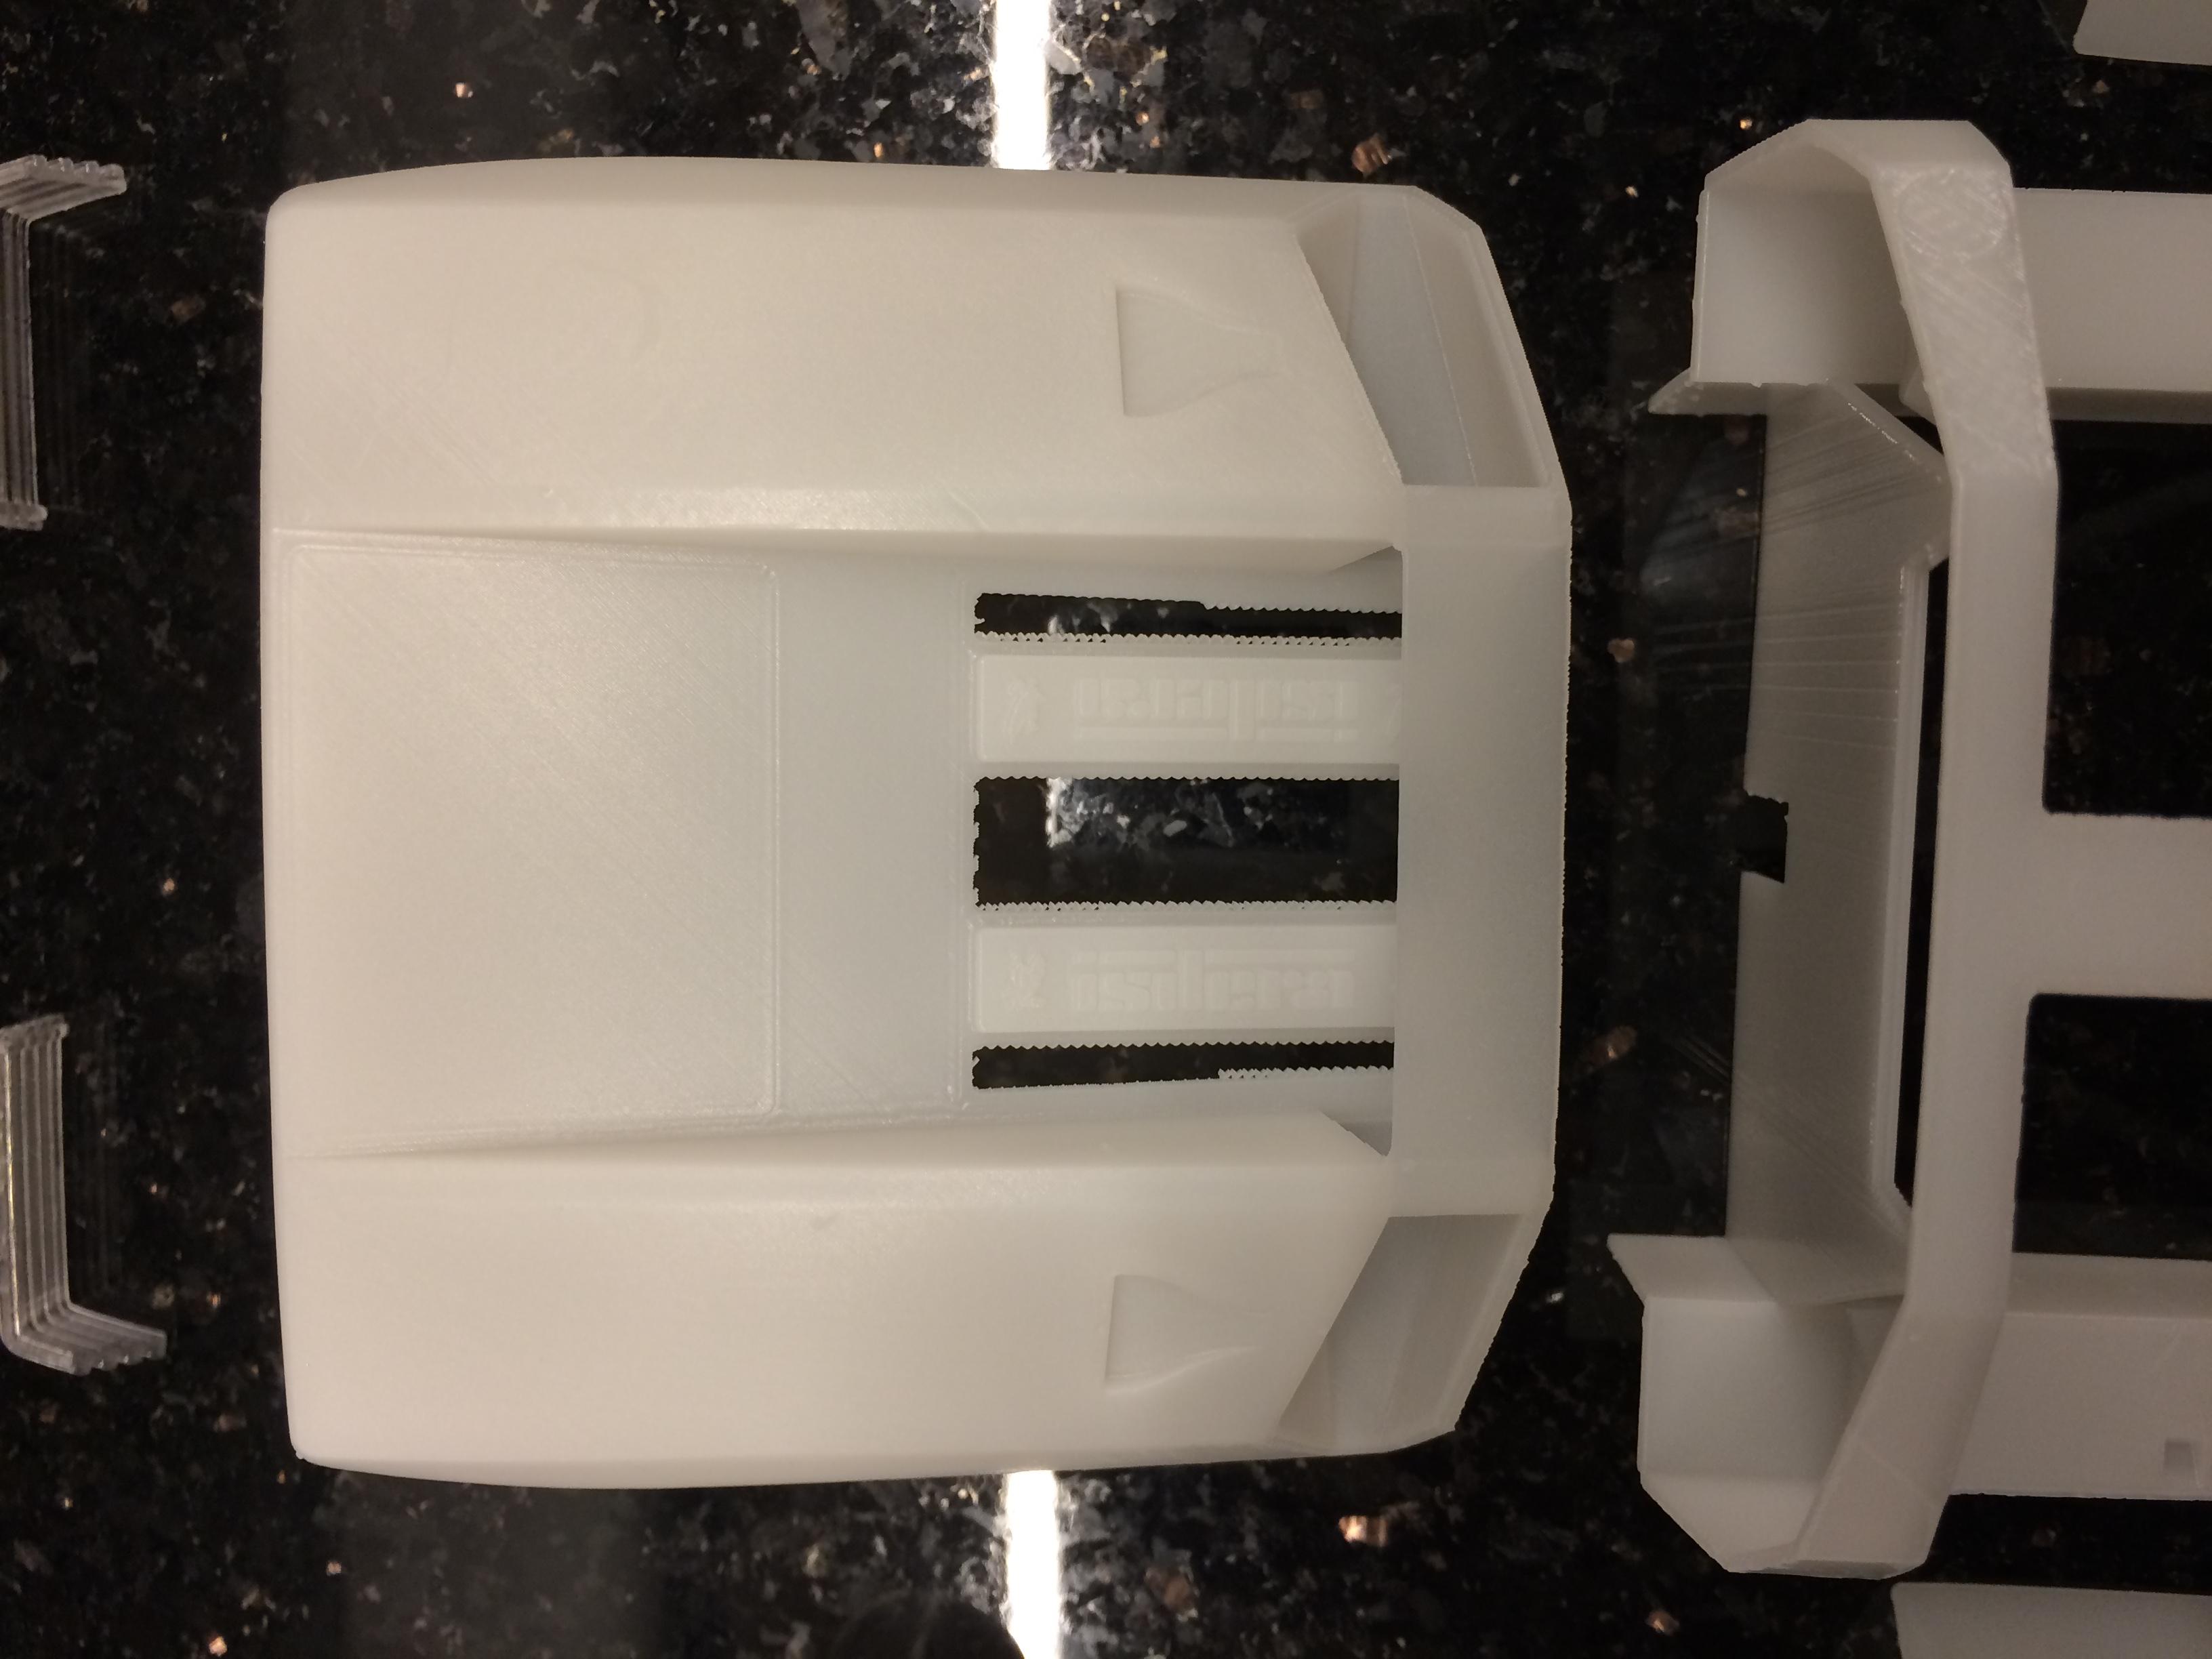
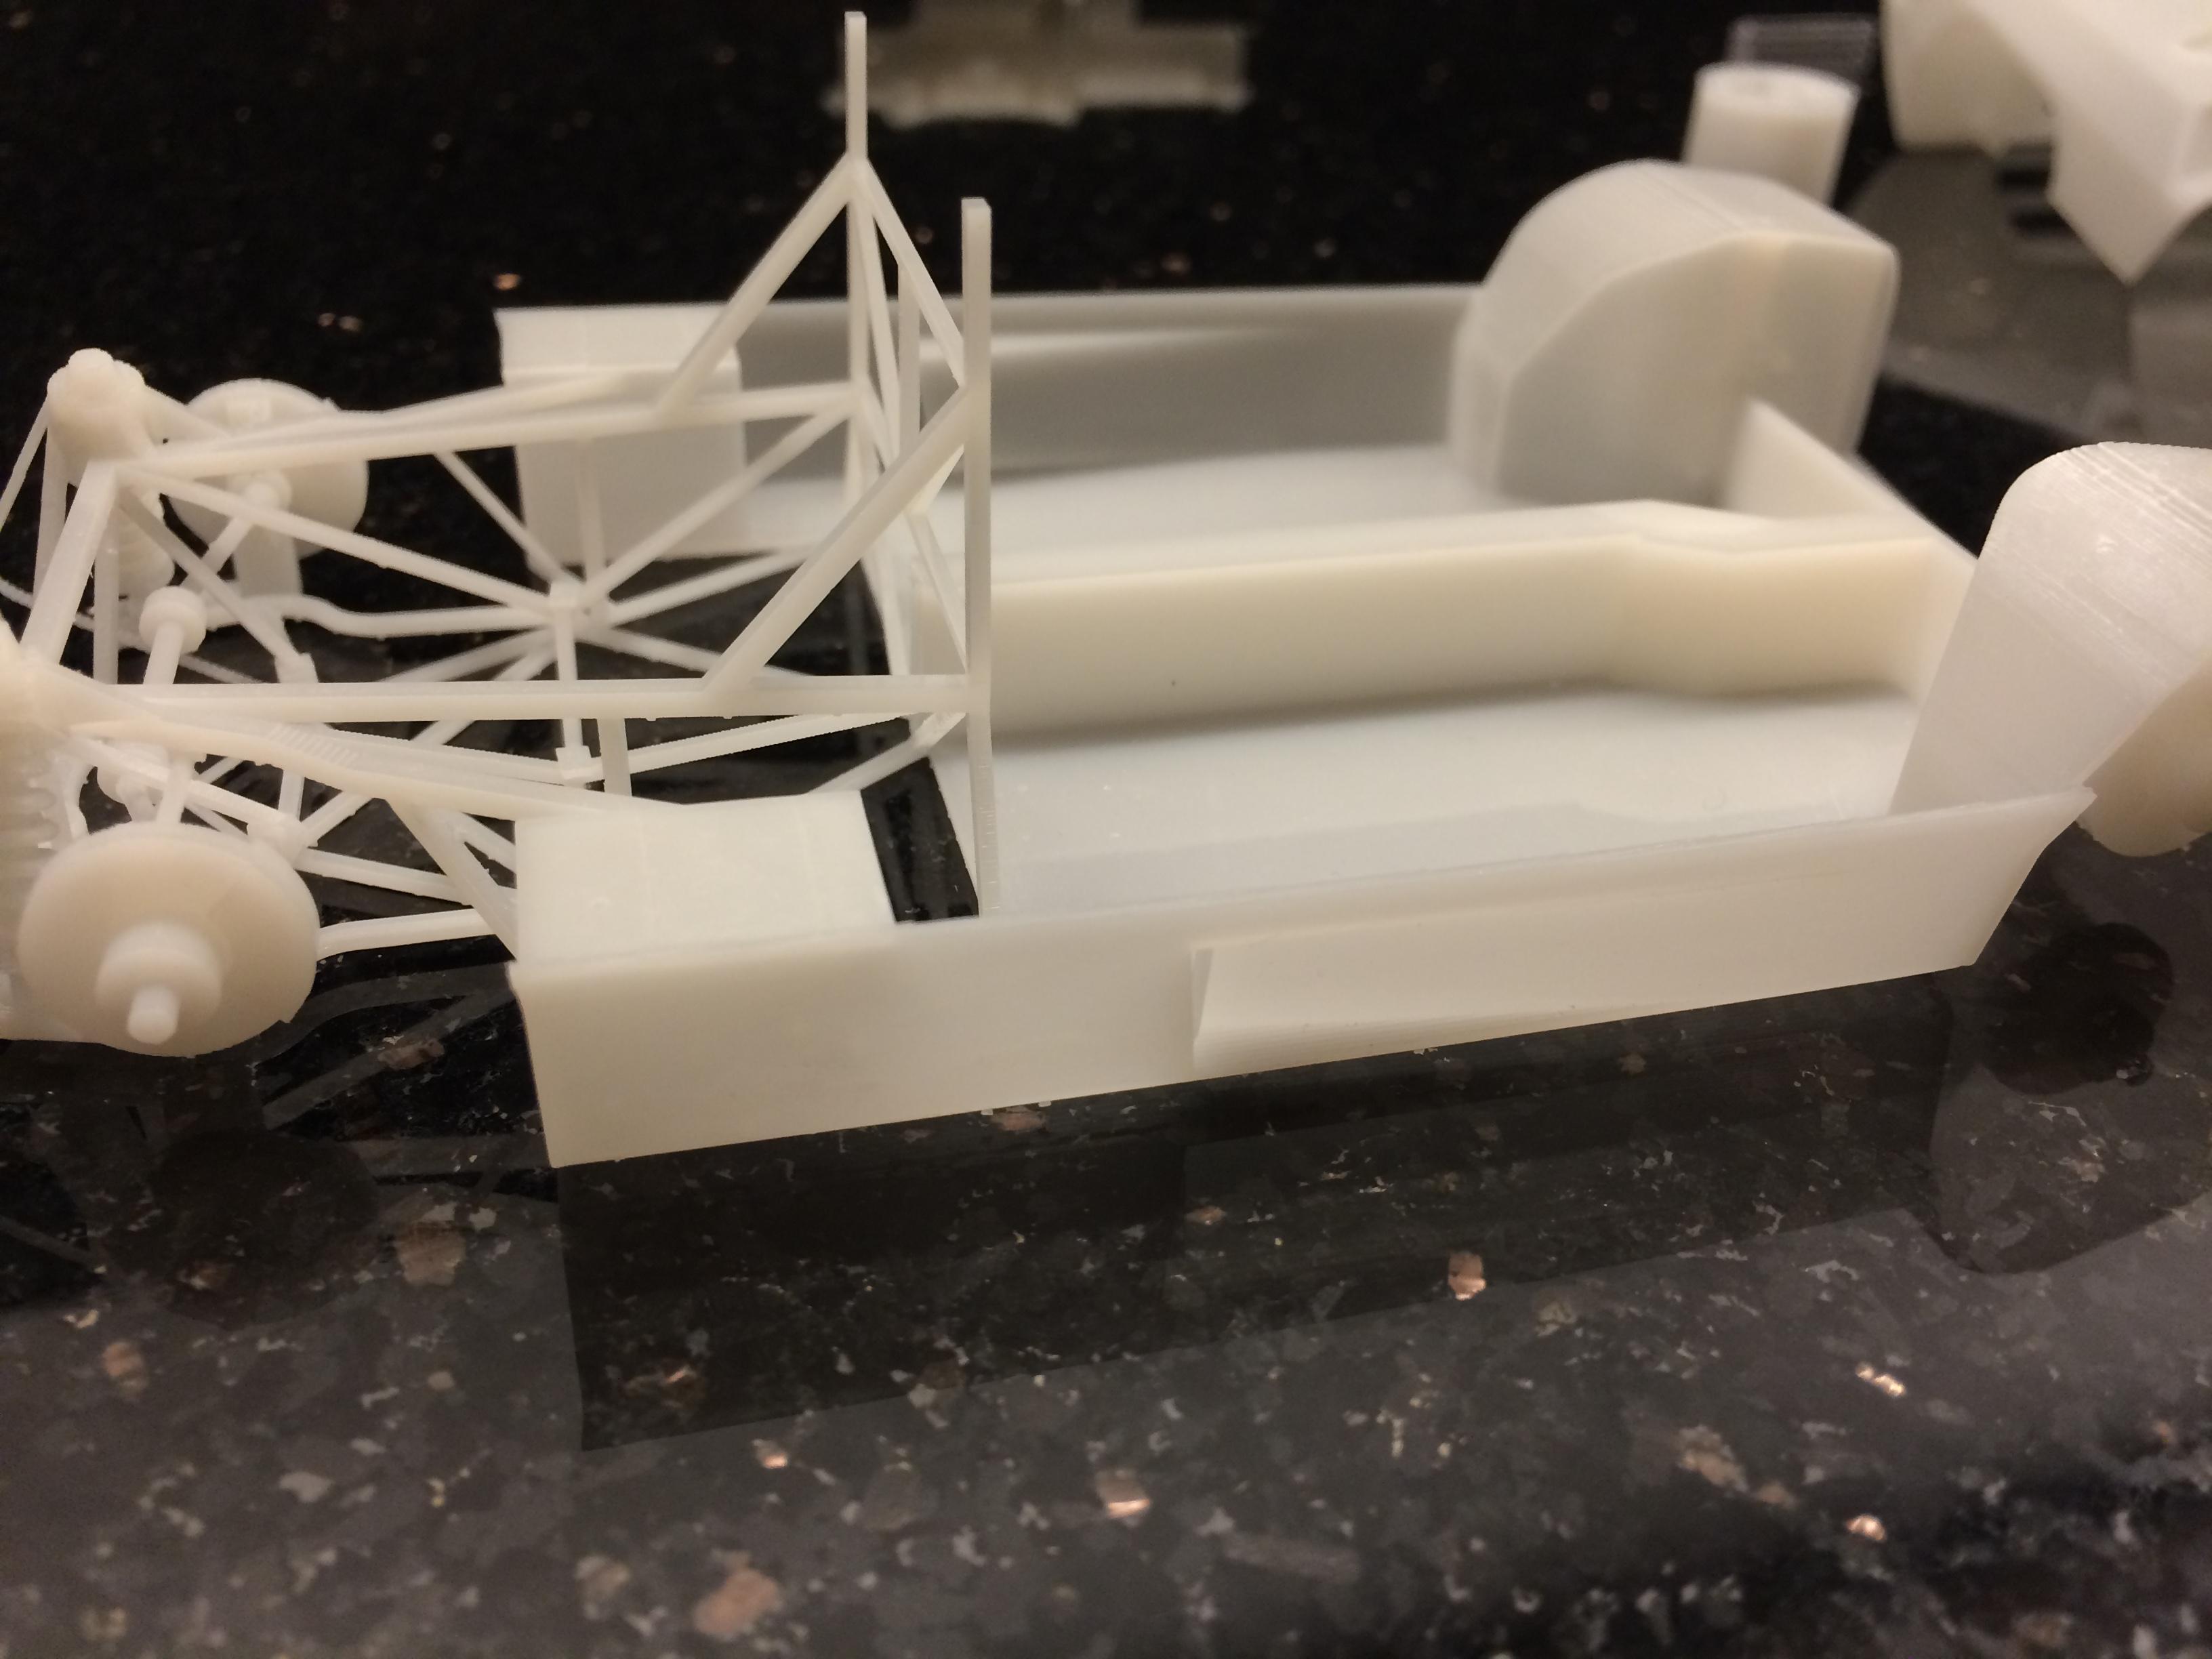
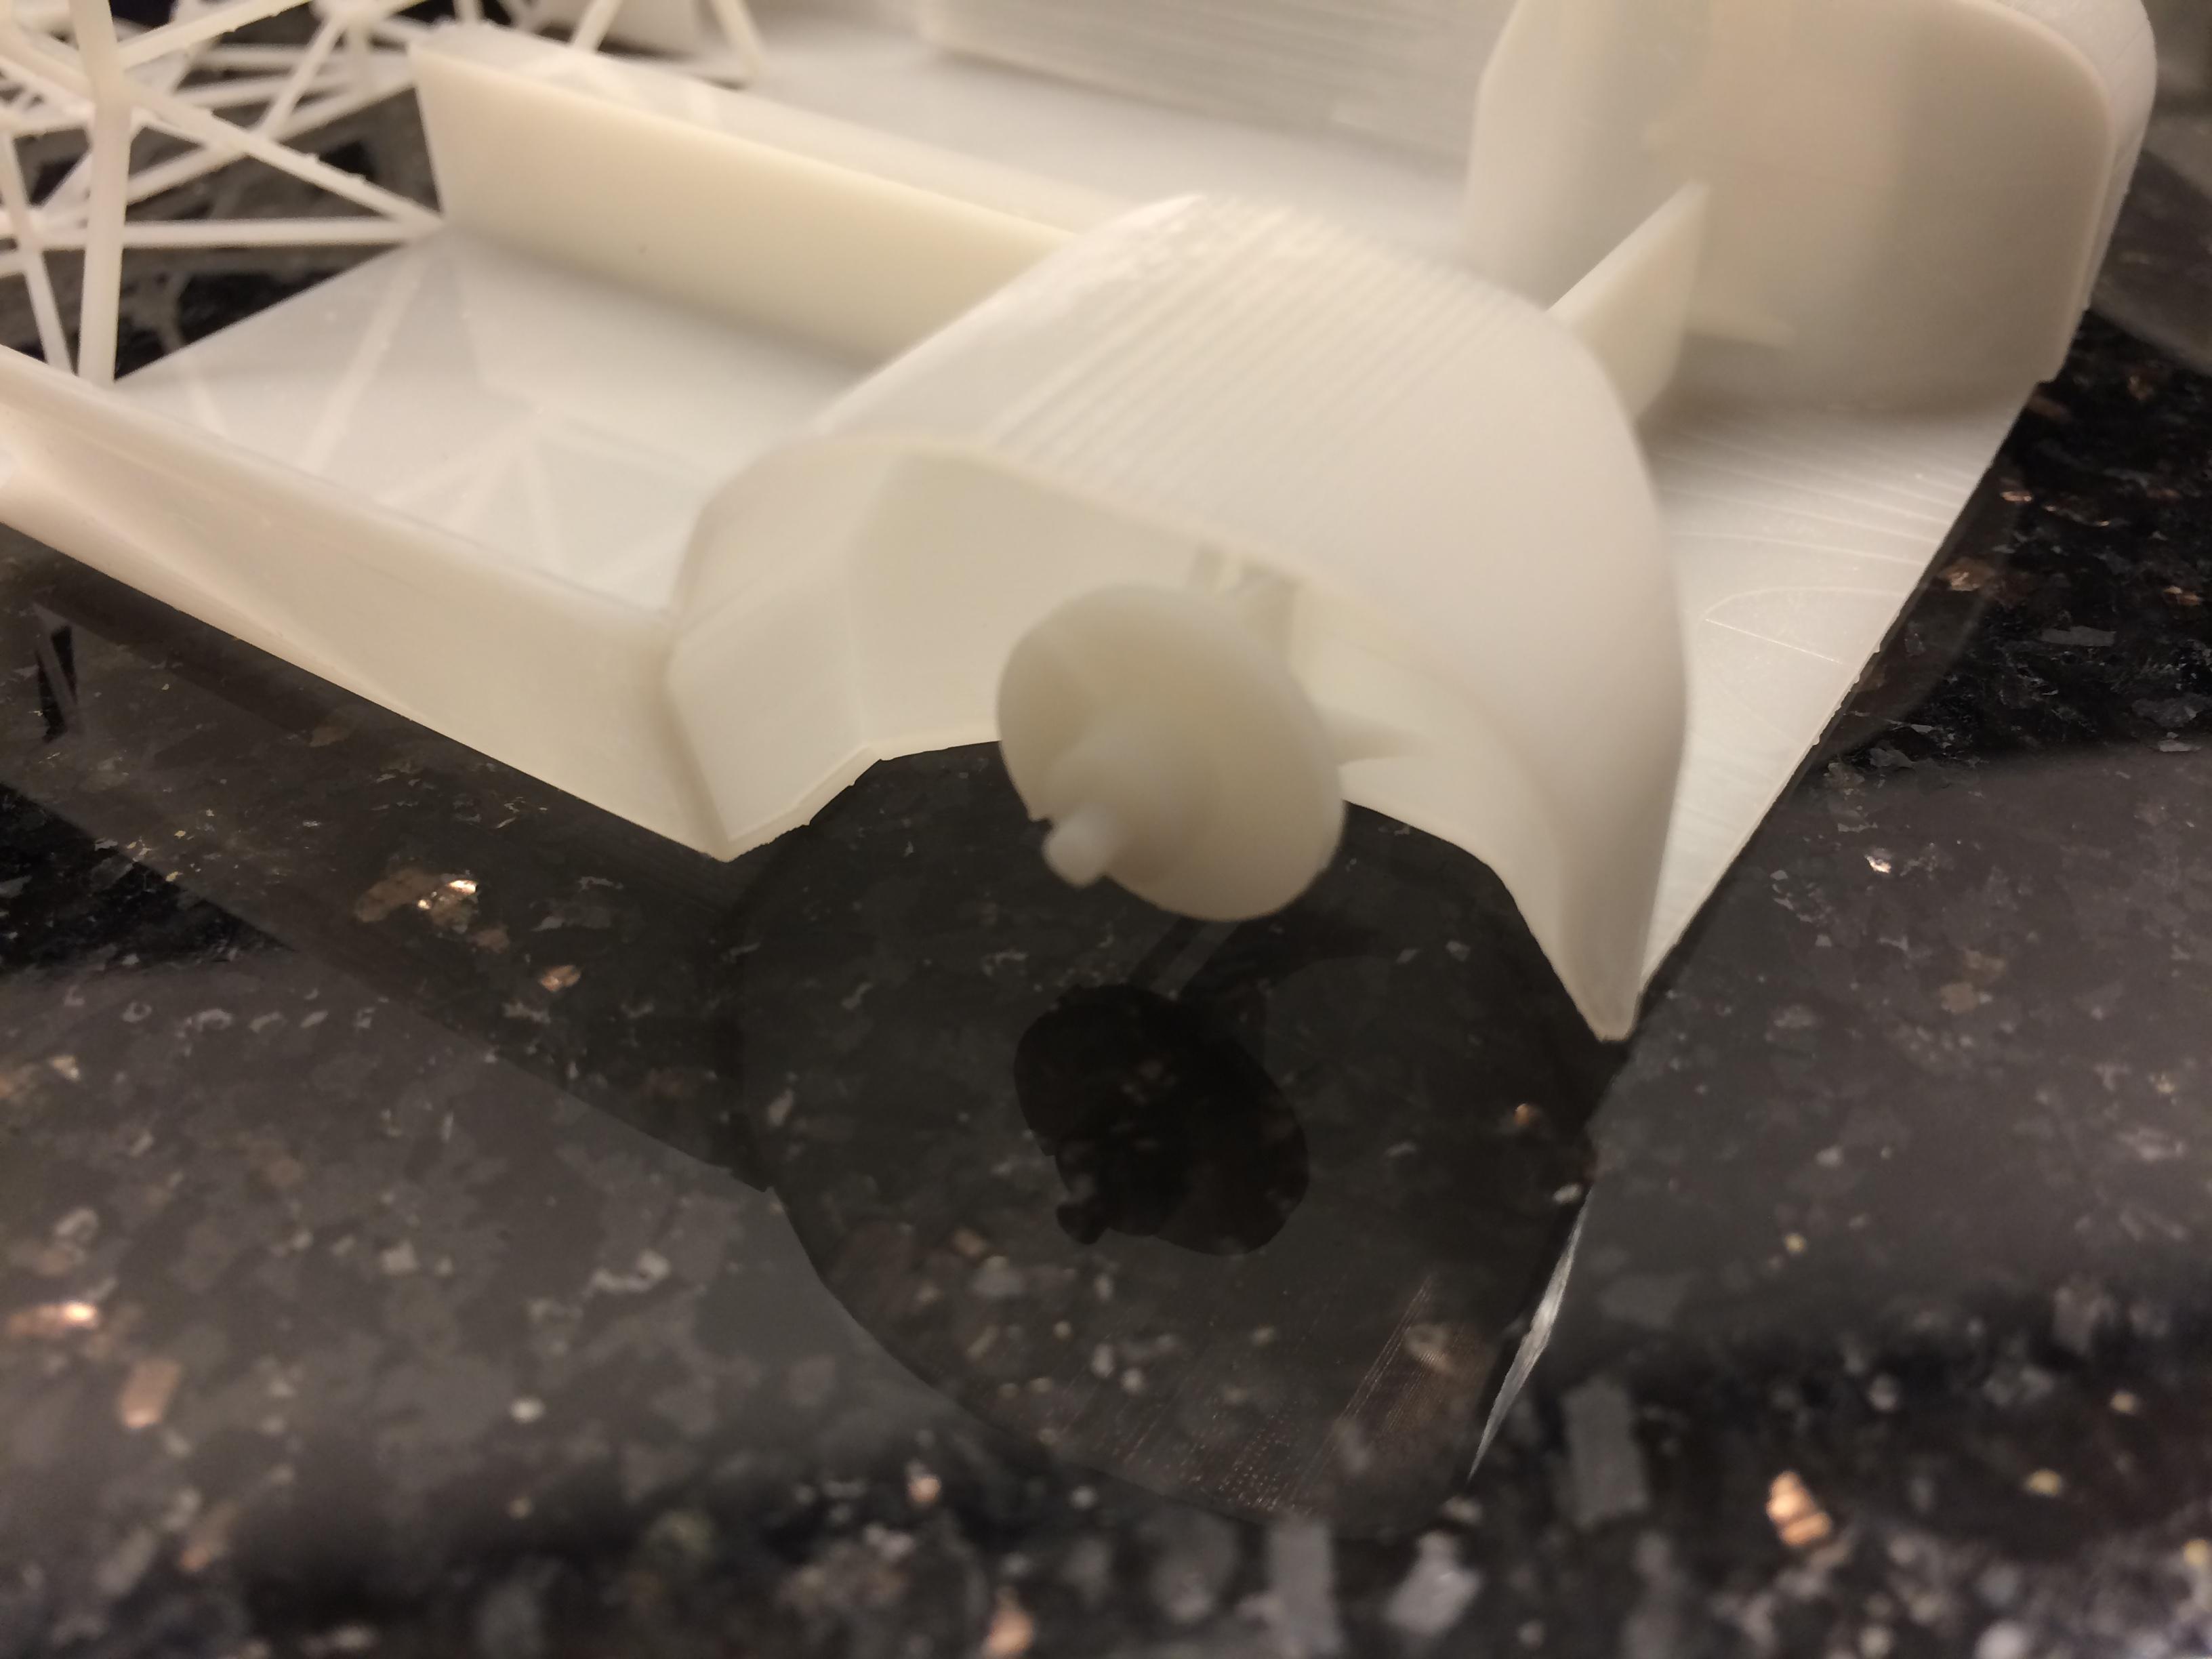
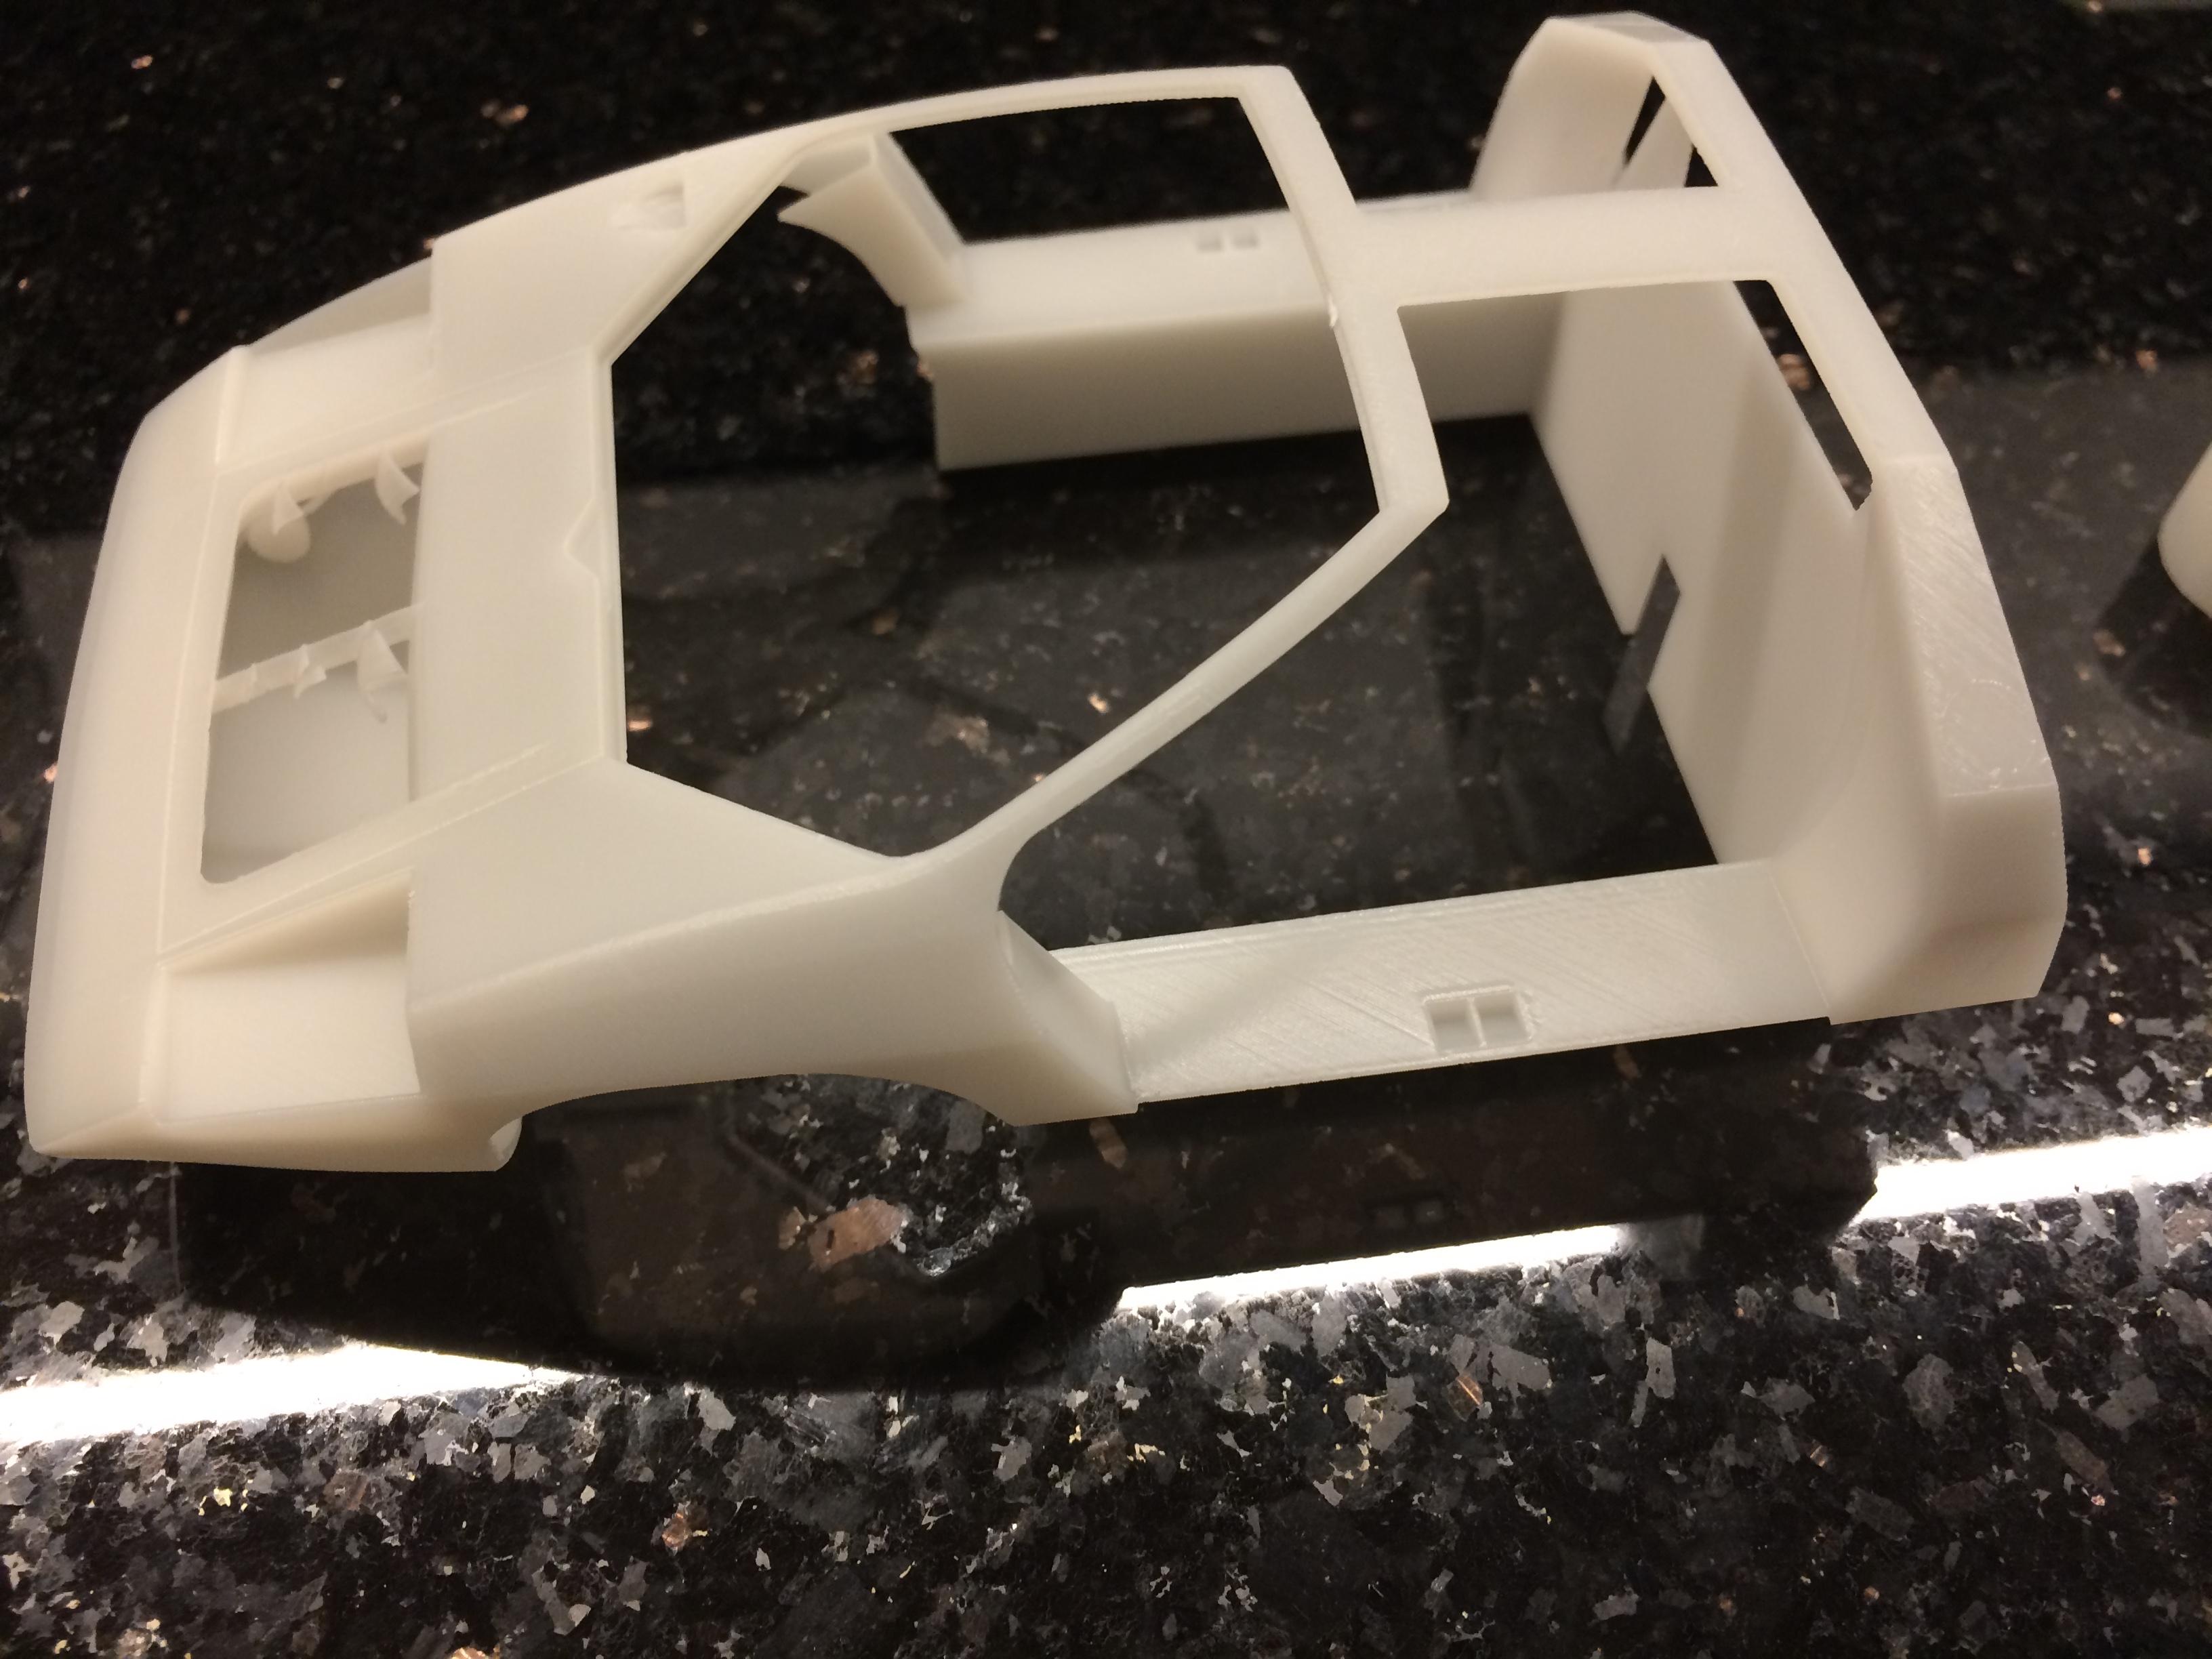
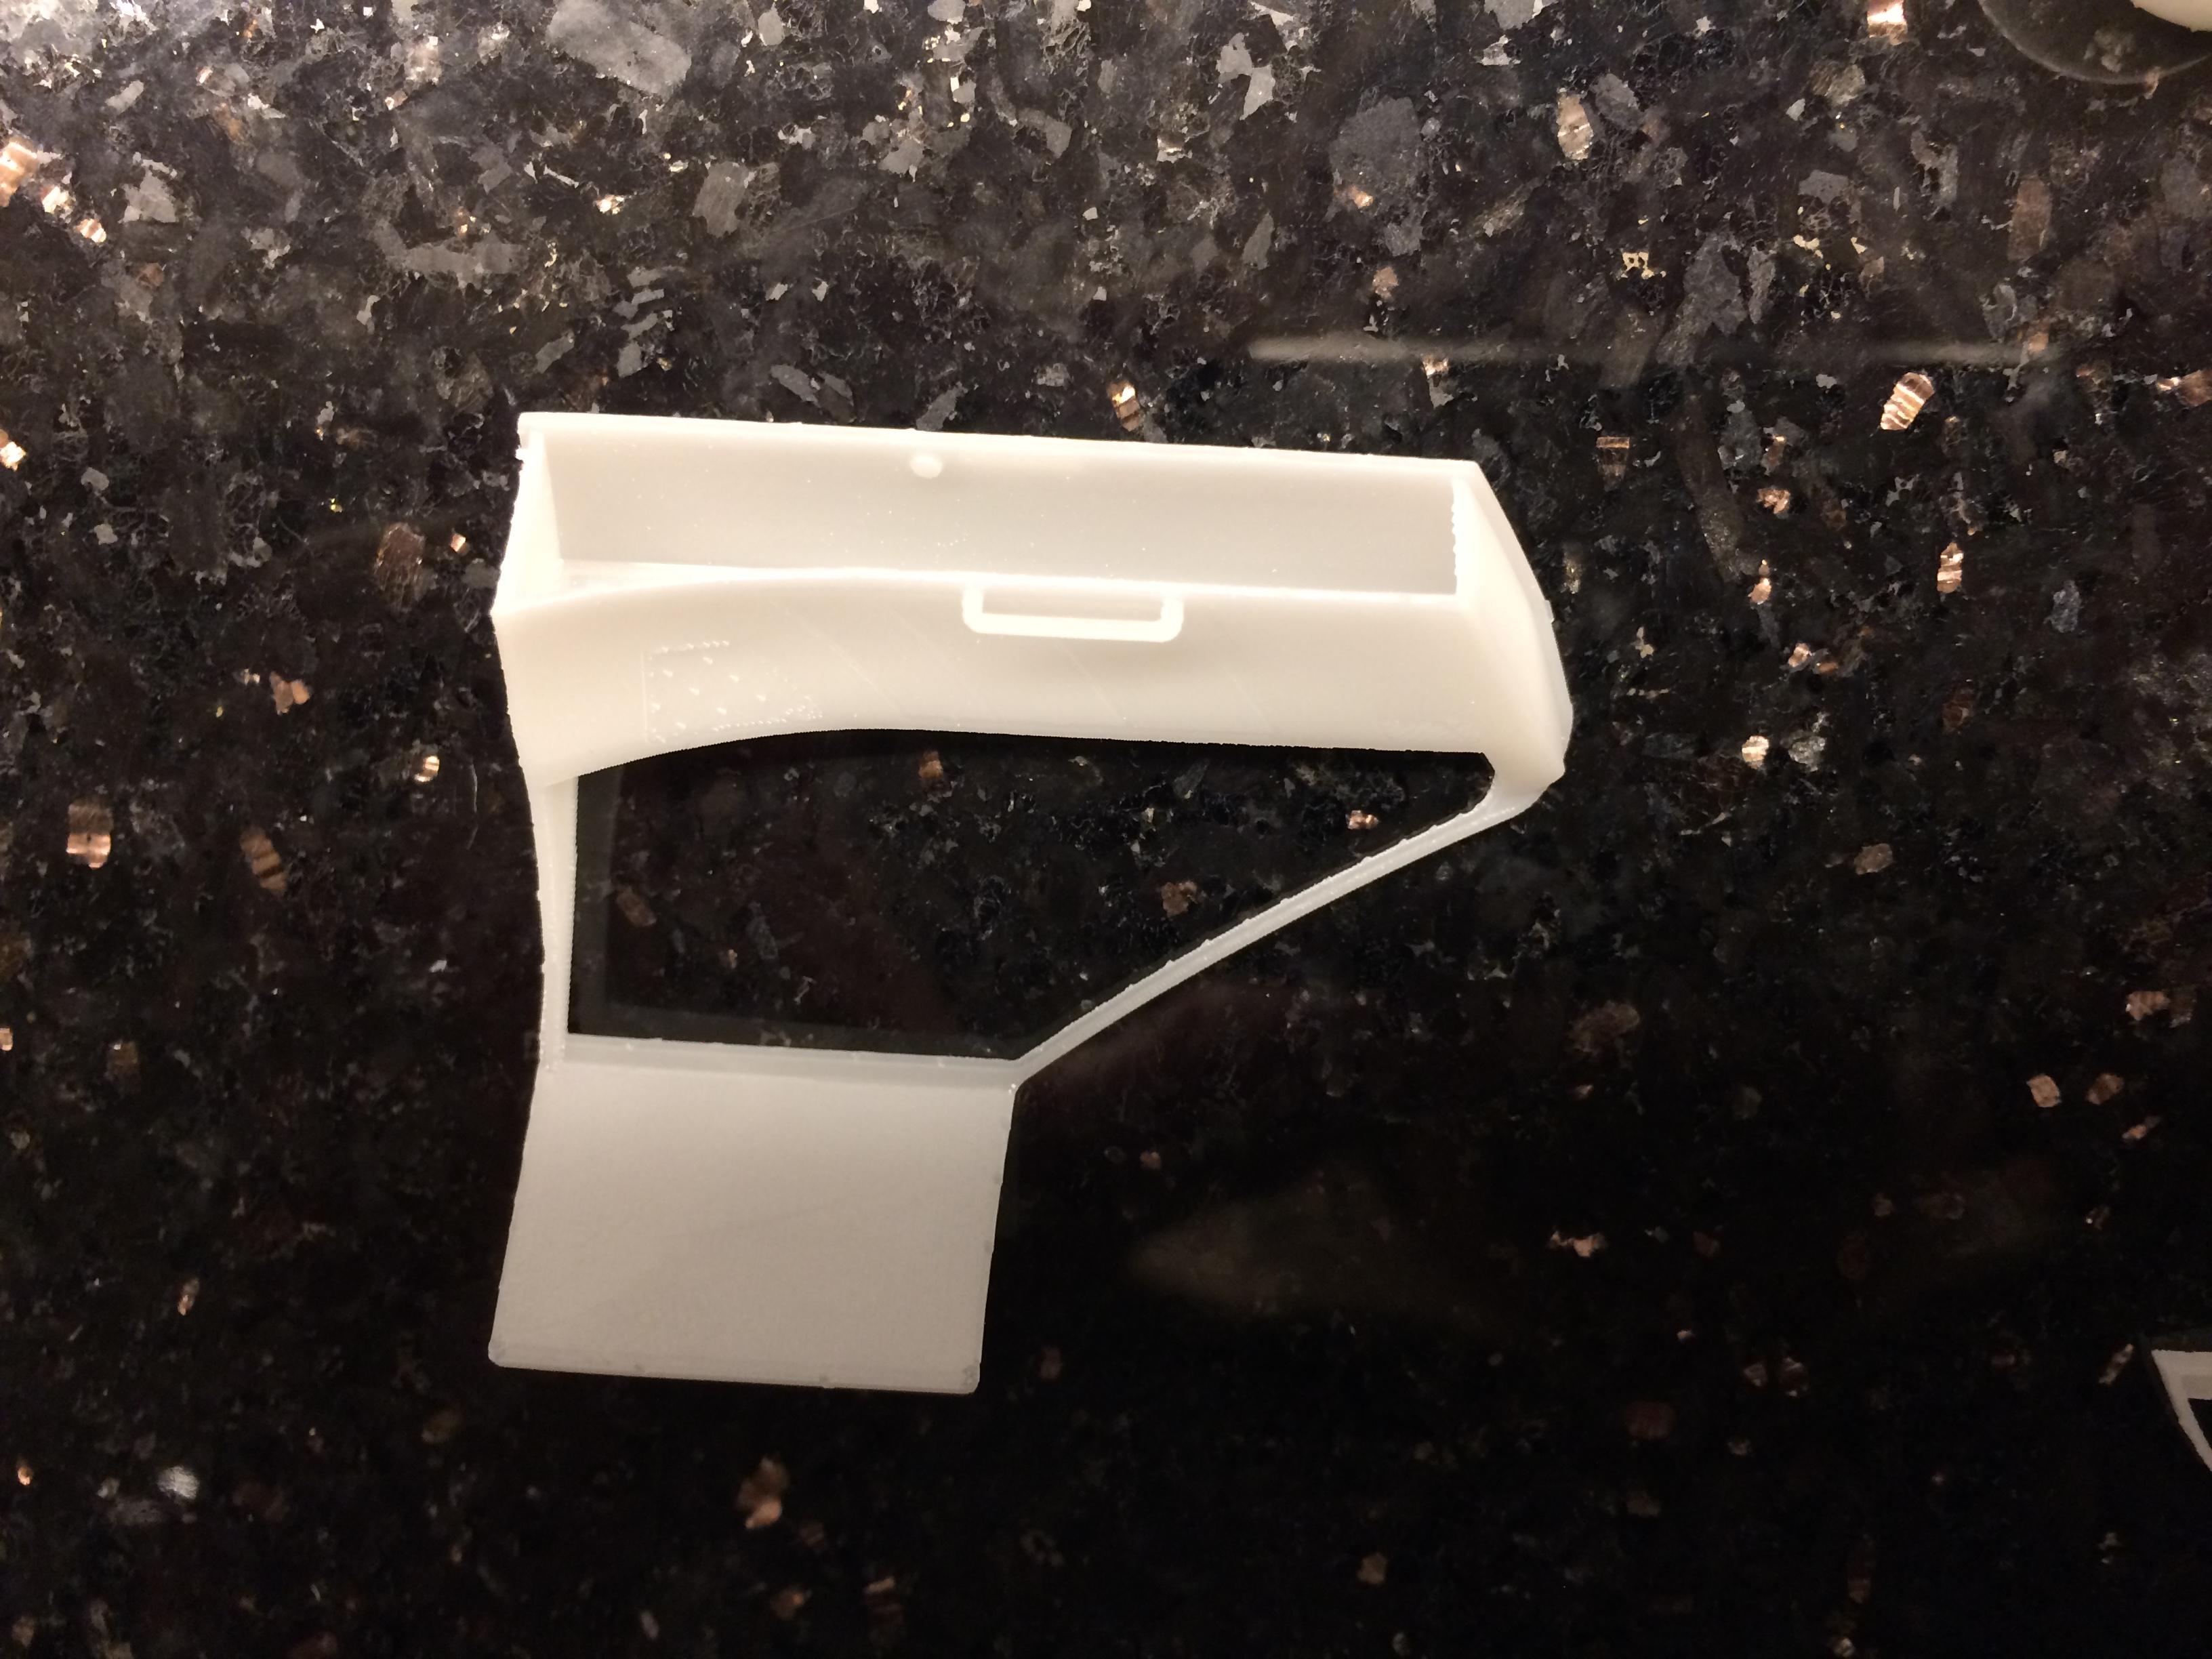
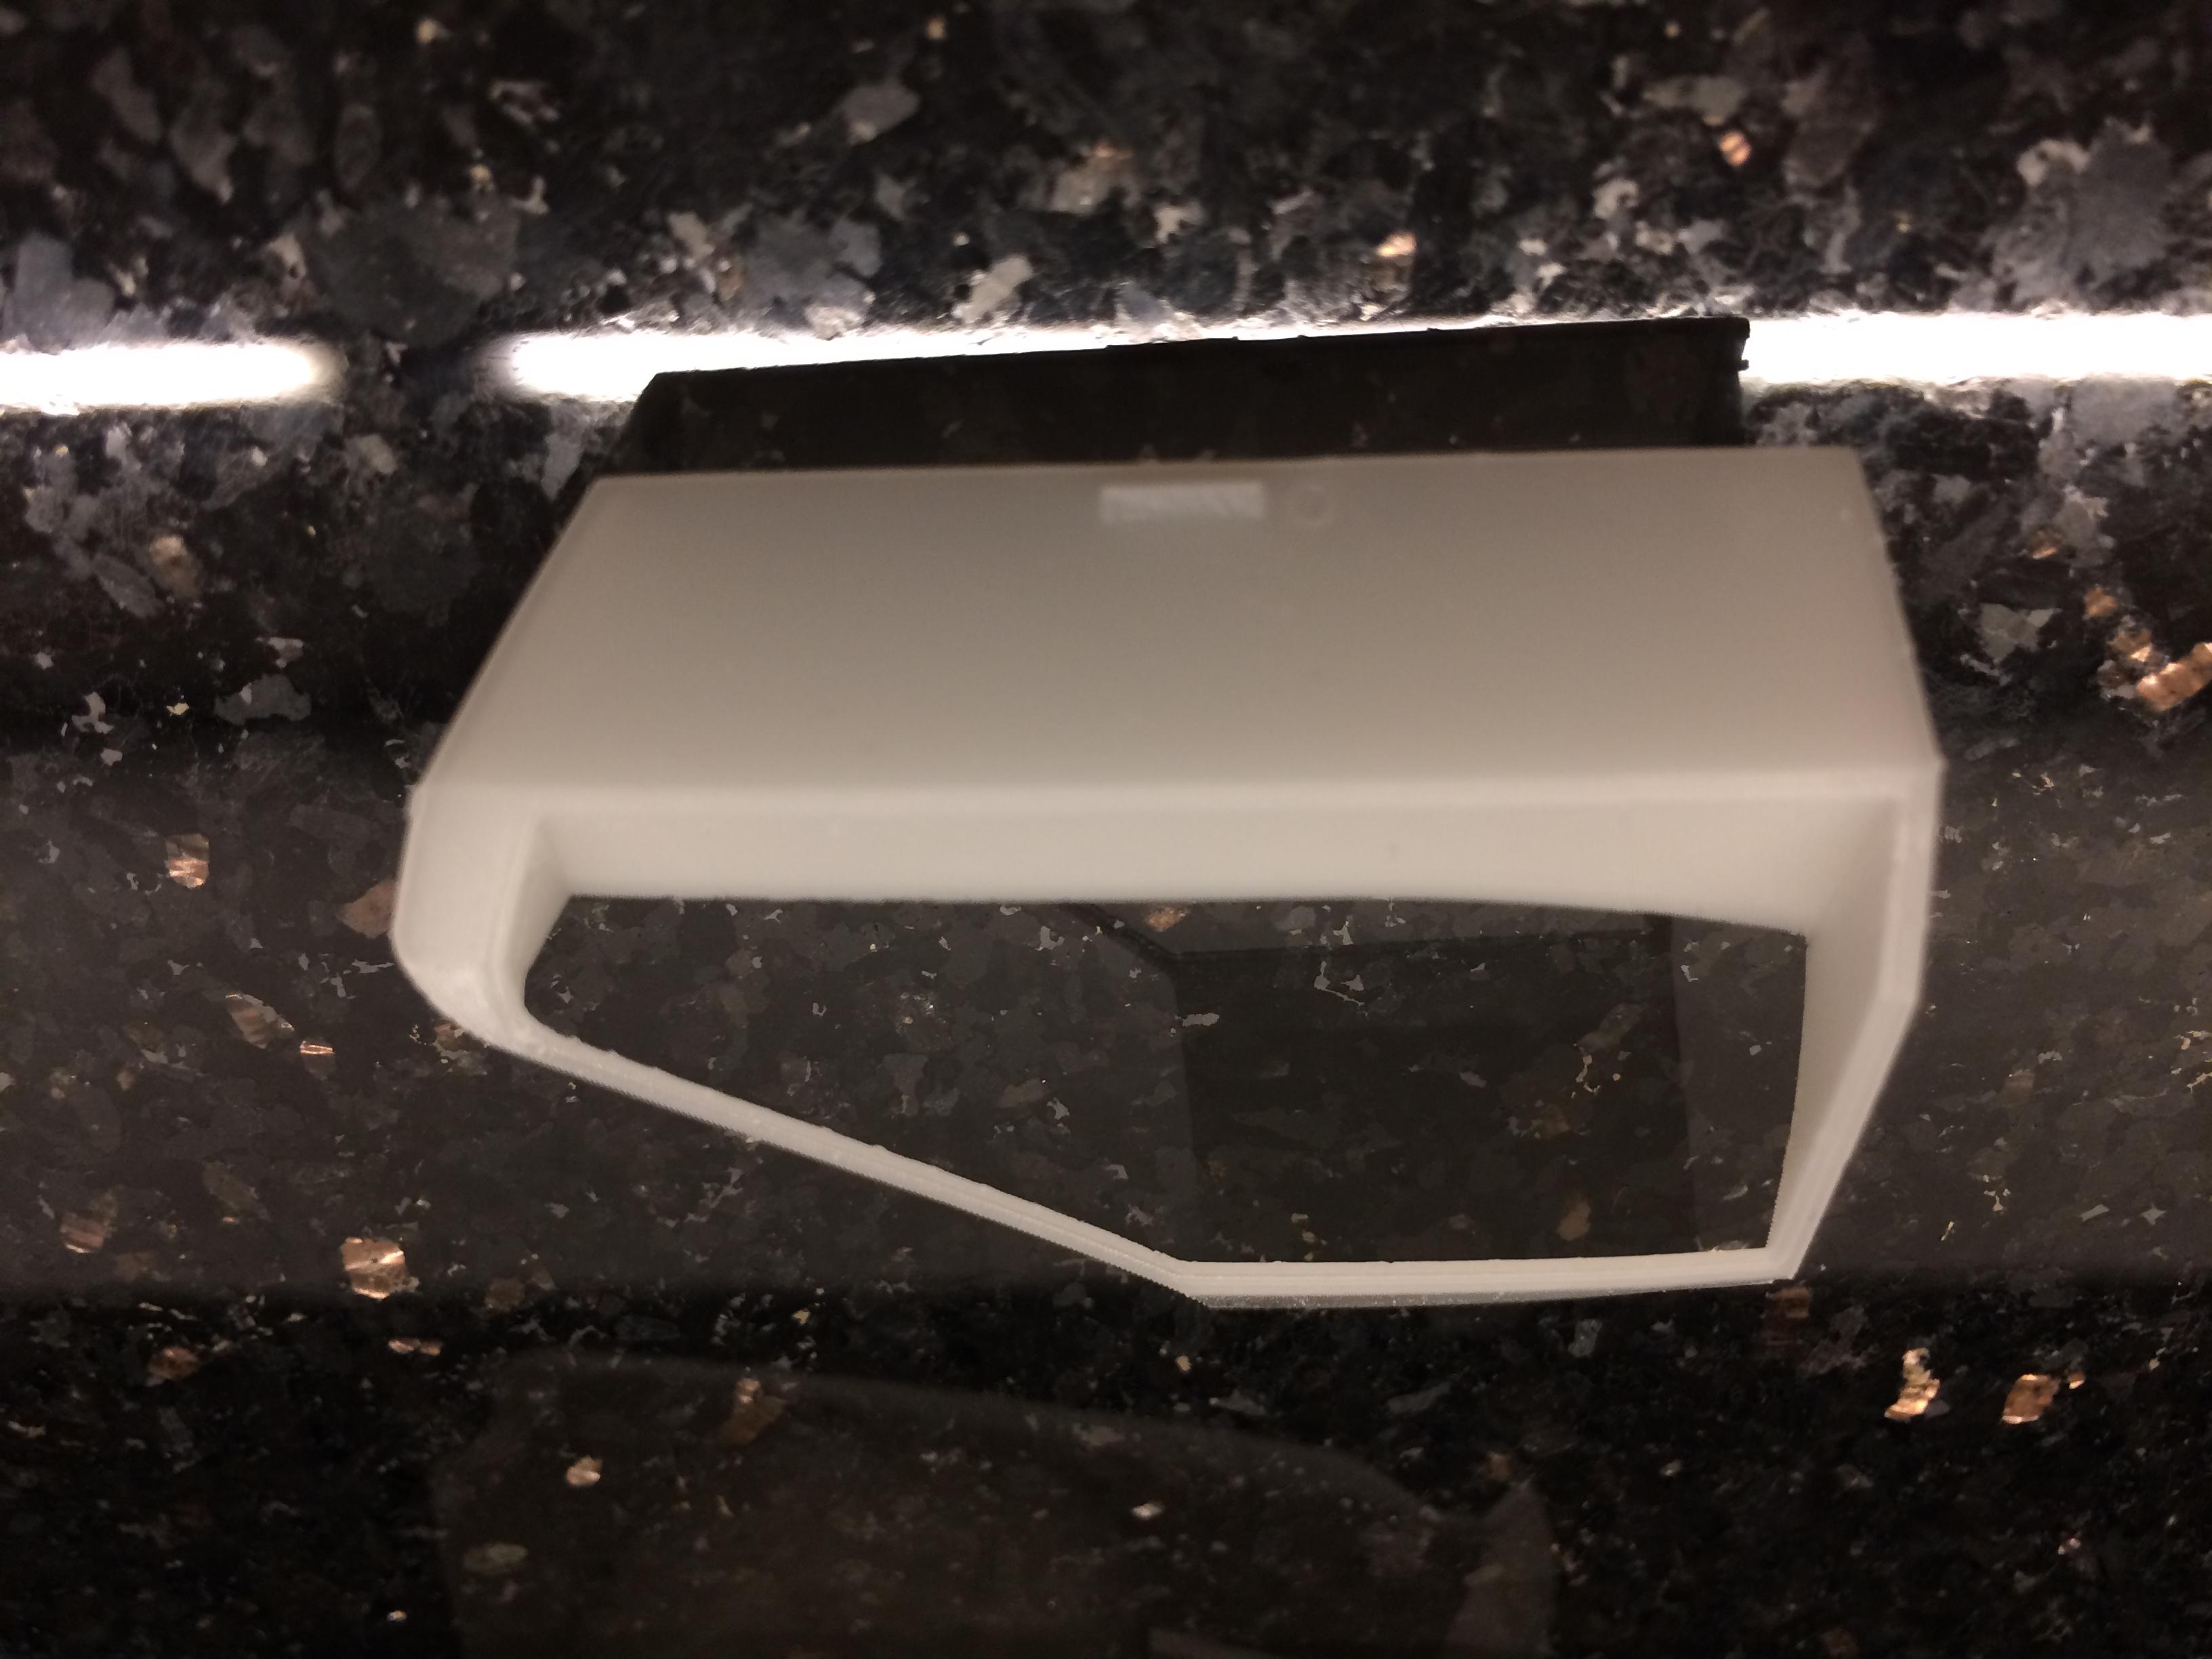
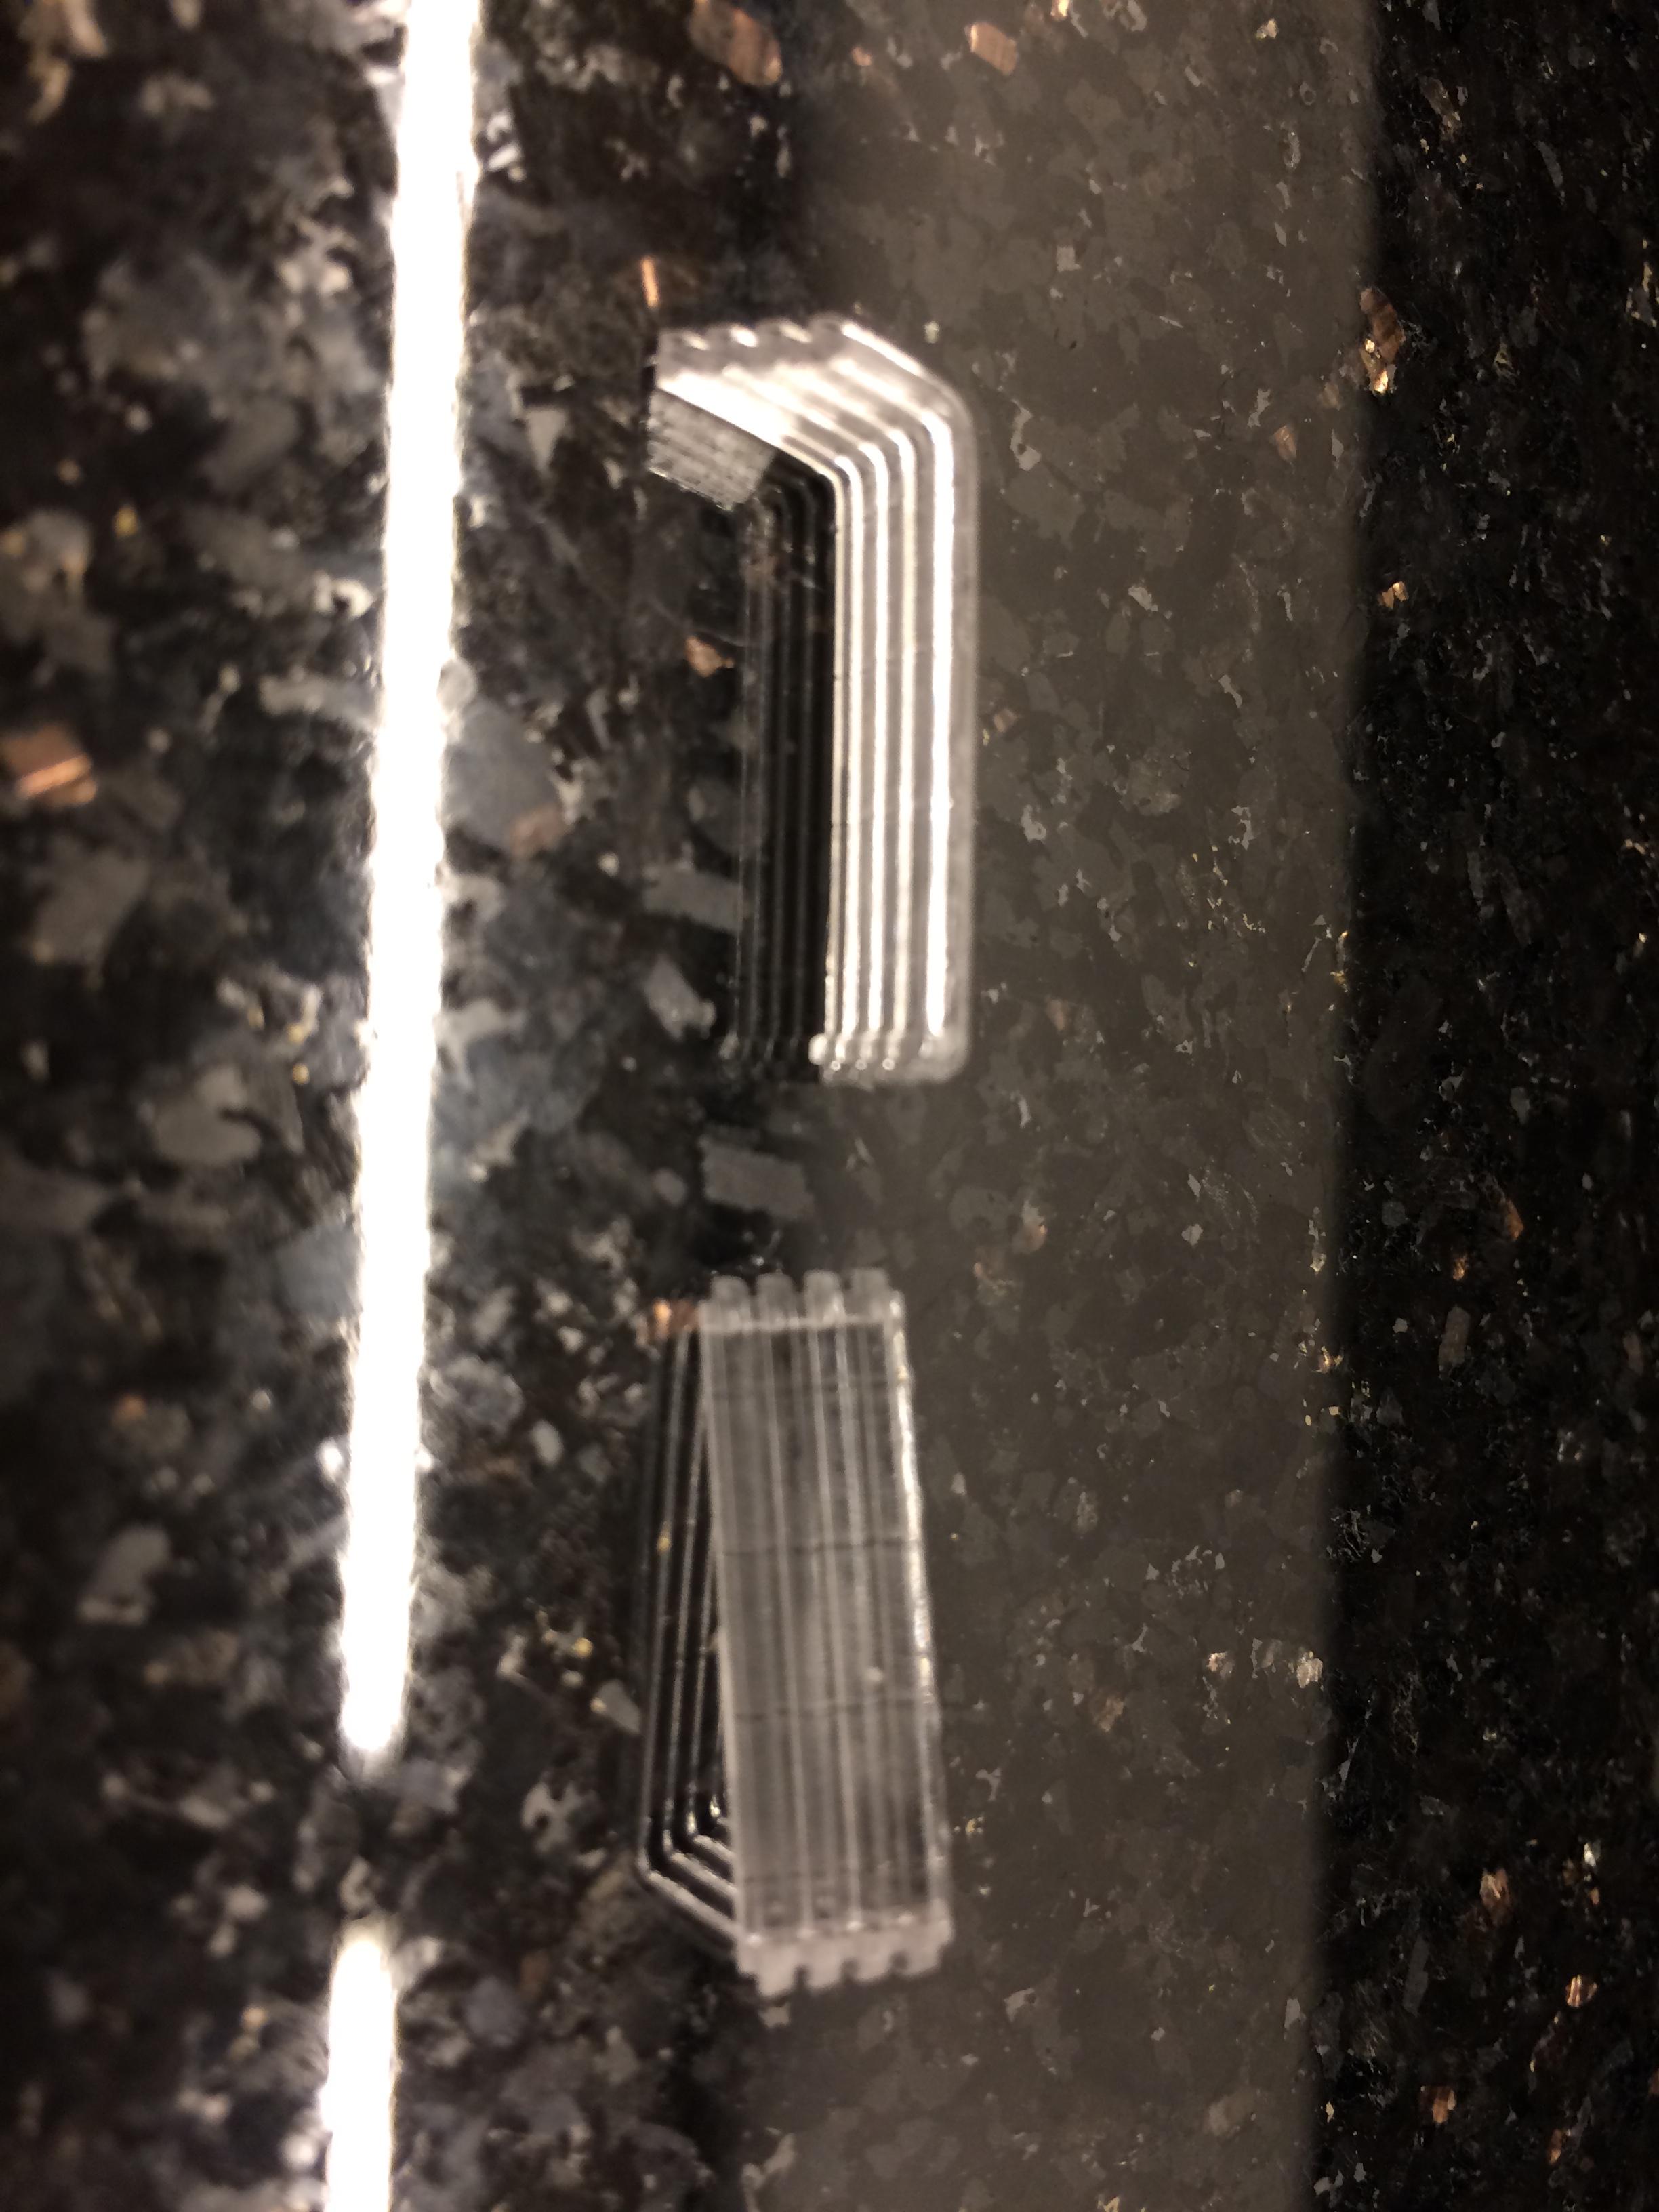
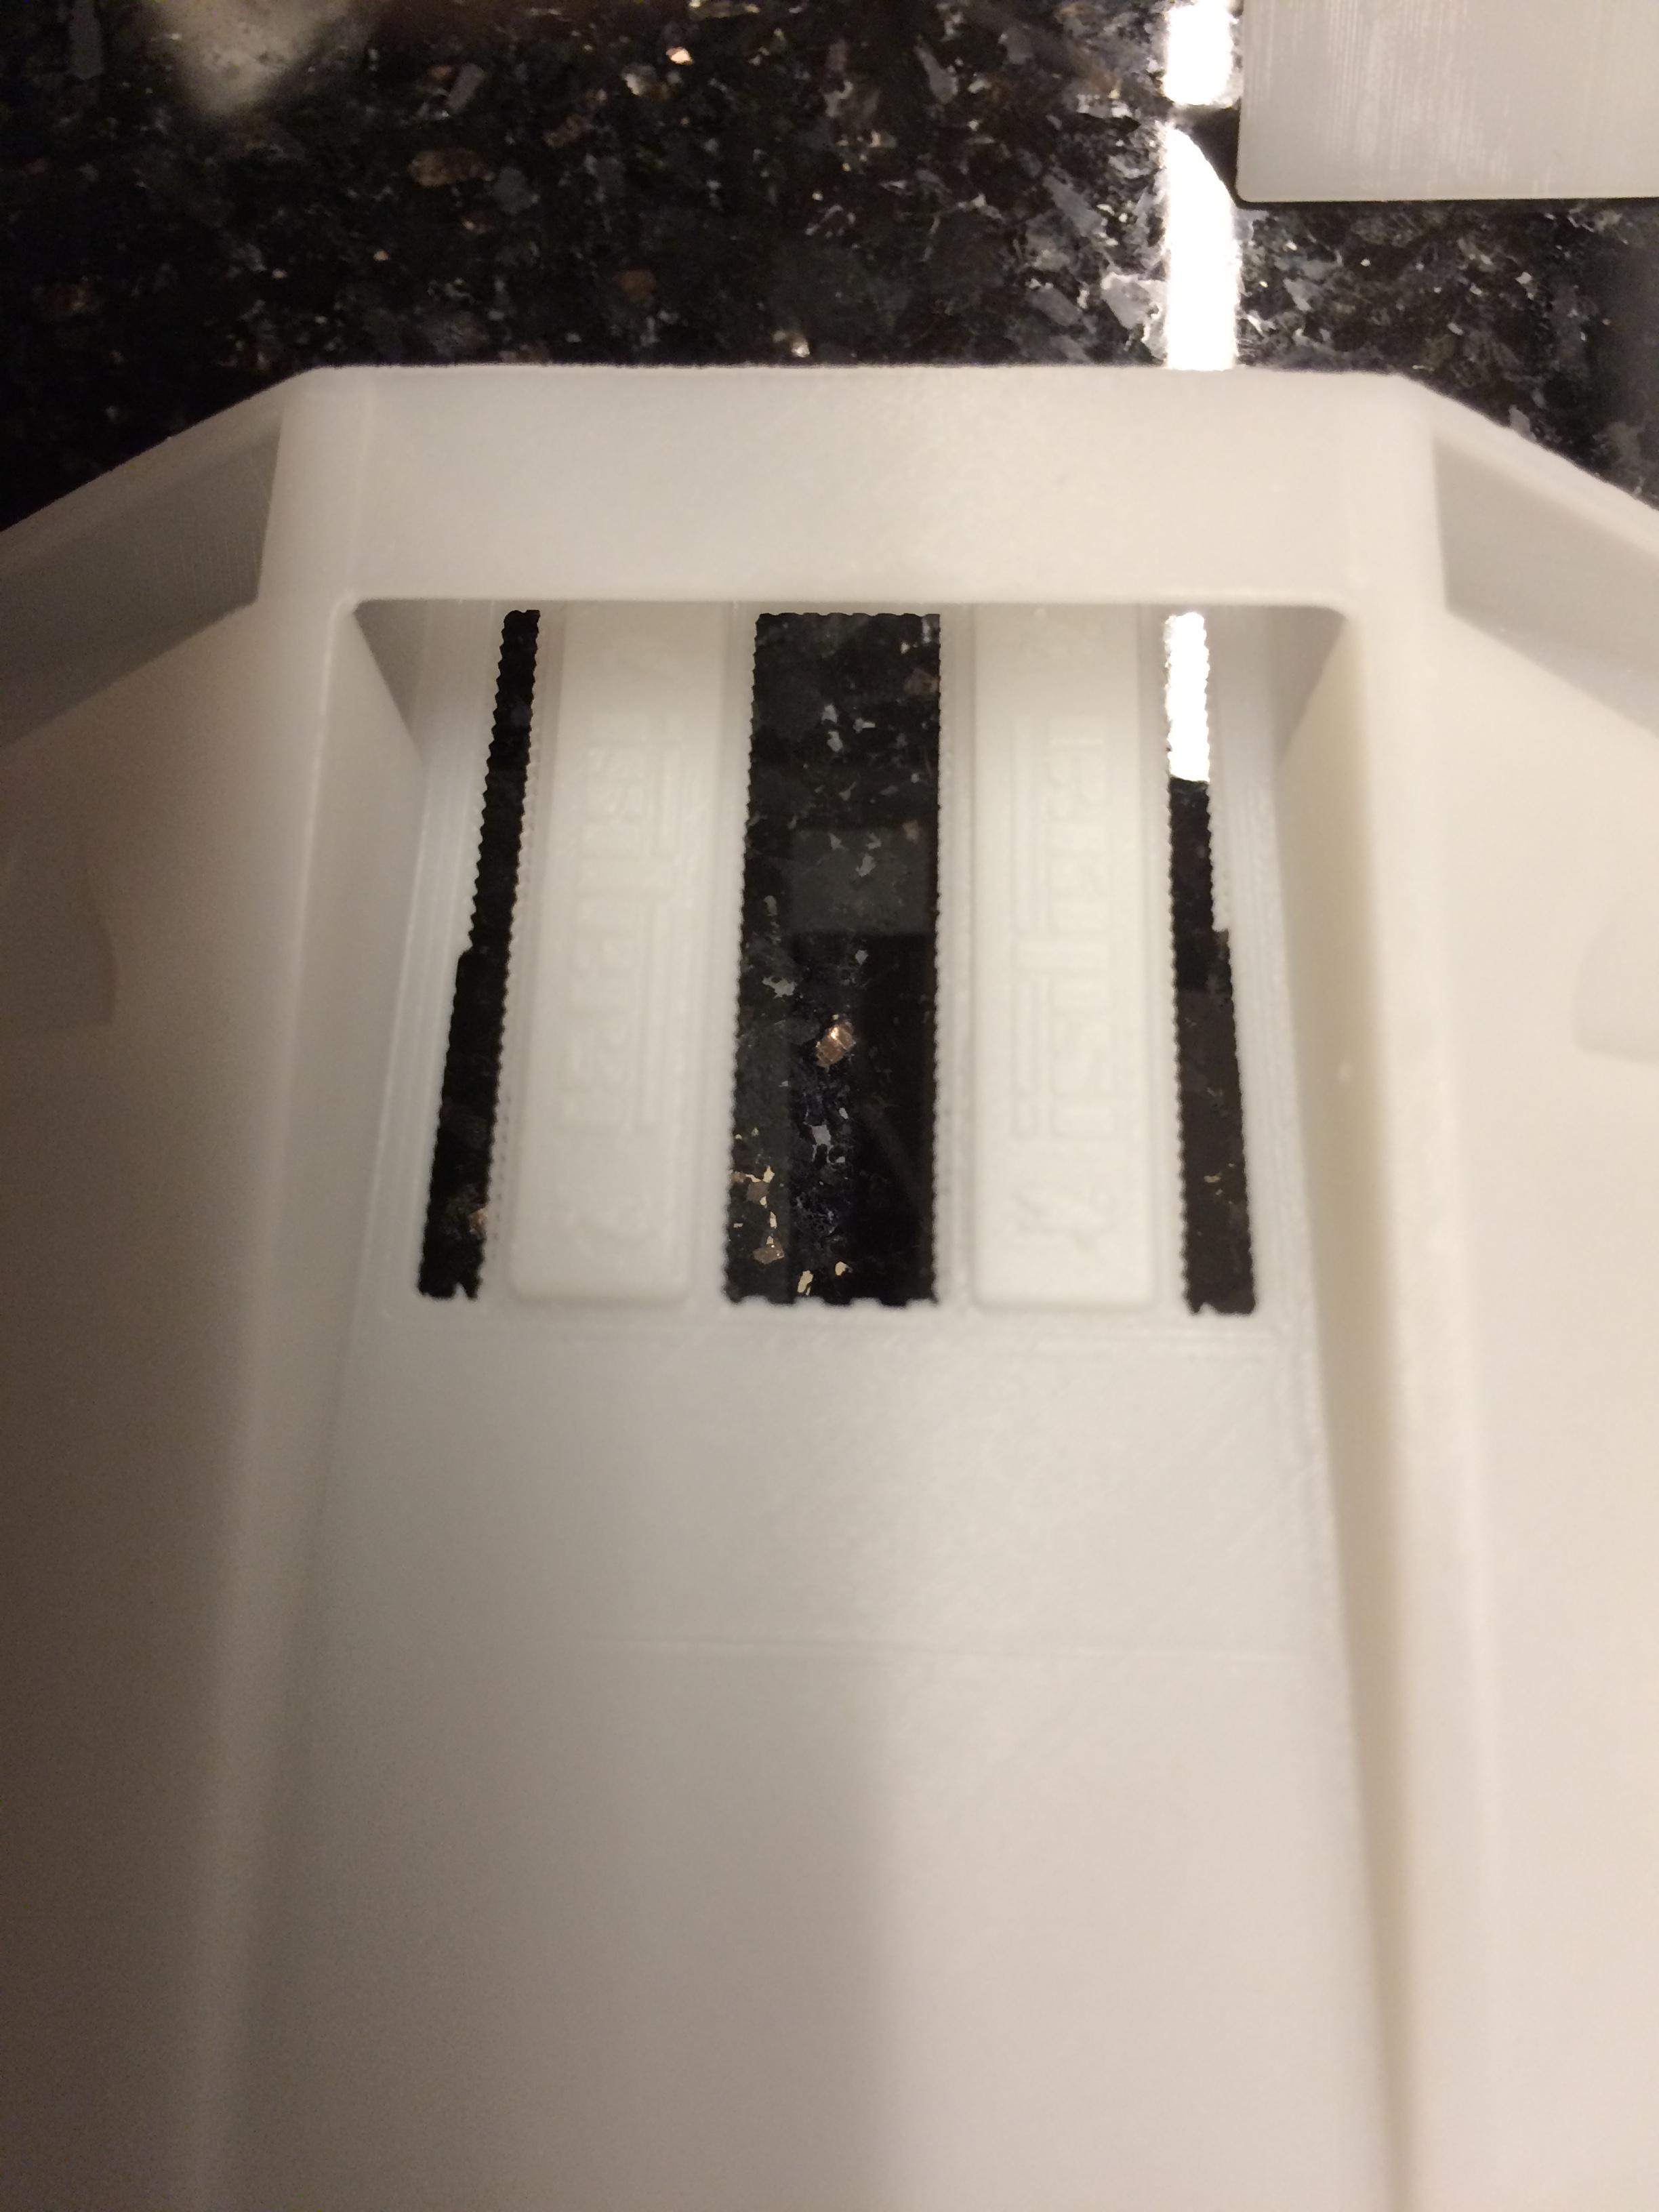
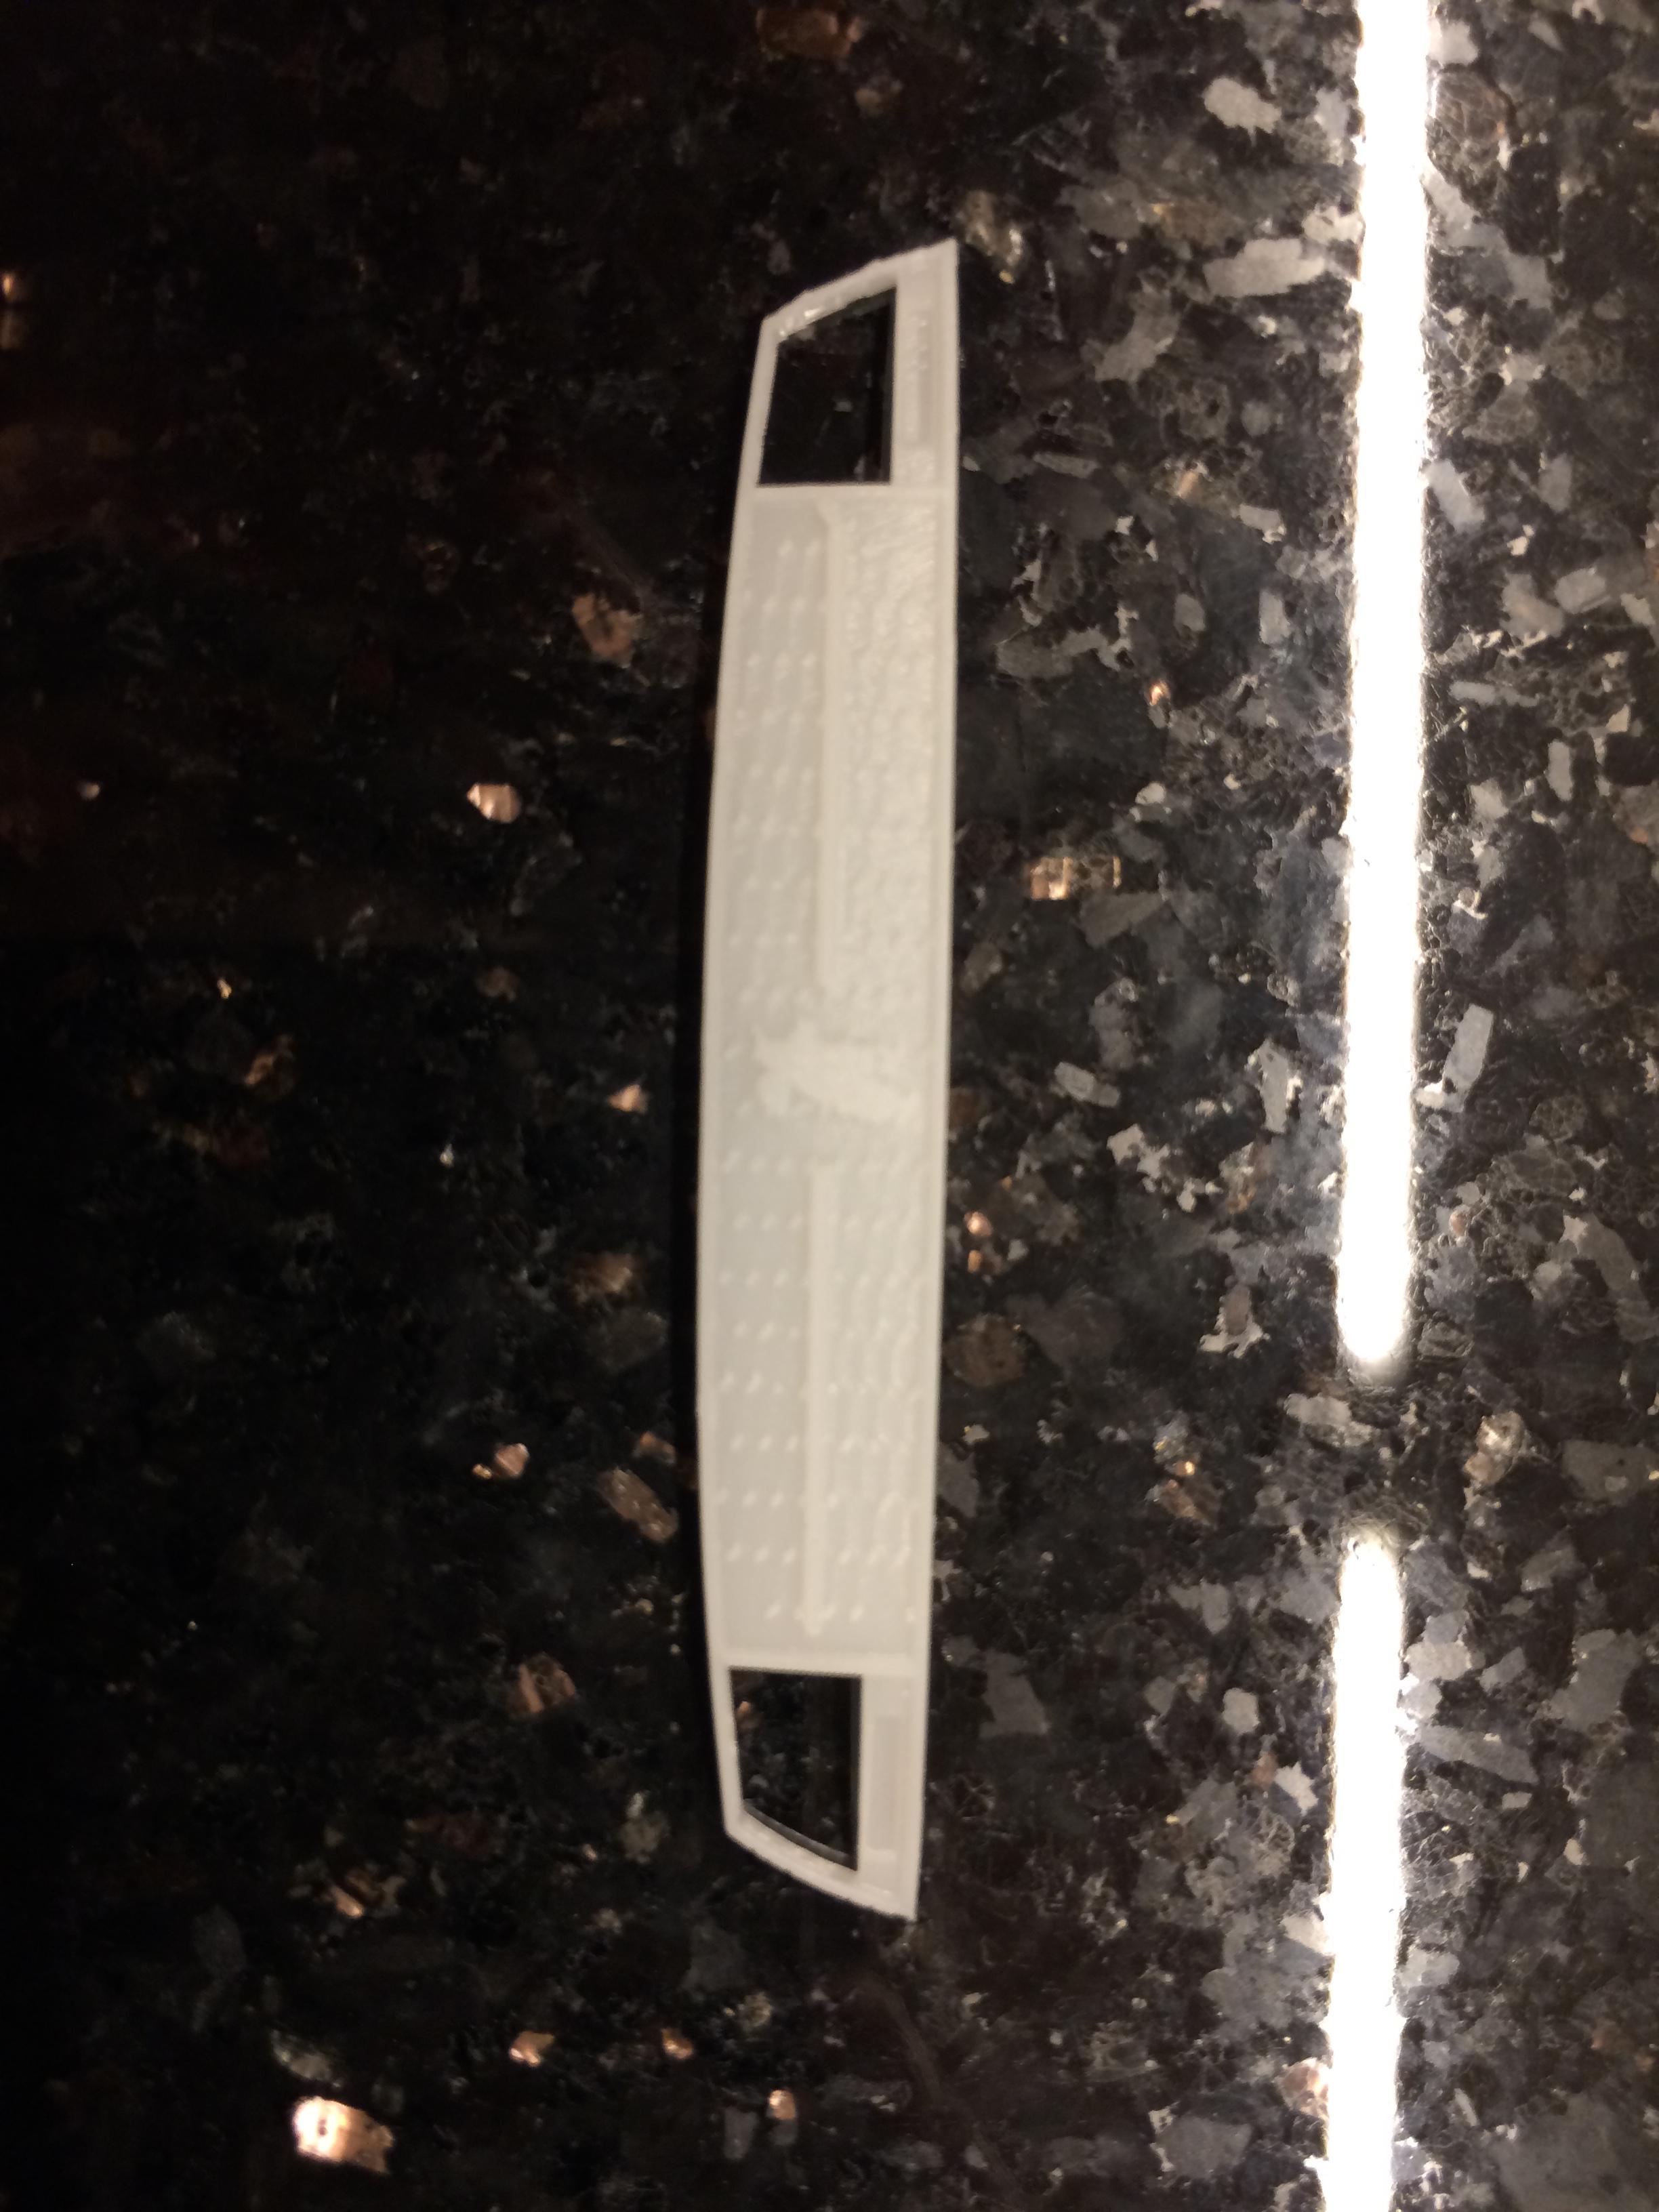
now I do have some news I would like to share. Today I received the 3D printed parts.
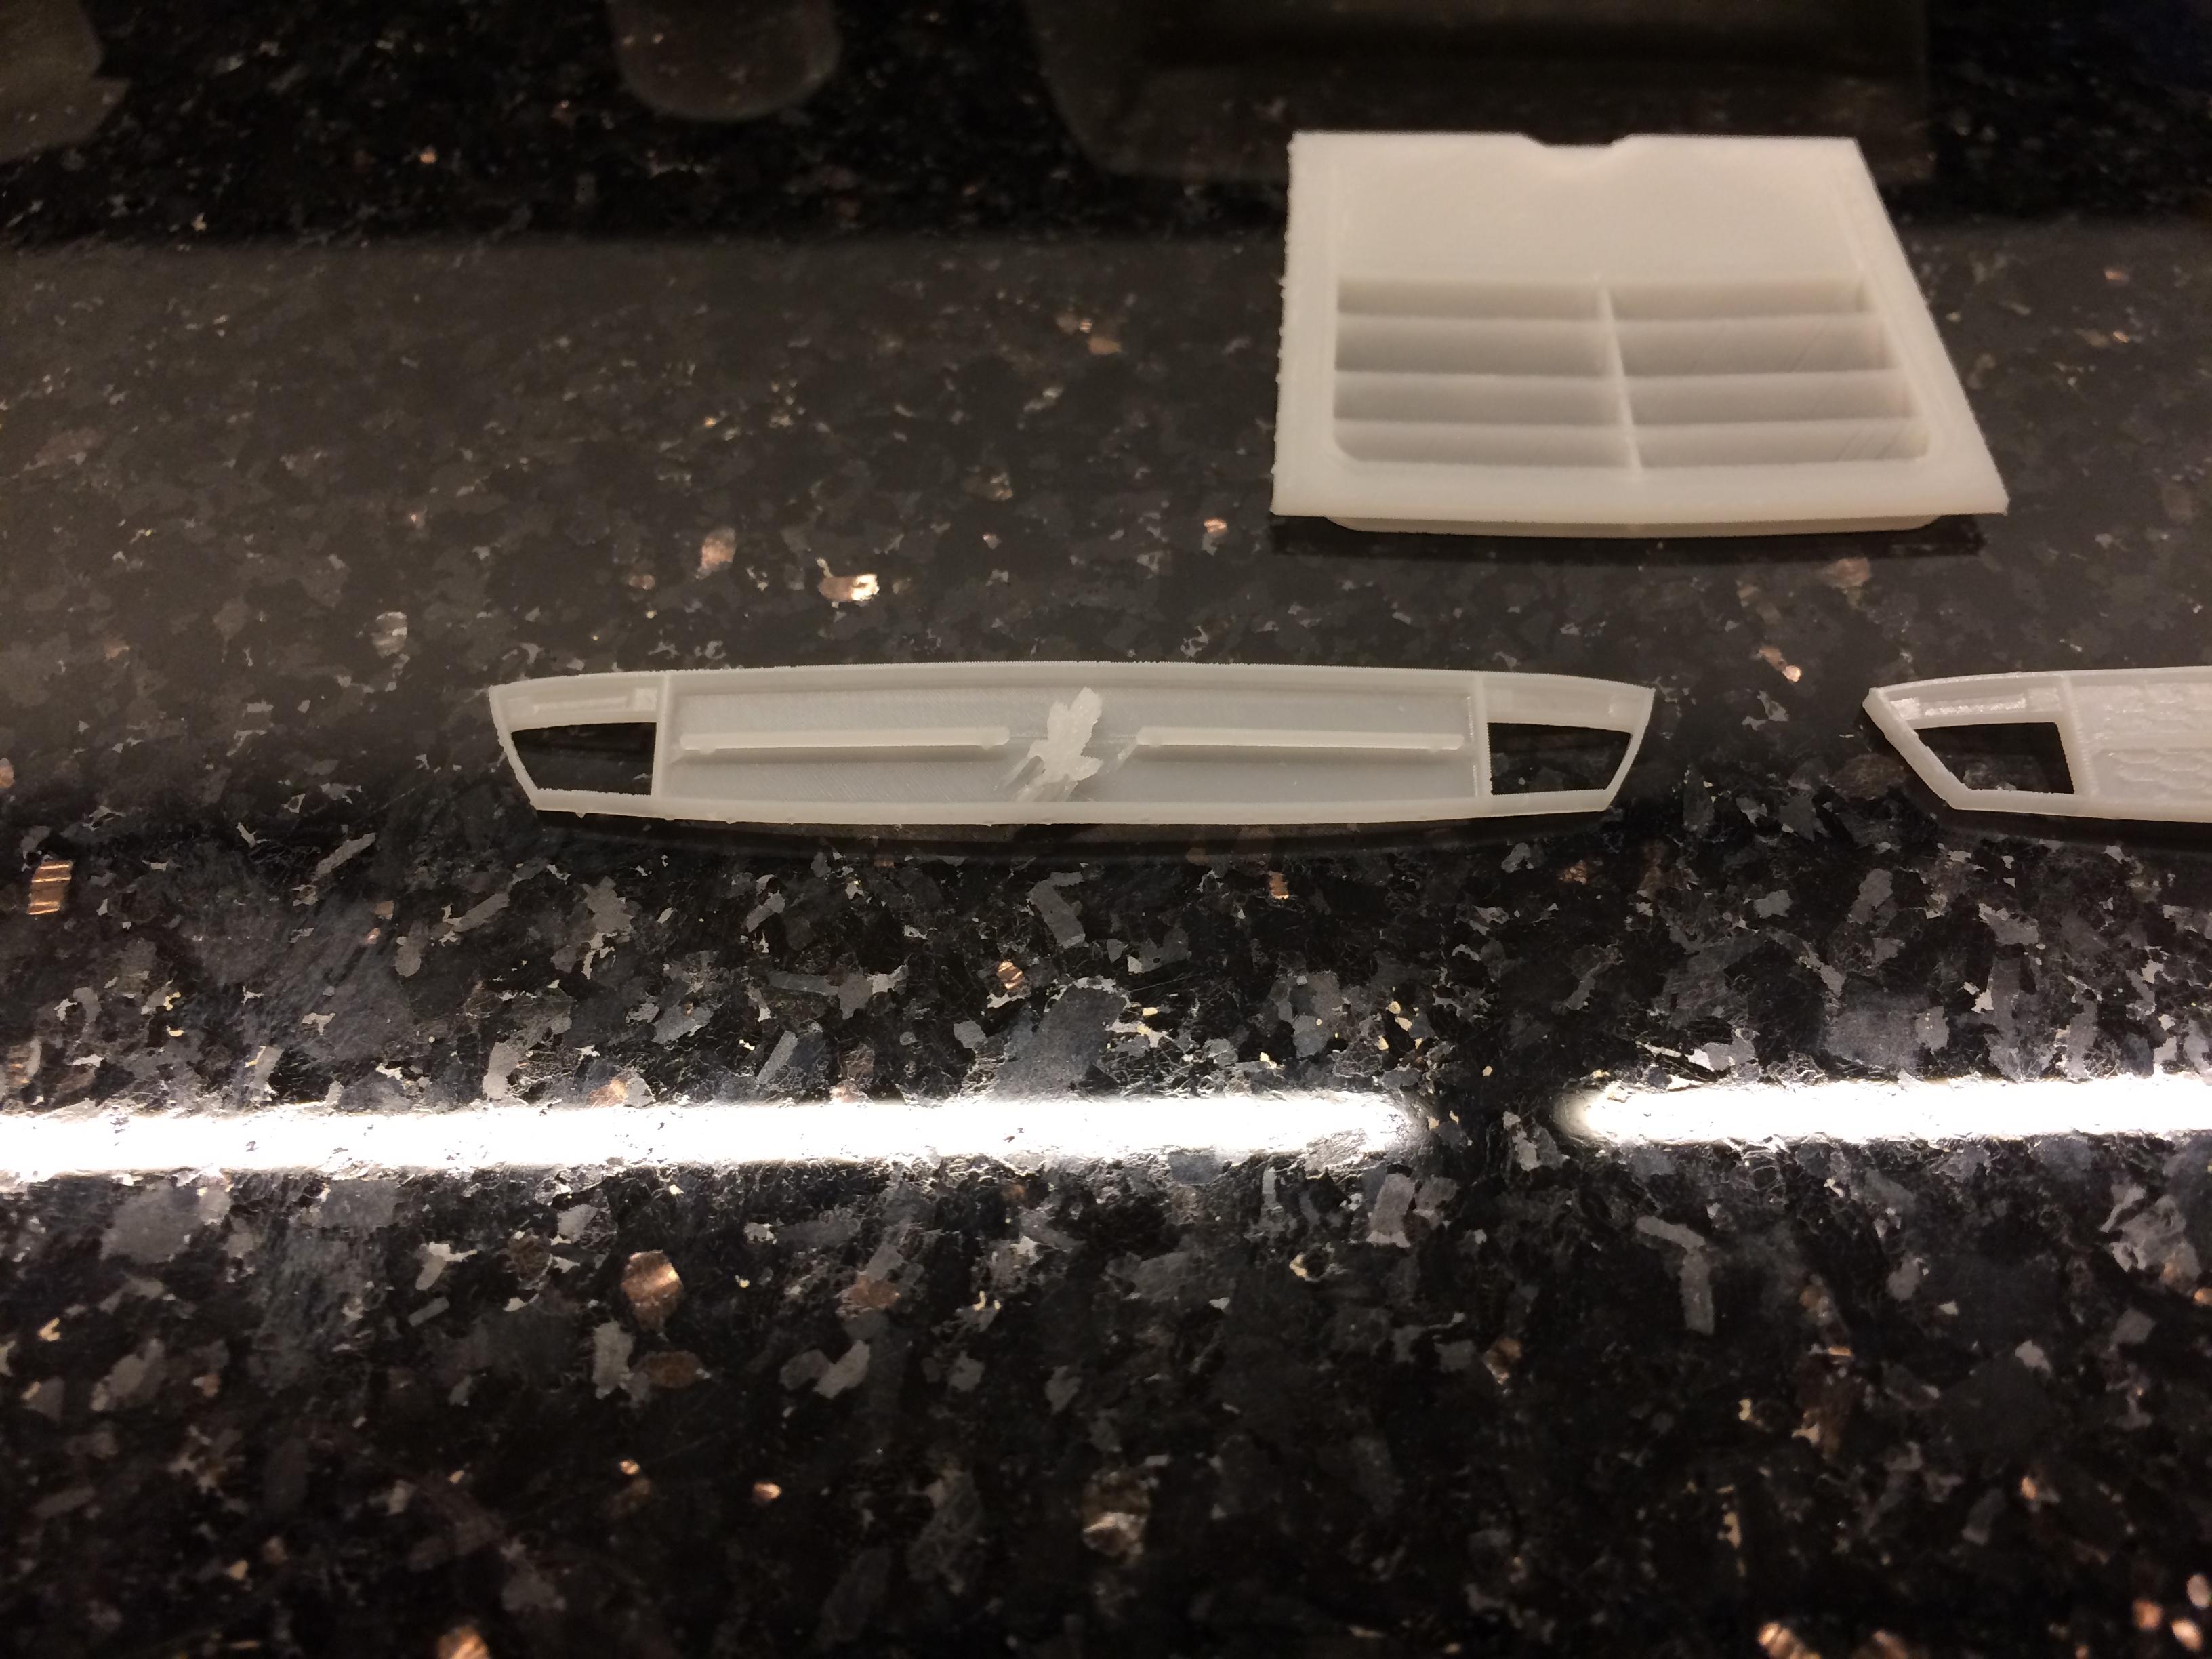
I had to modify the slats of the front hood as they where to thin. Unfortunately my CAD model crashed then so I had to made a separate part for the front hood. The hexagon pattern for the grilles also made problems, so I made a second version for the front grille.
But enough talked, here are the pictures of the parts.
-
On 10/6/2020 at 10:14 PM, Dann Tier said:
NICE!!!...i'm glad you Were able to get back to it -its looking BRILLIANT!!! I still think its so cool that you're building an early version, and mine is a custom later version! not long ago, there wasnt any!
Hello Dann,
thank you! Your feedback has always been a true motivation to carry on with this project.
Now I even have a plan how to do the windows and headlight covers. I will do them by thermoforming with a plaster mold. To create the mold, I will do a 3D printed negative mold.
I once did a canopy for the 1/12 Lindbergh GT200 by thermoforming with a plaster mold. Worked well back then.
Greetings from Germany
Erich
-
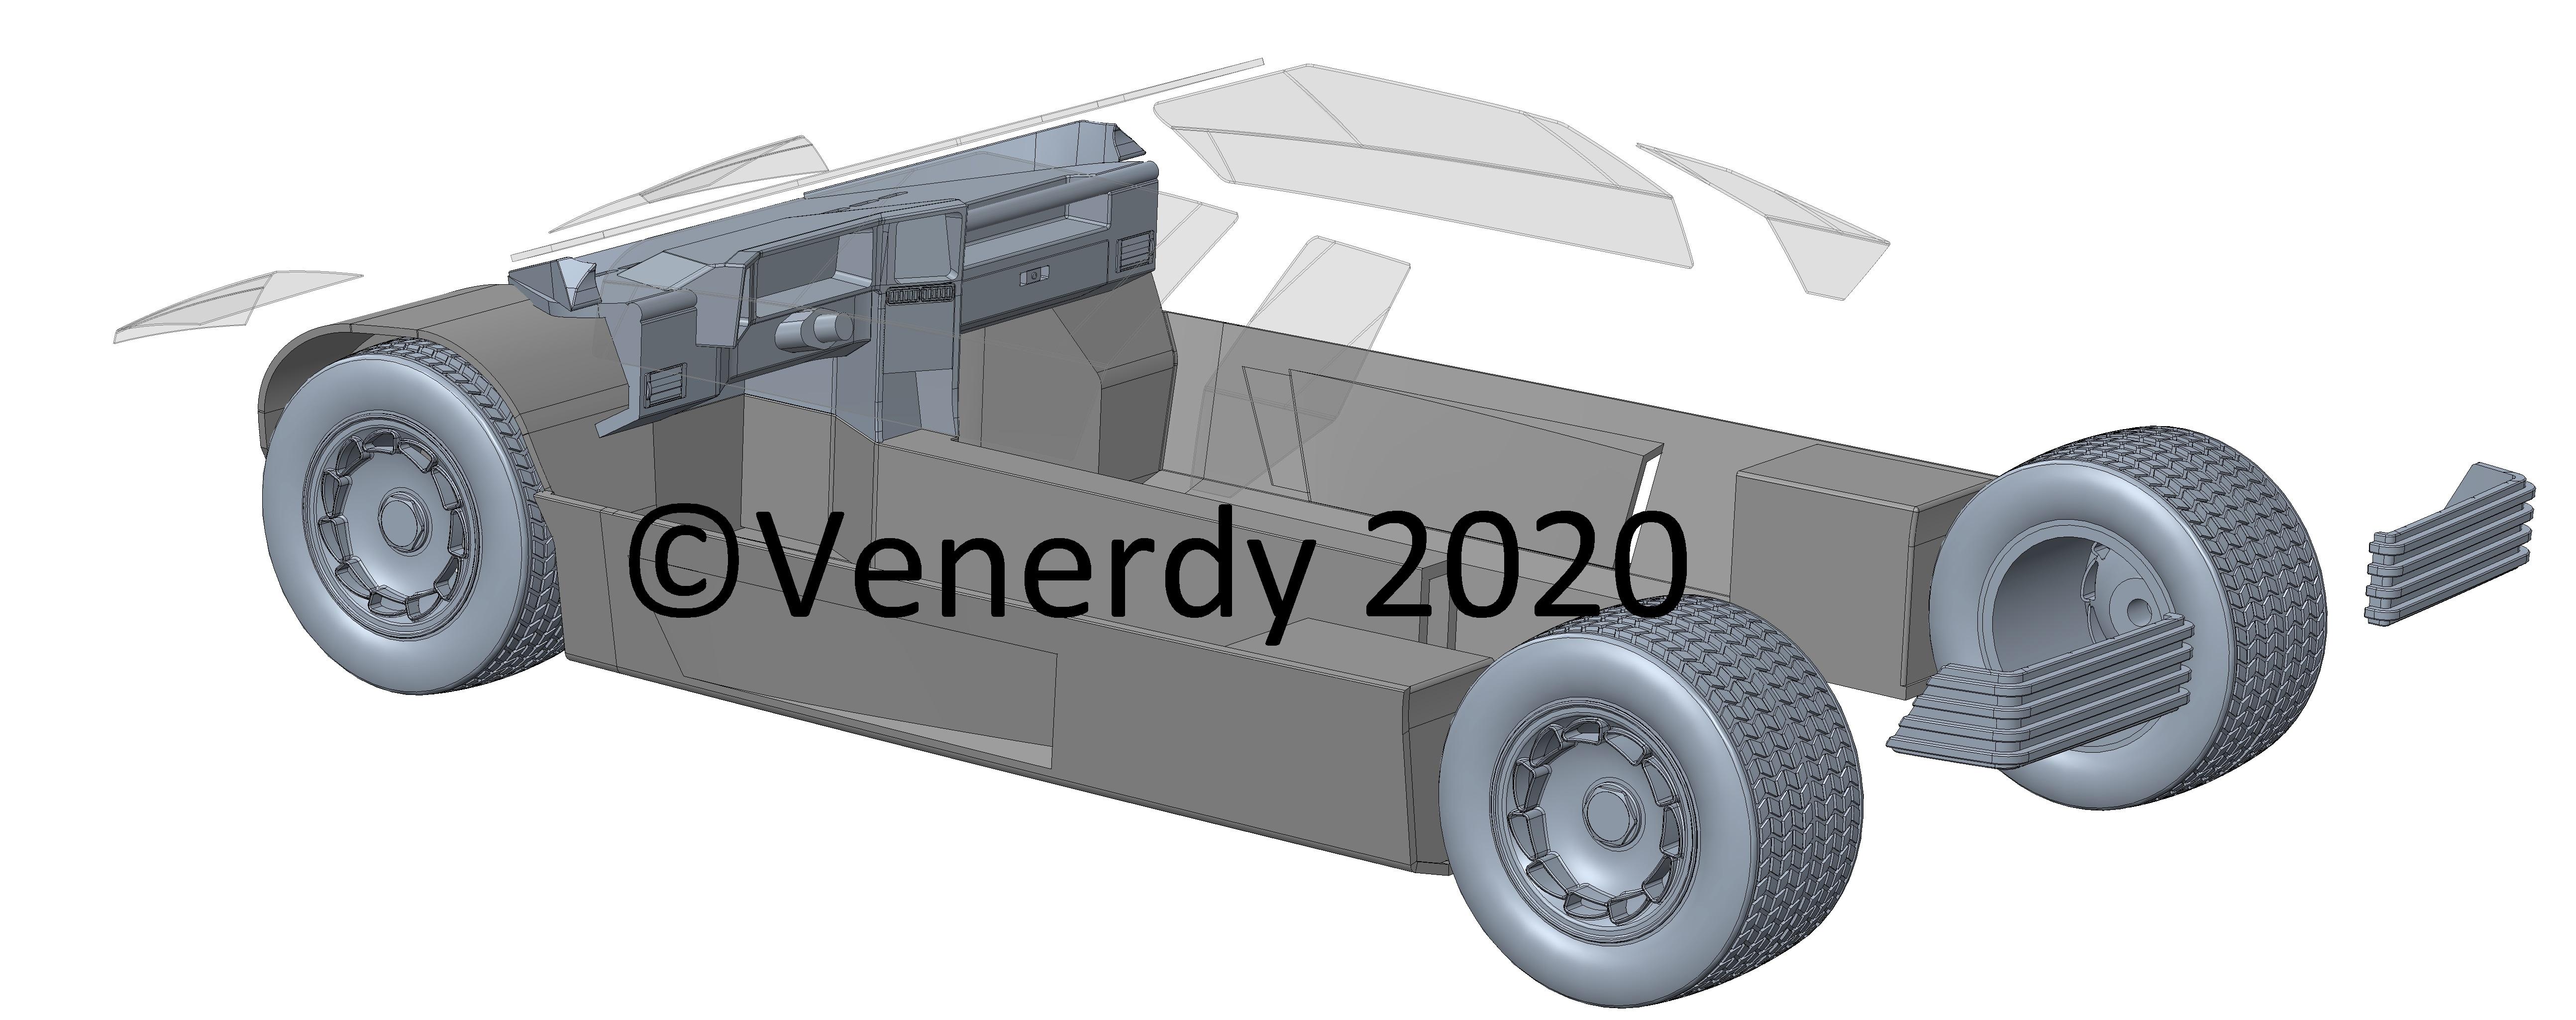
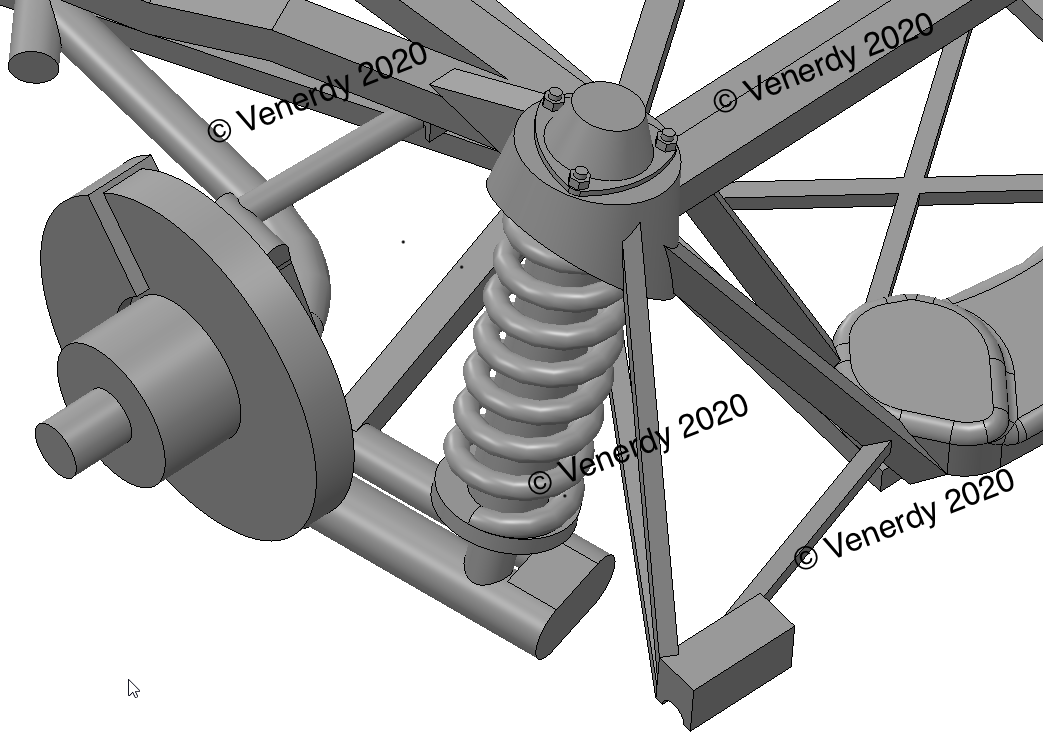
After the summer break I was able to go ahead.
I added the front and rear suspension as well as the tubular frame of the engine bay.
So the chassis should be ready soon.
-
Hello Dann,
this is absolutely amazing. Great work. It will be a fantastic model.
Maybe in a 5 years I can catch up with mine. Somehow I have to little sparetime for this hobby.
Greetings from Germany
Erich
-
Thank you Dann.
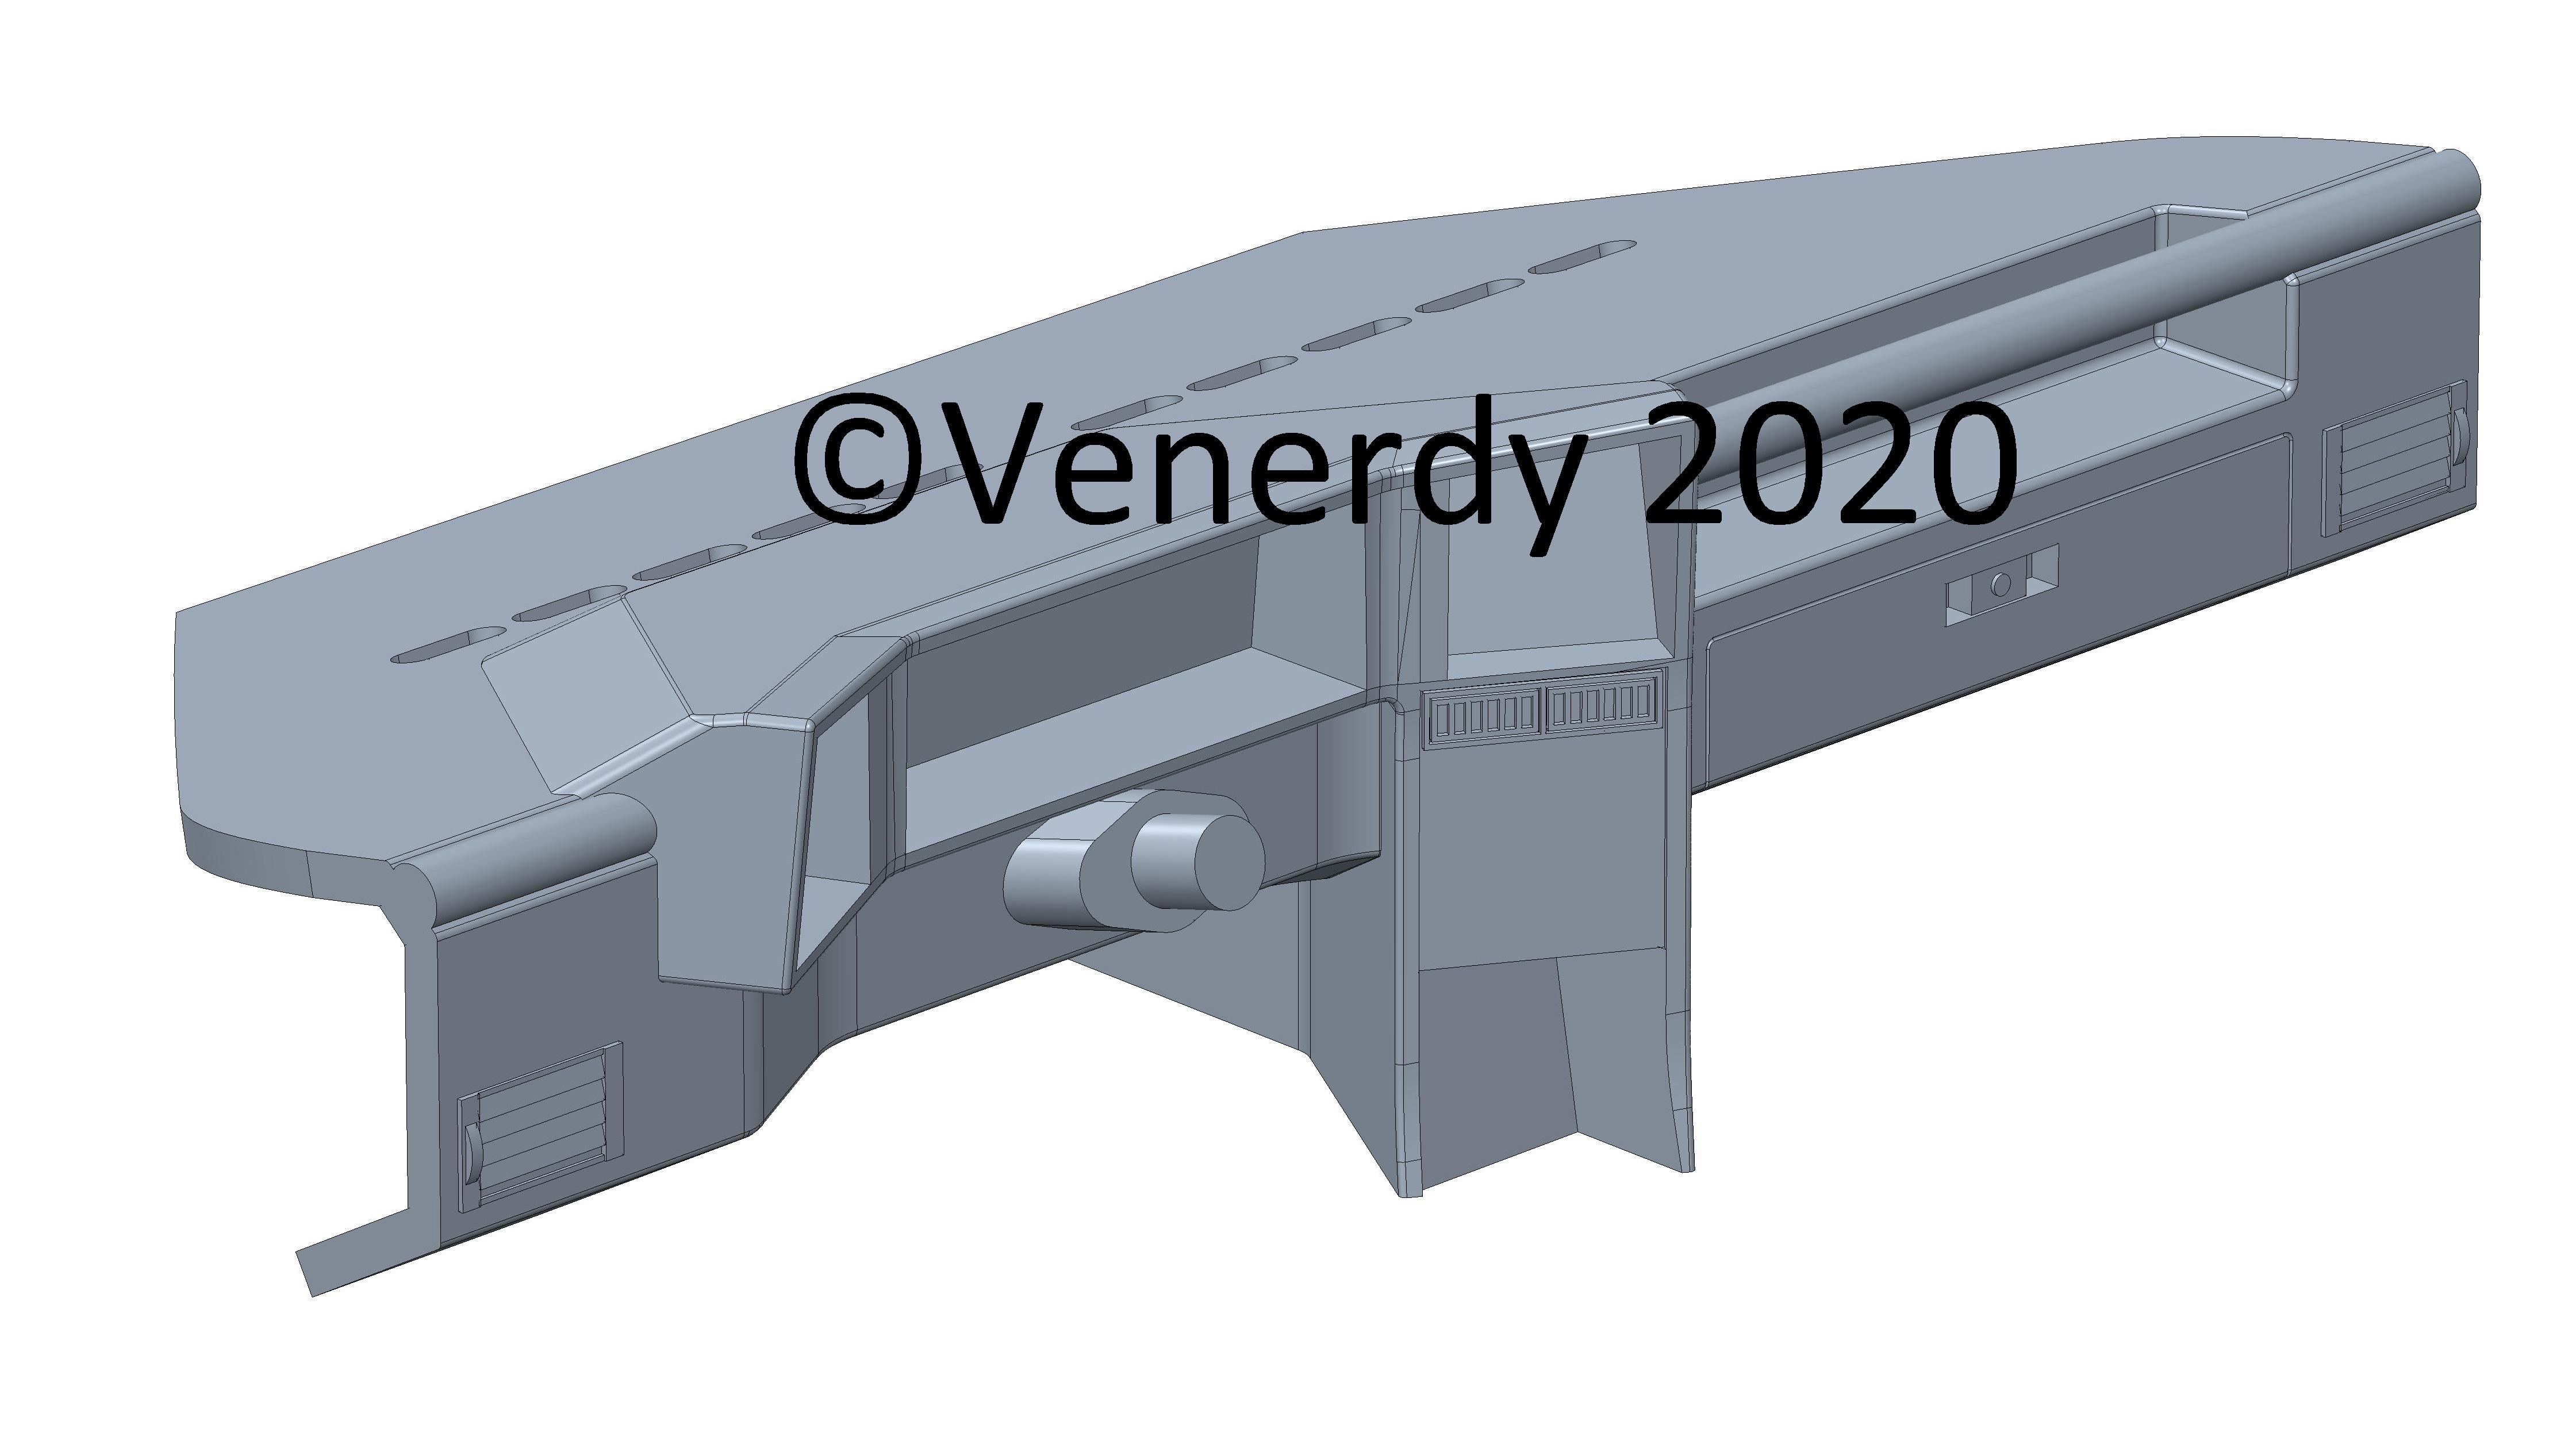
Now here are some updates:
- Dashboard is ready
- Chassis is ready if I do the tubular frame the old fashioned way with brass profiles
- Taillights are ready
-
On 6/20/2020 at 4:11 AM, Dann Tier said:
Looking GREAT, Bud!!!......i'm still stuck in the garden sadly.
Don´t worry, I´m stuck in the garden too...irrigation system + robo mower have to be installed.
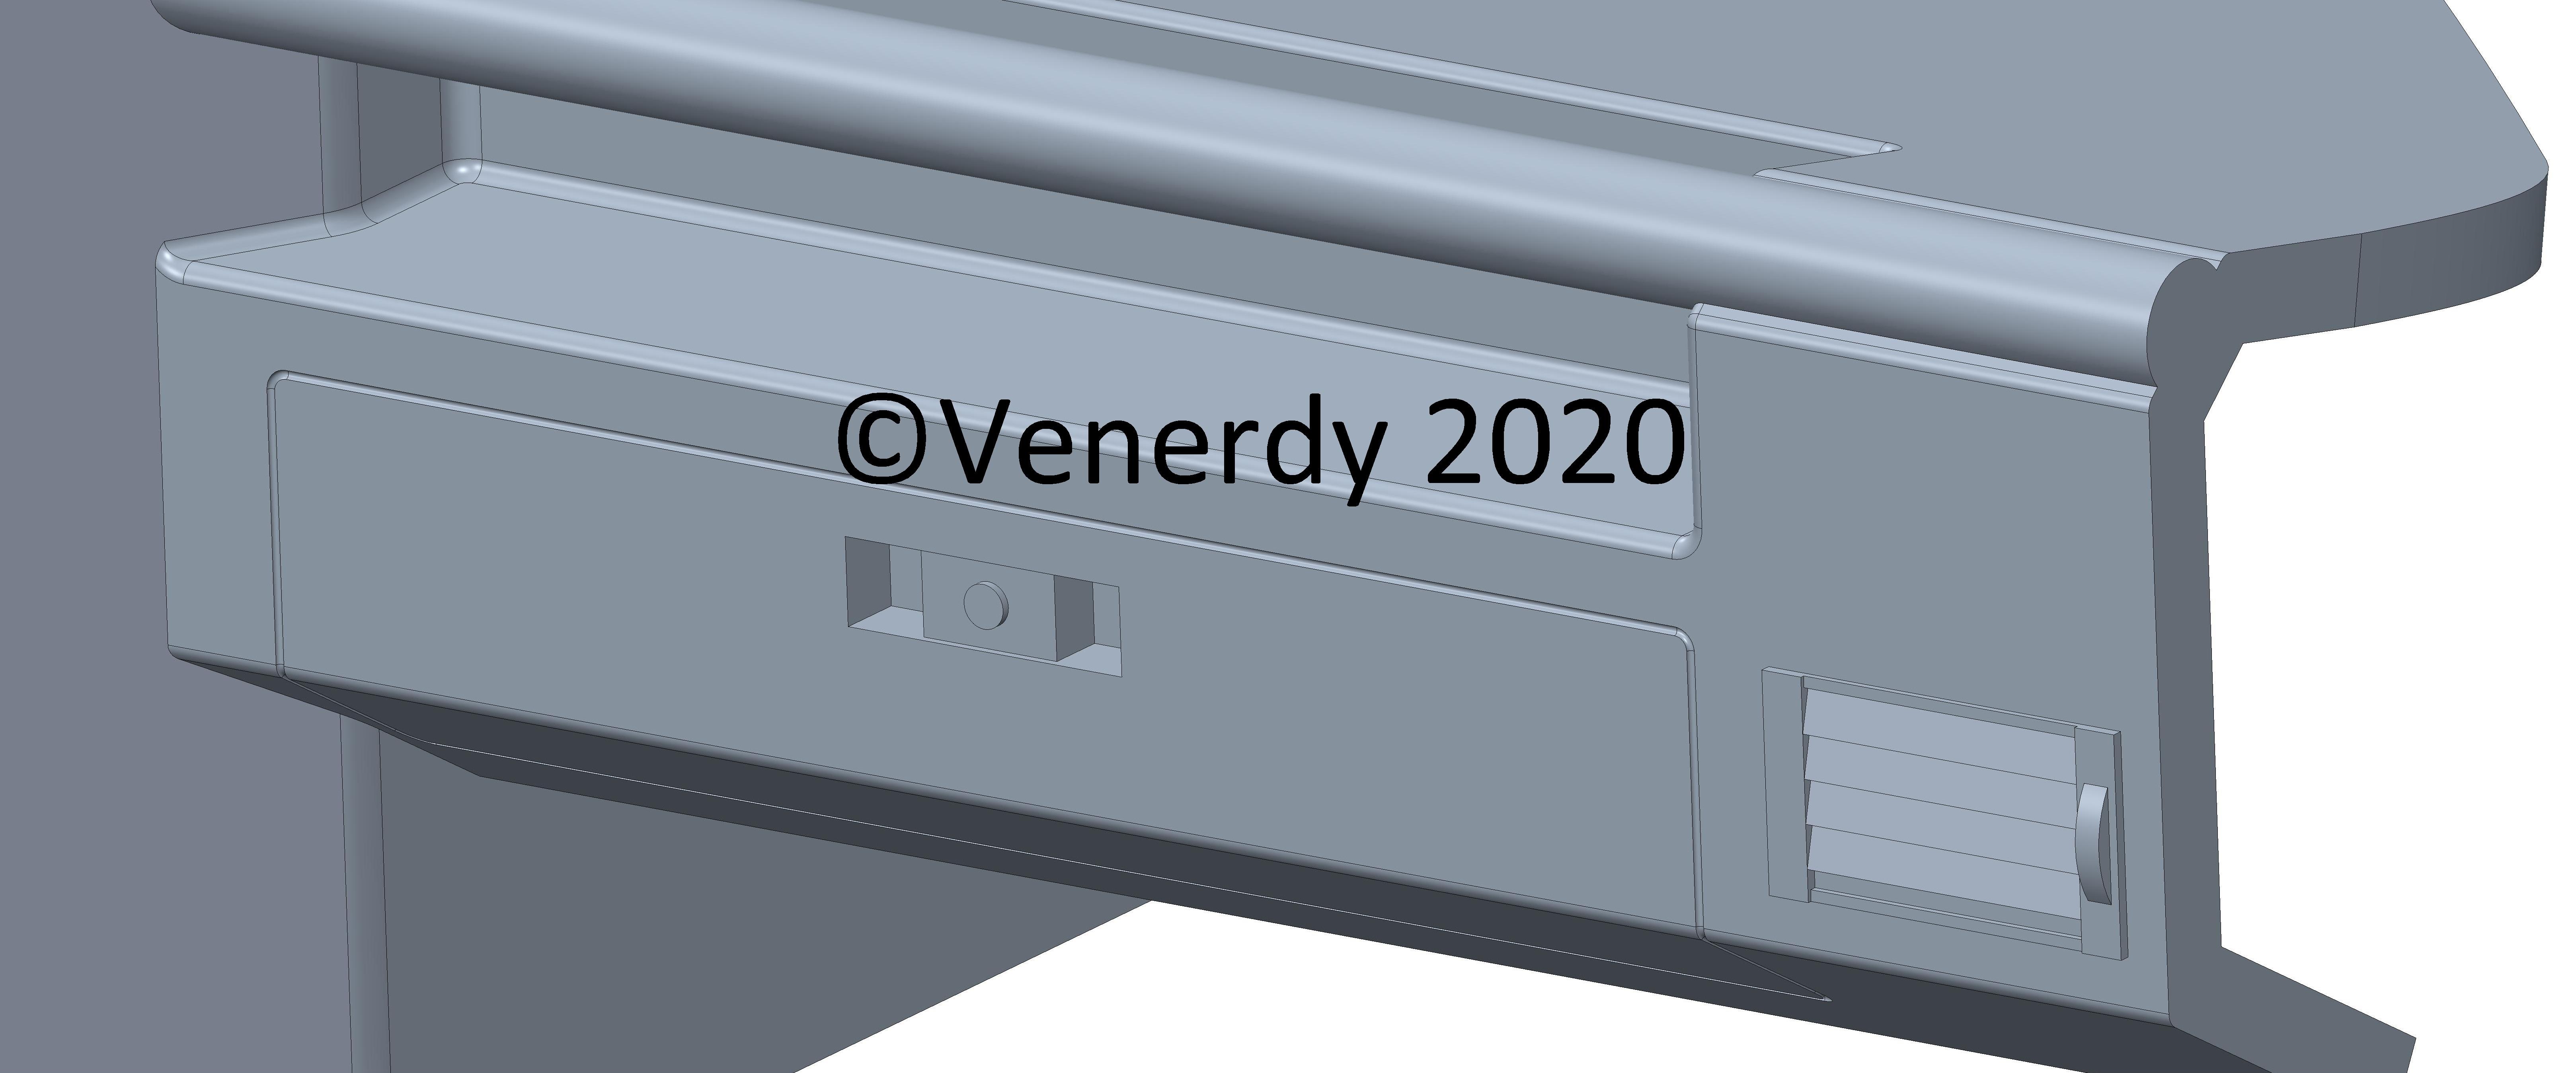
But nethertheless the dashboard is almost ready.
-
17 hours ago, David G. said:
Cool!
David G.
Thank you. The dashboard has been more difficult than I thought.
But now the general shape is done and I am confident to get the details done as well.


ISDERA imperator 108i Series 1
in WIP: Model Cars
Posted
Chronicle Part 6:
in late 2020 a dream took a great step to become true. The parts have been printed at a professionell printing service: