
Bbo1974
-
Posts
67 -
Joined
-
Last visited
Content Type
Profiles
Forums
Events
Gallery
Posts posted by Bbo1974
-
-
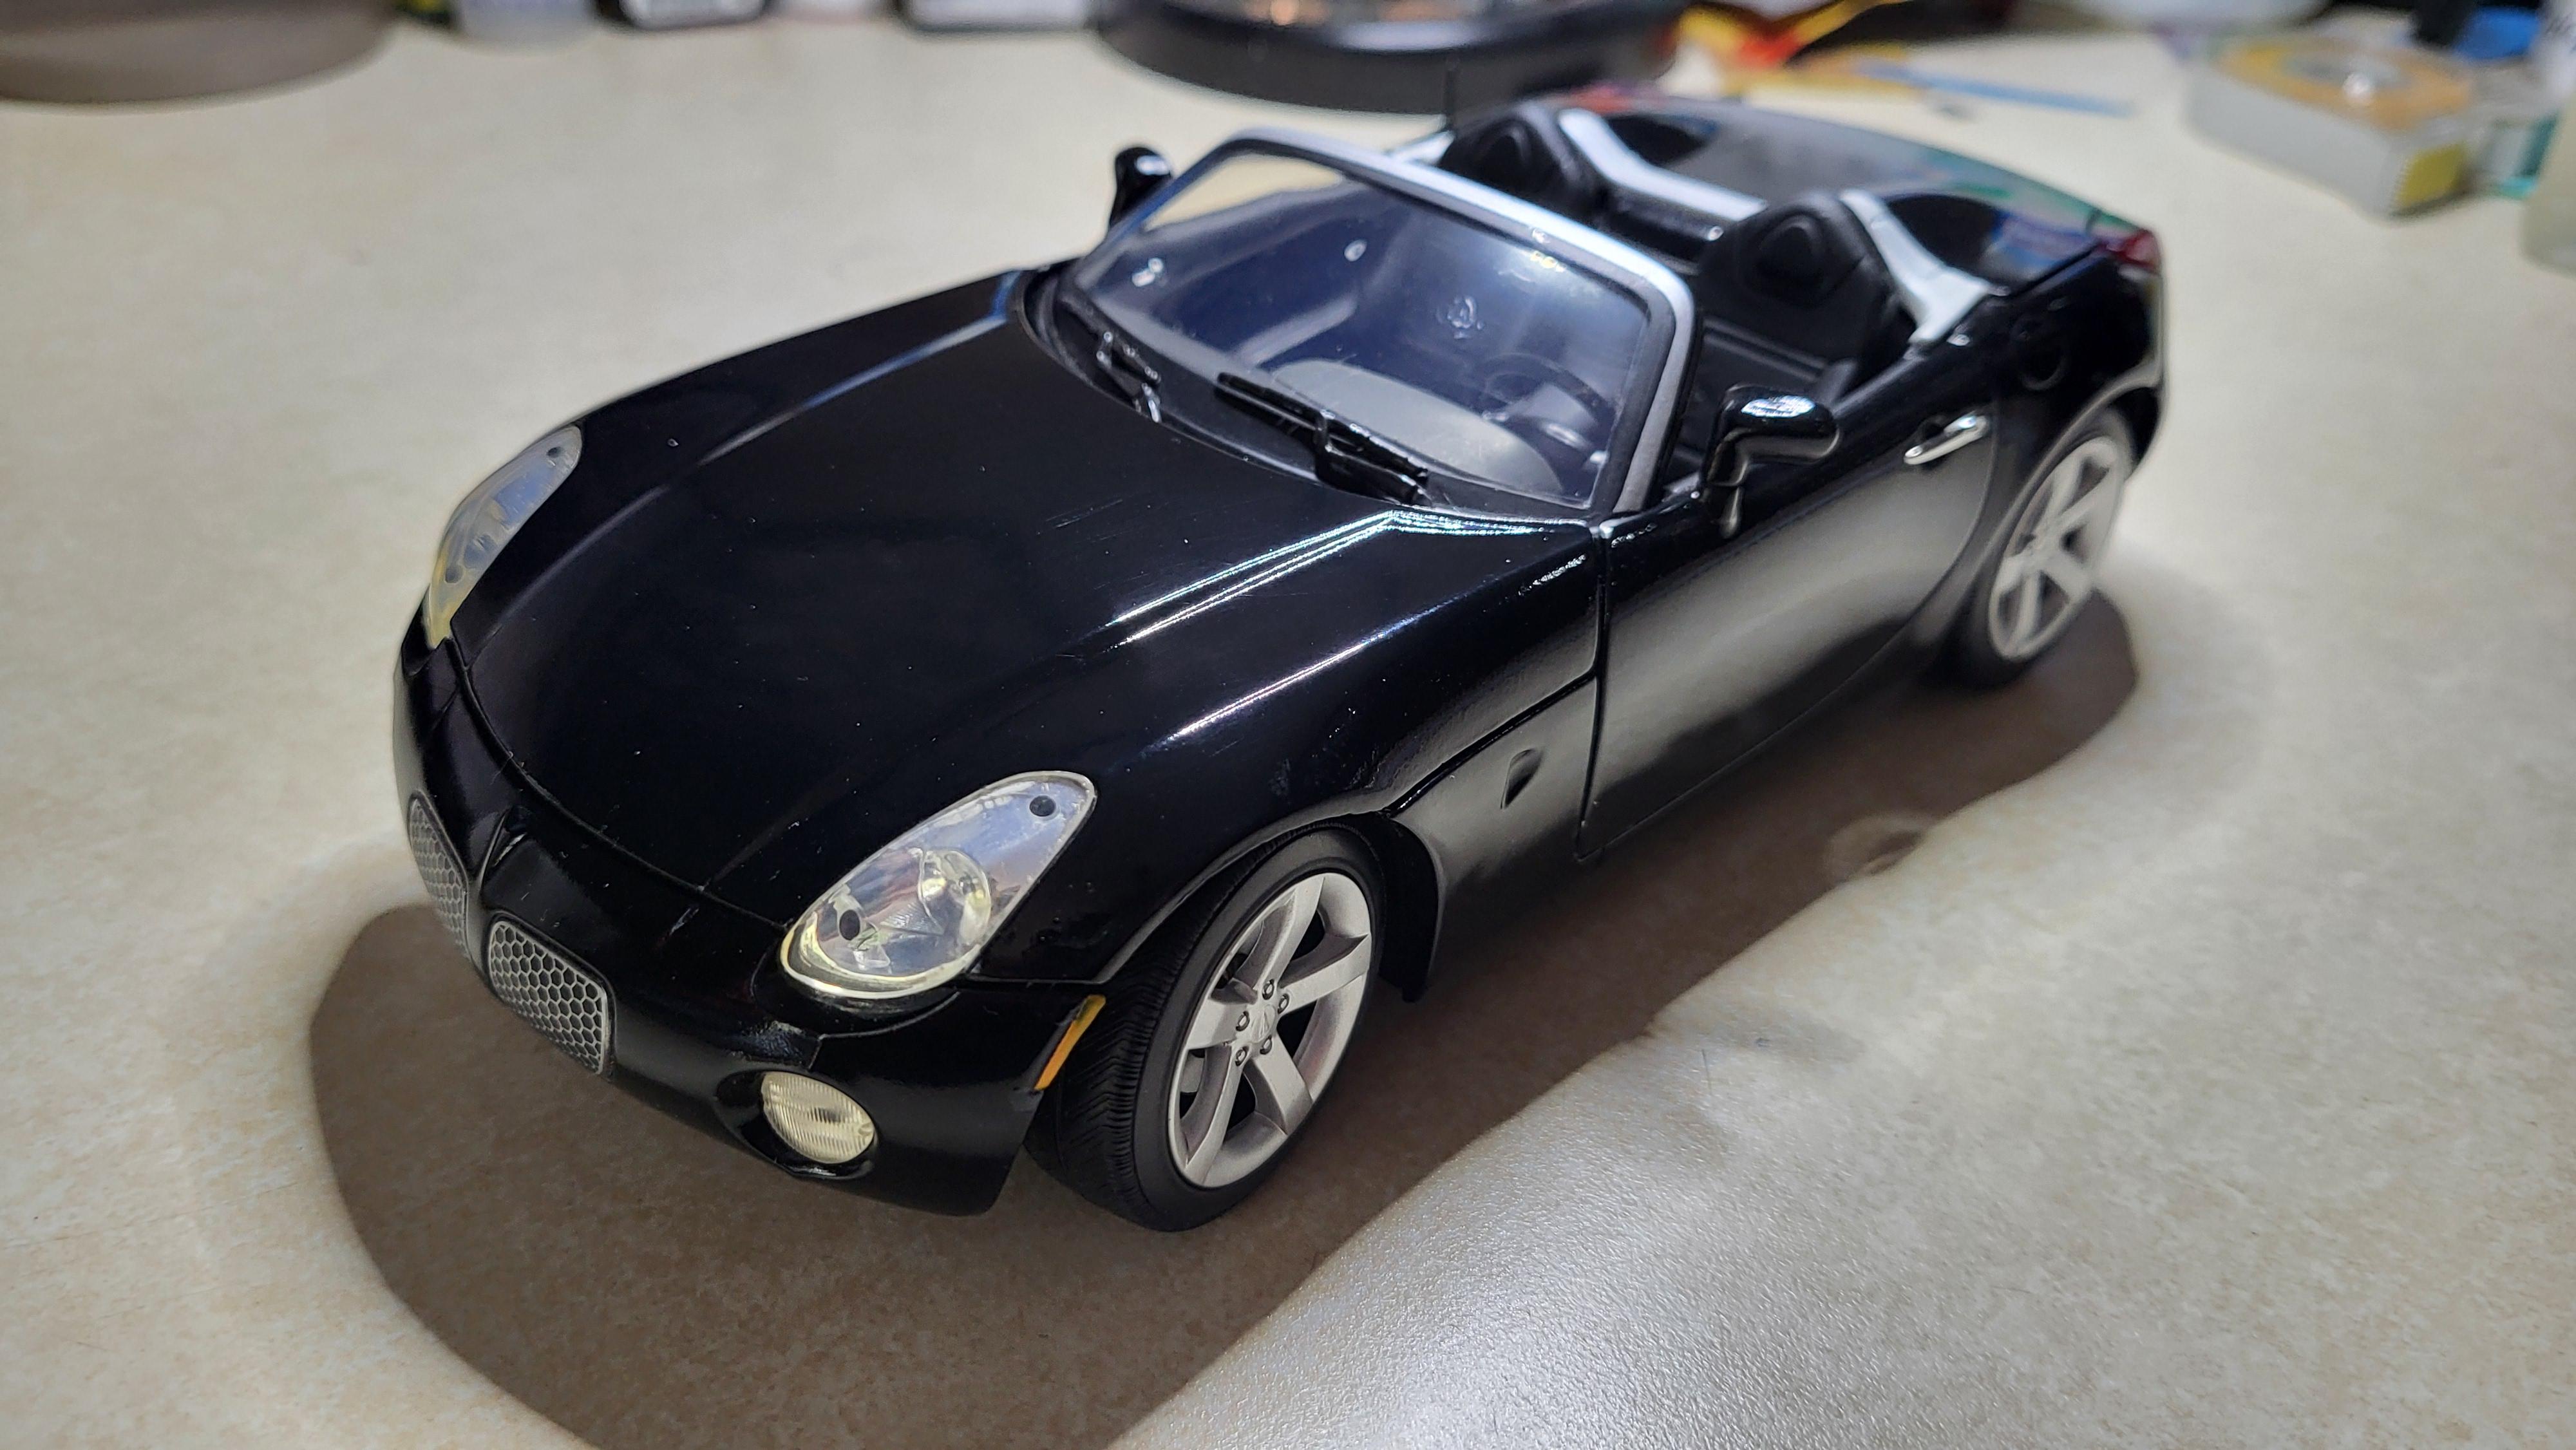
The Solstice is now painted and reassembled. I still need to come up with some Pontiac decals and make a license plate to make it match the full scale version.


-
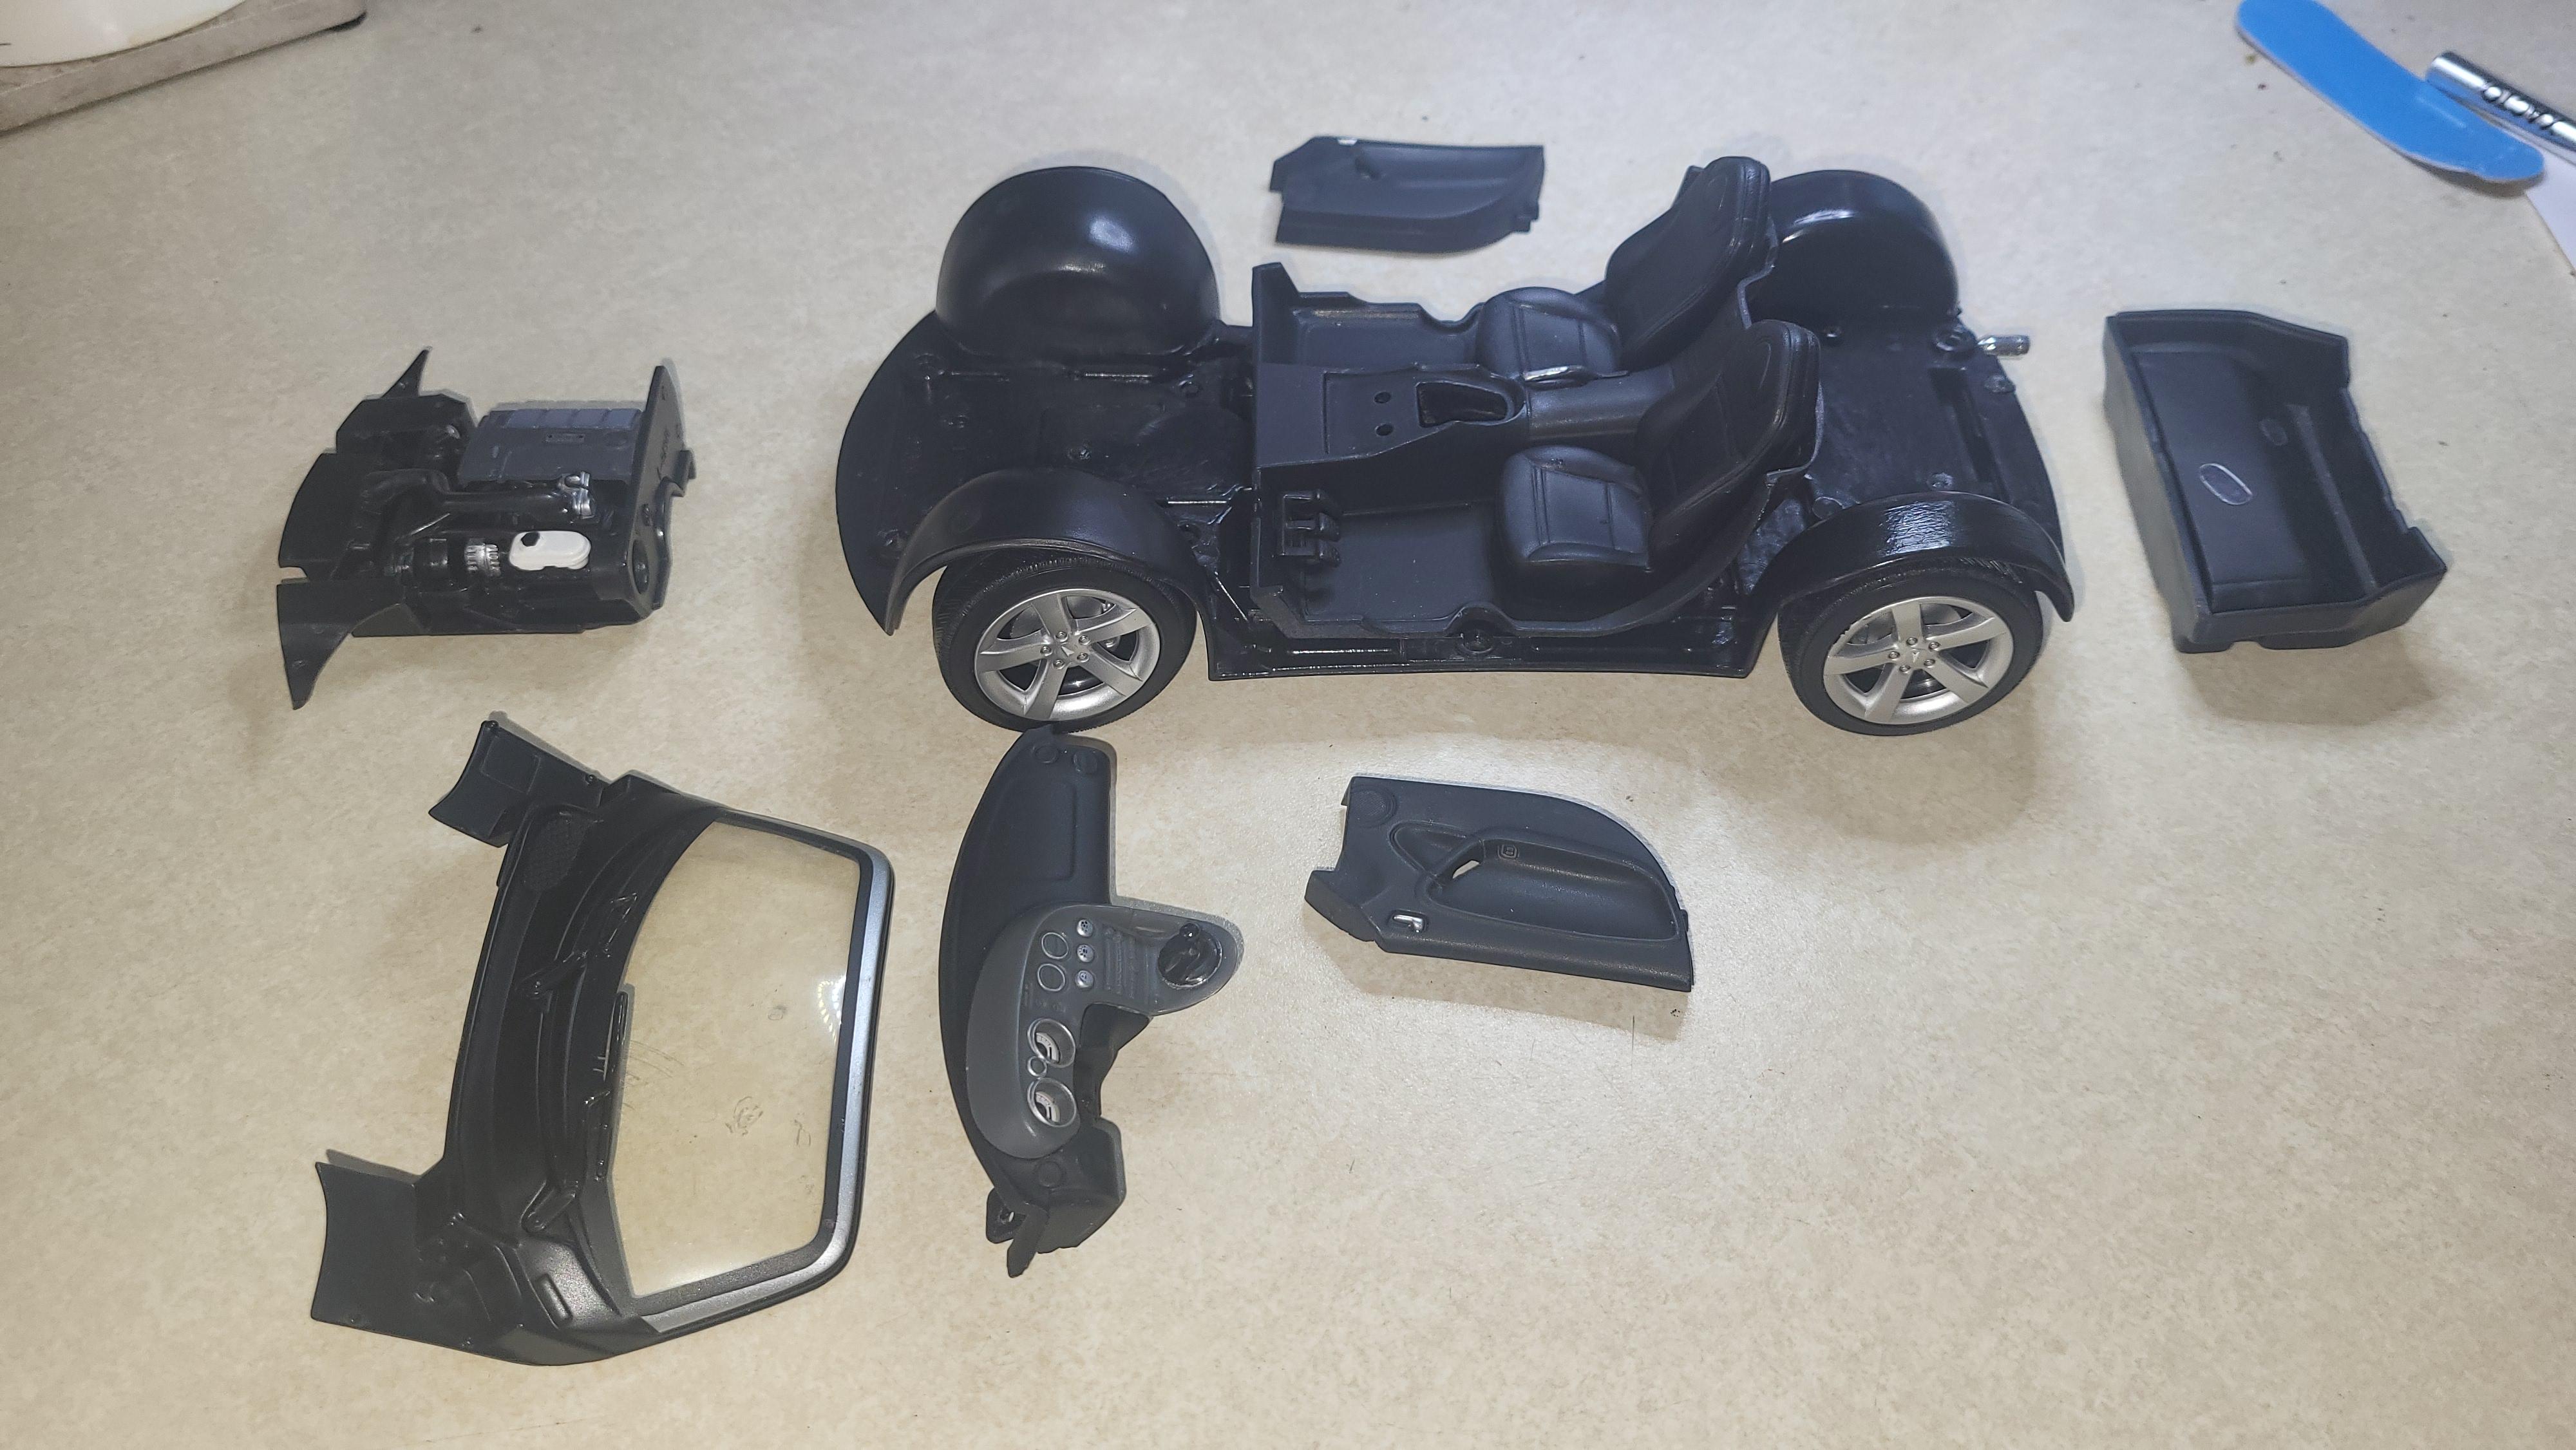
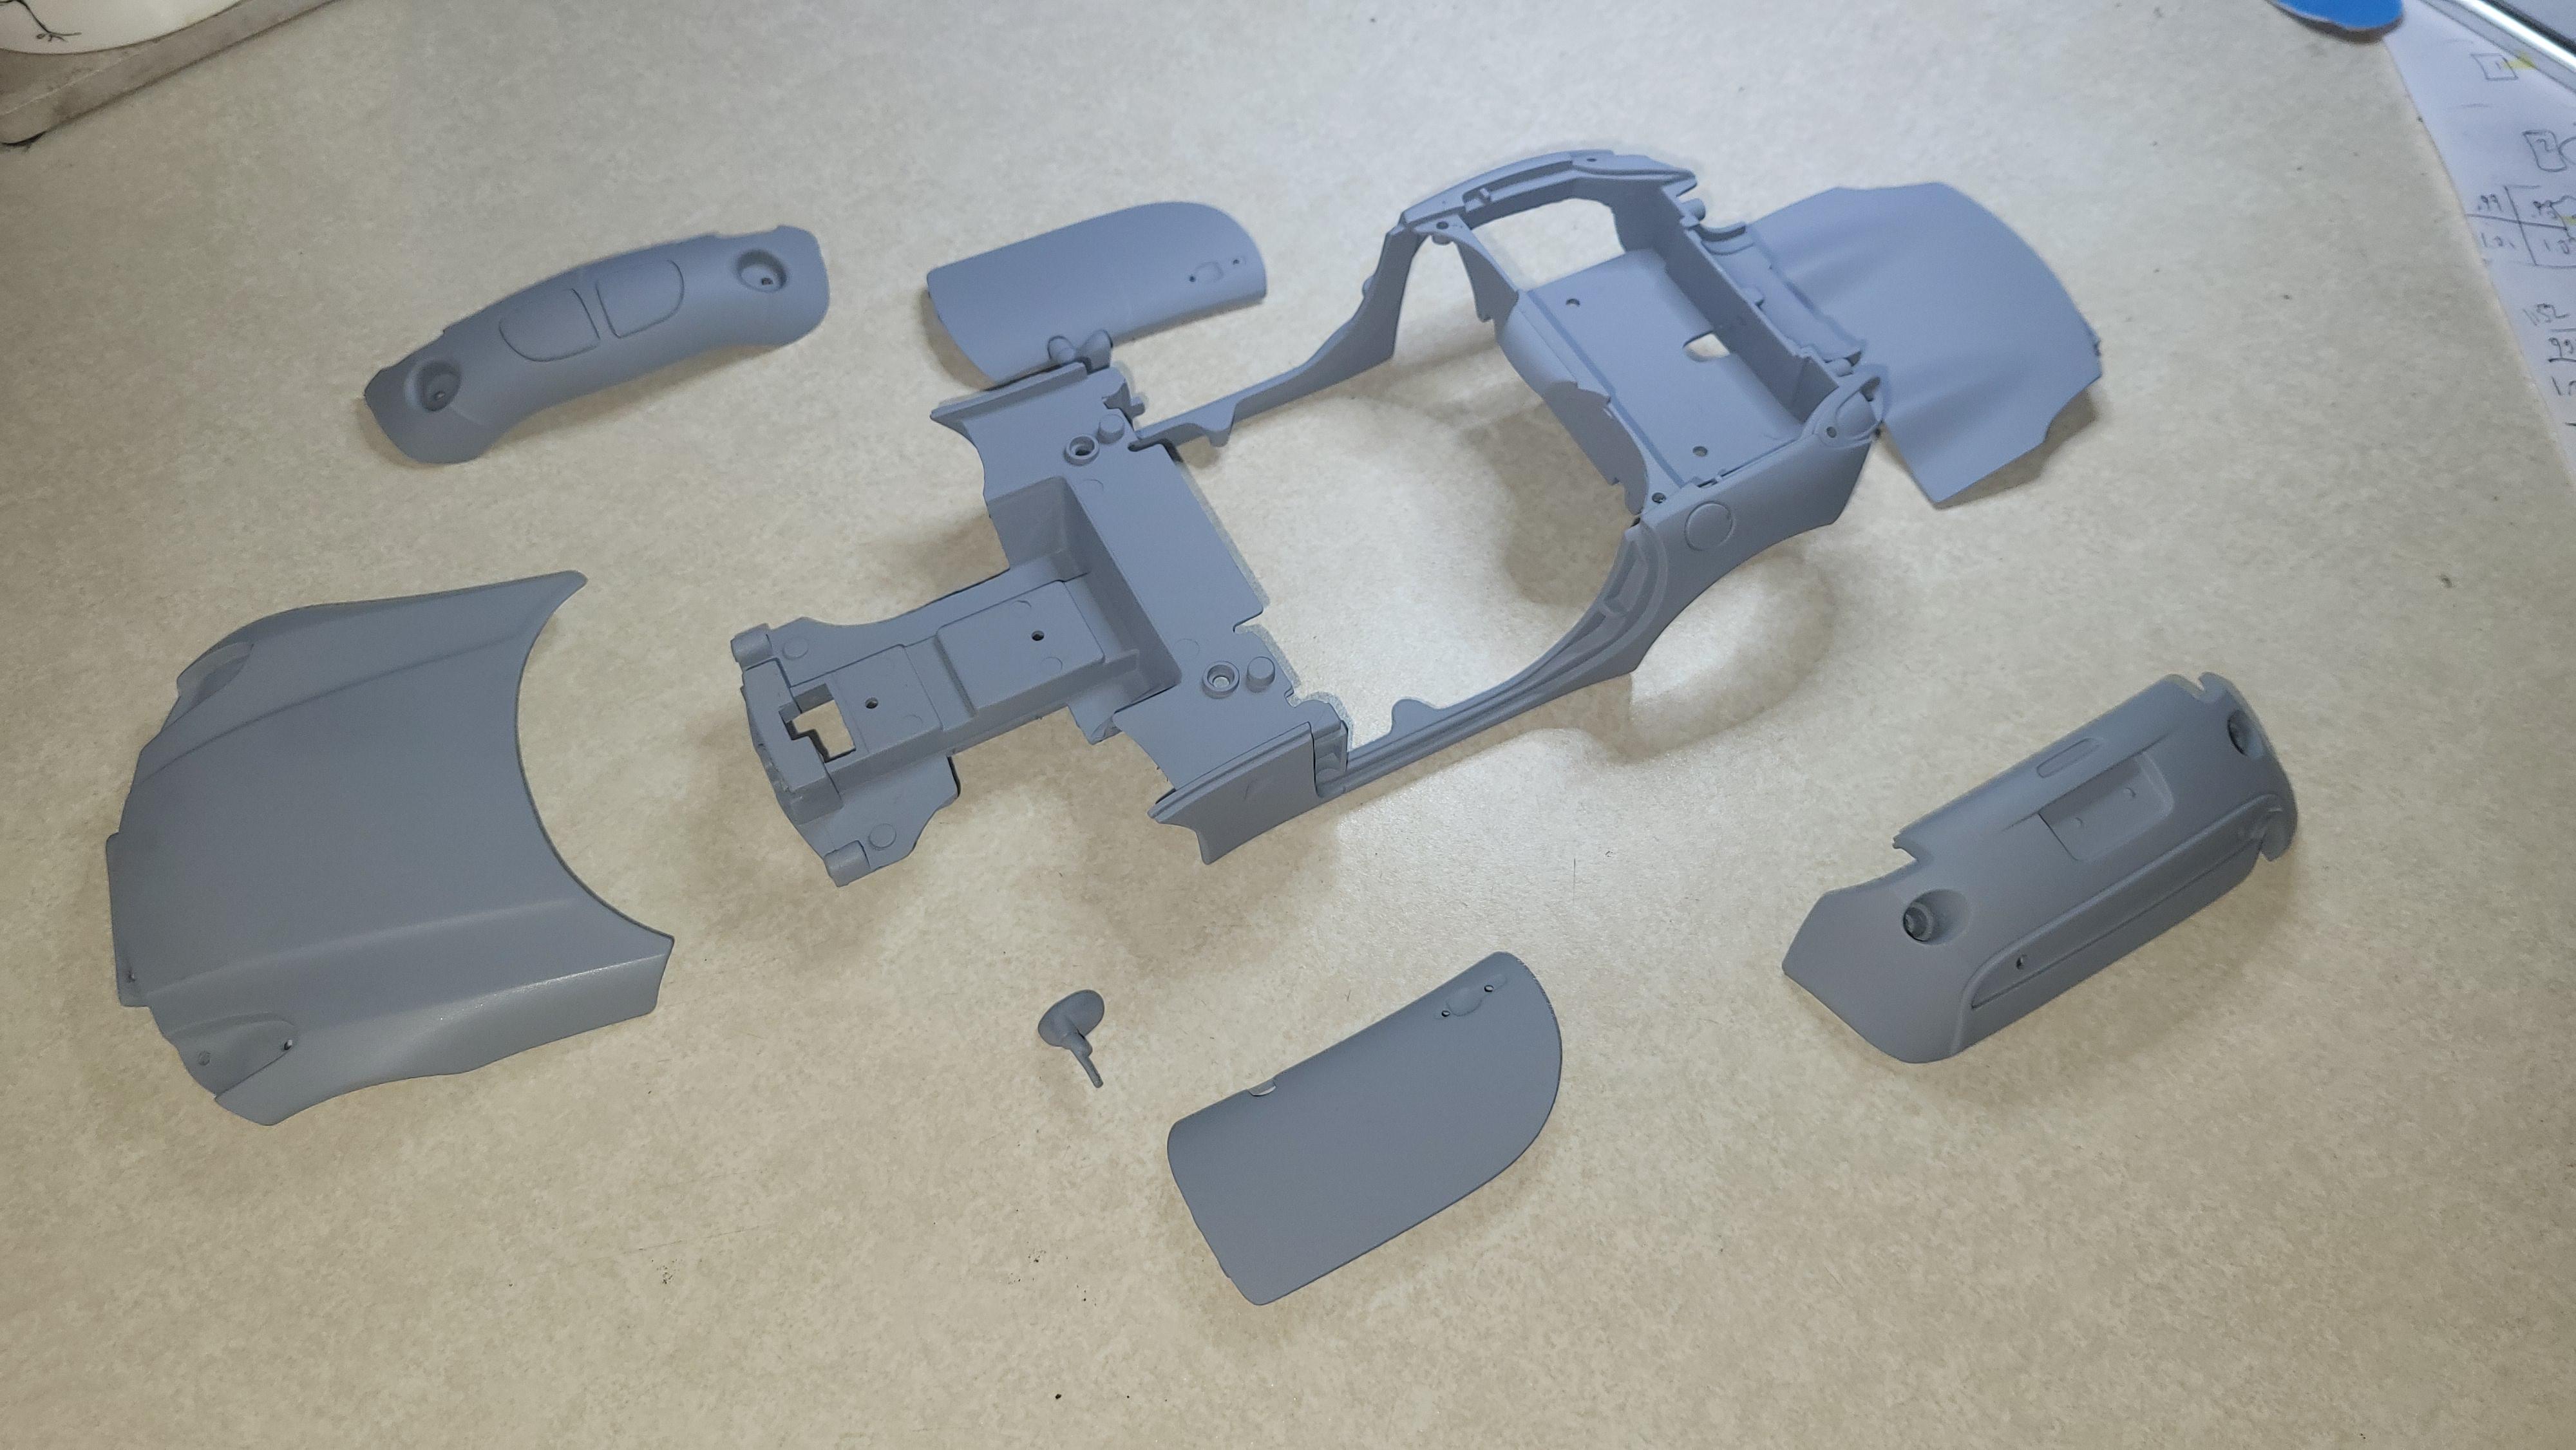
I have taken everything apart. Repainted the interior to match my car and primered the exterior.
I found a few Pontiac decal sets that will work for the emblems. I will most likely need to make my own decals for the Pontiac and Solstice letters on the trunk.
-
 1
1
-
-
Great looking build! Its good to have something to make you smile about your fun day!
-
 1
1
-
-
On 11/8/2023 at 3:33 PM, Motor City said:
A guy in my area has/had one. I shot a few pictures of it ten years ago! The elderly man who owned it might be dead now for all I know.
Beautiful truck. I had a rampage as my first vehicle. I wrecked it but always dreamed of getting another one and converting it to a Shelby Rampage like this.
-
1
-
-
13 hours ago, bbowser said:
Very nice! That looks like a decaling nightmare but you pulled it off.
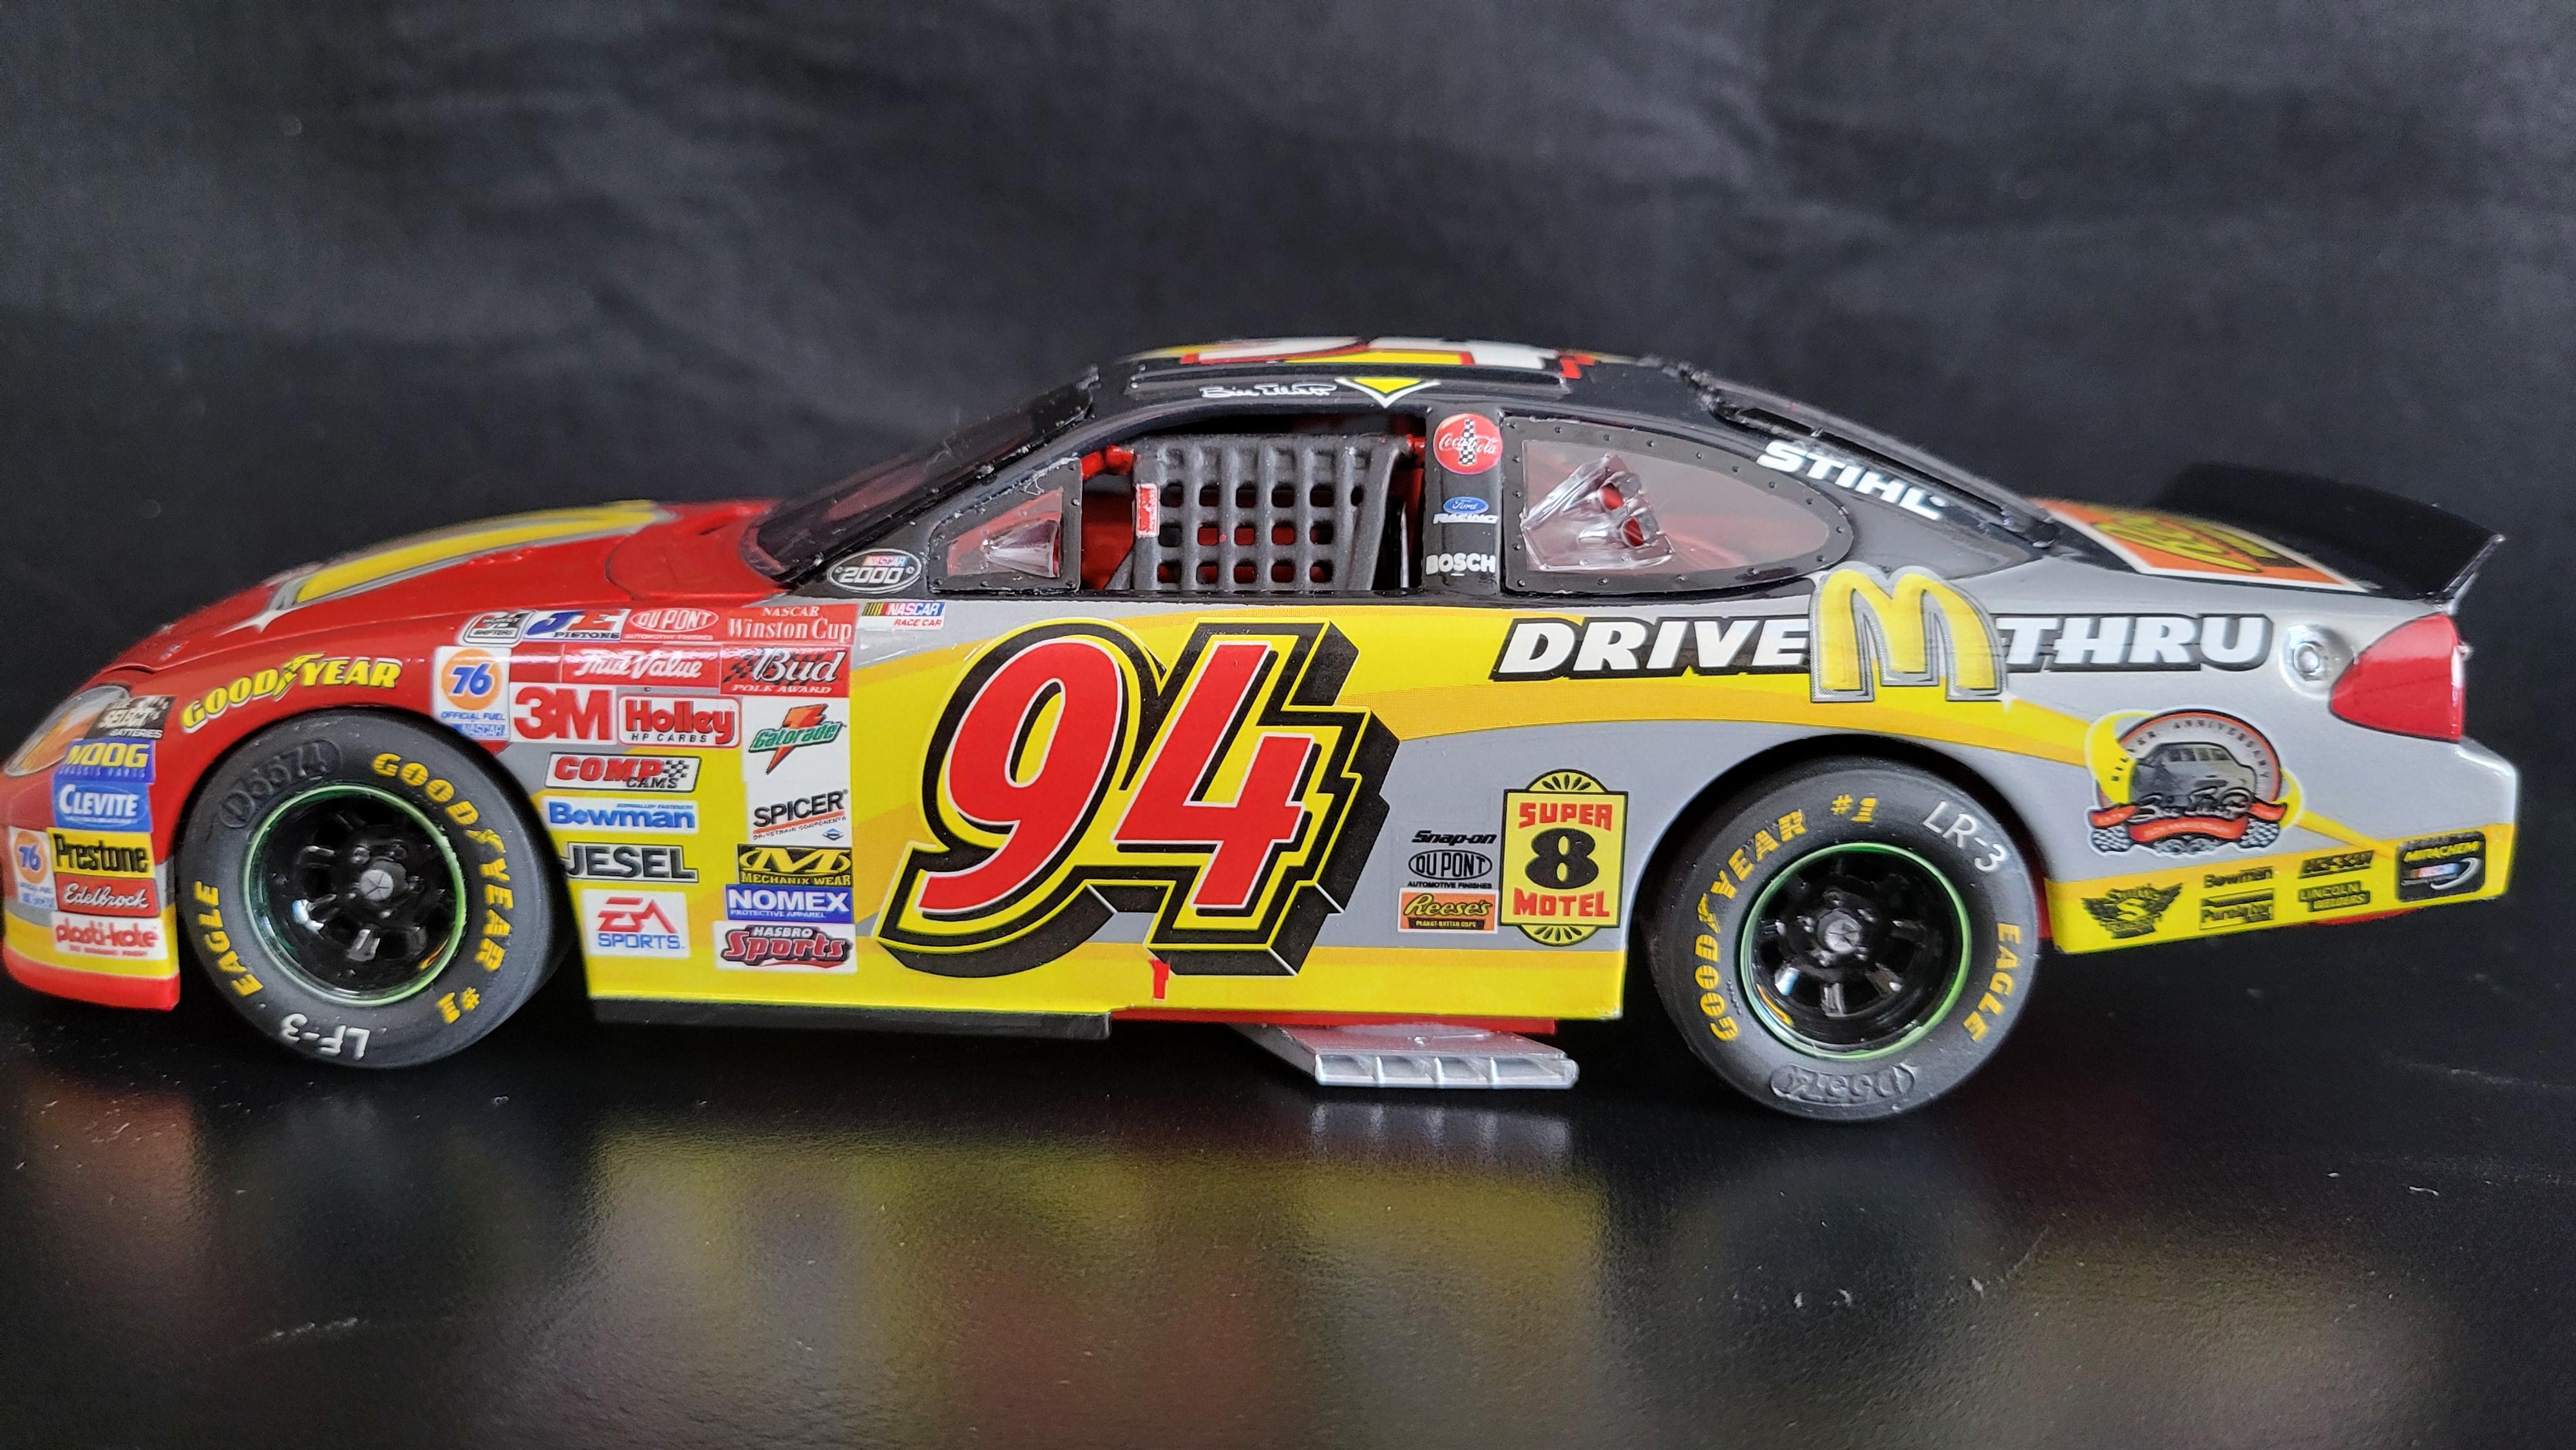
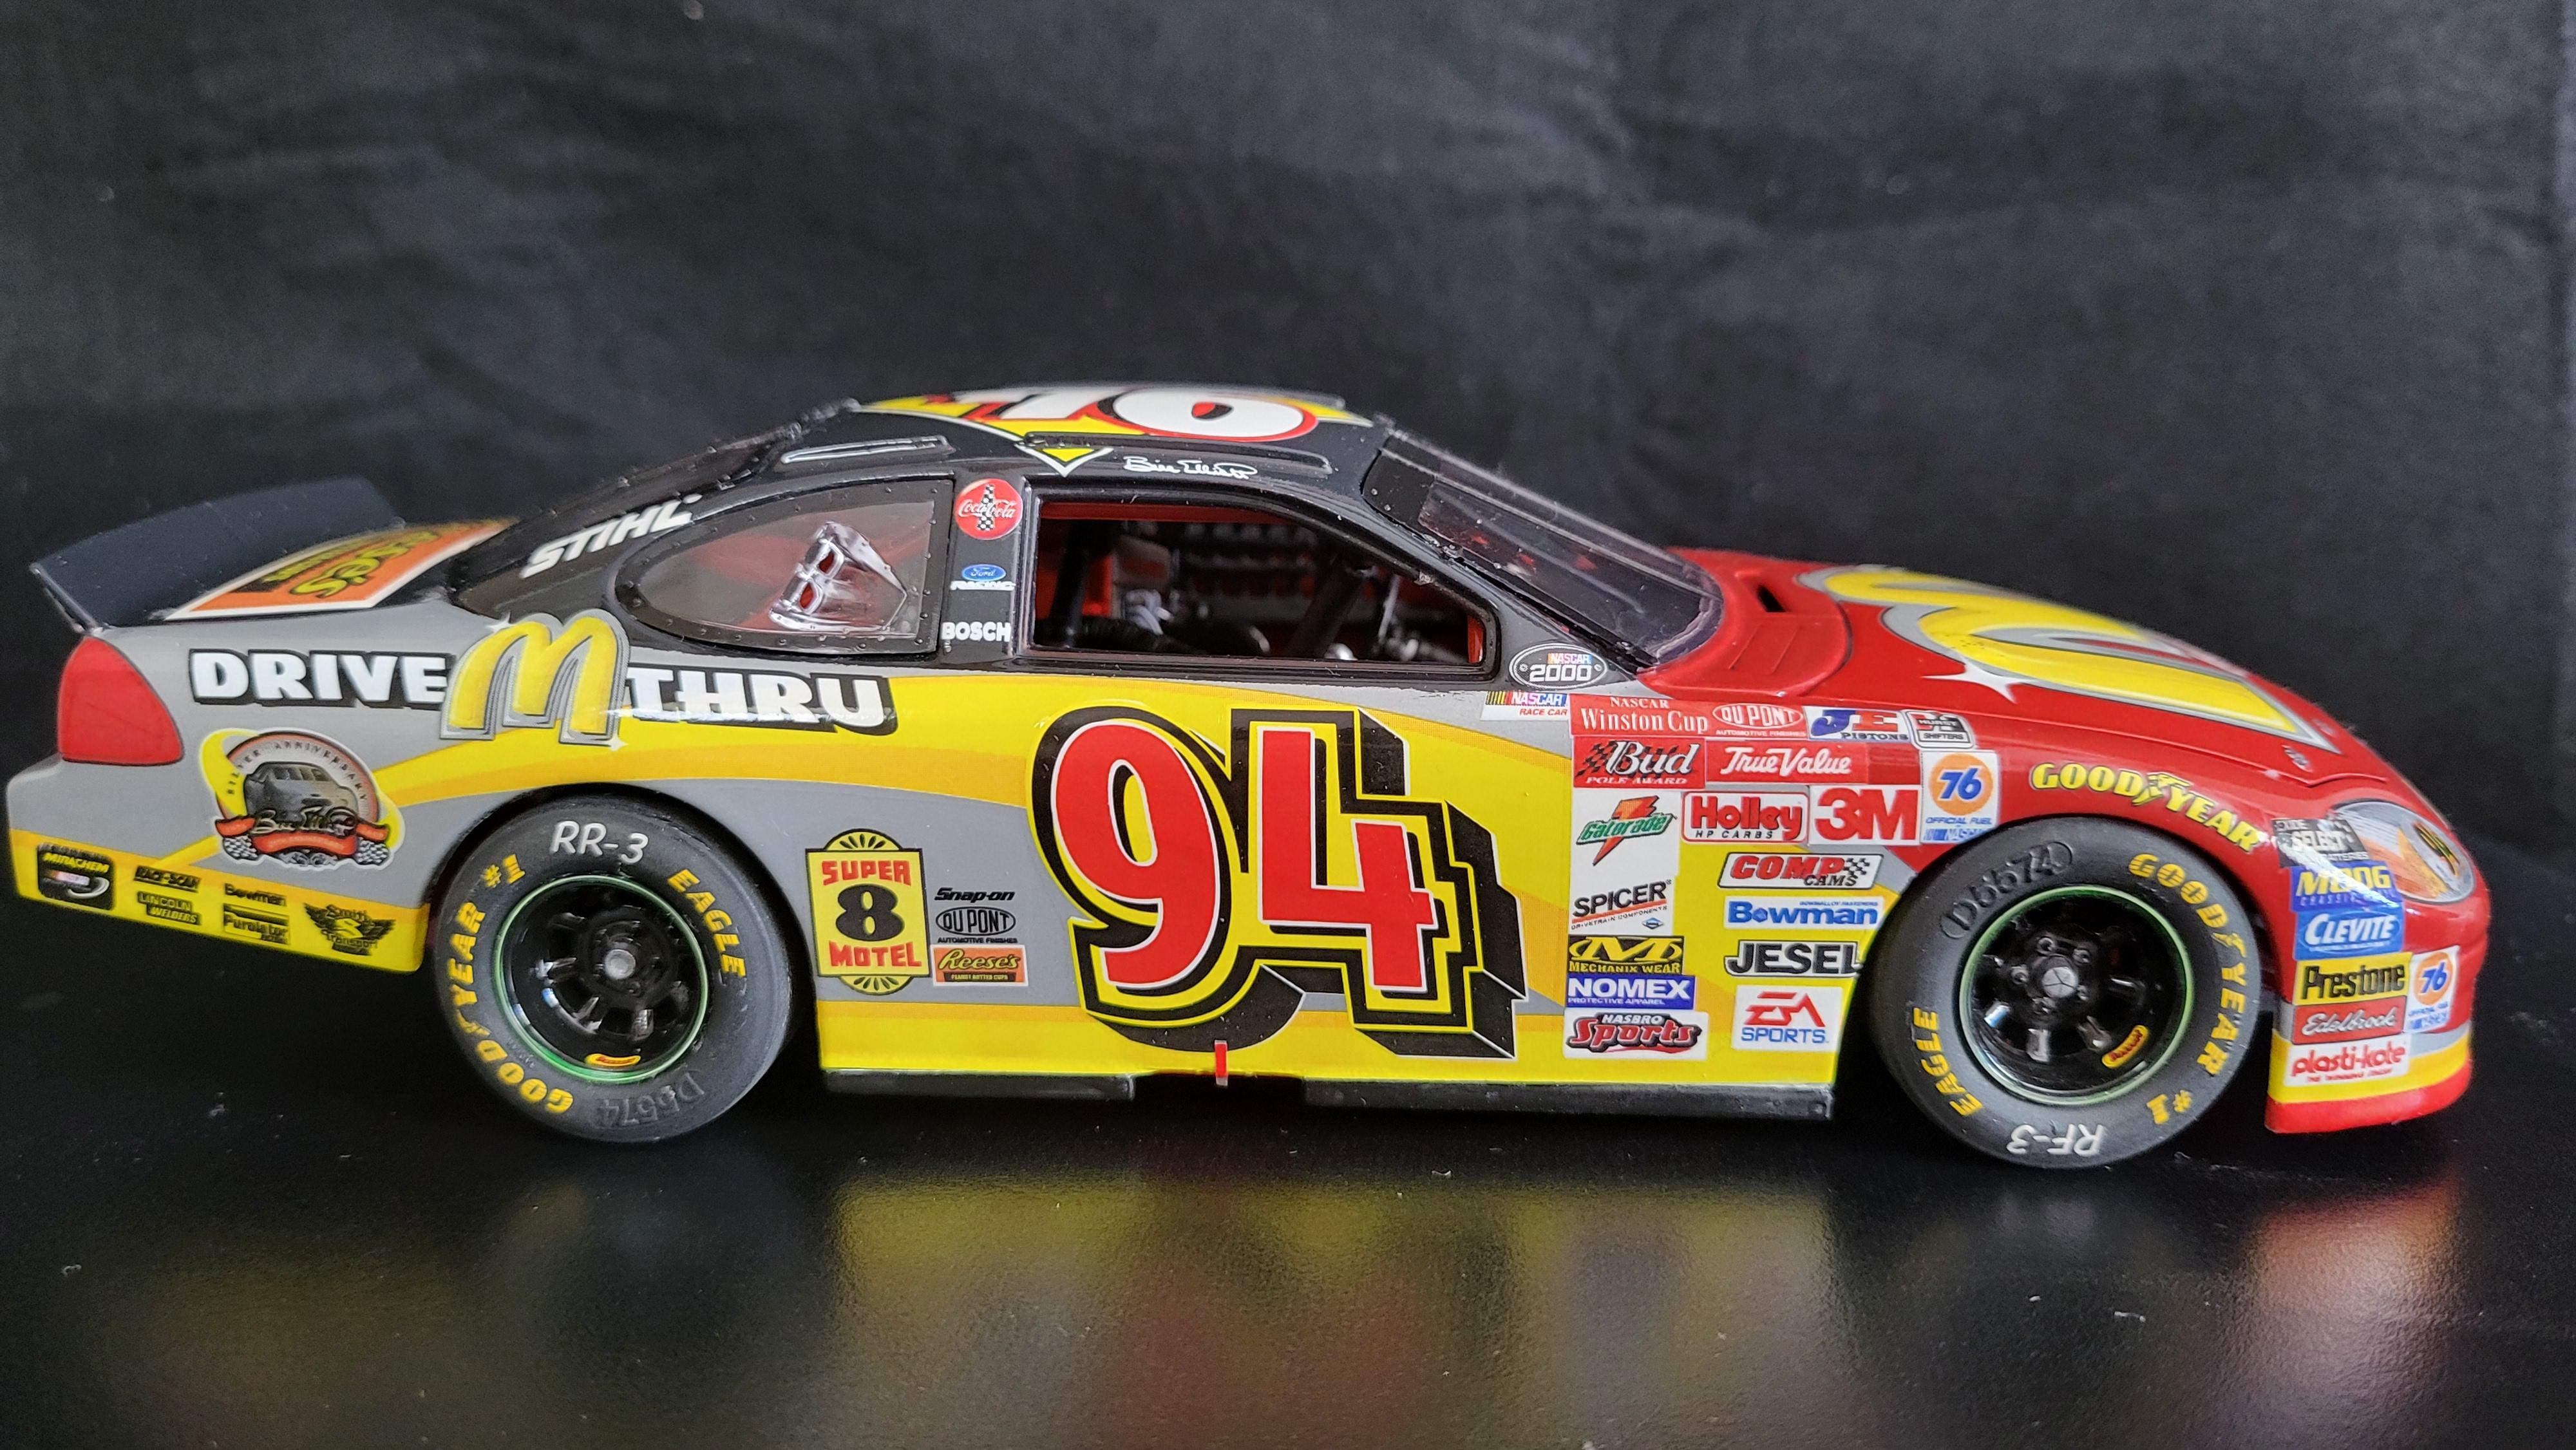
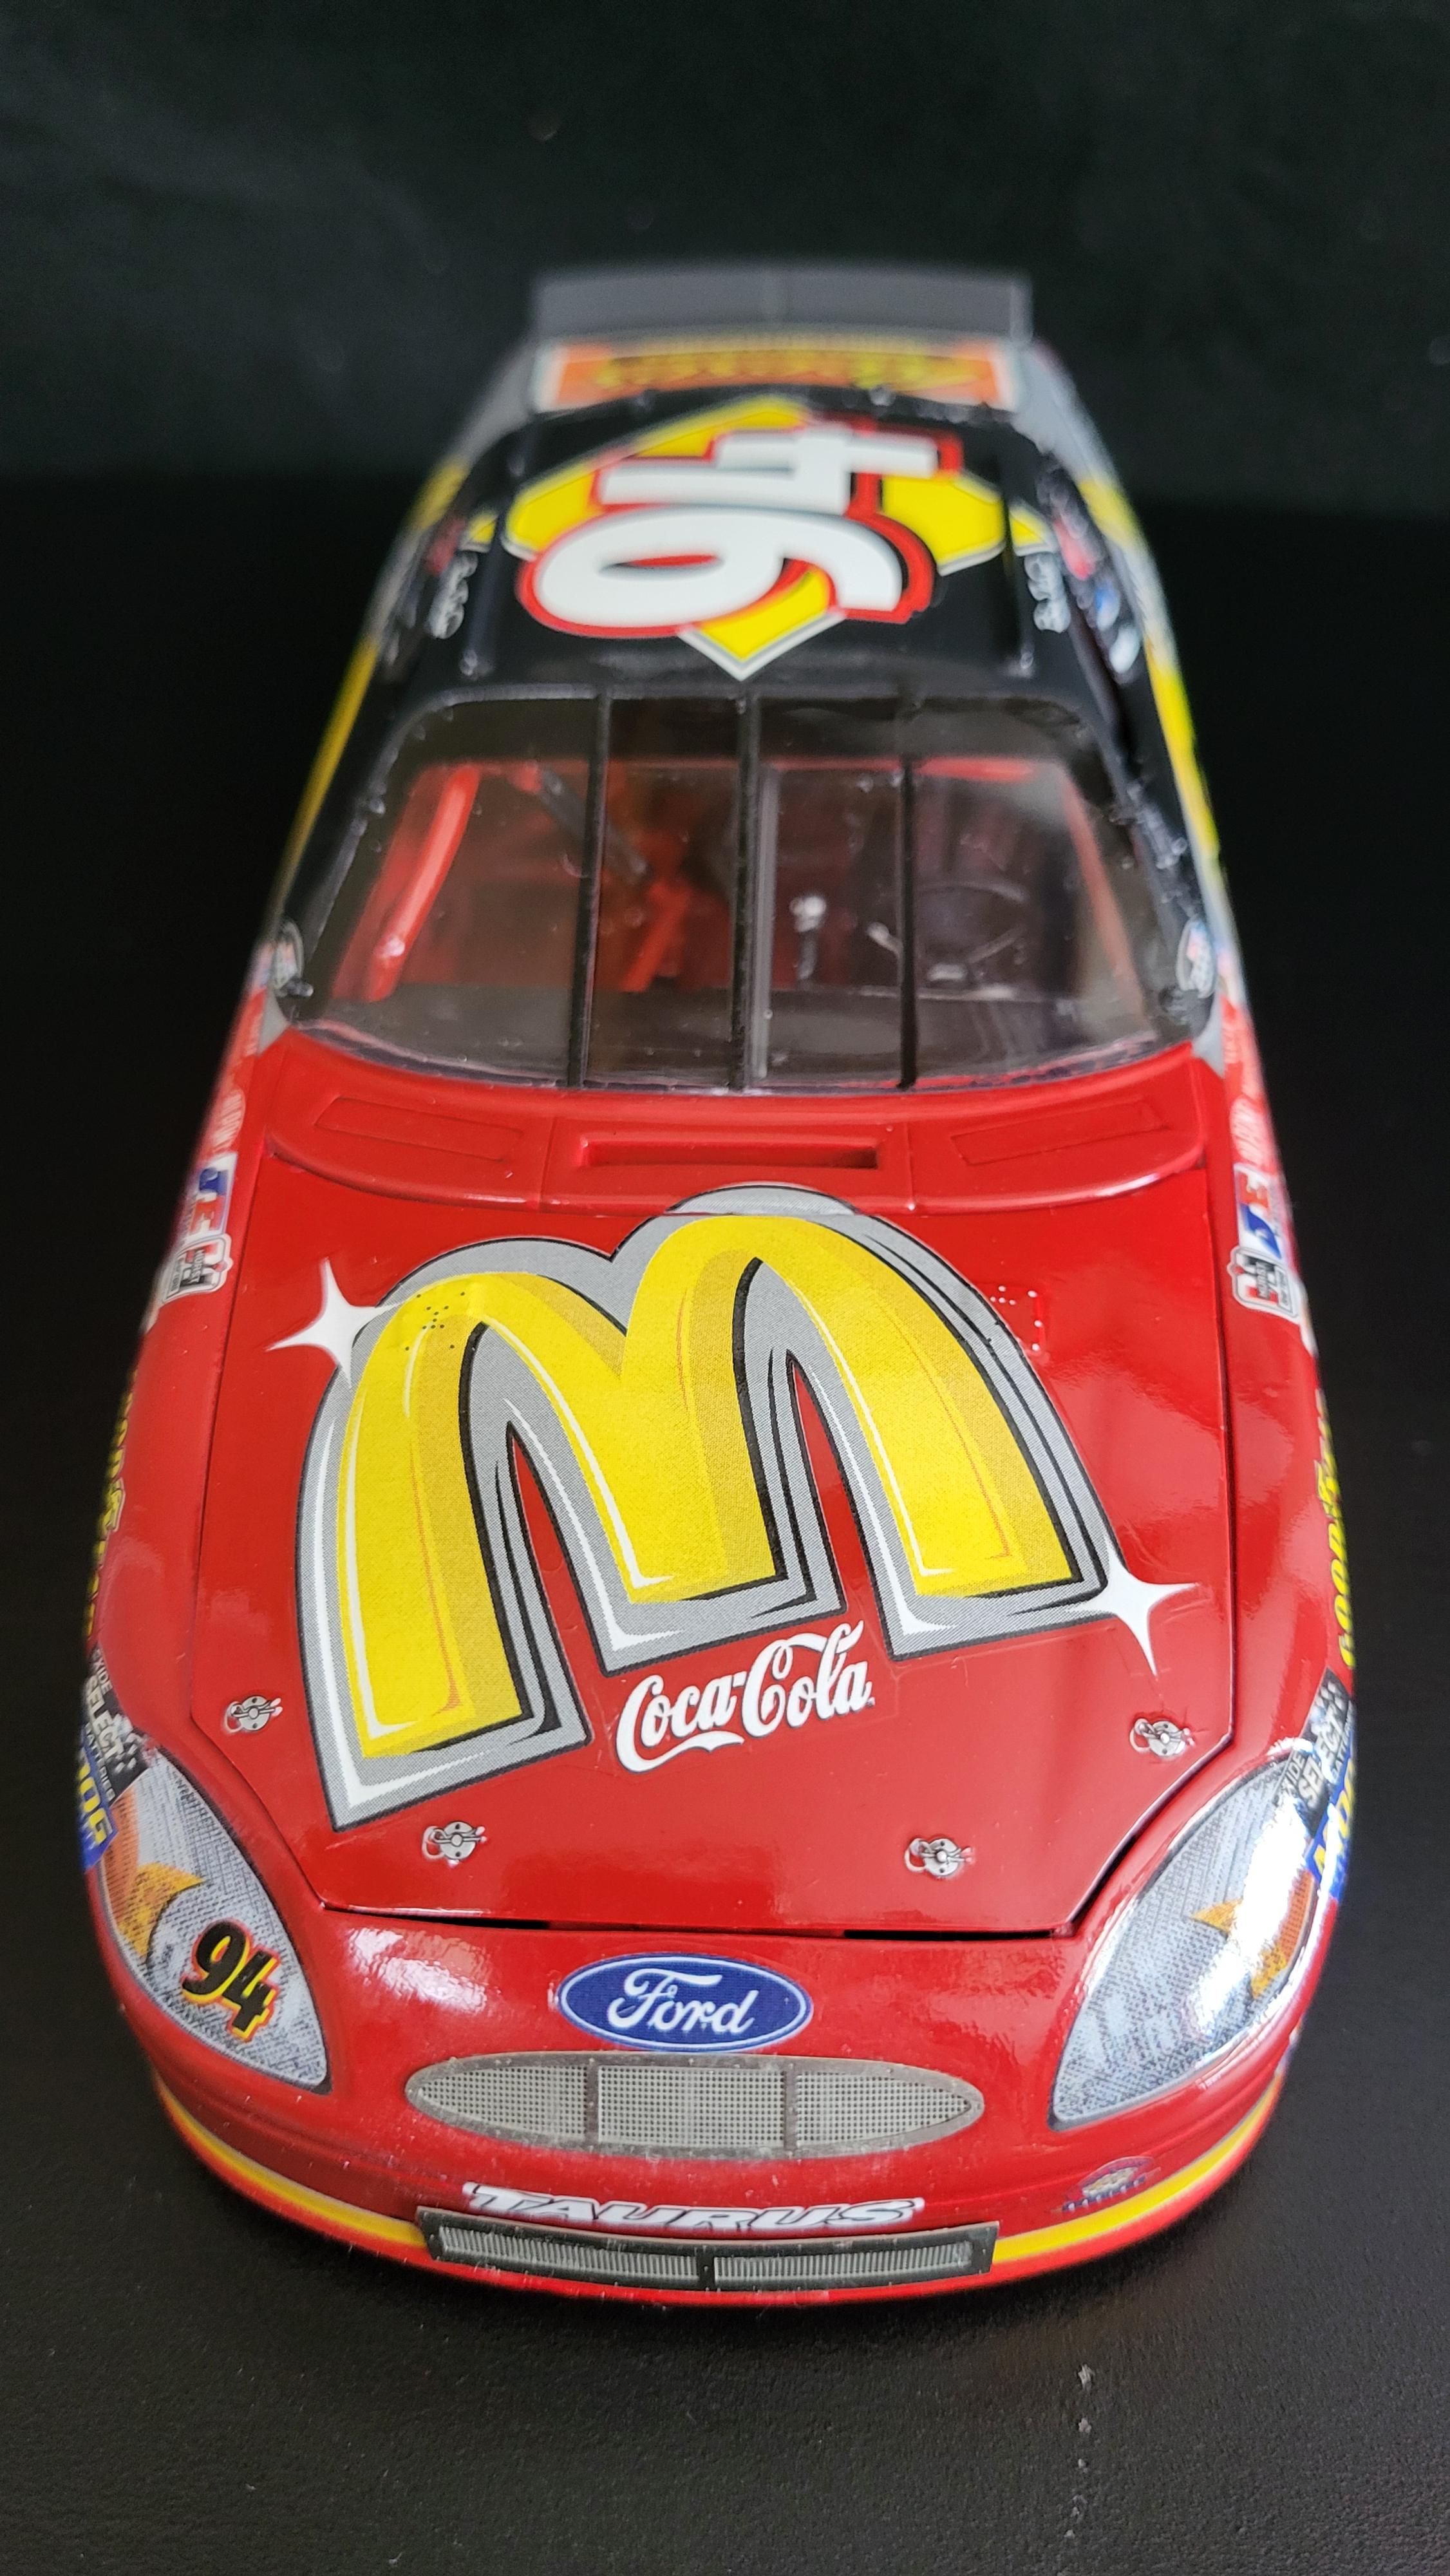
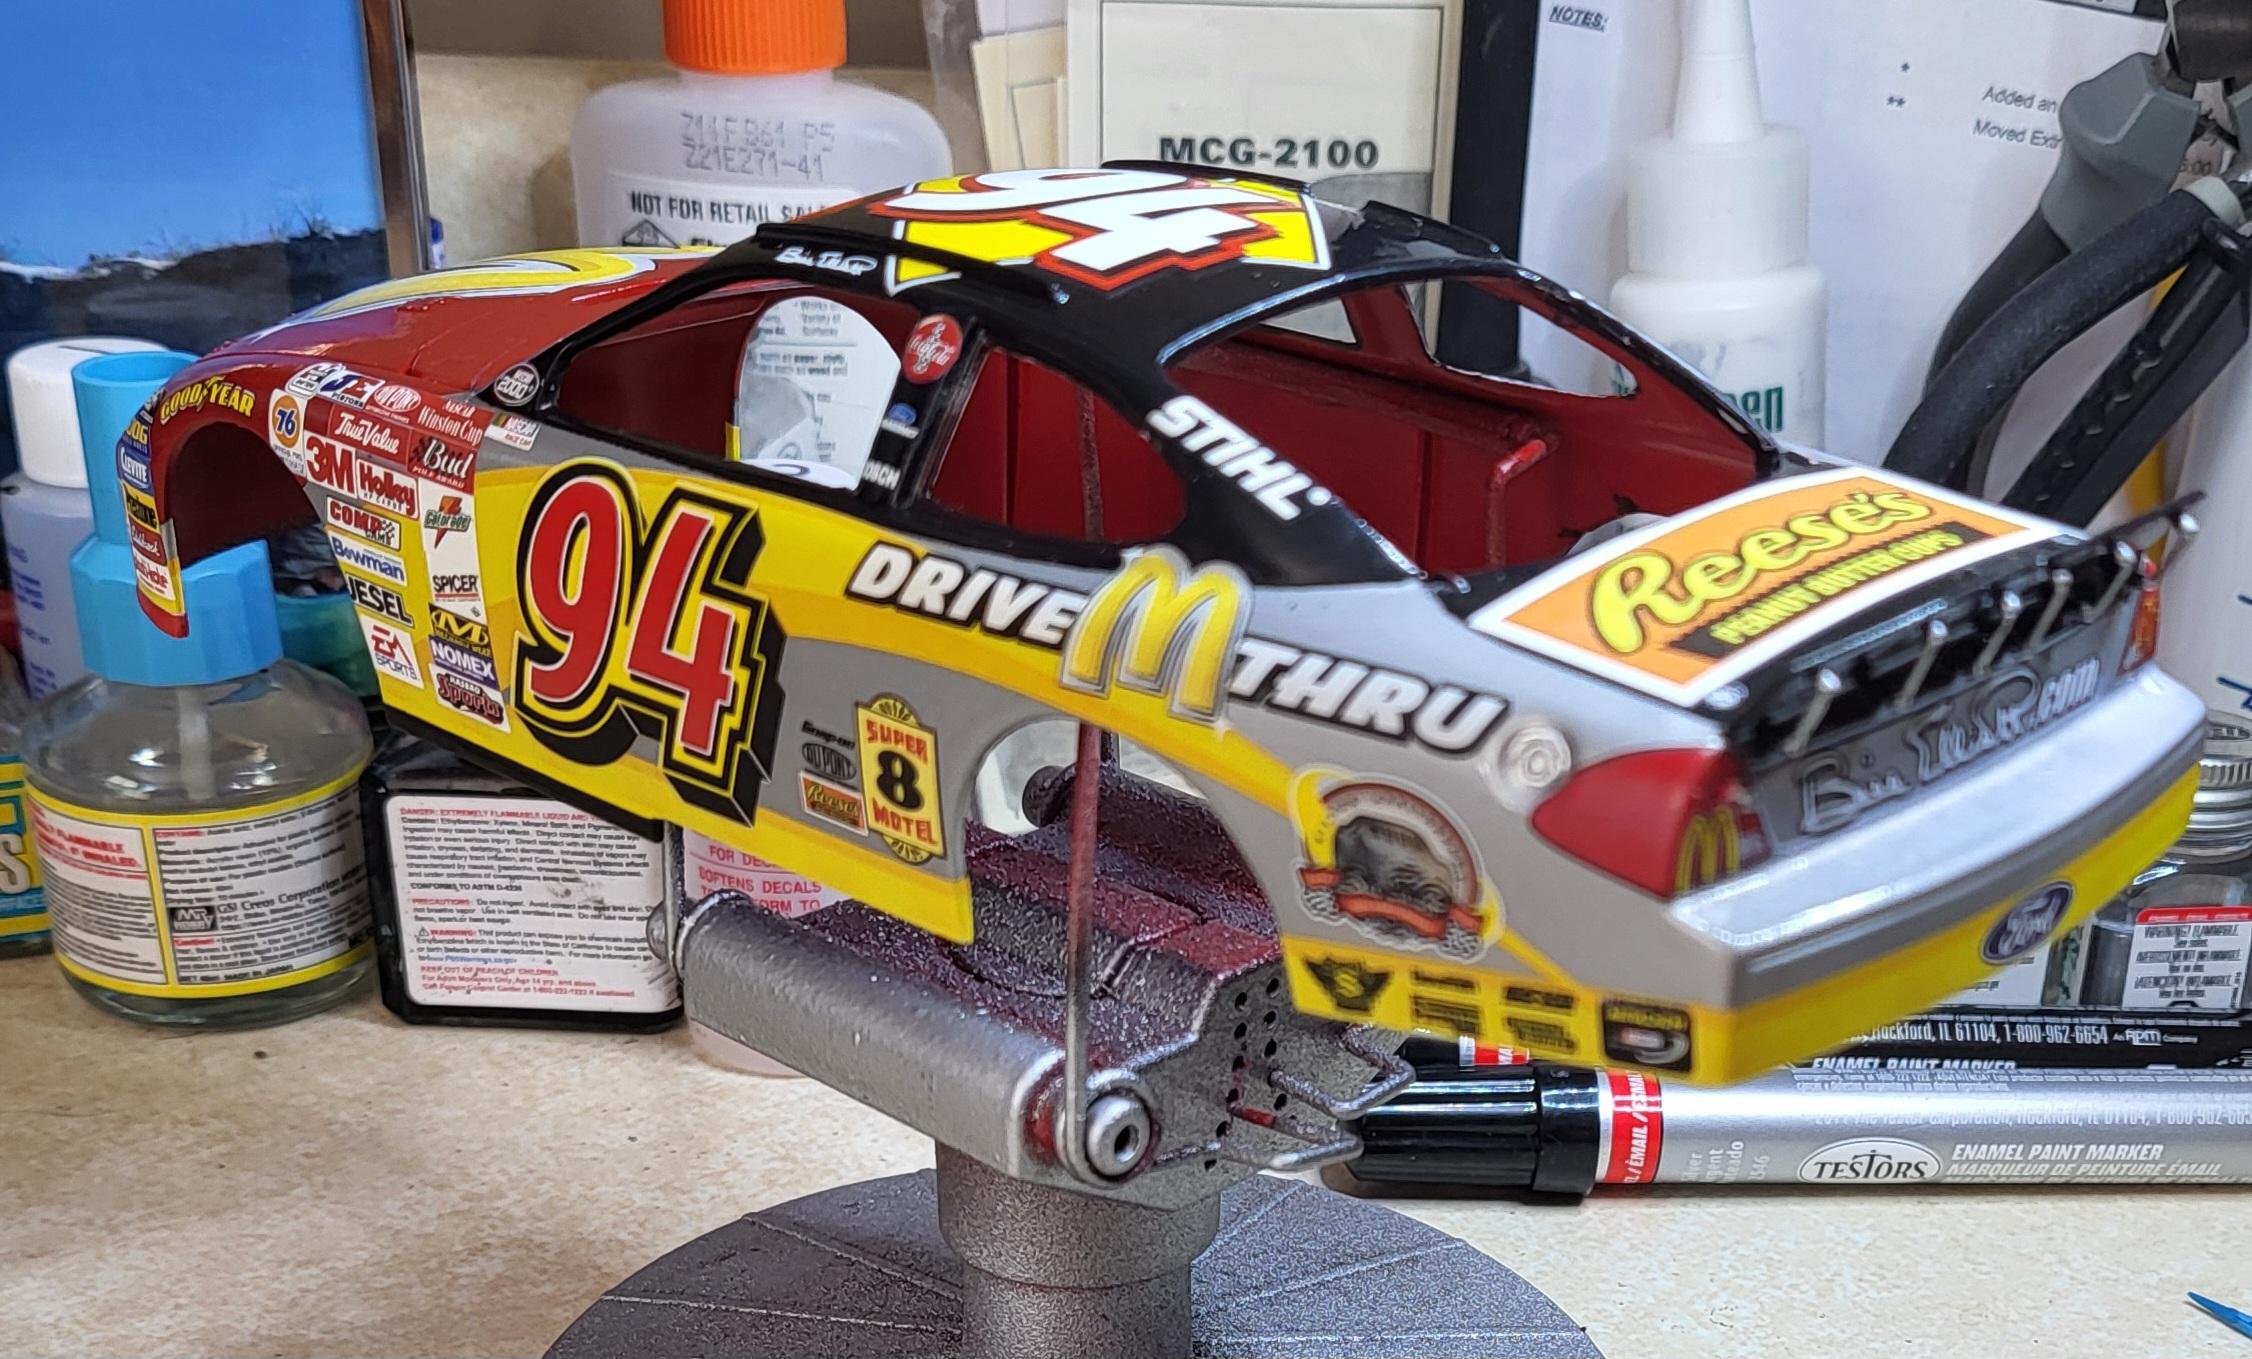
I didnt realize how many decals there were on this car! I probably shouldn't have stressed over the paint job as much... most of it got covered up with decals. It was definitely good practice for the upcoming Viper paint scheme.
-
Revell 2000 Ford Taurus (Dale Jarrett UPS) with 3 Amigos decals.
Continuing my Bill Elliott builds (#17 of 21 complete). The kit went together great with hardly any modifications needed. I lowered the front a little and added Model Car Garage grille. Used Krylon paints with Duplicolor primer and Krylon clear coat. I have had some trouble with those paints but wanted the color to match my other McDonalds cars so I decided to stick it out for one more car. Thanks to some users on here for tips with the paint applications. I typically don't clear coat over my decals but with the 3 Amigos decals you pretty much have to apply clear coat as they have a dull finish (paper-like) after application. That said, they went on really well, they were thin enough to adhere to the contours but not so thin that they easily tore (in fact I never had a tear at all). I would use 3 Amigos decals again (and probably will if I decide to do a Mac Tonight Tbird).
Next up for me will be the 2002 Dodge Intrepid. Since it is practically the same as the 2001 and 2003 models I am going to do the Viper SRT-10 paint scheme (decals by JWTBM... another first for me).
-
4
-
-
Decals have been applied. As soon as I get a warmer day I will apply a final clear coat. Then put the windows in and call it done.
-
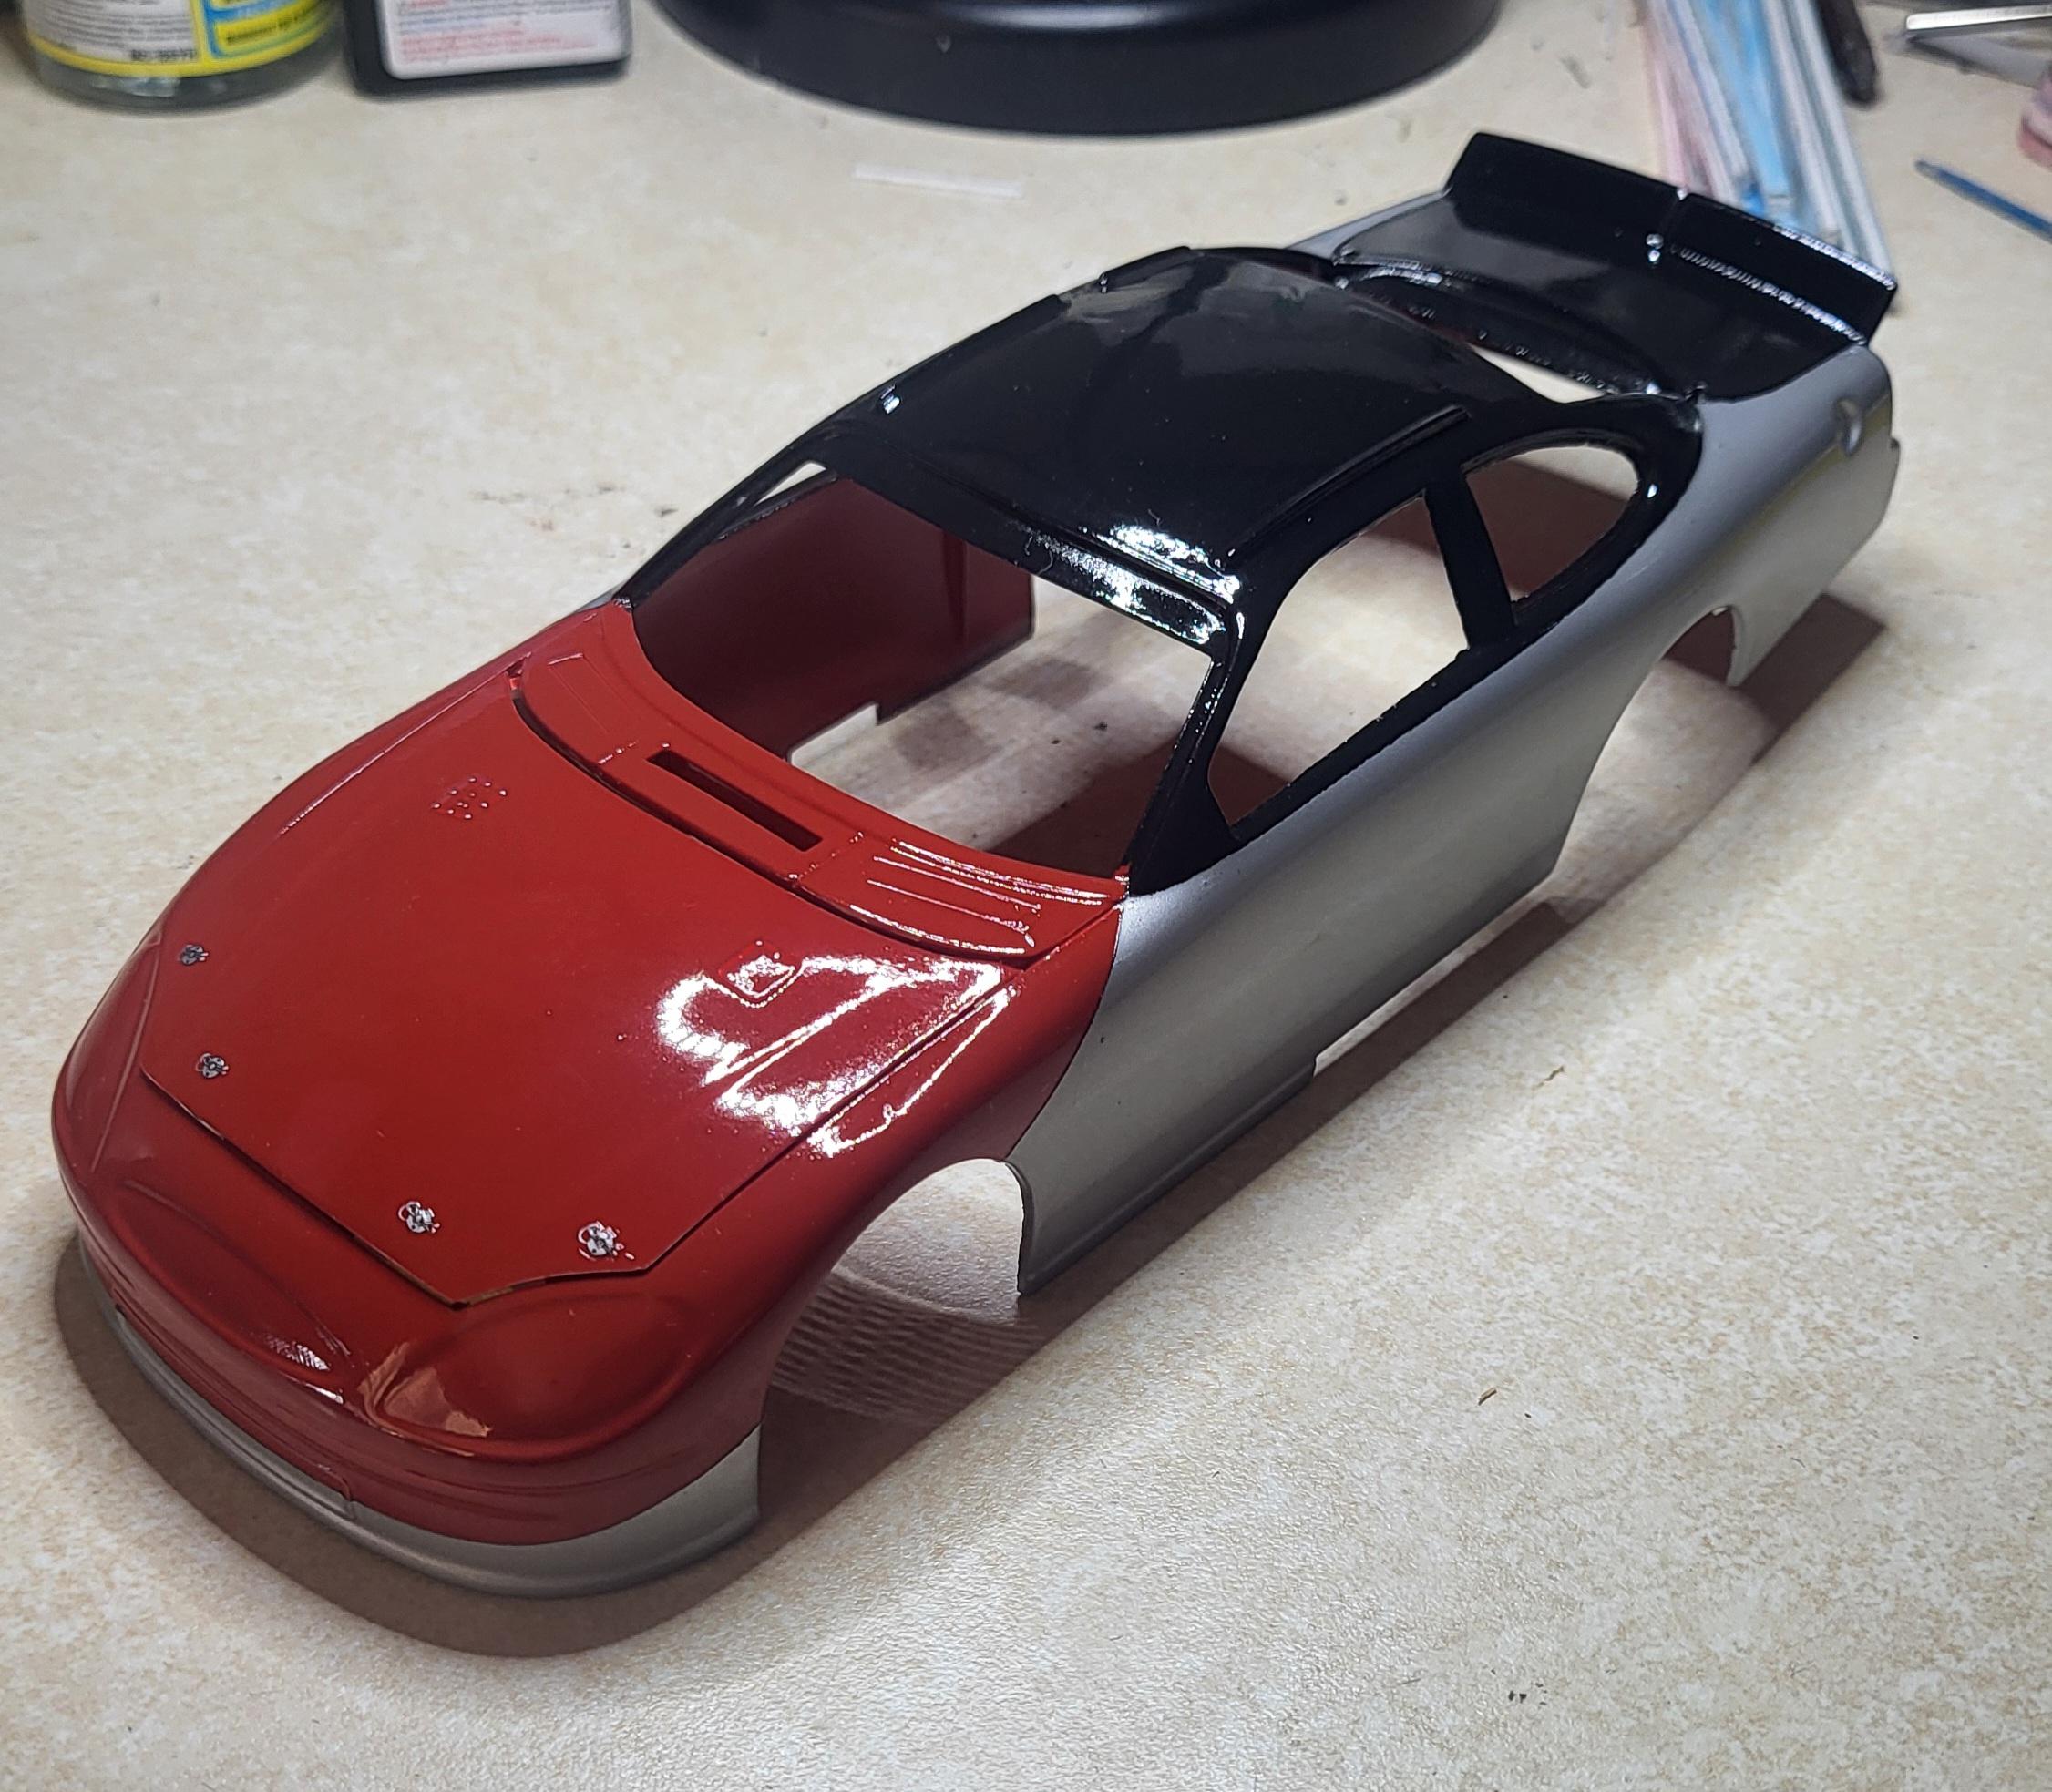
Thanks for the feedback. We have had some nice weather the past week and I was able to get this done. Followed everyone's advice by painting red then black then silver last. A little sanding then a coat of clear today. Looking forward to the decal work!
-
1
-
-
Very clean build! Nice looking cars!
-
I purchased a 1/18 scale Road Signature Pontiac Solsitce to fuel my daydreams until warmer weather when I can get the full scale model out of the garage. But I like to daydream in detail so the silver Solstice that I purchased on ebay needs to be repainted with the correct (for my model) Black with Black interior. It looks like it will be a fiarly striaghtfoward job, everything disassembles easily (no broken parts yet). The one thing that is bothering me so far is what I am going to do about emblems. There are 5 pontiac emblems as well as the Pontiac and Solctice lettering. Has anyone had success with removing the decals or have a good source for replacement details?
-
1
-
-
Good looking model and a cool story to go along with it!
-
1
-
-
I feel your pain! At least all your hard work on the chassis was not in vain. I look forward to seeing plan B, the Red Baron cars were always lookers.
-
Looks good! I have never seen this car built before. I agree with Volzfan, those Olds are good looking!
-
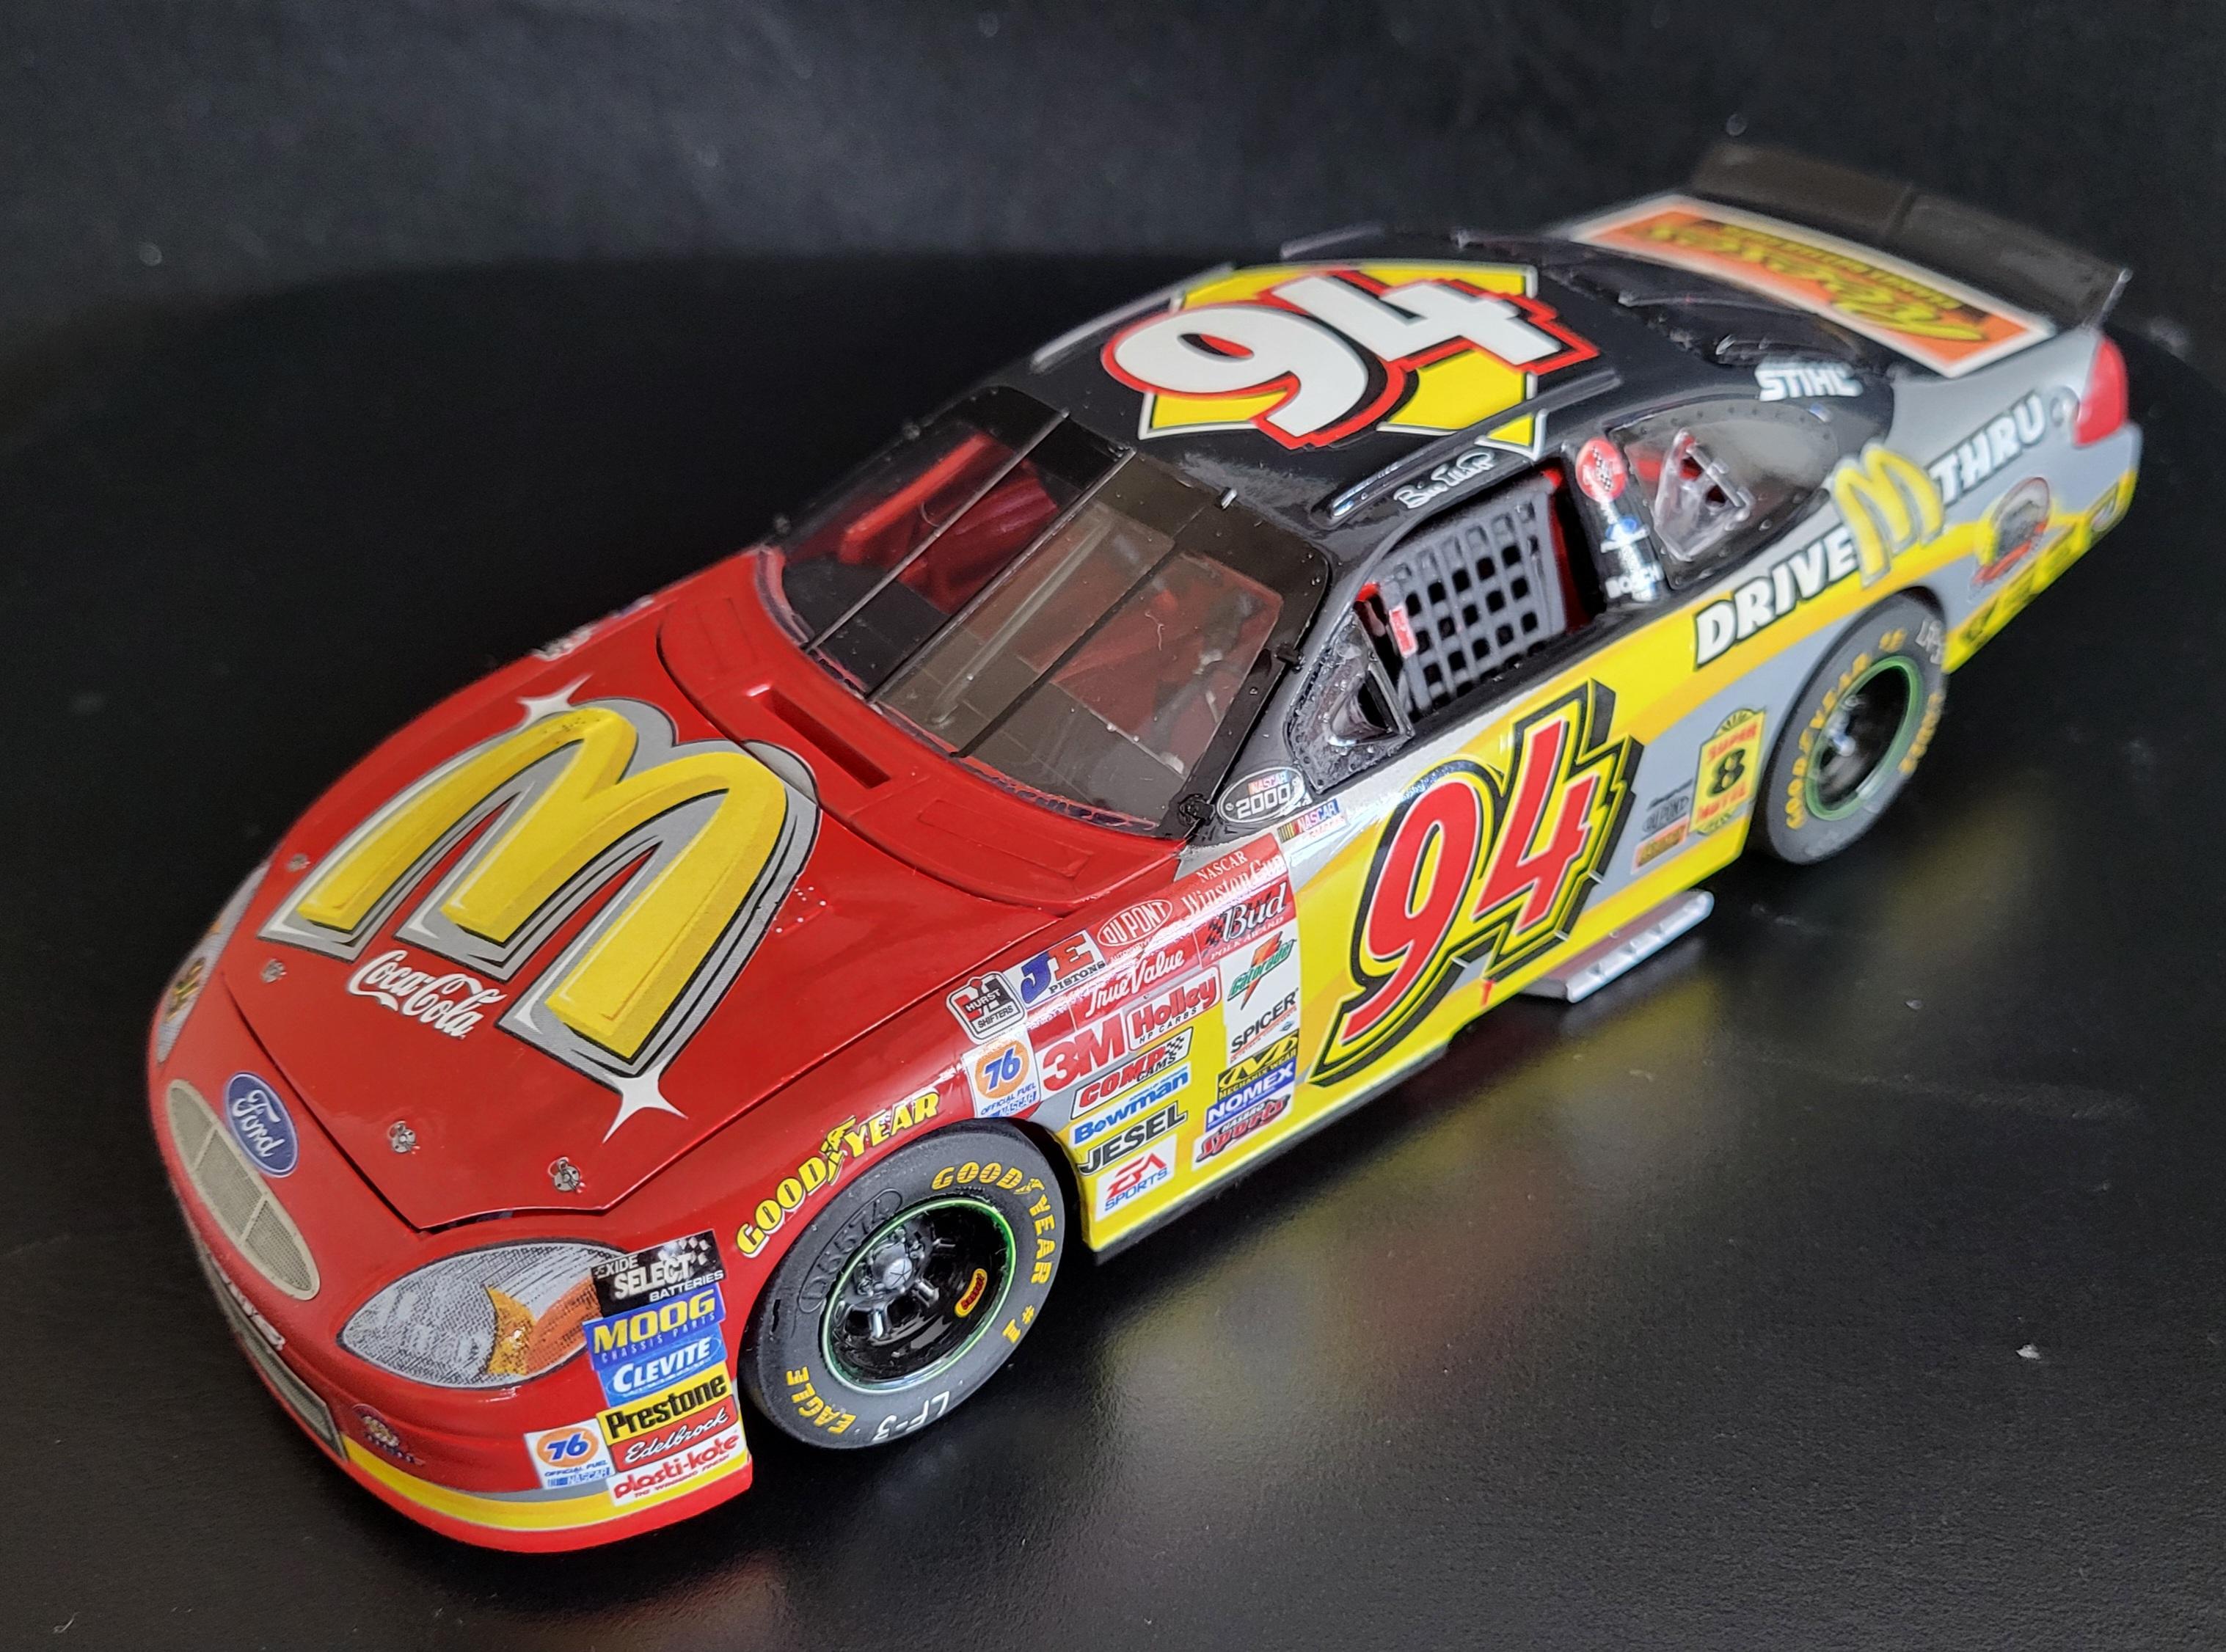
I am getting ready to paint my 2000 Bill Elliott McDonalds 25th anniversary Taurus. In looking over my collection of Bill Elliott kits, this is the only one that has three colors (other than a stripe).
My question is this... what order should apply the colors after my primer (white)?
I was thinking silver (all over), then red (front) then black (top). I also gave some thought to masking it off and doing each color separately but I am trying to minimize the raised edges between colors. The yellow areas are all decals.
I am using Krylon ColorMaxx. It is difficult to work with but I think I have it figured out now. I have used it on my other McDonalds cars and I want them to match.
-
Very nice build! I enjoyed the model and the background material as well. Thanks for sharing!
-
Very nice build. Those Skoal cars make good looking models and the old Regal body style has always been one of my favorites.
-
12 hours ago, Doug 1061 said:
Very nice. Those Ford heavy trucks of that era were some of the best looking trucks ever. I have thought about this kit but the price tag has kept me away. I may have to bite the bullet and pick one up.
I thought the same thing about the price. I had several that I was watching on ebay but they were too pricey. I finally got a special offer from one seller that put it in my price range.
-
1
-
-
Im not sure if this should go in the NASCAR section or here. This is my first try at a big rig model, I typically build race car models but this was the intersection of the two. I enjoyed this build, it was a nice change from the normal and I had to do a good deal of research to see what colors should be and how parts go together. I used the AMT/Italeri truck kit and I thought the level of detail and the fit of parts was great. The AMT car hauler gave me a few fits and there are some things I would definitely do different if I did it again, but I like the looks of it all on a shelf with my cars. After I finish my Bill Elliott projects I may circle back and build another truck just for fun!
-
7
-
-
I'm finished with the Bill Elliott 1994 Budweiser Ford Thunderbird. Elliott only had one win in 1994 (Southern 500 at Darlington), so I used the pictures I found from that race as the basis for this car. The Powerslide decals matched up really close. I only was missing 1 decal to match up with the photos from the actual race car (I'll leave it to y'all to see if you can find it). I started with a Monogram #16 Family Channel Thunderbird that I picked up at a local car show for $10. Then used the excellent Powerslide decals that had all the extras to build either the 1992, 1993, or 1994 cars. Since I already had 1992 and there were no wins in 1993, I chose to build the 1994 car. I may circle back and build the 1993 car at some point, but for now I think I am going to move on to the 2000 McDonalds Silver Anniversary Taurus. I'm getting close to the end of my project to build all of Bill Elliott's cars from 1983 to 2003 I only have 1985, 1993, 2000, 2002, 2003 left to build.
-
3
-
1
-
-
On 6/28/2024 at 4:44 PM, Jim N said:
Thank you for the comment Brent. I appreciate it.
I lower the stance as follows.
The back axle assembly attaches to the chassis with screws. I cut off about an 1/8 of an inch from the posts on the axle assembly.
The front has the holes for the axle to fit. The suspension piece, I leave alone because it is of a sufficient diameter. I enlarge the holes on the chassis to equal the suspension piece. I find a drill bit of the size of the suspension piece and slowly drill the chassis out.
The axles have to be shortened considerably. I put the axle in a vise and a cutting wheel in my Dremel tool and shorten them. I do this by sight, so I do not have an exact measurement for you, but you will have to cut off more than you think.
I hope this helps.
Sounds like a fun build. I will be referring back to this when I get ready to start mine.
-
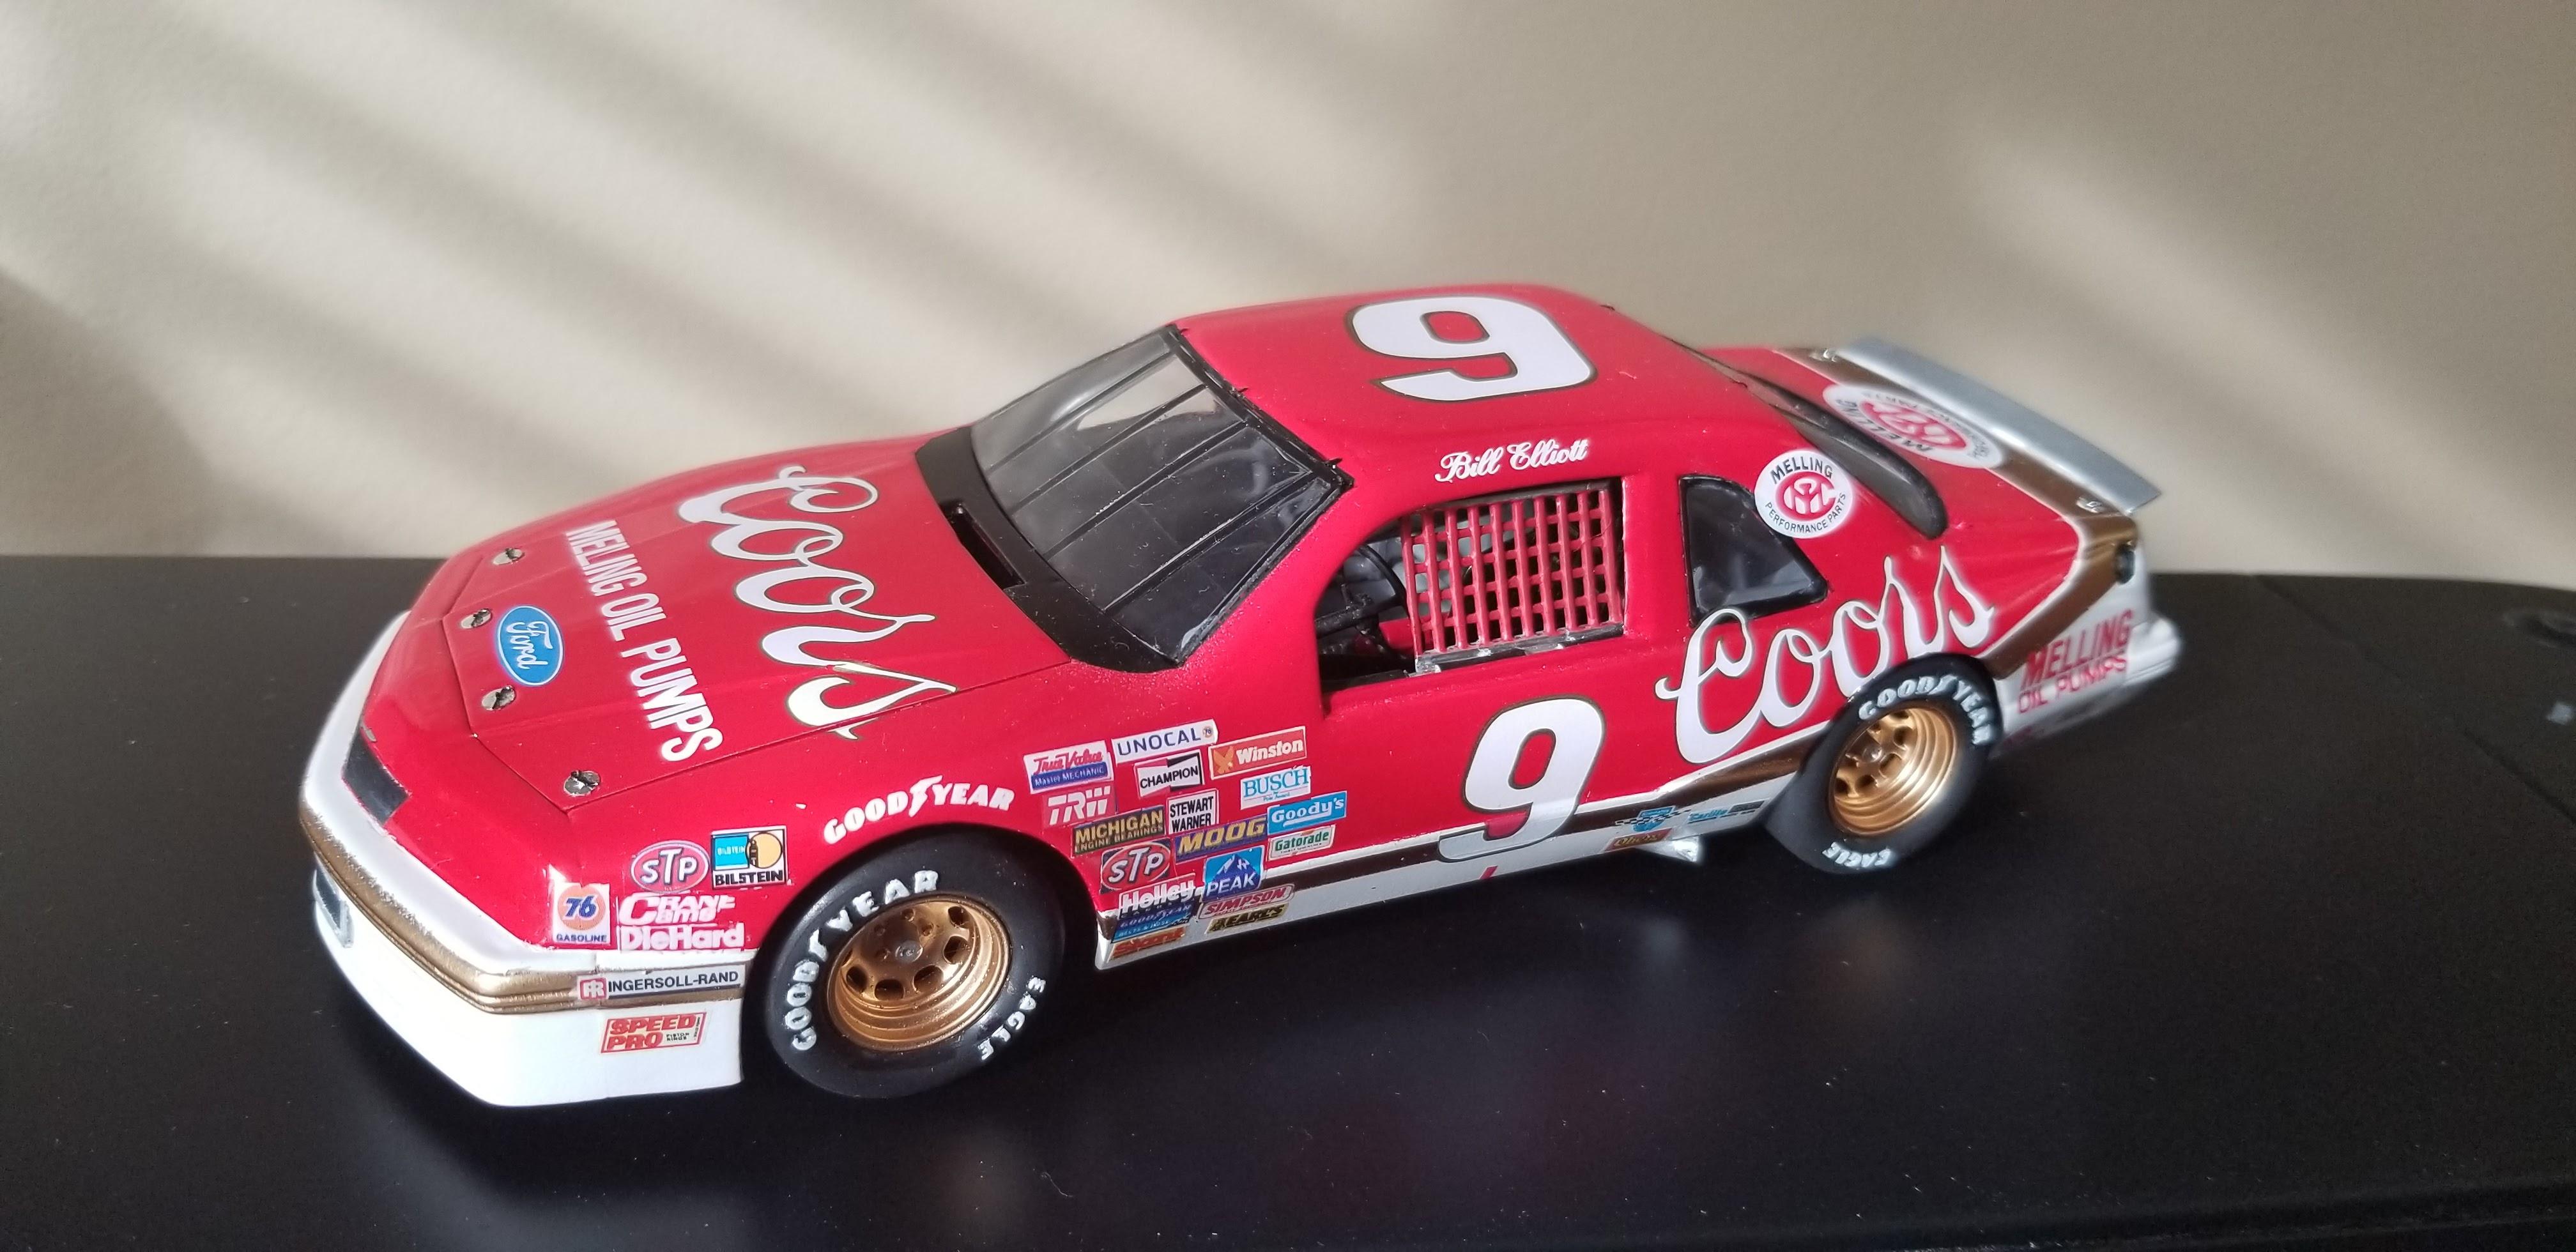
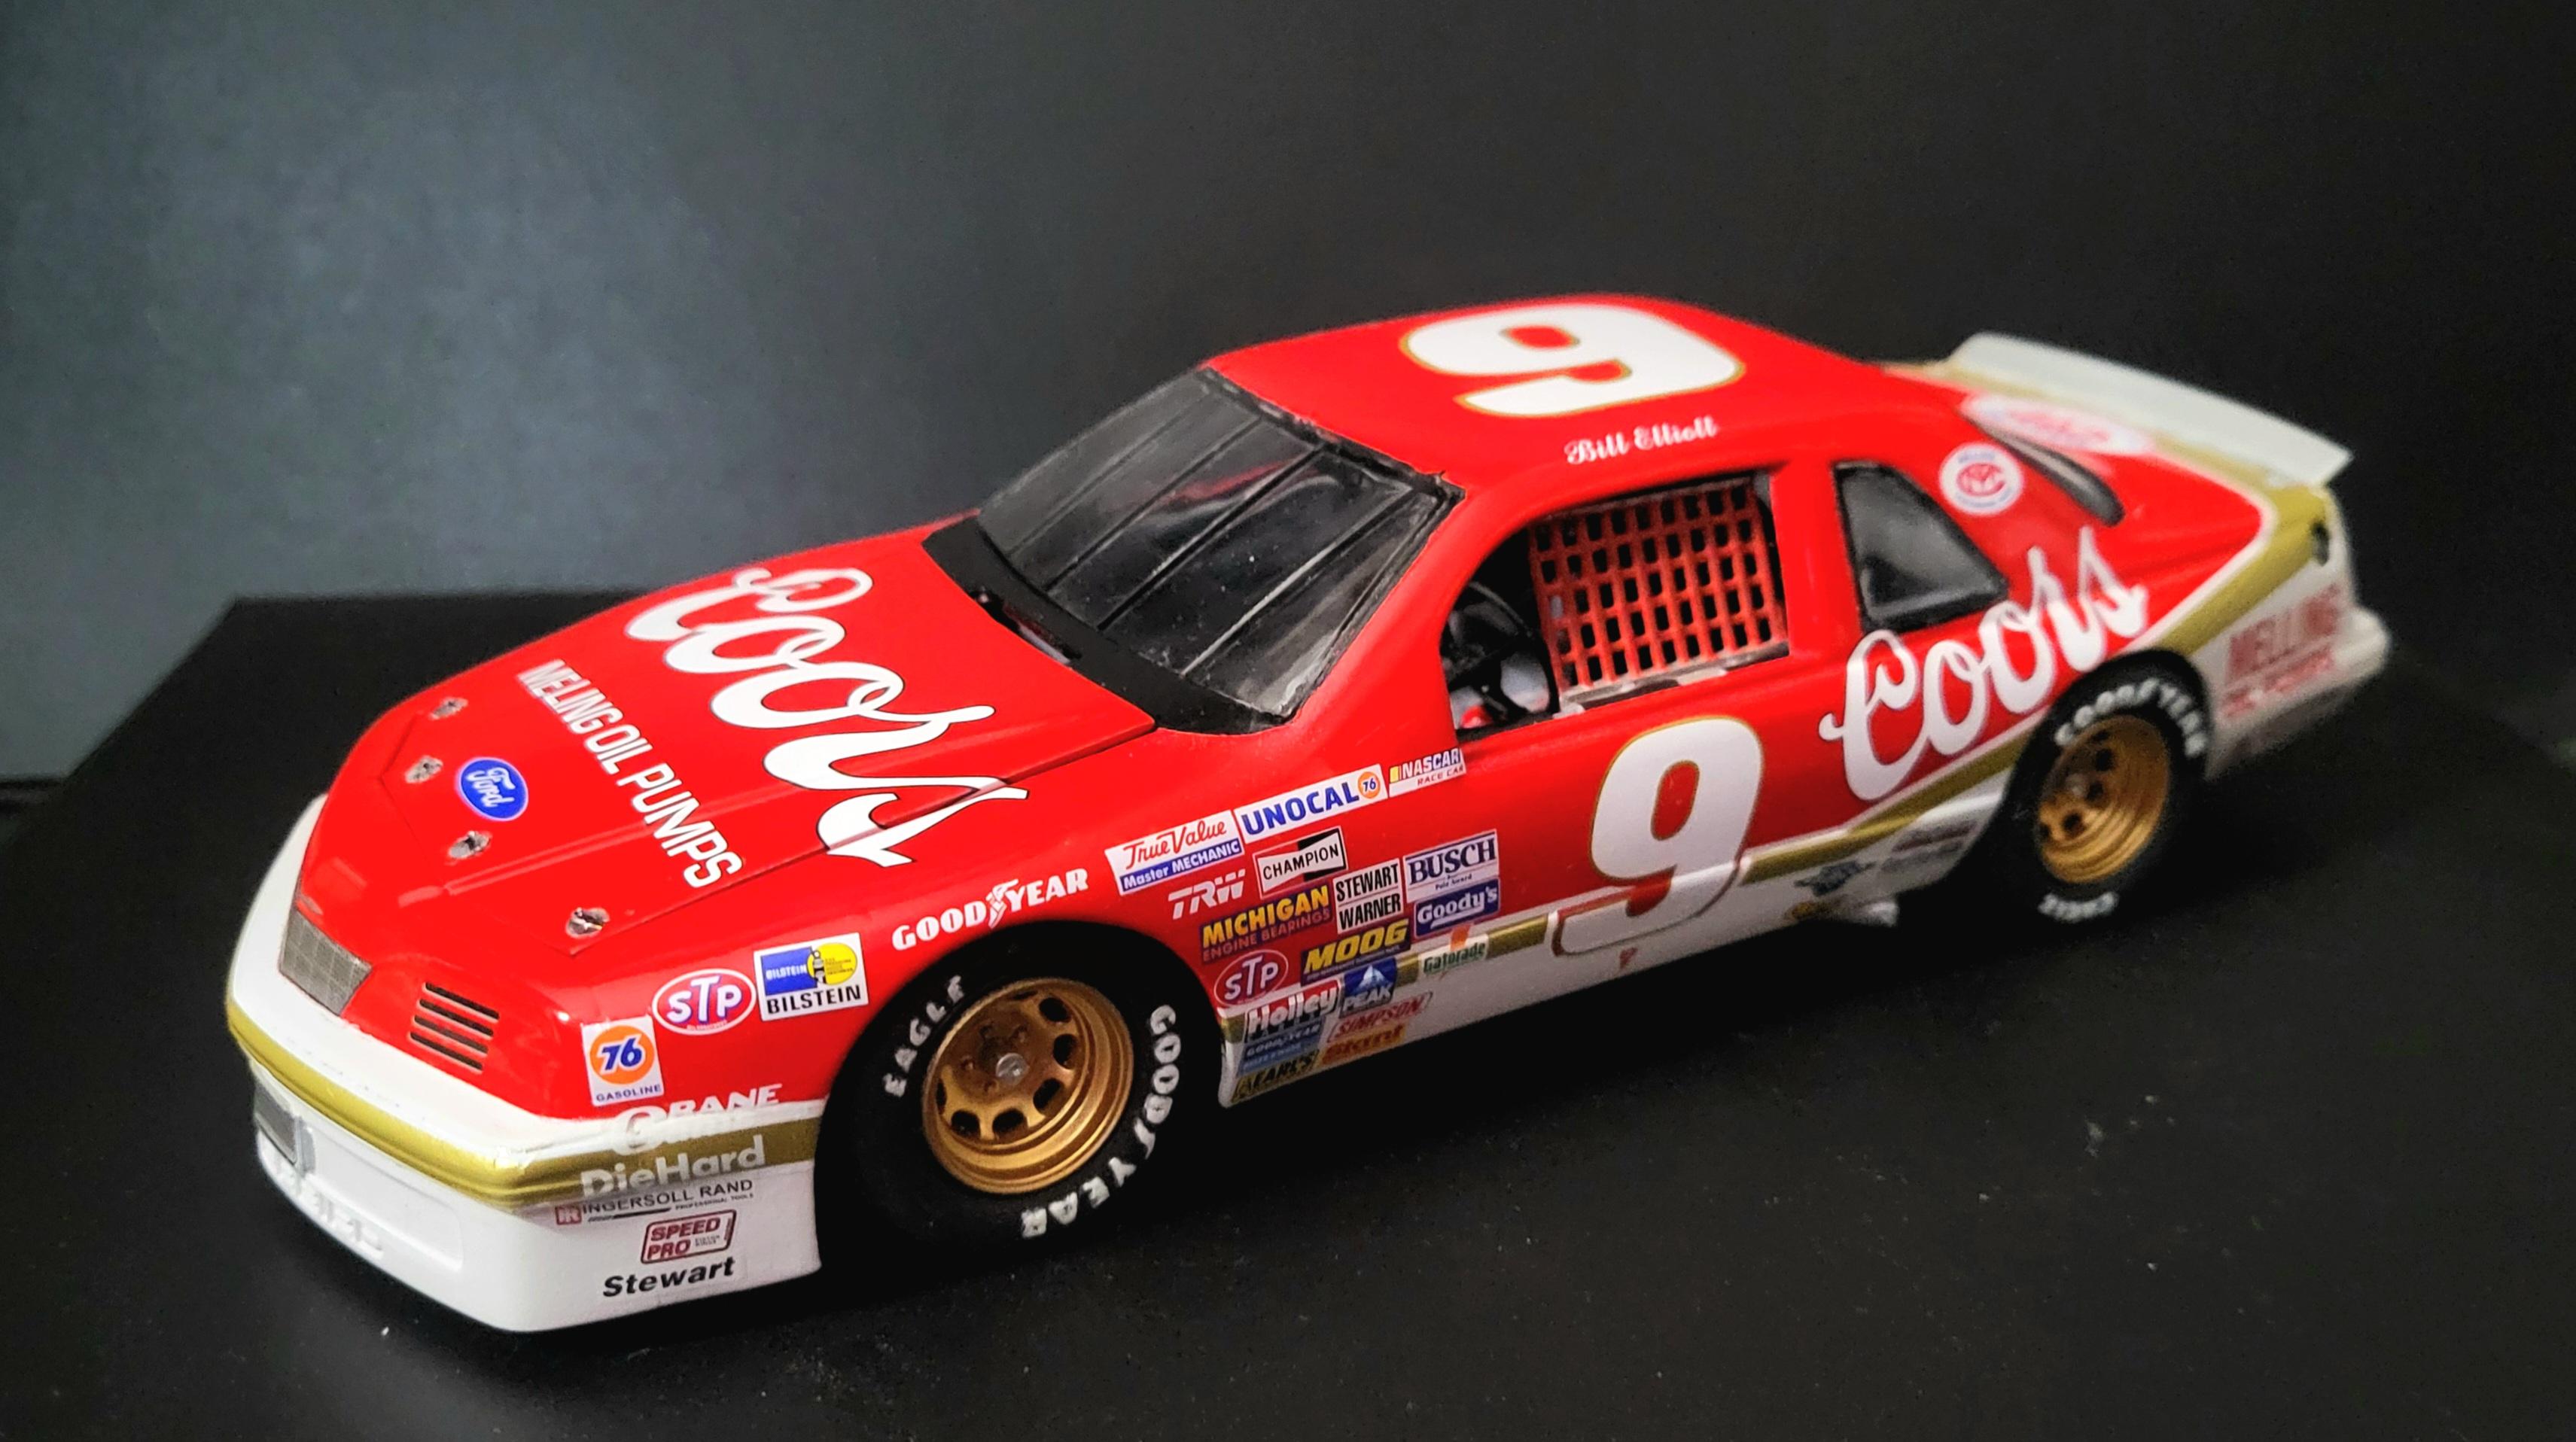
54 minutes ago, MarkJ said:
Brent, it looks like mission accomplished. The second picture of the car looks a lot cleaner and crisper with the new decals. However, the paint seems orangier then the first photo. Possible lighting differences or camera setup or did you edit the photo with a program like photoshop? No matter, it looks Awesome.
It must have been the lighting. I found a better place to take pictures of my models. The original photo had much more ambient light, which seemed to wash out the color. I did repaint the trunk and had to figure out which red I used from the 4 partial cans of different reds on my workbench. At some point I am going to pull out all my Bill Elliott models and take better pictures using the same set up.
-
Thanks for all the feedback. I used a little bit of all the posts.. tape at first, then soaked in some warm soapy water, used Micro Set on one of the stubborn decals then lightly sanded one of the others that did not want to come off. In the end I had to mask off and repaint a few areas due to the differences in the decals. That left some of the paint lines visible through the new decals. Overall I'm pretty happy with the end result. It will look fine sitting on the shelf, just don't look too close ?.
-
Perfect stance! I have a Dale Jr snap tite model that is going to be paired with a 2018 Camaro resin body. I would love to hear how you went about lowering the car.
-
Looks good! I see this model for sale all the time but rarely see it built. Your paint and detail work are excellent!


(1)(1).jpg.5adc44f7bb787699ced1b1403ca9f452.jpg)

(1).jpg.aa11615d3396455a08c3e2146fc13f27.jpg)
(1)(1).jpg.e5209c8b5546baa4eb4033dc4f422231.jpg)
(1)(1).jpg.75b2671d1c67f6b7e3421813a7d53d4e.jpg)


1981 Neil Bonnett Ford Thunderbird - Wood Brothers Racing
in NASCAR
Posted
I like the stance! It looks good with the square bird. Nice work!