

KevinCarroll
-
Posts
31 -
Joined
-
Last visited
Content Type
Profiles
Forums
Events
Gallery
Posts posted by KevinCarroll
-
-
Wow, nicely done Mr. Tice. A great variation on the (sadly) ancient AMT D8. As Dutzie says, a rarely seen vehicle bu one that was used so commonly in years past.
-
Scarily well done, sir. Several years ago we had a mixer accident nearby where the truck struck a low overpass and then careened into the path of a school bus on the other side.
-
Wow, Tommy, thanks for that - I was starting to doubt myself! For sure it was a cable-operated and tracked backhoe and clearly we are talking about the same still-born AMT model here. But in my mind's eye I kinda remember a blacked-out silhouette in one of the many model mags of the time. Very cool, a shame it was never released, but secondarily makes for a great modeling story. Thanks again.
Kevin
-
>>>AMT did plan at one time to do a power shovel, but never happened.......
I do recall the AMT shovel that they proposed back in the later-70s (?). If I remember correctly it was a cable-operated backhoe. My hazy recollection was a 'coming soon' announcement in one of the modeling magazines, well before the dawning of the interweb. They showed only a blacked-out drawing, little detail, but clearly a tracked excavator. I'm still anxiously awaiting it. 😉
A beautiful model!
-
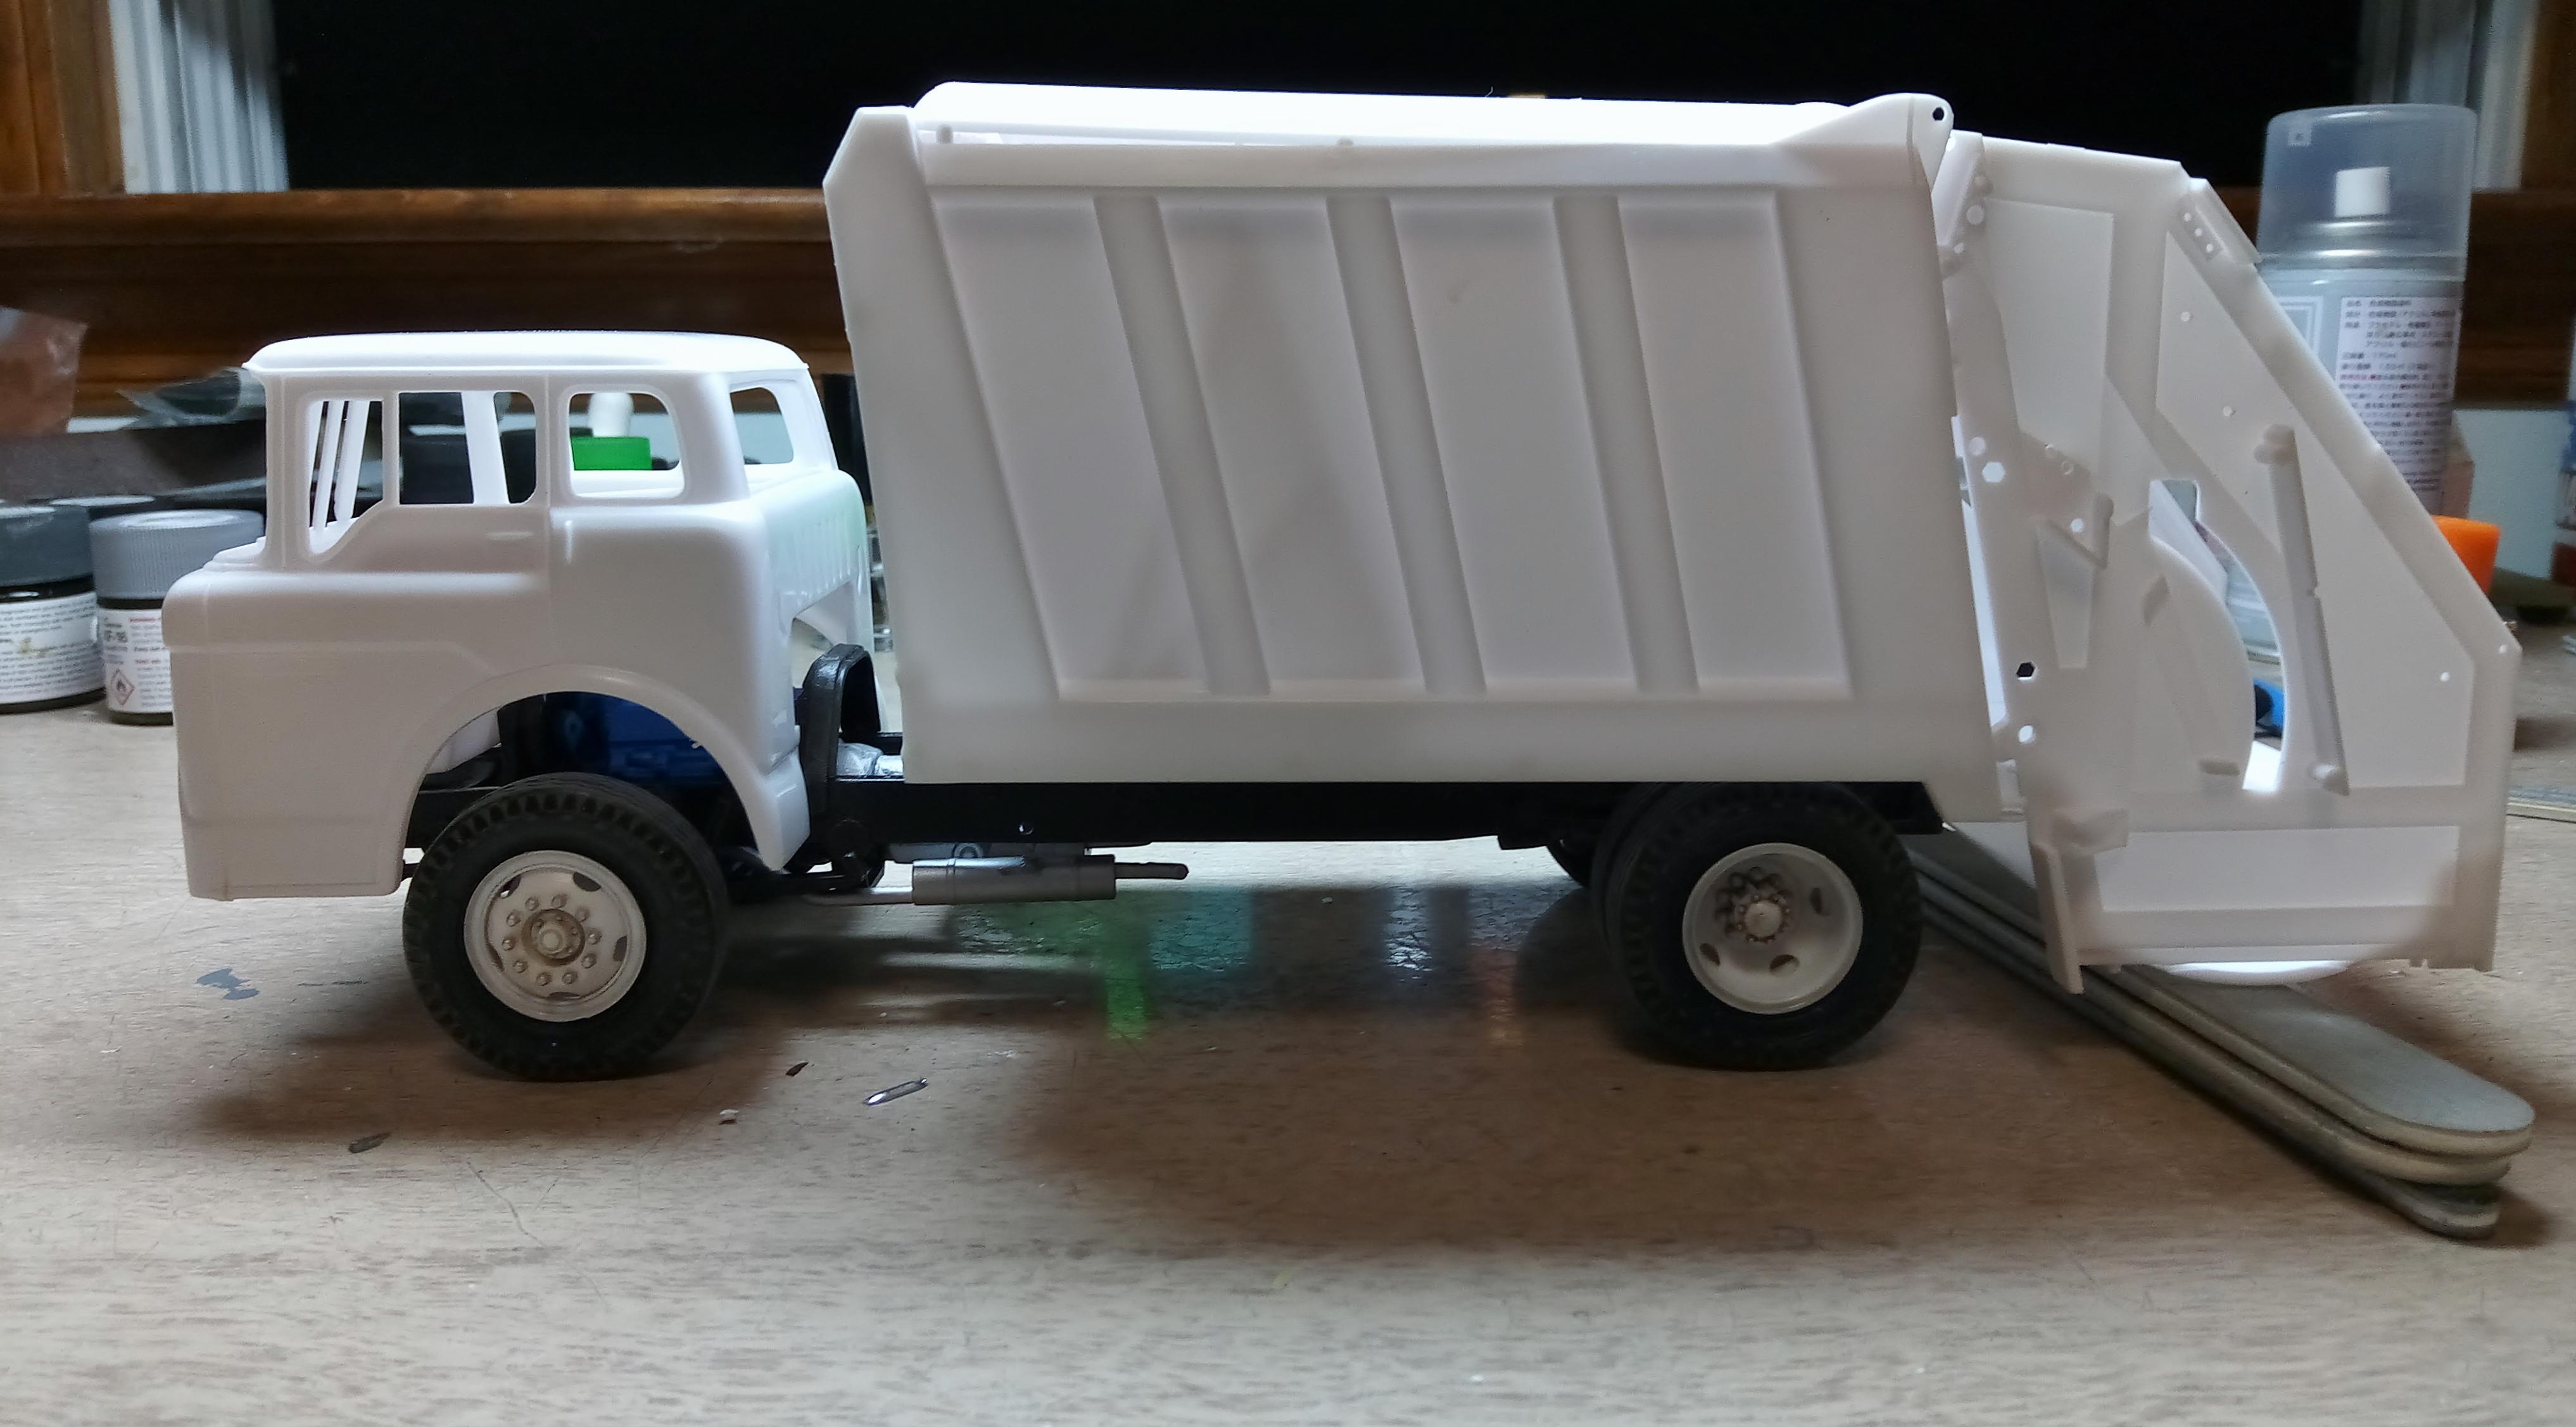
As I noted, I thought the compactor body was nicely done and it was the main attraction for me. Its fit is very good and the detail on it is more than adequate for out-of-the-box; as always, the better modelers here can really enhance that. Decals are pretty good too if not a hair thick. A word of caution though - they do want to immediately stick. Flood the area with water and a touch dish or hand soap; between that and the heartiness of the decals and you'll be good. Also, some of the hydraulic plumbing is questionable, but hey, the stuff they give you is pretty nice and busy appearing, so I was happy as is. Also, also......make sure you prime the compactor body if you are going to use a light finish color; see my on the bench mock-up photo with a bit of back light. No major sub-assemblies glued, just laid together.
My problems came with the chassis and cab. And I do *get* it - this is 'round two' for an older kit - and I accept the fact we are headed back two plus generations in molding and fit. (Heck, I'll be 70 years old this week). But did we need to use the same old instructions for the truck? Considering that parts fitment is iffy to begin with, better instructions would have been nice.
Anyway, I largely enjoyed the build and got my money's worth. It's hanging around and no doubt I'll come back to it sooner or later. I also got a new found respect for you car and truck guys, not normally my field of endeavor - well done, ladies and gents!

-
 1
1
-
-
1 hour ago, cobraman said:
You got farther along than I did with this kit.
That's because you're smarter than me, Ray! 😉
-
Not sure if this fits here, guys, as it is not a true WIP in terms of a step-by-step build. Yet neither is it ready for Under Glass. (In fact, I'd suggest it is headed for "Under The Bed" or at least The Shelf of Doom!) To this point it is 95% built but I have found it pretty frustrating build that has kicked my butt. The new compactor body is pretty nice and though some of the detail is a bit heavy handed, fit is really nice and that finished component was well worth it for me. The C-900 chassis and truck body is what really threw me. Admittedly I am not a truck/car modeler and I know more than a few of you are probably better versed in the vagaries of this particular truck kit than I. And I do mean vague in terms of fit AND directions!
") That said, there were more than my share of operator errors too.
That said, there were more than my share of operator errors too.
So all that said, here it is where it stands as of now. I think I'll just put it aside in my new found maturity (i.e. after 70 years!) and maybe come back to it in a few weeks when I'm feeling kinder to it.
-
3
-
-
Great info, Joe, thanks; this may be the answer!
By the way, this knucklehead finally got around to looking at the decal sheet in the AMT Ford Garwood Garbage truck and sees it actually has conspicuity stripes on it! Duh. This has been a fun build so far although I do now understand the complaints about the instructions.
-
Thank you. And as a matter of fact they also sell a decal sheet of warning placards specific to rear loading garbage trucks - good deal!
-
Thanks, gents. Gopher does have a few such things, but nothing really in the ballpark. I did buy their US military sheet just in case I want to make a base refuse truck! Surprised there aren't more conspicuity markings, I would have thought that a common decal. But the search goes on as does the build - thanks again.
Kevin
-
Great site, folks, thanks for helping out this long-time modeler but only 'sometimes' car/trucker guy.
Working on AMT's new 1/25 Ford/Garwood Garbage Truck and rather than getting locked into a prototype or kit marked truck, I'd like to have the freedom of a what-if municipal or commercial carter. Anybody make sheets like that? And then related, what about reflective conspicuity red and white striping? Thanks for any assistance.
Kevin
-
Mean and clean - love it!
-
A beautiful beast!
-
1
-
-
All the little things - which in reality are not little at all - really add up, Brian. Too many to mention, but that dinged and dented (how did you do that?) tailgate with chains and the wonderfully weathered wooden sideboards really caught my eye. As others have said, a great replica of a work-a-day truck, but one that is well cared for too. Congrats!
-
Great finished job, Dan, and I enjoyed the build log too. Question - where did you source the decals?
Kevin
-
7 hours ago, David G. said:
Those tracks are well worth the money spent on them.
David G.
Agreed. I know that this group is but a small sampling of the overall model building community, but between the interest here in aftermarket sales and the multiple (re-re)-releases of this venerable D8 kit by AMT et al, you have to wonder if, in a similar vein, a new 1/25 scale construction equipment kit might be at least a moderately successful kit?
But more to the point.......onwards and upwards, Dan!! Build on, brother! 😅
-
23 hours ago, gotnitro? said:
Huuuuge improvement over stock, really like the way the ROPS changes look of stock dozer
Those tracks look great too
I agree wholeheartedly. I'm seriously thinking of retro-fitting mine, just completed earlier this year. These went right over the kit idler and drive sprockets, right Dan?
-
9 hours ago, Mopar - D said:
Kevin what you see in my picture is how I removed them from the shipping box. They are shorter in length than the AMT kit tracks. I have to check and see if they are going to work.
Understood, although the stock kit tracks seem just a skosh too long for me, so this might hopefully even things out. Are the parts inside the curled tracks at the bottom of the photo how you link the ends?
I gotta tell ya, seems they have added a *lot* of additional D8 parts since I ordered in the late Winter of this year. Makes me want to - almost - build another!
-
The Papy Hobby stuff is great, Dan, worth the wait. The ROPS canopy alone is worth the price of admission. Question.....did you assemble the tracks or are they printed as a unit?
Kevin
-
Thanks, Dan, those tracks will make a great improvement. I don't think they were available when I built mine, but all of PapyHobby's stuff is great - the ROPS canopy, the ROPS screens, the grille screen, blade angle cylinder. Another item that is small but makes a great difference is SMT's colored PE instrument panel and data plaques.
Great build, looking forward to more.
Kevin
-
Mopar, love the paint job! It's truly an oldie but goldie kit; I just finished one and there are some photos down in the "Under Glass" forum.
Question - what tracks do you have on order for yours and can you please point the way with a link? Best of luck with the continuing build.
Kevin
-
1 hour ago, Warren D said:
Curious what you used for the grill, the originals came with stick on "decals". I have a new kit and the photoetched grill, just trying to figure out how to do it.
Warren:
Not sure what PE grille you may have, but I used the one from Papy Hobbies. See: https://papyhobby.com/collections/scale-1-24/products/d8-phototech.
I just centered the radiator grille on the solid plastic kit grille piece so it looked correct and then outlined it with a fine marker. I didn't worry about making the PE grille fit flush with the surrounding kit plastic. I left a fine kit plastic border all around. I then drilled a bunch of holes safely within that border and roughly nipped them out with a sprue cutter close - but not too close - to the outlined border. Use a rough sanding stick to straighten out the remainder. I left enough kit plastic along the border to super glue the PE grille to....nobody (well, most nobody) will notice that the perimeter PE is blocked by the kit plastic. A little weathering goes a long way! Similarly, use the fan safety grille the same way. It's not as noticeable as the front radiator grille, but it's easy and very self-satisfying!
-
Beautiful beast.
-
On 3/9/2022 at 9:22 AM, Daddyfink said:
It looks great! I need to build one for the sake of my childhood.
Back in the late 70's I found one of these kits at a thrift store for a $1! Bought it and then discovered that it has not Assembly Instructions! Yup, I assembled about 60 percent of it just using the images off the box and guessing, but I was unable to get it all together. But, I do have a current issue of it and it will be built!
Thank you. In a quick aside regarding this kit's instructions, like many an old fart, I tend to say 'things were way better back in the old days' - including kit instructions. Well, I got a quick come uppance using these instructions from the 1970s.......they're terrible. You were just as well off using the box art! 😉
-
1
-
.jpg.c809558d1ea7d27f5ee21cd5e7694590.jpg)
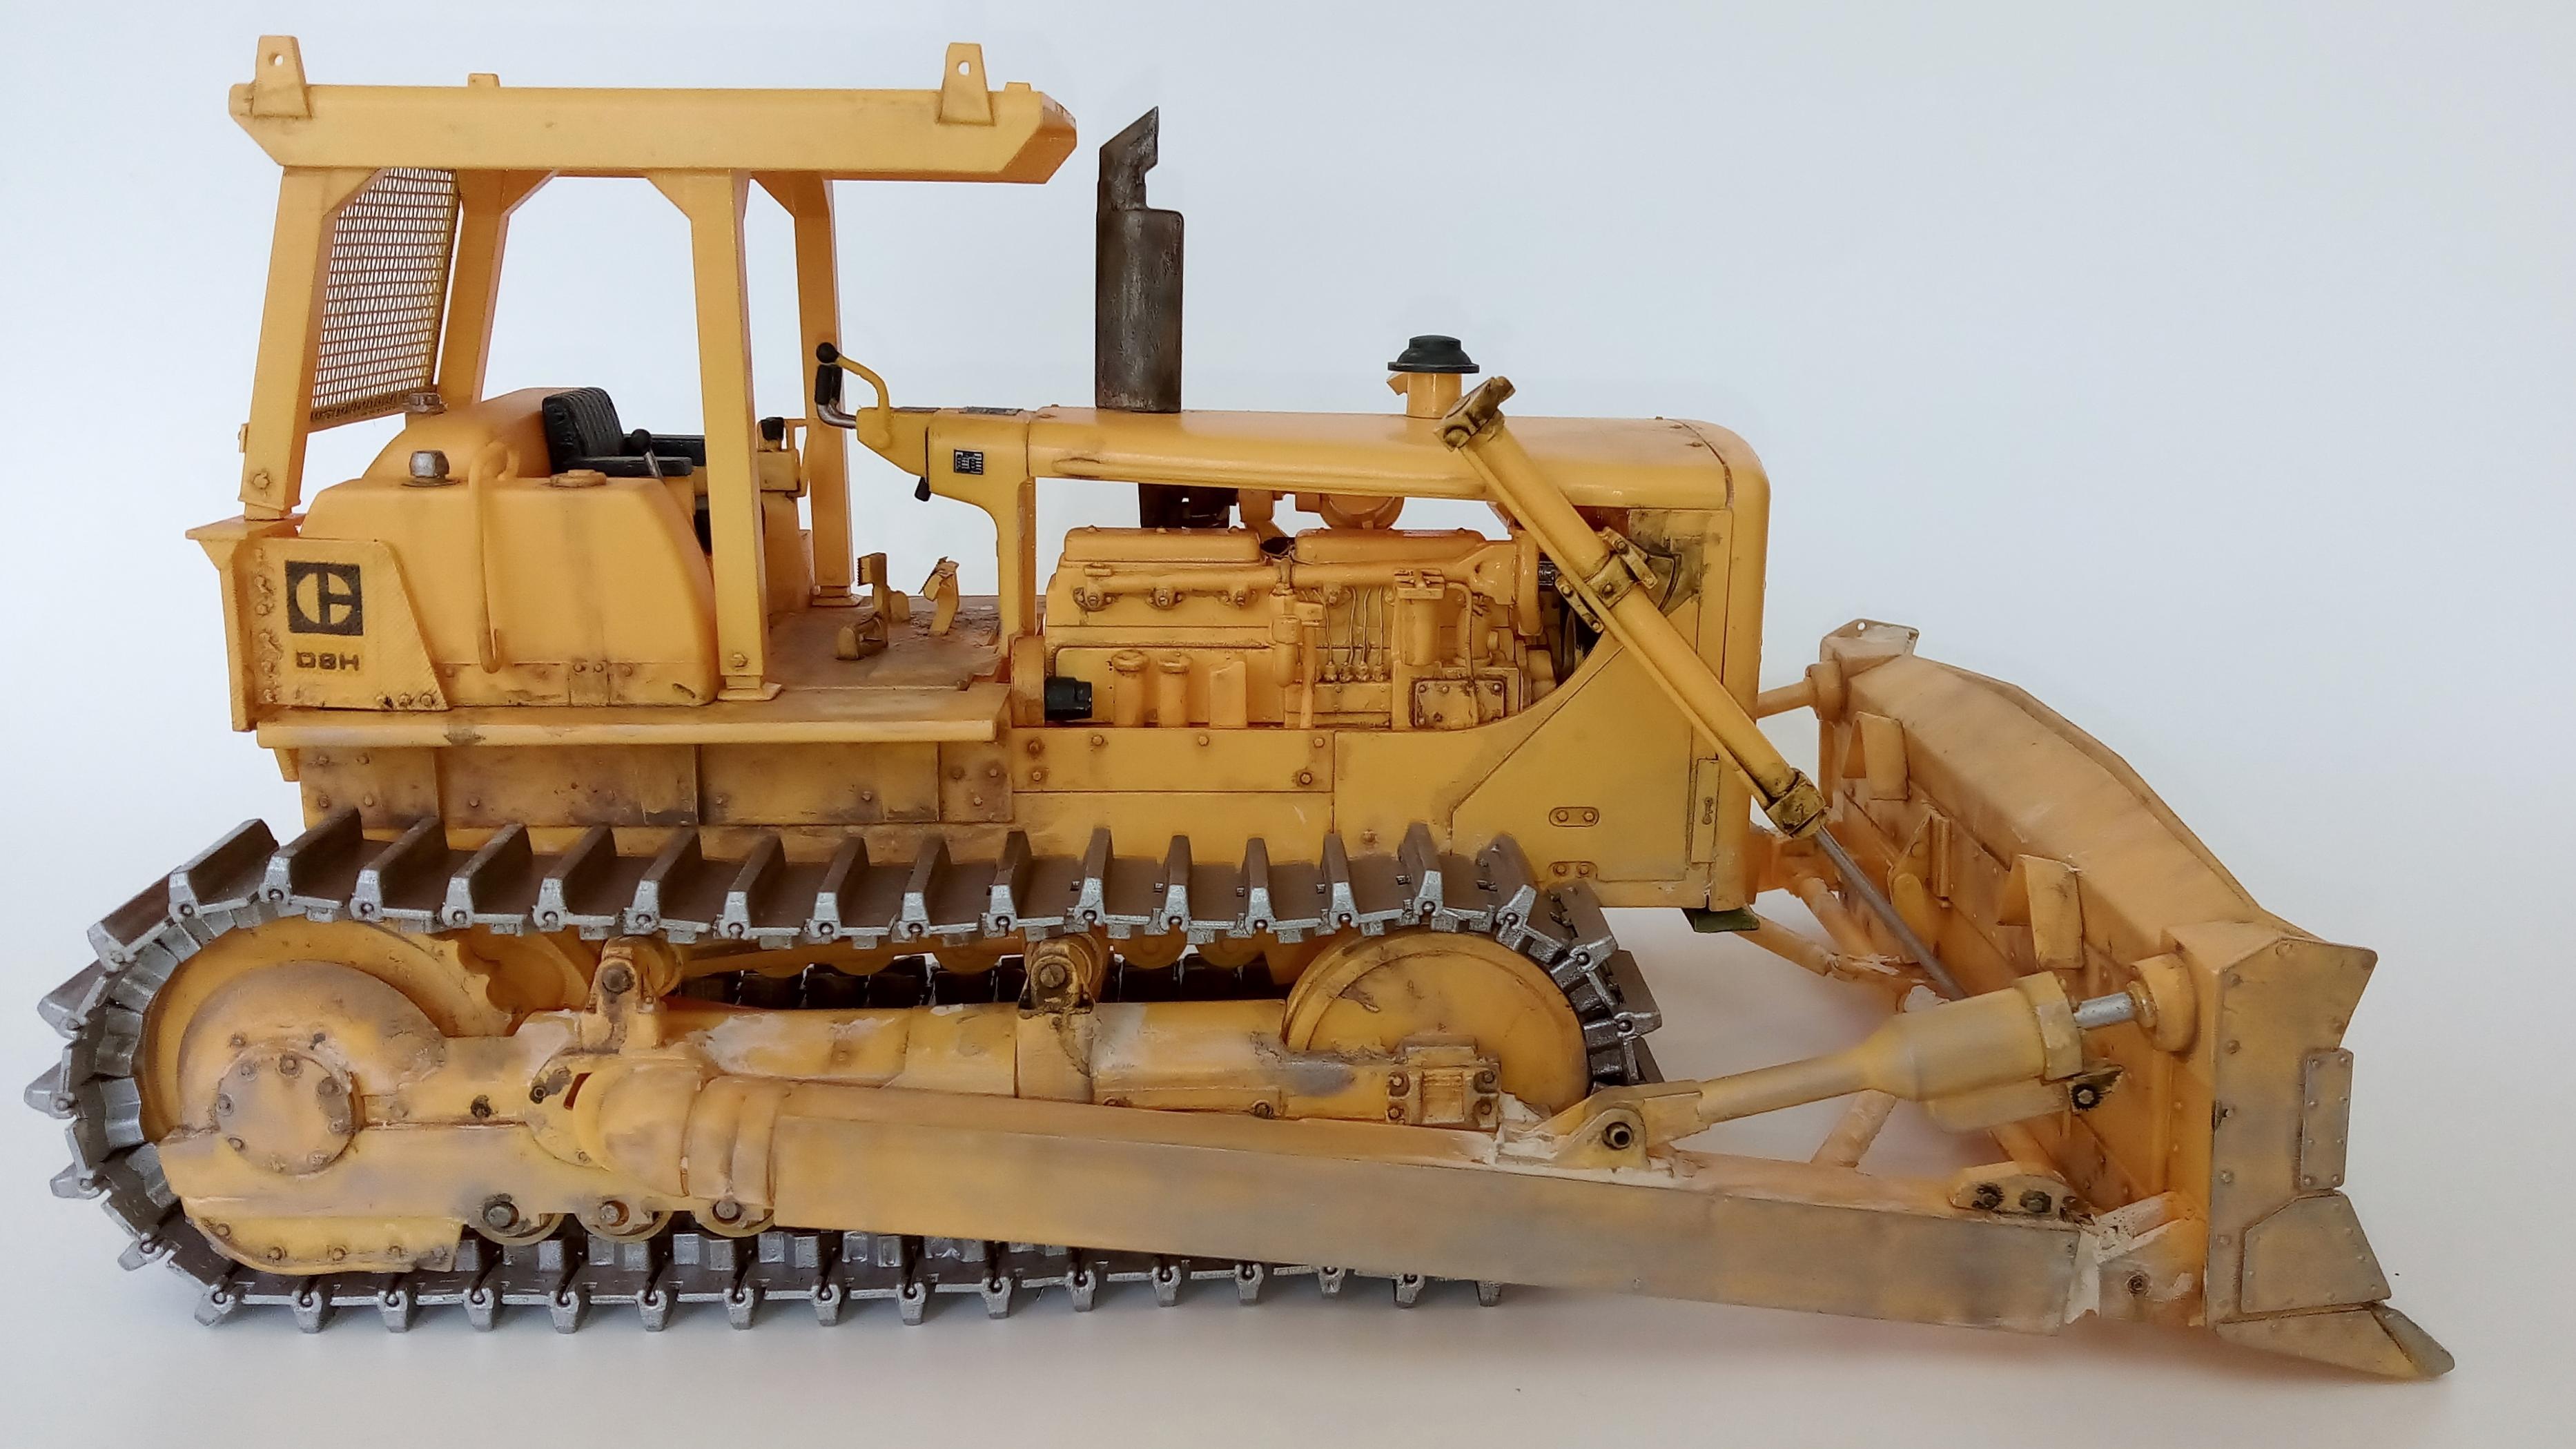

Caterpillar D8H Bulldozer
in Model Trucks: Big Rigs and Heavy Equipment
Posted
Sweet build, Chuck. Can you share where you sourced the decals, please?
Kevin