Alex Flint
-
Posts
418 -
Joined
-
Last visited
Recent Profile Visitors
2,394 profile views


Alex Flint's Achievements
MCM Avid Poster (5/6)
-
These are all my best and favorite interiors I've ever done.

-
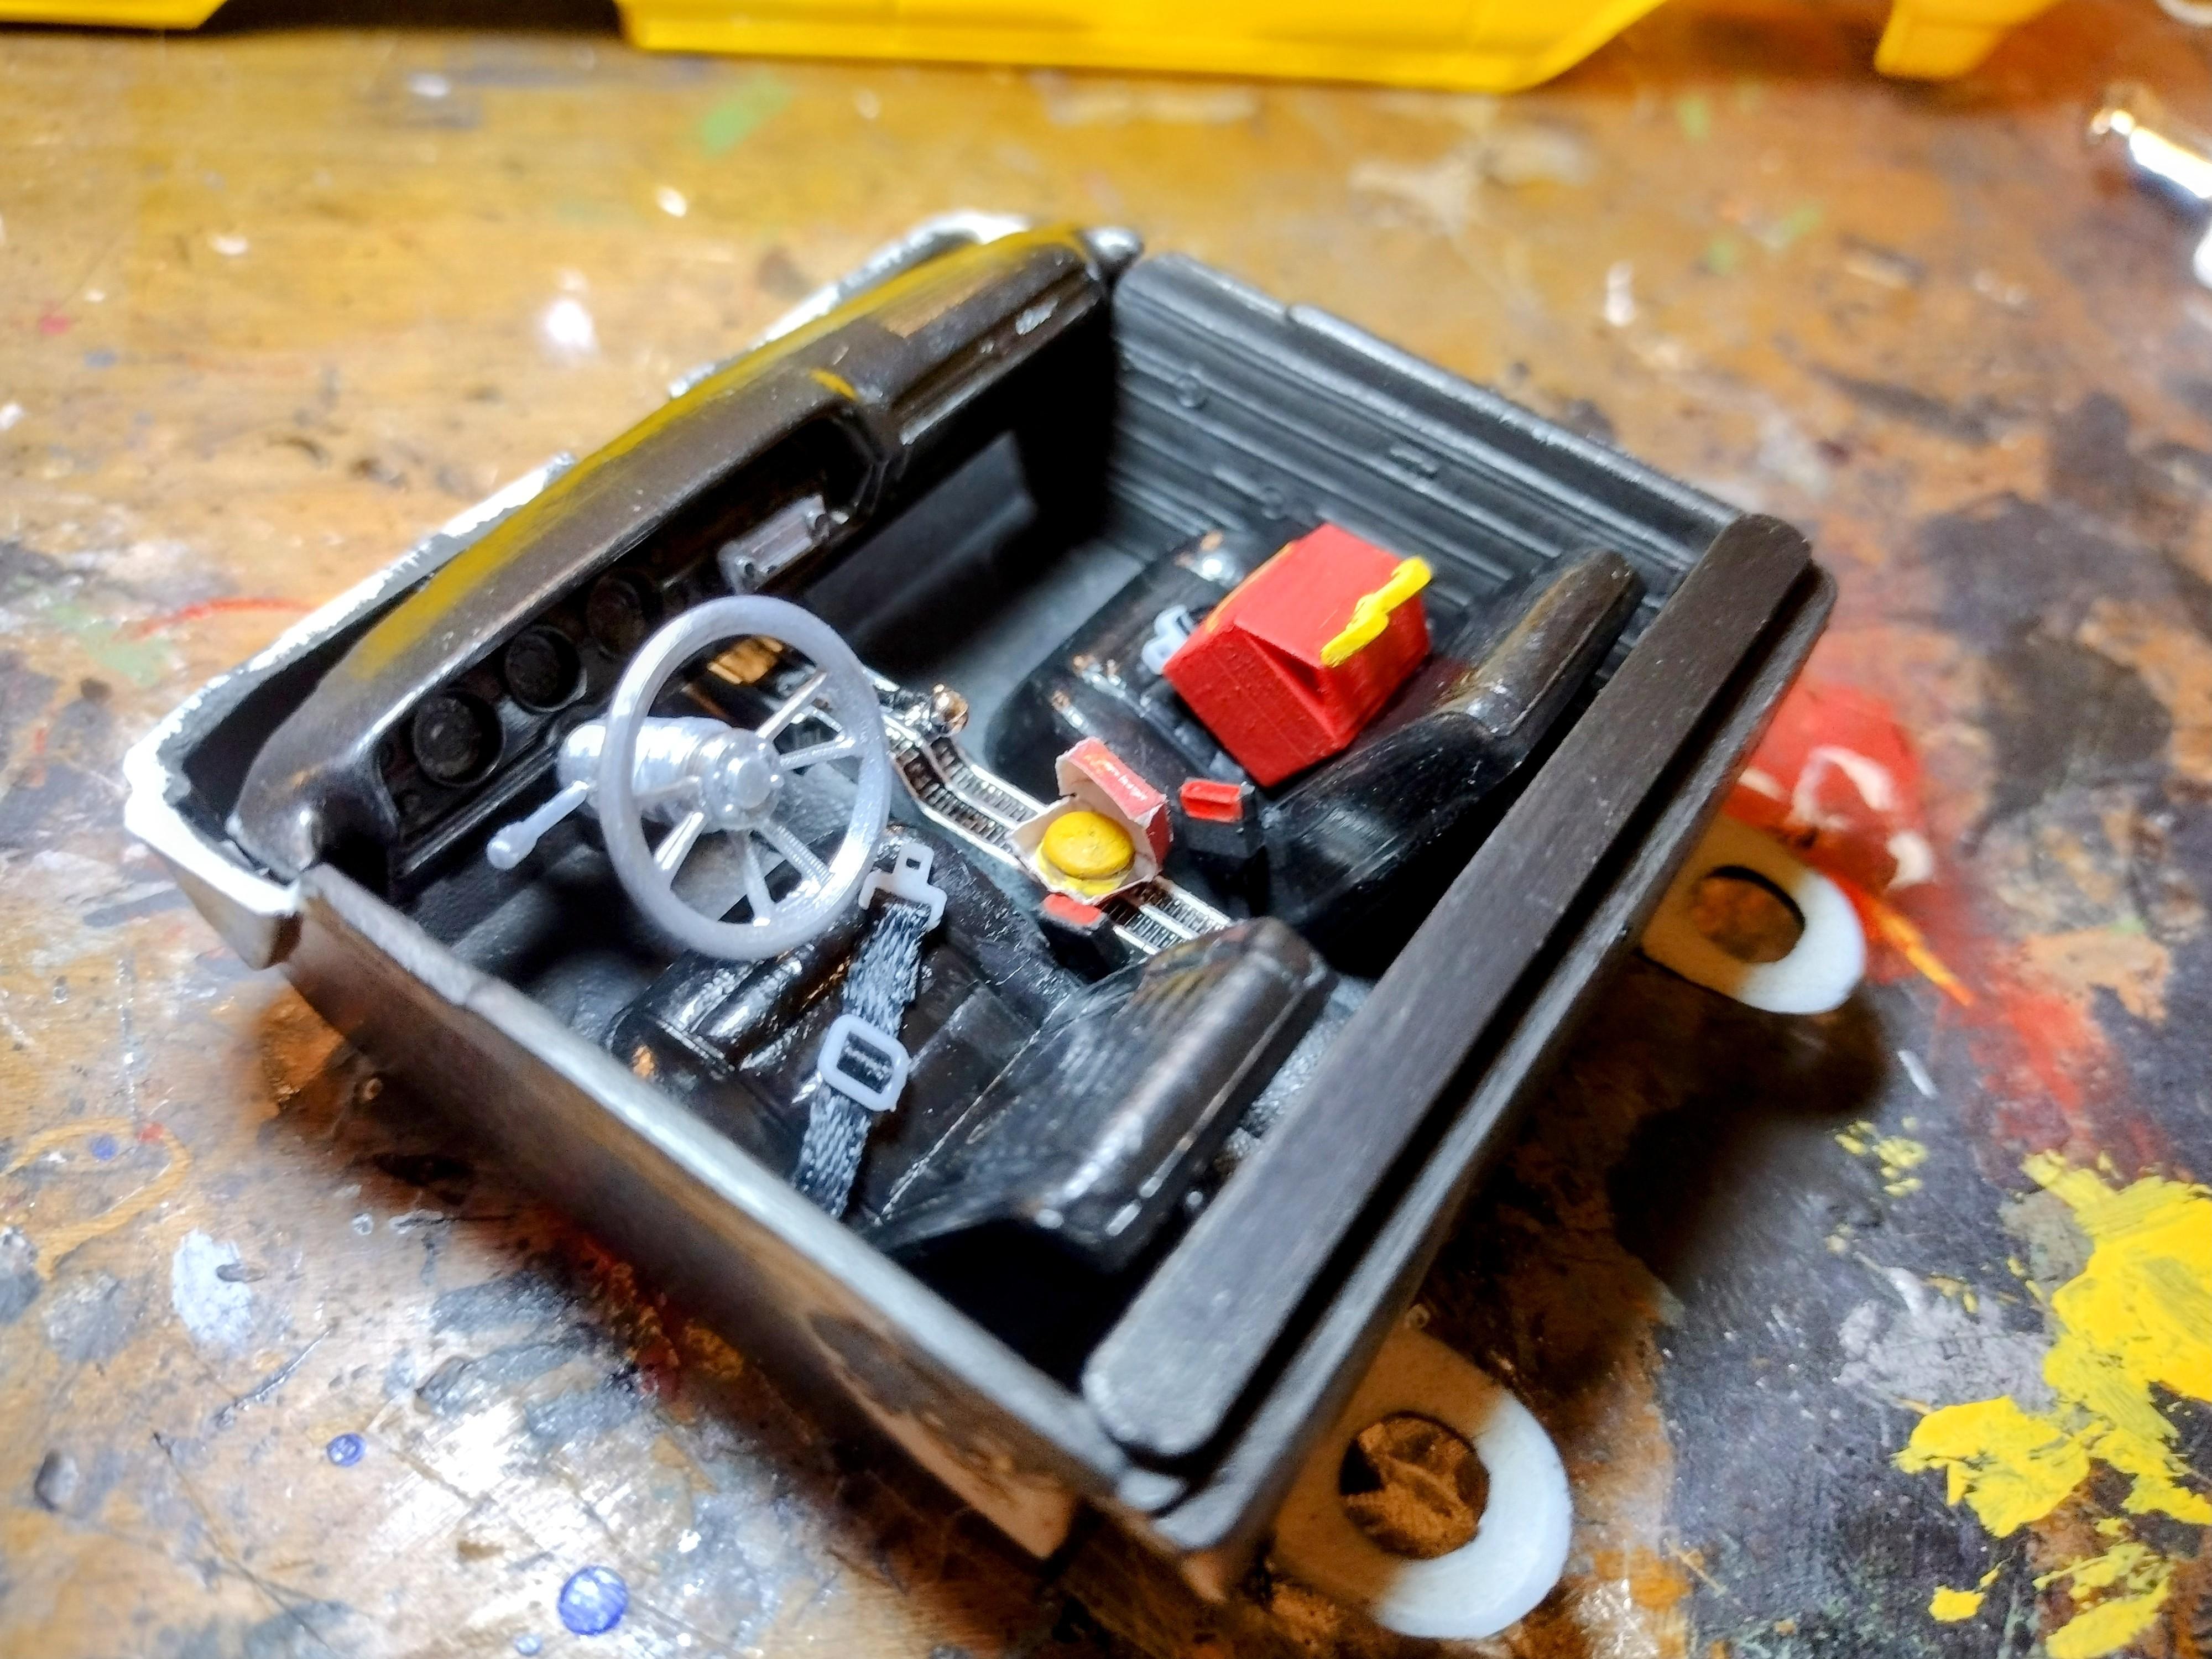
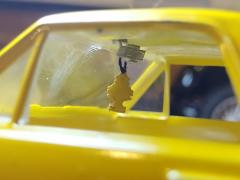
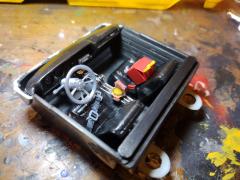
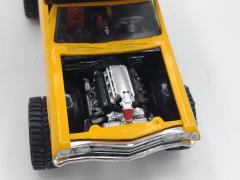
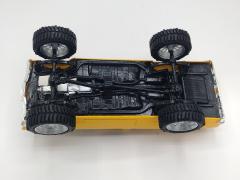
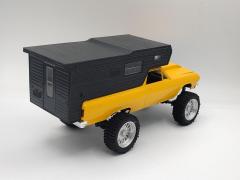
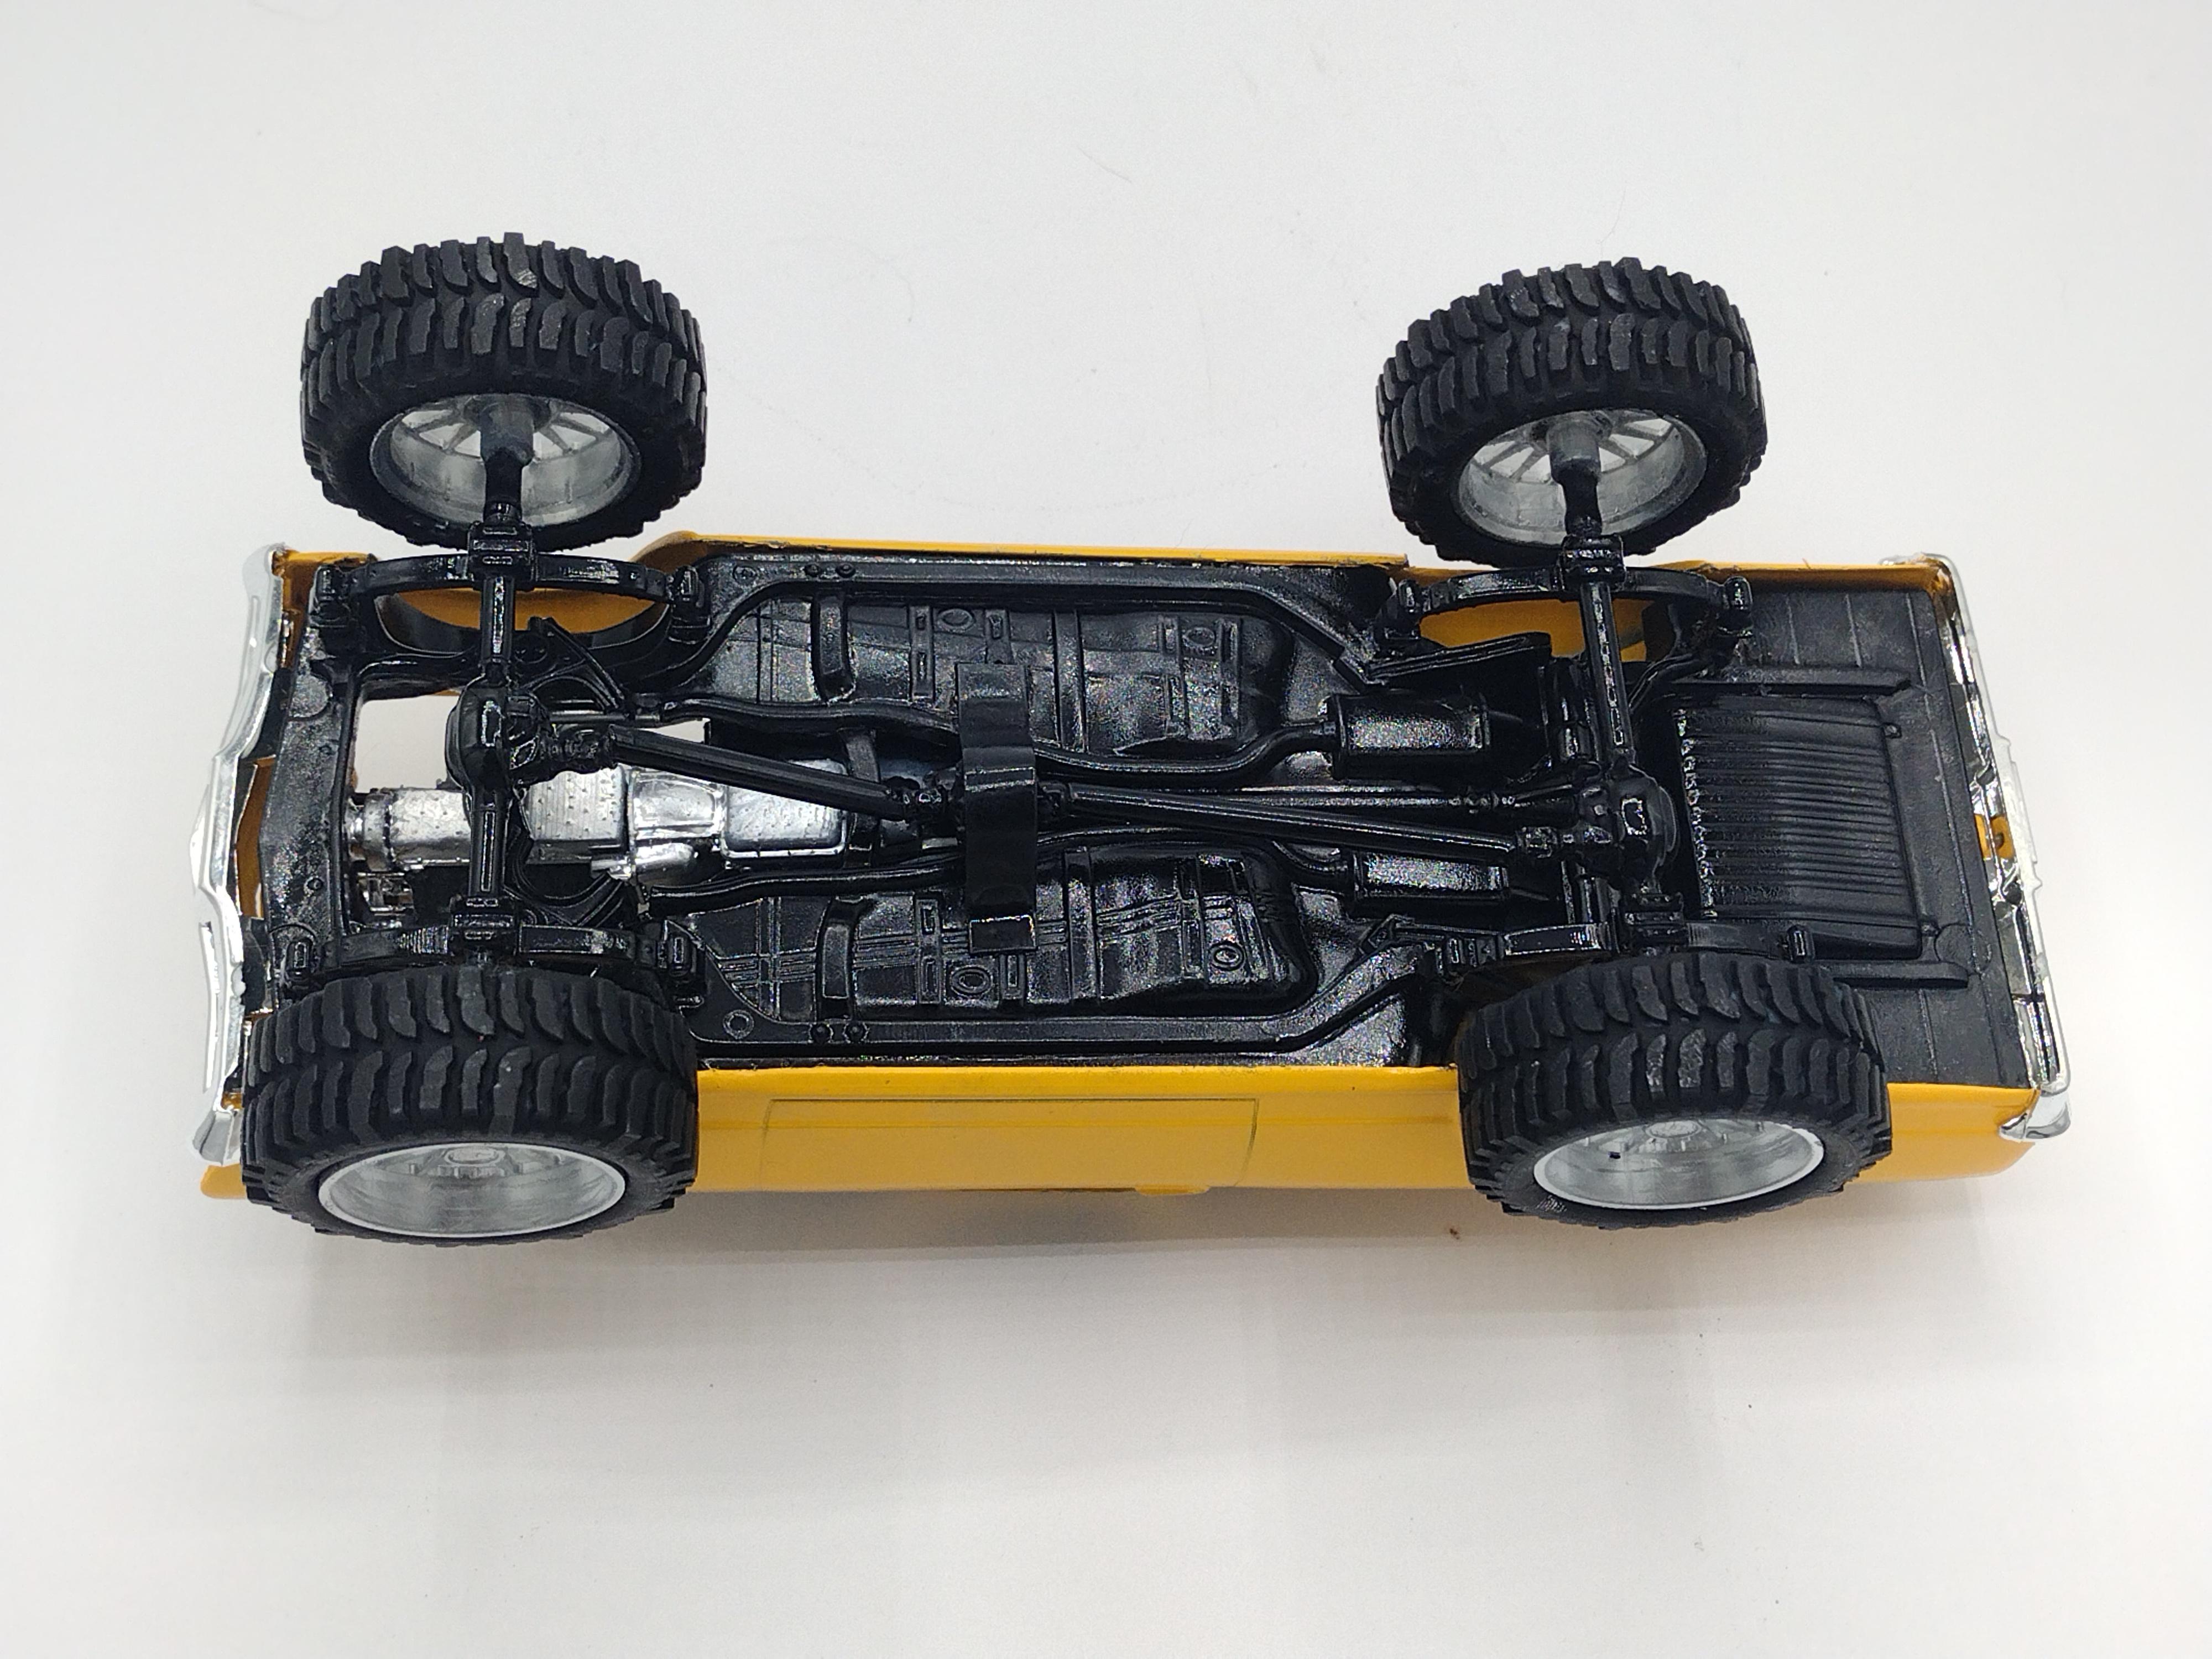
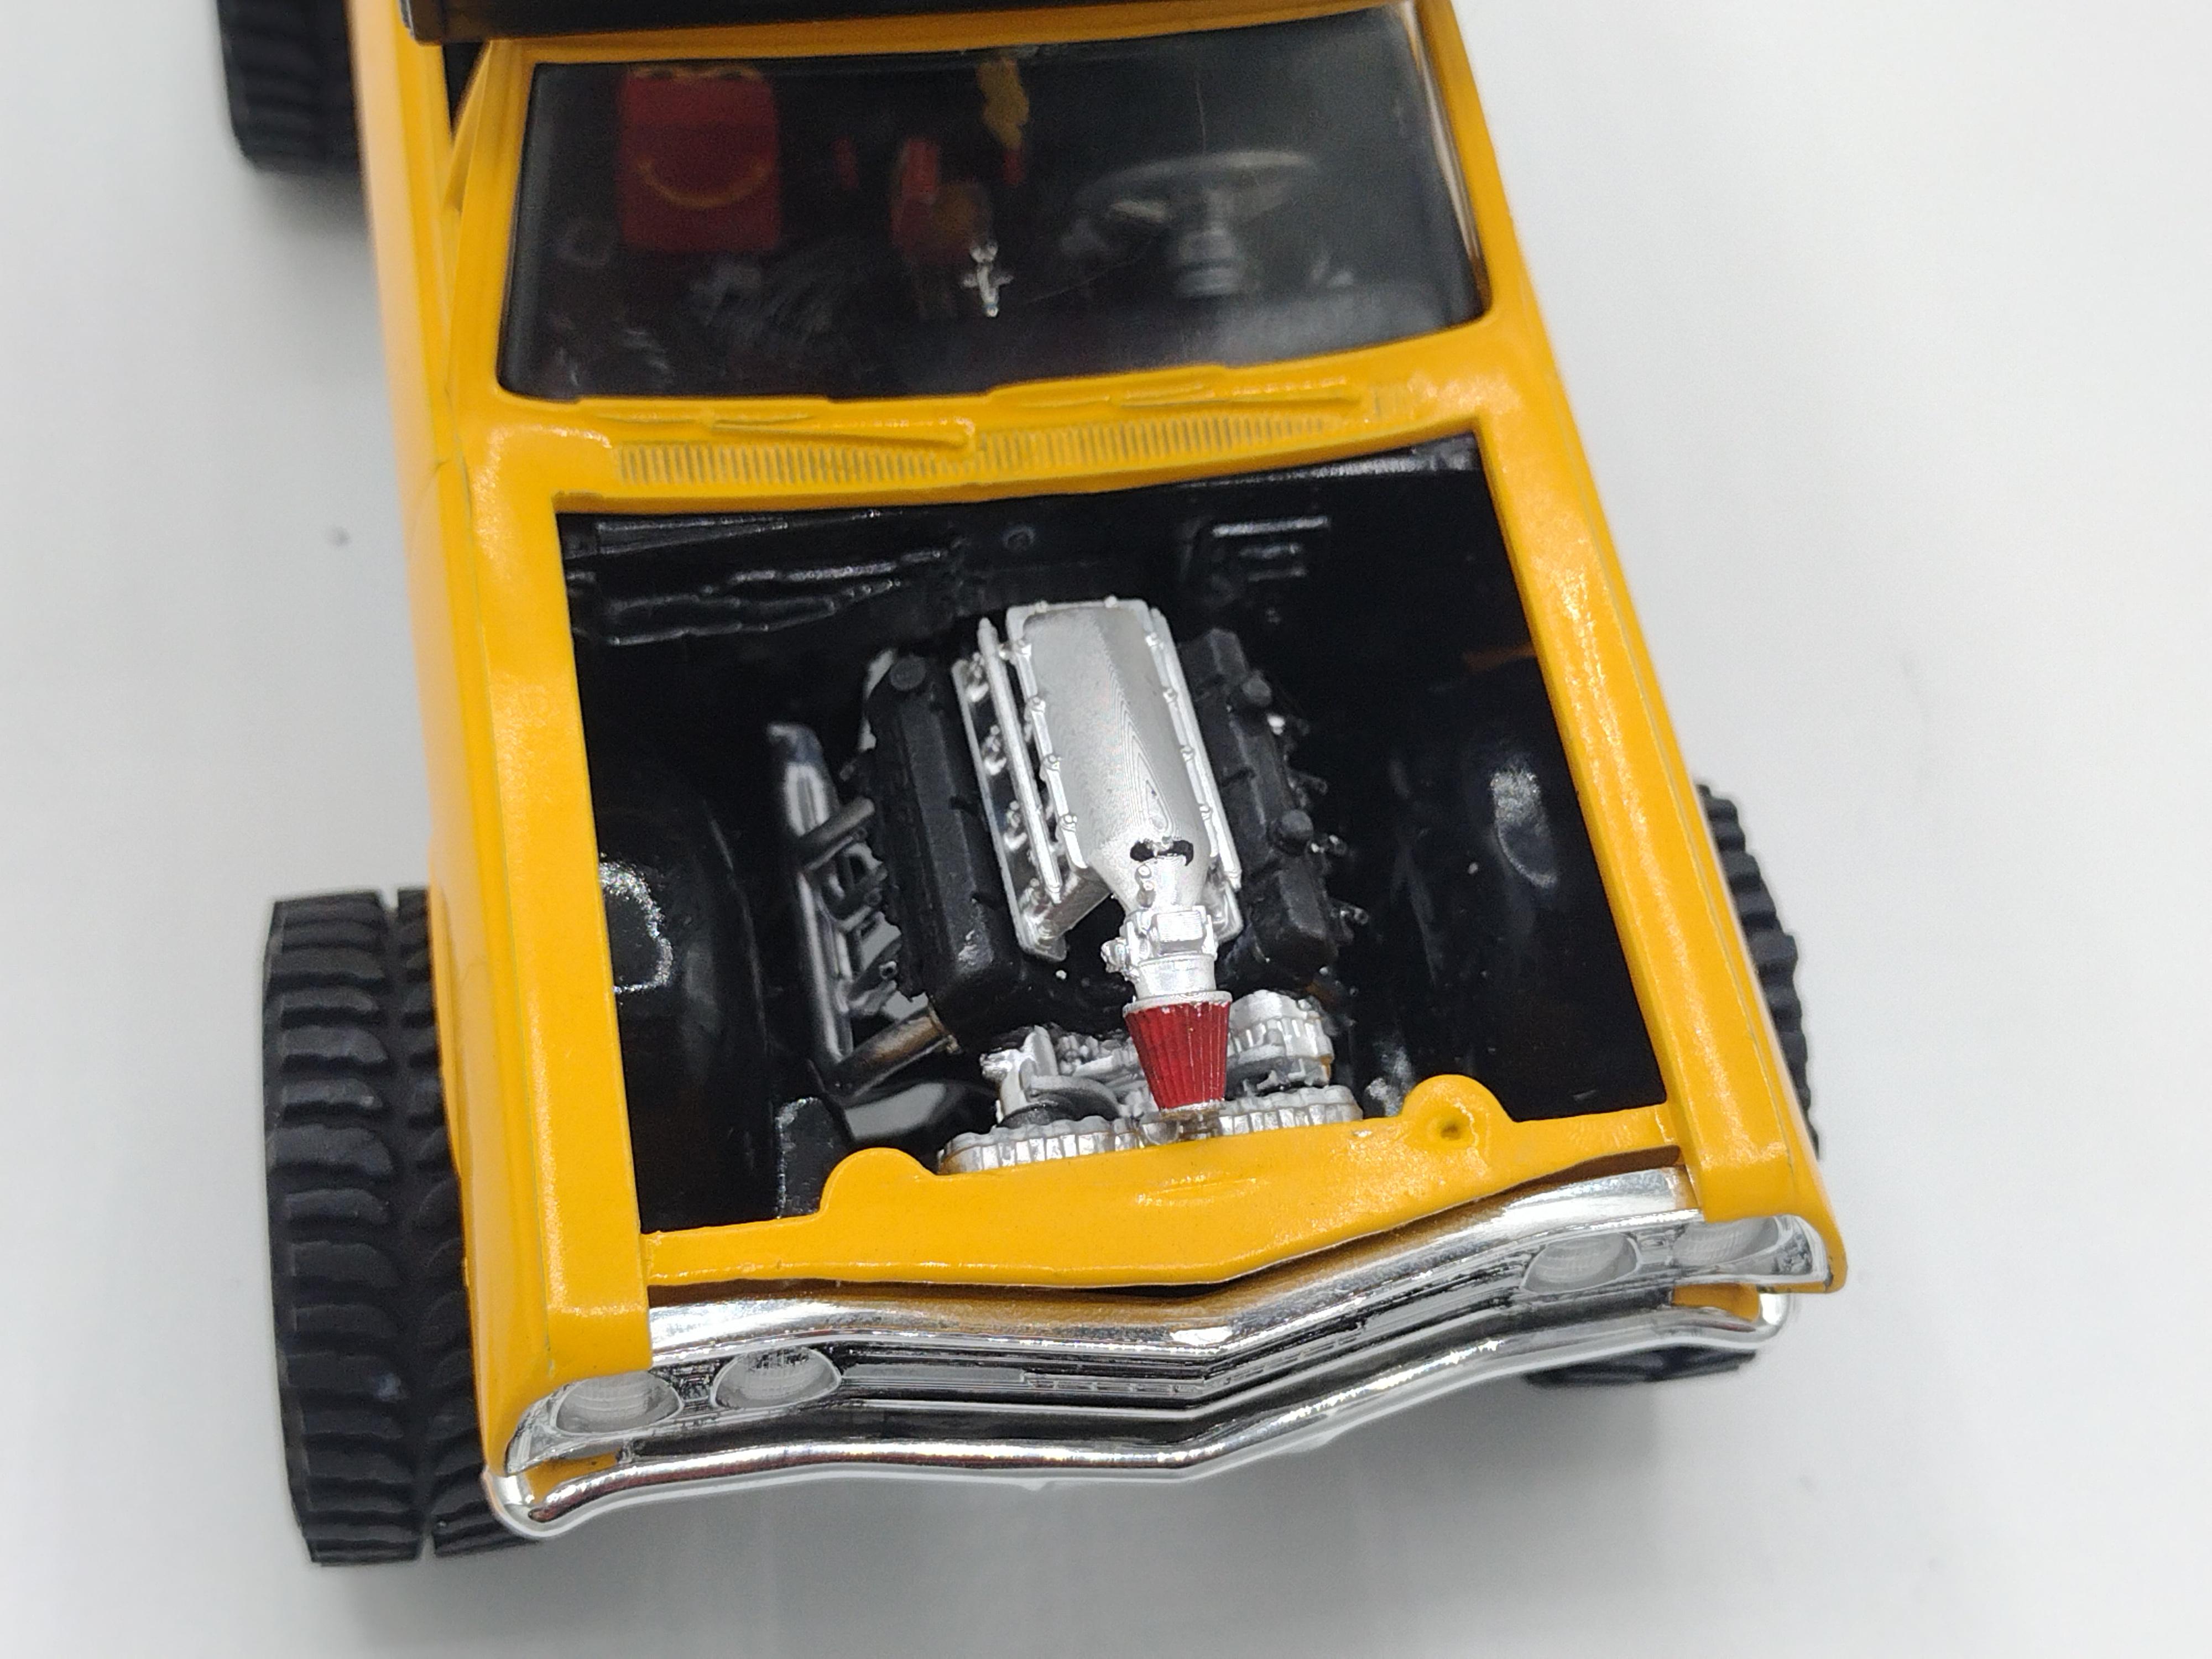
I named this build ATILLA. I wanted something that sounded tough so that's what inspired me to name it Atilla. I converted it from a rear wheel drive to a 4X4. The paint is Rust-Oleum Gloss Sun Yellow with a Black camper. The cowl hood scoop is 3D printed and molded onto the kit hood. The engine is a 3D printed ZZ 572 COPO Chevy engine that was designed by Motabas Yen on cults3D. The wheels are TIS rims I designed on some Z Force Model Works bogger tires. The rims are airbrushed with SMS Hyperchrome Cold Tone paint. The tires are just hand painted with a paint brush and some flat black acrylic craft paint. The leaf spring suspension is a 3D printed Nahuel Customs design. The transfer case and u-joints are 3D printed from files I got from cults3D. The driveshafts are made from plastic straws. I had to make a custom transfer case mounting bracket out of sheet styrene. I had to extend the axles to get the wheels to fit properly. The interior is hand painted with satin black acrylic craft paint and a paint brush. The steering column is a file I found on cults3D. The steering wheel is a 3D printed Pixel Print design. I 3D printed the seatbelt buckles and used black craft ribbon I got from Hobby Lobby. The radio face is a 3D printed high definition radio face I found on cults3D along with the McDonald's Happy Meal box and even the burger. The burger box is a cut and fold design I found on Google. The Chevy bowtie rear view mirror and the pine tree air freshener are 3D printed items I got files for on cults3D. The license plate is one I custom designed for this specific build. I used my inkjet printer to print it out on some glossy photo paper. I got my inspiration for this build from a Toyota Pickup called THE RULE BREAKER that was featured on Ultimate Rides. This was a really fun build.
-
-
 I named this build ATILLA. I wanted something that sounded tough so that's what inspired me to name it Atilla. I converted it from a rear wheel drive to a 4X4. The paint is Rust-Oleum Gloss Sun Yellow with a Black camper. The cowl hood scoop is 3D printed and molded onto the kit hood. The engine is a 3D printed ZZ 572 COPO Chevy engine that was designed by Motabas Yen on cults3D. The wheels are TIS rims I designed on some Z Force Model Works bogger tires. The rims are airbrushed with SMS Hyperchrome Cold Tone paint. The tires are just hand painted with a paint brush and some flat black acrylic craft paint. The leaf spring suspension is a 3D printed Nahuel Customs design. The transfer case and u-joints are 3D printed from files I got from cults3D. The driveshafts are made from plastic straws. I had to make a custom transfer case mounting bracket out of sheet styrene. I had to extend the axles to get the wheels to fit properly. The interior is hand painted with satin black acrylic craft paint and a paint brush. The steering column is a file I found on cults3D. The steering wheel is a 3D printed Pixel Print design. I 3D printed the seatbelt buckles and used black craft ribbon I got from Hobby Lobby. The radio face is a 3D printed high definition radio face I found on cults3D along with the McDonald's Happy Meal box and even the burger. The burger box is a cut and fold design I found on Google. The Chevy bowtie rear view mirror and the pine tree air freshener are 3D printed items I got files for on cults3D. The license plate is one I custom designed for this specific build. I used my inkjet printer to print it out on some glossy photo paper. I got my inspiration for this build from a Toyota Pickup called THE RULE BREAKER that was featured on Ultimate Rides. This was a really fun build.
-
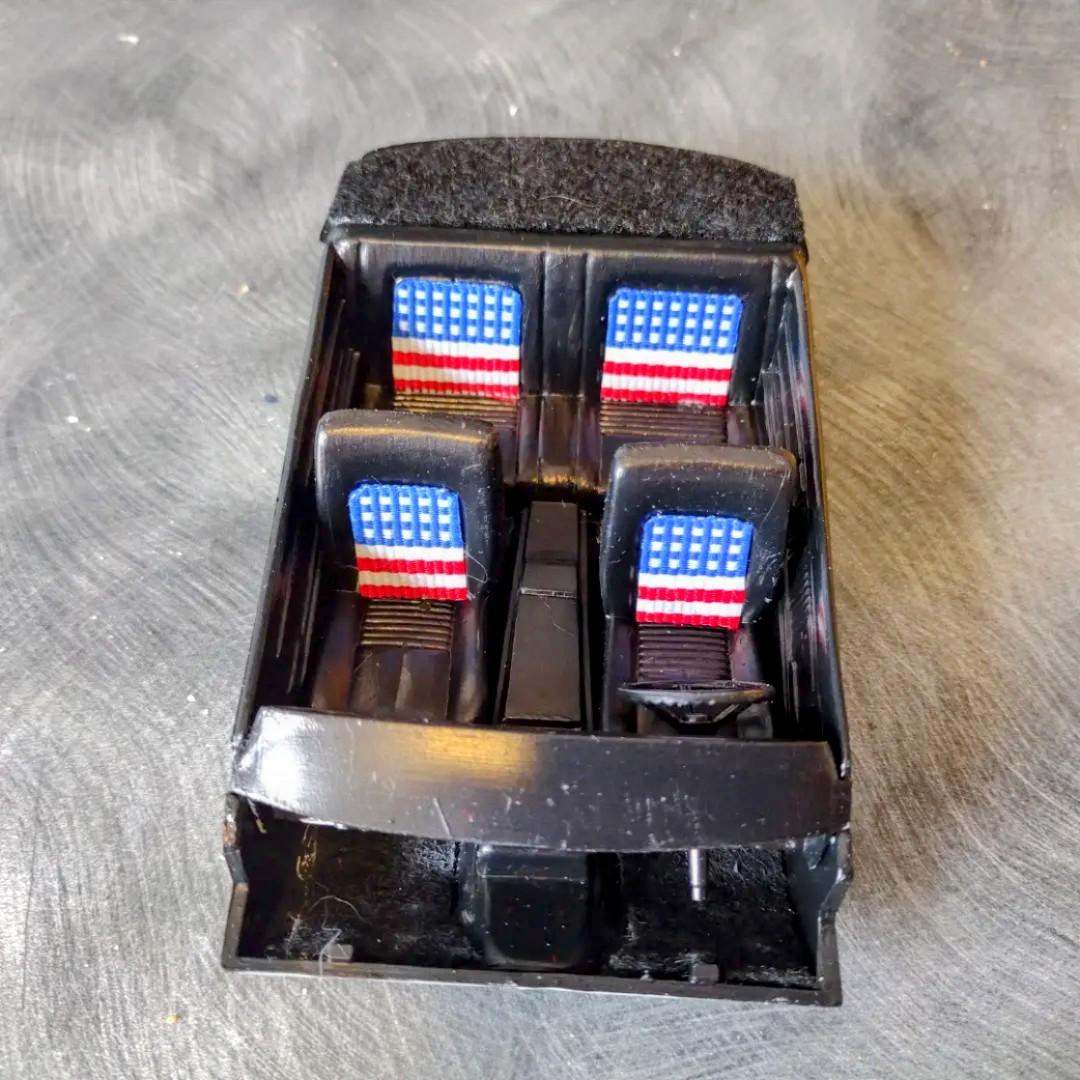
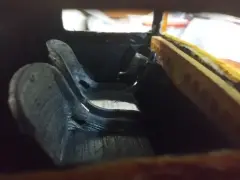
I used the tractor seats to try to keep it era correct and to keep it as low tech as possible. I figured the tractor seats were as close to to the Amish theme as I could get.
-
1915 Ford Center Door Model T Amish buggy
Images added to a gallery album owned by Alex Flint in Gallery
I named it AMISH MAFIA. It started out as a Jimmy Flintstone resin body. I designed and 3D printed the frame and floor to fit this specific resin car body. The wheels are kitbashed from an unknown kit. I designed and 3D printed a custom fuel tank and a mounting rack for it. The license plate is one of my custom designs that I do with the name of the build on it. The grill shell is another one of my designs. I used a Thomas Flyer grill as my reference for it. I left the grill screen out of the design so I could add a metal wire mesh screen to it for a more realistic look. The taillights are a Nahuel Customs design that I 3D printed in a clear resin that I dyed with a red transparent resin dye and only the edges are painted with a metallic silver acrylic craft paint. The engine is a MCS Designs Frenzel Supercharged Flathead Ford engine. I had to add my own transmission to the engine block in my slicer program because the original design didn't have one. I used a rubber hair band for the drive belt. The rear axle is 3D printed and was designed by Nahuel Customs. The Nahuel Customs front axle is 3D printed but I modified it to be a little narrower for this build. The windshield is cut from a hot wheels car box and attached at an angle to give it that period look. The door handles are also 3D printed but they are actually trunk handles. The driveshaft u-joints are 3D printed but the shaft part is made out of a plastic straw. The firewall is made from scratch out of styrene sheets. The seats are 3D printed tractor seats. The steering wheel and column is also 3D printed. Both were designed by Nahuel Customs. The steering column is positioned through through the firewall rather than through the body like a traditional rat rod would have. The entire build is hand painted with a paint brush. No airbrush or spray can used. -
-
I named it AMISH MAFIA. It started out as a Jimmy Flintstone resin body. I designed and 3D printed the frame and floor to fit this specific resin car body. The wheels are kitbashed from an unknown kit. I designed and 3D printed a custom fuel tank and a mounting rack for it. The license plate is one of my custom designs that I do with the name of the build on it. The grill shell is another one of my designs. I used a Thomas Flyer grill as my reference for it. I left the grill screen out of the design so I could add a metal wire mesh screen to it for a more realistic look. The taillights are a Nahuel Customs design that I 3D printed in a clear resin that I dyed with a red transparent resin dye and only the edges are painted with a metallic silver acrylic craft paint. The engine is a MCS Designs Frenzel Supercharged Flathead Ford engine. I had to add my own transmission to the engine block in my slicer program because the original design didn't have one. I used a rubber hair band for the drive belt. The rear axle is 3D printed and was designed by Nahuel Customs. The Nahuel Customs front axle is 3D printed but I modified it to be a little narrower for this build. The windshield is cut from a hot wheels car box and attached at an angle to give it that period look. The door handles are also 3D printed but they are actually trunk handles. The driveshaft u-joints are 3D printed but the shaft part is made out of a plastic straw. The firewall is made from scratch out of styrene sheets. The seats are 3D printed tractor seats. The steering wheel and column is also 3D printed. Both were designed by Nahuel Customs. The steering column is positioned through through the firewall rather than through the body like a traditional rat rod would have. The entire build is hand painted with a paint brush. No airbrush or spray can used.
-
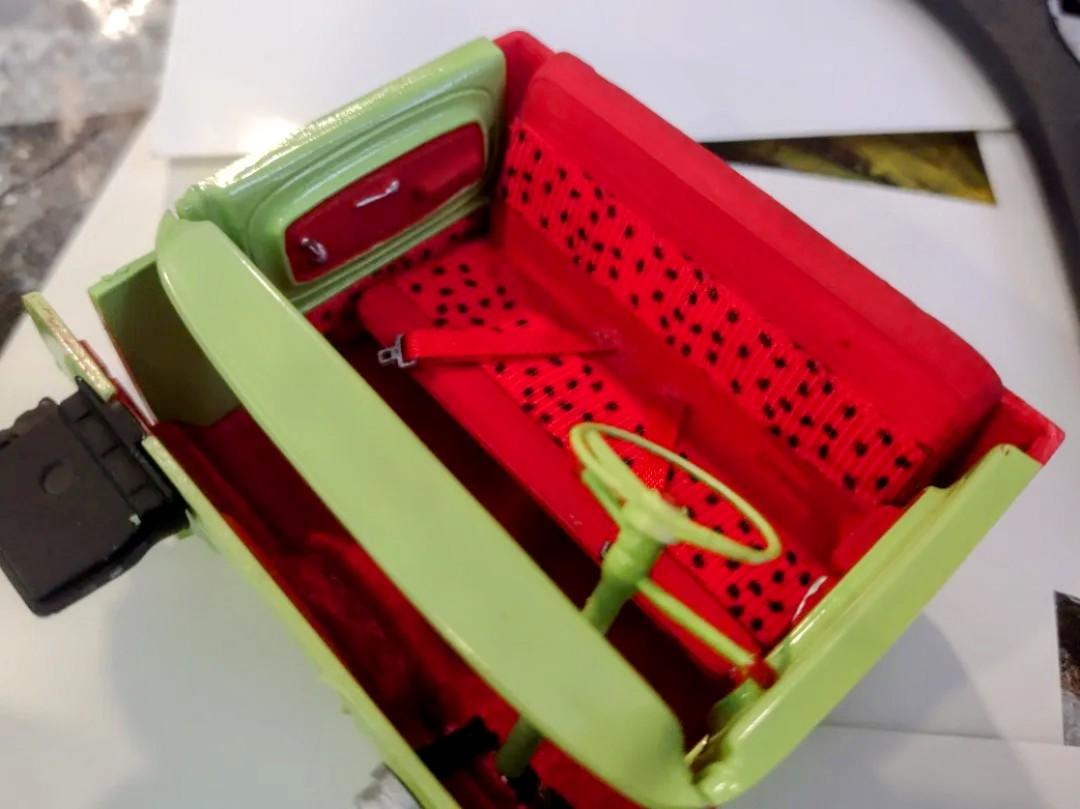
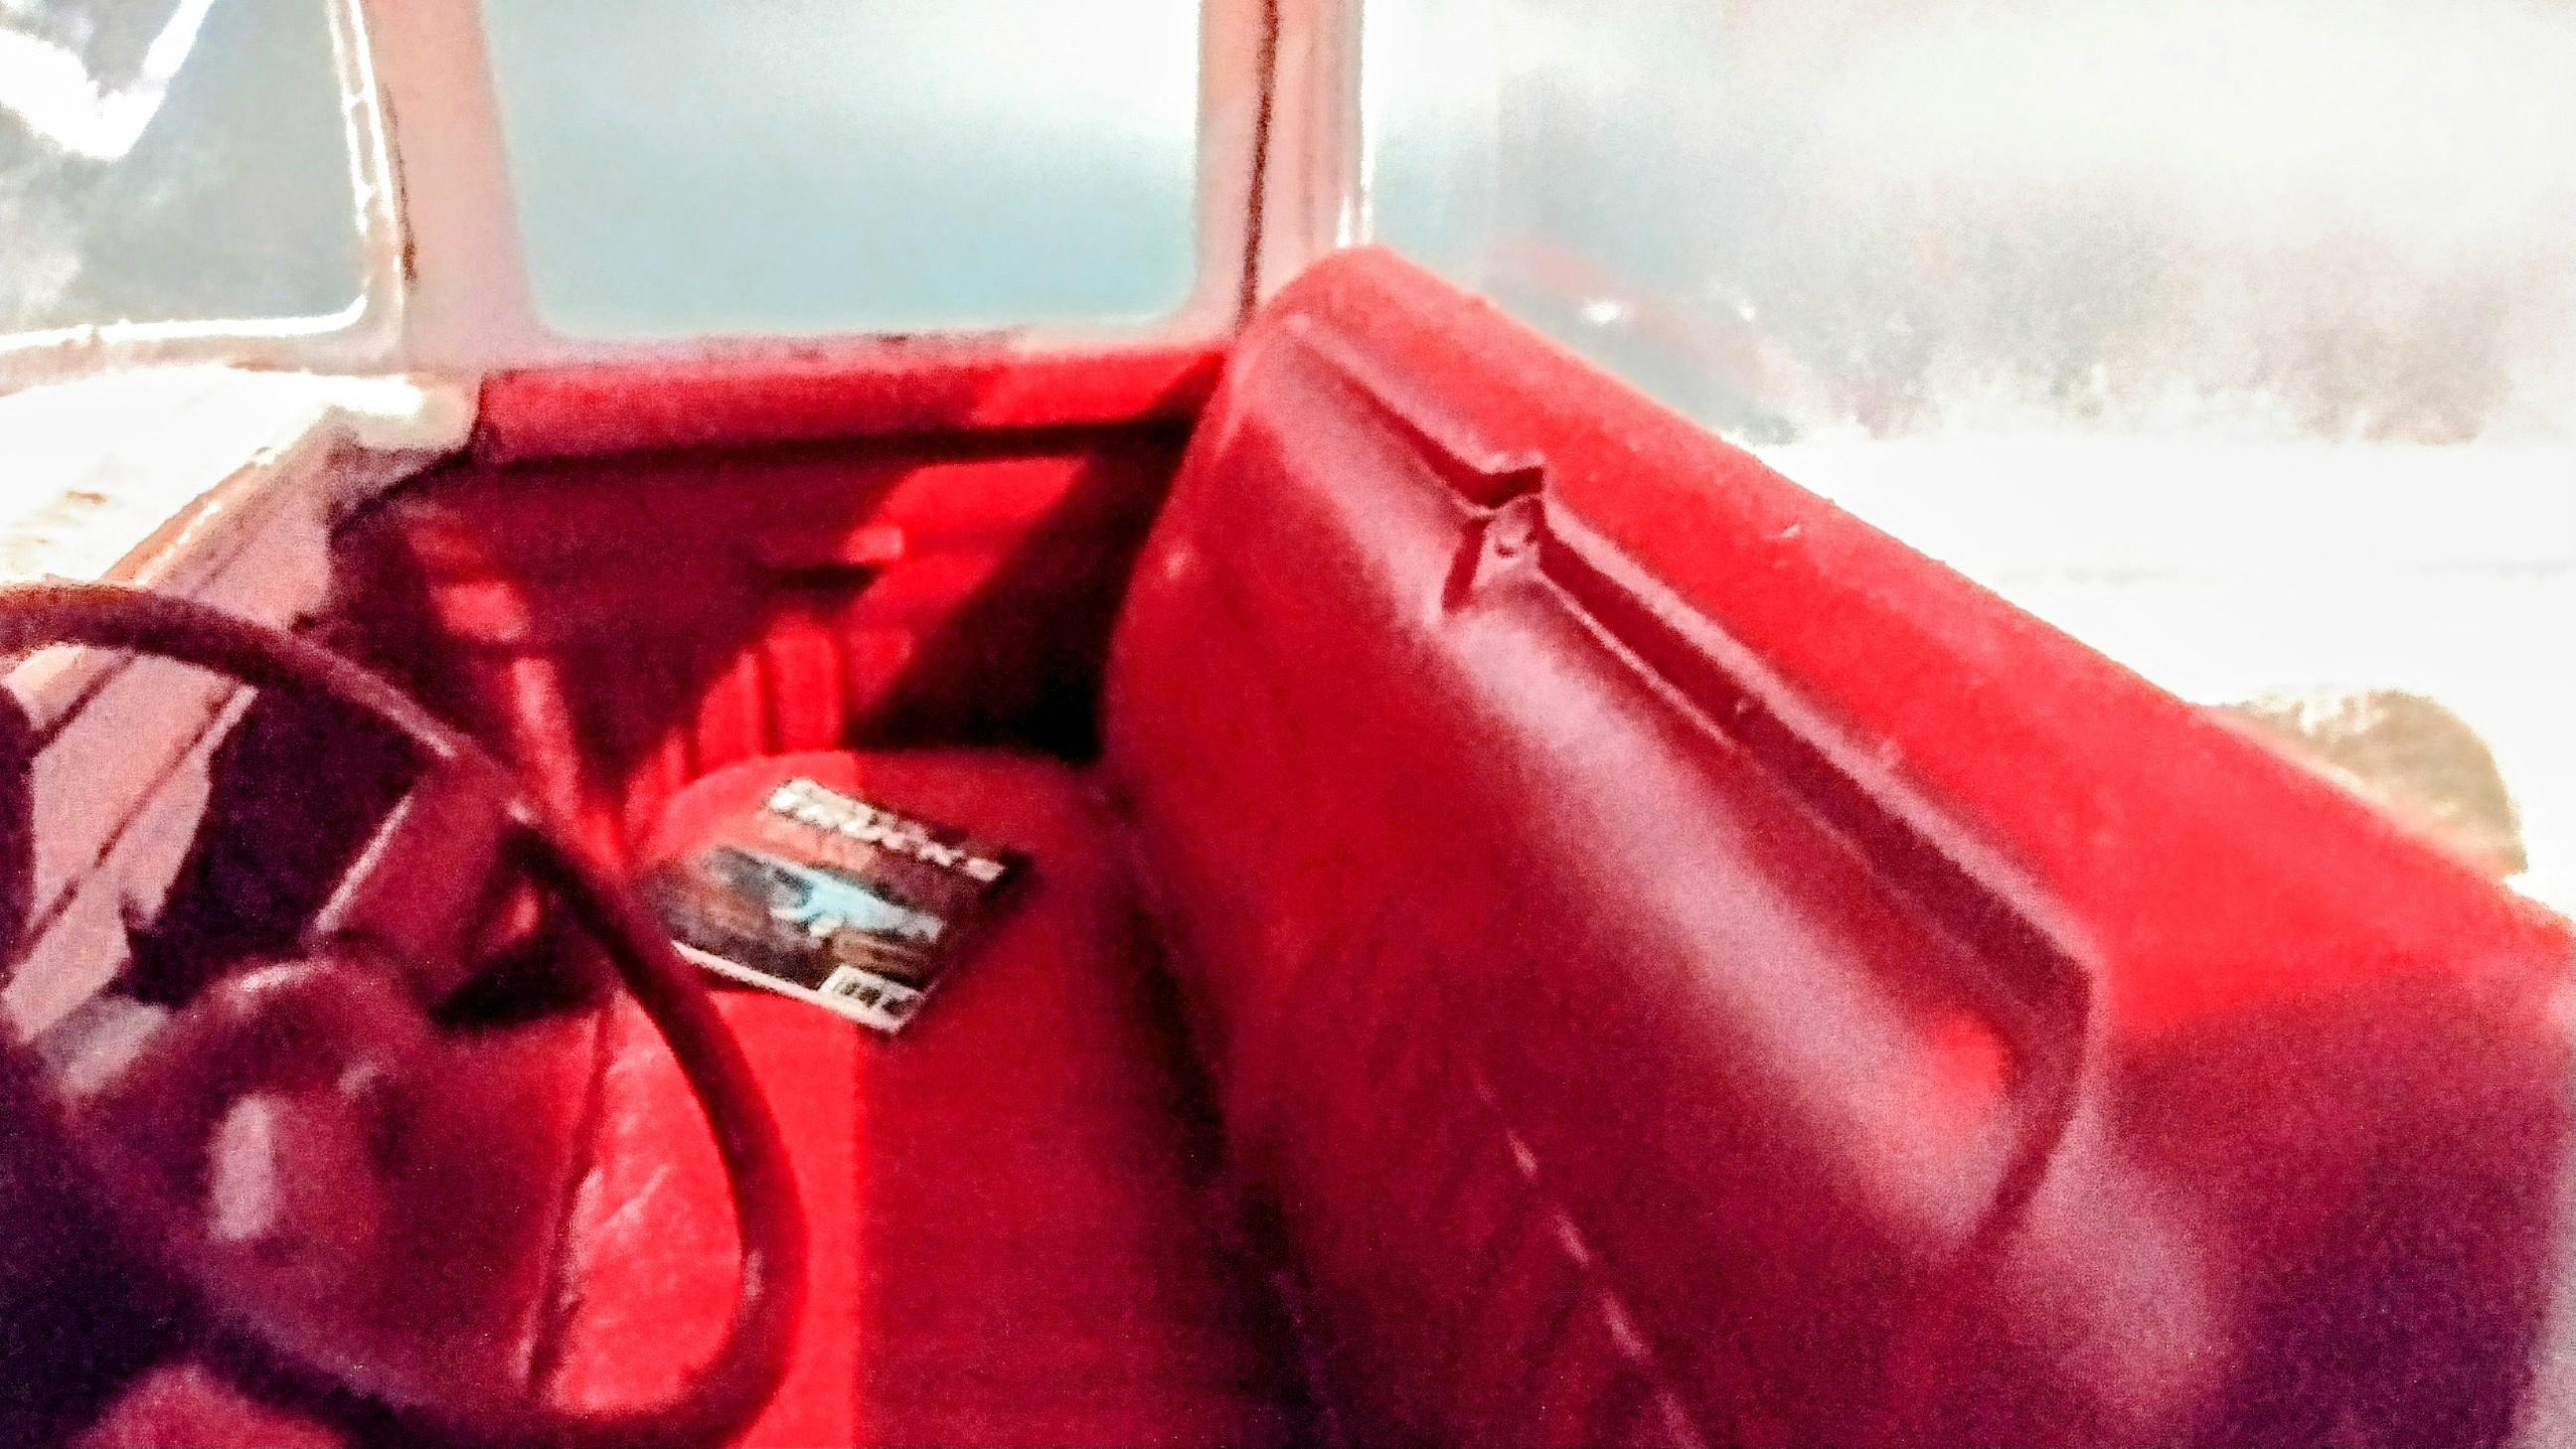
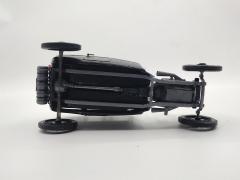
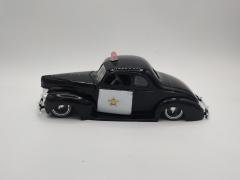
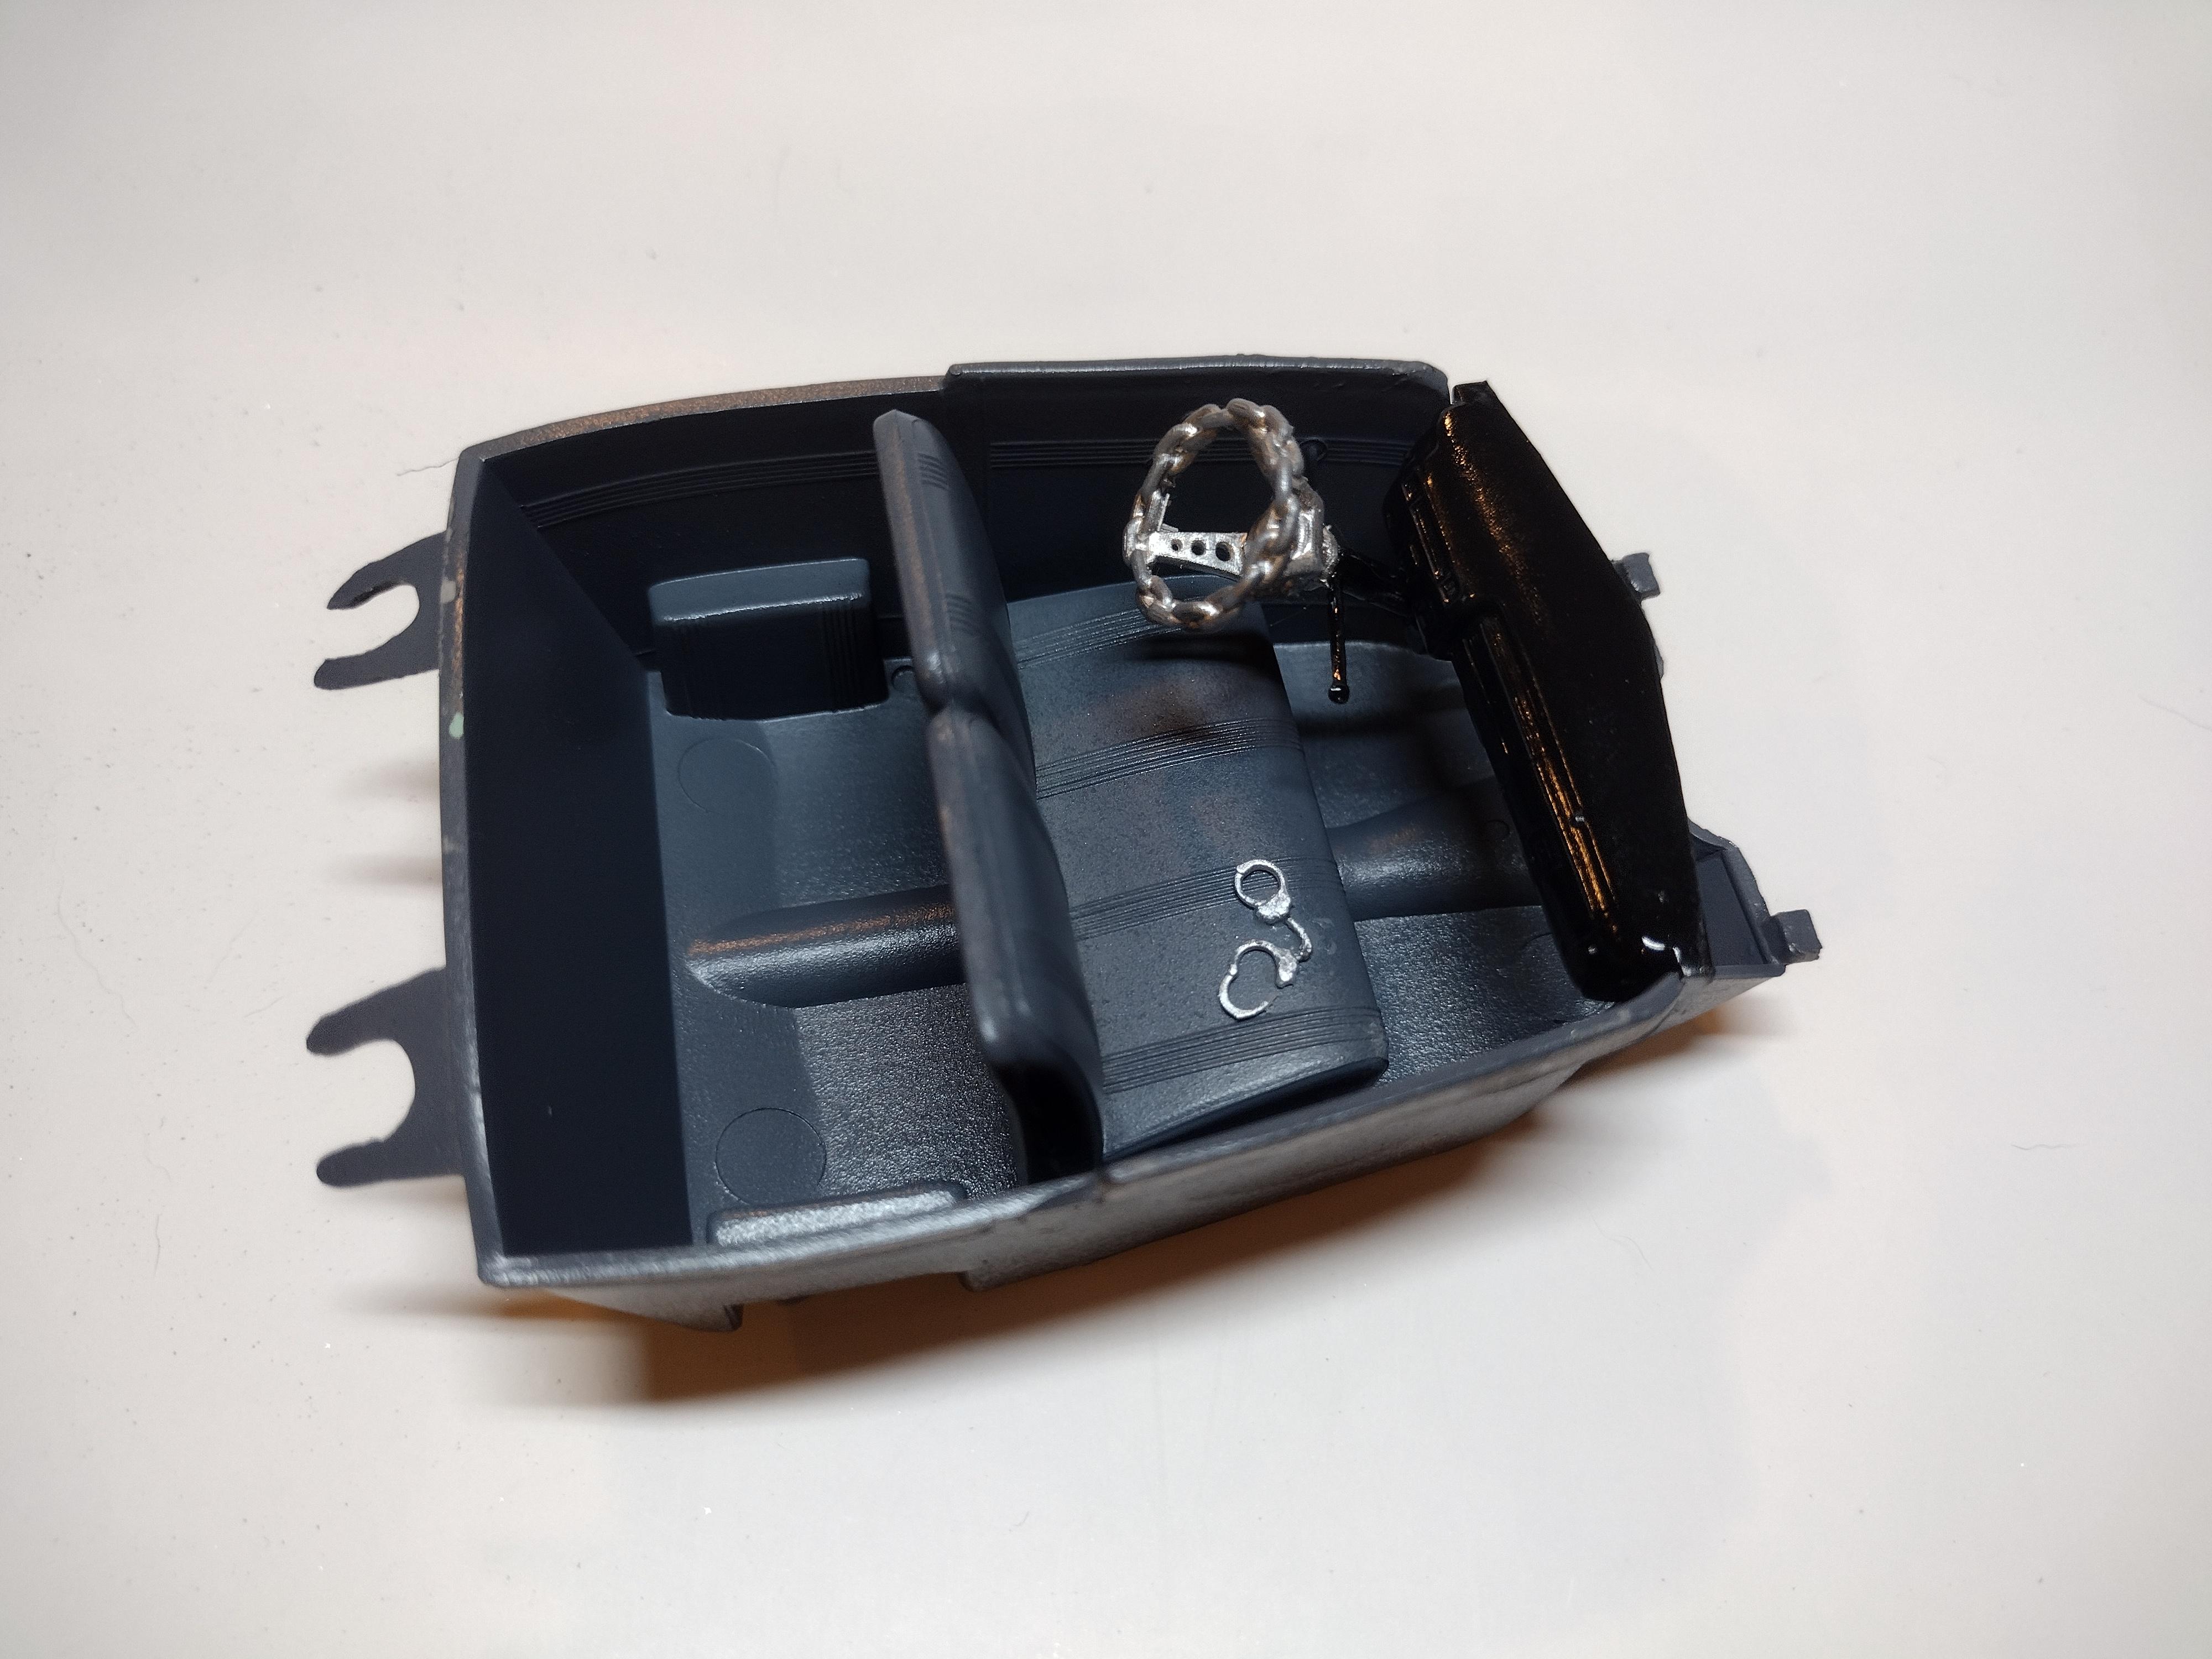
I named it MISDEMEANOR. I built it as a lowrider. I painted it a two tone Gloss Black and Gloss White with STS police car decals on the doors. The vintage emergency light is one of my designs that I 3D printed in two parts. The base is printed in grey resin and painted with SMS Hyperchrome Cold Tone airbrush paint and the cover is 3D printed in clear resin that I dyed with some red transparent resin dye. The engine is a MCS Designs Flathead Ford engine with a 4x2 intake manifold and connected to the radiator with some hollow rubber bead tubing with a piece of bead wire inside to hold it's shape. The engine is all hand painted with a paint brush and some acrylic craft paint. The wheels are Hoppin Hydro lowrider wheels. The rear suspension is modified to sit low and the front axle is a 3D printed 7 inch drop axle that was originally designed for a 1950 Chevy 3100 Pickup but I modified it to fit a 1940 Ford Coupe kit. The interior is hand painted with a Glossy Gray colored acrylic craft paint to make it look like vinyl. The dashboard is painted the same Gloss Black as the body. The chain link steering wheel is 3D printed and painted with SMS Hyperchrome Cold Tone airbrush paint. The handcuffs are one of my custom designs that I 3D printed and painted the same SMS Hyperchrome Cold Tone paint but I had to hand paint it with a small paint brush. The handcuffs chain is just a tiny piece of silver bead wire. I left the back seat out so it could be used as a place for a K9 police dog to sit. It's been a while since I built a lowrider but this is my first police car I've ever built. A friend of mine has the idea for this build and I just added some of my own personal touches to it as I built it.
-
-
I named it MISDEMEANOR. I built it as a lowrider. I painted it a two tone Gloss Black and Gloss White with STS police car decals on the doors. The vintage emergency light is one of my designs that I 3D printed in two parts. The base is printed in grey resin and painted with SMS Hyperchrome Cold Tone airbrush paint and the cover is 3D printed in clear resin that I dyed with some red transparent resin dye. The engine is a MCS Designs Flathead Ford engine with a 4x2 intake manifold and connected to the radiator with some hollow rubber bead tubing with a piece of bead wire inside to hold it's shape. The engine is all hand painted with a paint brush and some acrylic craft paint. The wheels are Hoppin Hydro lowrider wheels. The rear suspension is modified to sit low and the front axle is a 3D printed 7 inch drop axle that was originally designed for a 1950 Chevy 3100 Pickup but I modified it to fit a 1940 Ford Coupe kit. The interior is hand painted with a Glossy Gray colored acrylic craft paint to make it look like vinyl. The dashboard is painted the same Gloss Black as the body. The chain link steering wheel is 3D printed and painted with SMS Hyperchrome Cold Tone airbrush paint. The handcuffs are one of my custom designs that I 3D printed and painted the same SMS Hyperchrome Cold Tone paint but I had to hand paint it with a small paint brush. The handcuffs chain is just a tiny piece of silver bead wire. I left the back seat out so it could be used as a place for a K9 police dog to sit. It's been a while since I built a lowrider but this is my first police car I've ever built. A friend of mine has the idea for this build and I just added some of my own personal touches to it as I built it.
-
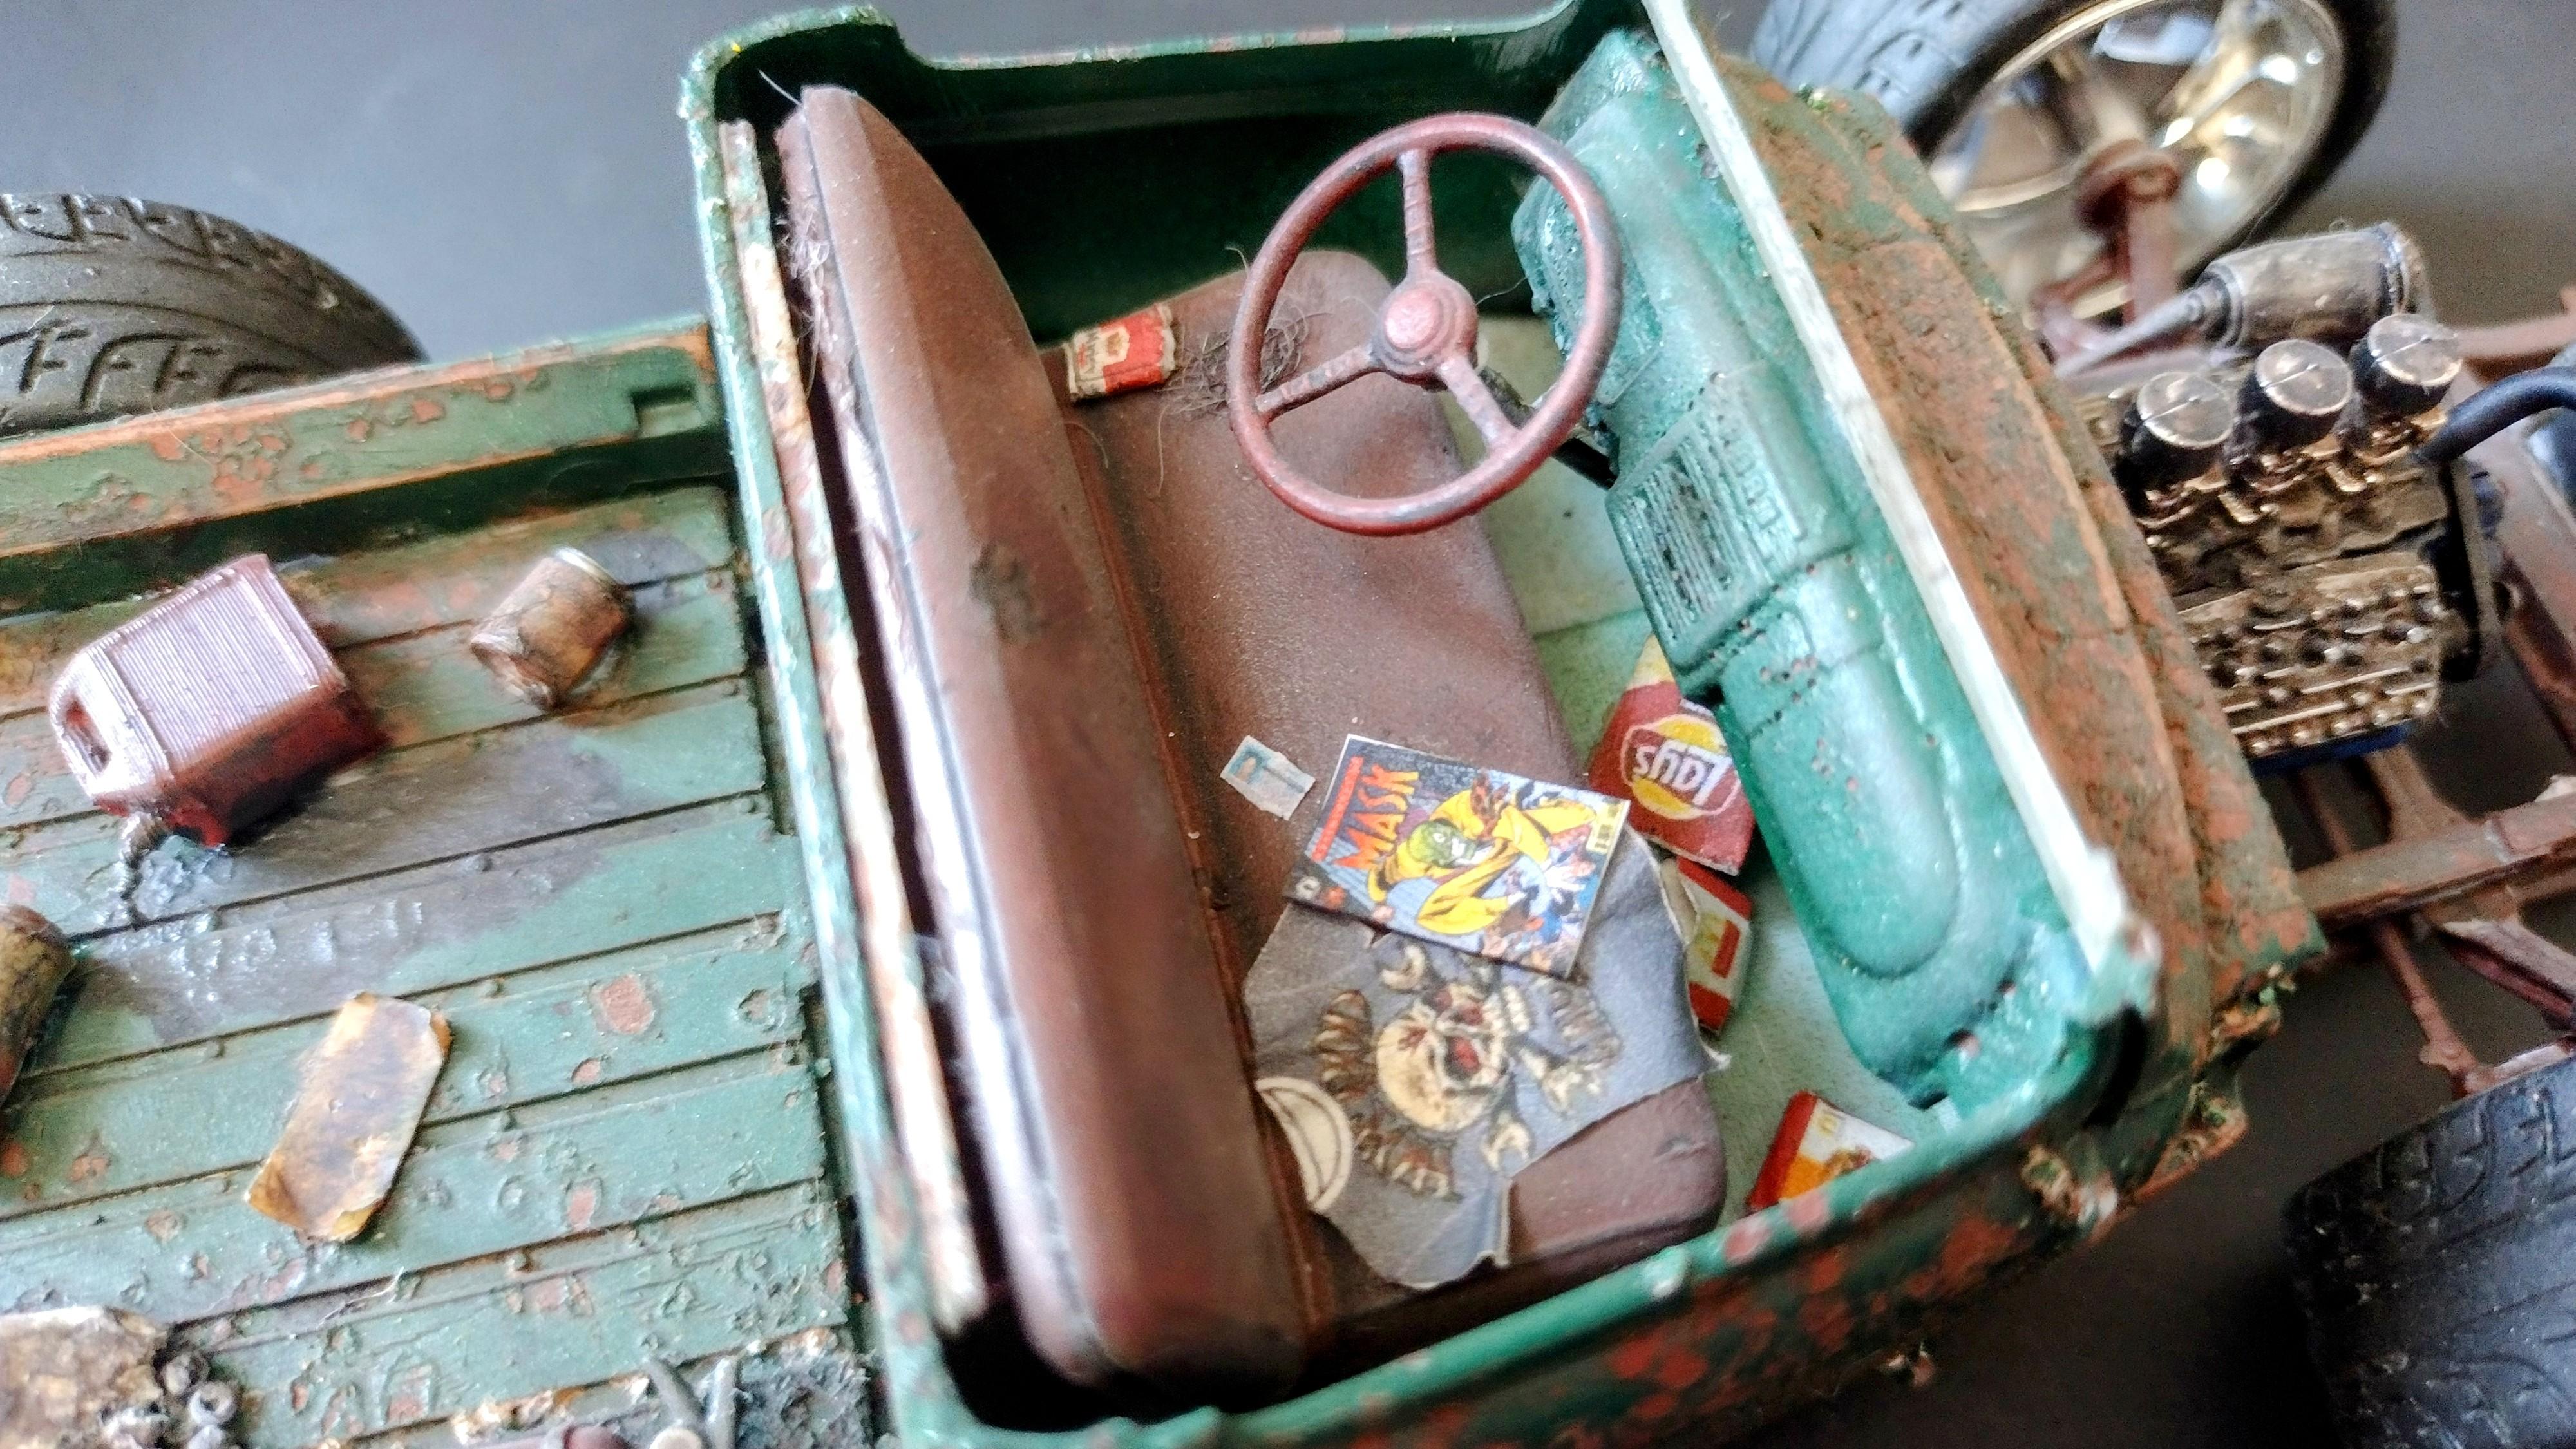
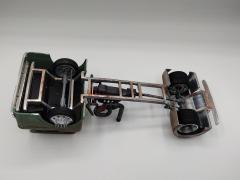
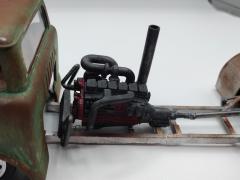
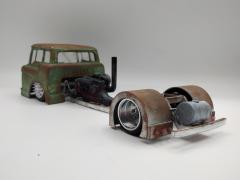
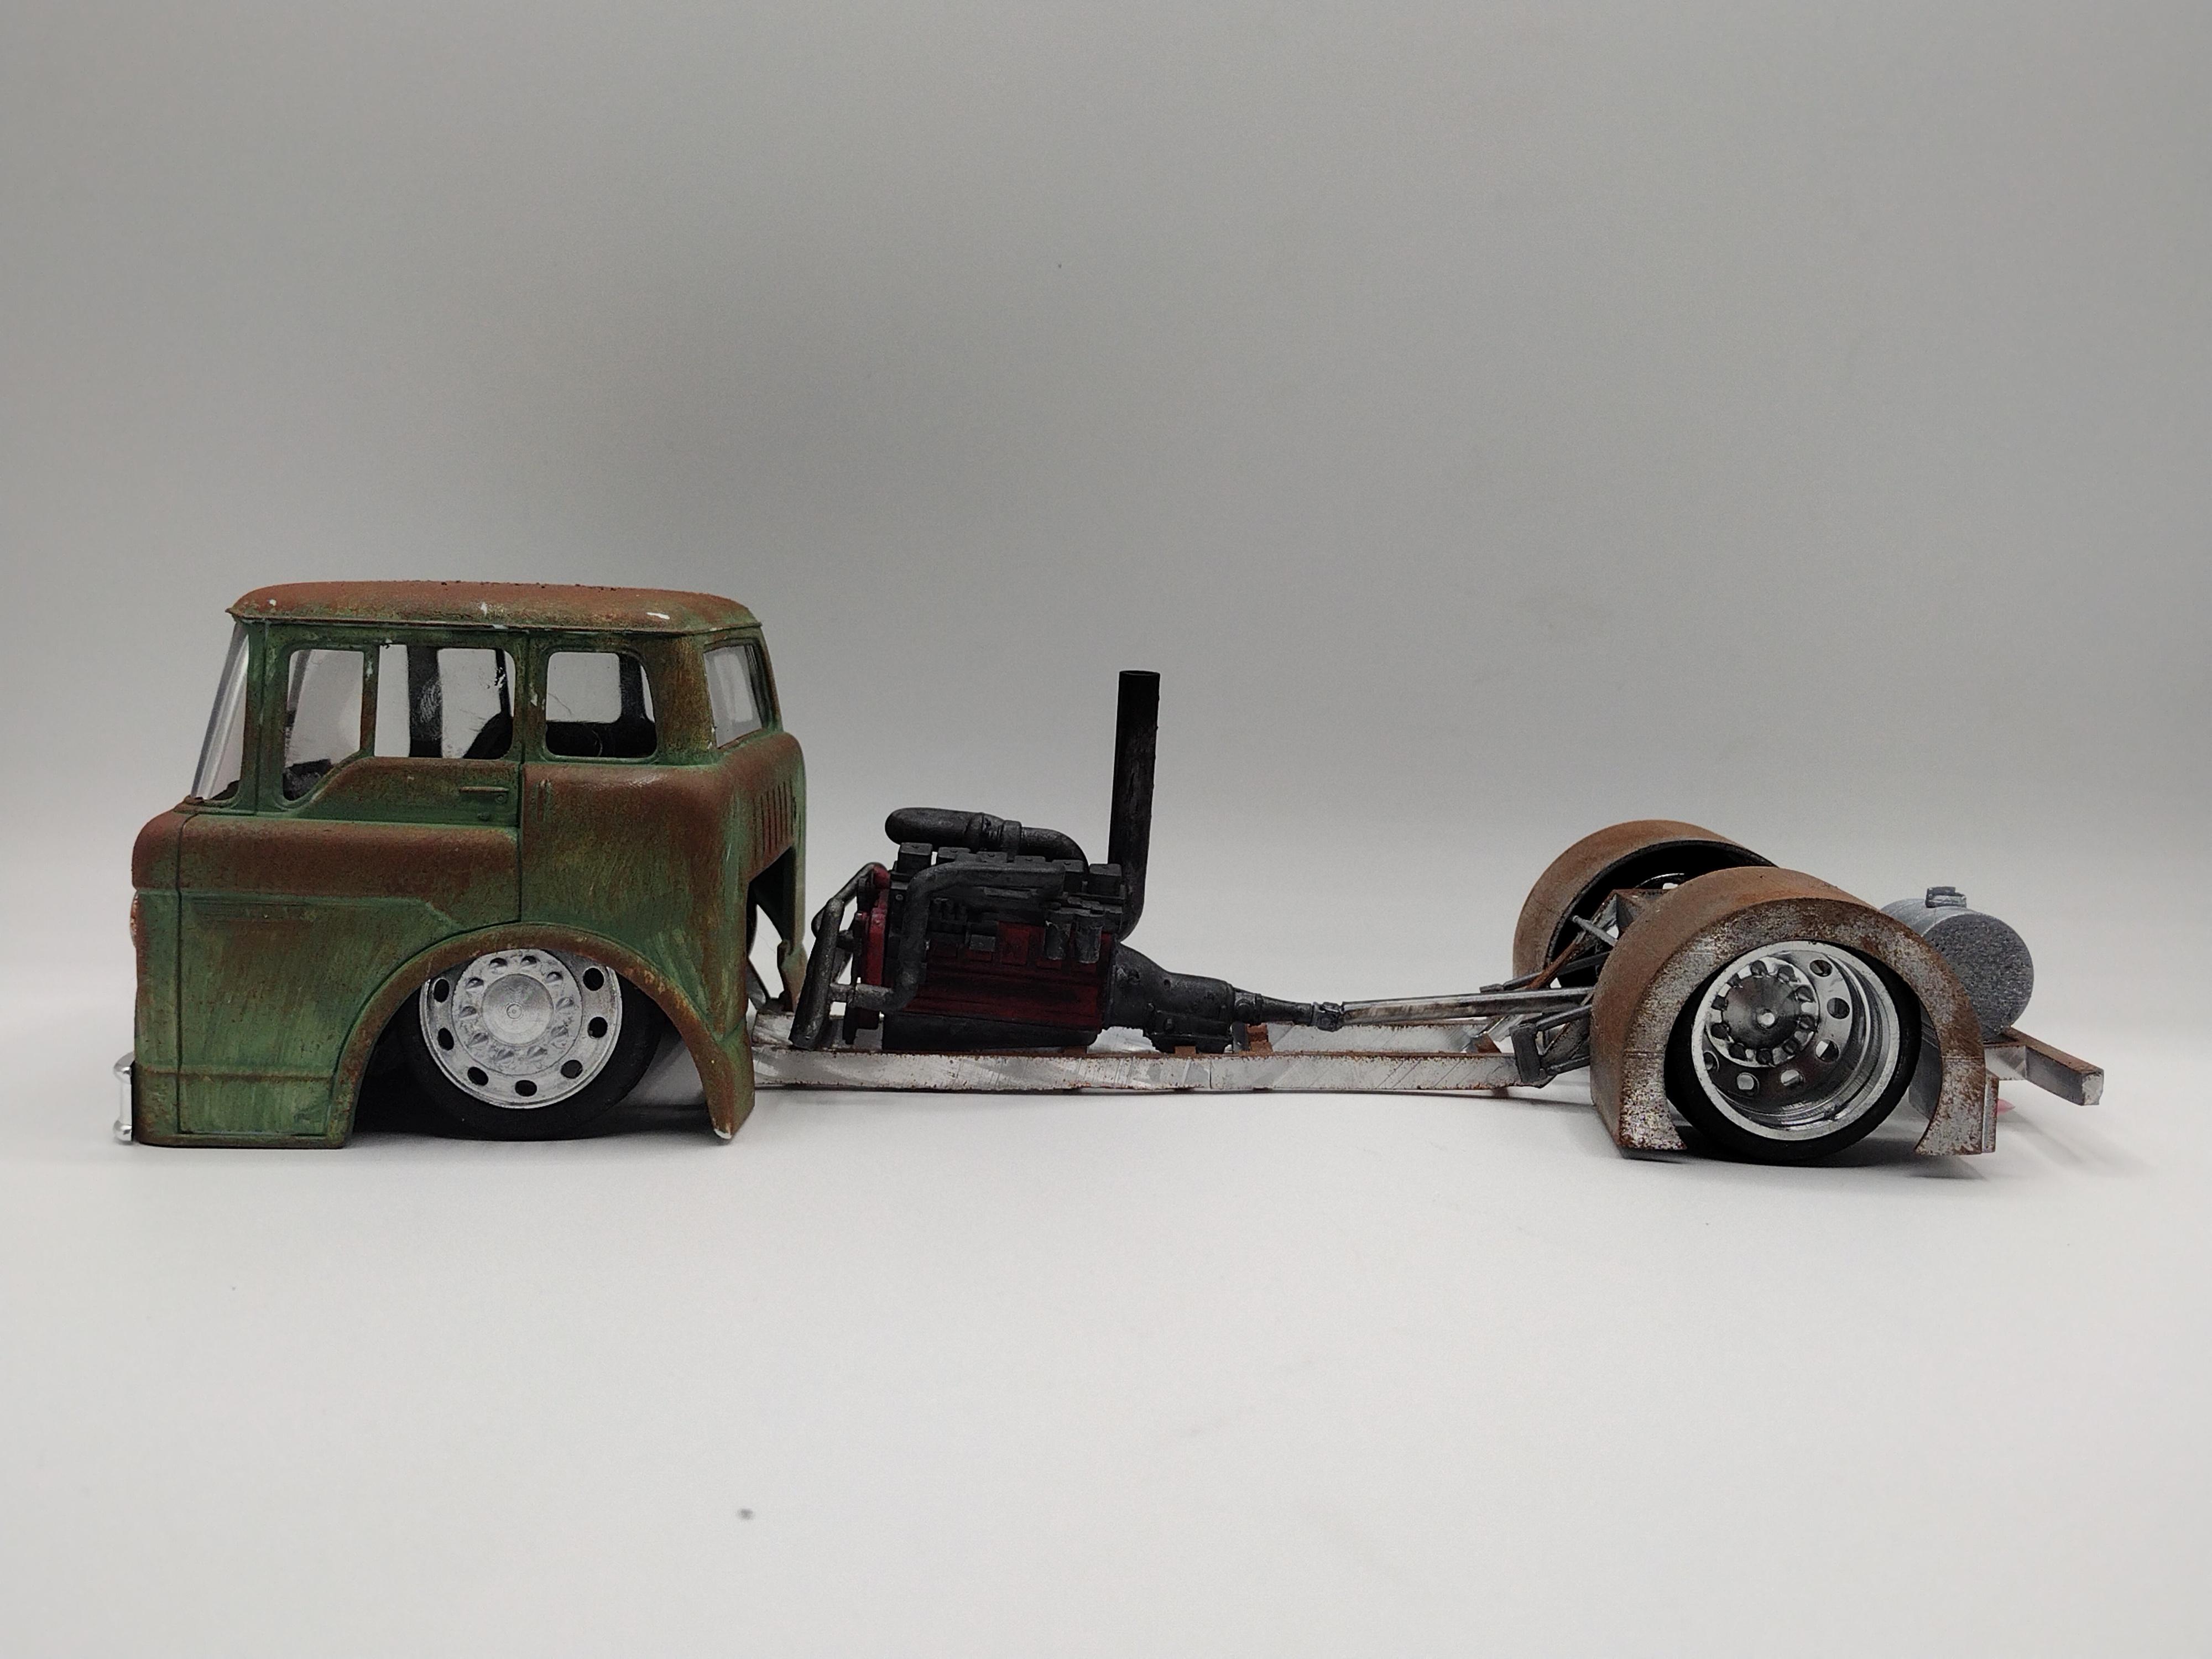
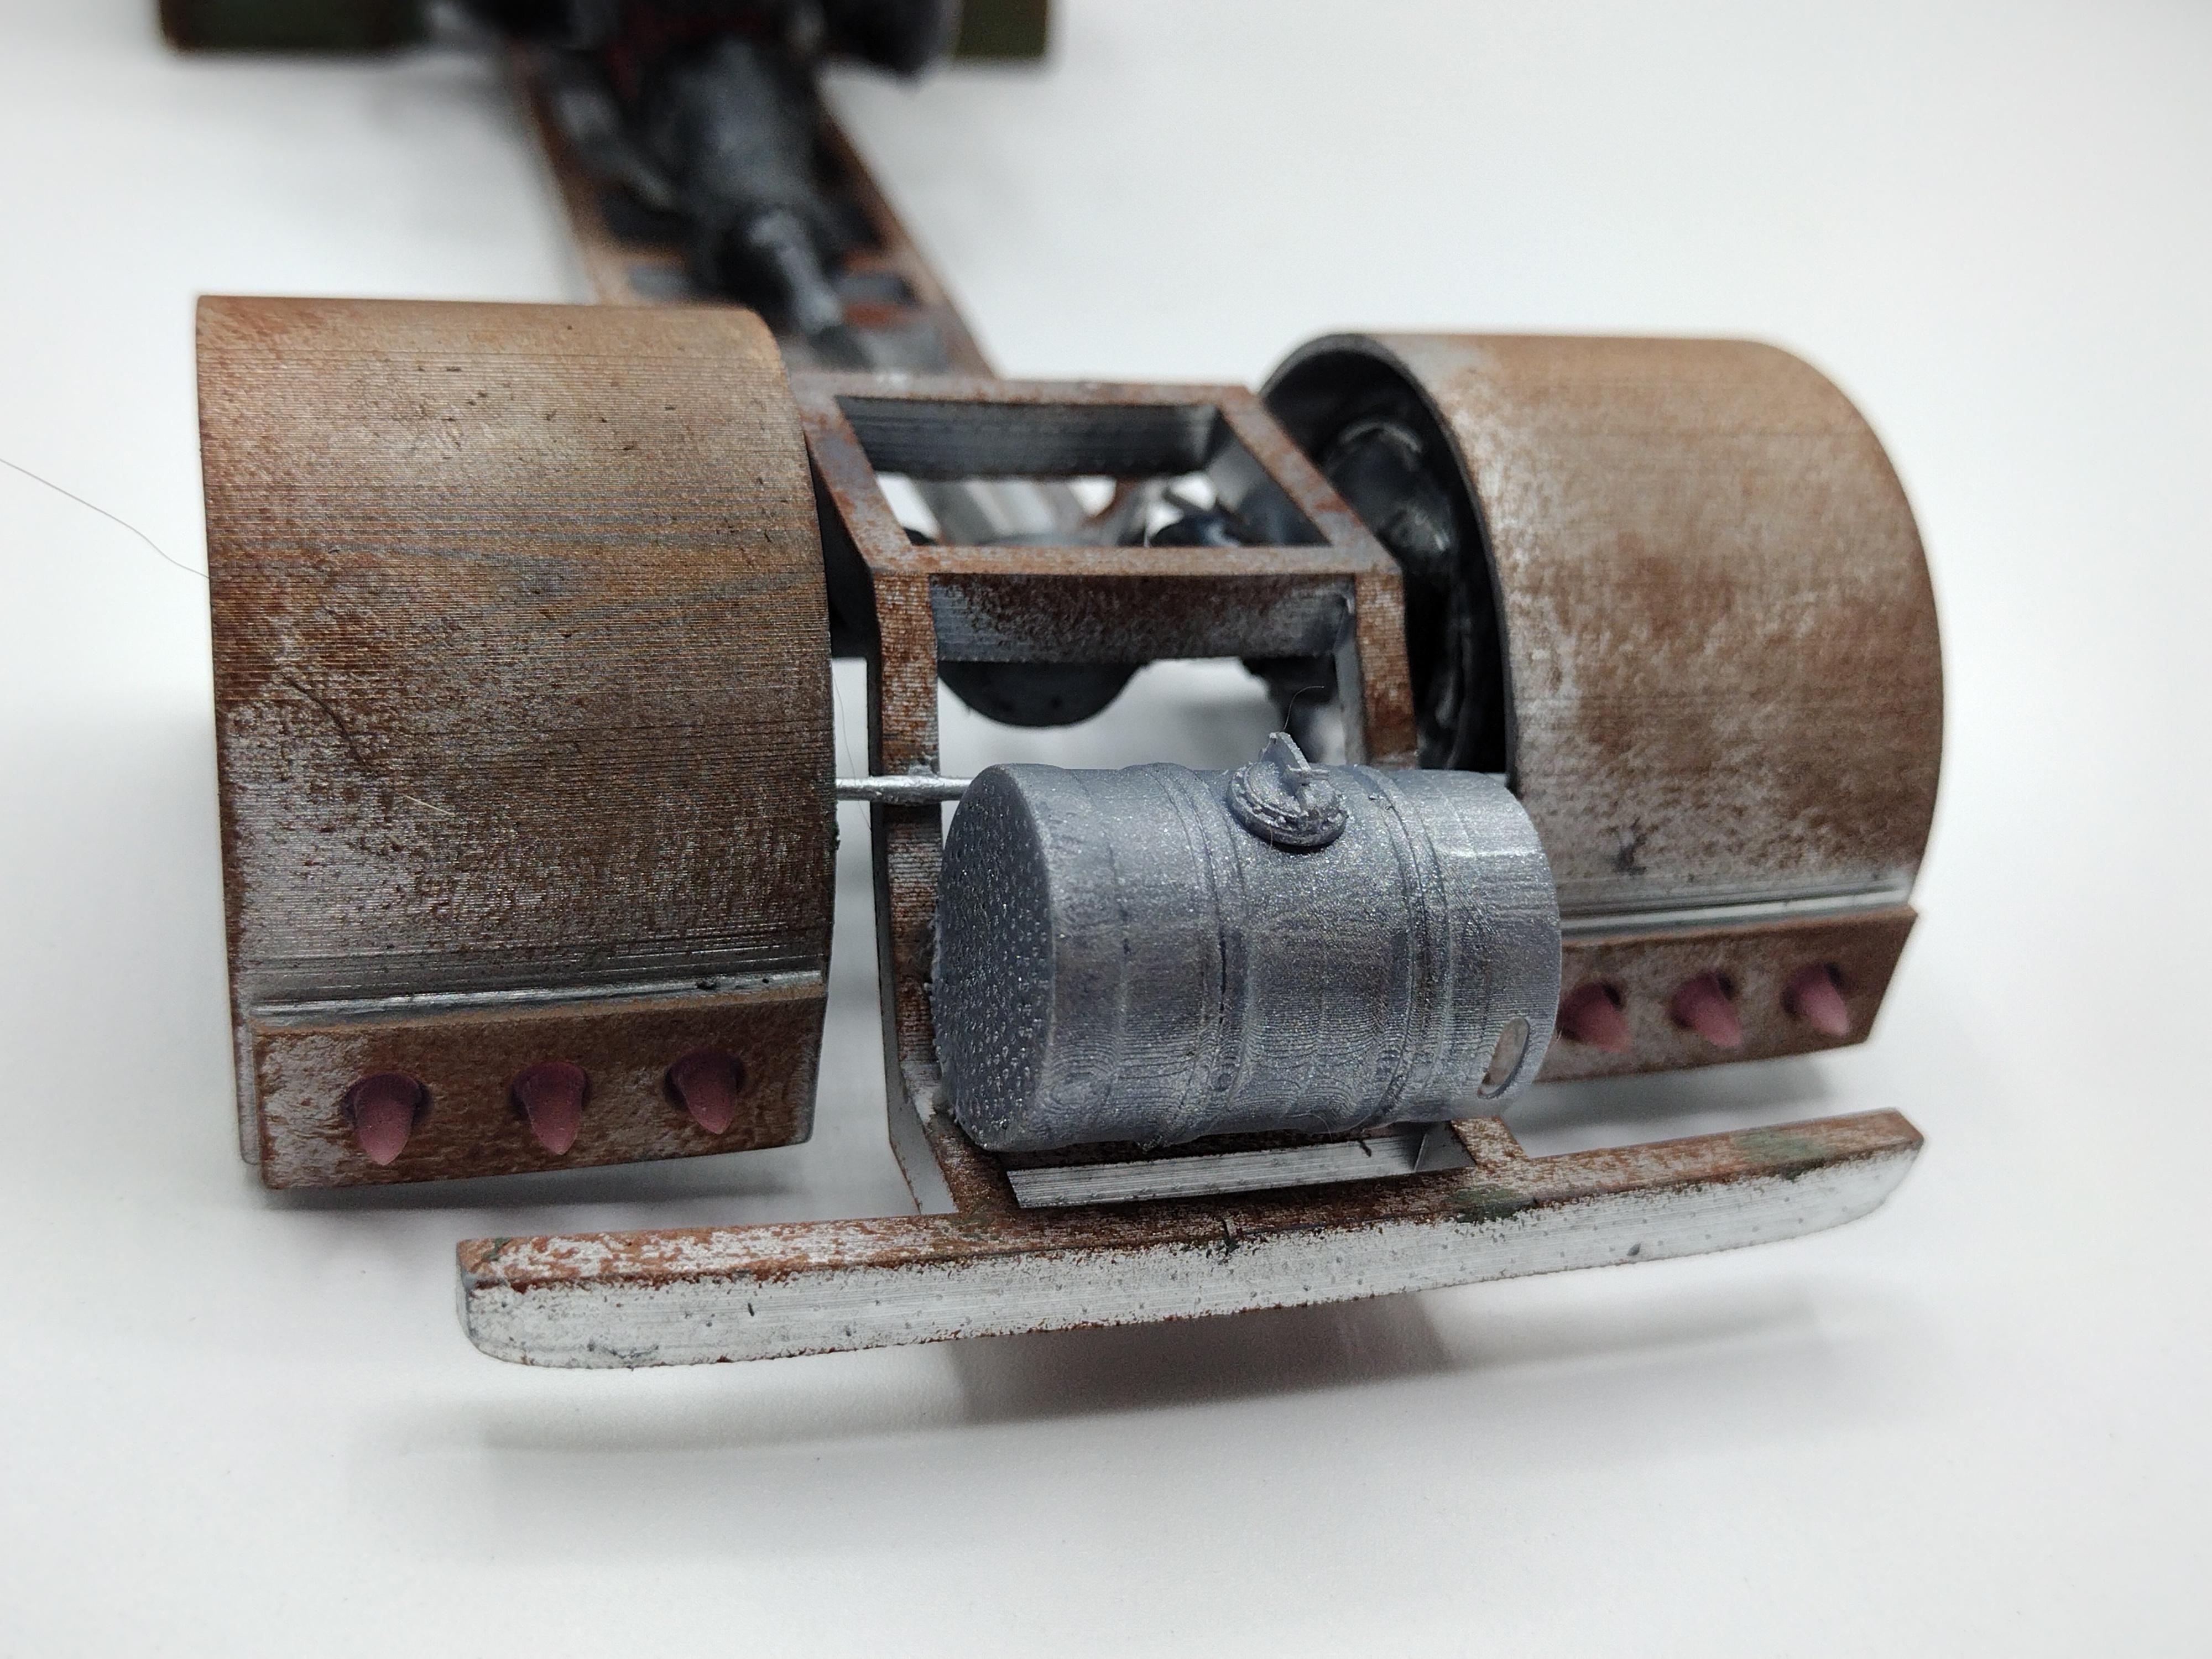
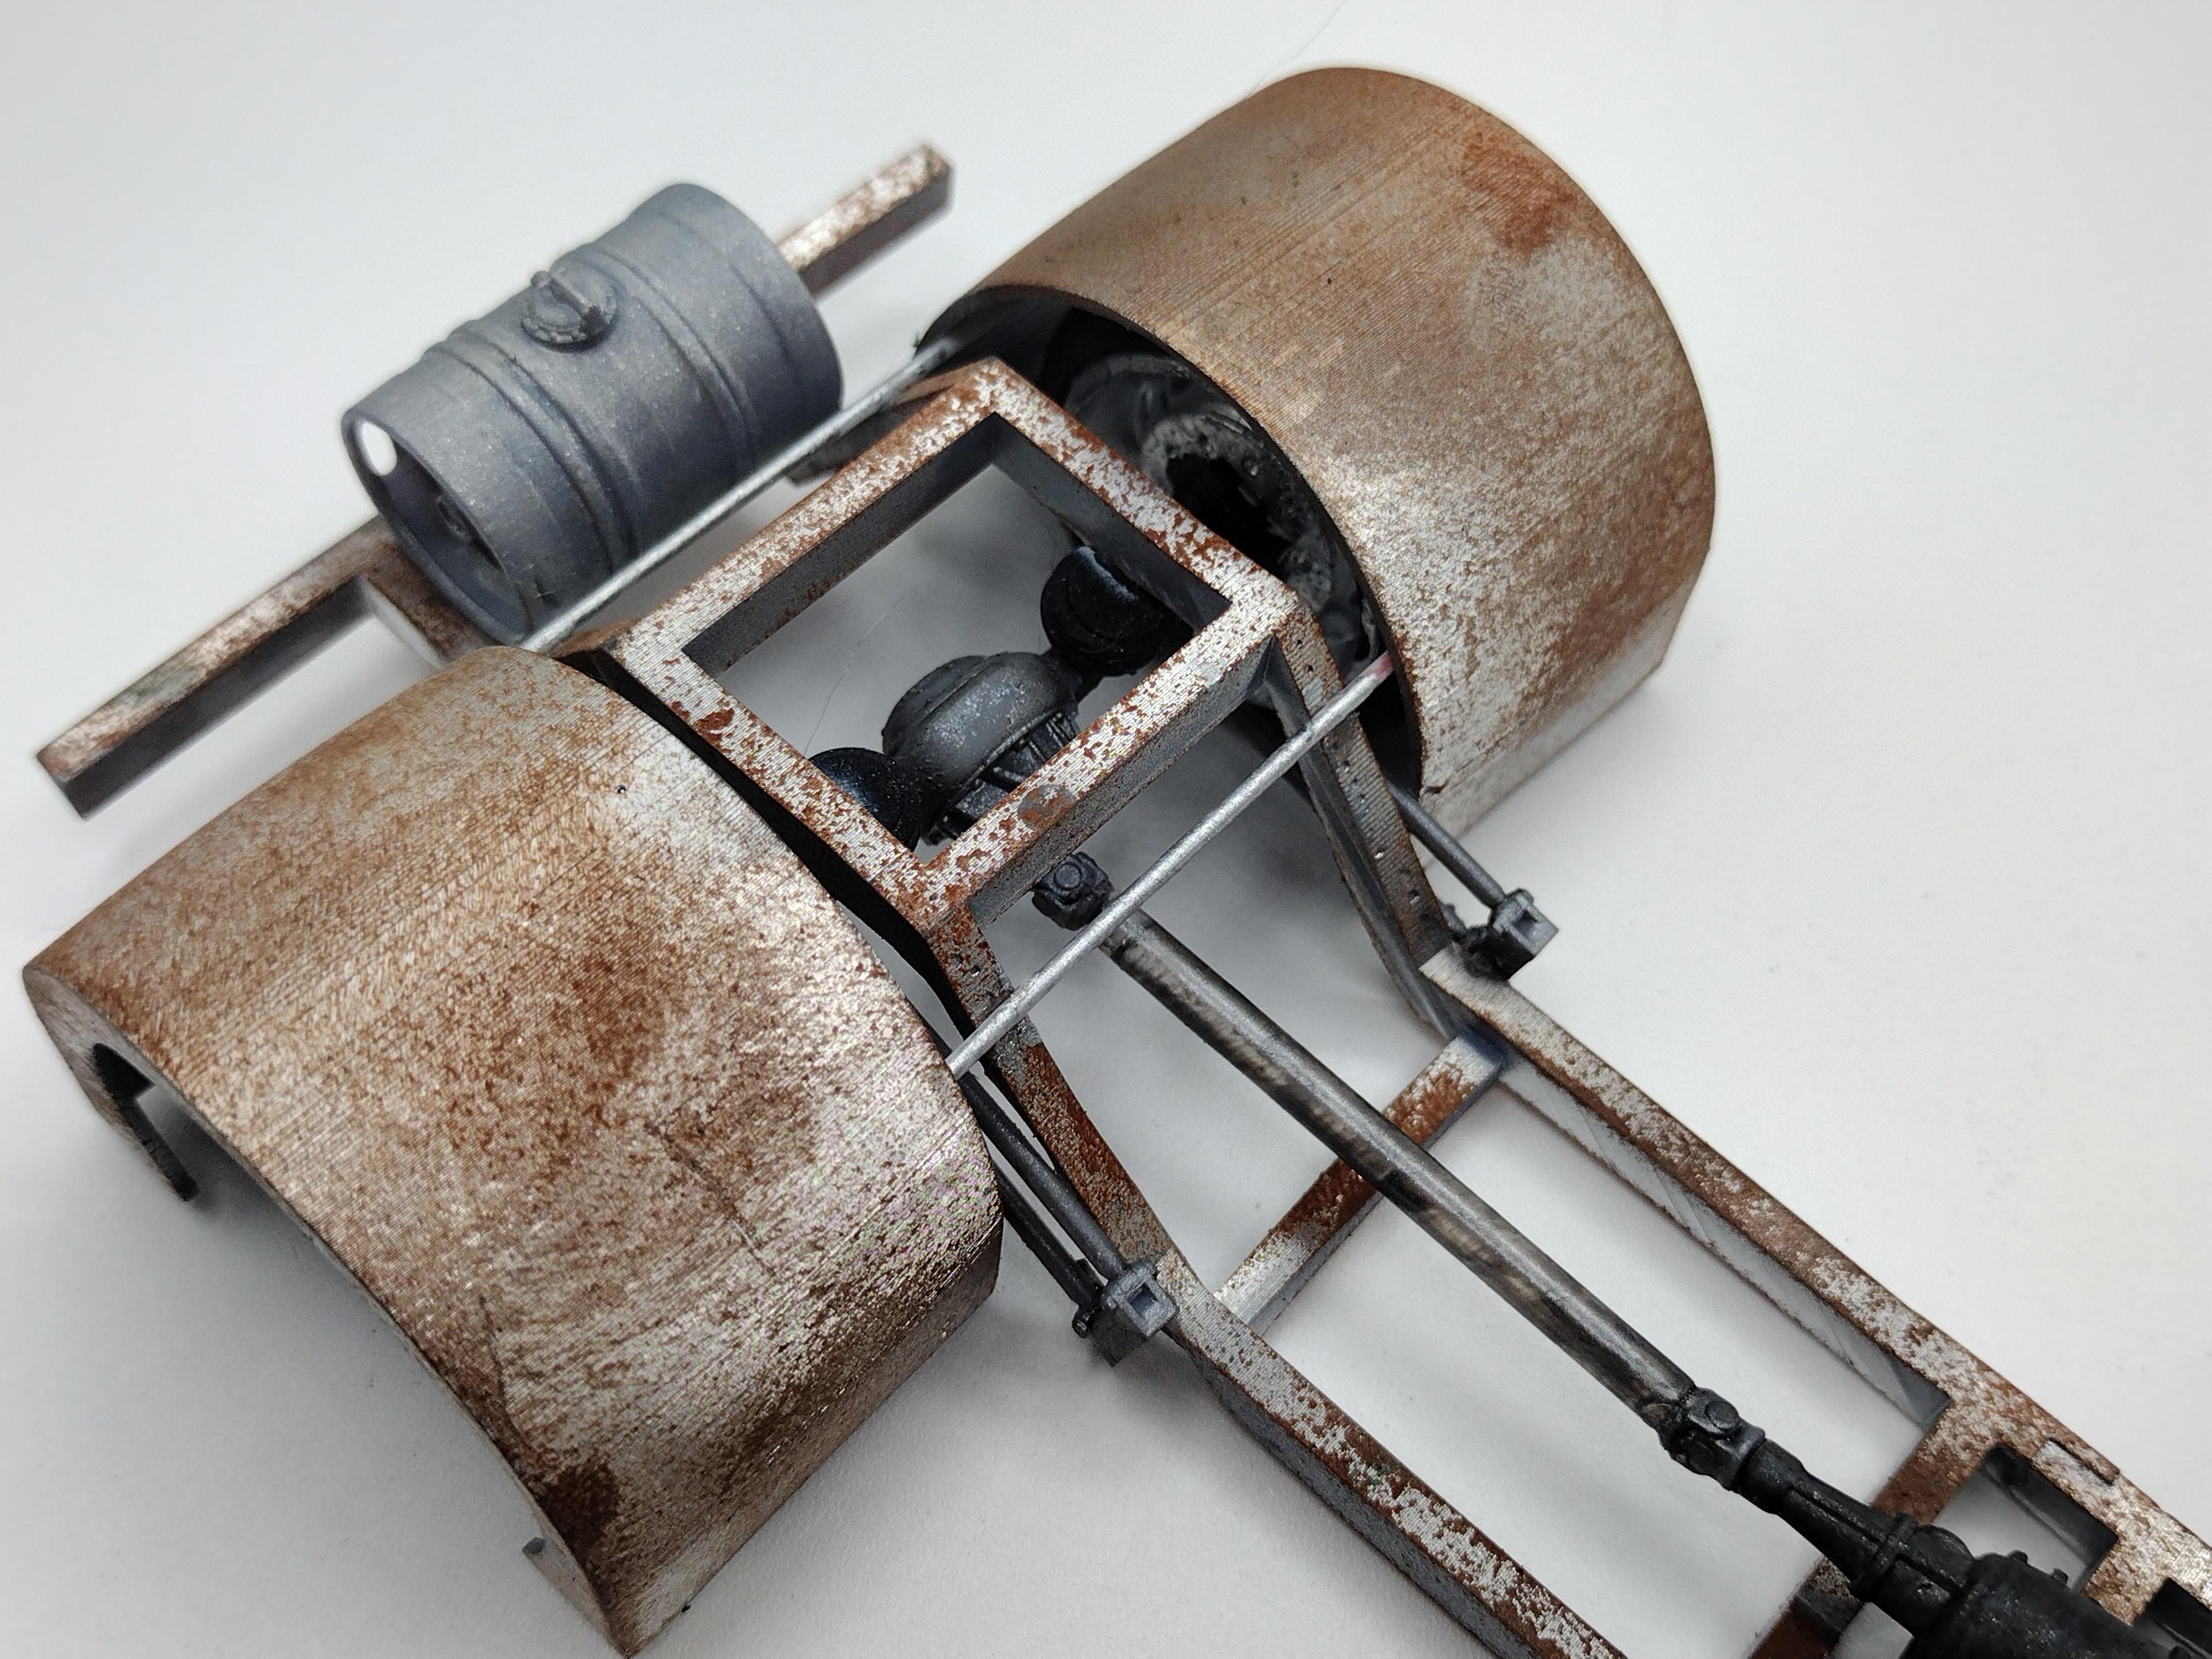
I named it GEAR JAMMER. This started out as a Ford C600 Cargo Truck. I painted it with a custom mixed Green acrylic craft paint color. I then sponge painted the patina on it using two different shades of brown acrylic craft paint. The interior is a Light Brown color with a Light Brown craft felt for carpet and headliner. I modified the interior tub to get the front wheels to fit with the cab sitting low. The barefoot gas and brake pedals are Nahuel Customs designs that I 3D printed. The seatbelts are some Brown ribbon I found at Hobby Lobby and the buckles are 3D printed. The engine is an Iceman Collections twin turbo Cummins diesel engine. I 3D printed an intercooler for it and made some custom pipes to connect it out of some styrene rods. I weathered the engine with some black acrylic craft paint dry brushed on. The frame is designed in two separate halves and 3D printed for this specific build. The wheels are 3D printed Alcoa Dually rims that I modified with spiked lug nuts and the tires are modified Z Force tires to fit these specific rims. The single hump rear fenders are also 3D printed and attached to the frame with some skinny styrene rods. The fuel tank is a custom 3D printed beer keg and a Nahuel Customs gas cap. The taillights are Nahuel Customs 1959 Cadillac taillights that I 3D printed in clear resin with some red dye mixed in. The front suspension is another Nahuel Customs design which is a custom big rig drop axle that I 3D printed. The rear 4 link suspension is also 3D printed and also a Nahuel Customs design. The airbags on the front and rear suspension are 3D printed in a flexible rubber resin that I don't use anymore. The driveshaft is custom made out of a couple of 3D printed u-joints and a styrene rod. The frame and rear fenders are painted with SMS Hyperchrome Cold Tone airbrush paint and weathered with some Brown acrylic craft paint and a sponge. The rims are also painted with SMS Hyperchrome Cold Tone airbrush paint but I didn't weather them. Everything that wasn't painted with SMS Hyperchrome Cold Tone airbrush paint was hand painted with a paint brush. This was a stalled project for a long time and it's finally done.
-
-
I named it GEAR JAMMER. This started out as a Ford C600 Cargo Truck. I painted it with a custom mixed Green acrylic craft paint color. I then sponge painted the patina on it using two different shades of brown acrylic craft paint. The interior is a Light Brown color with a Light Brown craft felt for carpet and headliner. I modified the interior tub to get the front wheels to fit with the cab sitting low. The barefoot gas and brake pedals are Nahuel Customs designs that I 3D printed. The seatbelts are some Brown ribbon I found at Hobby Lobby and the buckles are 3D printed. The engine is an Iceman Collections twin turbo Cummins diesel engine. I 3D printed an intercooler for it and made some custom pipes to connect it out of some styrene rods. I weathered the engine with some black acrylic craft paint dry brushed on. The frame is designed in two separate halves and 3D printed for this specific build. The wheels are 3D printed Alcoa Dually rims that I modified with spiked lug nuts and the tires are modified Z Force tires to fit these specific rims. The single hump rear fenders are also 3D printed and attached to the frame with some skinny styrene rods. The fuel tank is a custom 3D printed beer keg and a Nahuel Customs gas cap. The taillights are Nahuel Customs 1959 Cadillac taillights that I 3D printed in clear resin with some red dye mixed in. The front suspension is another Nahuel Customs design which is a custom big rig drop axle that I 3D printed. The rear 4 link suspension is also 3D printed and also a Nahuel Customs design. The airbags on the front and rear suspension are 3D printed in a flexible rubber resin that I don't use anymore. The driveshaft is custom made out of a couple of 3D printed u-joints and a styrene rod. The frame and rear fenders are painted with SMS Hyperchrome Cold Tone airbrush paint and weathered with some Brown acrylic craft paint and a sponge. The rims are also painted with SMS Hyperchrome Cold Tone airbrush paint but I didn't weather them. Everything that wasn't painted with SMS Hyperchrome Cold Tone airbrush paint was hand painted with a paint brush. This was a stalled project for a long time and it's finally done.
-
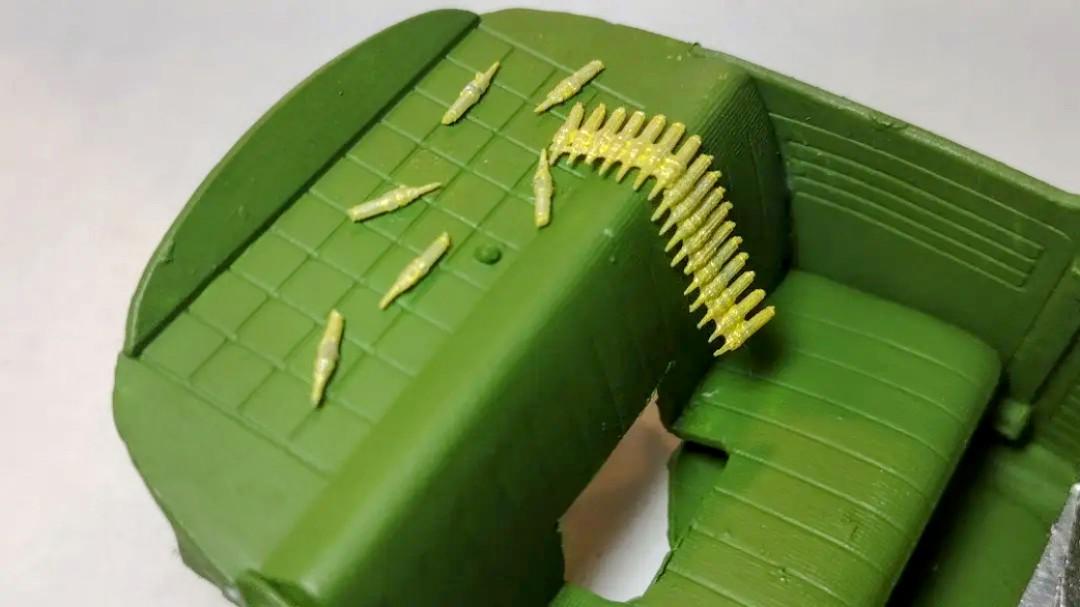
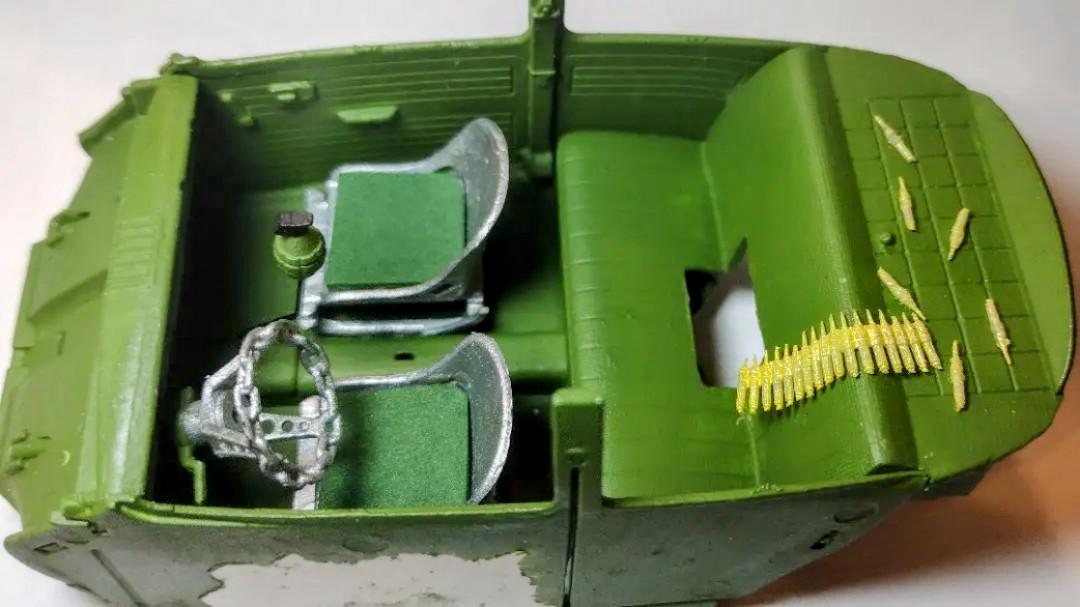
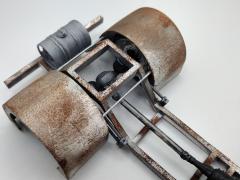
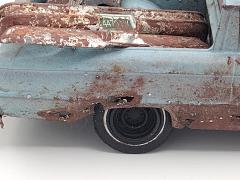
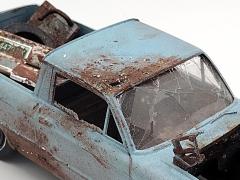
I built this to look like it's ready to be crushed. I started it by grinding some rust holes in the body. Then I sprayed on some rusty metal primer. Next, I sprinkled on some Epsom salt and sprayed on a Light Blue. Once the blue color dried, I brushed off the large pieces and left the tiny pieces to resemble rust bubbles. After all that I brushed on some rust-colored paint around the rust holes. I even added some watercolor paints to the rust holes as a wash. On the rust hole in the roof, I added some very slight green watercolor paint to look like it's got a little bit of grass starting to grow on it. I completely eliminated the engine and the hood but kept the hood hinges and the radiator. I added a radiator hose made from a black hollow rubber bead cord and a wire mesh screen for the radiator itself. The broken windshield and rear window are made out of a glass laptop screen protector that I cut out with scissors and smashed with a hammer. The passenger side window is done the same way except I cut out a thin strip and wedged it in between the body and the door panel then chipped along the edge to look like it was shattered into pieces. The passenger side taillight was eliminated and replaced with some red and black bead wire for detail. I patted on some rust-colored paint onto the bumpers and grill to make them look like they are rusty and attached them on at an angle, so they look like they are falling off the car. I ground out a hole in the bench seat and glued some pillow stuffing to the underside of the seat and painted it a brown color and weathered with a brownish watercolor paint with a little black mixed in. I eliminated the steering wheel but kept the steering column and the dashboard. The crushed soda cans are 3D printed. I put a pack of Camel cigarettes on the seat that i printed out on an inkjet printer and filled with some very thin styrene rods to resemble 1/24 scale cigarettes. I painted the undercarriage with a rust-colored primer and, while the primer is still freshly wet, I sprayed a flat black color on and let it mix while it dried. I used a technique I learned in Scale Auto Magazine to make one of the tires look flat. I carved out the middle of one edge and glued a piece of styrene plastic to the leftover flaps and the painted it flat black and the end result is a flat tire. The rims are painted flat black. I added a bunch of stuff in the bed. Those items include a mesh screen radiator with rubber hoses still attached, two rubber tires from another kit, a set of bumpers from a 1980s GMC Pickup kit, a real metal jewelry chain I painted with black calligraphy ink to make it look greasy, a 3D printed crushed soda can, and a 3D printed roll of duct tape. This is my rustiest build I've ever done.
-
-
I built this to look like it's ready to be crushed. I started it by grinding some rust holes in the body. Then I sprayed on some rusty metal primer. Next, I sprinkled on some Epsom salt and sprayed on a Light Blue. Once the blue color dried, I brushed off the large pieces and left the tiny pieces to resemble rust bubbles. After all that I brushed on some rust-colored paint around the rust holes. I even added some watercolor paints to the rust holes as a wash. On the rust hole in the roof, I added some very slight green watercolor paint to look like it's got a little bit of grass starting to grow on it. I completely eliminated the engine and the hood but kept the hood hinges and the radiator. I added a radiator hose made from a black hollow rubber bead cord and a wire mesh screen for the radiator itself. The broken windshield and rear window are made out of a glass laptop screen protector that I cut out with scissors and smashed with a hammer. The passenger side window is done the same way except I cut out a thin strip and wedged it in between the body and the door panel then chipped along the edge to look like it was shattered into pieces. The passenger side taillight was eliminated and replaced with some red and black bead wire for detail. I patted on some rust-colored paint onto the bumpers and grill to make them look like they are rusty and attached them on at an angle, so they look like they are falling off the car. I ground out a hole in the bench seat and glued some pillow stuffing to the underside of the seat and painted it a brown color and weathered with a brownish watercolor paint with a little black mixed in. I eliminated the steering wheel but kept the steering column and the dashboard. The crushed soda cans are 3D printed. I put a pack of Camel cigarettes on the seat that i printed out on an inkjet printer and filled with some very thin styrene rods to resemble 1/24 scale cigarettes. I painted the undercarriage with a rust-colored primer and, while the primer is still freshly wet, I sprayed a flat black color on and let it mix while it dried. I used a technique I learned in Scale Auto Magazine to make one of the tires look flat. I carved out the middle of one edge and glued a piece of styrene plastic to the leftover flaps and the painted it flat black and the end result is a flat tire. The rims are painted flat black. I added a bunch of stuff in the bed. Those items include a mesh screen radiator with rubber hoses still attached, two rubber tires from another kit, a set of bumpers from a 1980s GMC Pickup kit, a real metal jewelry chain I painted with black calligraphy ink to make it look greasy, a 3D printed crushed soda can, and a 3D printed roll of duct tape. This is my rustiest build I've ever done.
-
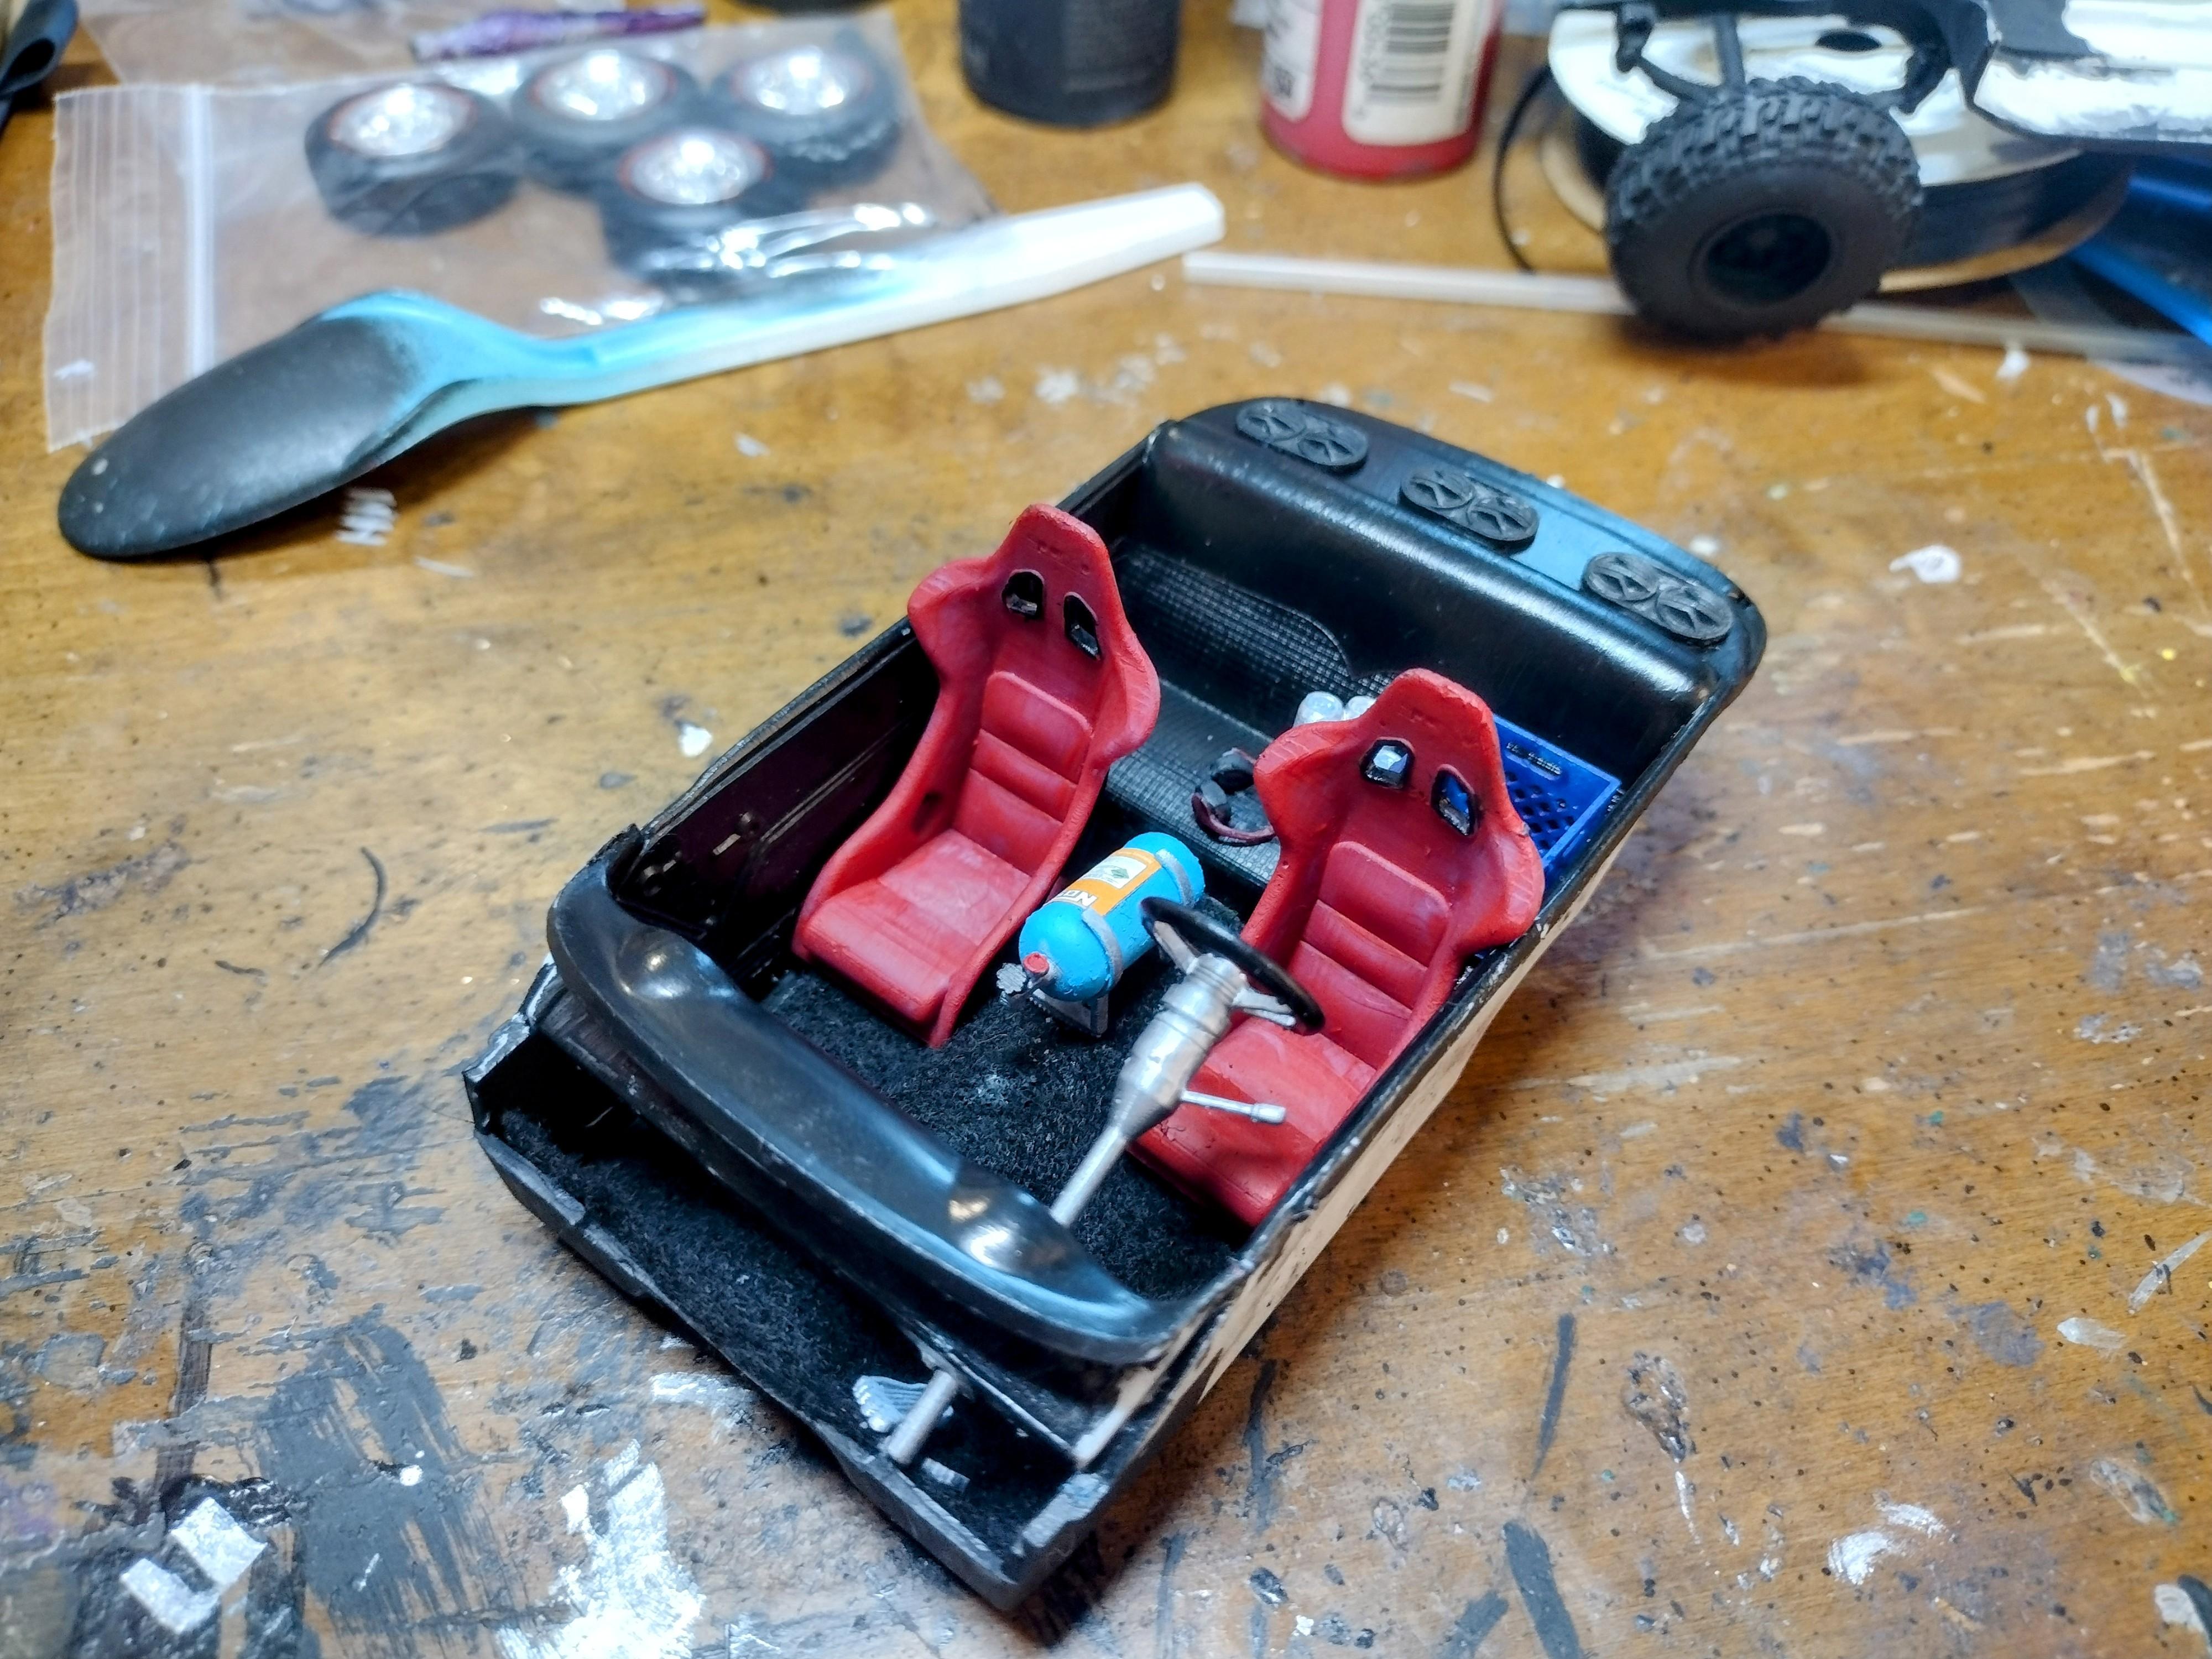
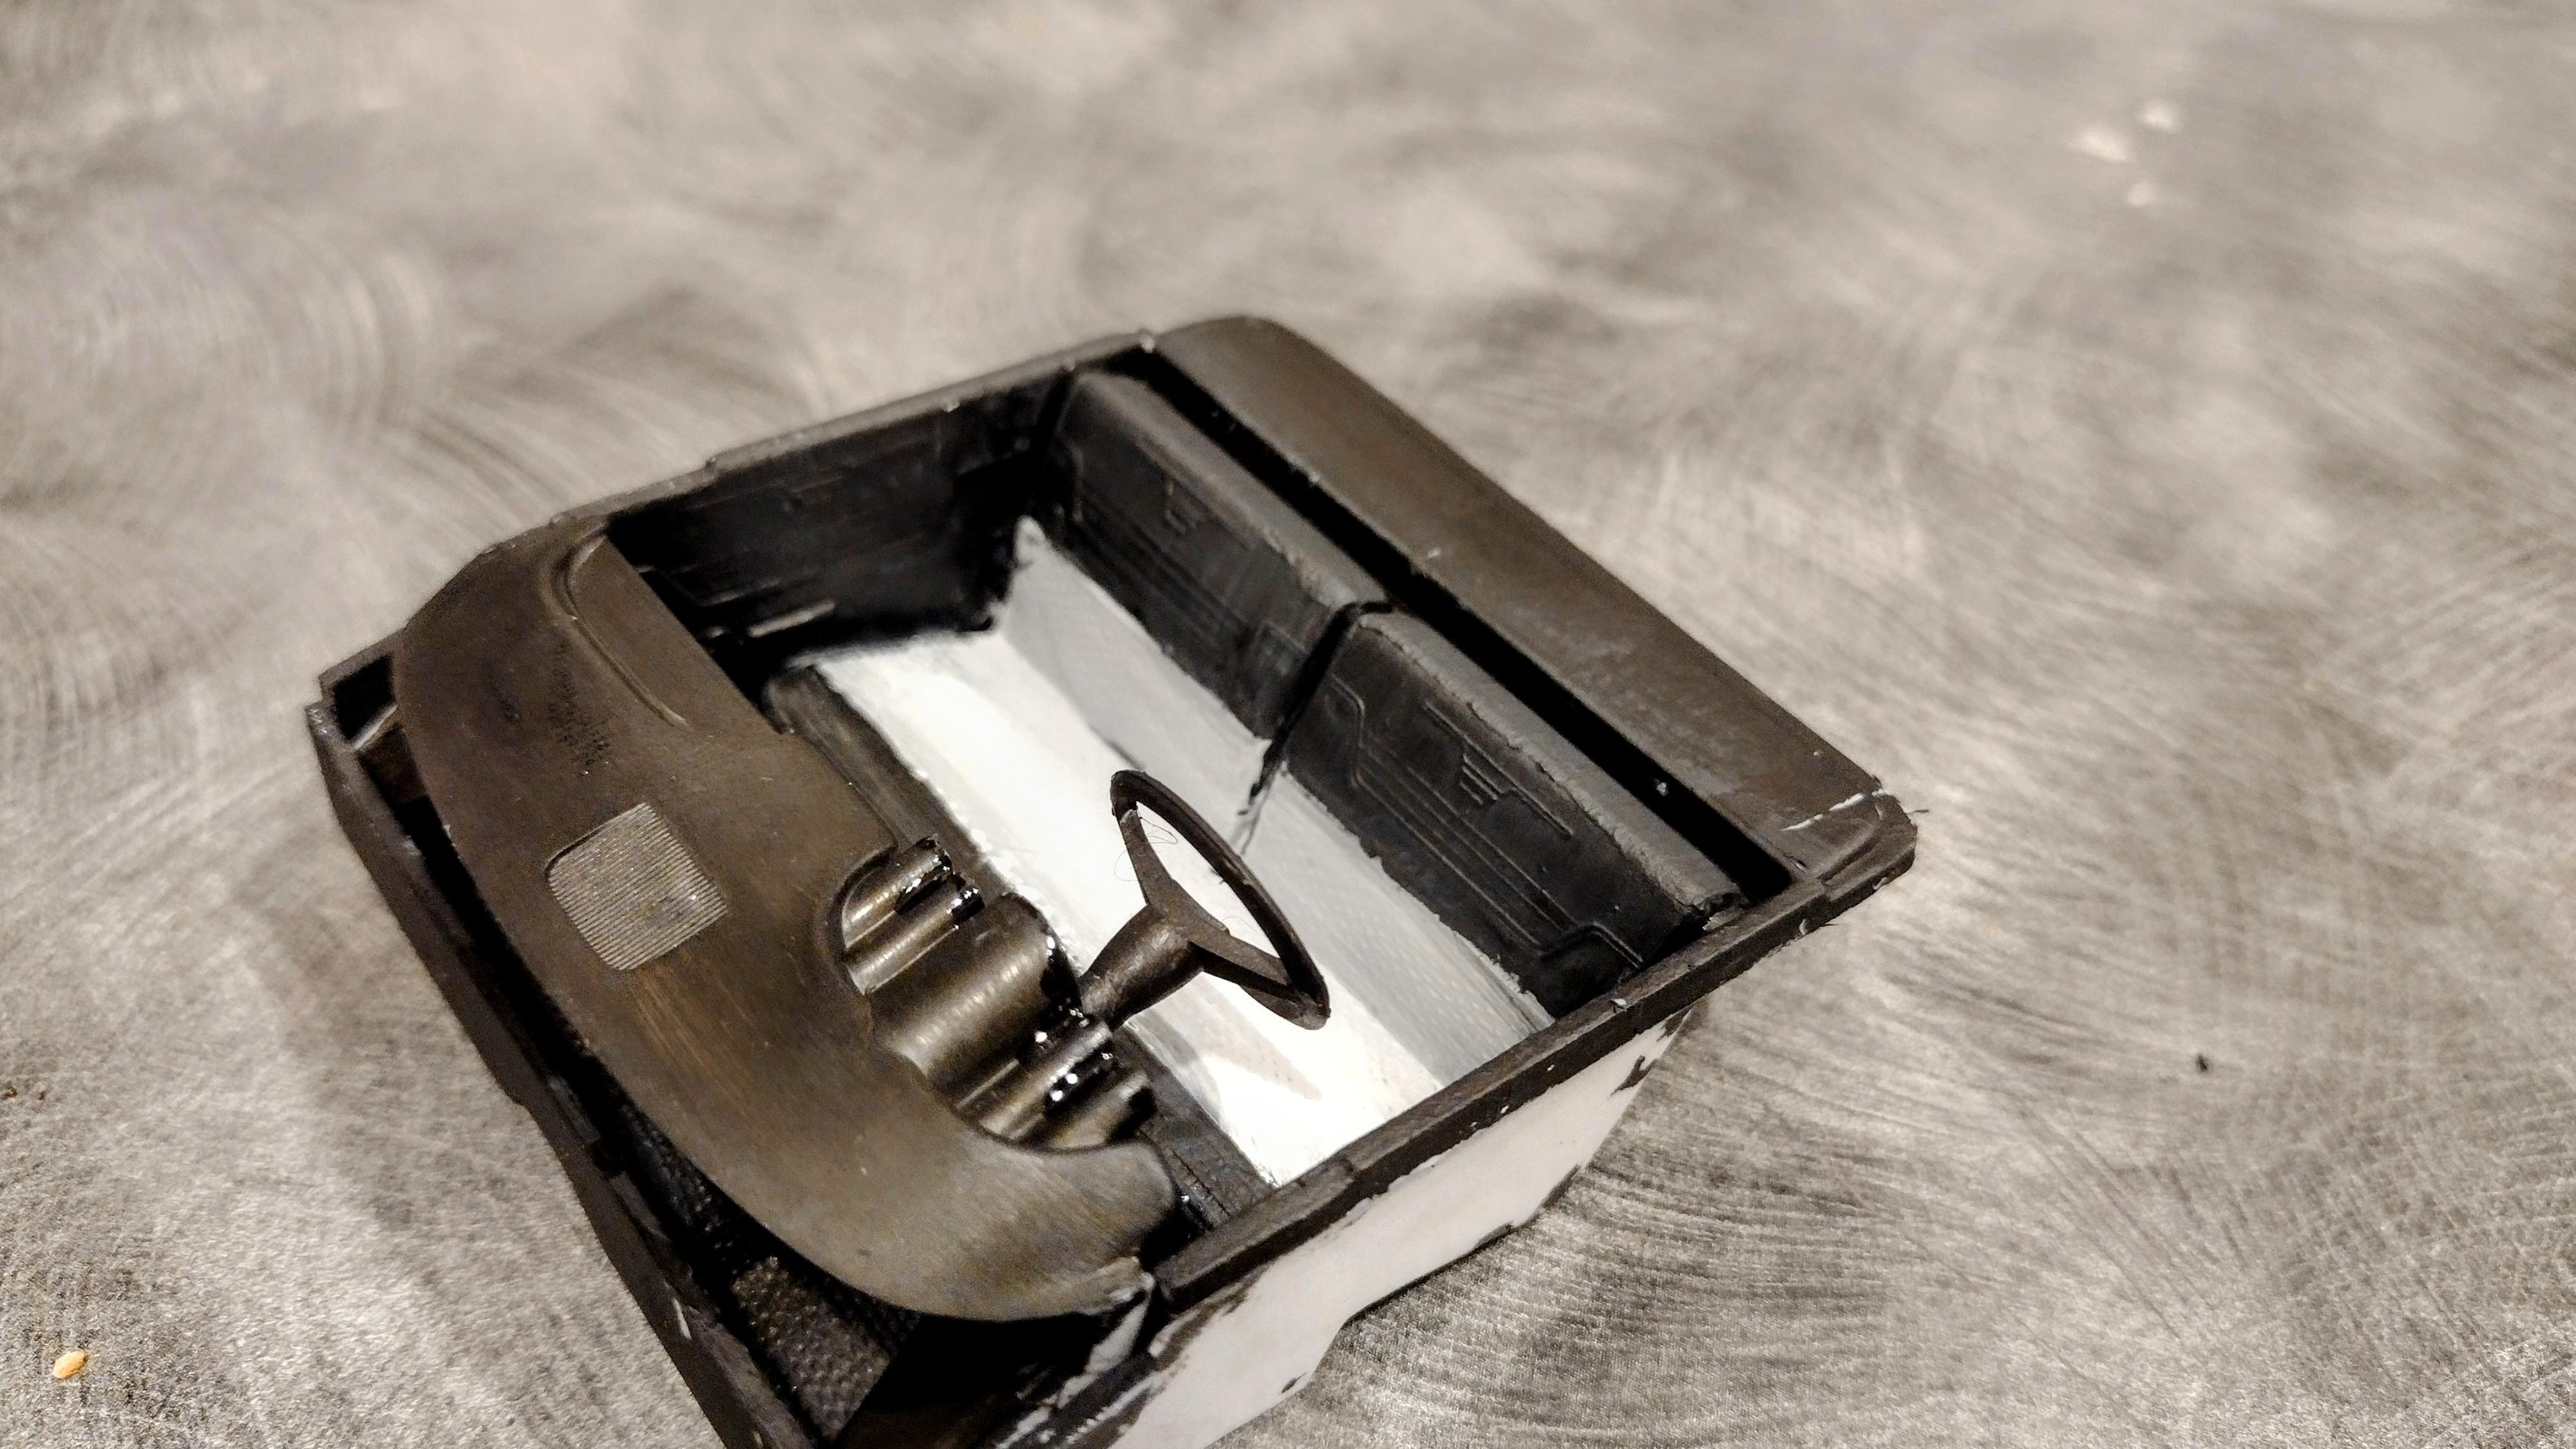
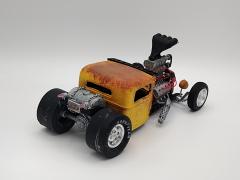
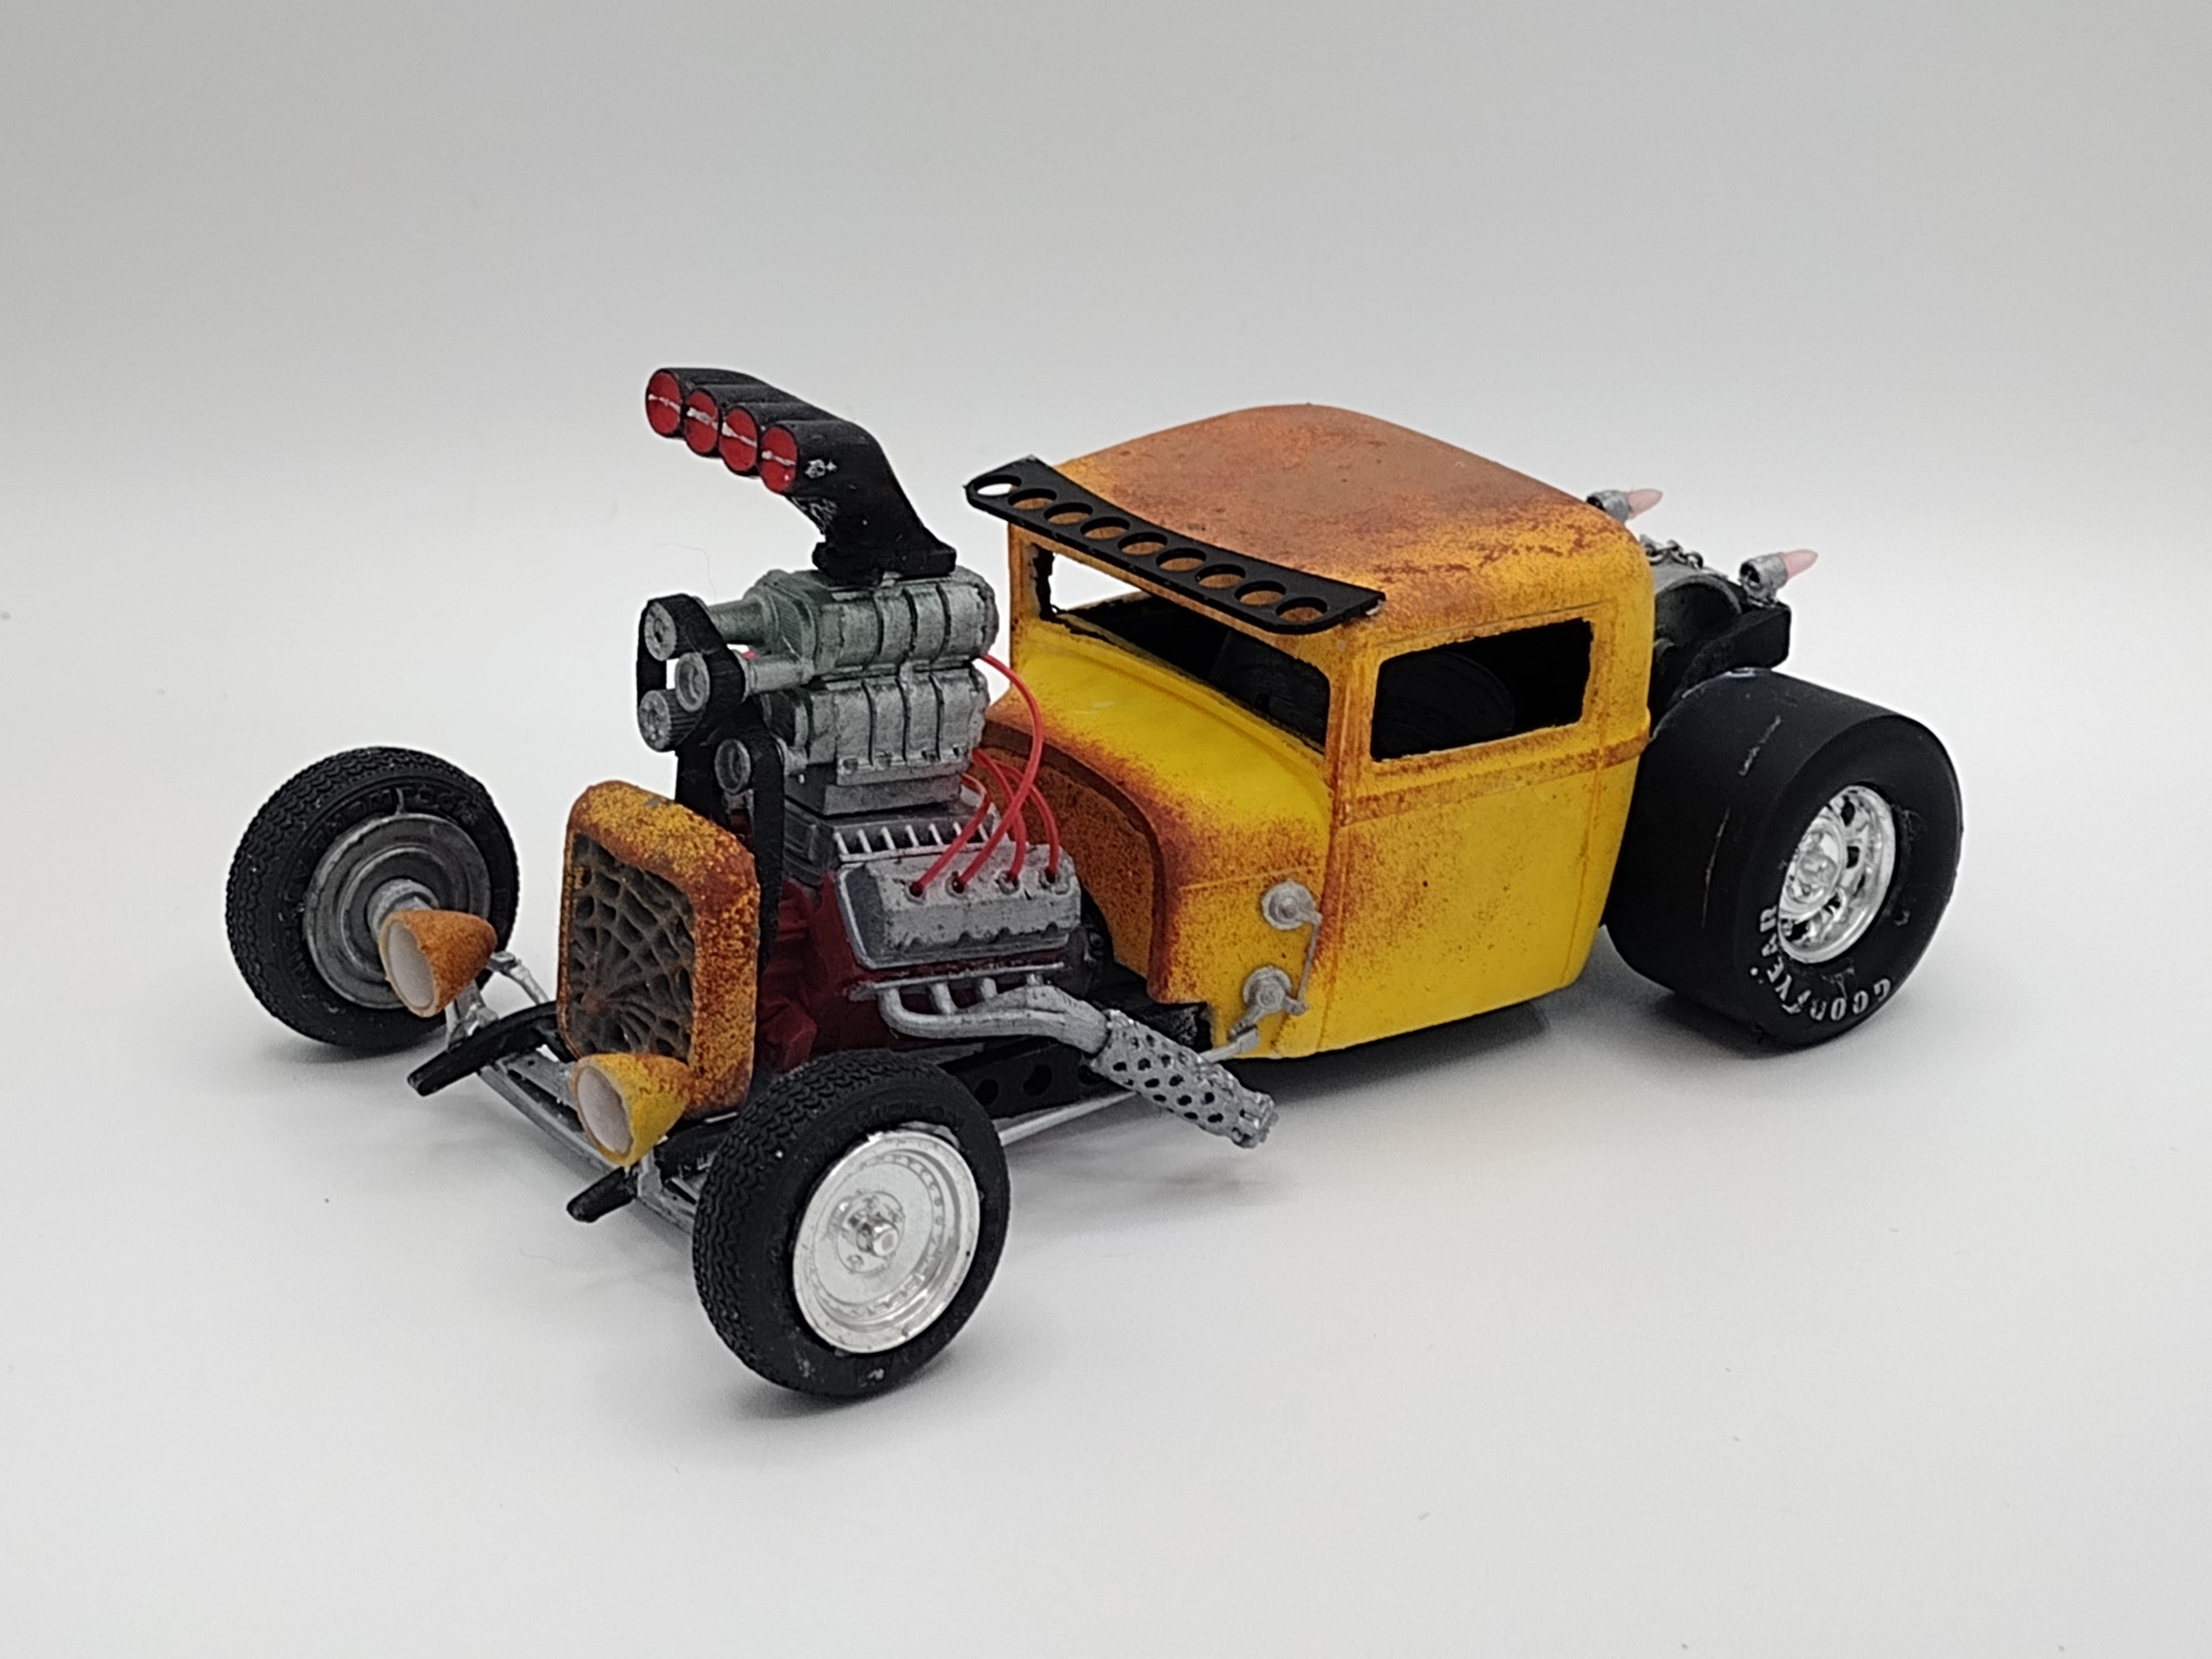
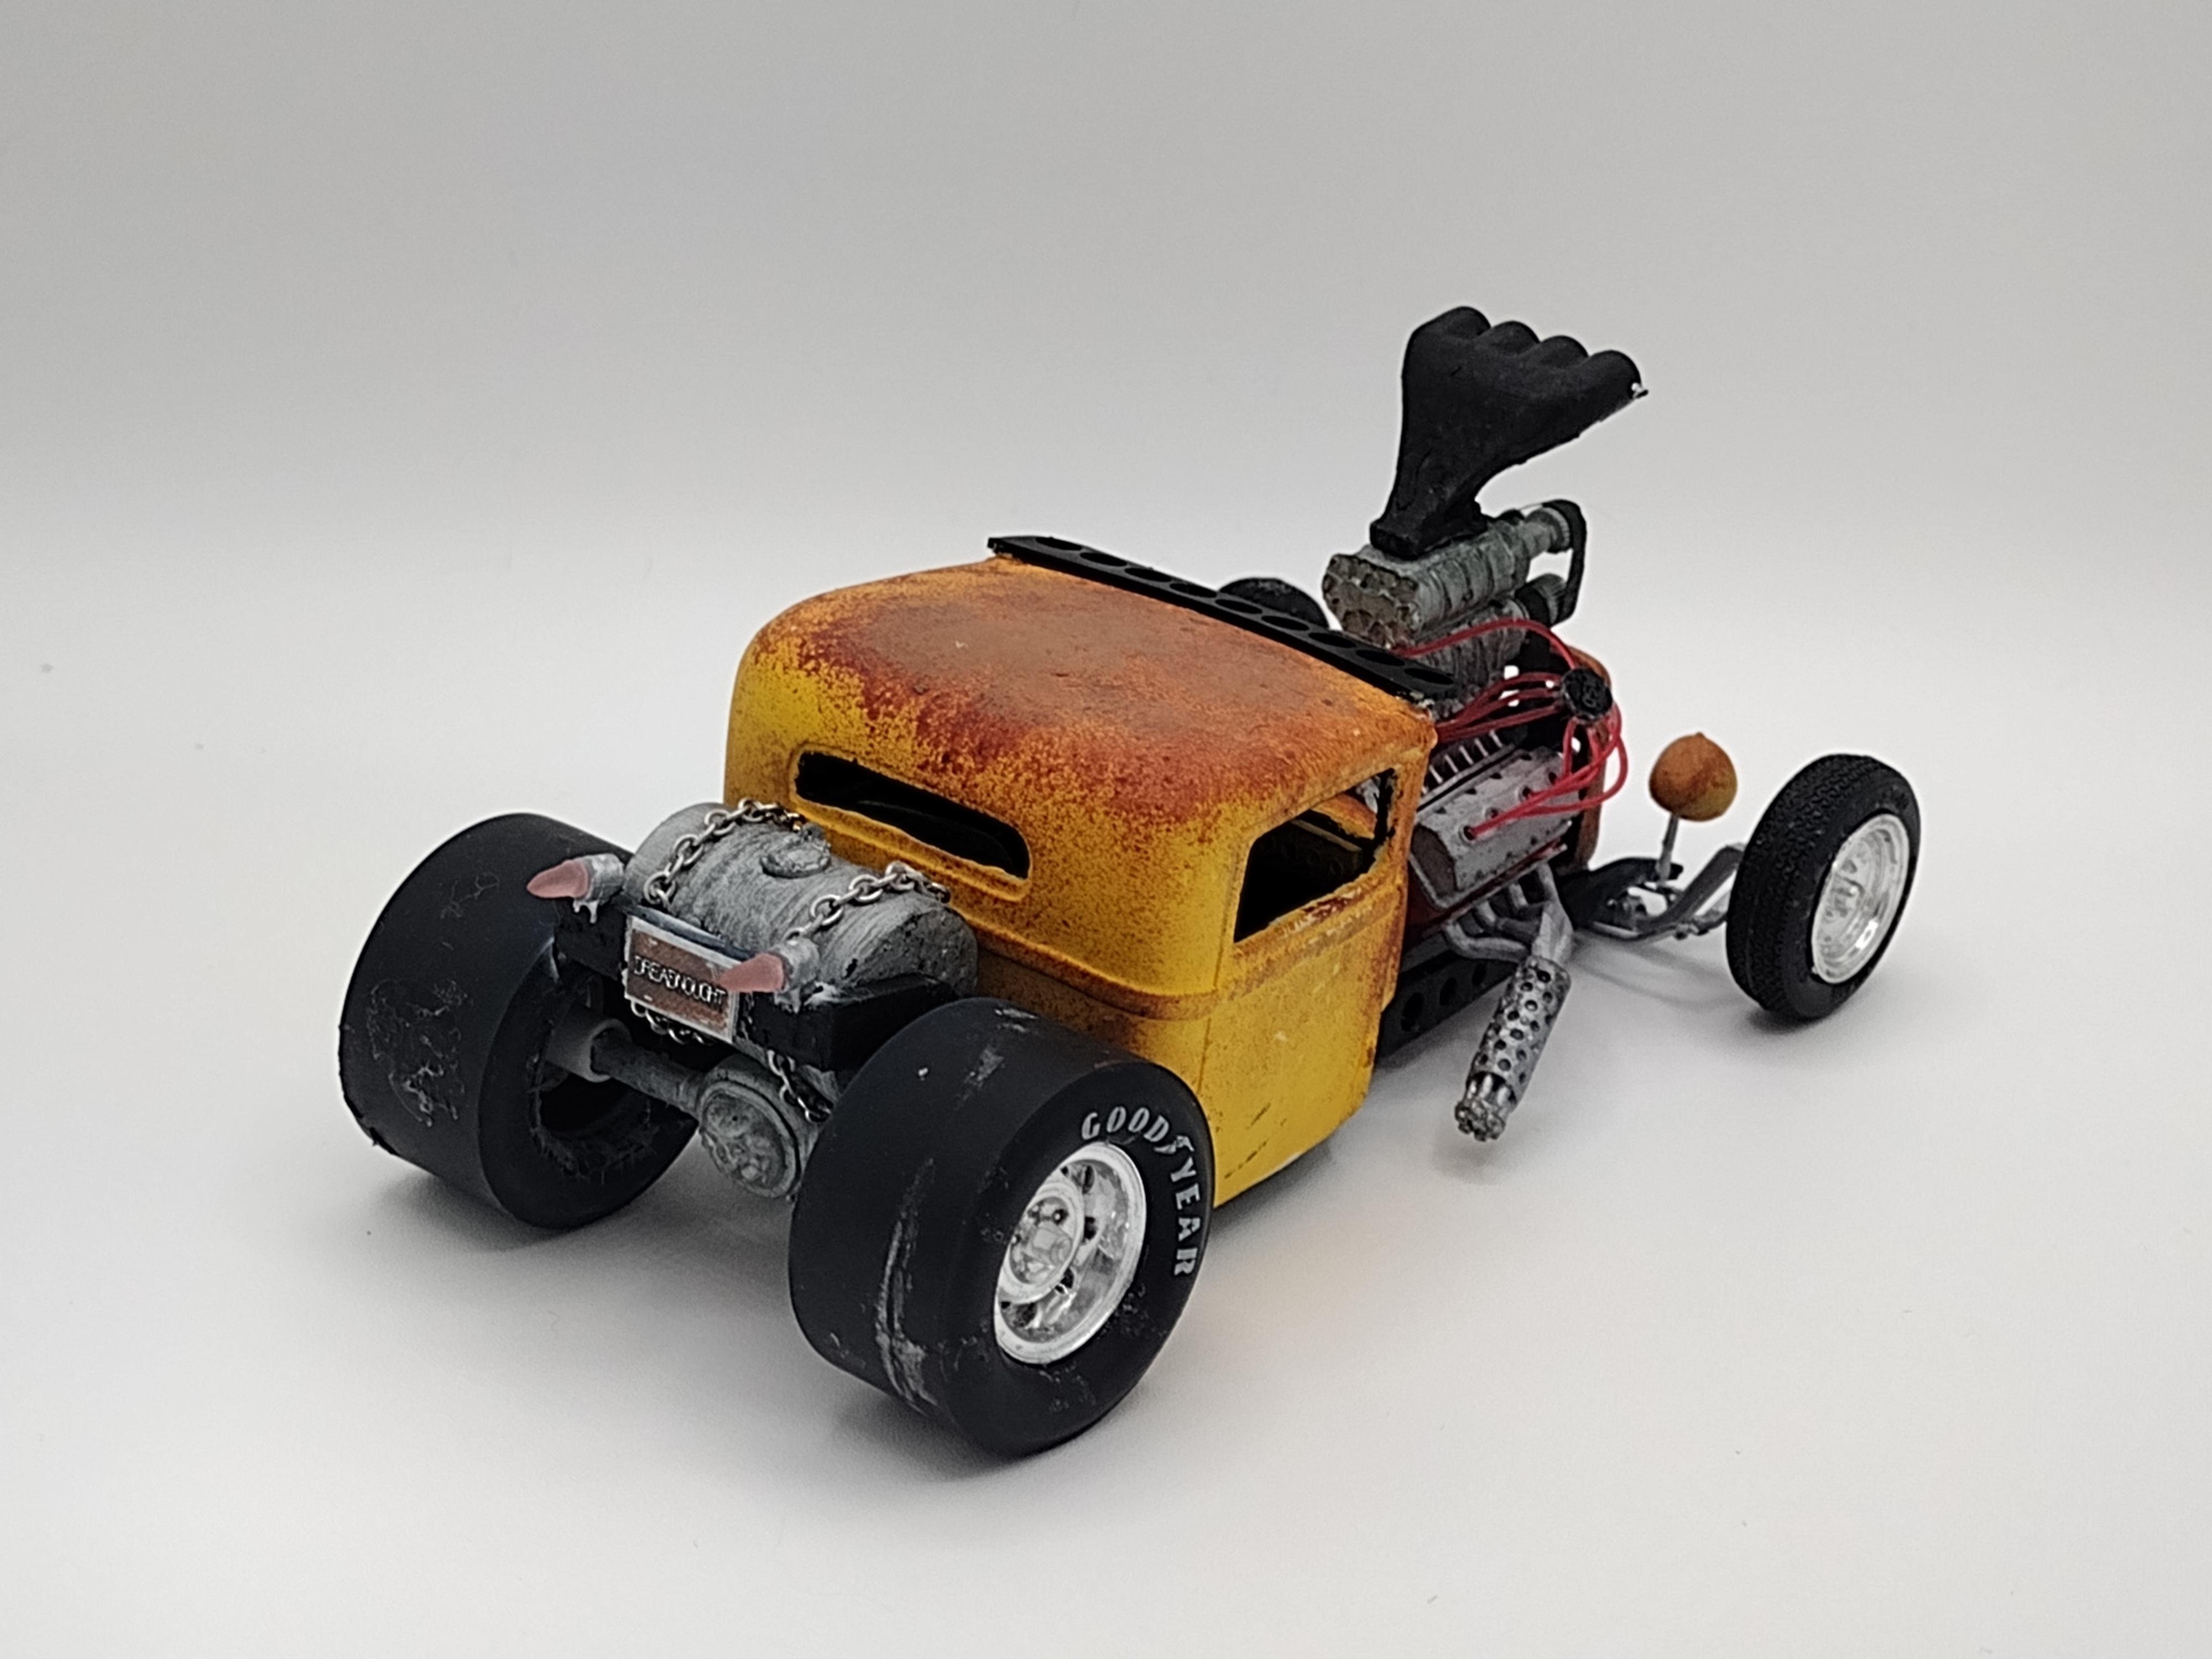
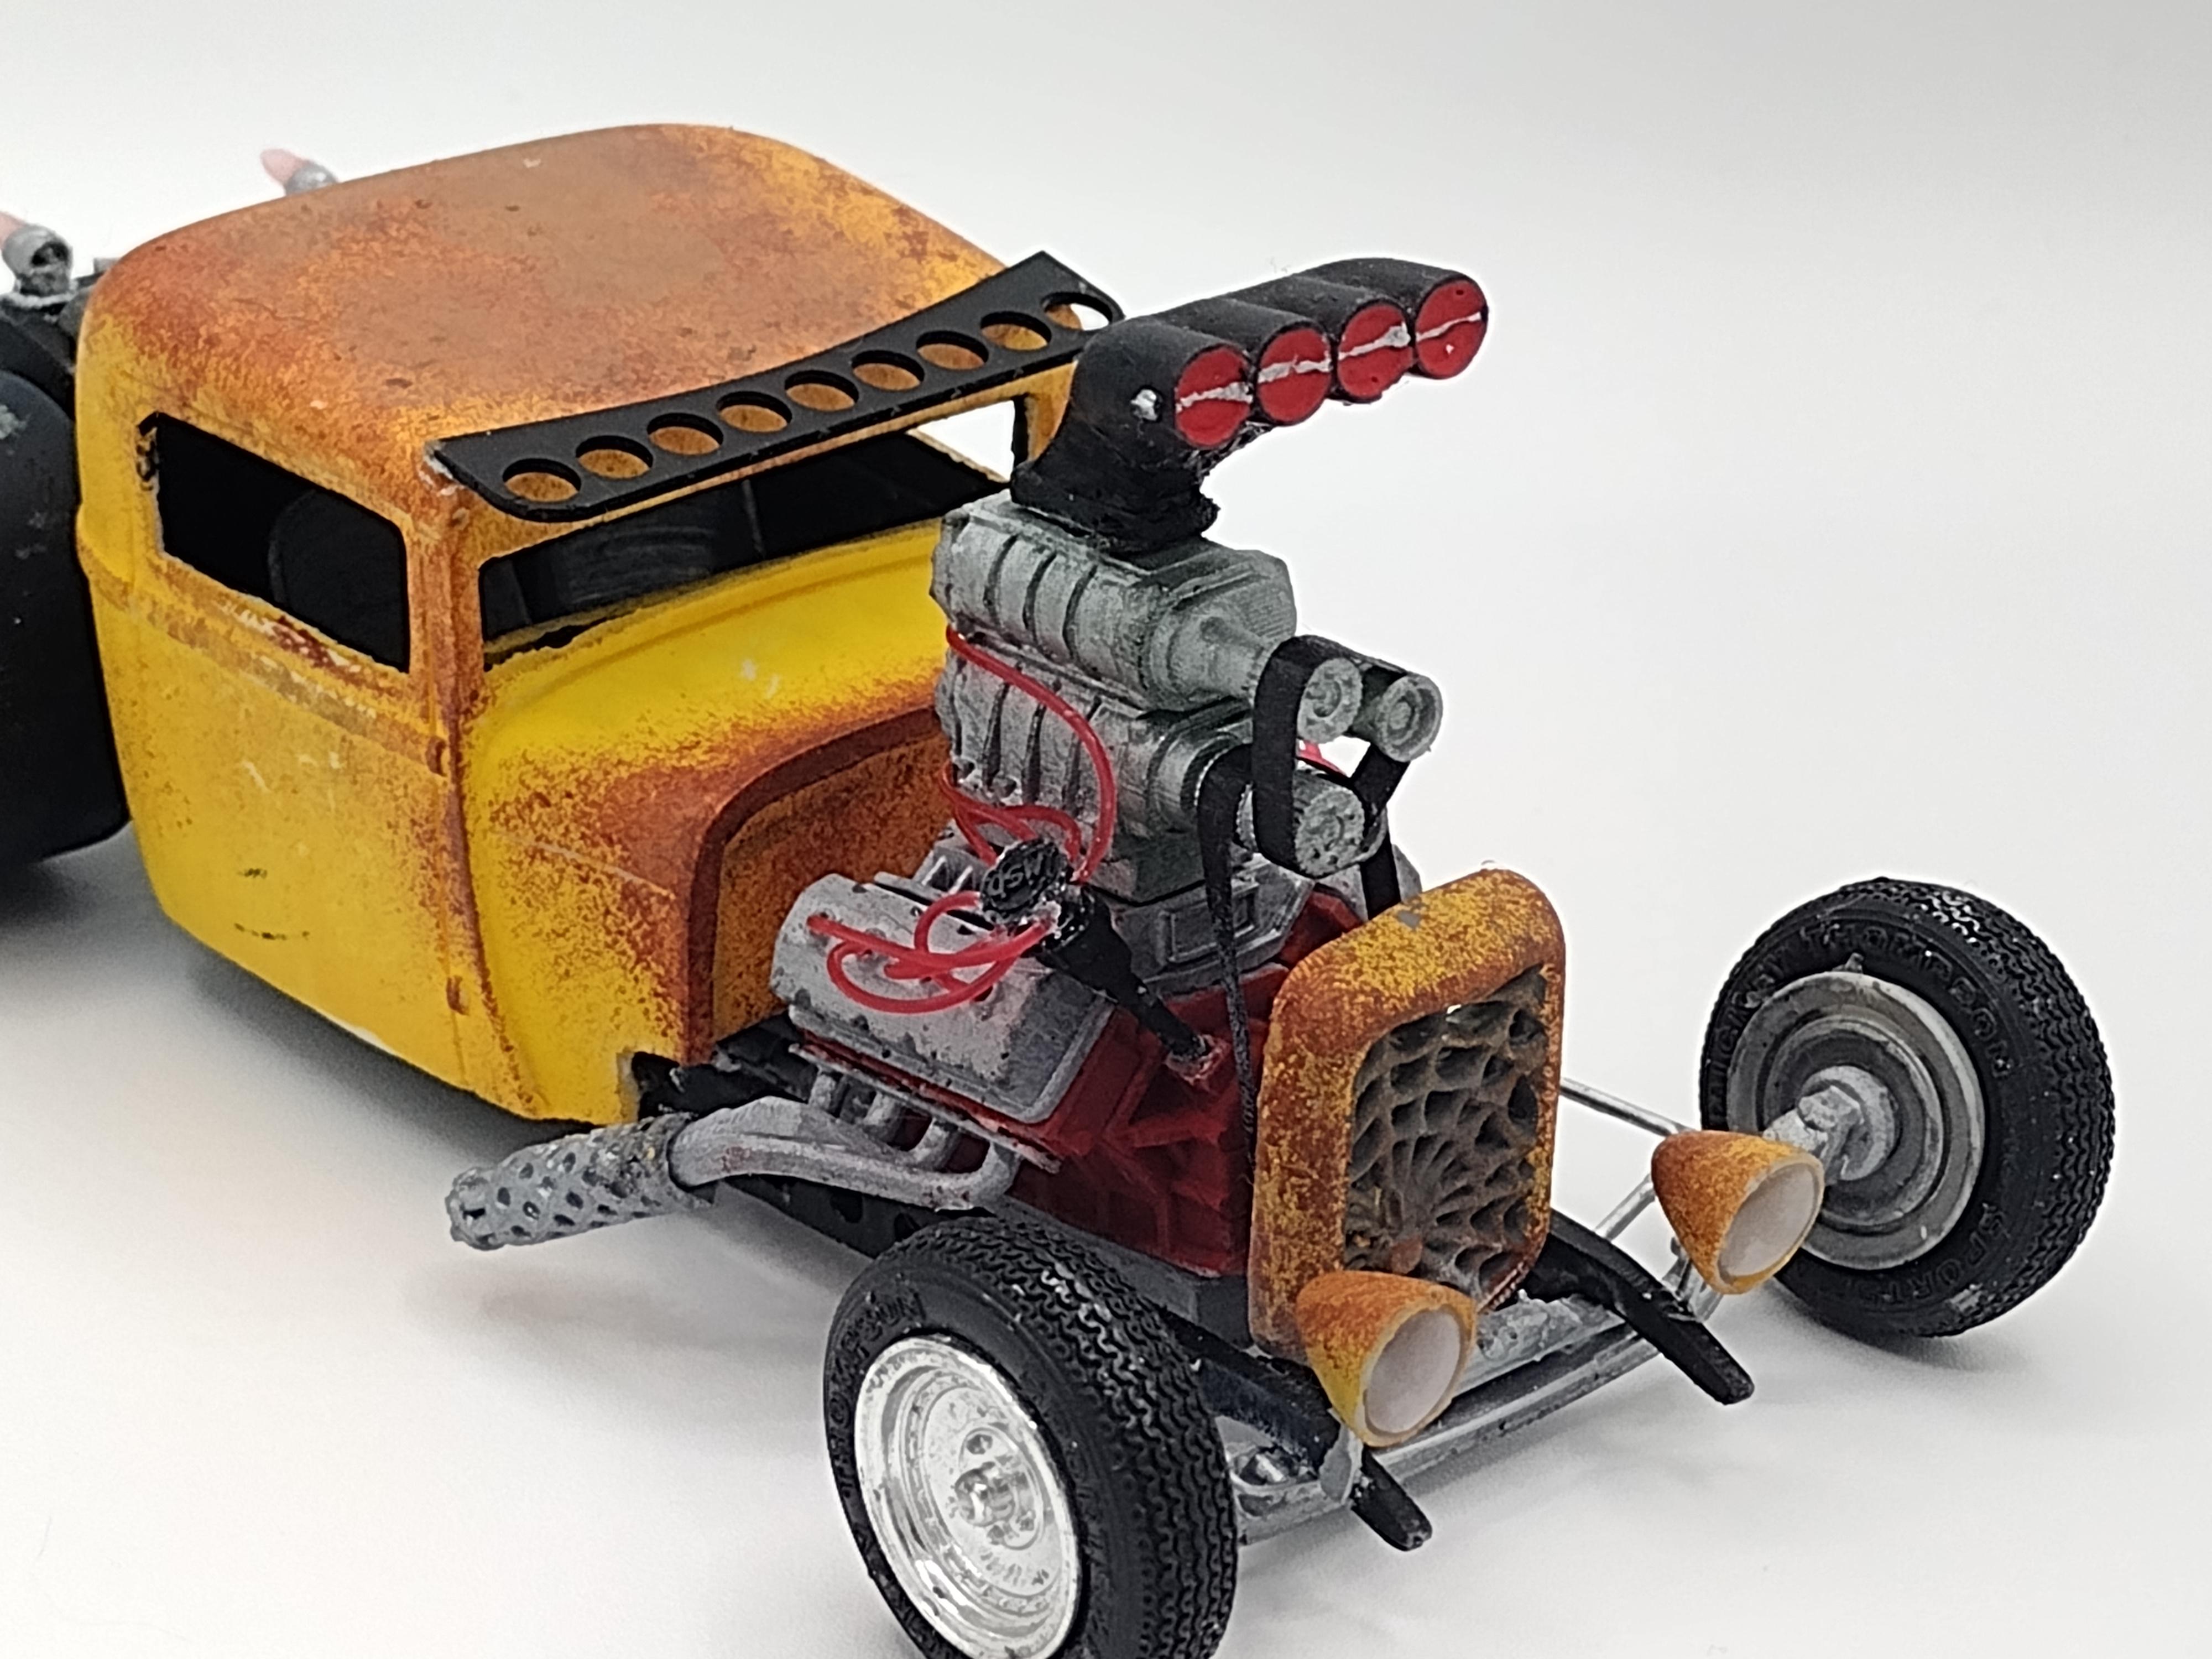
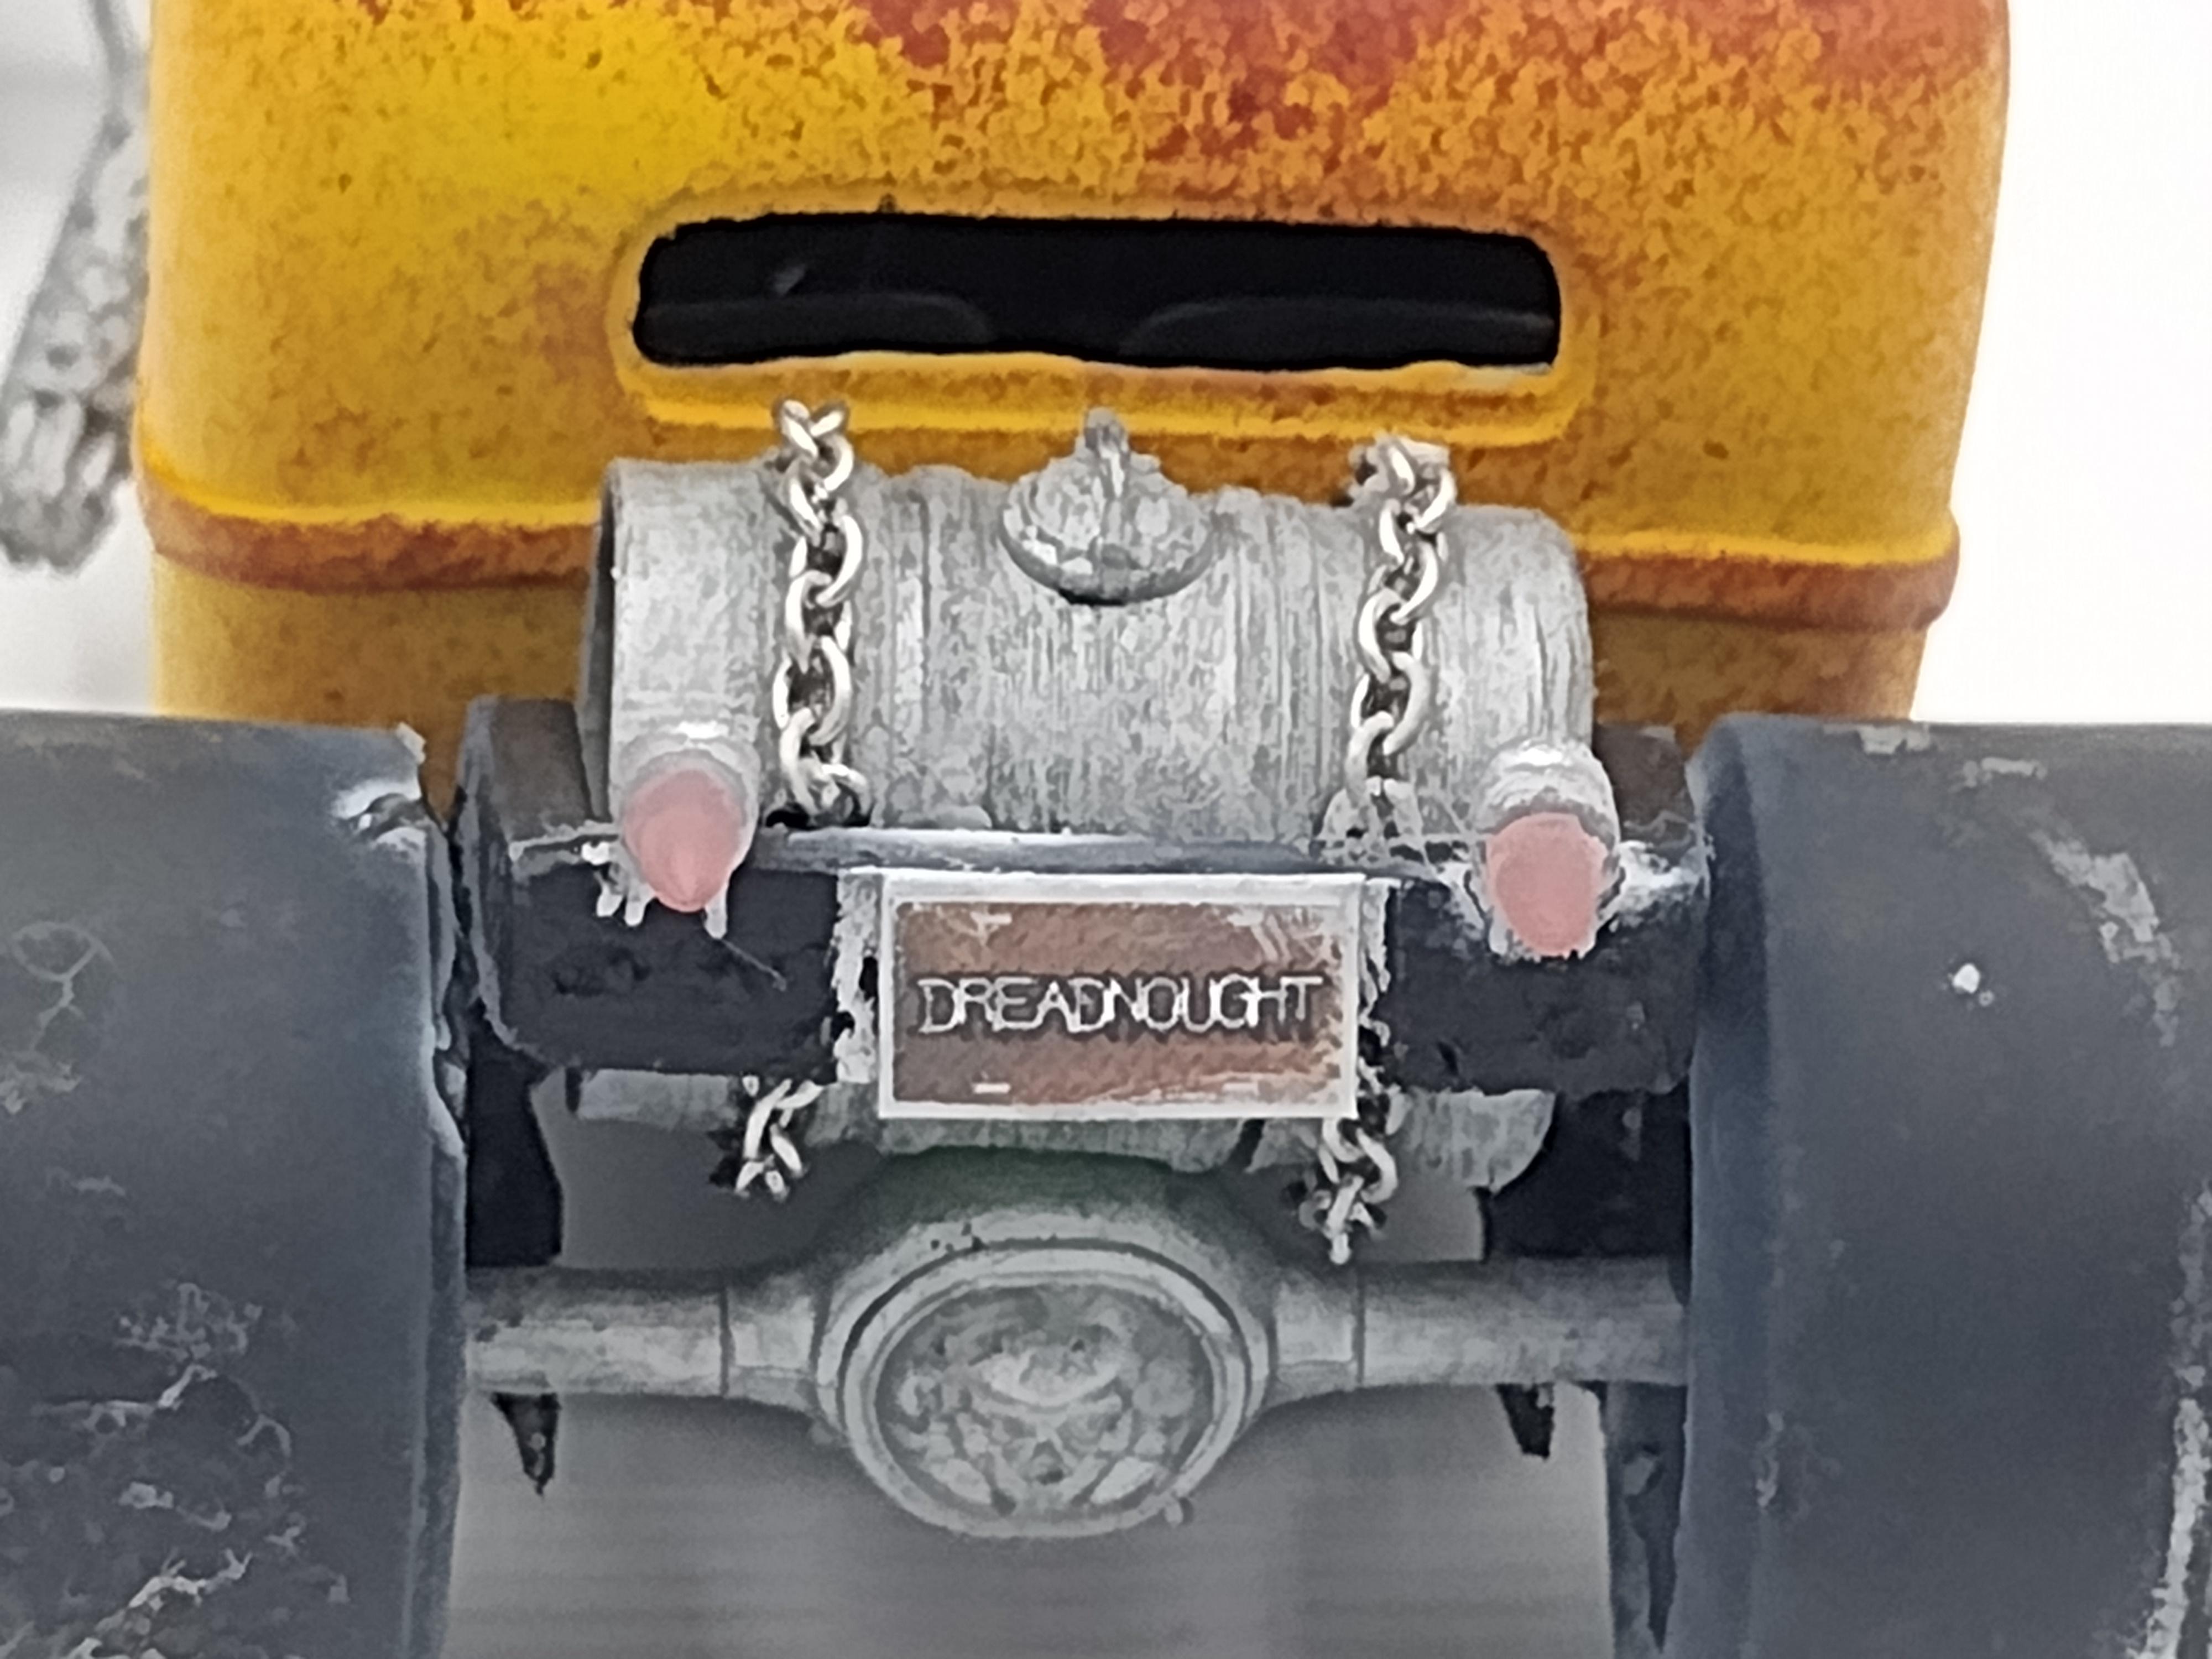
I call it DREADNAUGHT. It's painted with a yellow acrylic craft paint. the rust is two shades of brown acrylic craft paint patted on using some sponges i found at the dollar store. The body is a Jimmy Flintstone resin 1928/29 Ford Round Cab Pickup. The frame is a Nahuel Customs Tracknose frame that I 3D printed. The headlight pods are 3D printed with the lenses made from a couple of googly eyes. I even made some headlight bulbs out of some UV resin colored with a yellow dye and applied on the end of some pieces of styrene rods. The front suspension, the grill, the blower hat, the 1959 Cadillac taillights, and the rear axle are all 3D printed and designed by Nahuel Customs. The dual stacked supercharger is 3D printed. the drive belts are made from some narrow black masking tape. The spark plug wires are made from some red rubber bead cord. I attached some Black Box STL gatling gun exhaust tips that I 3D printed to the headers. the engine is a supercharged hemi from Iceman Collections that I modified for this build. the wheels and tires are salvaged from several different kits. The license plate is one of my custom designs that I did for this build. The steering mechanism is made from a 3D printed Matty's Custom Scale design and connected with a piece of styrene rod that I flattened at each end. The beer keg fuel tank is 3D printed and the chain that is on it is a real metal jewelry chain. I had to combine a Nahuel Customs fuel cap design with the beer keg design on my slicer program so that I wouldn't have to drill into the keg and also so I can 3D print both at the same time. The 1959 Cadillac Taillights are 3D printed with some clear resin that I dyed red and attached them to some piston style taillights that I also 3D printed. The visor is a Nahuel Customs design that I 3D printed and painted flat black. The interior tub is made from scratch styrene sheets and painted black. The smooth bomber style seats are 3D printed. The dashboard is another one of the Nahuel Customs designs that I 3D printed and painted the same yellow as the body. The firewall is made from scratch using a piece of a styrene sheet. The steering wheel is kitbashed and modified by cutting off the top and bottom curves of it. it is mounted to a piece of styrene rod I used as a steering column. It's hard to see but i 3D a bare foot gas pedal and a bare foot brake pedal that was designed by Nahuel Customs. I used a styrene tube to mount the rear wheels and I made a 4-link rear suspension from scratch. This build came out so nice I am going to build another one.
-
-
I call it DREADNAUGHT. It's painted with a yellow acrylic craft paint. the rust is two shades of brown acrylic craft paint patted on using some sponges i found at the dollar store. The body is a Jimmy Flintstone resin 1928/29 Ford Round Cab Pickup. The frame is a Nahuel Customs Tracknose frame that I 3D printed. The headlight pods are 3D printed with the lenses made from a couple of googly eyes. I even made some headlight bulbs out of some UV resin colored with a yellow dye and applied on the end of some pieces of styrene rods. The front suspension, the grill, the blower hat, the 1959 Cadillac taillights, and the rear axle are all 3D printed and designed by Nahuel Customs. The dual stacked supercharger is 3D printed. the drive belts are made from some narrow black masking tape. The spark plug wires are made from some red rubber bead cord. I attached some Black Box STL gatling gun exhaust tips that I 3D printed to the headers. the engine is a supercharged hemi from Iceman Collections that I modified for this build. the wheels and tires are salvaged from several different kits. The license plate is one of my custom designs that I did for this build. The steering mechanism is made from a 3D printed Matty's Custom Scale design and connected with a piece of styrene rod that I flattened at each end. The beer keg fuel tank is 3D printed and the chain that is on it is a real metal jewelry chain. I had to combine a Nahuel Customs fuel cap design with the beer keg design on my slicer program so that I wouldn't have to drill into the keg and also so I can 3D print both at the same time. The 1959 Cadillac Taillights are 3D printed with some clear resin that I dyed red and attached them to some piston style taillights that I also 3D printed. The visor is a Nahuel Customs design that I 3D printed and painted flat black. The interior tub is made from scratch styrene sheets and painted black. The smooth bomber style seats are 3D printed. The dashboard is another one of the Nahuel Customs designs that I 3D printed and painted the same yellow as the body. The firewall is made from scratch using a piece of a styrene sheet. The steering wheel is kitbashed and modified by cutting off the top and bottom curves of it. it is mounted to a piece of styrene rod I used as a steering column. It's hard to see but i 3D a bare foot gas pedal and a bare foot brake pedal that was designed by Nahuel Customs. I used a styrene tube to mount the rear wheels and I made a 4-link rear suspension from scratch. This build came out so nice I am going to build another one.
-
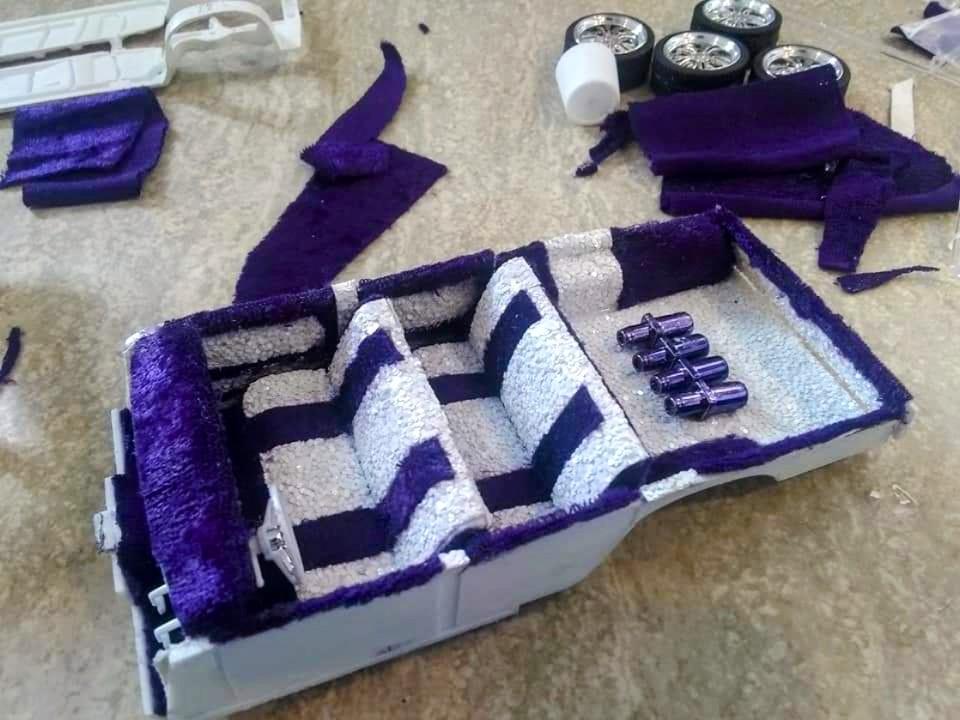
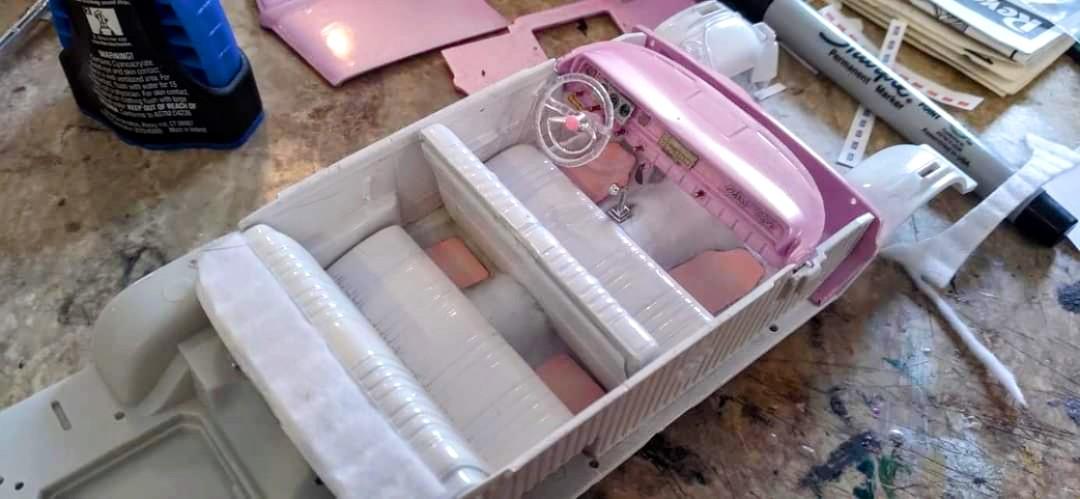
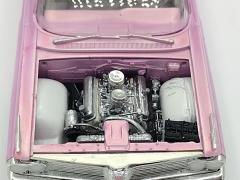
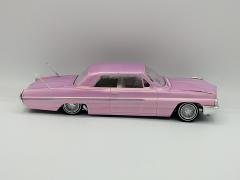
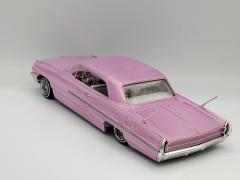
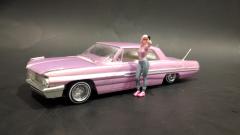
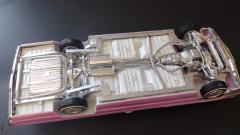
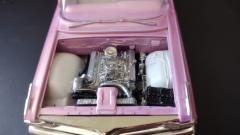
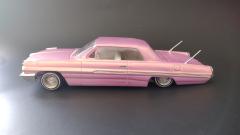
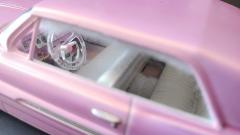
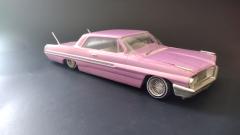
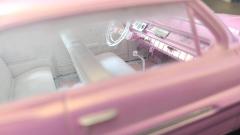
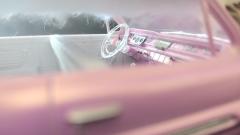
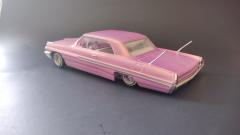
Named Pink Champagne. Painted with a Color Shift acrylic craft paint. The chrome trim is Molotow Liquid Chrome. The wheels are Pegasus chrome spokes. Engine color is a Kustom Canz Base Pearlz Snow White with as much chrome as I could cram on it. The interior features a Plush Faux Fur fabric for the headliner and a White craft felt for carpet. The floor mats I designed myself and printed them out on glossy photo paper. The gauge cluster are made of some pictures of custom gauges I found online. I used some photo etch details on the dashboard including a key with a dangling keychain in the ignition and some dashboard knobs made from some antique model ship detail parts. The horn button is a Pink Diamond Dot. The entire suspension, exhaust system, and frame is painted with Molotow Liquid Chrome. I 3D printed the figure and painted it to go with the car.
-