Alex Flint
-
Posts
418 -
Joined
-
Last visited
Recent Profile Visitors
2,400 profile views


Alex Flint's Achievements
MCM Avid Poster (5/6)
-
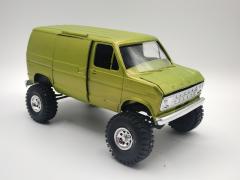
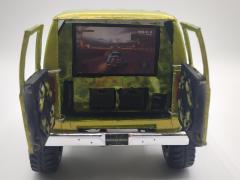
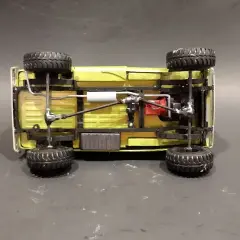
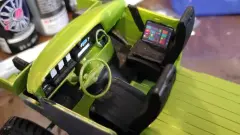
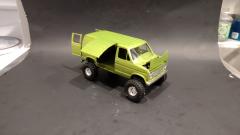
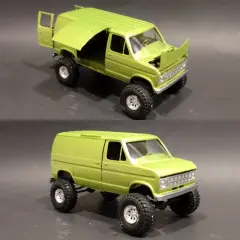
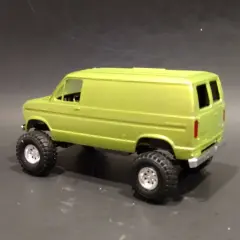
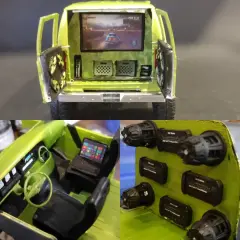
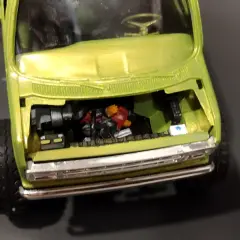
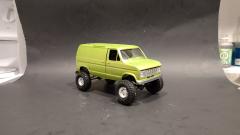
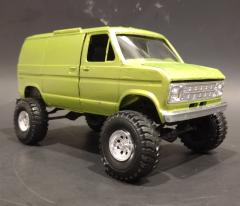
1977 Ford Econoline Van 4x4
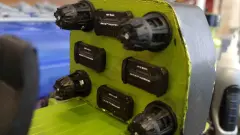
Built for a SEMA show themed build off on Instagram. Named it THE BOOM BOX. Hand painted it with a paint brush. It's painted with an acrylic craft paint call Green Flash. The wheels are spare wheels I had laying around. The leaf spring suspension is entirely made from scratch. The interior is mostly stock. I scratch built an entertainment wall in the back of the van with slots to hold a 3D printed Playstation 5, two 3D printed Playstation 5 controllers, two 3D printed milk Crates to hold games, and a 3D printed flat screen TV with a screenshot picture I found online. The back side of the wall is covered in an adhesive vinyl material I found at my local craft store. The front side of the wall has 4 JPS Customs resin Jackhammer subwoofers and 4 JPS Customs resin Jackhammer amps and painted the same color as the body. The front cab is box stock except for a 3D printed digital radio on the dashboard, a 3D printed pair of headphones on the console, and a 3D printed laptop on the passenger seat. The engine is box stock. The side door is cut open and hinged upward with hinges made from scratch using paperclips an able to stay open with the help from a piece of a round styrene rod above the door. The back doors are opened and hinged normally with scratch built hinges made from paperclips. The speakers on the inside of the back doors are 3D printed and designed by Pixel Print 3D. The door panels on the back doors are made entirely from scratch. The hood is not hinged but if it was it would be hinged to open forward. The last detail I added was a custom license plate I designed with the van's name on it.
- Updated
- 19 images
- 19 images
-
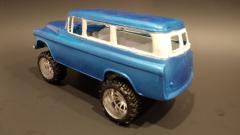
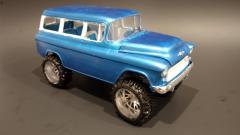
1955 Chevy Suburban 4x4
I call this one ZEUS. The body is a Jimmy Flintstone resin body and I used an AMT 1955 Chevy Cameo Pickup kit as my donor kit. The body is hand painted with a Sheer Metallic Blue acrylic craft paint color. The suspension is from the donor kit. The transfer case is pulled from a Ford Bronco 4x4 kit. The driveshafts are made from scratch. The rims are one of my 3D designed TIS 547 Off Road rims and 3D printed with some Z Force Model Works bogger tires that are also 3D printed. The rims are painted with Molotow Liquid Chrome and the tires are painted with a flat black acrylic craft paint. The frame and suspension are painted with a metallic silver acrylic craft paint. The grill is a Big Guys Garage custom 1955 Chevy Pickup mesh grill and painted white. The interior is modified from the 1955 Chevy Cameo Pickup kit interior. From the front seats on back is all made from scratch. The transmission hump is made from a scrap piece of plastic I ot from an old shaving razor box. The seats are salvaged from a couple of parts kits. The steering wheel is from an AMT Ford Phaeton street rod kit. The interior is painted the same colors as the body but reversed. The windshield is the 1955 Chevy Cameo Pickup kit glass. The engine is a 3D printed Hobbi Werks Fuel Injected 632 cid Big Block Chevy engine. The inner front fender wells are trimmed a little to fit the headers. The hood is also salvaged from the 1955 Chevy Cameo Pickup donor kit. The inner fender wells in the back are the ones that would have been used on the 1955 Chevy Cameo Pickup. Even the rear floor is actually the truck bed with a sheet of styrene laying on top of it to smooth it out. The figure is a 3DP Miniatures design and is 3D printed. The Bulldog is 3D printed too.
- Updated
- 18 images
- 18 images
-
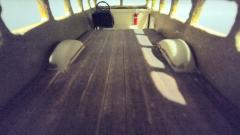
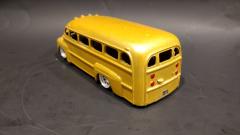
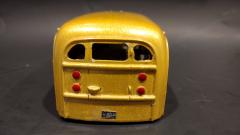
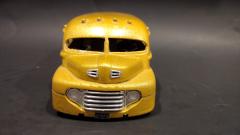
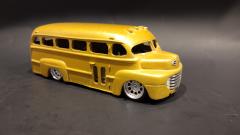
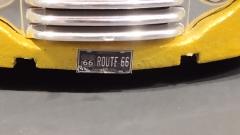
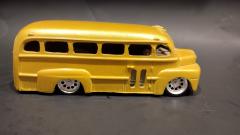
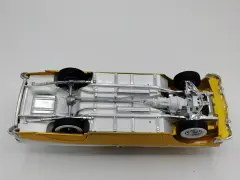
1950 Ford COE School Bus
I named this build SCHOOL'S OUT. It's a Jimmy Flintstone resin body. The body also came with an interior tub. The paint job is a Krylon Stained Glass Canary Yellow over a Krylon Shimmer Metallic Pear color and cleared with a Rust-Oleum Lacquer Gloss Clear. The grill and nose trim came from a 1950 Ford Pickup kit. The interior floor is real wood popsicle craft sticks I got at Hobby Lobby and stained with a real wood stain marker I found at my local hardware store. The seat, steering wheel, and fire extinguisher are salvaged from some spare parts I had laying around. The wheels are Pegasus 23" Magnum wheels. The license plates are scaled down from real license plates I found on Google. The taillights are actually painted with nail polish that glows under a blacklight. This is my most expensive resin model I've ever done. The body alone cost me $50. And that doesn't include the money it cost me for shipping which was around $10-$12 extra.
- Updated
- 11 images
- 11 images
-
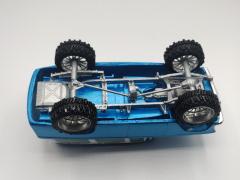
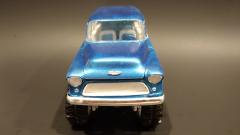
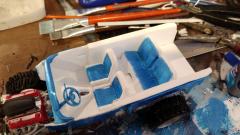
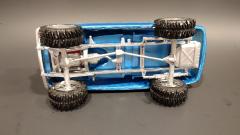
1955 Chevy Bel Air Sedan 4X4
I named it SASQUATCH. The paint is a Rust-Oleum Light Blue with Flat Black weathering sponge painted on. The bumpers have been eliminated. The KC off road is lights and the roof rack are 3D printed. The grill has been detailed using black acrylic craft paint. The 4X4 leaf spring suspension is 3D printed along with the wheels and tires, the transfer case, and the u-joints on the driveshaft. The shaft part of the driveshaft is made from scratch using a plastic straw. The engine is a 3D printed 572 Big Block Chevy engine. The battery is a 3D printed Optima battery. The interior is painted Satin Black. The carpet is some black craft felt. The seats are 3D printed Sparco racing seats. I 3D printed a NOS bottle and mounting rack to go between the seats. I also 3D printed the radio face, the steering wheel, and the steering column. I added three twin speaker pods to the rear window deck. The 3D printed accessories on the back seat are a milk crate, a 6 pack of soda cans, and a pair of headphones. I also 3D the bare foot gas and brake pedal. This is one of my favorite builds I've done.
- Updated
- 7 images
- 7 images
-
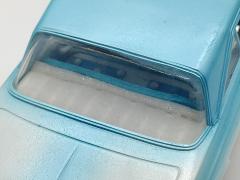
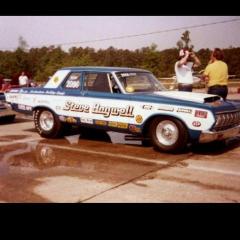
1964 Plymouth Belvedere
I named this one ALPENGEIST which is a German word meaning GHOST OF THE ALPS. I airbrushed it with acrylic craft paint that I thinned out using windshield washer fluid. It works perfectly and doesn't affect the color of the paint. The colors I used were a Shimmer White base with an Ice Blue fades. The front seats are salvaged from a different kit and upholstered with a Light Blue craft foam with White diamond dots to simulate snowballs. The rear seat, door panels, and the dashboard are upholstered with extra fine glitter White craft foam and Light Blue craft foam with White diamond dots to simulate snowballs. The piping is a Light Blue string ribbon I got at Hobby Lobby. The radio is a photo etch detail part. Instead of fuzzy dice hanging from the rear view mirror I decided to make snowballs out of some crystal bead I painted them with a Shimmer White acrylic craft paint. The string on them is a thin piece of White embroidery thread. The carpet is White craft felt. The headliner is a Light Blue craft felt. The rear window carpet is a White embossed craft felt. The inner headlights were purposely left off to give the look of cold air intakes. The license plate is one I custom designed for this specific build. The chrome details on the taillights are painted with Molotow Liquid Chrome using a toothpick to apply it. The wheels are Pegasus Sovereigns. The engine is fully plumbed and wired. The spark plug wires are Light Blue bead wire. The plug wire boots are tiny Black beads. The battery terminal connectors are gold crimp cord ends. The battery cables are Black bead wire for the negative side and Red bead wire for the positive side. The fuel line is a clear stretchy bead cord with a White tube bead used for a fuel filter. The brake lines are Light Blue bead wire made into a coil by wrapping a tiny screw with the wire. The ignition wire is a Light Blue bead wire and the ignition coil is a piece of aluminum tubing. The radiator hose is a Silver braided bead wire. The carburetor spring is a coiled Black bead wire and connected to a couple of watch brackets make it look more realistic. The exhaust system and the suspension is painted with Molotow Liquid Chrome.
- Updated
- 11 images
- 11 images
-
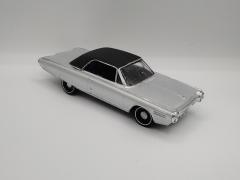
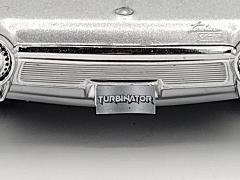
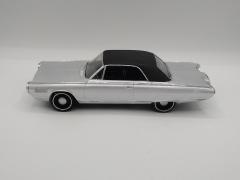
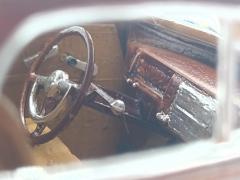
1964 Chrysler Turbine
I call it THE TURBINATOR. It's a Jo-Han snap kit. I painted the body with a Paint Huffer Metal Flake Silver Surfer color with a white base. The molded on chrome trim is painted with a Molotow Liquid Chrome marker. The vinyl top is painted with a Flat Black acrylic craft paint and applied with a paint brush. The interior is painted Gloss Black to give it a leather look and detailed with a Molotow Liquid Chrome marker. The undercarriage is also painted with a Flat Black acrylic craft paint and detailed with a Molotow Liquid Chrome marker. The original steering wheel is swapped out for a parts box steering wheel to go along with the street machine look. The wheels and tires are 3D printed and painted with a paint brush and detailed with a Molotow Liquid Chrome marker. The license plates are one of my custom designs. I accidentally broke the hood ornament off so instead of trying to fix it I covered up the break with Molotow Liquid Chrome. I used a custom rendering I found on Instagram as my reference for this one. This build was so easy to do it took me almost 24 hours to complete it.
- Updated
- 7 images
- 7 images
-
1941 Plymouth Coupe
I call it SEXUAL CHOCOLATE after the Paint Huffer Metal Flake color I used of the same name. The wheels are custom 3D printed Vellano wheels with modified Z Force Model Works tires. All the chrome trim is painted with Molotow Liquid Chrome. The suspension and engine parts are also painted with Molotow Liquid Chrome. The interior is painted with a Tan acrylic craft paint. The interior door handles, window cranks, and foot pedals are 3D printed by Iceman Collections. The dashboard, steering wheel and column are painted with the same paint as the body. The carpet is a brown craft felt. The headliner is also craft felt. The floor mats are custom laser engraved on some Tan faux leather with the word KING on the driver's side and QUEEN on the passenger side. The radiator hose is made of a hollow rubber bead tubing with a piece of bead wire inside to hold its shape. The air filter and the taillights are painted with the same red acrylic craft paint. The engine block and transmission are painted with a Brown acrylic craft paint similar to the body color. The undercarriage is also painted with the same color as the body. The grill is detail with a Black acrylic craft paint.
- Updated
- 13 images
- 13 images
-
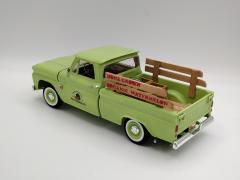
1964 Chevy C10 Fleetside Pickup
I call this build MELON BOMB. I built it as a Watermelon Farm truck. This is a Revell kit and I was very impressed with how well it went together. The paint is a Rust-Oleum Gloss Apple Green over a Rust-Oleum Flat White primer with a Rust-Oleum Gloss Clear Lacquer over the top. The decals on the doors are custom made from a picture I found on Google and printed out using an inkjet printer on some clear label sticker paper. The decal is also cleared over. The wood bed and rails are real wood Popsicle sticks with a real Golden Oak wood stain painted on. I wanted the rails to have a little waterfall look to them so I very carefully cut one corner off each Popsicle stick and sanded them smooth to get the rounded shape. The chrome trim in the bed is some styrene rods I got from Hobby Lobby and painted with Molotow Liquid Chrome. The lettering on the bed rails are painted on using a custom stencil I cut out on a Silhouette vinyl cutting machine and painted with some red acrylic craft paint and a round paint sponge I got from my local Dollar Tree store. The interior is painted with a Red acrylic craft paint using a paint brush and the same color I used on the body for the dashboard, door panels, steering wheel, and steering column. The seat inserts are made with some watermelon seed ribbon I found on Etsy. The same ribbon is also used on the lower section of the door panels where as the same Red paint that is used on seat is painted on the upper part of the door panels. The fuzzy dice that are hanging from the rear view mirror are 3D printed and painted to match the interior with the same green color that was used on the body for the dots. The string holding them on the mirror is some green colored embroidery thread. The carpet is Red craft felt. The seatbelt buckles are 3D printed and the seatbelts are made from some red ribbon I got from Hobby Lobby. The gauges cluster is made from a picture I found on Google and printed out on some glossy photo paper. All the silver parts of the undercarriage are painted with a silver acrylic craft paint. The engine is painted the same color as the body with the red details. The battery is a 3D printed Optima battery. The radiator hose is made from some hollow rubber bead tubing with a piece of bead wire inside to keep it in position. All the tiny red details on the engine, interior, and chrome trim are all painted by hand. The watermelons and the wooden crates are 3D printed and hand painted. The license plate on the back is one I custom designed and is printed out on some glossy photo paper. The wheels are painted the same color as the body. I tried to make this build look lightly customized but at the same time as a working farm truck that you'd see at a farmers market. This is one of my best builds and definitely one of my favorites.
- Updated
- 16 images
- 16 images
-
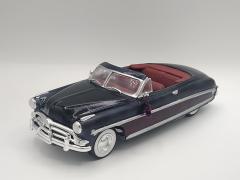
1952 Hudson Hornet Convertible
I call it BLACK WIDOW. I painted it Tropical Glitz Candy Black and Candy Black Cherry over a Paint Huffer Silver Surfer. The trim is painted with SMS Hyperchrome Cold Tone airbrush paint. The interior is hand painted with acrylic craft paint using a paint brush. The raccoon tail hanging from the side mirror is a piece of a white pipe cleaner colored with a couple of Sharpie markers. The steering wheel is salvaged from my parts box. I don't know what kit it came from though. I'm assuming a 1940 Ford. The Fedora hat is 3D printed. the wheels and tires came from two separate kits. The main base for the undercarriage is painted with Flat Black acrylic craft paint. The engine is completely box stock.
- Updated
- 6 images
- 6 images
-
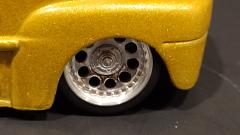
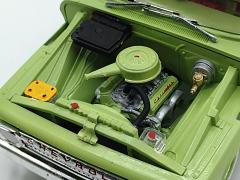
1956 Chevy Bel Air
I call it GOLD RUSH. It's painted with Paint Huffer Gold Rush and Gloss White with some Tropical Glitz Frostbite metal flake sprayed on top. The chrome trim is painted with SMS Hyperchrome Cold Tone airbrush paint. The Interior is painted like the body. The front bench seat is pulled from a 1955 Chevy Bel Air Sedan kit. The dashboard is from a different 1956 Chevy Bel Air kit because the original kit was missing one. The undercarriage is painted Gloss White with SMS Hyperchrome Cold Tone details. before I sprayed on the chrome I had to mask off the white using silly putty. The wheels are 3D printed and came from JaysResinWheels1948 on eBay. The tires came in two parts. The whitewall inserts and the tires which are painted with acrylic craft paint using a paint brush. The fender skirts are also 3D printed and came from 3D Scale Parts. The steering wheel I 3D printed myself and painted it with SMS Hyperchrome Cold Tone paint. The engine is box stock except for the radiator hose which is made from a piece of a hollow rubber bead cord with a wire inside so it will hold its shape. The hardest part of this build was attaching the front bumper. Other than that, it was a good kit.
- Updated
- 6 images
- 6 images