

tyrone
-
Posts
2,781 -
Joined
-
Last visited
Content Type
Profiles
Forums
Events
Gallery
Everything posted by tyrone
-
Great Job Ryan...
-
 Thanks Jeff... Just noticed the right side mirror is crooked.... It was just tacked on for mock up pics...lol...
 -
Thanks alot fellas for the kind words... I really appreciate it.. I've put the clear coat on and gave it a few days to dry.. Yesterday I polished the body to clean some trash that was in the clear... I've added the running boards also.. heres a few pics.. thanks for looking and comments welcome...
-
1958 Plymouth Pro Street Complete 4/14/13
tyrone replied to am73grand's topic in WIP: Drag Racing Models
Turned out Awesome... Great Job Ron.... -
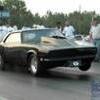
This Nova is bad to the bone..... great job....
-
One of the best looking Nova's I've seen.... you nailed it... I've done a couple of these builds, I also did a yenko version and with with green for the color.. In spite of the flaws.. I'll take the R/M kit over the AMT old pro kit any day.....
-
-
Great start... should be an awesome build... keep the pics rolling...
-
Man that is a real cool looking build, I love the weathering too... you nailed it...
-
Awesome... I love the last pic the most of all.......
-
This was a very cool project to see unfold... I like the finished result... and I like your execution......Fabulous work..
-
Procharged Corvette Z06 - updated 4/10 Finished!
tyrone replied to shucky's topic in WIP: Model Cars
Looks great Mike... I really like the detail on those headlights... Can't wait to see more pics... -
Looks great Mike.. I light the black bumpers and tailight bezels......
-
Charles Carpenters 1955 Chevy Pro Mod......FINISHED...06/09/13
tyrone replied to tyrone's topic in WIP: Drag Racing Models
here's a few more... -
Charles Carpenters 1955 Chevy Pro Mod......FINISHED...06/09/13
tyrone replied to tyrone's topic in WIP: Drag Racing Models
Thanks Chris.. I appreciate it bro... Alright they say all good things come to an end.. and unfortunately my time off from work has come to an end.. it's back to work tomorrow..smh... well on the 55 I got the the transmission and the shifter detailed and put in the car.. I also made some brackets, and added dzus fasteners to them below the headers to for the front end, I also added some to the trunk area and to the cowl area for the front end.. I got the battery and cables installed, and I added the anchor for the rear chutes.... the front end is also a one piece now.. thanks for looking and comments welcome... -
cool builds Ron.....
-
Great job on this build Richard... you style of building/detailing is clean and neat.... good stuff...
-
thanks fellas... I really appreciate it.... Jonathan I used the testors model putty in the grey and white tube...
-
Great looking 67 Camaro.... I think it turned out really good....
-
Thanks fellas for all the kind words ... I appreciate it.... Carter I did not measure anything when I did this... I basically just went with what I thought was right...lol... I cut the end off as close to the rear of the extended cab glass as I could, and I cut the donor Cab off as close to the front as I could... If that make sense..lol... Well the first bout with the paint did not fair out so well... So I dunked it in the purple pond and started over heres's a few pics I'm gonna let it dry a few days then wet sand it and then lay on the clear... thanks for looking and comments welcome....
-
Looking great Richard...
-
Charles Carpenters 1955 Chevy Pro Mod......FINISHED...06/09/13
tyrone replied to tyrone's topic in WIP: Drag Racing Models
Thanks Dave... I've always liked this paint scheme the best of the two... glad you like it.. Bill.... thanks bro.. I appreciate you checking in on it.. Brad... thanks alot man for your help... I remember you and Dave (comp1839) coming to the rescue on the El General pro mod build also.. thanks again....if there's anything I can do for you just yell..... -
Charles Carpenters 1955 Chevy Pro Mod......FINISHED...06/09/13
tyrone replied to tyrone's topic in WIP: Drag Racing Models
I really need some help guys... IF there is anyone that can make a few decals for me......OR knows someone that can make them I would certainly appreciate it... here's a pic of the ones I would need.. If trades or cash is needed it's no problem... Thanks in advance... here's a pic of the ones needed..... -
Charles Carpenters 1955 Chevy Pro Mod......FINISHED...06/09/13
tyrone replied to tyrone's topic in WIP: Drag Racing Models
Thanks John and Bill I apppreciate you guys checking in on it.... I get a lot of motivation and encouragement from all of you guys and I really appreciate it... Well I've been making some progress on this one... I made a fire tank, by one of the tanks from the Chi-Town hustler kit.. it took a lot of grinding with the dremel tool and some sanding but I got it to work... I've also got the fuel cell painted I still need to plumb it and mount the fuel pump.. I've got the seat painted and covered, I still need to do the harness. I got the coil and wire installed, and I played around with the headers with some more shades of alclad to get a little closer to the ref pics.. the I sharpened the tip of a toothpick and painted on the weld beads... I decided to cut the front end off after all my plan is to now glue the hood on and make it a one piece... thanks for looking and comments are welcome... -
Great work John... the seat belts look great..... as does everything else....