

doomcrew
-
Posts
418 -
Joined
-
Last visited
Content Type
Profiles
Forums
Events
Gallery
Posts posted by doomcrew
-
-
Very nice.
-
Thanks guys, really appreciated.
-
Haven't been on here for a long while, what with life getting in the way. Moving house, building models and props for Pinewood Studios etc.
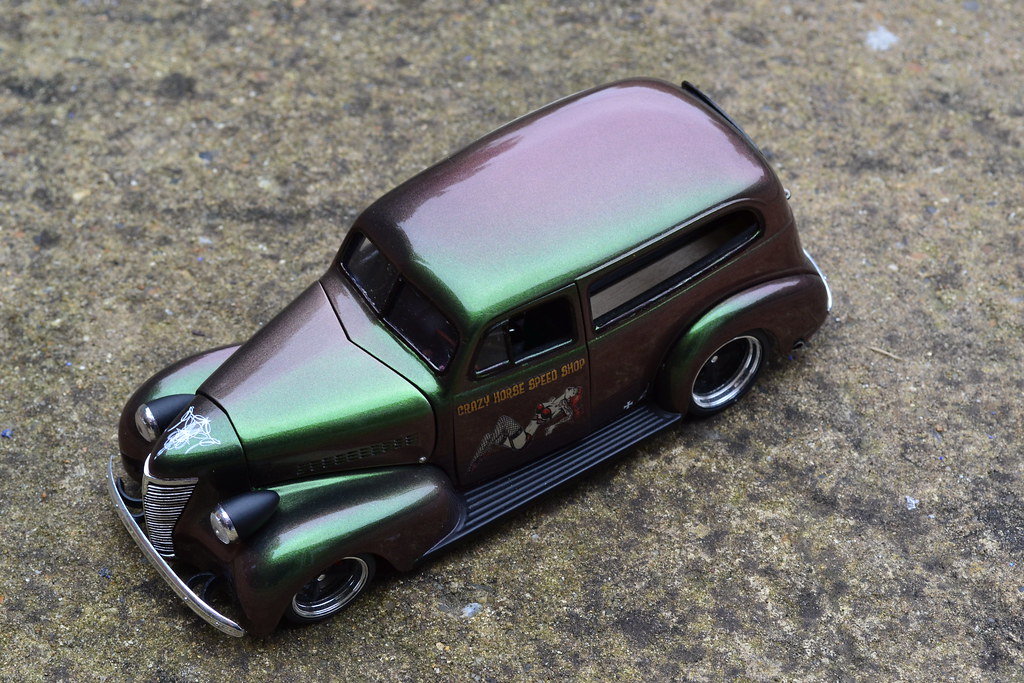
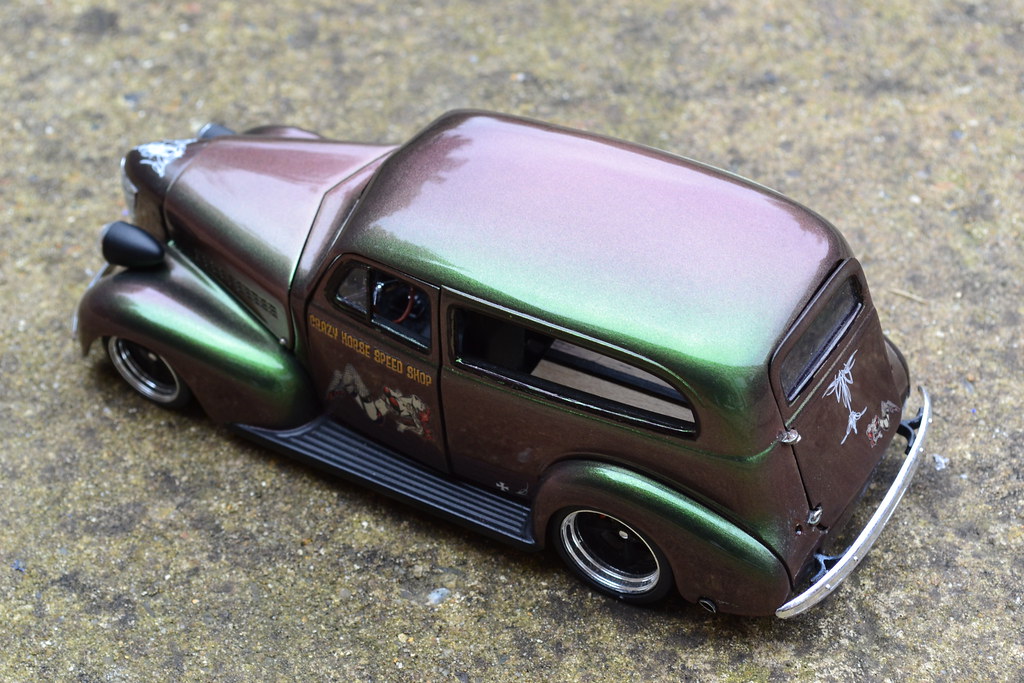
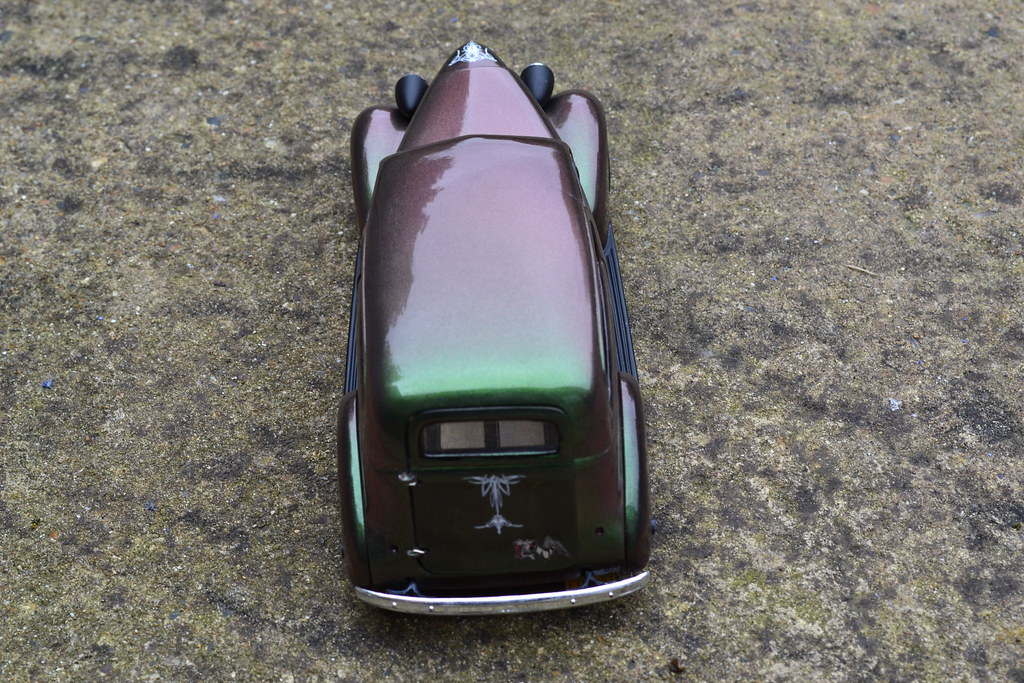
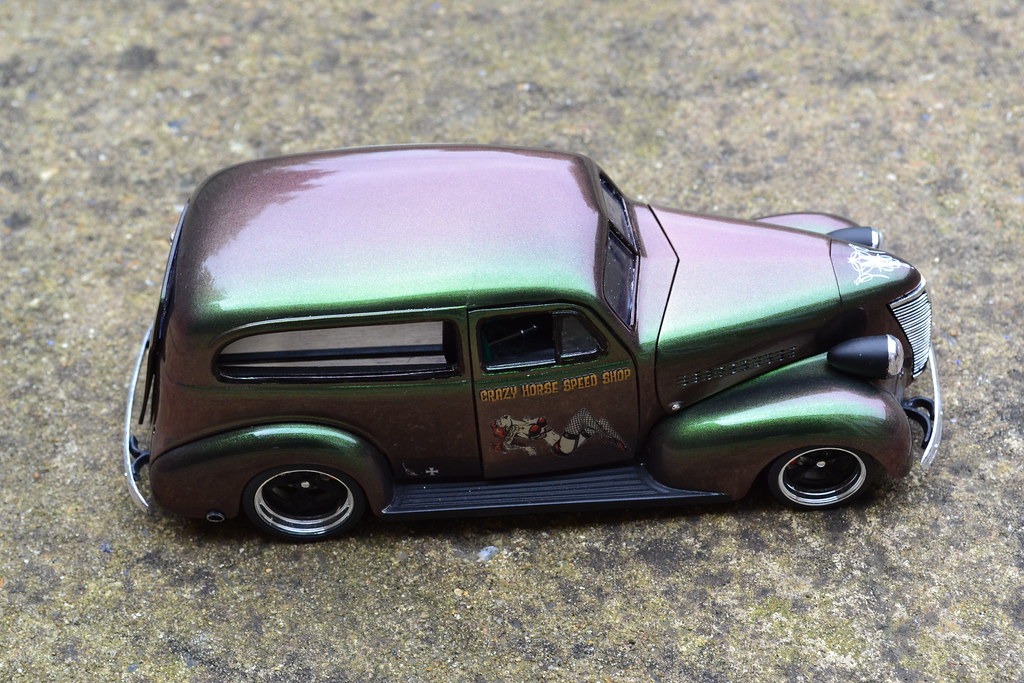
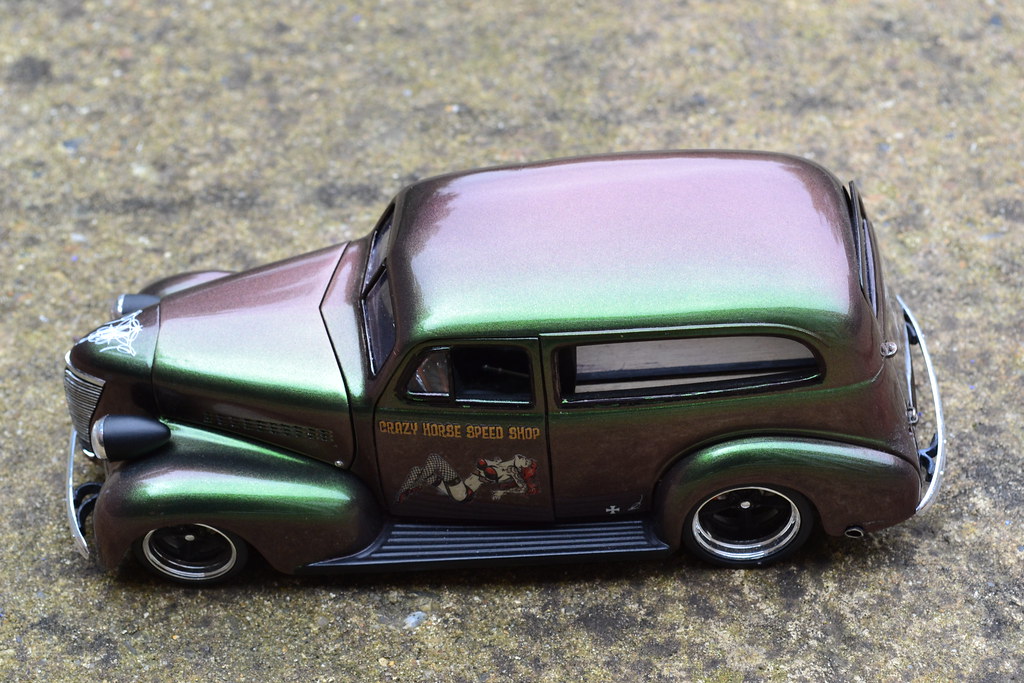
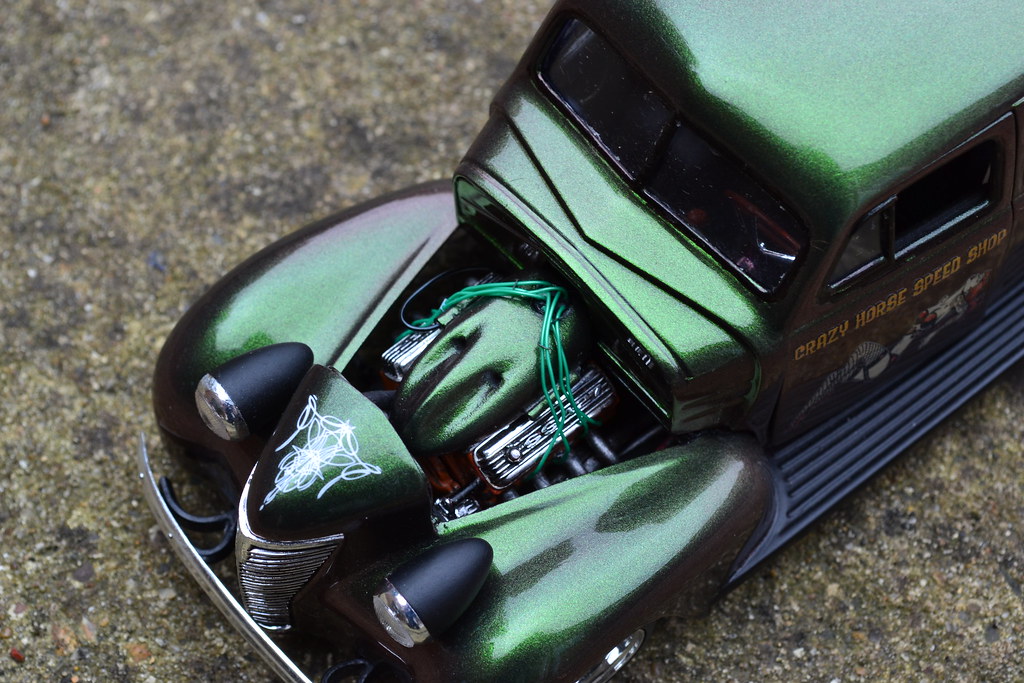
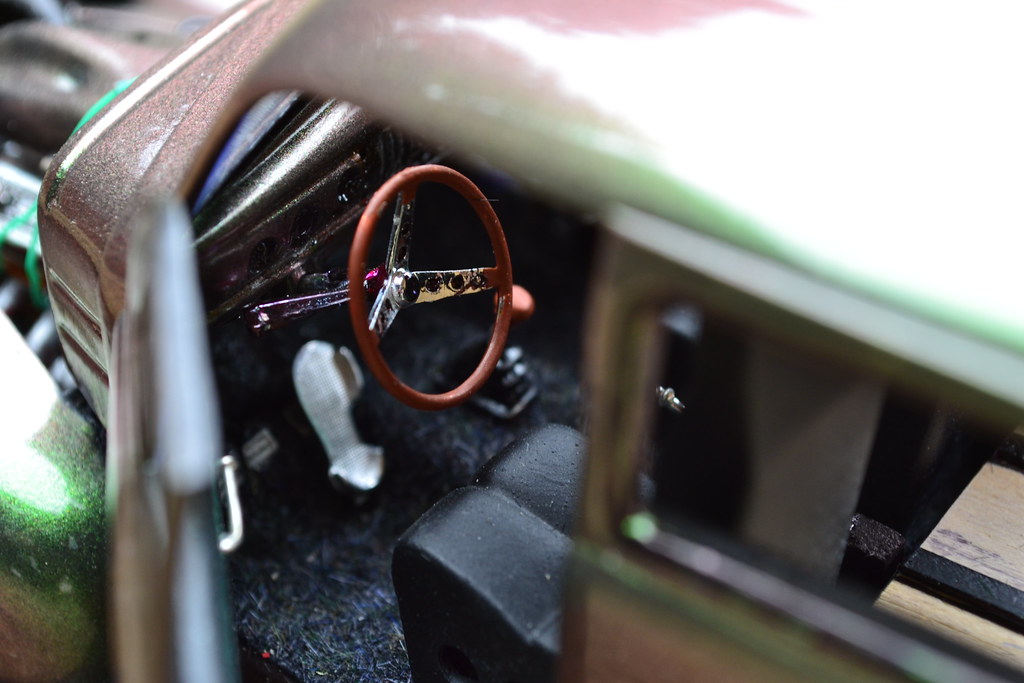
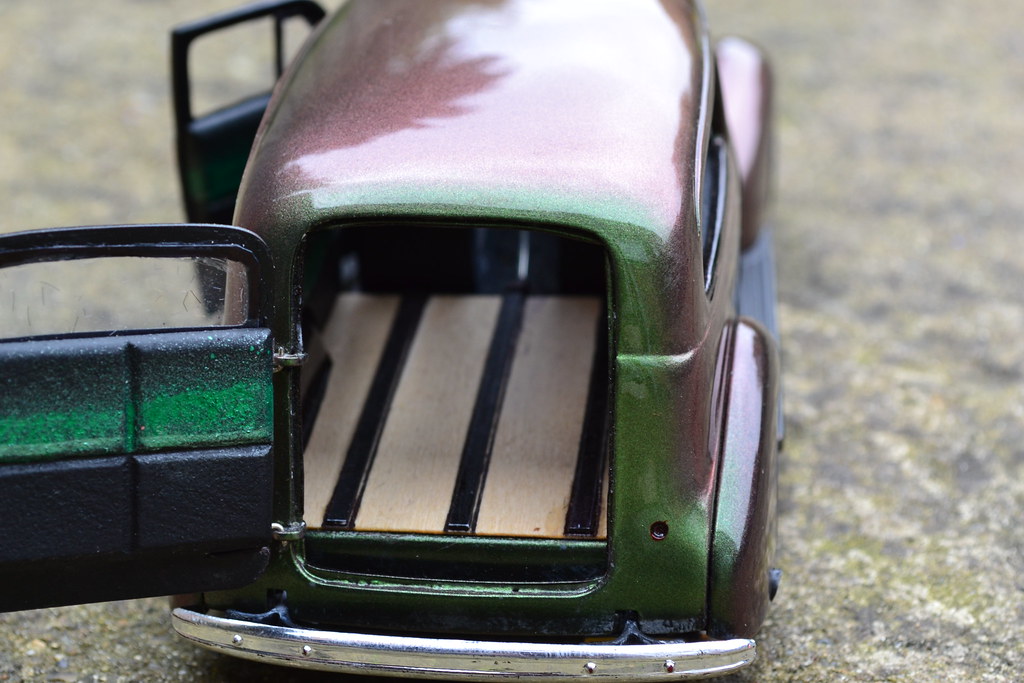
But managed to get this built, a 39 Chevy Wagon. Did a few mods and scratchbuilt parts for this, and the wheels are from Mr Steve Zimmerman with my own turned rims for the back of the wheels. I used real wood for the floor, chemiwood for the air filter, door cards and interior panels. Paint is flip flop over a black base.
 DSC_0130 by doomcrew, on FlickrDSC_0131 by doomcrew, on FlickrDSC_0132 by doomcrew, on FlickrDSC_0134 by doomcrew, on FlickrDSC_0137 by doomcrew, on FlickrDSC_0138 by doomcrew, on FlickrDSC_0140 by doomcrew, on FlickrDSC_0141 by doomcrew, on Flickr
 -
Thanks for the kind comments everyone, I very much appreciate them. Chemiwood is also known as Renshape and it's great stuff to model with.
-
This was my last project, a 41 Chevy rat truck. The chassis is one I have had around 30 years, and I think it's from an old MPC Datsun pick-up, but not sure. The grill is resin and modified. The pick-up bed is scratch built from real wood. The wheels are old Herb Deeks pewter wheels. The air bags were made from carved chemiwood, turned aluminium and heat shrink tubing. I used the salt technique for the weathering.
DSCF0210 by doomcrew, on FlickrDSCF0200 by doomcrew, on FlickrDSCF0194 by doomcrew, on FlickrDSCF0199 by doomcrew, on FlickrDSCF0197 by doomcrew, on FlickrDSCF0201 by doomcrew, on FlickrDSCF0203 by doomcrew, on FlickrDSCF0207 by doomcrew, on FlickrDSCF0219 by doomcrew, on FlickrDSCF0231 by doomcrew, on FlickrDSCF0193 by doomcrew, on FlickrDSCF0195 by doomcrew, on Flickr -
Appreciated guys, one last pic for you before I button it up the next few days once and for all. I am going to have to change the valve cover breathers as they're all wrong for the dry sump setup on the engine. I'll make a pair that route to the puke tank I just made. Cheers,
Ok Tim, stop showing us pics of the real engine, come out of your garage and leave your full sized car alone. :-)
Joking aside, this is some serious detailing my friend, and your machining skills are top notch. This is with out doubt the best 1/25th scale engine I have ever seen. Without knowing the scale, this would pass for a much larger scale engine. Superb.
Steve
-
@Codi inspiring stuff as always, love the work on the rear end.
@MitchP I put the CF decal on the hat in two halves, and used decal softener on it, so it could conform to the shape.
I let the first half dry, then repeated the process, when dry, I trimmed it, then cleared it.
Steve
-
I used cellulose clear straight out of the can over Scale Motor Sports CF decals on this resin injector hat. I did the same on the panels and these were on my 1/16th scale Soul Reaper Pro-Mod Camaro and I had no problems.
-
I'm not going to repeat what has already been said, or maybe I will, as this is a superb build.
Excuse me while I lift my jaw off the floor and put my eyes back in.
Looking forward to the next instalment and glad to see you are back on it after your surgery.
Steve
-
Hi Tim. I am in total awe of this build, this is top notch stuff, and given me lots of ideas of machining parts.
Good luck with your hand surgery, I know how that feels, had surgery twice on my right hand/wrist, and still not right.
Look forward to the next instalment of this superb build, after your have recovered of course.
Steve
-
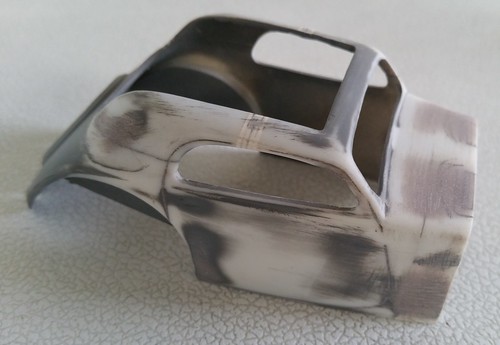
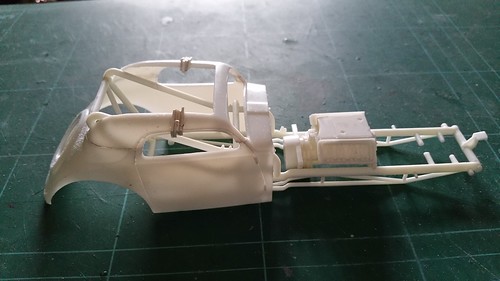
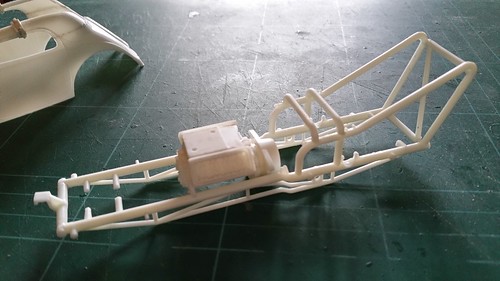
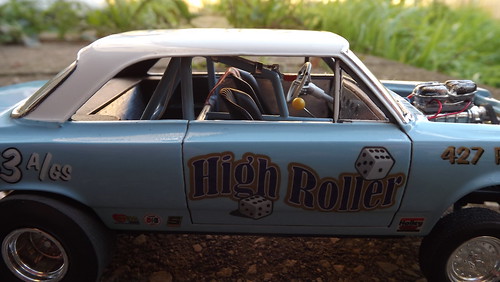
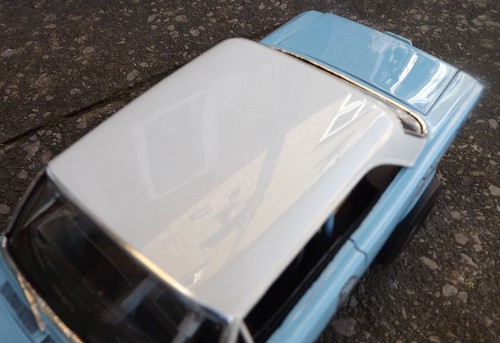
The Fiat is done.
-
Well I don't think the insurance would cover accidental alien collisions, so the owner would have to sell.
-
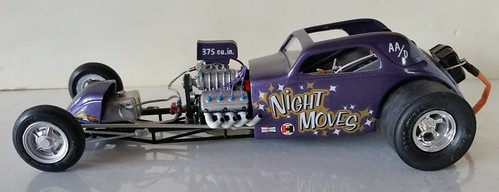
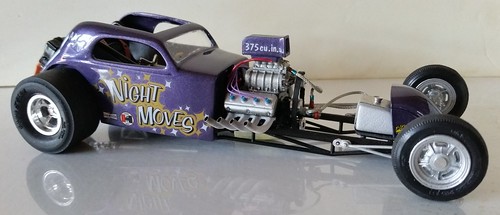
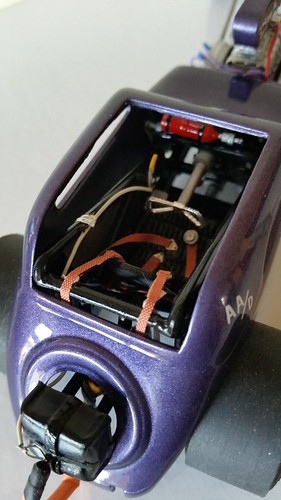
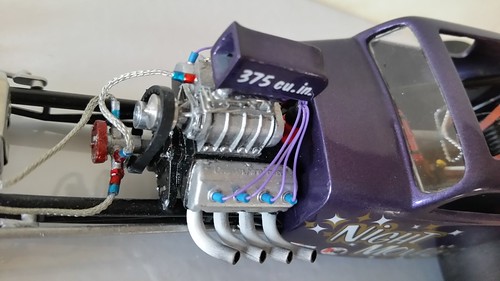
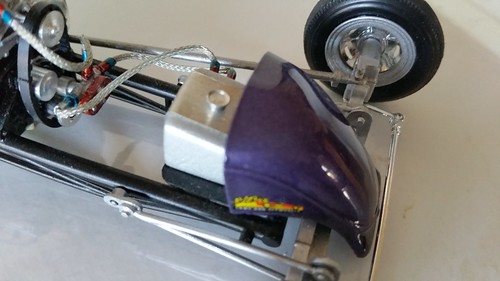
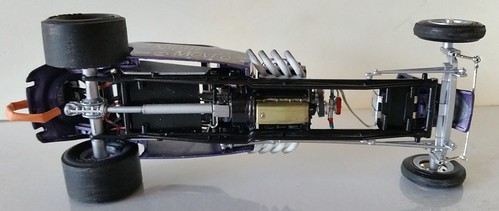
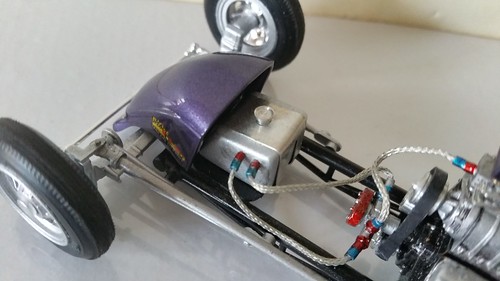
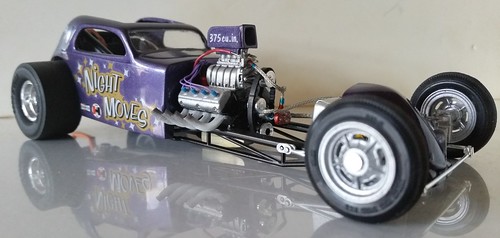
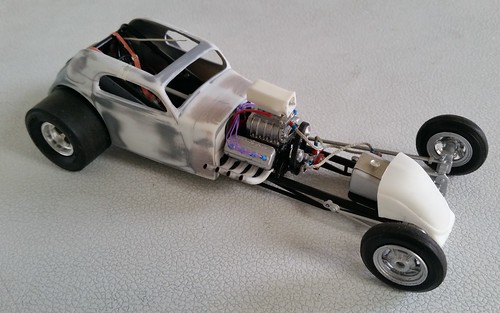
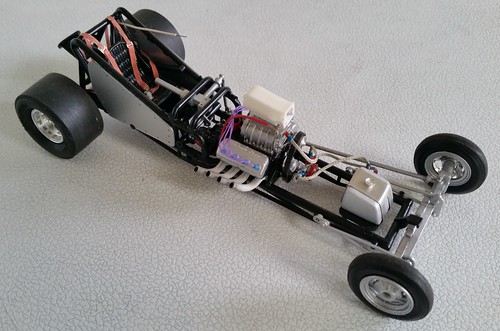
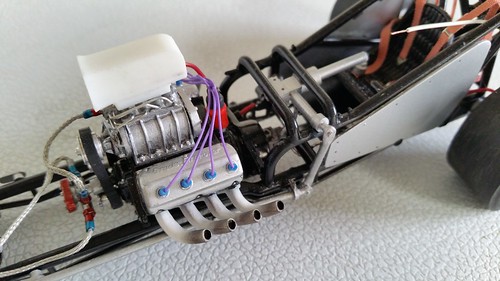
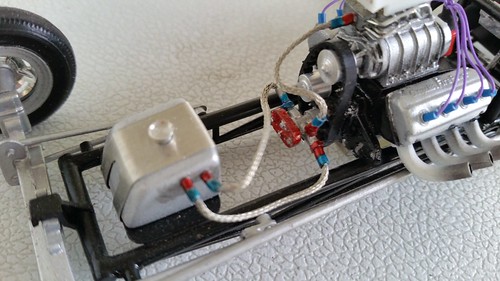
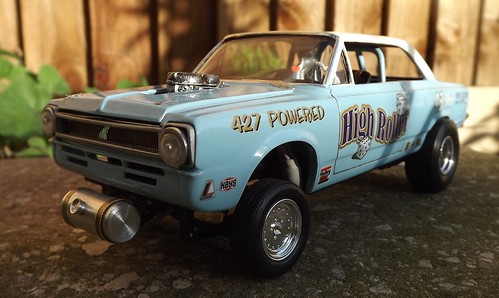
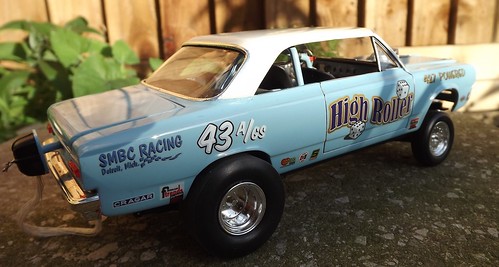
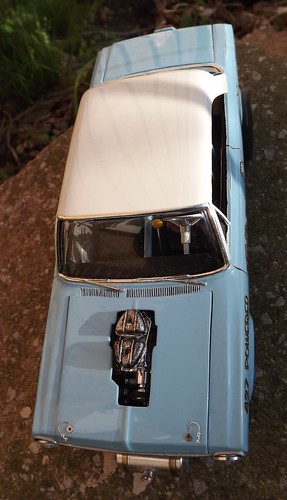
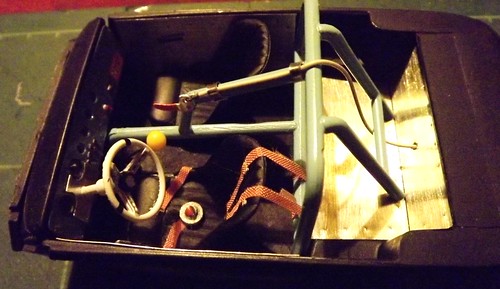
This is where I am with the Topo. Just getting the prepped for paint, and I was toying with the idea of a rear wing, but as of yet, I am undecided. I scratch built the fuel pump, fuel block and fuel tank. The tank was made from chemiwood, with sheet pewter strapping, and a turned cap. I also turned two of the blower pulleys, before my lathe choose to stop working again, it is very hit and miss at the moment, and still can't work out why. I scratch built the ally side panels and part of the steering along with the brackets for the front axle. Plenty still to do.
-
Really nice looking 40 and love the paint, great colour. Hope to see it for real soon.
Steve
-
Cheers guys.
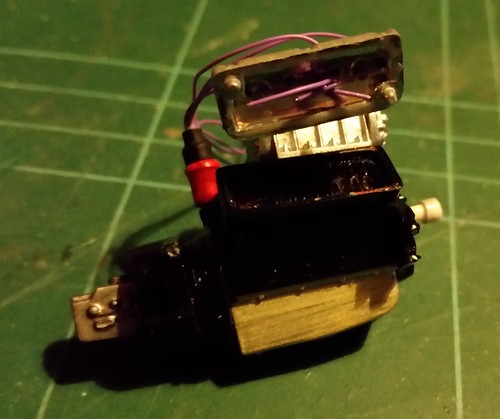
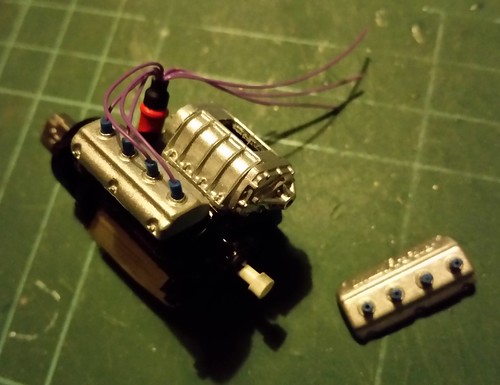
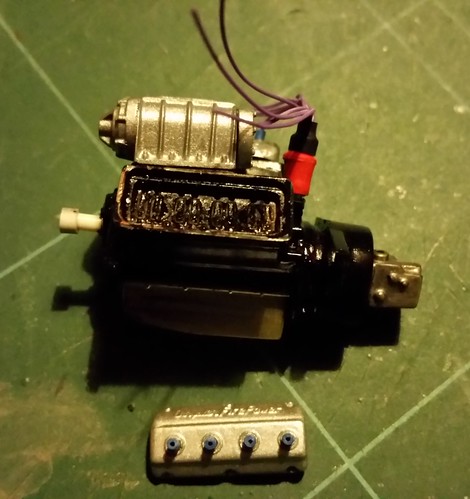
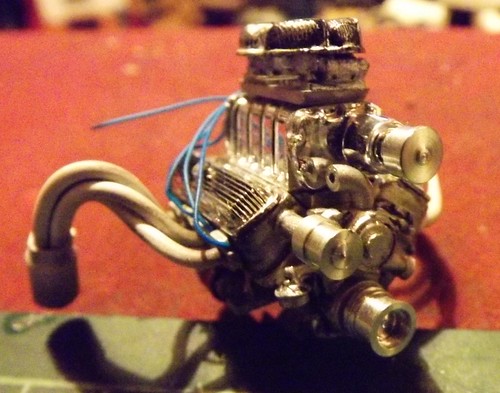
Made some more progress on this, despite finding a small problem with the chrome. Originally I was going to keep the chrome valve covers and blower. However, while doing the wiring, I noticed that the chrome was rubbing off. I made the choice of stripping off all the chrome and spray them silver, and to be honest, it looks better for it. I tried to find a different way of doing the ignition leads, and came up with the idea of clumping the wires together, inserting them in to a piece of tubing which is then attached to the top of the mag. I then used a small length of heat shrink tubing threaded over the wires and pushed on top of the mag, and heat treated. As you can see in the pics, the valve covers were drilled out, and plug boots were pushed in to them. The wires were then inserted and left loose, so that they can adjusted as the covers are fitted. -
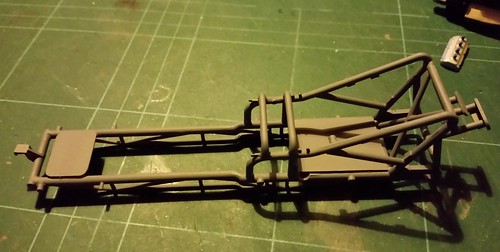
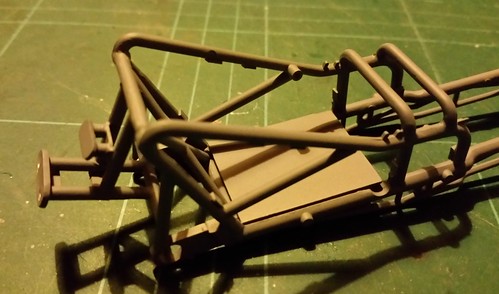
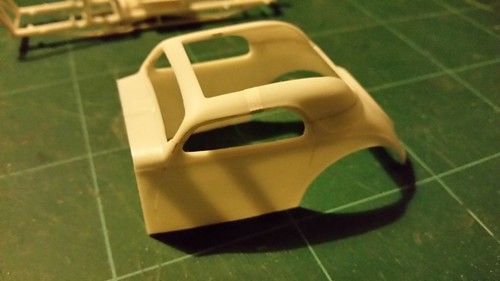
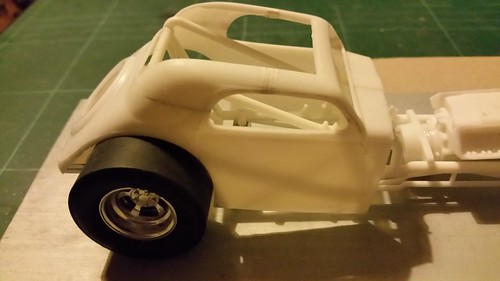
Ok, new project has begun, a Fiat Topolino Fuel Altered, from the Double Dragster kit. I have chosen the longer chassis for this, chopped the roof and extended the front of the body. I will extend the rear for the rear axle. More to follow.
-
Thank you guys for the kind comments.
-
-
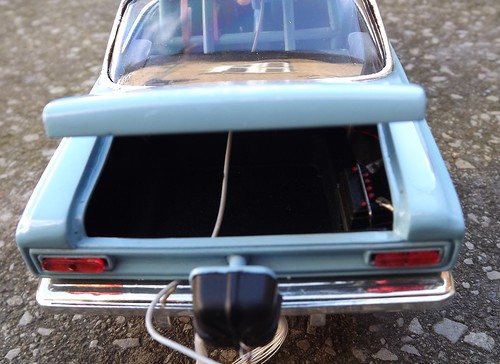
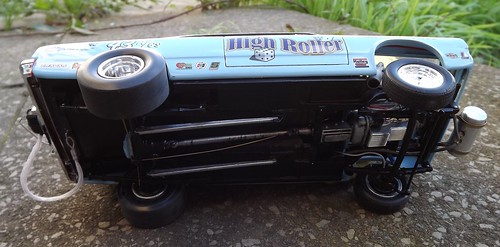
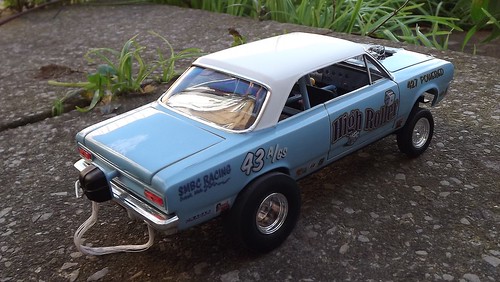
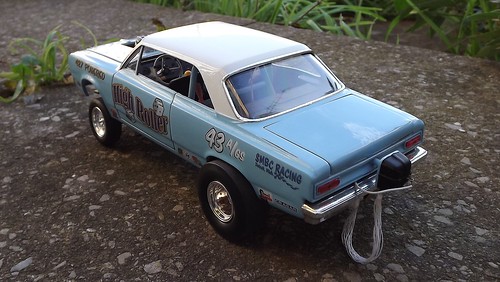
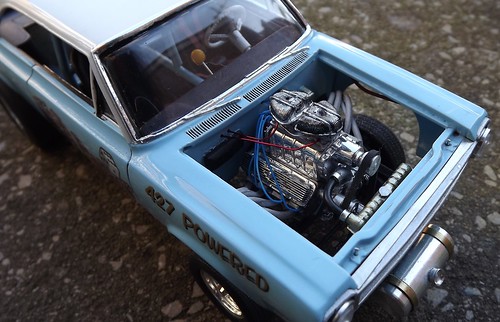
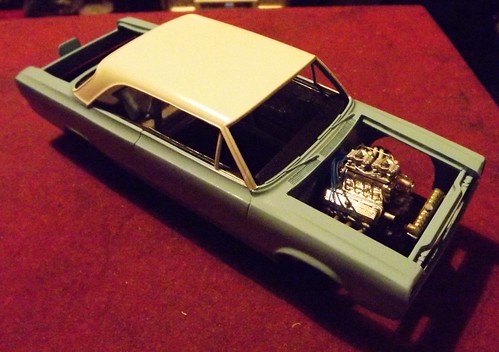
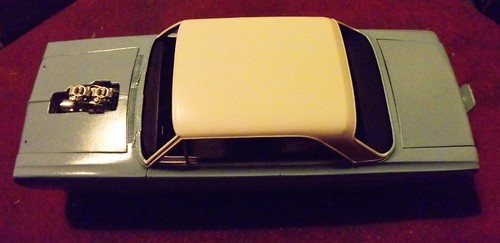
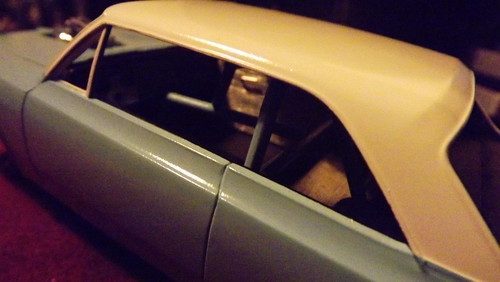
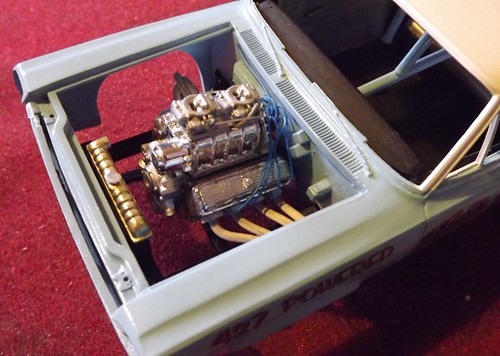
The Rambler is now done. I decided to do a little patina here and there, a little worn paint, weathering on the underside and mechanicals. I turned a Moon tank on my lathe, but did it in four parts. The centre section is ally tube, this makes it easier to drill into by hand. The ends could be then machined and designed to just press fit into place, then comes the cap with the spout combined. The strapping was made out of photo etched brass strip. The head lights were also turned, with photo etch mesh for the grill, this shows off the radiator, and you can see all the way through to the front of the engine. The hood pins are from the Revell Dodge Daytona kit.
-
-
Well, it could covert into an anal probe, you what these aliens are like.
-
I have seen many Gassers with ally panels in the interior, and the detail on the original panels, were very shallow, it made sense to add the aluminium.
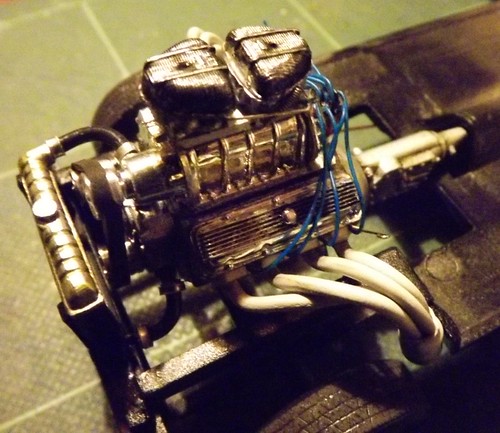
Ok, got some more done. Turned a set of pulleys on my lathe, but chose only the crank, aux and charger pulleys. Found a pair of air filters in my parts box, made an oil dip stick from a used guitar string. The engine is now installed with the drive shaft and water hoses. The interior is nearly done. The body has now been clear coated, with the usual frustrating foreign particles making their way on to the painted surface. The way round this is to let the clear dry, and sand back to remove the offending item, and re-clear. I will let it cure now before polishing. The wheels are now on with the drum brakes, with brake lines to follow.Stay tuned for more. -
Second colour is now on, with the roll bar painted as well. Aluminium interior panels were made from sheet pewter. Transfers were applied with white pin striping on the boot lid, just needs clear coating. Will do some machining for pulleys and front mounted moon tank. Brakes will be drum front and rear, which gives me the chance to use parts from the parts bin.Stay tuned.
-
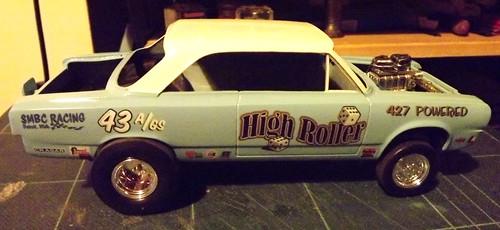
Well it says it's a 69 on the box, and this is a Johan kit.


TV Movie Hot Rod 41 willys
in WIP: Drag Racing Models
Posted
Rock n Roll Willys, a blast from the past, there's root beer all over the track. Spot on with this build.