

Evilmonkeyman
-
Posts
33 -
Joined
-
Last visited
Content Type
Profiles
Forums
Events
Gallery
Posts posted by Evilmonkeyman
-
-
I want to say they had that funky car in the picture on Top Gear last season. They didn't drve it from what I remember, don't remember the name or manufacturer either ( possibly Renualt?).
I only watched a few hours of the race, it was really good but the F1 qualifying came on and that comes first for me (favorite motorsport). But I do have the end of the race DVR'd and plan watching it later.
-
It has been a terrible season for sure. Living in northeast Oklahoma we see it every year, some mild and some extreme.
It makes me cringe when I here of an outbreak in states that it is uncommon. Sad that there was a lose of lifes but thankfully it was as deadly as it could have been.
Our prayers go out to the families and hope for a speedy recovery.
-
Are they R/C cars?
Sorry, I am not familiar with HPI.
Either way they look awesome!
-
Has there ever been a kit offered for this monster?
Even if not has any ever attempted to scratch build it or any other hill climb car? I did see some Escudo kits on eBay but not the race car.
I have had a slight obsession with this car since Gran Tourismo 3 (what can I say, I am only 30 and a part of the "Nintendo" generation)
-
I hope this doesn't effect my trade with forum member Dwanye!
This was my first trade and first time shipping international, sent 3 kits and it cost me $40! But that was with Fedex but I think it would have been $30+ thru the post office.
Still blows my mind that a 2.4lbs package costs that much to ship to Canada, not like it's crossing an ocean!
-
Truck looks great! I am going to try a technique with acrylics I found on this forum for the rust and weathering.
I plan on my truck to be rotting away on the back side of the property, even going to try to make other retired farm equipment for the display sceen.
-
Thanks for the responses, I had thought about using my soldering iron to heat the plastic but a lighter would less of a hassle, thanks.
The pie pan stuff is awesome! I can see using for a wreck but I am just "dinging" it up to capture rough life of a retired farm truck.
-
Does anyone have a good method for putting dents in the cars? I am doing a rusted out farm truck and need a good way to show some of the bumps and bruises it may have gotten while in use. The truck is the 1965 Chevy stepside and I always see dents in the doors, on the tops of the wheel wells.
Any ideas?
-
I hadn't seen most of those pictures of the Daytona coupe!
Even though I switched to the later model I still love seeing any pictures of the 2D, really any Chaparral. :-)
-
I wish I had some progress to post, but I haven't touched it in a while. Between fishing and really wanting to wait for pictures so that I can get the detail right. Also came across a thread in the tips forum on weathering with acrylics has me starting a new build to pass the time.
I will post more when this gets started back up.
-
Anyone have any idea how to duplicate the finish of these fiberglass parts? I have a color matched for it. I was thinking of a black base coat, then spraying a watery yellow over it, but i dont know what to spray it on, like a stencil of sorts.
http://www.pbase.com/9146gt/image/133971555
Good question. I would try on a scratch piece, maybe spray on the yellow/brown color and when it is tacky but not wet use a stiff fan brush or coarse grit file to rake the pattern on and use a black wash. Nothing proven, just a thought off the top of my head.
-
been working on some of the interior necessities. steering wheel. c02, fire and nitrous bottles. throttle pedal.

hope you enjoy.
Just curious if you used Dykem on the bottles?
Made me smile seeing the set of 1-2-3 blocks sitting up there in the picture of the body.
The build really is outrageous.
I was more or less wondering if anyone had built a Can-Am or formula 1, really any road race car either scratch built or built from a kit, not the availability of a kit. Lord knows my wife would kill me if I spent $300+ on a kit!
-
This is the kind of build that got me back into the hobby.
Fantastic work!
I hope to do a Can-Am or some other race car in this scale and detail.
Has there ever been anything 1/8 Formula 1 done?
-
Thanks Mike!
Even though this is a later car, the detail shown around the weber carbs is nice. Not to mention that it is a gorgeous picture.
I didn't get any work done, between the races on (Rolex sports car and WRC) and general weekend running around.
I will post an update when I get some more progress done, I think I might finish the paint on the engine so that I can get the detail work started on it. I am kind of shuffling my feet waiting for some more pictures from Ron, going to sent him some pictures tomorrow I think.
-
Never used it for personal projects, but I work with Catia daily and Vericut as well. I myself can only build simple stuff in Catia. I am the documentation technician at a tier 1 aerospace parts manufacturing and assembling plant. Catia is far from cheap though!
-
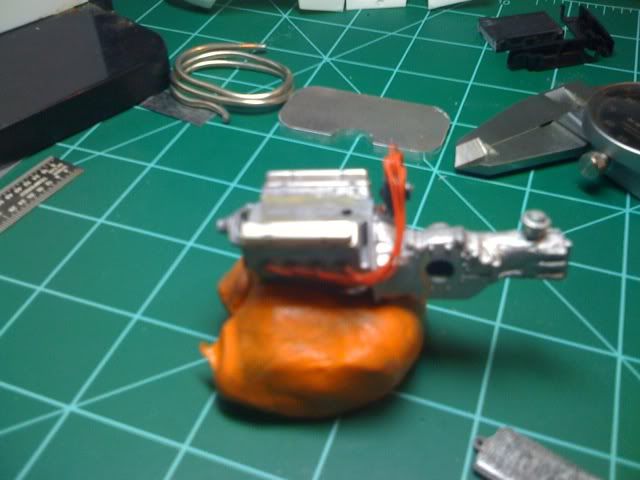
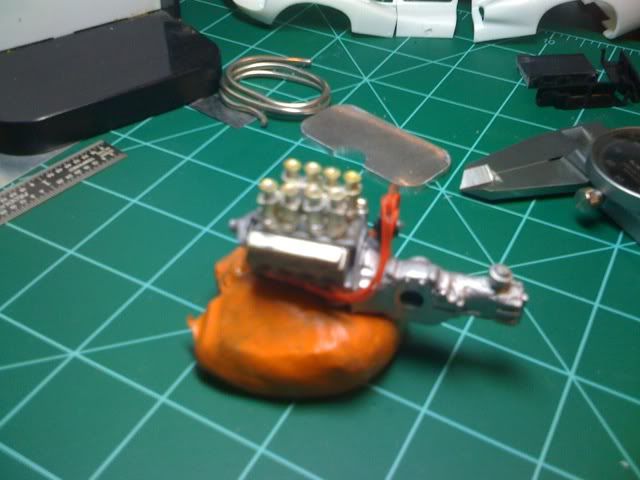
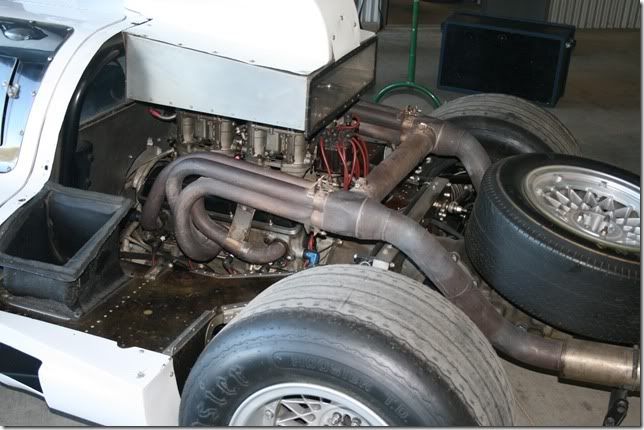
Ok, Keep in mind that I took these with phone so they are not very sharp.
The engine came out of a partially done kit so I still some painting to touch up.
I will have better pictures later, but you can see the transmission work that is done.
This is the in-progress intake made of .010" aluminum flashing.
The intake & carbs are just set on there for the visual.
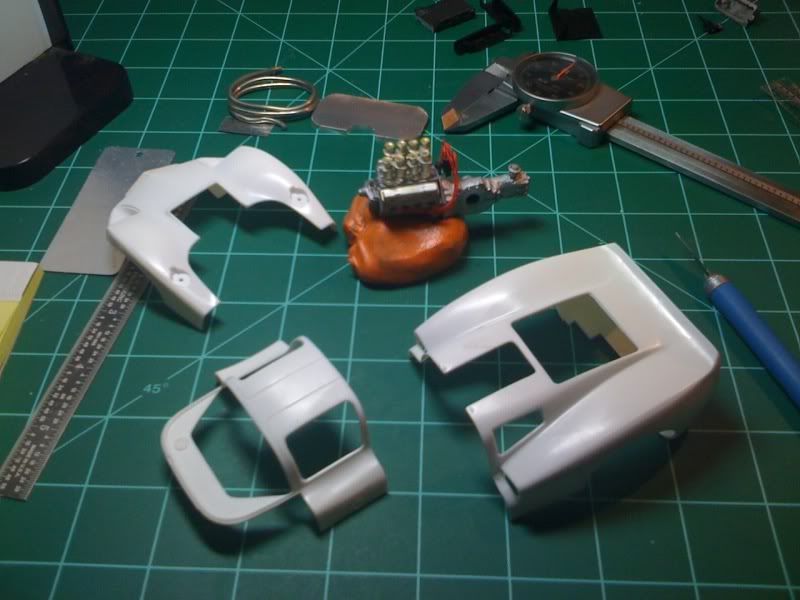
The body cut into panels, still have a few more cutouts needing to be done like the gas tank caps.
Now I can get in there and maybe get some progress made, been a long week and I have maybe put an hour into so I might put in a good nights worth of work.
-
Sweet!
I am going to take a few shots with the phone to show the little progress I have made. They won't be great but will give a glimpse of the project.
-
Let's see if this works.
-
I have the pics he sent in the email, how would I go about posting them from my iPhone?
Here in bit (dinner time now) I will try a few things and see if I can get them on here since they are saved in an email.
-
I am not 100% sure about the openings, the pic I have seen of the Daytona 2D that showed any thing with the rear body panel had it opened up at the track and I don't remember seeing them.
The Fujimi kit is the Sebring body and is a much better kit but still lacks in the detail department.
I figured it would be a long shot to ask the museum, but it paid off. I can't wait until he pulls the 2D out for the drive next time. We I upload the pics I will be sending him a few for any corrections needed, hopefully this might "inspire" him to give it an inspection so that he can get me the detail pictures.
-
Really? Let the man build it the way he wants, you sound like a bunch of D & D nerds.
Dude, just build it how you want and thicken that skin up a little.
I look forward to the detail work and the crazy amount of after market parts being used.
-
Sorry that it has been a while since an update.
I have taken a few pics of the progress, but have yet to upload them as I do not have Internet here at the house (except this iPhone). So I will have to get enough to do it at work.
So I have the body cut into sections, I plan on cutting the doors after I get the cockpit built so I have a sure size reference. I cut the transmission off at the point that the "half" transmission from the Fujimi kit starts and the fit was great. The kits transmission is far too round and the detail is mostly wrong or lacking, so using the picture of the engine Ron Low sent I puttied up the tranny. Using 1/16" styrene dowel, I made the raised bolt moldings on the top of the tranny and sanded in the detailing. Turned out well with minor imperfections that will mostly be hidden by the spare tire. Still need to add in the bolts though.
Started working on the new manifold, first sculpting it from Sculpy clay but wasn't pleased with the outcome (I use it for lure making, my other hobby that connects to my passion for fishing.). So I got out the .010" aluminum roof flashing and went to work, I will go into detail on this when I post the pictures. Same with the carbs and the modifications needed to make them work.
Should have some pictures up soon.
-
I picked up the Fujimi kit earlier l, I talked the shop owner into trading it for a few of my kits. I took a little bit of hit on the trade, but the kits were not as interesting to me as this build is. Traded a Lindberg Little Red Wagon, Revell O'Reily's top fuel, Revell "Chi-Town Hustler" and 2 Dale Earnheart NASCAR kits. But I am happy about the trade and my wife is happy that I didn't spend any money, at least not on the kit, picked up a flexi file too.
So now I get to start sanding and cutting body panels again.
How do I post pictures from my iPhone? I really want to post the picture Don Low sent of the engine.
-
Wow, I really feel like I gained more knowledge on scratch building from this thread than I have picked up over the last few years.
This is masterful work and I thank you for sharing it.
I look forward to more!


How Many Hours Per Week Do You Spend Modeling?
in General Automotive Talk (Trucks and Cars)
Posted
Maybe an hour or so a week, sometimes I will sit at the bench for a few hours if the weather is not so great.
I do spent more time tinkering in the cold months (i.e non-fishing months)