

JLewis
-
Posts
52 -
Joined
-
Last visited
Content Type
Profiles
Forums
Events
Gallery
Posts posted by JLewis
-
-
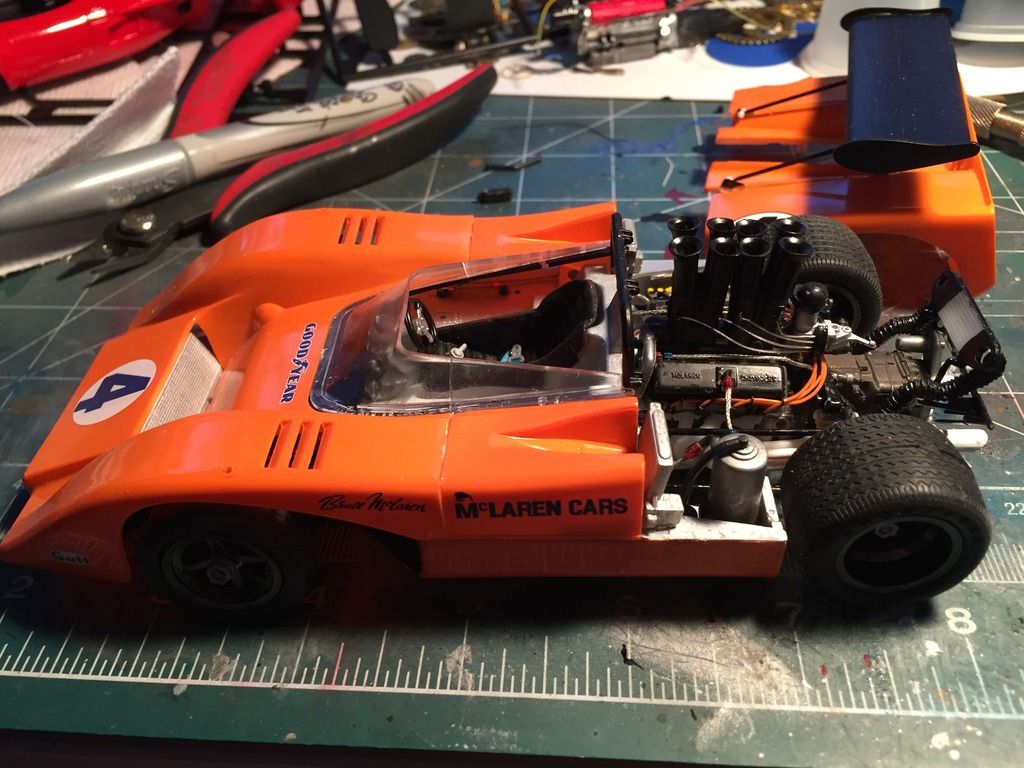
This thread didn't seem to catch many people. I want to thank those who did offer comments. Here is the finished product. I was happy to make everything fit under the body work.

-
So back to the important stuff. I wanted to make the rear engine cover easily removable so I decided to use some design license to make the wing attach to the engine cover so it could be removed as a unit. To do this I made two little bosses attached to the engine cover.
Then I modified the stanchions and added brackets for the arms so the arms will attach to the cover instead of the roll bar
Next I assembled the arms and brackets for the new wing attachment
'
-
Been gone a while doing some jewelry for Christmas. I bought a bunch of watch guts and made a bunch of steampunk style jewelry. I cast watch parts in resin and make pendants, earrings, hairclips, bracelets, etc. My wife offers these up on facebook for free or for any donation the reader wants with the money going for Christmas decorations for the homeless abused women she works with. She got in a ton of money and was able to give out a lot of trees and decorations for Christmas. Food and clothes for the shelter women are available, but decorations and gifts are hard to come by. She fills this need with the jewelry we make.
I buy watch guts by weight from China:
I use clear resin to mount the parts in jewelry blanks I also get from China.
We also make pendants and earrings from cast gears:
I also get some larger watch carcasses and mount them as necklaces:
-
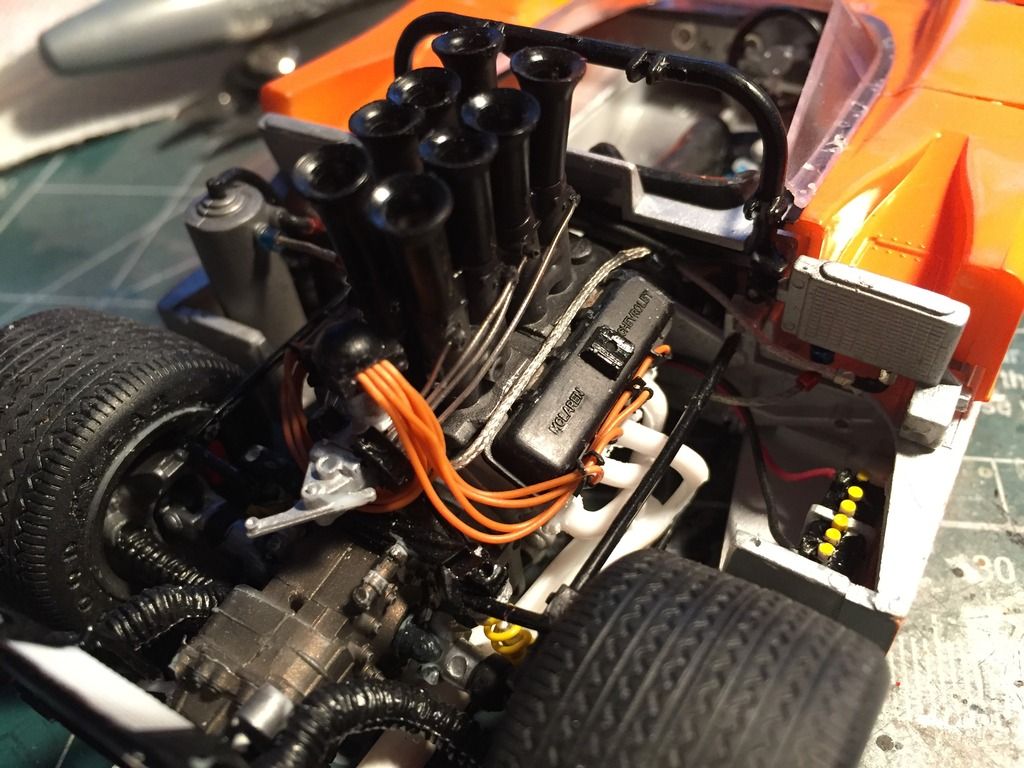
A little more progress. Was able to mount the roll bar and oil radiators and the plumbing to tie them together. Except for the transmission cooler, I think all the hoses have been made.
-
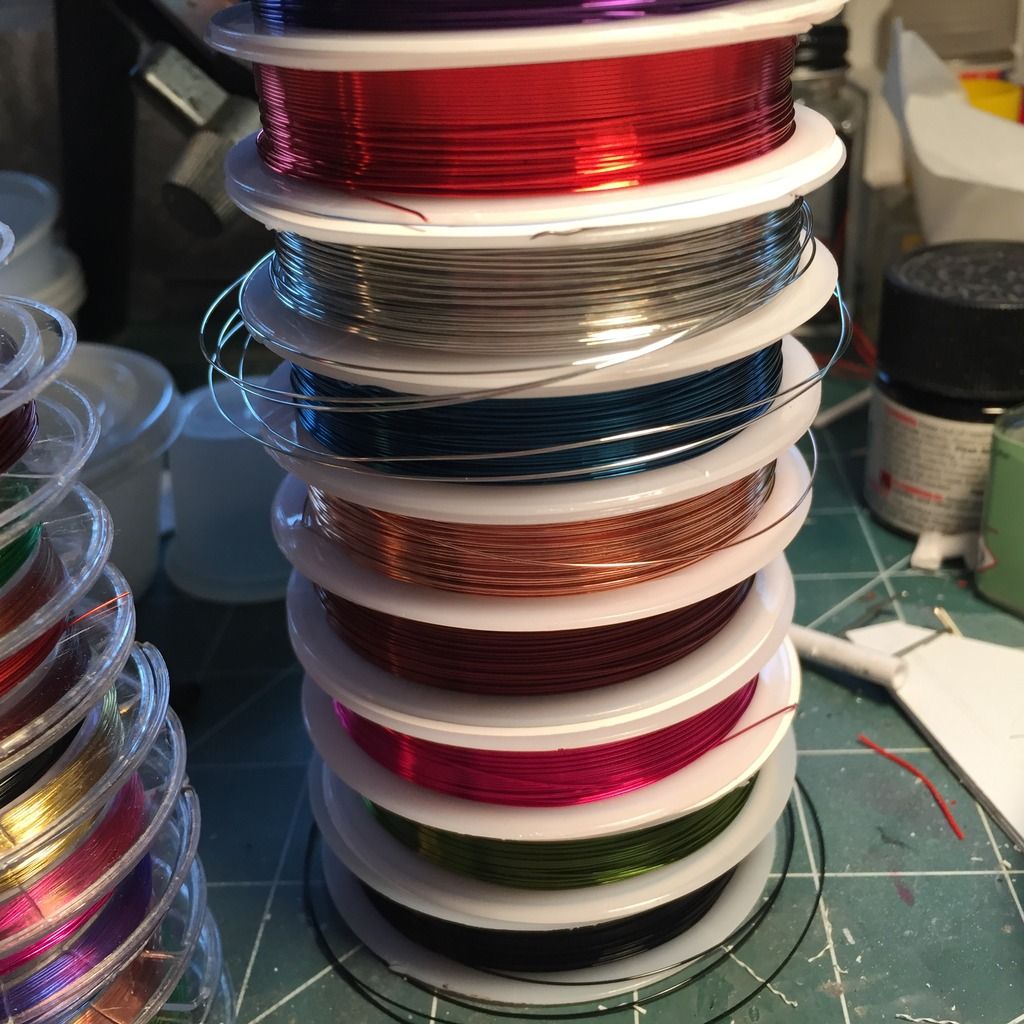
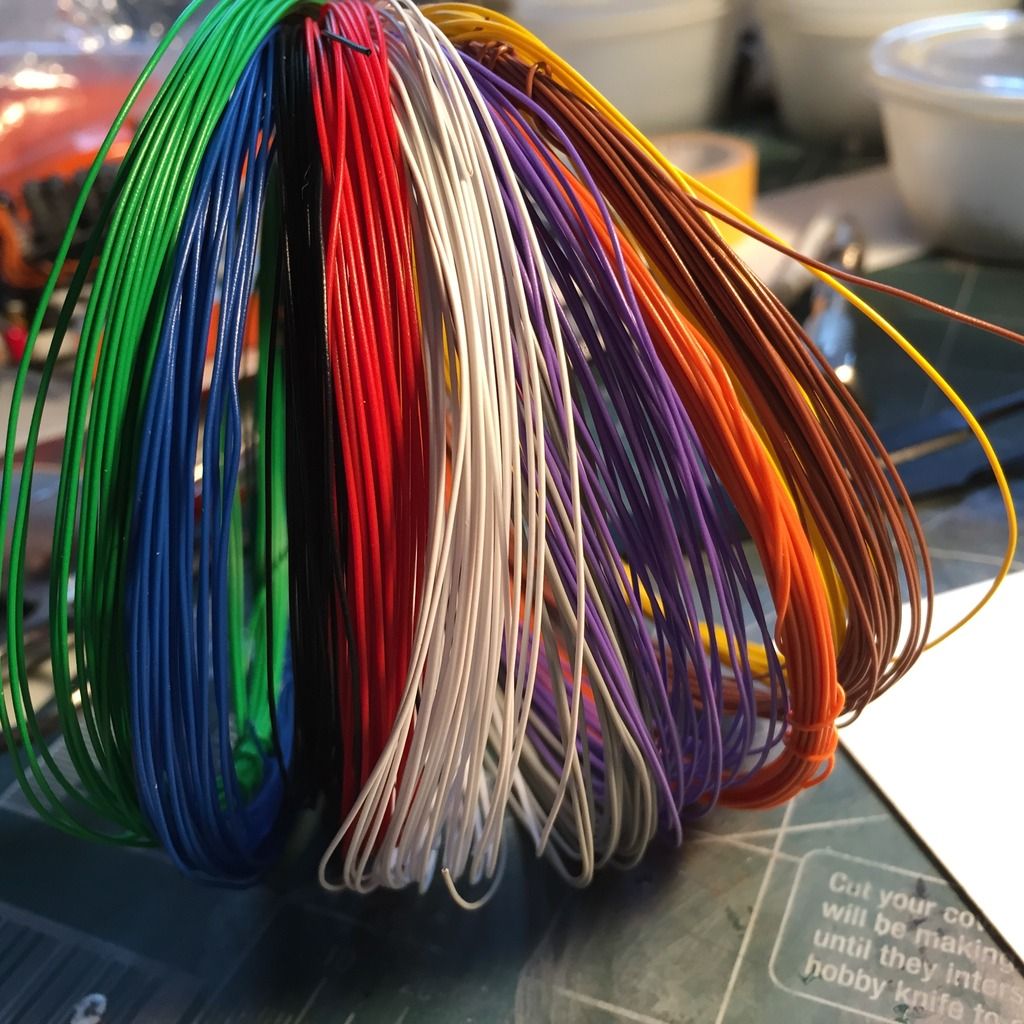
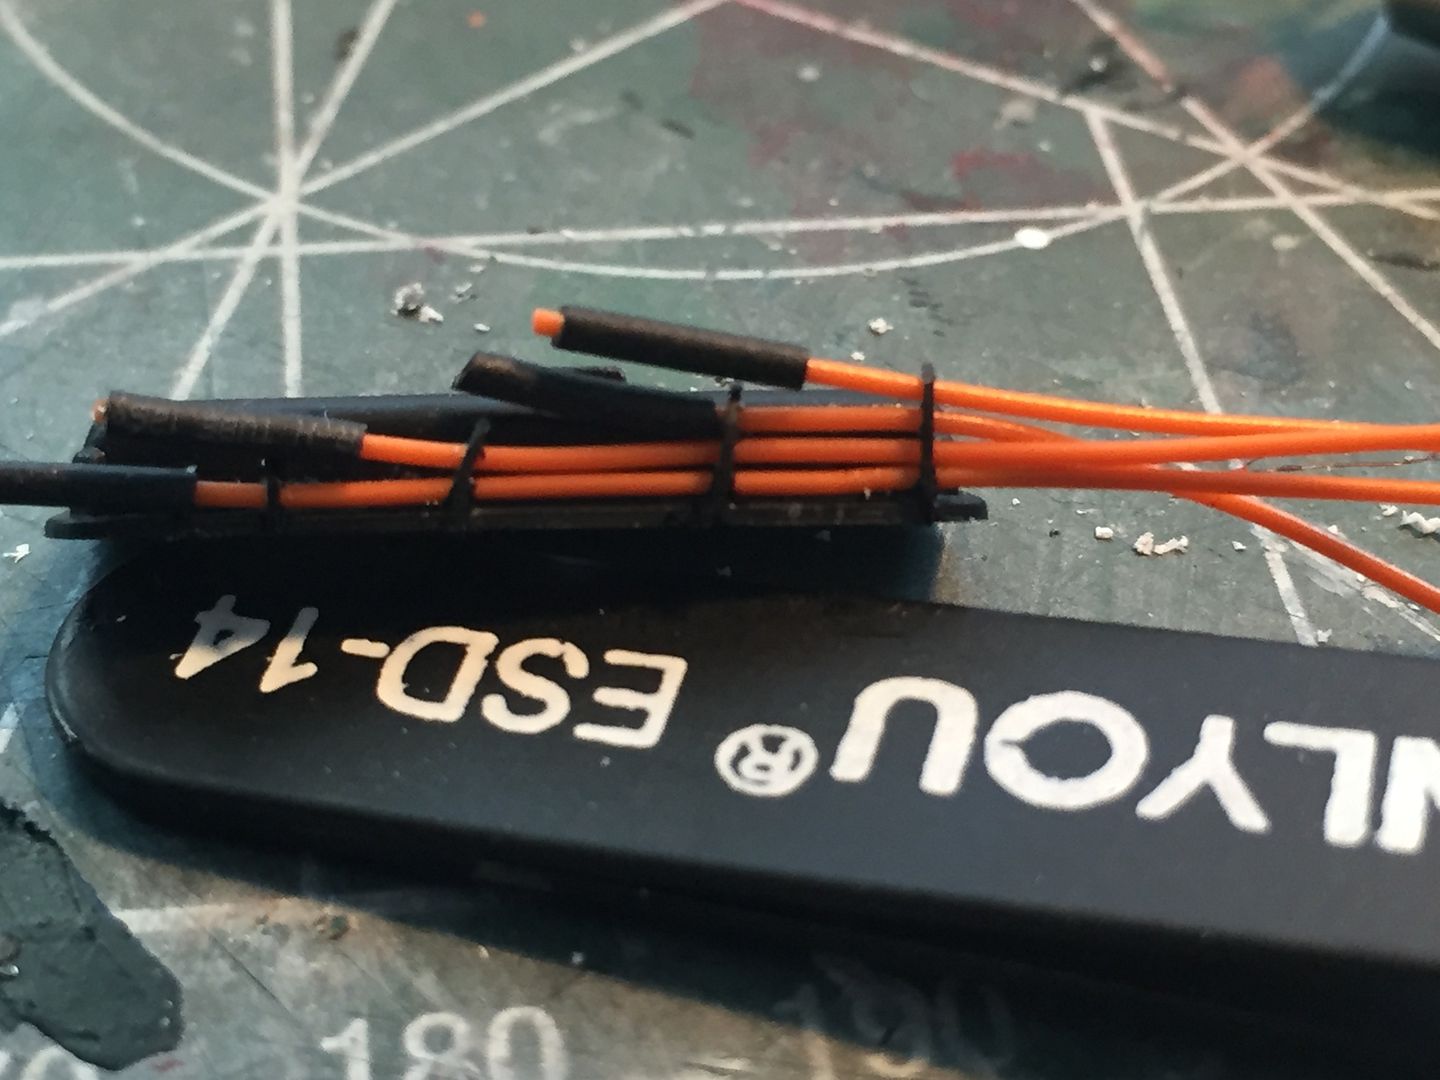
The smallest wire is in the front
the white wire and the black and red wire are about .2 mm and are about as small an insulated wire as I can find. The white wire is from Micron Meter and runs $15.00 for fifty feet. They have it in a bunch of colors but you have to buy a minimum of fifty feet. The shipping was also high, thirteen dollars. I thought I would buy a roll of white and use colored sharpies to color them but whatever the coating is, sharpie ink won't touch it. While the per foot price is good, you would have to invest a hundred dollars for a half dozen different colors.
the red and black wires are the best bargain. They come from Hobby King and cost $.44 for one meter. Fabulous price. Only in black and red. They call it Turnigy High Quality 36awg wire. Best deal by far. I bought six meters of each color for $6.00. Believe me, this stuff is tiny. Great for gauges etc. in scale, this wire is around 3/16 of an inch and is the smallest I have found.
If anyone knows any smaller scale wire please chime in. I did see some wire used by model railroad people but it was pricey.
-
In the back of the picture are rolls of beading wire. There are ten colors and ten meters of each color. The larger tools are .4 mm and the smaller rolls are .3 mm. That means the smaller rolls are a scale 3/8 inch while the larger rolls scale out to less than one half of an inch.
these are a super buy at less than ten dollars each set. The drawback is that this is a shiny wire. I tried to touch them up with some sandpaper but I couldn't remove the shine without going through the color. A coat of flat clear worked well but it is one more step. The smaller wire is a good size for every day wiring.
-
Wire. What are some affordable alternatives? Wire to scale can be expensive. Aftermarket wire can run three dollars a foot. Here are some alternatives.
starting at the left is a bundle of .5 mm wire. This is the size that most aftermarket companies use. I found this bundle of ten feet of ten different colors for less than $6.00. That is 100 feet of wire at six cents a foot. Outstanding deal.
-
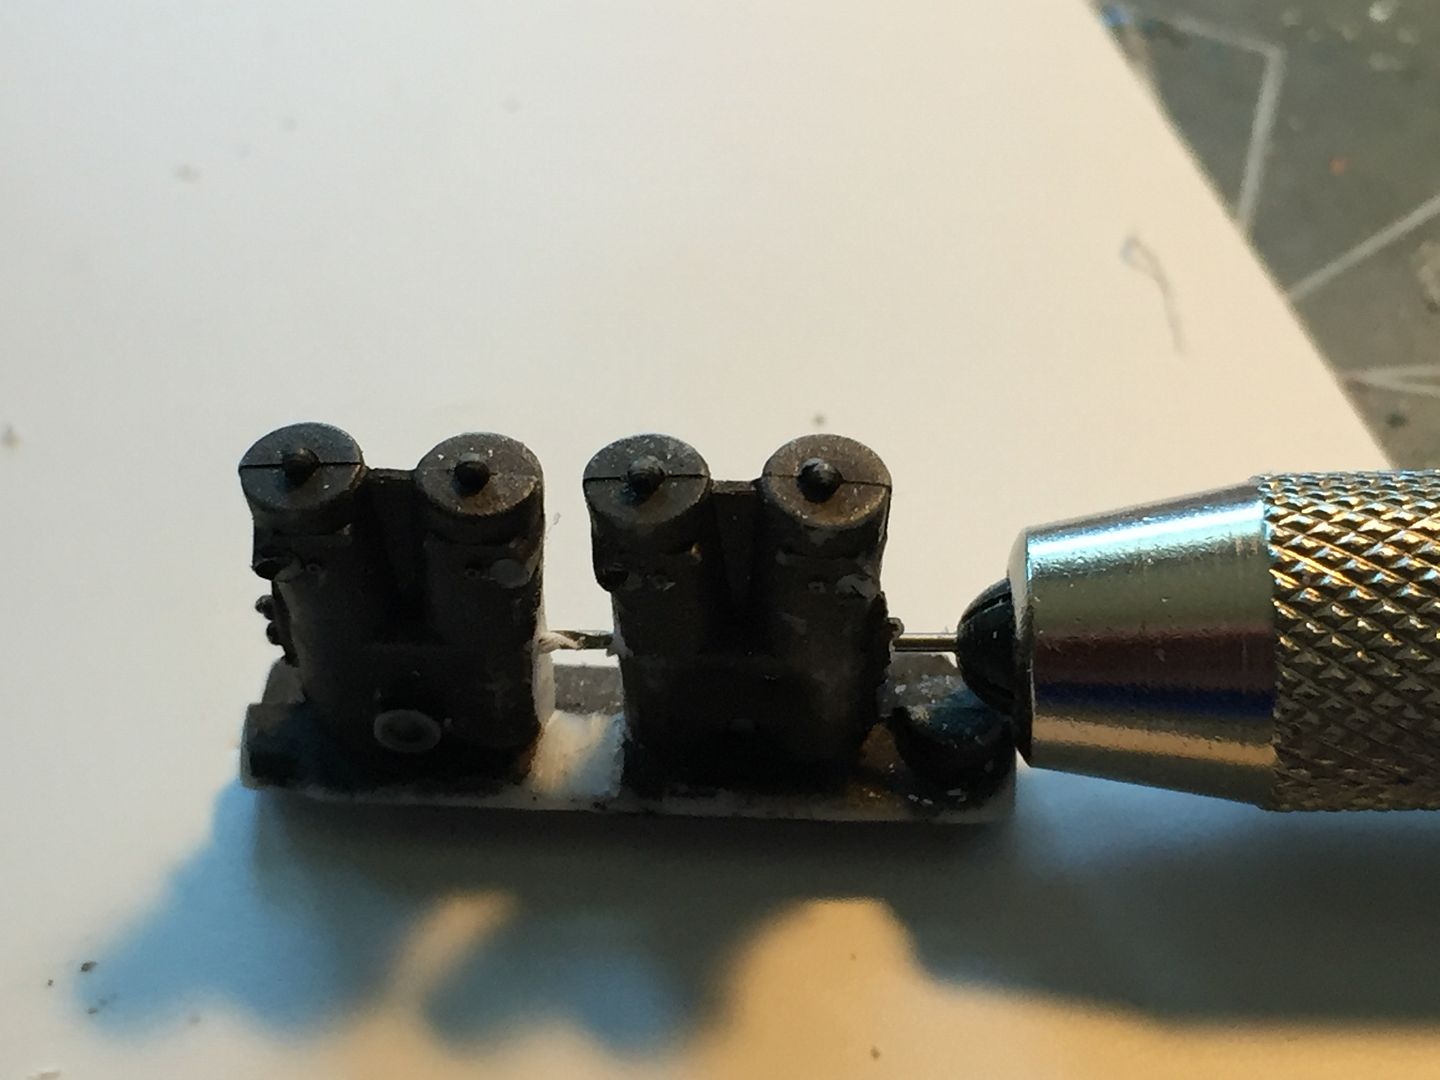
Once dry trim off the excess and clean up the edges. Now use the holes in the top to drill your wire holes. I usually go down about 3/16 of an inch. When drilling these holes I angle the drill slightly toward the center of the sprue so I don't tear out the side of my distributor.
now you can cut off your distributor and mount it on a smaller shaft. By the way, when I drill the hole in the center of the distributor for the coil wire I drill far enough so when I cut off the finished distributor head the center hole is there so I can mount the head.
-
Now take a thin piece of sheet stock, I use .010 inch, and tape your template to it. Drill out your holes in the thin stock and remove the template.
now find your 5 mm thick sprue and square the end. Drill a hole in the center of the end of the sprue. If anyone needs it I can show you how to make a jig to find the center of a piece of round stock. Now insert a short piece of wire through the center hole of your stock with the holes in it and into the end of the sprue. Glue the pieces together.
-
Now cut out your templates and keep them for future use
-
Do this on both sides.
Now make lines that go from your hole on the straight line through the point where the two arcs meet and guess what, you have now made perfect 60 degree lines for a six cylinder distributor.
Now use your two millimeter compass and scribe a circle around the center and drill your holes.
-
How about a six cylinder? Start with a new piece of stock, scribe a straight line and drill a hole on the line somewhere near the middle. Except for the two millimeter distance on your scribe compass, there are no other exact measurements needed. Take your two millimeter compass and move one point out to around an inch or so. Use this to scribe a half circle around your center hole.
now use that same compass to scribe a line from where the circle crosses the straight line to where the compass hits the half circle
-
Take a piece of sprue and drill two holes two millimeters apart and press a couple of pins into the holes to make a scribe compass. Use this to scribe a circle around your center hole. Now drill 8 holes at the intersection on of your scribed circle. Now you have a template to use for 4 and 8 cylinder distributors.
-
Now draw two more lines parallel to the first one so you have a grid. Connect the diagonal corners .
using a drill bit the size of your chosen wire, drill a hole in the center
-
This is how I make distributors from scratch. My methods are ideas taken from other places and my own spin on things. I first want to have a template for the hole pattern. That saves hours later. I have templates for 8, 6 and 4 cylinder distributors.
i got a digital caliper that reads in inches and millimeters. I paid $12.00 from AliExpress. I measure in millimeters because in 1/24 or 1/25 scale, a millimeter on the model is almost exactly one inch on the full size car. So I want a 5 inch around distributor so I look for a 5 millimeter piece of sprue. I keep any sprue that is larger than usual just for these types of things, so now we can make a scale 8 cylinder distributor.
take a piece of flat stock, I use .020 inch thick, and scribe a straight line on it. Using any type of straightedge, next draw two more lines parallel to the first
use anything that you know has a 90 degree corner and scribe a line perpendicular to one of your original lines
-
Thanks djflyer. It is great fun for me to try to invent new ways of using cheap materials. It is not even the money. I am old enough to be able to invest pretty much what I want in my hobby, but I really get a kick out of making my own stuff. The aftermarket is amazing and there are things out there that are truly Beautiful. For me though, it sometimes feels like modeling can become less of a creative experience and more of a shopping experience. Open up any online aftermarket catalog and you can just click on your end result. Pick a distributor package, a carburetor package, a wiring package, a hose package, a pulley package, an interior package, wait for the mailman and glue them all together. A beautiful finished product but for me, those cars can kind of become a showcase for some other vendors talent while the builder becomes more of an assembler. This is just my opinion, don't hate me for it.
-
Next up are oil coolers and roll bar. I just helped someone build a scratch built distributor and I took some pics. I thought I might put up a little tutorial on how I do a distributor if anyone is interested.
-
Finally some more progress. The paint came out great and pretty much all of the hoses and wires are in. Now the big moment, will the body panels fit around all this stuff? Drum roll please
and they do! No one is more surprised than I am. After all that stuff was put in, there is at least some semblance of order
-
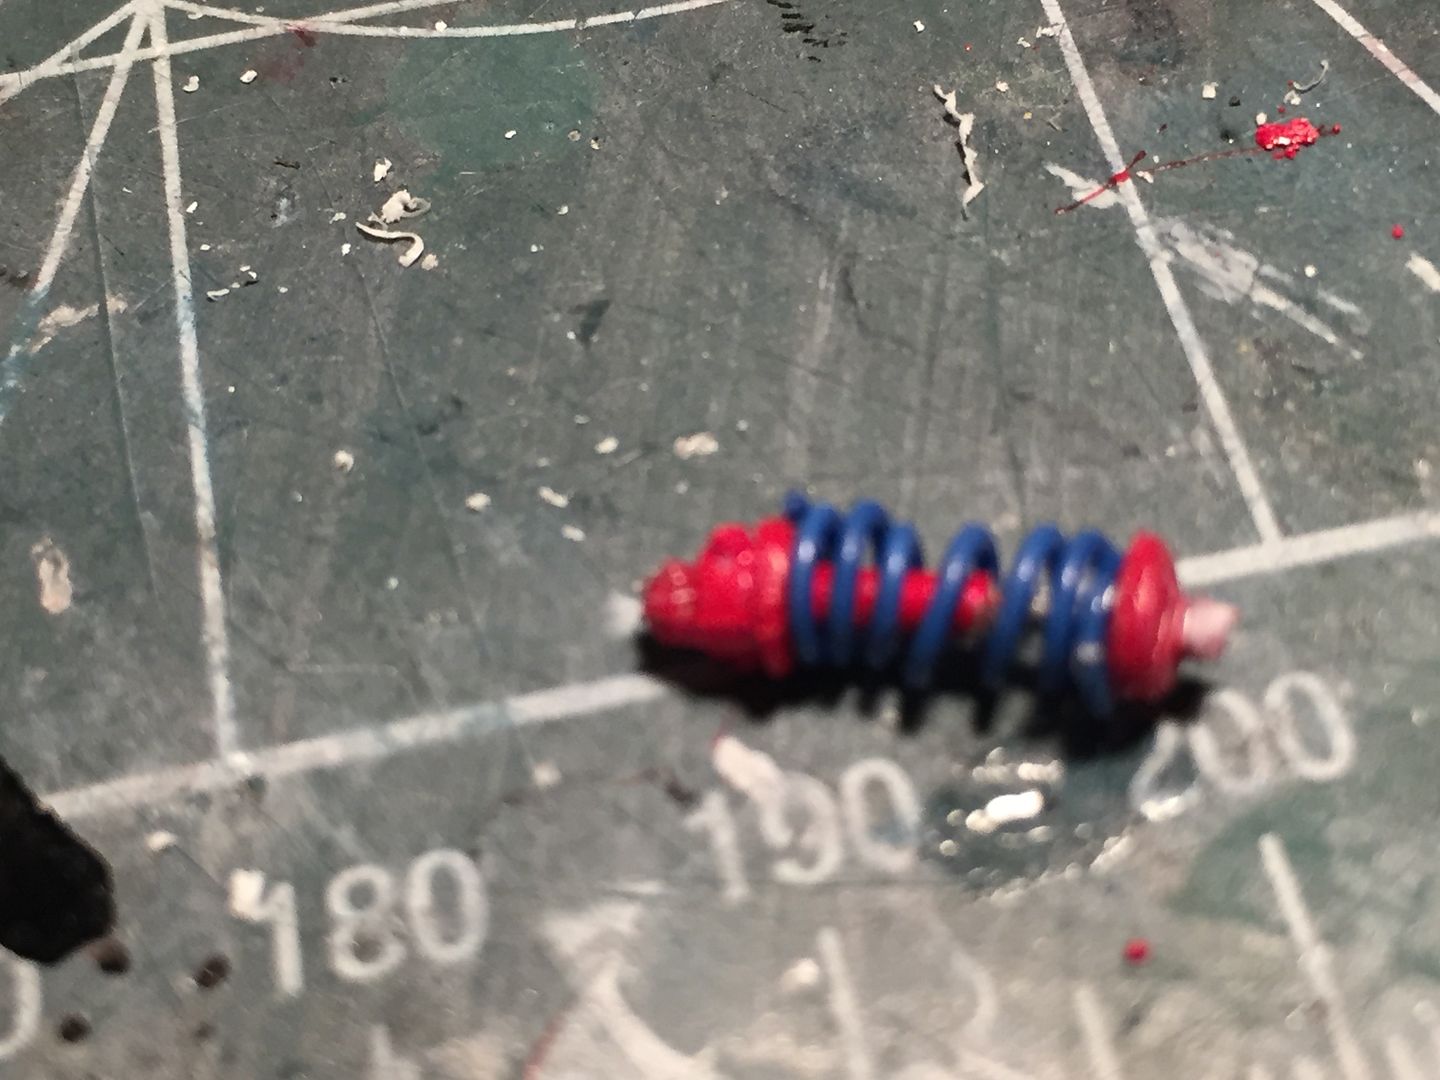
Now is the time to start assembling the rear suspension. I built up a couple of shocks to replace the kit ones. It is really amazing how one part on a sprue, like the beautiful rear half shafts, can be right next to a pair of shocks that look like a third grader made them. I built the shocks by cutting off the top and bottom of the kit shocks and building a new center section out of tube and styrene. I wound the strings on an empty drill bit.
I know the colors are different but I have an extra kit to practice with and I didn't like the red ones.I started building the details for the top of the pontoons. I got the lines ready and then painted and attached the seat pan and top. So far, all the lines and hoses are fitting and the bodywork will go on fine.
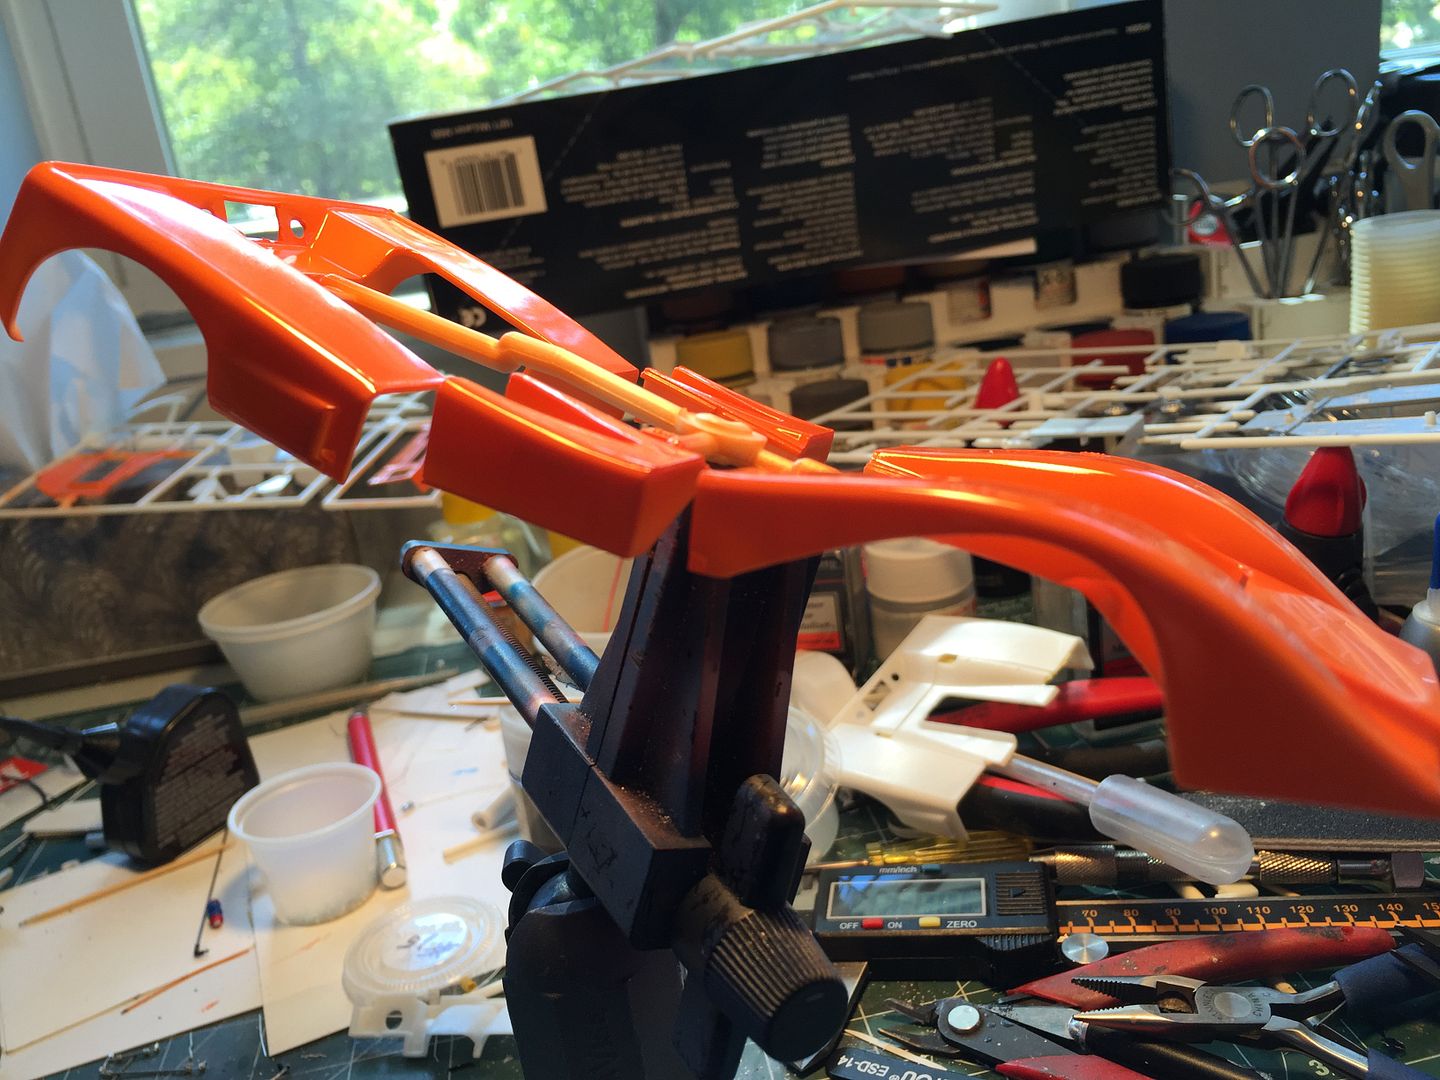
I couldn't resist doing something different. When I built this kit probably twenty years ago, I ordered the custom paint to match the McLaren orange. That was back when you didn't have a computerized store and you actually had to call and order on the hone and write checks. I remember at the time I ordered the paint and got tired of waiting for it. I mixed my own paint (which didn't look too bad) and when the custom paint came, i threw it in the paint box. Well, believe it or not, twenty years later that paint was as good as new and laid down a great paint job.
Not too bad for right out of the airbrush.
Thanks for looking
-
It would be easy to make curbside. You would need to assemble the engine block/transaxle, heads and valve covers as well as the injector stacks since they are so prominent. You could leave off all the belts. hoses, wires, etc. The rear suspension builds off the transaxle so you would need to put in the suspension pieces. It would be interesting to see if you could just glue the axles onto the transaxle and attach the wheels to those. They are pretty stout so you might find that to be enough. Anyway, you could leave off 2/3 of the parts if you want to build it closed up.
-
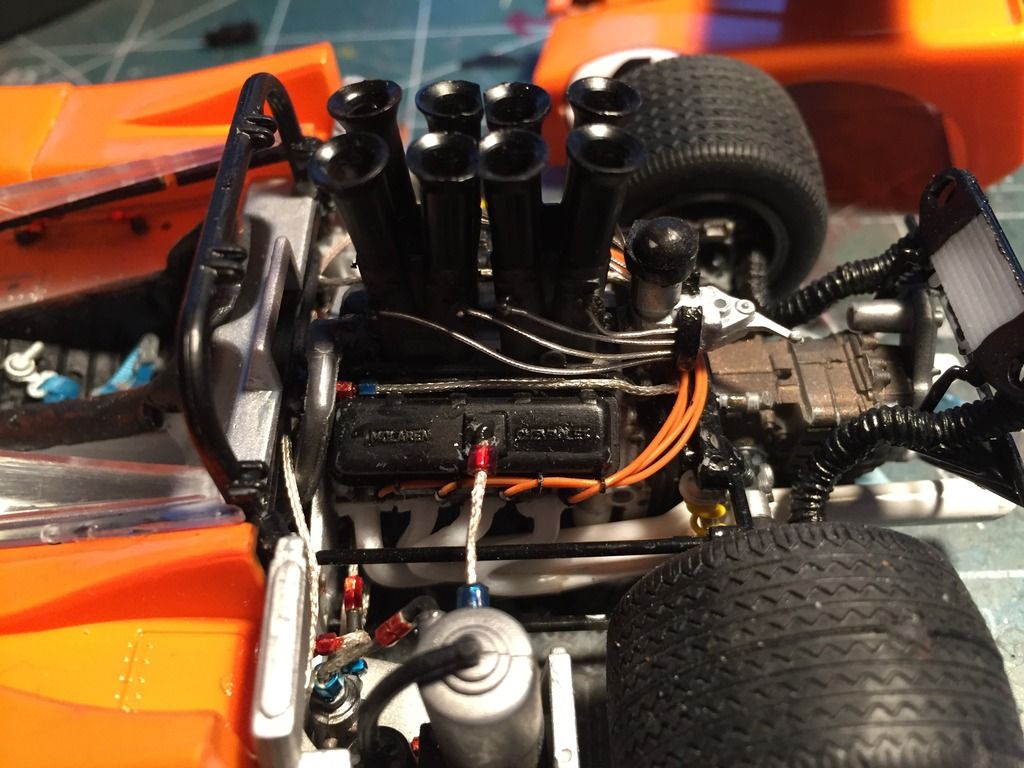
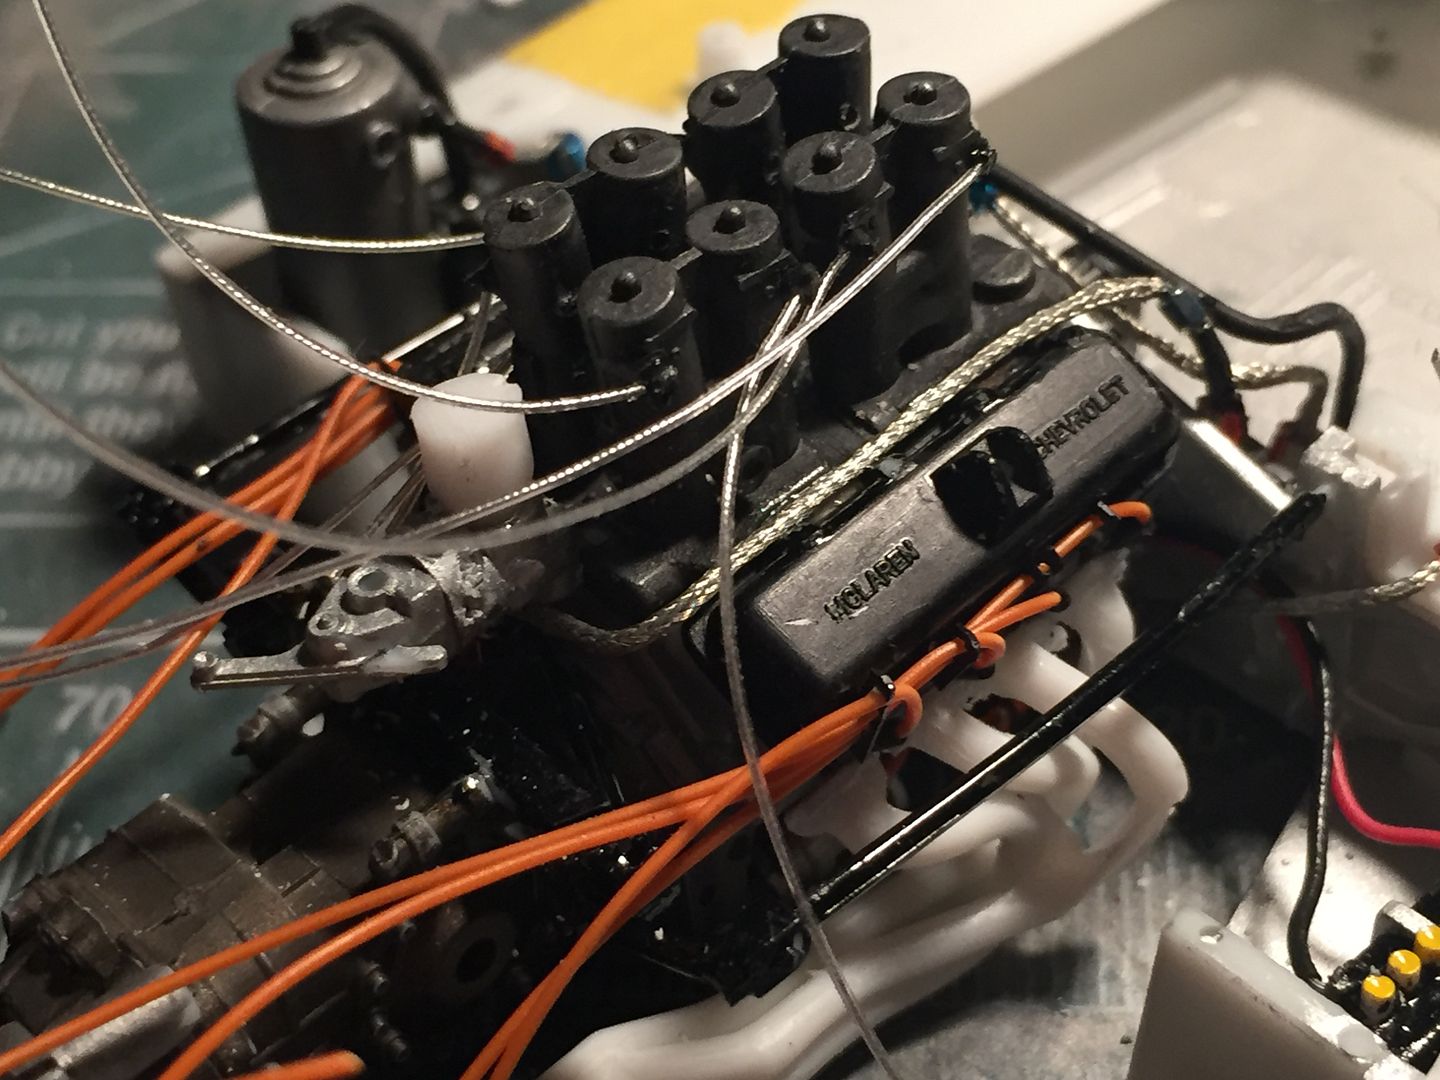
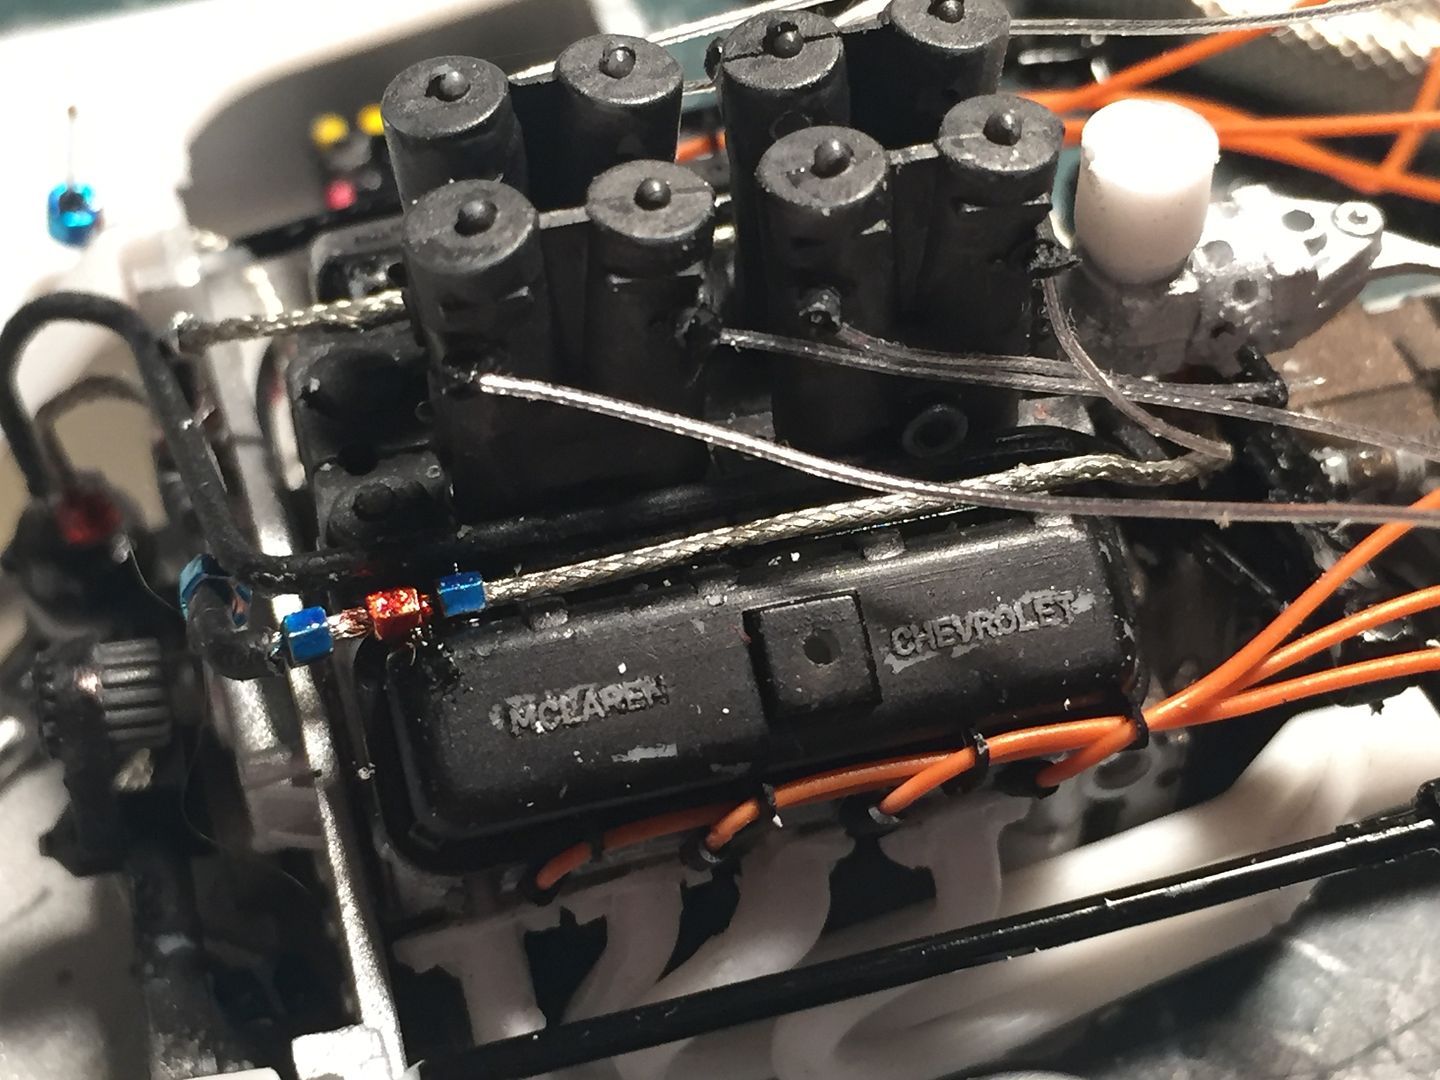
Moving up I can add the plug looms and wires and install the valve covers:
Once the valve covers are in, I can start the top end fuel lines. First is the pressure and return lines running down the left side of the engine. These go from the fuel distributor to the fuel pump.
Then the fuel regulator line on the right side of the engine
Now for the fuel injection lines
I built two fuel distributor blocks and routed the lines to them
Last was to build a new magneto top just like the first one I built and install it and run the plug wires to it. That's it for now.
Thanks for looking.
-
Time for a do-over. Trying to replace all the lines and hoses has been frustrating. The vinyl in the kit is very flexible and when the instructions show gluing one end in step 2 and hooking up the other end in step 10, it is hard to see what lies in the way. Too often, the kit hoses are bent around stuff that you never would have imagined being in the way. The other thing is that I am determined to make all of the body panels fit around all of the detail parts and not have to leave stuff off to make the body panels sit down where they are supposed to be. The instructions actually say to leave certain parts off if you want the body to fit.
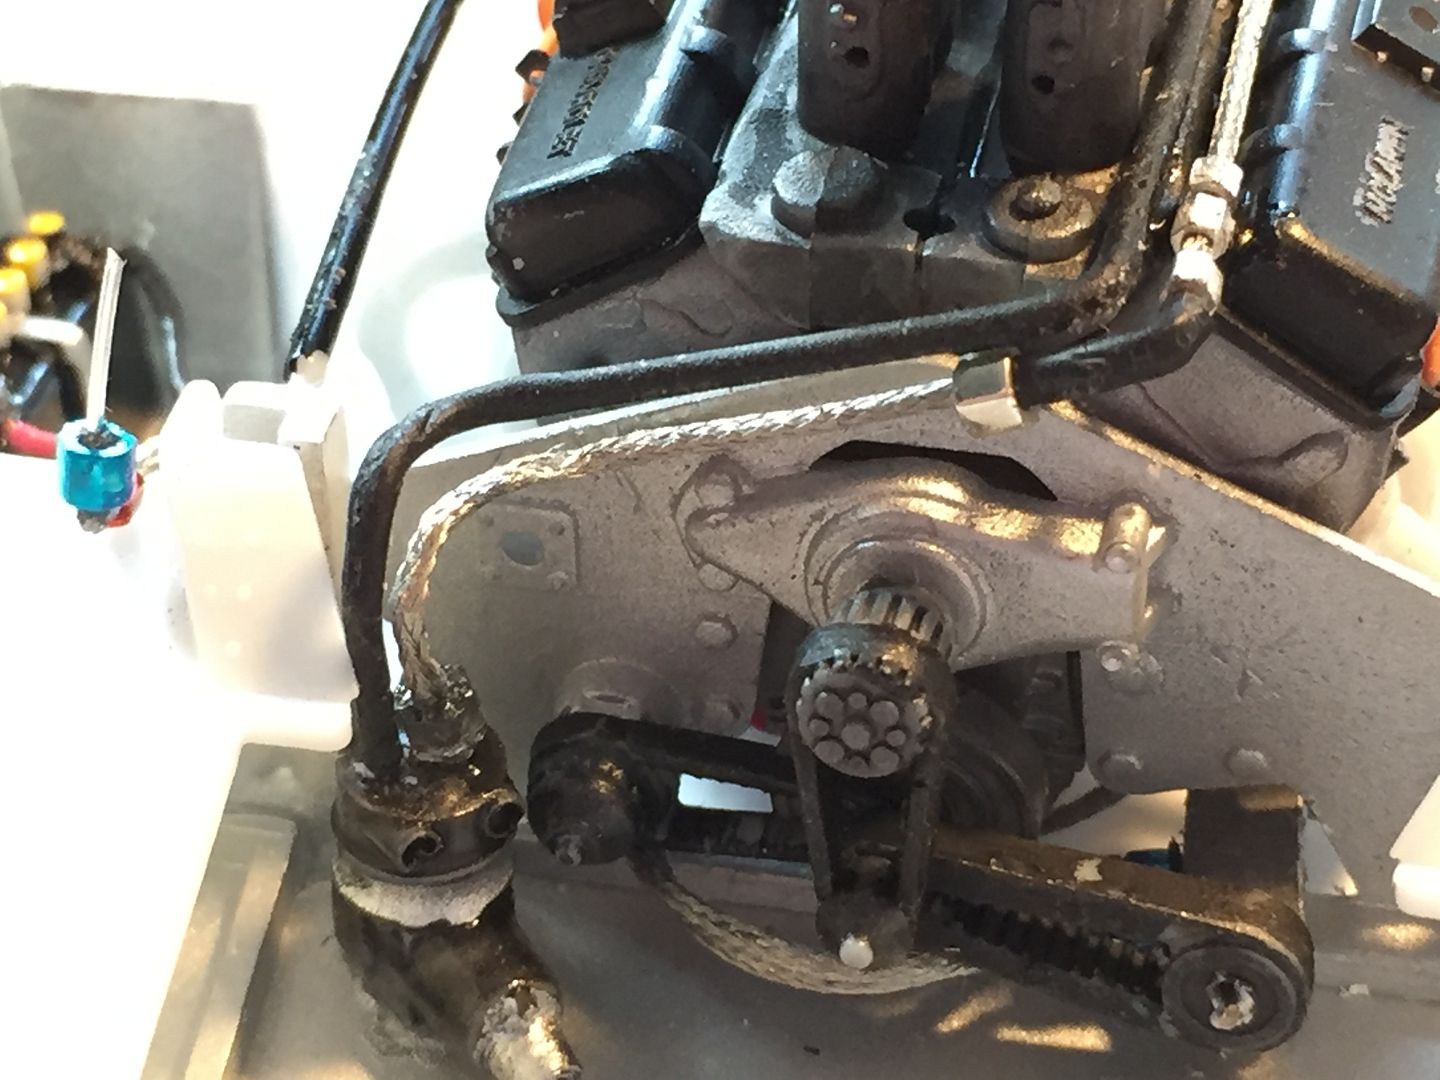
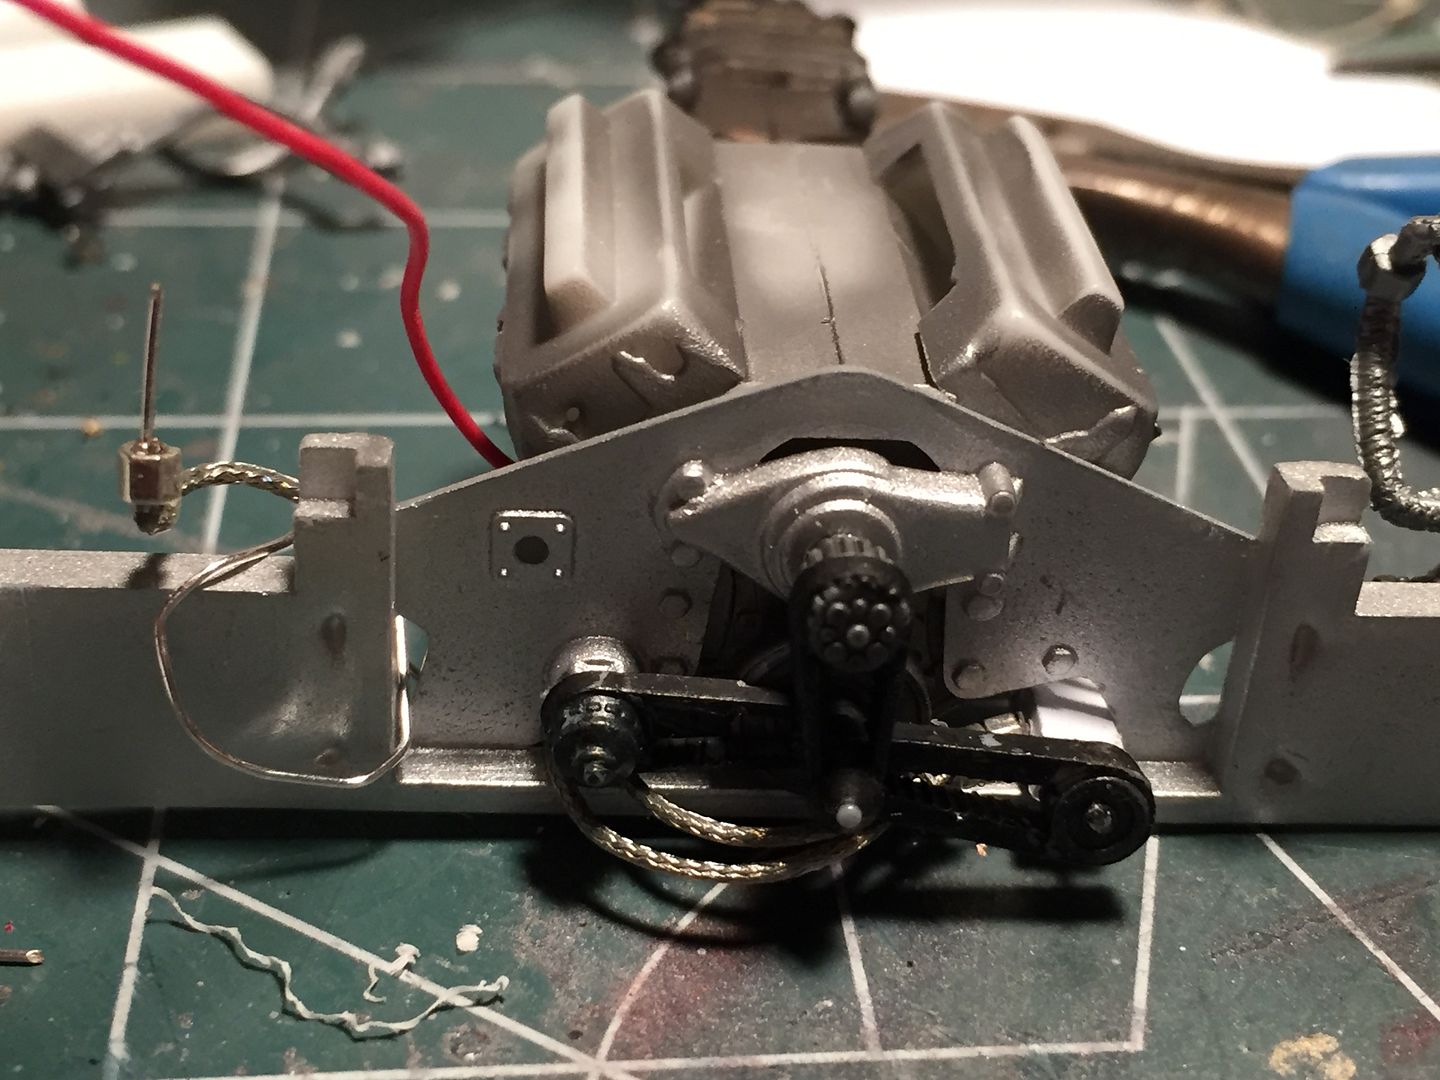
So, I had a second incomplete kit and I decided to start over and instead of following the instructions exactly, I would work instead from the ground up so I could add all the detail parts as assemblies so that everything would fit as they should. First was to attach the bare engine block to the front bulkhead so the belts could go on first. Then the lower oil lines from the pump to the sump could be added.
The lower oil lines now can tuck in around the belts.
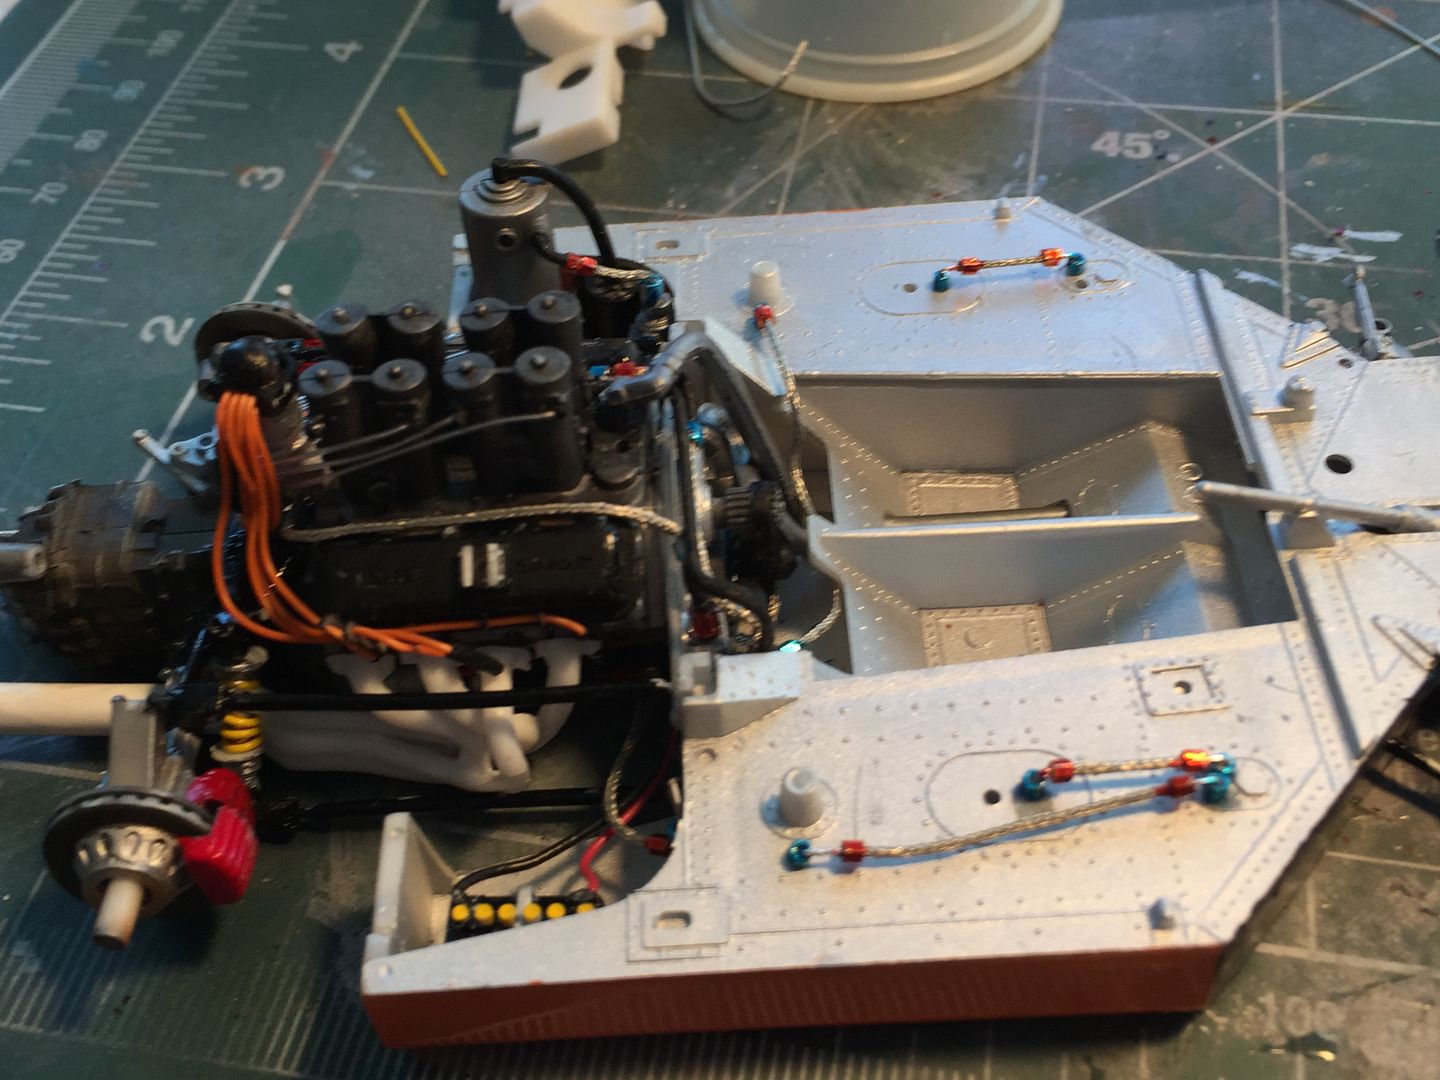
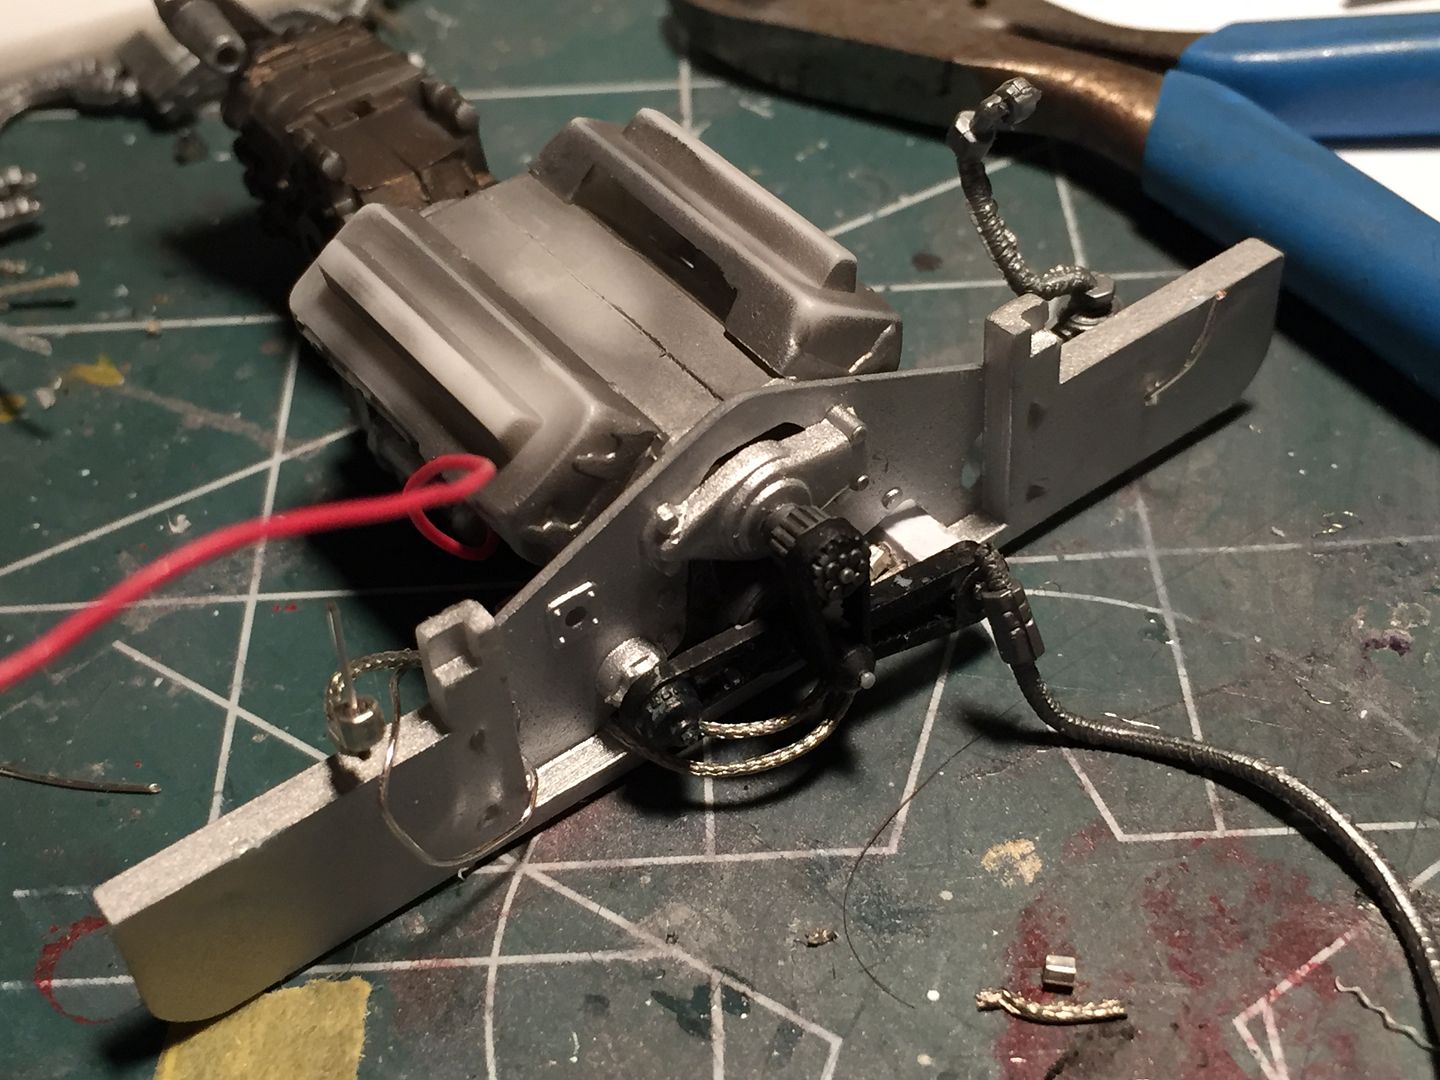
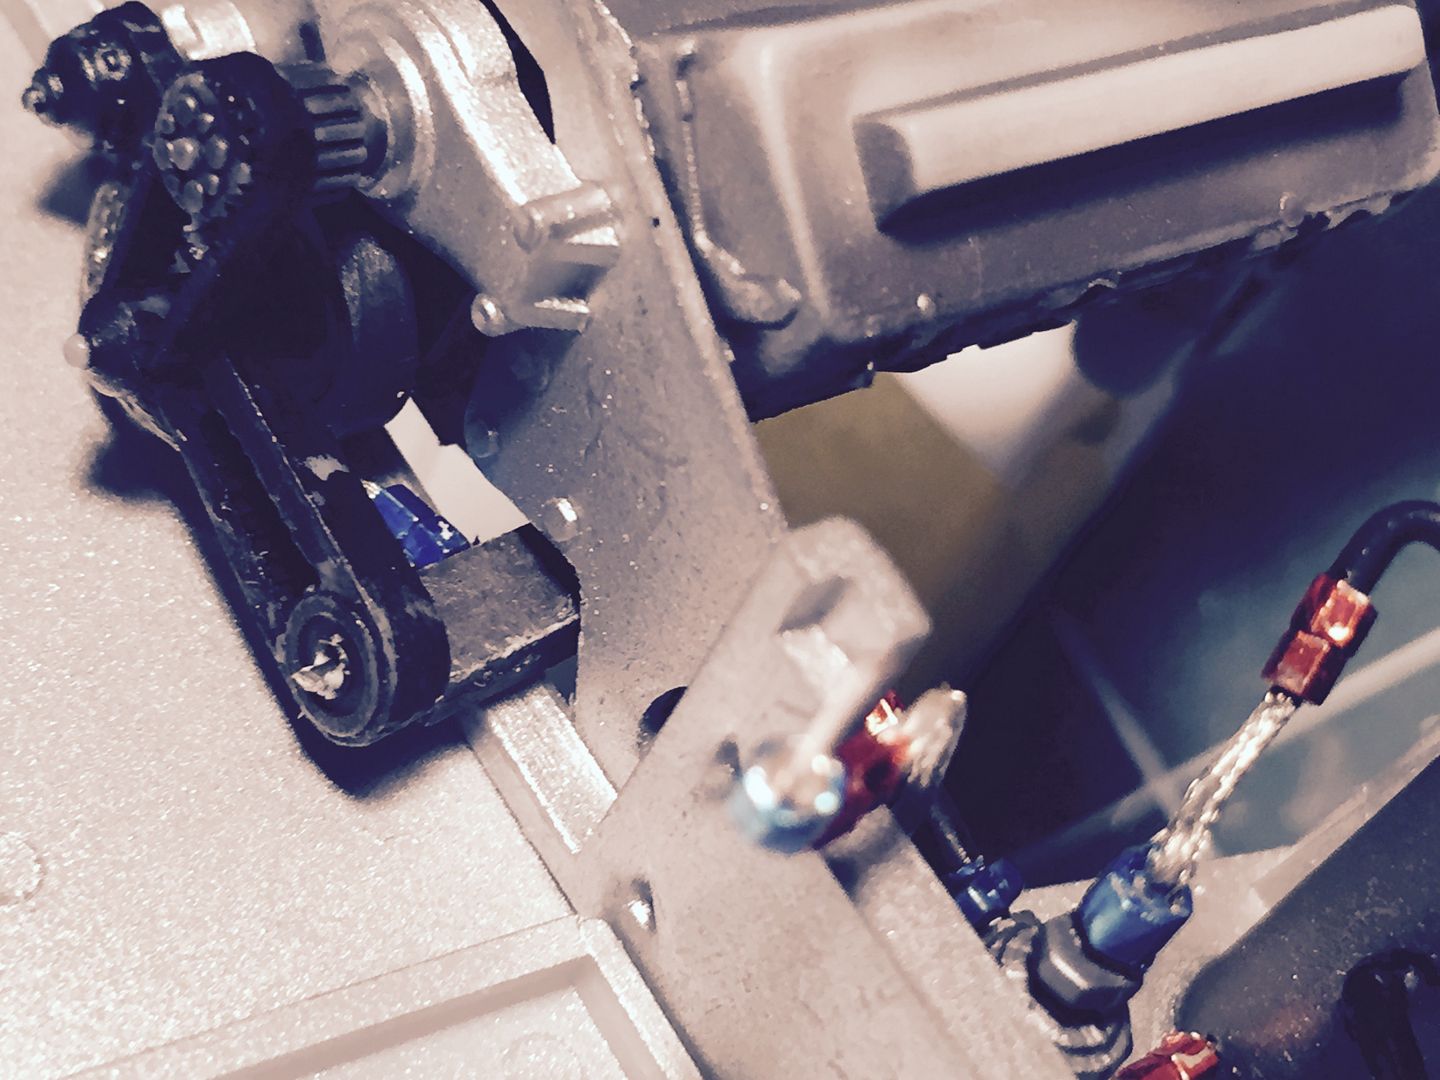
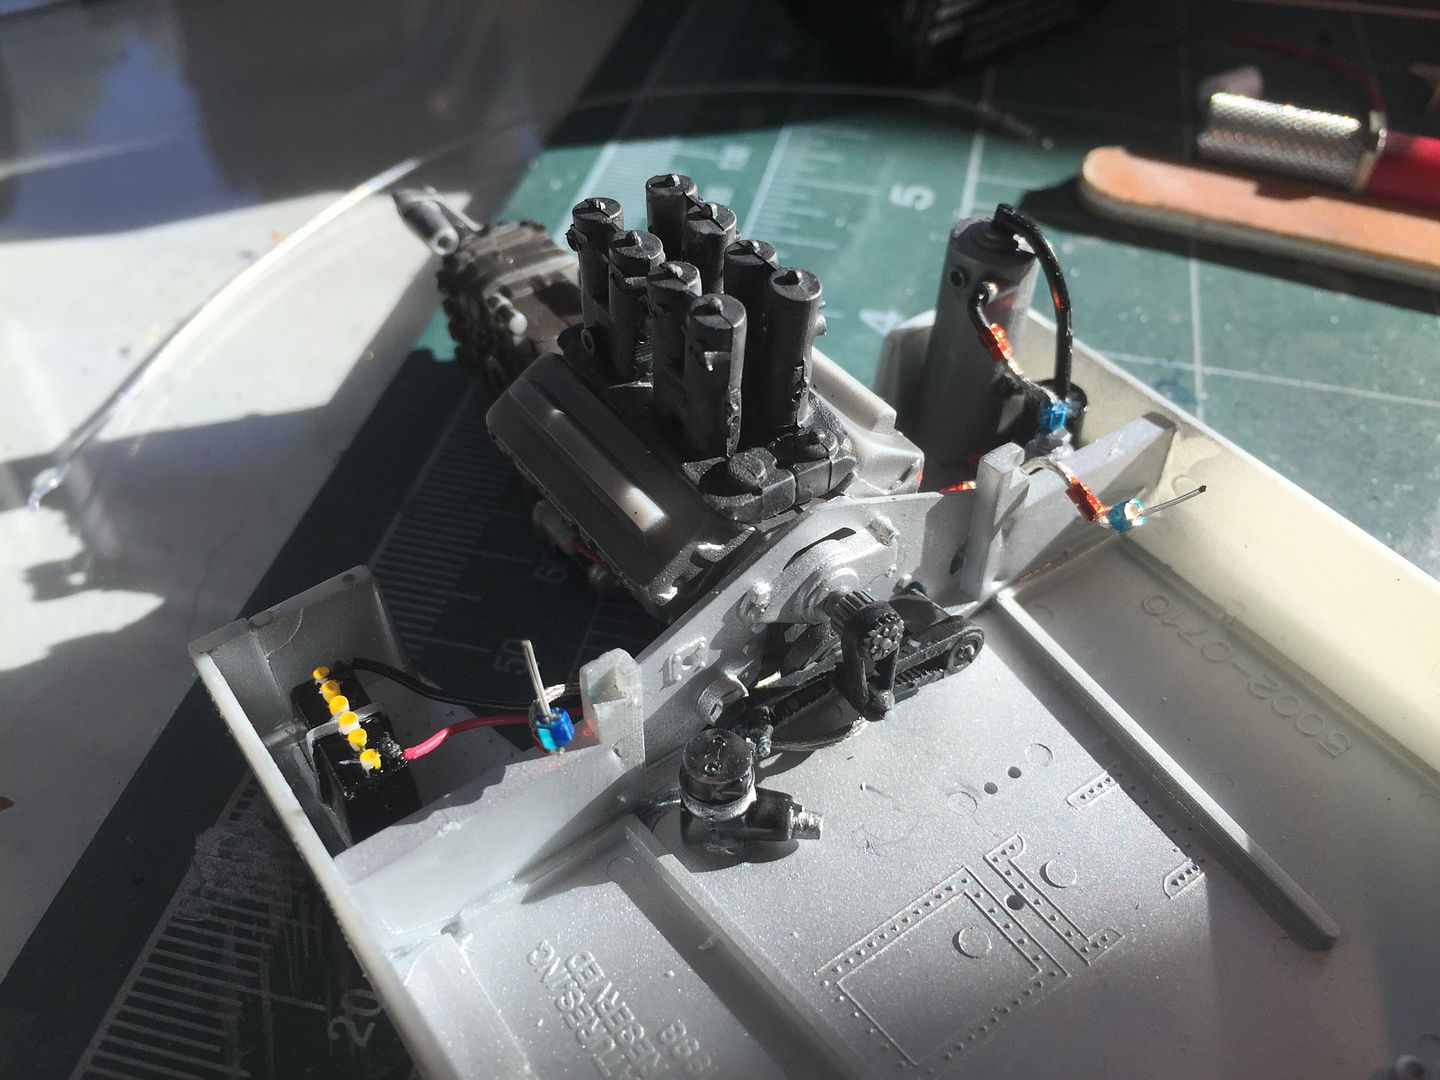
Big deviation from the instructions was to now assemble the engine and bulkhead to the belly pan. This allows me to add in the oil tanks, overflows, and fuel pump to the pan and plumb the lines from each. The position of the oil coolers that are attached to the roll bar can be established so the oil cooler lines can be added in their proper place. As each additional piece is added, they can be run so they don't interfere with the prior pieces or if necessary, old parts can be moved to make way. So now I added the oil tank and pump as well as the oil cooler lines and fuel pump.
The lower oil pump lines and return lines can now be put into place as well as the sump lines.
With the lower oil lines in place, I can now move up to the fuel system. First I cut the material from between the sets of stacks to prepare for some possible throttle linkage.
Next I drilled holes through the manifolds to be able to add throttle linkages. The jury is still out on how much I am going to try to add here but I wanted to be prepared.
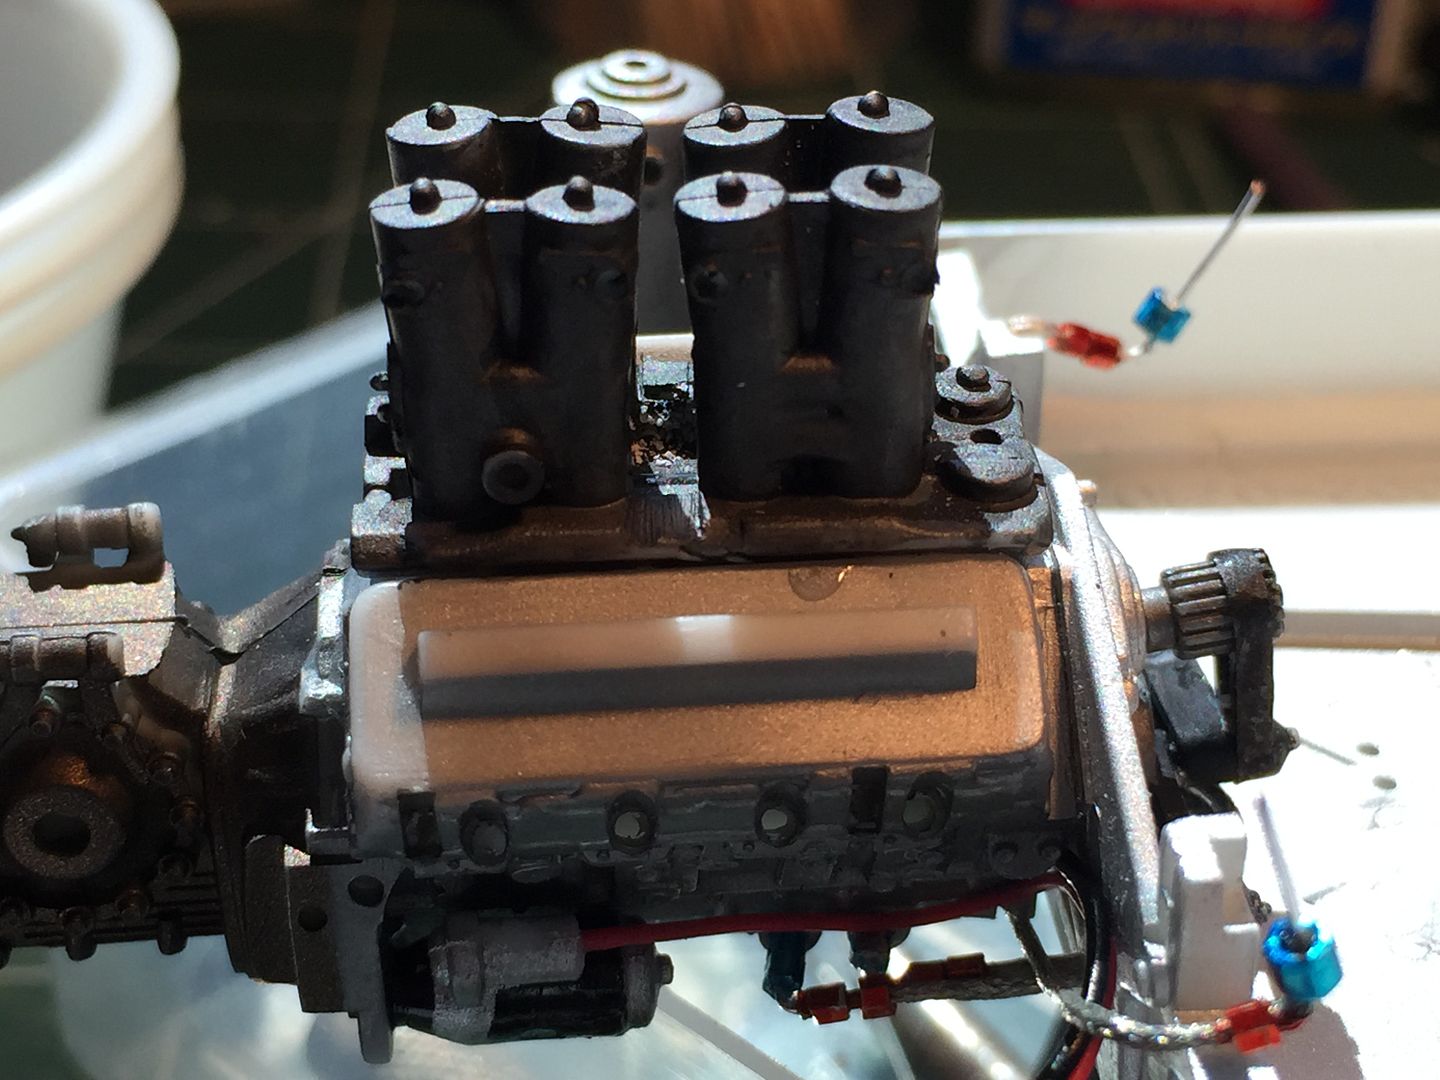
I touched up and cleaned up the manifolds and added them to the engine block.
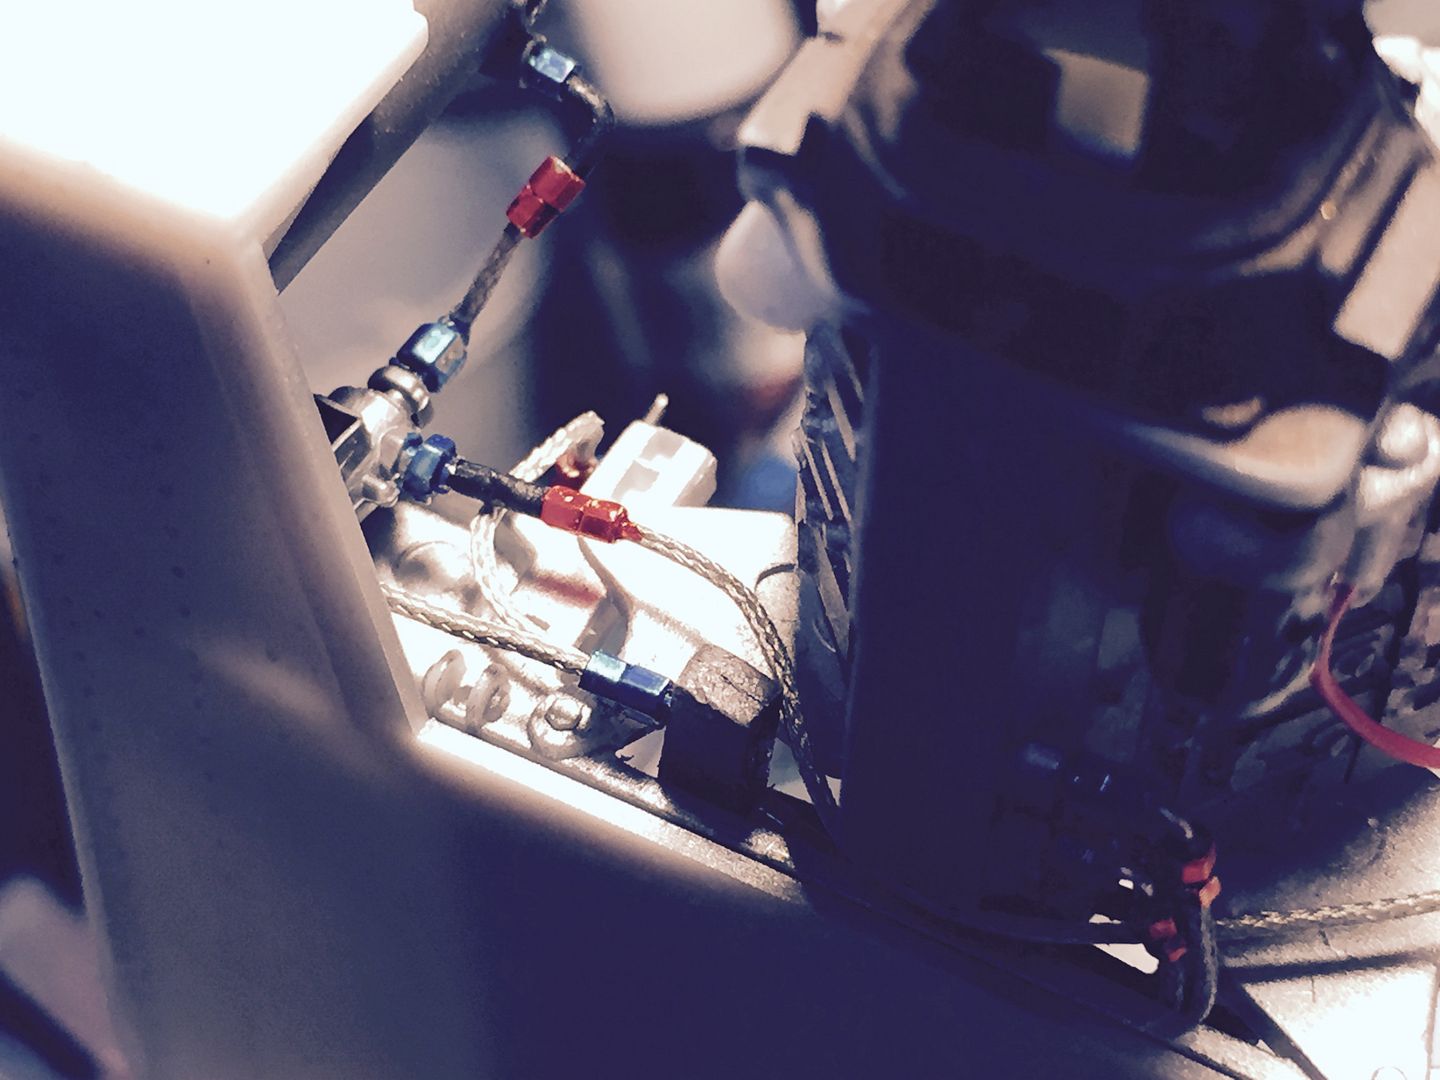
The feed and return fuel lines as well the the regulator lines can be run right alongside the intake manifold. I used both braided and hard lines here as seen in the 1:1 photos. This is one area that the kit parts are a pain. The kit lines are so big that they don't want to stay in place and don't like to not interfere with the upper engine cover and the seat back panel. Hopefully by using more scale sizes and keeping everything nice and neat, I can make everything sit where it is supposed to.
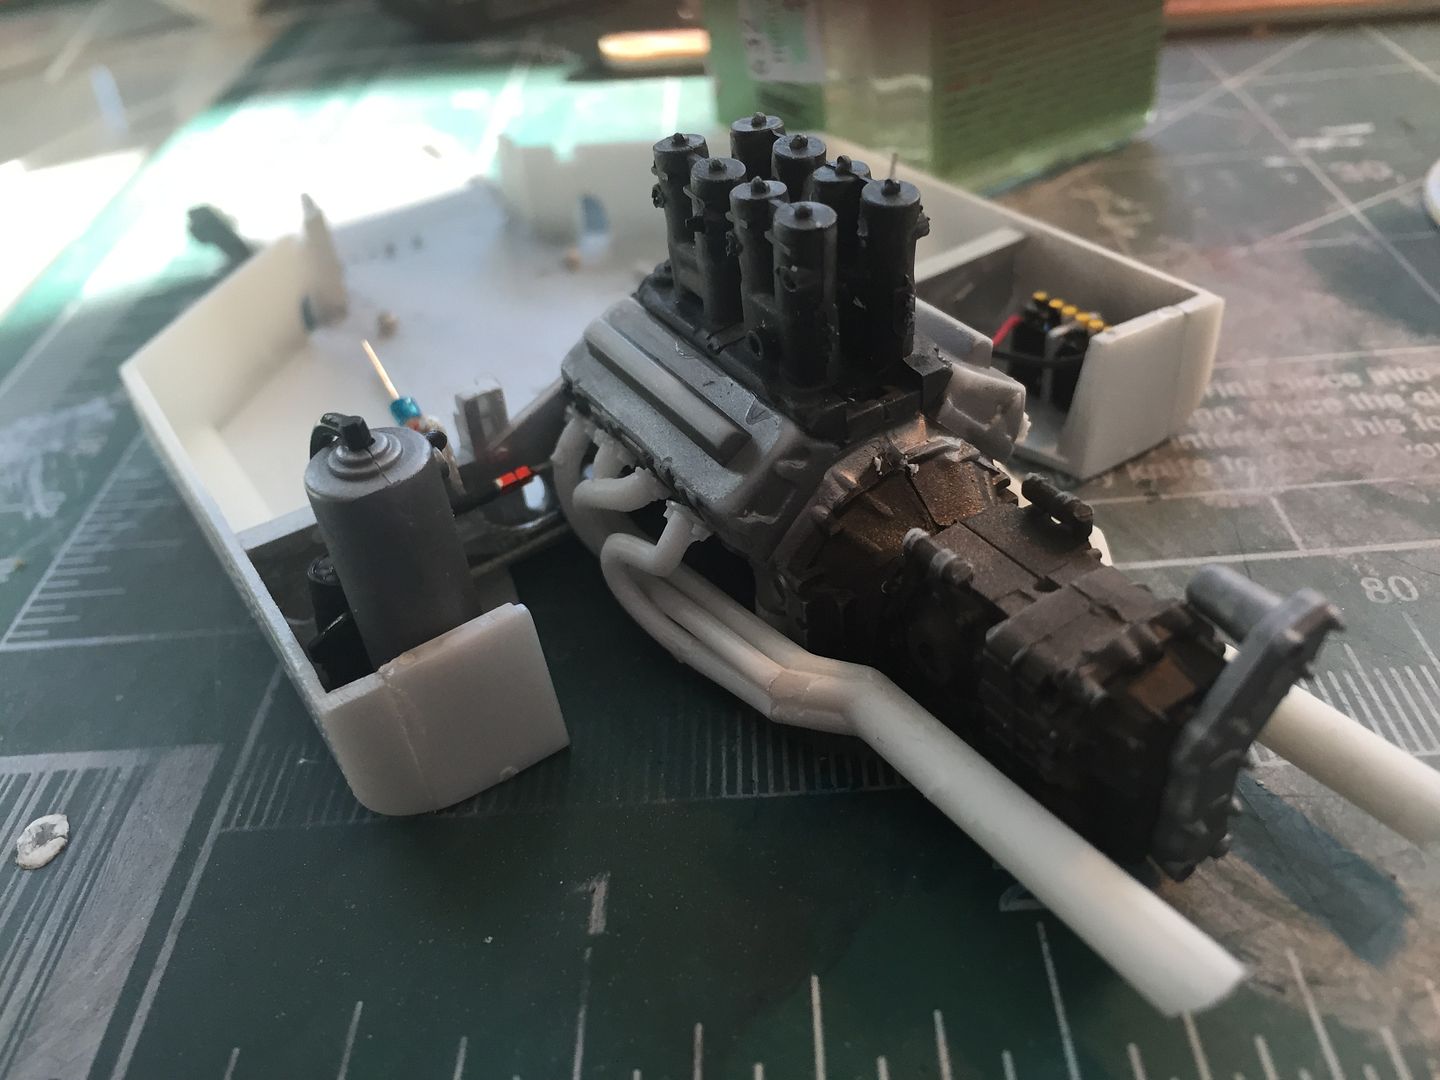
Here is the engine with the lower oil lines in place. Everything is tucked in close to the engine and bulkhead so hopefully this will aid in making the final fit work. All the lines shown are added all throughout the kit instructions after exhausts, and rear suspension is added. Hopefully deviating from the instructions will make everything fit better.
Now with the oil system in place, the engine area is hopefully neat and tidy. Next comes the exhaust pipes. These fit so poorly that I drilled and pinned the connections to the engine block. I'm still not 100% happy with them but i think it is one of those things that only I can see the issue, probably nobody else will see them.
-
For the plug wire go to eBay and look for the seller Inventex2012. It is called 10 X 10 ft 30 AWG wrapping wire. It is $5.80
the coax came from eBay seller MDFly electronics. It was called .81 mm coaxial cable. They are currently out of it but it was $.99 for 3 feet just last week.
-
Thanks for the compliments.
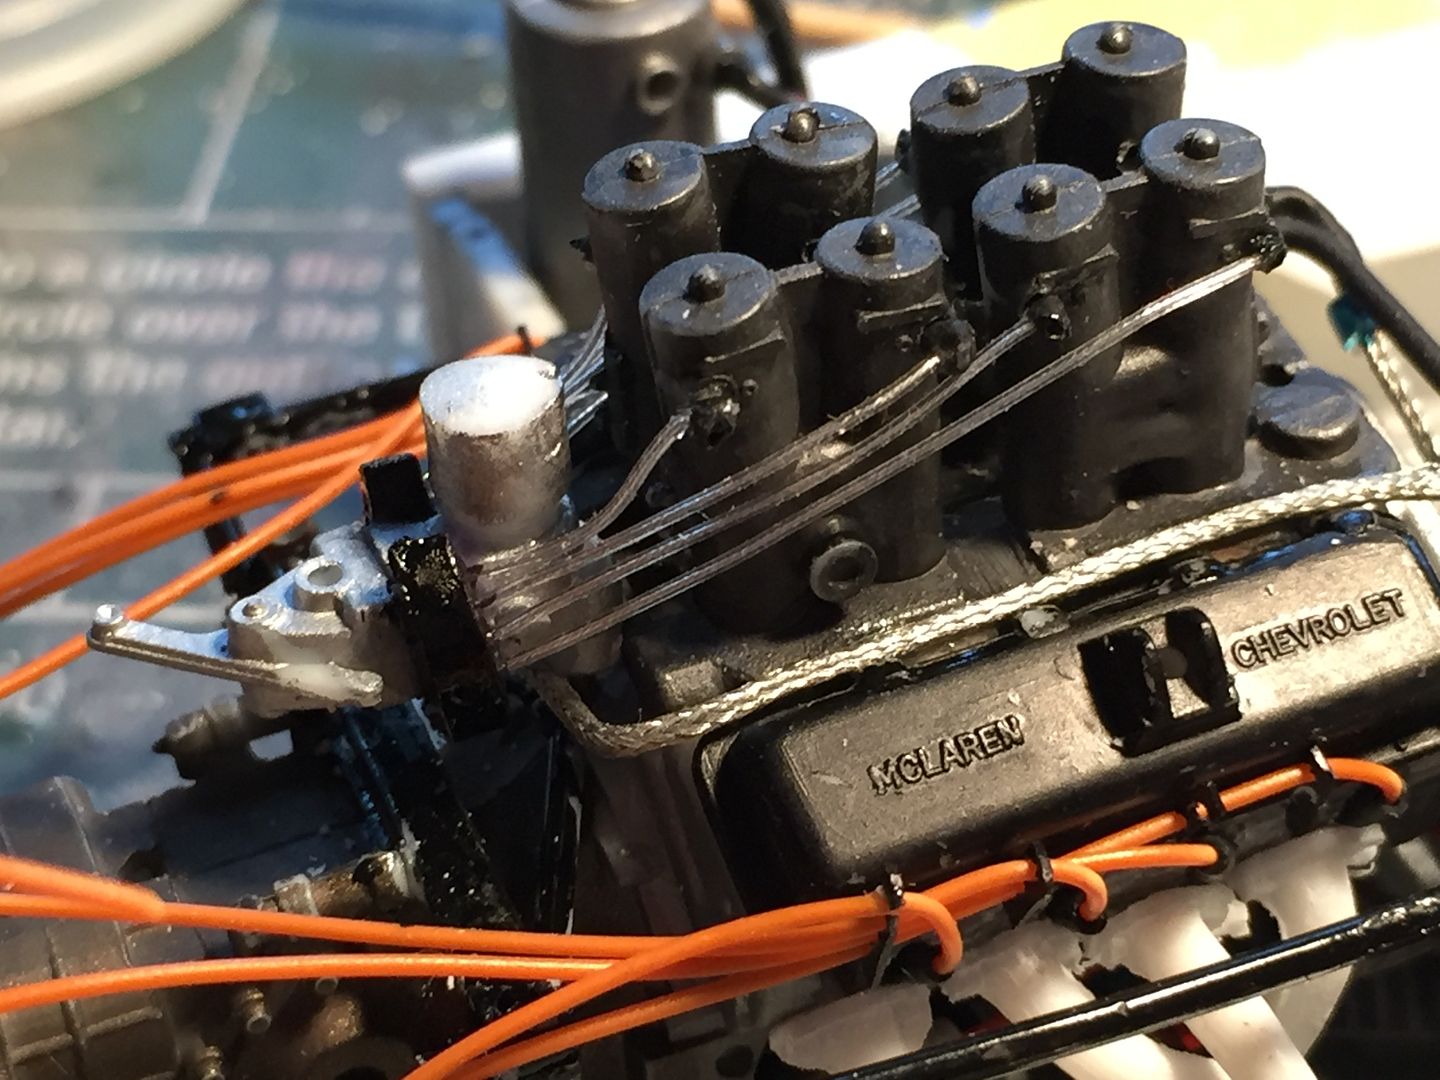
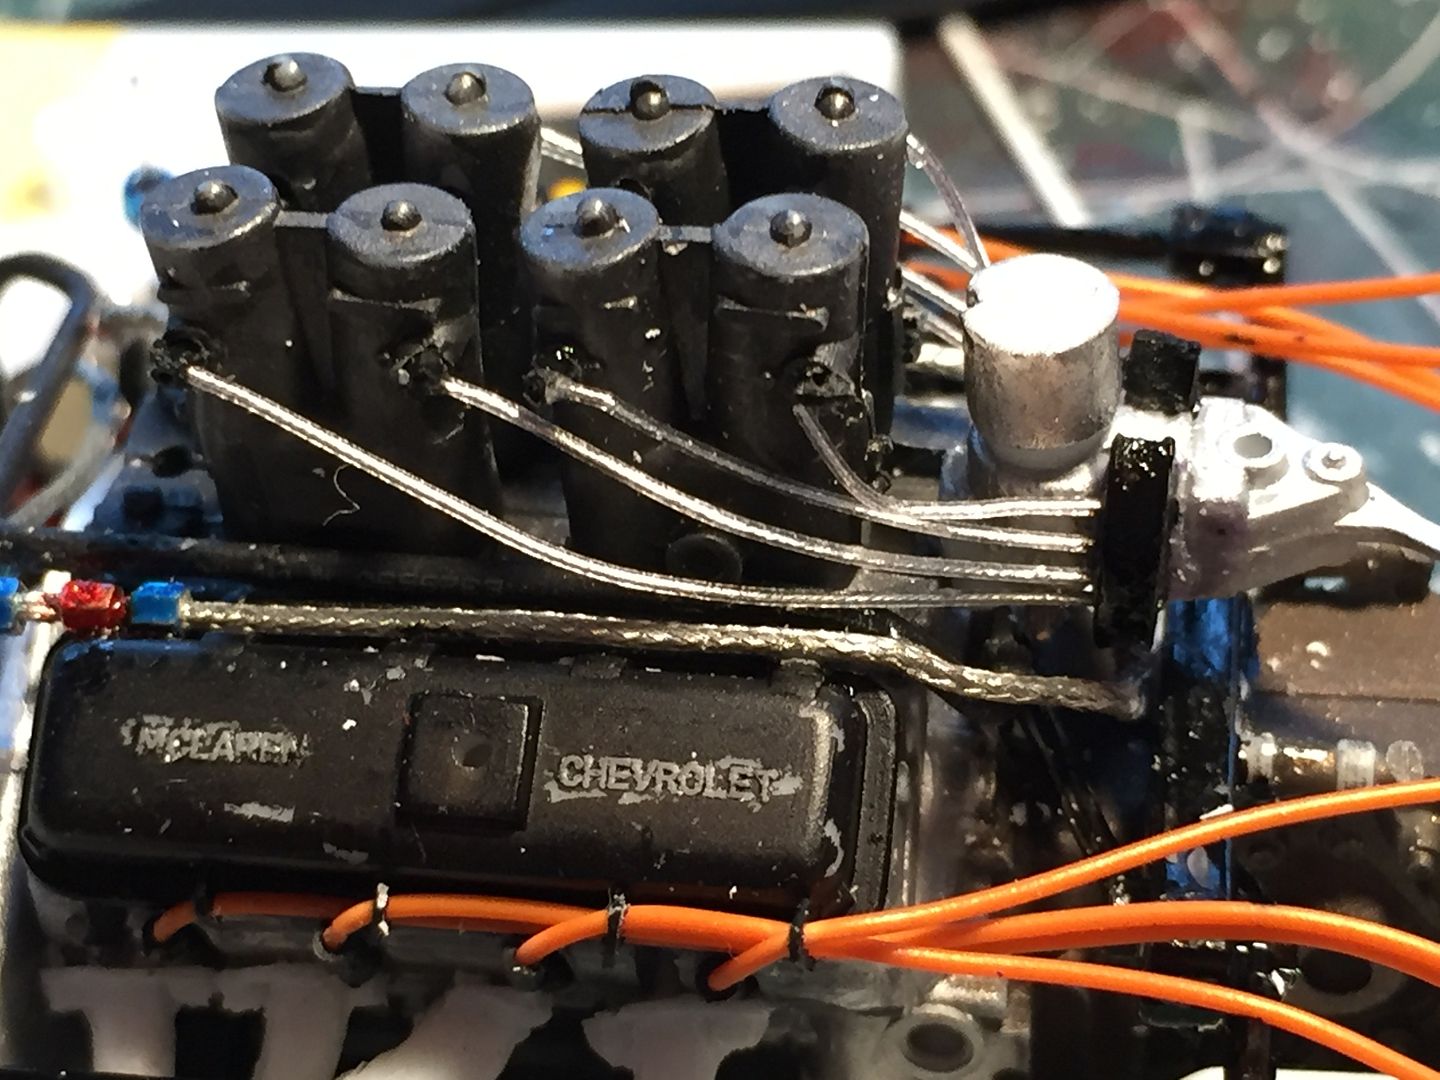
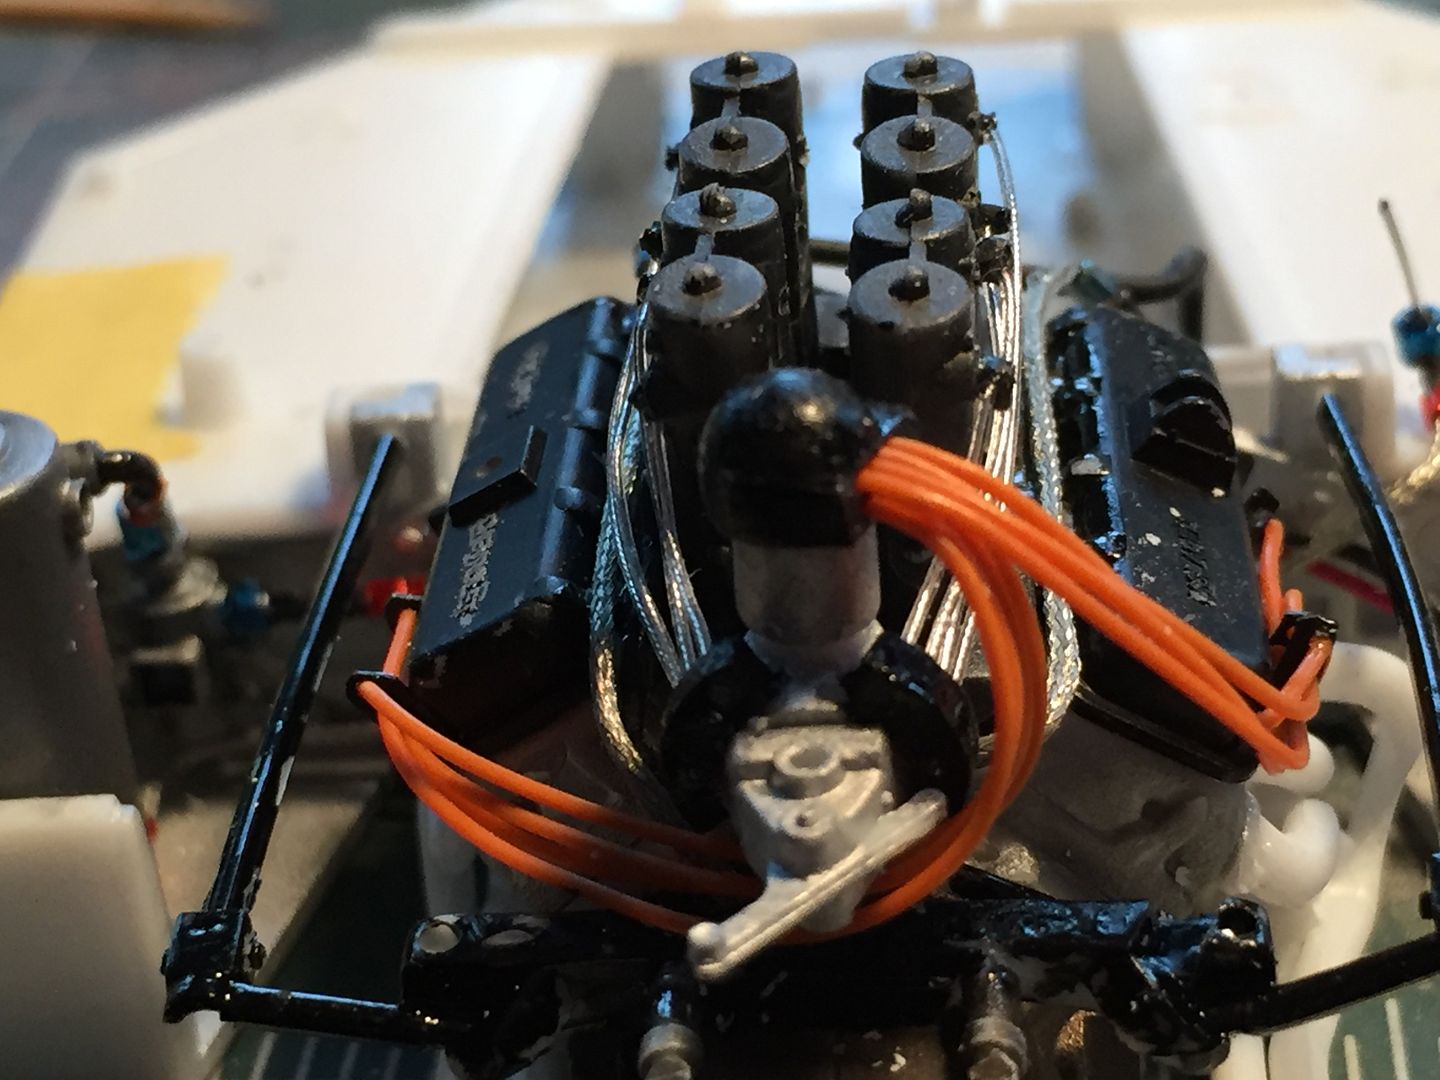
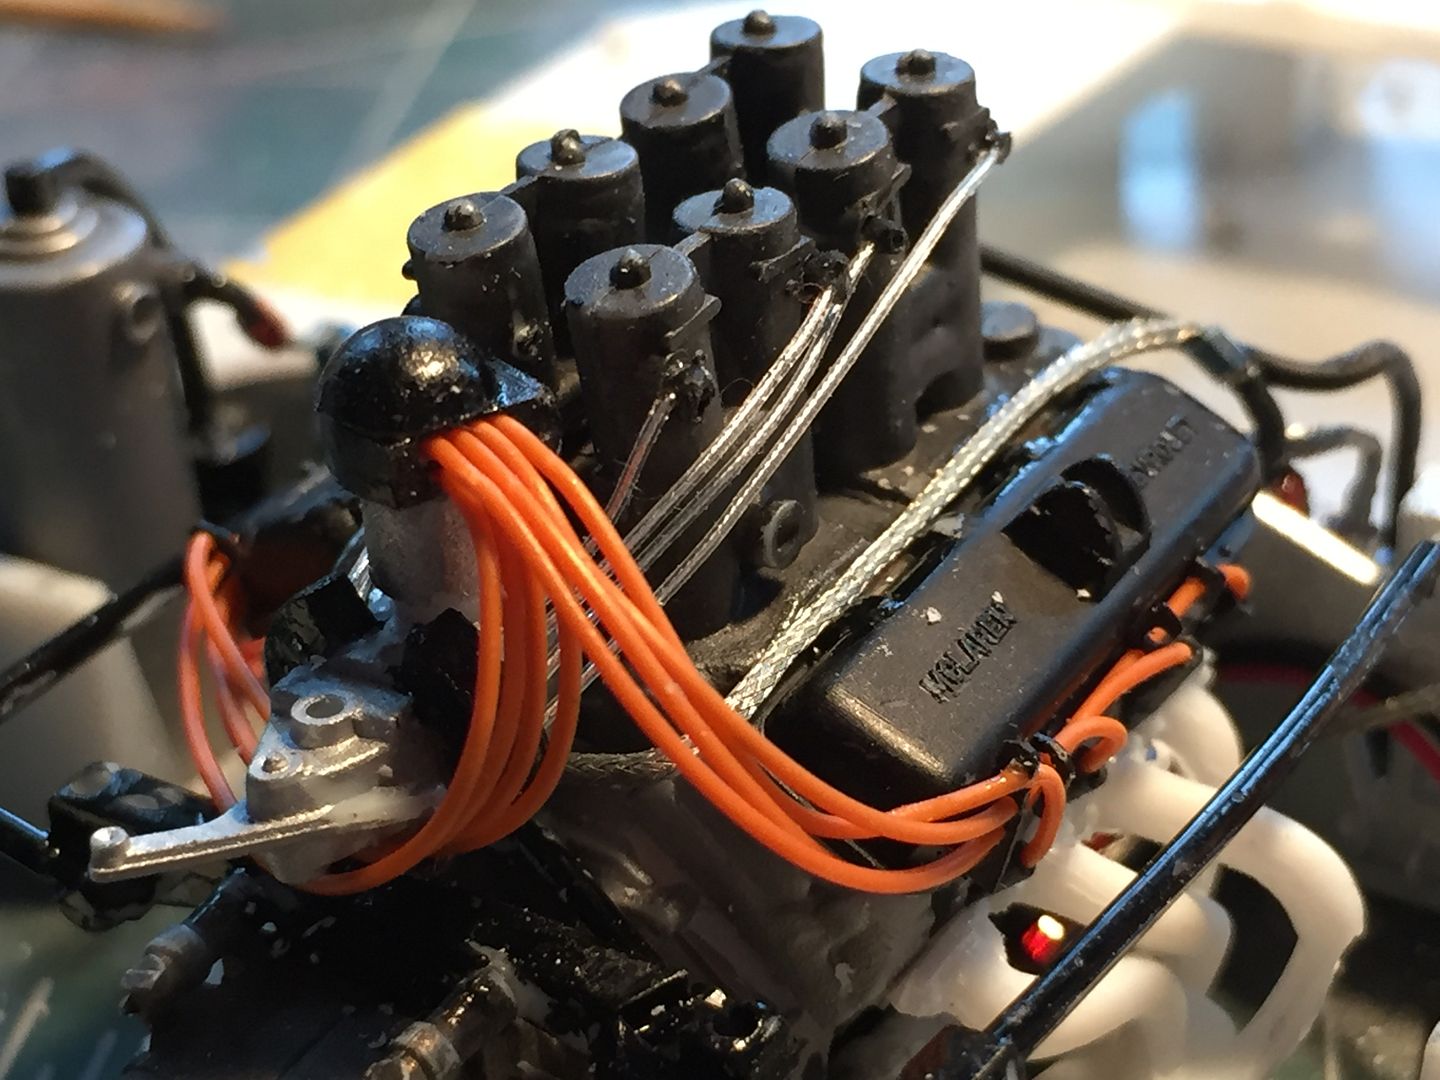
I have had fun playing with some materials. One thing I have had fun with is shrink wrap tubing. It makes great plug wire boots and distributor cap boots. I found some shrink wrap tubing with a .6 mm inner diameter and a 2:1 shrink ratio. That means that the minimum inside diameter is .3 mm and the outside diameter goes down to around .5 mm, or 1/2 inch in scale. You can also stretch the tubing when hot to get it much smaller and thinner. For motorcycles this stuff is perfect for throttle and brake cables and can be shrunk to the handlebar mounts perfectly. I usually put a small diameter wire inside so I can bend it and it will stay bent. A note about shrink wrap. Most wraps shrink at 200-220 degrees F. Plastic melts at 300-330 degrees (it will get softer, but not melt at anything lower). Find a 200 degree heat source and you can shrink the wrap without melting your project.
I have been getting shrink wrap through EC-Buying Technology Co., Ltd in China. 5 meters of .6mm wrap costs 77 cents. Look on EBay for ".61 mm coax". There are actually smaller shrink wraps available through medical supply places but it is VERY expensive.
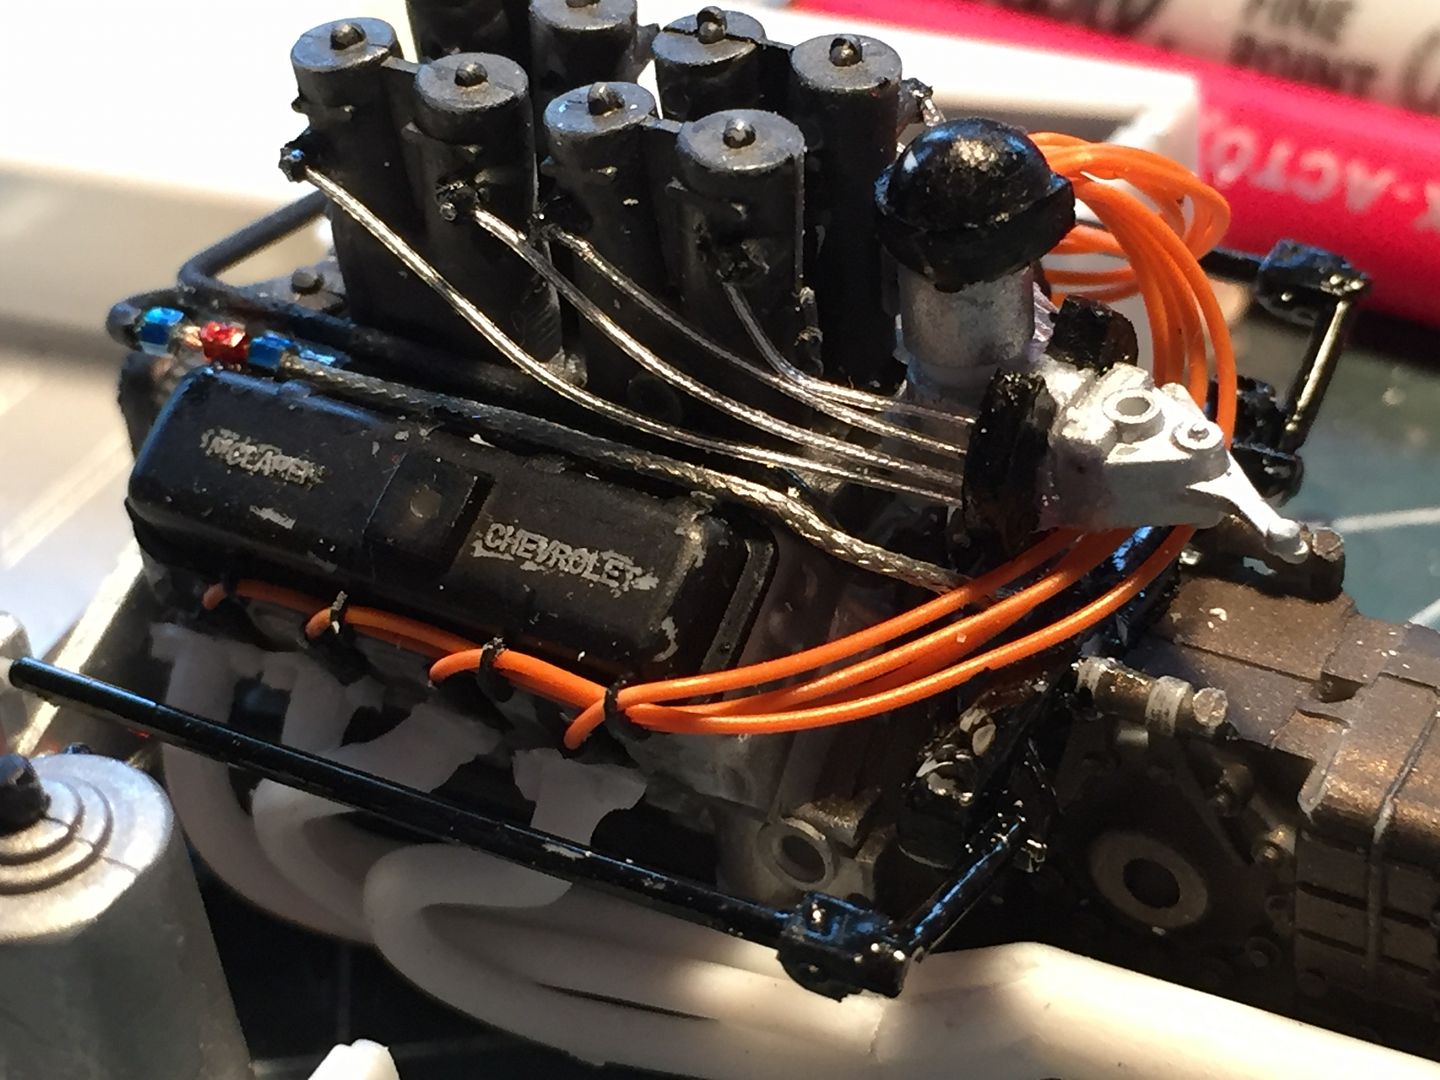
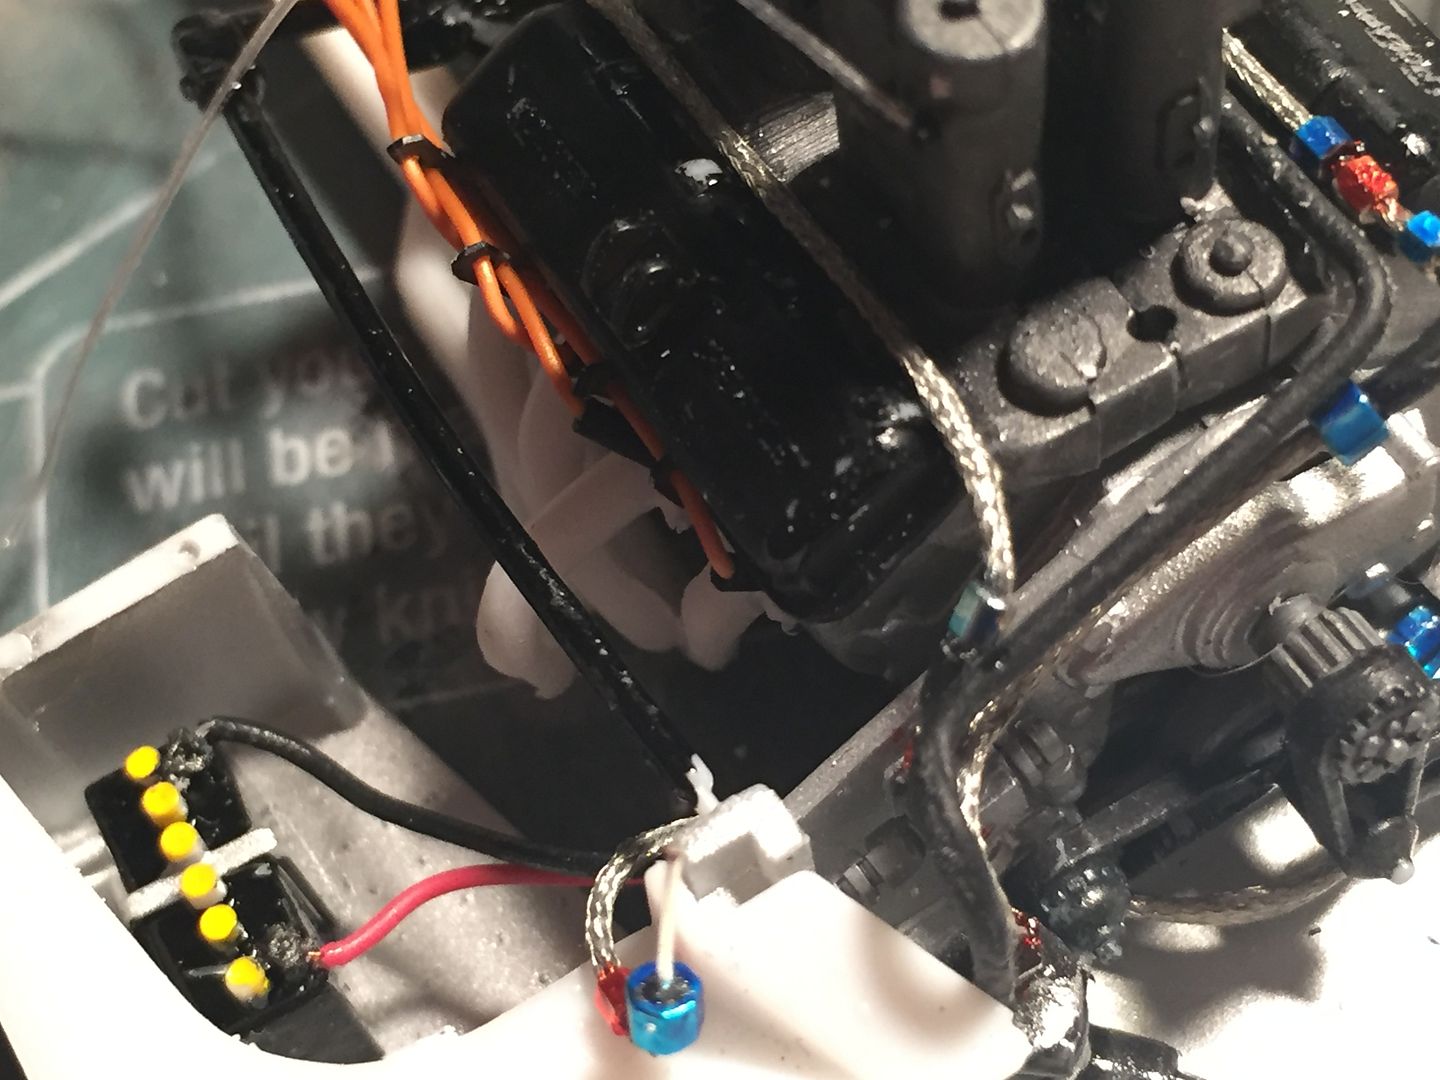
The wires here were done using shrink wrap. I like the distributor cap ones. I never liked the look of a scale distributor where the wires all sprout out of one hole. The plug boots are two pieces of wrap cut at a 45 degree angle and shrunk over a 90 degree bend in the wire. If anyone is interested I could do a short tutorial on how I made these in detail.Miniature coax cable will give me three things. The outer skin is great for water hoses and radiator hoses. The braid is great for braided hose, of course, but the inner core wire makes beautiful brake lines and fuel lines (see the fuel lines on the engine pic above). It is tiny, pretty close to .3 mm (or a scale 1/4 inch). I usually use a thin wire in the middle of my braided lines so I can bend them as I want and the braid doesn't appear collapsed when it goes around a corner. I found coax that has an outside diameter at less than one mm and the braid, when removed and stretched gets down around a third of a mm, or 3/8 inch in scale. I don't have the supplier name right here, I will post it tonight when I get home. If i remember, 3 meters costs less than 5 dollars.
Hex beads work great. They are sometimes referred to as "seed beads", Google "hex seed beads" and you will find them all over. I got mine from Fusion Beads. I got 4 sizes, #8, #10, #11, and #15. The number 15 bead is the smallest and scales out to around 3/4 of an inch. You can get them in all kinds of colors. I got them in silver and they look pretty good when painted with Tamiya red and blue clear. The are sold by weight and for $4.50 you get somewhere around 1300 beads. I figured it out and a 2 inch braided hose with 4 bead fittings cost about a penny.
I also found a source for wire. The wire is the same that you get in aftermarket sources. My source had ten pieces, each ten feet long, in ten different colors for 5 dollars and change. I ordered three of them so for around $15.00 I got 300 feet of wire in ten colors.
I will post the link for the coax and plug wire tonight. It was a U.S. company and their service was great.
Thanks for looking


 I know the colors are different but I have an extra kit to practice with and I didn't like the red ones.
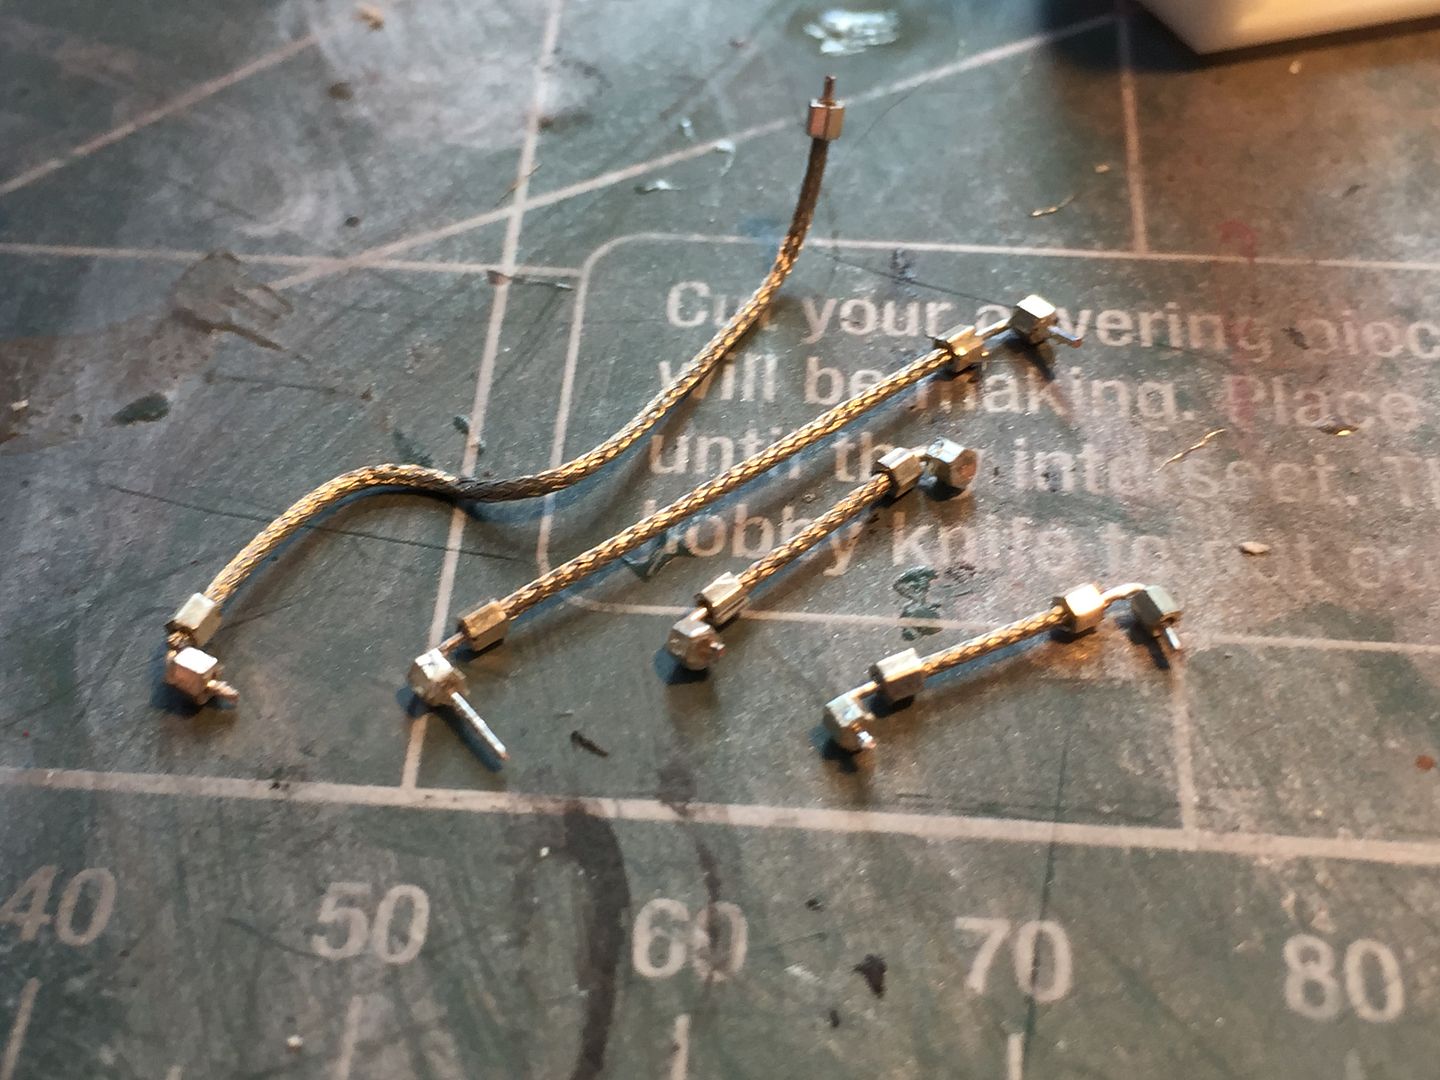


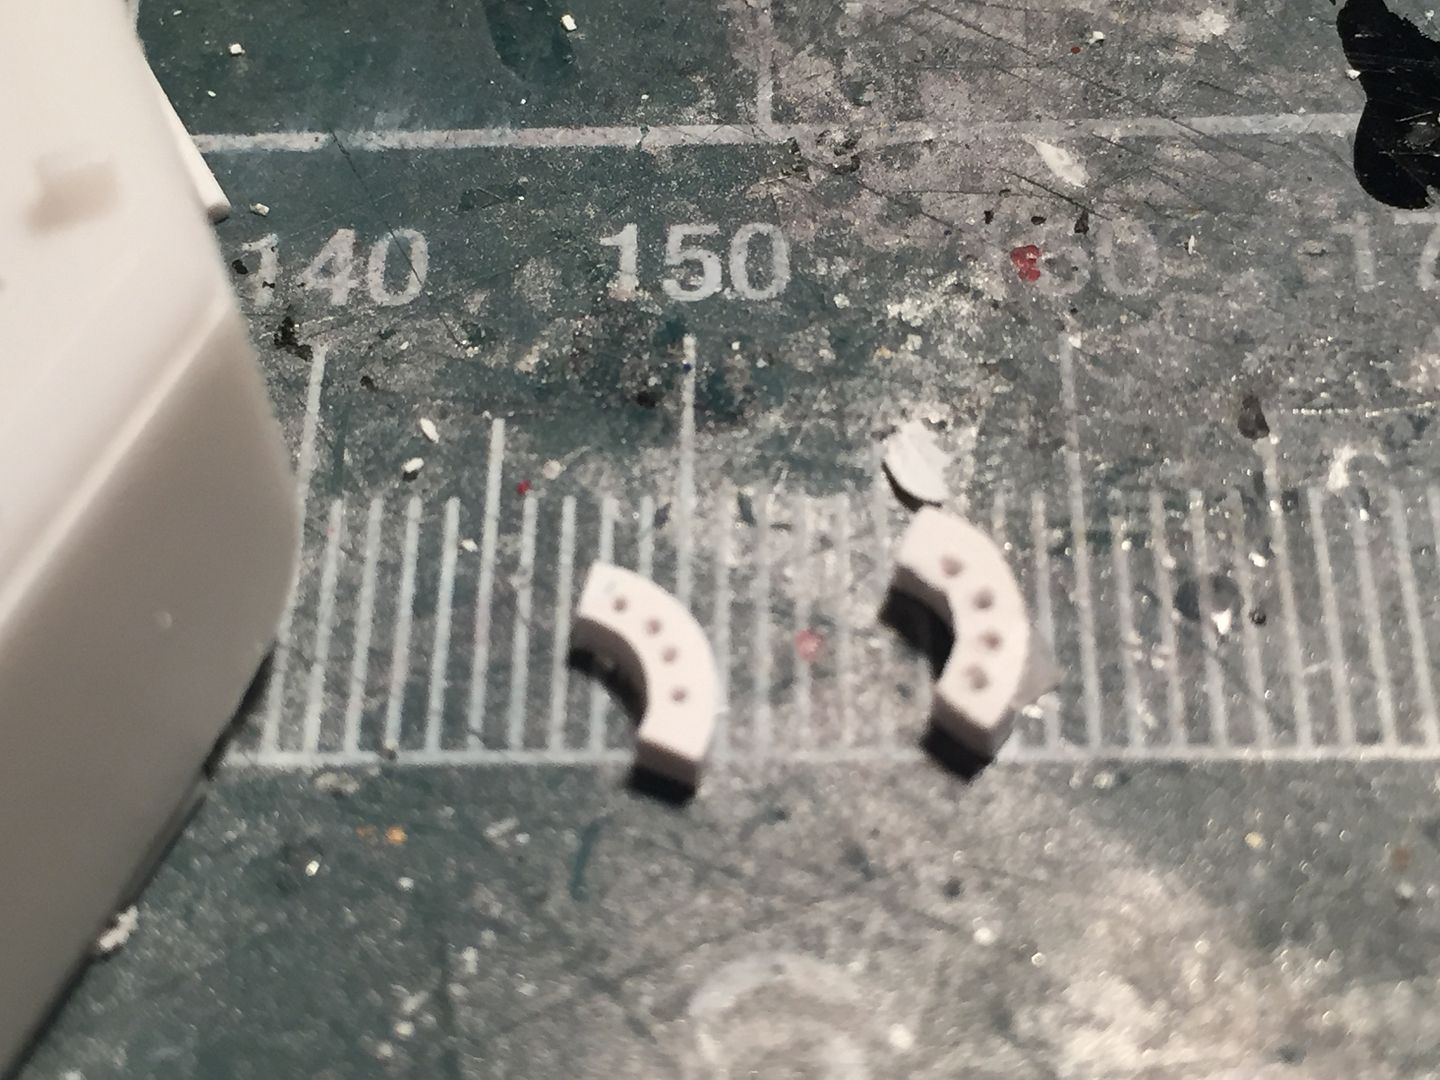


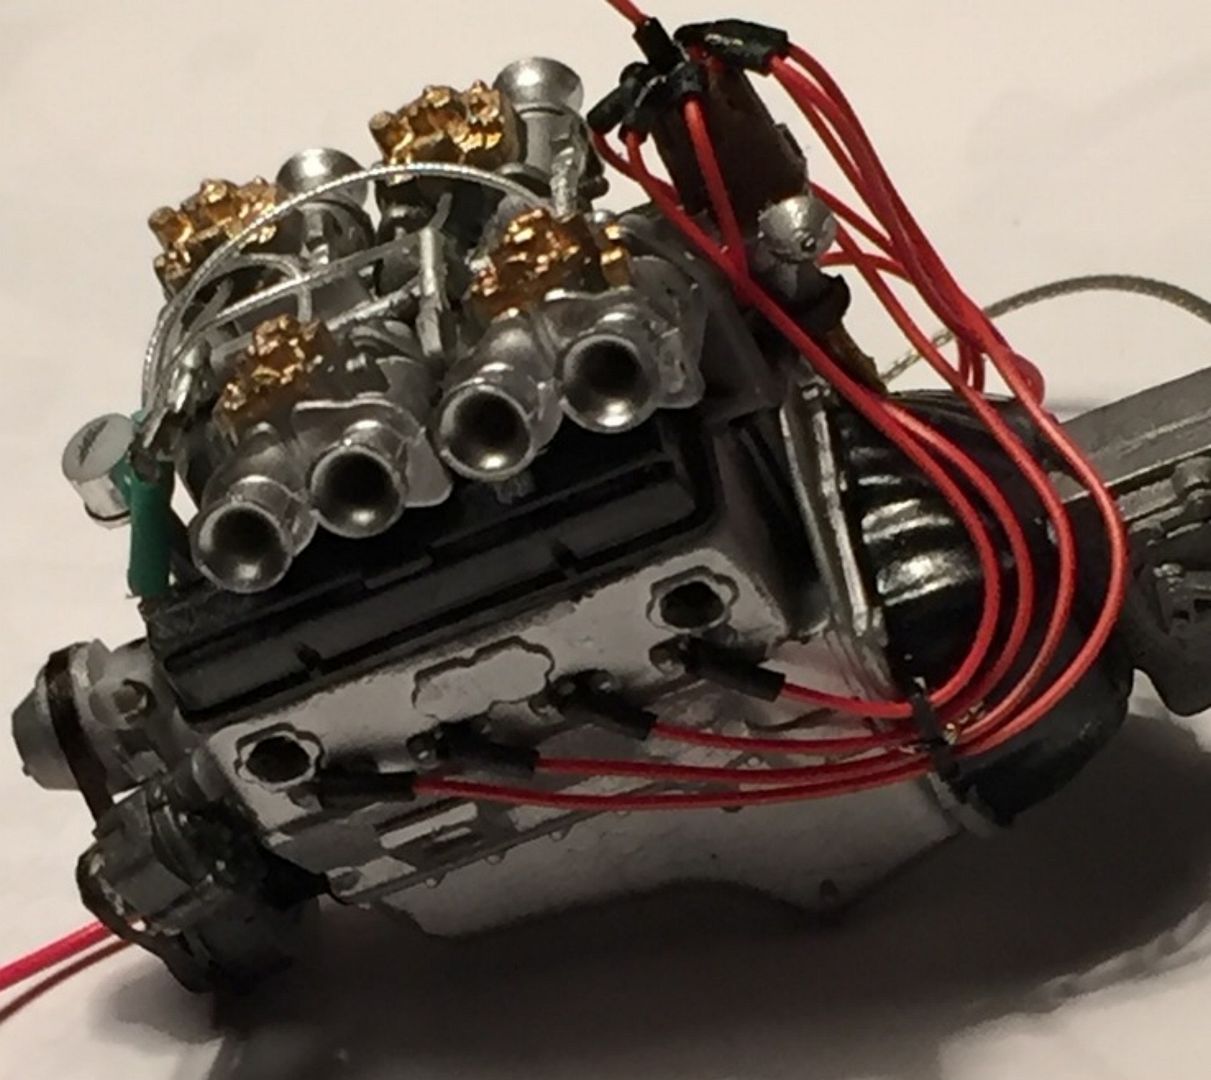 The wires here were done using shrink wrap. I like the distributor cap ones. I never liked the look of a scale distributor where the wires all sprout out of one hole. The plug boots are two pieces of wrap cut at a 45 degree angle and shrunk over a 90 degree bend in the wire. If anyone is interested I could do a short tutorial on how I made these in detail.
Accurate Miniatures McLaren
in WIP: Model Cars
Posted