Search the Community
Showing results for tags 'kitbash'.
Found 14 results
-
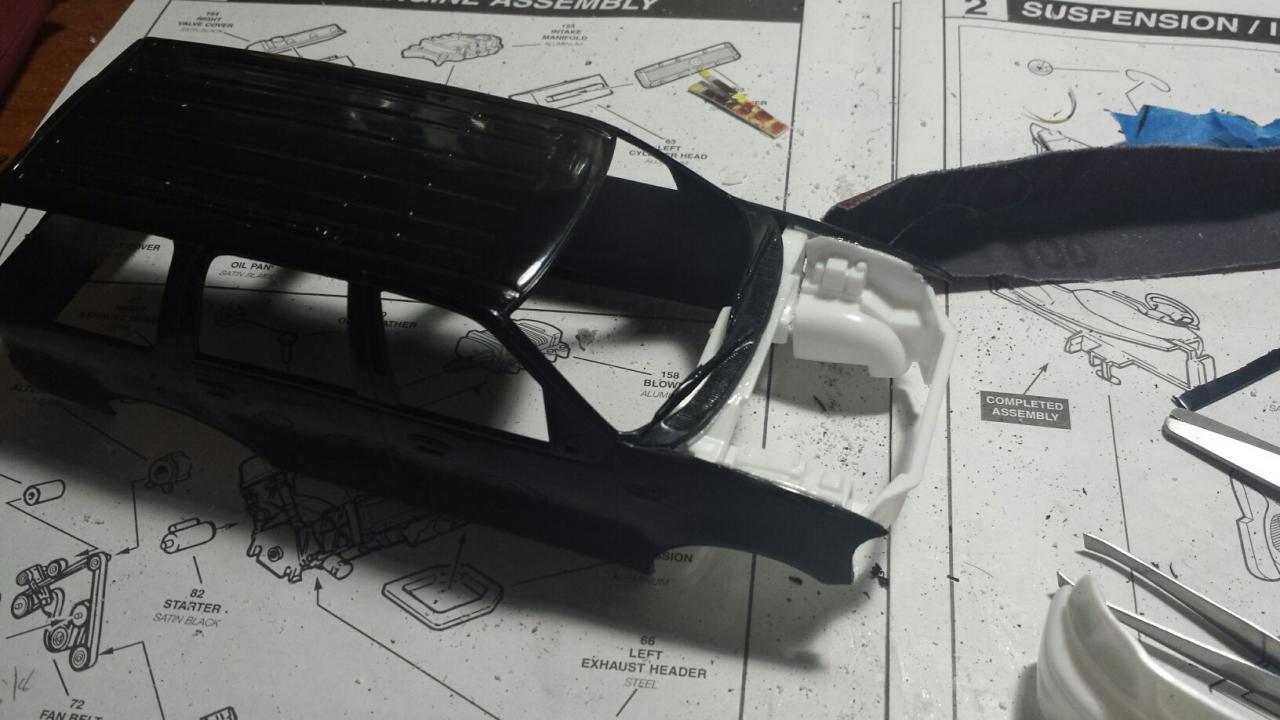
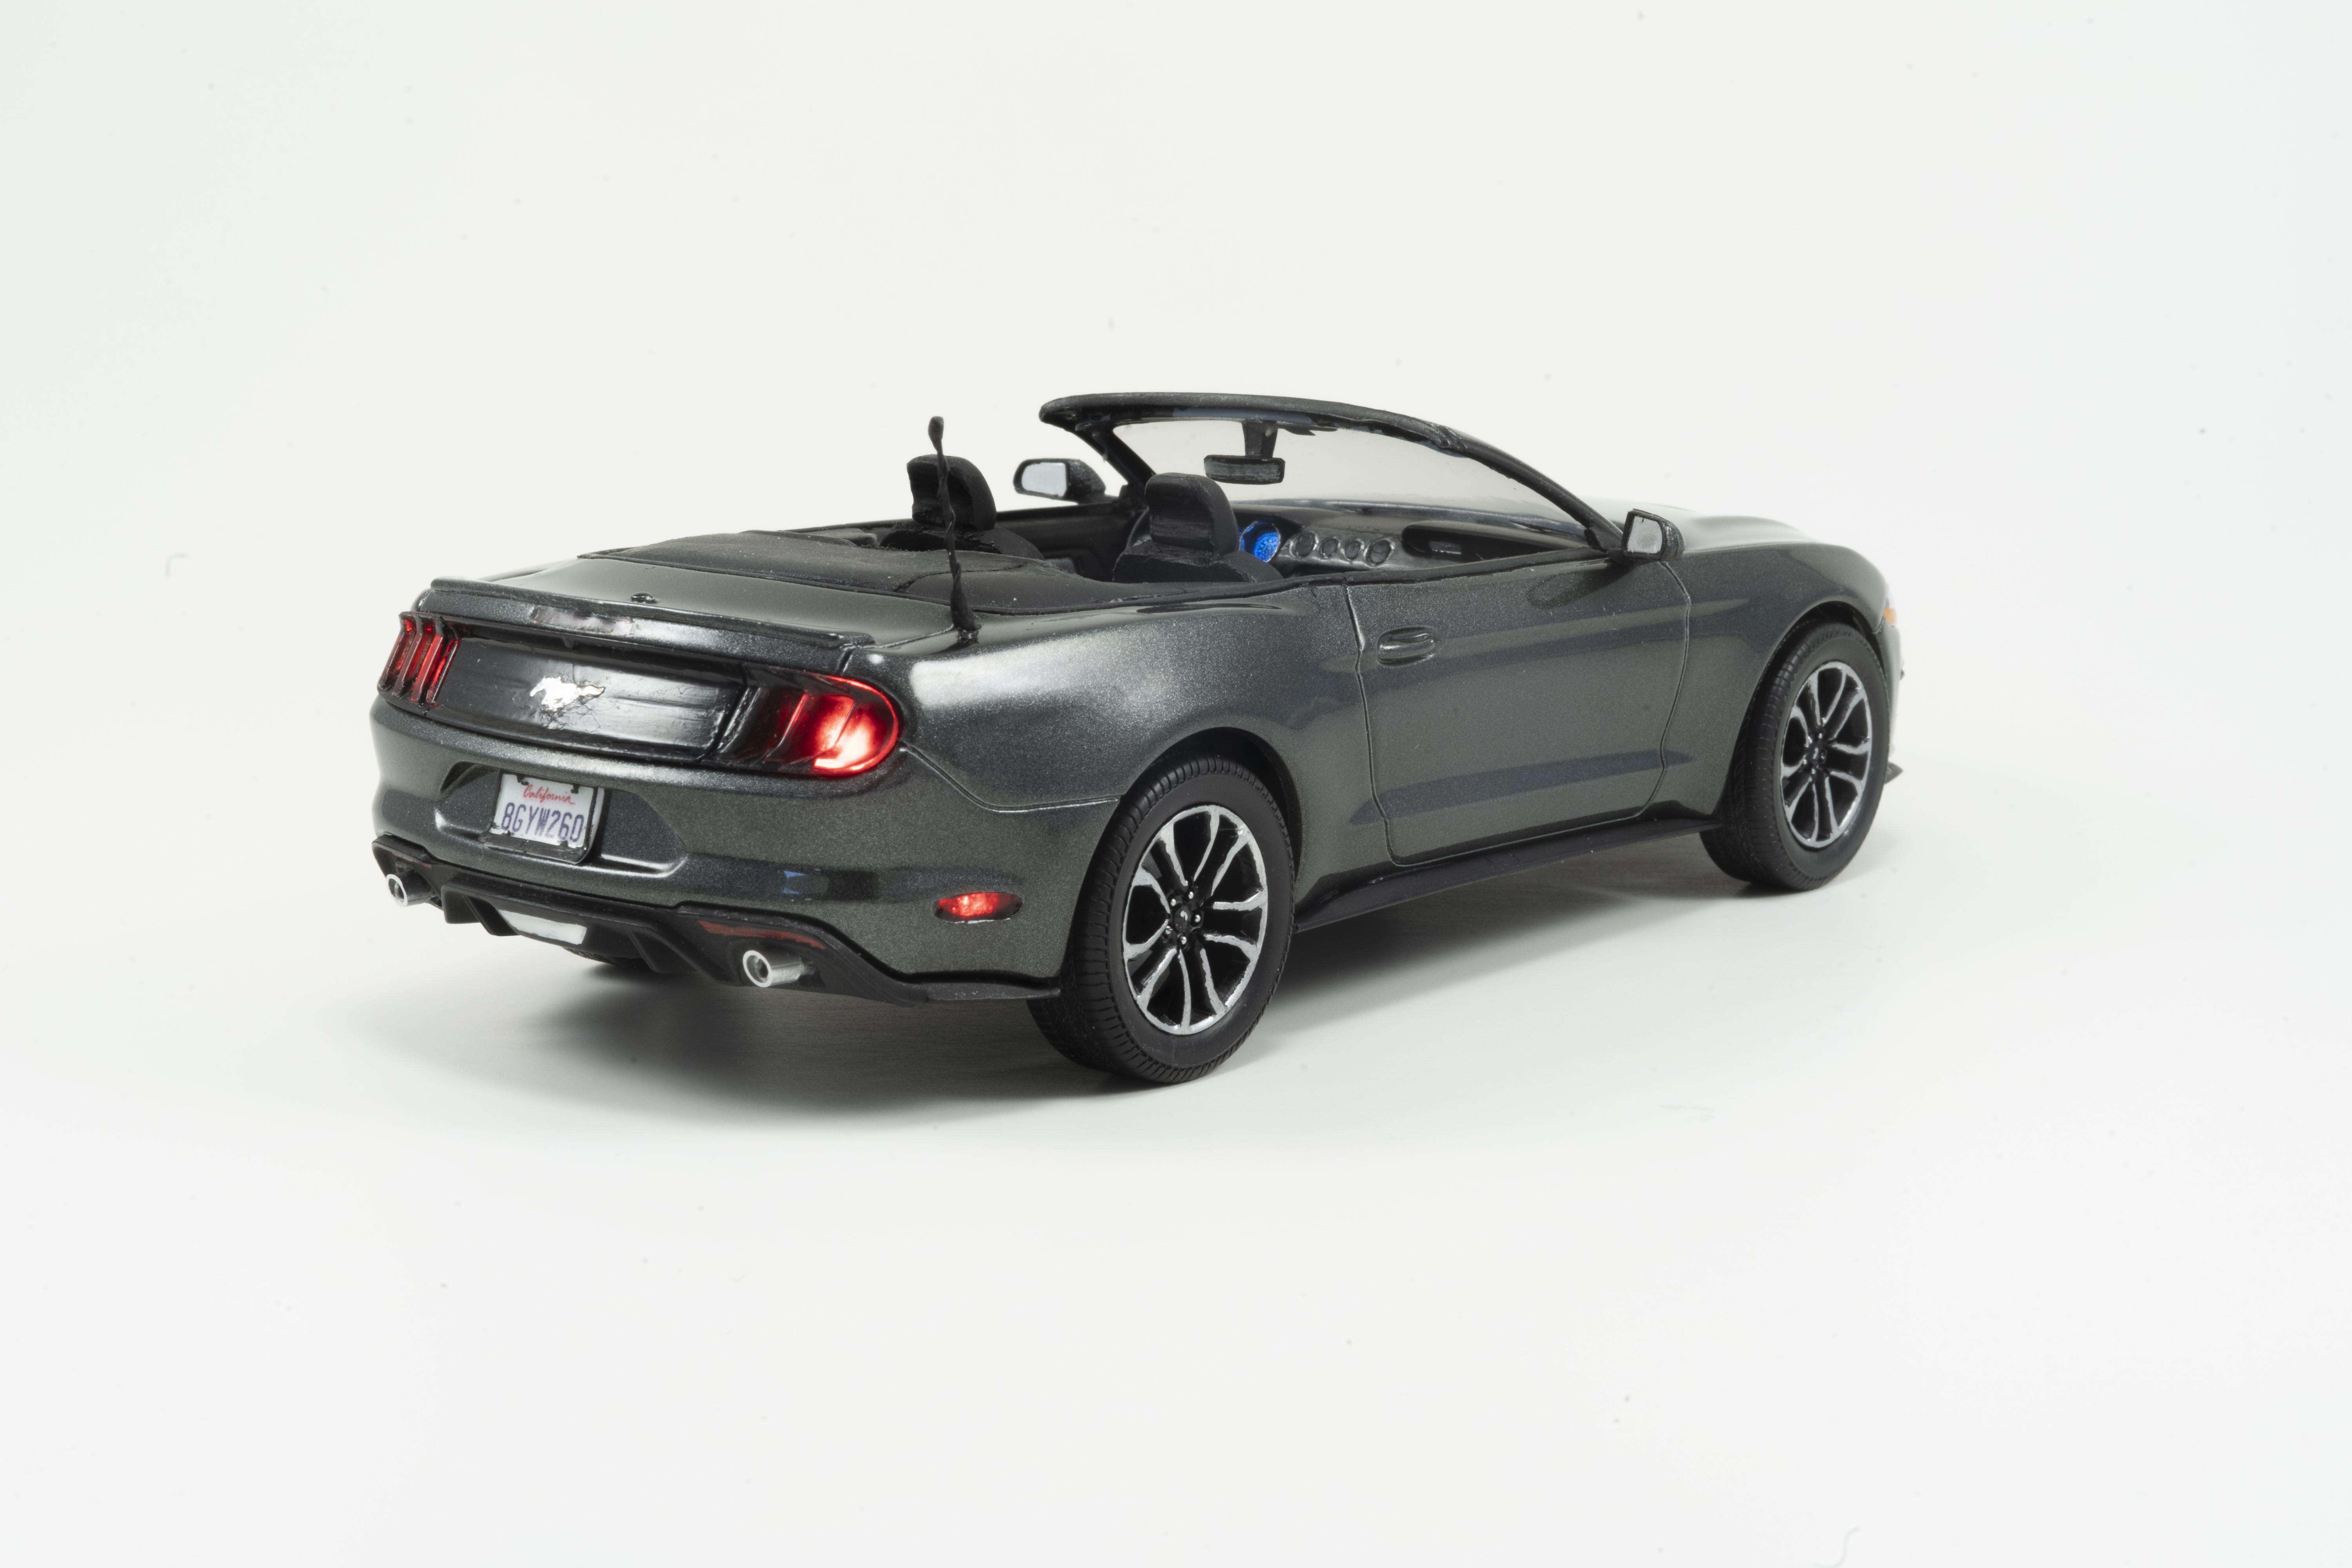
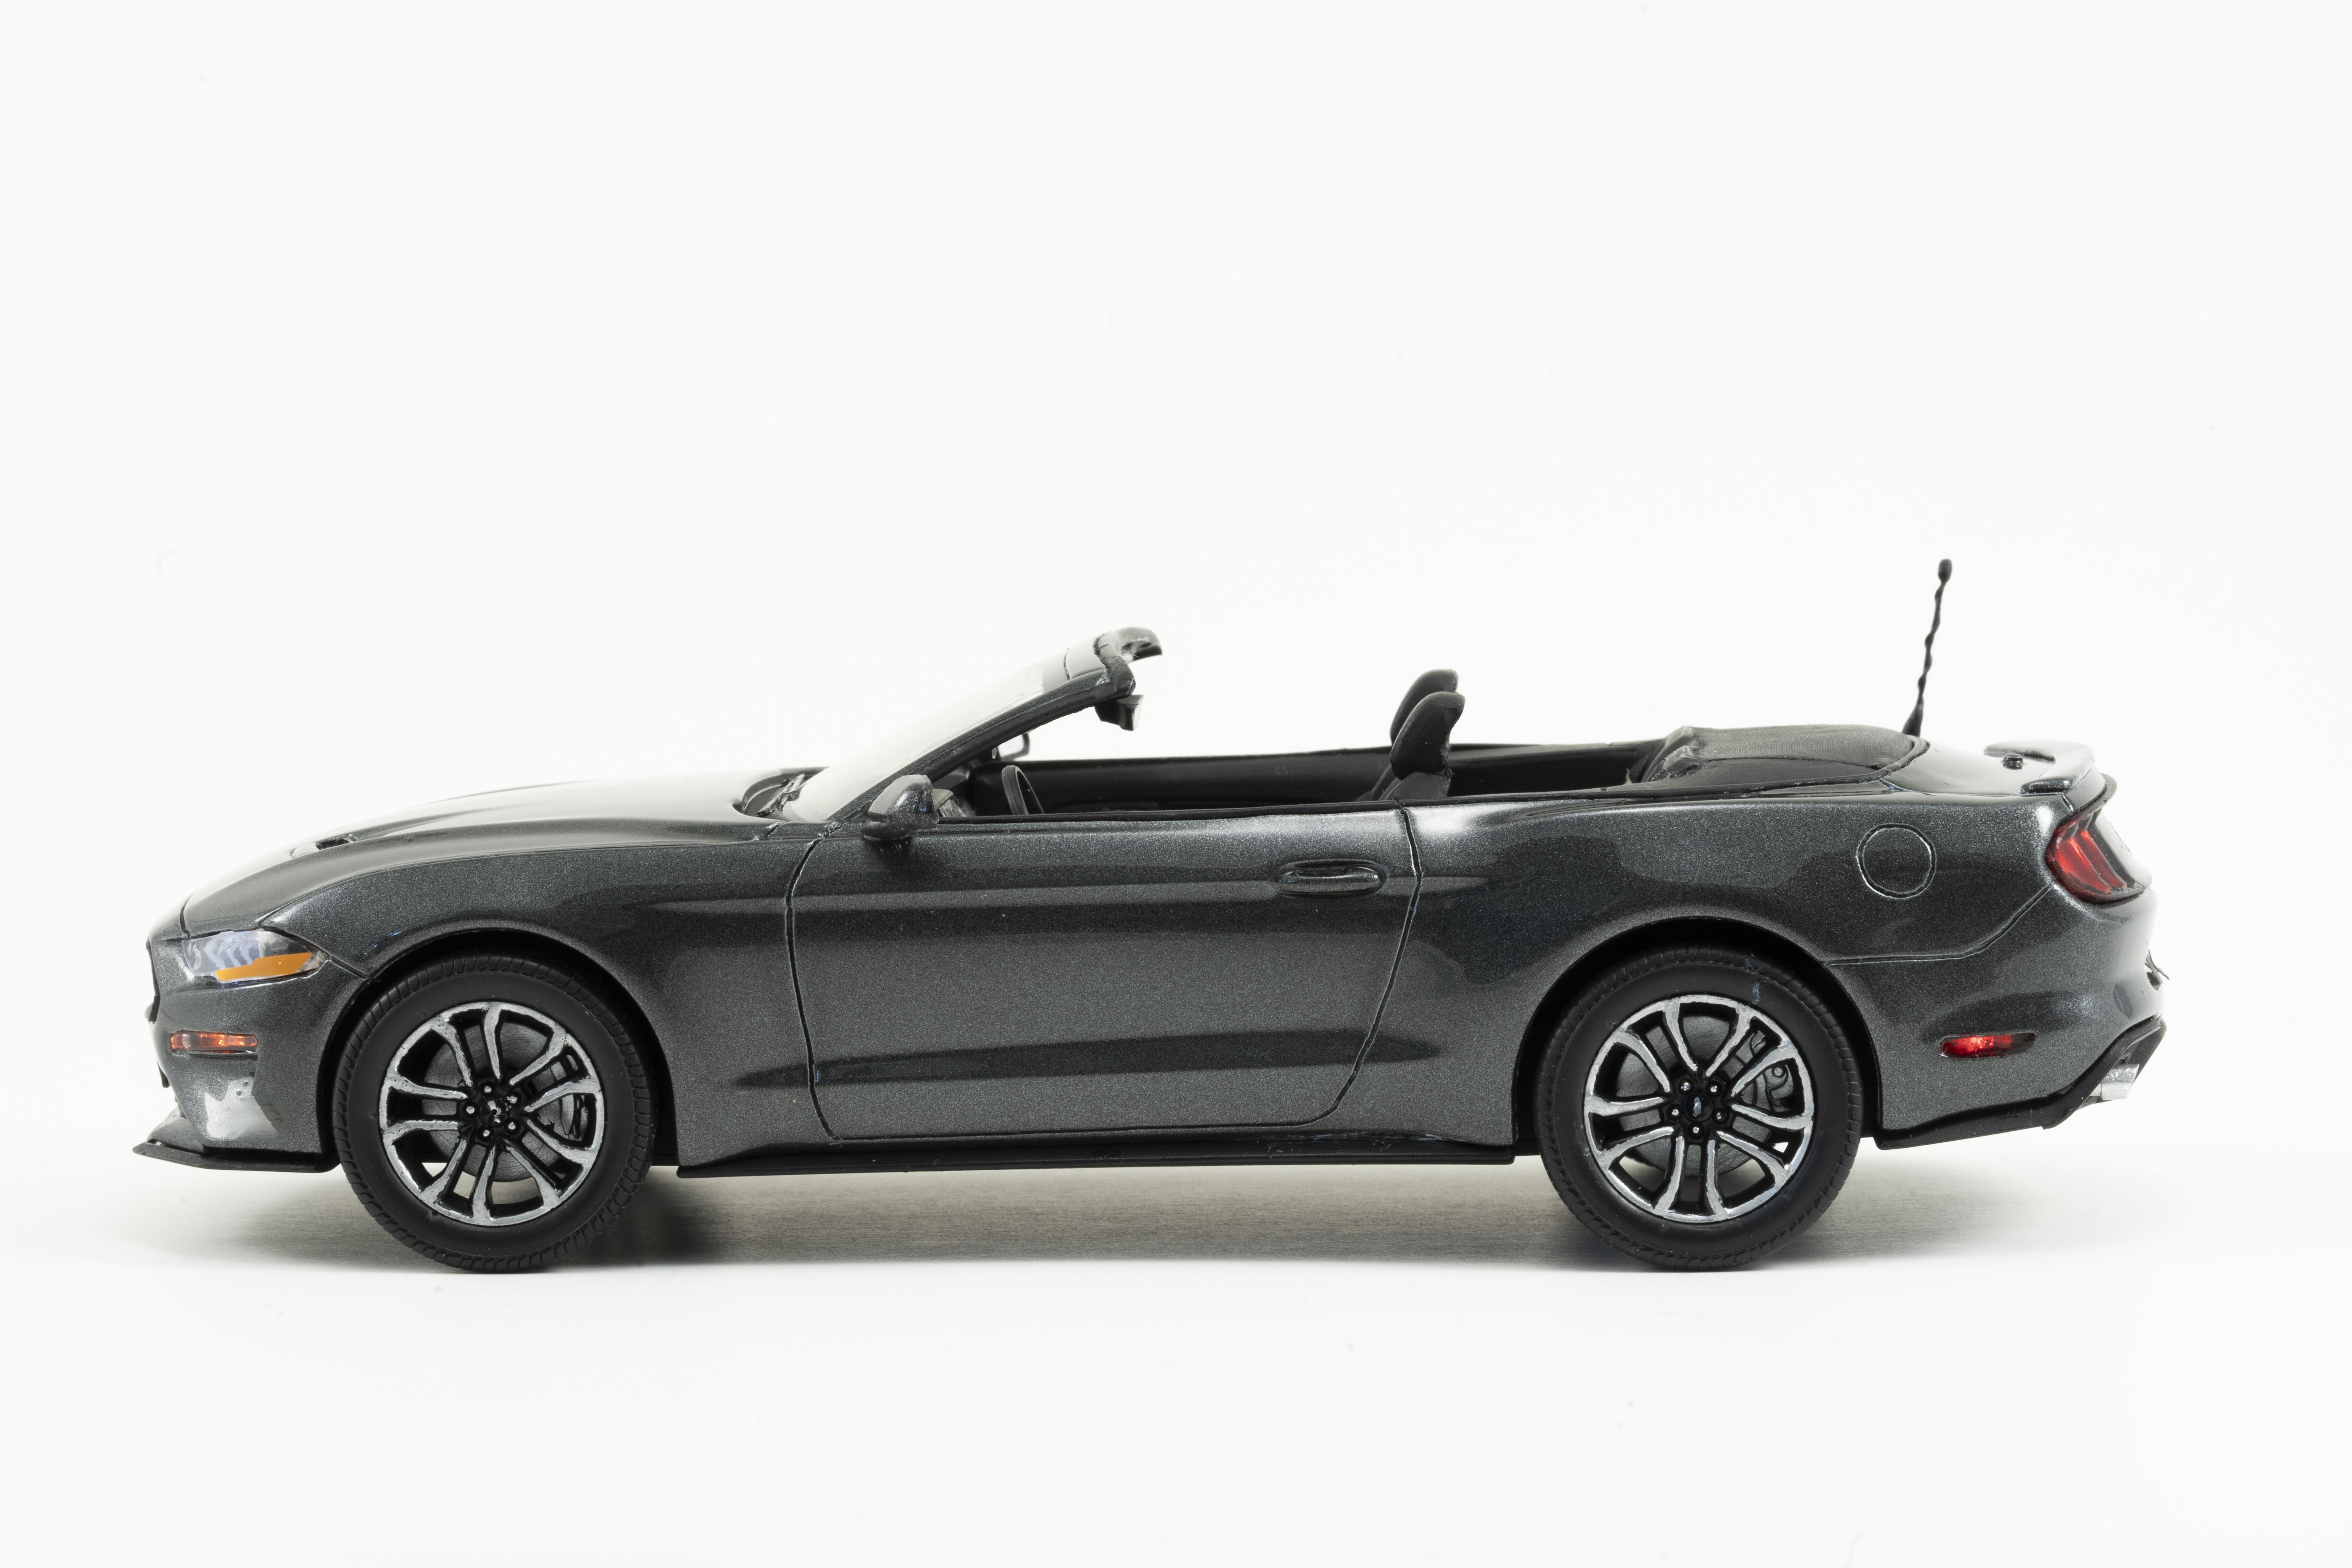
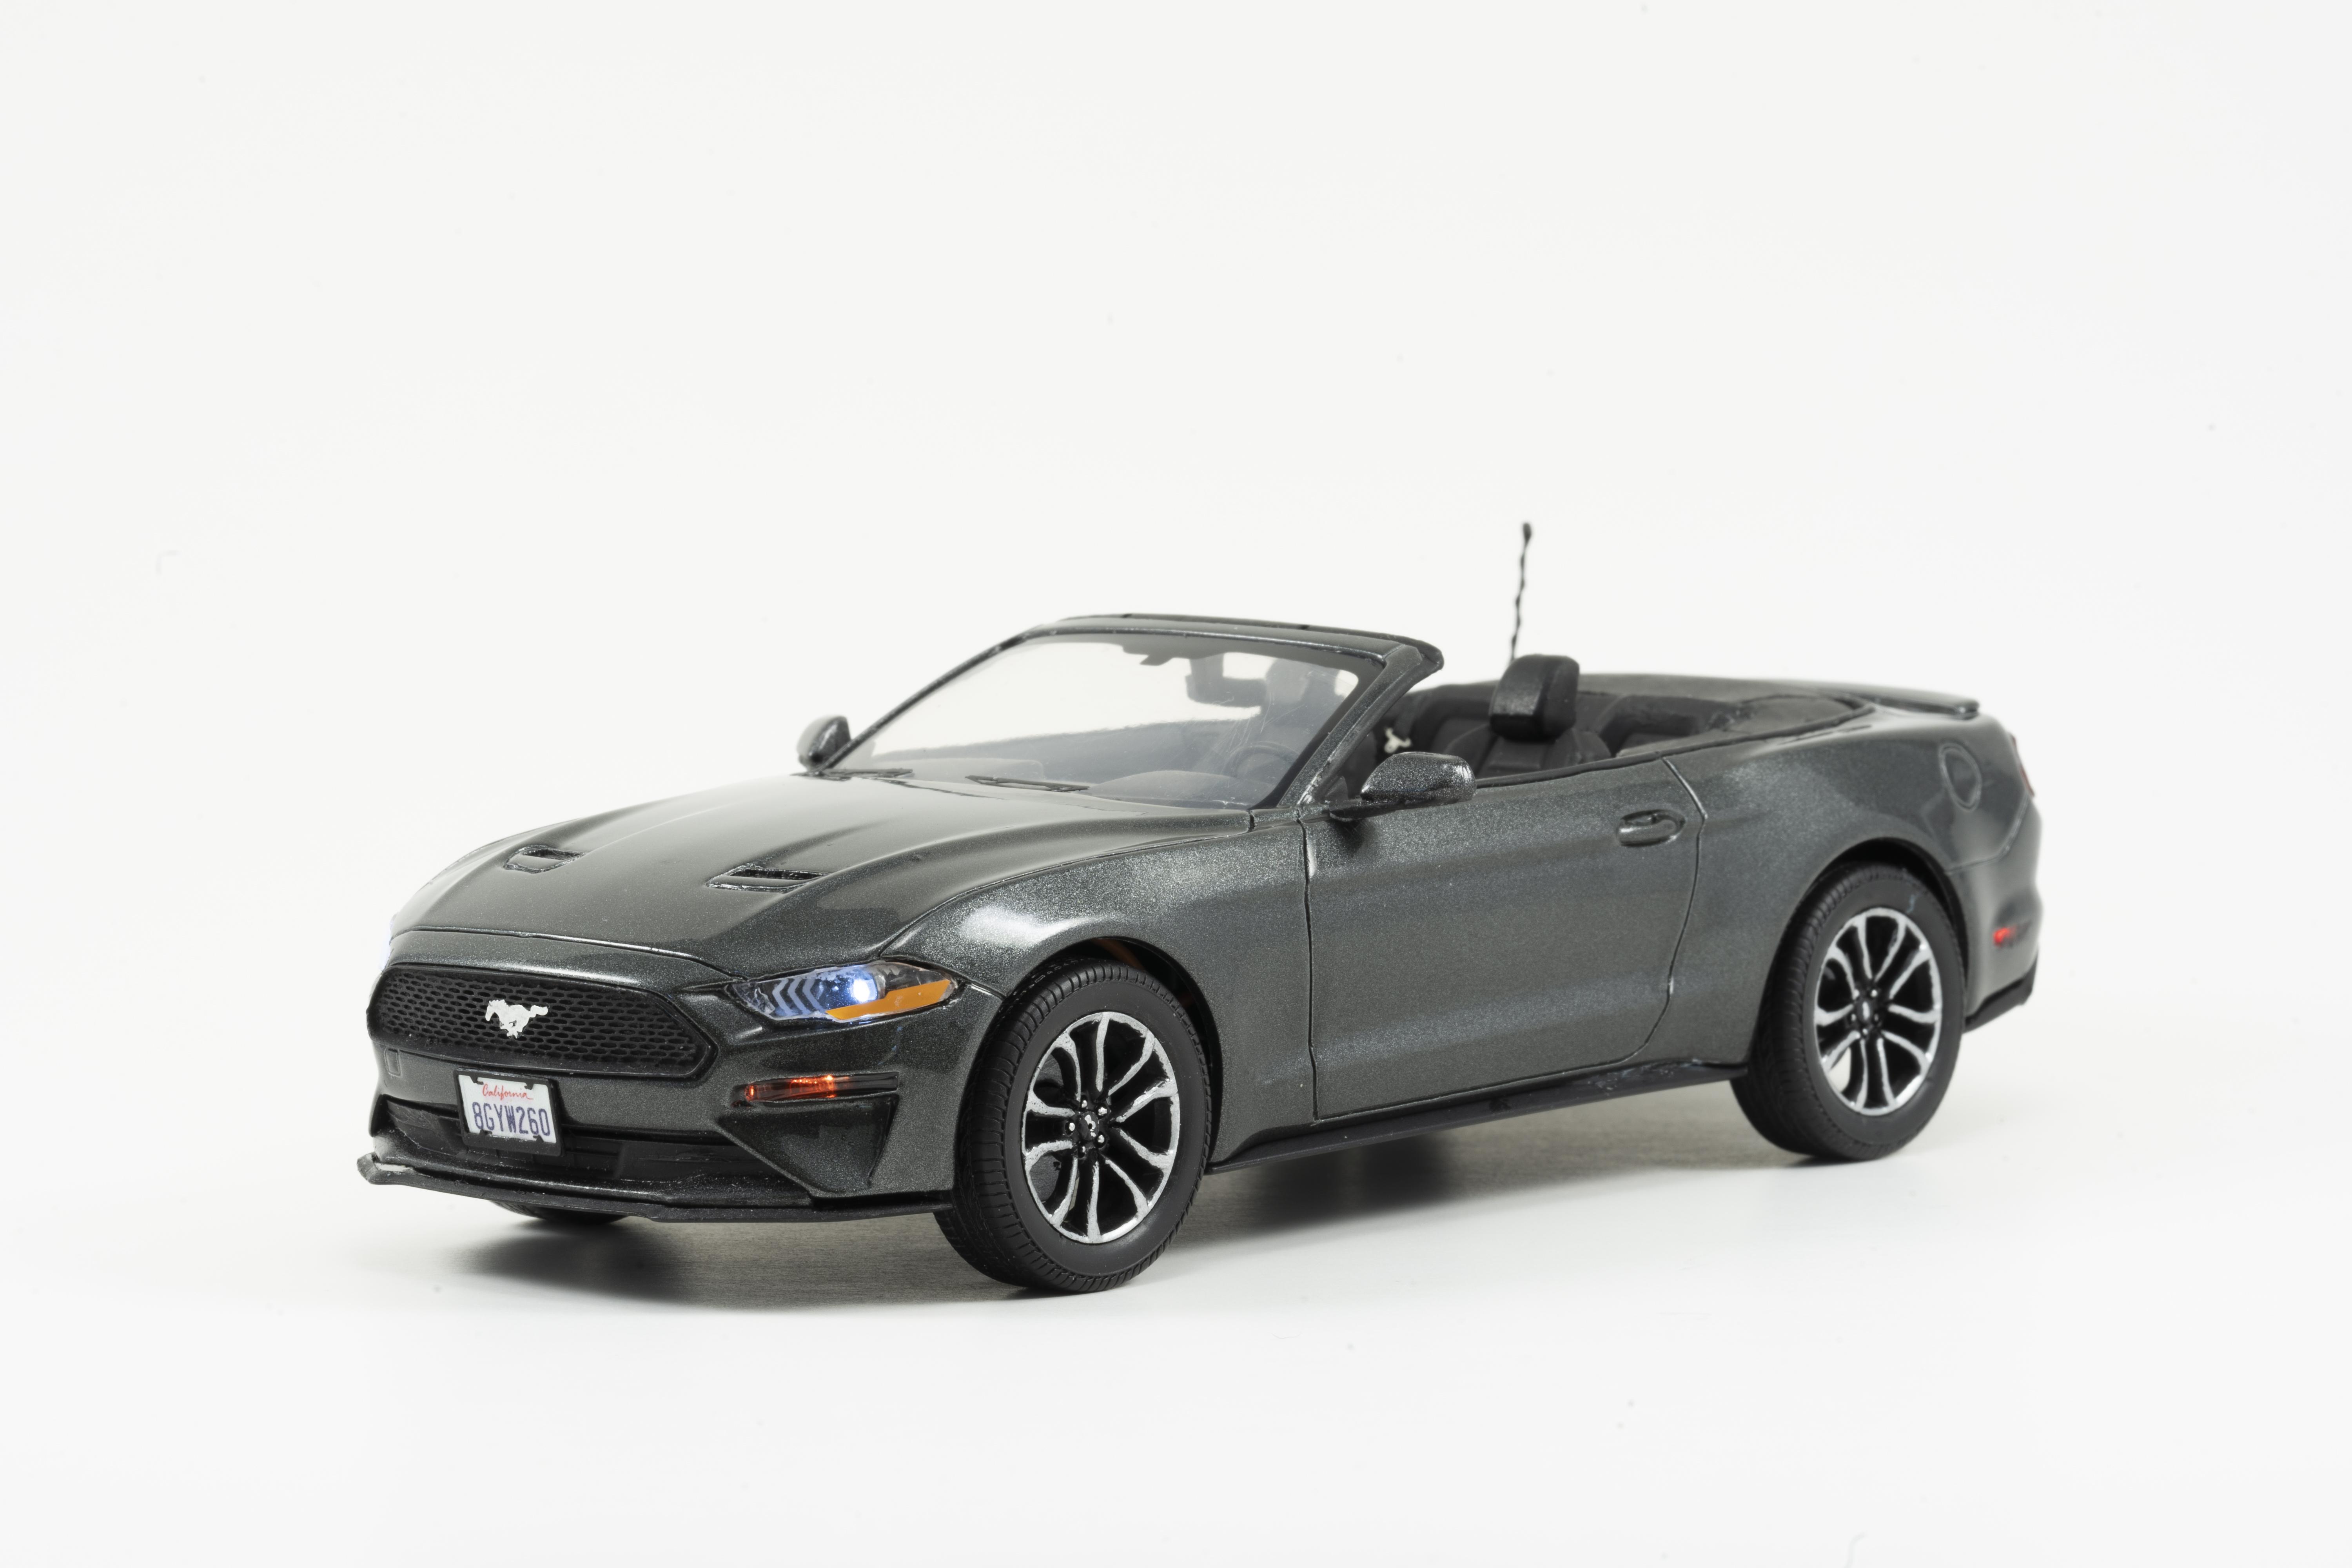
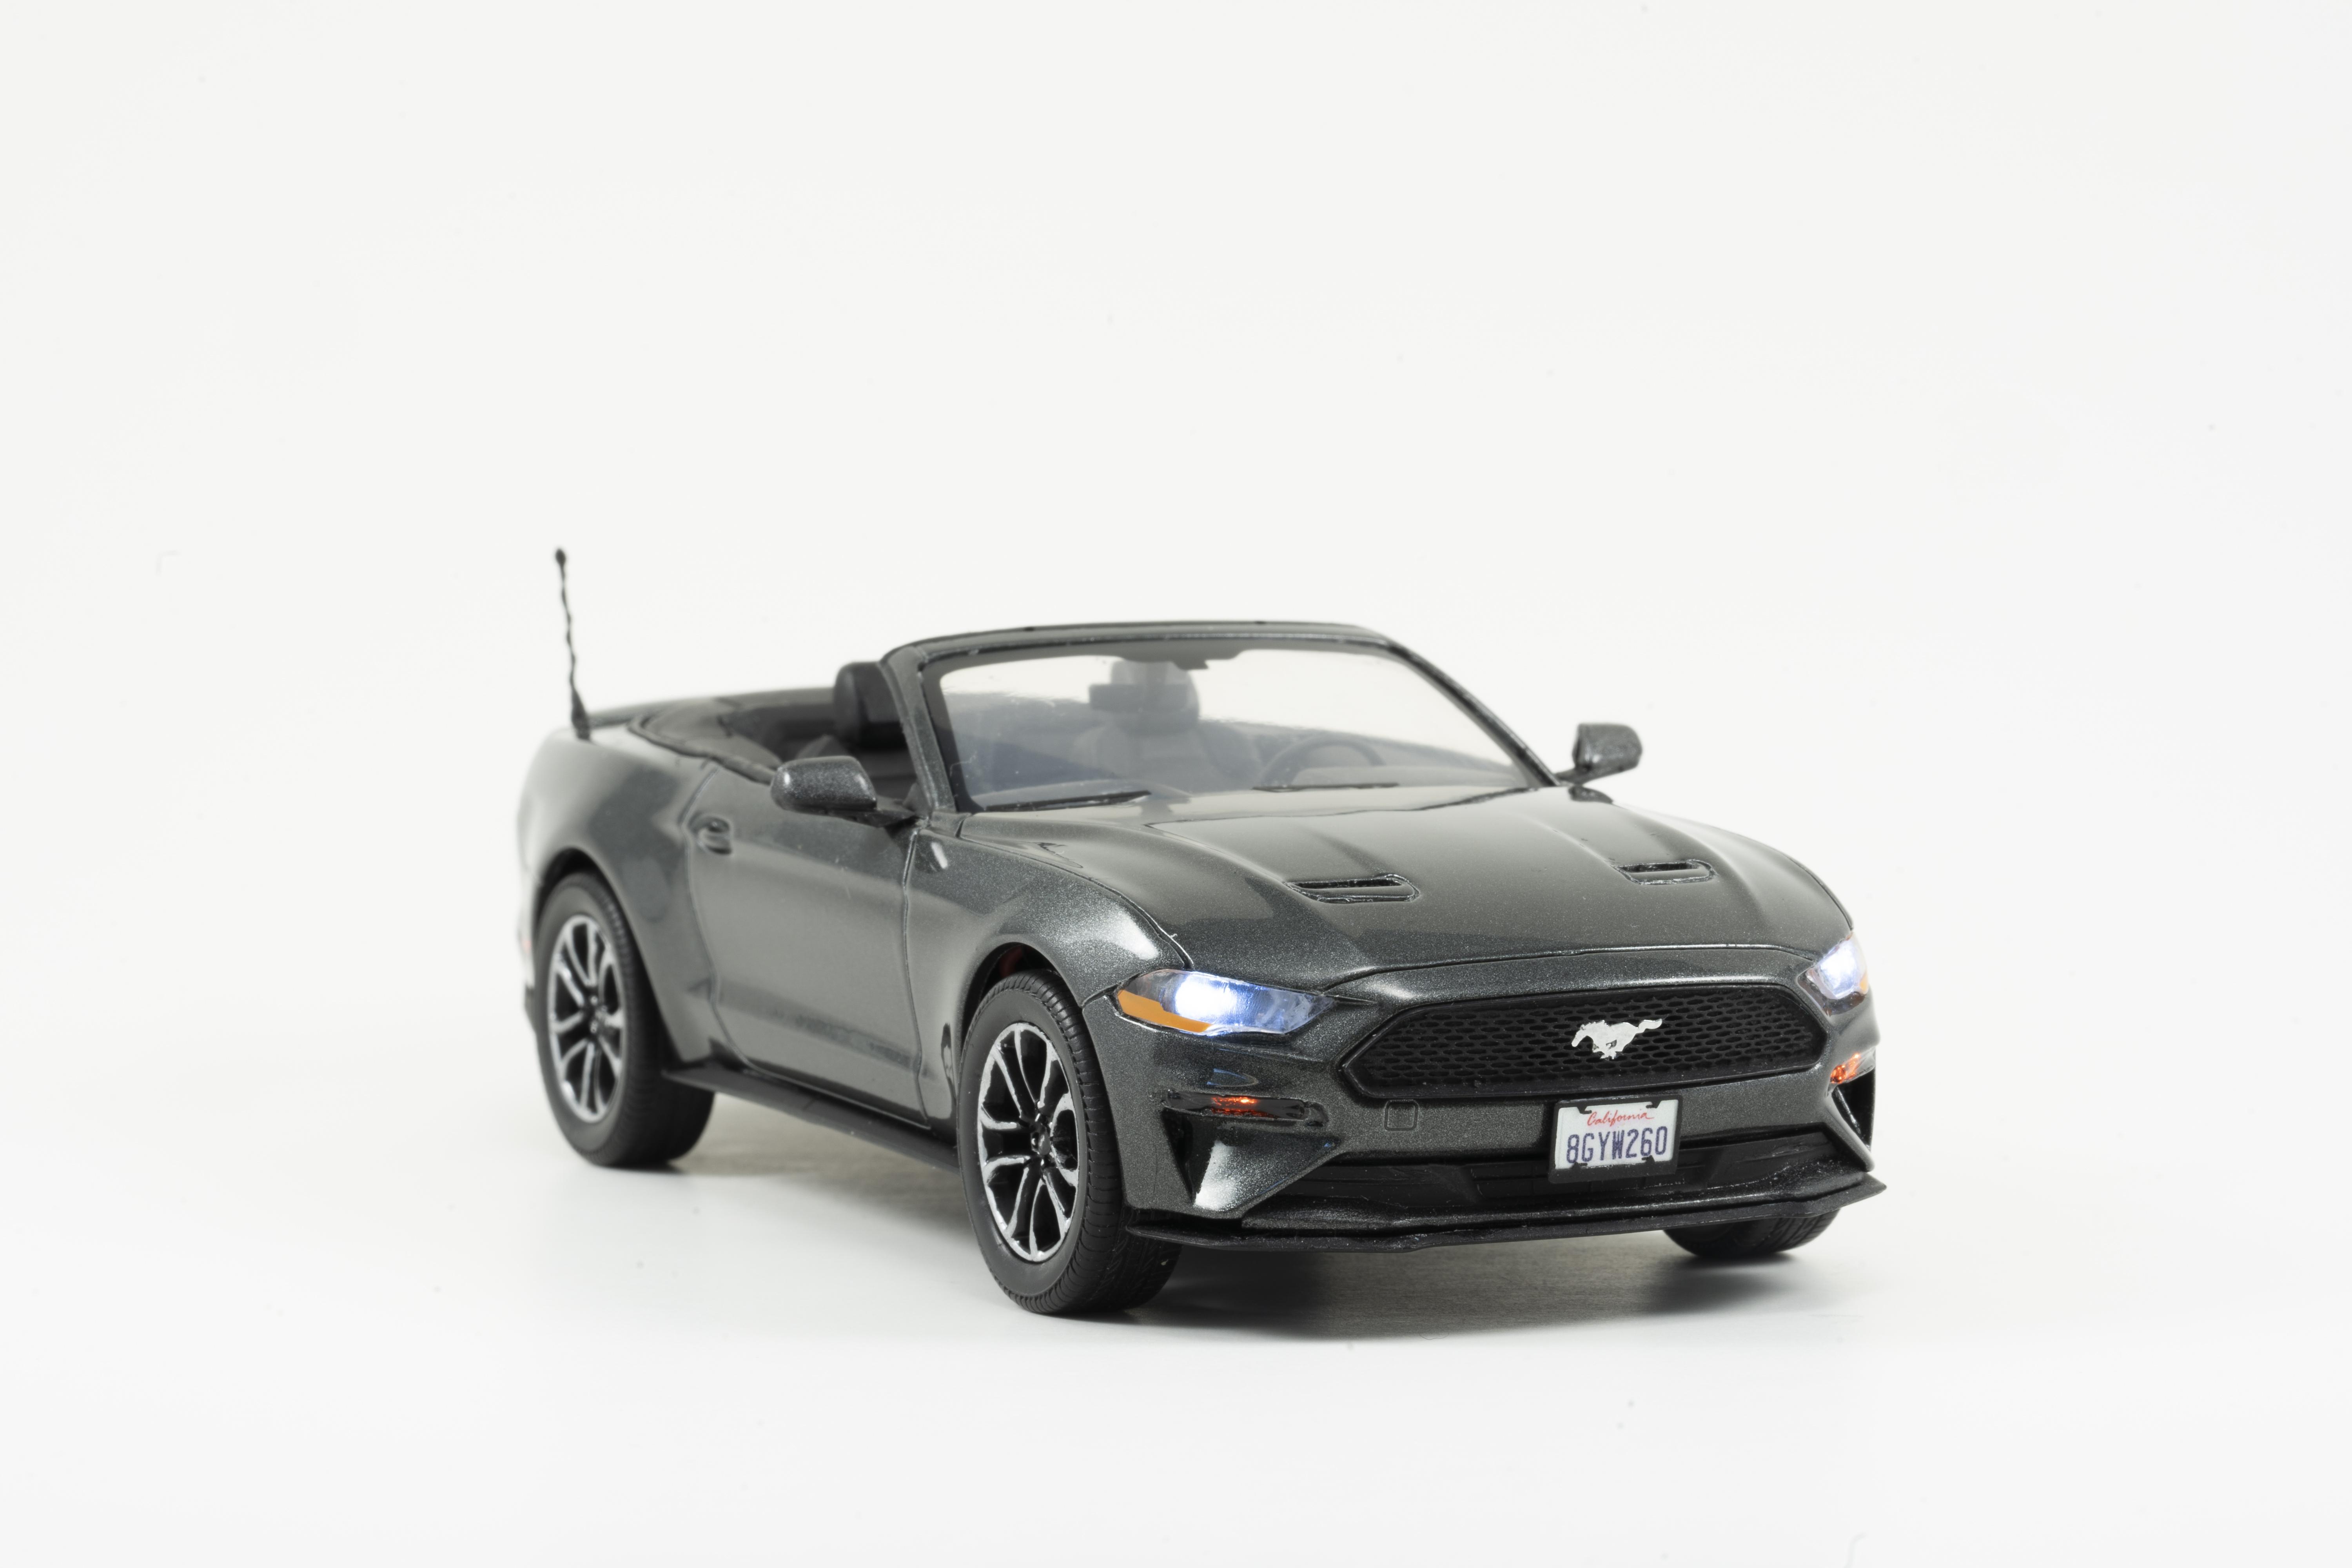
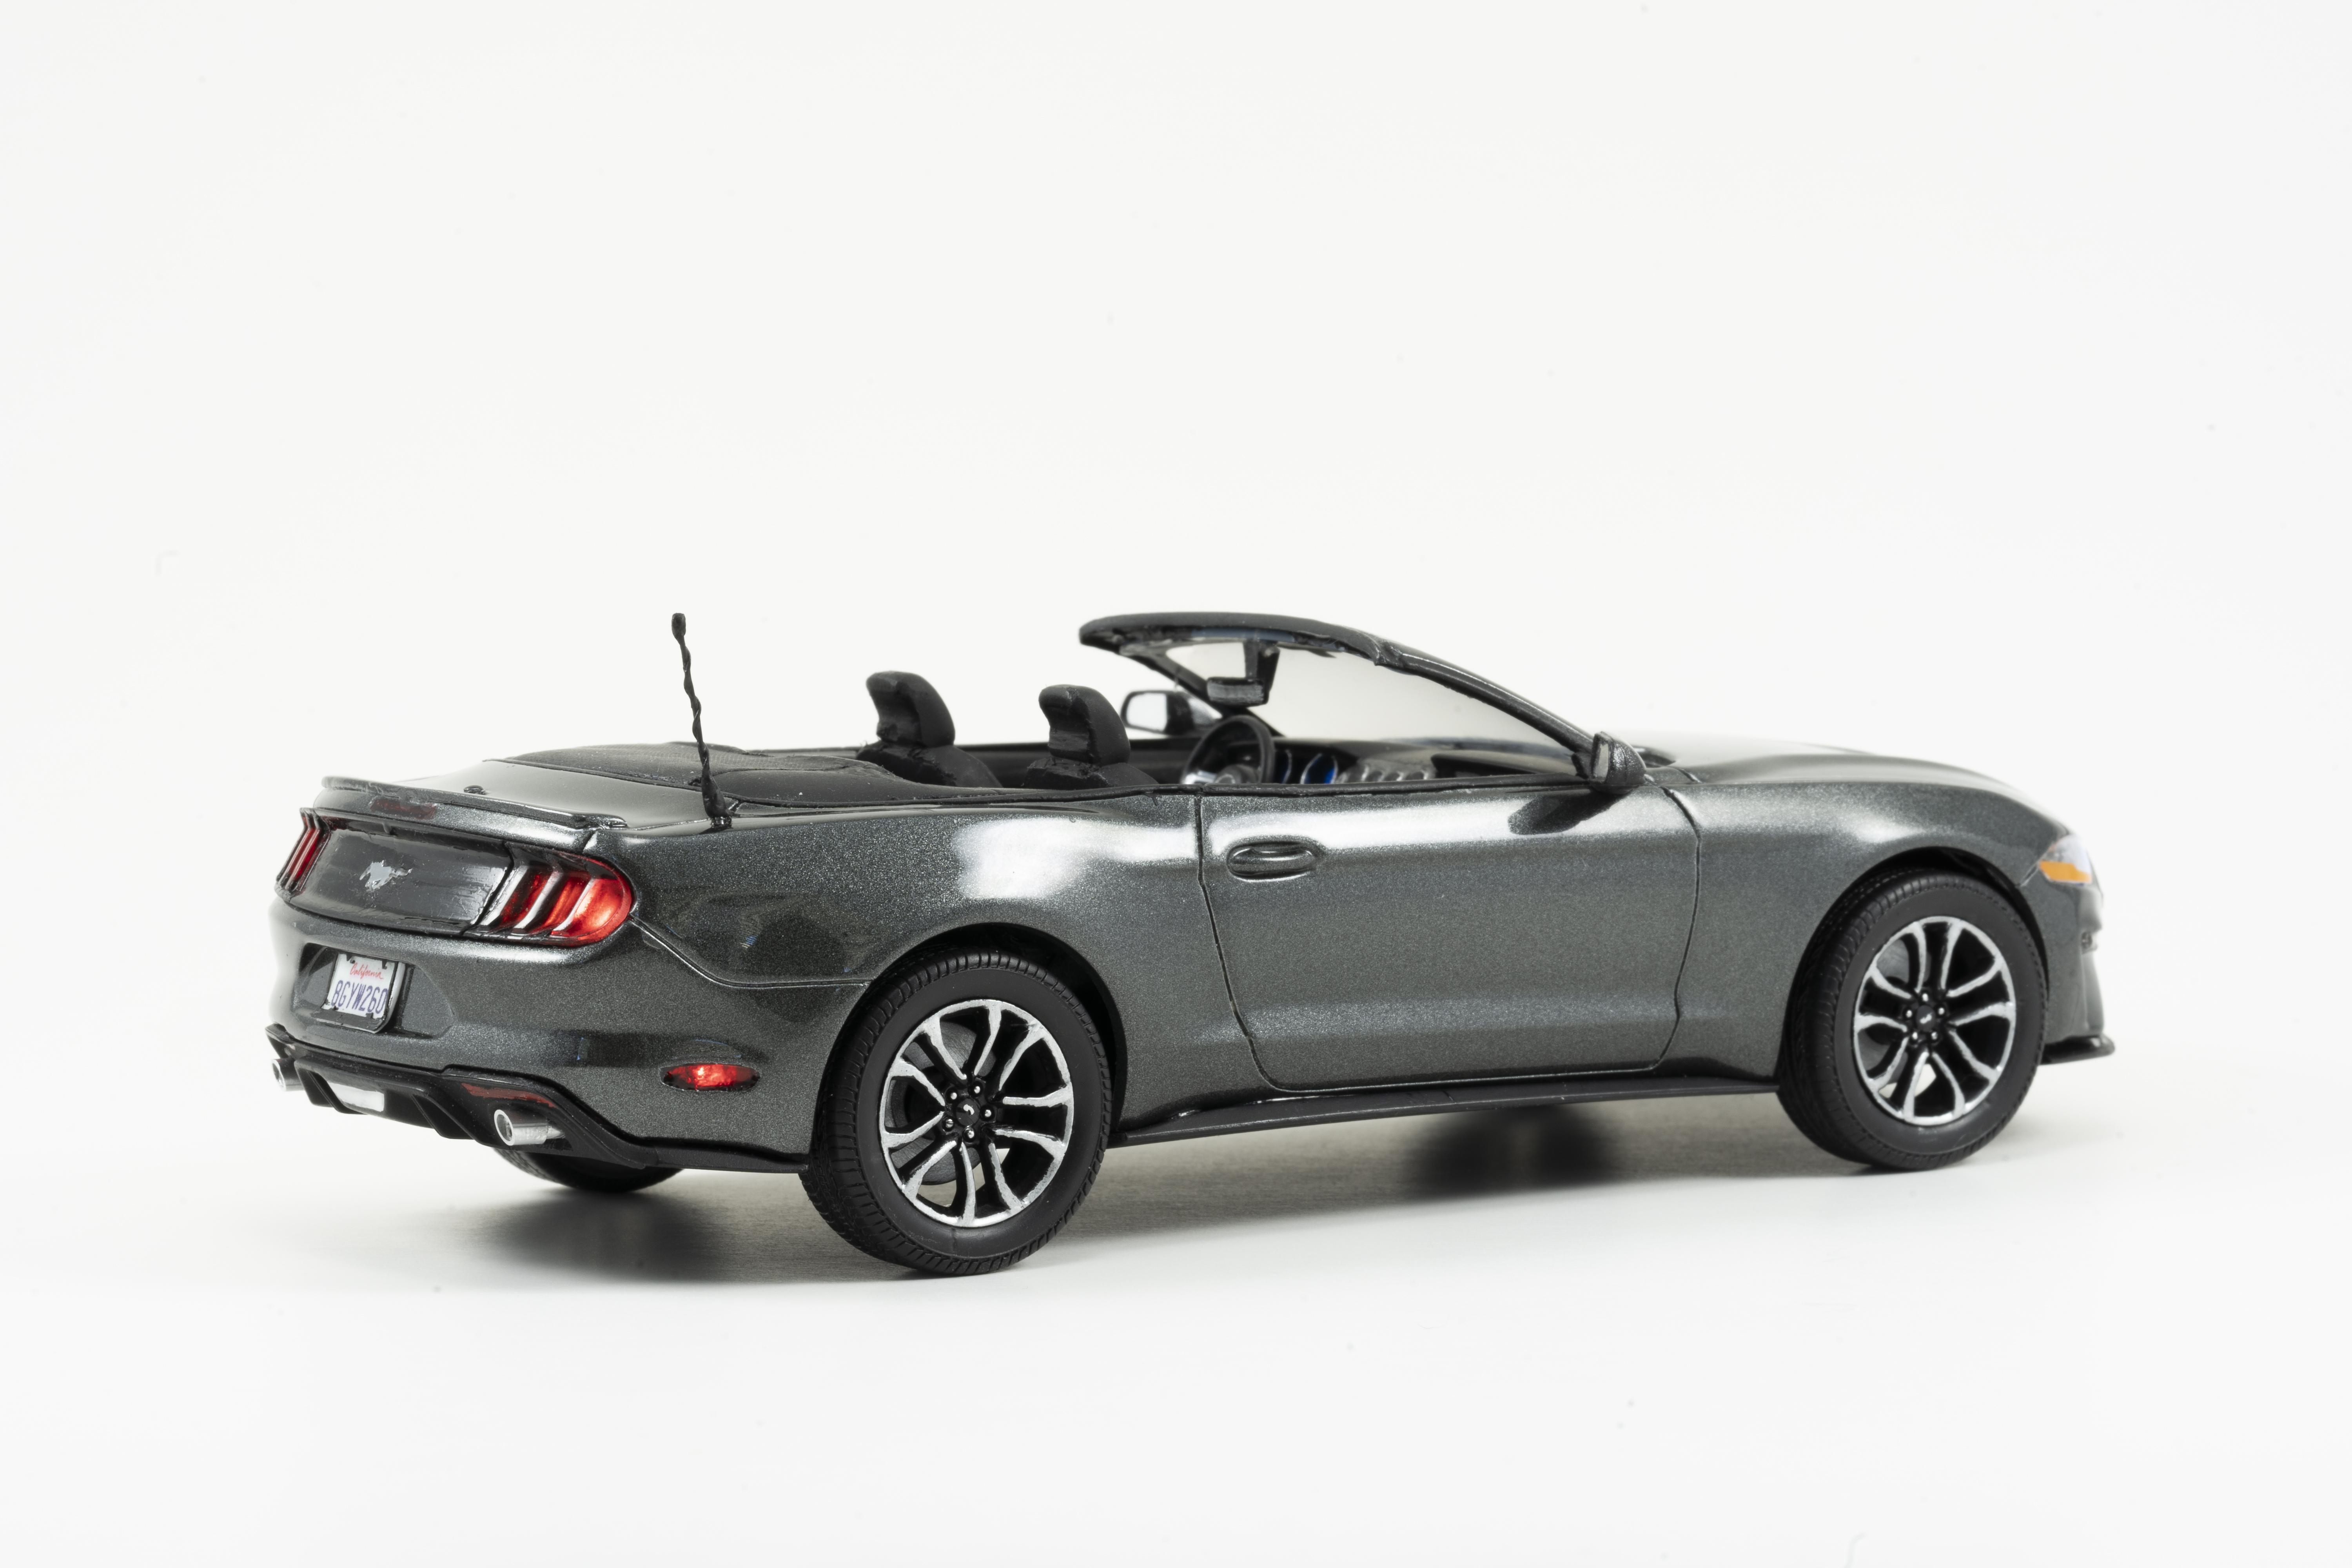
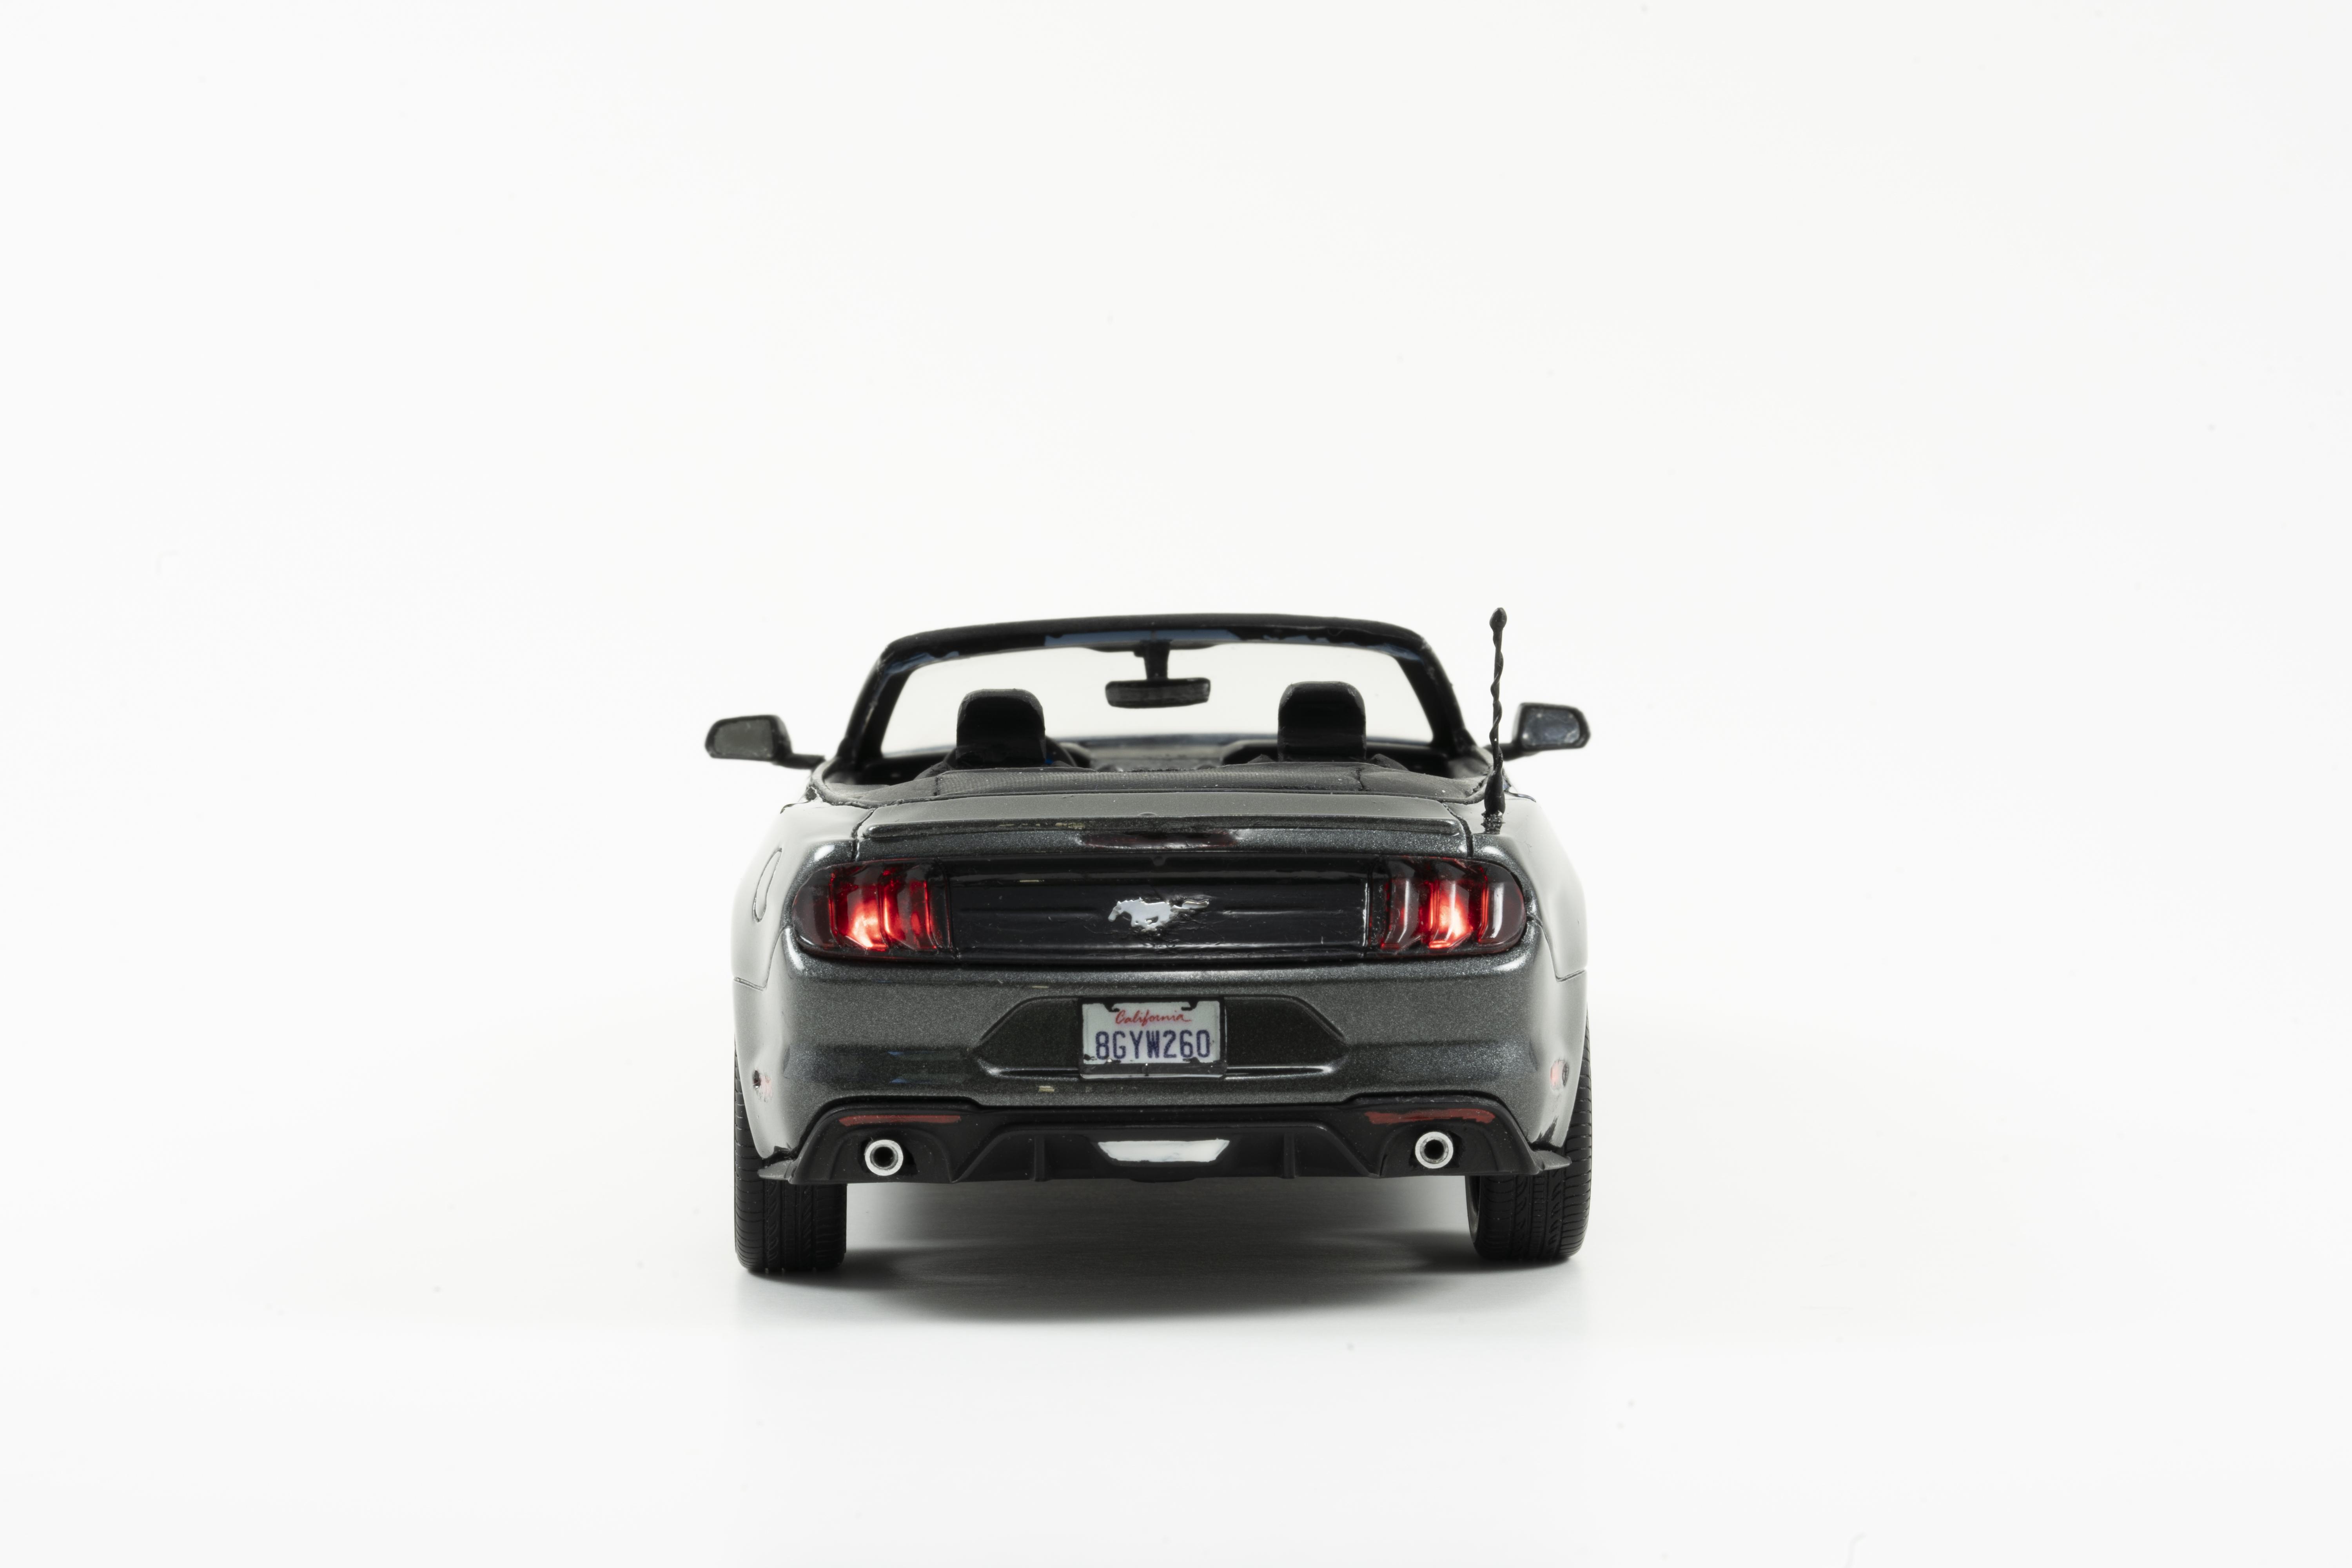
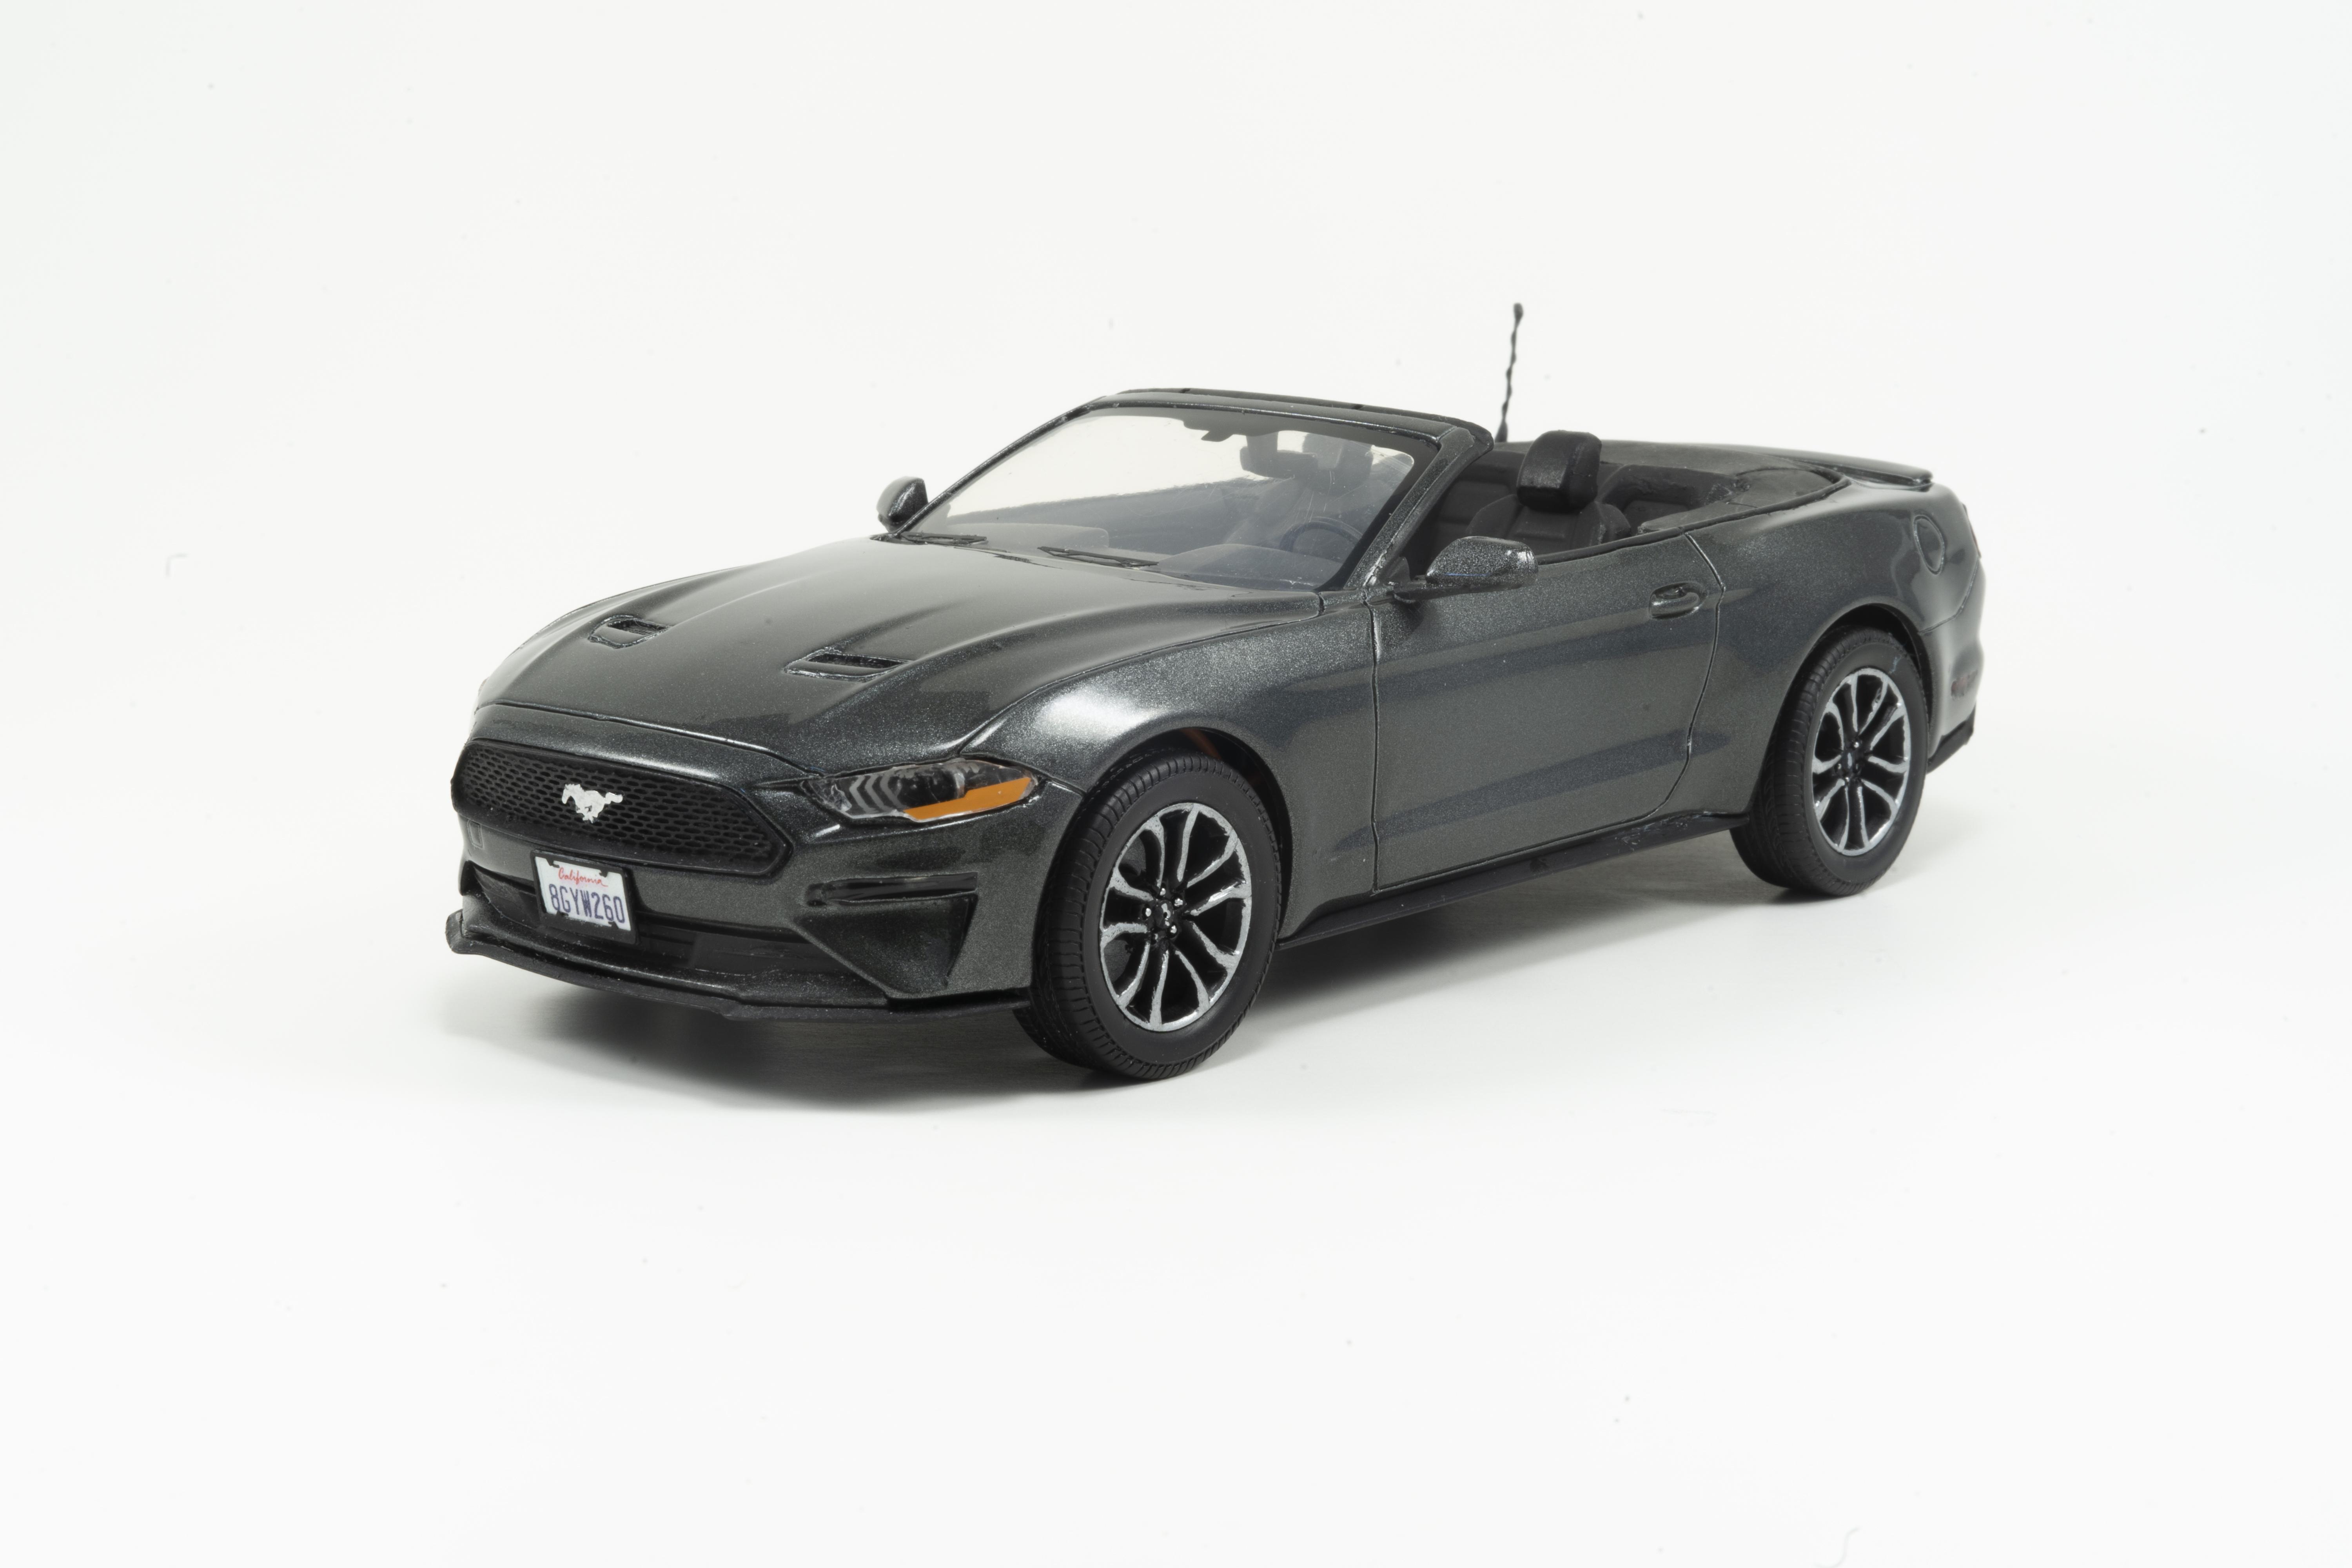
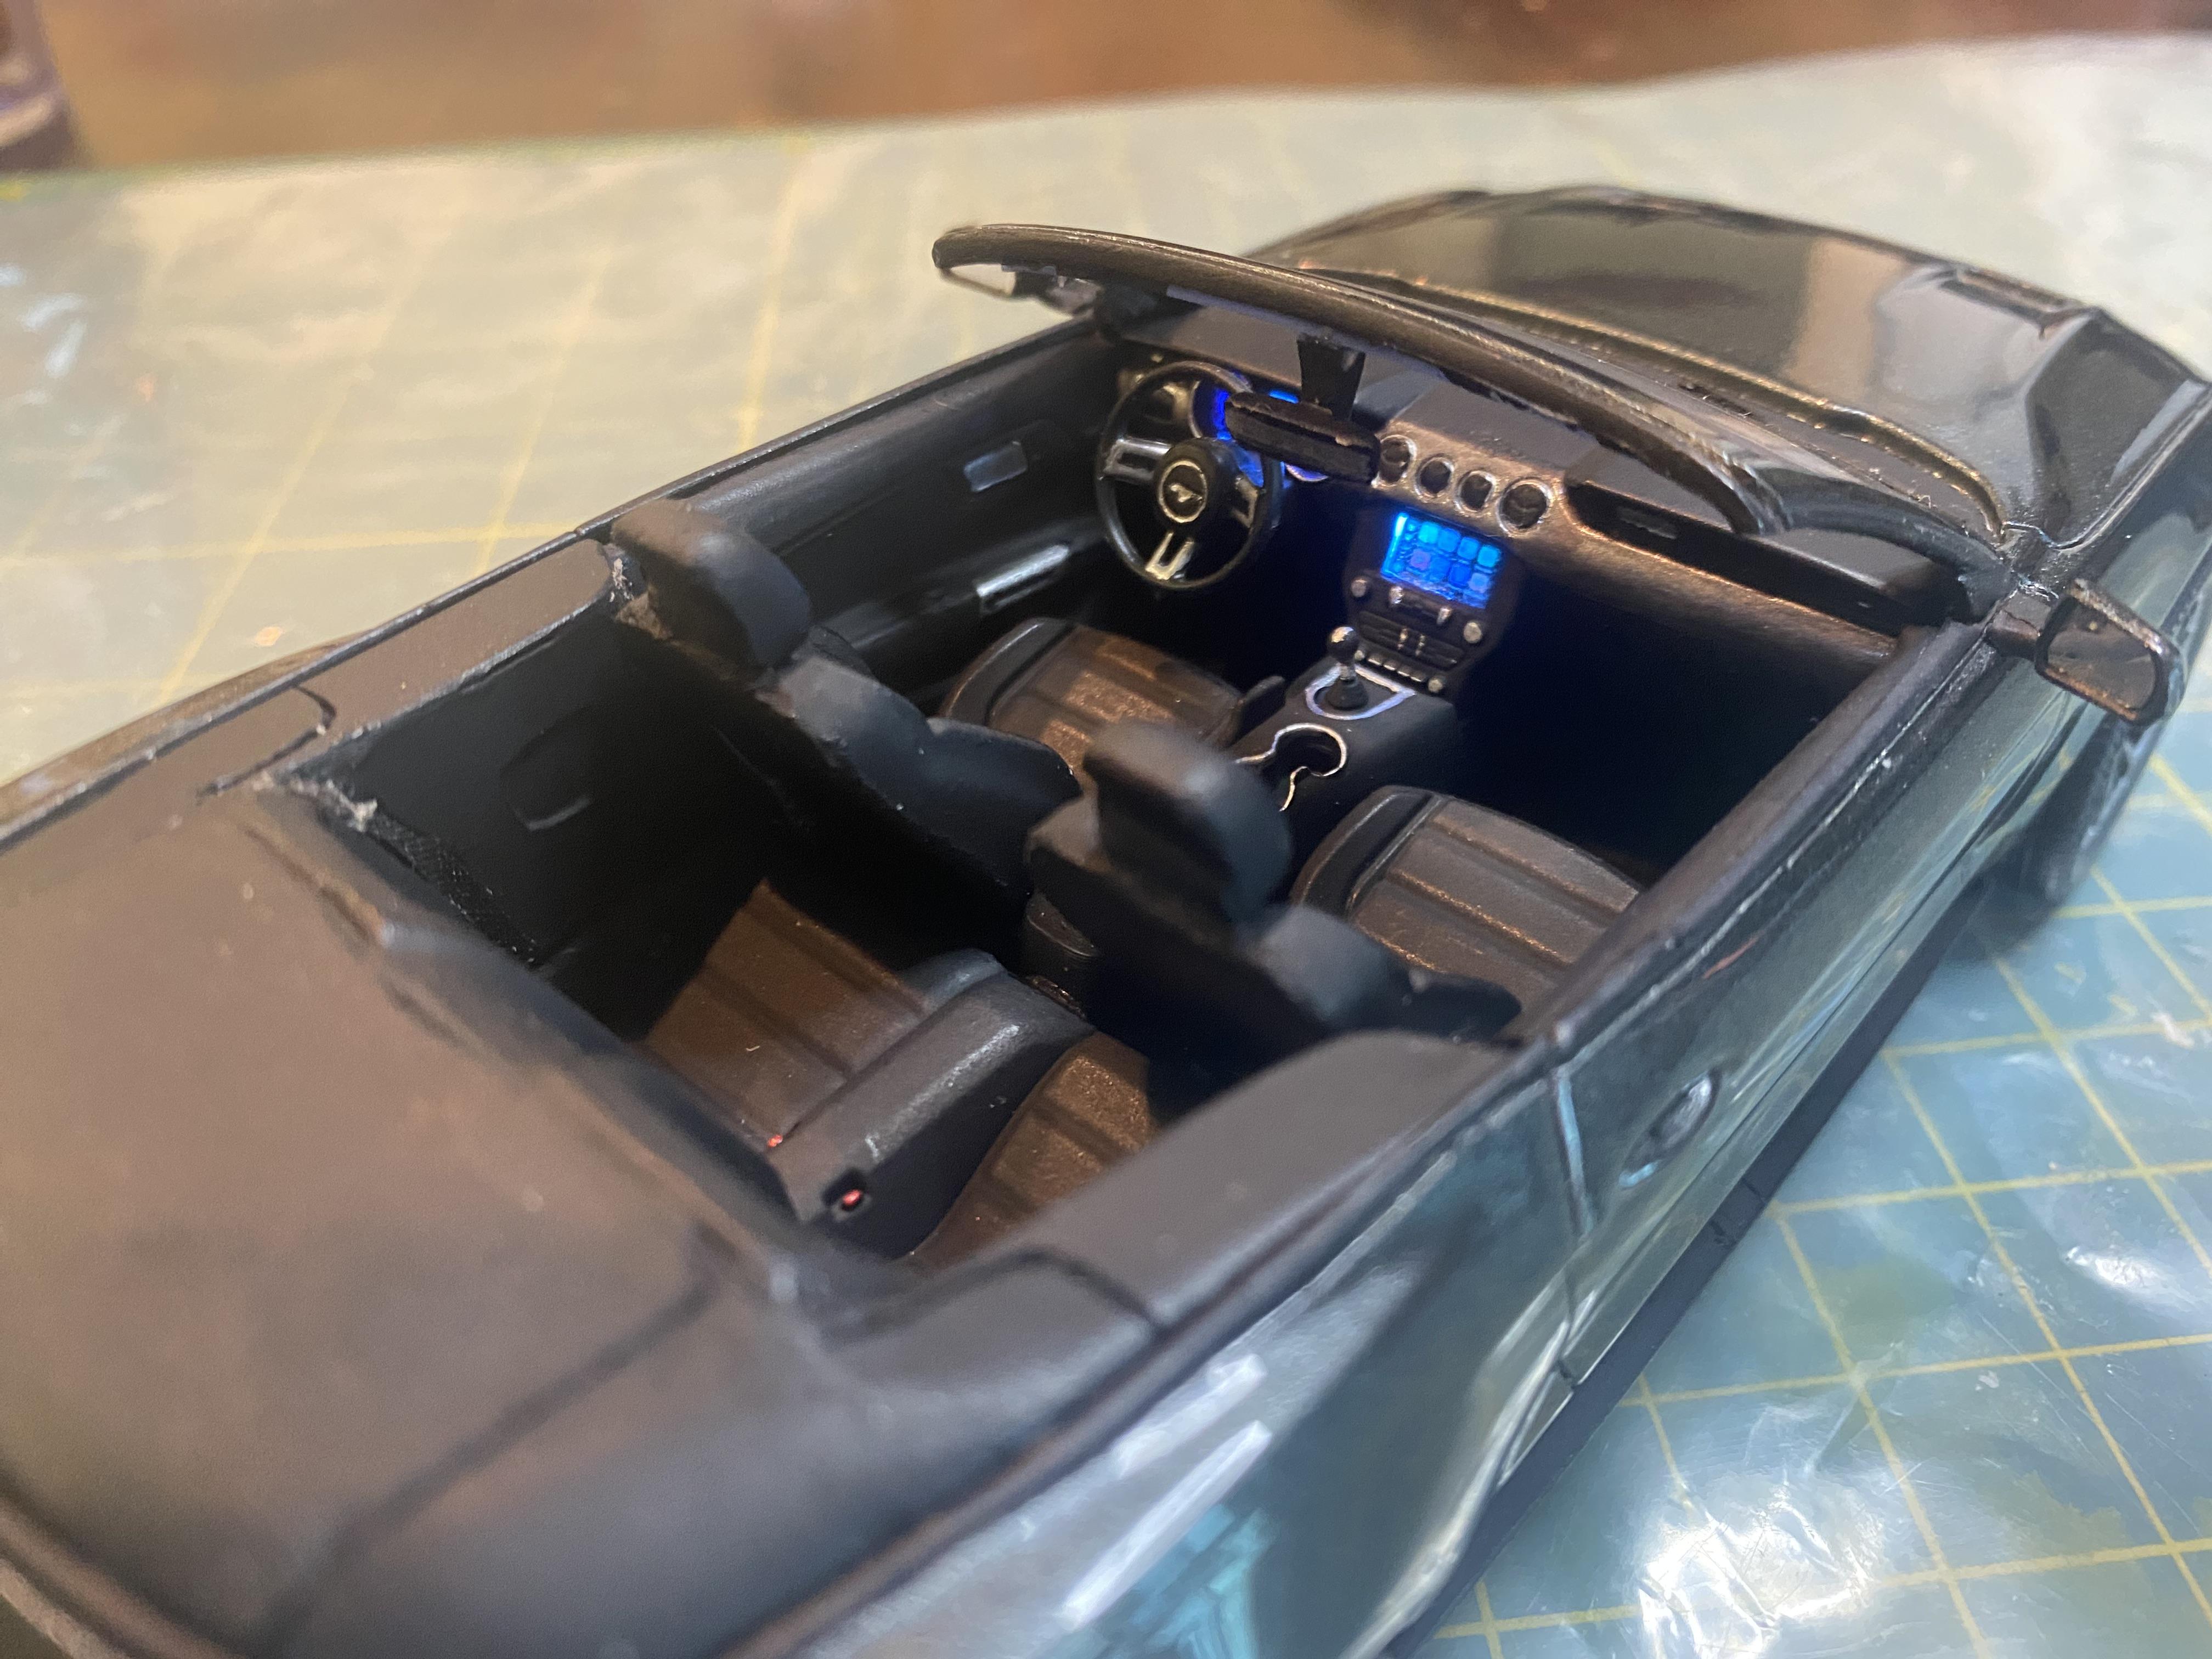
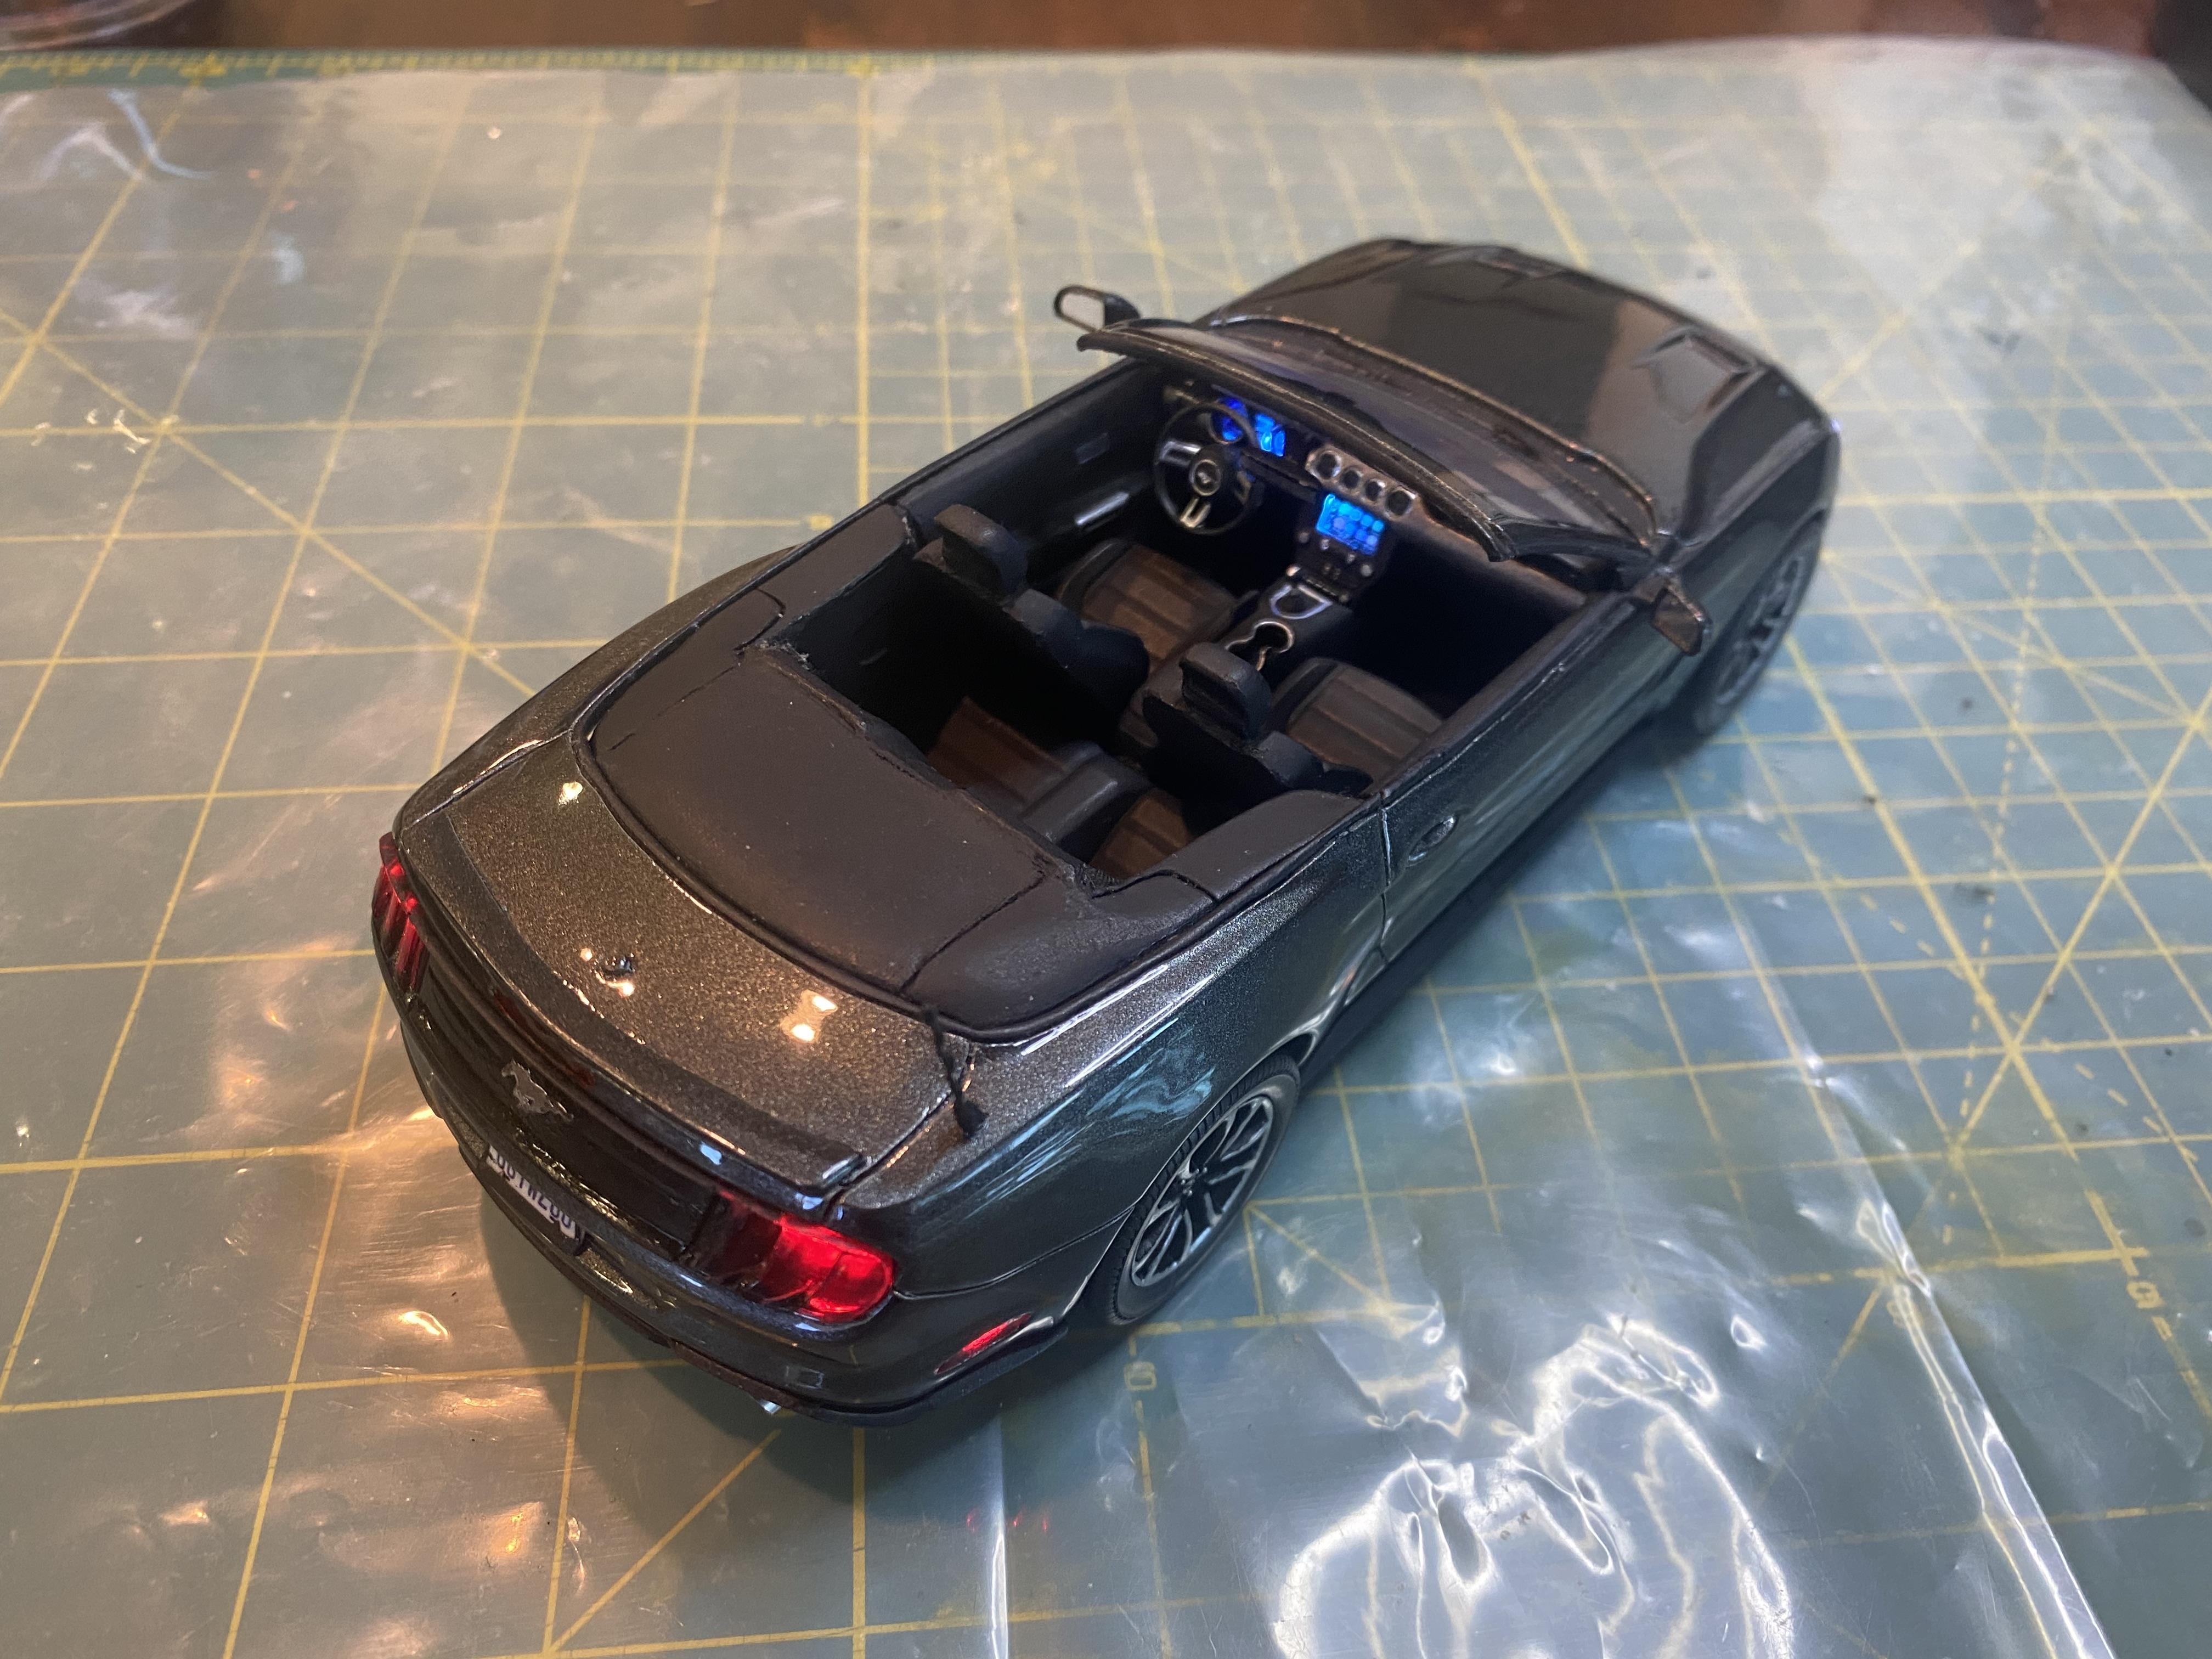
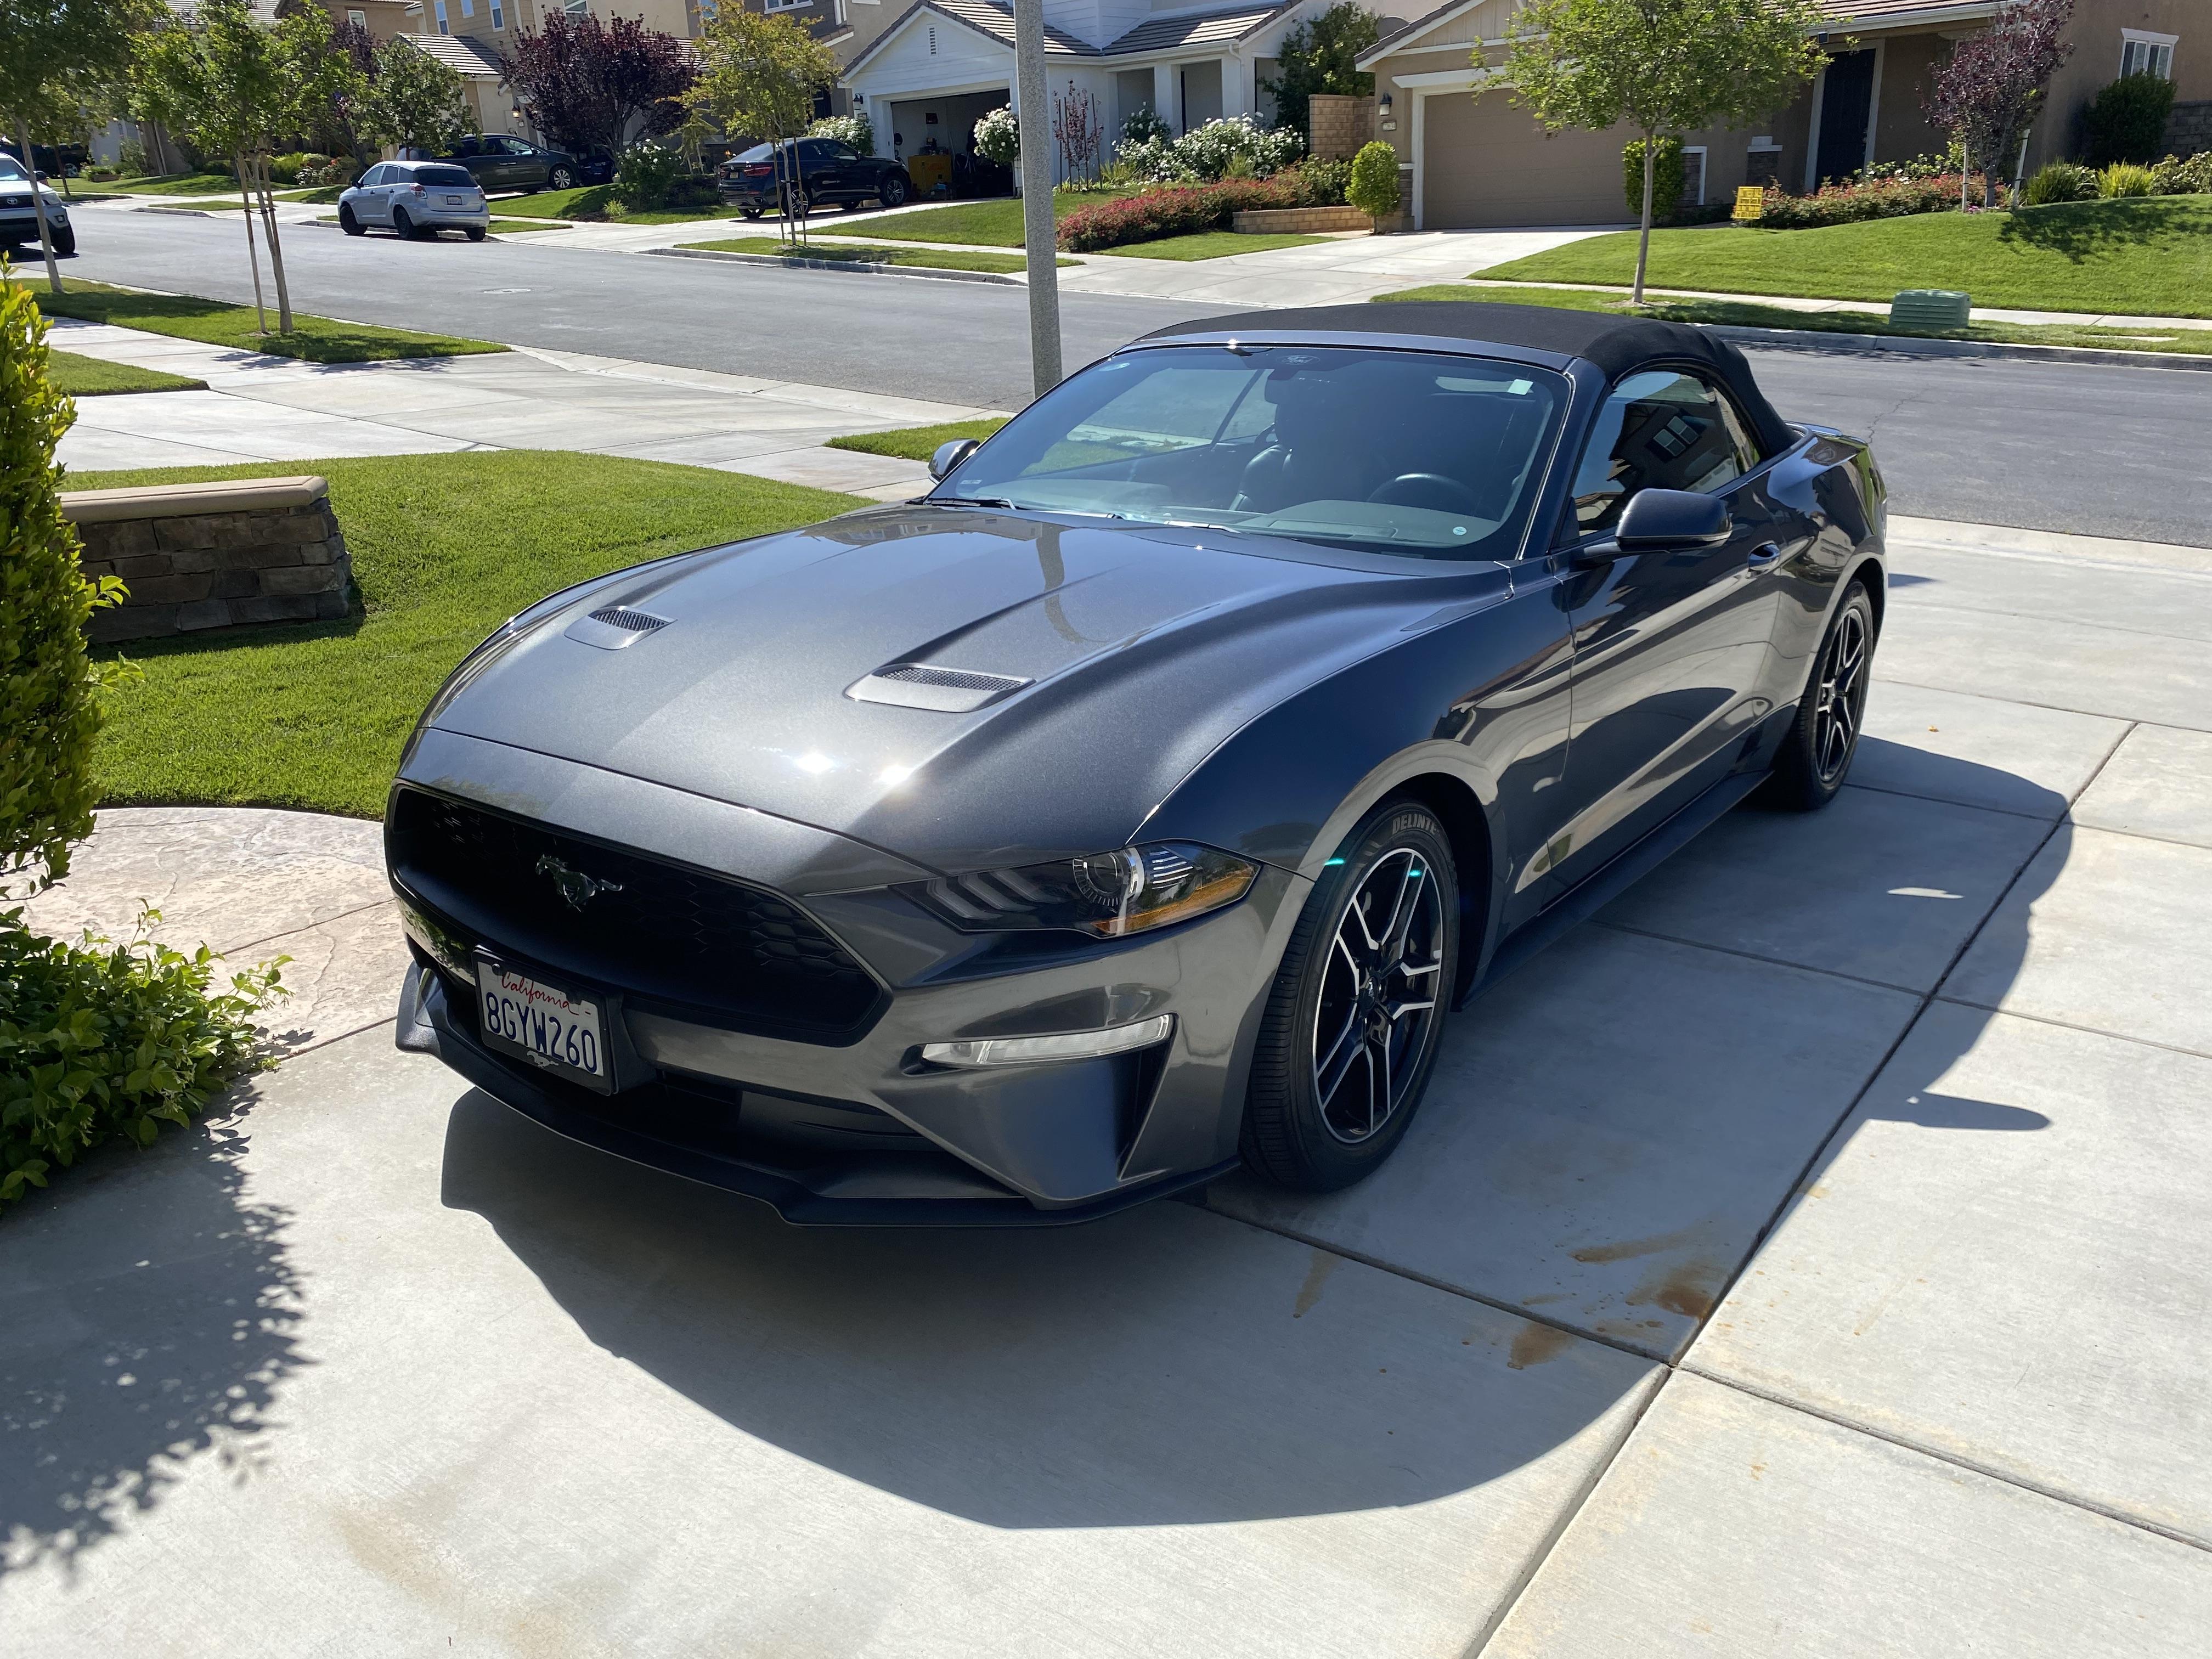
I finally finished the build of my 2018 Mustang Convertible. This is build 5 of our 5 Mustangs in our family. Kitbash of Revell snap kit and a Motor Max diecast used for parts as well as a lot of scratch built parts. I have been using 3V coin batteries for my LEDs but this build required an A23 12V battery. if you haven’t seen the WIP thread see it here:

-
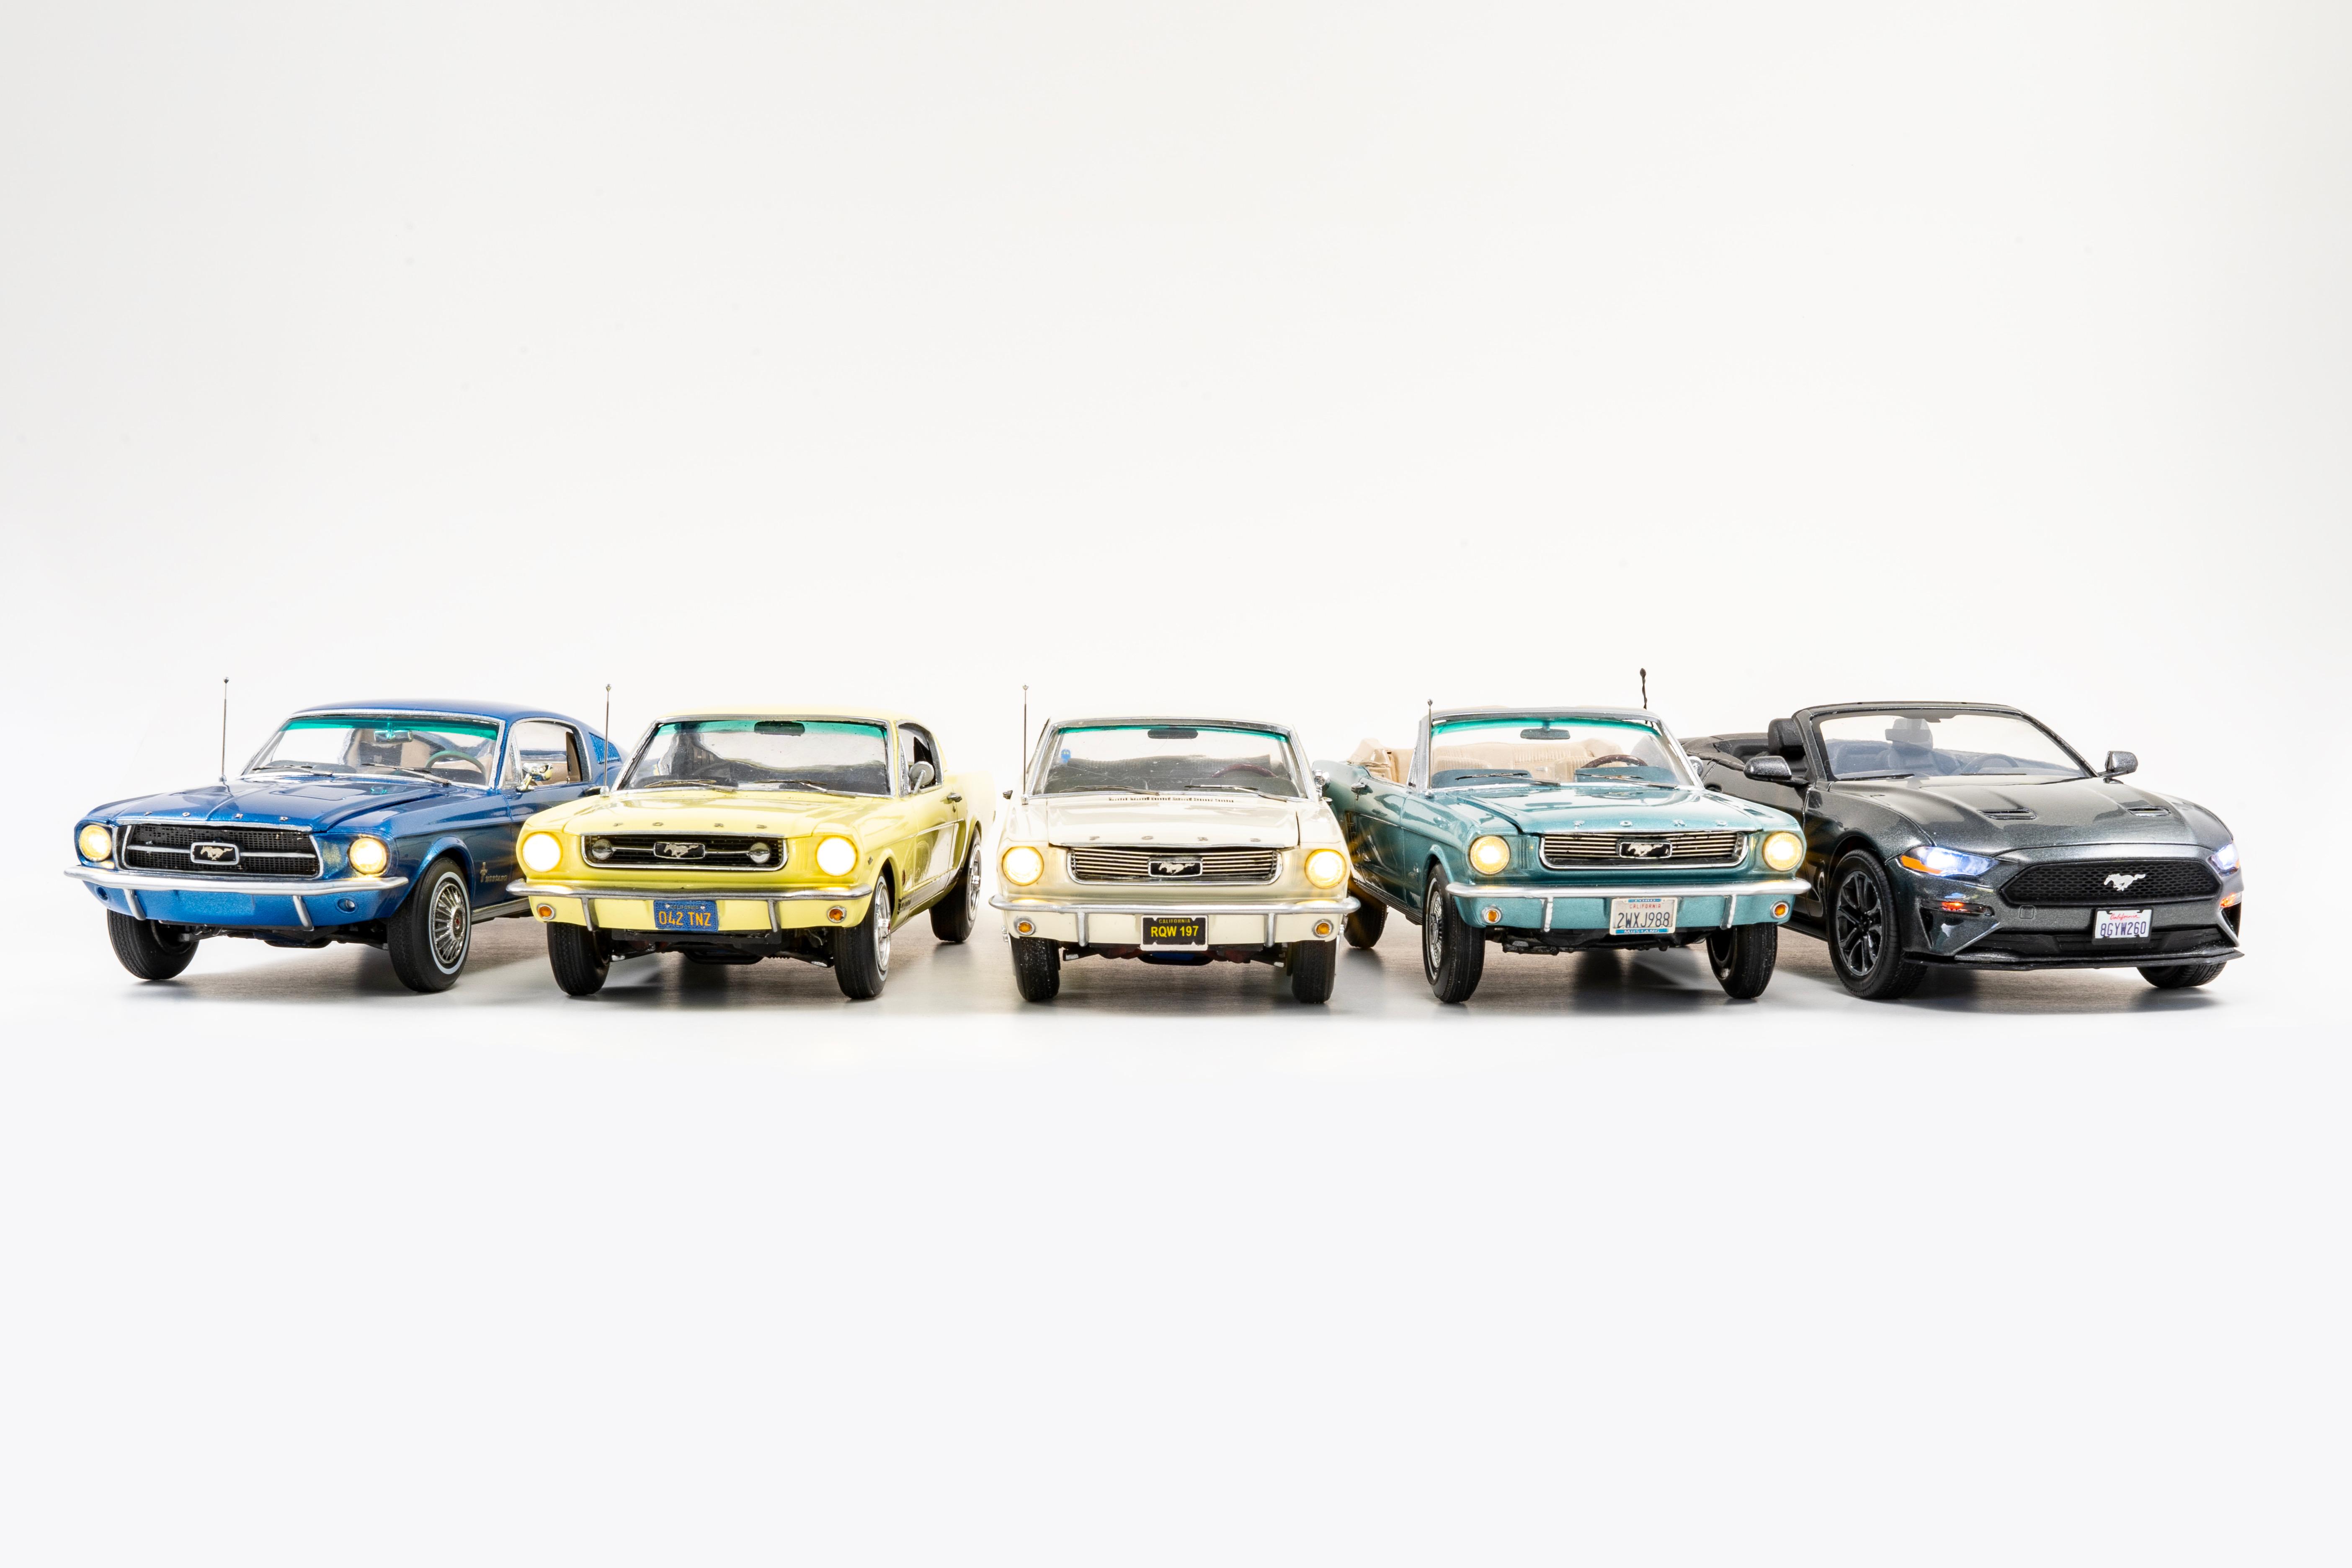
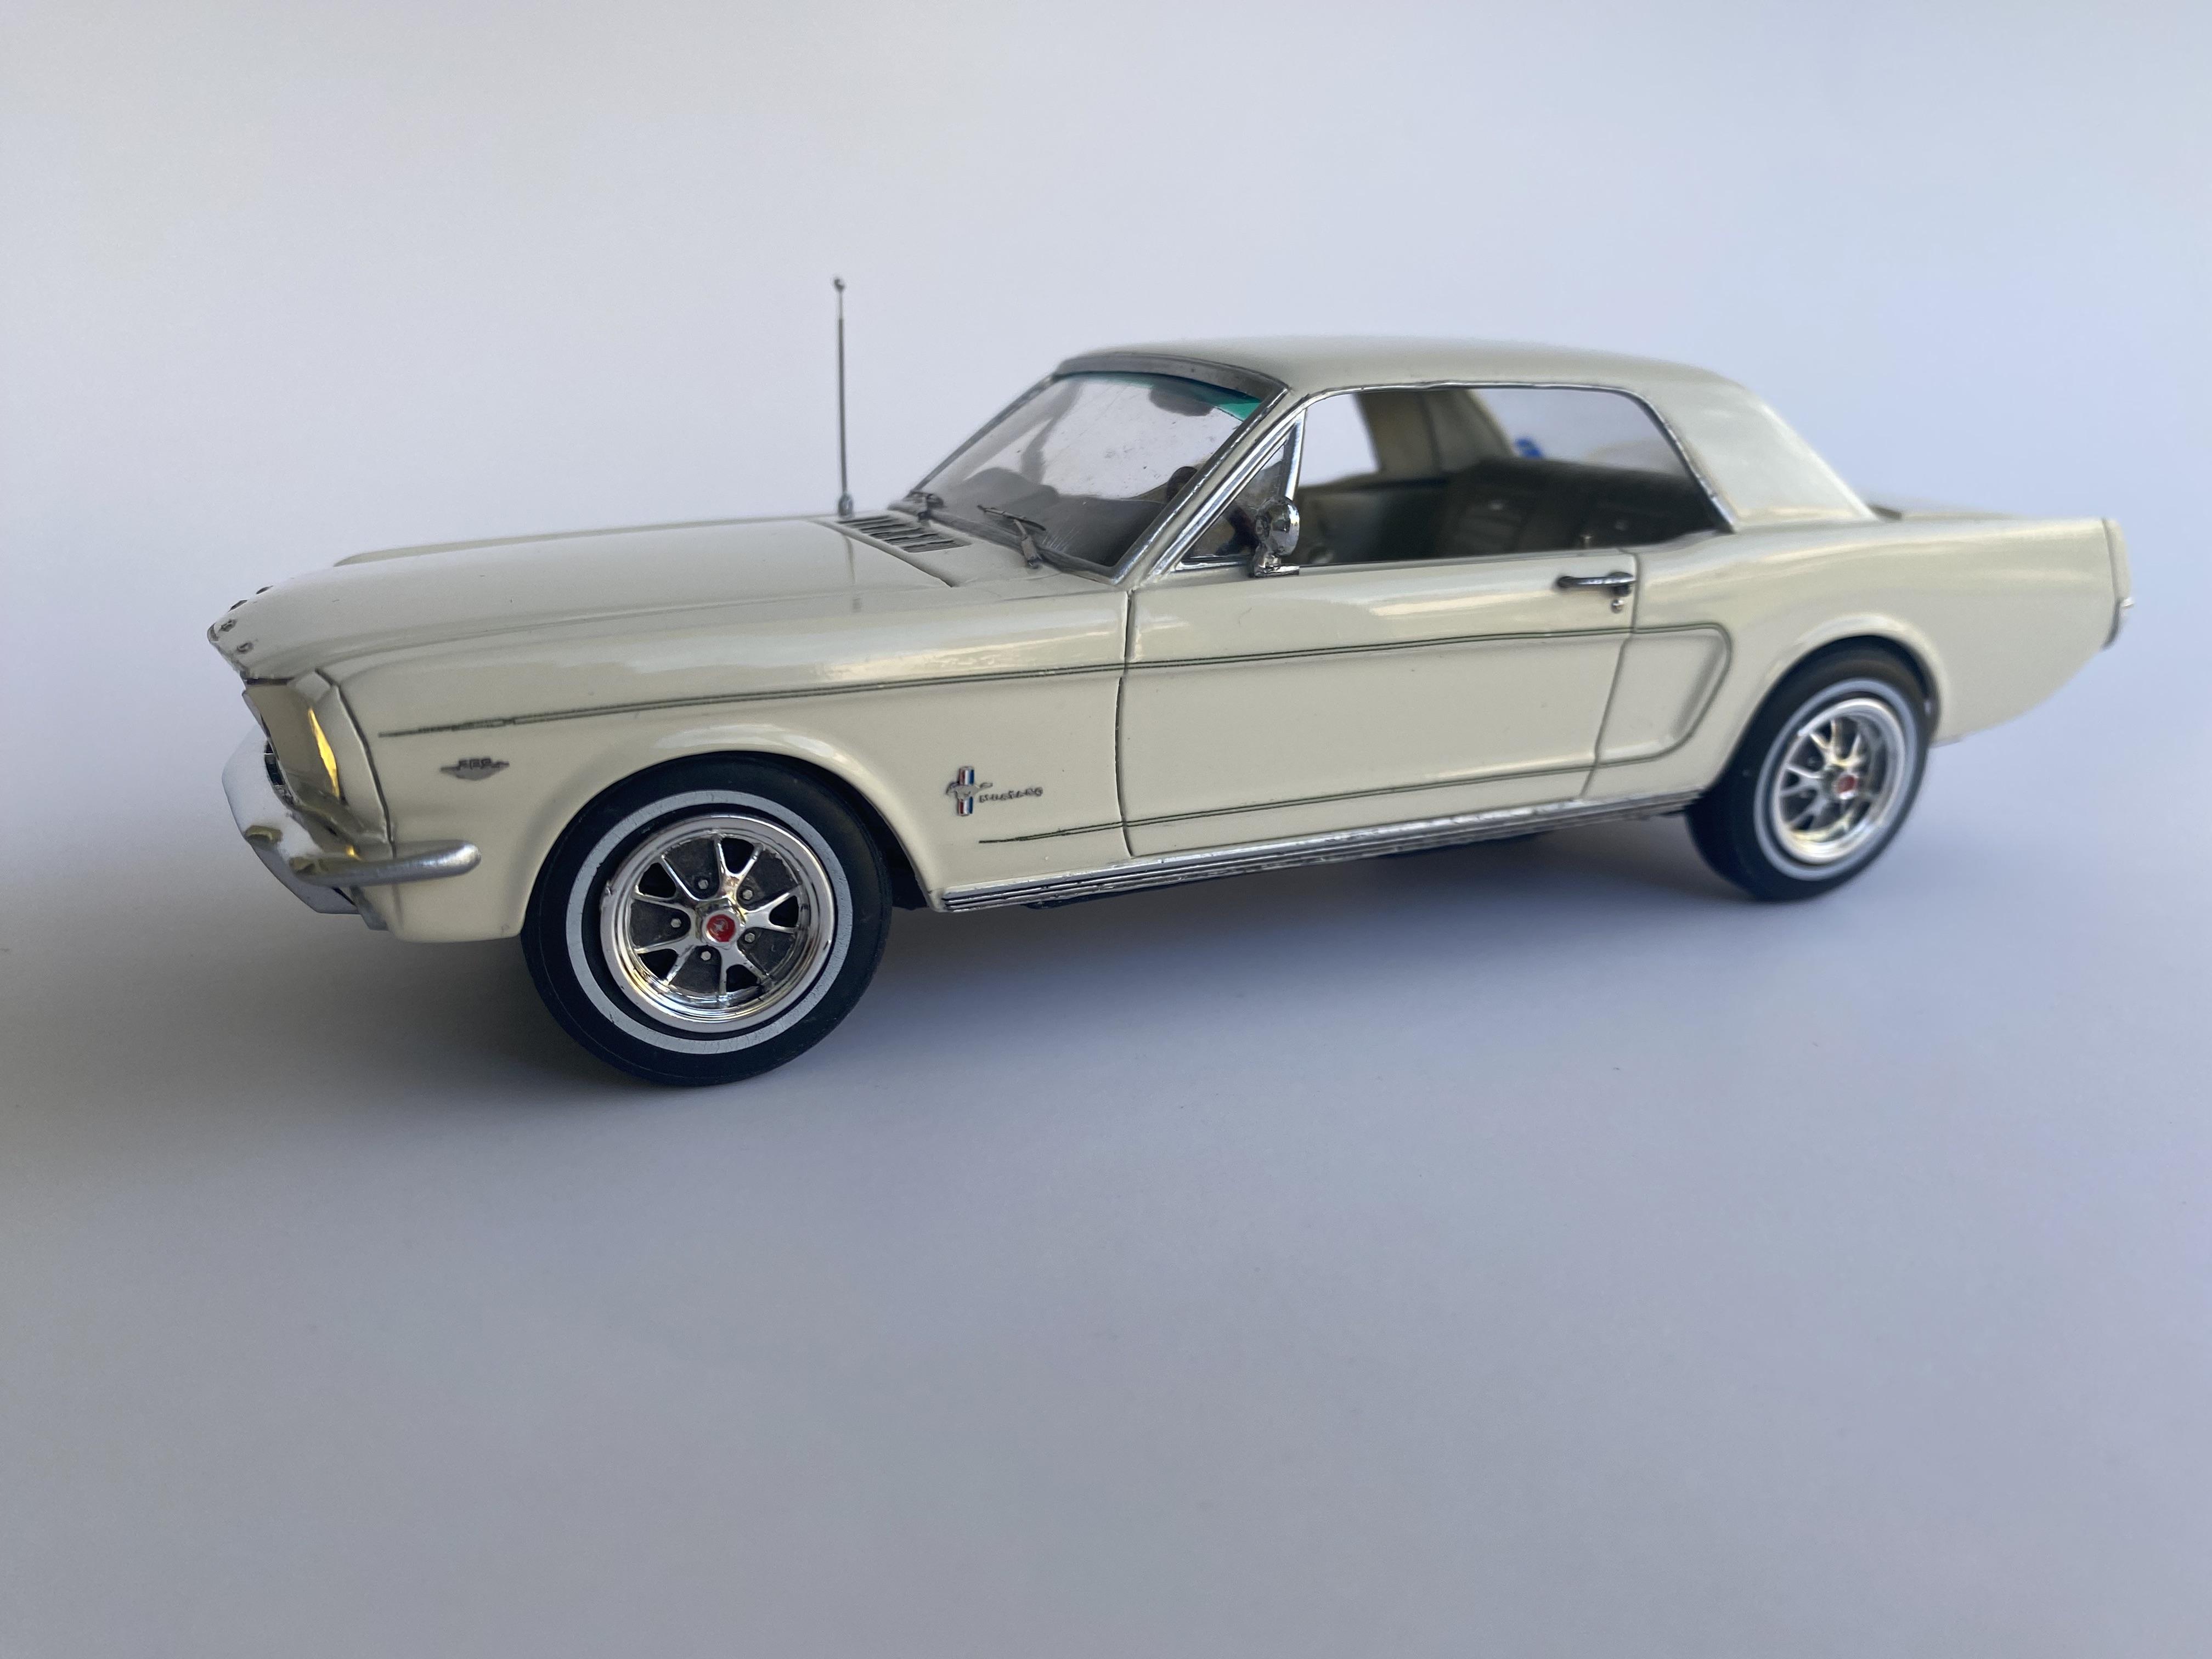
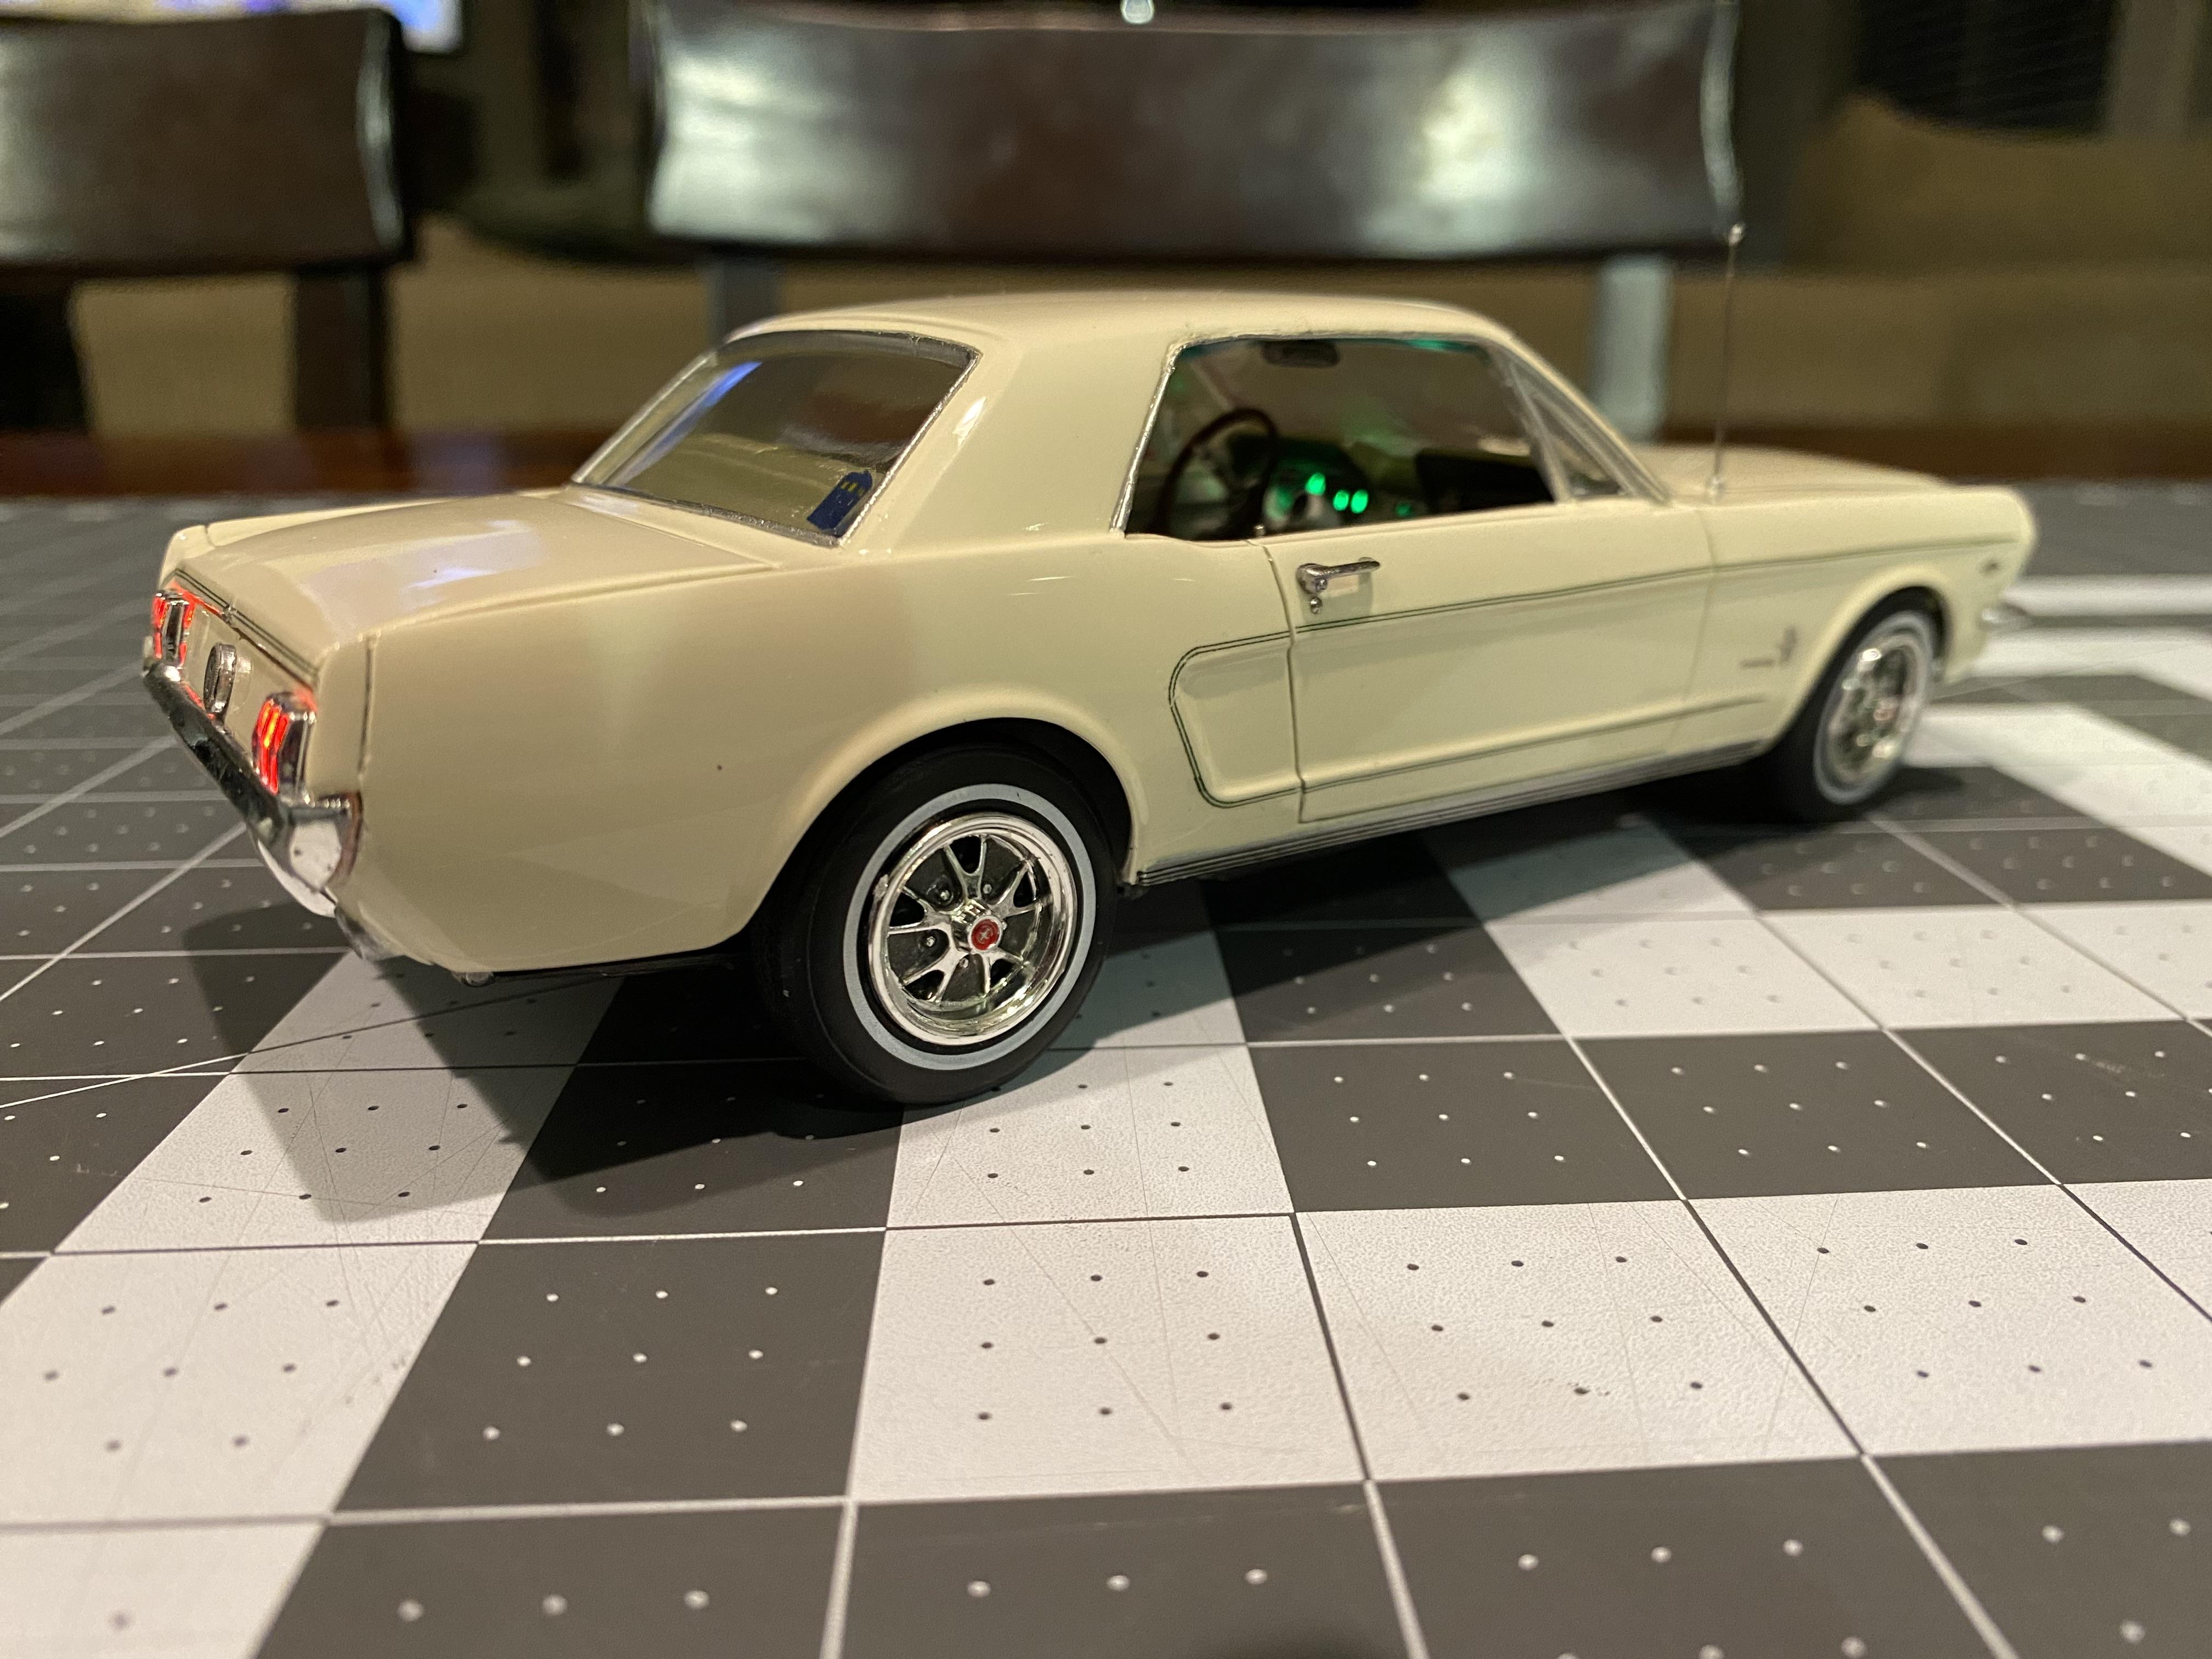
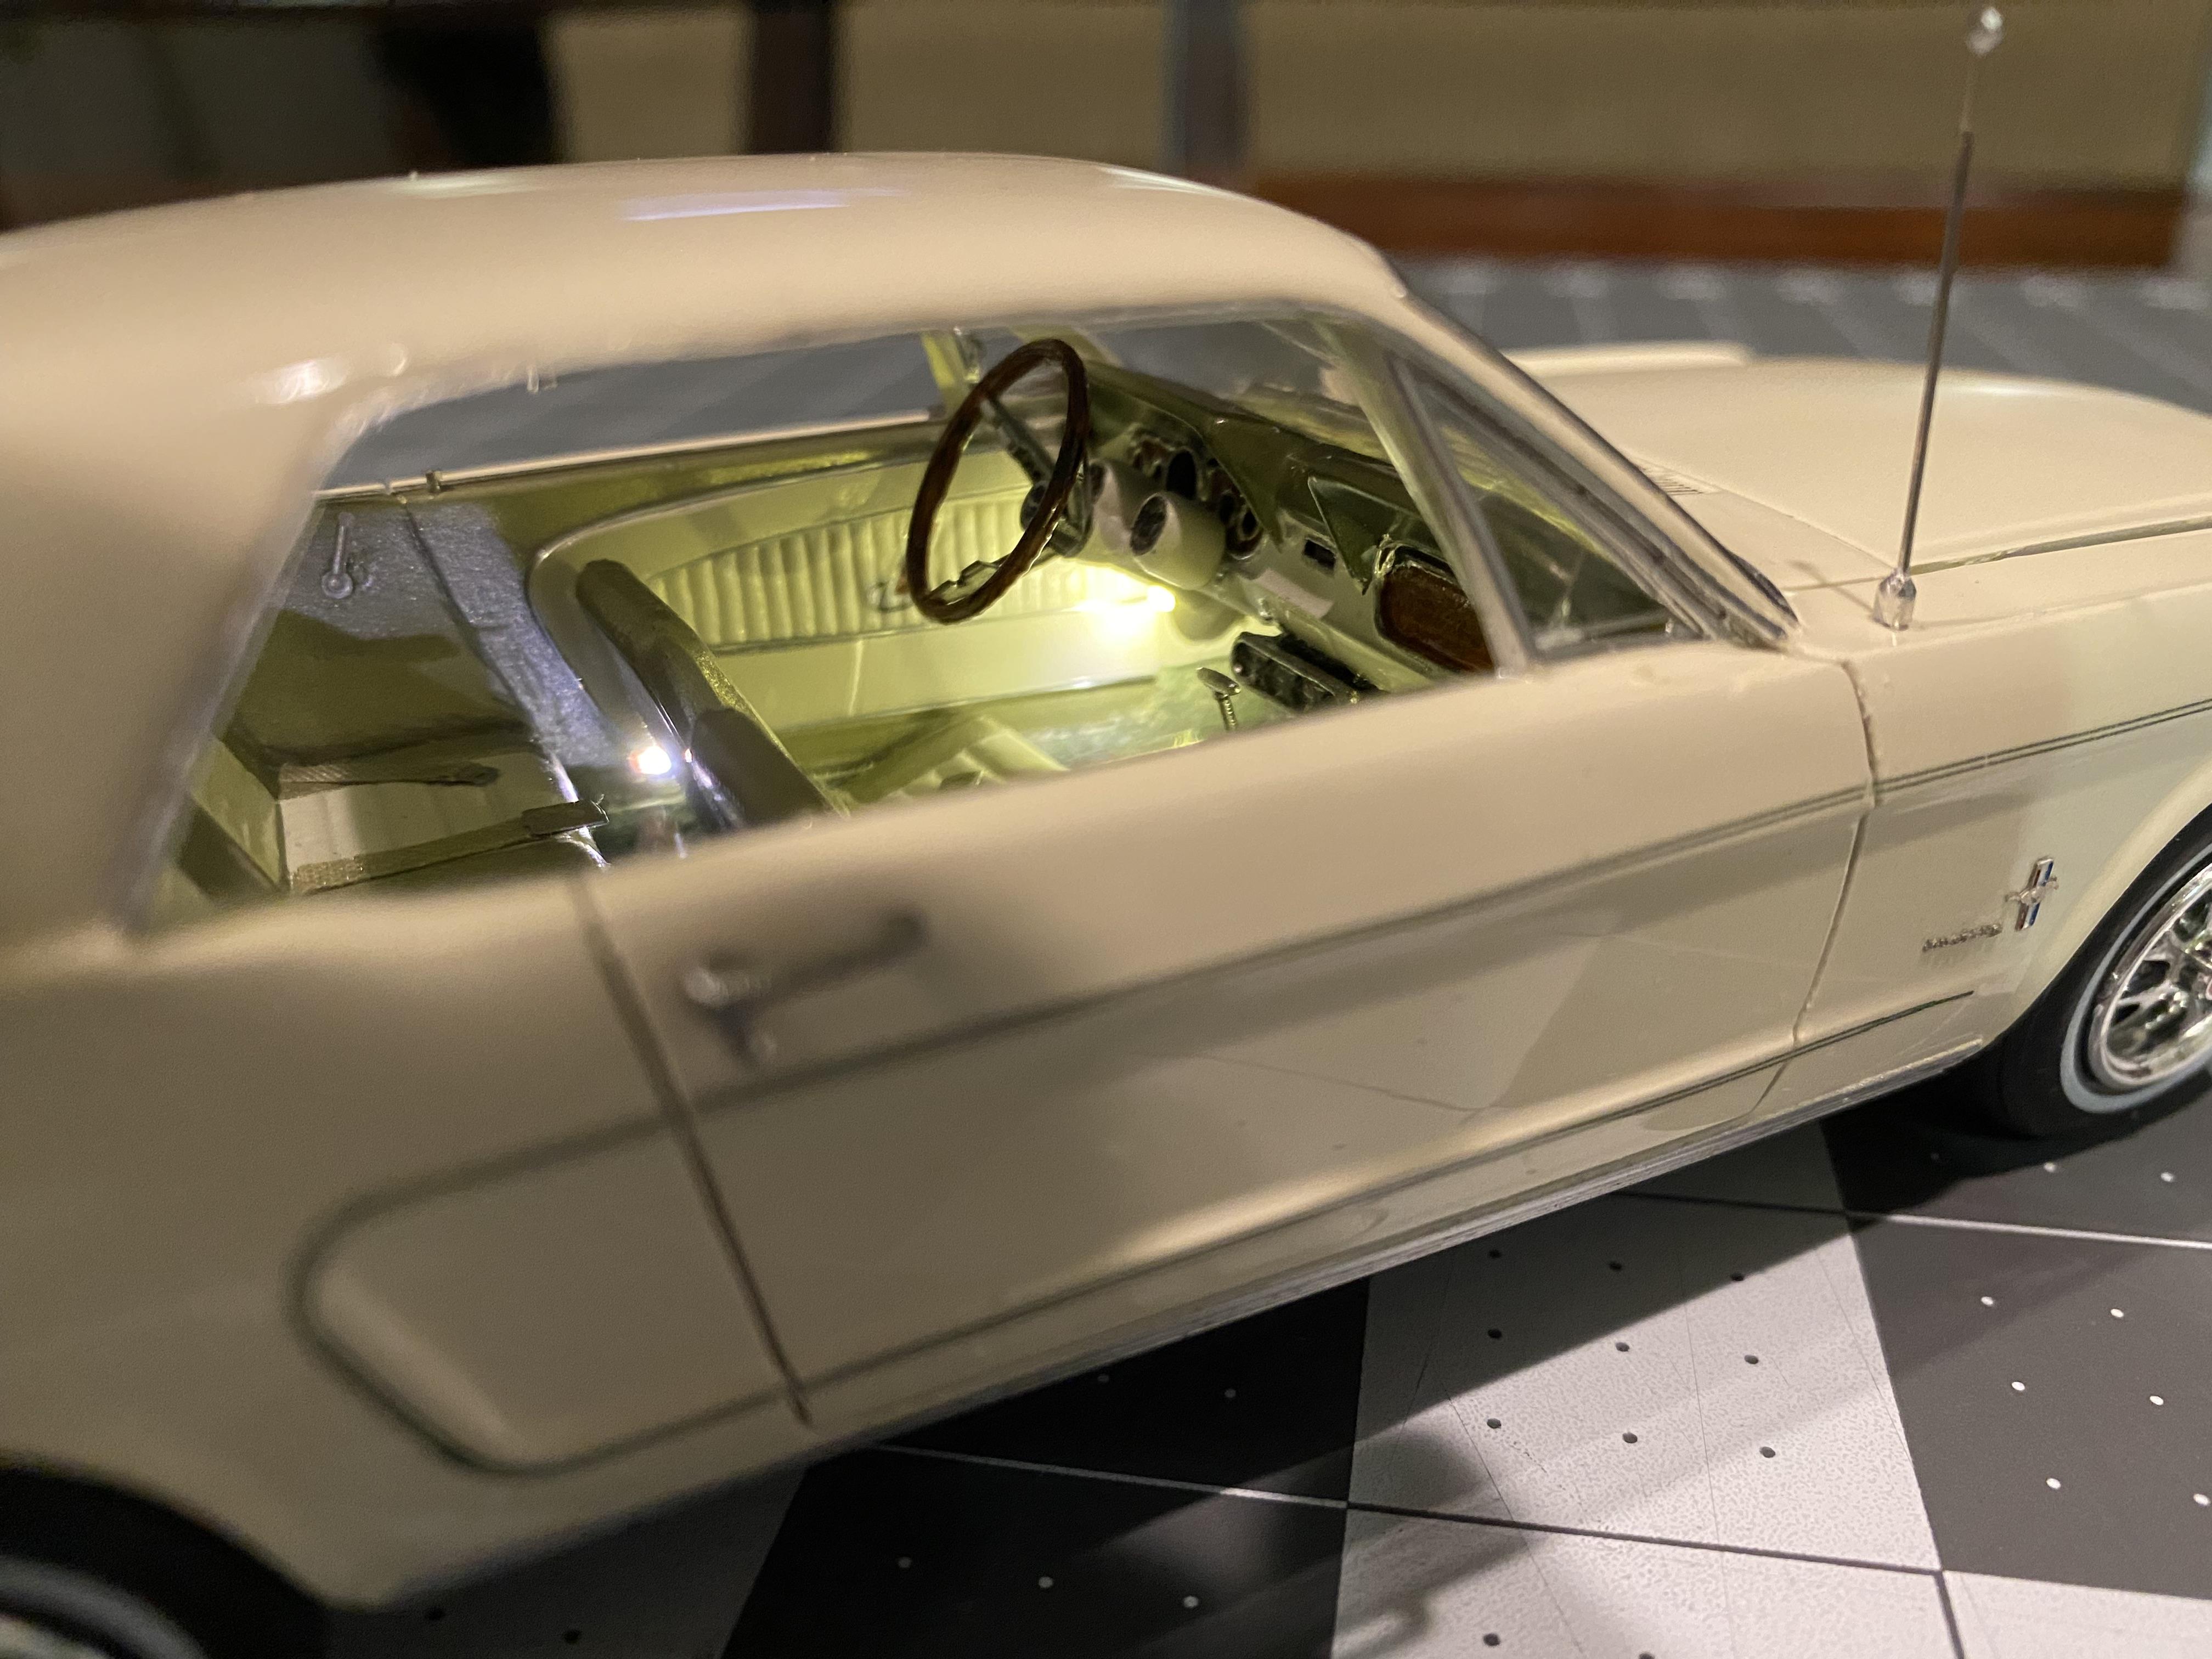
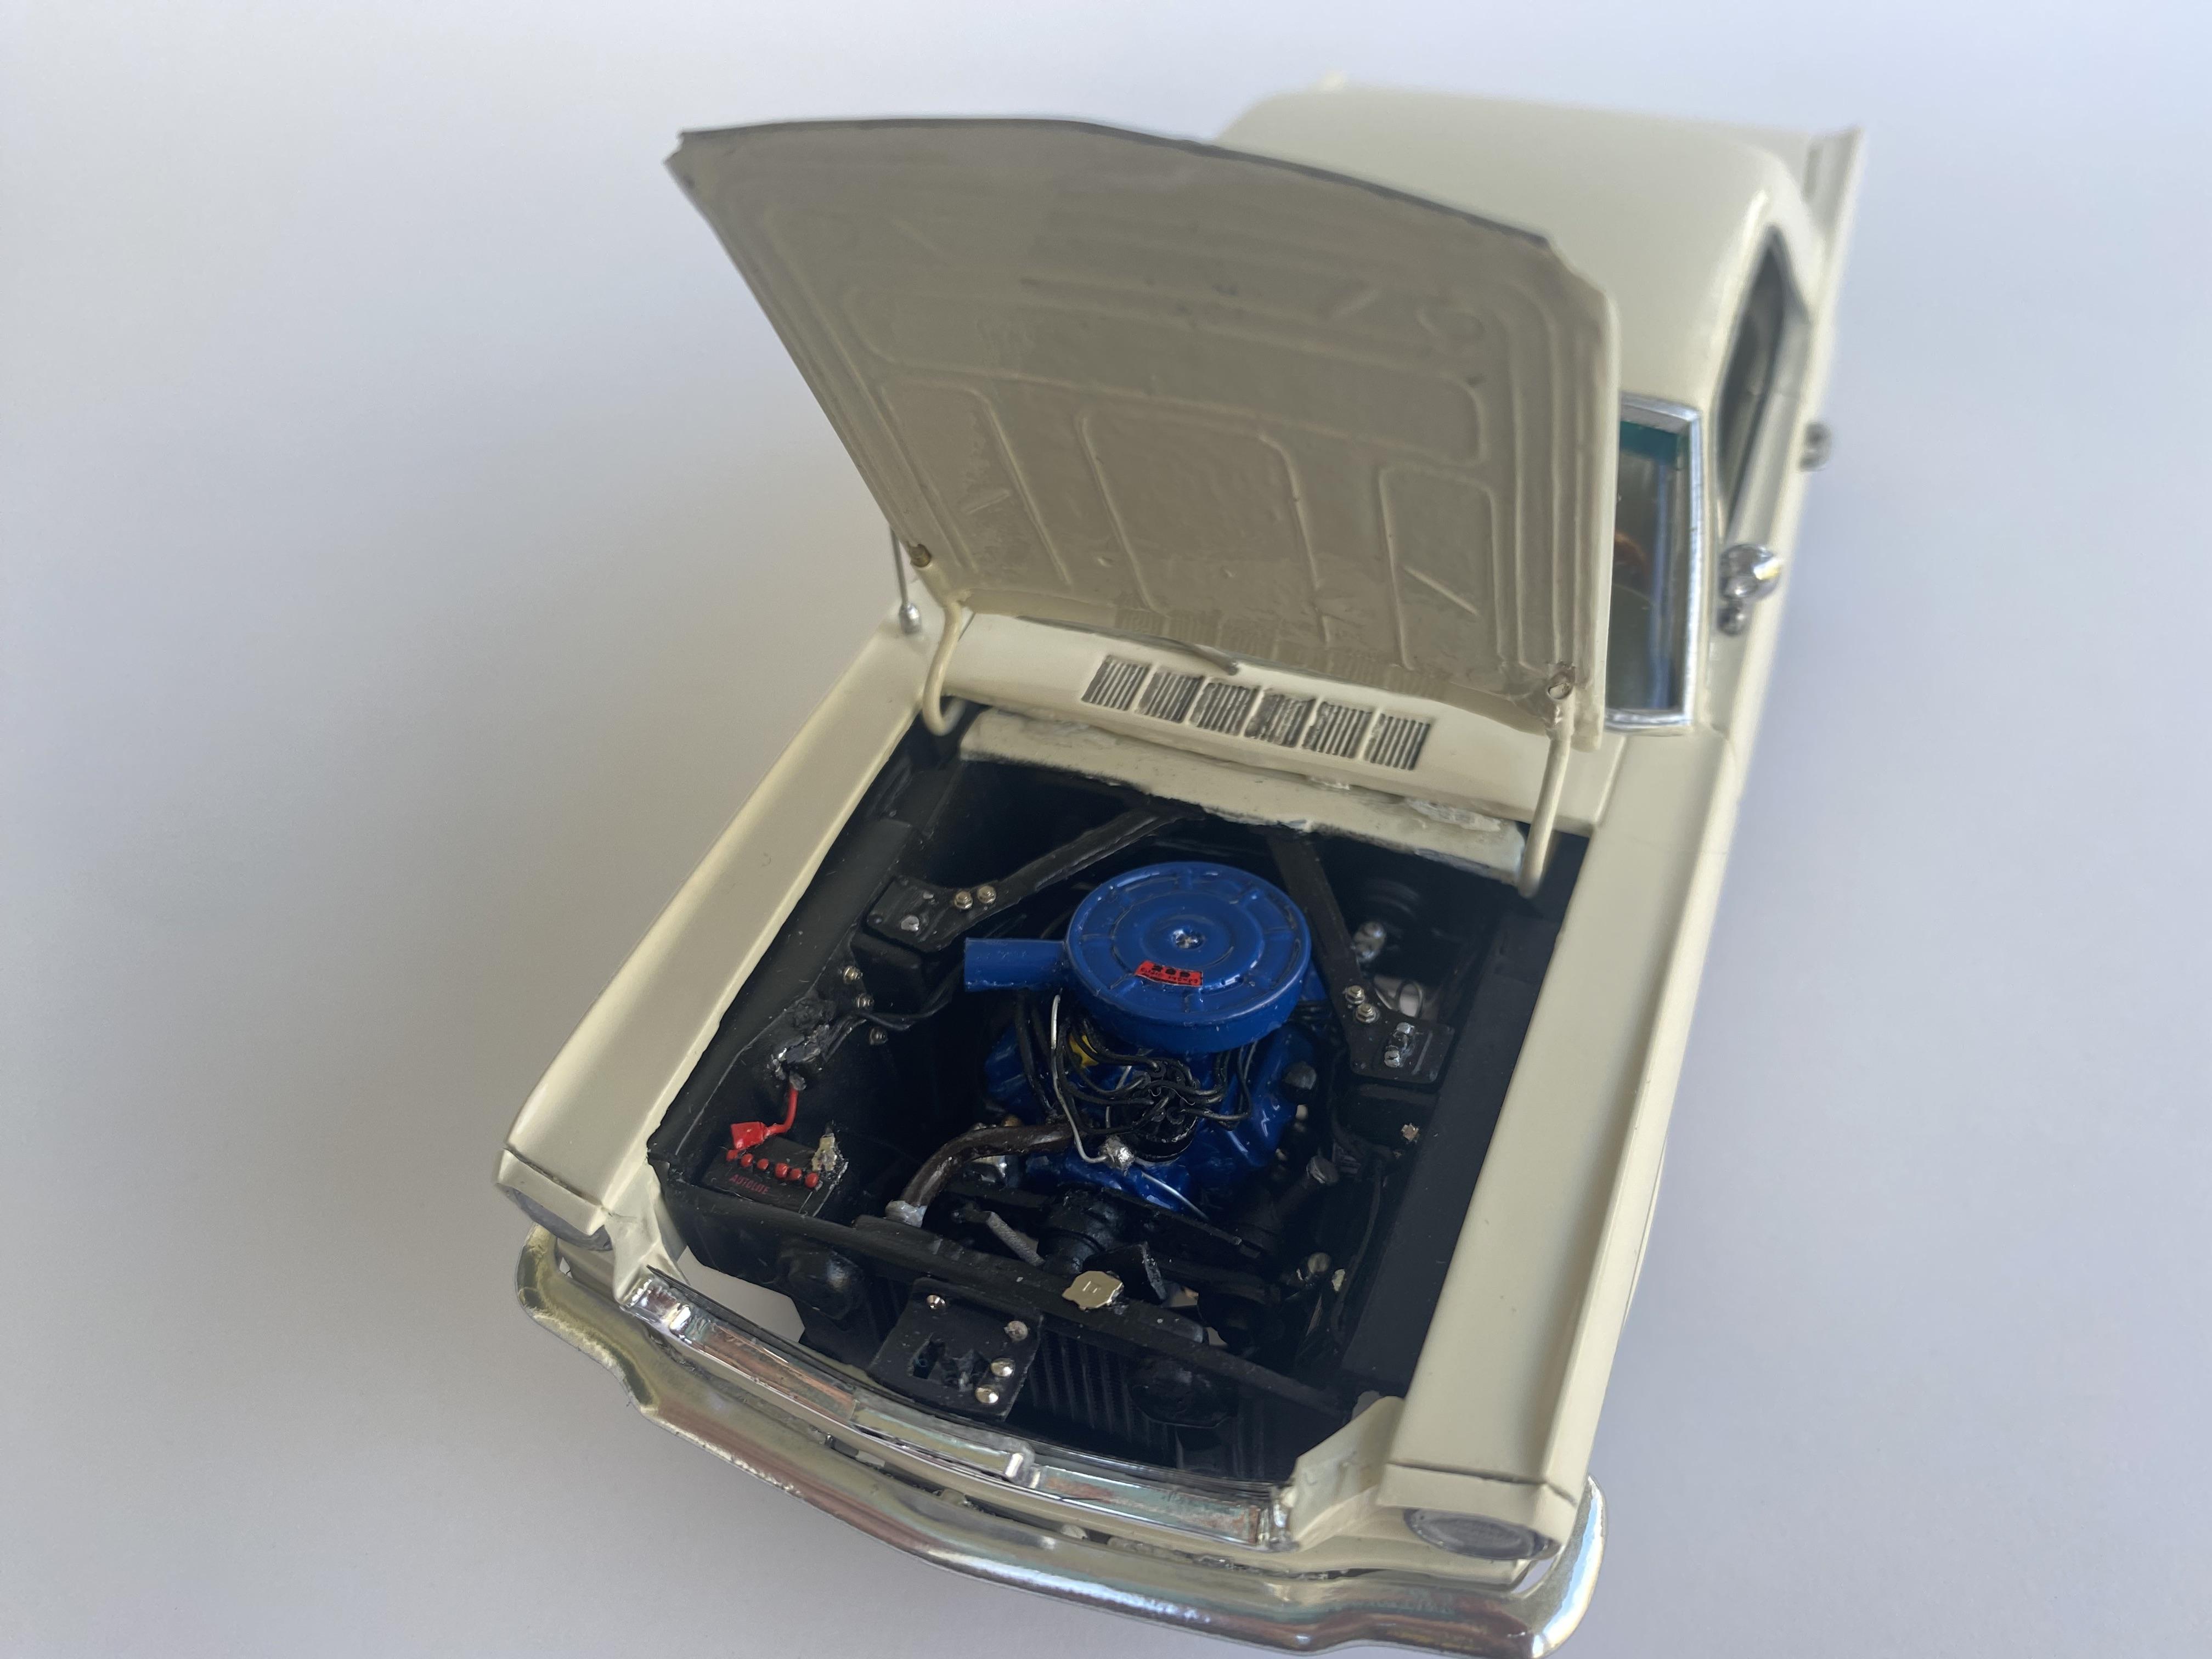
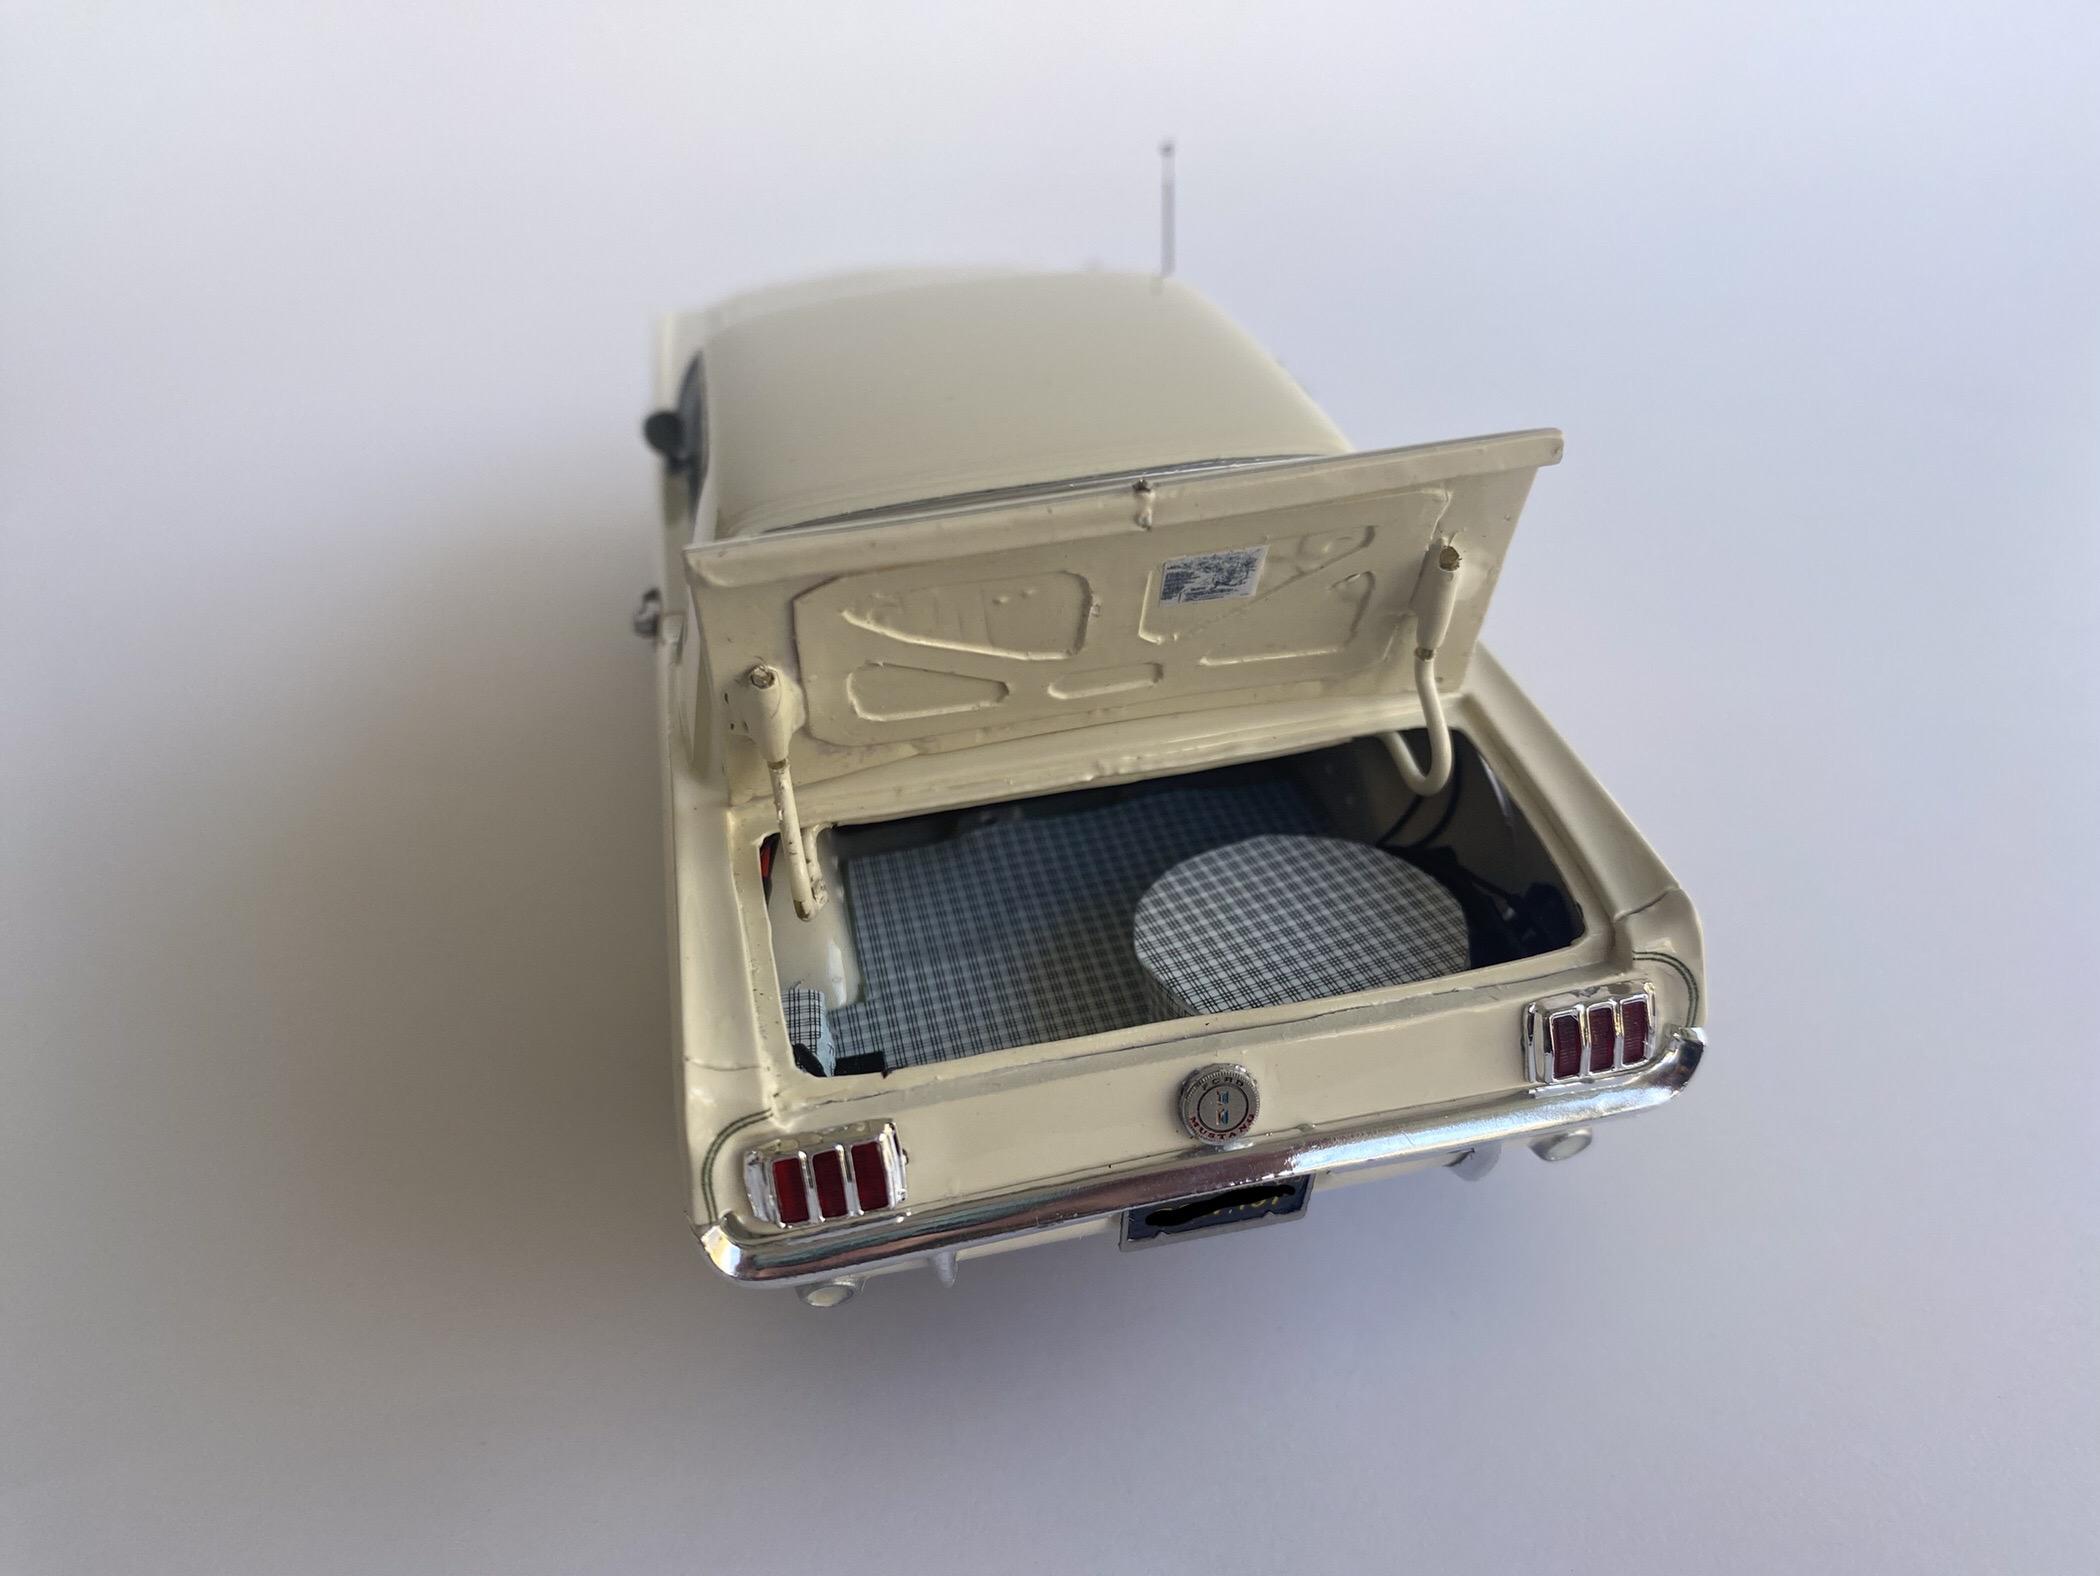
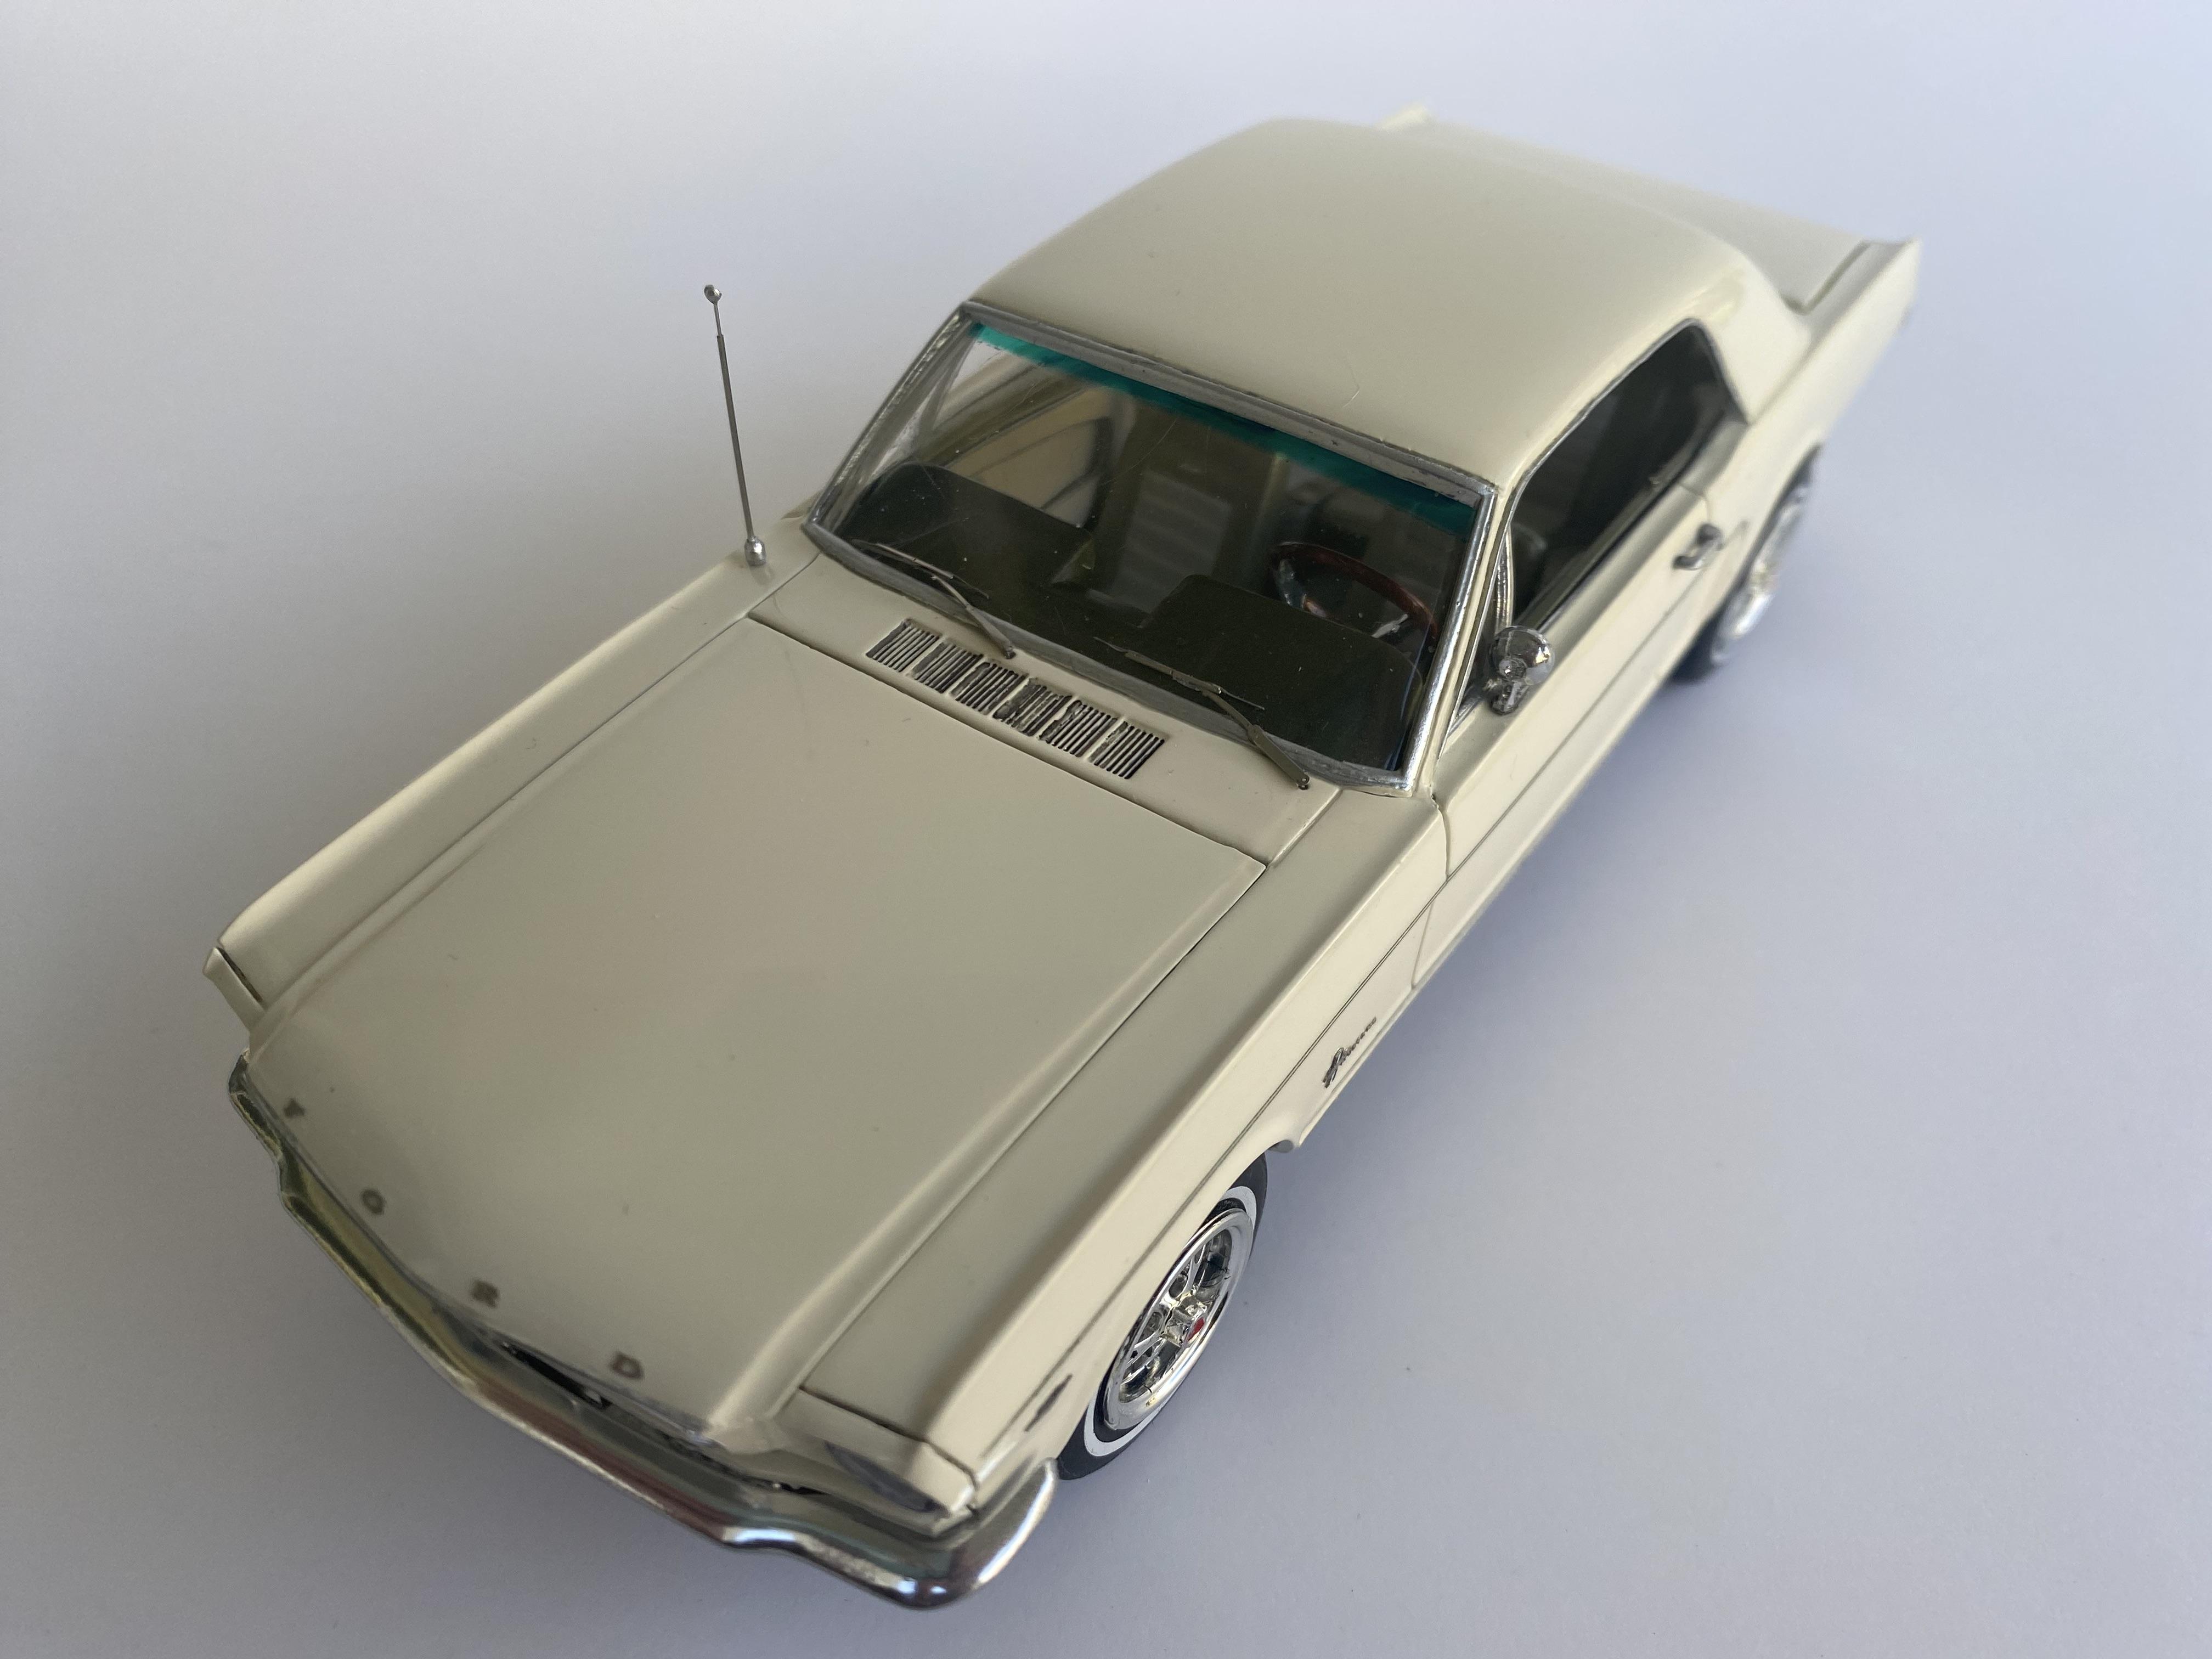
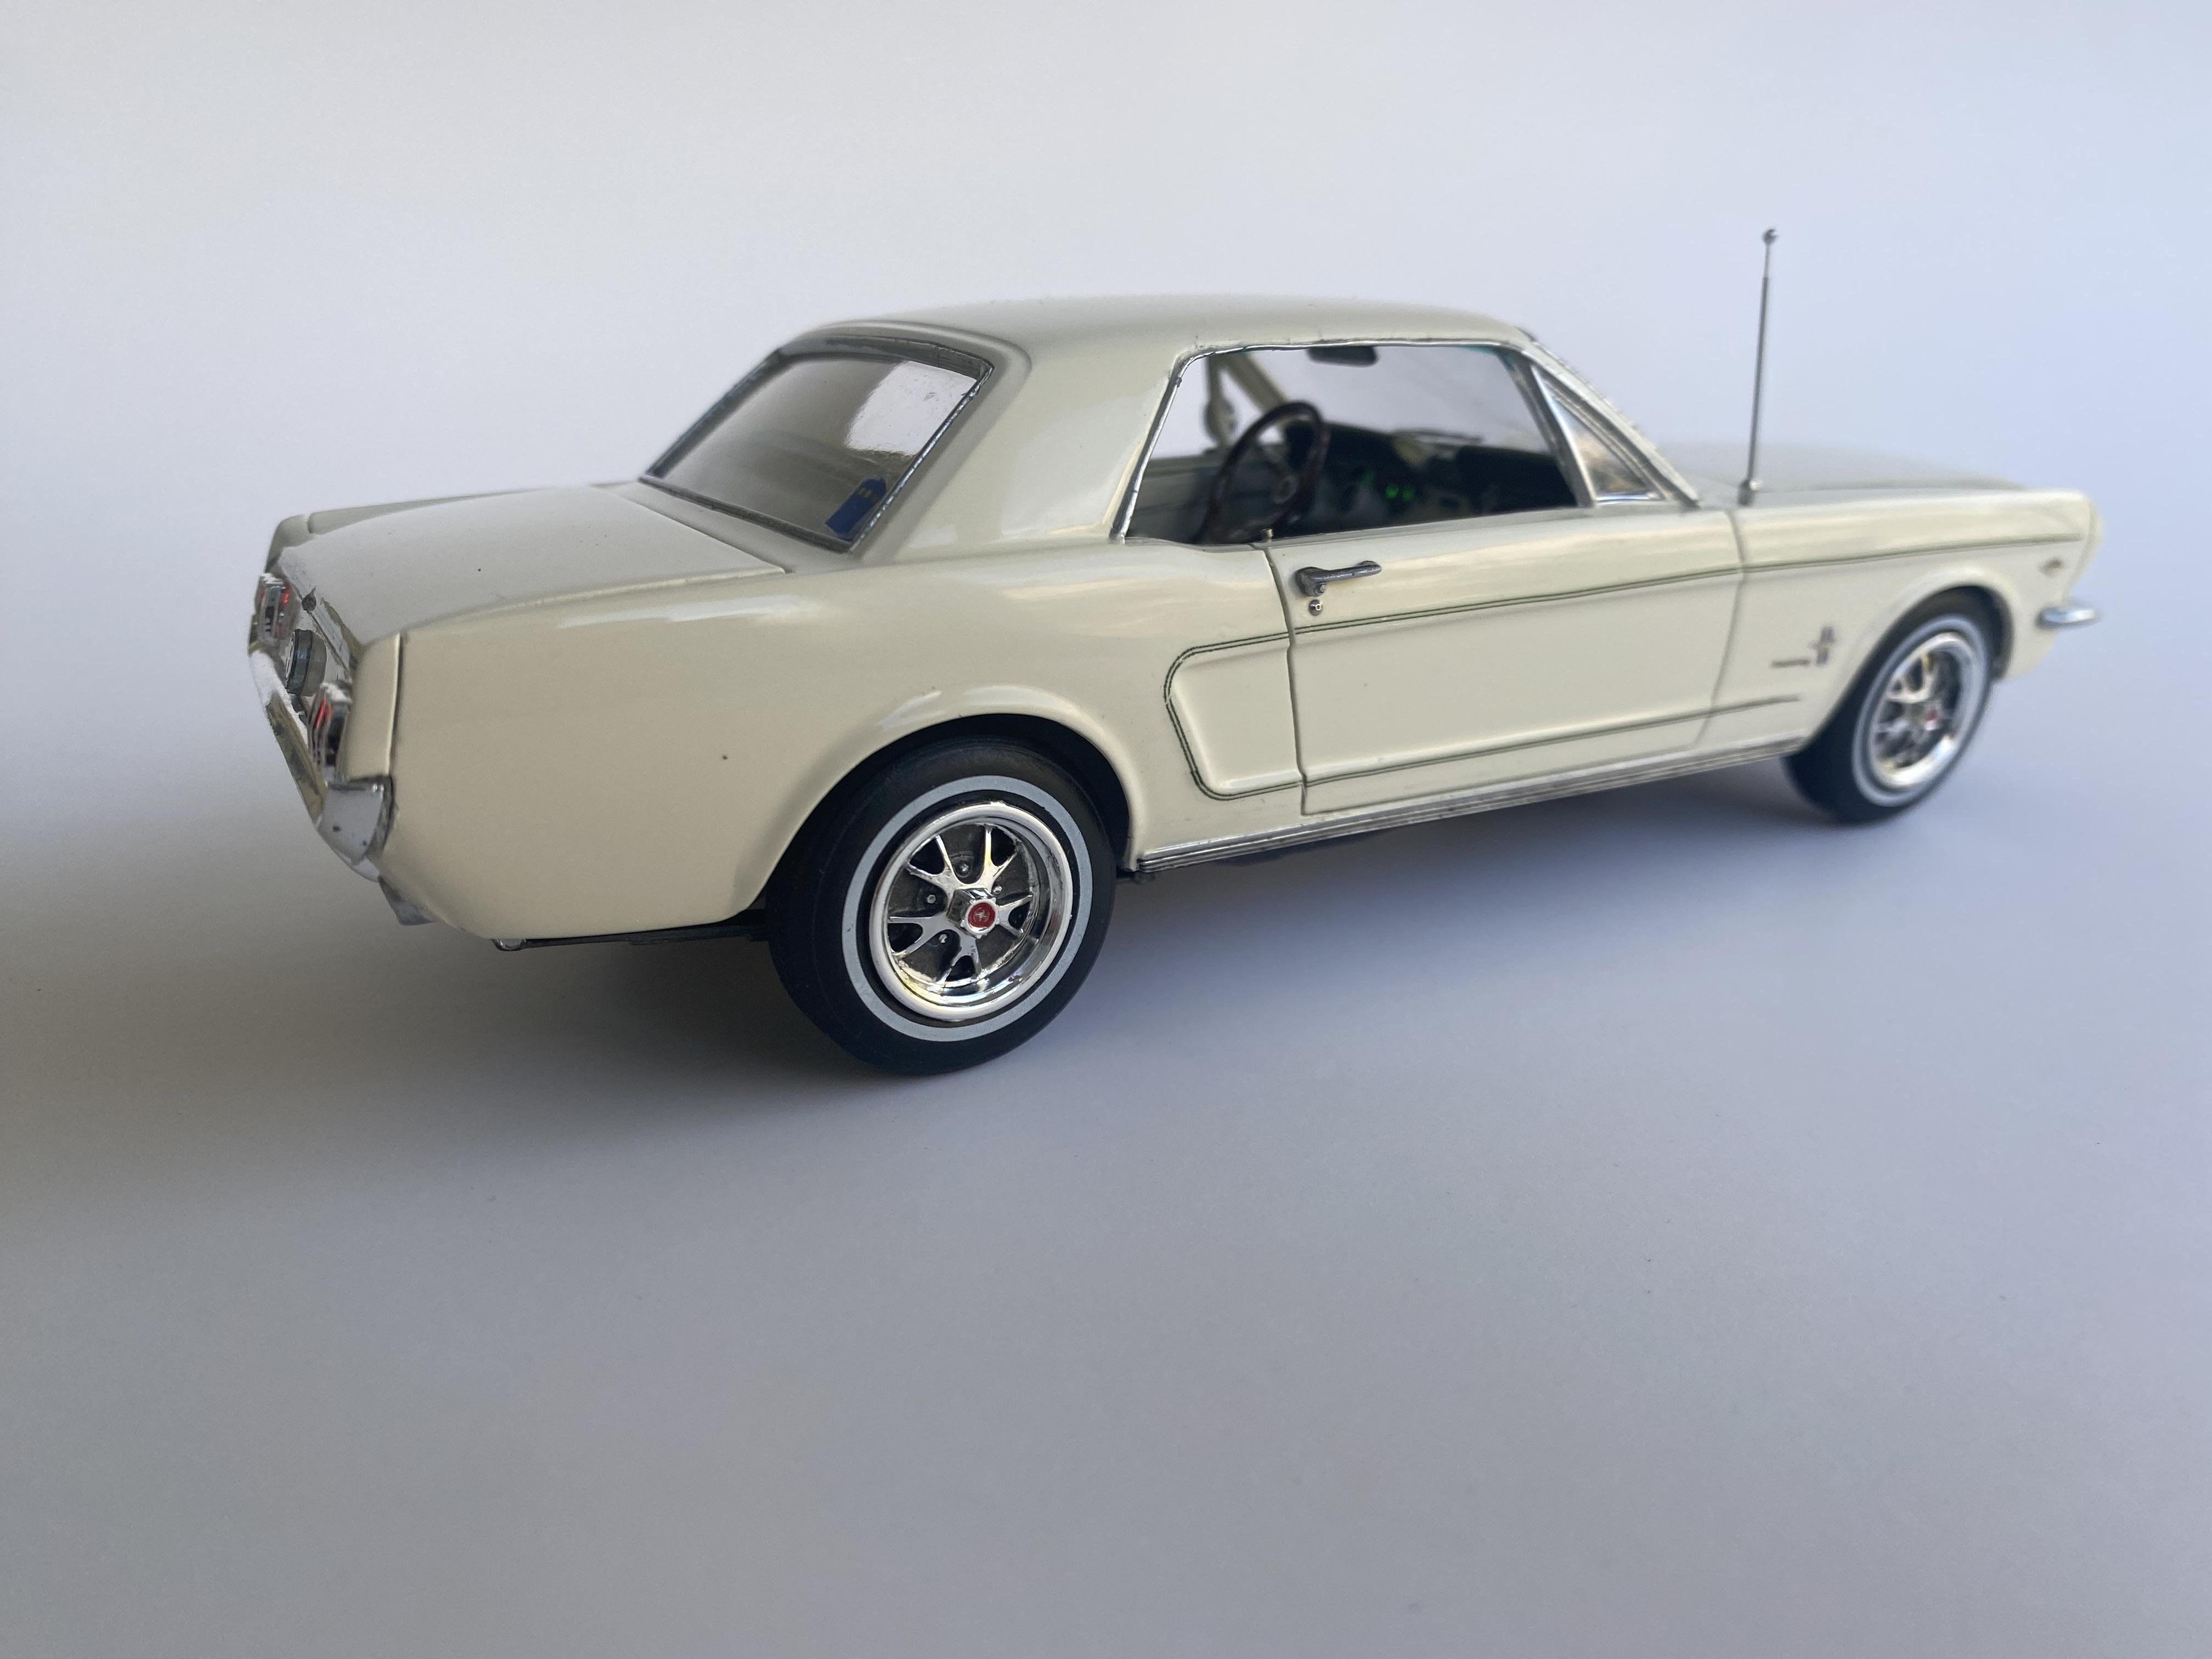
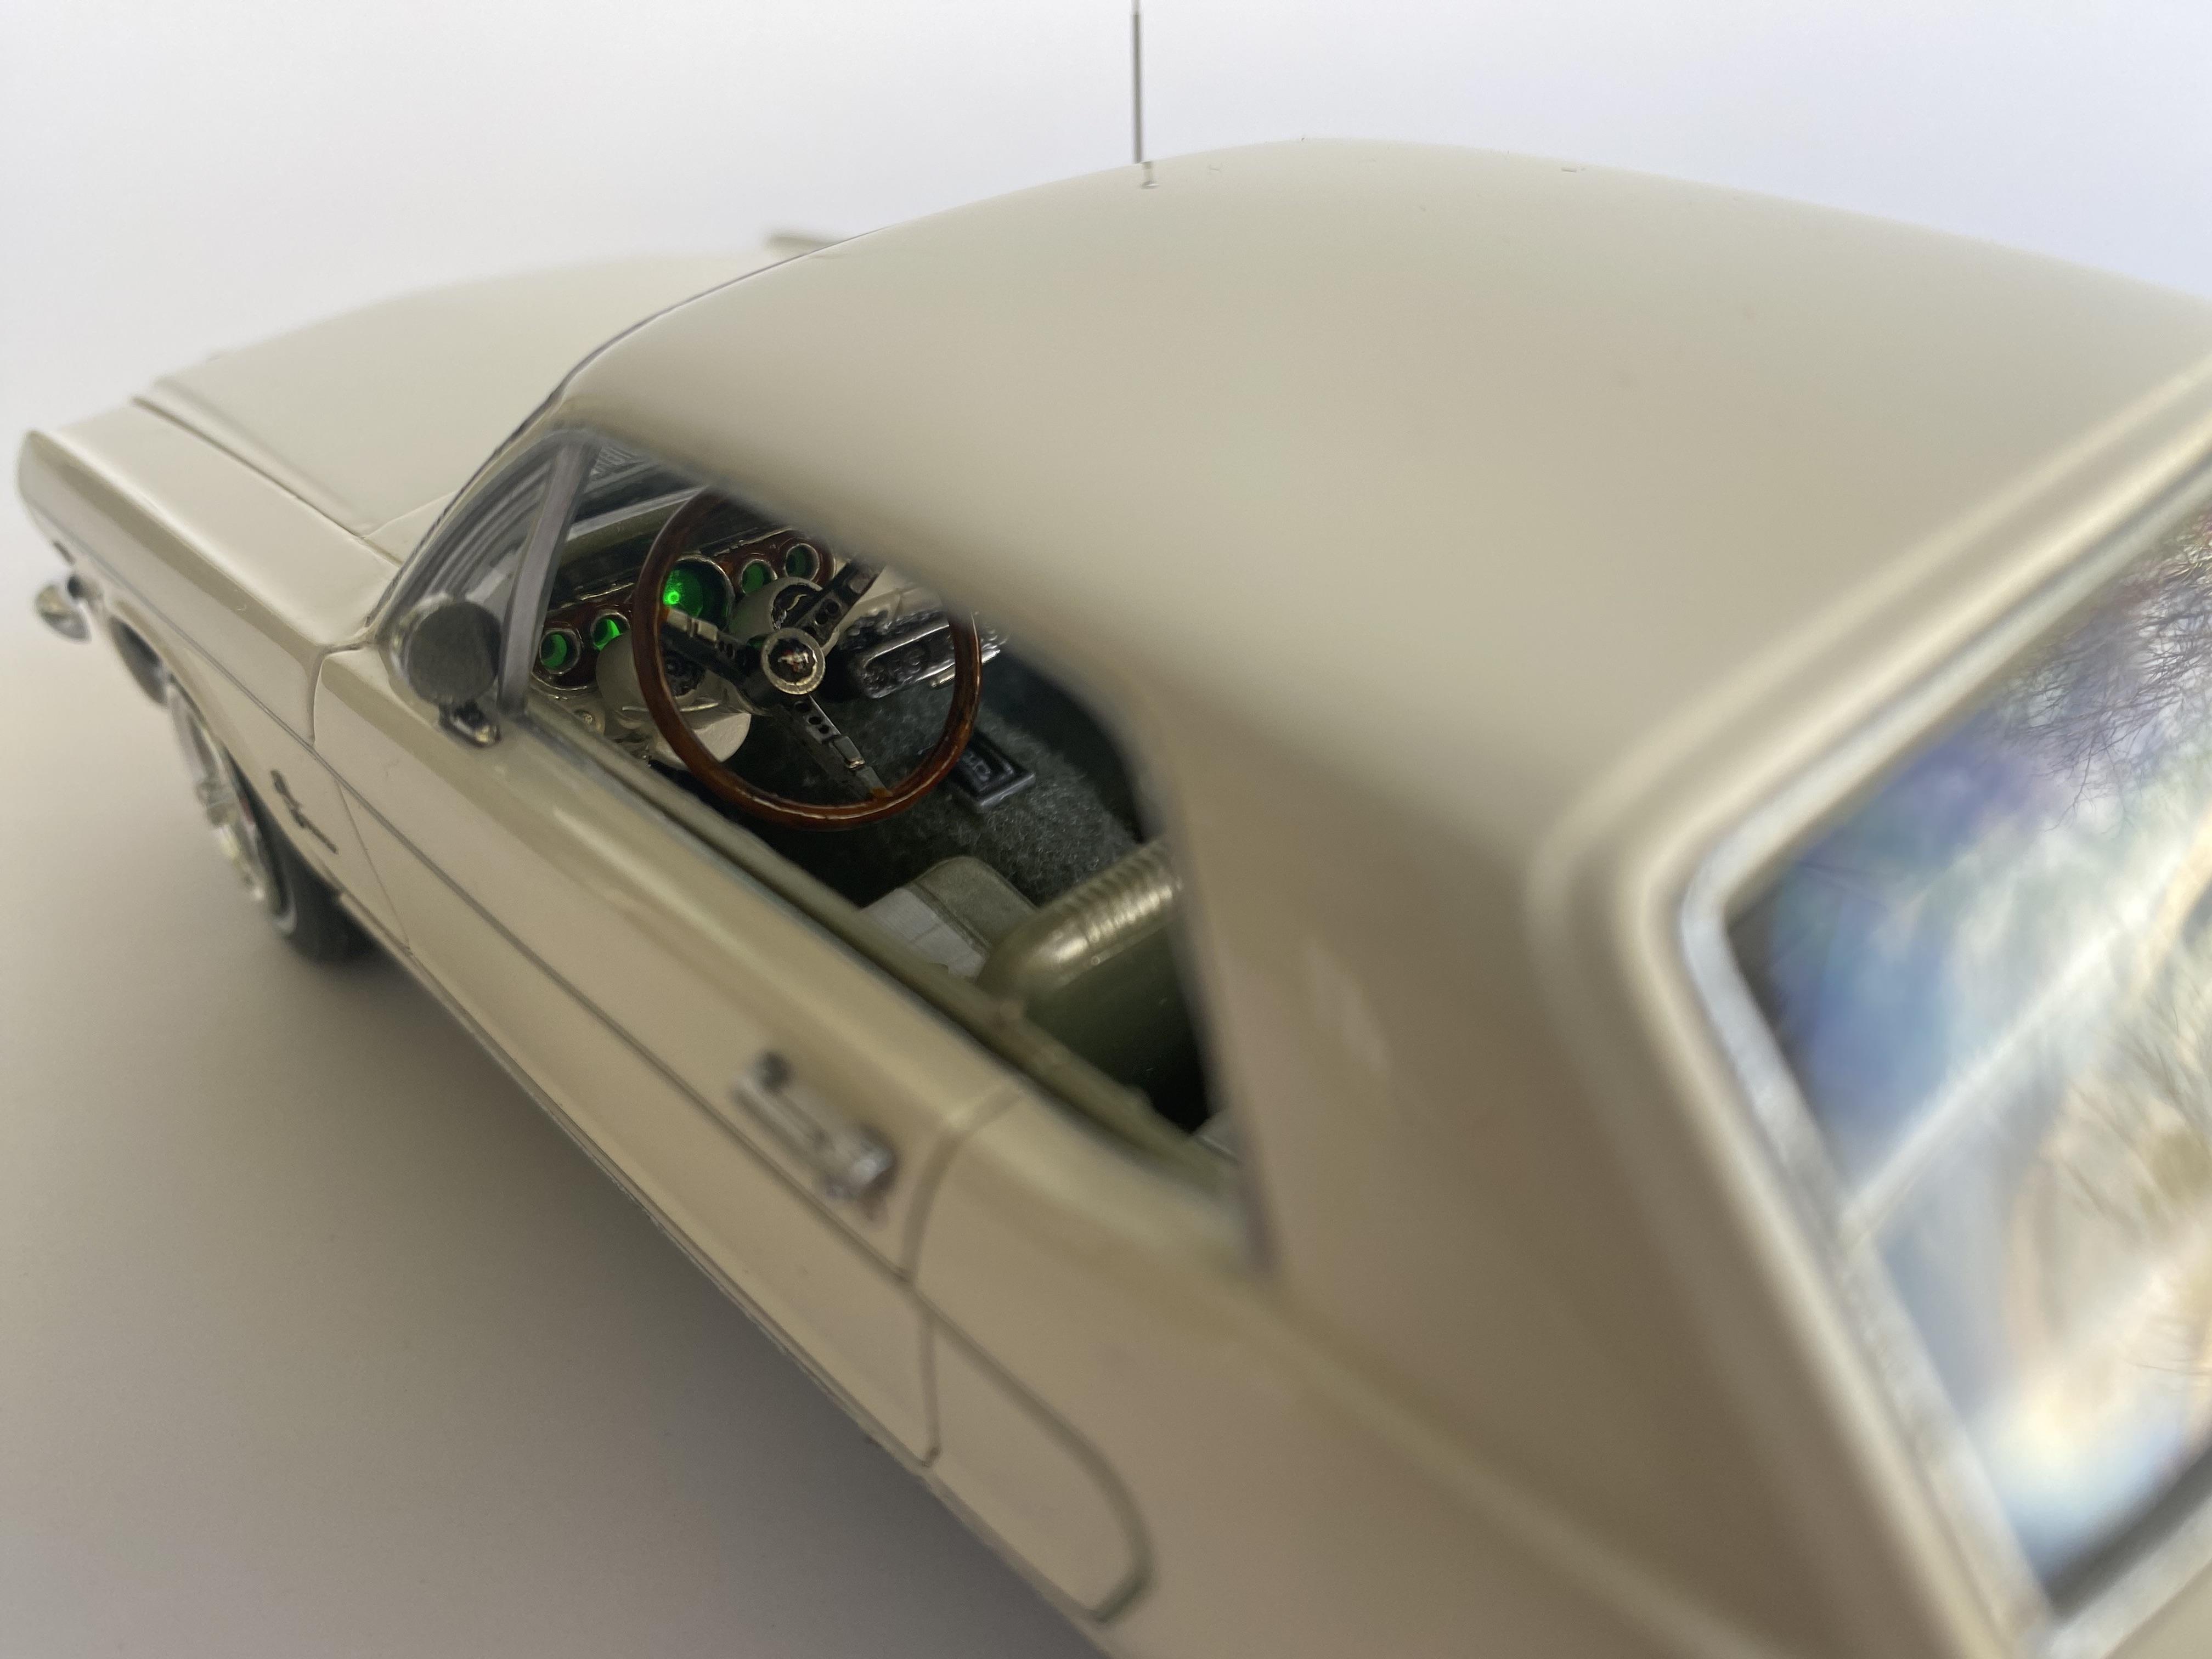
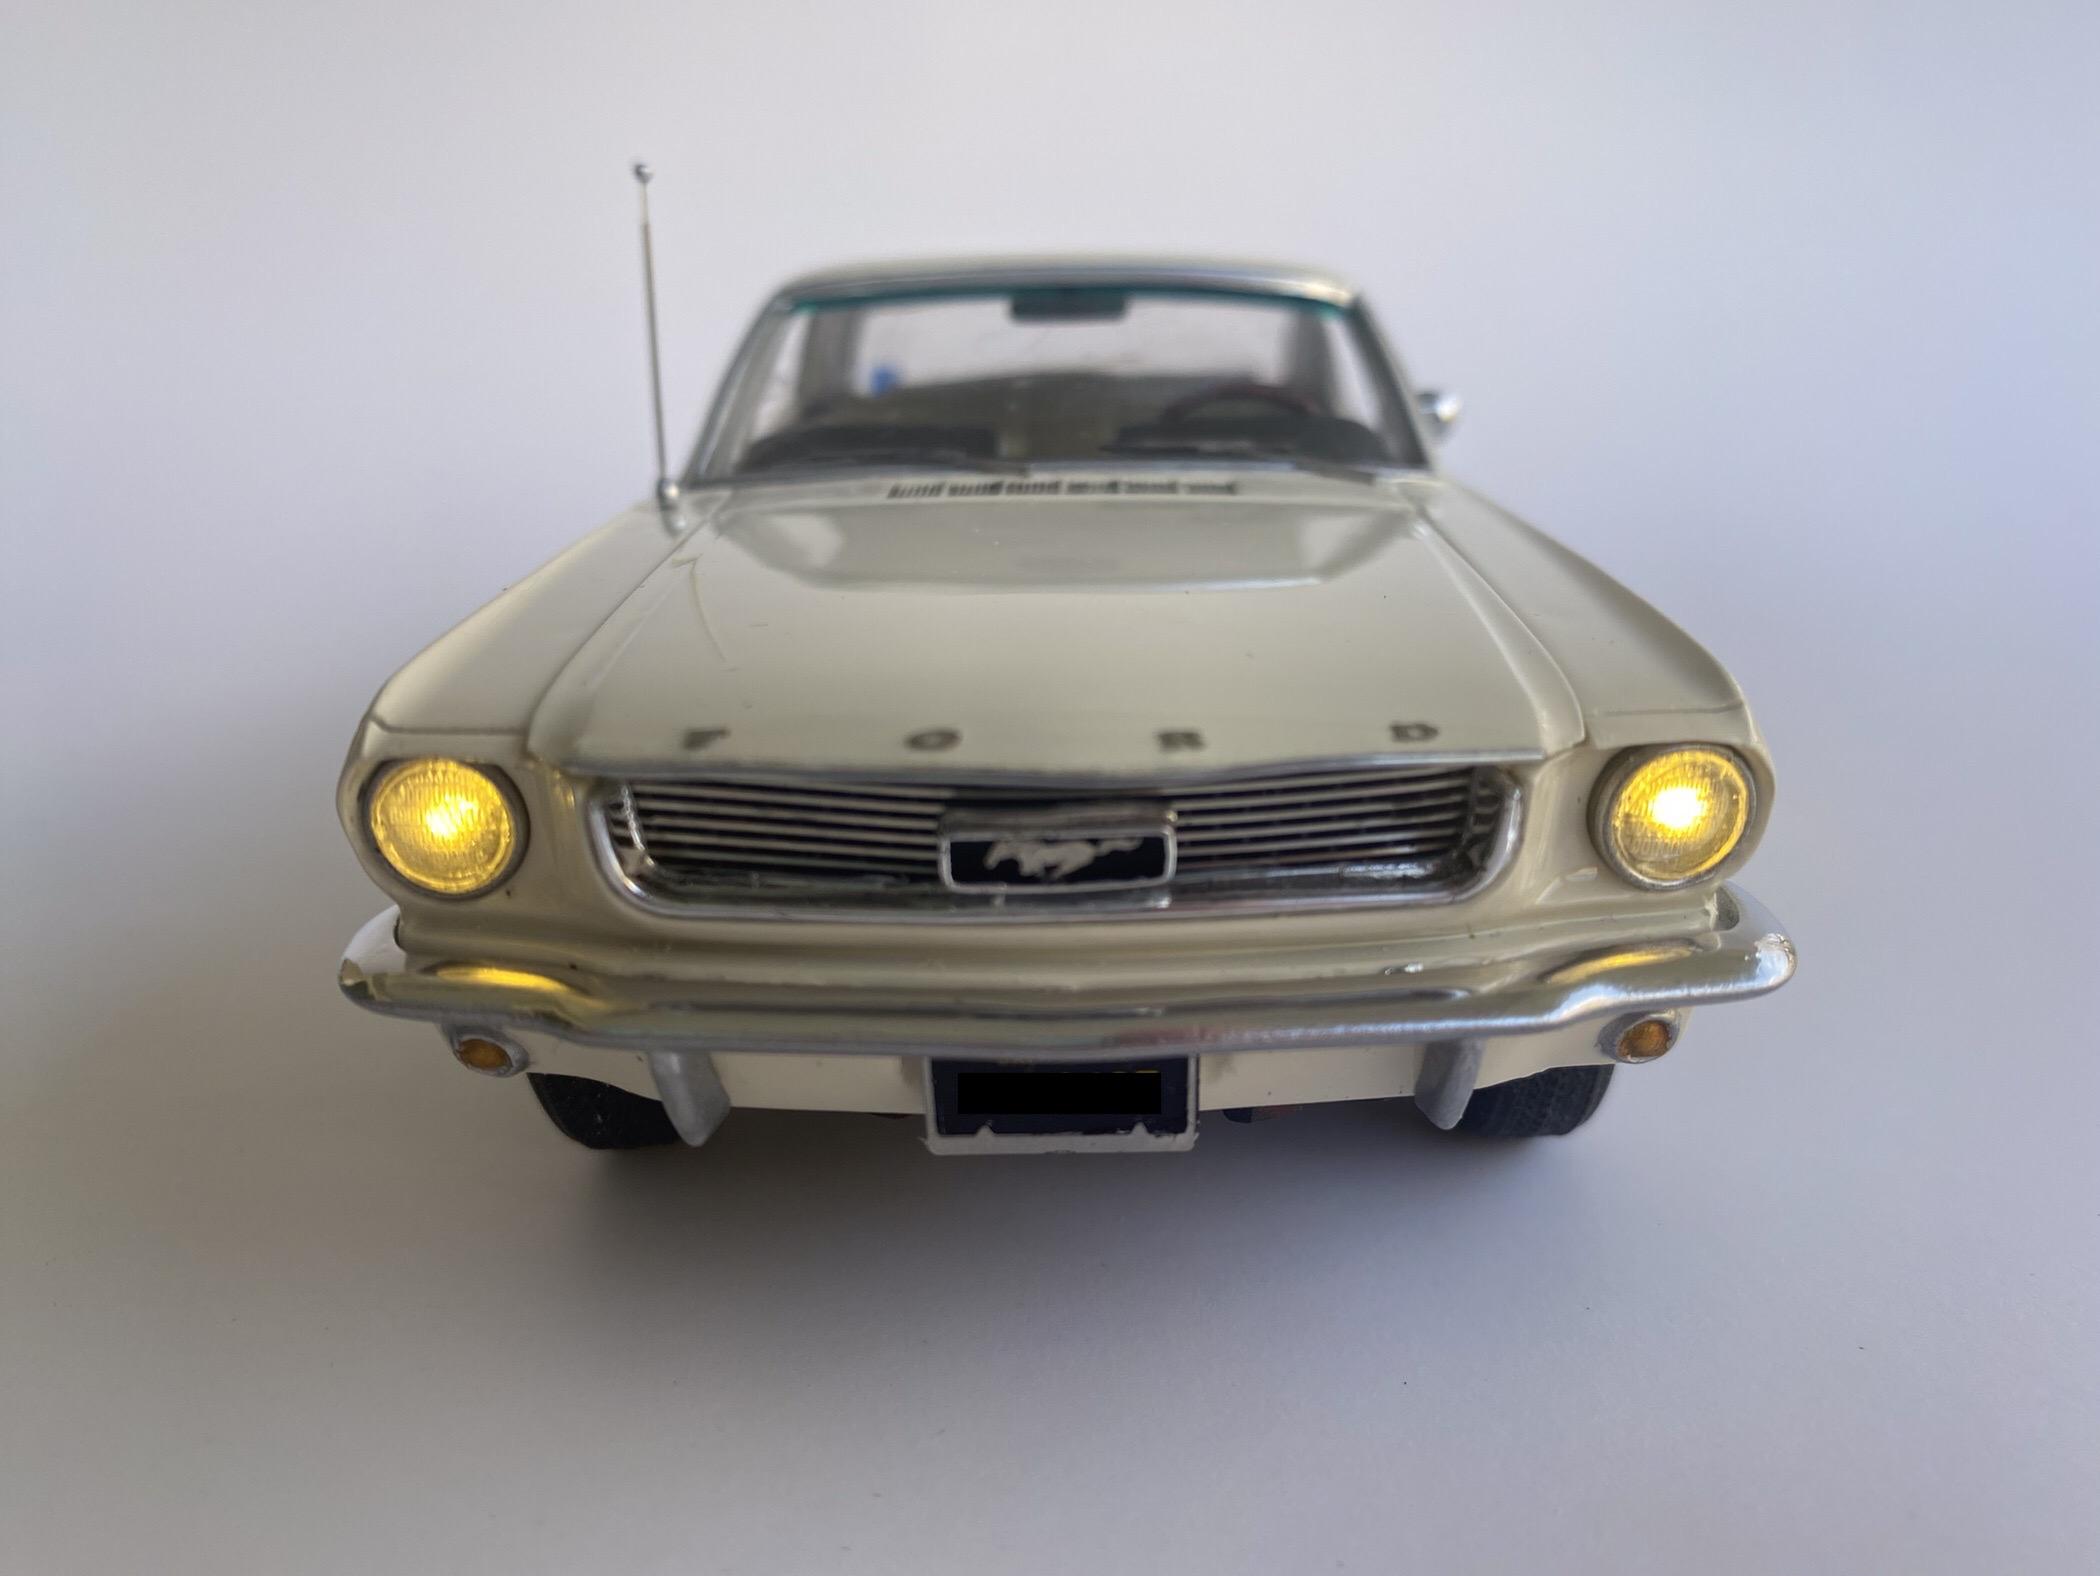
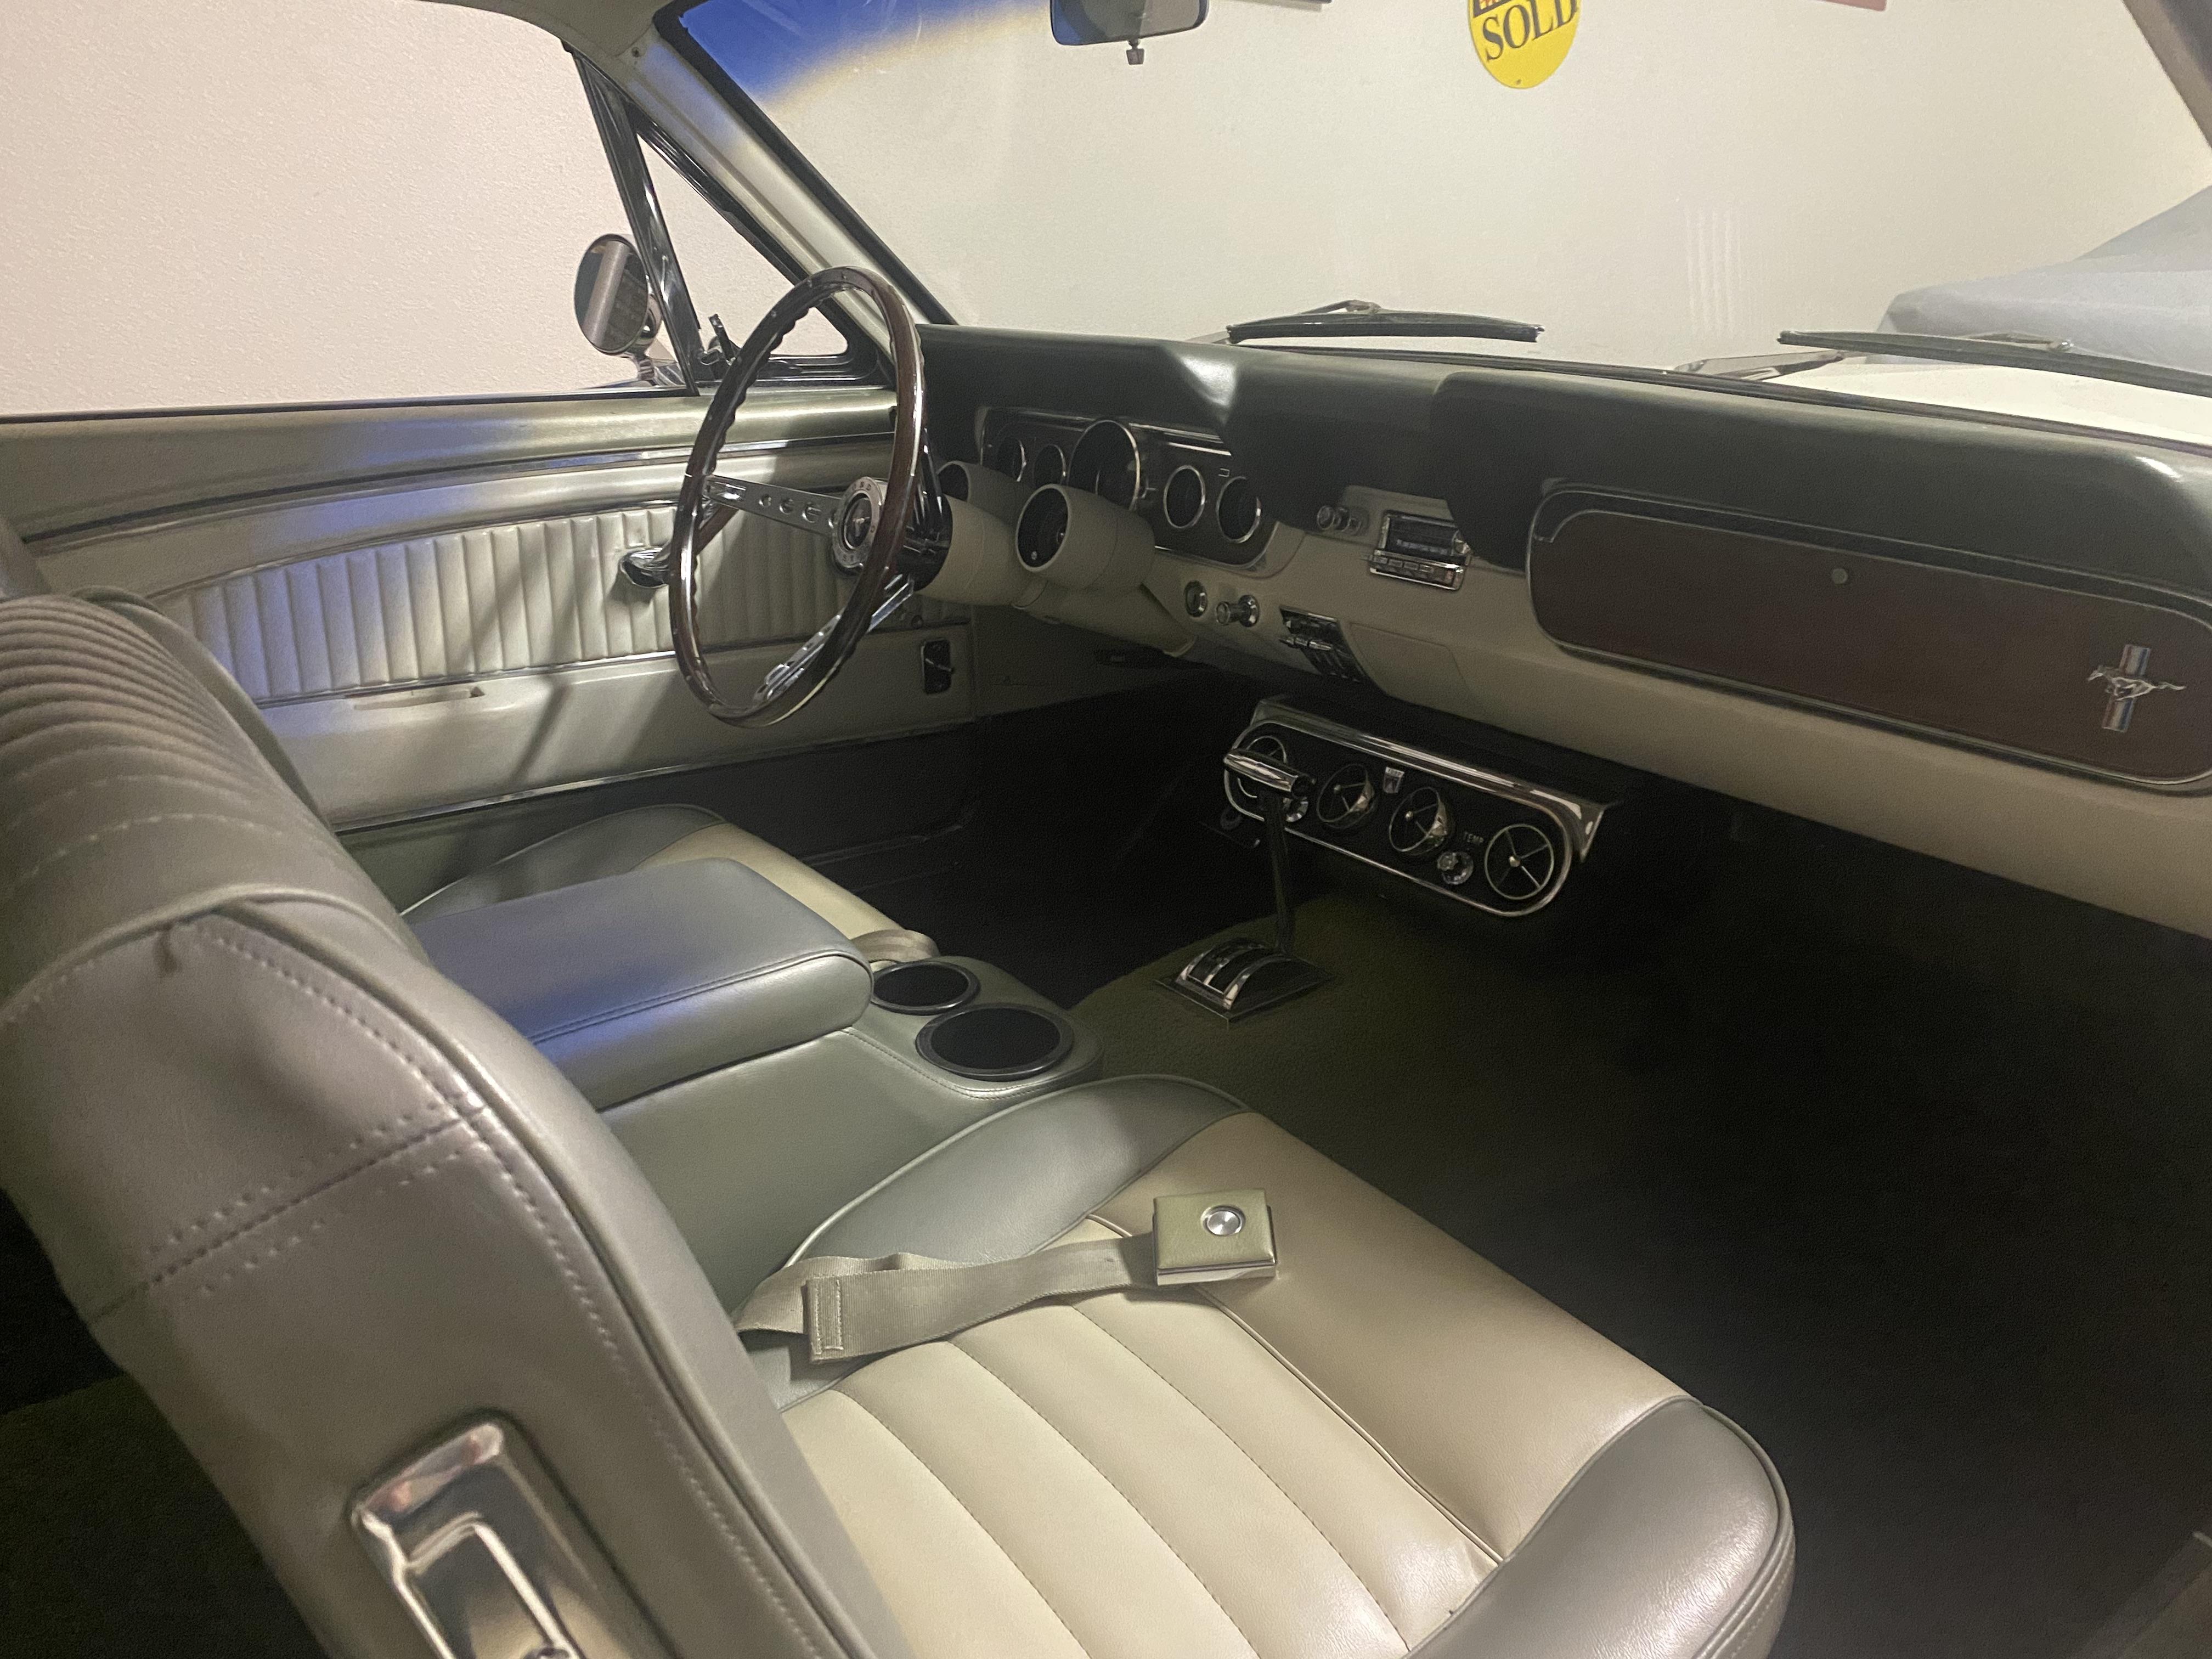
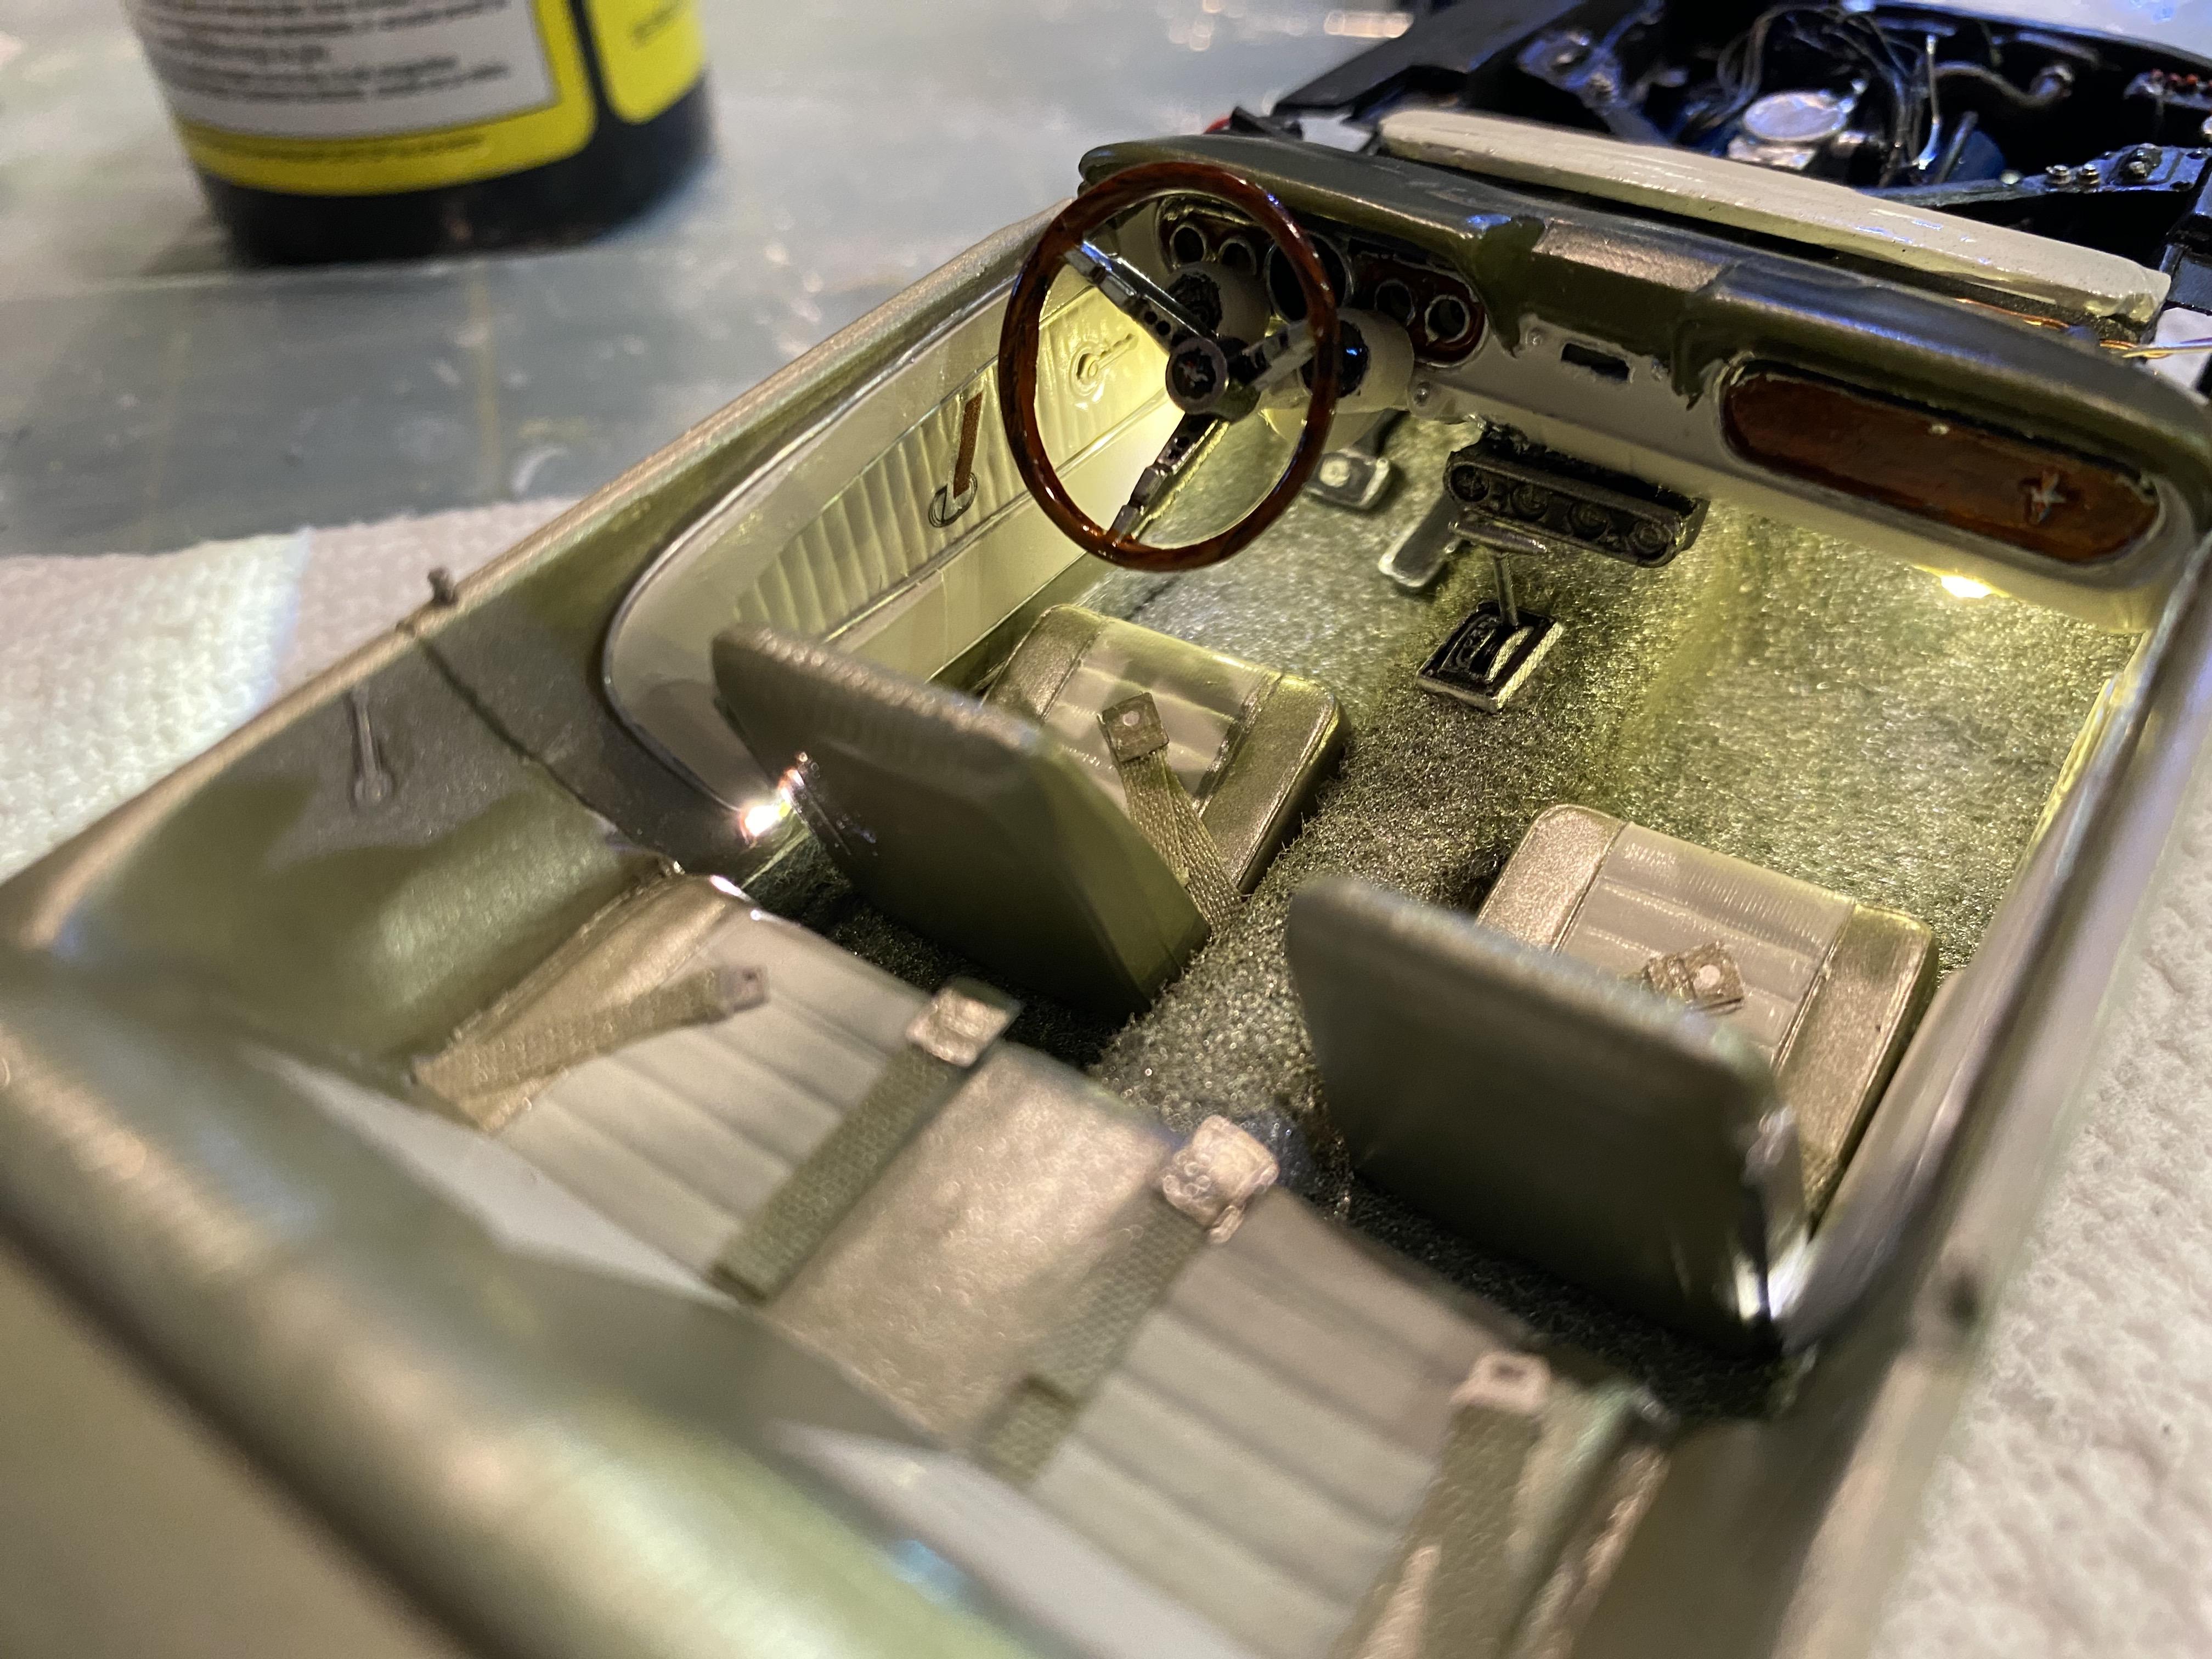
The 4th Mustang build of our 5 real Mustangs currently in our family. My daughters 1966 Mustang Coupe she affectionately named Tony, for Anthony Leedo “Lee” Iacocca. Kit bashed an AMT 1966 coupe kit from the early 2000s and another AMT 1967 Mustang GT Fastback. You can check the full process of building Tony by checking out the full build WIP thread: WIP thread for Tony the 1966 Mustang There are two settings. One for the interior lights, the other for the headlights, taillights and gauge lights. The detailed engine, interior, trunk and chassis The actual car
-
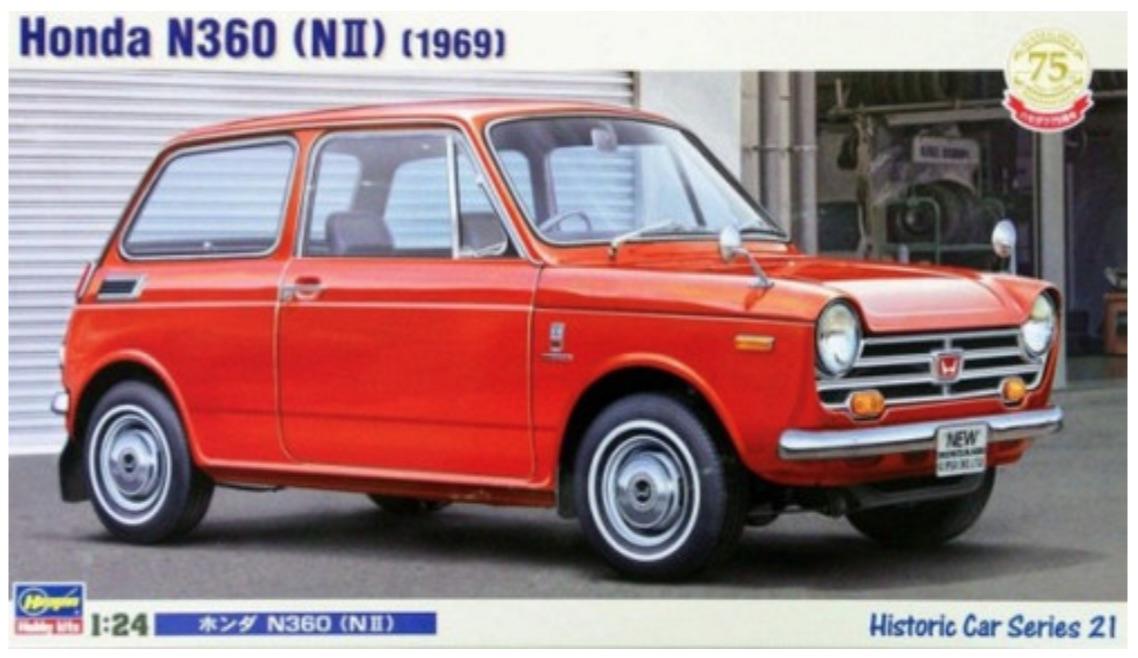
 This is the third temptation, this week for me. Now there is a 3D printed side by side, and the Hasegawa kit, who wants something different to do? + =
- 10 replies
-
- 2
-

-
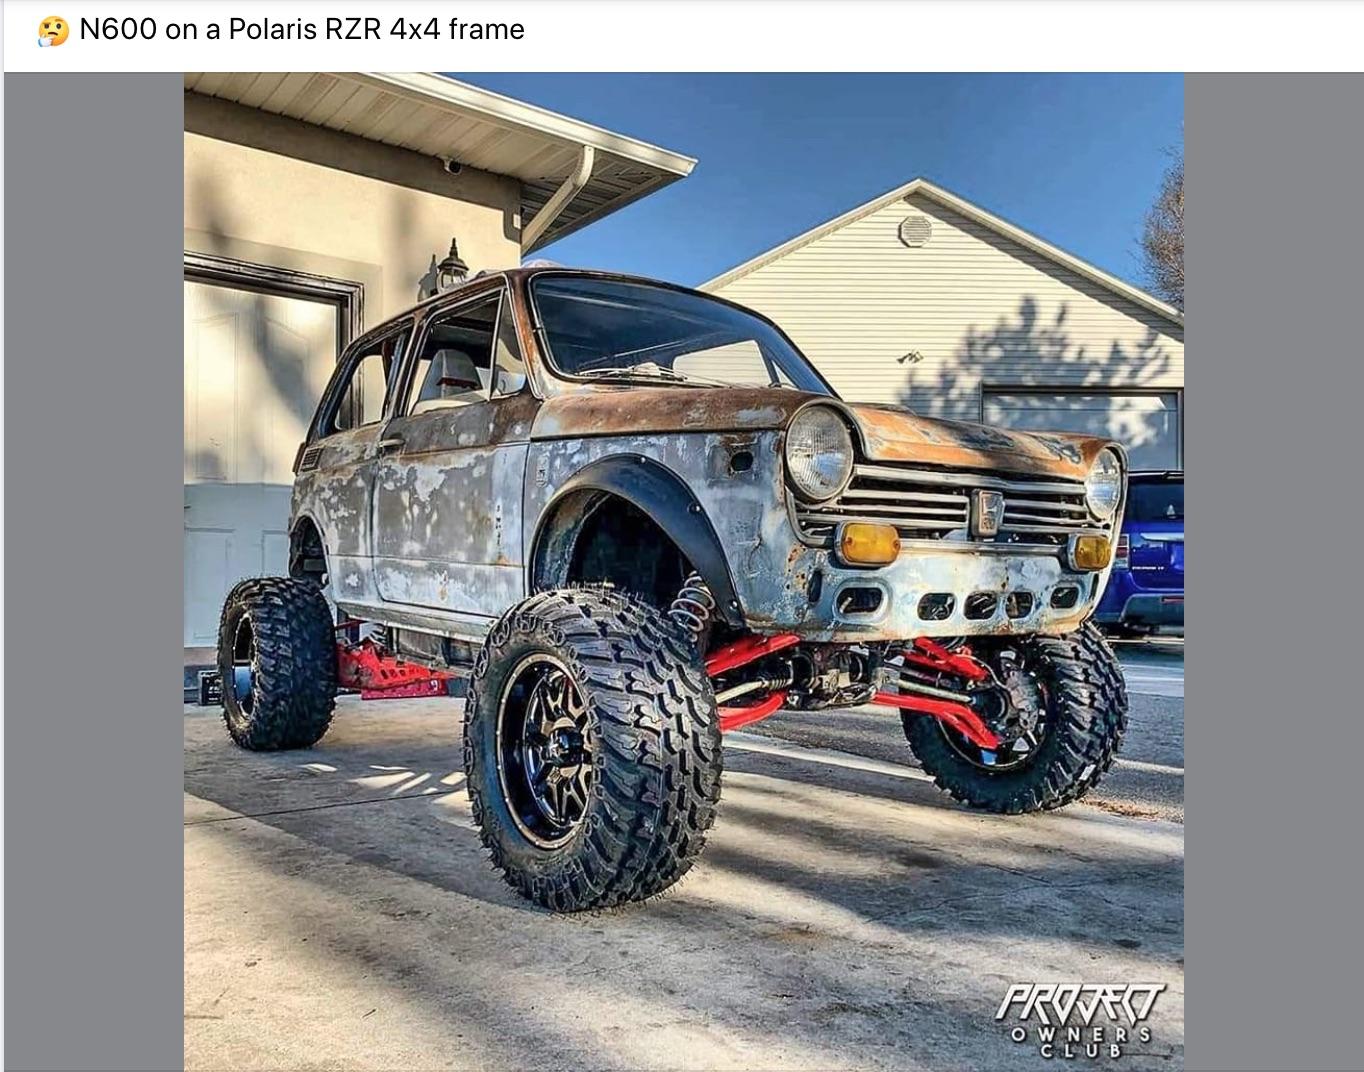
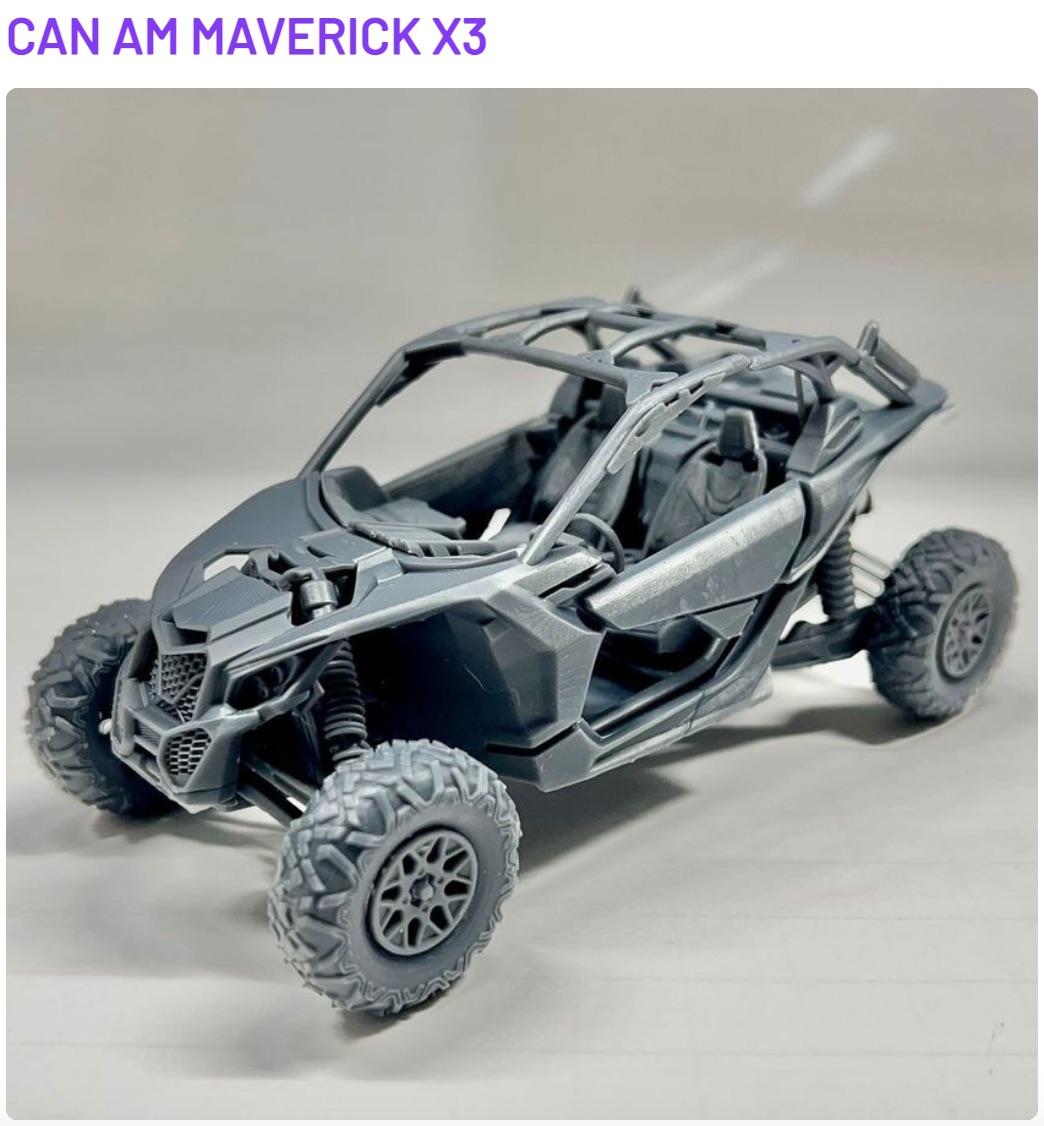
- honda n360
- can am
- (and 2 more)
-
anyone ever put a 40 ford truck bed and rear fenders on a 40 or 41 willys pickup cab or do you think it would work i just dont like the way the 40s willys models look with bobbed beds
-
 Hi Folks, new here and wondered if I could draw on your big rig expertise a little if I may? So I really wanted one of these for my 1/48 FJ-3 Fury diorama (desperately) it’s just Sooo cool. I’ve taken the Atlantis re-pops of the old Revell Chevy stake truck and the Fruehauf trailer from the White fueler and smushed them together as follows… Mods have included removing and remounting the front fender as a separate entity, mirrors, shortening the chassis a bit, taking the skirt off the trailer, etc.- there’s a way to go yet. The headlights are going to be nose studs from a jewellery store with the facets sanded off and polished. The mirrors are made from laminate. Atlantis’s new glazing parts are superb for the Chevy, hats off to them. The wheels for the Stake Truck were a little agricultural for the paved airfields where this truck would have plied its trade , so I turned the White truck tyres to 9” high road tyres on the lathe then turned the 22.5” rims from Defmodel’s resin set for the Tamiya GMC army truck. I think they really beef up the tractor. Is it an ‘57 8400 do you think? It’s lovely hard plastic- polishes up beautifully. So used to the softish modern grey stuff! Ah yes - expertise please, if you could? Top photograph (the only one in existence as far as I can tell) you can see immediately behind the cab there’s a tank and a load of hydraulic or air lines. Anyone seen a setup like this before? Gas for the tractor unit? Exhaust baffle system? Compressed air? Pump unit for the trailer? Any answers will be gratefully received as it’ll need scratchbuilding. Thanks for looking, I’ll keep you posted on progress cheerio, Matt
 -
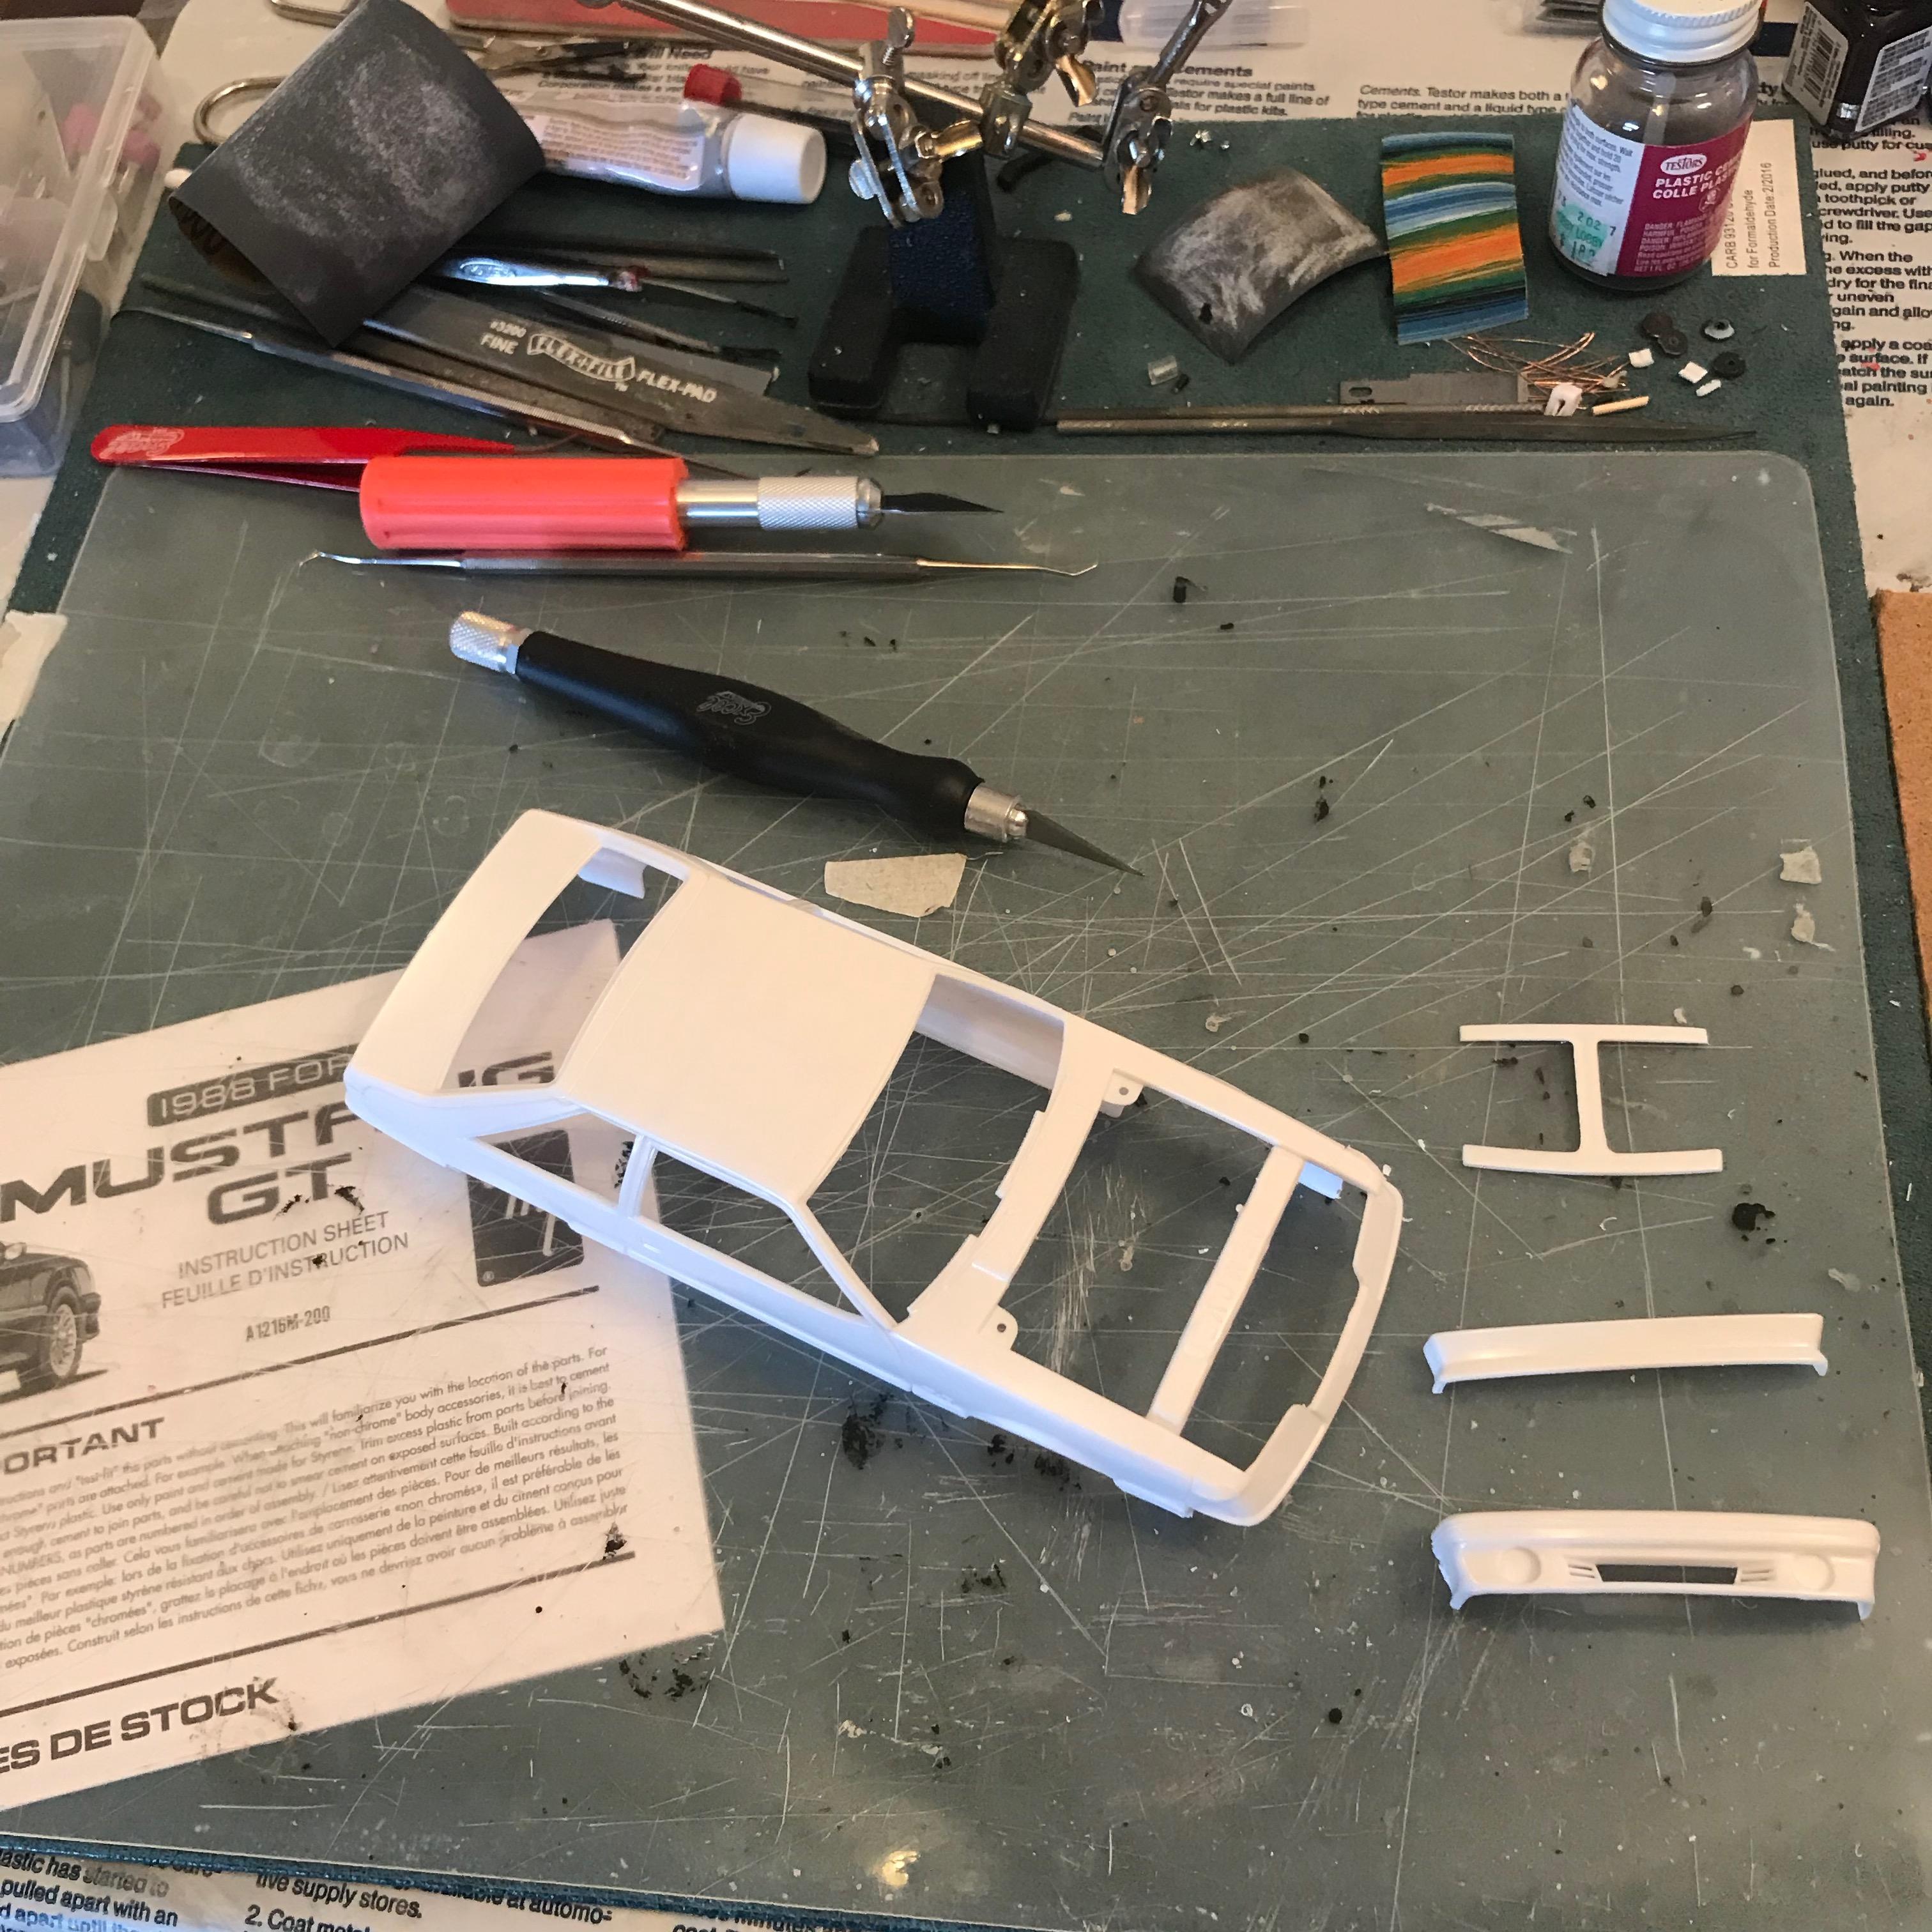
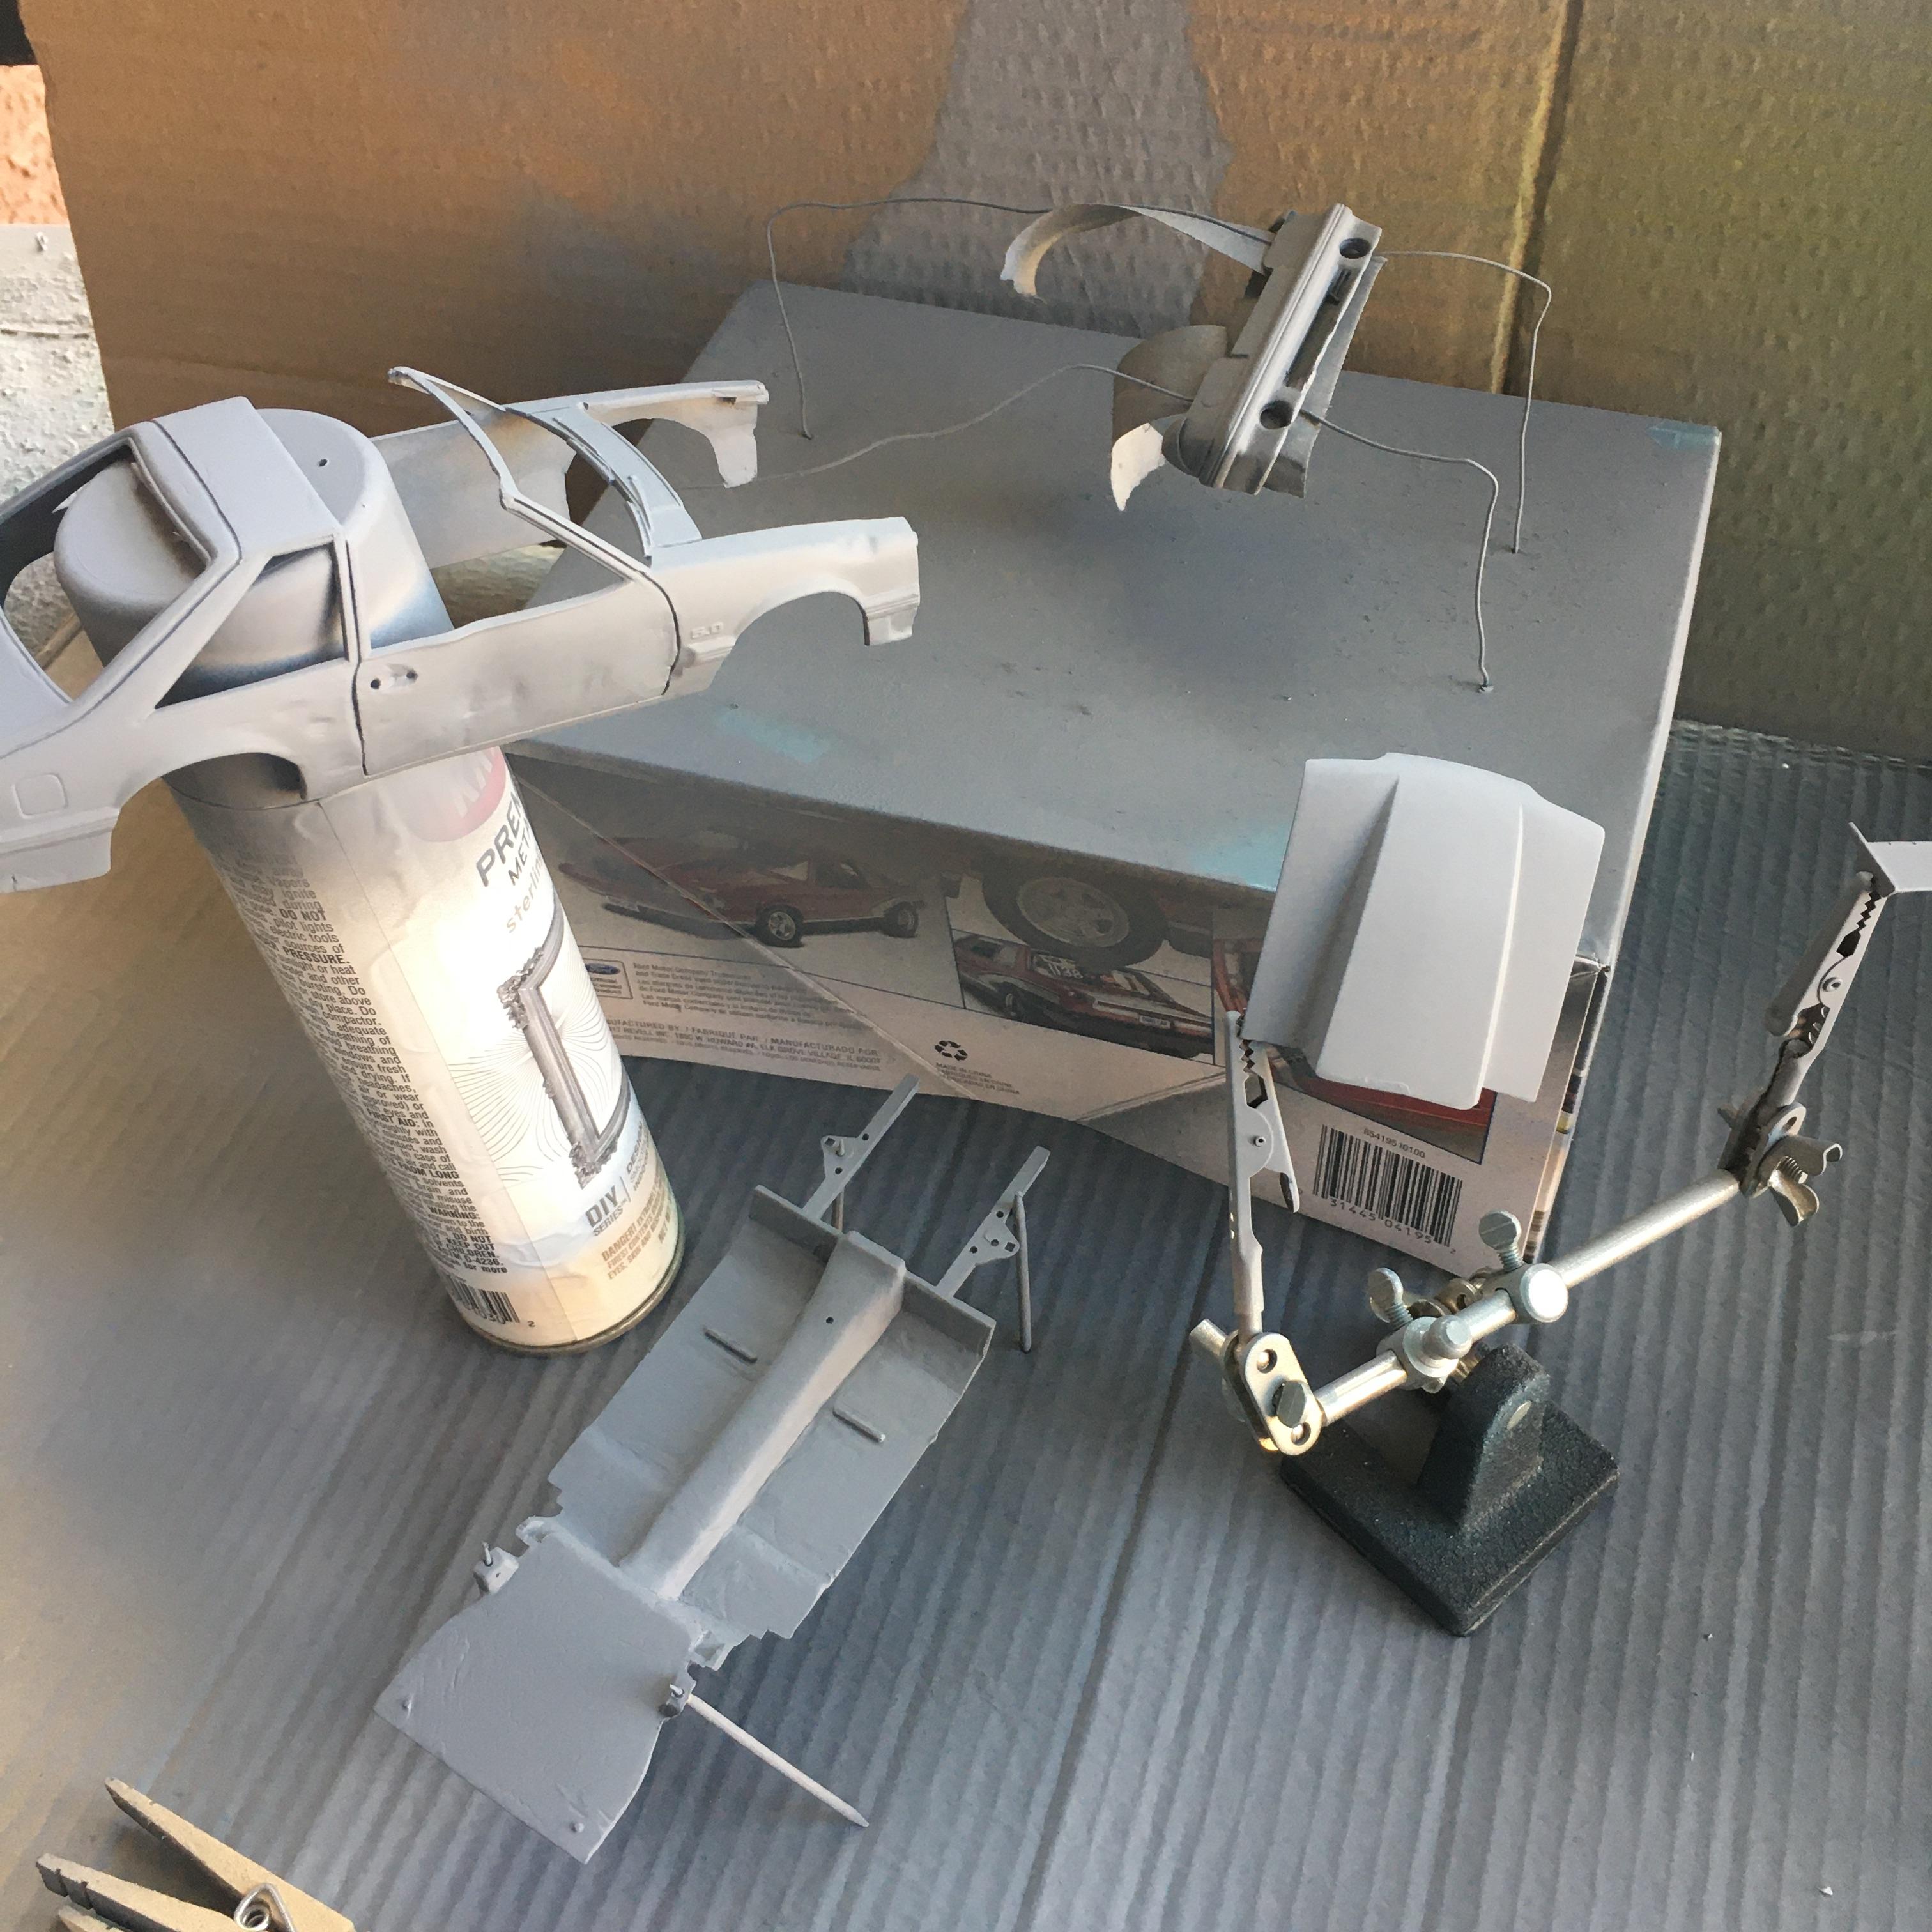
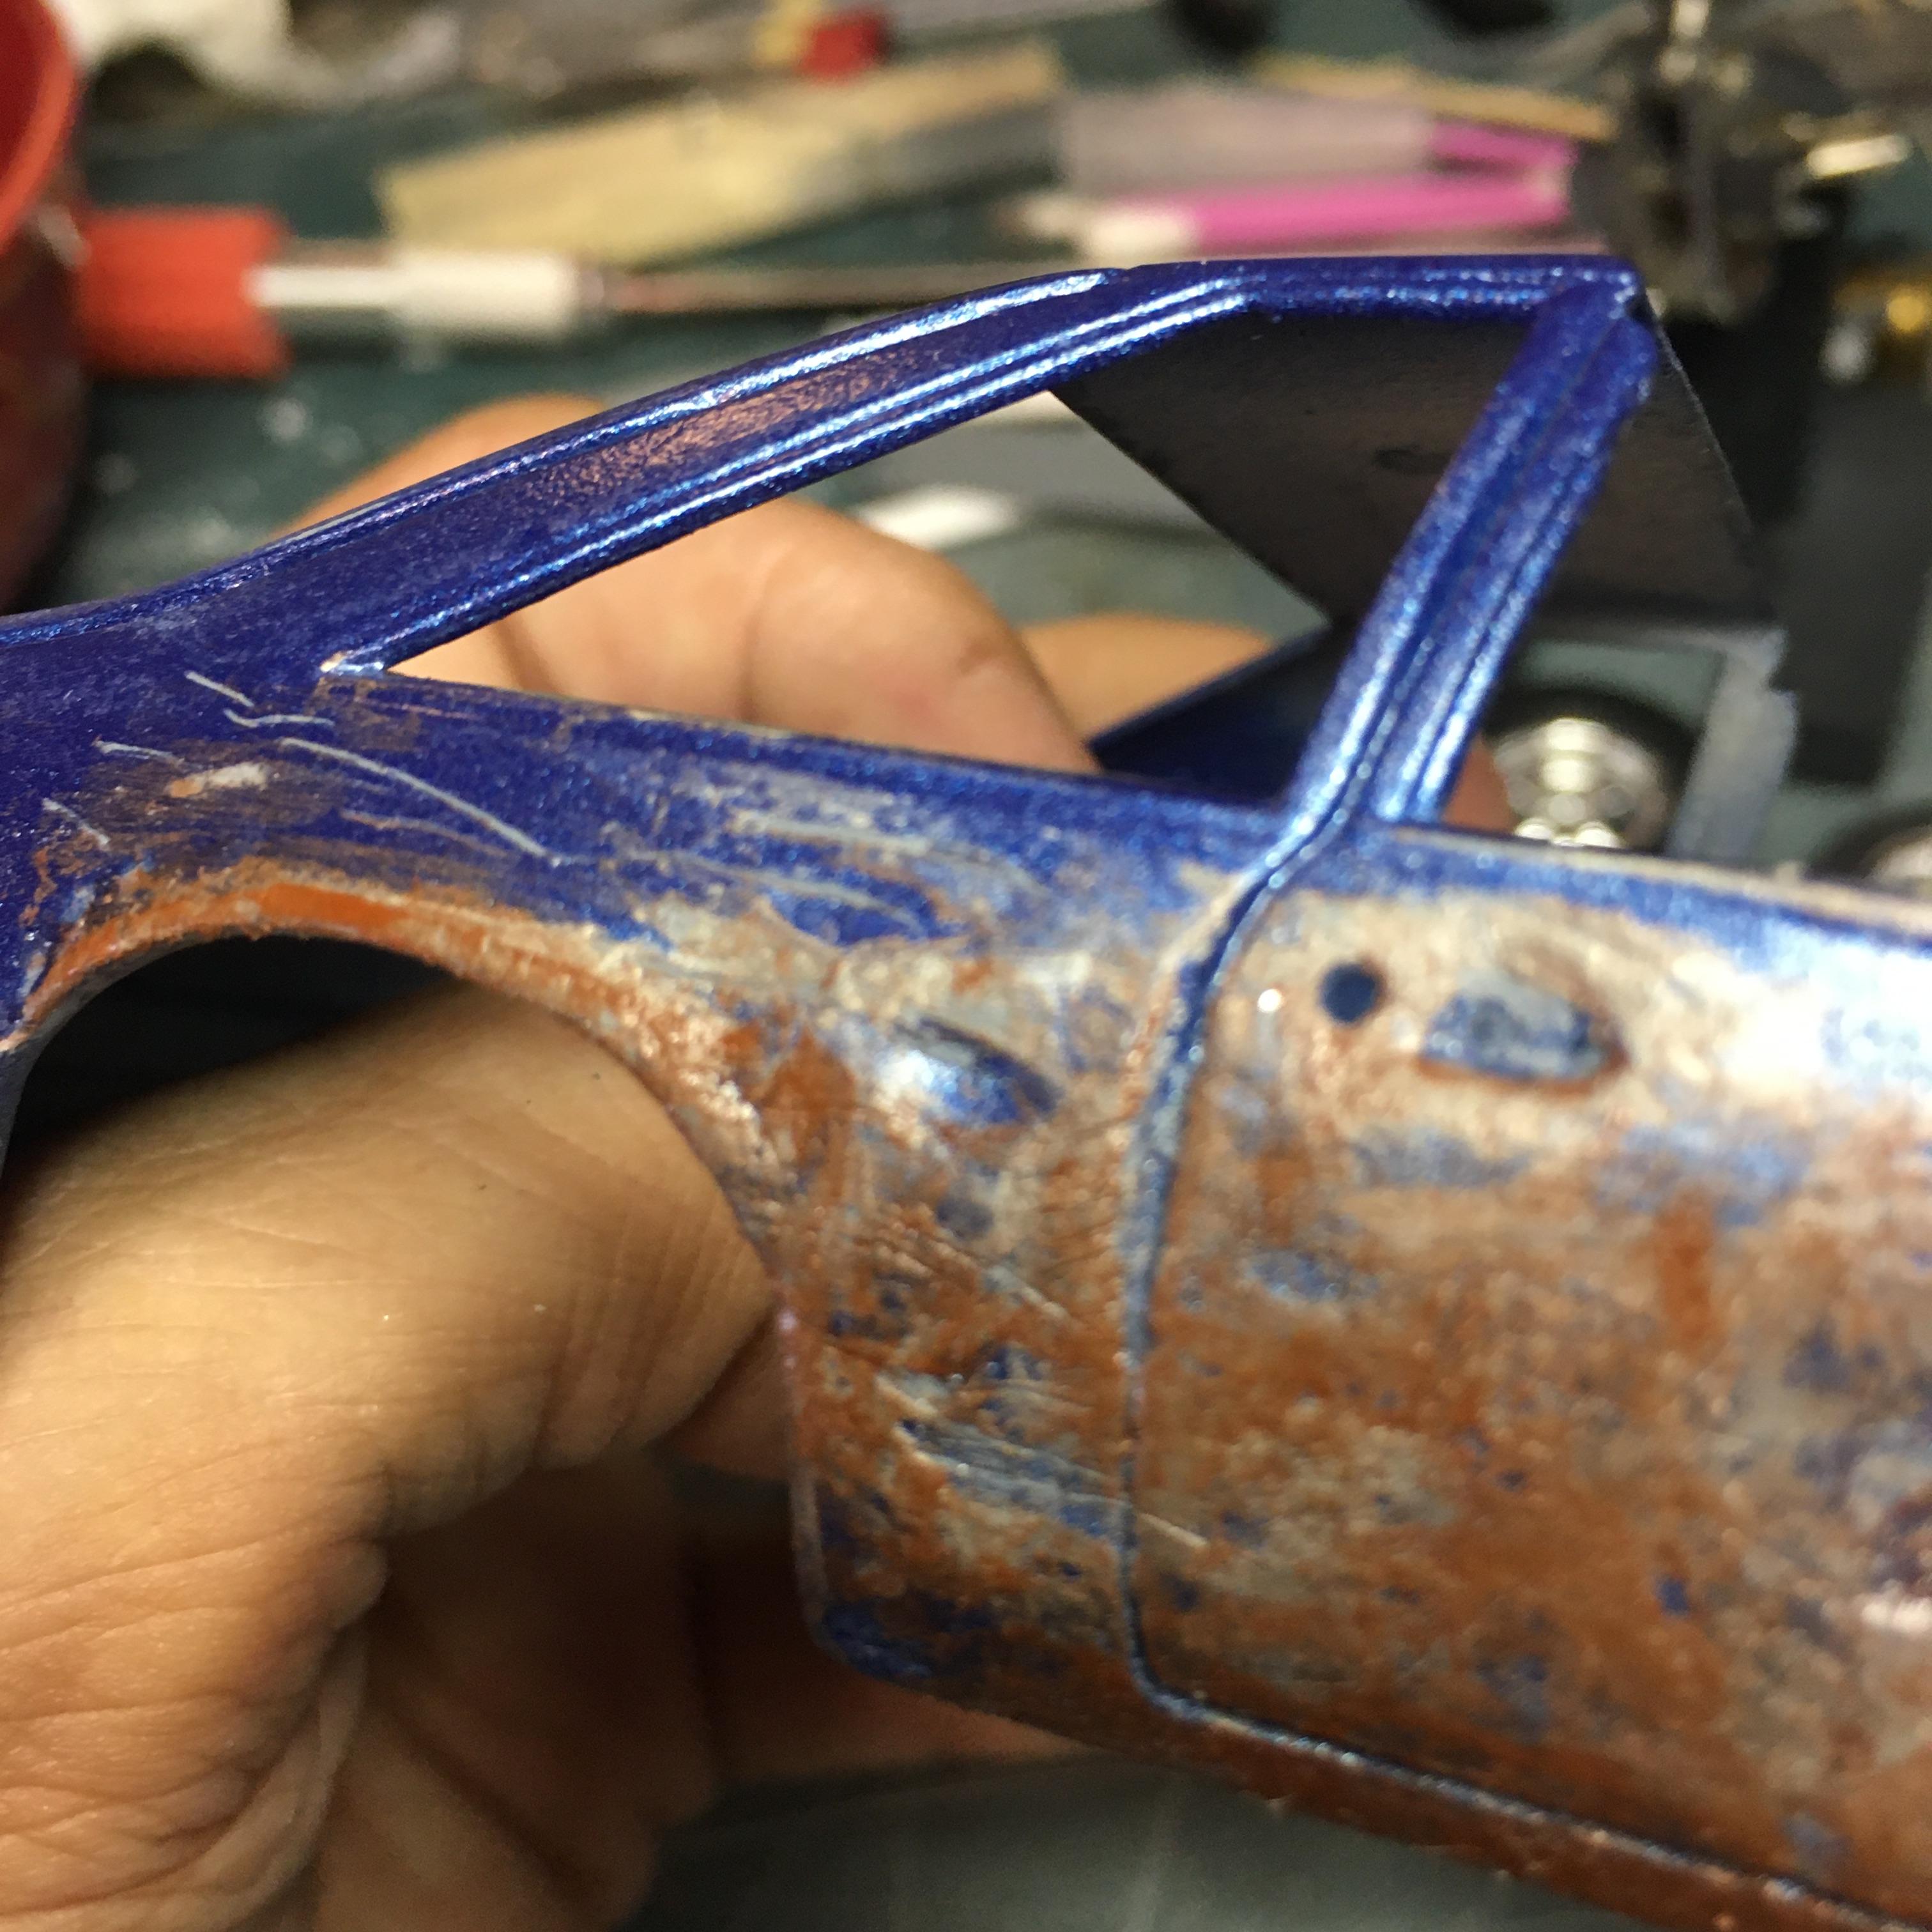
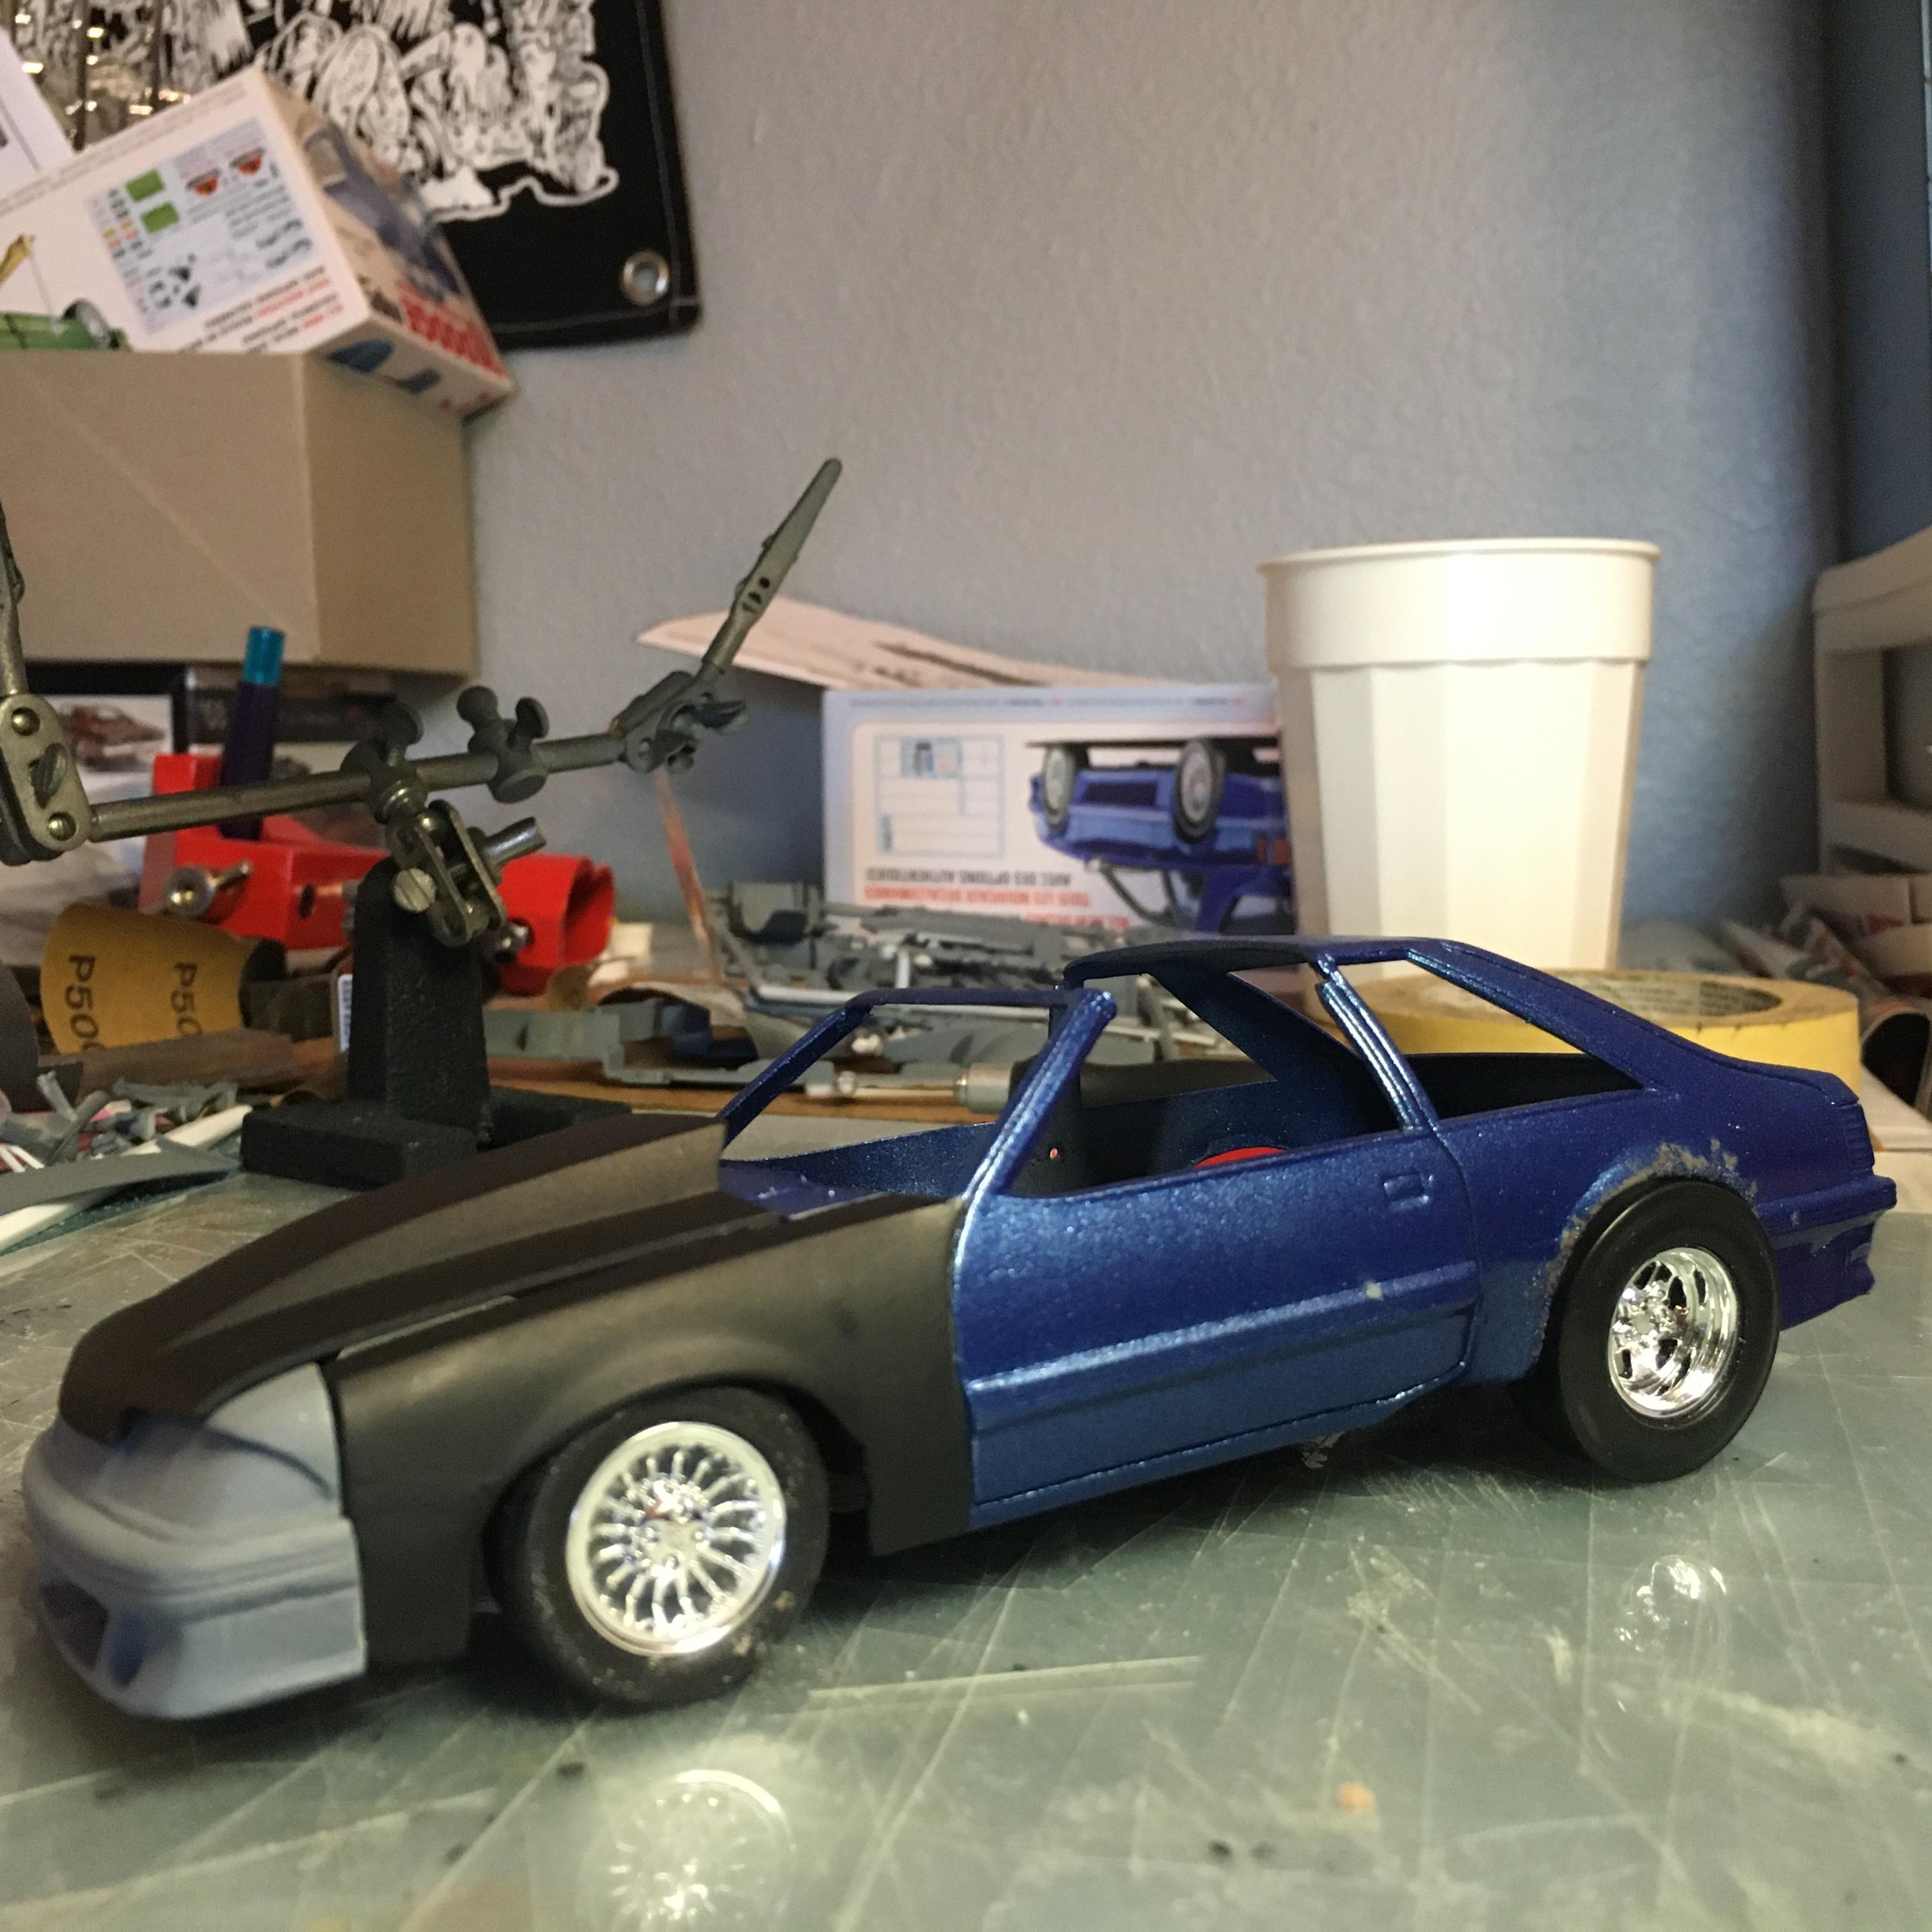
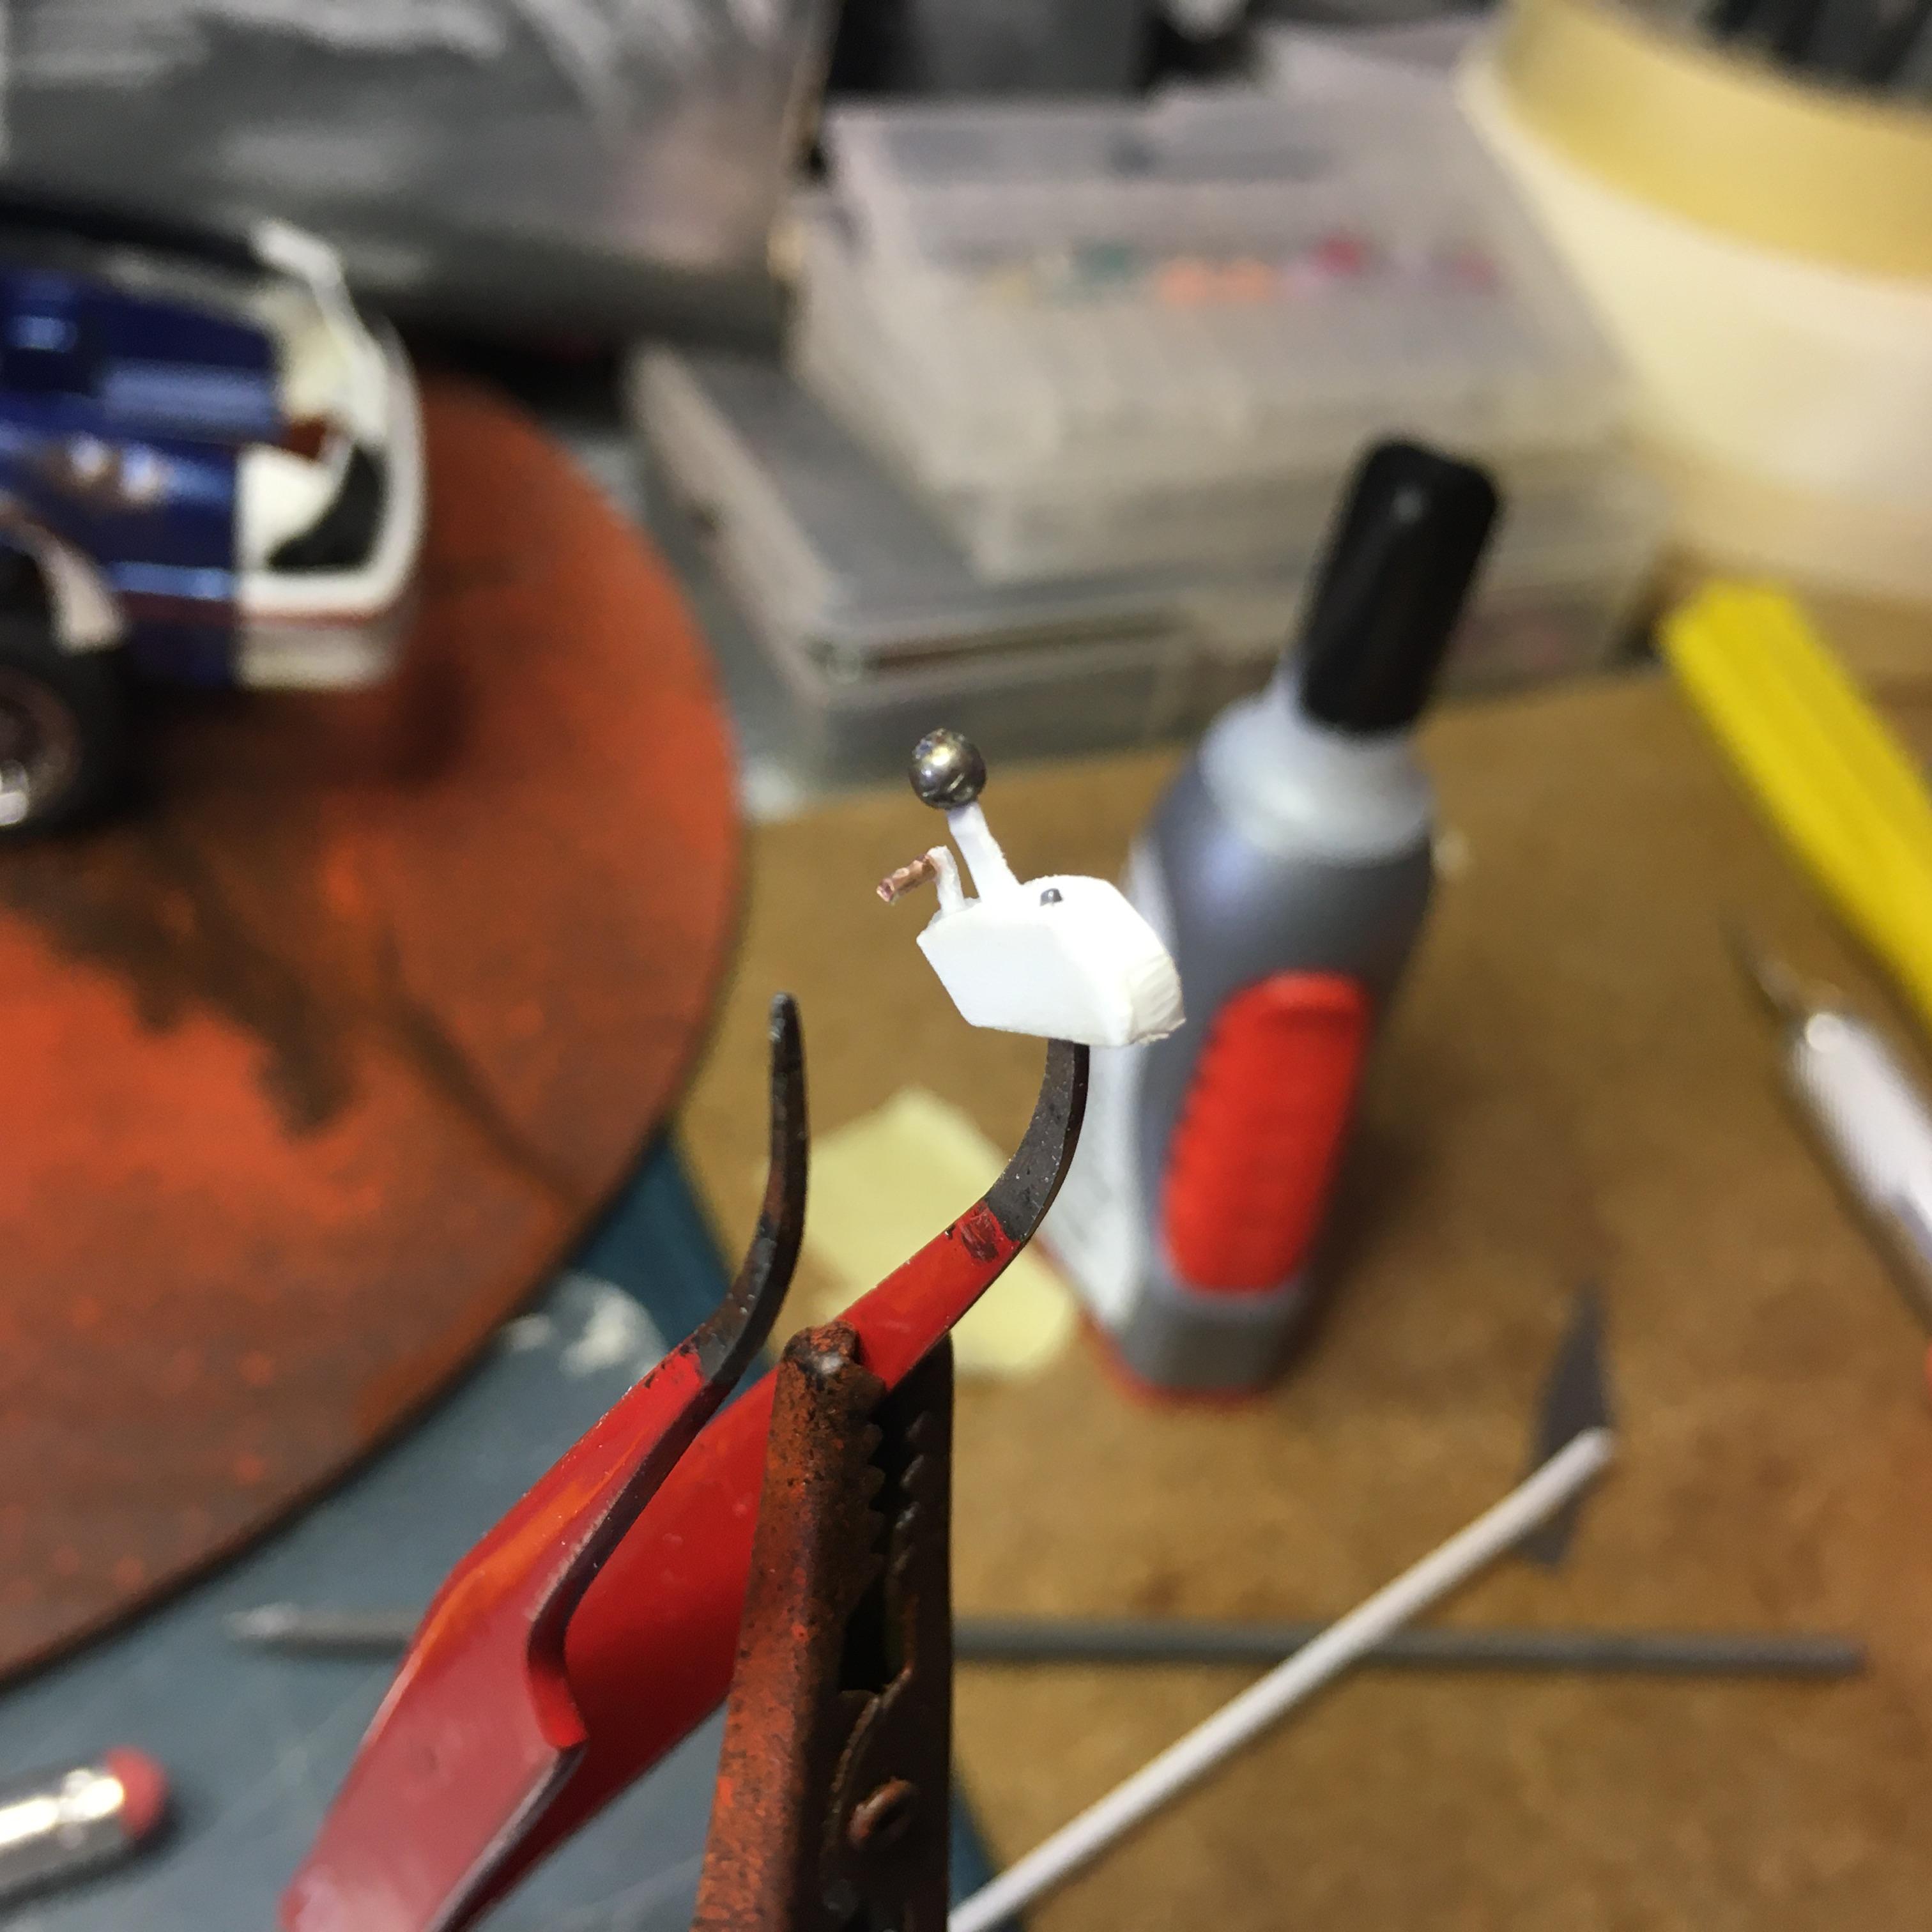
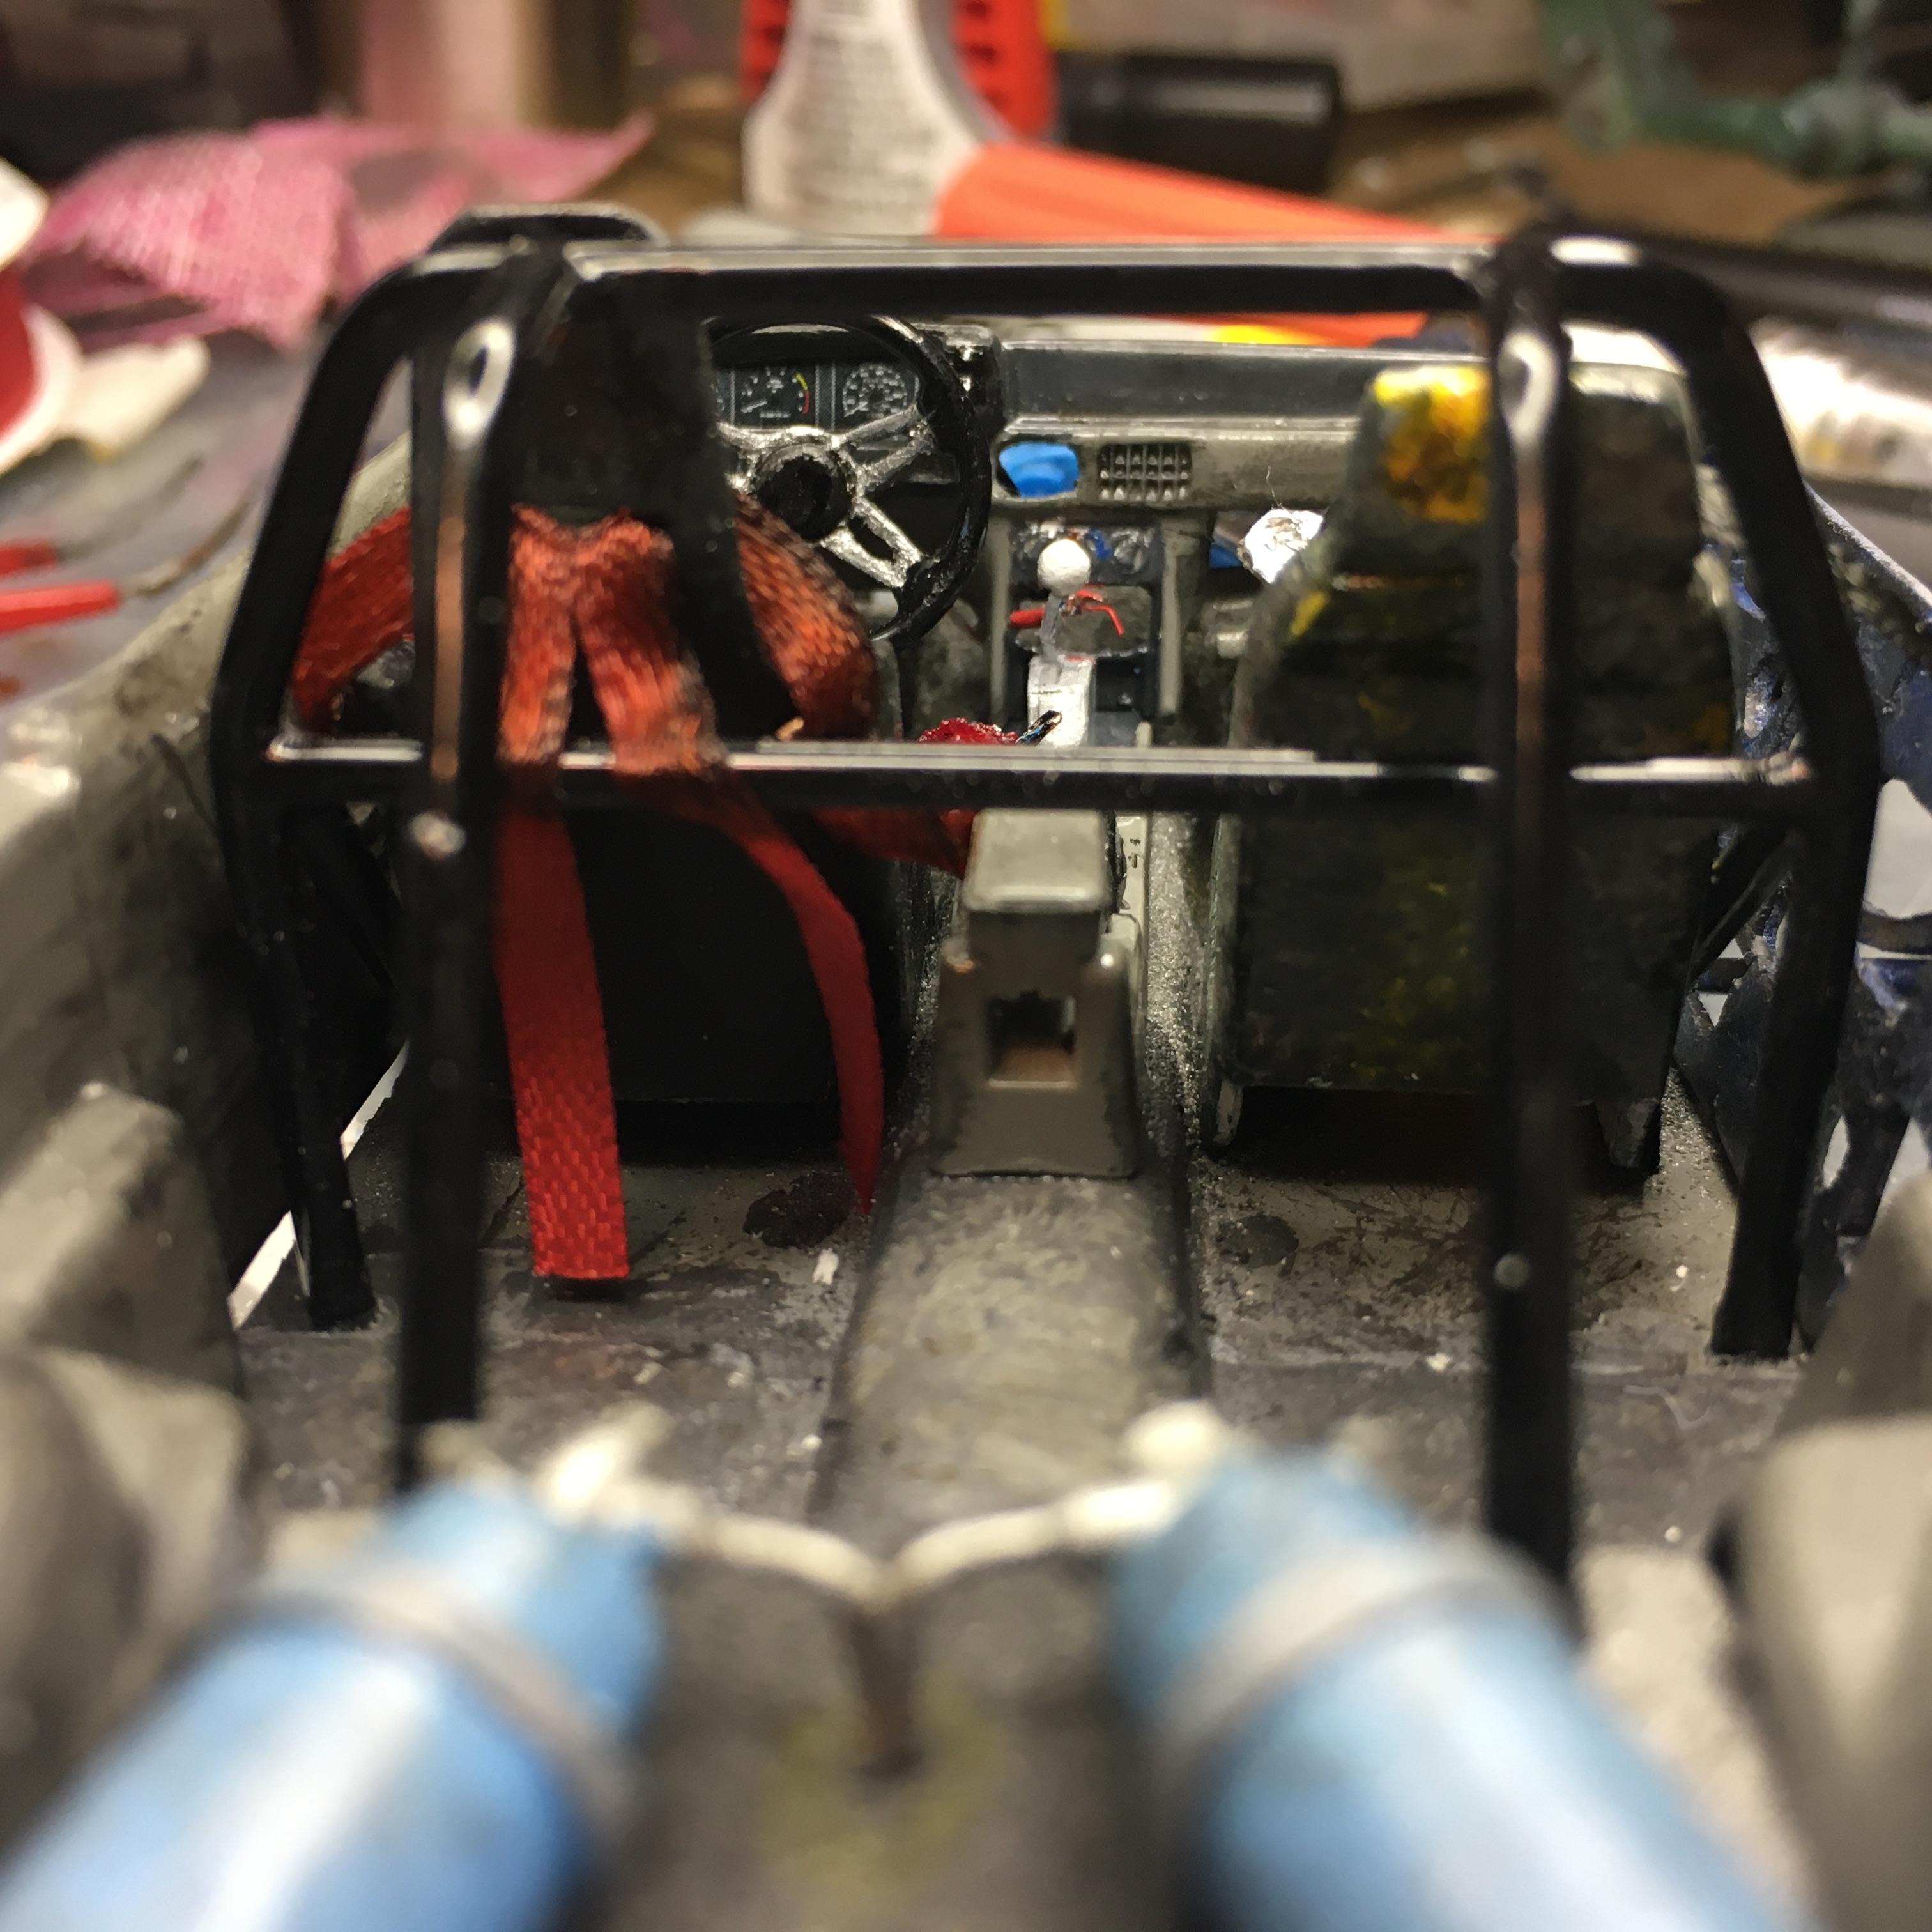
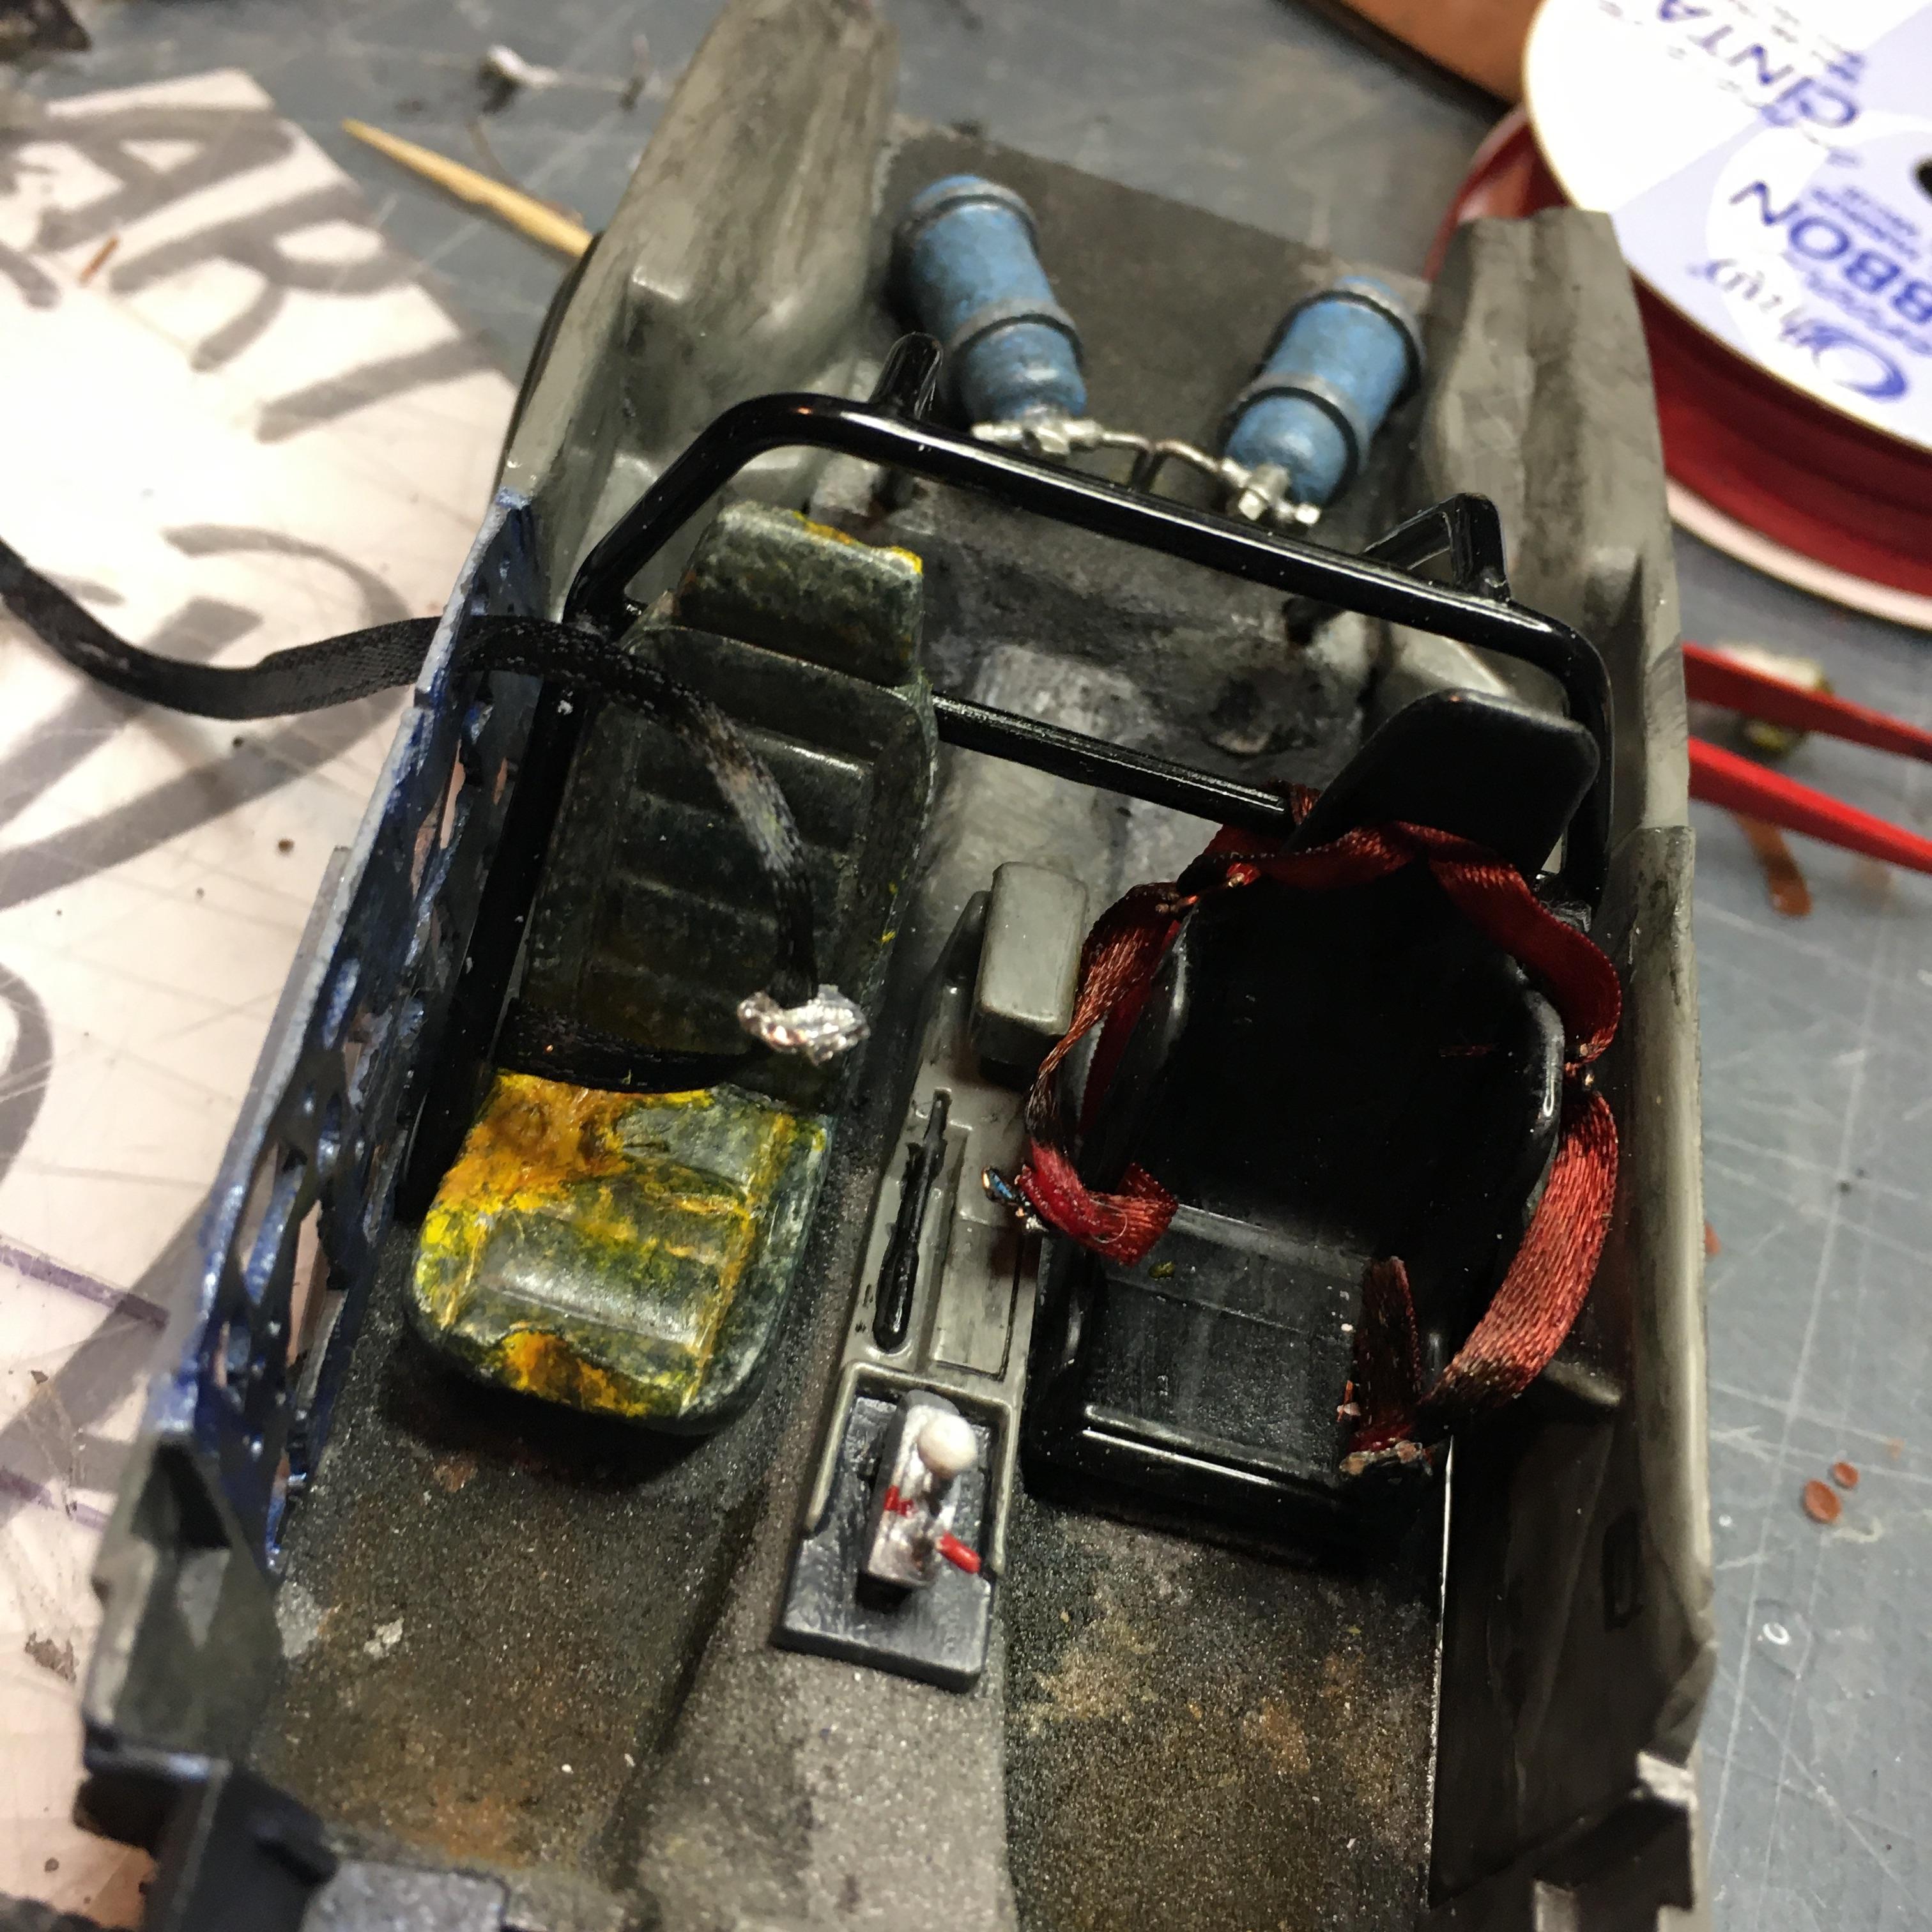
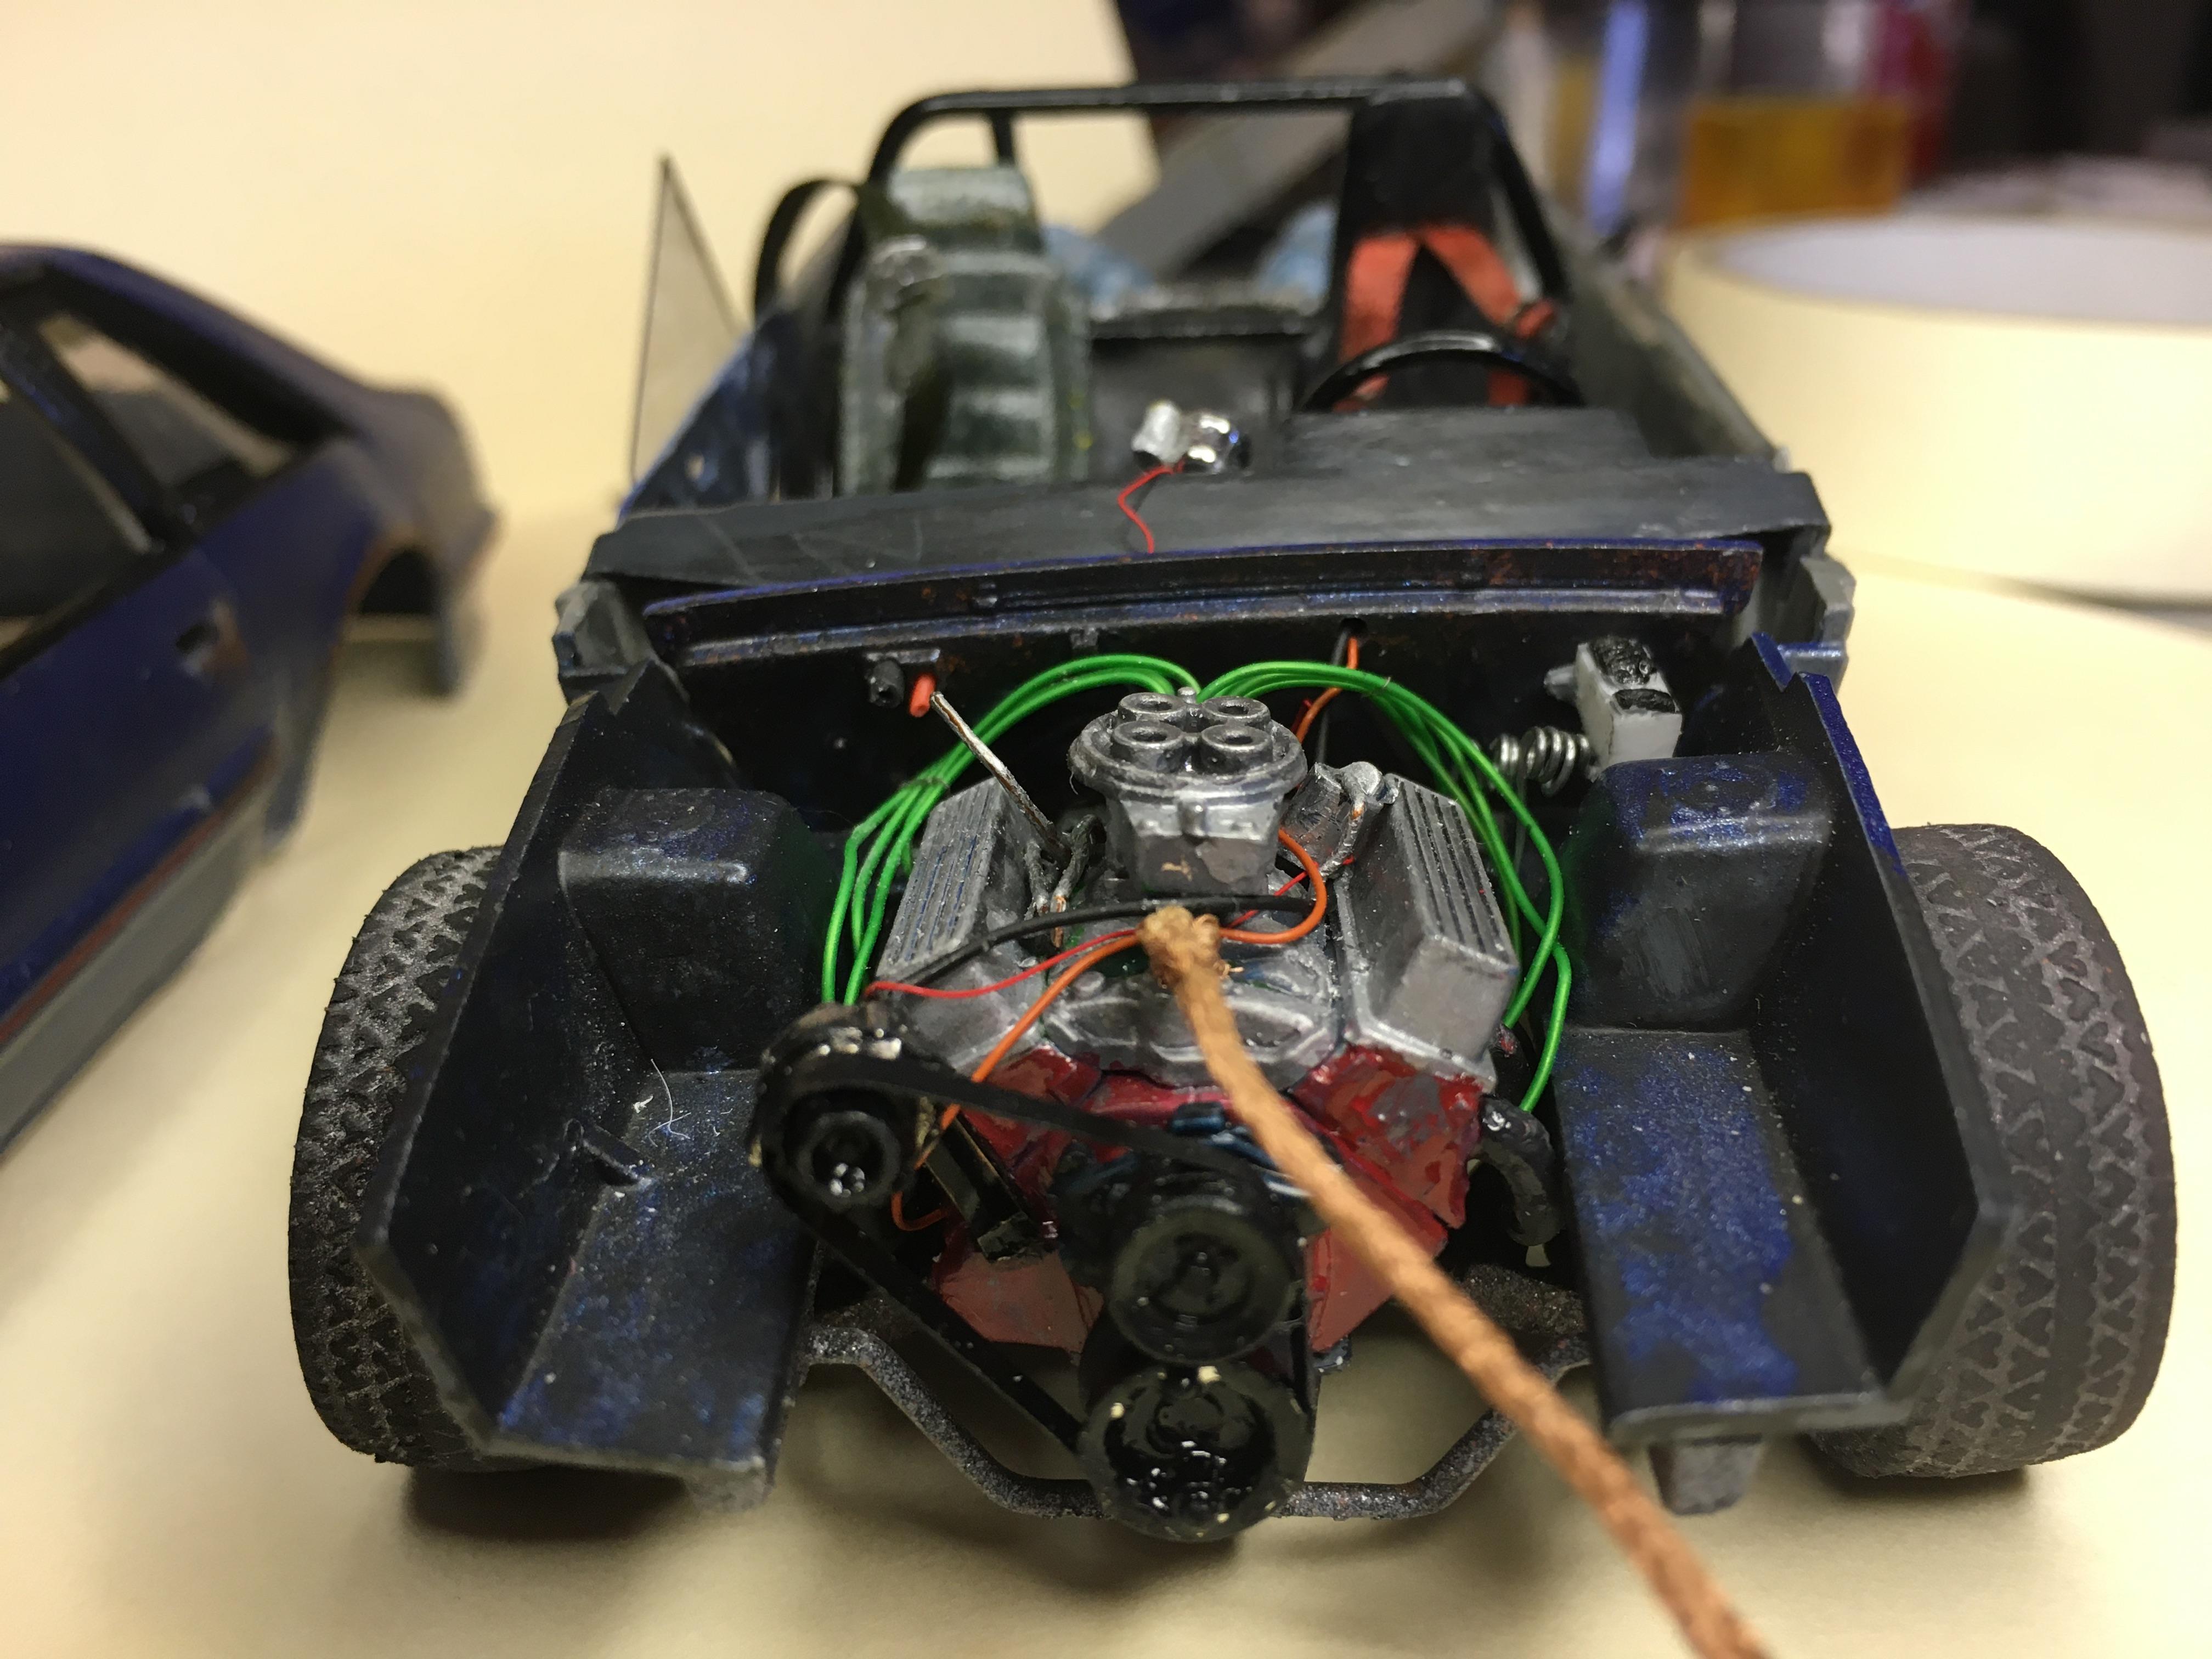
My goal is to build the worst Foxbody I can imagine. I'm starting with AMT's 88 GT kit. I am using a few unused bits from a 90LX that Revell released, I recently built as well. I will be scratching out whatever I need to complete the vision. Enjoy... Went into primer... I am going with a targa roof instead of T-Tops. I was having trouble getting the lower front valance so i cut the whole clip off and worked these pieces together. This is how the real car is built, so I figured nothing would look funny once it's all together. The fog lights have beaten out of their housings and the airdam is far from aerodynamic. This thing will be several colors, so perfection isn't my aim here. Scribed the panel lines, worked the dents into the body with candle heat. I'm giving this hog beast the big cowl hood to clear what I believe to be a stroked, nitrous huffing Chevy motor. This heap will be a fully neglected death trap, complete with improper safety equipment and unsafe components. Peep these bald 4 lug OEM front wheels... Sure it does 11's but the only thing holding it together is a thick coat of grime and rust... I've seen 1 foxbody in my whole life that had a stereo in it. The glovebox latch is broken and the passenger door panel is long gone. Got some color laid out and I am going to keep the patina for now. Focusing on interior, I found a grant style aftermarket wheel that was screaming for a trip back to the 80's. Scratched out a ratchet shifter and some nitrous tanks. Color and Style... With the tall valve covers I believe this to be a stroker setup on a 350 cast. Wired and plumed all the bits as best as I can tell. Manual brakes, no A/C, no power steering, cut the heater lines, so not much needed under the hood... I scratched out the harmonic balancer, alt bracket, serp belt, plug wires, wet shot intake and brake lines. It's running shorty headers, and I had to reverse the oil pan instead of modifying the K member 🤫 But it all tucks in nicely. It's going to have electric fans, but I'm having trouble with the core support fitting properly. Can you spot the coolant leak? This is where I am now. 7 months and counting...
-
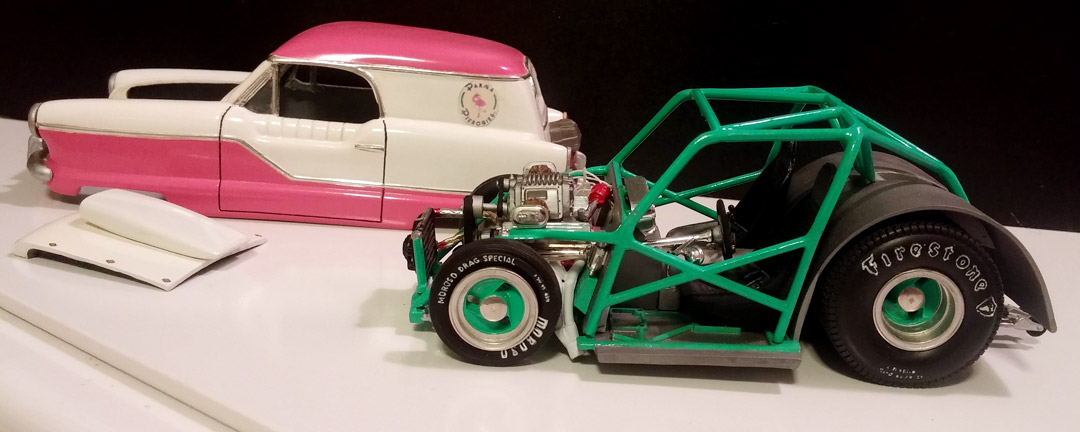
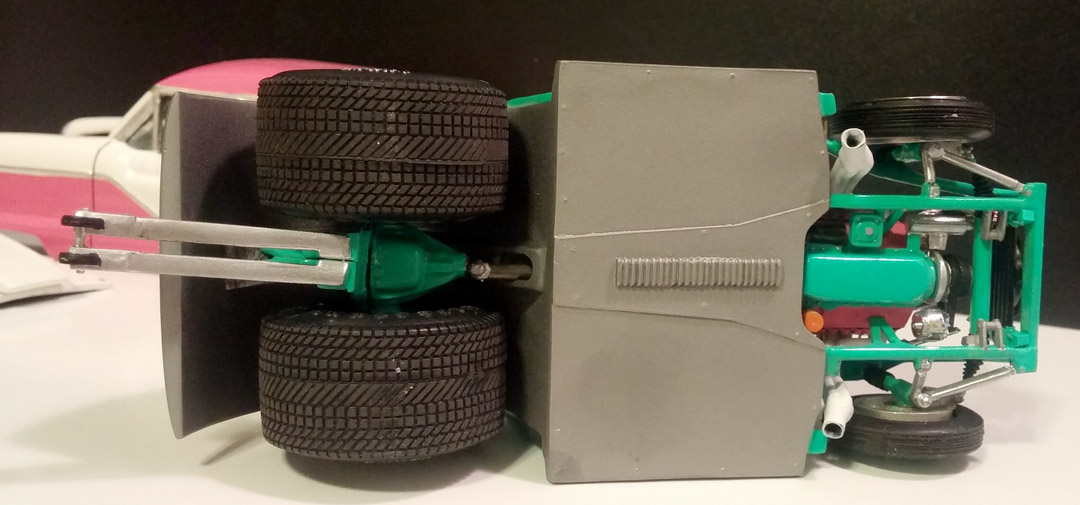
 Saw on another thread some converting stock 66 pan. I want to do a fairly simple drag car with this kit. Now I've seen some things here I must address. 1. Why a 4 door wagon? Simple, except for rumored USAF vehicles it's the only factory offered wagon. Wagons have long history of weight transfer superiority. I have this in styrene in hand and like it a lot. 2. Do you have to cut the engine compartment away? According to the other thread yes but I don't think so. Has anyone noticed the holes in the inner fenders on stock 63? Looks like spring location holes like in the 66. Proportionally looks okay. You might choose to but I intend to use this body intact. Looking at the body I think springs and upper arms can be used with the stock chassis for added detail? We shall see on this thread. I'm keeping this simple because the chassis retains leaf springs. If it offered a 4 link and more sophisticated parts I'd likely gut the engine bay and add tubular a arms and coil overs. But this is intended to be a simple build of a street/bracket footbrake car. I hope you find it enjoyable.
-
 This one was yet another Street Rodder magazine Modeler's Corner how-to, focusing on kitbashing a "phantom" Model A SuperCab DRW fifth wheel trailer towing rig. The orange graphics came from yet another Revell kit decal sheet designed by the late Brian Bordon, while the charcoal gray paint was from the Testors Car Colors paint rack and those deeply tinted (actually, opaque) windows were unexposed camera film. This one was never finished in that there's no engine or interior (yet) and the chassis, derived from a 1/32 scale semi-tractor kit, was a bit crude in its design. I was also never fully pleased with the paint, but I didn't want to redo it, nor bury it in a bunch of clearcoat. Will it be finished? Given that it has existed in this state for just about exactly 30 years now, probably not, but never say never....meanwhile, thanks for checkin' her out! TIM
 -
After a year of trying this and that, I finished this crazy kitbash project. Based around the Monogram 1/48 scale P=40 Warhawk, AMT Model T frame, suspension parts from Airfix's 1/32 Omnibus, and a mish-mash of other bits I either grabbed from the parts pile, or built myself. Drive system drops from behind the prop spinner to a shaft running under the engine to the rear axle. After these photos were taken, I added hexnuts to cap the front hubs. Figure is a 1/43 '50s sports car driver in resin.
-
resin 15 center door t on ice cream truck complete chassie, switcher fenders, raised chop it seemed to much
-
decided everybody has a conv or carsontop caddy. how bout a 48 ford chopped version roof and trunk area conversion
-
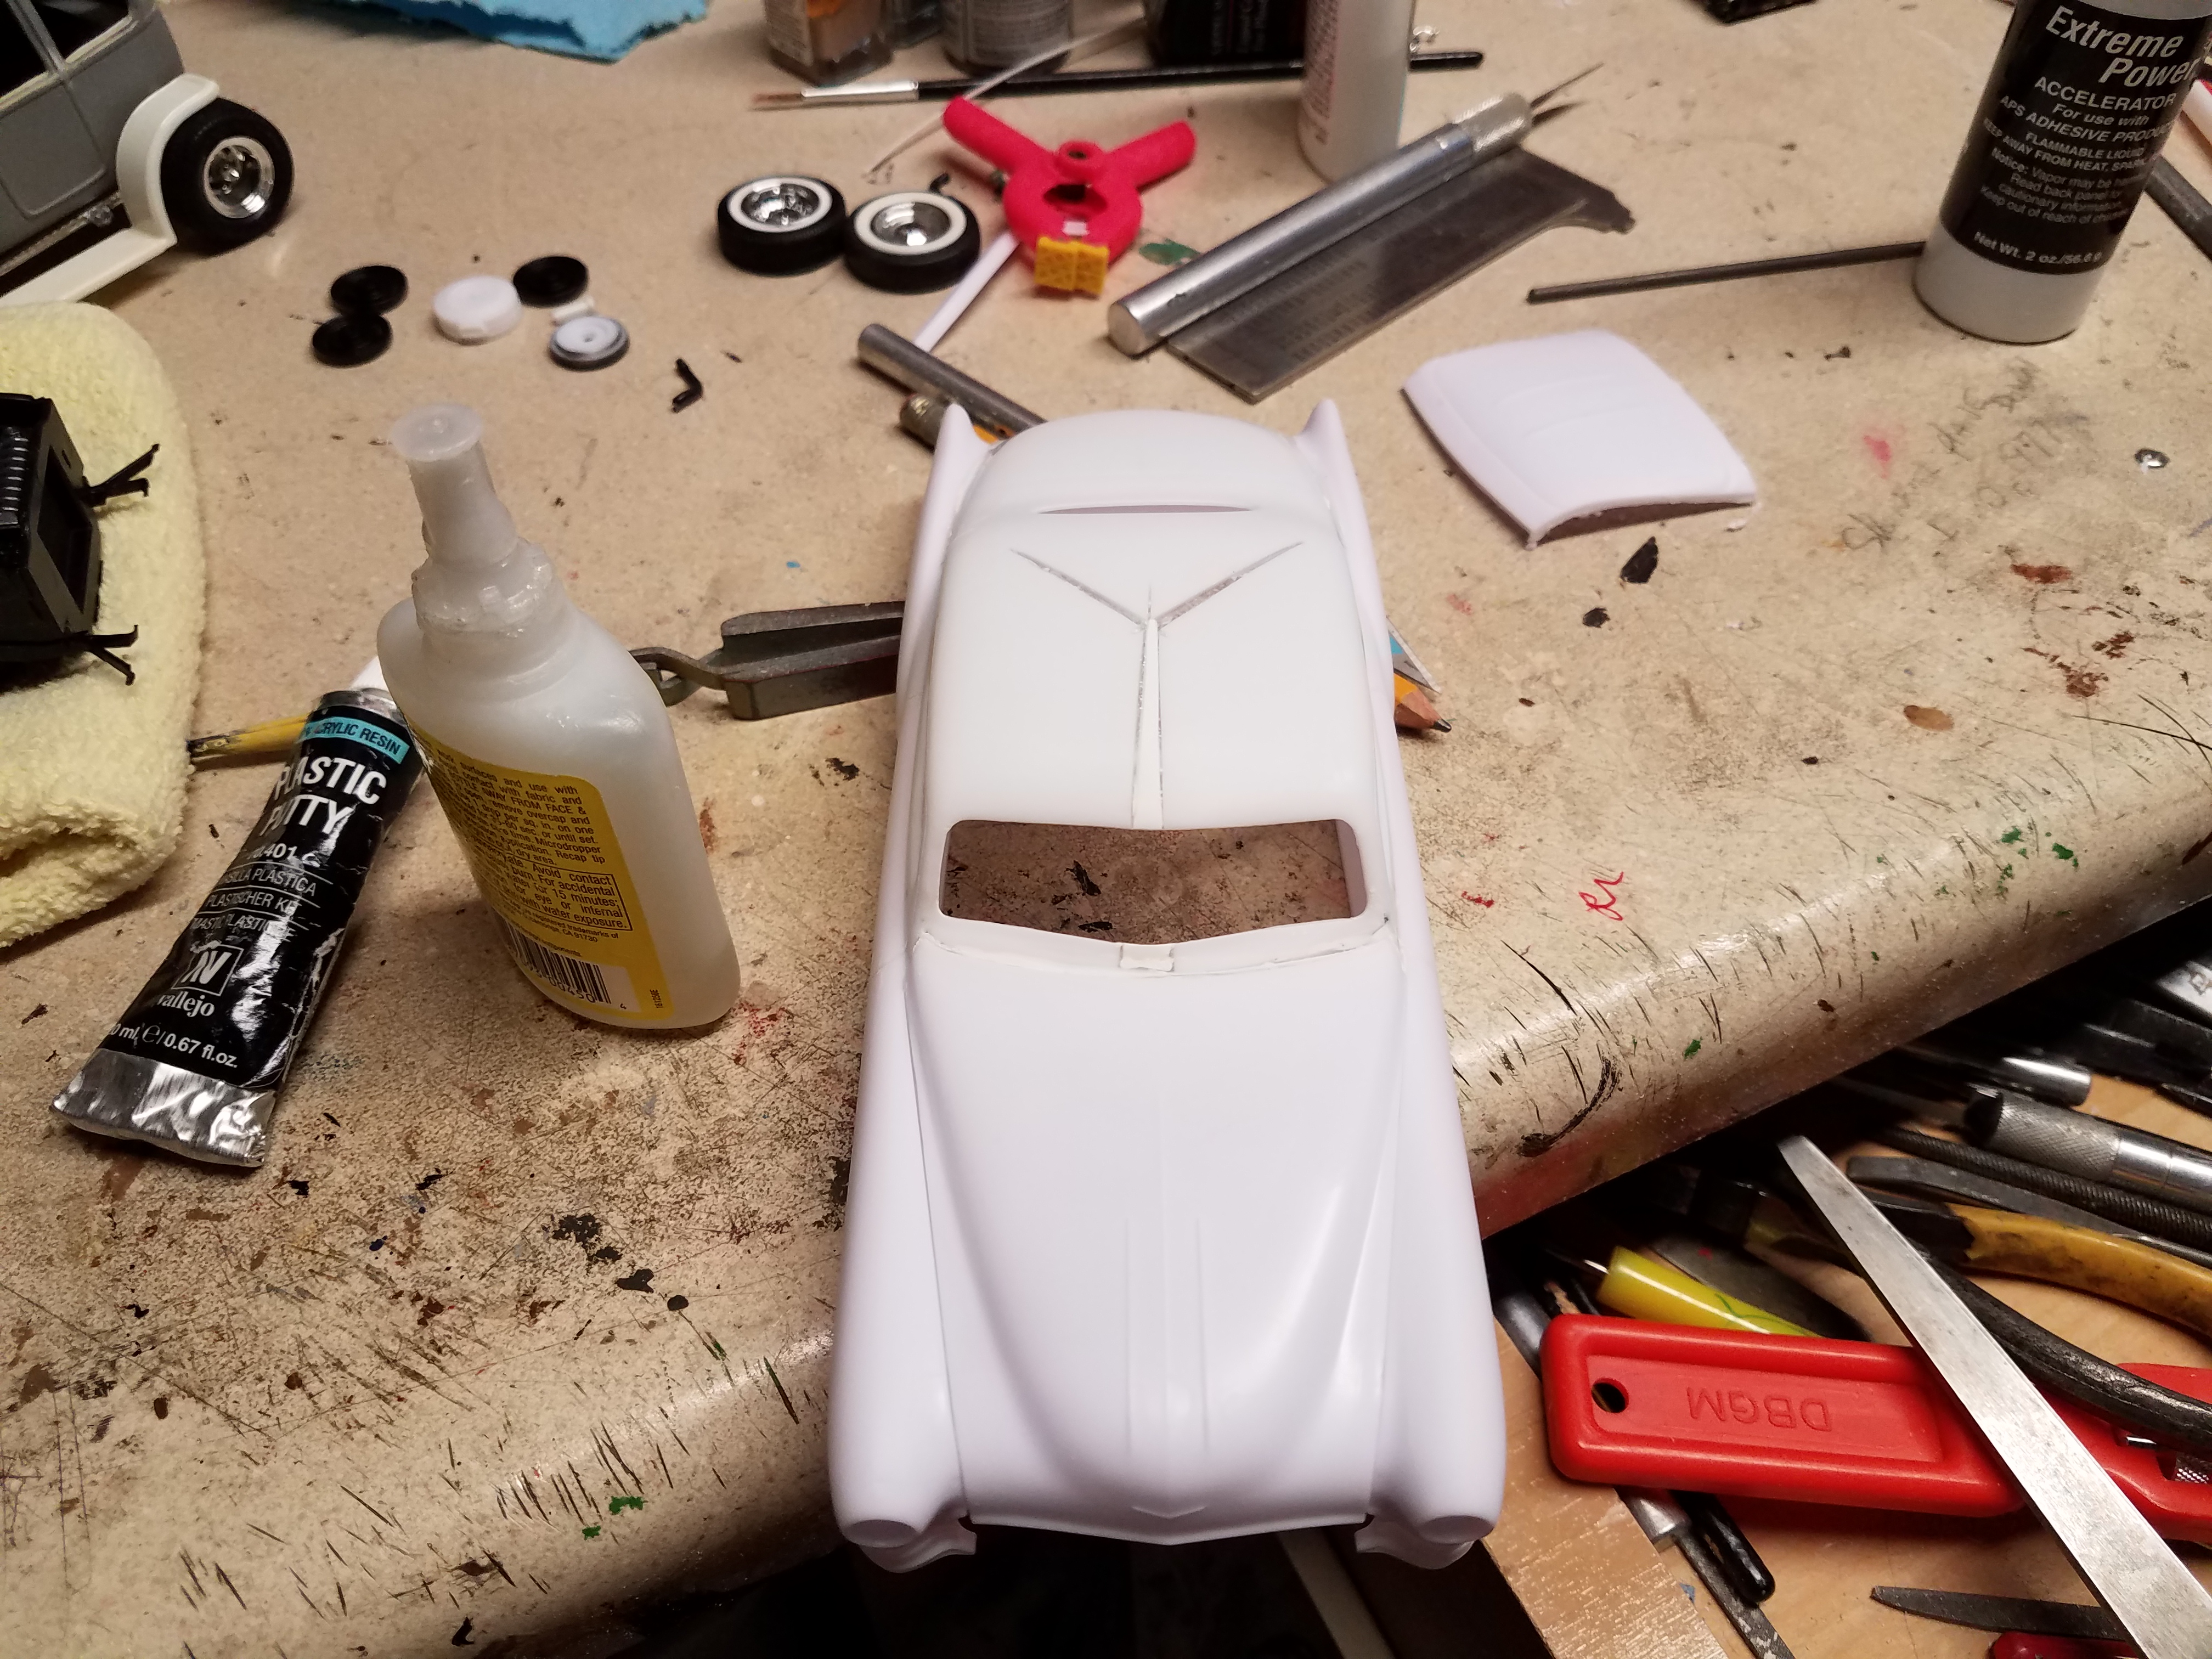
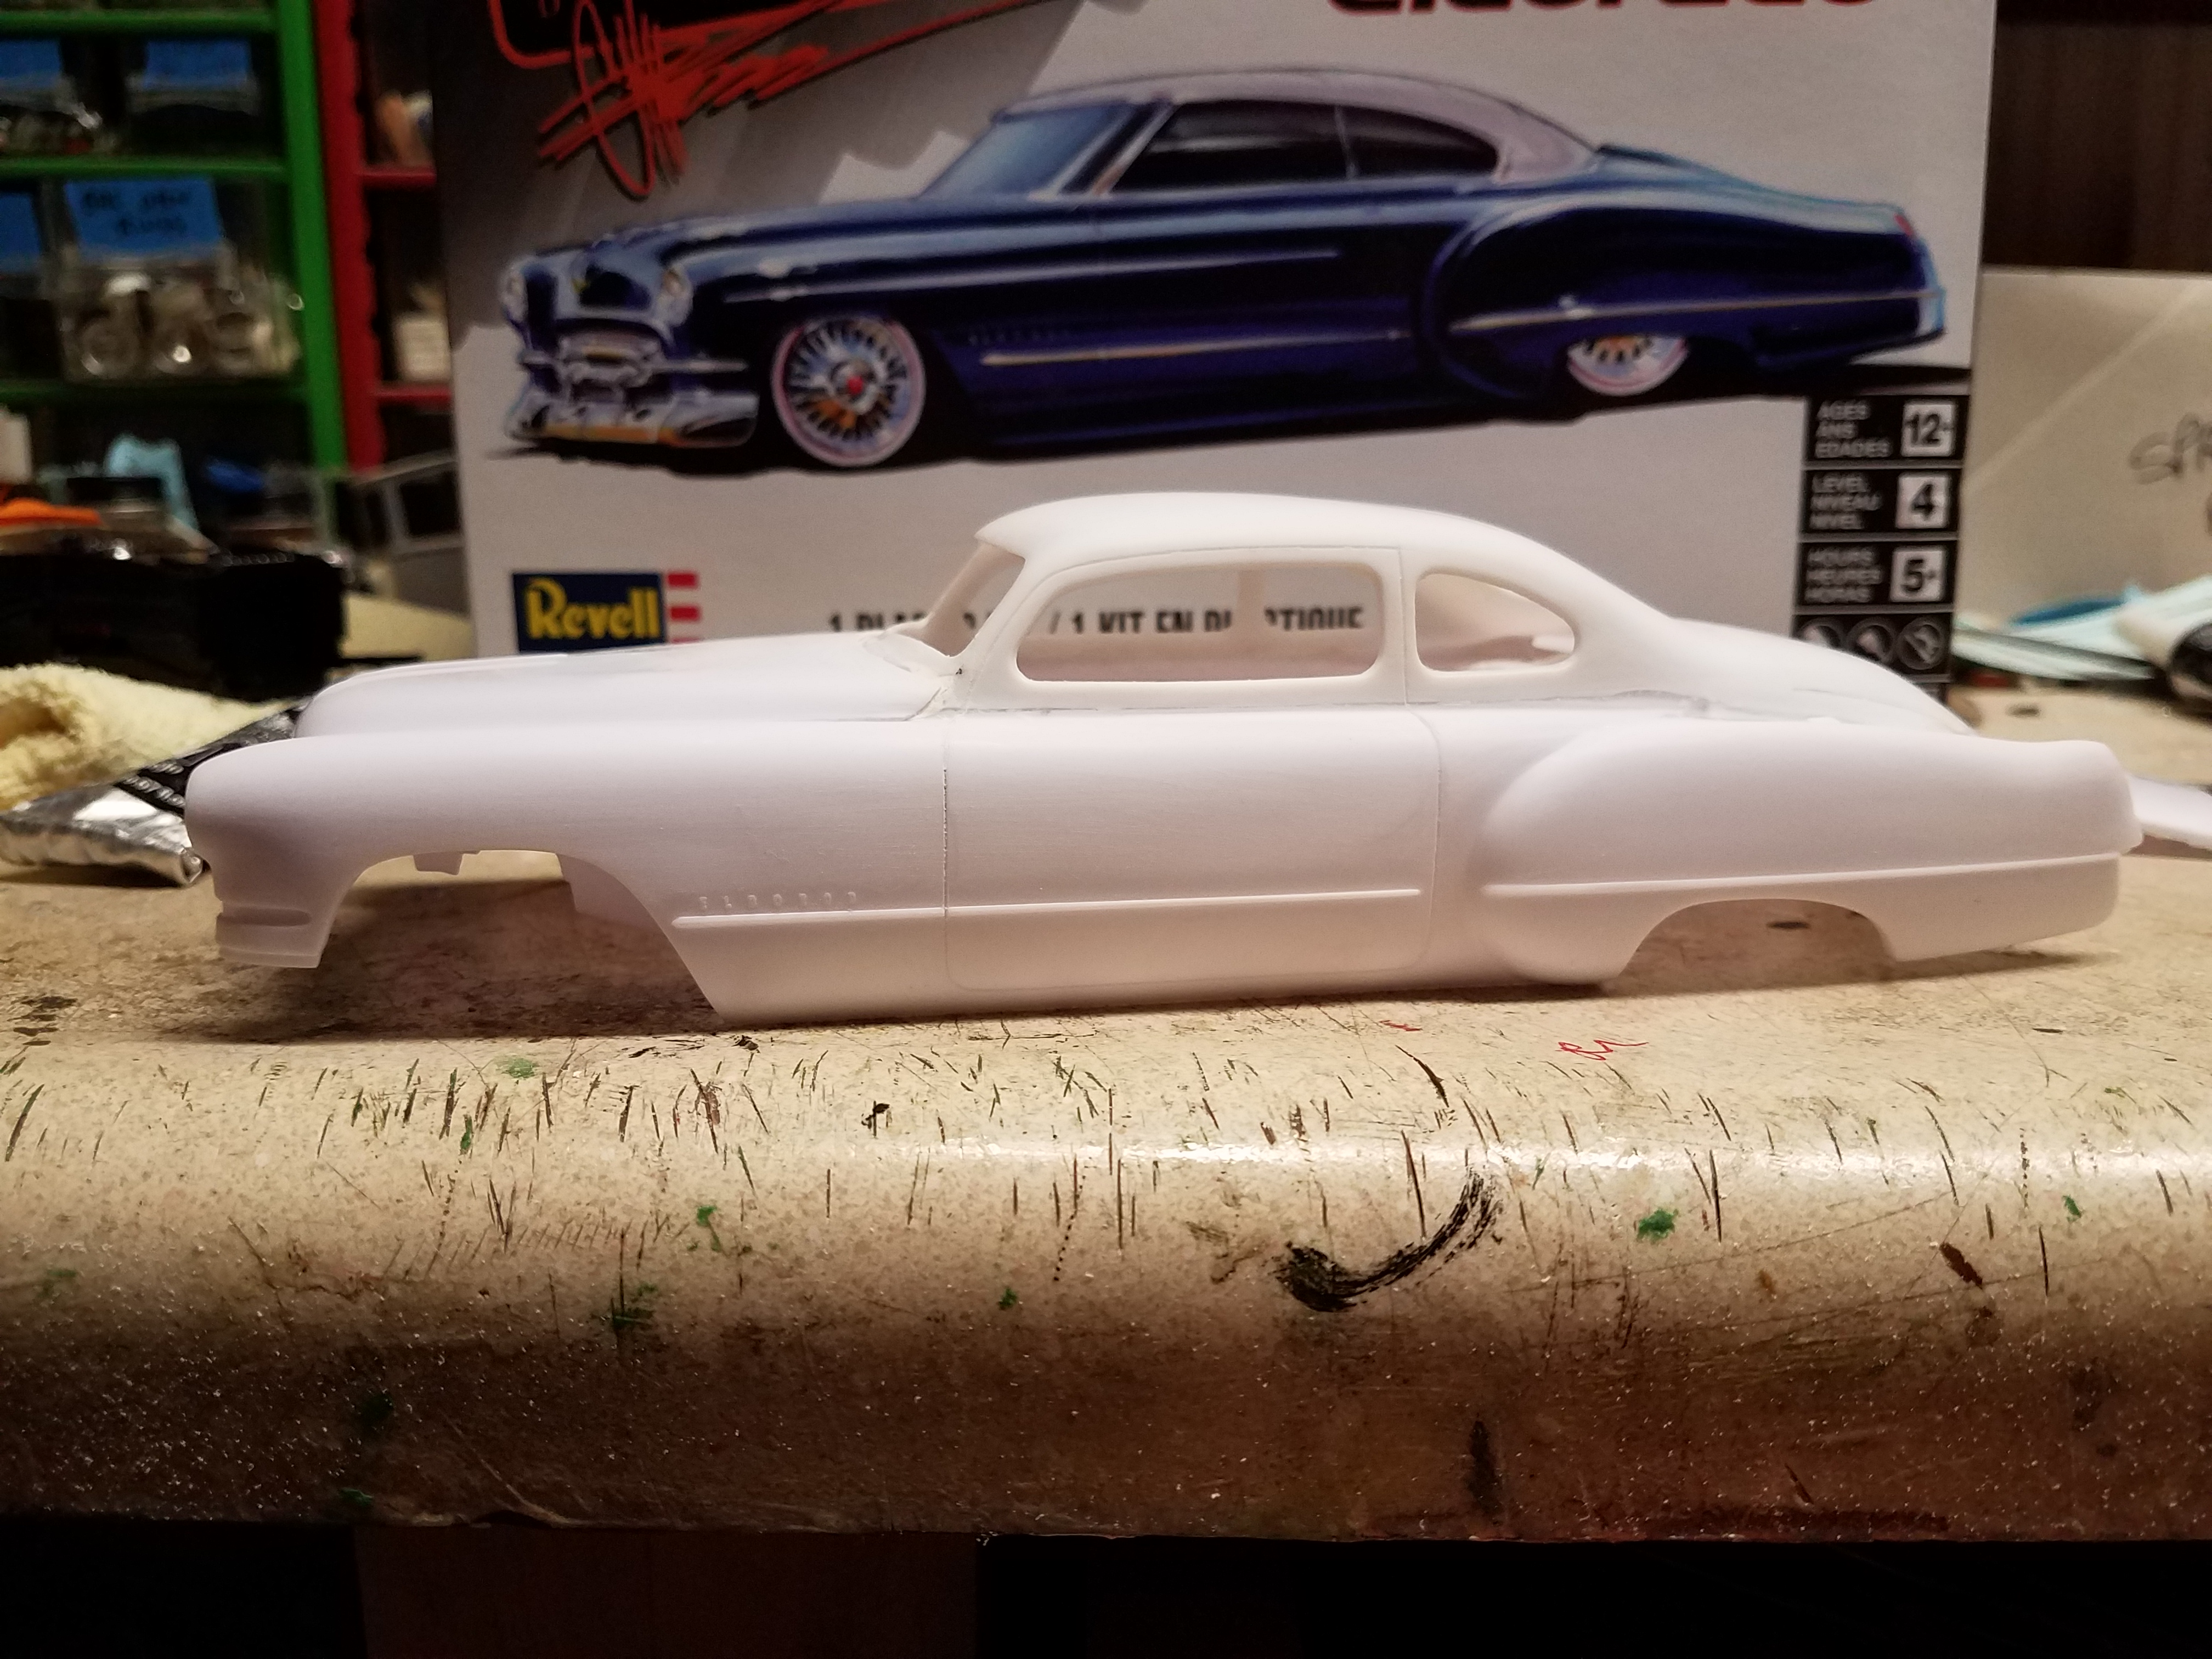
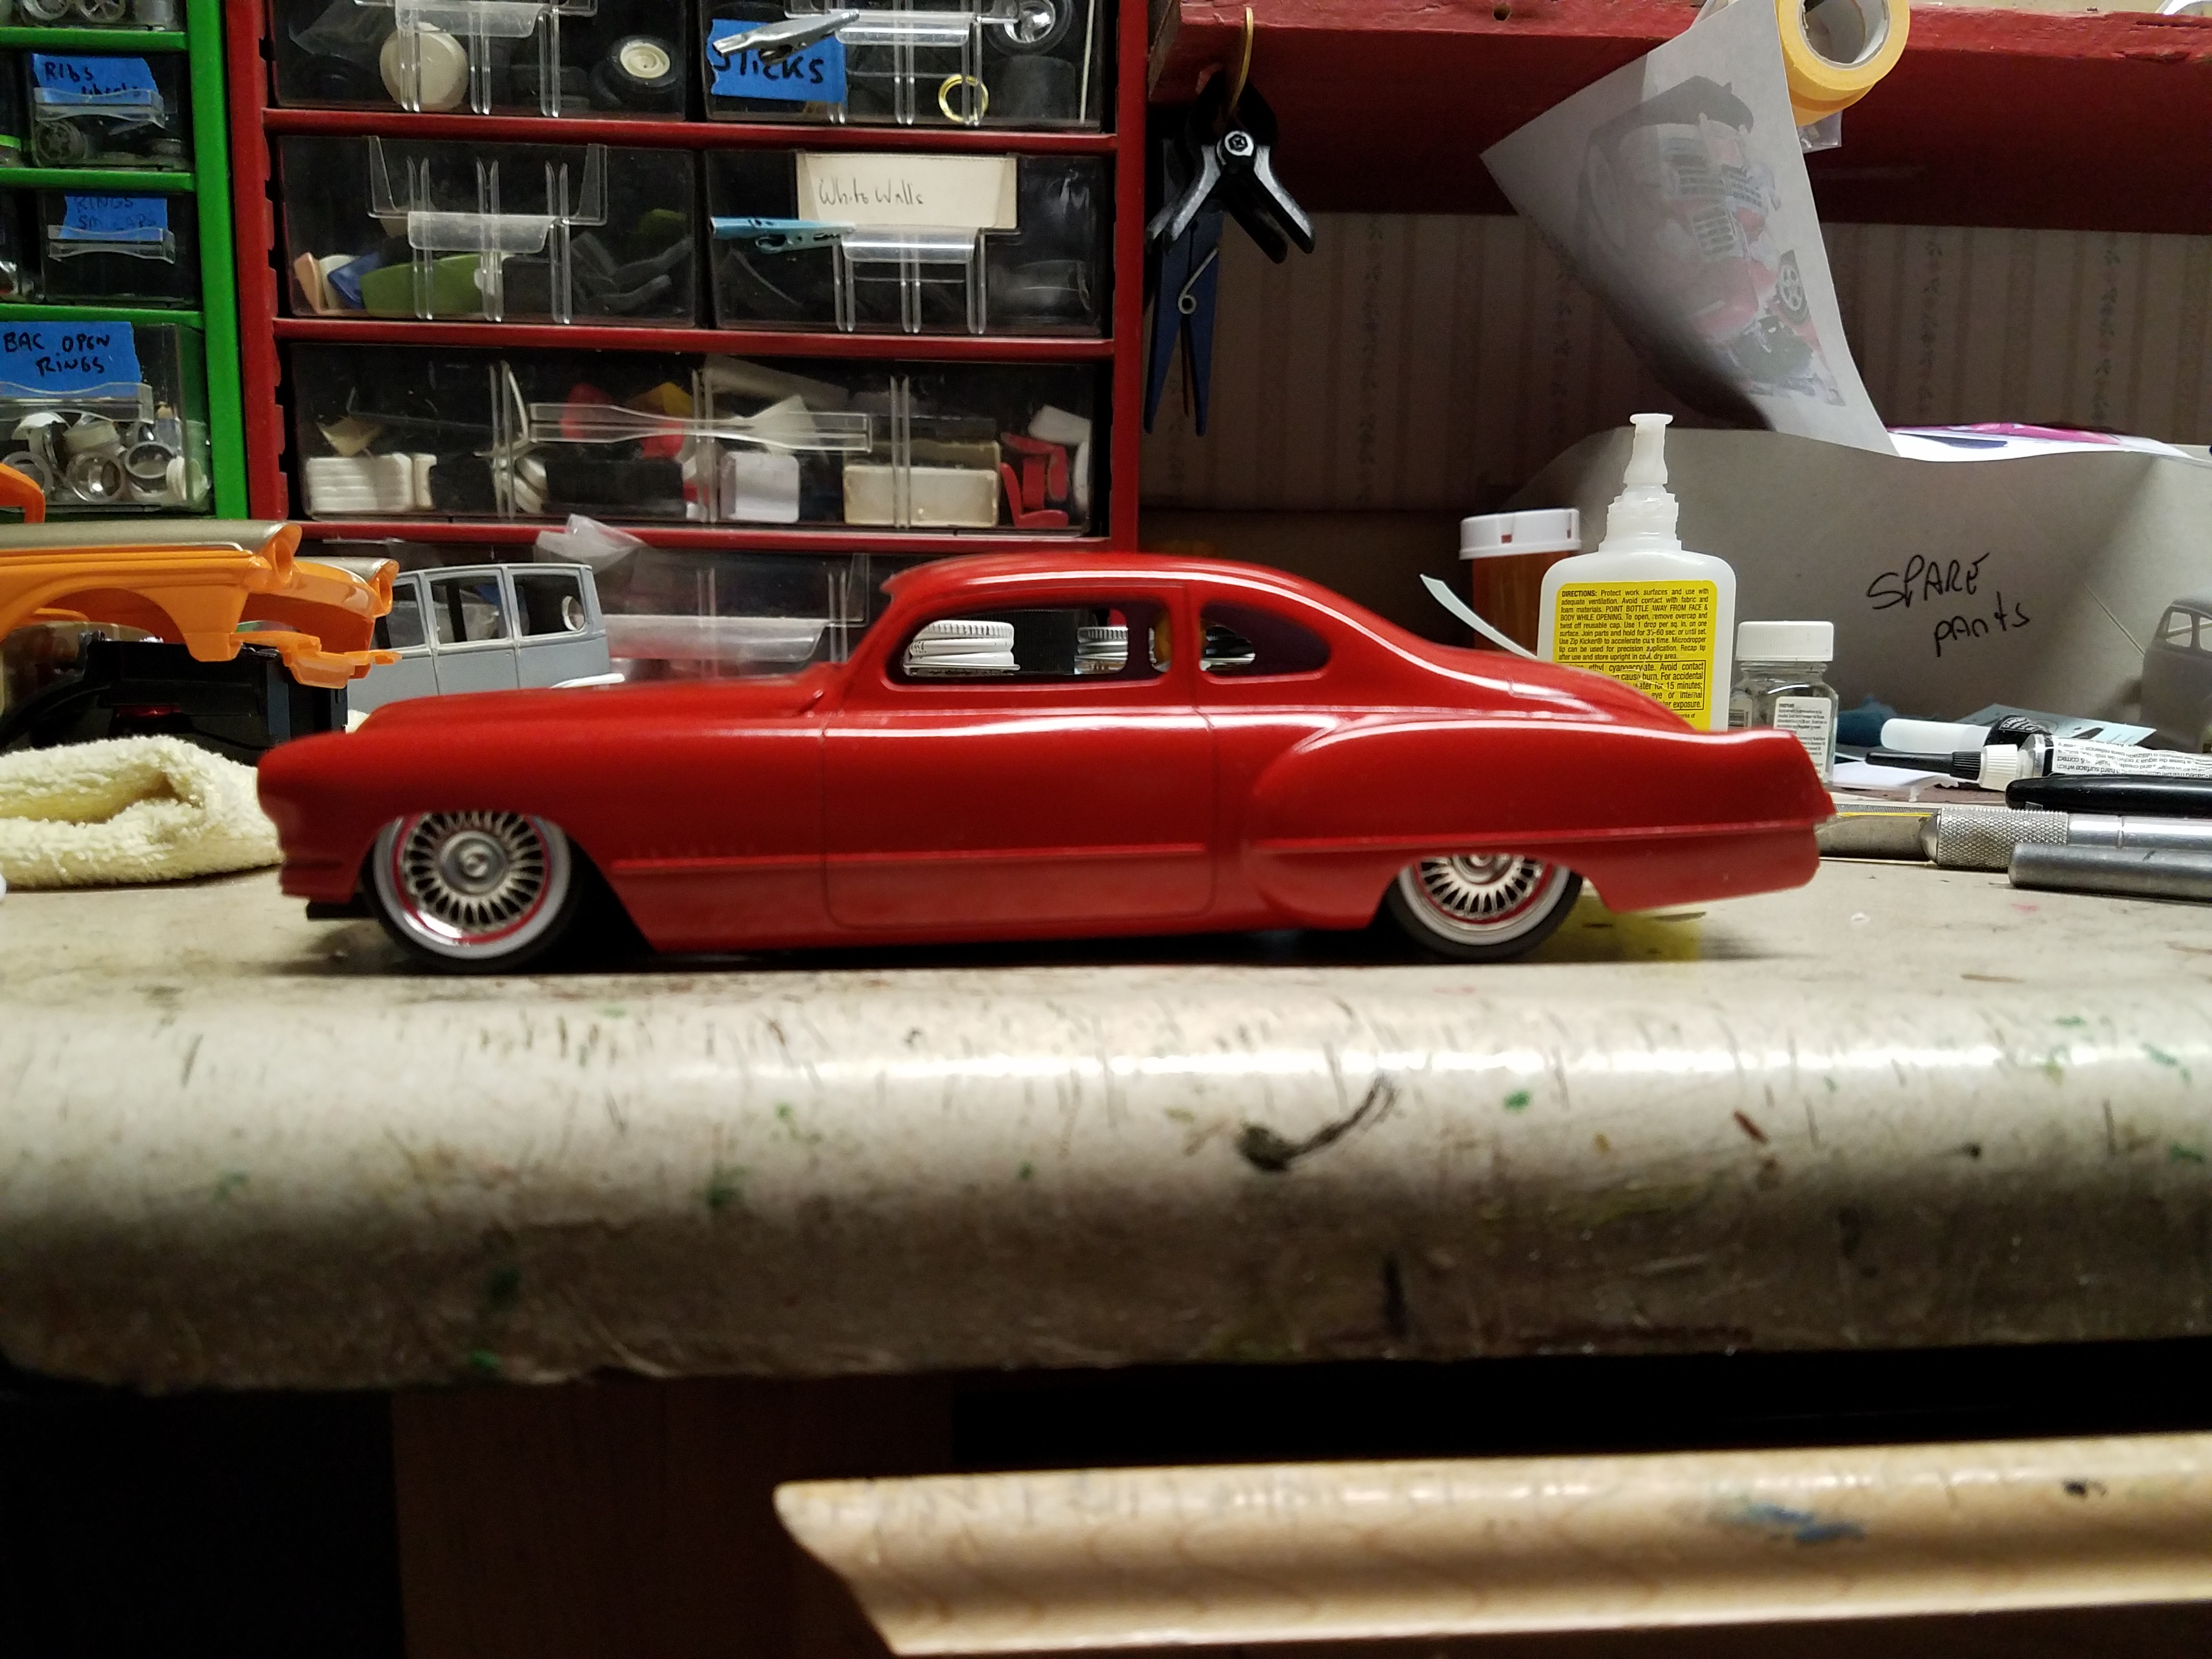
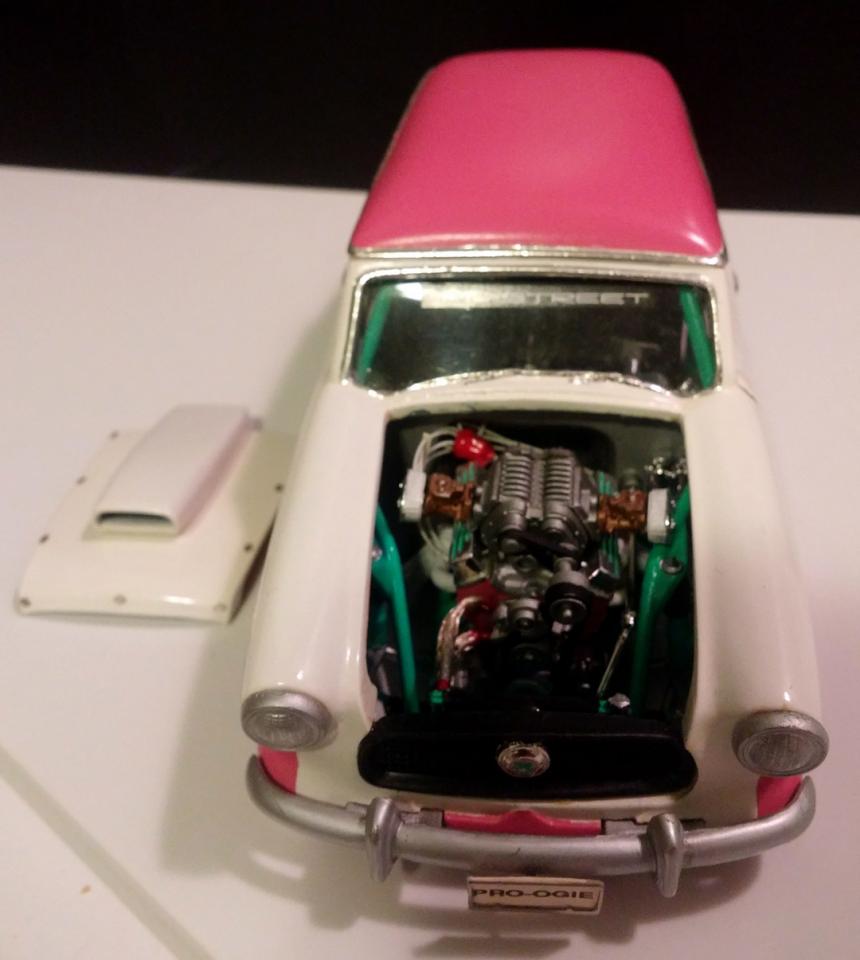
Back in 1991 my modeling friends were ragging on me to build something out of my head and not follow magazine articles. So at Toledo Toy Show I purchased a Modelhaus Nash Metro Sedan Delivery phantom body. I also picked up the then cool Revell Pro Street Beretta. My friends also much maligned that kit for the excesses and too much chrome. They were Hot Rodders and Muscle car fans and worked so they had big toy cars while I toiled in college and was broke. I started on this project in mid July, there was a lot of family things to take care of with the failing health and passing of my Grandfather. Once life calmed down to a dull roar I started in earnest. I cut open the hood and attempted to thin things out. I used the Beretta's scope and tossed the rest of the body aside. The chassis and roll cage was the biggest engineer hurdle for me. I was able to trim off excess floor material in the back to flow with the body and cut off what wasn't needed up front. This still left me with a wheelbase way too long. I forget how much I took out but the floor pan was deigned that it was impossible to make a clean cut and save the tranny tunnel, louvers and such. I filed it off flat and laminated thin sheet polystyrene with 5 minute epoxy to rebuild the detail. I used a strip of louvers from the Revell '53 Chevy Sedan Delivery on the tranny tunnel. Then the roll cage was too low and a lot of fiddly work ensued to make it work. I used after market pewter rims and wire on the engine. I strpped off most of the chrome and used various colors of Testors Metalizer on the blower and other once chrome parts. I also used some very old Pactra turquoise enamel and that almost blew the whole project. The color was about 25 years old then and wouldn't dry right and took about 2 weeks to cure to the touch. The body is painted Duplicolor white from a rattle can and Fiat pink lacquer I airbrushed onto the model. Another almost trajic moment in paint was when I finished laying down the pink a midge landed on the fresh paint and almost destroyed the roof and my timing. Another problem was my masking, I left the paint to dry too long and t started to chip around the edges. I touched it up and rubbed out the finish, I made the Parma Pierogi logo from an color xerox print that was scaled down from a business card, I clear coated the paper and then applied to the side. This is in the age before good color printers and before we could print our own decals. I had fun with this build.
-
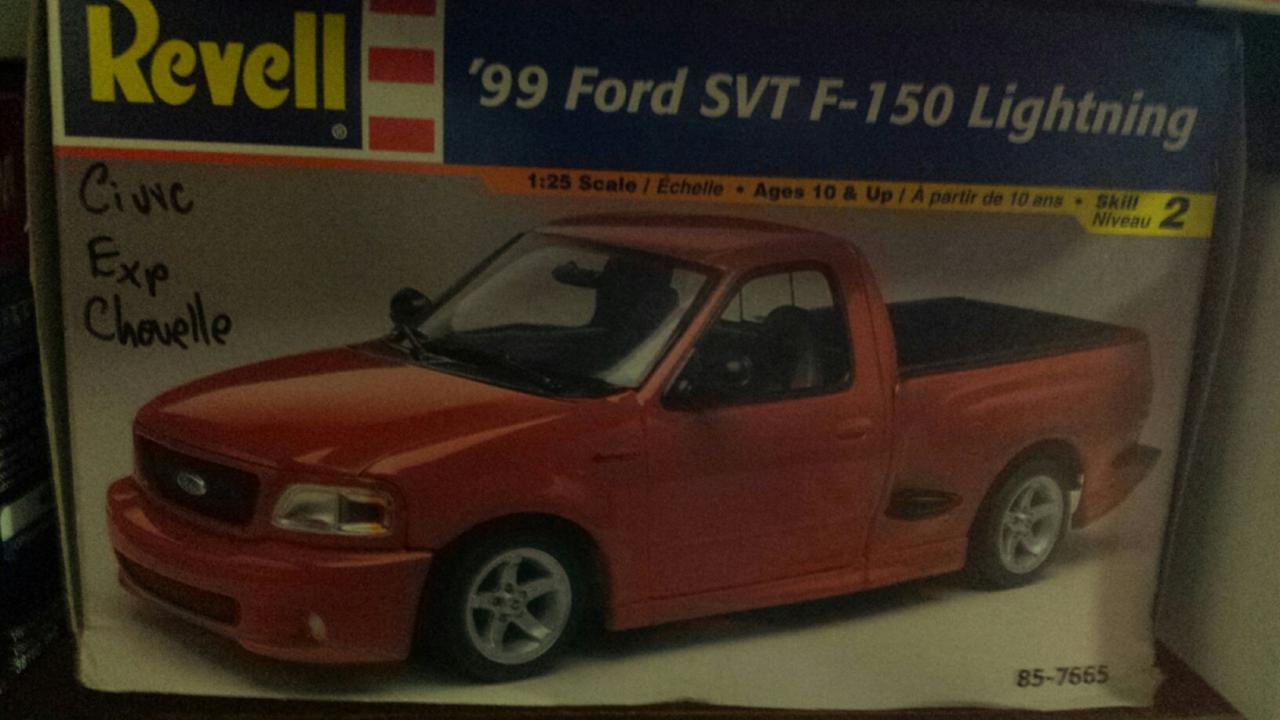
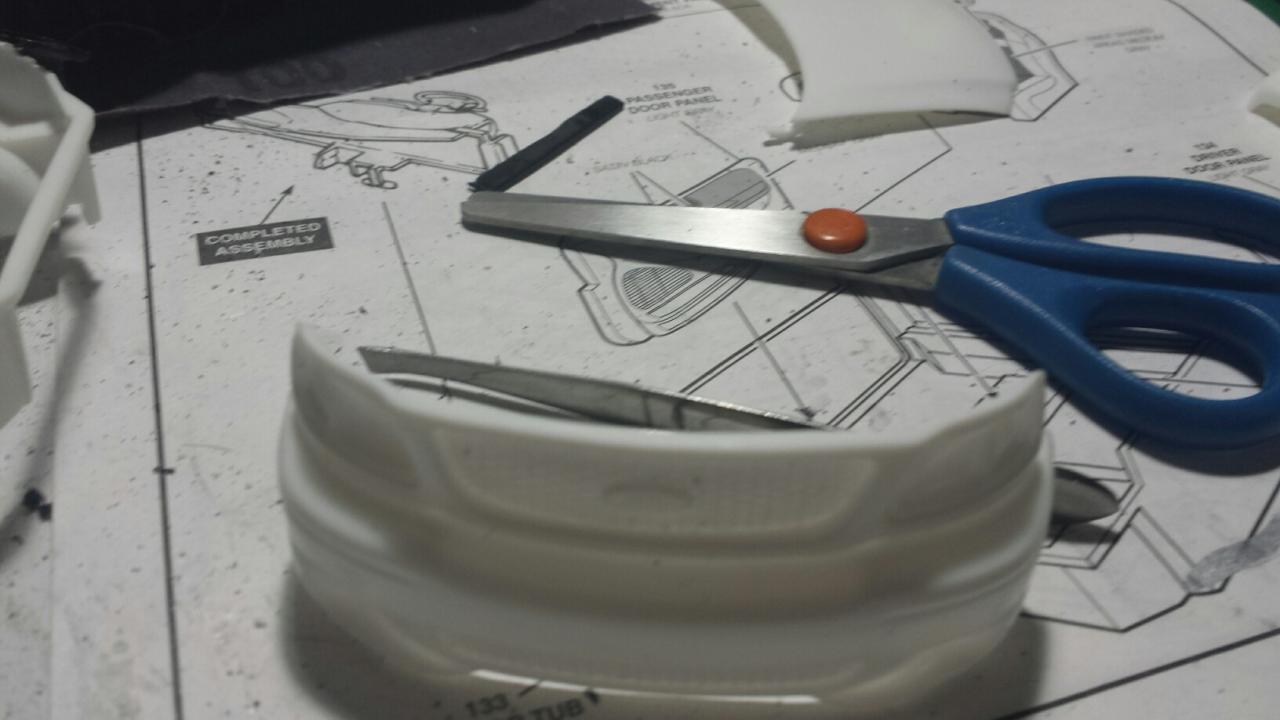
Well this is going to be more like a "On th Work bench / Under Glass" I know I should have done them separate but I got too involved in the build lol, this was my first kitbash other than a small engine or wheel swap. Enough talk here are the pics. I took these 2 kits a skill 1 Expedition adn a Skill 2 Lightning to create fords one off "Thunder" First thing was opening the hood of the expedition, cutting the engine bay out of the lightning and transplanting it to the expedition. Next for the interior tub mods, this took some thinking and doing so i could mount the chassis of the ligtning to the expedition.
-
I was just reading the kit review about the 69 chevelle rag top that is hitting the shelves and everyone knows that the old kit detail leaves something to be desired. someone had mentioned that the 69 cutlass chassis should be an easy drop in...... really? I never would have come up with that one. I would have gone to the 67 chevelle first..... then I thought just how many kit bashing scenarios have I missed or wasted time butchering pieces, only to find out that a piece out of another kit would have worked wonders. so, this may fly, it may not, but what I was thinking for this thread was if you have ever kit bashed pieces out of 1 kit to another, no matter what it is, could you list it here for an easy reference. not matter what kits, how old or how little it may seem, someone will use your idea. here is an easy one to start off with, I don't think the 68 charger has ever had the proper hemi round air cleaner in any of its issues, steal the one out of a 67 coronet, GTX or 66/7 charger kit. if you have any others, lets here them...


.jpg.137b1116e47d37814405b4f00ad9ea89.jpg)