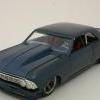
ScrappyJ Posted January 31, 2010 Posted January 31, 2010 (edited) This one has been finished since November, but I never got pictures posted. I figure I would post some of the in-progress pics and the post some of the completed pics in the "Under Glass" section later. Started with the Jada Camaro body: Ordered a set of Bob Dudek rims: Edited February 1, 2010 by ScrappyJ
Len Woodruff Posted January 31, 2010 Posted January 31, 2010 (edited) Those Dudek rims are beautiful. How do you order from Bob? Edited January 31, 2010 by Len Woodruff
Ben Posted February 1, 2010 Posted February 1, 2010 WOW!!!!!!! Those wheels are Sawweeeeeeeet! How much for the set? I want some!!!!!!
ScrappyJ Posted February 1, 2010 Author Posted February 1, 2010 (edited) Unfortunately gents, these were one-off wheels and aren't available to the public. Bob's work is fantastic and very reasonably-priced for the quality and work. However, lots of folks don't get why his parts are so expensive. Being a novice machinist myself, I can tell you it is well worth it. If you are serious about buying some of his stuff, I can reach out to him, however, only if you are serious and willing to pay. I don't believe he's doing many special orders, but he has his own line of "shelf" parts. Edited February 1, 2010 by ScrappyJ
ScrappyJ Posted February 1, 2010 Author Posted February 1, 2010 (edited) I thought the rear spoiler and cowl hood were a little anemic, so I scratch built the rear spoiler and raised and extend the cowl more towards the windshield: You can also see from those pics where I scribbed out the marker lights. I made masters using styrene and had my good friend David Morton to cast them in translucent amber and red, respectively. Edited February 1, 2010 by ScrappyJ
ScrappyJ Posted February 1, 2010 Author Posted February 1, 2010 (edited) Some soldered brass stuff ready for electro, chrome plating: Rear trailing arems Spindles Upper control arms Lower control arms, although they really wouln't work, but I was getting lazy Edited February 1, 2010 by ScrappyJ
Ben Posted February 1, 2010 Posted February 1, 2010 I too am an amature machinest and fully understand what's involved in making something like that! As they say, if you wanna play, you gotta pay! He has to be set up with full CNC i'm guessing?
Ben Posted February 1, 2010 Posted February 1, 2010 By the way, outstanding work on the Camaro so far!!!!!!
ScrappyJ Posted February 1, 2010 Author Posted February 1, 2010 Adjustable struts I machined: I too am an amature machinest and fully understand what's involved in making something like that! As they say, if you wanna play, you gotta pay! He has to be set up with full CNC i'm guessing? He is set up on a CNC, Ben.
ScrappyJ Posted February 1, 2010 Author Posted February 1, 2010 In this shot, you can see where the grill was opened, the air induction in the bumper was opened, and the air vents for the brakes right above the front chin spoiler were opened: The gills in front of the rear wheels were opened in this shot:
ScrappyJ Posted February 2, 2010 Author Posted February 2, 2010 This was the first diffuser design. Unfortunately, GTMike explained to me that the bottom part of the diffuser would have neutralized the whole purpose of diffusers and thus I took that part off. You can also see where I added material for the holes for the exhaust tips: This is the injector set up on the motor. I used RB Motion 1/20 ferrari velocity stacks, then I re did the base for the plenum to accept the velocity stacks and the carbon fibered it along with the valve cover, covers. You can also see the turned pulleys and the machined oil filler, etc:
ScrappyJ Posted February 2, 2010 Author Posted February 2, 2010 Front suspencion: As you can see, the design of the control arms wouldn't allow the spindles to turn. Fortunately, most of this part can't be seen beyond the wheel: With the motor and the crhome-plated, brass radiator (you can see it through the grill): Rear suspension set up. In this picture, you can see the mostly brass suspension. The trailing arms can actually adjust as they were drilled and tapped. The sway bar was also soldered brass and then chrome-plated:
ScrappyJ Posted February 2, 2010 Author Posted February 2, 2010 On to the interior: And the chassis and interior all coming together:
gilsdropshop1 Posted February 2, 2010 Posted February 2, 2010 awsome build love it, just clean and mean!!
Railfreak78 Posted February 2, 2010 Posted February 2, 2010 <~~~~~~~In awe of your work and some of your friends. I don't know if I should strive to get to your level or throw my kits in the recycle bin half the time. Wow I'm impressed
ScrappyJ Posted February 2, 2010 Author Posted February 2, 2010 (edited) Thanks, Gents! As soon as I get a chance, I will be posting some pics. of the finished model in the "under glass" section of the forum. @ Mike. I like yours too, Mike! Looks like we both had similar visions. Edited February 2, 2010 by ScrappyJ
Guest Sickfish Posted February 2, 2010 Posted February 2, 2010 Dirk, firstly i hope my most humble apologies ( on Marc's thread ) has been accepted?? I finally got that foot of mine out of my mouth . As i said on Marc's thread, it's very obvious both you & he are EXTREMELY talented builders & this Camaro of your's is a prime example of your talent!! Simply AMAZING!! The way i see it now is, either i get myself a lathe & learn how to machine parts of my own or.....throw in the towel!! Fantastic work & awsome skill here Dirk!! Cheer's Cliff!
ScrappyJ Posted February 2, 2010 Author Posted February 2, 2010 (edited) Dirk, firstly i hope my most humble apologies ( on Marc's thread ) has been accepted?? I finally got that foot of mine out of my mouth . As i said on Marc's thread, it's very obvious both you & he are EXTREMELY talented builders & this Camaro of your's is a prime example of your talent!! Simply AMAZING!! The way i see it now is, either i get myself a lathe & learn how to machine parts of my own or.....throw in the towel!! Fantastic work & awsome skill here Dirk!! Cheer's Cliff! No worries, Cliff! I come from a place similar to yours where you respect each other and life is sort of laid back (St. Thomas, USVI). As Jeff Sauber said, I should have used emoticons to soften the reaction from others and I didn't. BTW, if you do invest in a mill and lathe set-up, any advice I can provide based on my experience, feel free to reach out to me. Thanks for the kind words too! Edited February 2, 2010 by ScrappyJ
ScrappyJ Posted February 3, 2010 Author Posted February 3, 2010 Just a couple more things- Here you can see where the mirror has been modified. I don't know exactly what the styling is called, but I didn't like the mirror attached to the body (with the original mirror, they stuck out too far from the car): Here, you can barely see the centers for the wheels as they are cast in task 9 resin, which is a little transulcent, but IMHO, is more stable and easier to work with than some of the other resins. Again, my good friend, Dave Morton, cast the centers that my other good friend, Bob Dudek, machined for me: I forgot to mention, the strut support bar was originally not going to have the cross support, which would obviously give it a lot more support while handling the corner duties. My good friend Jay Ruis, gave me the idea to add the cross support and drill the four holes for added looks (in the real world, it would be to take as much weight off of the part): I think that pretty much covers the build-up of the Maro (my other friend Tim K called it that, so I think I'm going to stick with that). Next, I'll try getting the finished car posted "under glass". I finally got some pics taken this Sunday with my new Canon 50D. Still need to work on some aperature (f-stop) and shutter-speed settings. I never added the in-progress on my '66 Chevelle either, so I think I will add some of those pictures too. I hope everyone enjoyed the build-up pics and I apologize I don't get to post pics while building as I don't have a permanent camera set-up, separate from my buildin area.
janositamas Posted February 3, 2010 Posted February 3, 2010 This is too much for me, you did an absolutely fantastic work so far, can't wait to see more!
Recommended Posts
Create an account or sign in to comment
You need to be a member in order to leave a comment
Create an account
Sign up for a new account in our community. It's easy!
Register a new accountSign in
Already have an account? Sign in here.
Sign In Now