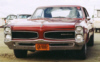
Ponti Posted January 18, 2008 Posted January 18, 2008 (edited) Hello everyone, Am building the Revell 1967 GTX for a group build on another forum and thought I'd share it with you. Pictures can be found here. Sox & Martin GTX Have made a start on correcting the markings on the body, as having looked at a few pictures of the original car some are missing and others are on the kit when they should not be. I'm still not sure on the new HEMI logo I've made for the side, any ideas? Oh yes sorry I didn't have an US currency to hand for the picture Hope you all like and any help or advice would be great. Andrew Edited January 18, 2008 by Ponti
Ponti Posted January 21, 2008 Author Posted January 21, 2008 Main work today is on the body. Having looked at pic's of the real car I noticed that there is no chrome strips on the sill's or wheel arches, so file in hand and a bit of luck there off. Before and after shots ( well driverside and passenger). Hopefully you can also see that the scripts have been removed off the front wing ready for the one's I made to be fitted.
Jefbo Posted January 21, 2008 Posted January 21, 2008 Looking good Andrew, nice attention to the details. Is it me, or does the roof appear to dip in the center of the model? It may just be the photo angle. It's fun watching a build from the very beginning. Keep us posted. Jefbo
Ponti Posted January 21, 2008 Author Posted January 21, 2008 Looking good Andrew, nice attention to the details. Is it me, or does the roof appear to dip in the center of the model? It may just be the photo angle. It's fun watching a build from the very beginning. Keep us posted. Jefbo Hi Jefbo, Thanks for nice words. You could be right about the roof looks like a small dip at the front, will give it a blast with some primer and have a look. Whats the best way of over coming it if there is a dip?
Jefbo Posted January 21, 2008 Posted January 21, 2008 Whats the best way of over coming it if there is a dip? I guess it all depends on how much of a dip. I have only had small dips to work with so far, What I have done, (got one on the bench right now) is fill, block sand, prime, fill, block sand, prime... till I get the ding out. Again, most of what I have been working on has been small dips. Sometimes when I get close, I shot a thin coat of black paint and wet sand with 3200 paper. The almost polished black paint shows everything. This is what I do but I'm always looking for a better way I suspect that's true for most of us here. Jefbo
Ponti Posted January 21, 2008 Author Posted January 21, 2008 Thanks for that tip. Will have a go at it later.
Harry P. Posted January 21, 2008 Posted January 21, 2008 Looks like that roof sags pretty badly...more than a coat or two of primer can fix!
Ponti Posted January 22, 2008 Author Posted January 22, 2008 Looks like that roof sags pretty badly...more than a coat or two of primer can fix! Hi Harry, Been looking at it today and I think your right. Will wait and do a dry fit of the glazing and see if that helps as you can push it back up easy with your finger, so once the glazing is in it might help. todays work, still on the body. Decided the bonnet needed some extra detail to the strenghtening ribs as these were only marked on the kit, so to give them some depth have started to thicken them with some foil. Before during after Ok this was the 1st round. Have left it for a few hours as it's making my eye's go :hypnotised: Also whilst giving my eye's a break been working on the motor.
modelguy( jeff) Posted January 22, 2008 Posted January 22, 2008 looks good so far like the hood detail
Jon Cole Posted January 22, 2008 Posted January 22, 2008 Looks like that roof sags pretty badly...more than a coat or two of primer can fix! Does the kit have one-piece glass (front & rear as one?) If so, that may help put upward pressure on the roof. Do a test fit with the glass and maybe that will help.. hope so. -Jon-
Ponti Posted February 17, 2008 Author Posted February 17, 2008 Horray, finally managed to get some modelling done. Haven't done much more that can be photo'd loads of small bits done. Only thing done that I've photo'd is I've removed the moulded on handbrake cable and have drilled and temperally fitted a wire to check the fit and look. Also I had been looking at the kit's moulded on fuel filler pipe and decided I didn't like it, so would have a go at making a proper looking one. At present it's just mocked up for the picture, still needs a bit of furtalling on the join between the 2 pipes. Before After
m408 Posted February 17, 2008 Posted February 17, 2008 Hi Jefbo, Thanks for nice words. You could be right about the roof looks like a small dip at the front, will give it a blast with some primer and have a look. Whats the best way of over coming it if there is a dip? I'm not nearly as experienced as the guys who have already answered, but. I would try putting it hot water for awhile, inverting it on a towel and adding some weight, a few paint bottles, to the affected area. The towel should allow it to go past level.
Recommended Posts
Create an account or sign in to comment
You need to be a member in order to leave a comment
Create an account
Sign up for a new account in our community. It's easy!
Register a new accountSign in
Already have an account? Sign in here.
Sign In Now