ghoodii
-
Posts
79 -
Joined
-
Last visited
ghoodii's Achievements
MCM Regular (3/6)
-
LLV “mail truck“
ghoodii replied to ridinframe's topic in WIP: Model Trucks: Pickups, Vans, SUVs, Light Commercial
Interesting project....would love a larger step van offering. What thickness plastic are you using and what setting on the Cricket are you using? Any issues with the plastic shifting while cutting? -
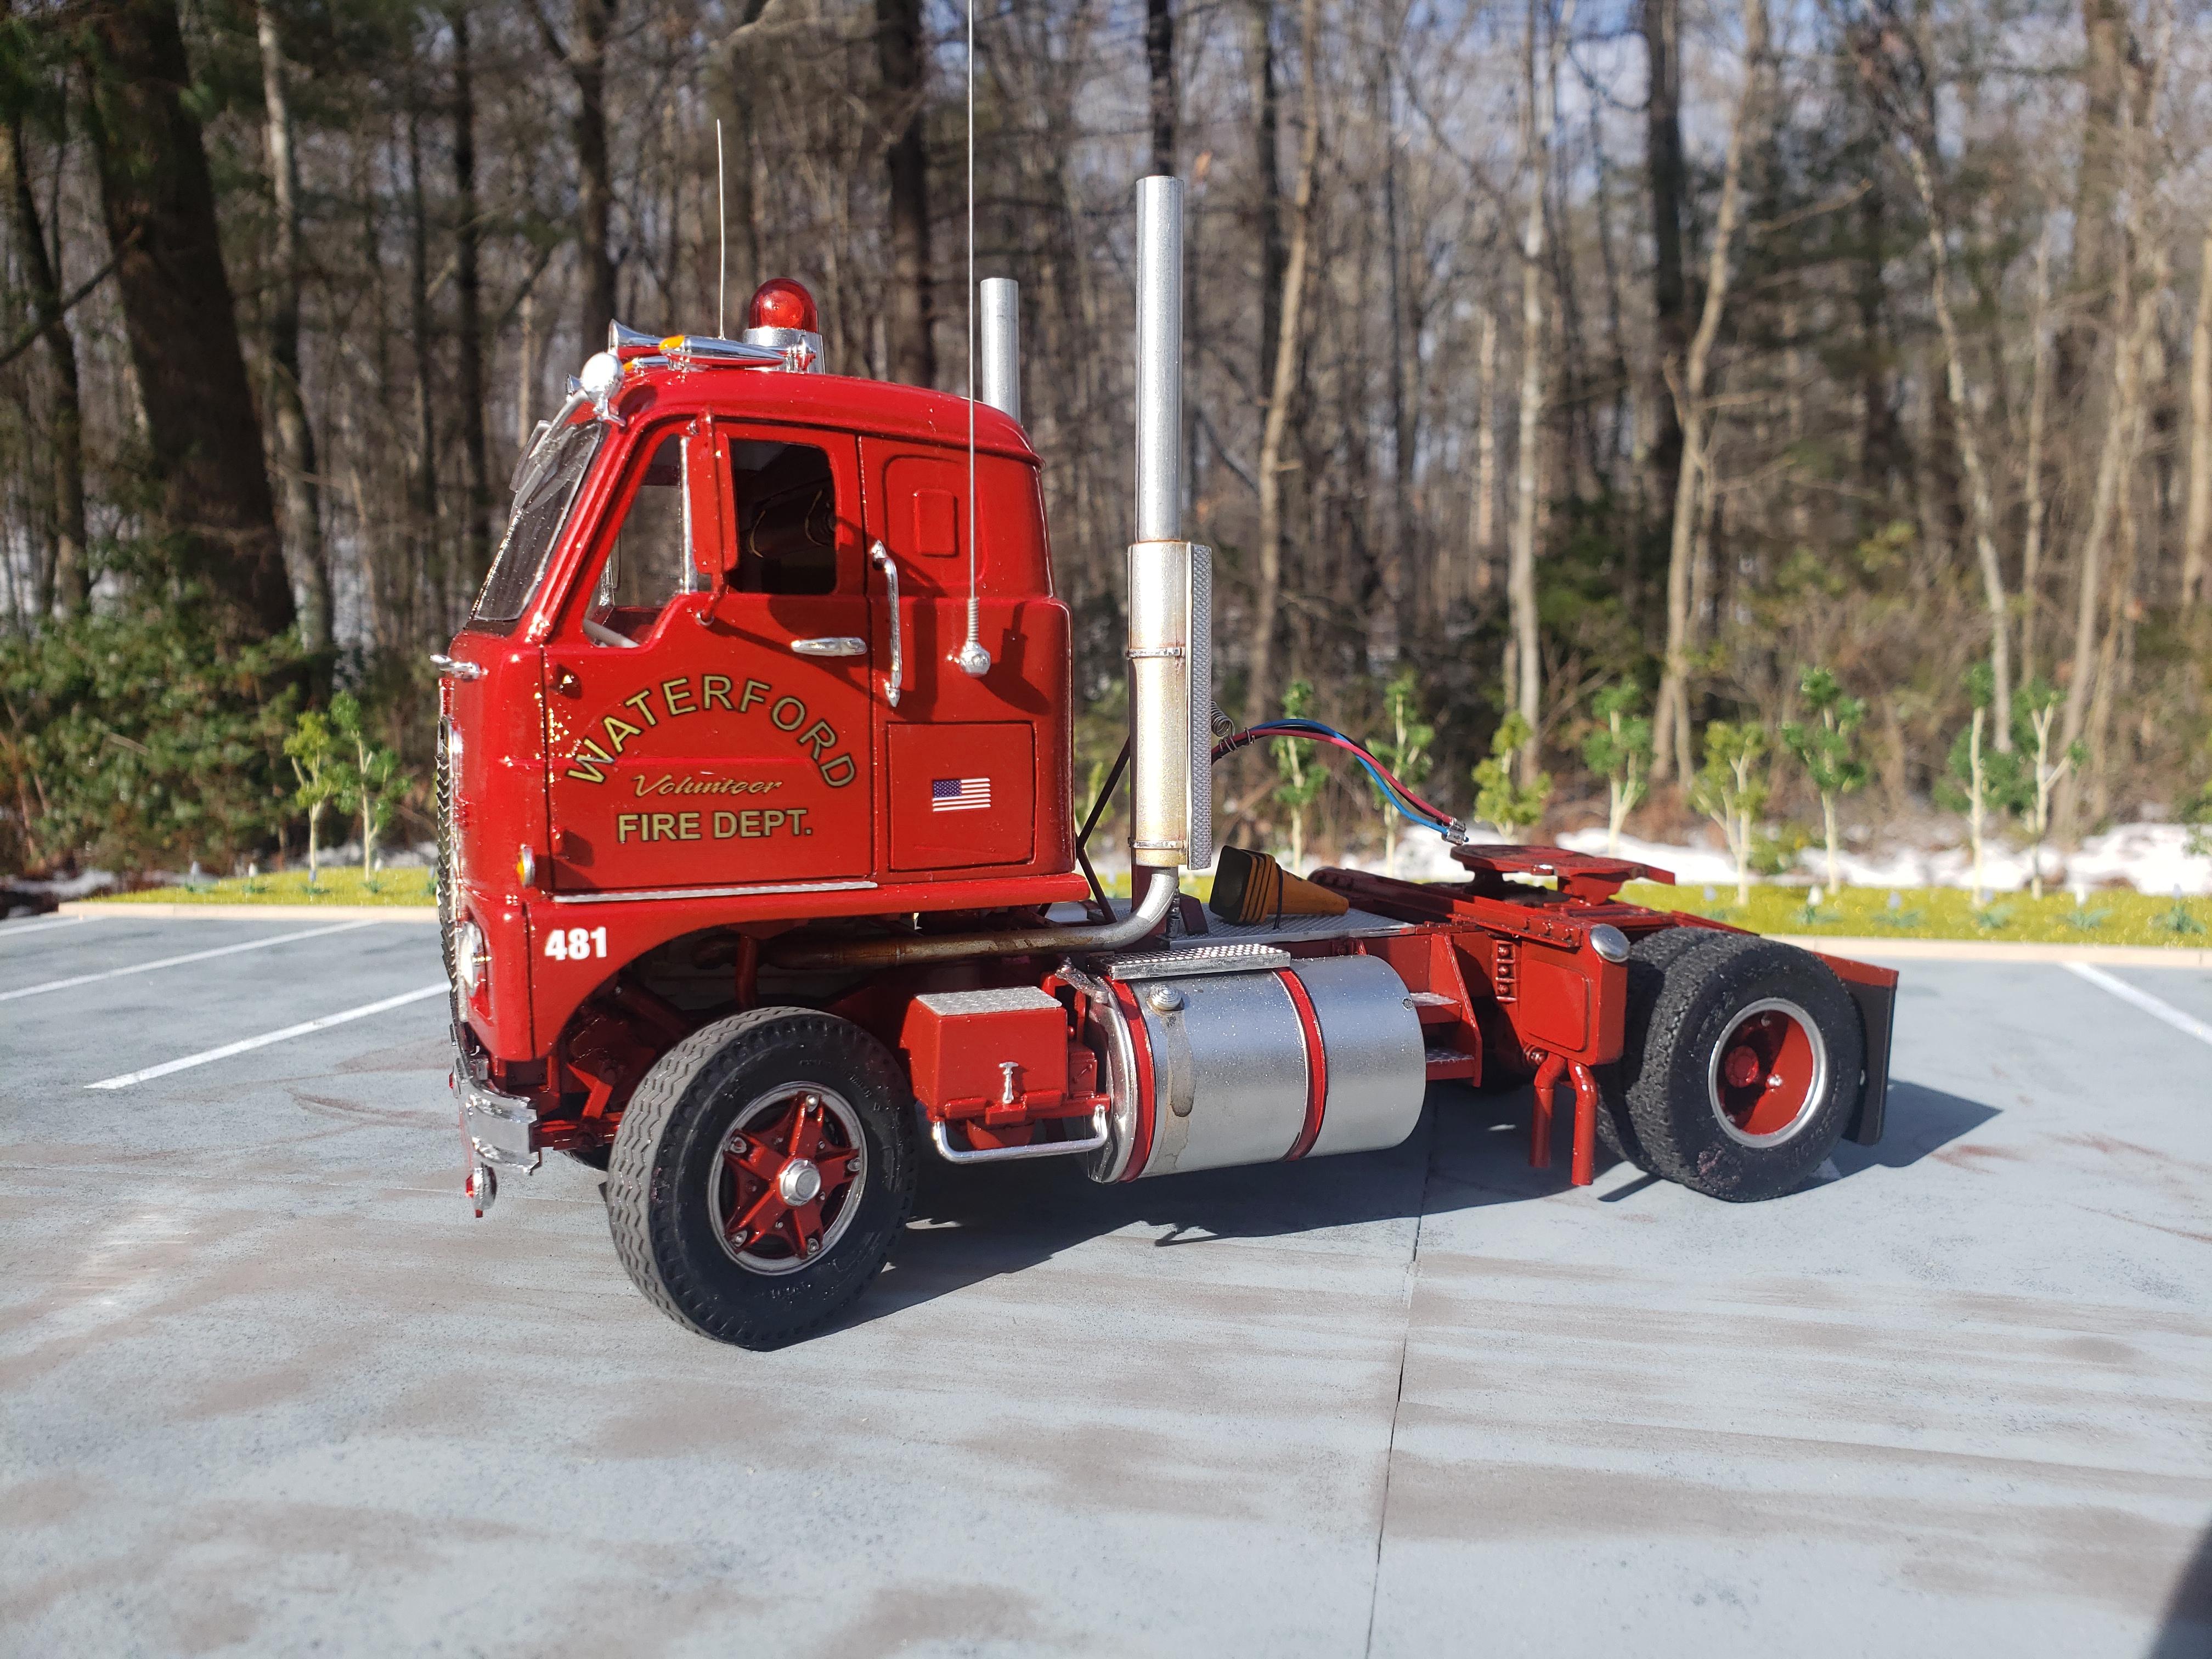
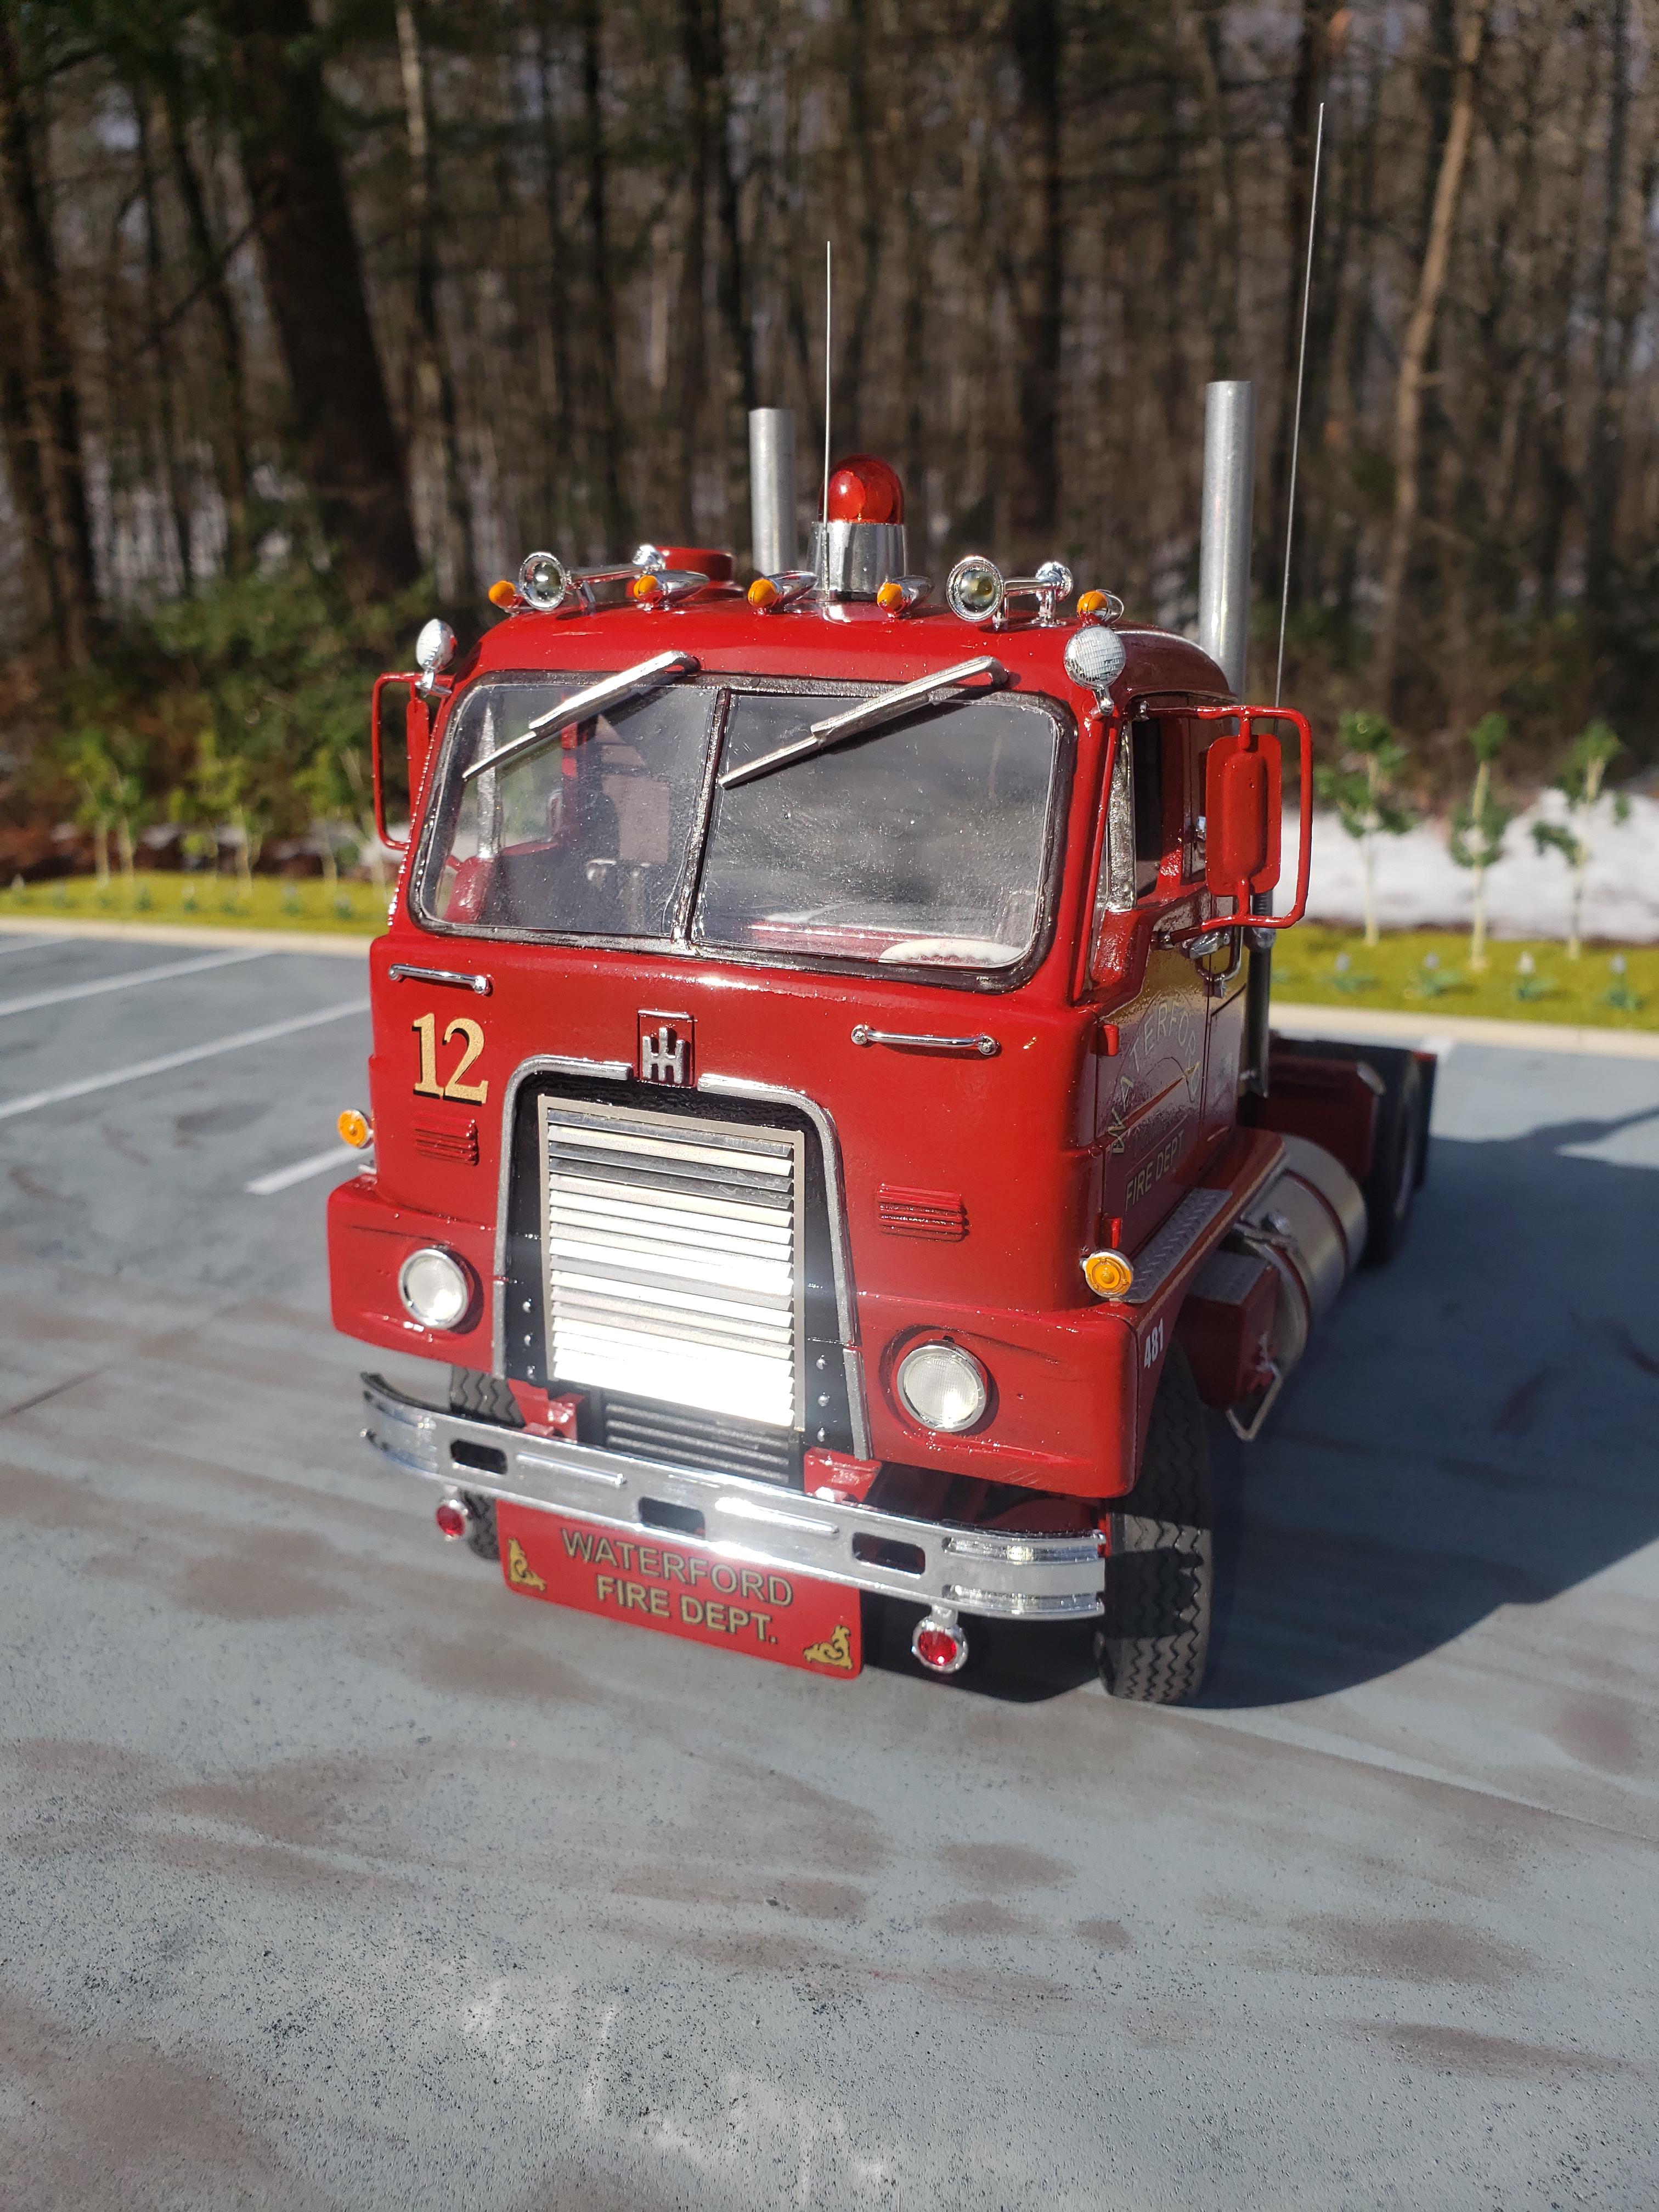
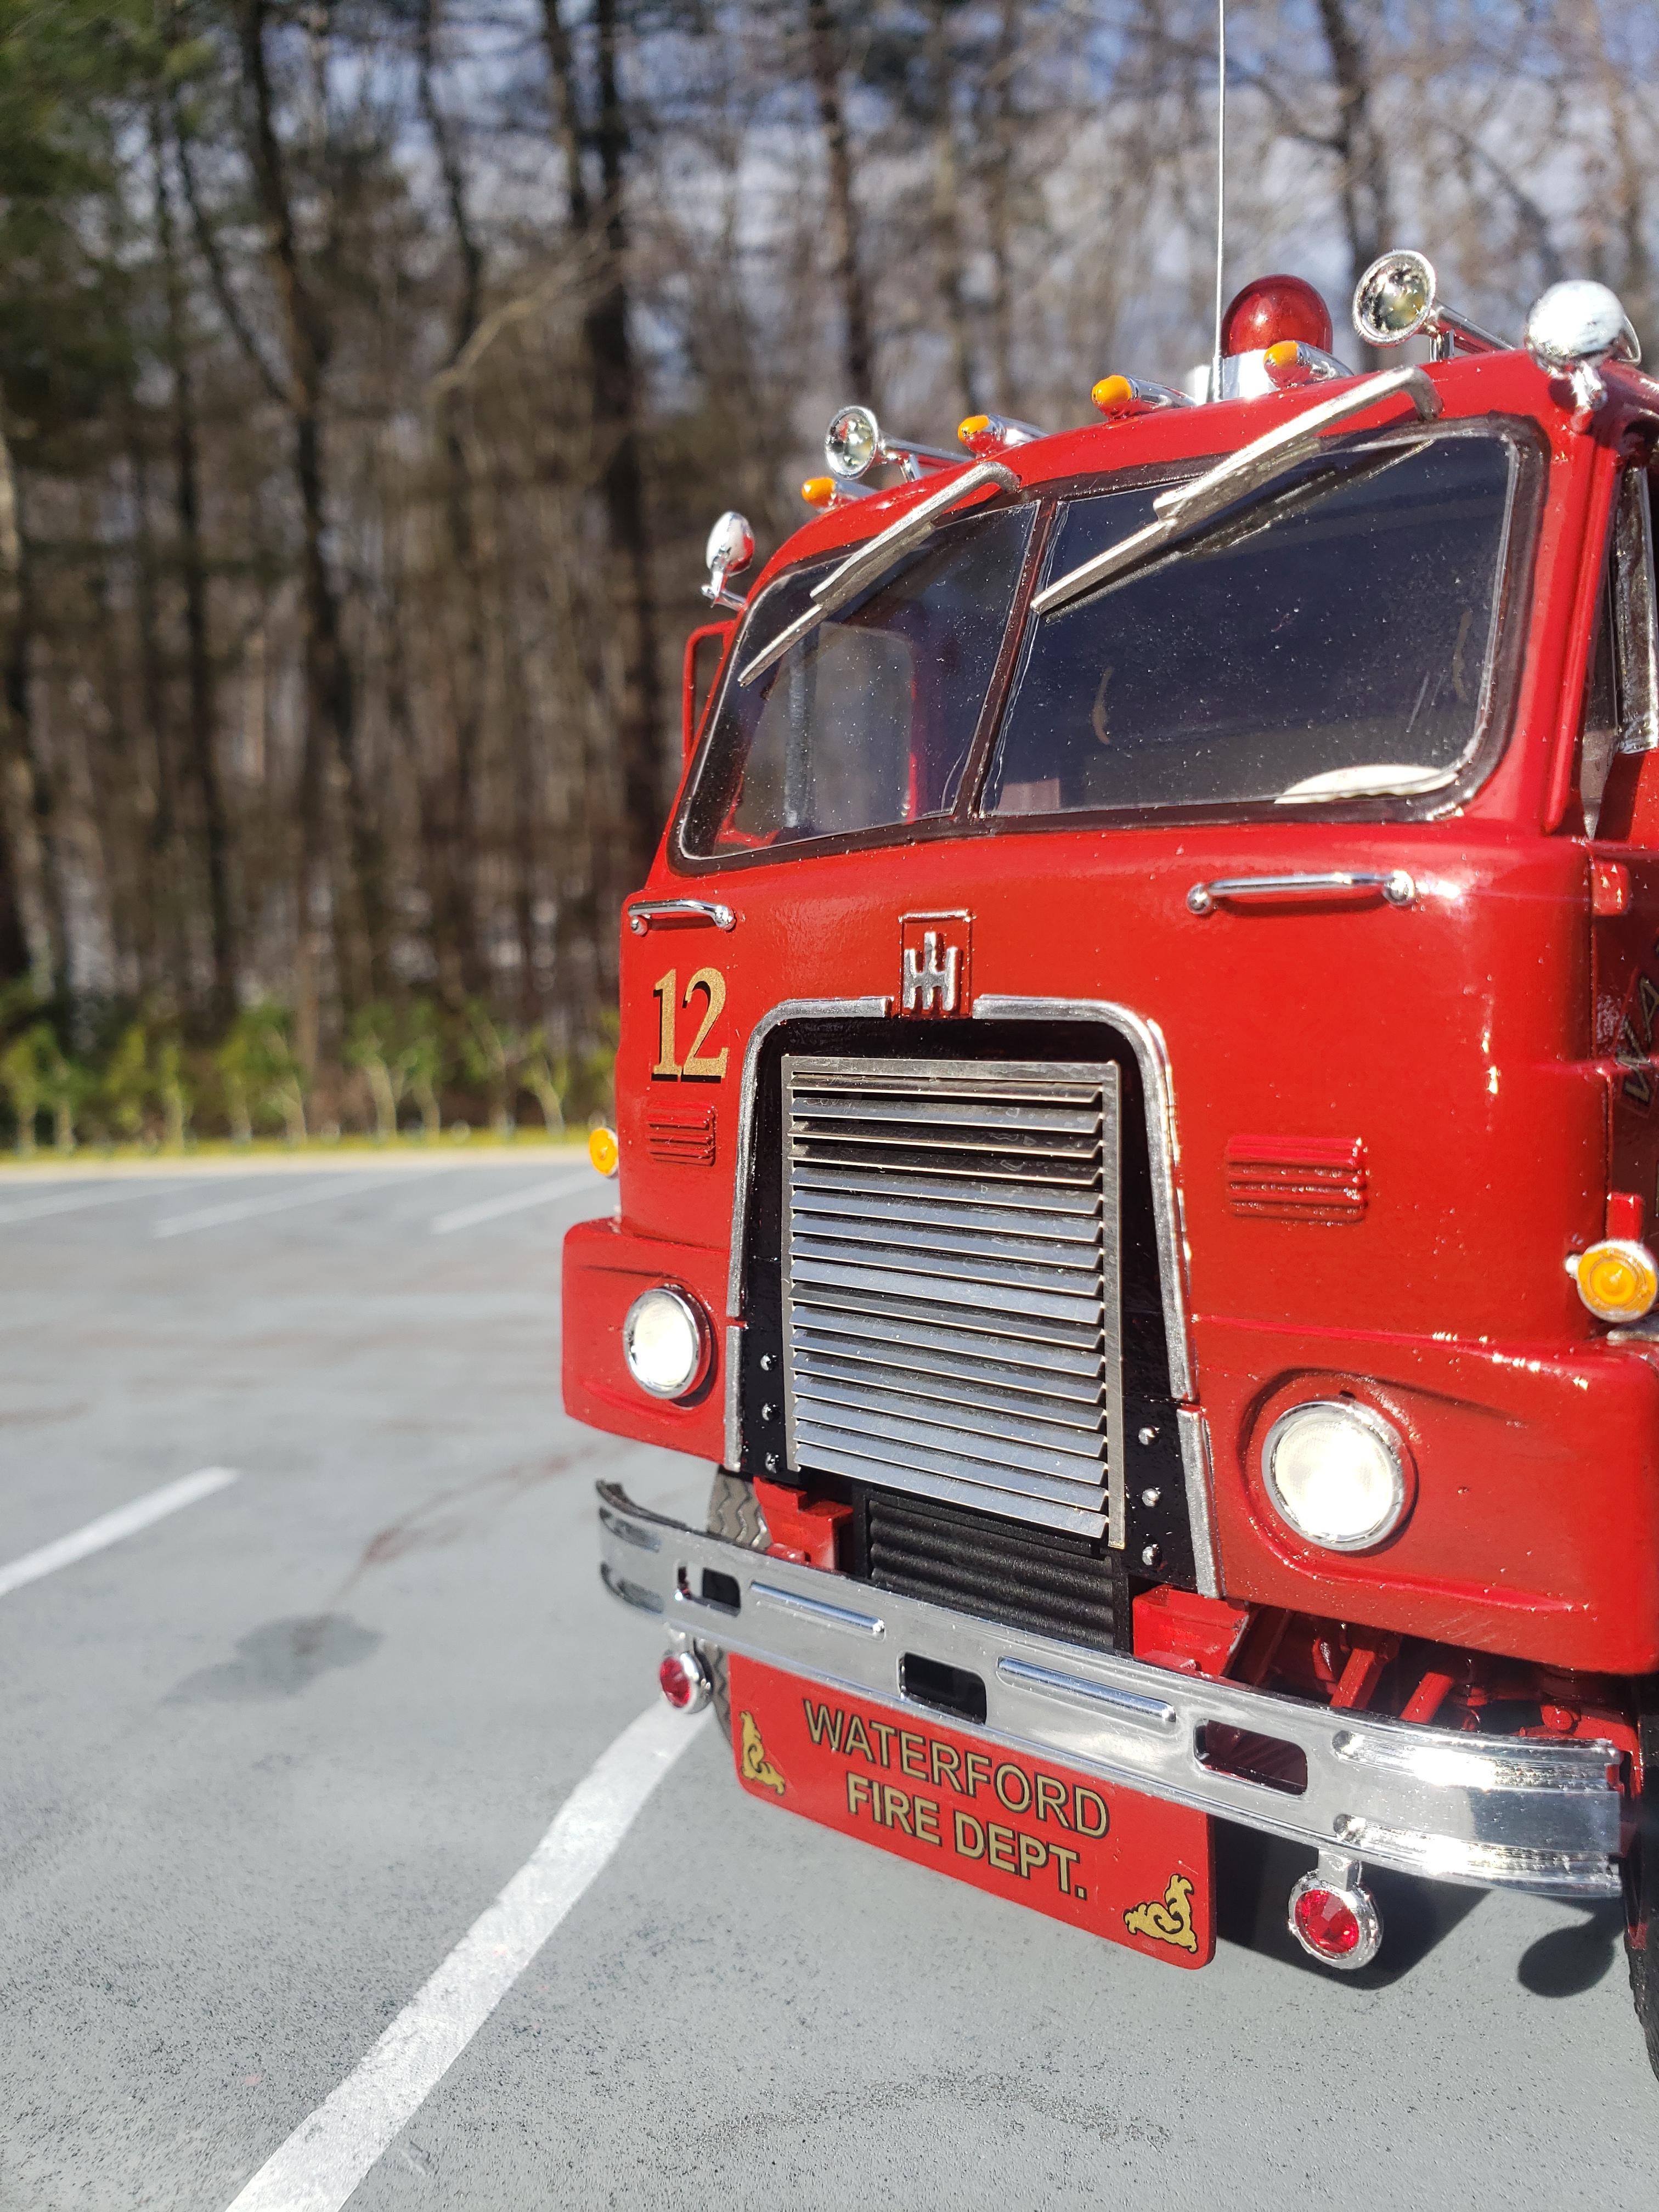
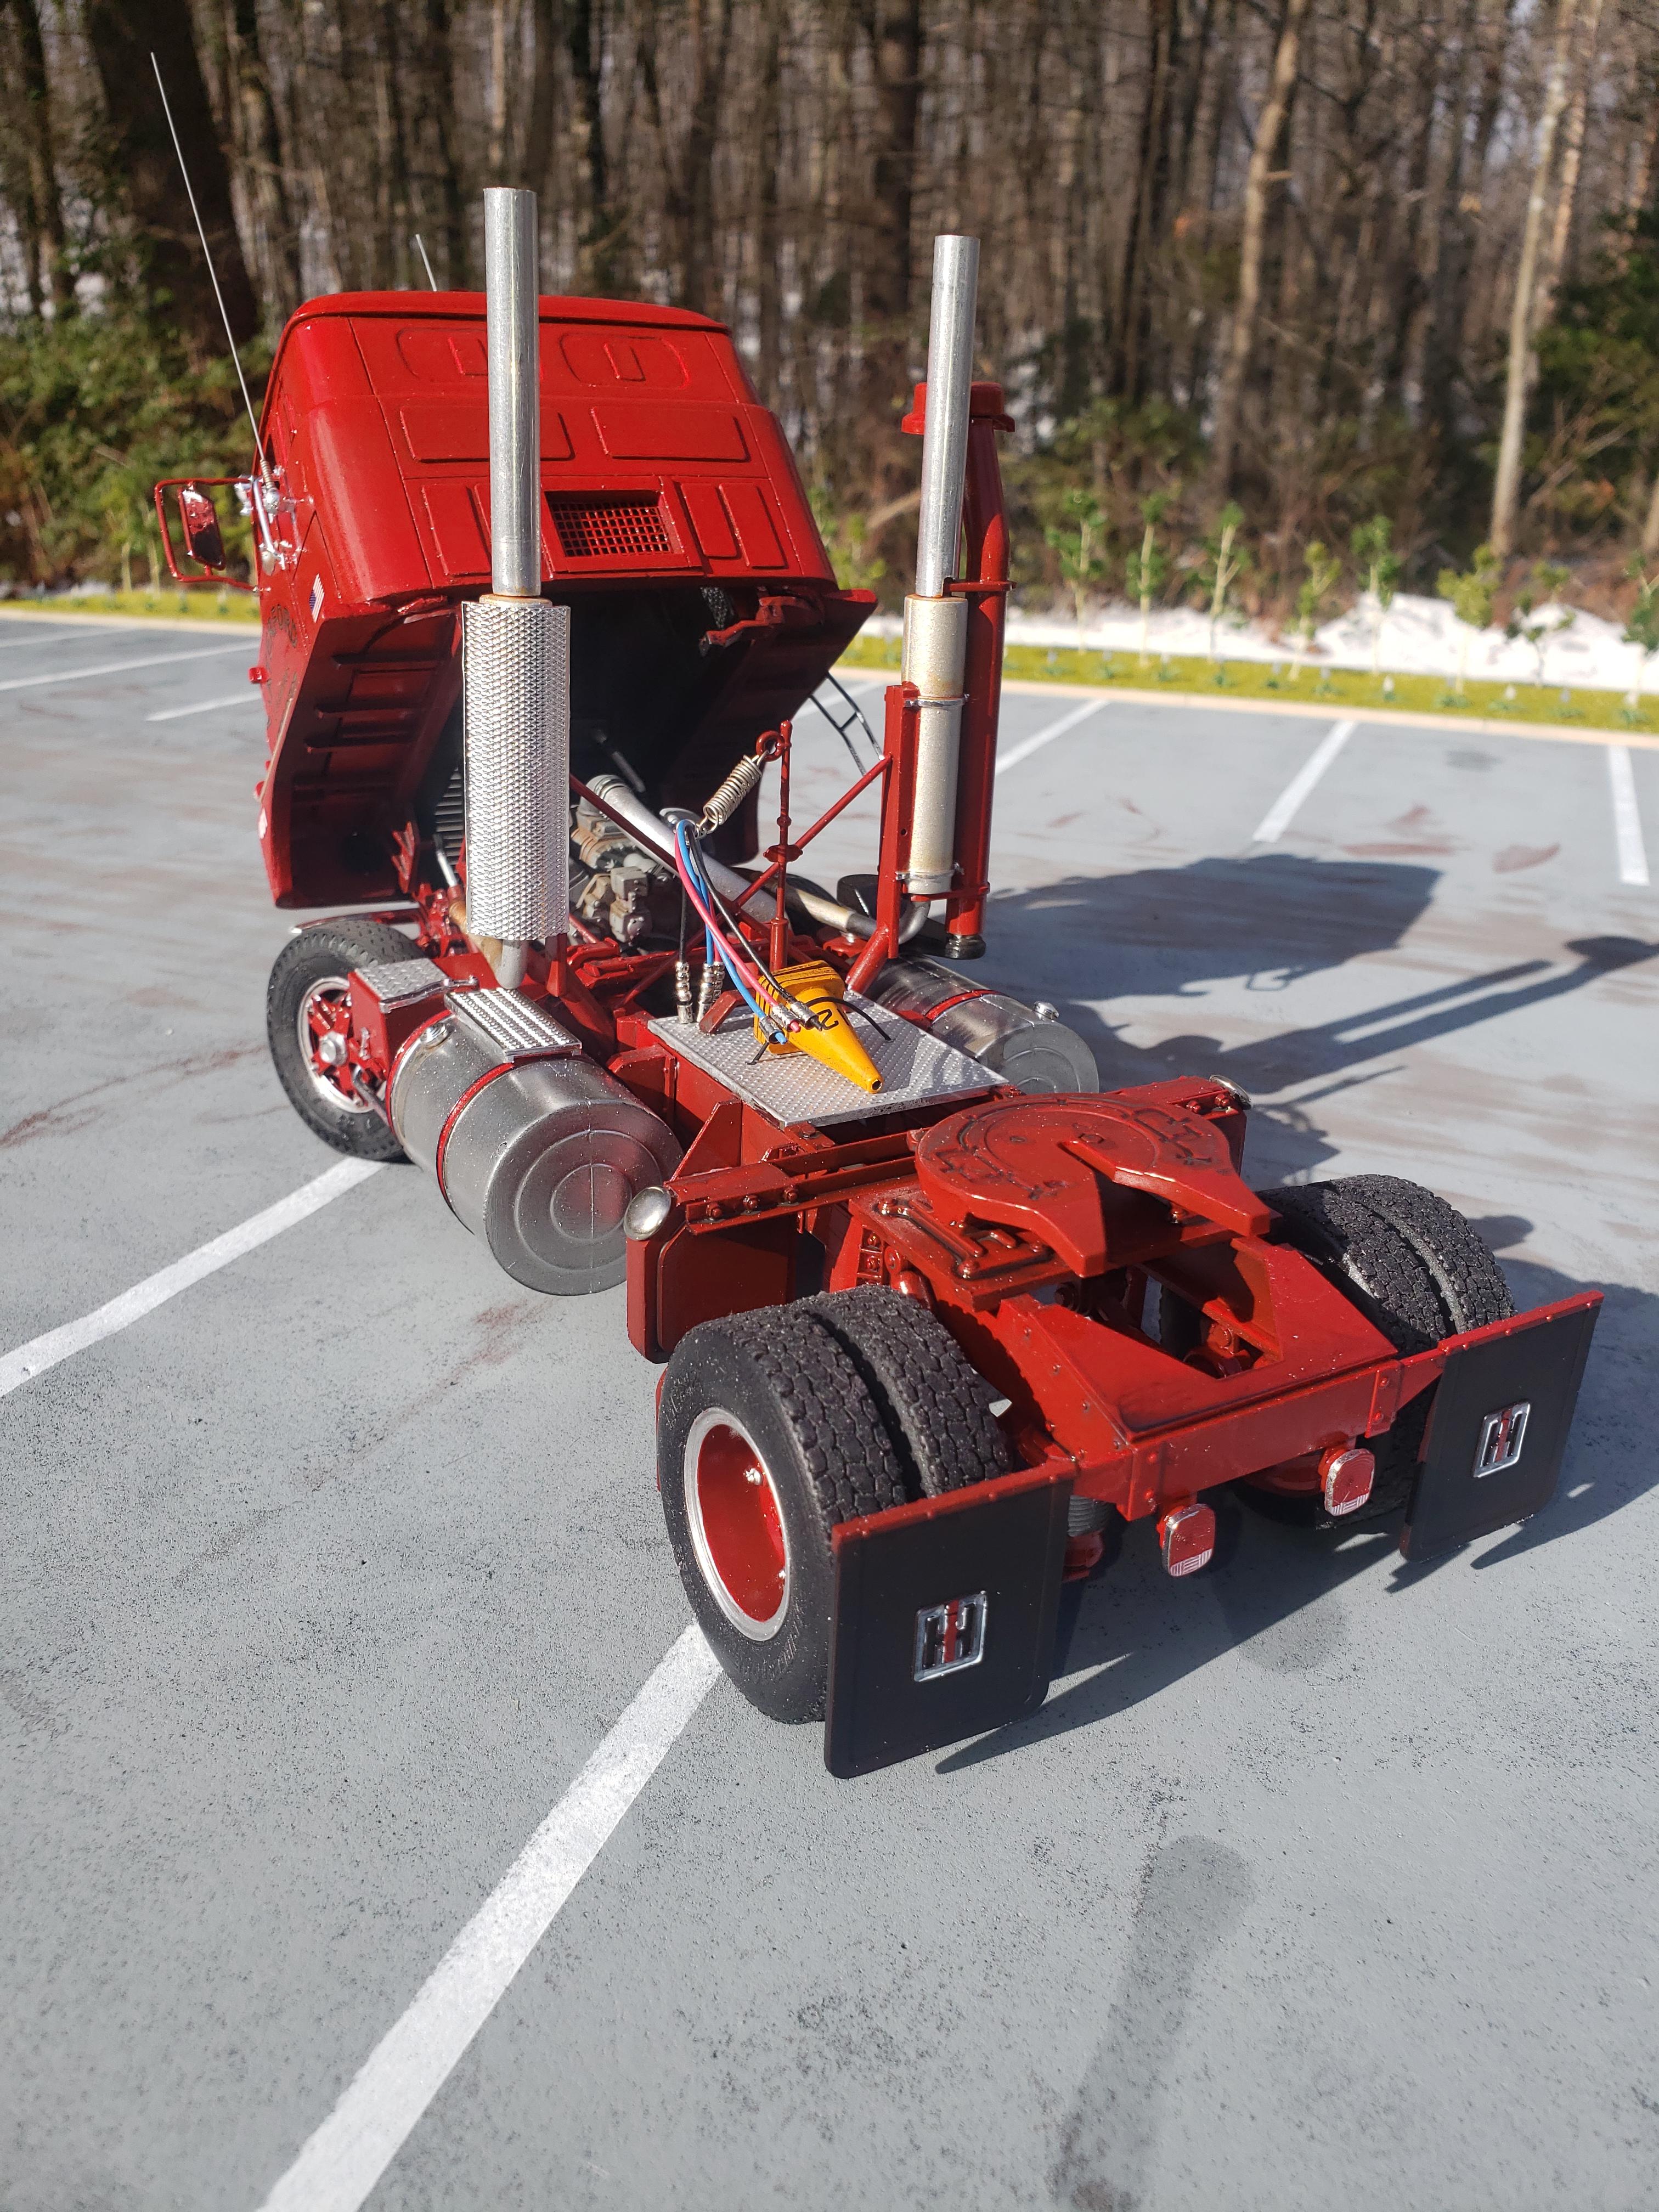
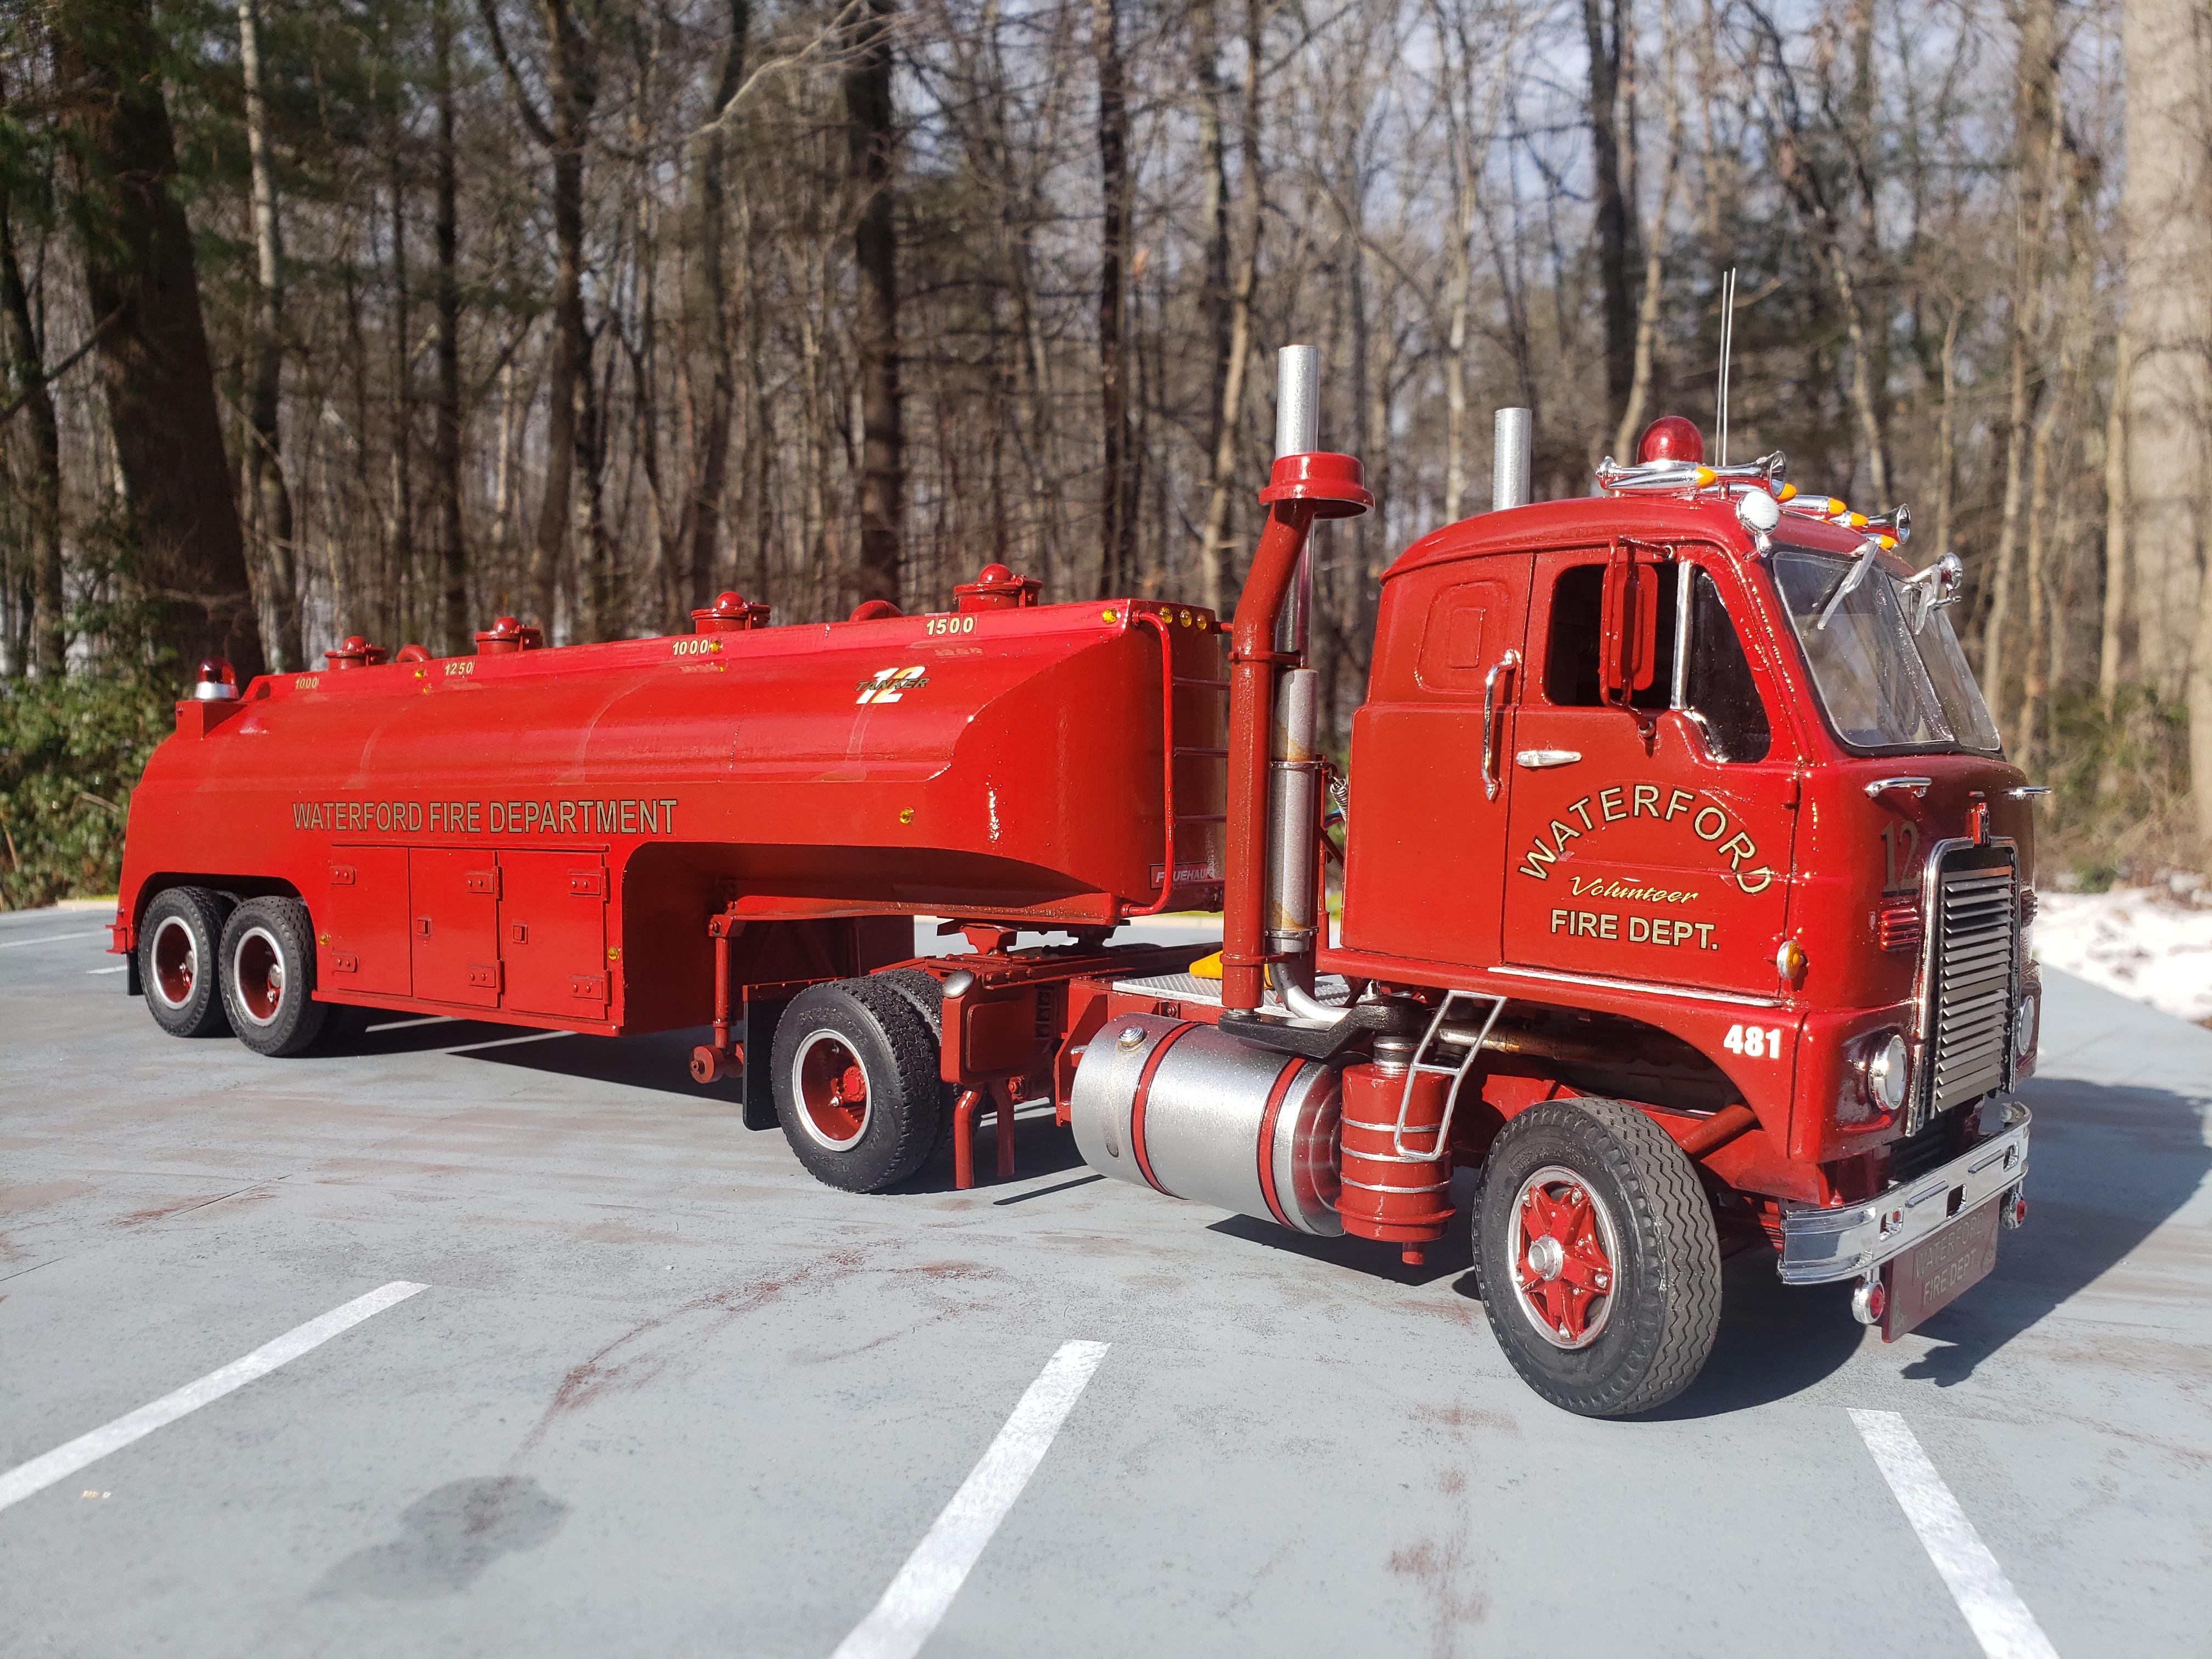
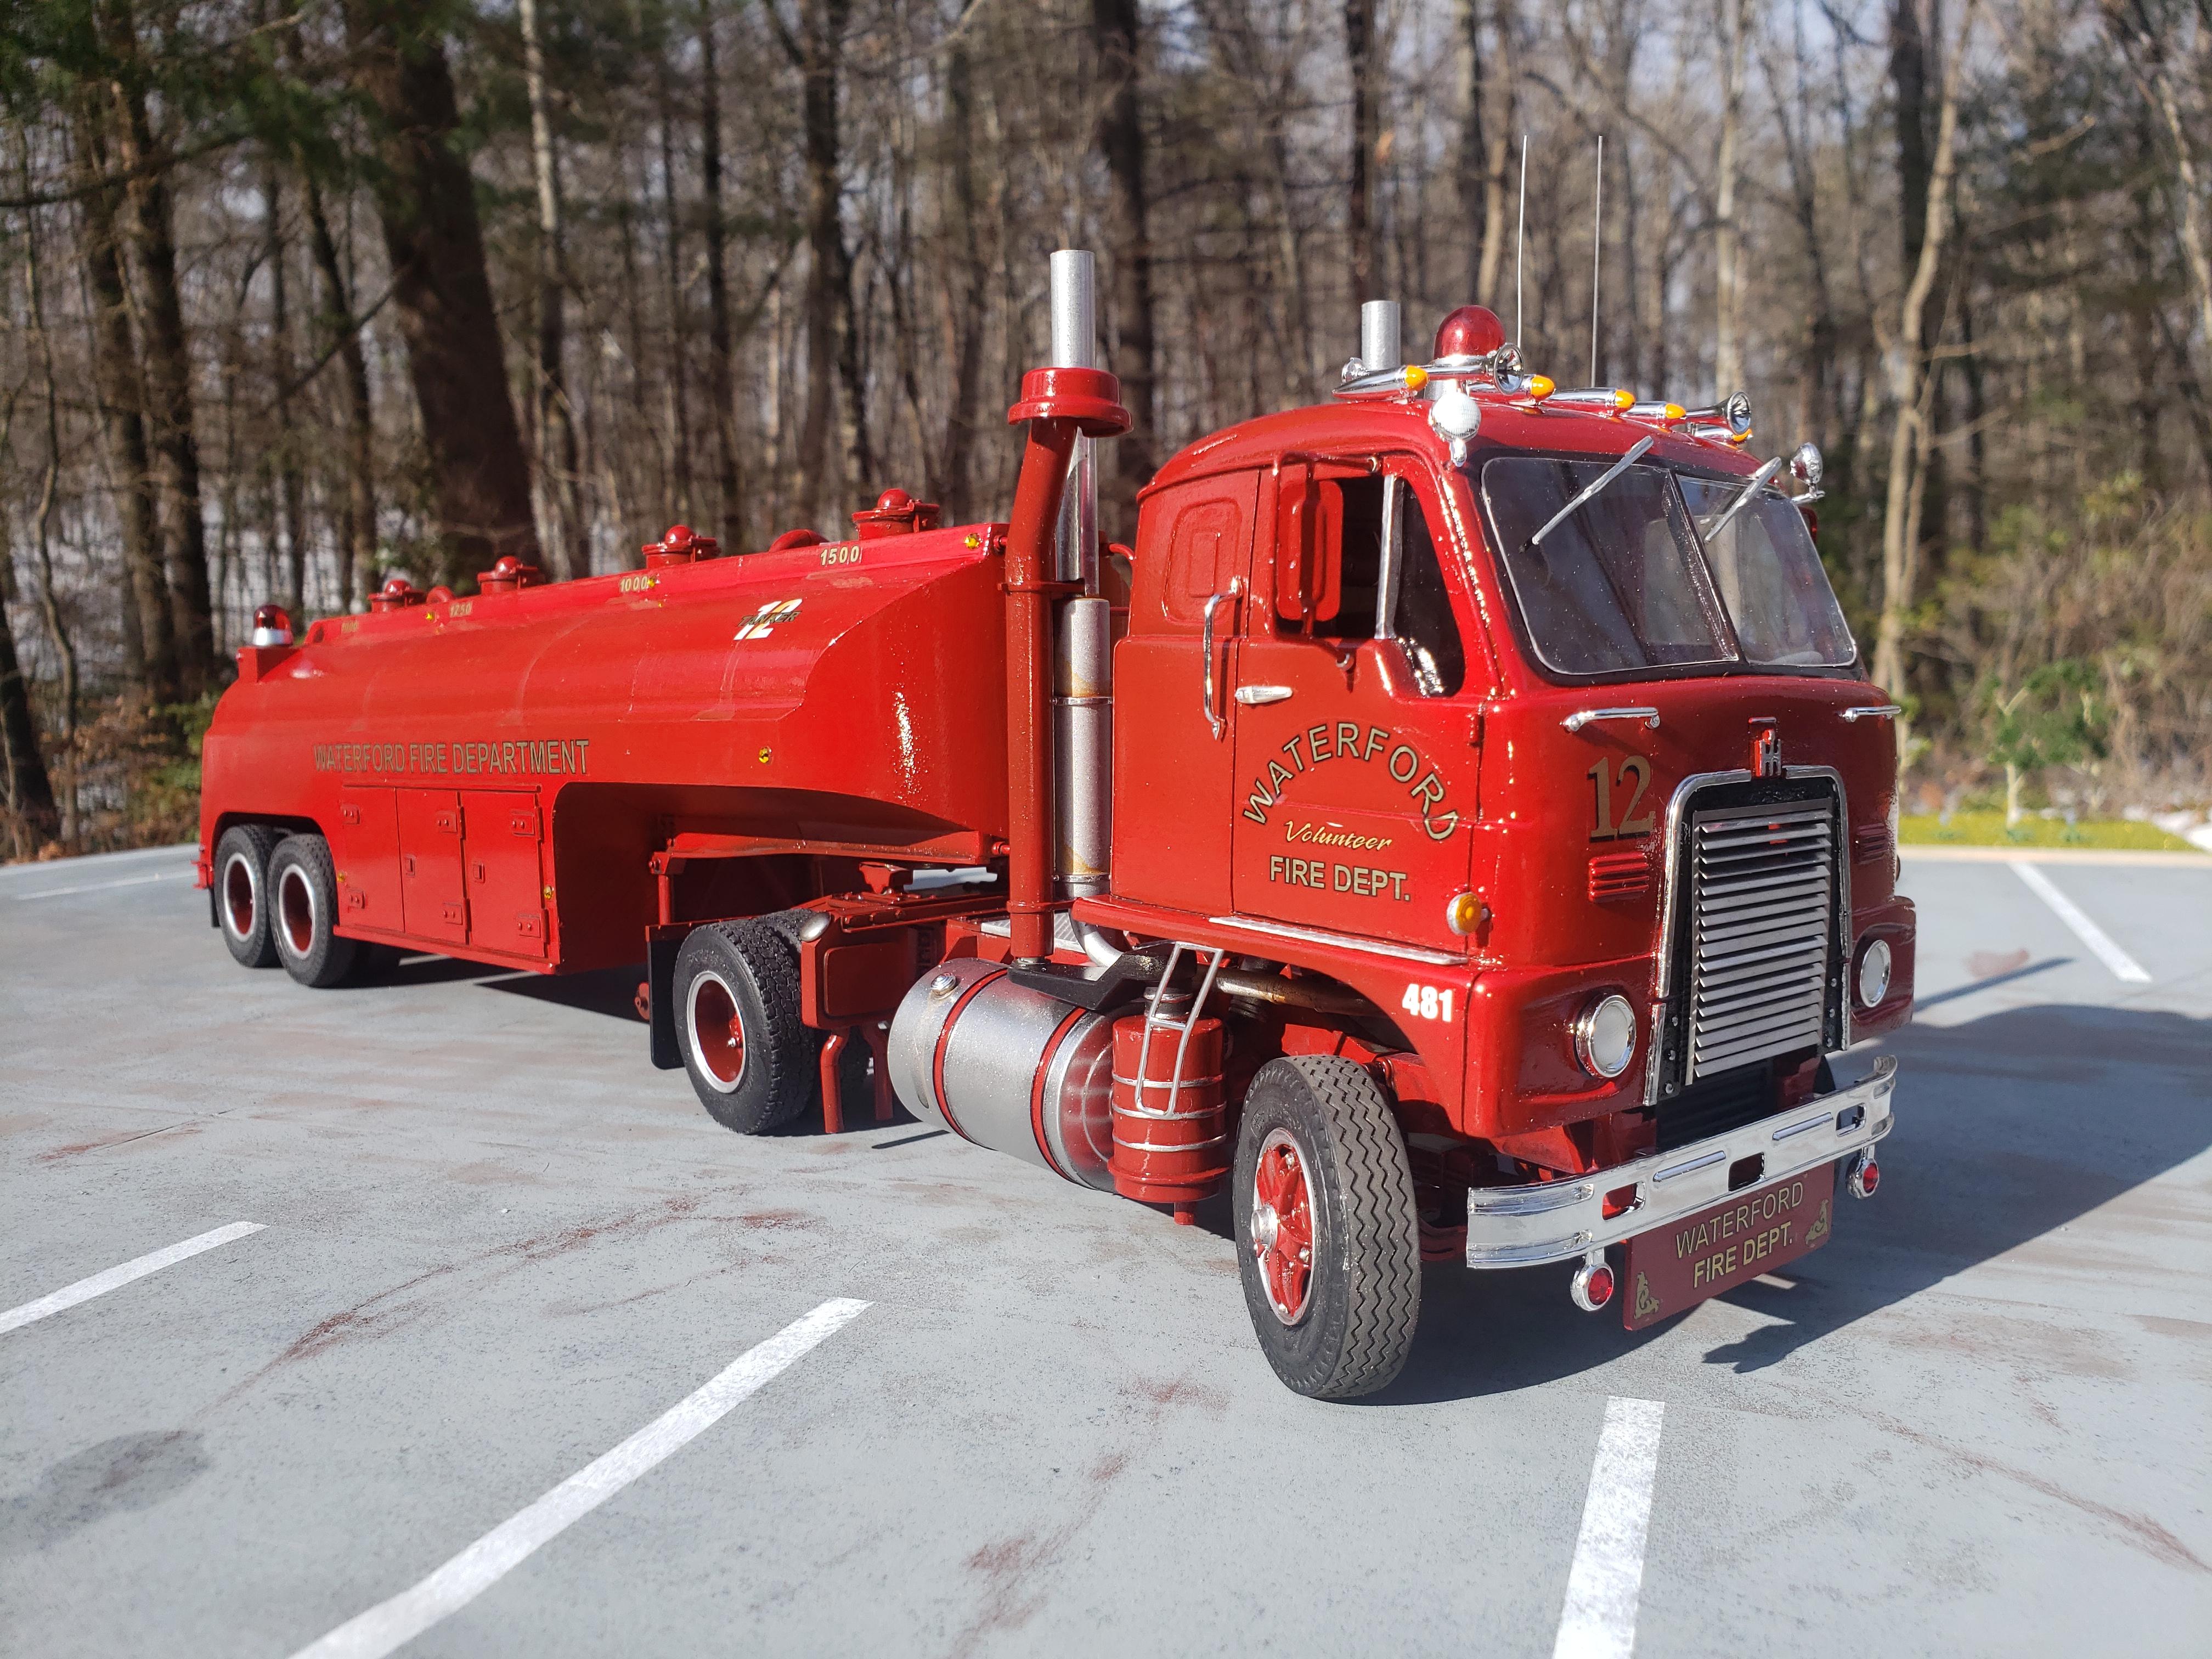
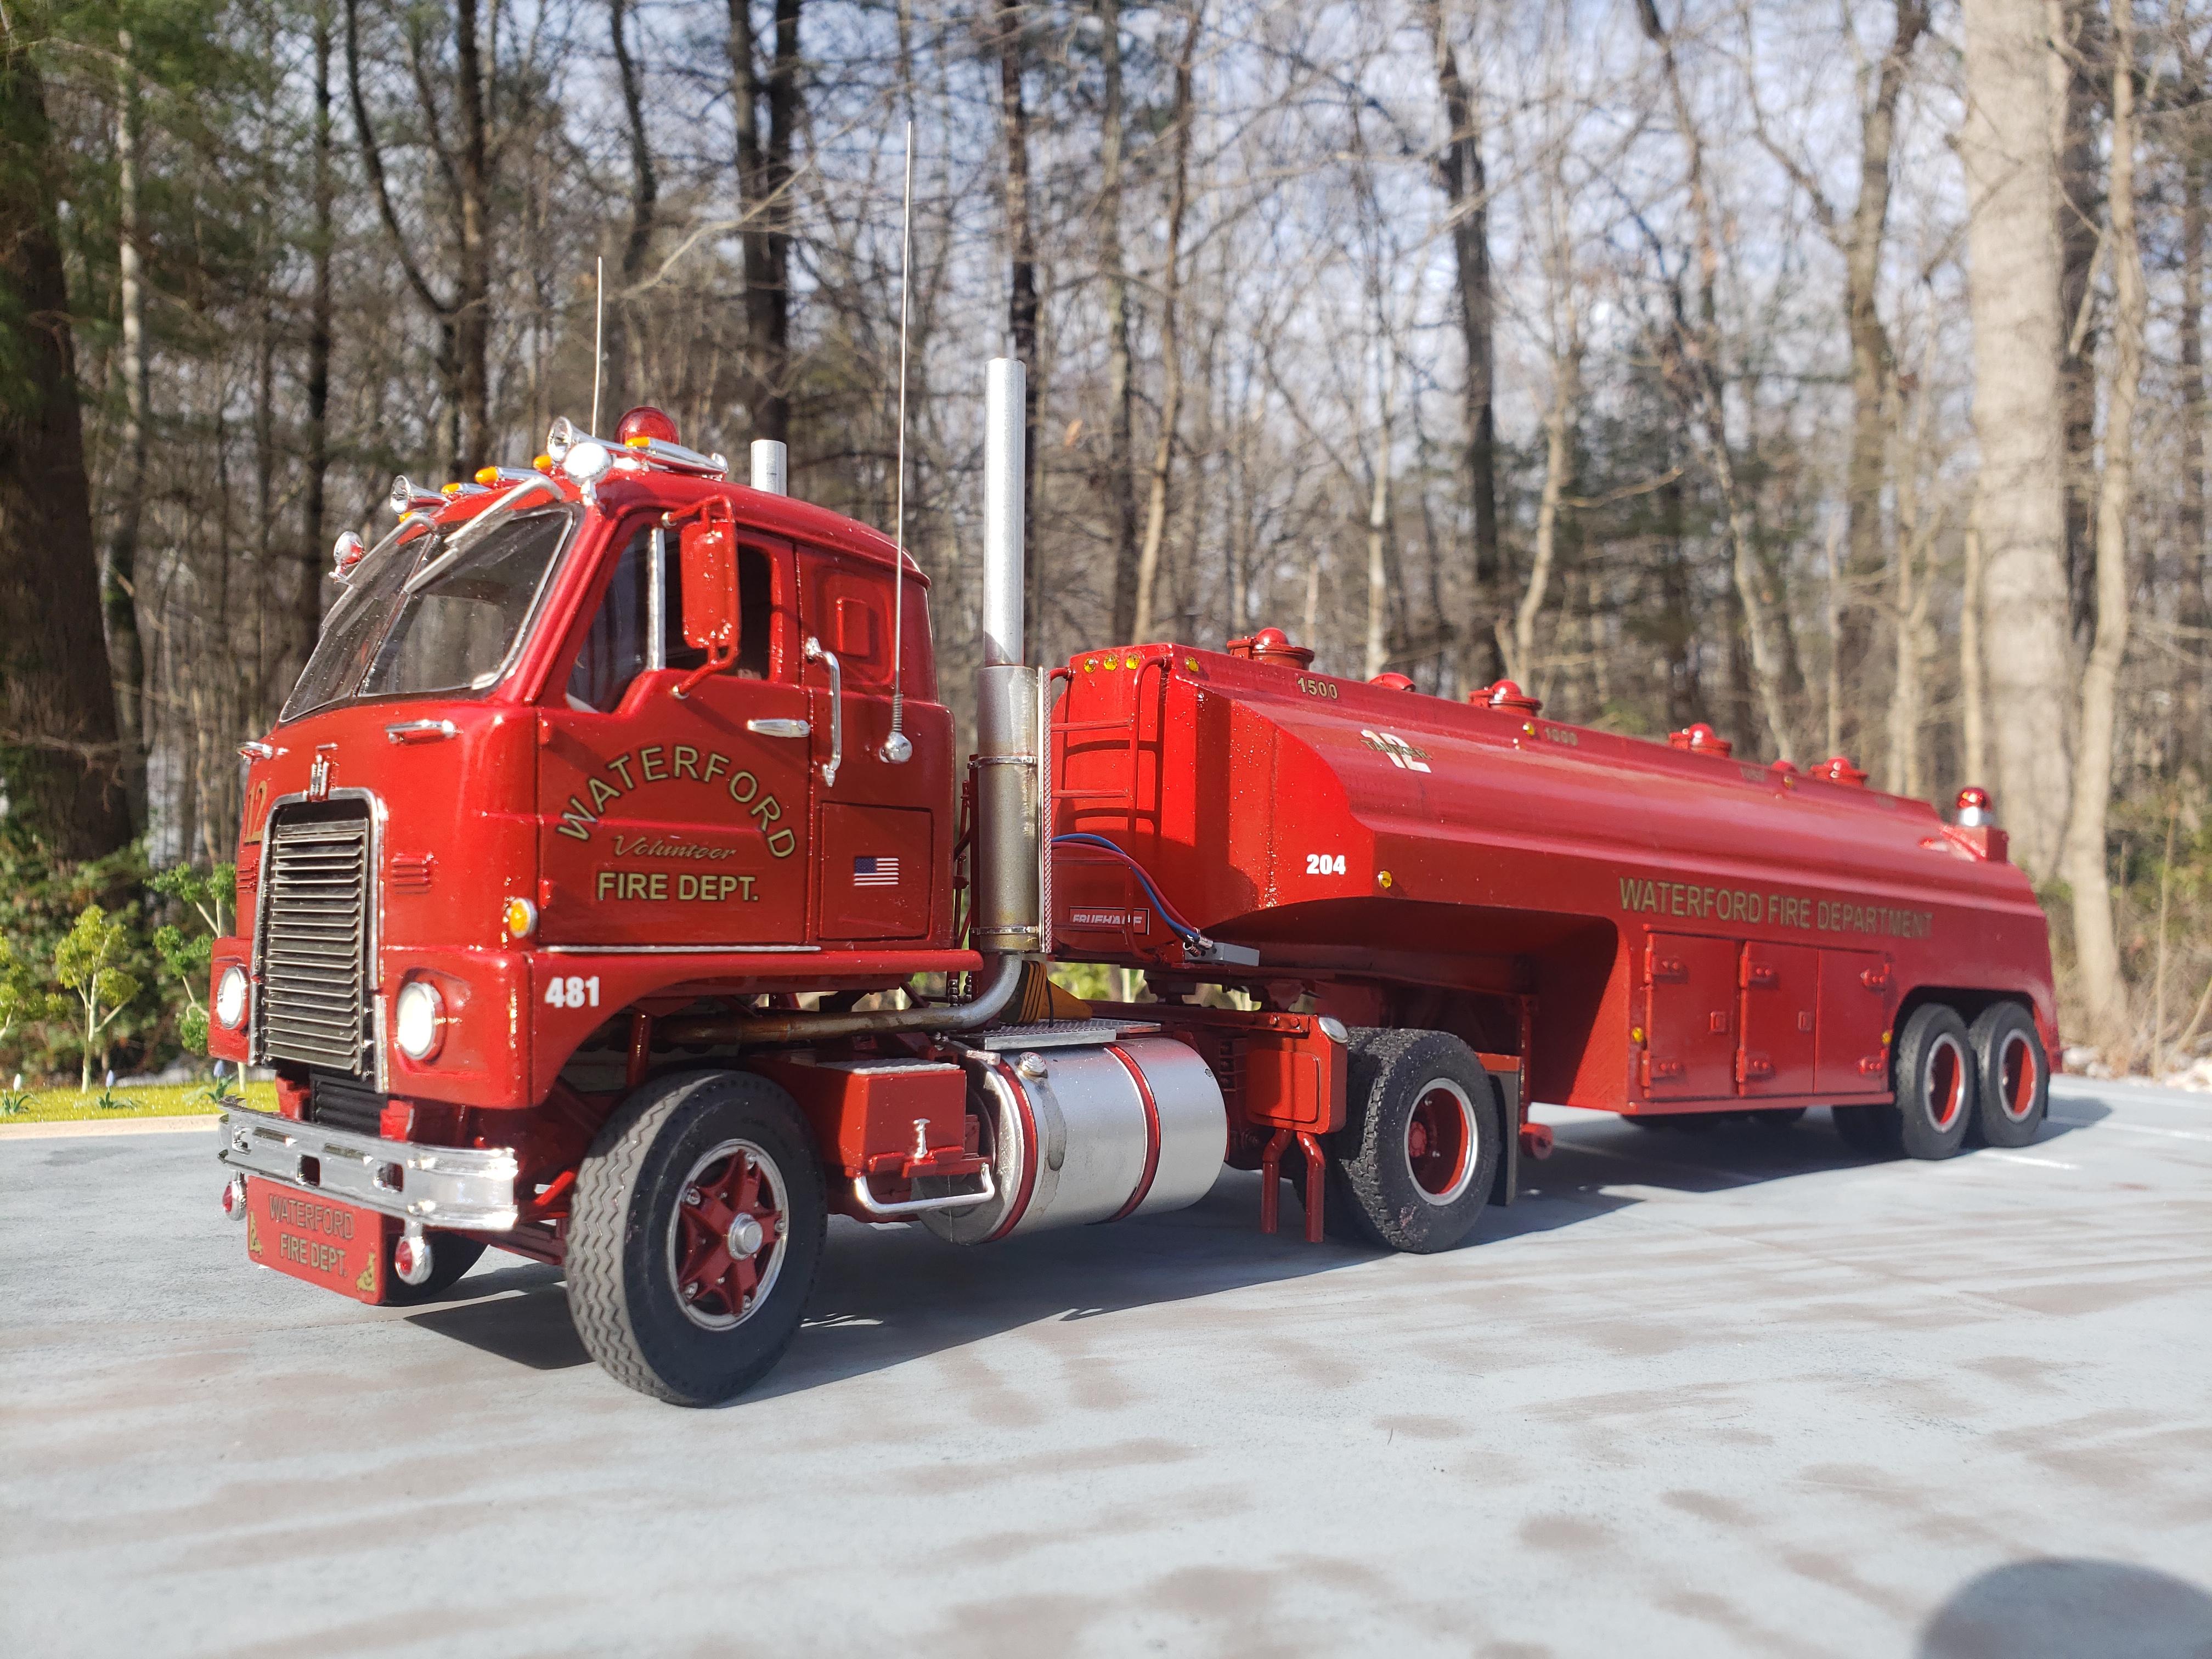
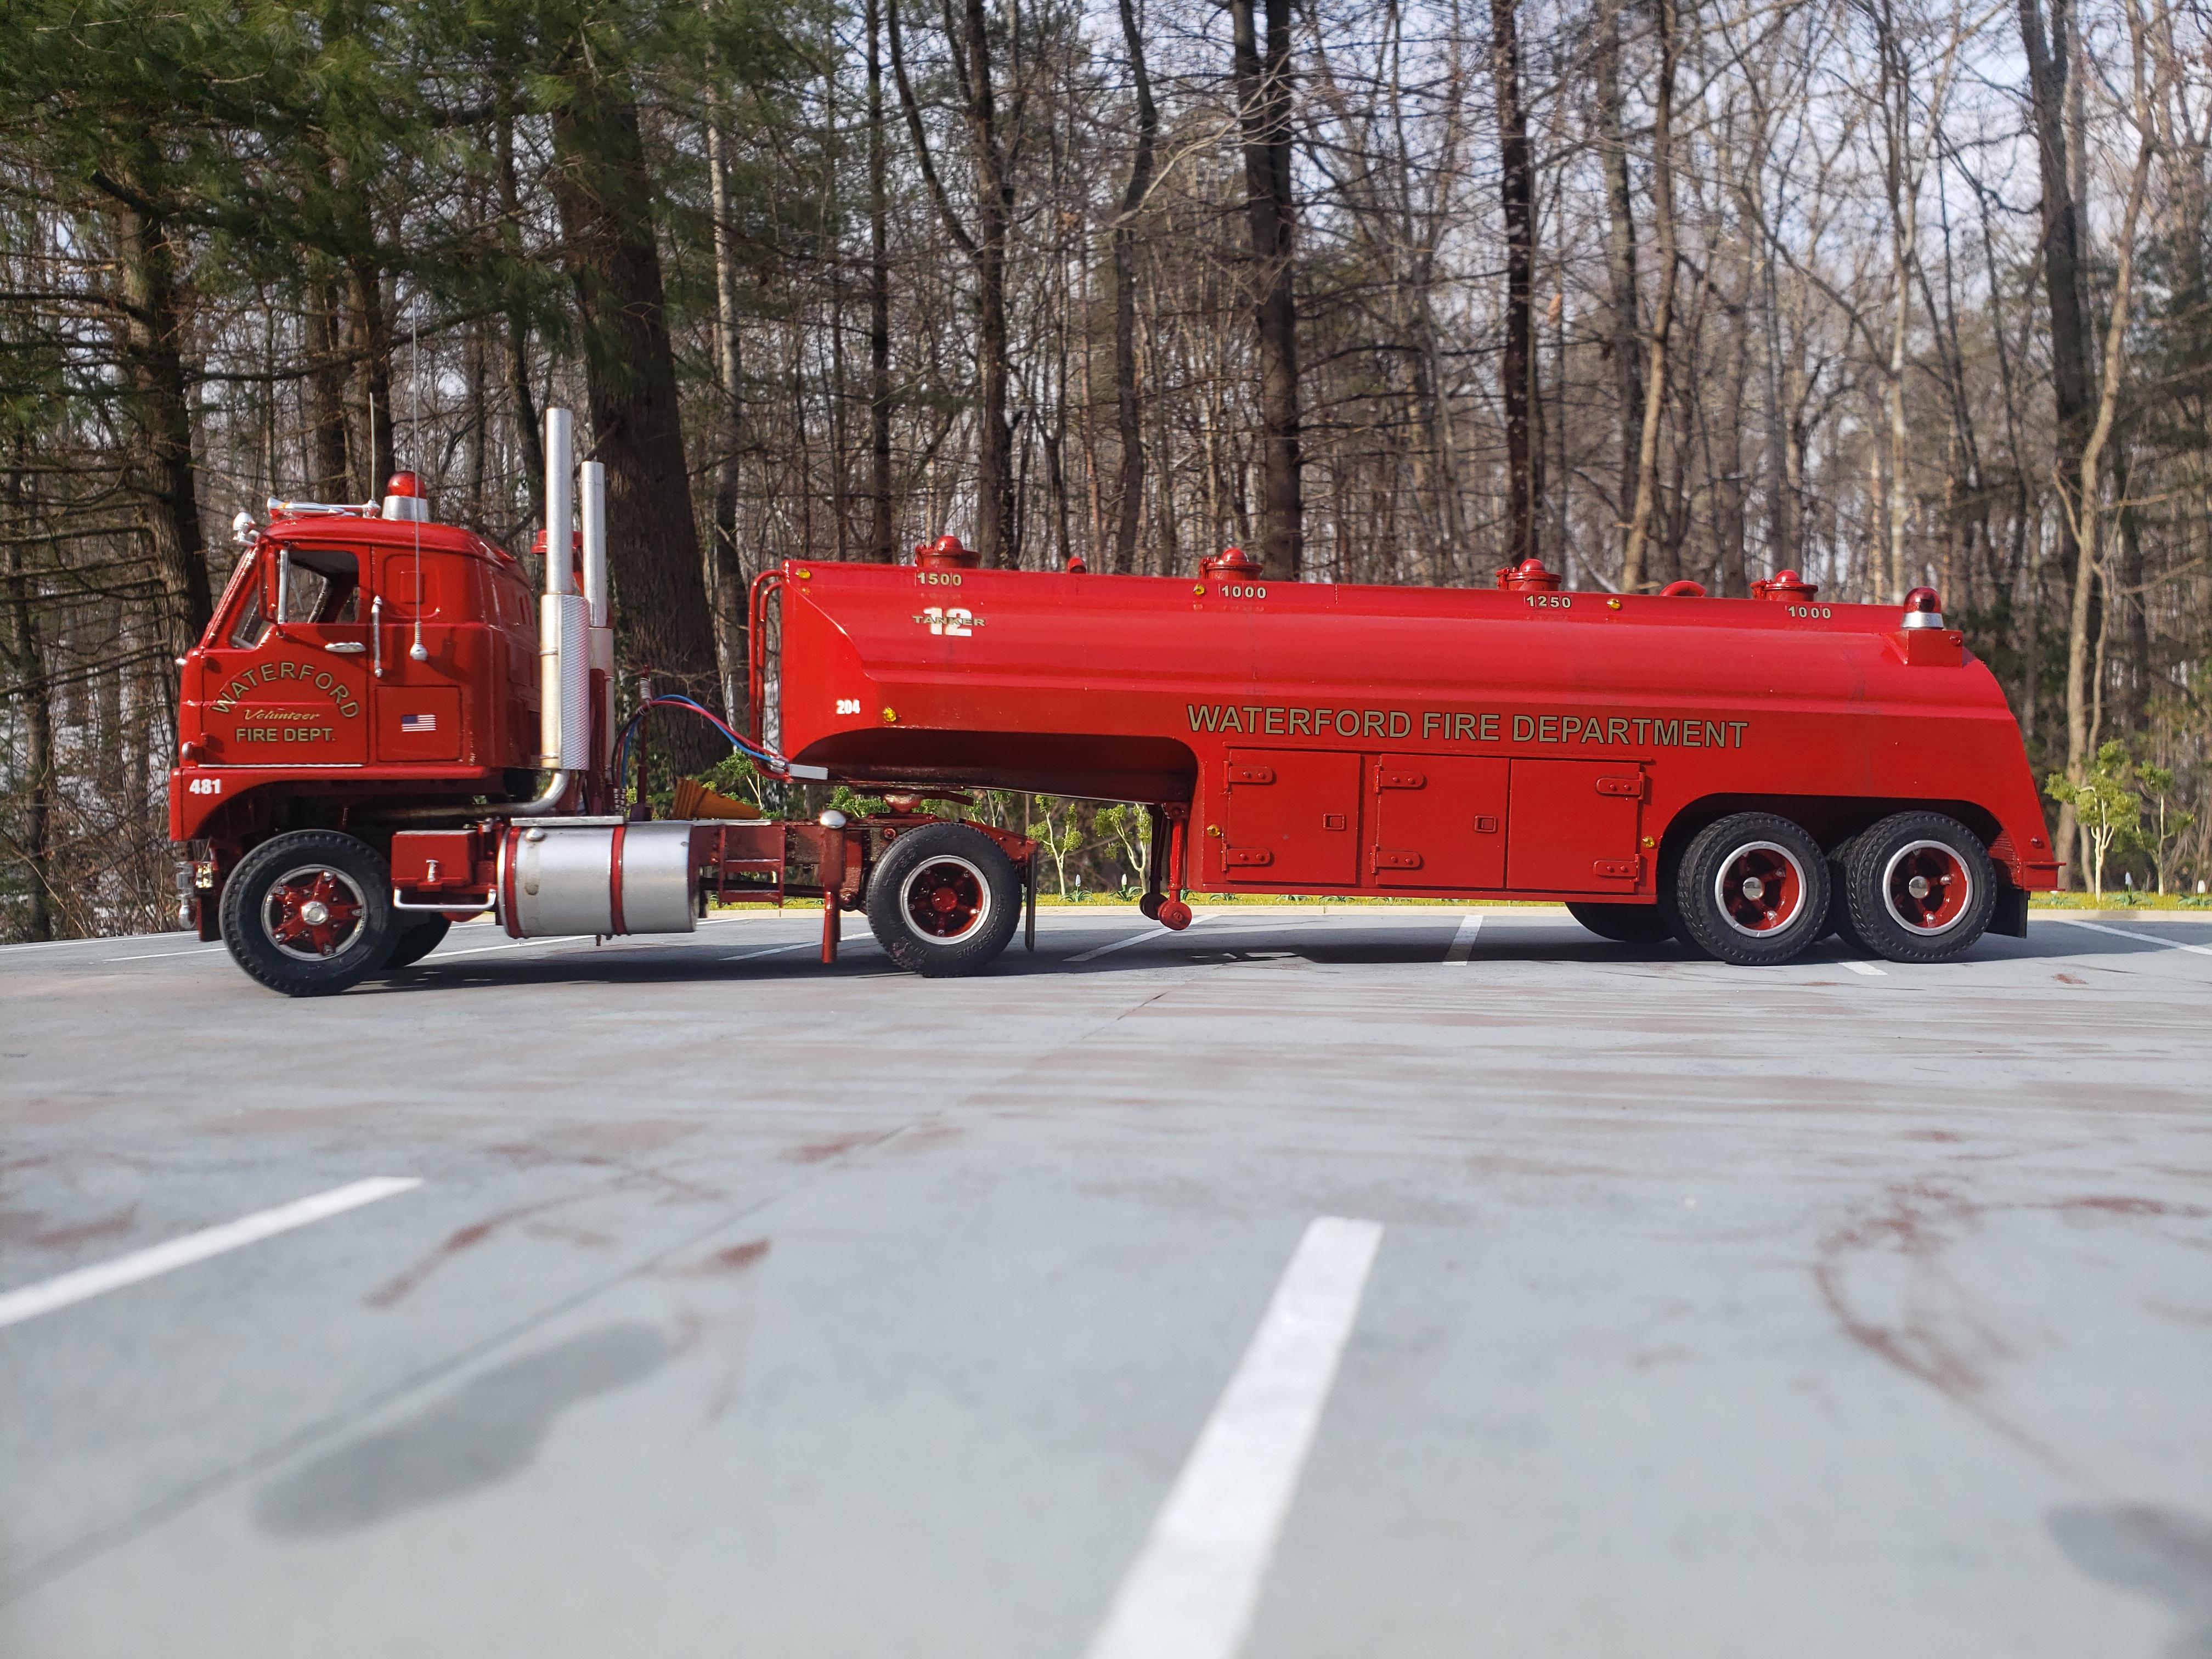
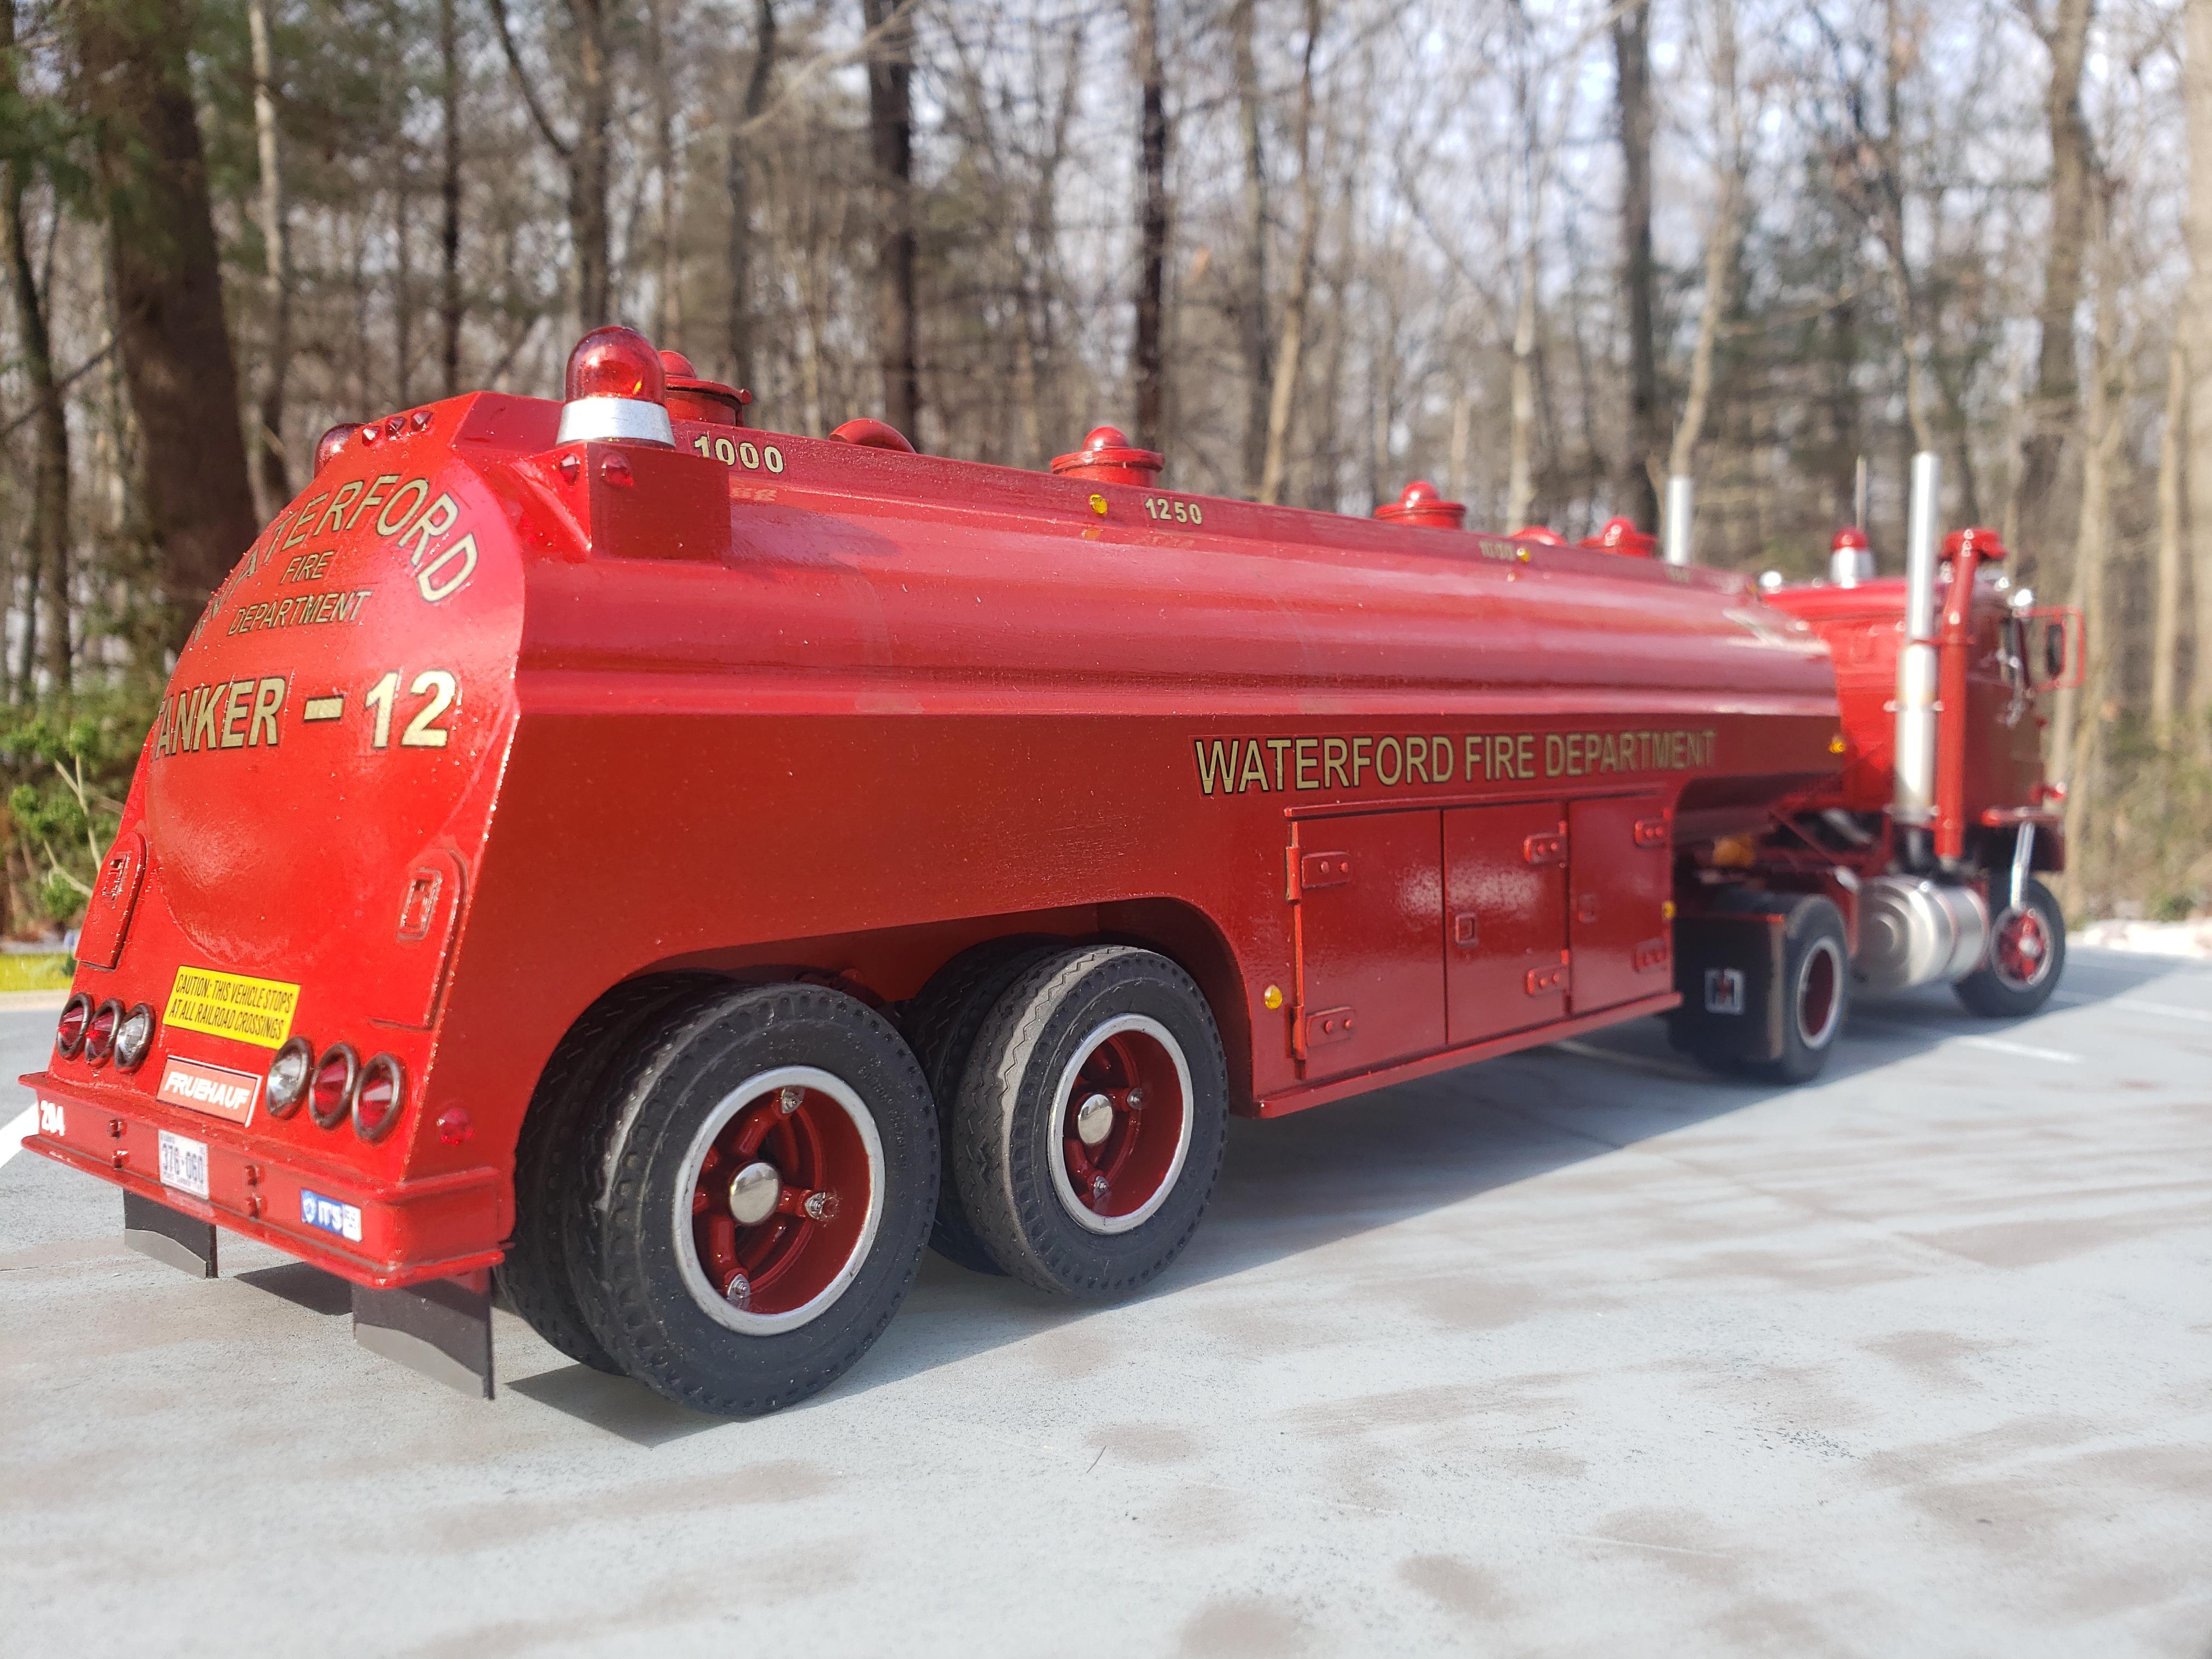
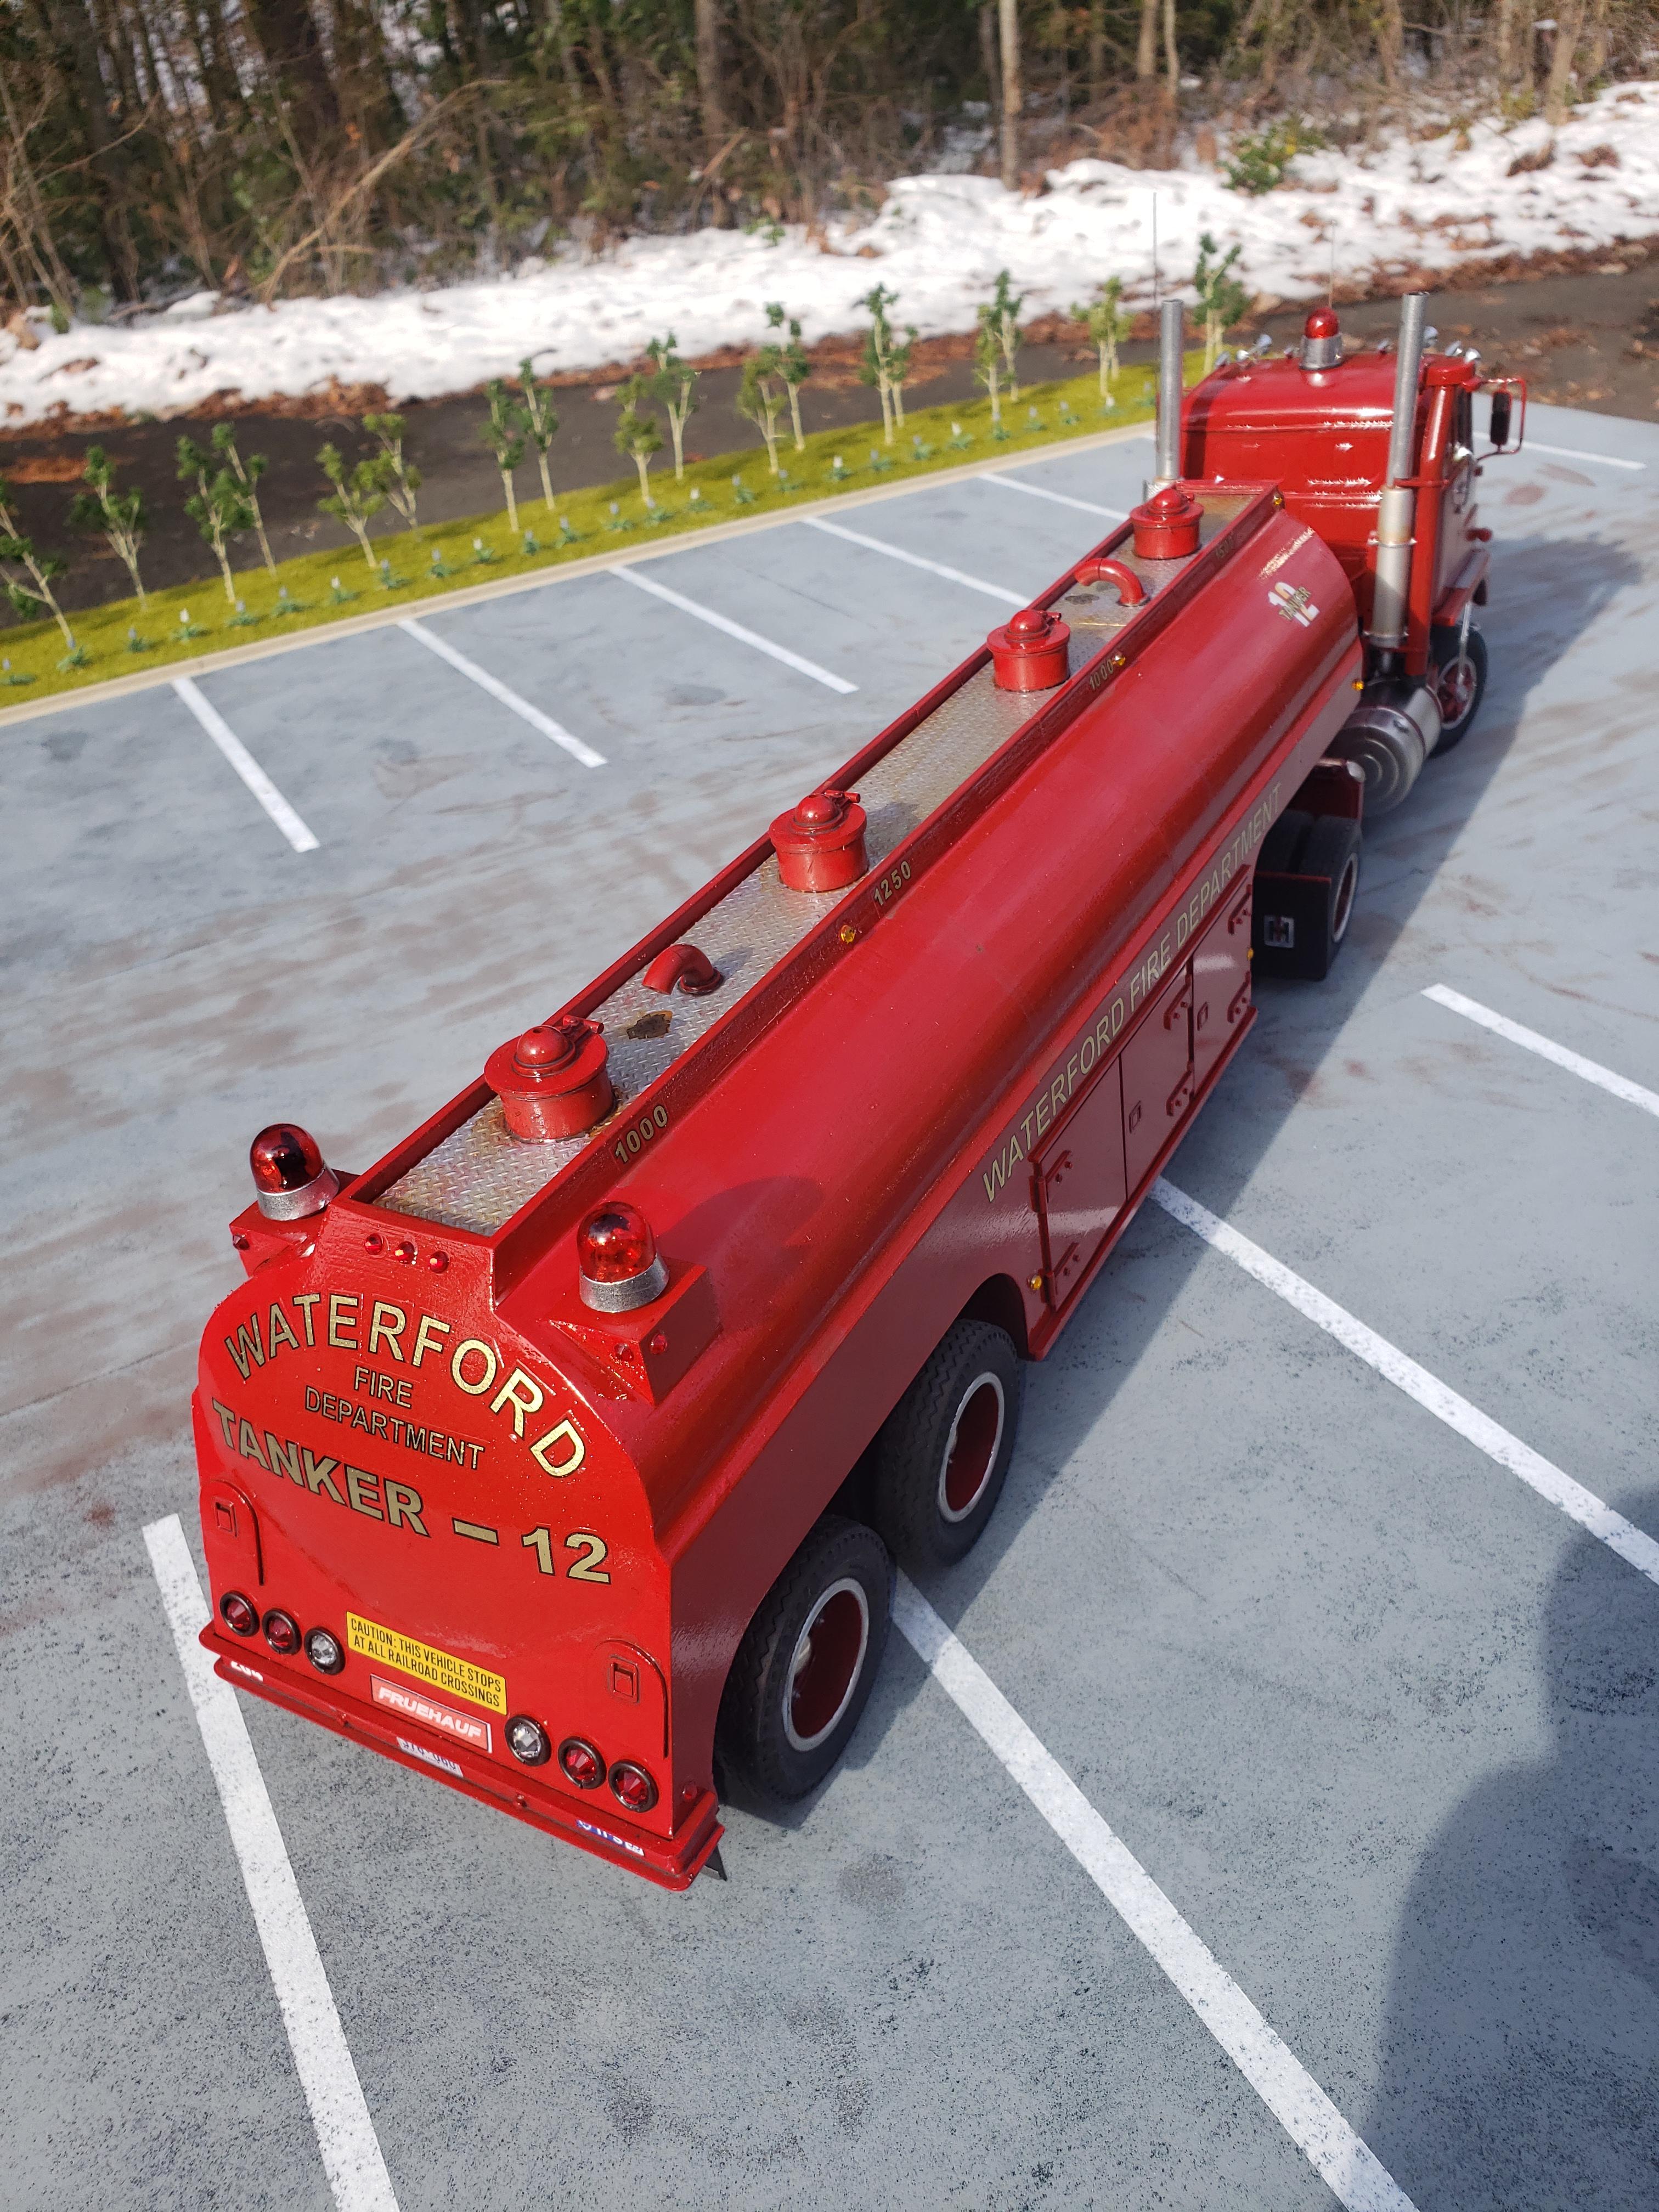
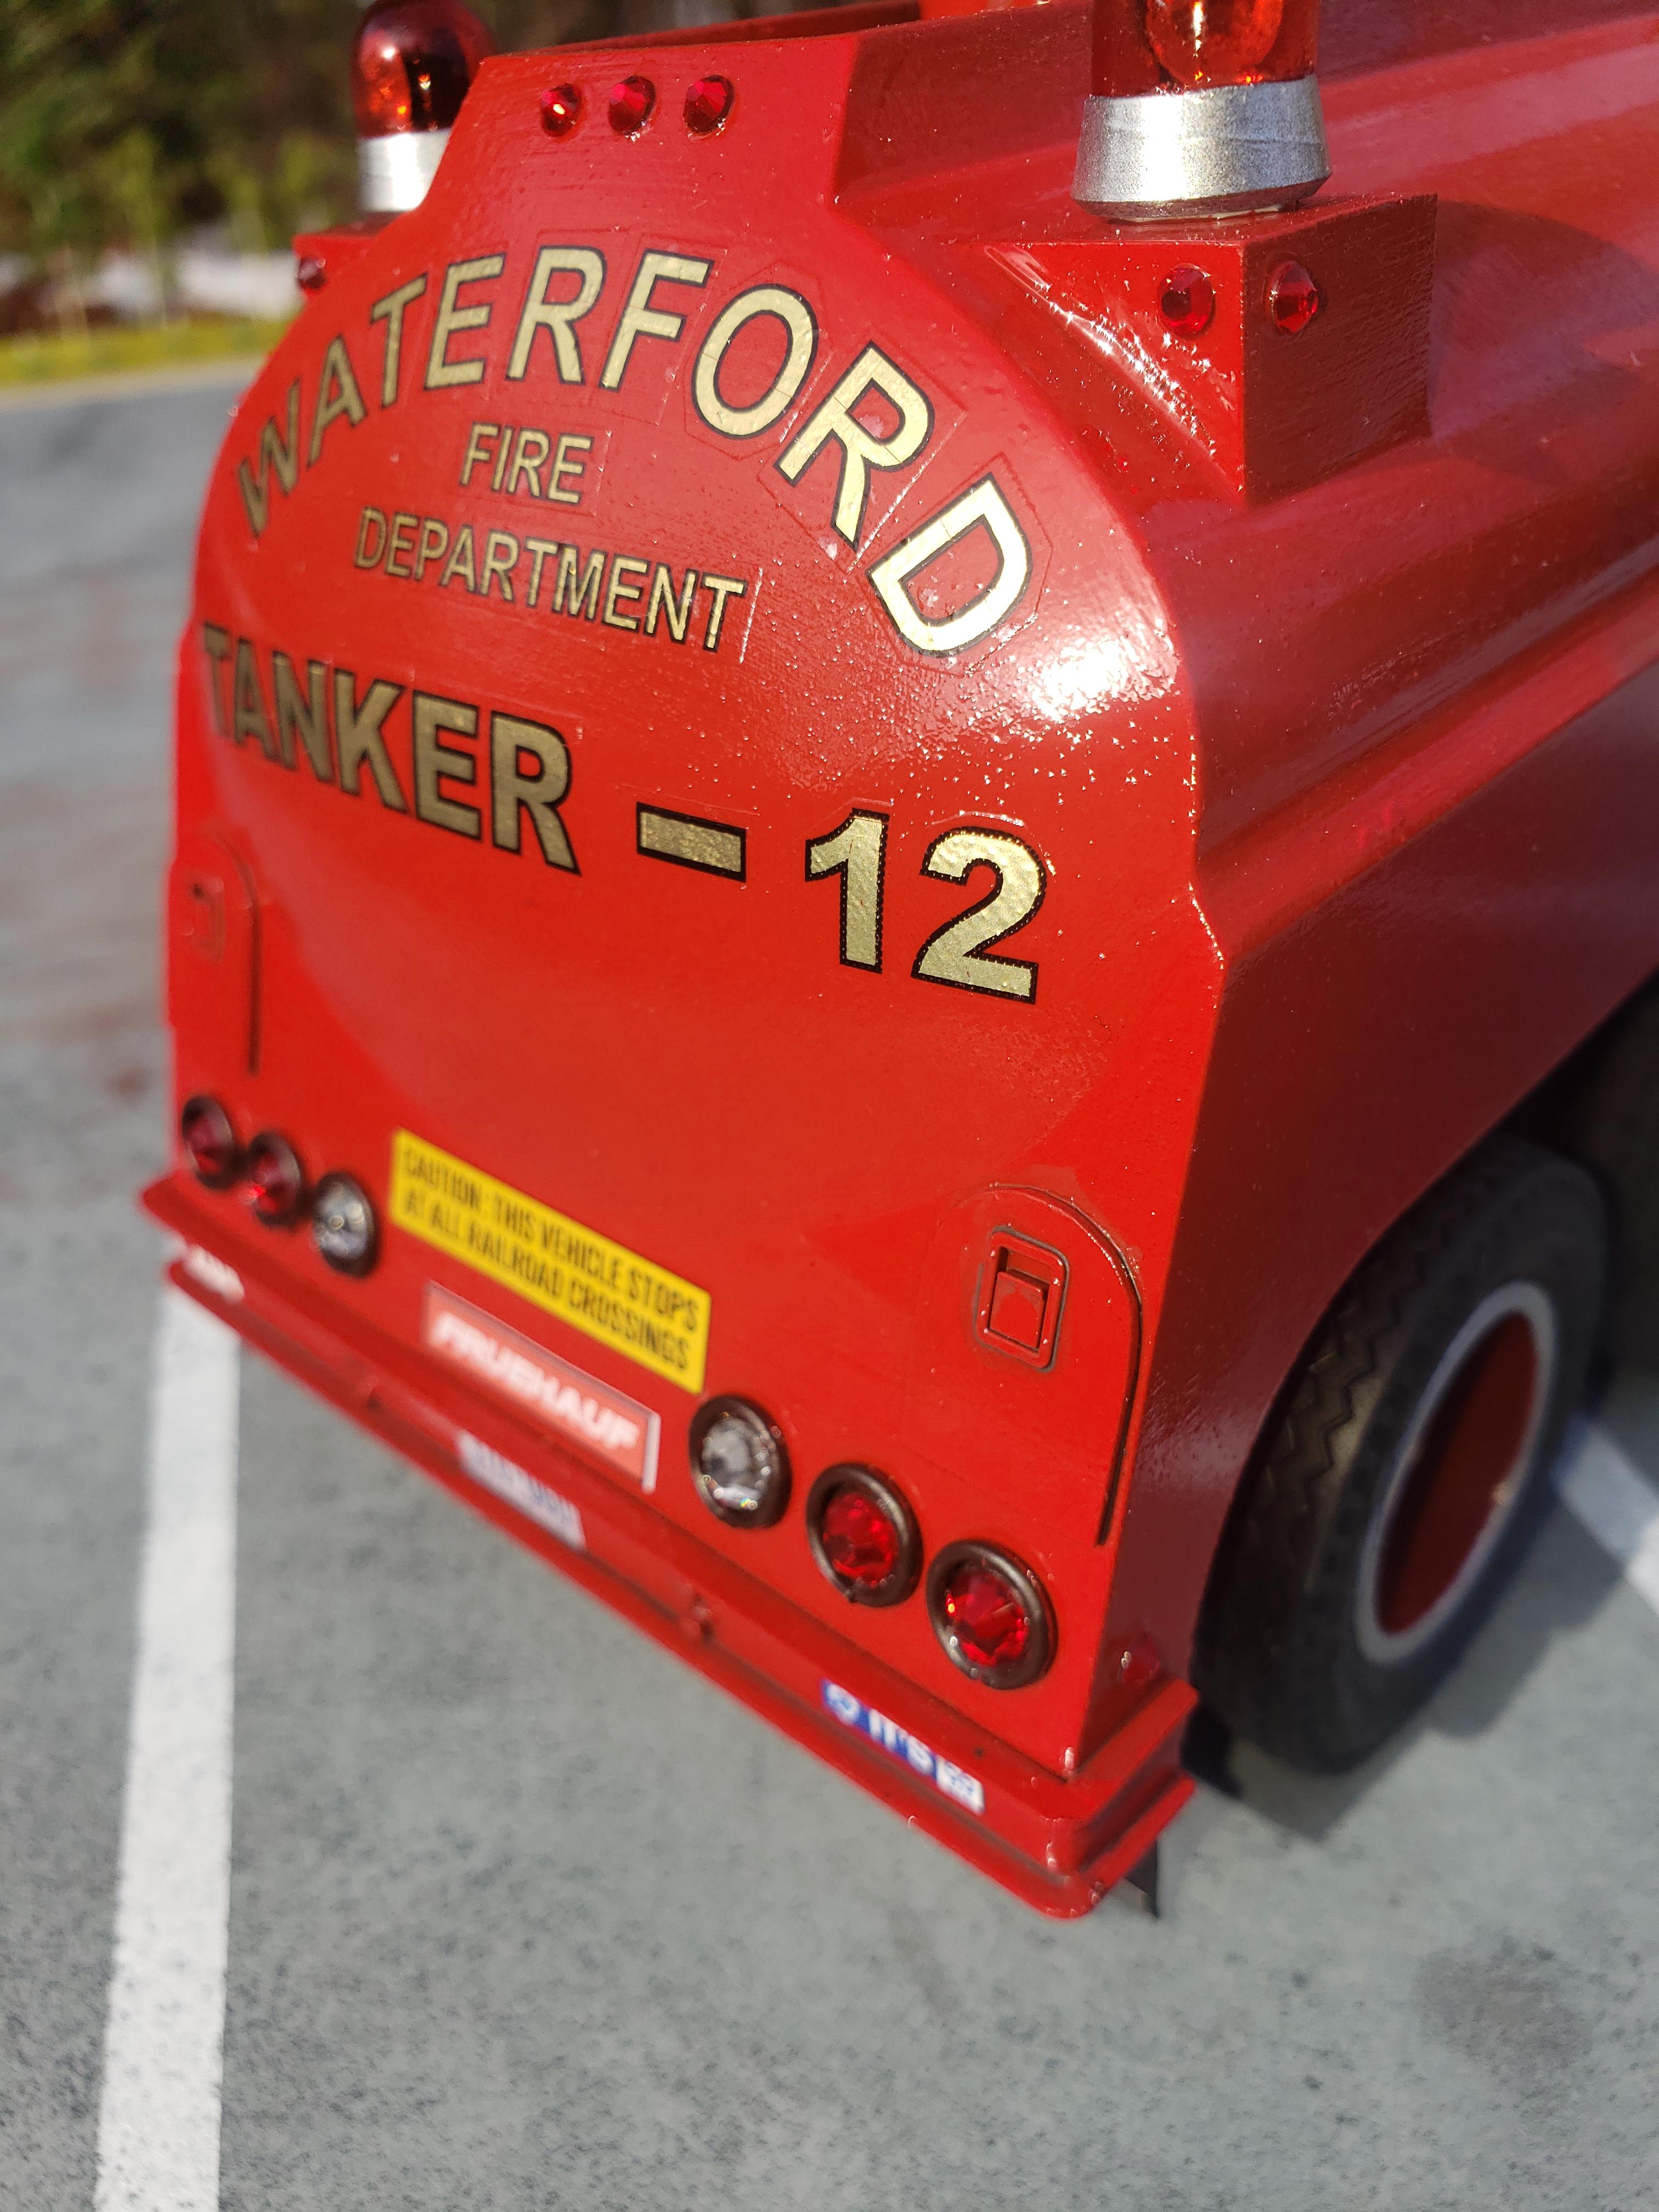
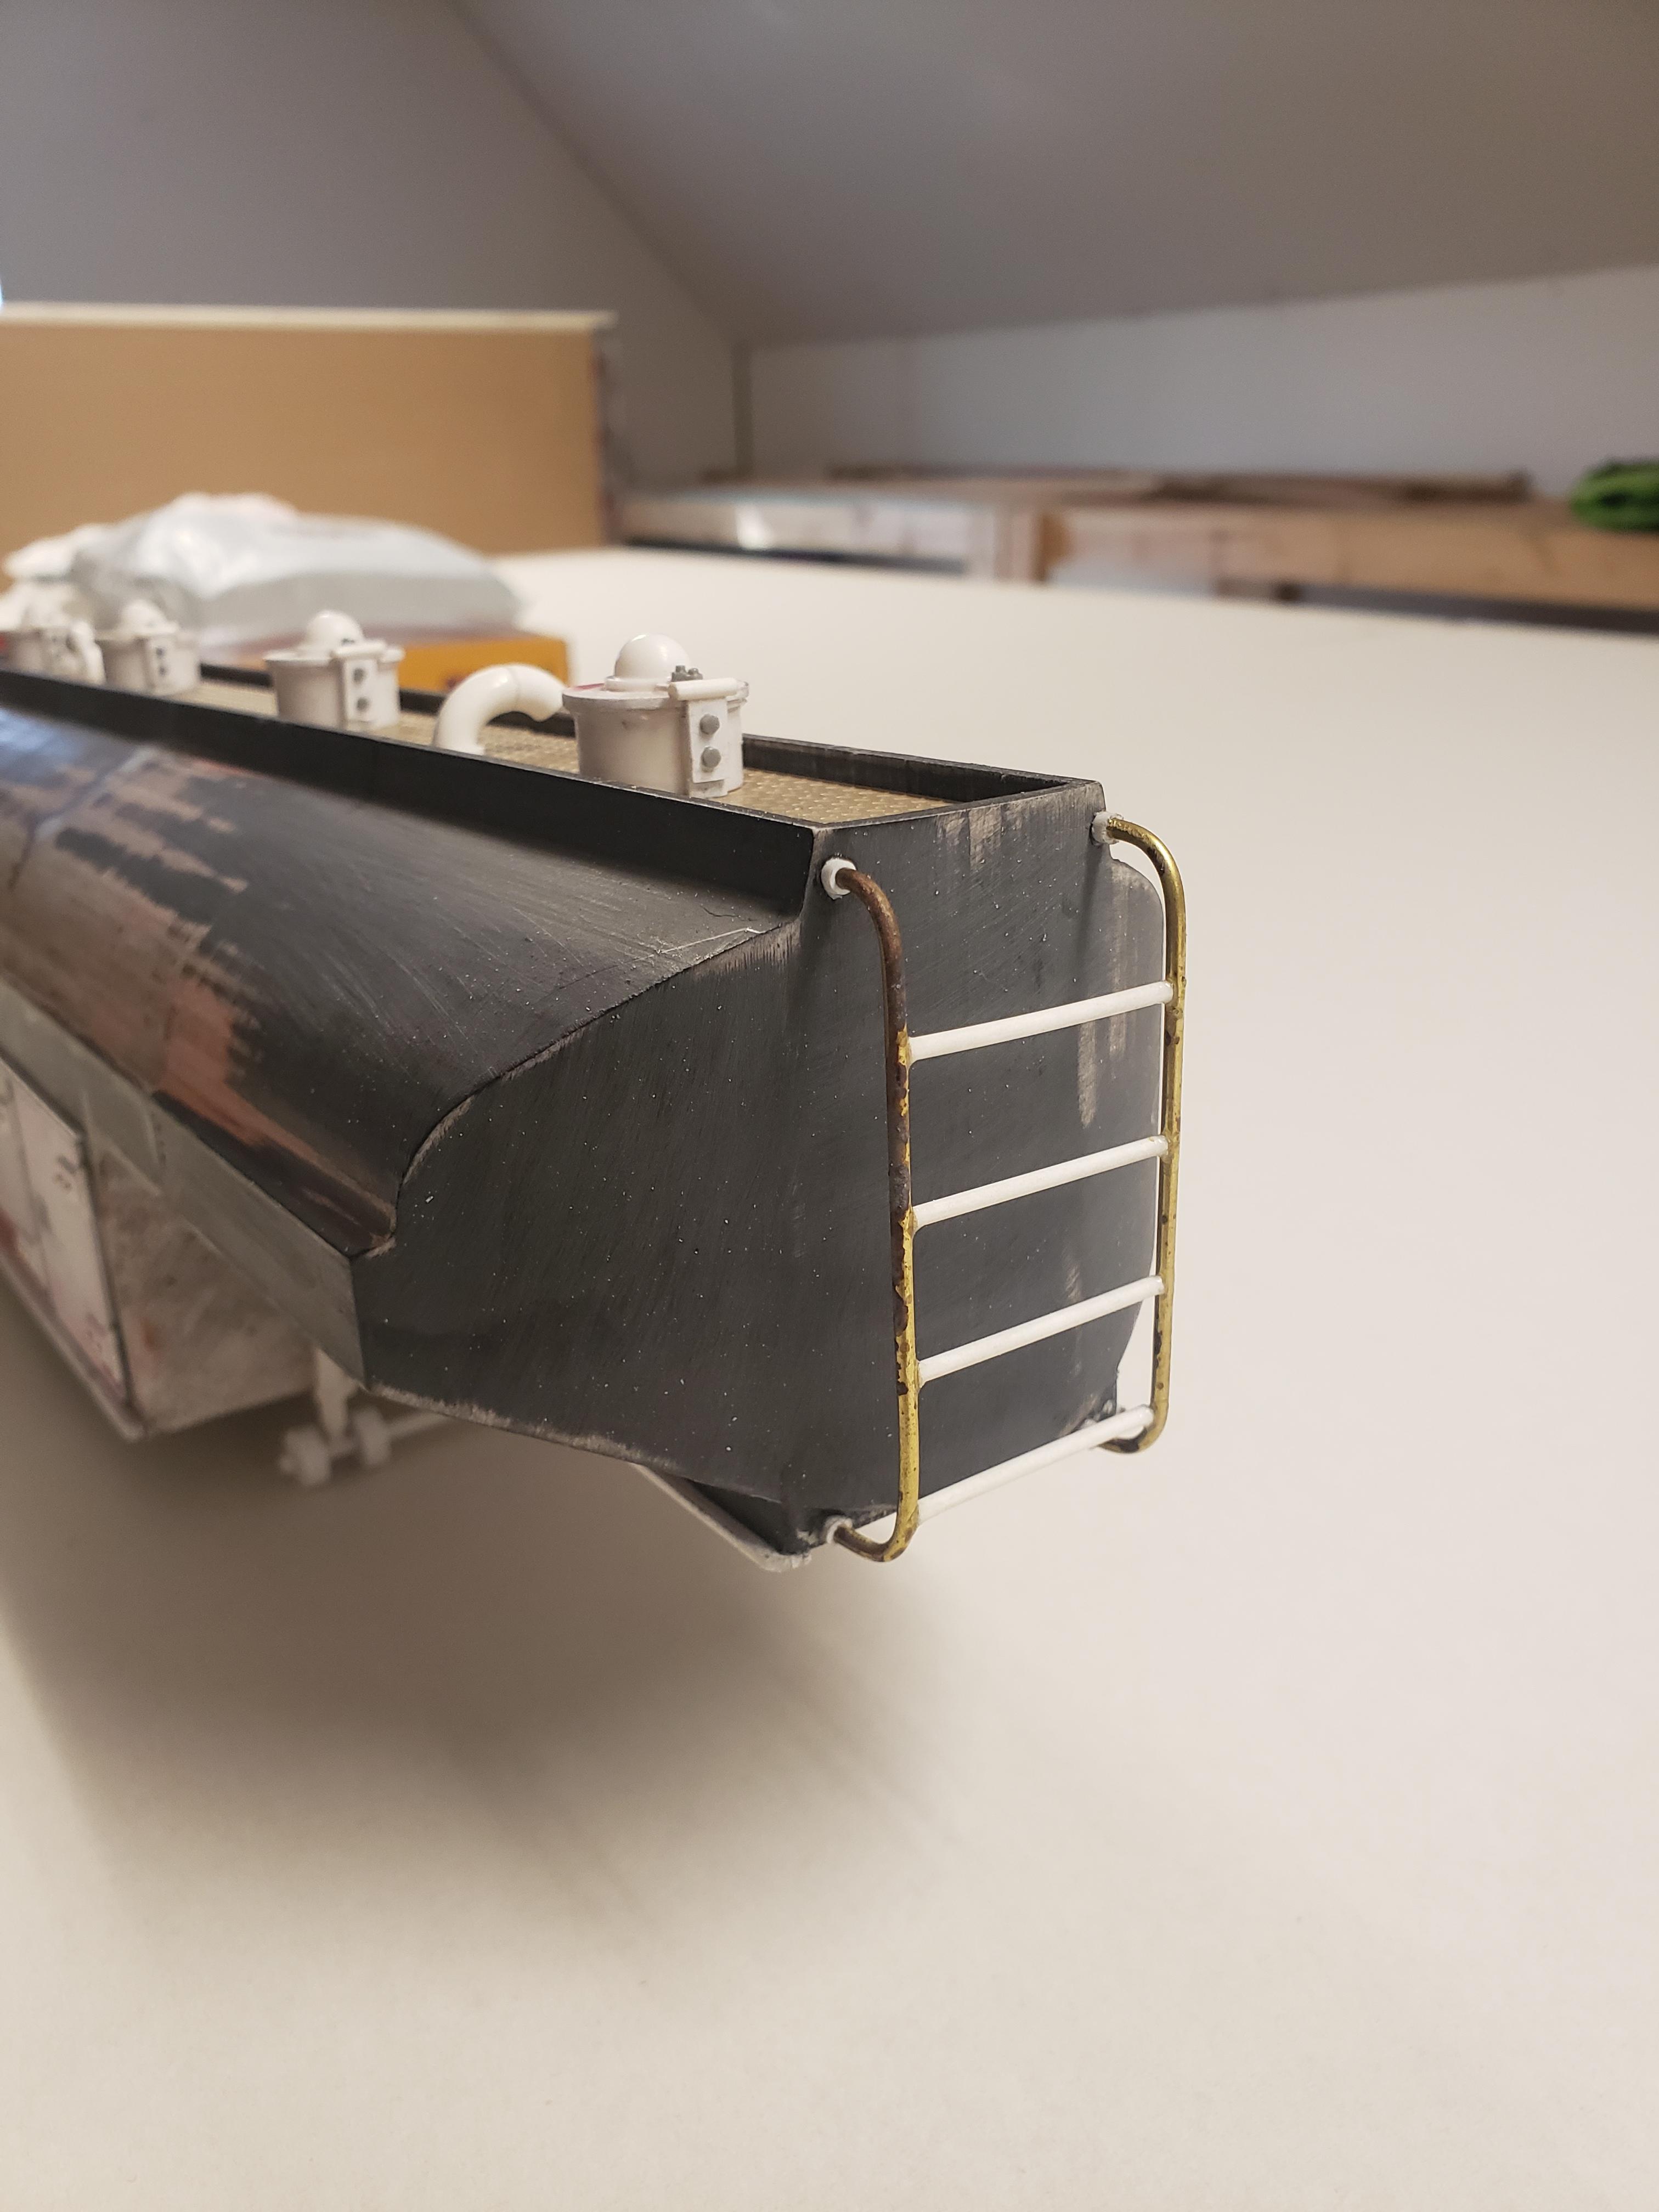
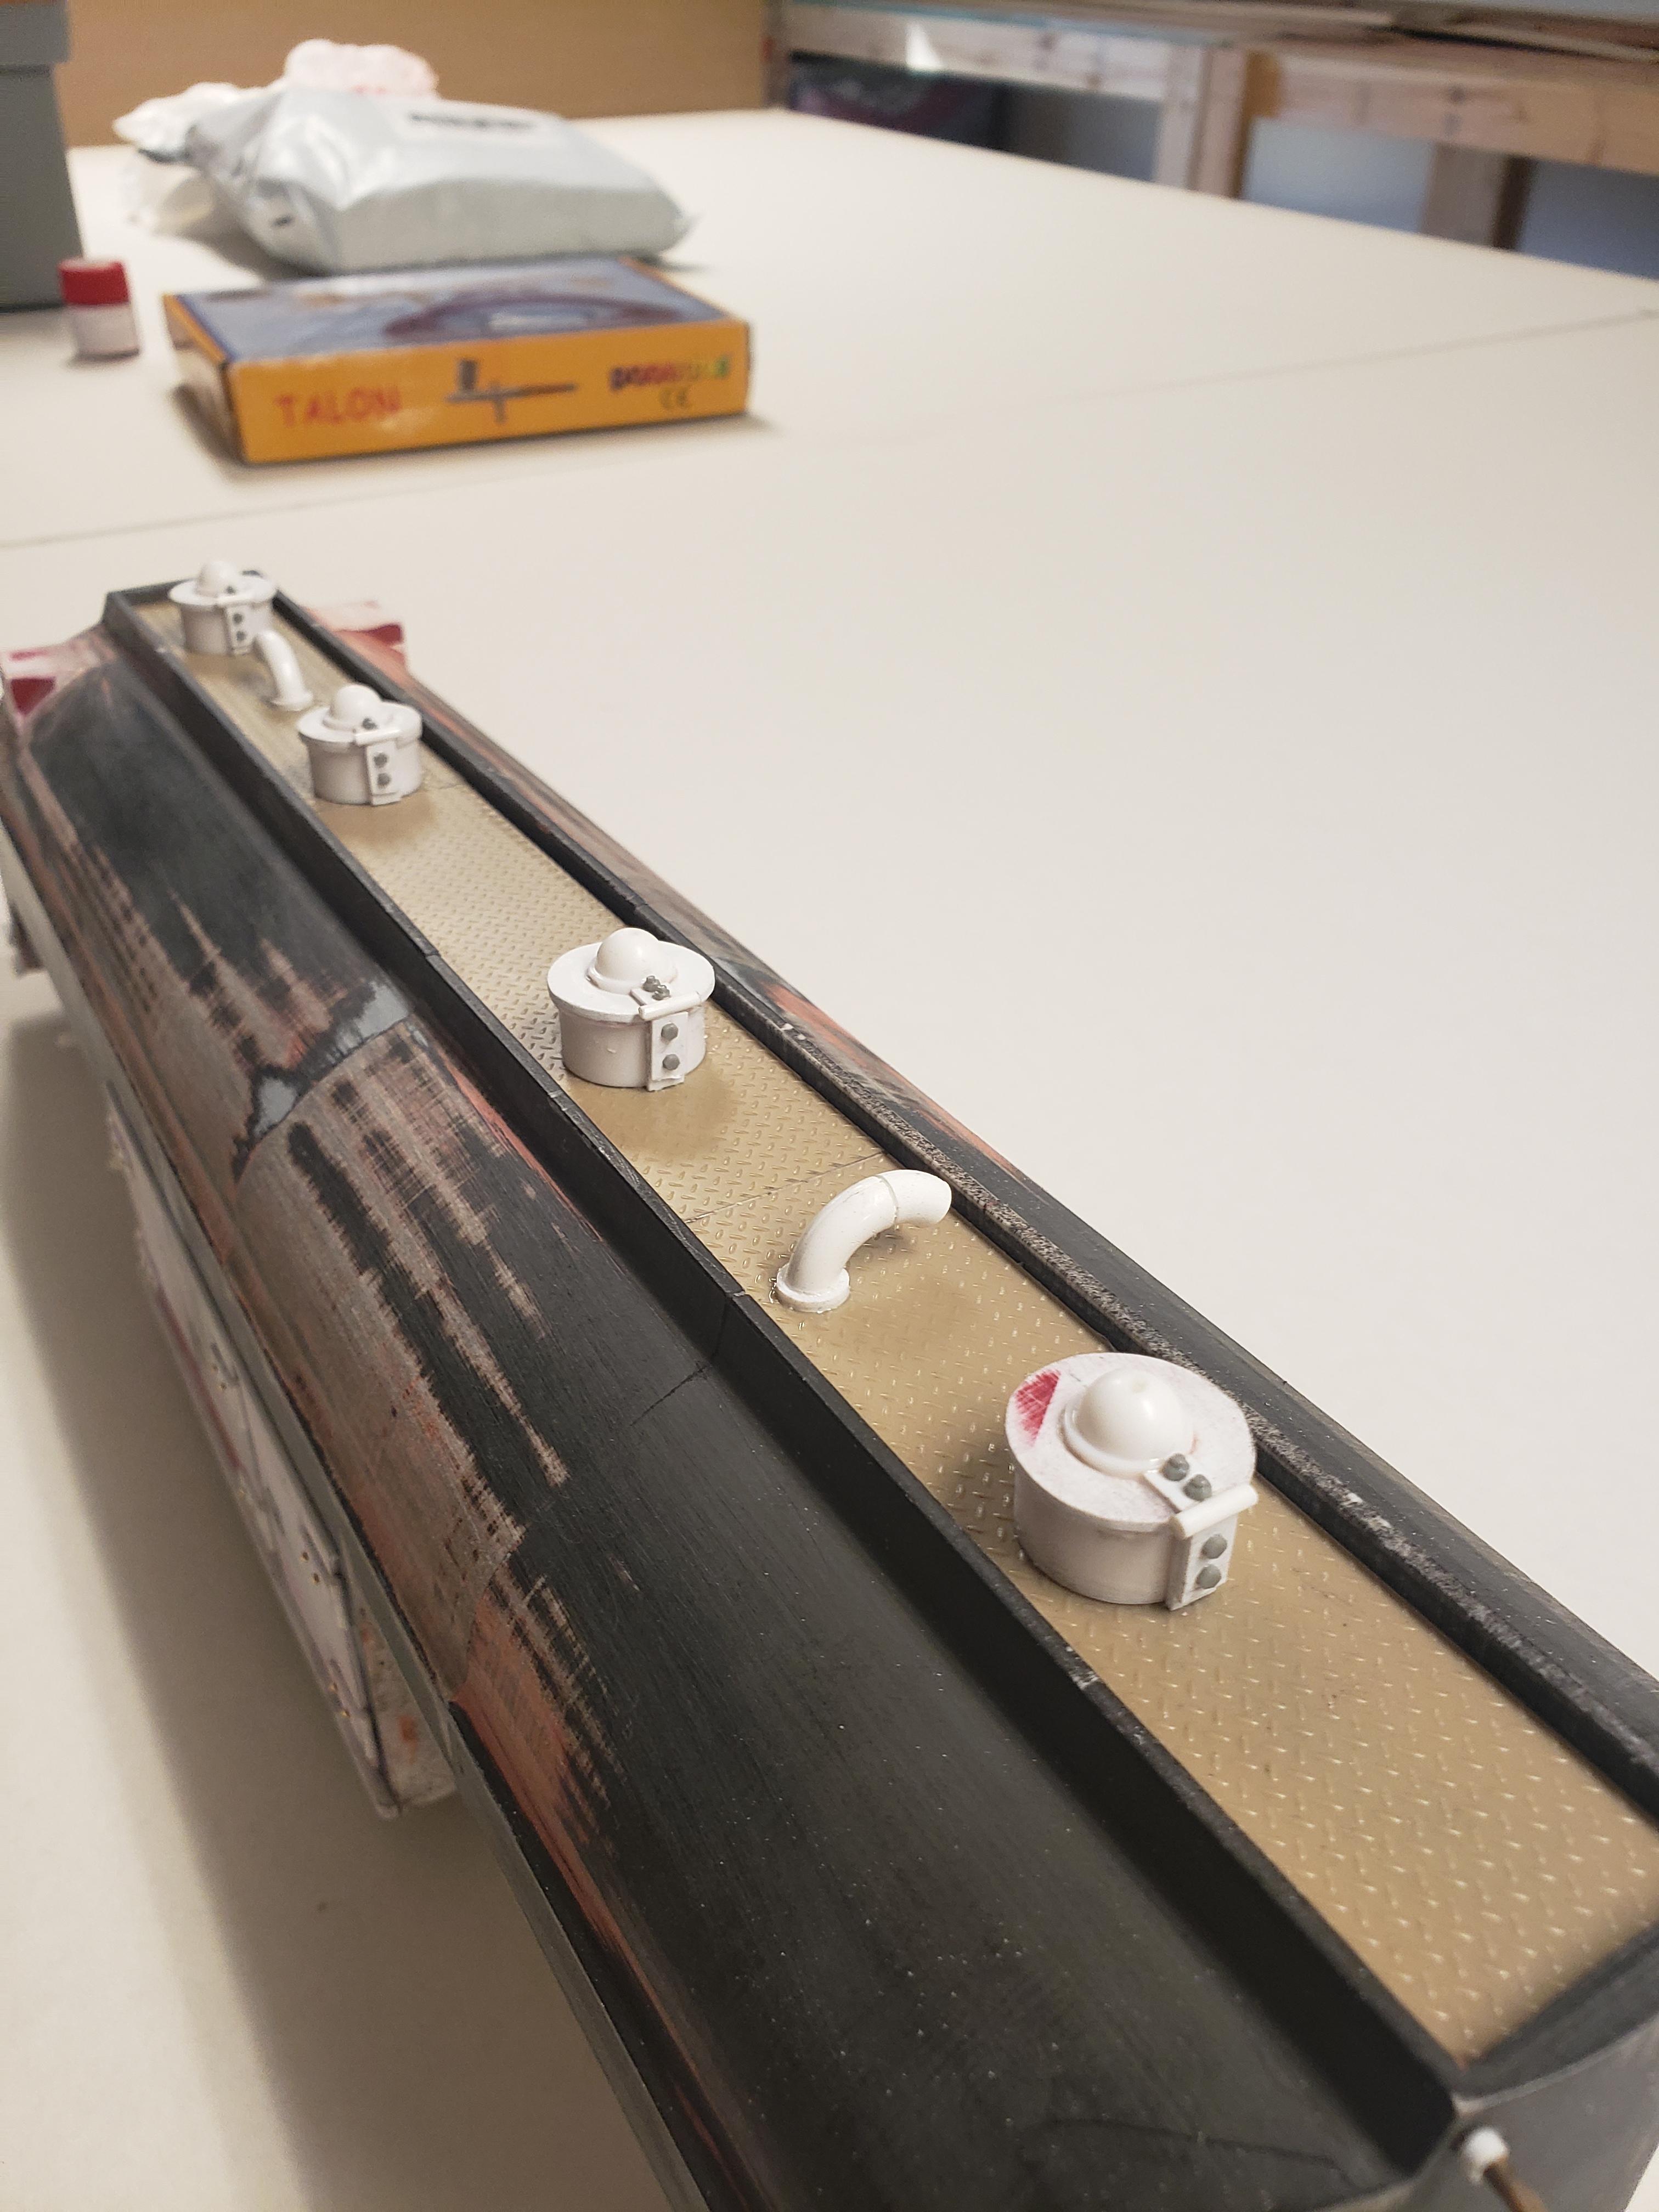
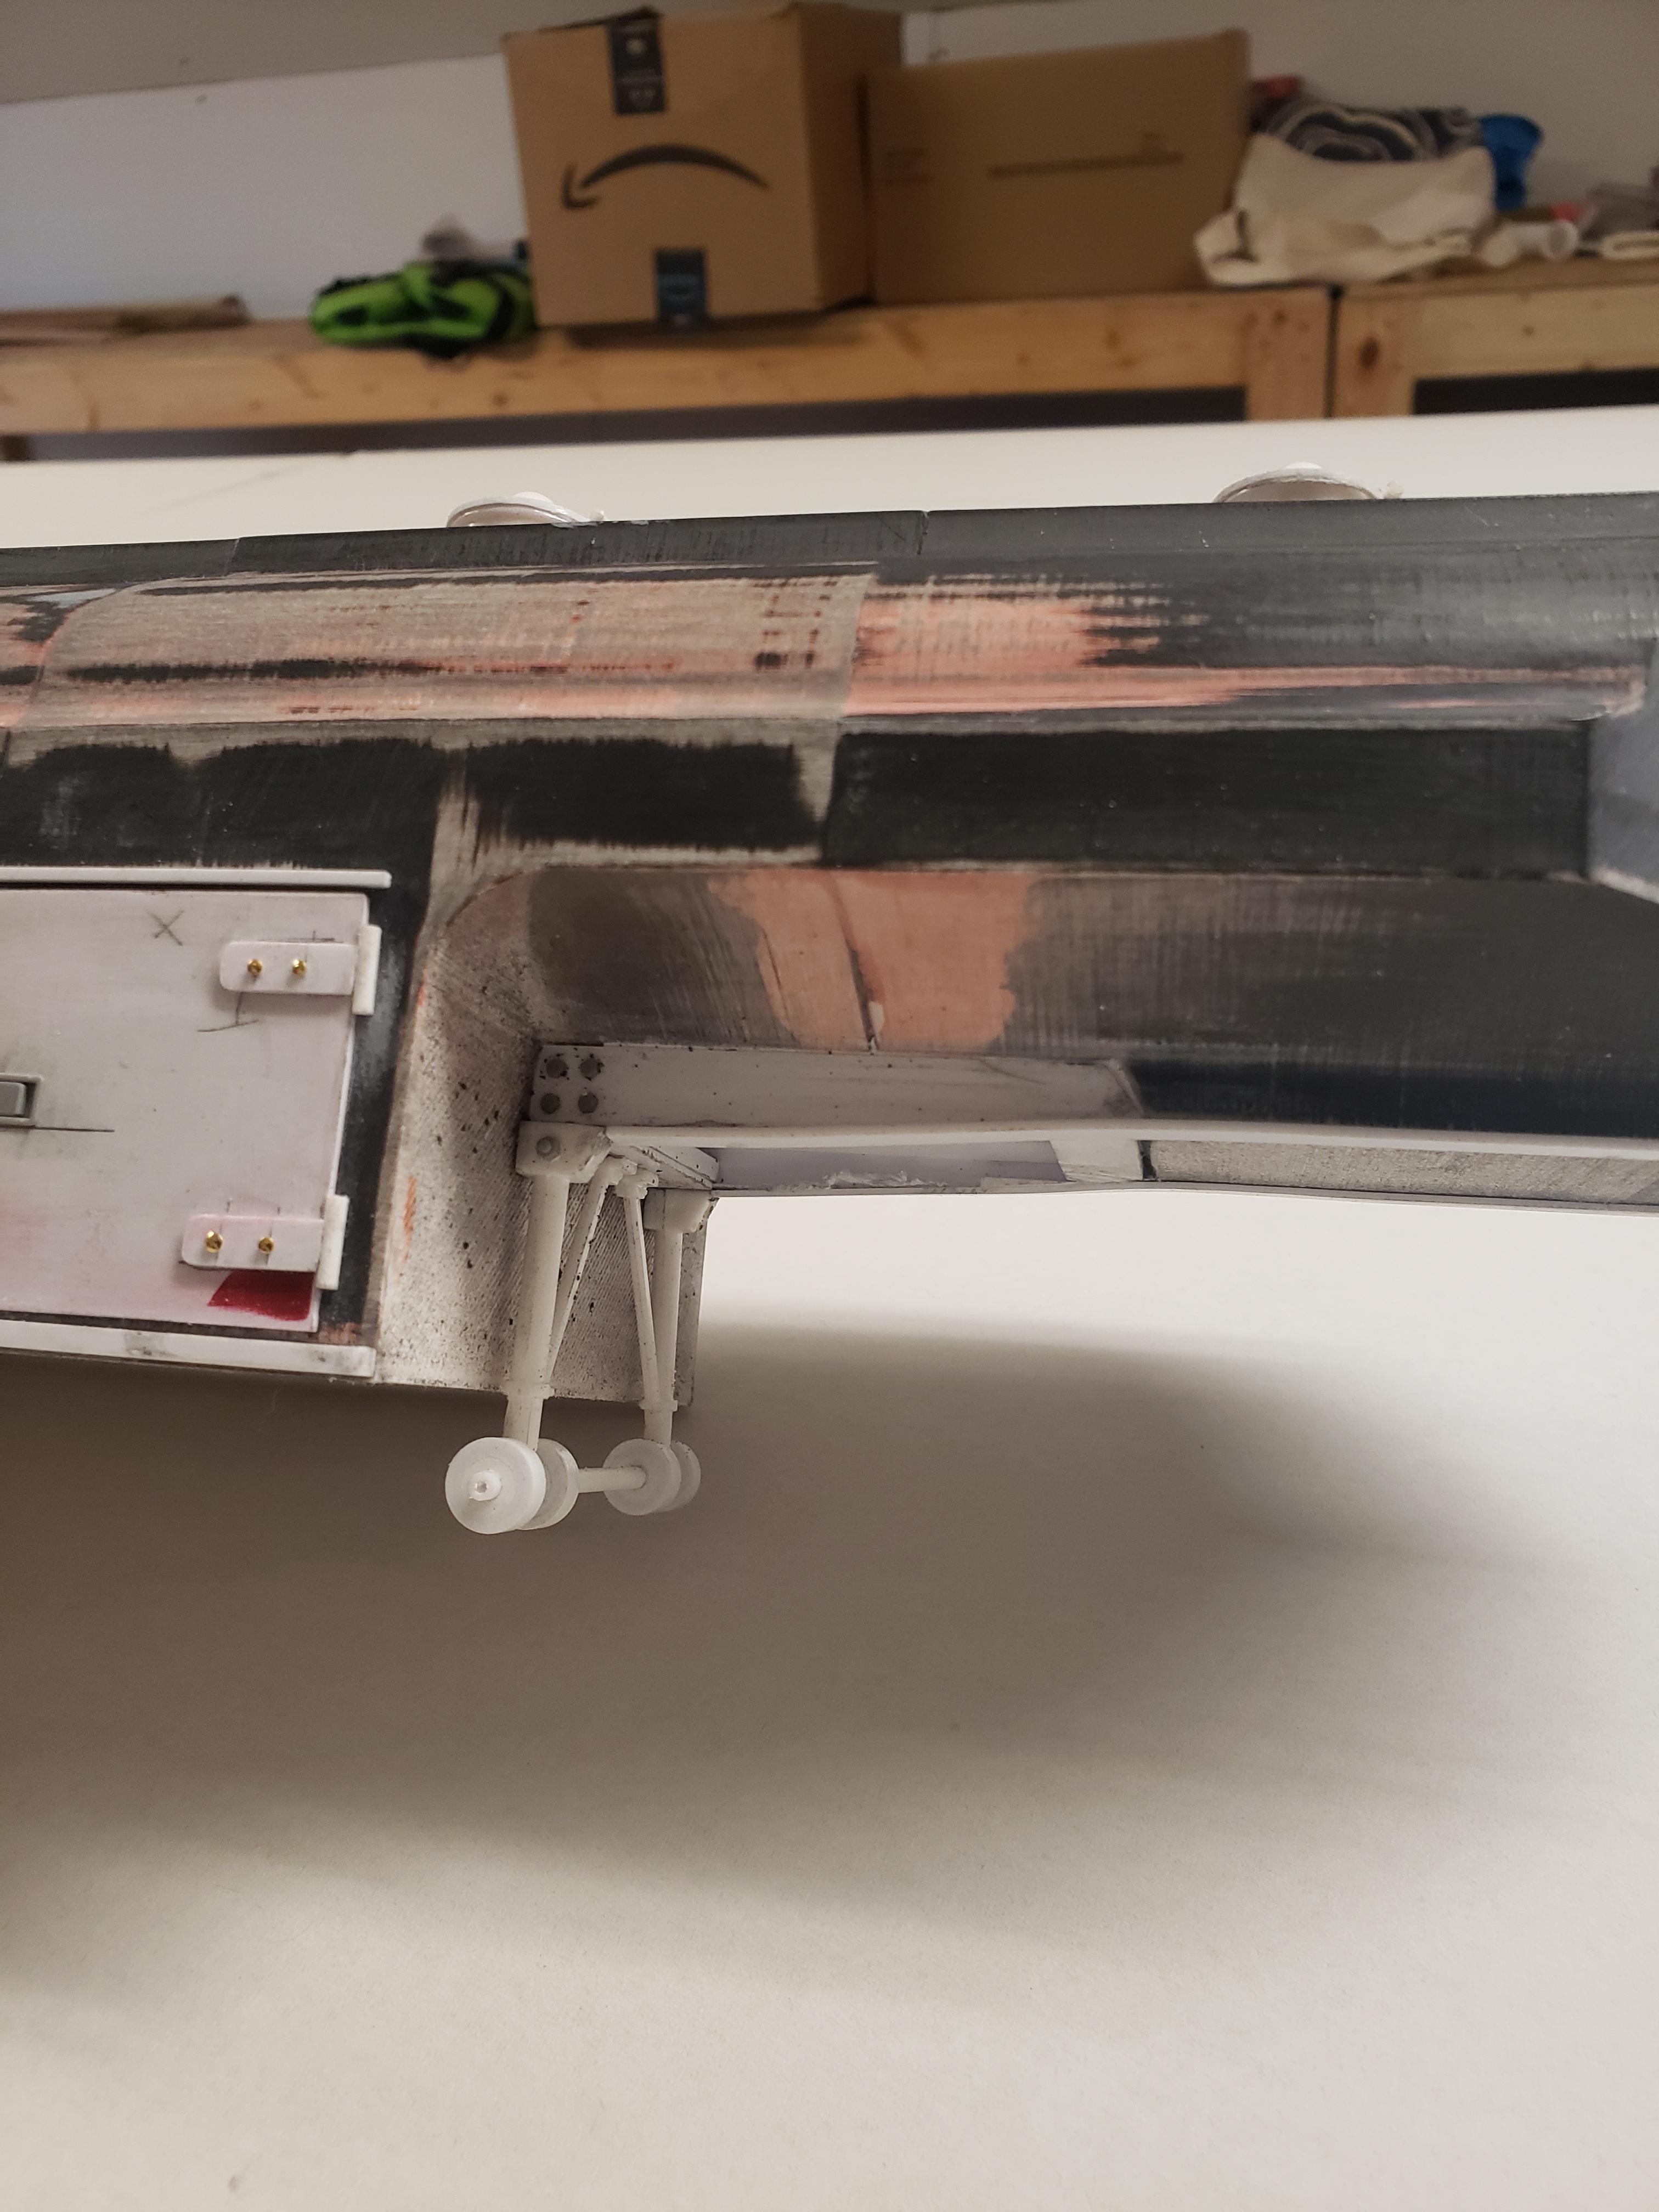
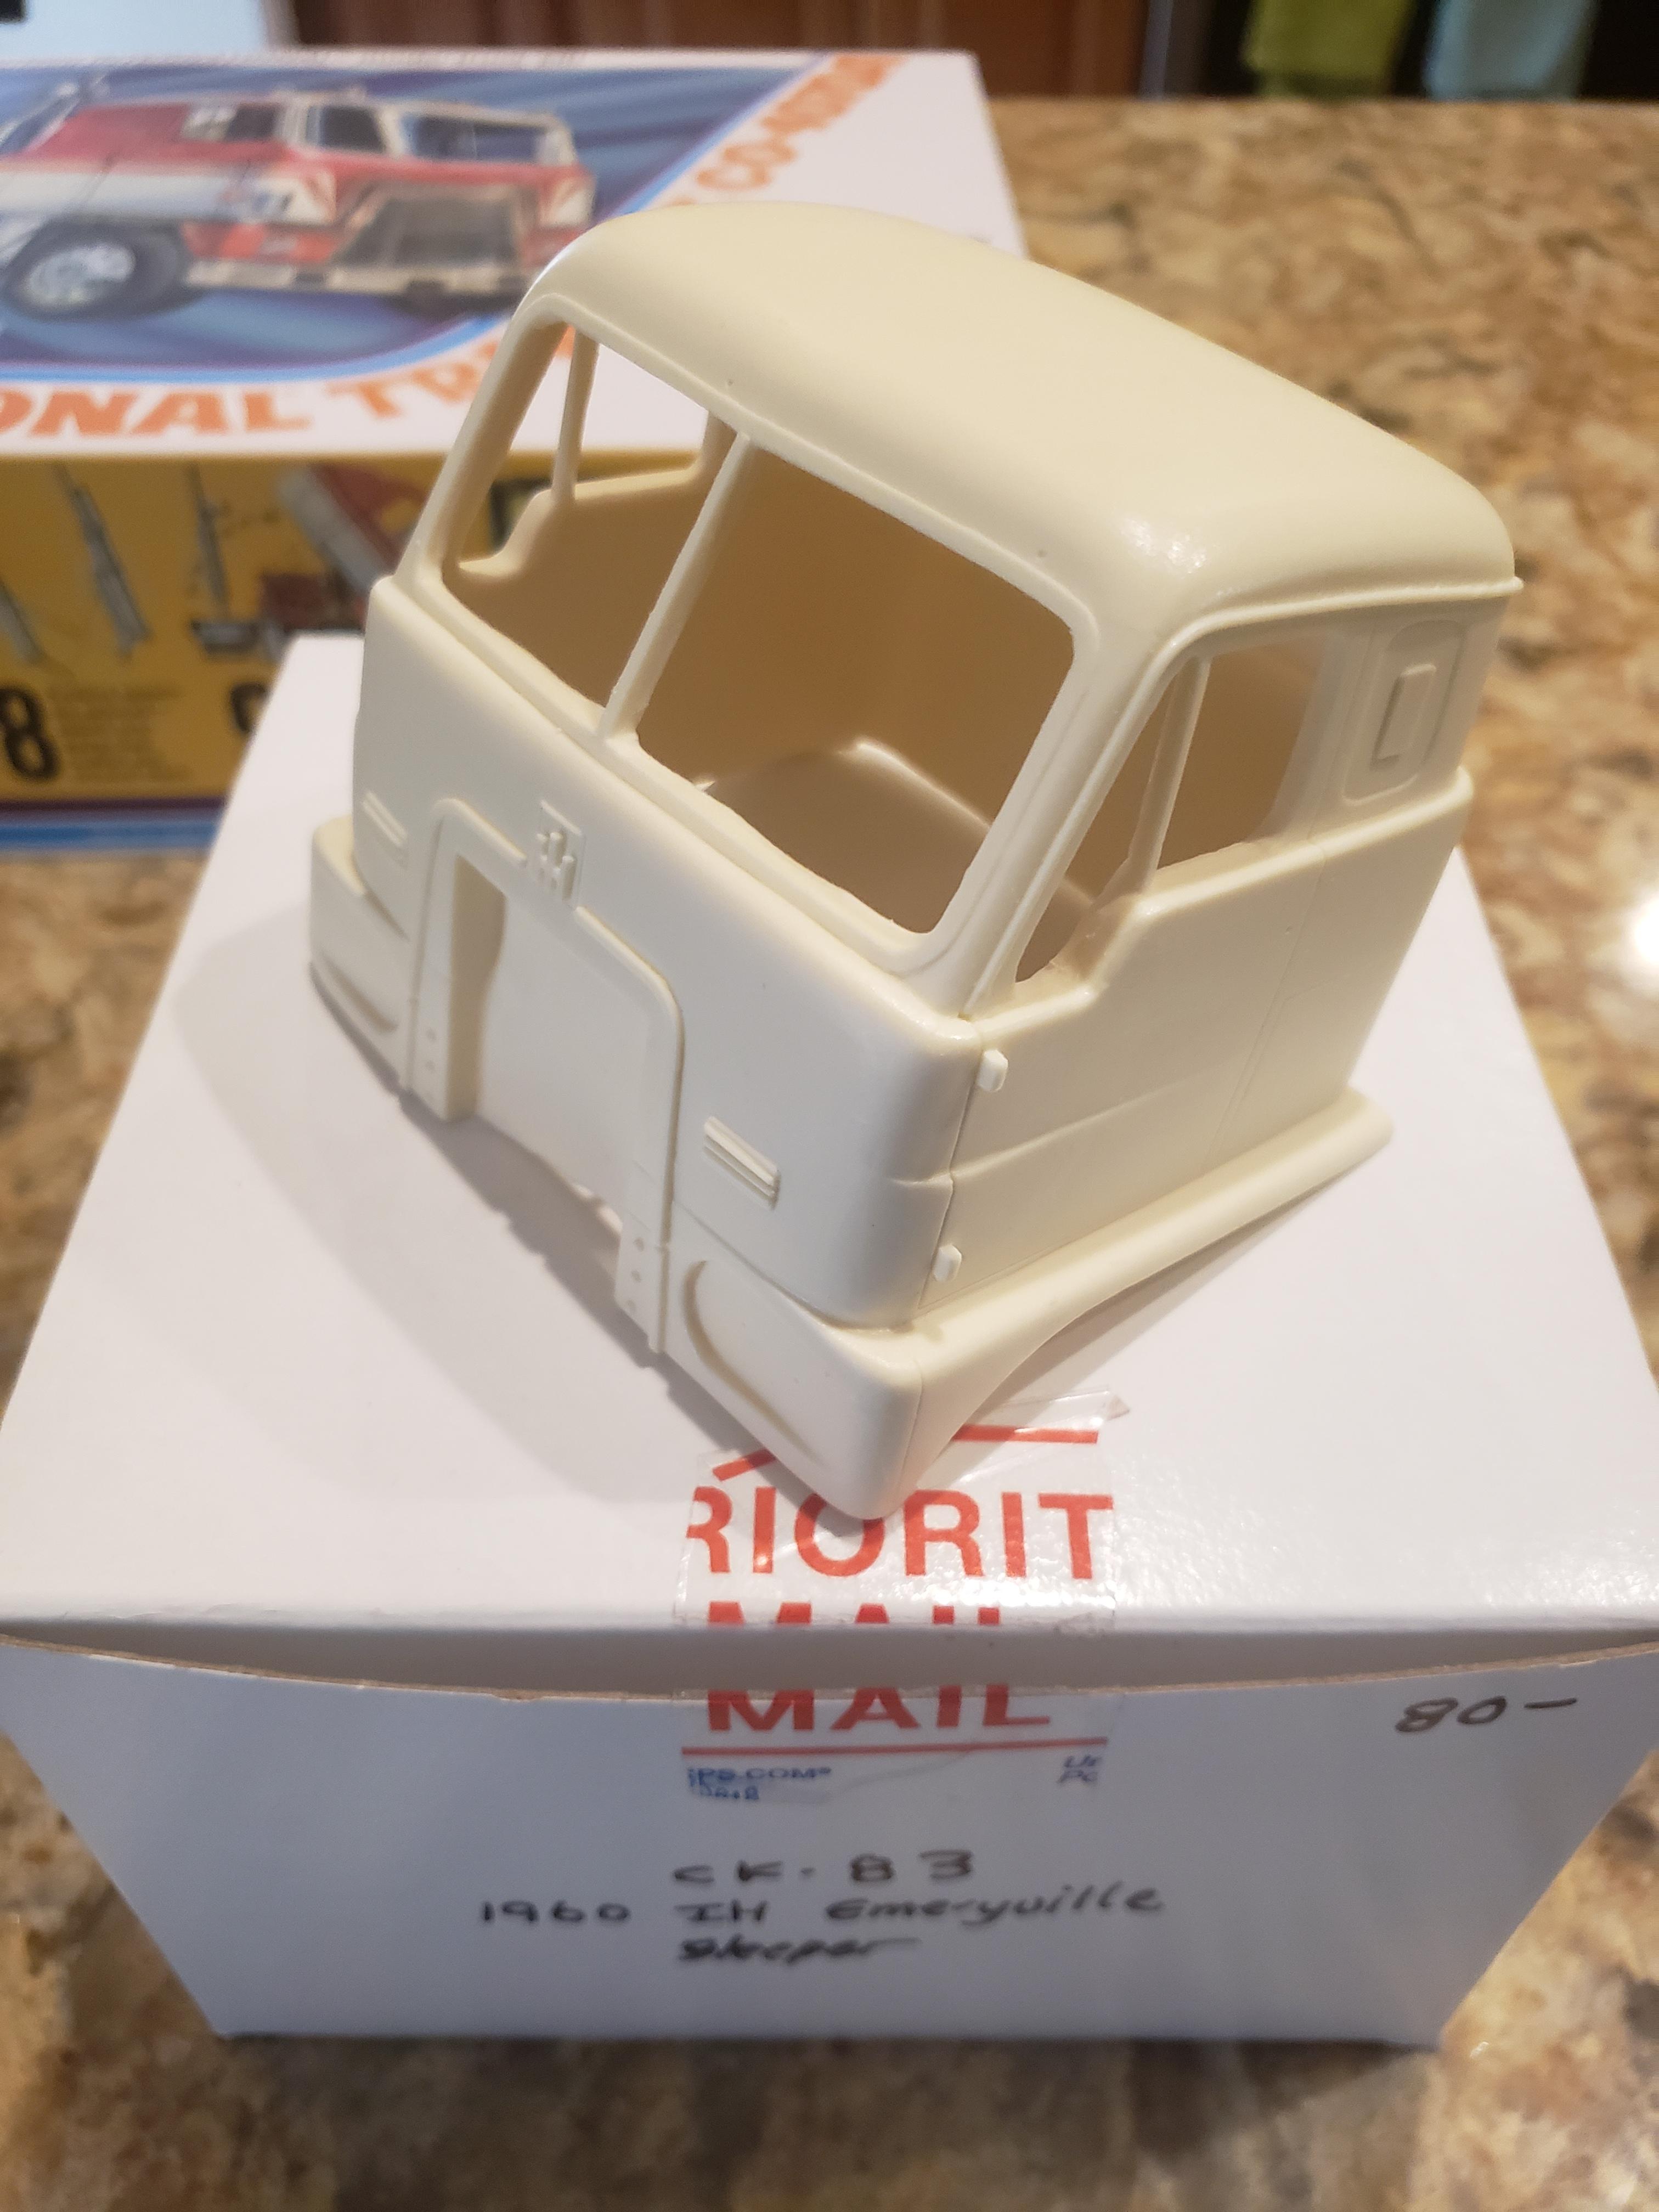
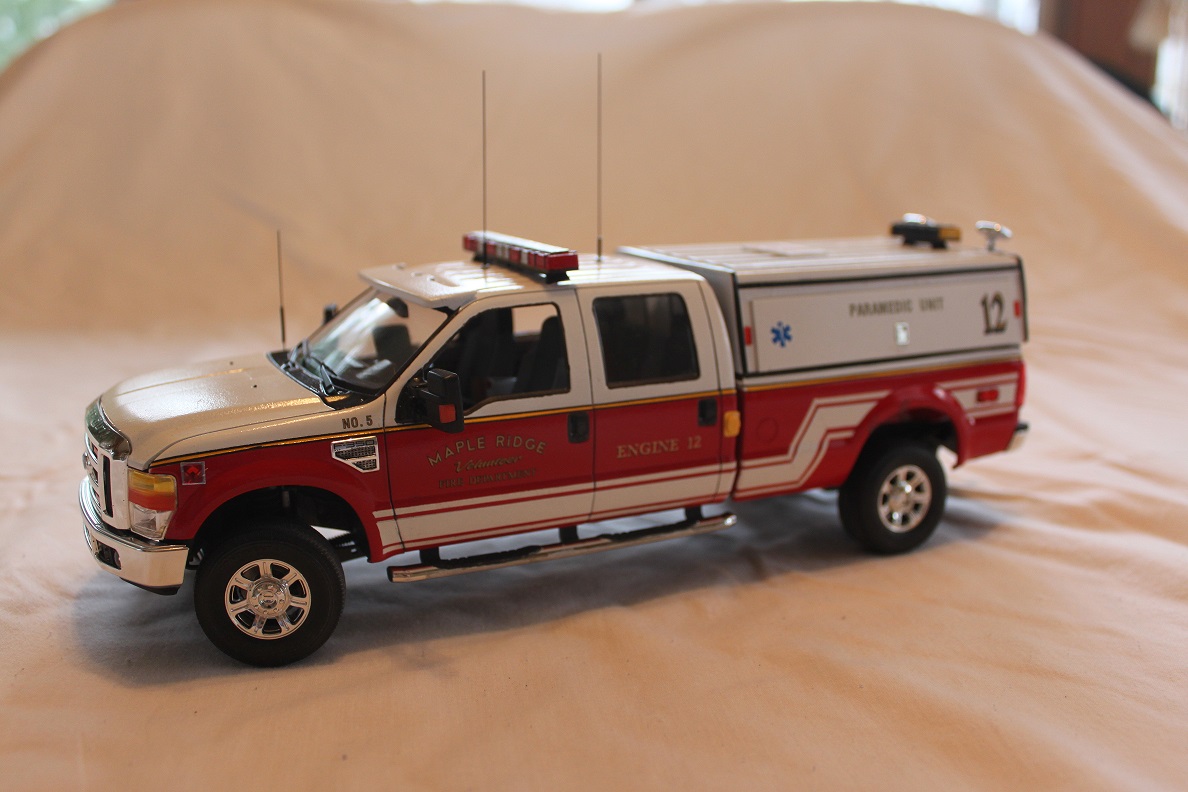
Calling this one done. AITM Emeryville resin casting, Keystone Aluminum 3D "Duel " tanker and a Round2 4070 donor kit. Airbrushed Tamiya X-7 red over black primer. Aftermarket includes, Moluminum, Scenes Unlimited, David Parsley, Firebird Designs decals, Czech Truck Models and Don Mills.

-
Emeryville / Fruehauf tanker
ghoodii replied to ghoodii's topic in WIP: Model Trucks: Big Rigs and Heavy Equipment
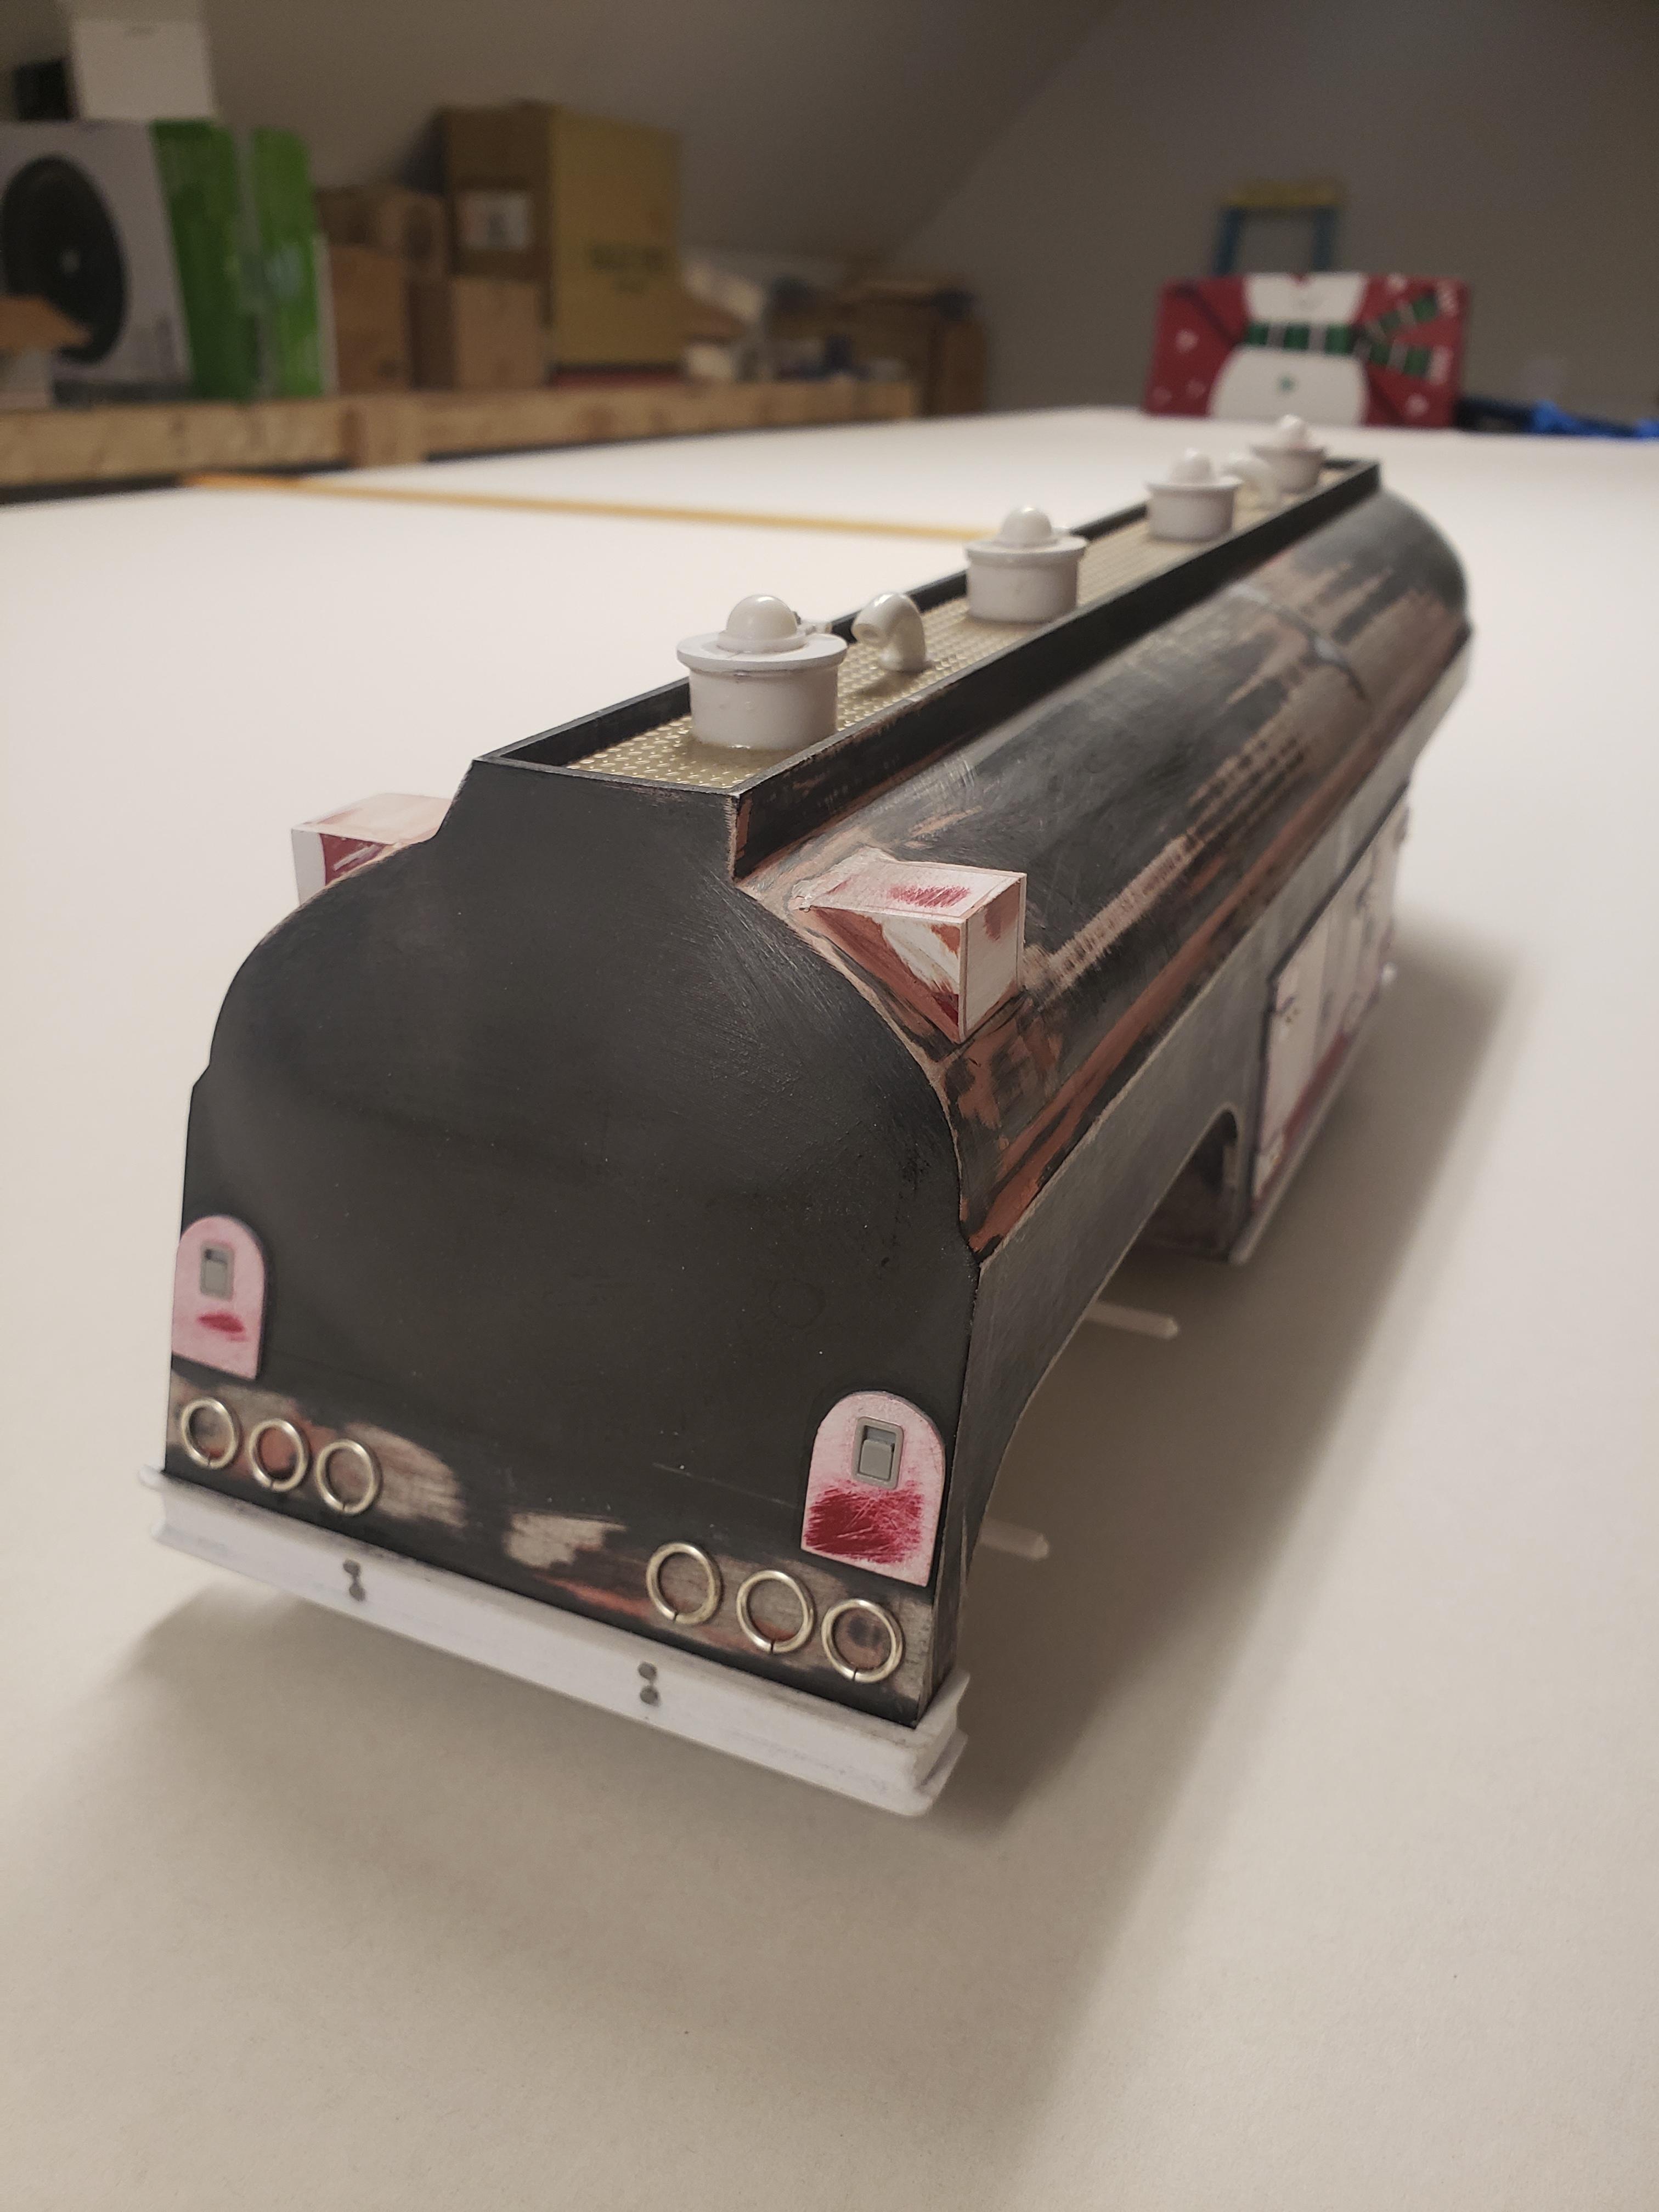
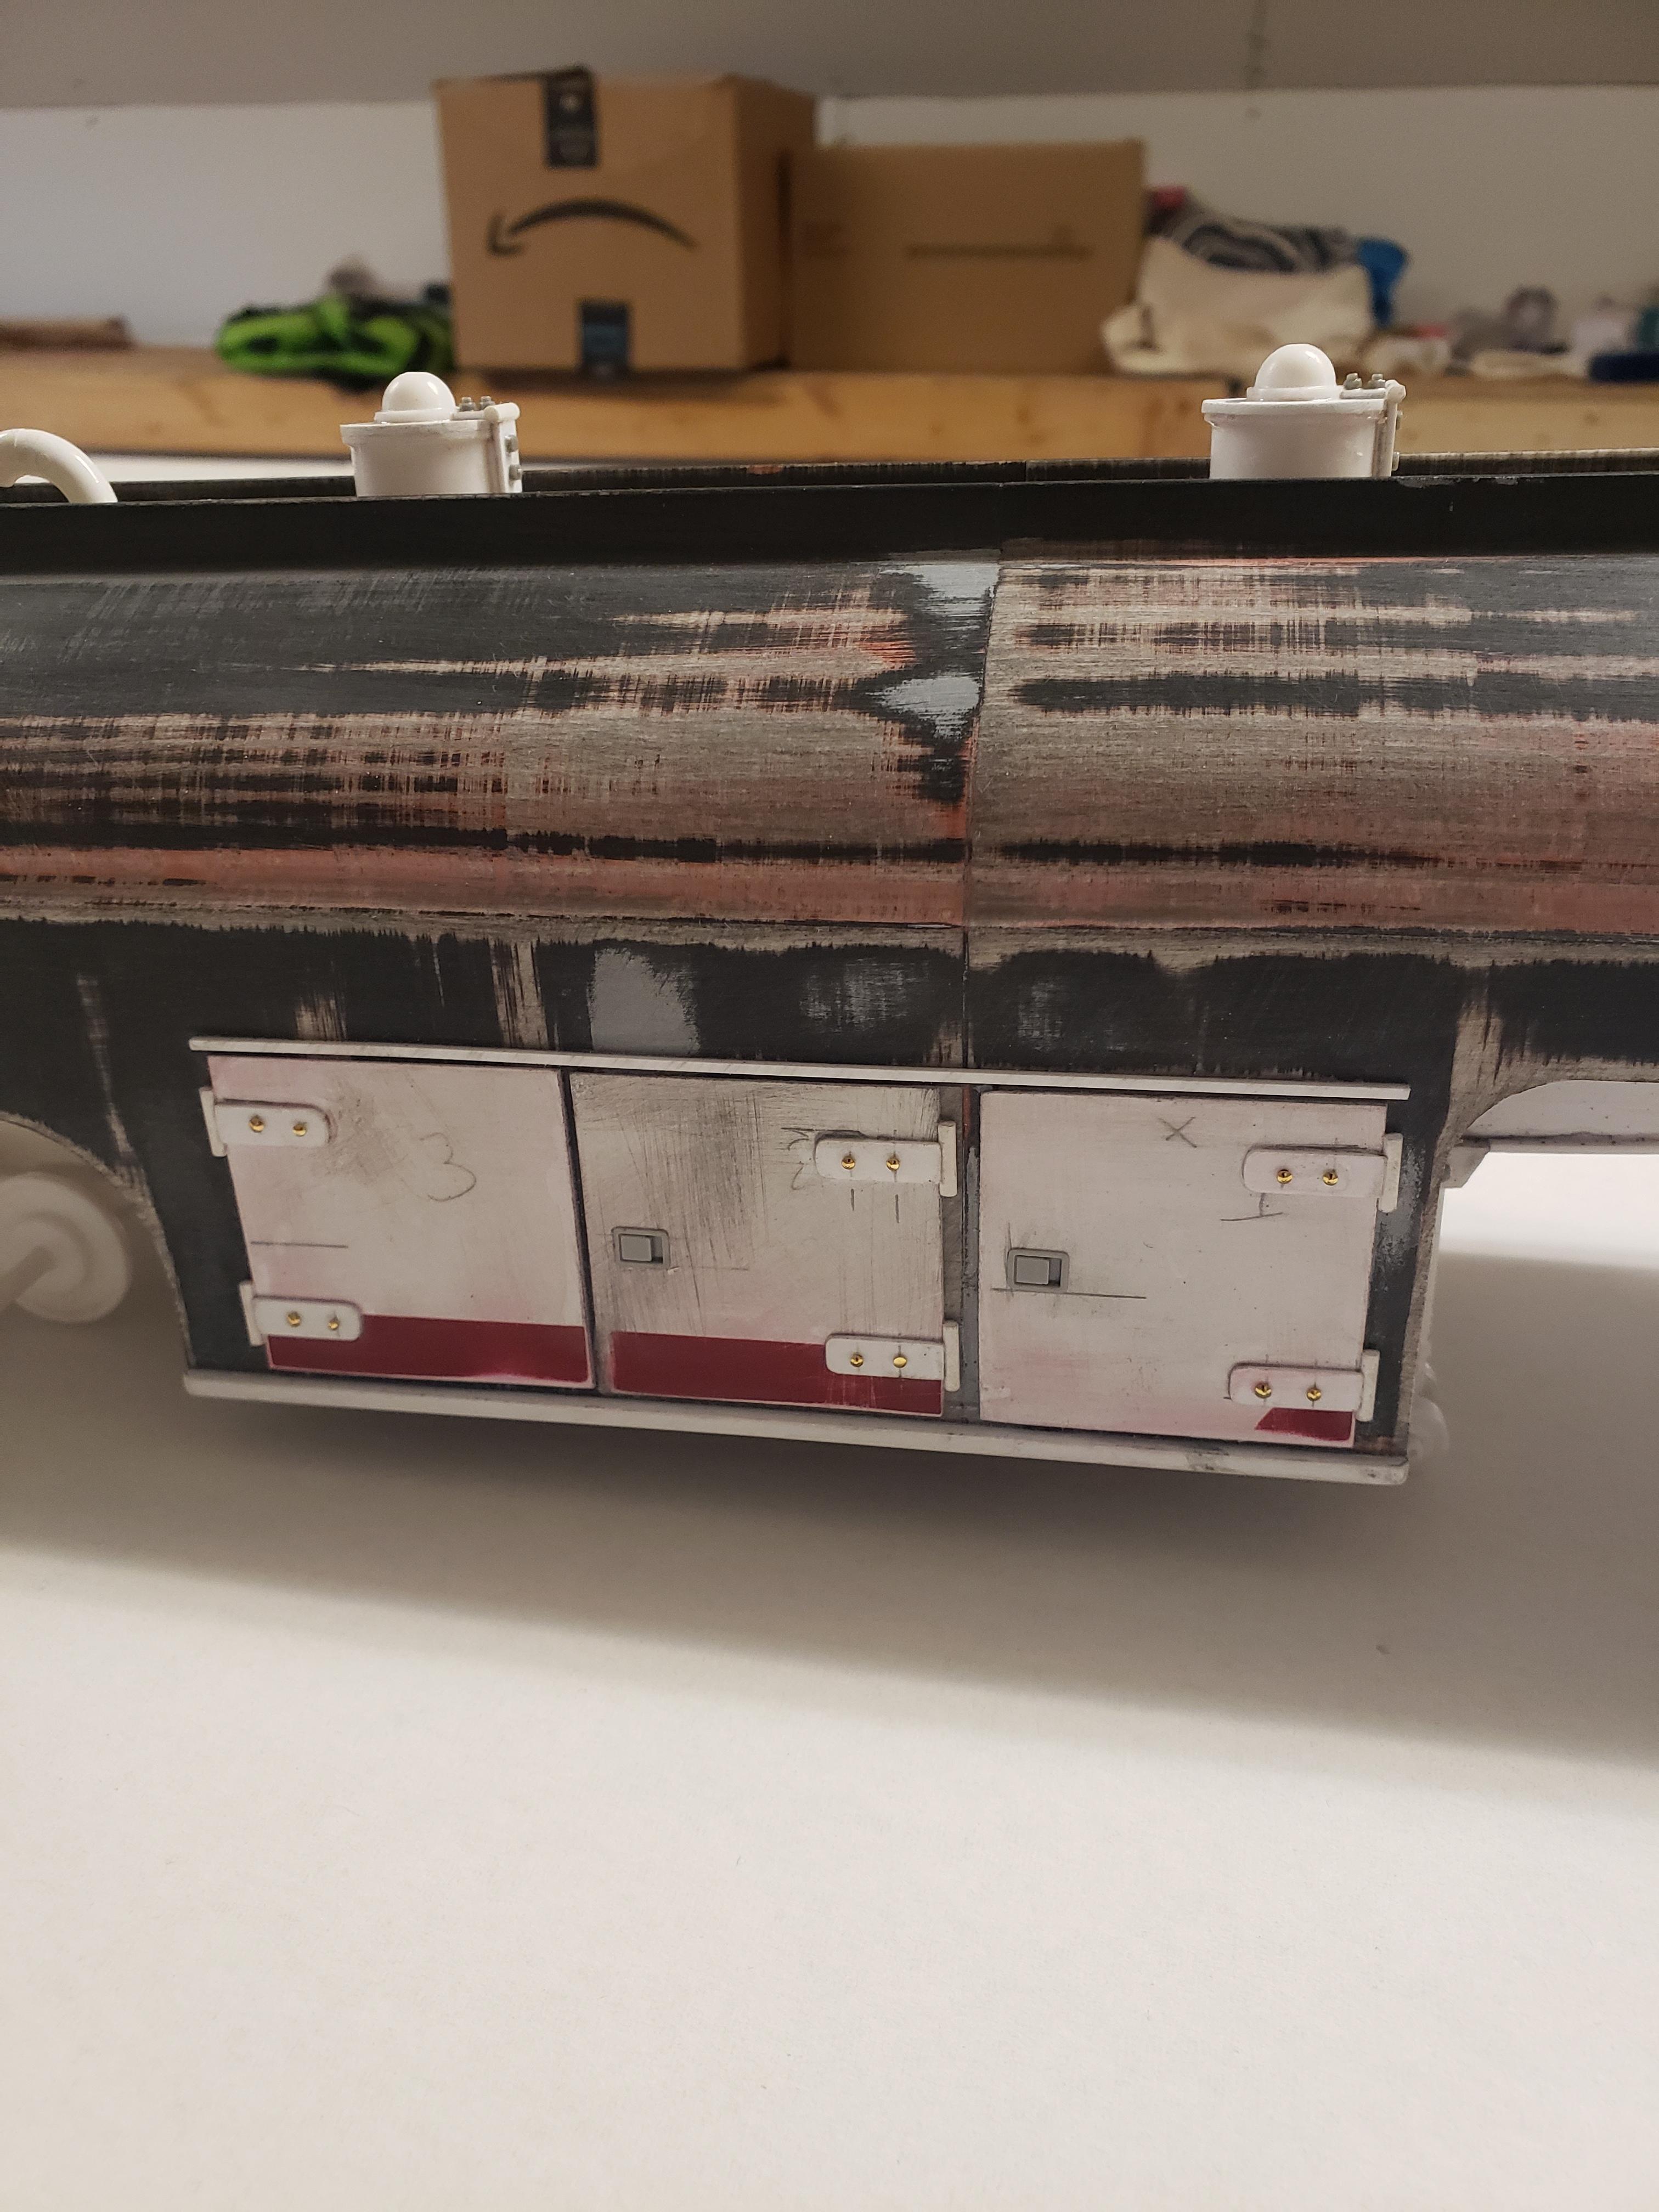
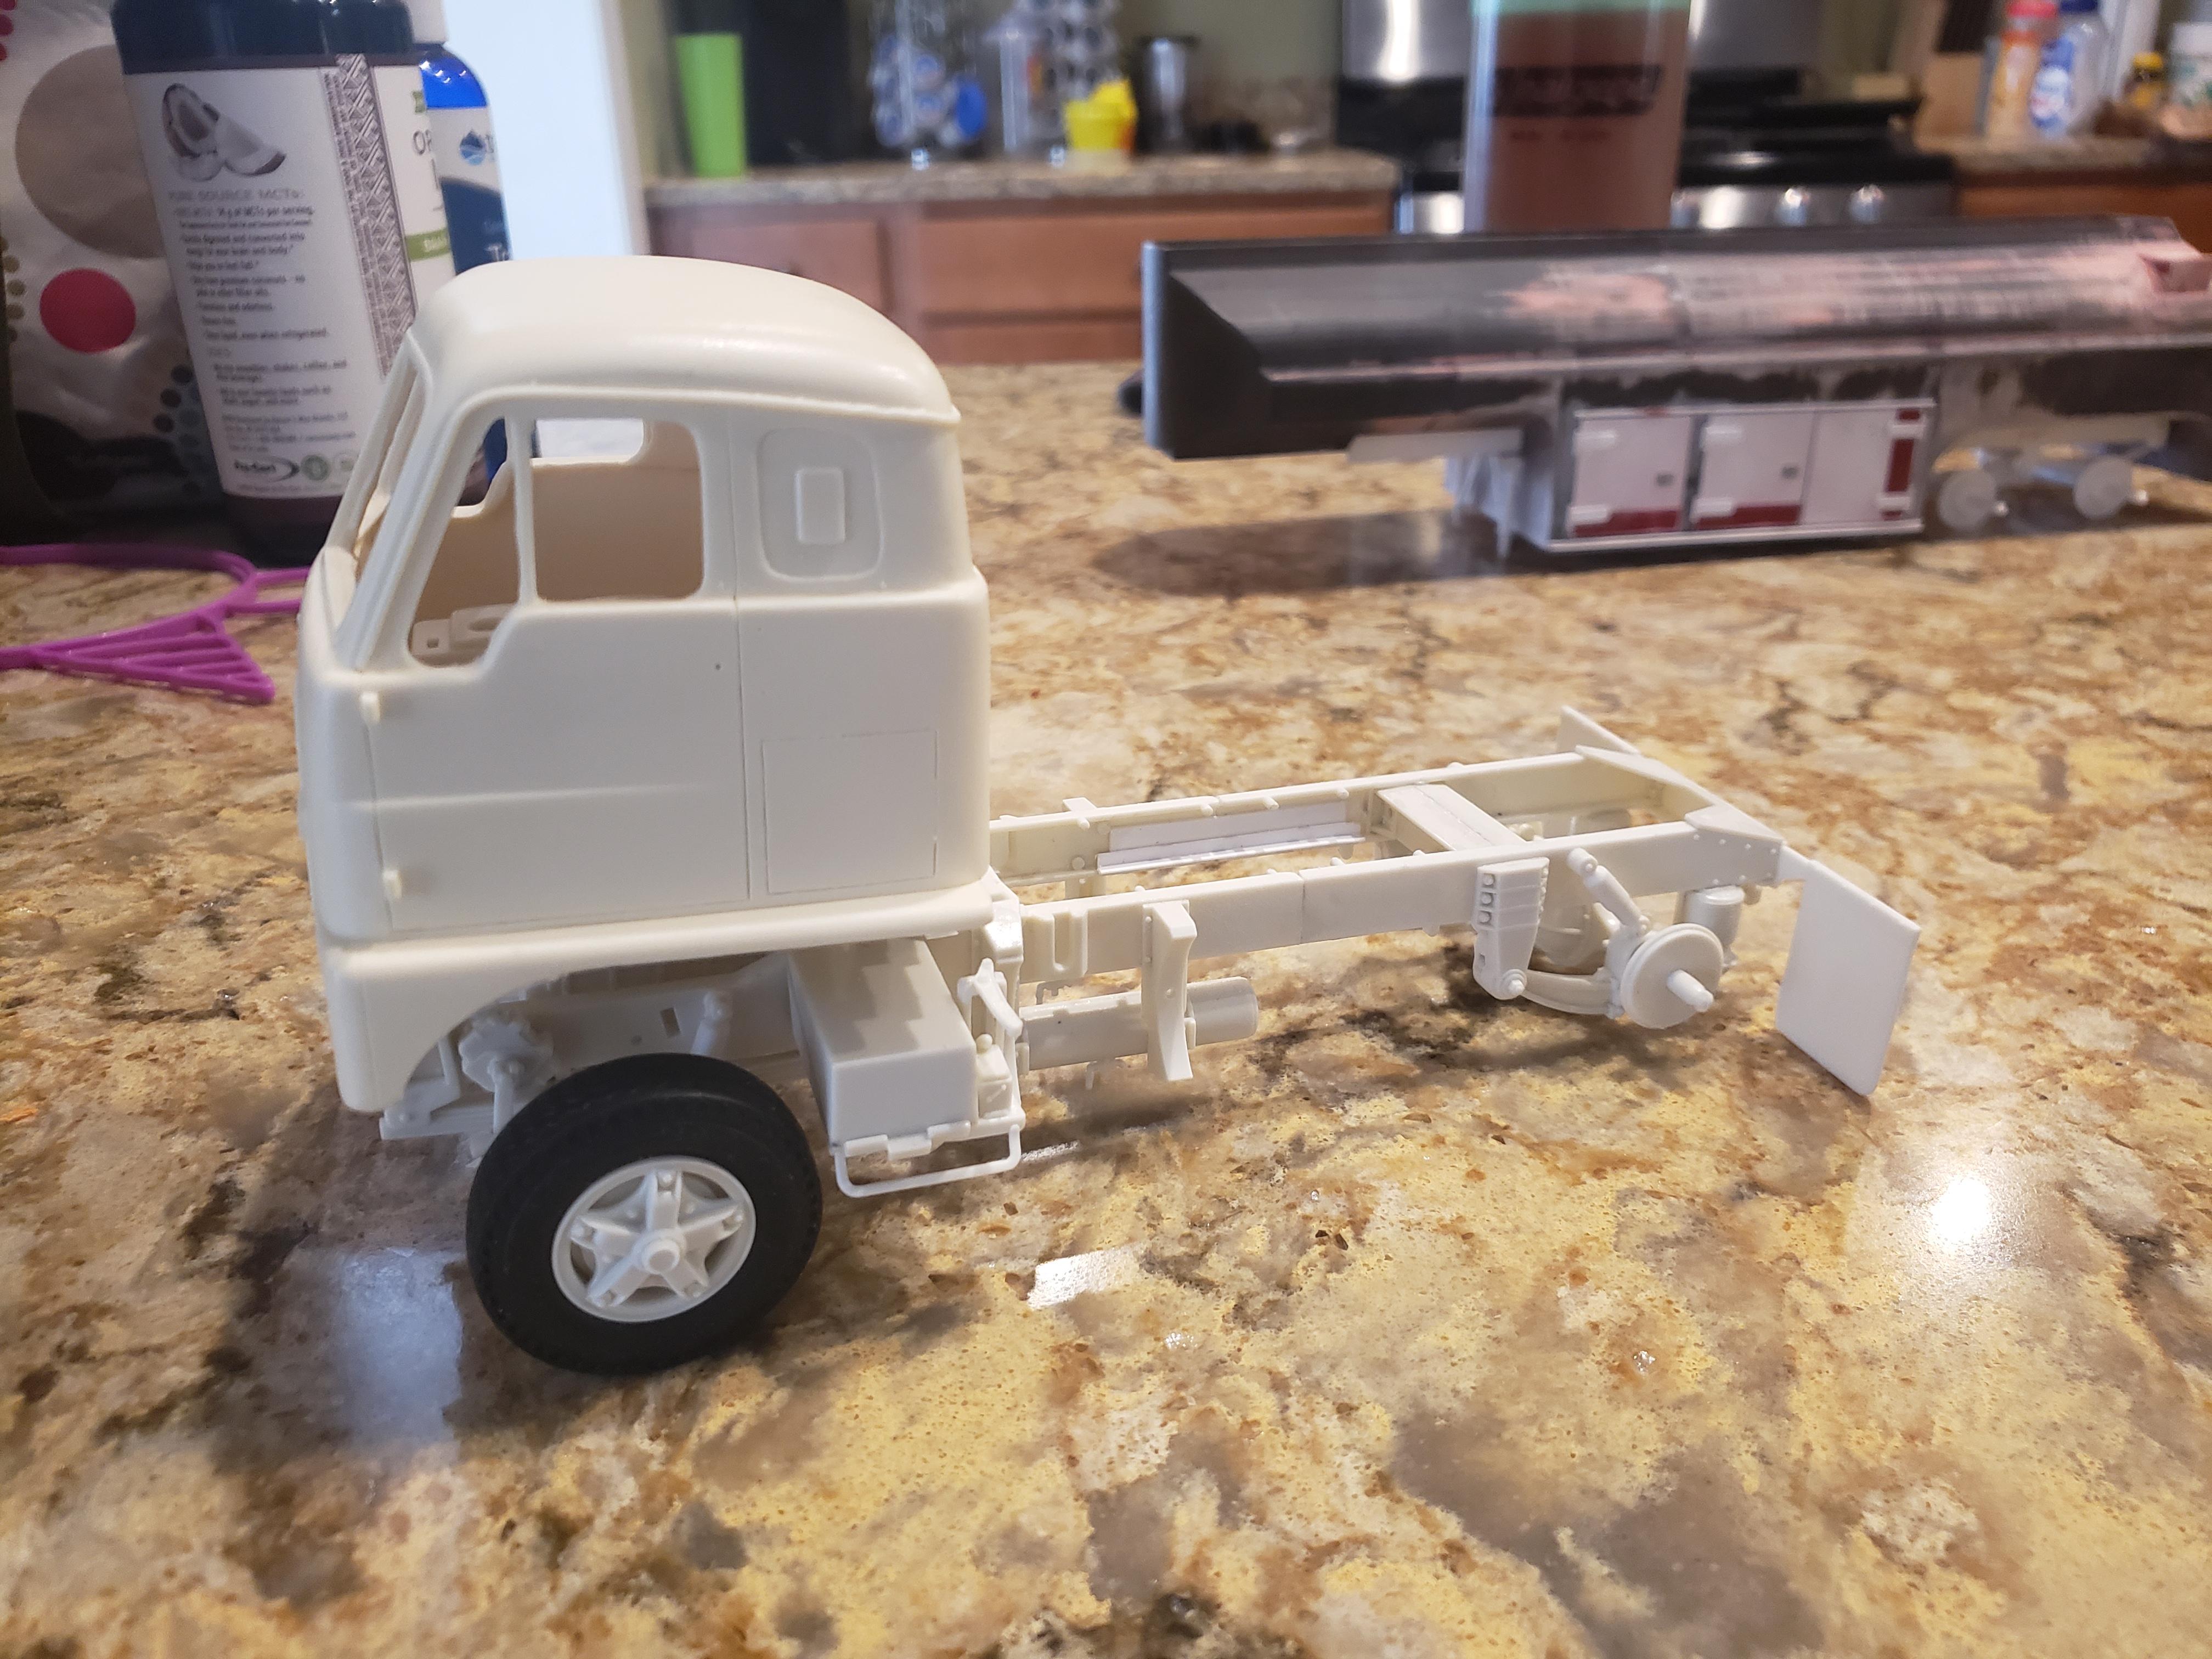
Chopped 2 inches from the front of the tanker, scratchbuilt new compartment doors on both sides and rear, dome tops. Running gear is from the Round2/ old IMC delivery trailer as well as landing gear.
-
Emeryville / Fruehauf tanker
ghoodii replied to ghoodii's topic in WIP: Model Trucks: Big Rigs and Heavy Equipment
Its going to be a fire department tanker....so red. -
Using an AITM Emeryville cab, a Keystone Aluminum "Duel" tanker and a Round2 4070
-
yes it was
-
yes it was, 2nd place in light truck category.....
-
David, Good eye!!!! Yes they are, cut the lights into individual units and used the two outer lights for this, the other two are going to show up on the bumper of the squad truck....
-
Interesting Idea
ghoodii replied to hooknladderno1's topic in WIP: Model Trucks: Pickups, Vans, SUVs, Light Commercial
Dave, Just placed an order with Shapeways....thanks for the heads up....I was needing a stokes basket for my F350 squad..... George -
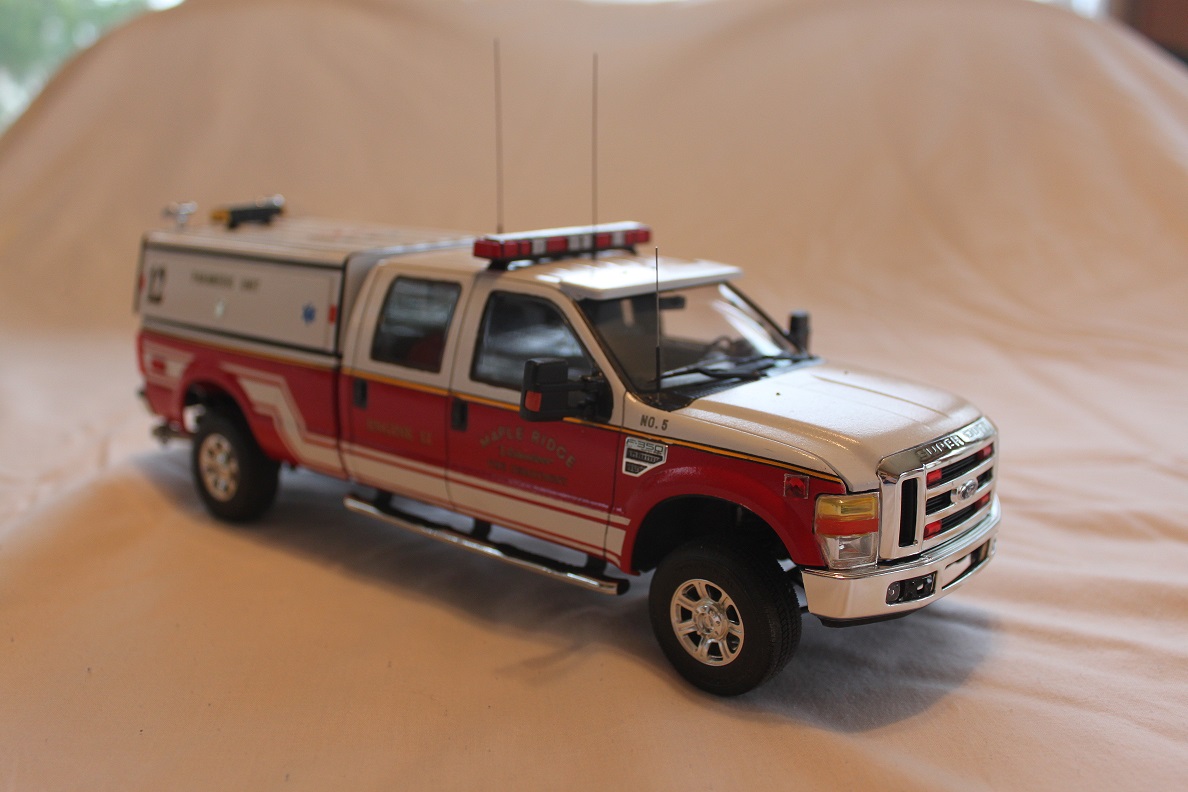
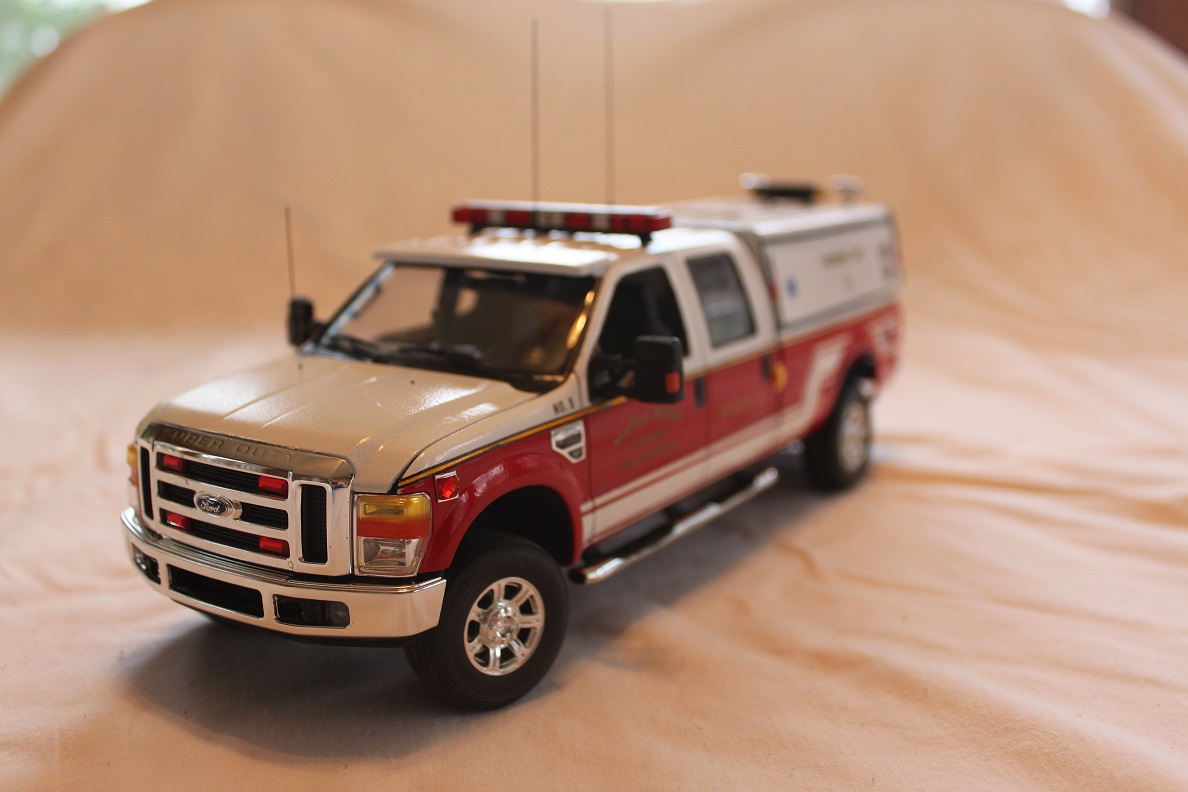
Calling this one done, still working on the Galaxie trailer to go behind....will do better pictures when the sun comes out.....
-
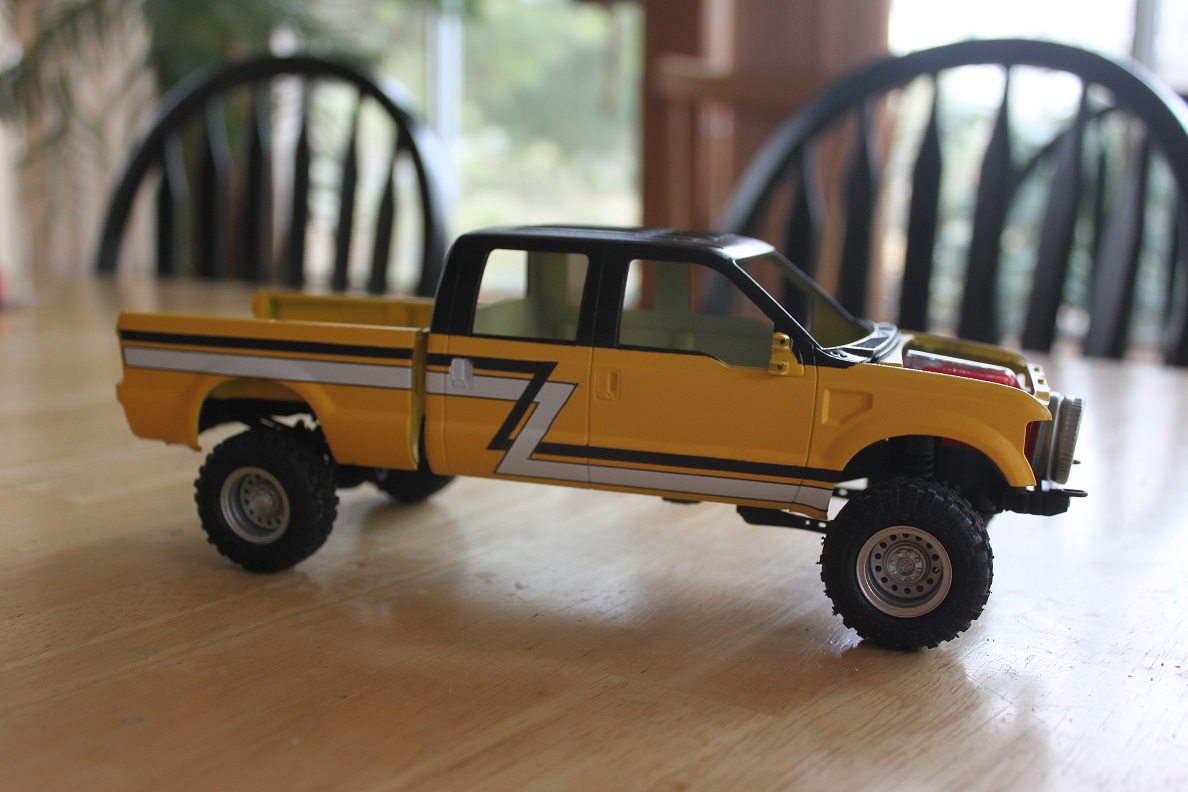
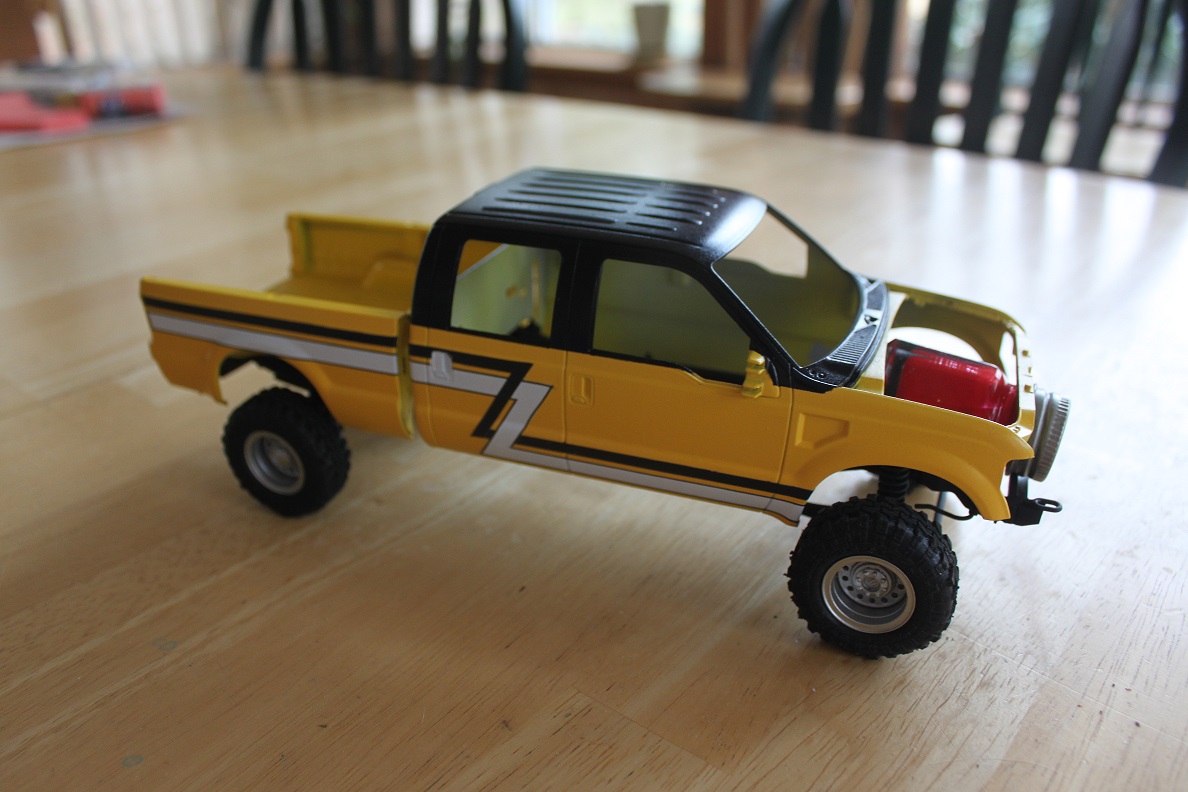
I started with this one.....then got the idea for the squad......then saw the yellow brush truck......I can't stop myself.......still have 1 more waiting......not sure if I'm going to try a dually or go for regular cab long bed??????
-
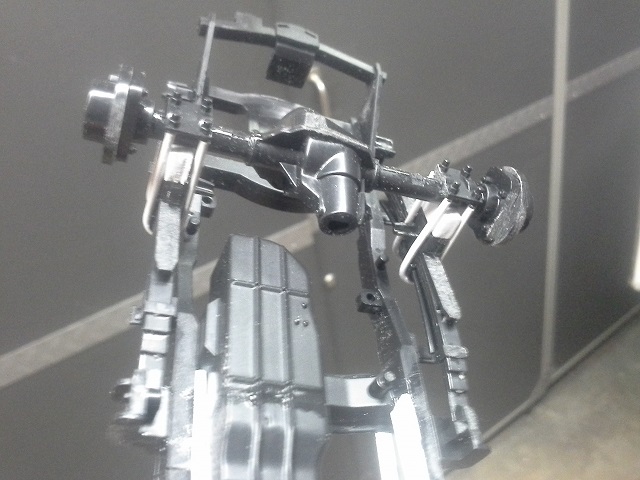
I got the cab over the interior....took some finessing.....but I am off on the chassis to interior tub fit and now my front bumper doesn't line up. Over all I am happy with the kit, but it does have its quirks.....I'll know on the next two......
-
F350 Short Bed
ghoodii replied to ghoodii's topic in WIP: Model Trucks: Pickups, Vans, SUVs, Light Commercial
One of the bed....15mm cut from the front.....not worried about loosing the stake pockets since they will be covered by tool boxes
-
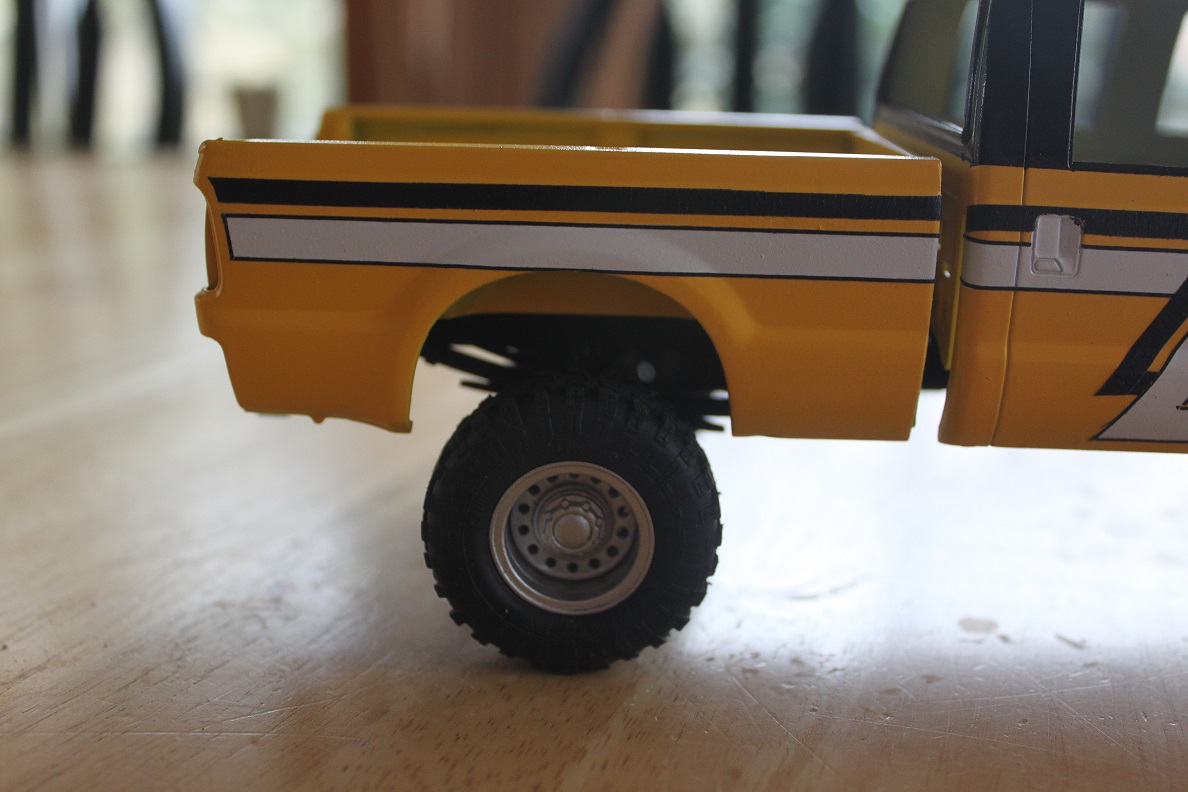
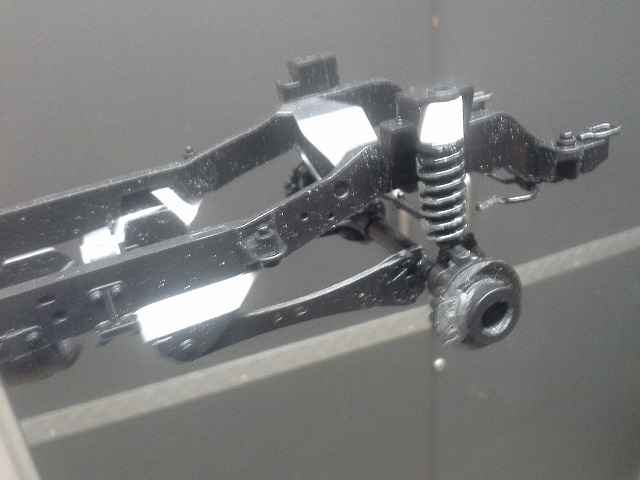
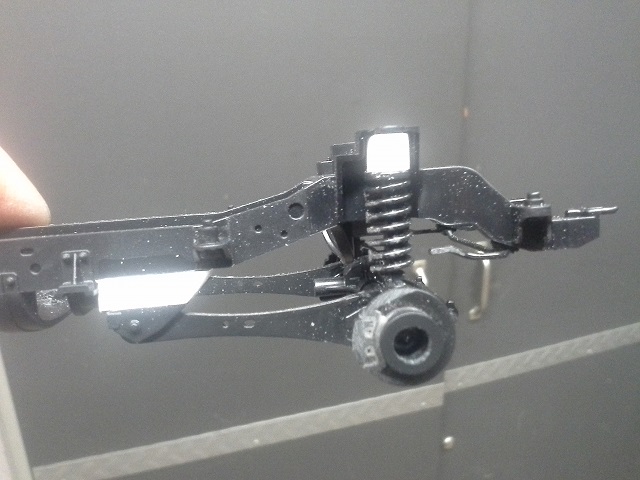
And if two wasn't enough.....saw a picture of a brush truck operated by Benedict VFD in Maryland....so......cut the chassis down by 15mm and added a lift to accommodate the "Scenes Unlimited" wheels with Aoshima tires....perfect combo. Although this wont be an exact match to the 1:1.....it will be close, with scratch built skid mounted tank, pump and hose bed for the back and brushguard on the front..... All three truck are progressing .....
-
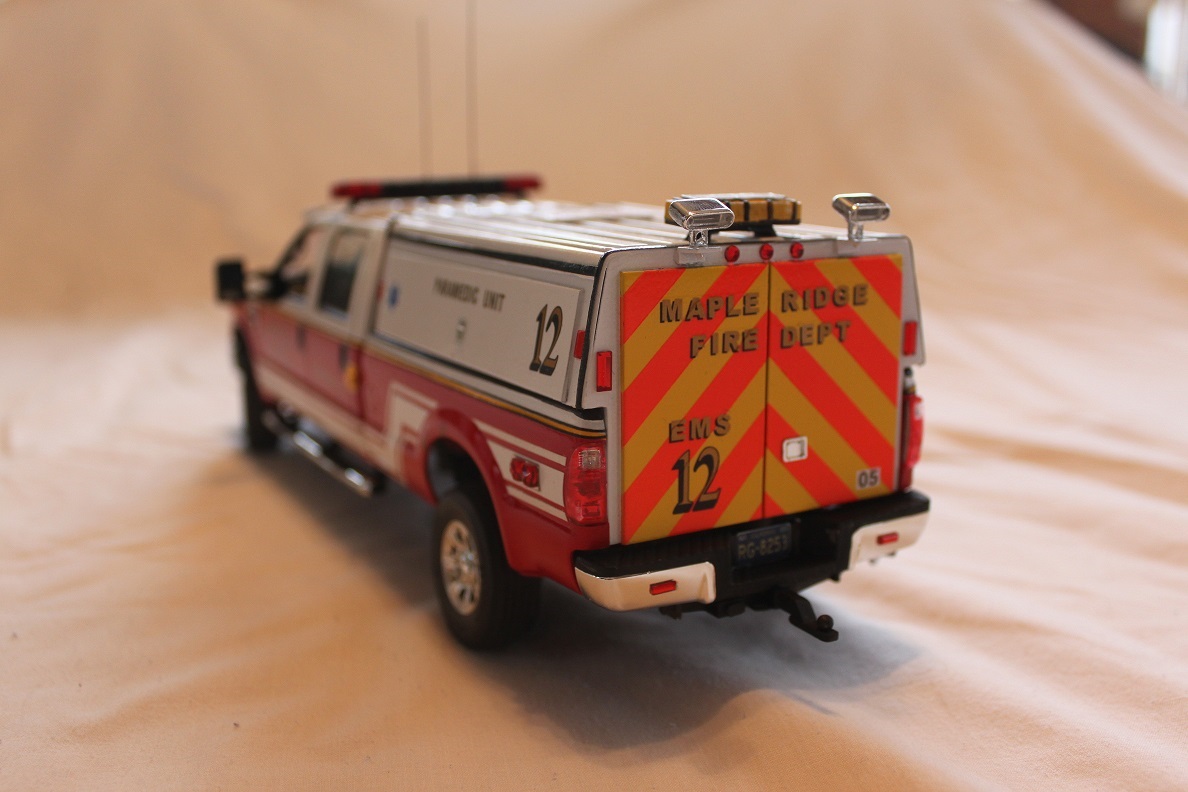
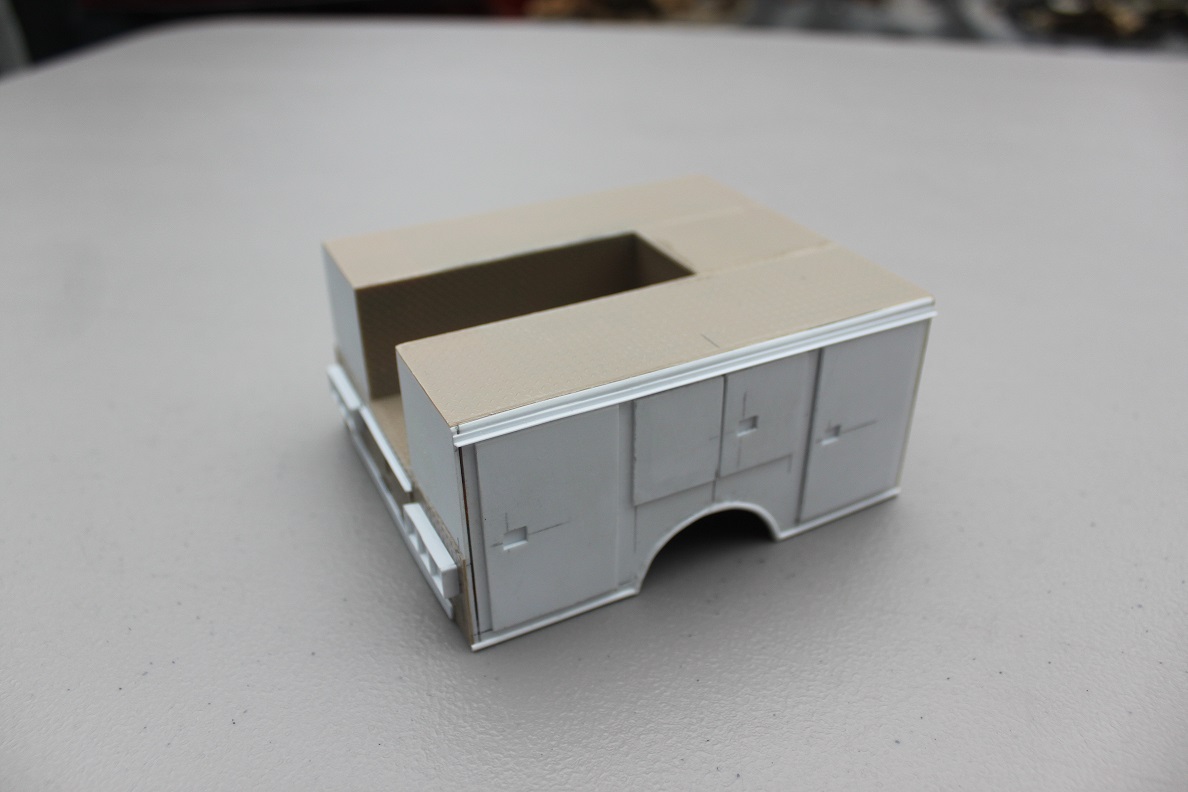
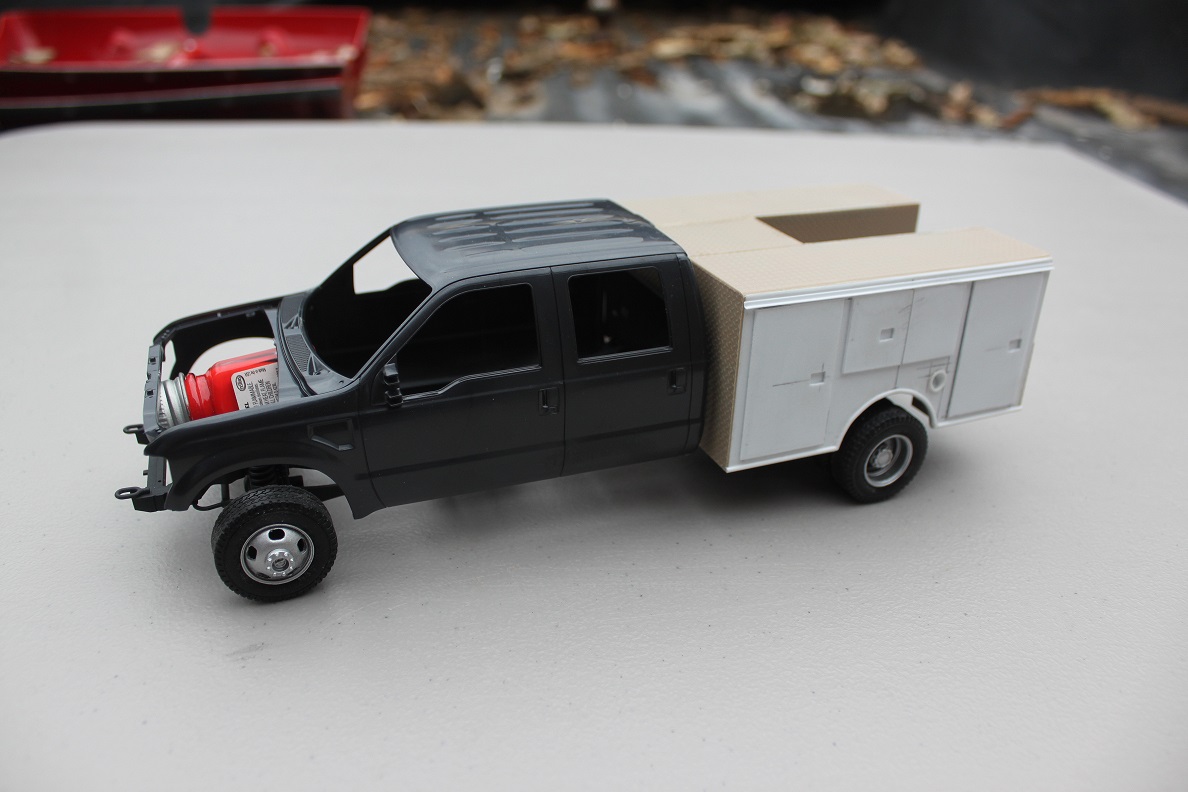
While building the first F350.....the idea to do something different and inspired by the NTSB truck posted here created this.....used "Scenes Unlimited" wheels and tires (highly recommend them)....scratch built utility body......it will be painted to match the Paramedic Response pickup