Tory
-
Posts
48 -
Joined
-
Last visited
Content Type
Profiles
Forums
Events
Gallery
Everything posted by Tory
-
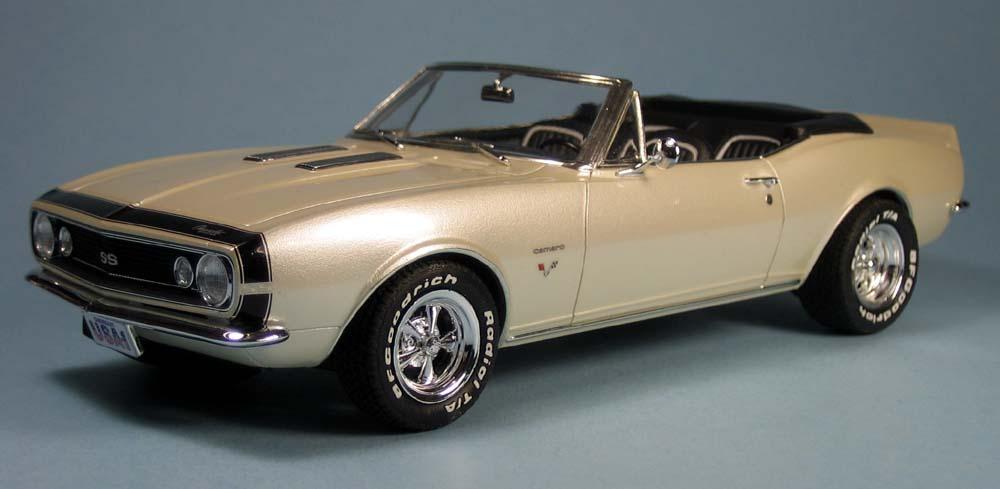
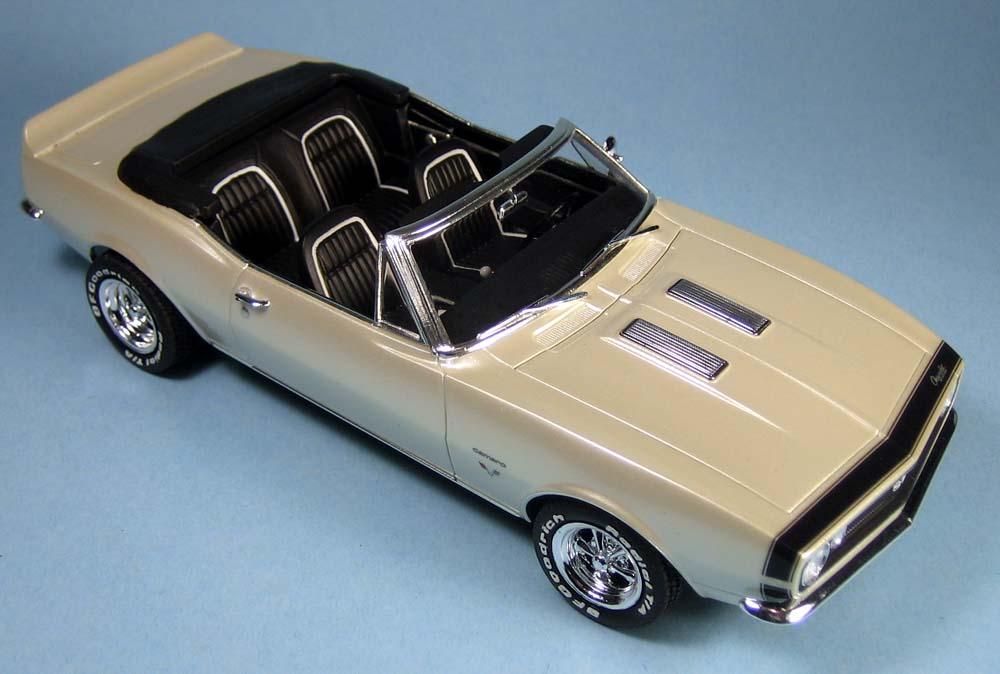
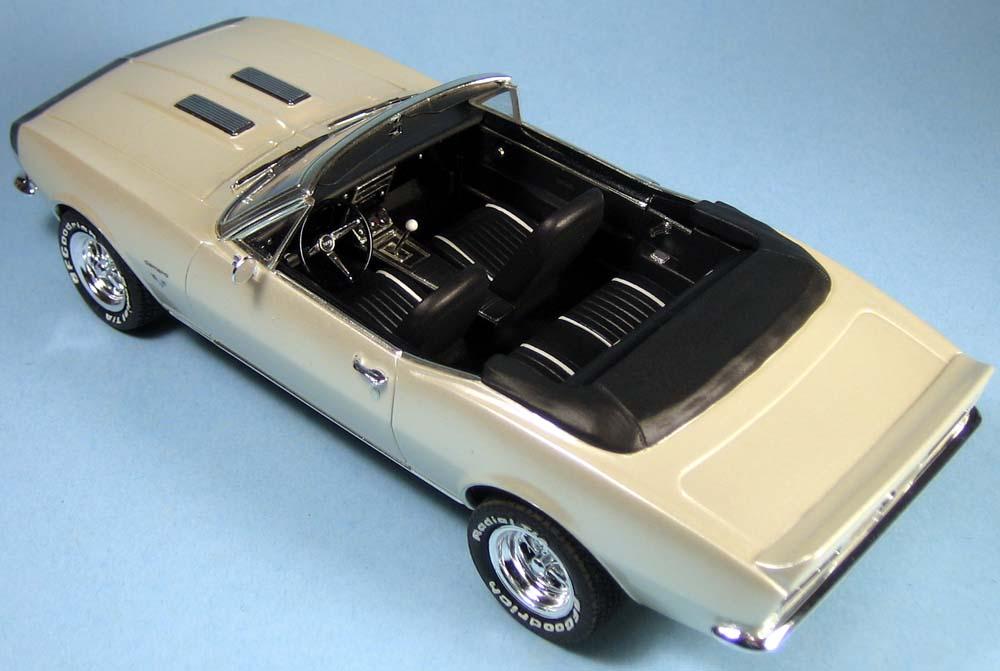
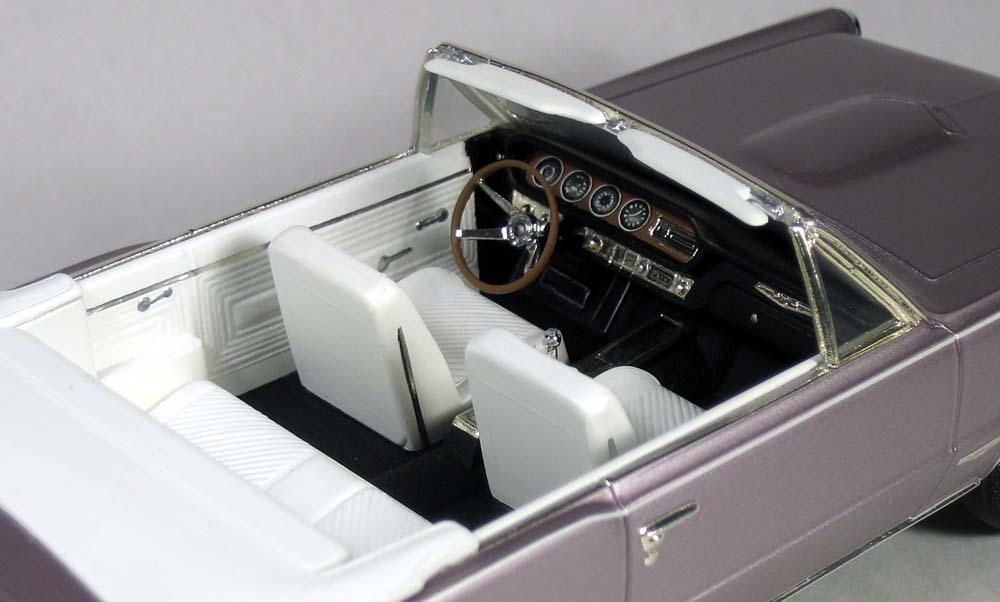
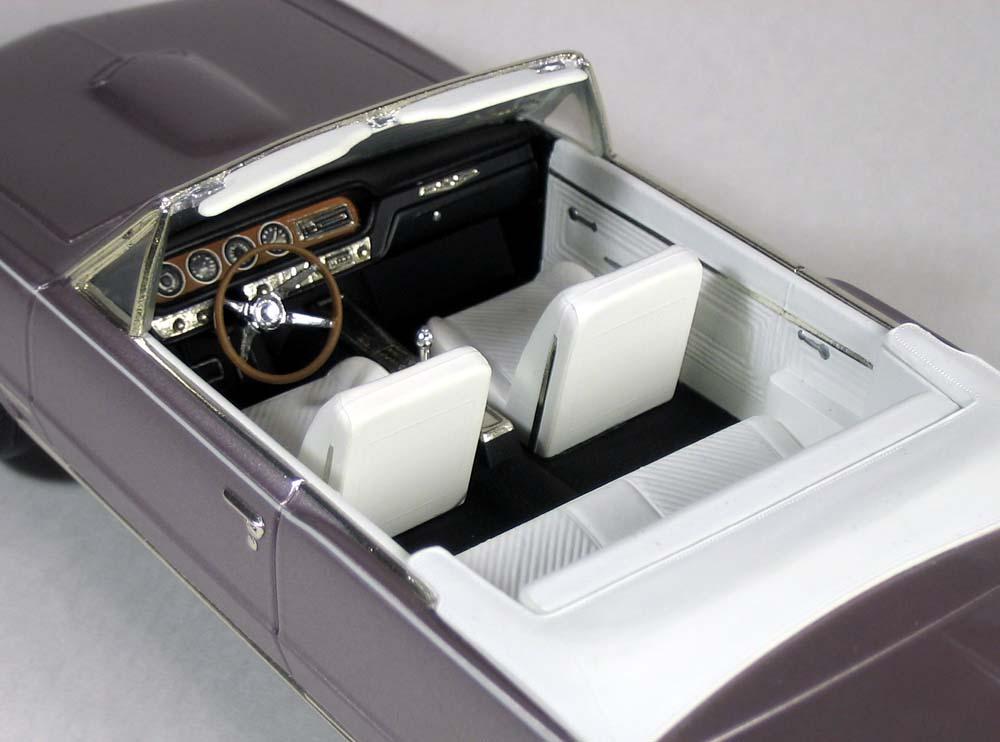
Many thanks for all the kind words! Sorry Len, no build photos, I was on too tight a schedule to take time out to take pictures! Gene, the piping was accomplished by painting the seats white first, then applying very thin strips of masking tape and spraying them black. I use Tamiya brand masking tape and swear by it. After removing the tape, some touch up was required using a fine tip brush and a steady hand! Jim, I used Cadillac White Pearl paint code 800J from Automotive Touch-up. It is a 3 part paint, base coat, mid coat and clear coat. I bit of a pain to spray, but that's what was on the actual car. Tory
-
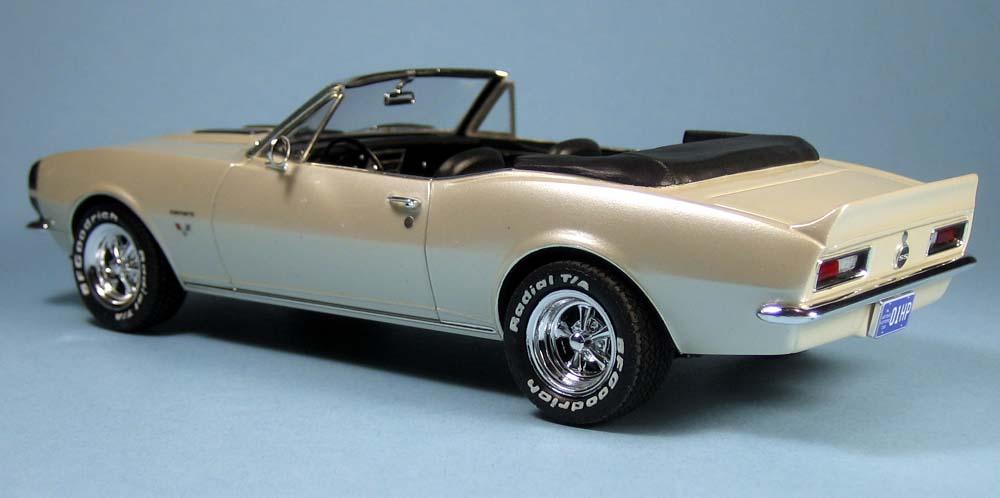
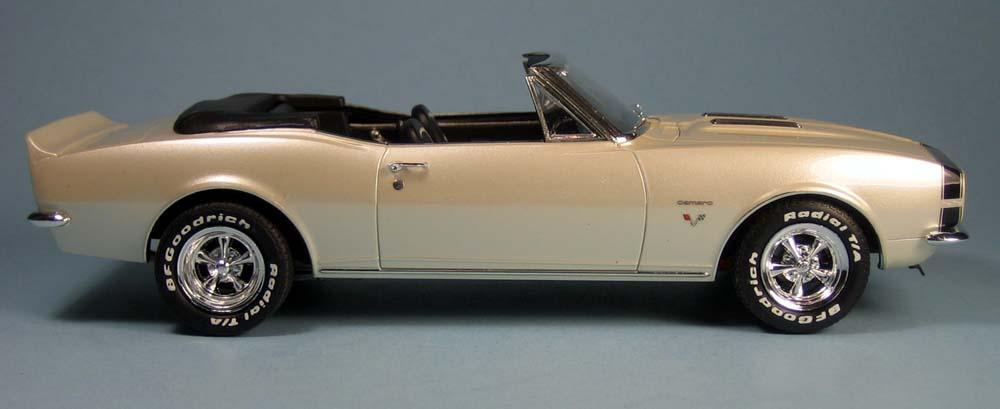
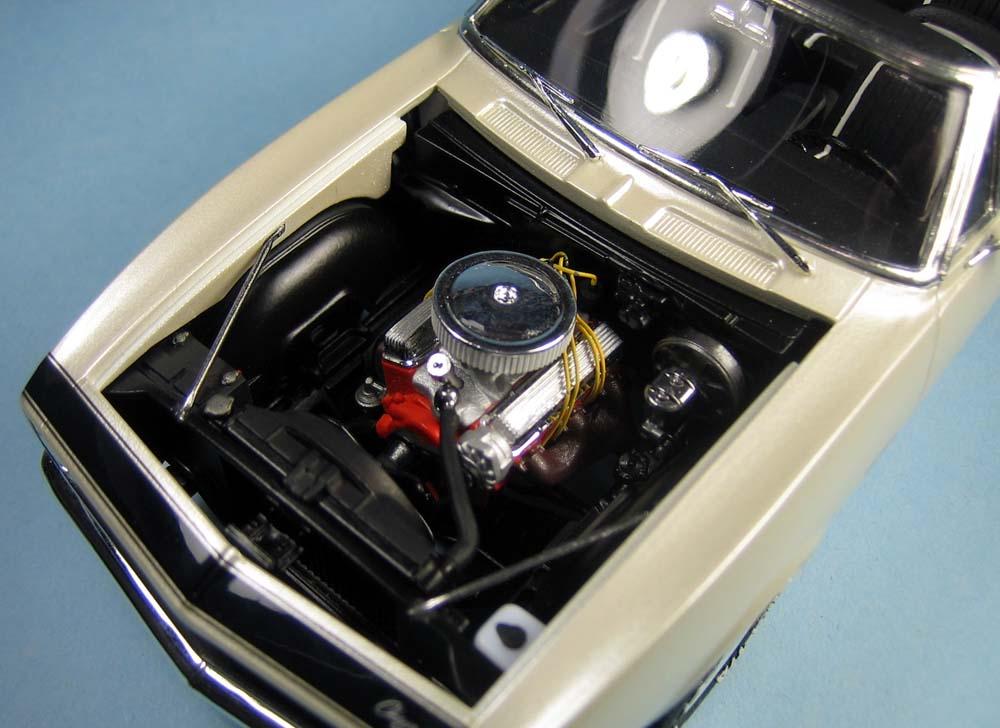
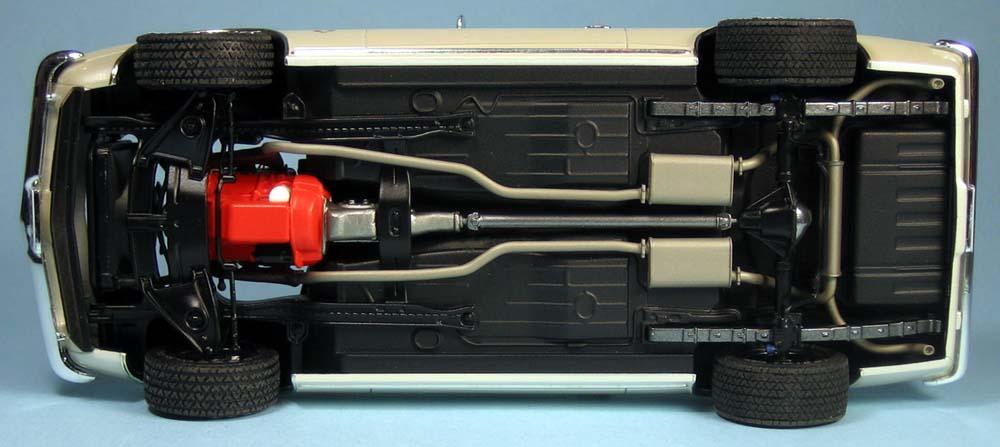
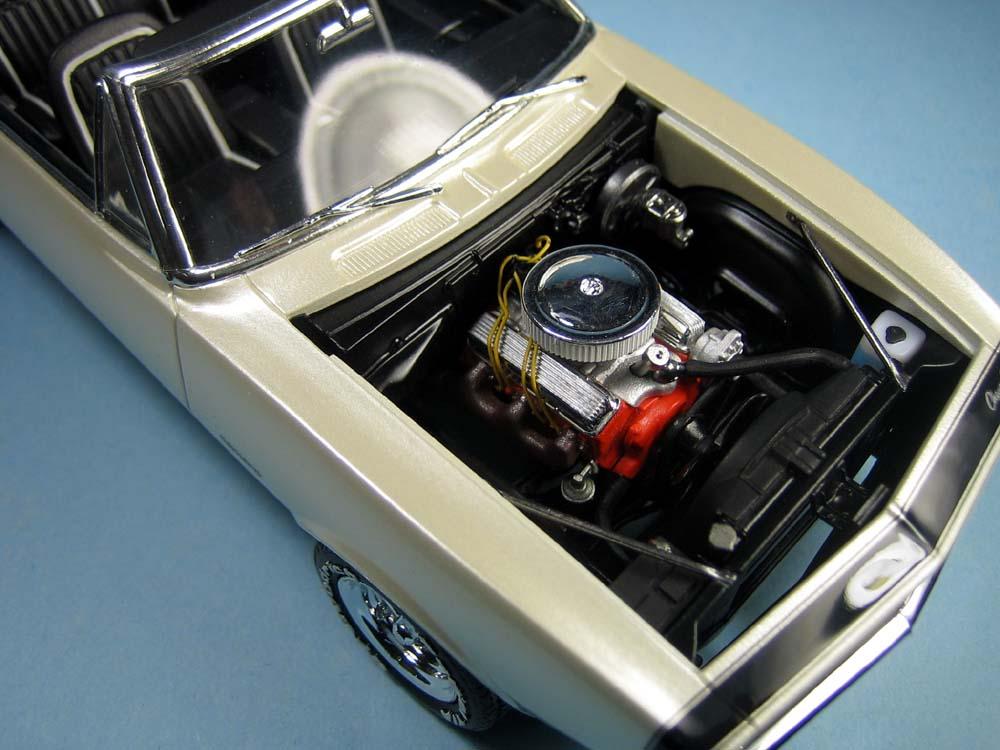
I finally finished my latest project, a 1967 Camaro SS 350 convertible built for my daughter's boss and good friend of the family. He owns the actual car and my daughter wanted to surprise him with a scale model of his car for Christmas. She presented it to him this past Monday and he was bowled over! Good to know it is in a good home where it will be appreciated. It is basically the Revell 1967 Camaro SS kit combined with the rear deck and interior tub and seats from the Revell 1969 Camaro SS Convertible. I started this one back during the summer and if it weren't for so many of my fellow JSMCC club members donating wheels, tires, engines, valve covers, etc. it might not have ever gotten finished! Thanks guys!

-
Thanks! Although I didn't consider it a "sucky" kit per say, just old and in need of a little TLC. It sure does look the part of a '65 GTO so at least they got the body contours right! And thanks to all the kind remarks on these, and for the compliments on my photography. I keep working at improving it and I feel I am getting there! Nice to know others agree! Tory
-
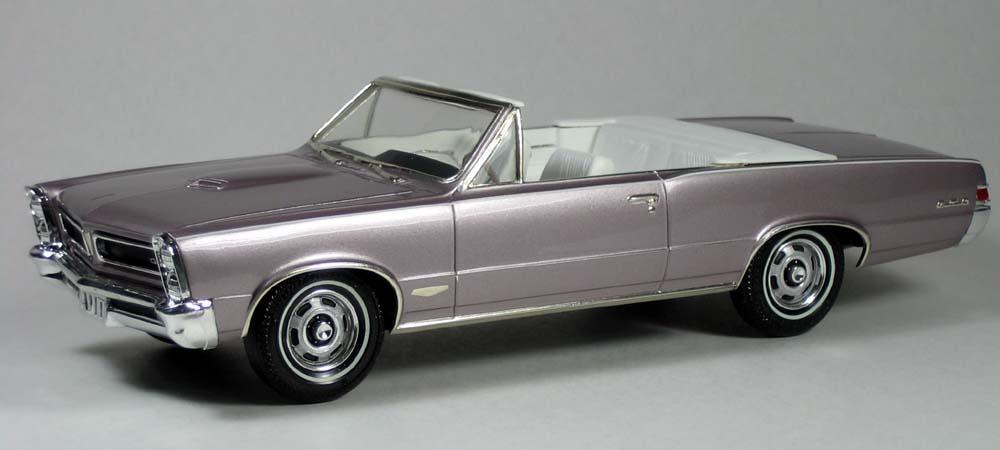
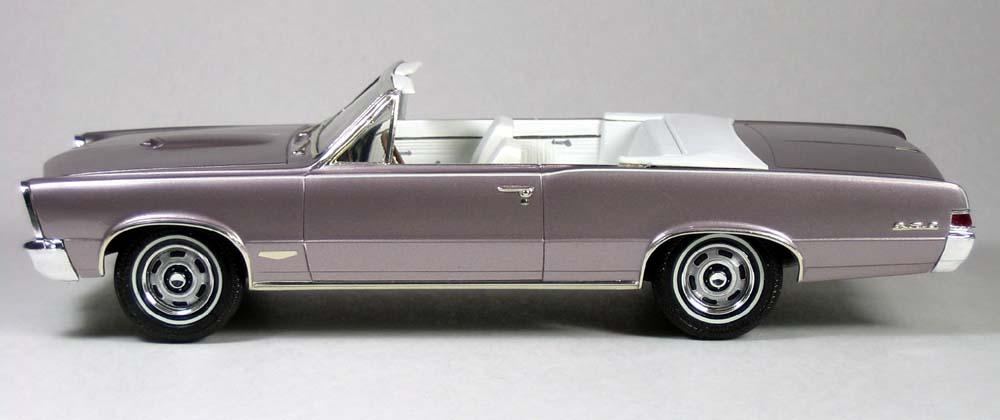
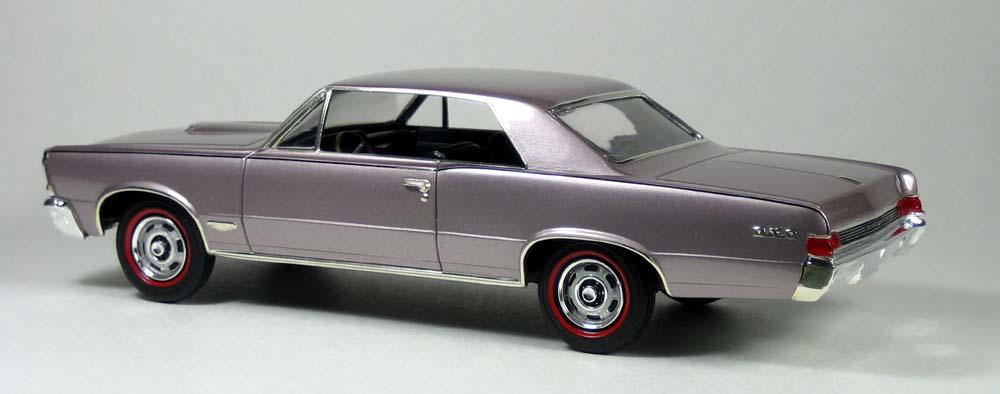
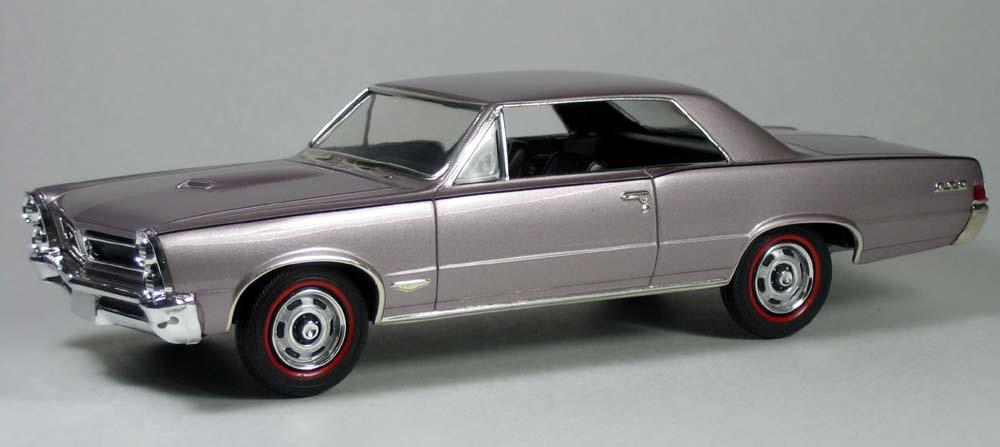
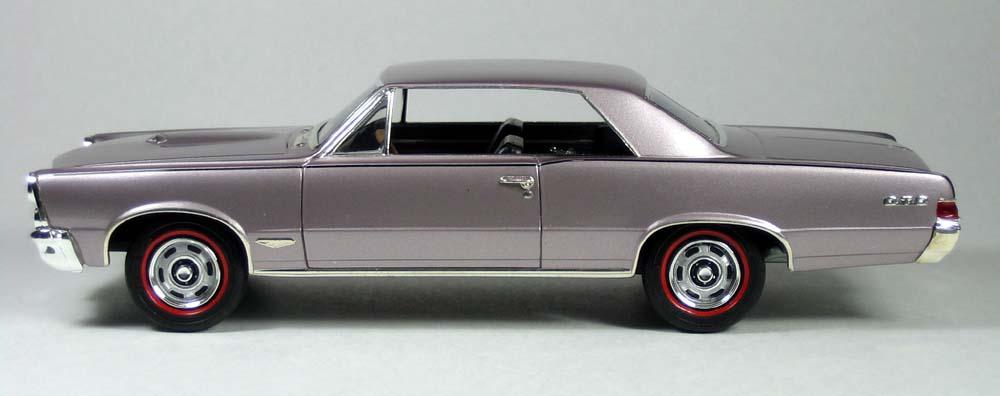
Thank you all for the compliments on my GTOs! It seems the color is a hit.
-
Exactly! And there are tiny differences between them, the original is a lot cleaner, specially the raised lettering on the body.
-
Thanks! The gauges are hand painted. I primed the dash with Tamiya flat white primer. After giving it ample time to dry I did a Testors flat black wash. When that was good and dry, I took a tiny piece of 600 Wet or Dry sandpaper and lightly sanded the high spots until the white base coat showed through nicely. I did some touch up with the flat black and then when it had time to dry I cut tiny circles of masking tape and masked of the bezels. I then airbrushed on the Brown acrylic wood color. That received a dark brown wash as well to give it a more "wood" look. When all of this was done and the gauge masks were removed I lightly sanded the bezels to bring out the white edges, which from a distance in in photos look like chrome. It's a lot of work but I think the results speak for themselves!
-
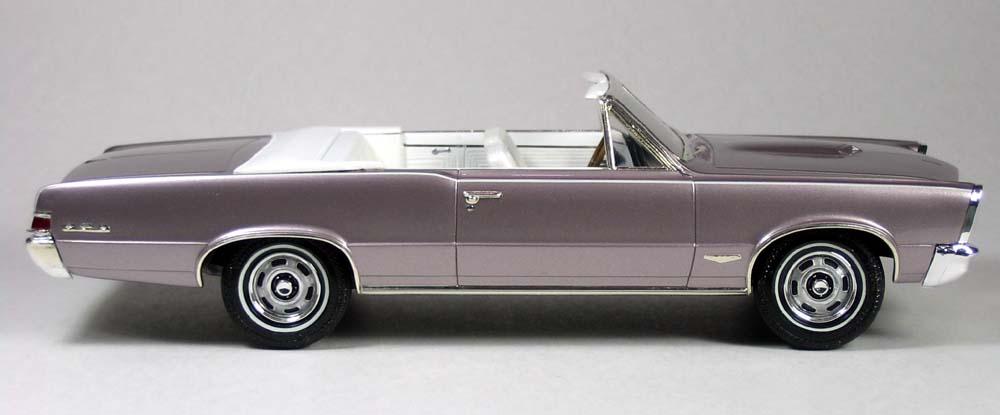
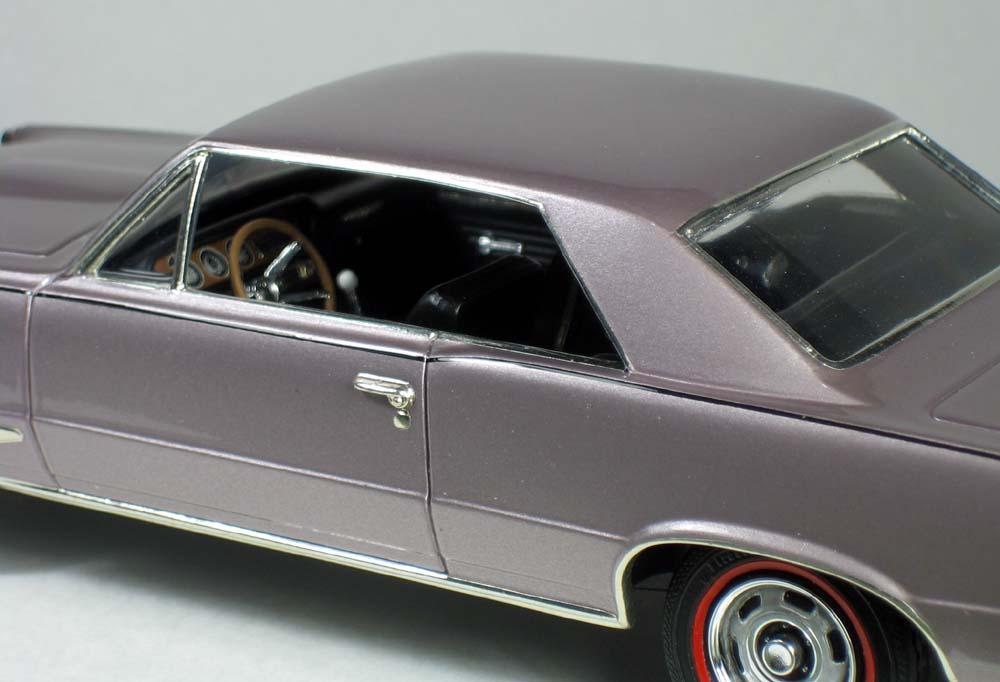
Thanks glad you like it! The wheels are the AMT Rally I parts included in the kit. They are actually very nice if you take the time to paint them carefully. I painted the steel wheel areas Tamiya flat aluminum and the centers and slots with a Testors flat black wash.
-
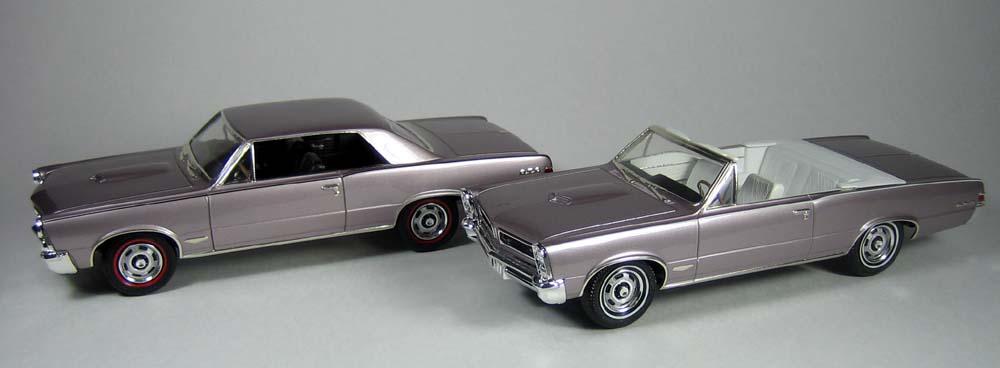
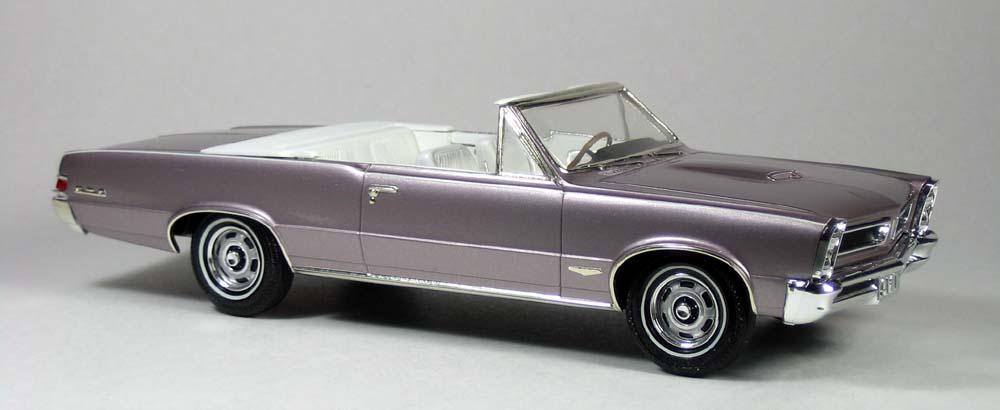
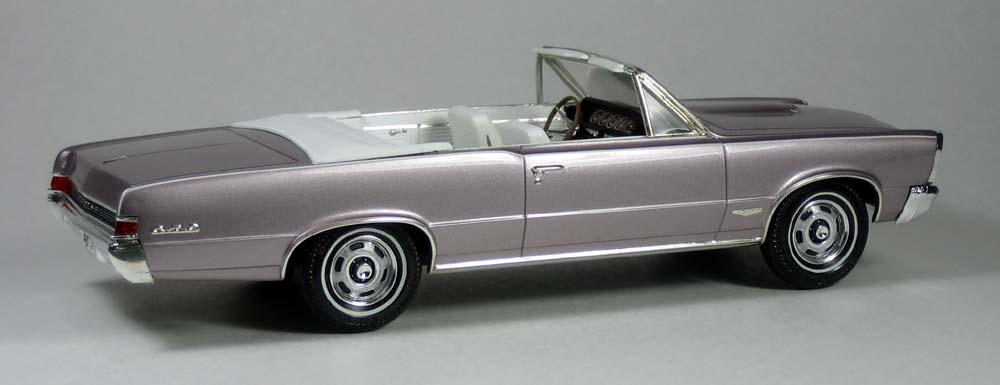
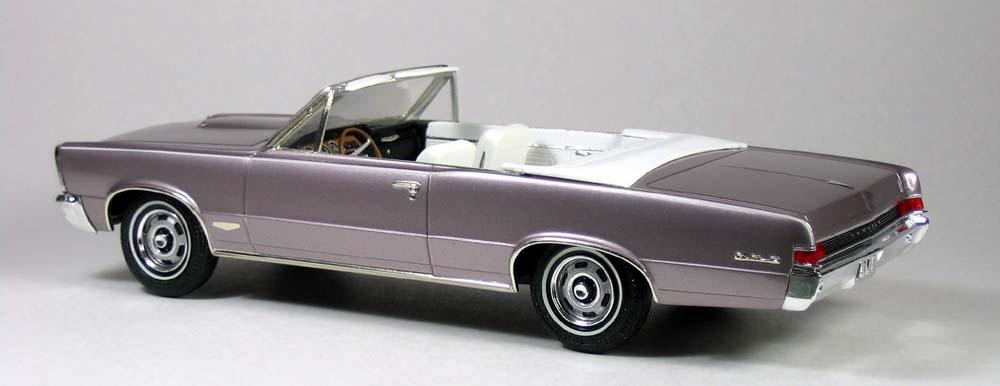
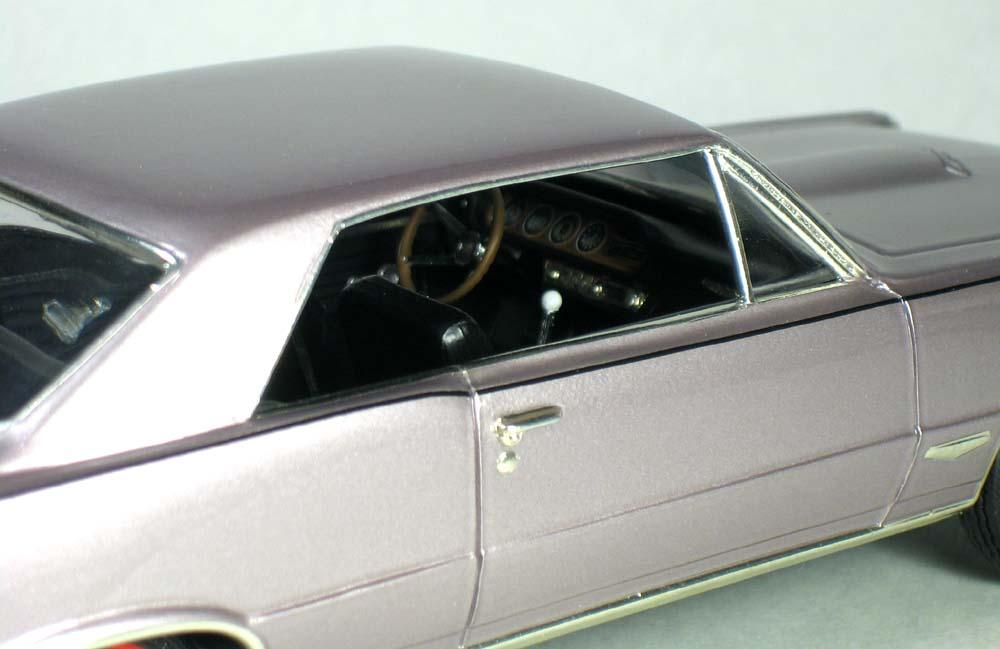
I finally got around to photographing the pair of 1965 GTOs I built back over the winter. They were built for my model car clubs "Showroom Stock" Contest and were meant to be entered as a pair, sort of a his and hers thing. Unfortunately I wasn't aware that the rules state only one model may be entered and so I had to pick one. I went with the convertible and it didn't win, but was very well liked anyhow. The Convertible was built from an original AMT 3 in 1 kit from 1965. The hardtop was from a later reissue of that same kit. Since the kit was designed to be built either as a convertible or hardtop, the top was a separate part that needs to be glued on and blended into the body, no small task as the fit is marginal at best. I decided to finish them in a very unusual color offered in 1965 called Iris Mist. Since they were to be displayed as a pair I painted them both the same color, I gave the hardtop a black interior and the convertible a white interior. I also gave the convertible white wall tires, while the hardtop got classic red lines. Thanks for looking! Tory
-
1/25 '63 Spirit of America
Tory replied to Terry Jessee's topic in General Automotive Talk (Trucks and Cars)
Hi Terry, That looks to be the work of Dave Young, a very good friend of mine! Also one of the most talented builders I've come across. I don't know whether or not he drops in here and I can see this thread has been dormant for years, but anyway, the mystery builder is solved. Tory -
AMT Peterbilt 359 California Hauler Wrecker
Tory replied to Tory's topic in Model Trucks: Big Rigs and Heavy Equipment
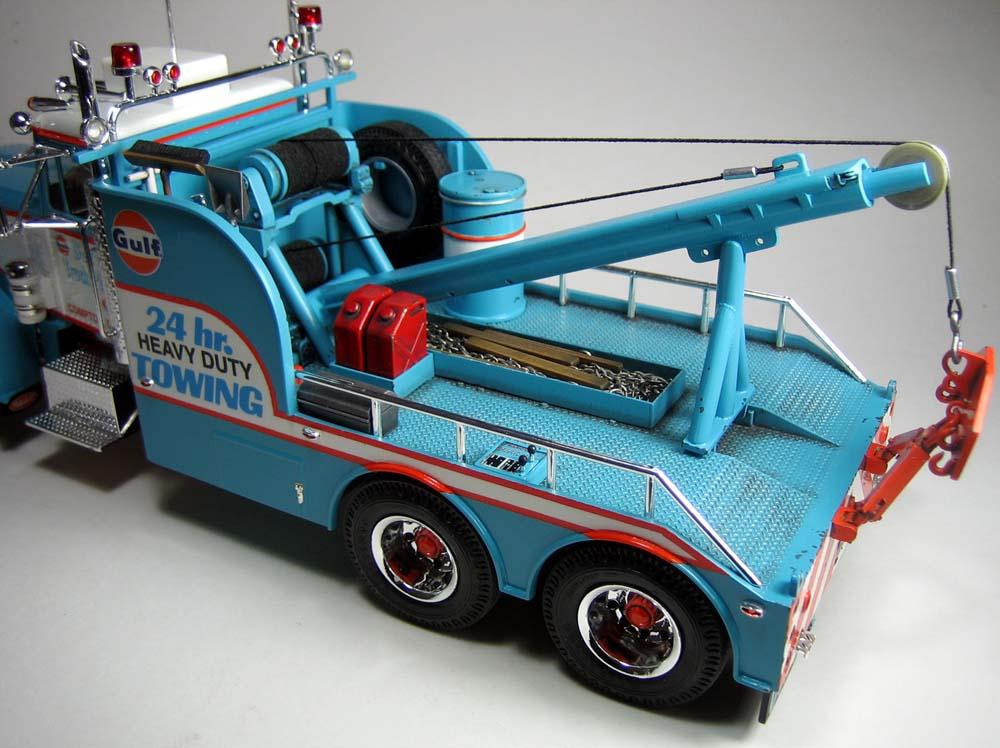
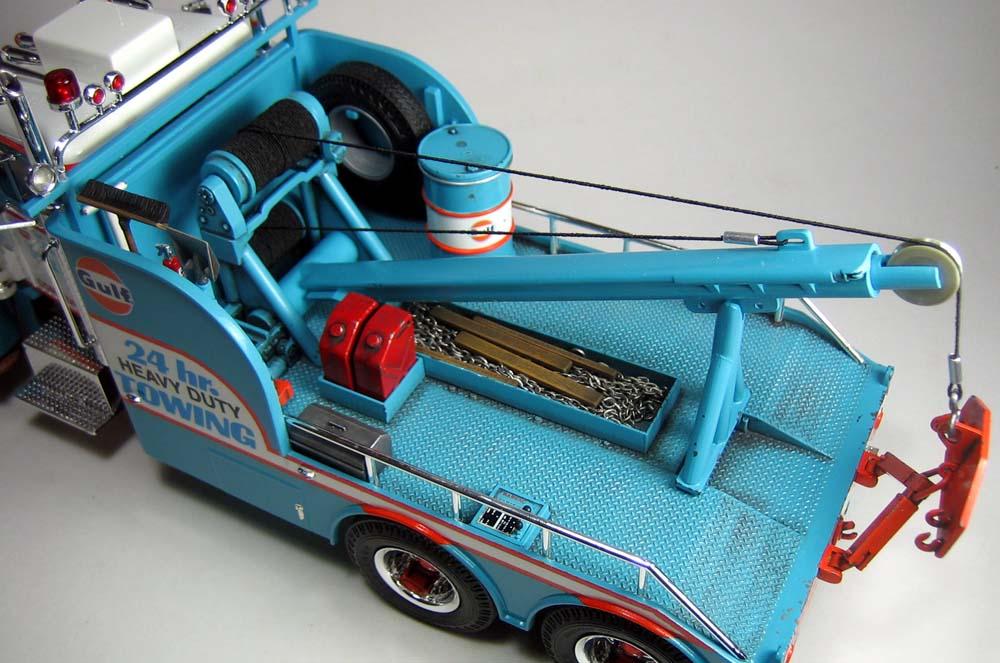
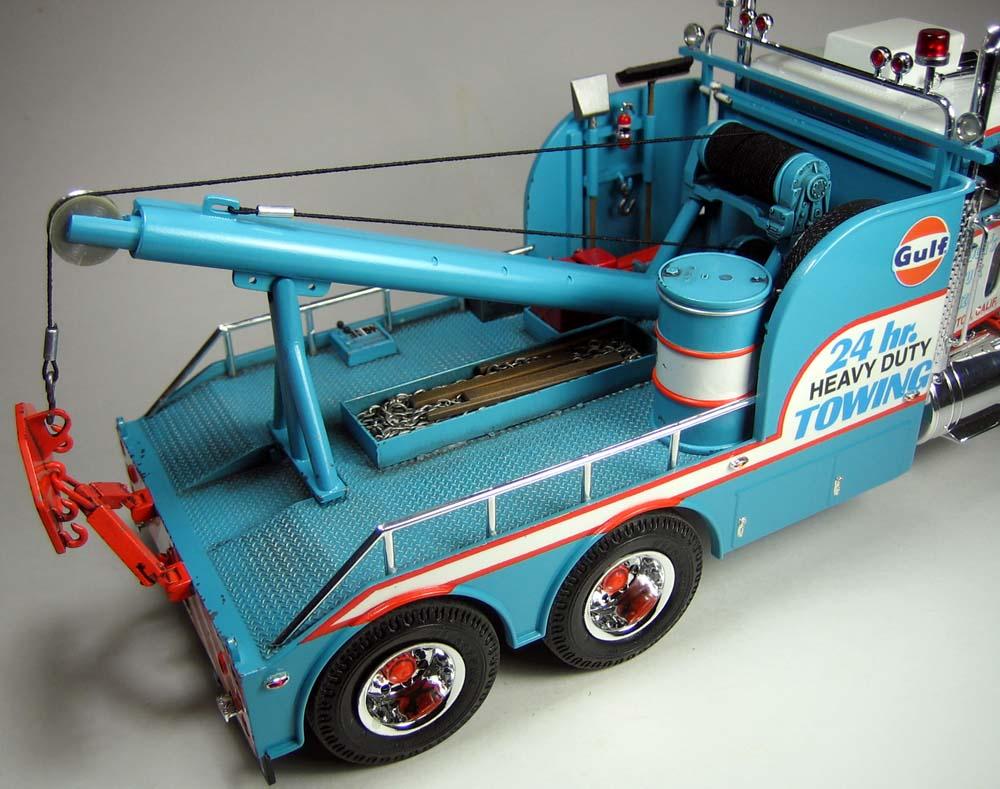
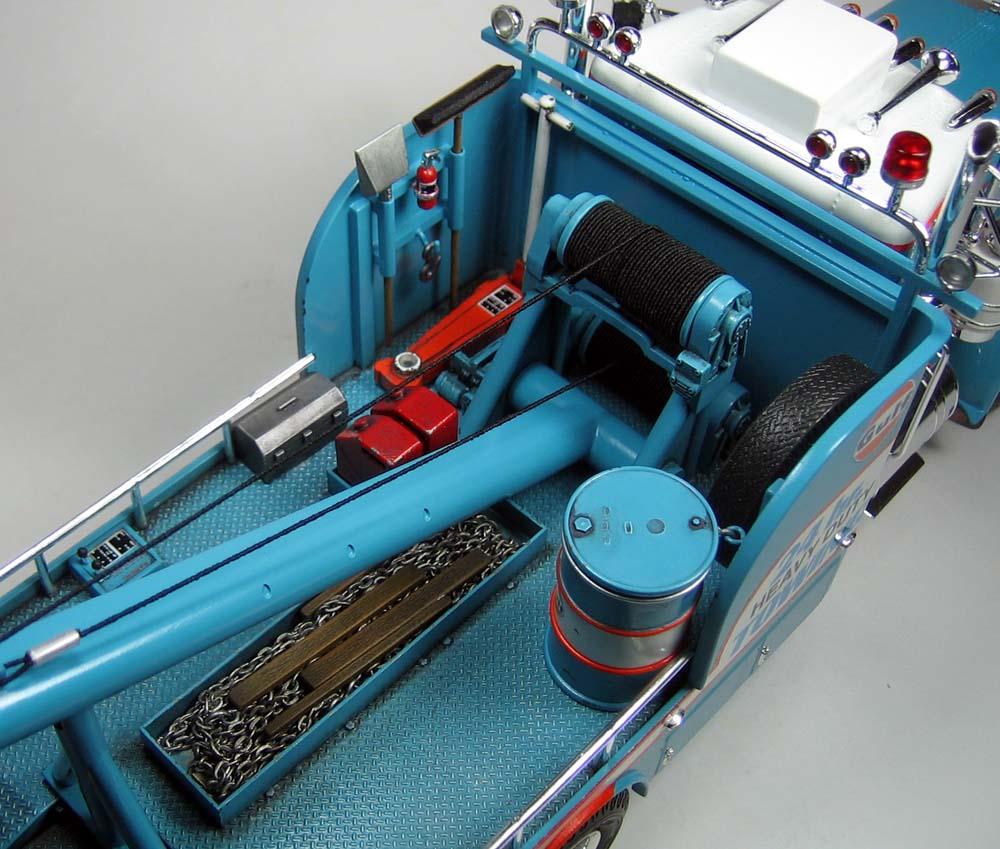
Again, many thanks for all the kind words on my Wrecker! As I mentioned, I had hoped to add additional details to the deck, as it does look a little sterile for a work horse. Here are some photos of what I have done since the original post. The tool box, floor jack, gas cans, broom, shovel, fire extinguisher, spare hook, and wood planks were all included in the wrecker kit. I scratch built the boxes for the chain and gas cans as well as the rack that holds the broom and shovel out of Evergreen Styrene stock. The chain was purchased at a Michael's Craft Store. The securing strap for the 50 gallon drum was made from some soft wire stock along with the ring that it is attached to the side of the body. Some additional chrome was added to the body storage door handles using Bare Metal Foil. I also added some paint chipping along the rear deck edge as I am sure this area would have gotten chipped up while loading and unloading the various tools and supplies. I also chipped up the orange towing apparatus as this too would have been subject to this sort of abuse. All in all I think it really fills out the work area nicely. Tory
-
AMT Peterbilt 359 California Hauler Wrecker
Tory replied to Tory's topic in Model Trucks: Big Rigs and Heavy Equipment
Thank you all again for all the kind words on my Wrecker! I am so glad it has found favor here. I am currently putting the finishing touches on some accessories to add to the back to "busy" it up a little. When they are in place I will post some additional photos. Jacobus, I am honored to be an inspiration for a restoration of your old Wrecker. Glad you like the color, I thought it worked well for this vintage truck. Tory -
AMT Peterbilt 359 California Hauler Wrecker
Tory replied to Tory's topic in Model Trucks: Big Rigs and Heavy Equipment
Gator, Thanks for the suggestions. I'm thinking the ratchet strap might be the easier way from a modeling point of view, although since this truck is meant to be from the late '60s-early '70s would that have been in use at the time? -
AMT Peterbilt 359 California Hauler Wrecker
Tory replied to Tory's topic in Model Trucks: Big Rigs and Heavy Equipment
Wow, beautiful model Clayton, love the color combination and detail you added to the bed. Thank you for sharing the link! Terry thanks for the suggestions I will certainly keep them in mind as I attempt to clutter the bed! Tory -
AMT Peterbilt 359 California Hauler Wrecker
Tory replied to Tory's topic in Model Trucks: Big Rigs and Heavy Equipment
Thank you Clayton, that is extreemely helpful. Are more photos of your rig posted here? I would love to see all of it, looks like a beautiful model! -
AMT Peterbilt 359 California Hauler Wrecker
Tory replied to Tory's topic in Model Trucks: Big Rigs and Heavy Equipment
Thanks again guys! The more I look at it the more I feel it needs a little more "clutter" in the back. Since the kit came with a bunch of accessories, I've decided to paint them up and add them to the wrecker body deck to "busy" it up. Also, I think the 50 gallon drum needs to be secured somehow, any of you truck experts know how this would be done in real life? Would they wrap a chain around it? Bungee cords? Any suggestions would be welcome. As a matter of fact, if any of you think it might benefit from other things added (chains, cables, tools, etc.) let me know. Thanks. Tory -
AMT Peterbilt 359 California Hauler Wrecker
Tory replied to Tory's topic in Model Trucks: Big Rigs and Heavy Equipment
Thanks again guys! JT, I agree that swapping the fuel tank and battery box really gives it that little something extra. Again, this was a suggestion from my buddy Mike who also supplied me with these parts. I can't thank him enough for his help on this project! Dave, for the exhaust manifolds I stripped the chrome and primed them with Plastikote sandable gray auto primer. They were airbrushed with Floquil Tuscan Red (a model railroad color) and then given a light dusting of orange artist oil pastel. I also did a little Floquil Grimy Black wash around the mounting bolts to blend it into the engine grime. Hope that helps. Tory -
AMT Peterbilt 359 California Hauler Wrecker
Tory replied to Tory's topic in Model Trucks: Big Rigs and Heavy Equipment
Again, many thanks for all the kind words on my Wrecker. I agree, narrowing the bed makes a huge improvement as the wheels and tires sit right at the edge of the body where they should. I've seen other builds of this kit that didn't narrow the body and the wheels and tires look a little odd sitting in so far. And if it wasn't for my buddy Mike Capasso letting me in on this little trick, mine would have had the same issue! "Checkmate" Rob, I toyed with painting the inside of the wrecker body and boom orange but decided to stick with the blue for no other reason than I ran out of orange paint and was too cheap to buy more LOL! In the end, I think the blue works better and kept it closer to the box art. But I still wonder how it might have looked with the orange... -
AMT Peterbilt 359 California Hauler Wrecker
Tory replied to Tory's topic in Model Trucks: Big Rigs and Heavy Equipment
Here is how I narrowed the body: 1. I removed 1/8" from each side of the deck. 2. I cut 1/4" out of the center of the front upright wall. This also requires removing 1/8" from each side of the opening on the bottom to clear the frame rails. 3. I removed 1/8" from both sides of the rear panel between taillights and license plate recess. See diagram below. -
AMT Peterbilt 359 California Hauler Wrecker
Tory replied to Tory's topic in Model Trucks: Big Rigs and Heavy Equipment
Let me clarify this statement a little, I've built hundreds of models since I was a kid, however this is the first "big rig" I've done in a very long time. Sorry if that statement is misleading! -
AMT Peterbilt 359 California Hauler Wrecker
Tory replied to Tory's topic in Model Trucks: Big Rigs and Heavy Equipment
Thanks for the advice Clayton, I assume you mean on the handles? I also went back and forth on foiling the trim strip down the hood. I've seen it both ways, but for a rig that has as much bling as this one, I thought it might have been overkill! Tory -
AMT Peterbilt 359 California Hauler Wrecker
Tory replied to Tory's topic in Model Trucks: Big Rigs and Heavy Equipment
Many thanks again for all the kind words. Seeing how so many of you are masterful builders, these compliments carry a lot of weight. Good catch on the narrower body JT, another bit of advice given to me by my buddy Mike. The only drawback with that is the 50 gallon drum no longer fits in that corner. But otherwise having the tires flush with the sides of the body really helps the aesthetics. Tory -
AMT Peterbilt 359 California Hauler Wrecker
Tory replied to Tory's topic in Model Trucks: Big Rigs and Heavy Equipment
Thanks Helmut, yes the tank and battery box are from the Revell snap kit. I thought it needed a little "bling"! And thank you all for the kind words on my model, I am delighted it found favor here! Here are a few Chassis shots showing the weathering below. I wanted it to have a used but not abused look, a clean work but not a show truck sort of thing. Tory -
I just completed this AMT Peterbilt Wrecker using the recently reissued California Hauler kit combined with an AMT/Ertl Wrecker kit. I was hoping to represent it in its original incarnation reflecting the first issue box art. This is my first official truck build since I was a kid and under the tutelage of fellow Jersey Shore Model Car Club member Mike Capasso saw it to completion in time for our club's Heavy Commercial Contest Night last Friday. It is finished in overall Tamiya Coral Blue with Tamiya Pure White and Orange accents. I took a few liberties but on the whole tried to remain faithful to the original kit. Hope you all like it. Original Box Art Tory
-
Thanks Walter, I can't wait to see what I come up with next too! I can assure you I will be as surprised as the next guy!
-
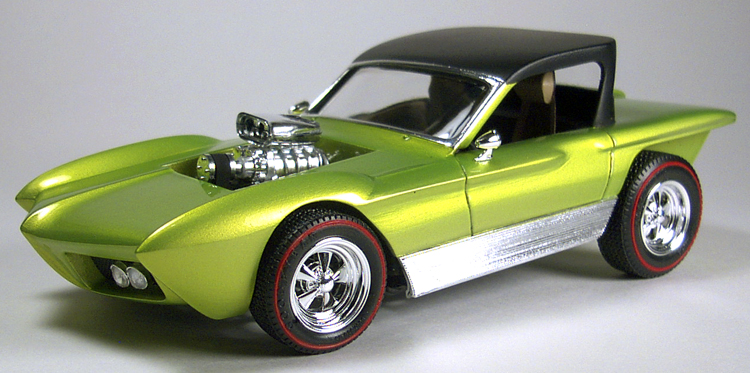
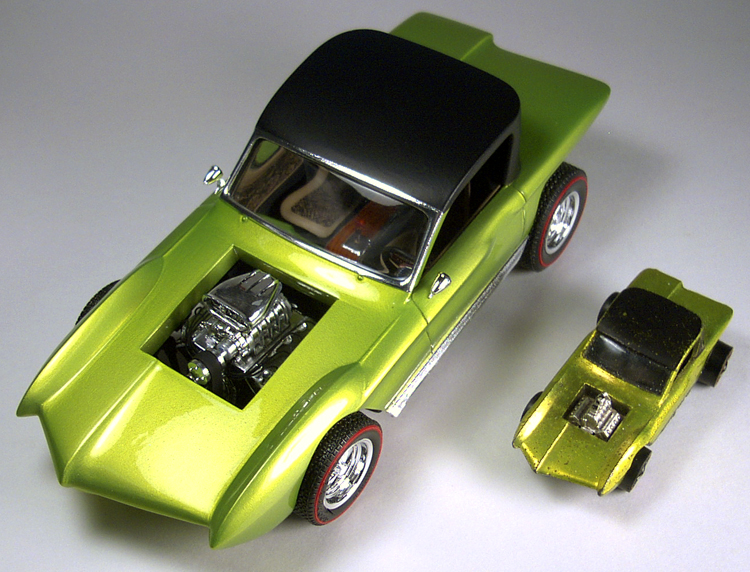
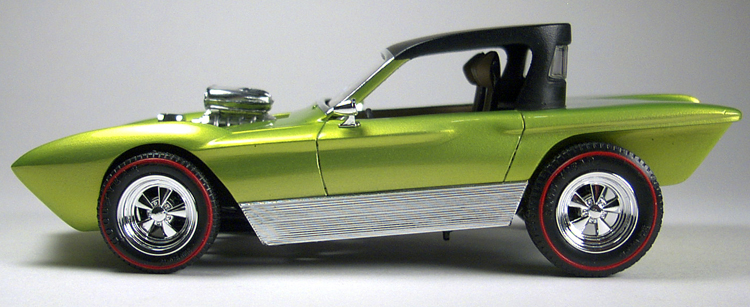
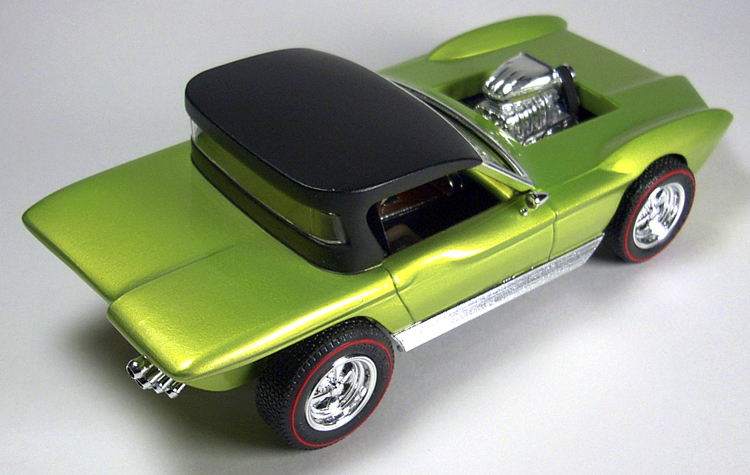
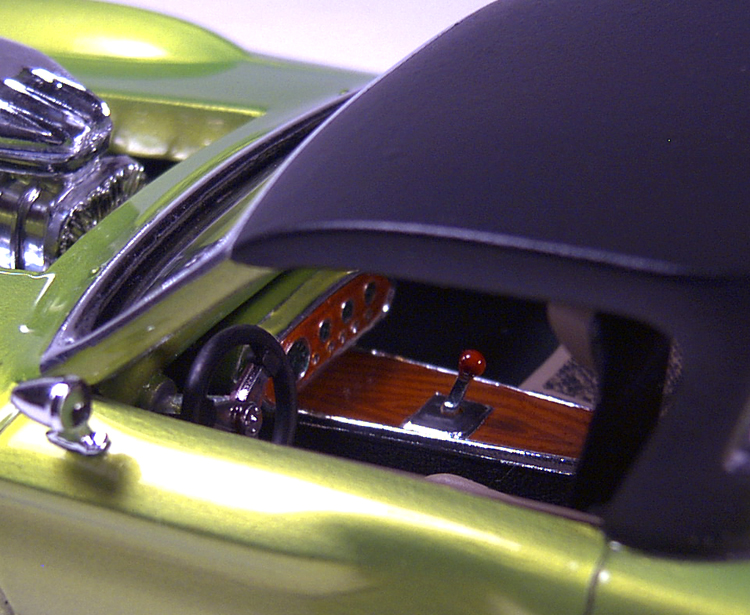
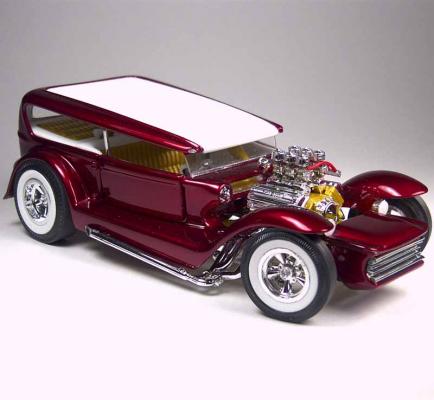
Thanks Al, Bruce and Jake! Jake, of the original 16 Hot Wheels, the Beatnik Bandit, Python (Cheetah), Deora, and Hot Heap and Silhouette we based on Show Rods and were available as 1/25 scale model kits. Beyond that, I couldn't say what Hot Wheels would be do-able in model kit form. Bruce, here are a few more photos of the Python: