

aurfalien
-
Posts
3,119 -
Joined
-
Last visited
Content Type
Profiles
Forums
Events
Gallery
Posts posted by aurfalien
-
-
Hello,
I waited a good bit before posting as I wanted to give it a real shot on my own.
But I'm really in need of some help with HRMs Miller 91. To say that the instructions are hard to follow would be an understatement.
Does any one have pictures of a finished kit? I'd like to post what I have so far but man I can't even start it!
I'd love some close ups, spring mount locations etc... I actually don't even know exactly what I need other that a lot?
And before any one suggests this, I've called Harold a few times and got the infamous old "look on the internet..."
The kit itself was very expensive for me albeit worth every penny I'm sure. So I'd rather not buy a very expensive book on the subject and hope you all don't suggest this.
I feel really really stupid and frustrated posting you've no idea. I've read posts from a very prolific and amazing builder on this forum who says that kit instructions are for those who don't know how to build.
So I shamelessly say that yes I don't know how to build but would love to be a great builder.
And lastly I'm trying to build this as a dedication to Harold as he mentioned that while this kit was his best seller, few if any have built it. And judging by the instructions I can see why.
So I'd love to build it and show every one what a wonderful kit that it is.
-
Hello,
I usually don't reply to build threads or built threads as I've nothing to add of ANY value and just about every build I see here is awesome and every one posts as such. However it seems ppl have missed this one so I don't feel foolish in posting.
Your build is awesome and inspired me to buy this kit. I'm actually looking to buy it and have my eye on a few on eBay.
At any rate very very very nice and I'm certain this slipped through the cracks as you would have seen many replies otherwise.
You're a great builder no doubt!
-
 1
1
-
-
3 hours ago, Plowboy said:
I would go with a six cylinder. You don't see them under the hood very often. I am a little biased though.

Ah good point and thanks Roger.
Yep looks like it's inline 6 then
")
-
3 hours ago, Kromolly said:
Depends on what you're after, I suppose. I kind of like the primer look and as-is it has an interesting patina. If you went with primer and finished your assembly it would look like a project car and would reflect your burnout with the project, but still be really cool. Hot-rodded six would be cool.
Thanks Roy. The primer does look cool now that you mention it. It's Krylon ColorMaxx Matte Deep Grey primer + paint.
I'm fixing my inline 6 as we speak
-
1 hour ago, rrb124@sbcglobal.net said:
My gosh! Big fan of anything ABARTH from that period. Have owned 2 Fiats and 5 Alfa Romeo cars in 1:1. Going to follow your build. Good looking car and killer wheels.
Not familiar with the kit or the paint you are using.
Thanks for posting.
Wow now this is unforeseen and very very cool as I assumed my post would evaporate into oblivion.
You've inspired me to keep going so I'll at least fix up the exhaust.
Here is a fellow and excellent builder who has done one of these;
http://24th-scale.blogspot.com/2016/06/abarth-ot-1300-almost-done.html
This kit was released by MFH but is a garage kit of sorts, if you can call it that.
You can still find it on eBay etc... but man it's a tough one. But then again I'm a very junior builder so maybe easier in more capable hands.
-
27 minutes ago, Ace-Garageguy said:
Reminds me of one of Harry Bradley's personal cars.
I'd vote for a hot-rodded six, or old-school smallblock Chebby power.
And I think a burgundy / maroon would be perfect.
Nice idea for the headliner too. Looks great.

Why thank you Monsignor Ace. It's my understanding and I think that an inline 6 is very smooth and would be fitting of this cool customer.
So a 6 it will be.
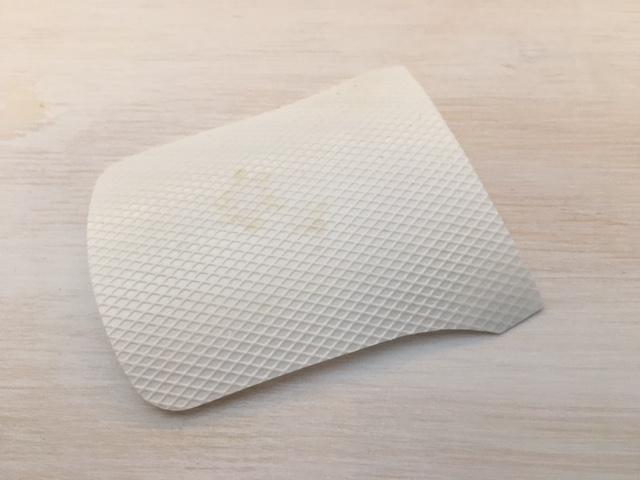
The head liner which is also on parts of the seats and door panels is off of a model railroad site. One site looks like grates but the other looks like it's tufted/quilted.
-
11 minutes ago, Mattilacken said:
Looks cool! Just spray some paint and assemble it;-)
Thanks dude.
It just dawned on me that I have to make the glass as well. Arrgghhh, well it is what it is.
-
Hello,
So I'm fairly burnt on the following project and have shelved it for now.
It's an Abarth OT1300 that I'm using TrueColor paint on which is AWESOME paint BTW.
The chassis was so warped that it spun like a bottle and took me a good while to flatten.
It had this odd way of attaching the front and rear hood/trunk. So I made them open and close and also fit better although it may not look like much at this point.
The chassis is painted in a custom color that I made mixing silver with baby blue so that it's a sort of pale blue metal that the reference pictures inside the kit showed.
I widened the rear wheels and detailed them up a bit.
In process of trying to build this thing, I had destroyed the headers and distributor and started to make my own headers which sucked big time.
After several attempts in following suggestions on this site, I came up with simply using 45 and 90 degree Plastruct tubing bits and all it needs is some filling and sanding. But the bends are about right for my liking.
At any rate it is what it is.

-
PS Actually burgundy was the color that I was looking at.
-
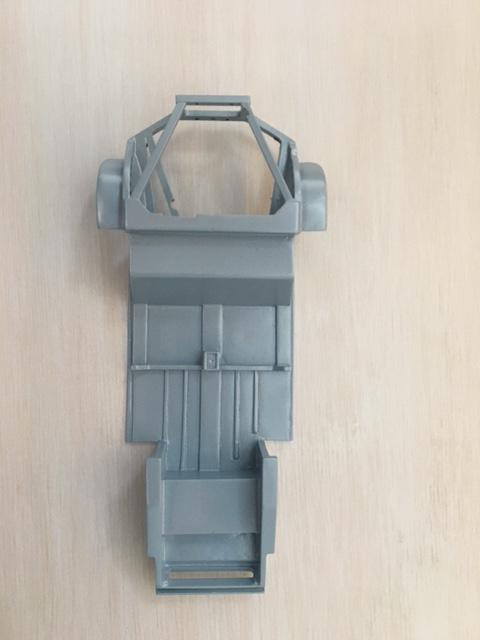
Hello,
So I'm fairly burnt on the following project and have shelved it for now.
It's a Chevy of which I bought off eBay but came with a warped body. So I bought a Flintstone chop top and realized that it was too chopped and squared for my liking. I spent oodles and oodles of time making it bigger and more rounded. The body may not look like much but it represents too much off of my life.
The interior door panels having a diamond pattern were made a bit over sized so that when I slide the body over the chassis, they fill any gaps and create a rather nice snug fit. Again it may not look like much but it took me oodles and oodles of time.
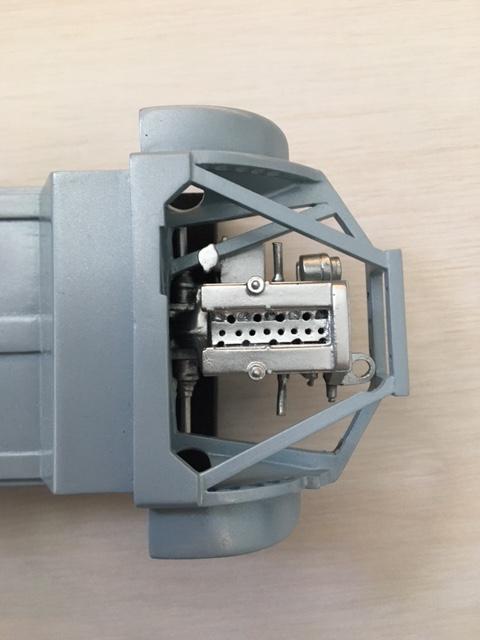
Unsure which power plant to outfit it with as the stock inline 6 looks rather boring but I can always dress it up. If you all could suggest a fitting power plant, then that would help me.
The rear tires have been widened (a bit too much I now realize) and the stance took a lot of tweaking in looking right to my eyes. Man I took a lot of time on the suspension although most of you are yawning about now.
The steering works however it's so slammed that I may open the front fenders a bit so that the tires don't rub and can move.
I'm also unsure how to have a functional opening hood as it needs to open up and forward to clear the window. So if any body has some ideas, I'd be happy to hear them.
I'm thinking that the paint will be some sort of metallic maroon etc... and touch off with a white diamond pattern upholstery should like cool I hope.
I will reduce some chrome but still have it present.
-
Hello,
Always lurkin, never postin.... but I have been building, or rather trying to finish at least one of my stupid darn bloody projects.
At any rate some one may have posted this so excuse the redundancy.
Yea I'm down for this one;
https://www.jadlamracingmodels.com/revell-05667-gift-set-100-years-jaguar-1-24-car-model-kit/
-
Ah thanks gents, very much appreciated.
-
Hello,
Would any one know if the Testors Porsche 935 is a re-box of the Tamiya 935/78?
I'm curious if it has a long nose/long tail and nice interior like the Tamiya kit.
-
I've built both the Monogram and Fujimi kits, they are simple (slot kit-ish) and turn out cool. Either will give you quick satisfaction
However I preferred the Monogram body shape.
I'd suggest picking up a set of aftermarket tires/wheels for either kit from here;
The decal sheets will probably be wasted however I don't have a source for em.
These kits offer a lot in terms of adding detail etc... all up to your desire and imagination.
Here's one of mine, sadly it burned in a fire;
-
-
Hi all,
I was curious if any one wouldn't mind posting the dimensions that I've outlined red?
It's a real pretty engine.
-
Über cool pic.
-
Cool vid about Pedros warez;
-
Wow, this thread multiplied over night, cool.
I've decided to go with a solution a bit more versatile which uses my Shop Vac and oven.
Less working parts to break as those will work for a very long time. It's 12"x12" with an adapter in the background (6"x6"?).
* The unit pictured is by Pedro on Etsy. After some perusing, I believe his to be the best for this sort of approach.
-
1 hour ago, Mark said:
Be wary of eBay listings that say it hasn't been tested, so the seller doesn't know whether or not it heats up. In all probability that means they did test it and it doesn't work. It only takes a minute or two, and an electrical outlet, to figure that out. Knowing it heats up would add to the value of the unit, so it's only logical to take a minute or two and plug it in.
Sometimes the (hand operated) vacuum doesn't work. There are (or at least were) eBay sellers that offered an "upgrade kit" that included some grease to regain the seal needed to get vacuum. You don't get a lot, but you need all of what you can get.
Don't pay stupid money for one, even if you stumble into a never-used one. The accessories and plastic included won't be of any use for model building anyway. Most of these didn't get much use, they only got used until the plastic sheets supplied with it ran out. The eBay upgrade kit cost about twenty bucks as I remember, and that was a while back. For about $100 you can get a dental lab machine (used to make trays for impressions) that will outperform the Mattel unit.
Wow, thank you kindly Mark, great advise.
I did see a dental grade unit on Amazon for ~$130 but will look else where for variety. It's largest complaint was filament heat up time but it's not like I'm cranking out parts for distribution or anything.
Thanks again.
-
Esteemed builders and crafters extraordinaire,
I've always wanted to get my hands on some sort of vacuforming machine for general hobby/crafts needs.
So I'm reaching out to see what you would all look for in a used Mattel version? Basically advise similar to what one would give in used car shopping.
I haven't really seen any new ones by other brands that I like but am searching.
Thanks in advance.
-
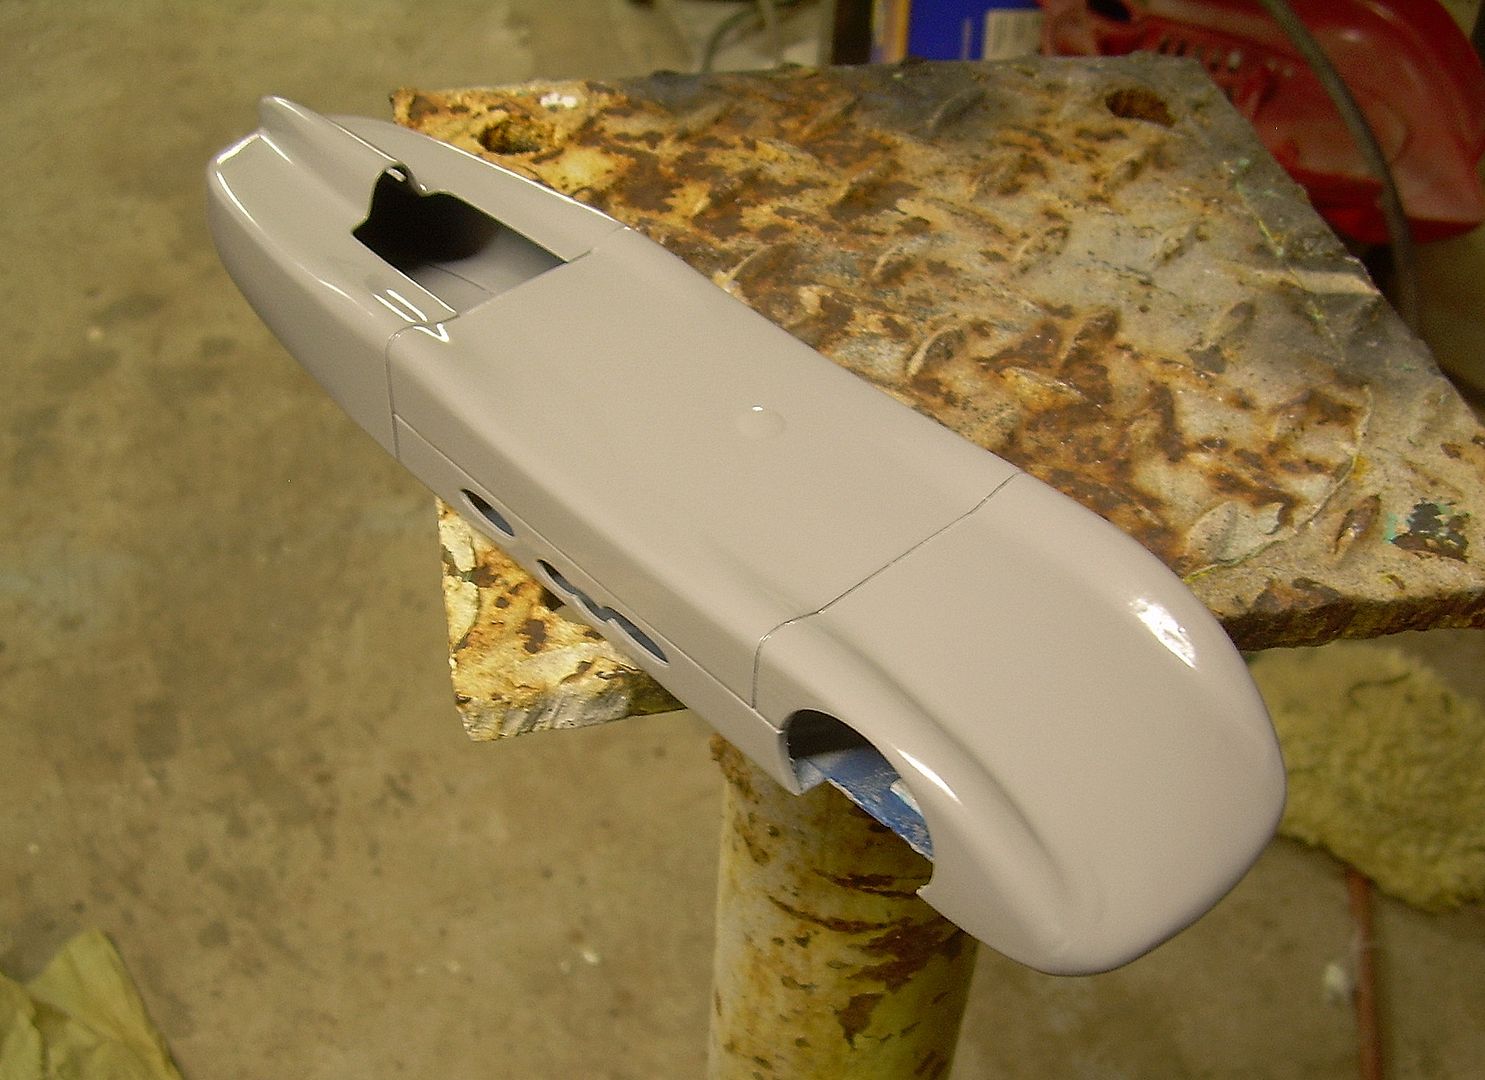
1 minute ago, Ace-Garageguy said:
There's a lot you can do with a real-car spray gun that would be not so easy with an airbrush.
This heavily modded Challenger One body was shot with 2K urethane primer using a conventional full-size HVLP gun.
WOW!!! Looks smooth as butter. Very very nice!
Looking forward to my hybrid of sorts Creos PS 290.
-
6 hours ago, Greg Myers said:
I am not familiar with the term "spray gun" are you referring to aerosol spray cans, i.e. "rattle cans" ?
I found this link very helpful;
http://paulbudzik.com/miniature-spray-guns/miniature-spray-guns-pg-3.html
-
8 hours ago, StevenGuthmiller said:
While the brush does spray in a nice, wide pattern with the fan nozzle, it does not lay down the paint as heavily as some other air brushes, so be aware of that.
Thanks Steve. I actually prefer this as less is more in my book.


Miller 91 help
in Model Building Questions and Answers
Posted
Hi Bill and nice to hear from you.
Thanks for the links, I'll take em")
I'm not big on build threads but I'll try and start one for this bad boy in the hopes that it would help other kit owners and would be owners.