
Rocking Rodney Rat
-
Posts
1,858 -
Joined
-
Last visited
Content Type
Profiles
Forums
Events
Gallery
Posts posted by Rocking Rodney Rat
-
-
On 1/1/2024 at 9:19 AM, NOBLNG said:
Looking good there Rodney!😎 When channeling my ‘32, I used a Mr.Hobby paint bottle as a sanding drum.🙂 It worked for me.
Thanks, I often wrap sandpaper around tires to sand arches such as that, the variety of sizes is helpful... -RRR
-
On 1/2/2024 at 12:45 PM, BDSchindler said:
GS Hypo Cement is VERY good!
Thanks for the tip on this, I just ordered a tube in FleaBay. I have been using E6000 for glass and when parts need to be 'nudged' into place. What I don't like about E6000 is that it's very stringy and if I'm not careful it will drape a gooey thread across the parts... -RRR
-
Use Tamiya TS-47 Chrome Yellow.... -RRR
-
Yeah!! This is a sweet build... -RRR
-
Here's my oldest survivor from 40 years ago. I heavily chopped the MPC 'Switchers' 1932 sedan delivery. I filled in all of the body lines and indentations except the rear door (I had no idea what I was doing). It had a wing on the top originally. The exhaust from the Jawbreaker (American Graffiti dragster) is long gone. Add about 1000 coats of hardware store black and viola!!! LOL!!! -RRR

-
 1
1
-
-
Very nice work on a variety of subjects.... -RRR
-
7 hours ago, CabDriver said:
Vallejo rubber black
I wasn't aware of that paint, I'll have to check it out.... -RRR
-
https://www.modelhaustires.com/ nice selection, shipped quickly. The center holes fit AMT wheels, not Revell. Shoot them with Tamiya Rubber Black.... -RRR
-
Lookin' good...this thing should be done just in time for the next ice age!!! -RRR
-
2
-
-
On 12/31/2023 at 1:04 PM, dusty_shelf said:
Would be interested in your opinions.
Those tires are perfect for your application. Pick up some Tamiya TS-85 Rubber Black paint for them.... -RRR
-
The answer is always "yes". -RRR
-
1
-
-
3 hours ago, moparmike619 said:
I think it goes without saying that 3 builds of that quality represent a complete success at the bench for this year…so many of your builds have been an inspiration for builds of my own. Love your style and the commitment to detail and quality you always churn out. Cheers and good luck in 2024!
Thanks, Mike. That's very kind of you to say that. -RRR
-
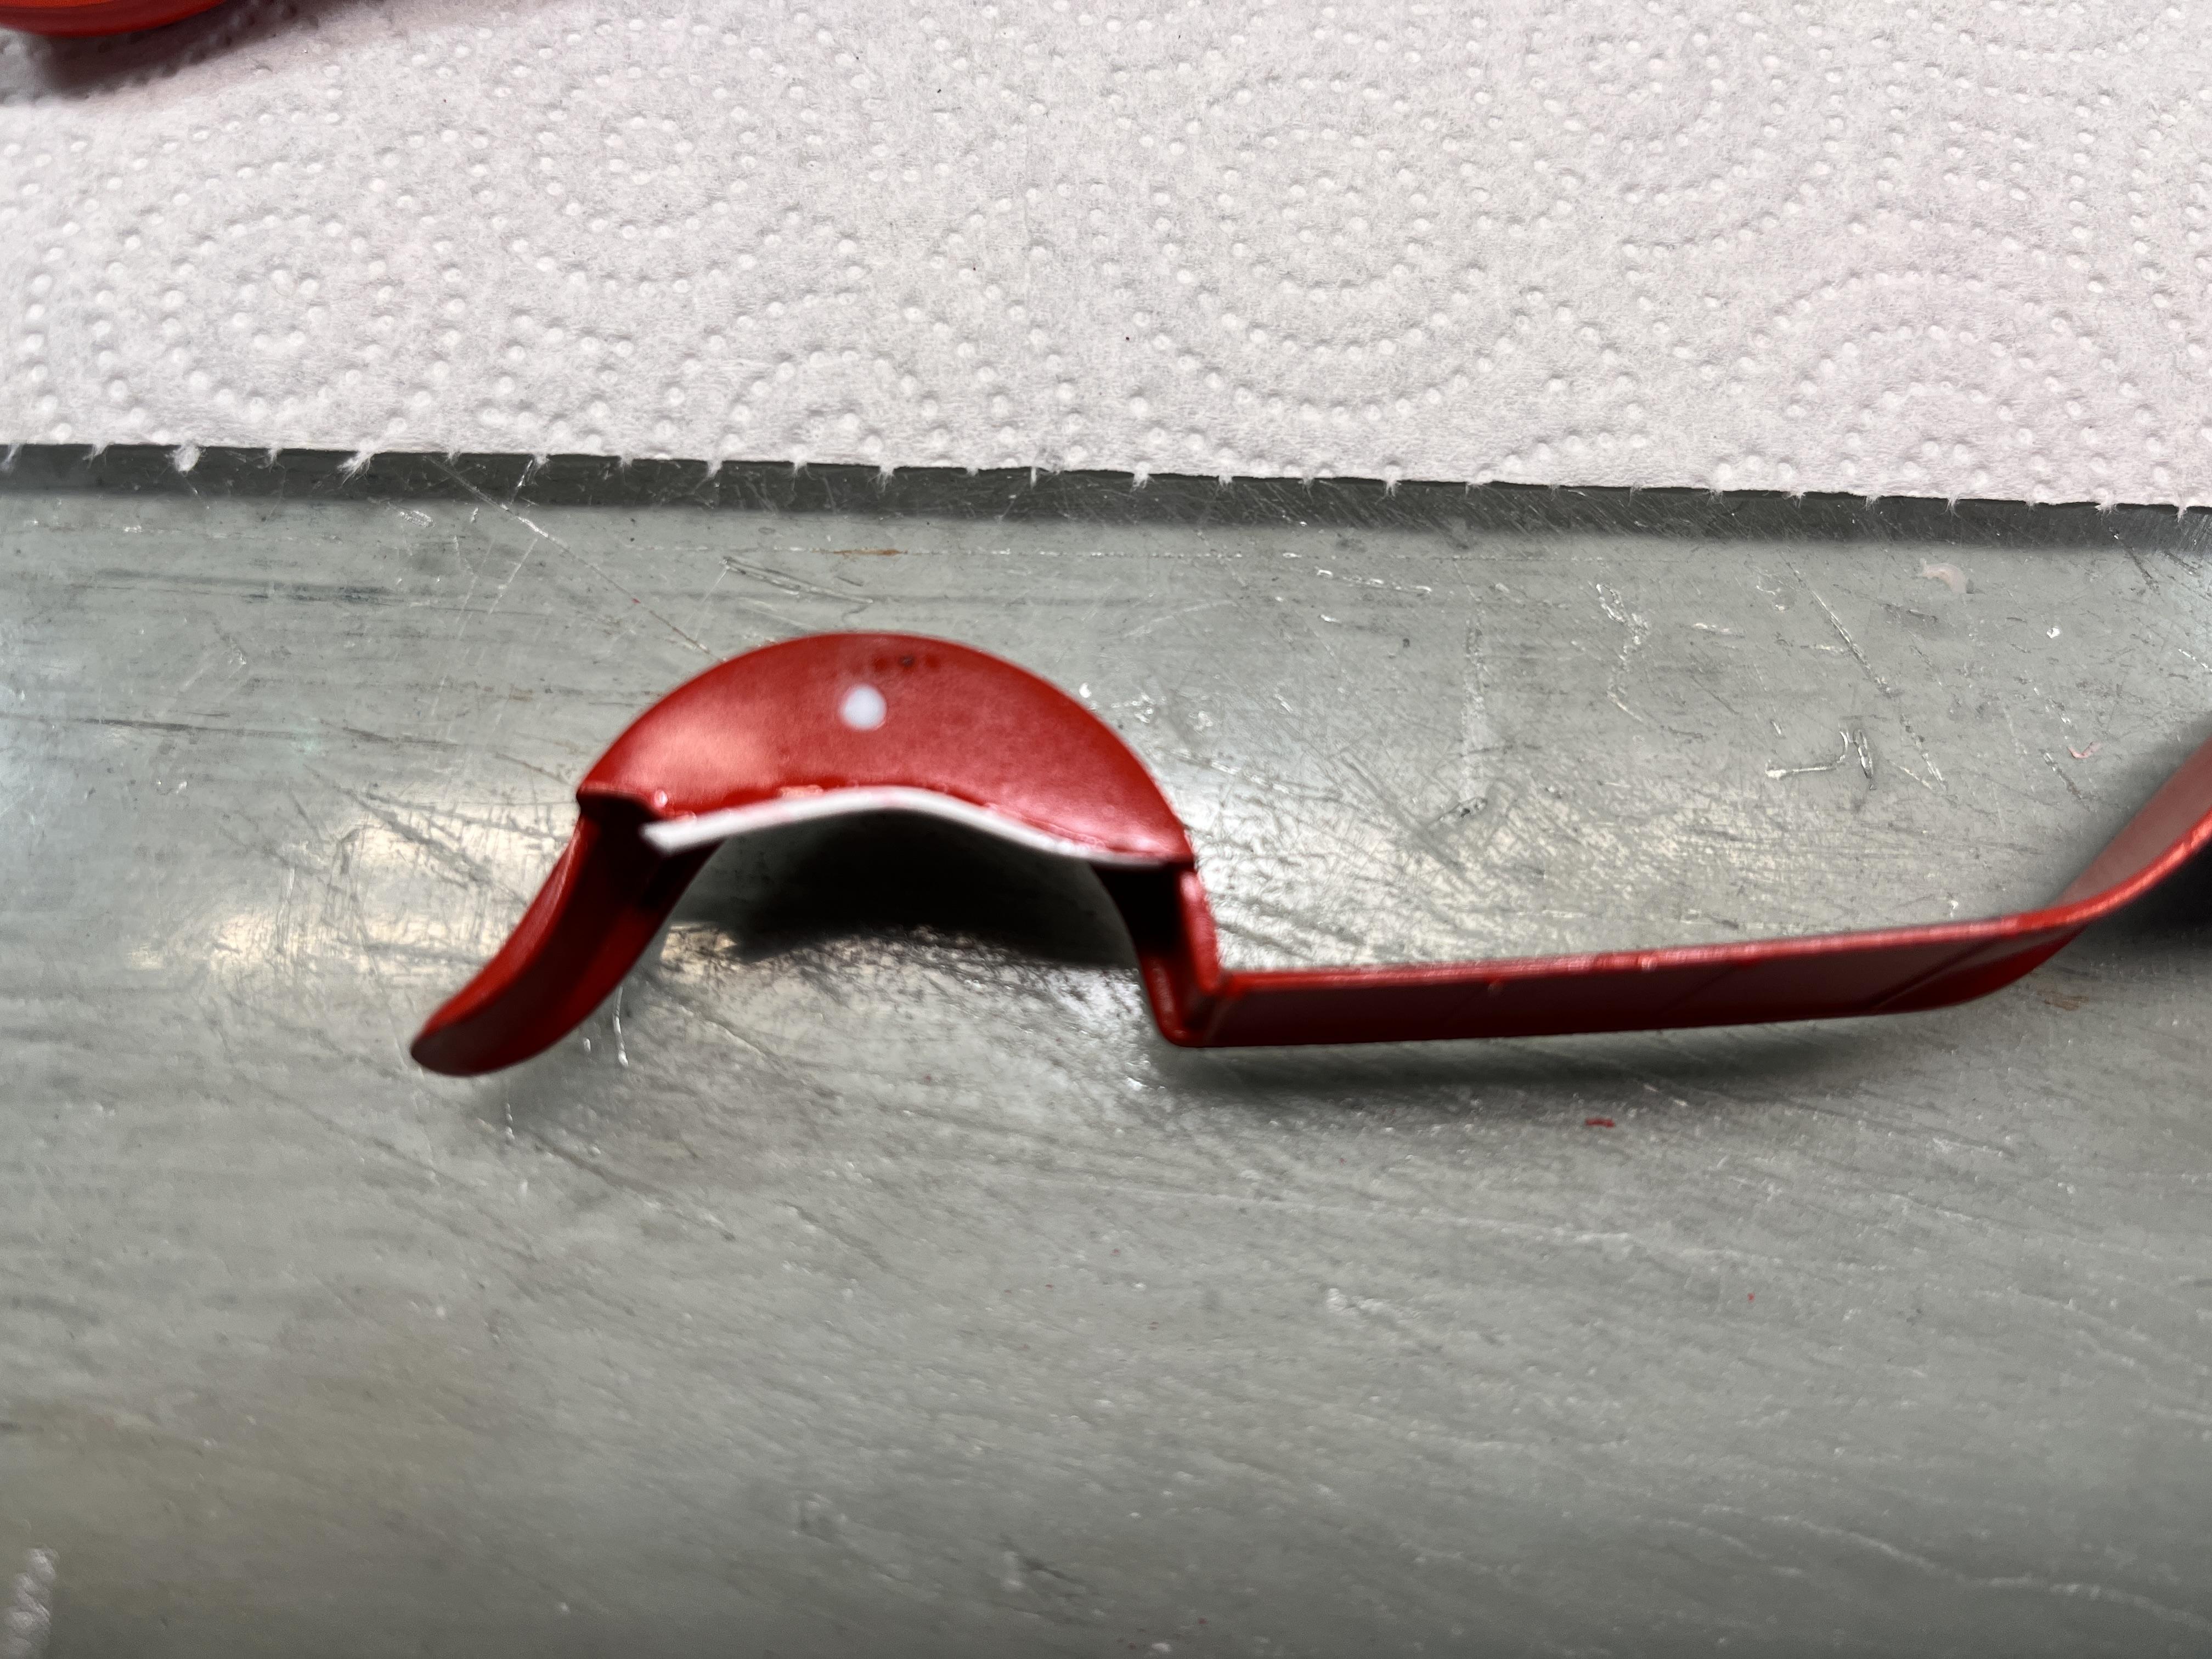
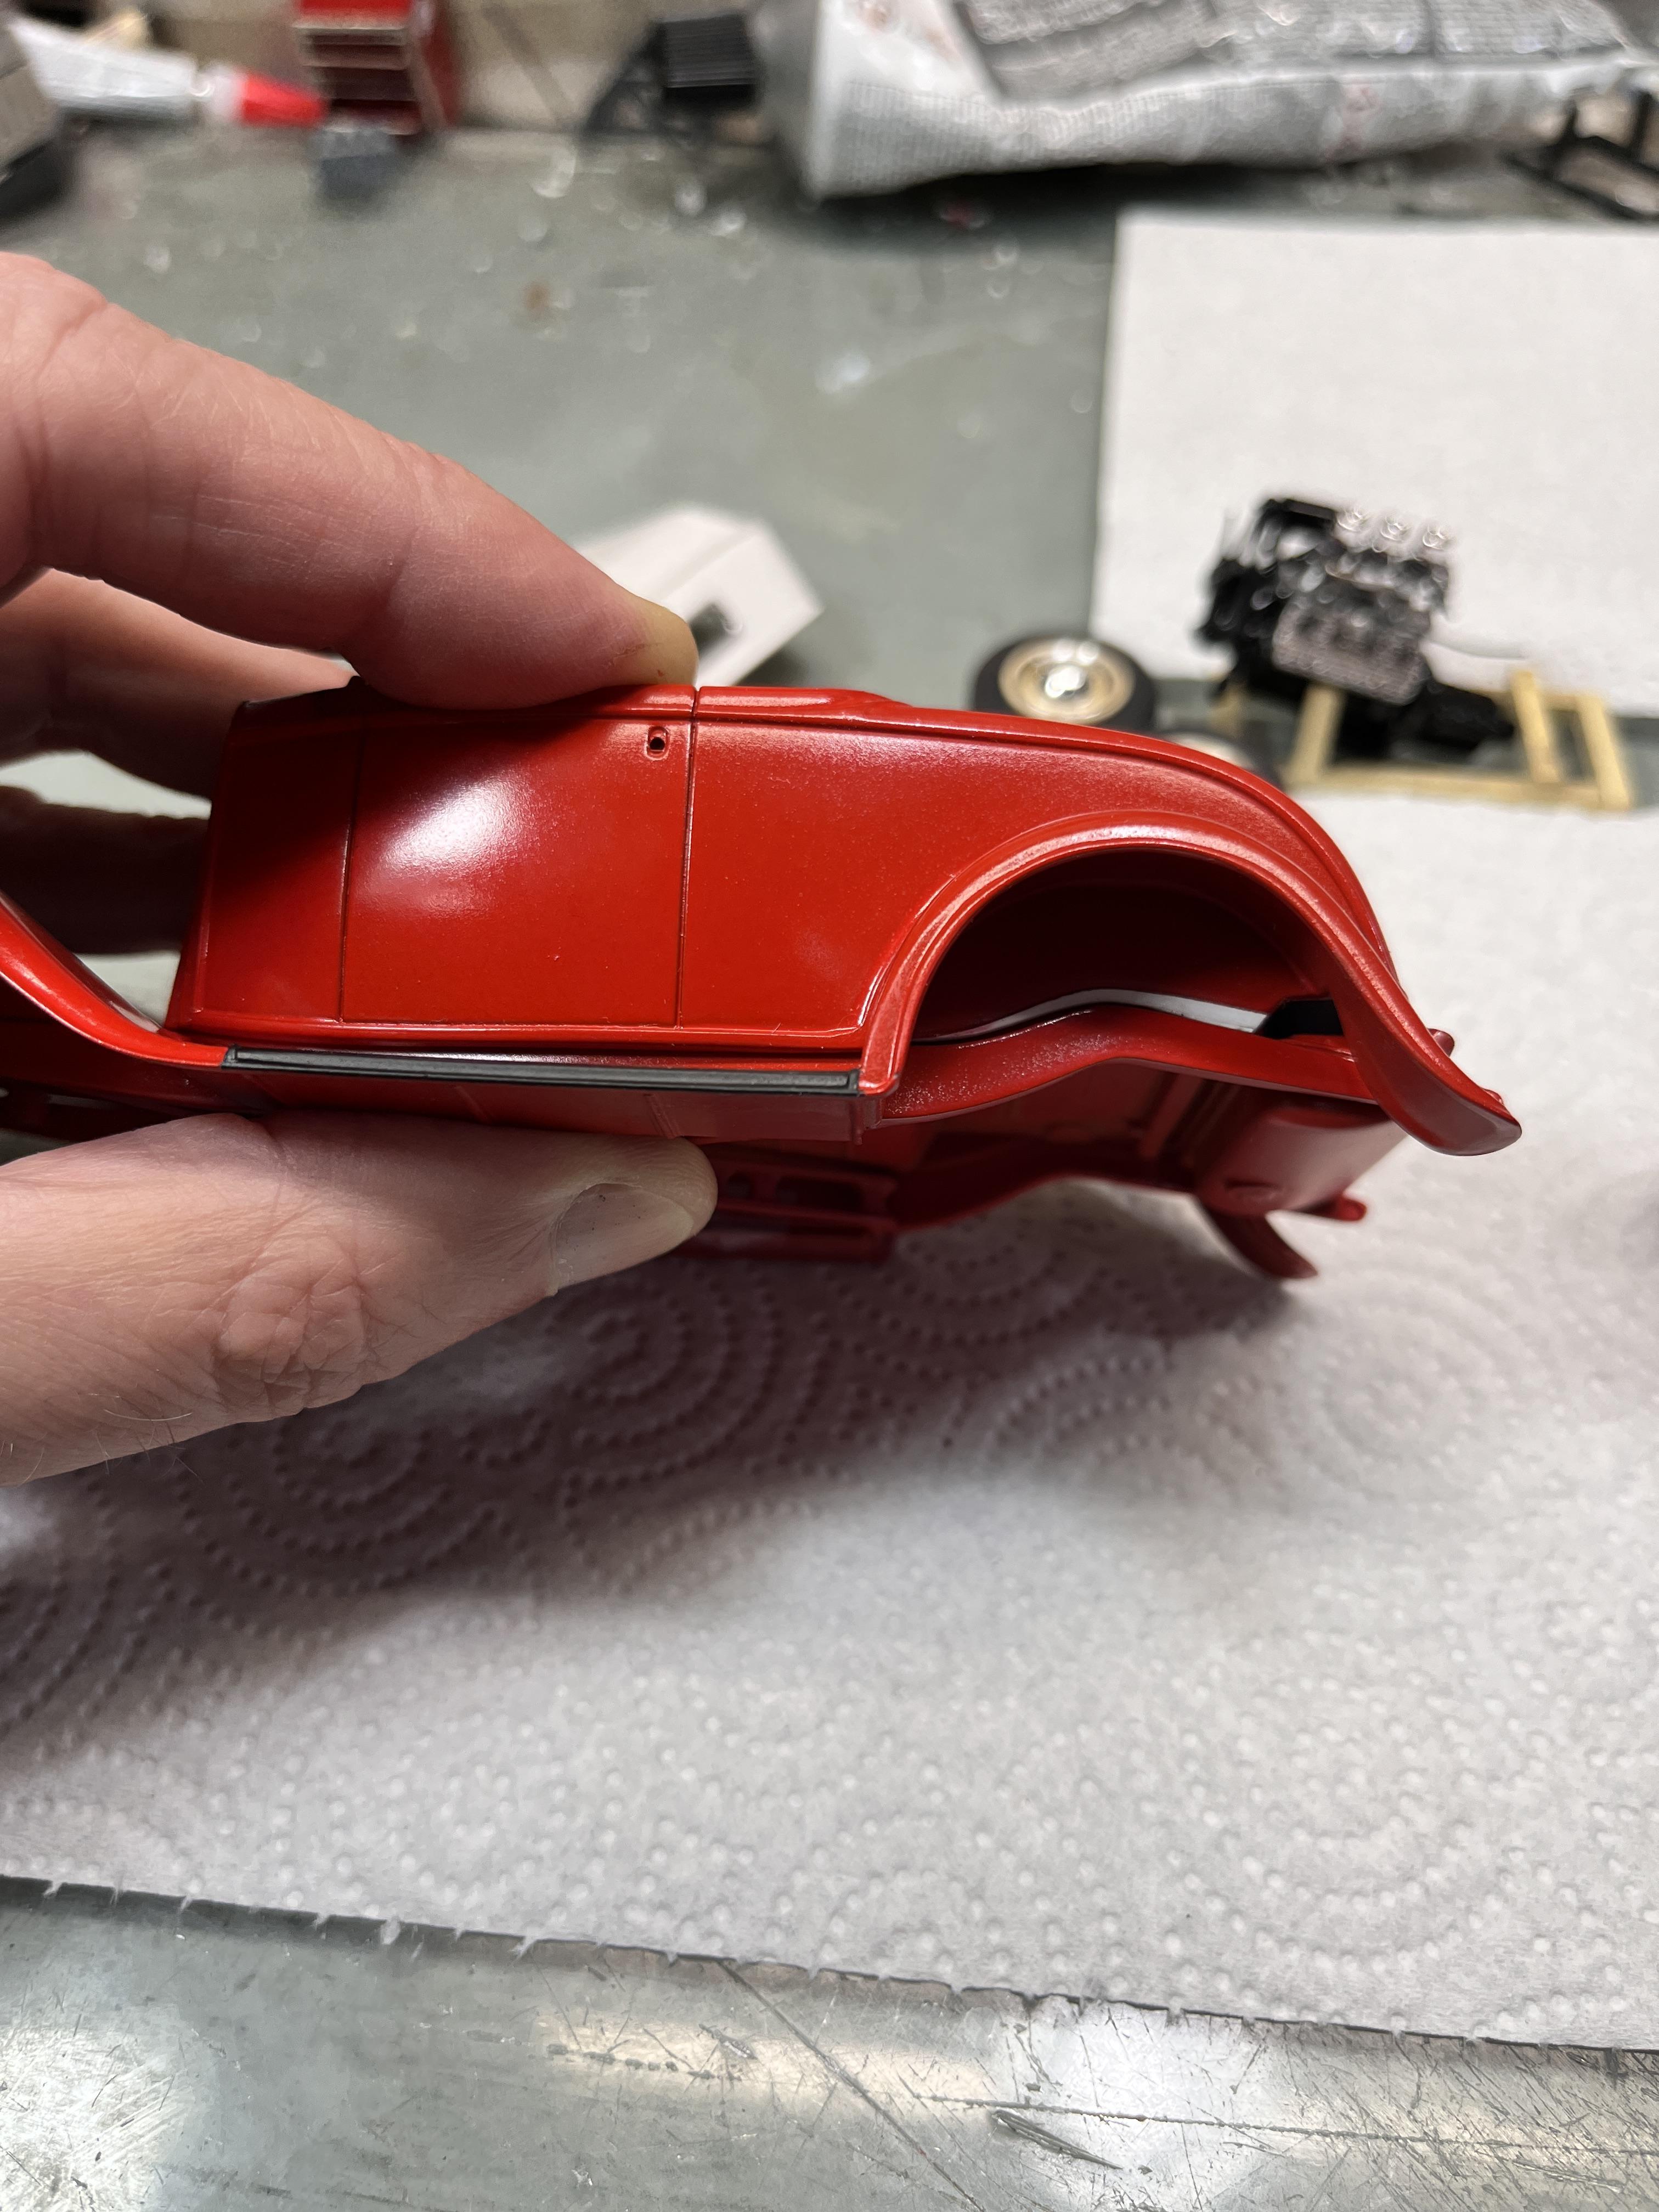
Well, it's been the better part of a year since I worked on this build. Once I got it painted, the fitment of the fenders to the body was leaving a gap. The driver side has more of a gap than the passenger side (?). I got frustrated with it and threw it in a box. New year, new opportunity. I started fitting and futzing around with this again yesterday...
sorry for that crappy pic....
------------------
I glued on a wedge shaped piece to the the bottom of the fender where it meets the frame. This forces the fender up in to the body. I also carefully (since it's already painted) sanded down the fender opening on the body where the fitment was the worst. This seems to have fixed the problem. I did add a small strip on the passenger fender as well to snug it to the body. I painted up the white wedge with the Tamiya Pure Red. It will be hidden by the tire, so it won't be obvious...
Now, let's see if I can throw this together. It's interesting revisiting a build that sat in a box for the better part of a year, as I try to remember how this was all going together... -RRR
-
6
-
-
4 hours ago, spencer1984 said:
Nice clean work, well done!
Thanks, Bill! -RRR
-
2 hours ago, ismaelg said:
Love that Moon Racing Cams decal!
I believe that's on the Time Machine Chevelle AWB decal sheet. -RRR
-
My building has slowed way down lately. I had a few builds that got mothballed for a variety of reasons this year. The only three I finished were all drag cars... -RRR

-
8
-
-
Amazing variety in your stellar work, Claude! -RRR
-
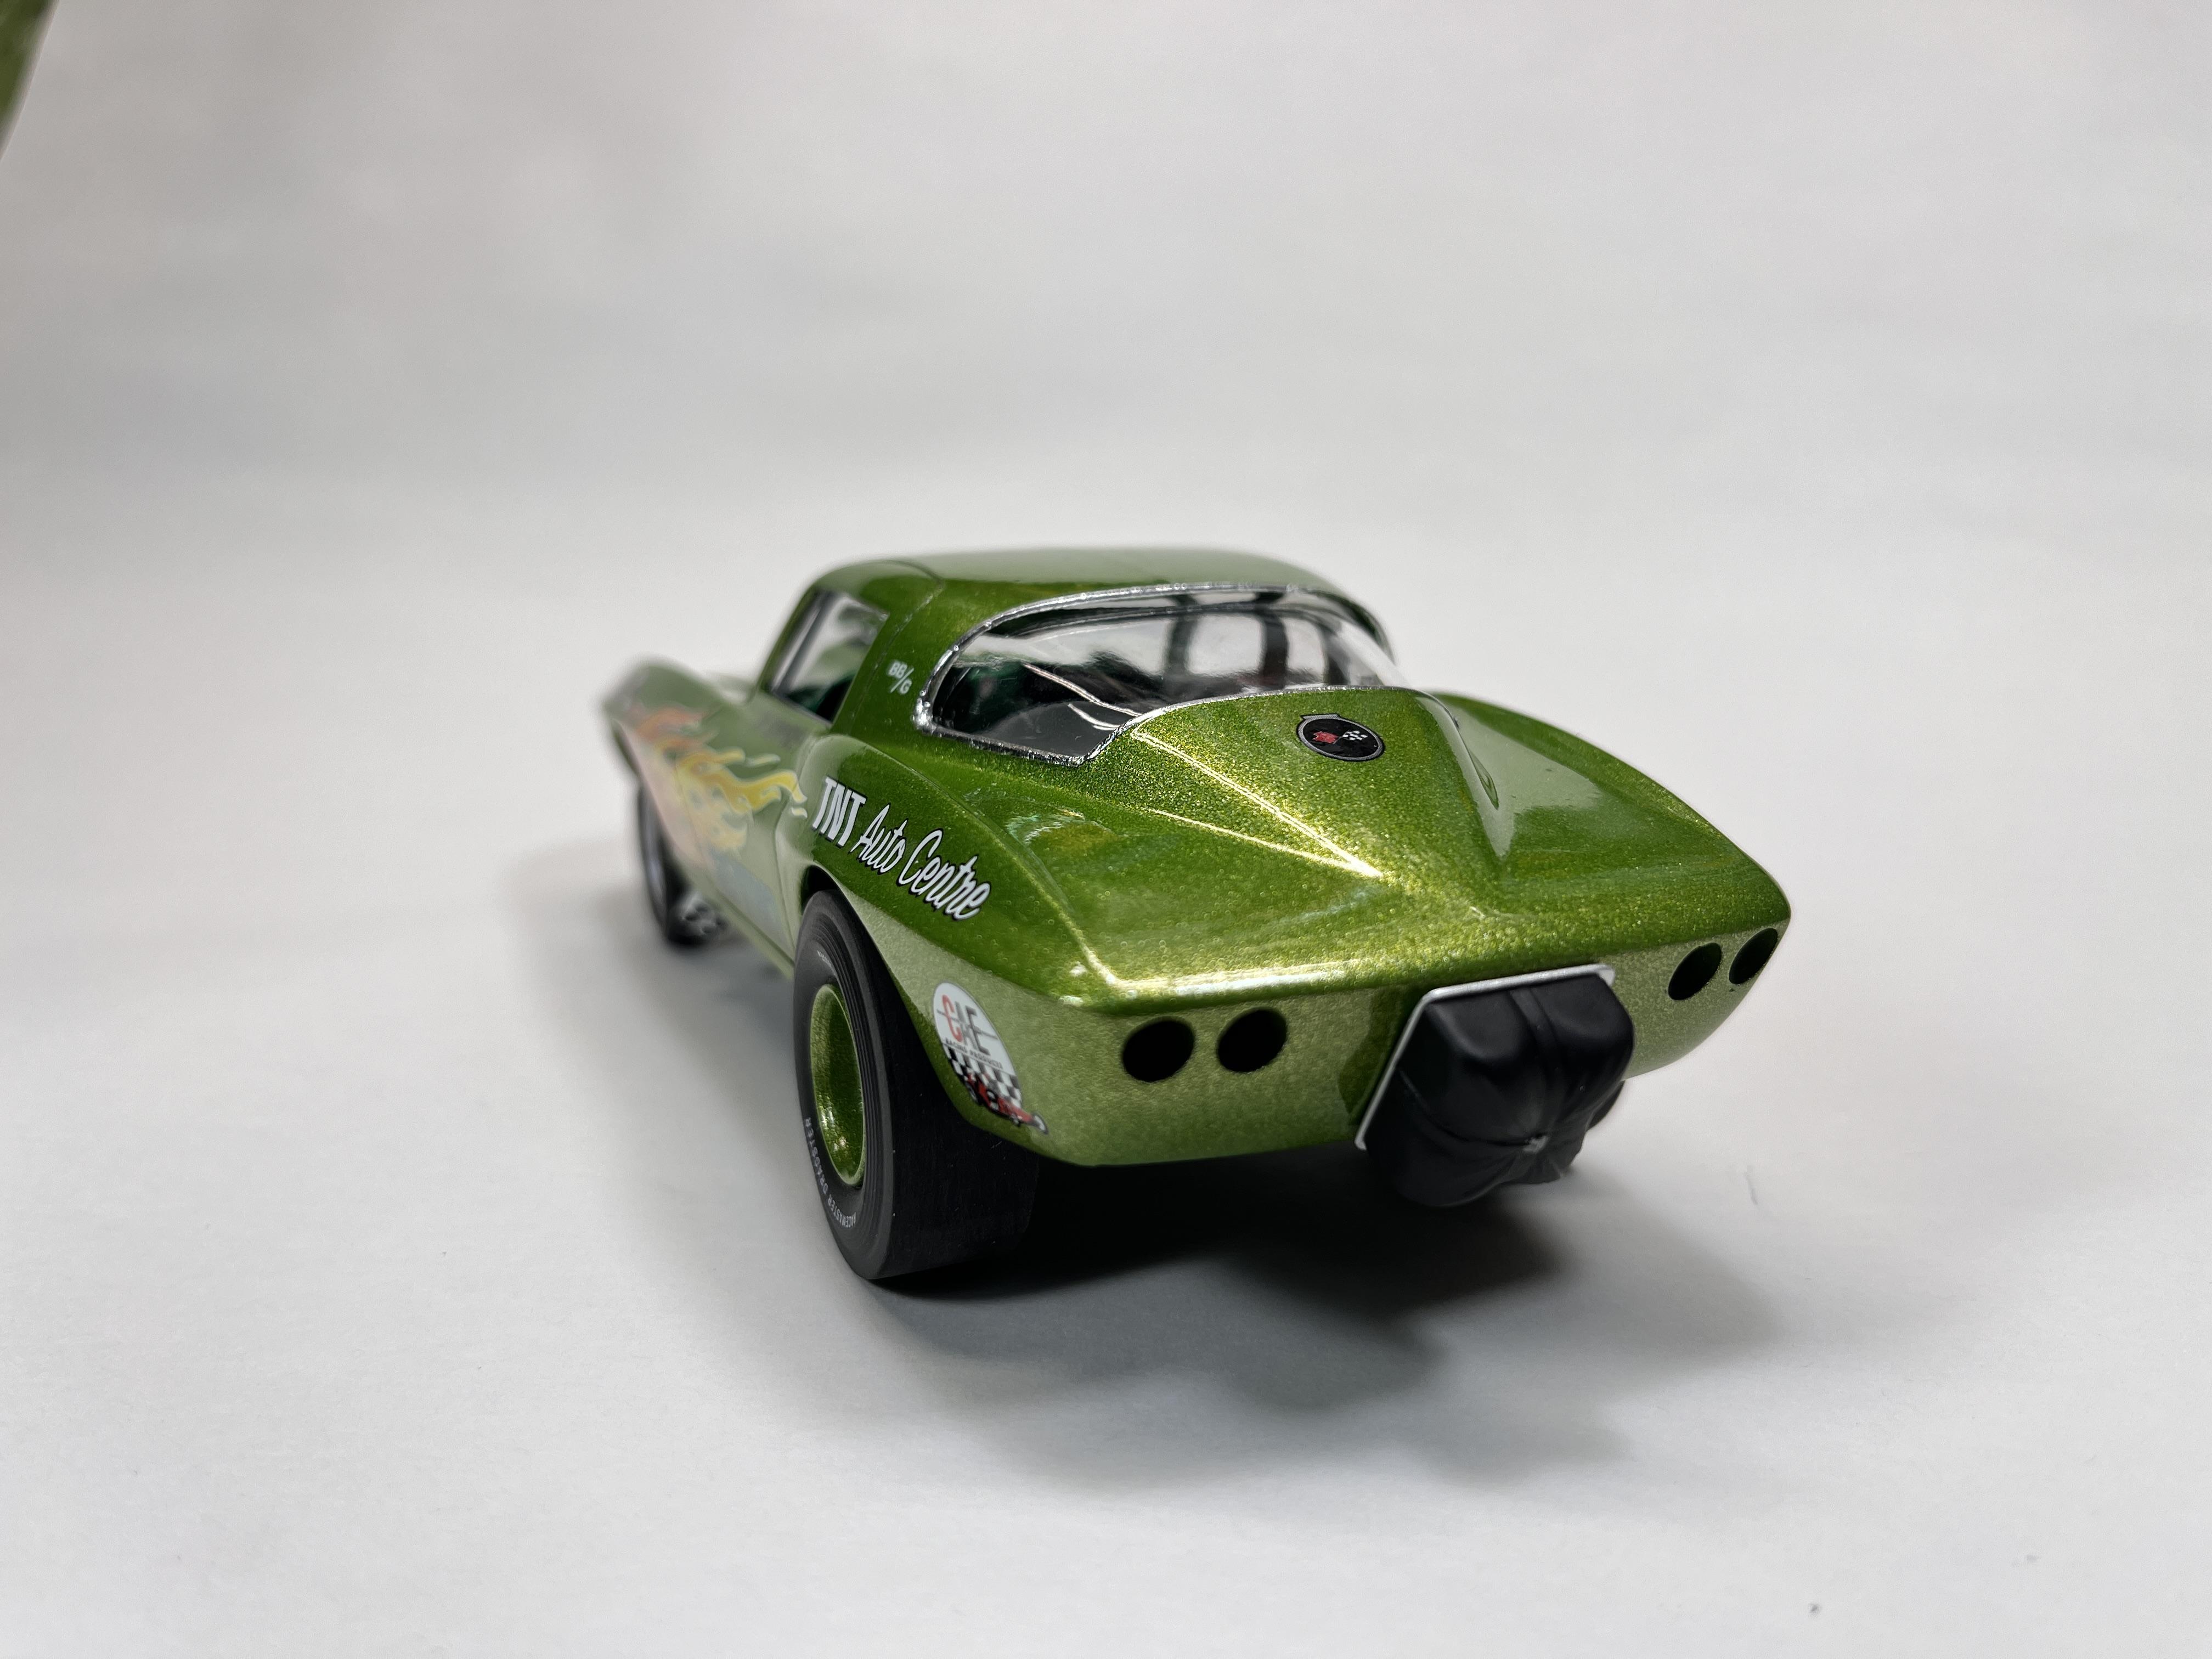
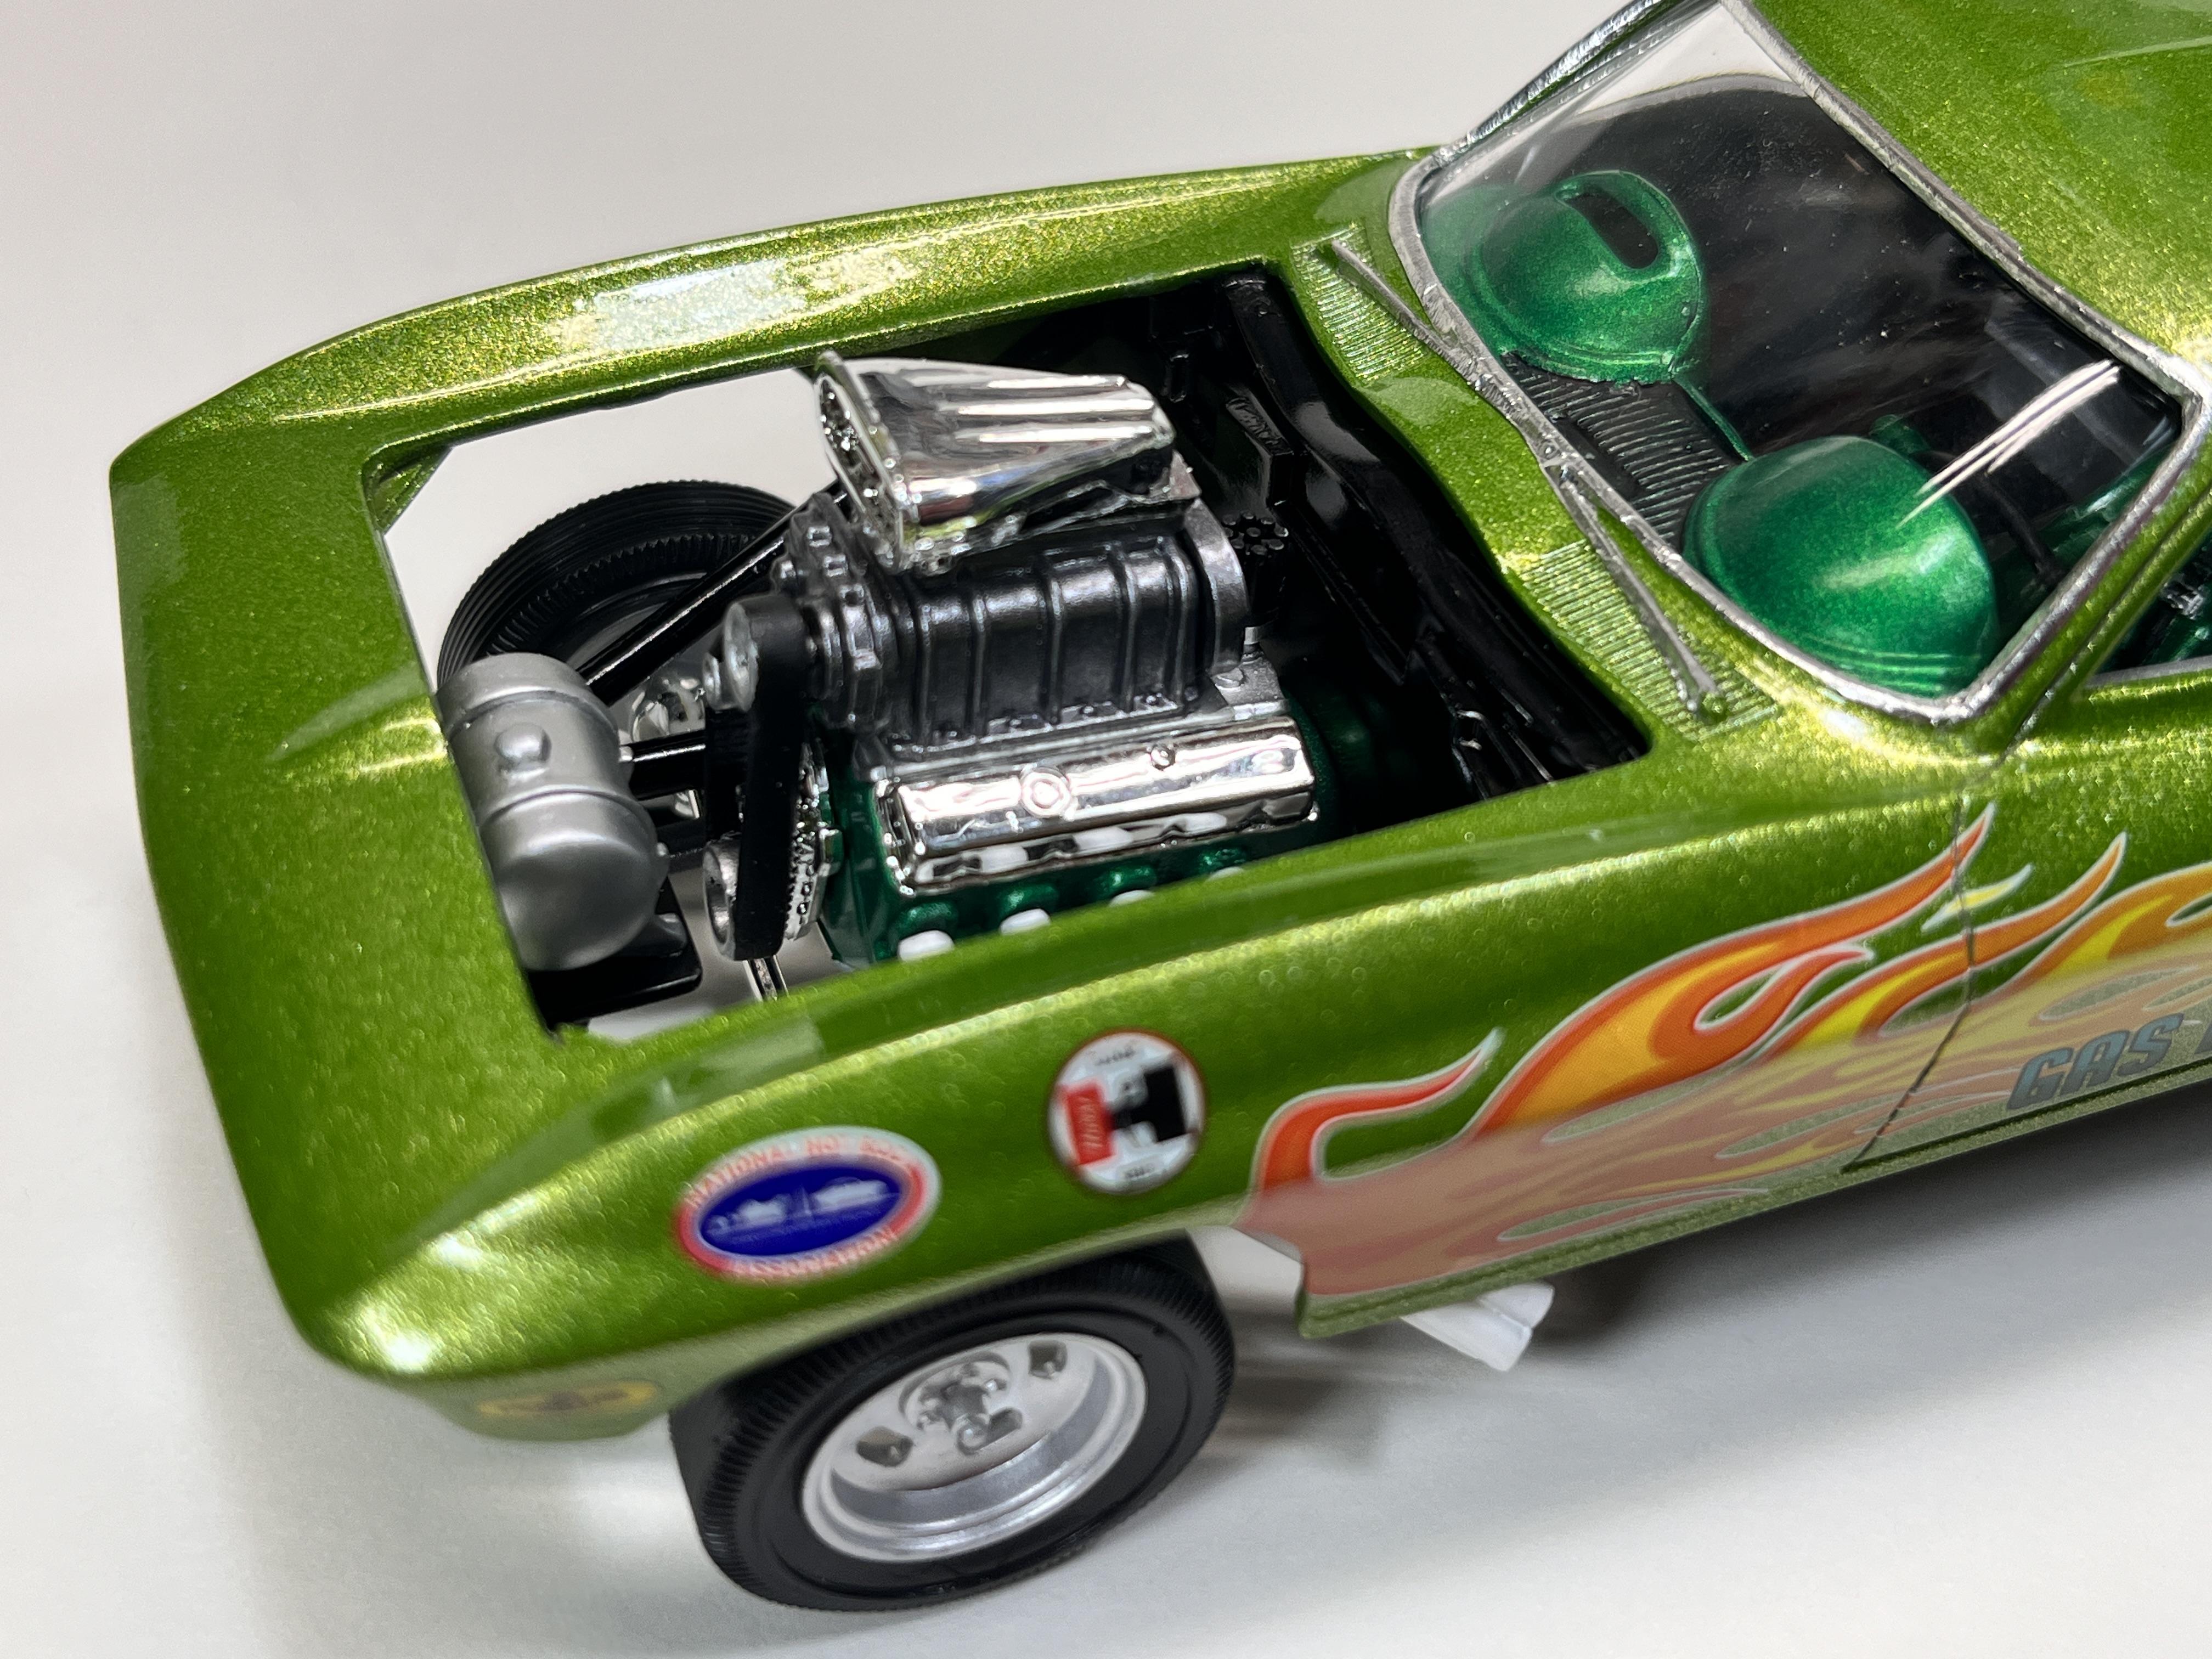
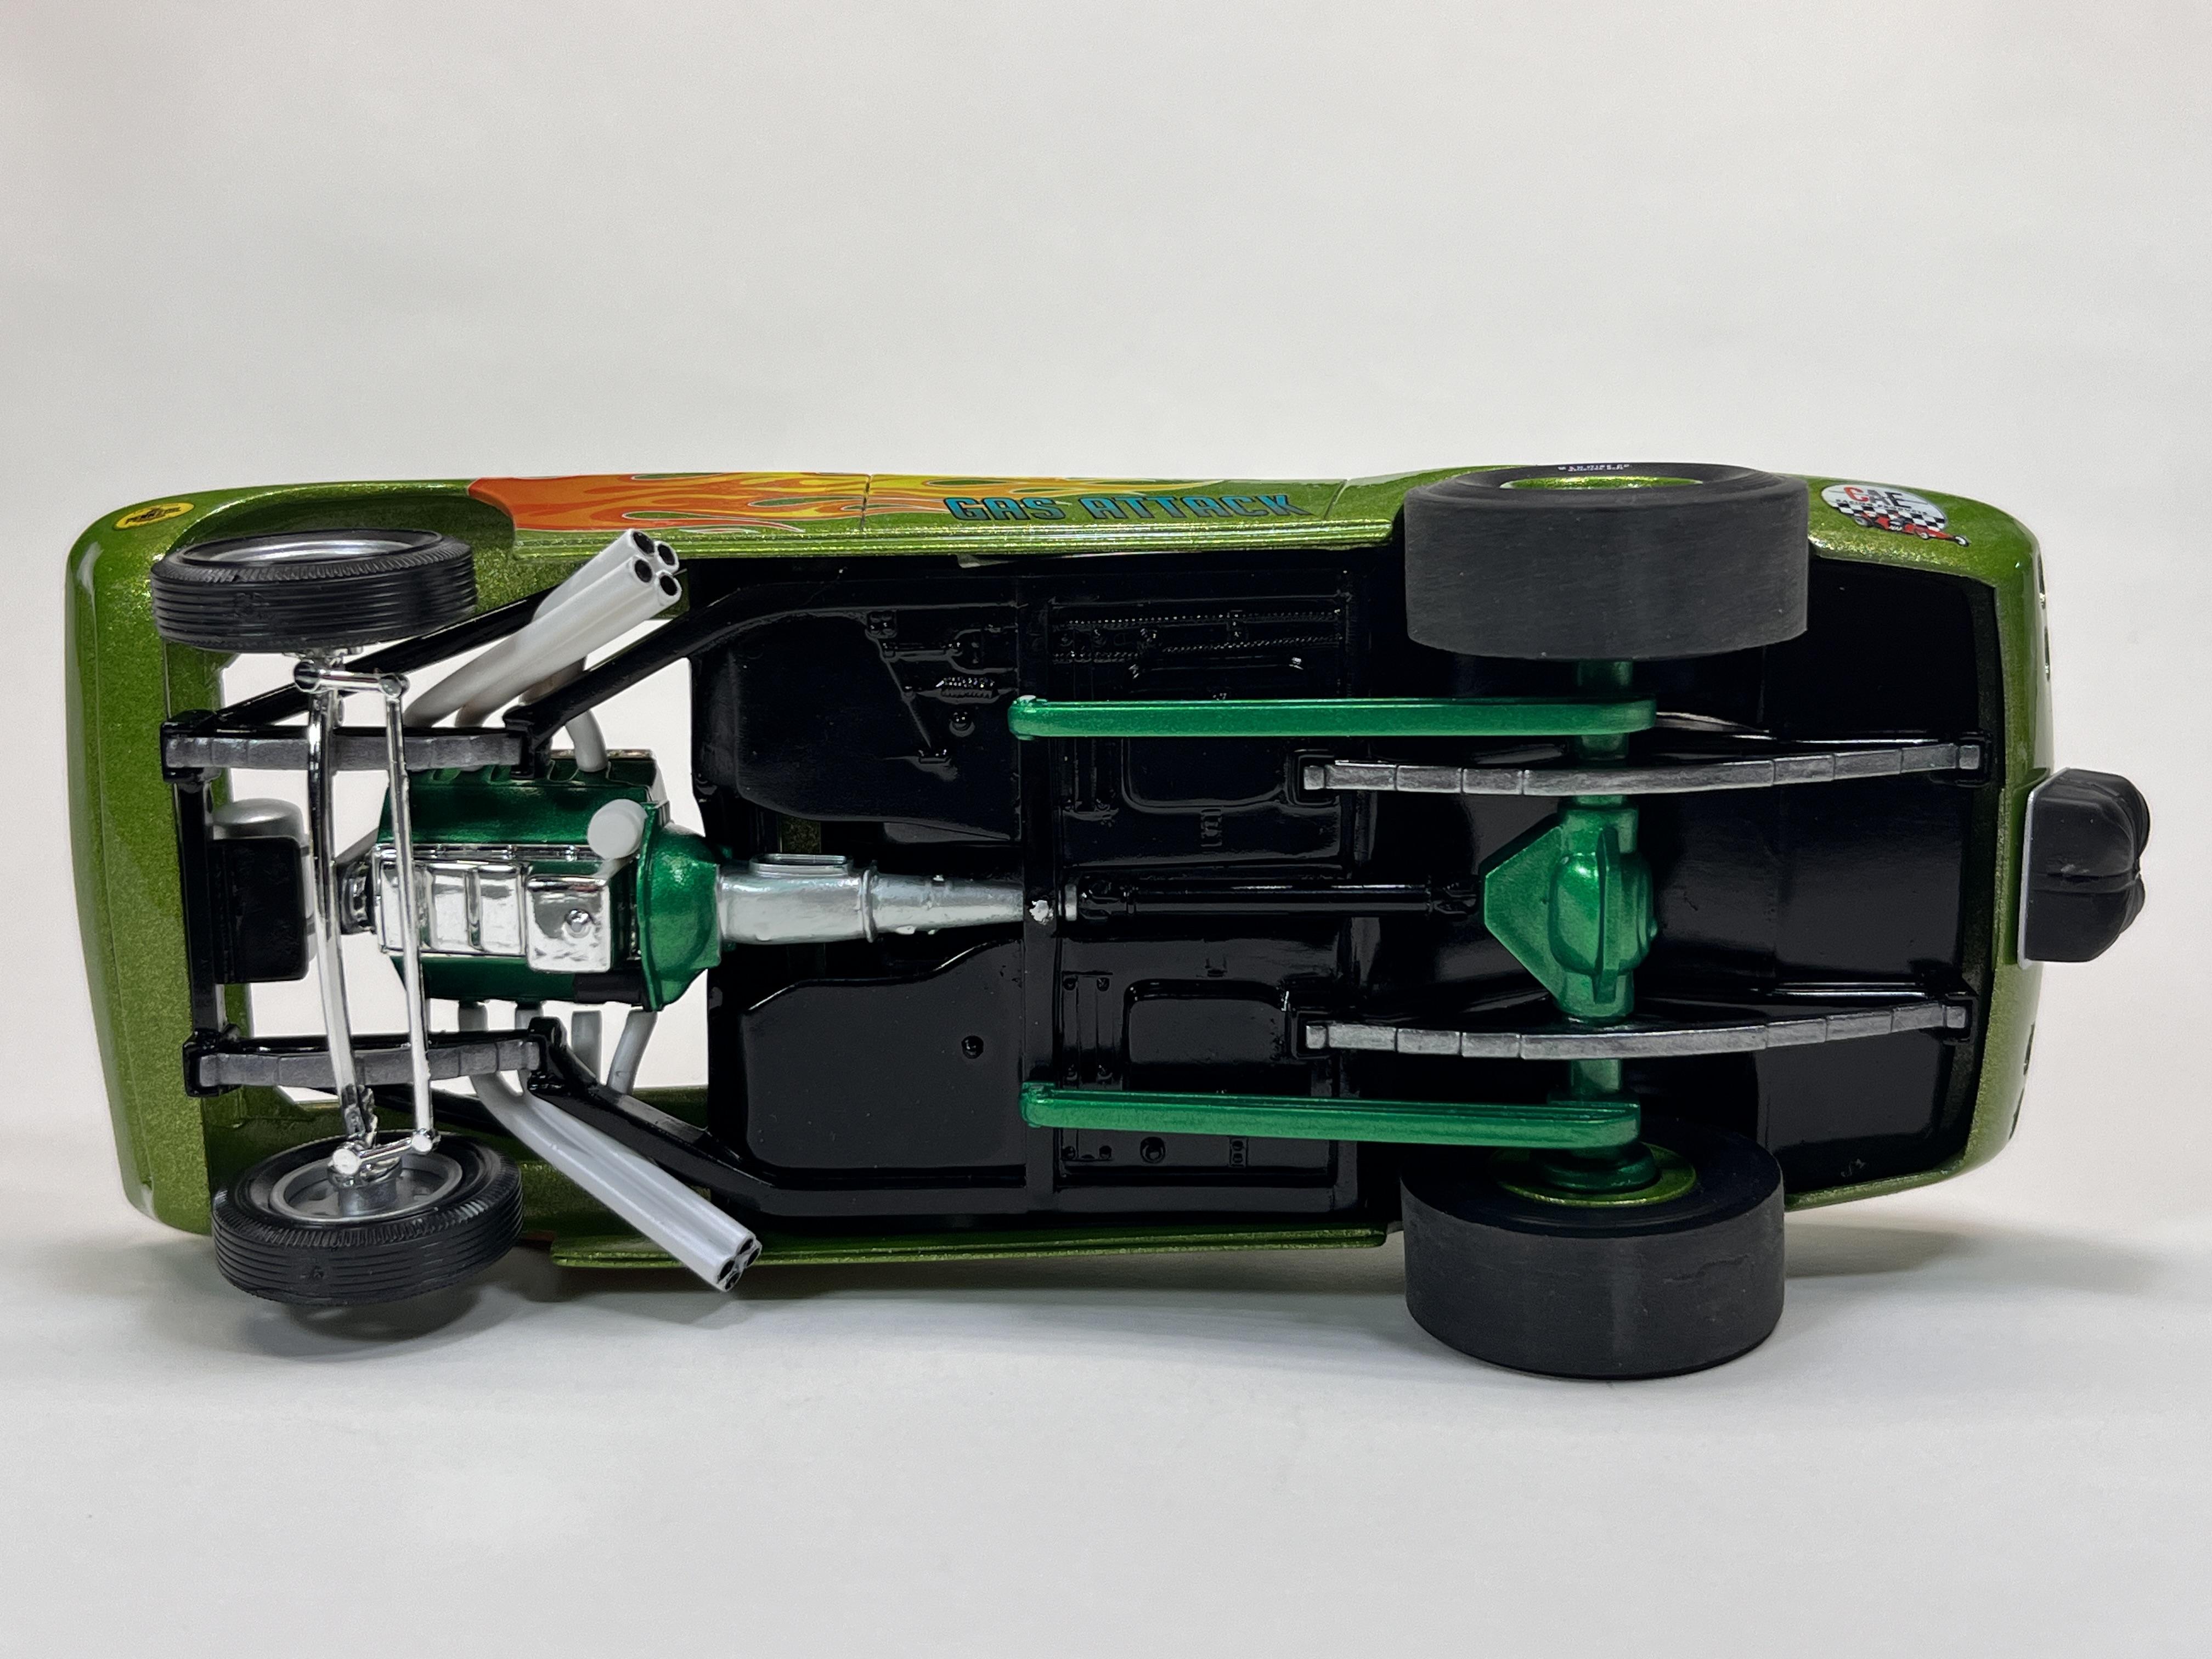
One final build for the year! This is a mash-up of the MPC "Streaker Vette" and the AMT "Rat Packer" altered wheelbase Chevy II with a few added bits and pieces.
Paint is Testors Extreme Lime Ice with Mystic Emerald accents.
More pix here: https://public.fotki.com/jferren/67-corvette-gasser-/ -RRR
-
9
-
-
Here's the final mockup. This one is done, I'll be posting 'under glass' soon.... -RRR
-
2
-
-
Rule #1. Don't use Rustoleum. There is no rule #2. -RRR
-
4
-
 1
1
-
-
17 hours ago, roadhawg said:
Looking good!!BIG gasser fan here!!!I"m currently working on the Mobius 65 Nova trying to make it more period correct and if if you can get to Ringgold GA, the Southeast Gassers association make their return to rainerd OPtimist dragstrip this upcoming year March 24th. close to 100 Authentic period correct gassers competing heads up first to the finish line wins the way drag racing used to be. they put on an awesome show!!!their motto is "Follow us to 1967!!!"
Thanks, Tommy. I do occasionally check out SEGA goings on posted on H.A.M.B. -RRR
-
9 hours ago, CabDriver said:
Always enjoy seeing one of your projects come together - nice work so far!
Thanks, Jim! Happy Holidays!! -RRR
-
Moving along to the engine placement and exhaust now...I glued the firewall in place and cleaned up the intersection of the Corvette floorpan and the rear tubs...
I added an extended tail piece to the transmission so it now meets the crossmember.....
The next step is to extended the primary tubes of the headers so they reach the heads. I found some pieces of old AMT funny car exhaust tubes that are roughly the same diameter of the headers for extensions...
----------------------------------
Header extensions have been glued on....
--------------------------------
both headers have been extended, sanded down, puttied in and sanded some more...
---------------------------
The headers are a very snug fit.....new motor mounts were fabricated up, slightly behind the original mounts that were removed...the driveshaft will be shortened an RCH or two....
That's all for today... -RRR
-
3
-


Chopped 3-Window Hemi Deuce
in WIP: Model Cars
Posted
Looking good, Jim.
I guess it's too late now, but in regards to the stock firewall. I have trimmed out the edge of the cowl so that the firewall can be recessed into the body an RCH or two. This is a resin firewall from Replicas and Miniatures of Maryland, a bit thinner than the firewall you were trying to use. This did allow me to use the Hemi from the kit.
-------------------------
Another area, on one '32 build, I modified the frame for fitting in a QC by notching the gas tank for clearance.
In this case using a Model A spring and crossmember.....
Just a couple of tricks...carry on! -RRR