SawgrassRaven
-
Posts
98 -
Joined
-
Last visited
Content Type
Profiles
Forums
Events
Gallery
Everything posted by SawgrassRaven
-
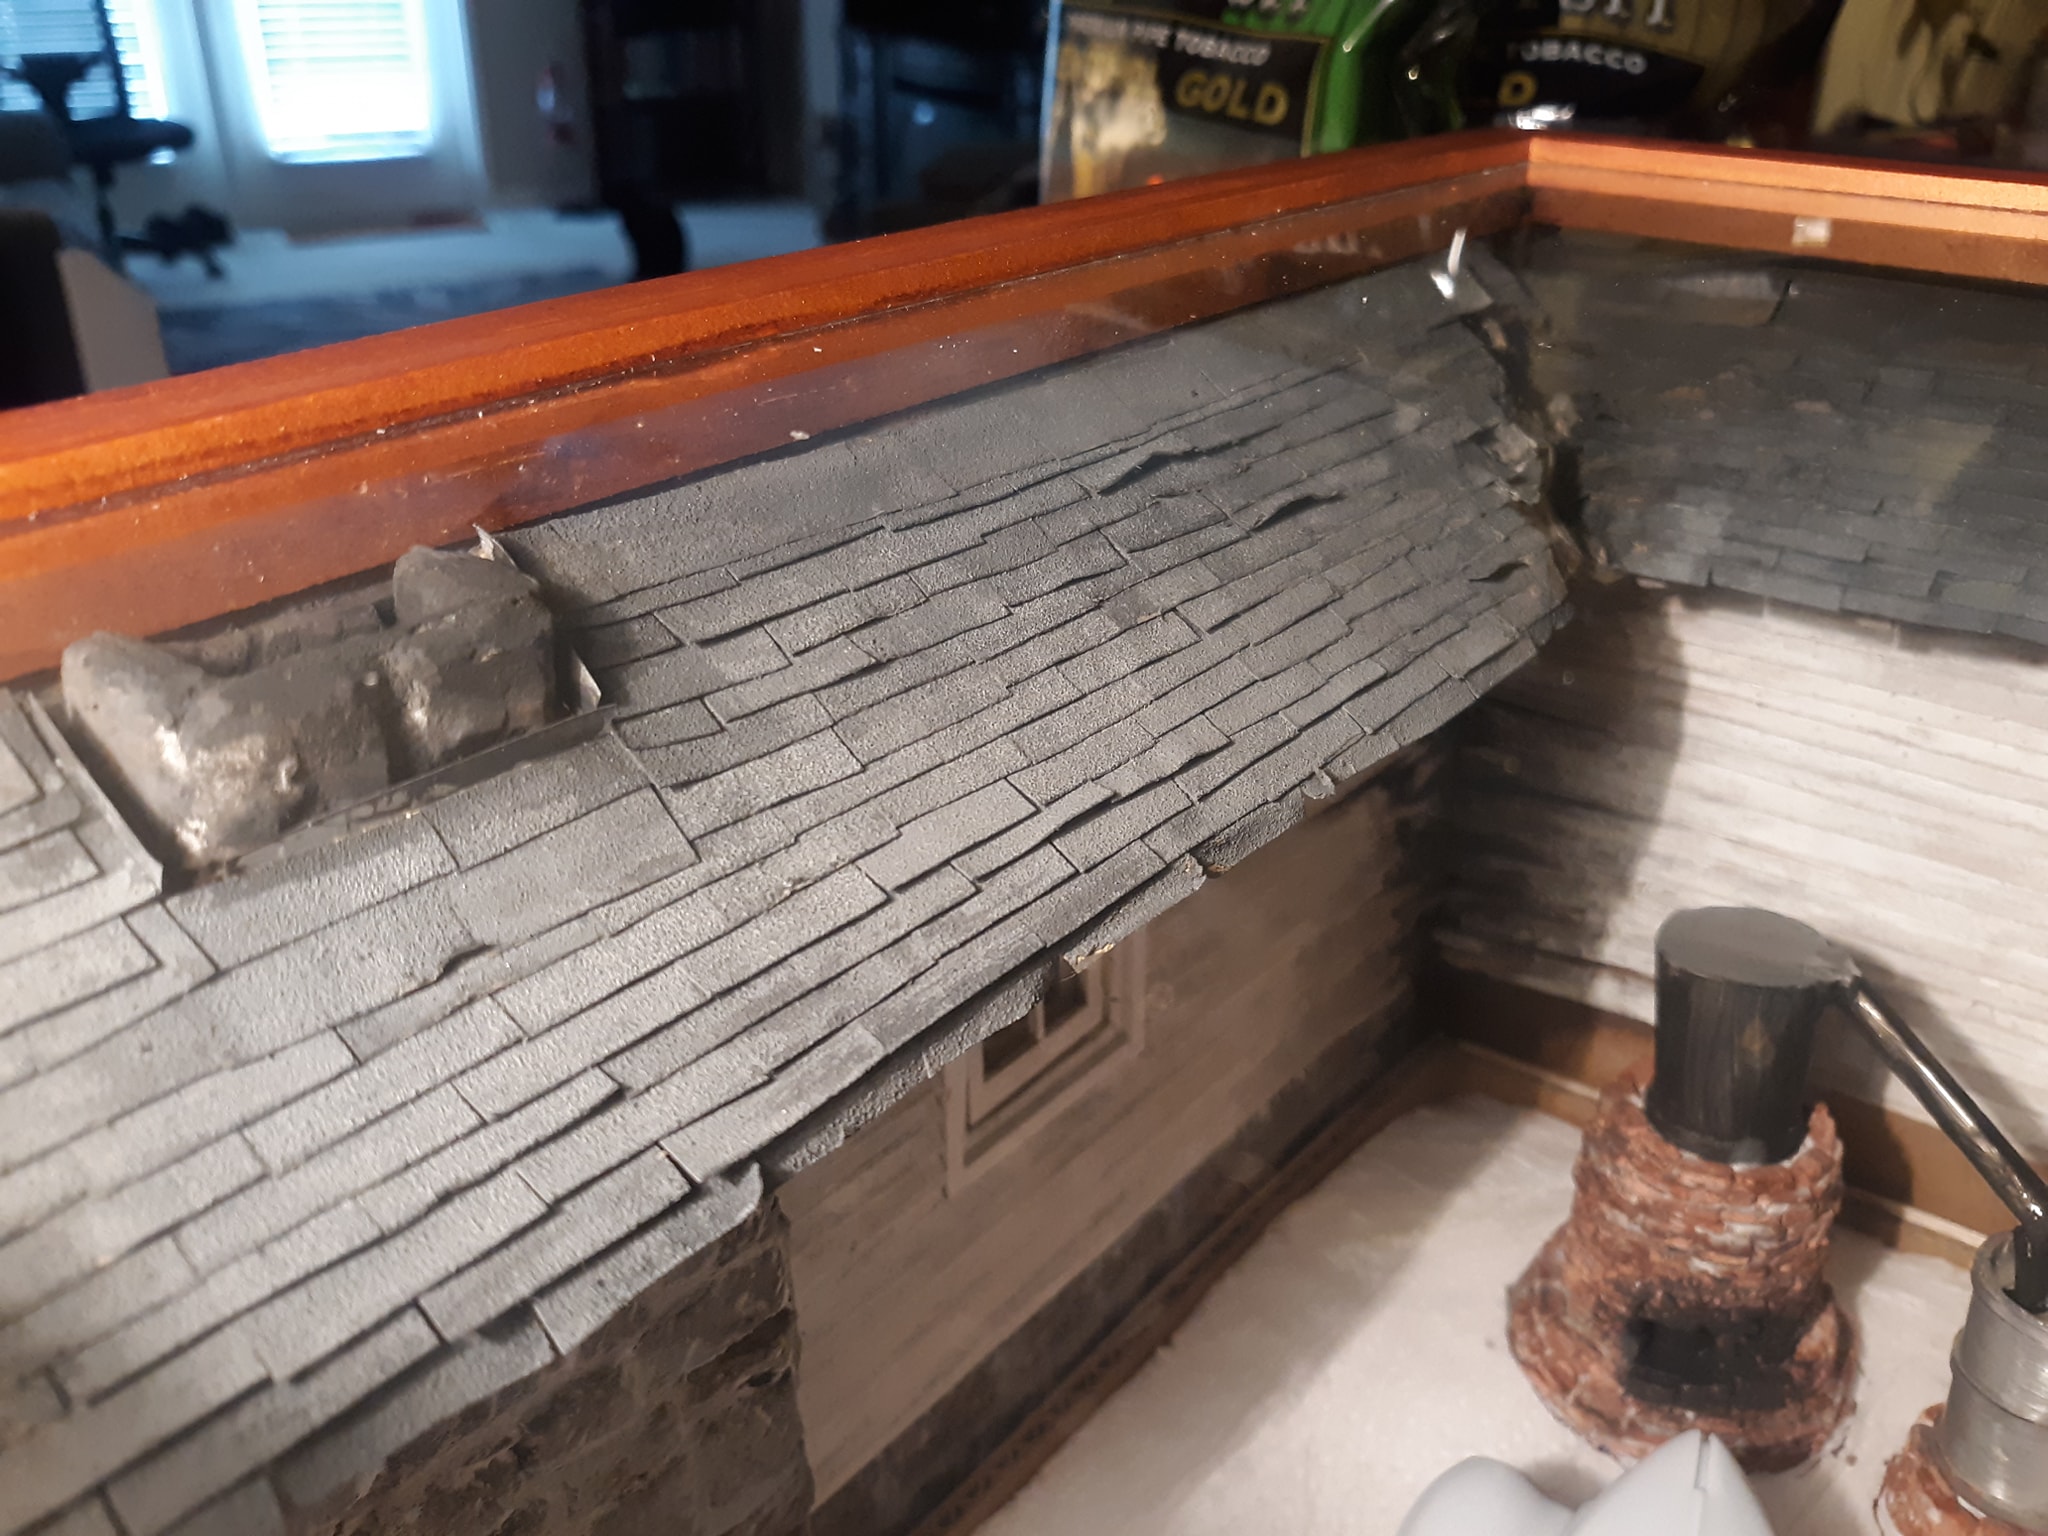
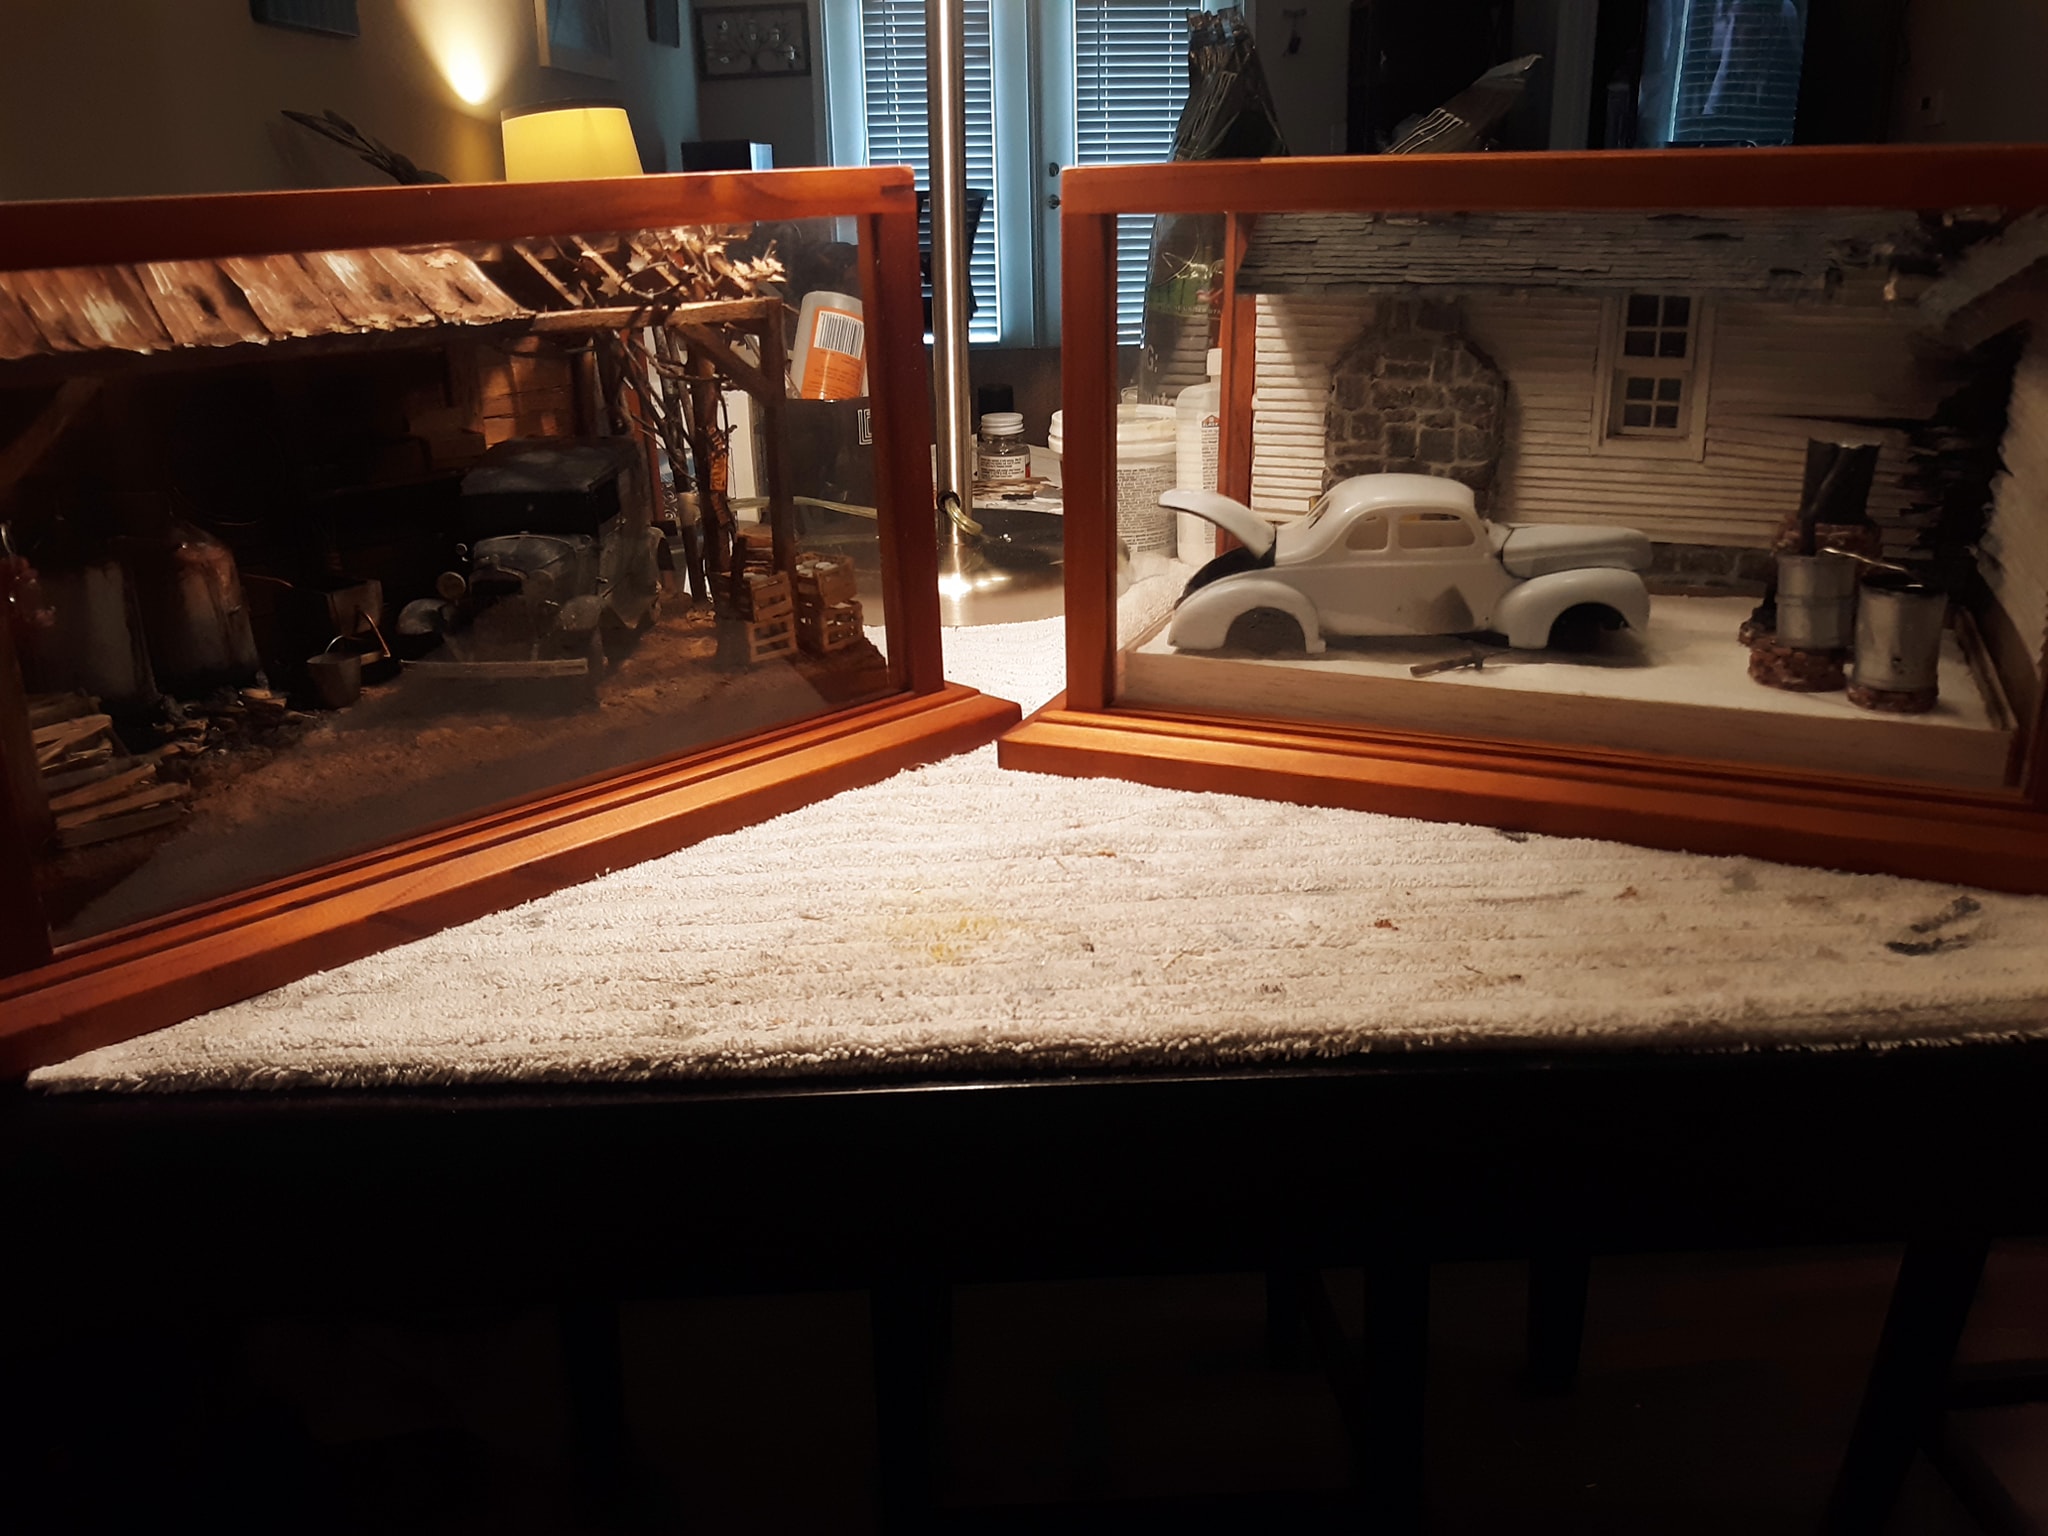
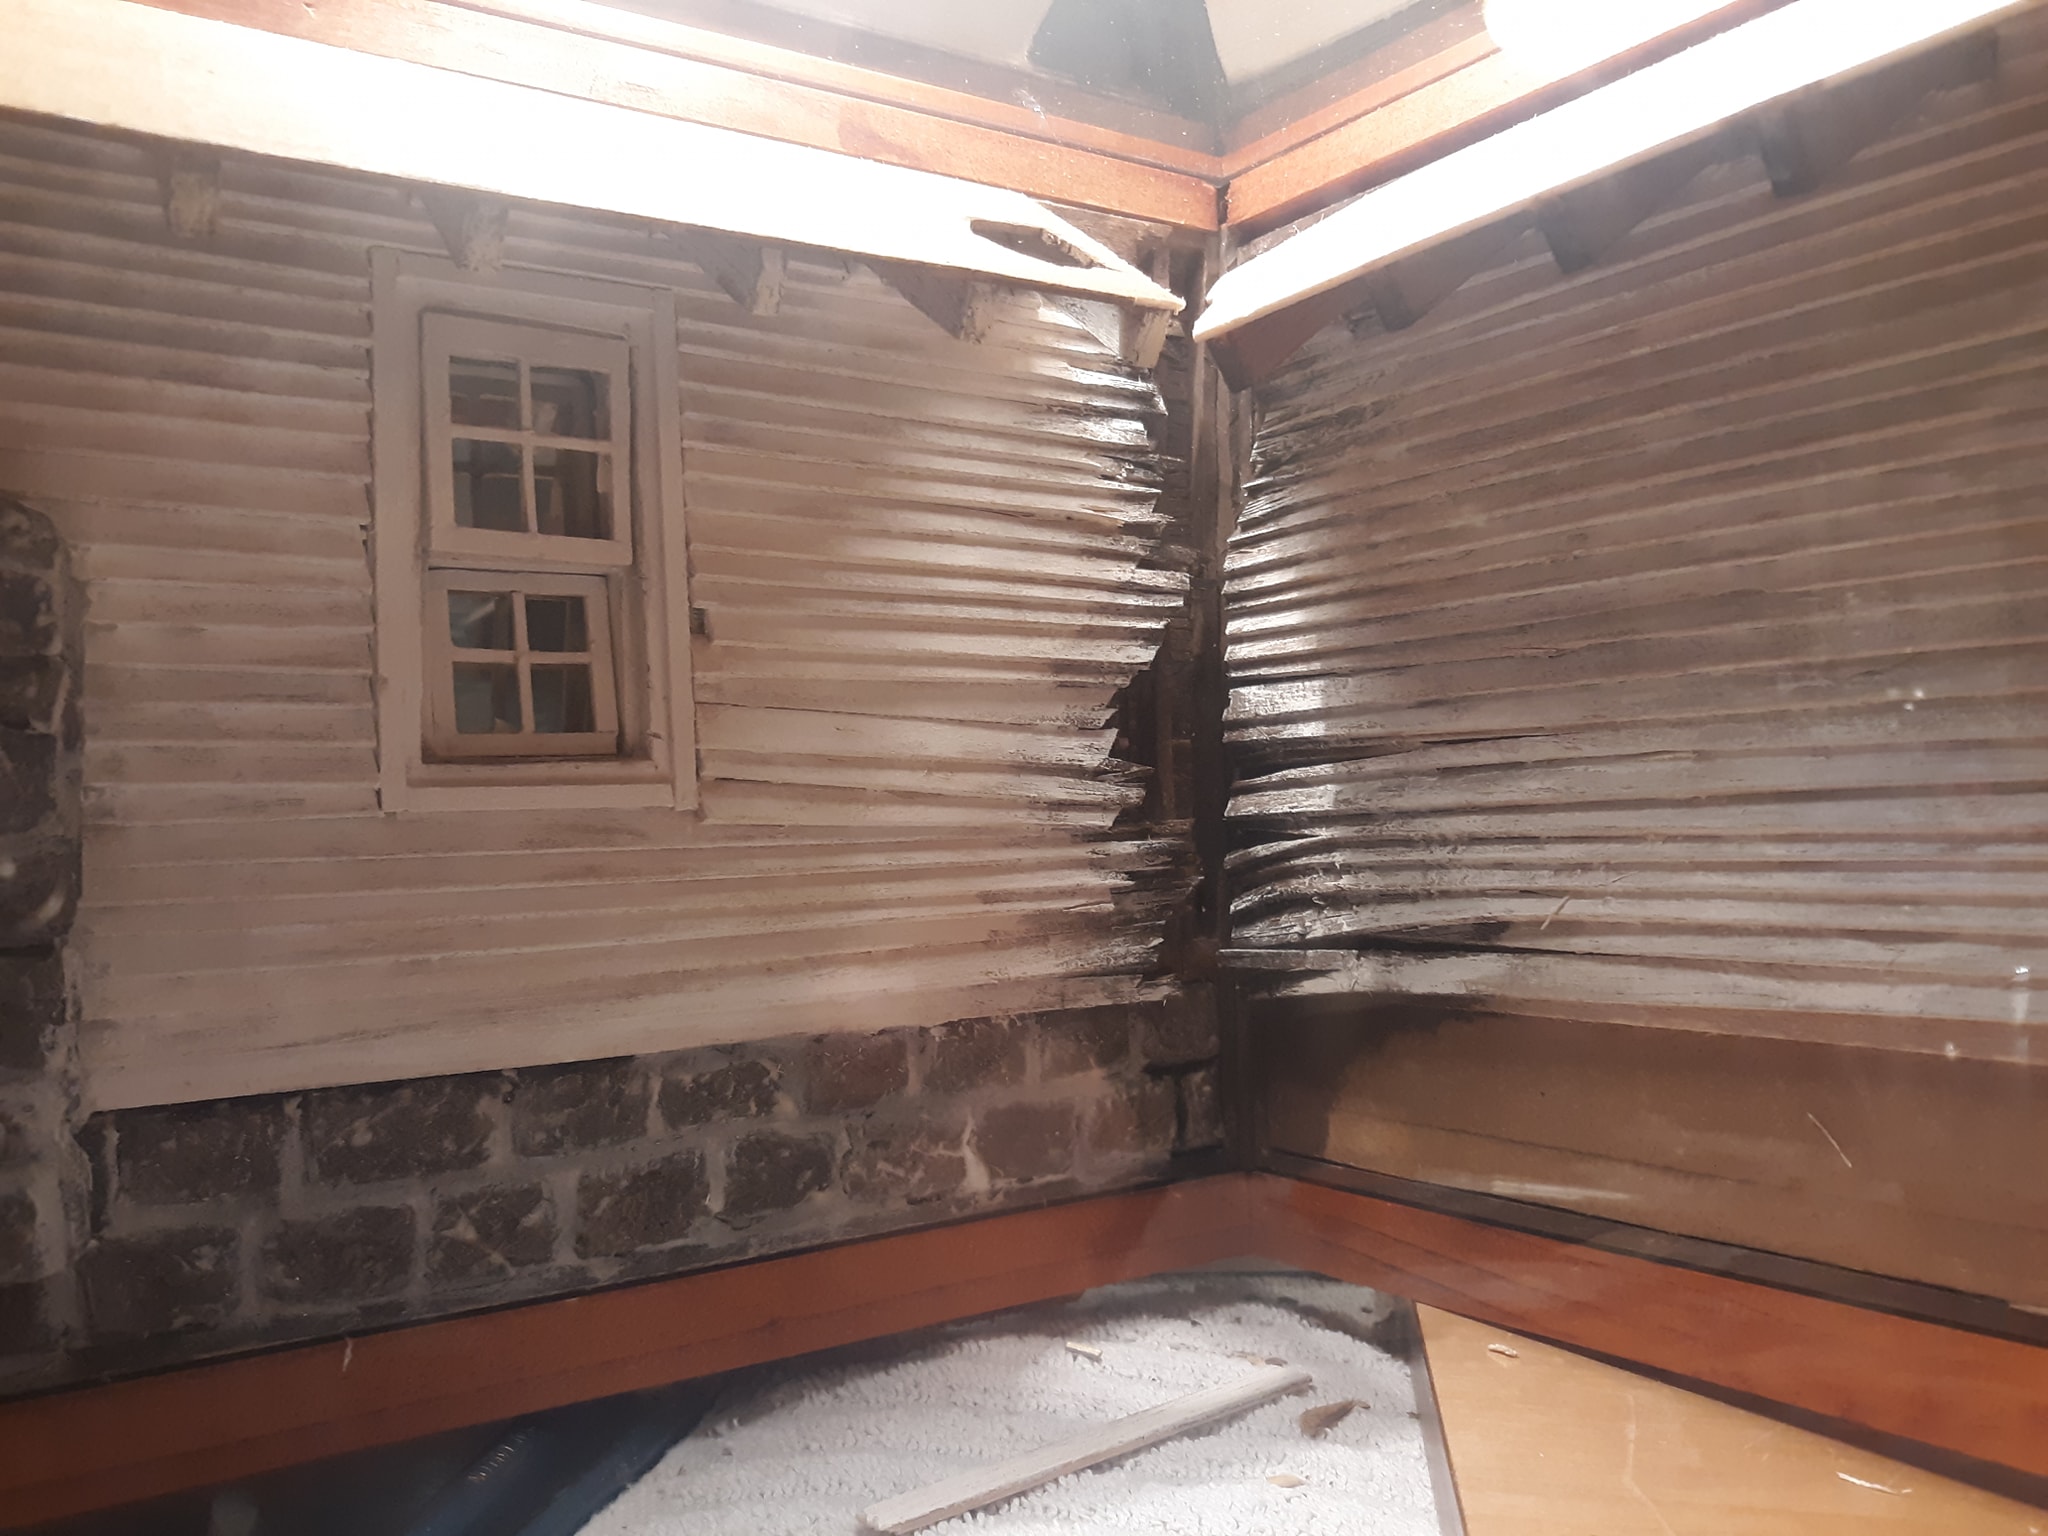
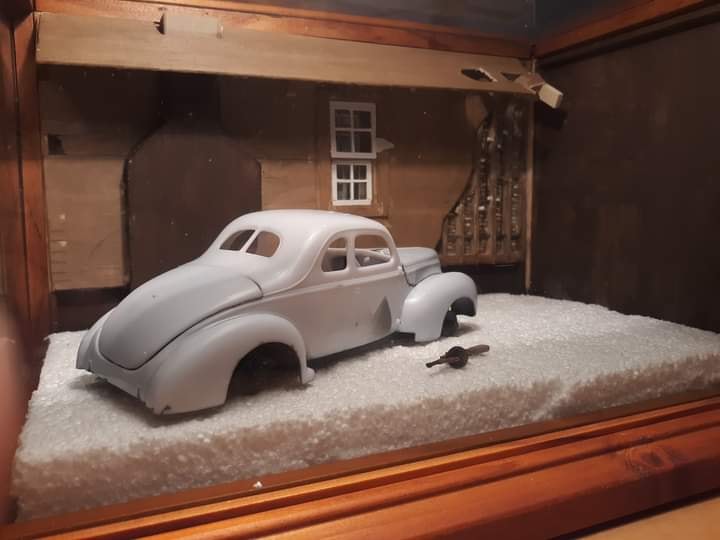
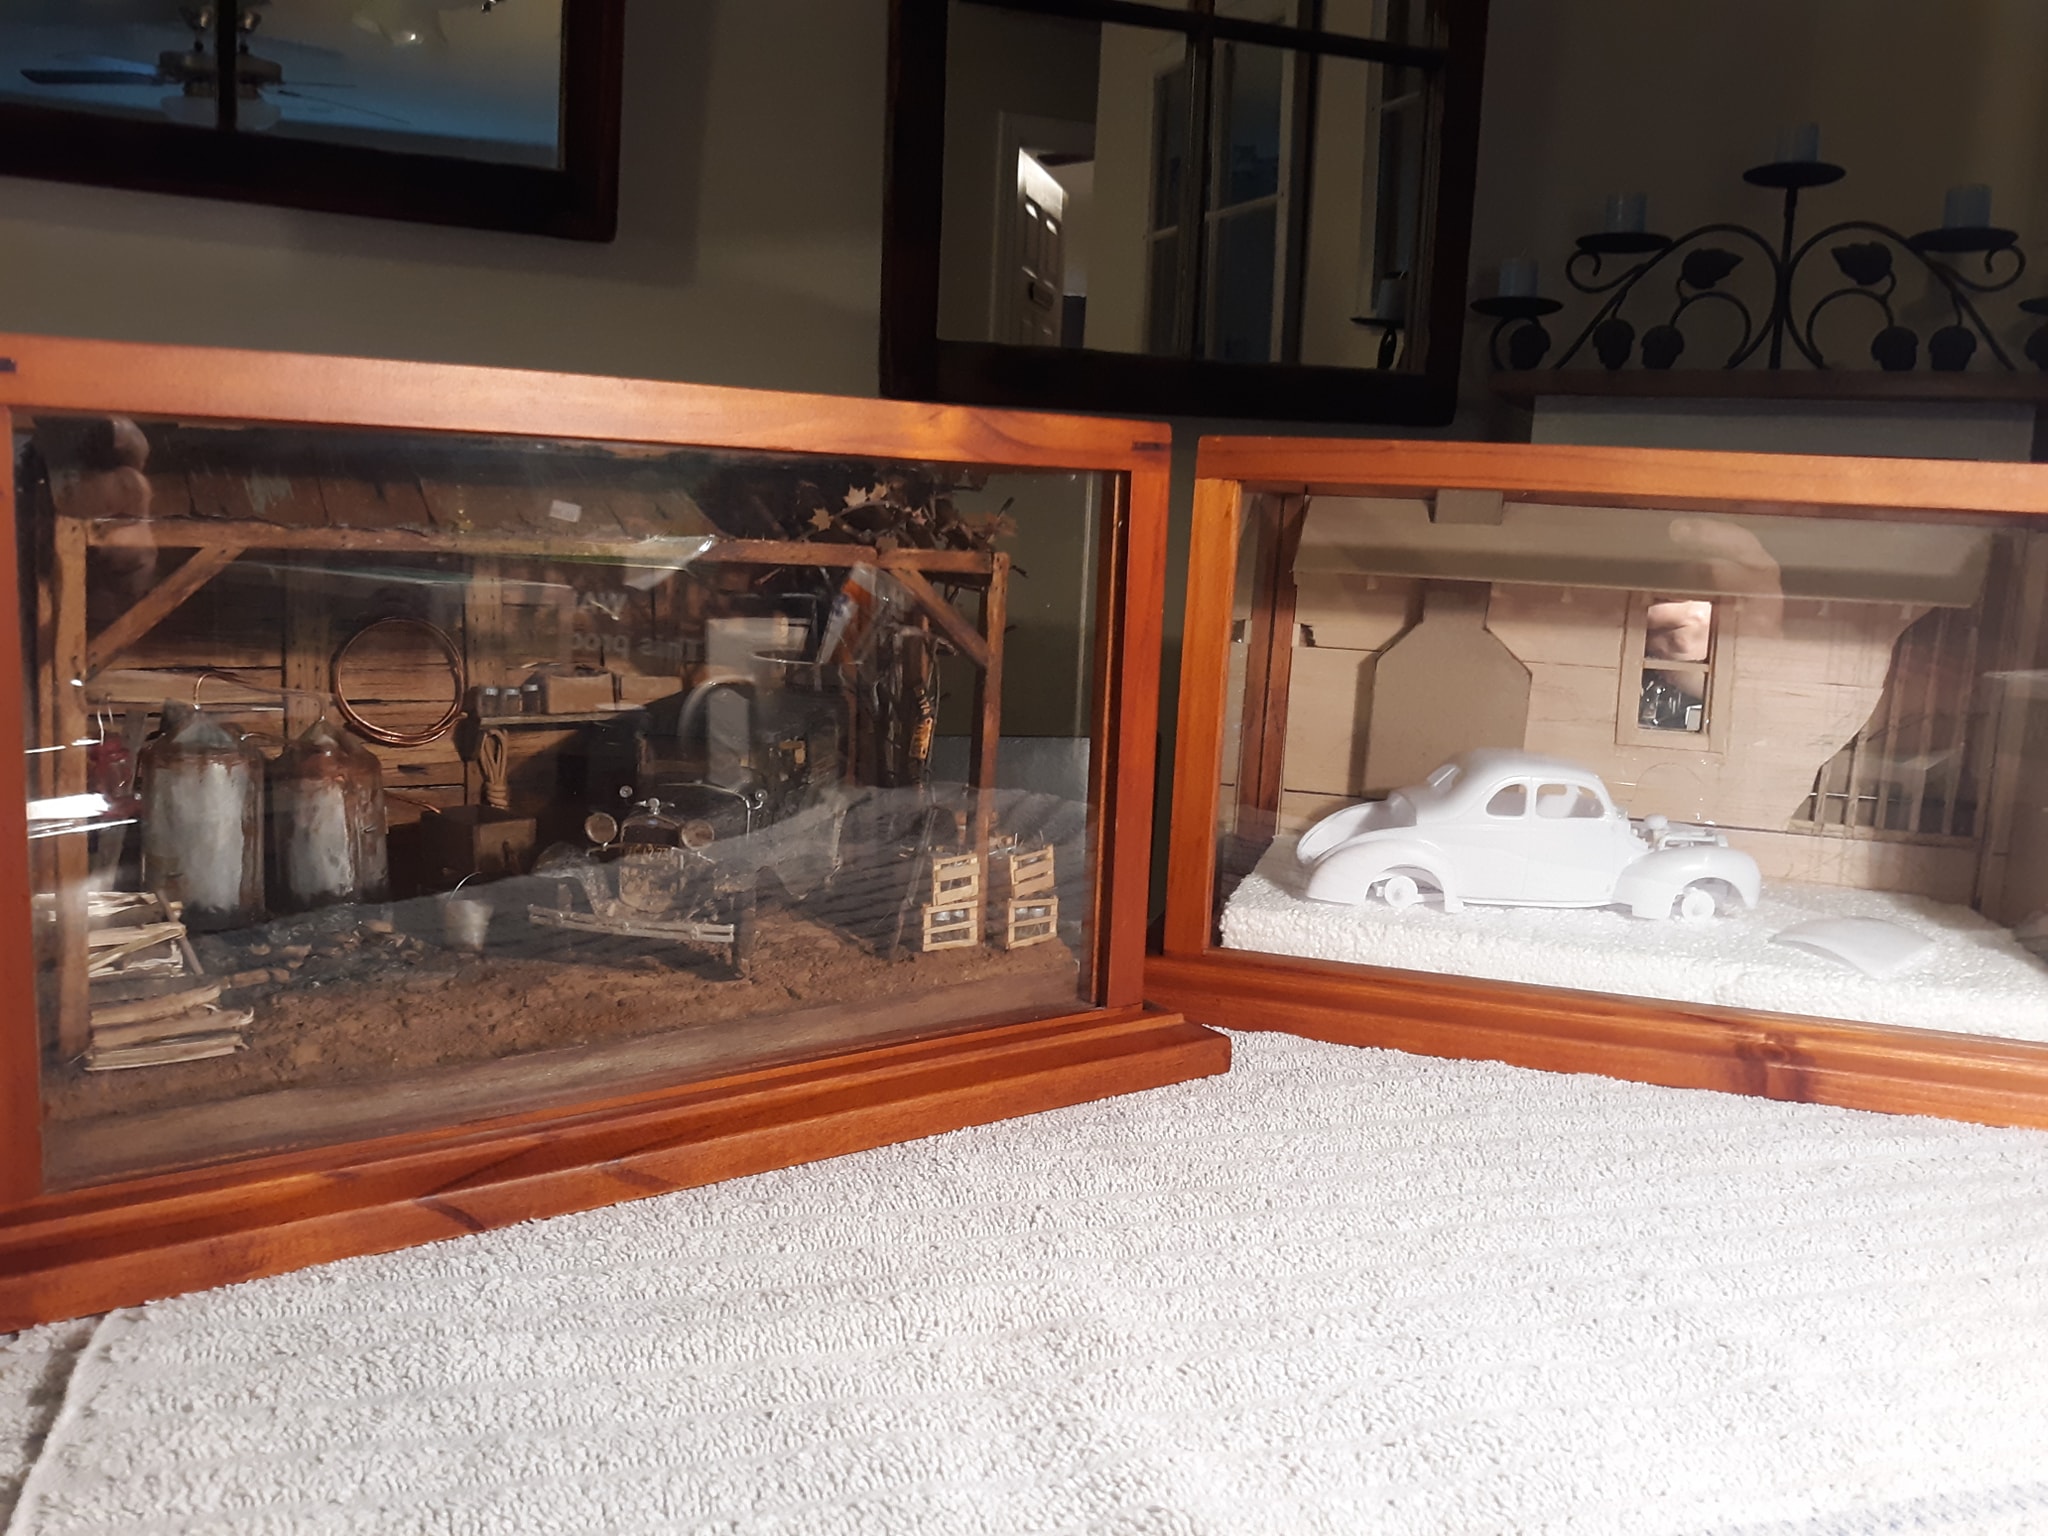
Tweaked the corner and roof damage a bit. This is about as far as I plan to go on the roof. This is pretty much it for the main structure and final layout with the exception of weathering and other small details. Just a comparison pic with her older sister. Now we can begin on the car.

-
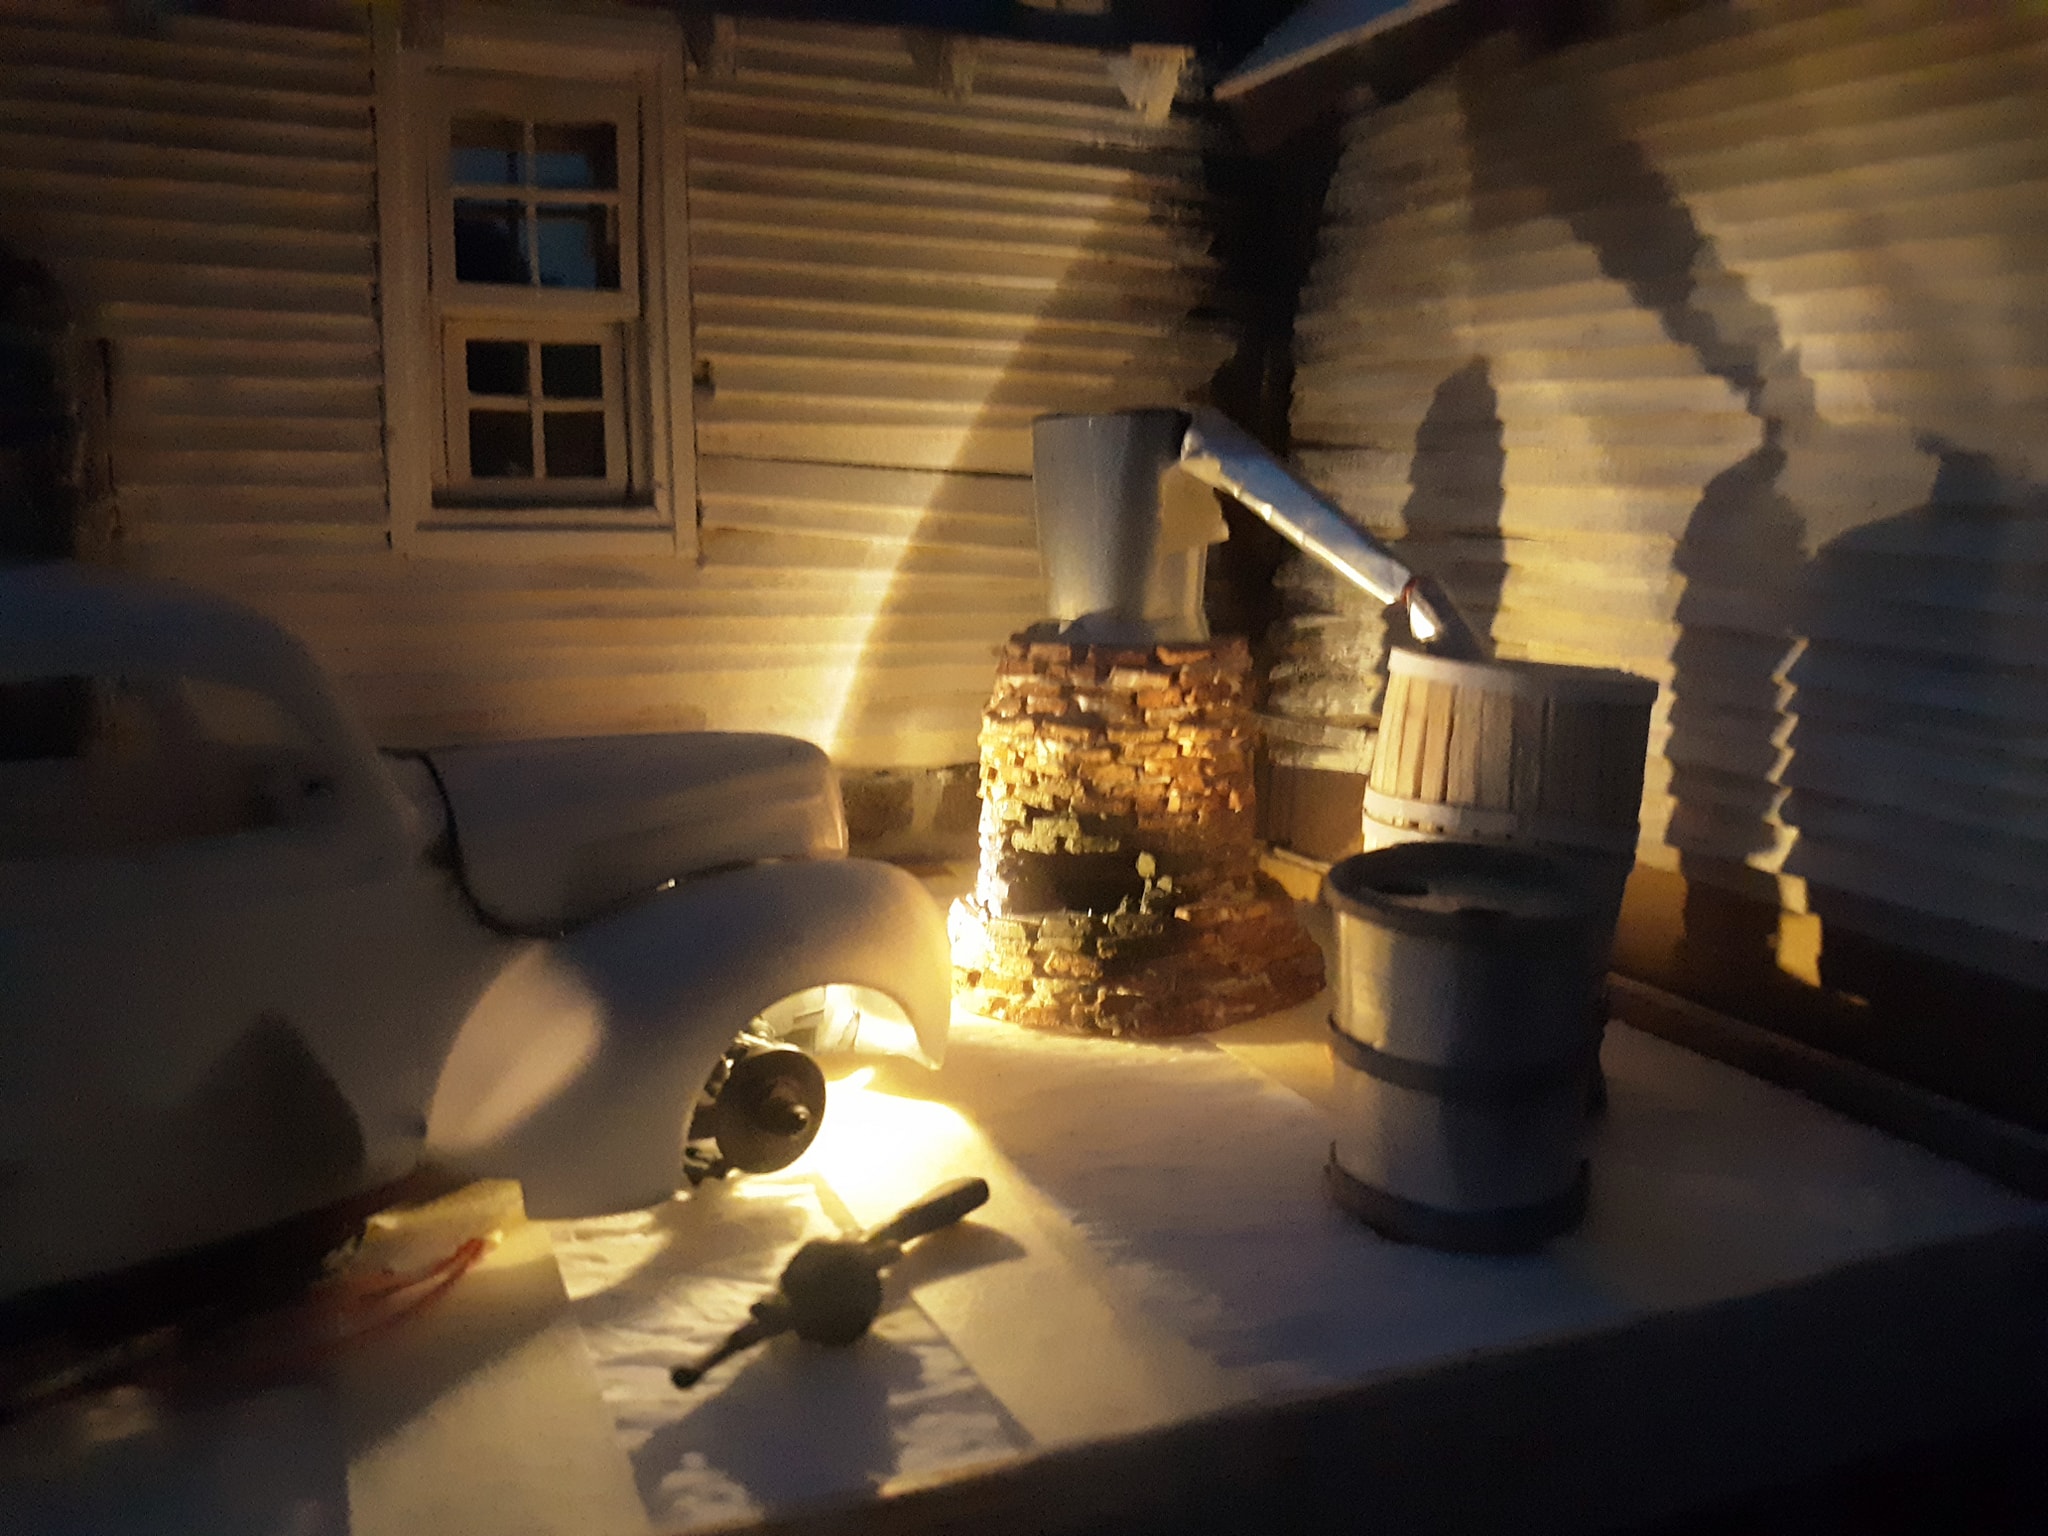
I took a break from the still and did some roofing. It's starting to resemble a house!
-
Thanks Ray! I enjoy building the scene more than I do the car.
-
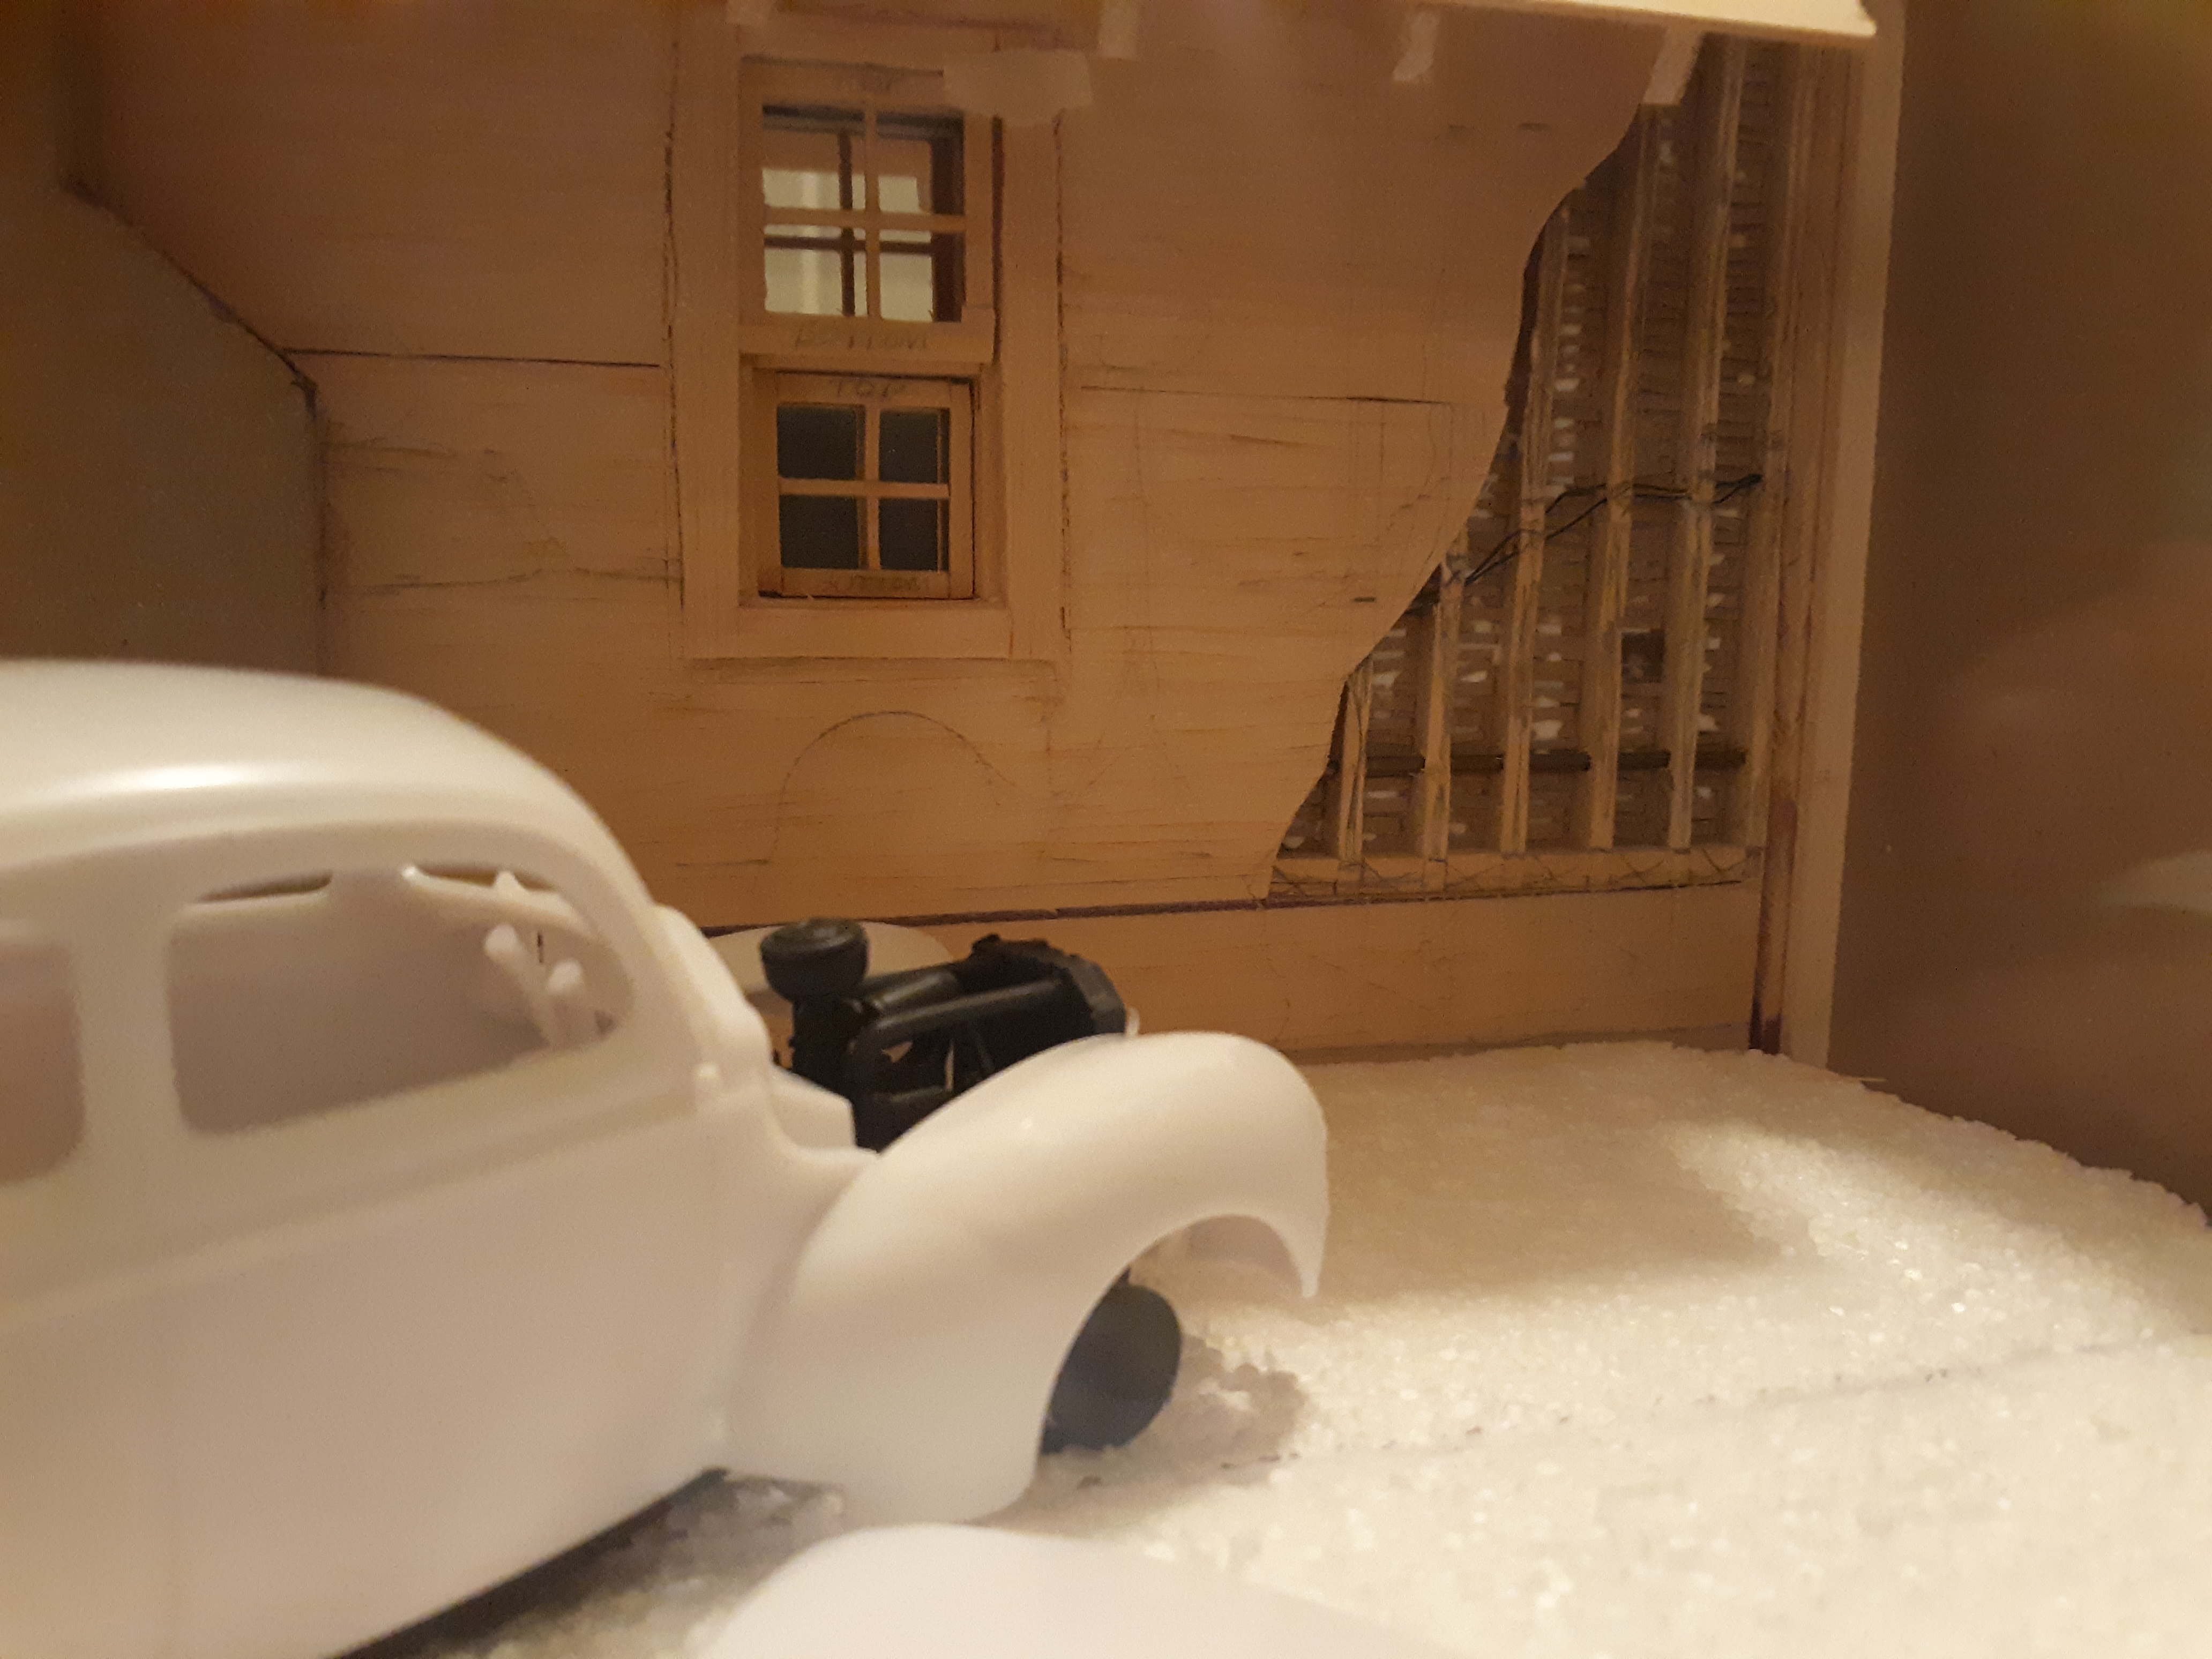
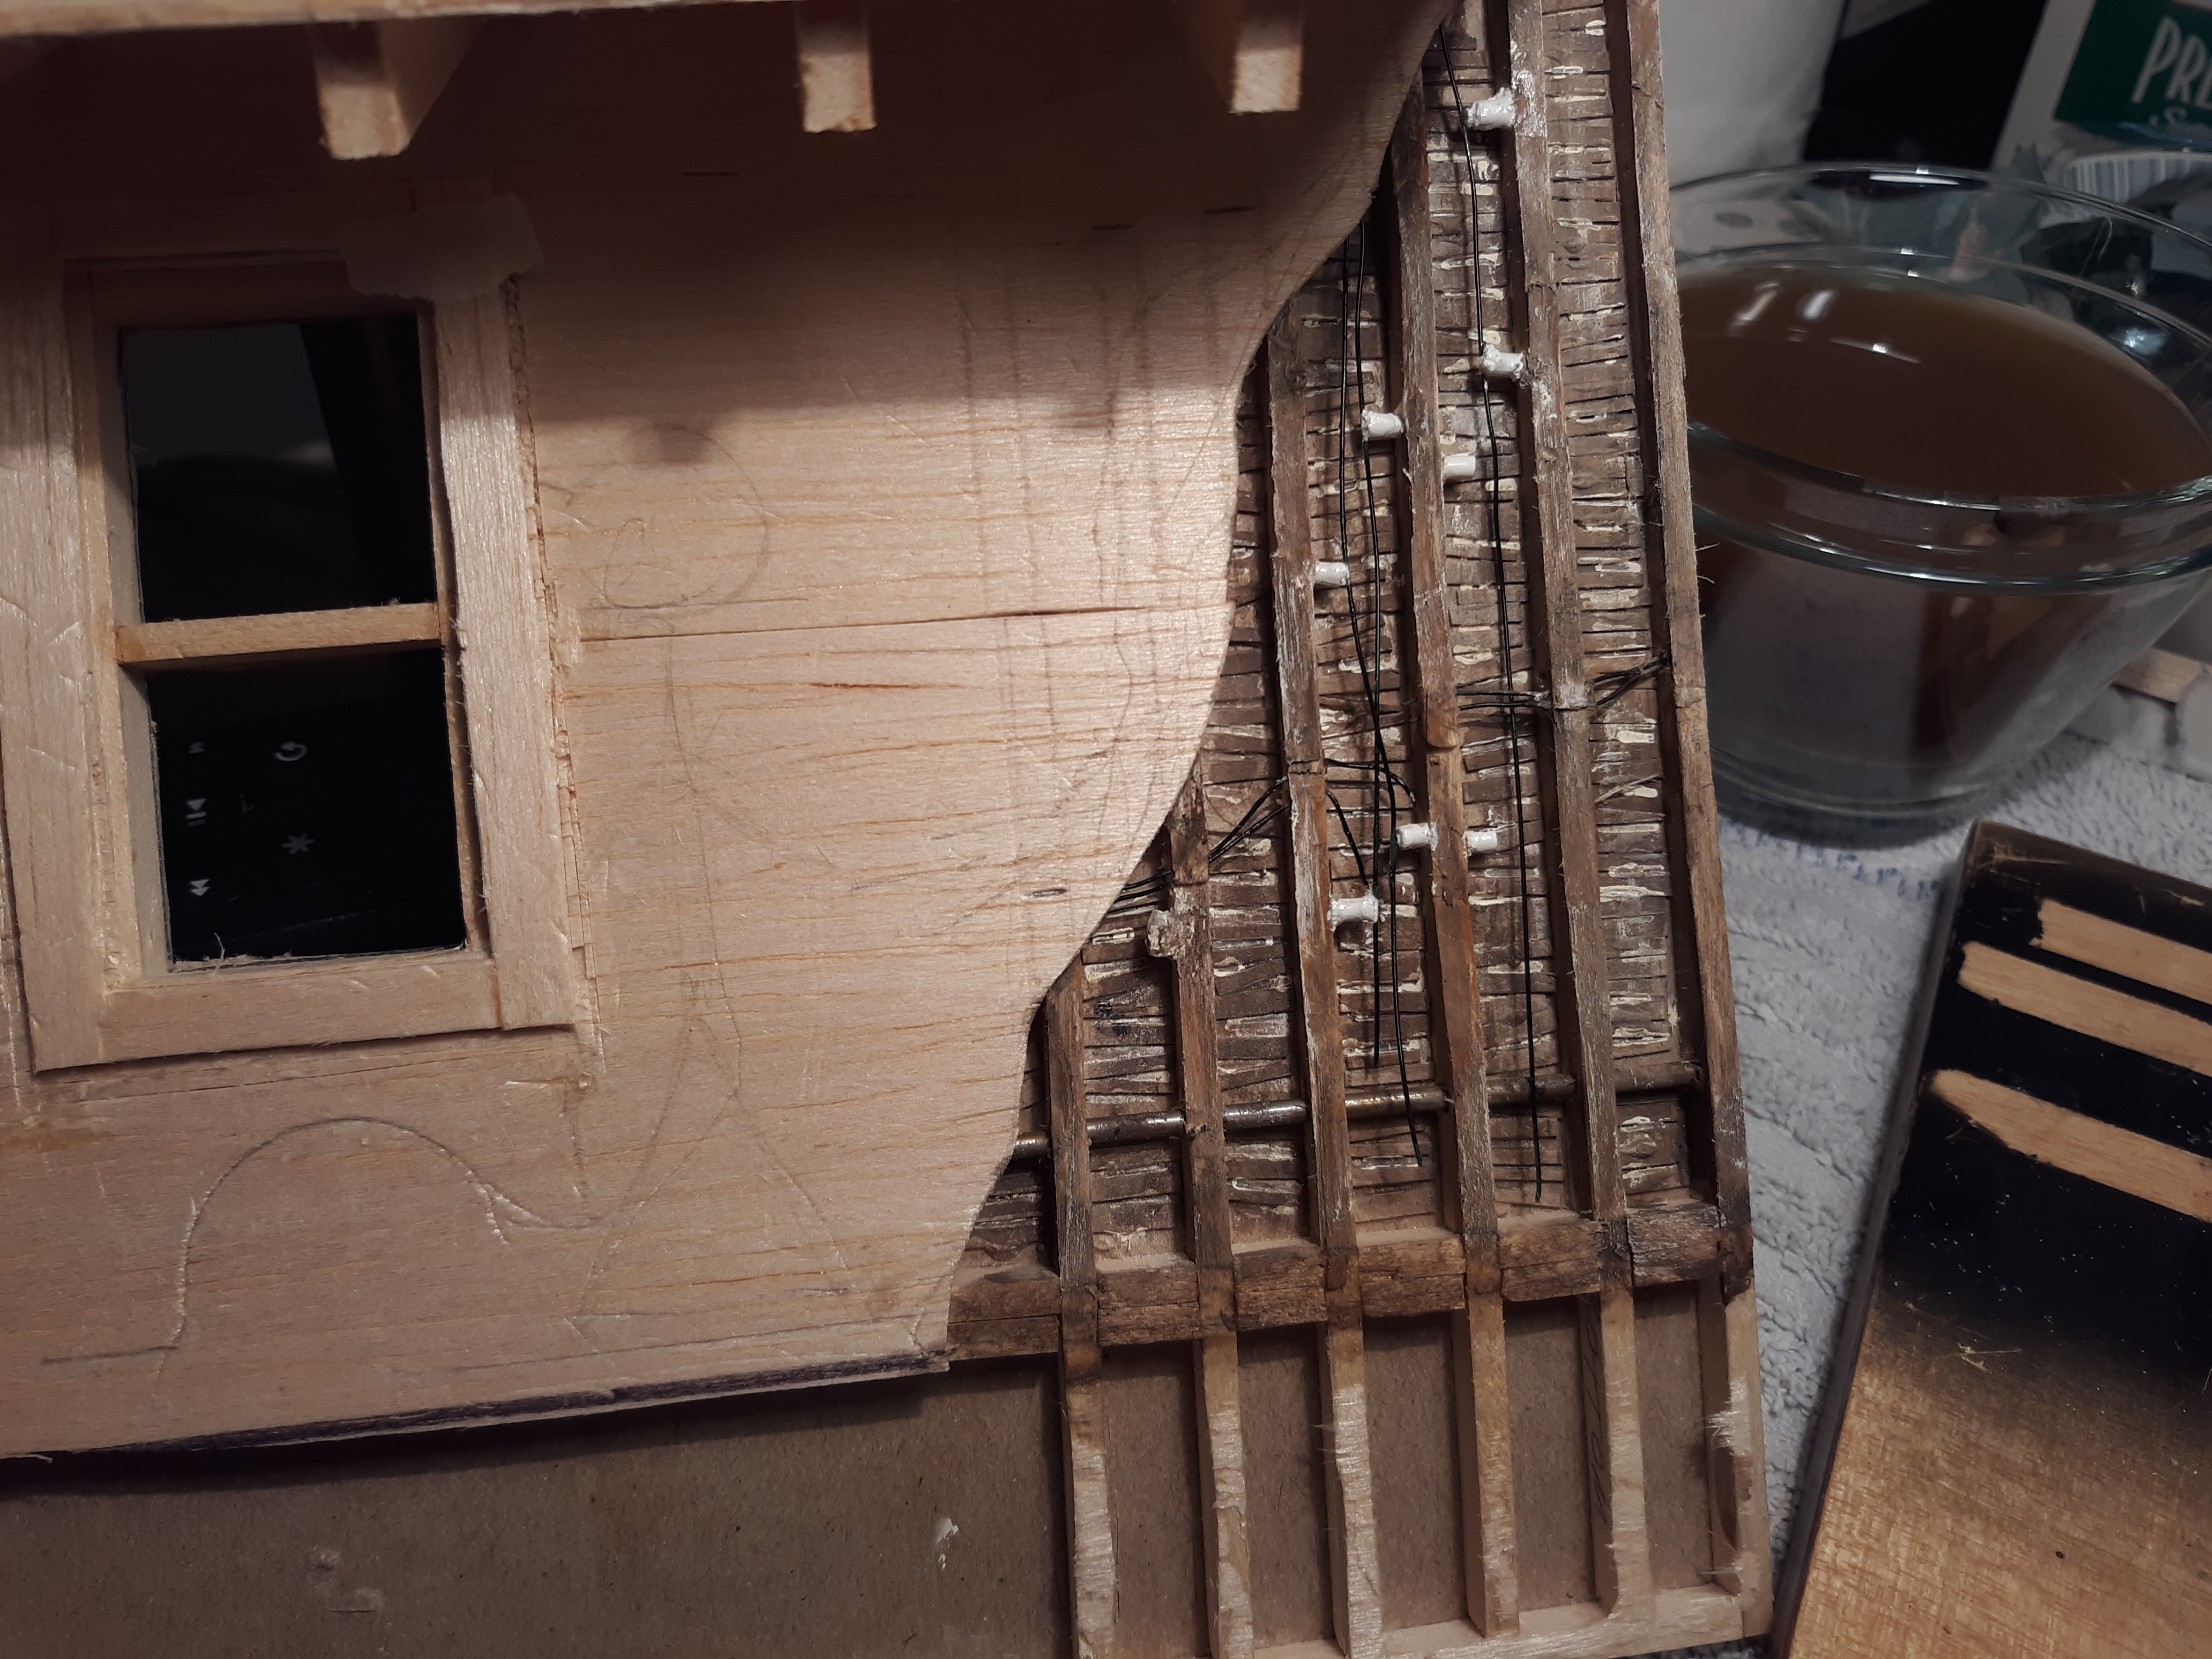
Thanks for all the complements, folks! Just finishing up the rotted wood water damage and some still plumbing. Unfortunately, I lost almost all the interior wall wiring and insulators detail. Small progress for almost all day, but worth it. Thanks for looking.
-
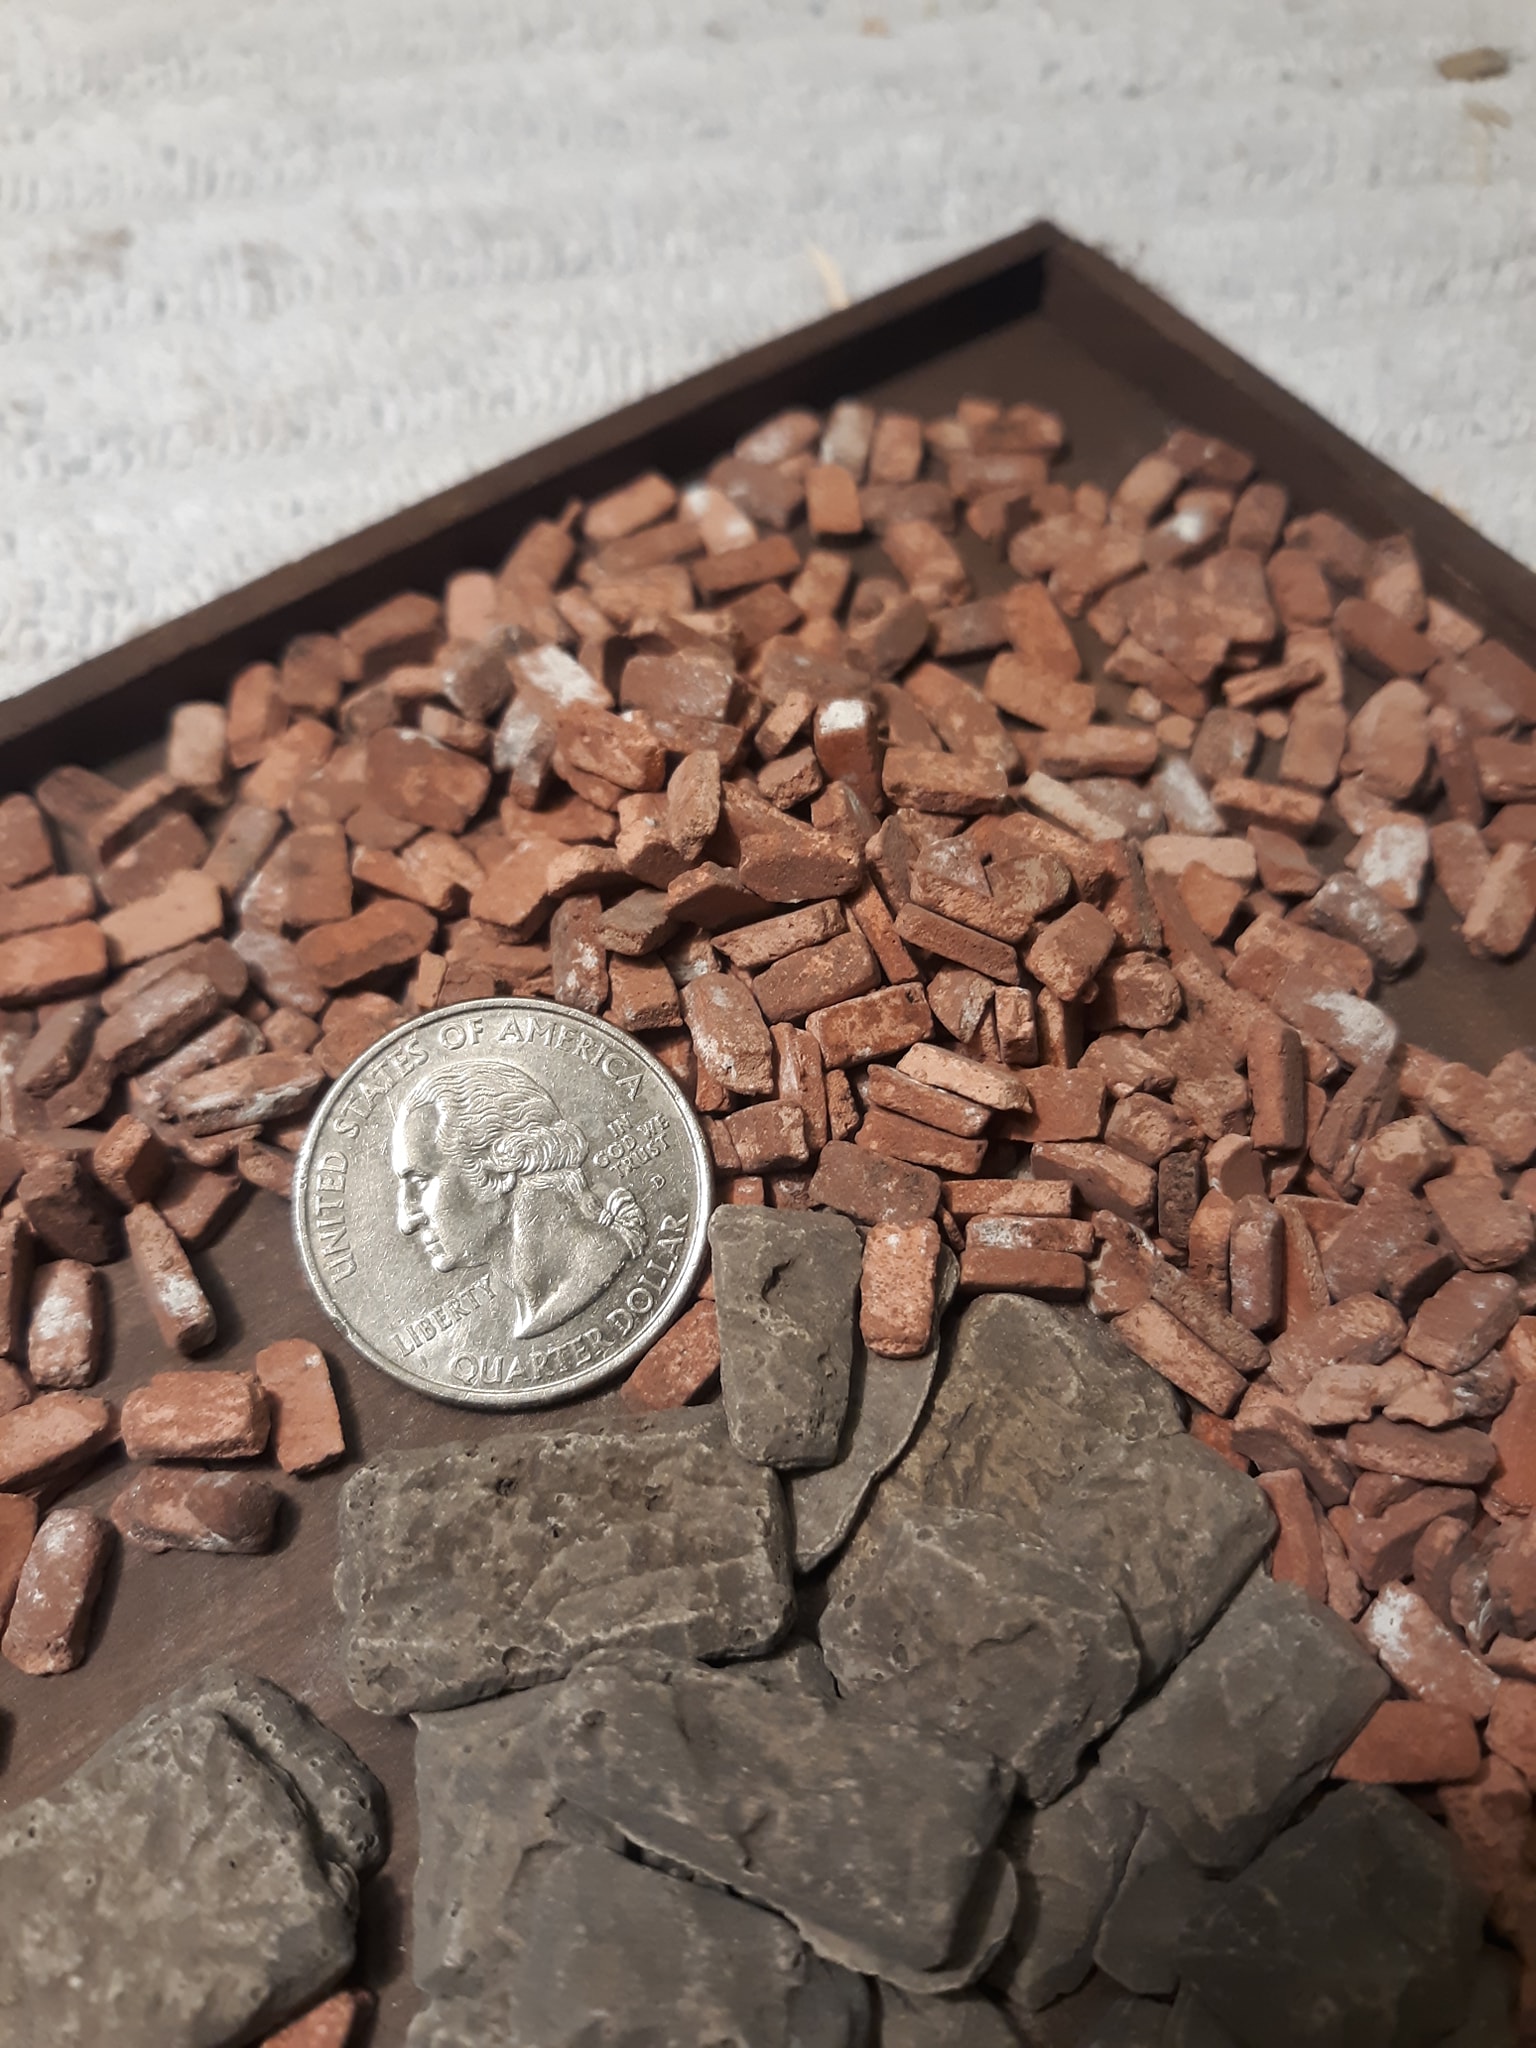
No, I bought them and the stones from an eBay seller in Canada that makes excellent railroad stuff.
-
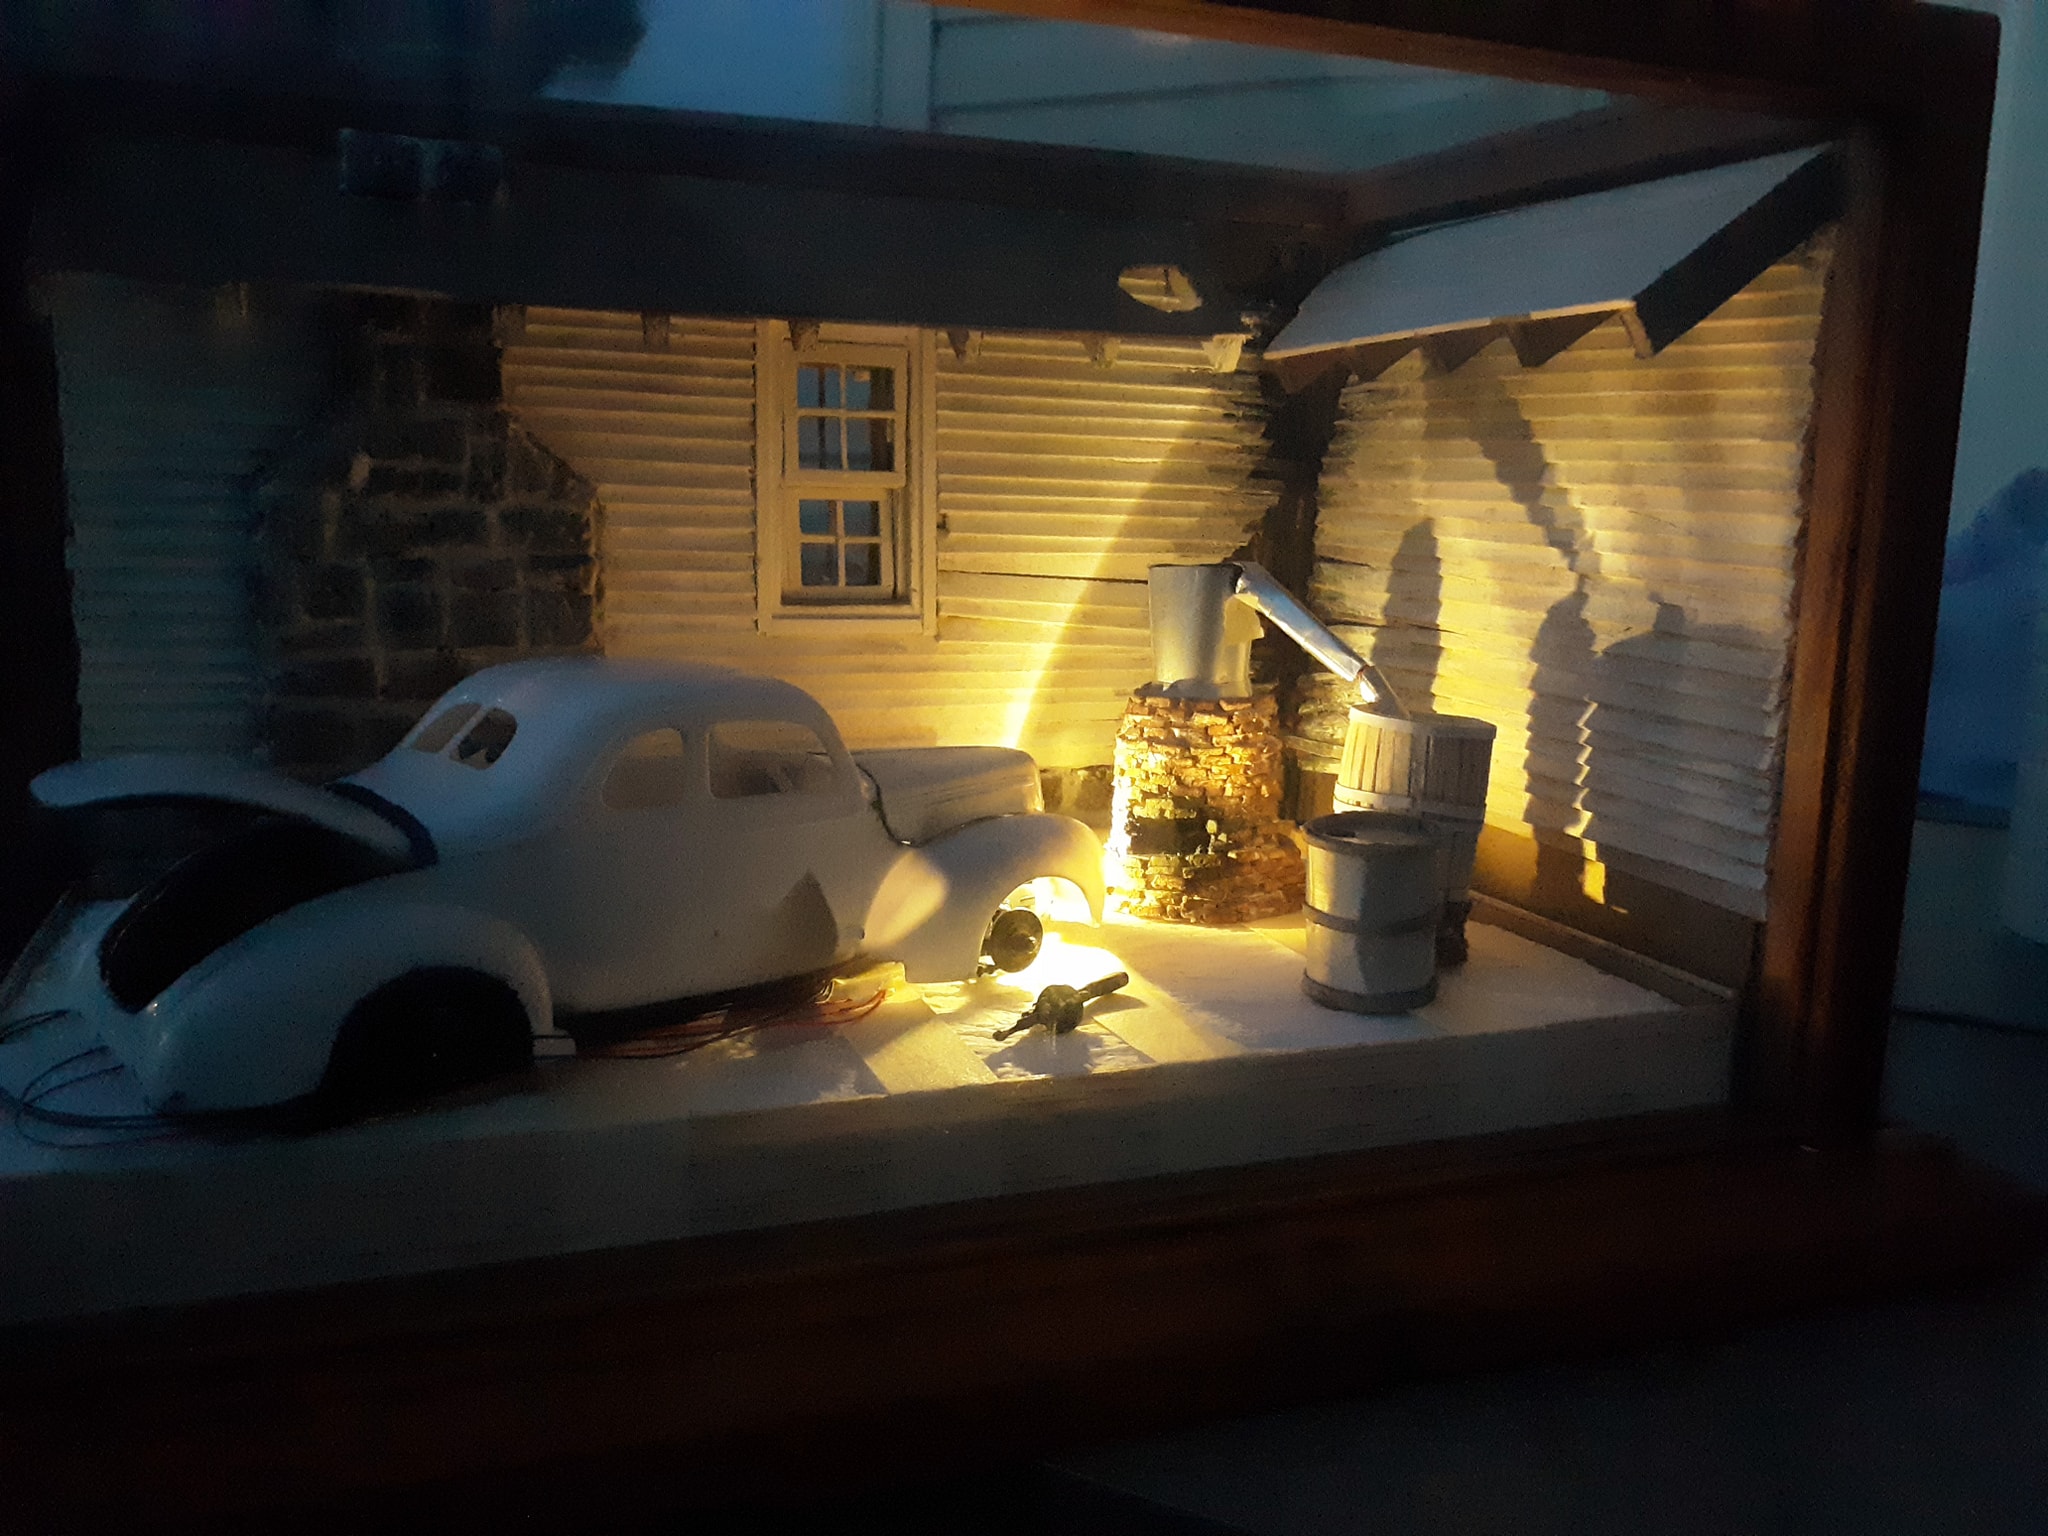
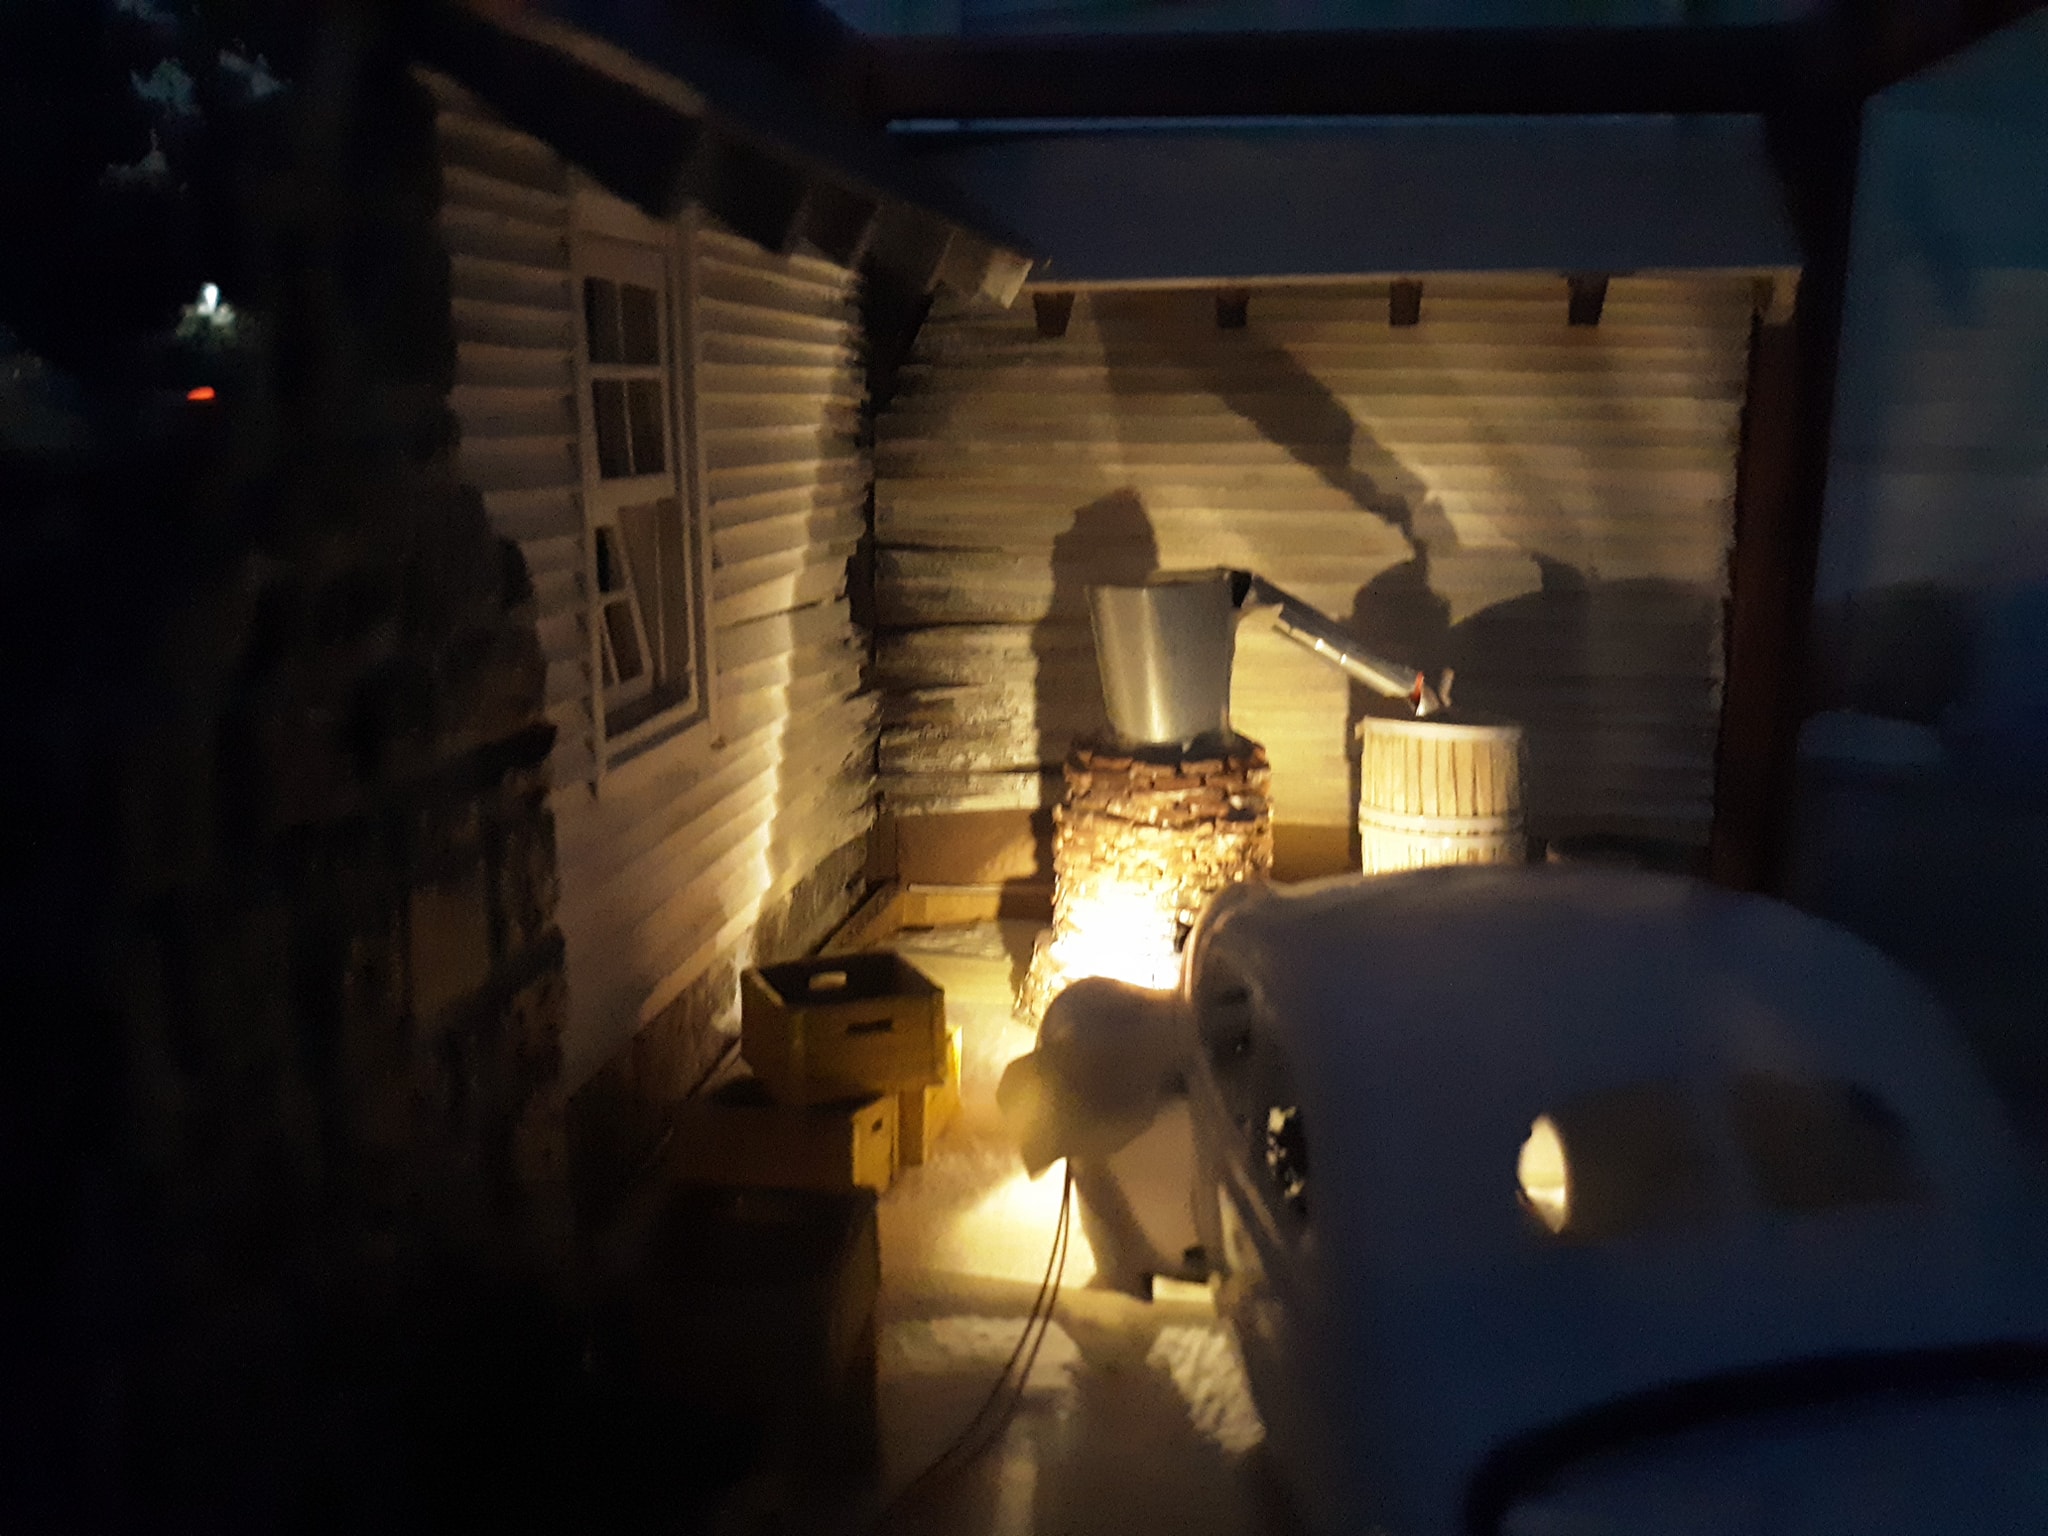
A warm summer evening outside with some moonshine lemonade and friends. Why not light her up tonight?
-
Thanks Alan!
-
Sure! I plan to enjoy some icy shine lemonade later!
-
And finally the progress up to today. Thanks for looking.
-
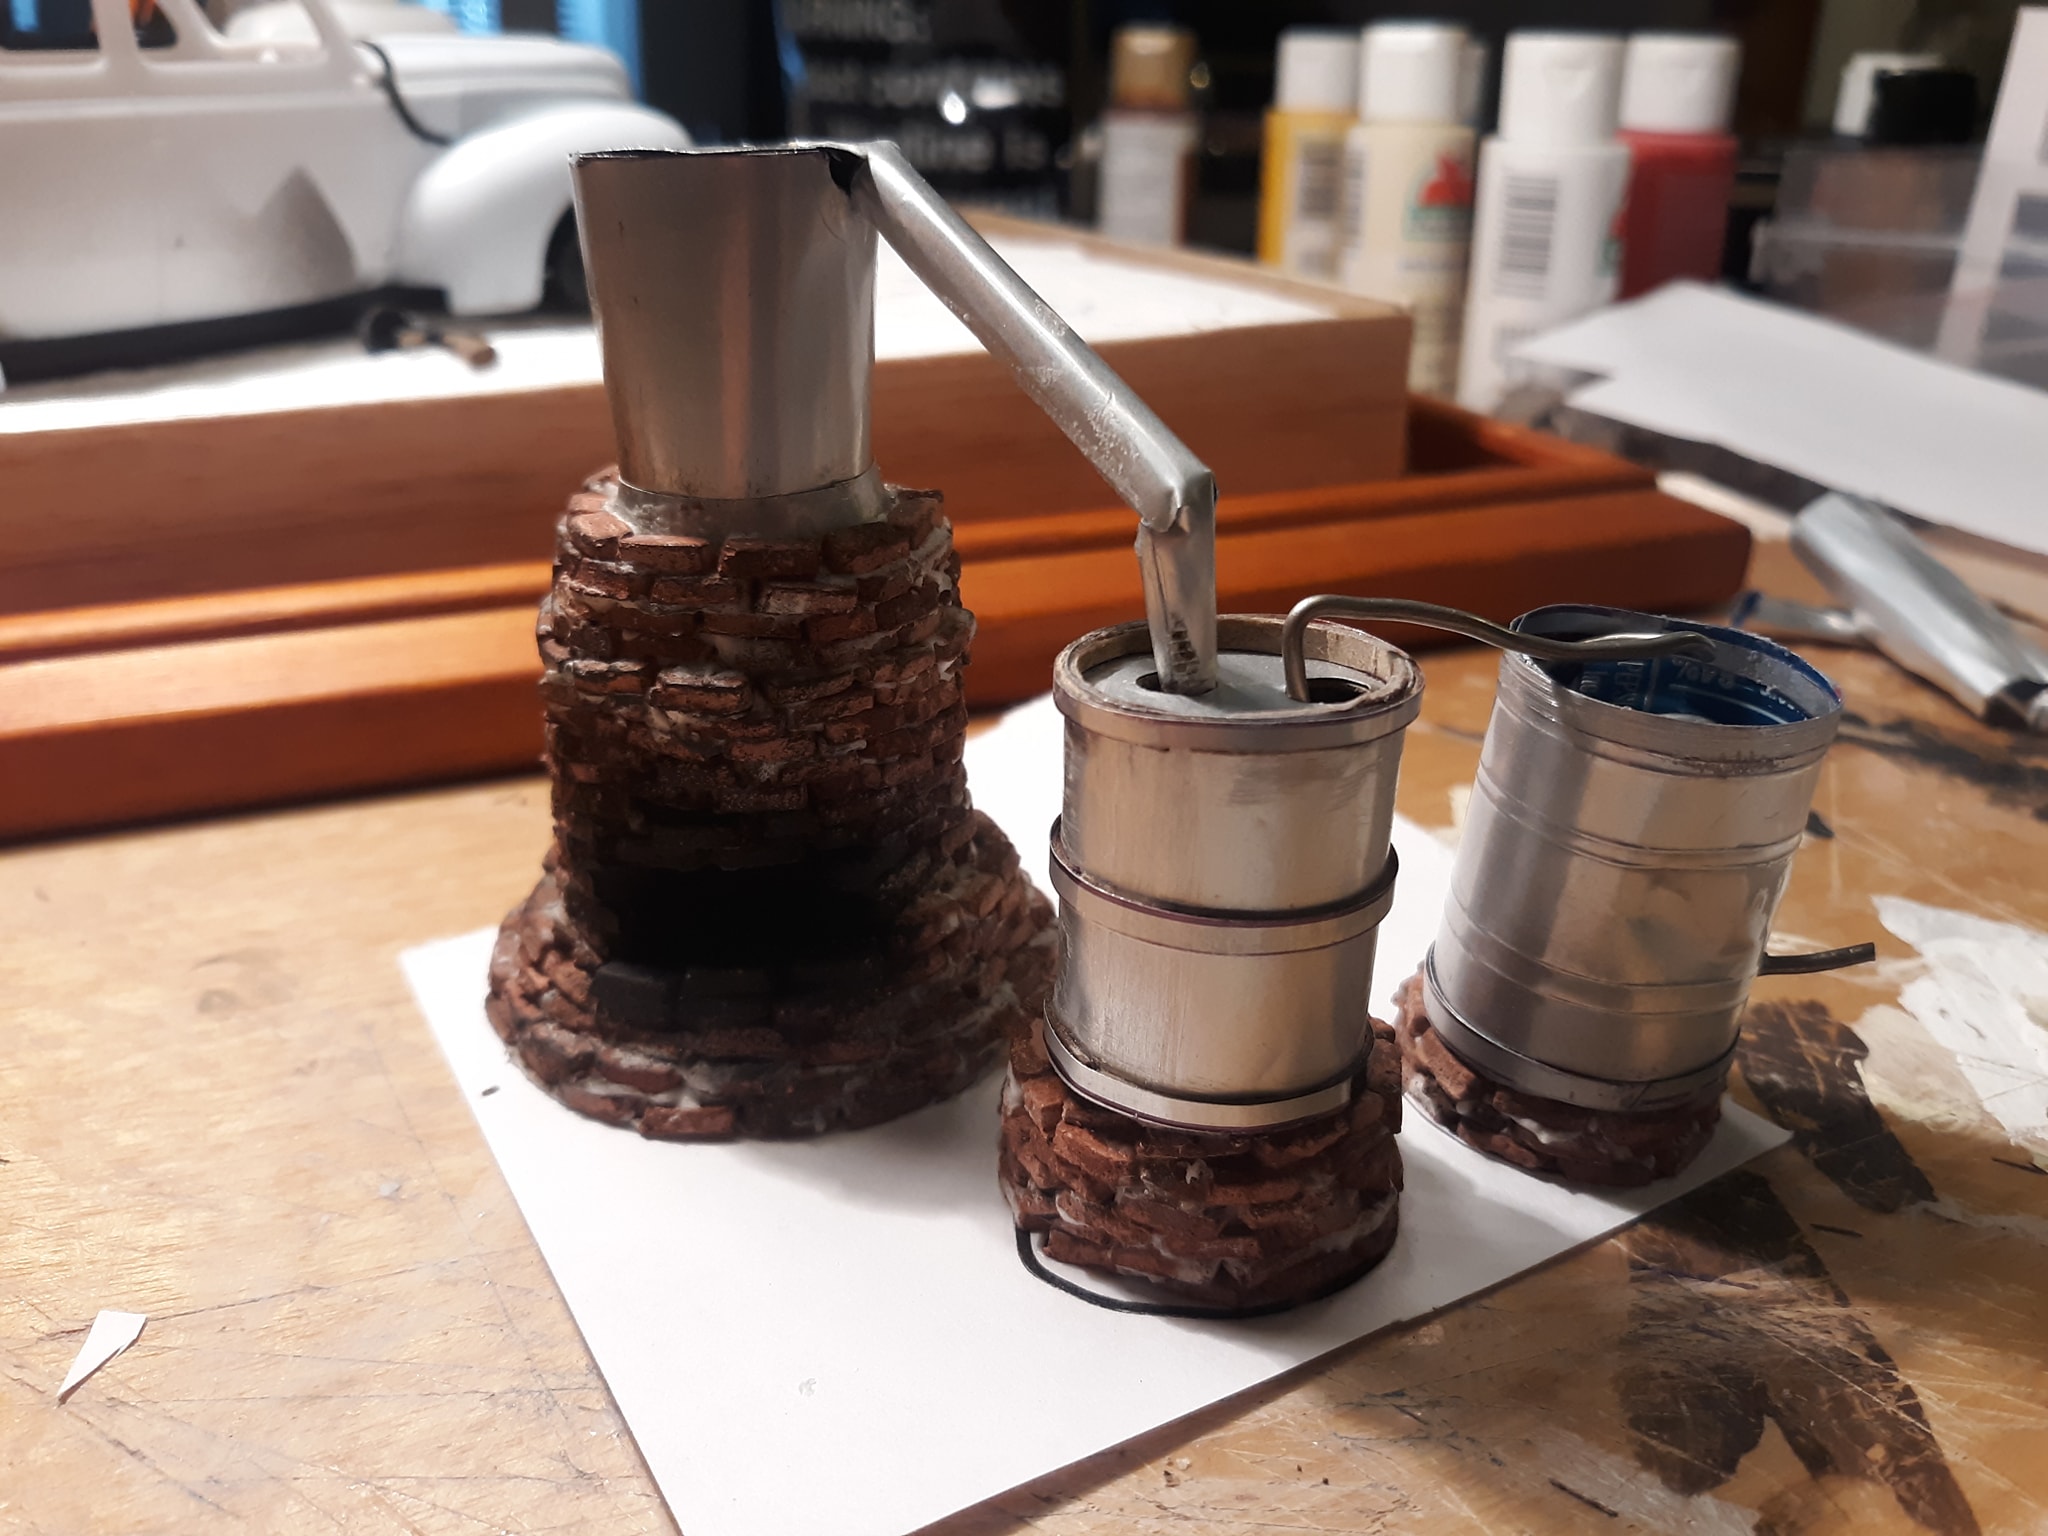
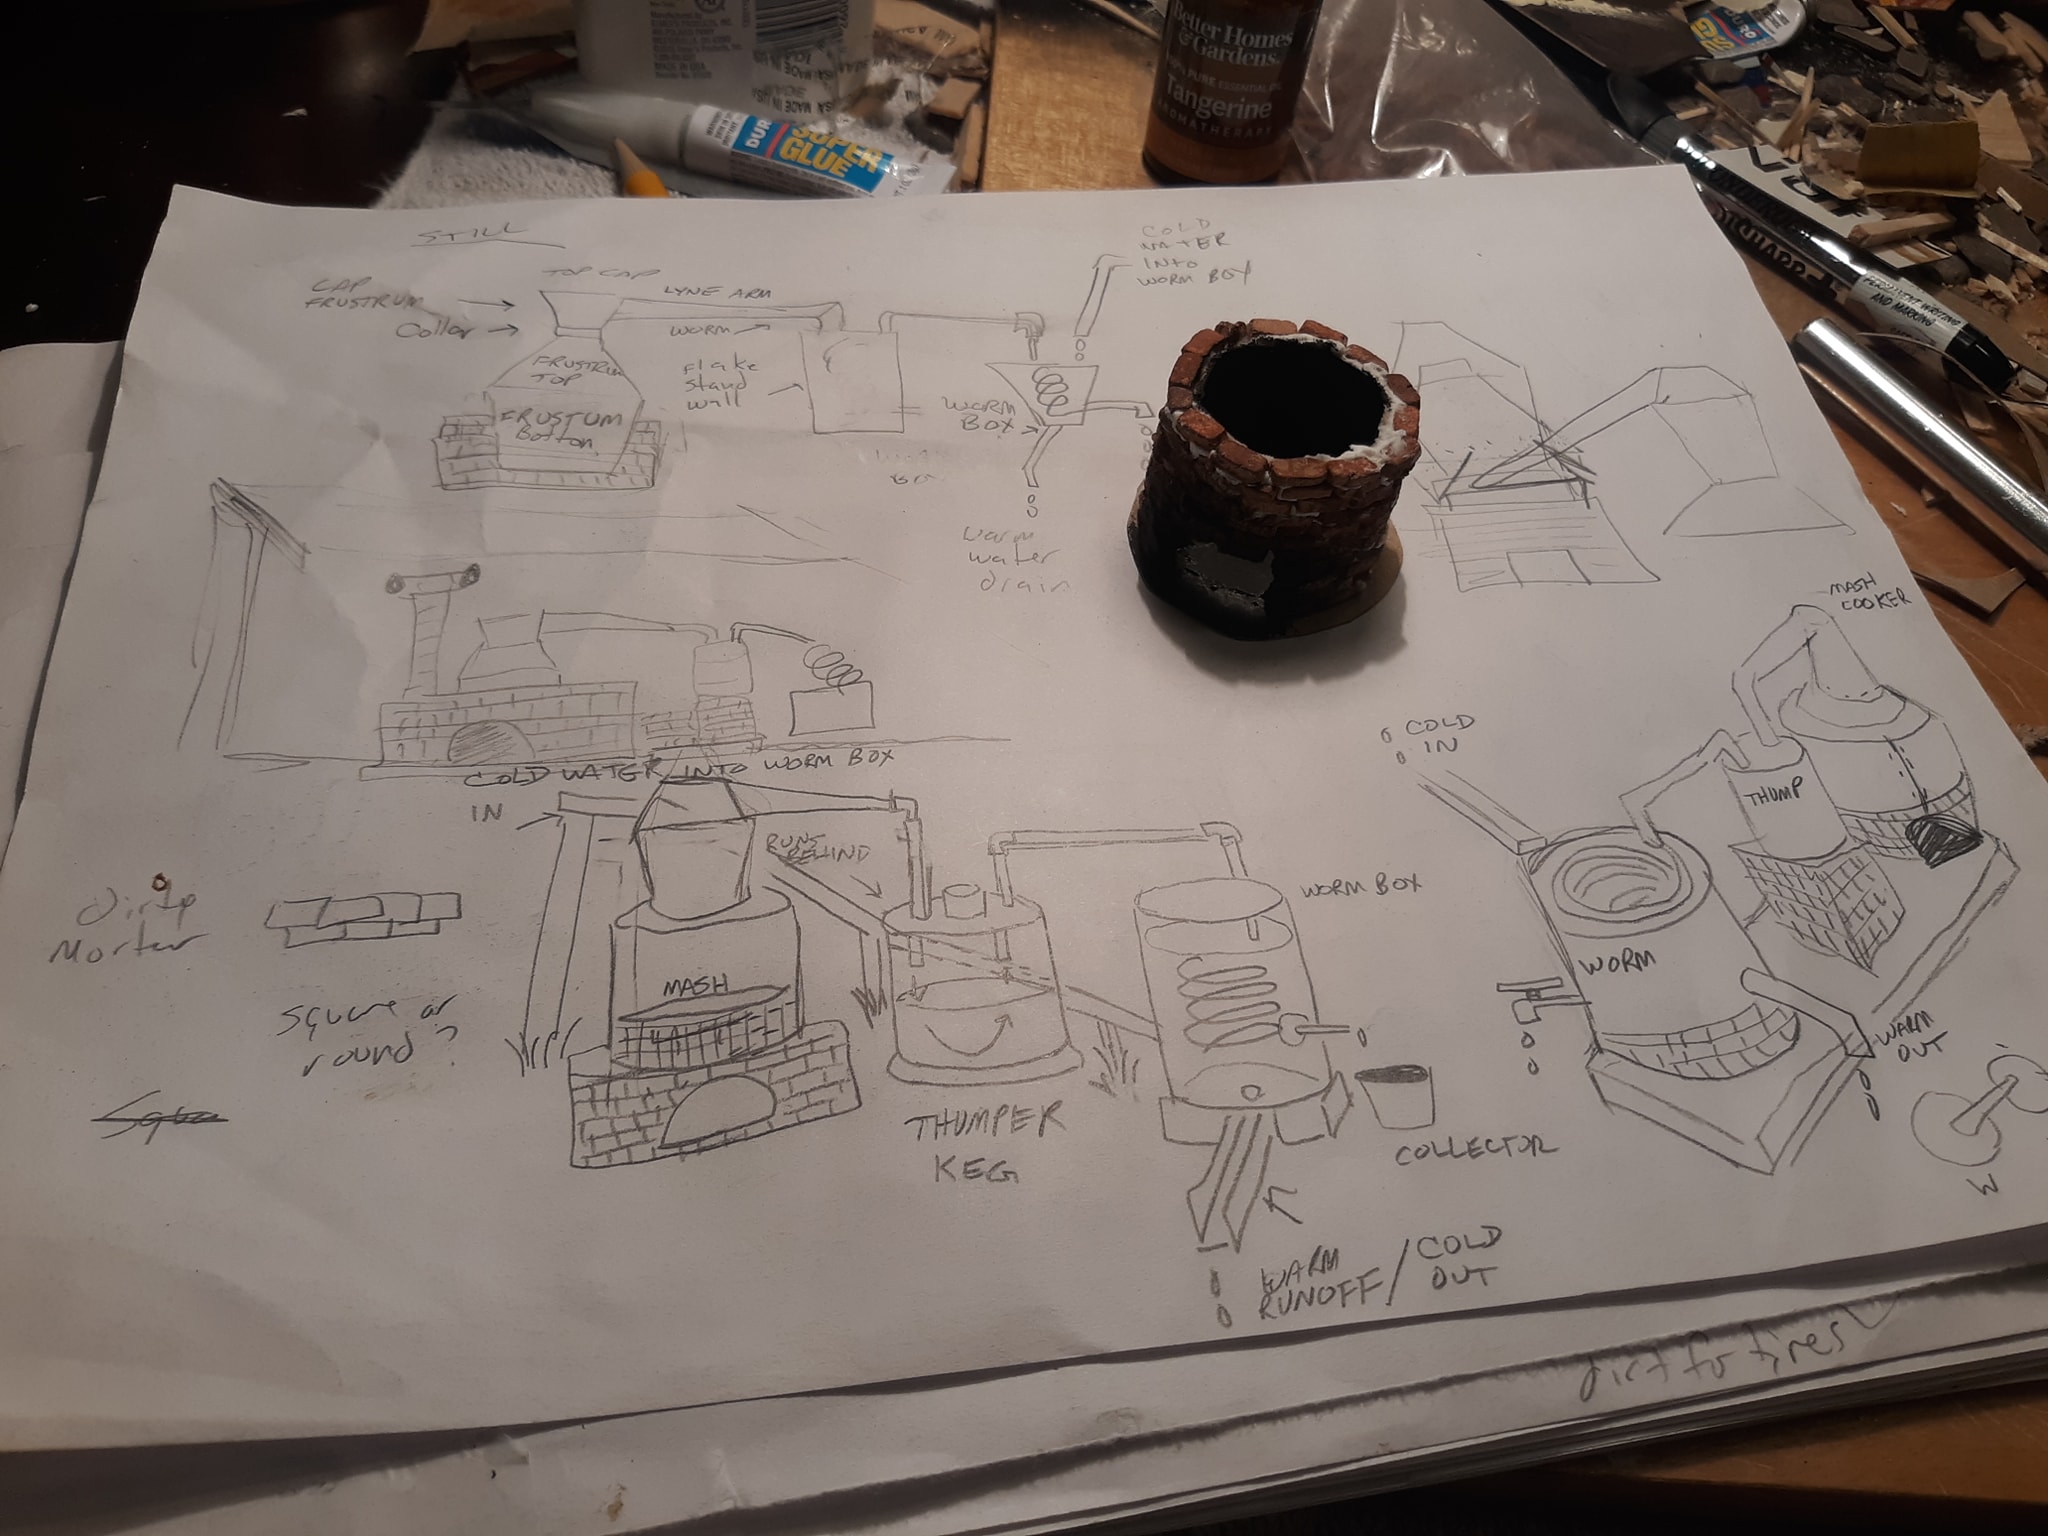
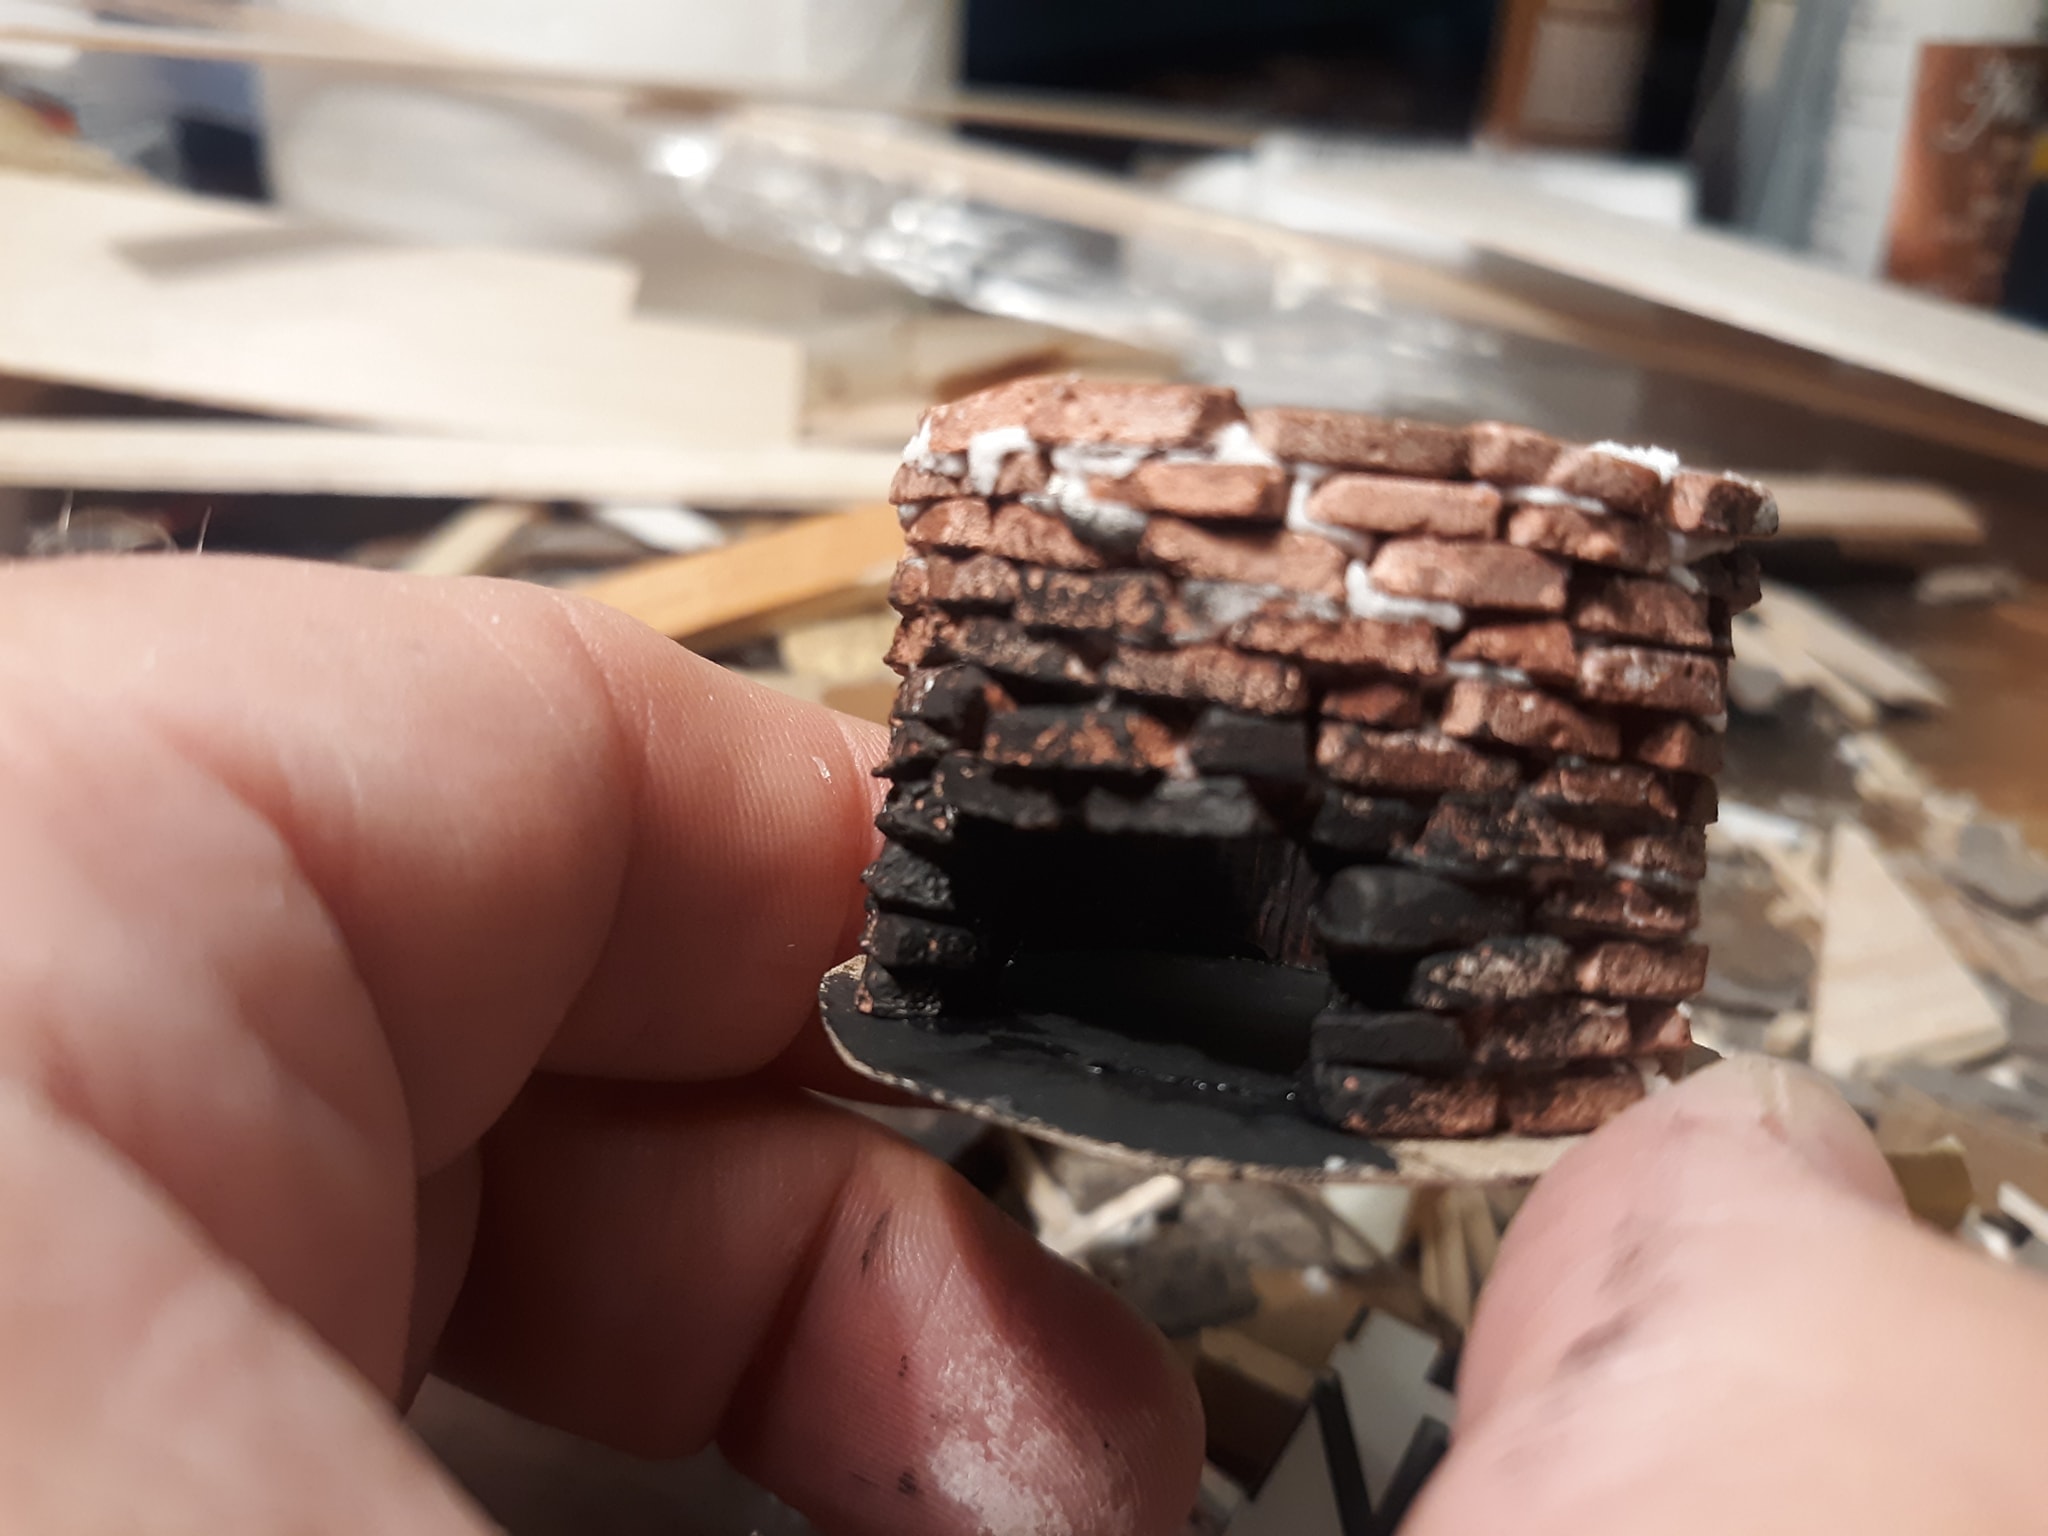
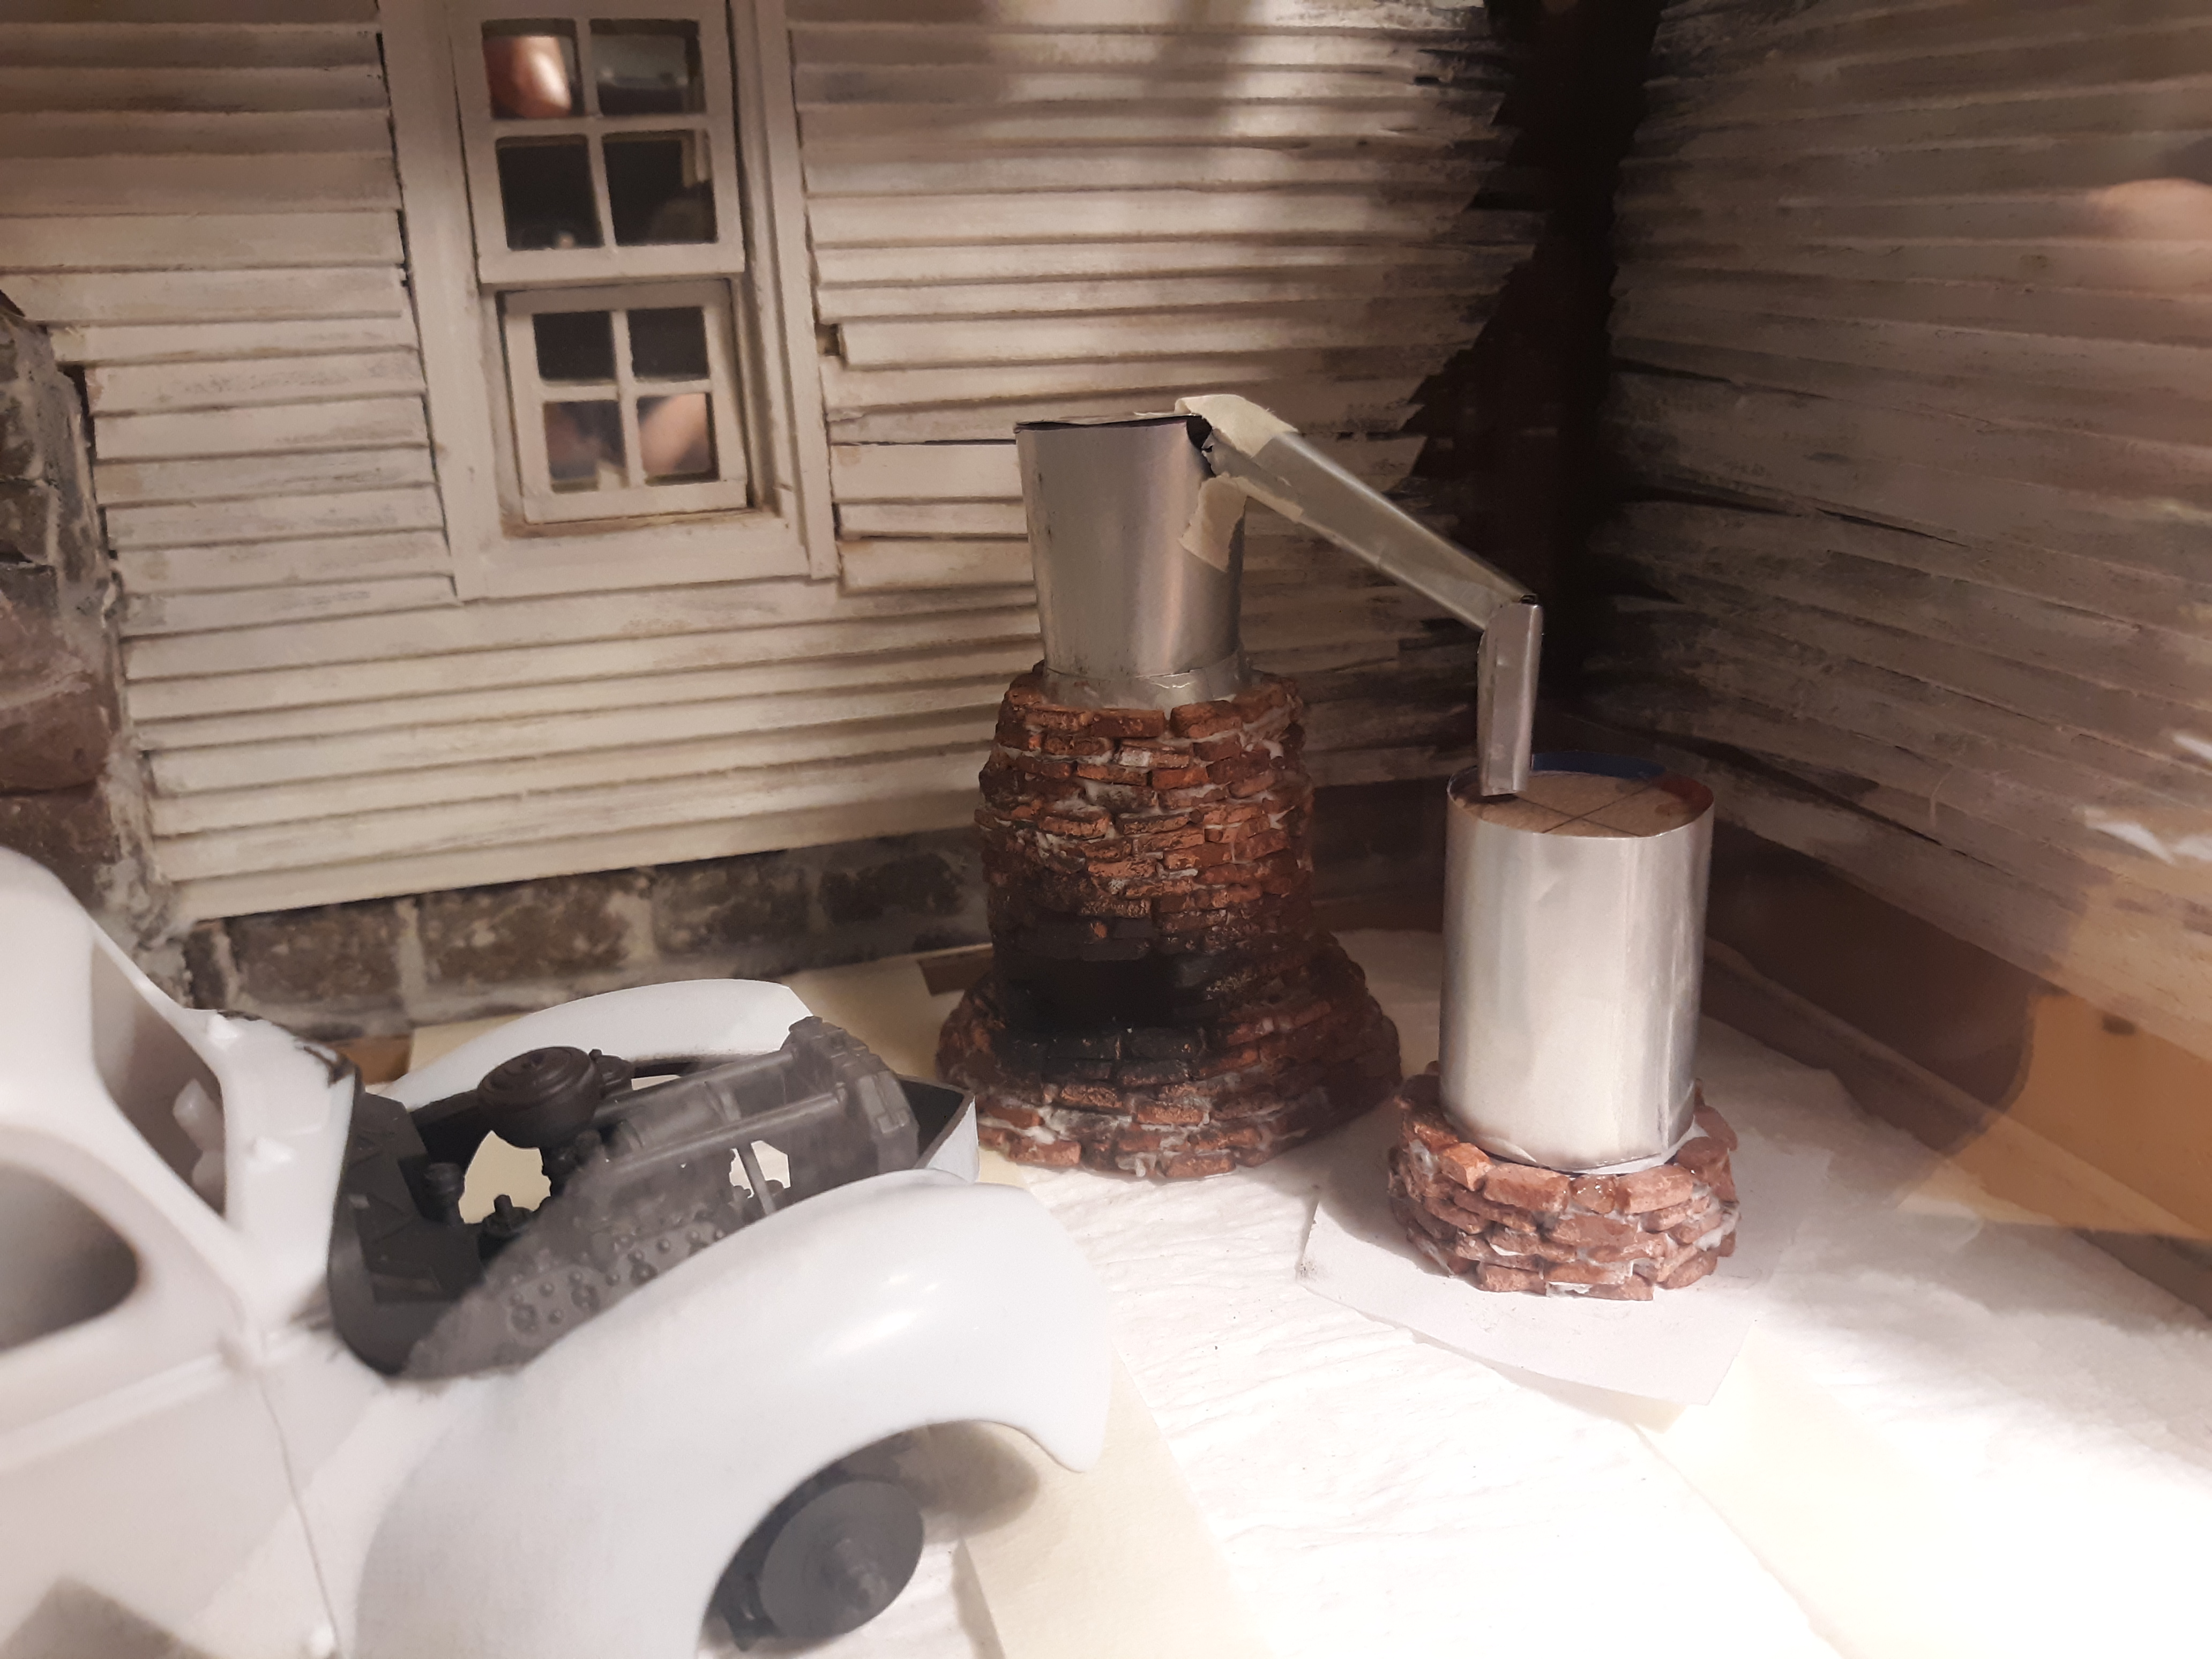
Start up to this point. And it's time to build a thumper keg single mash still.
-
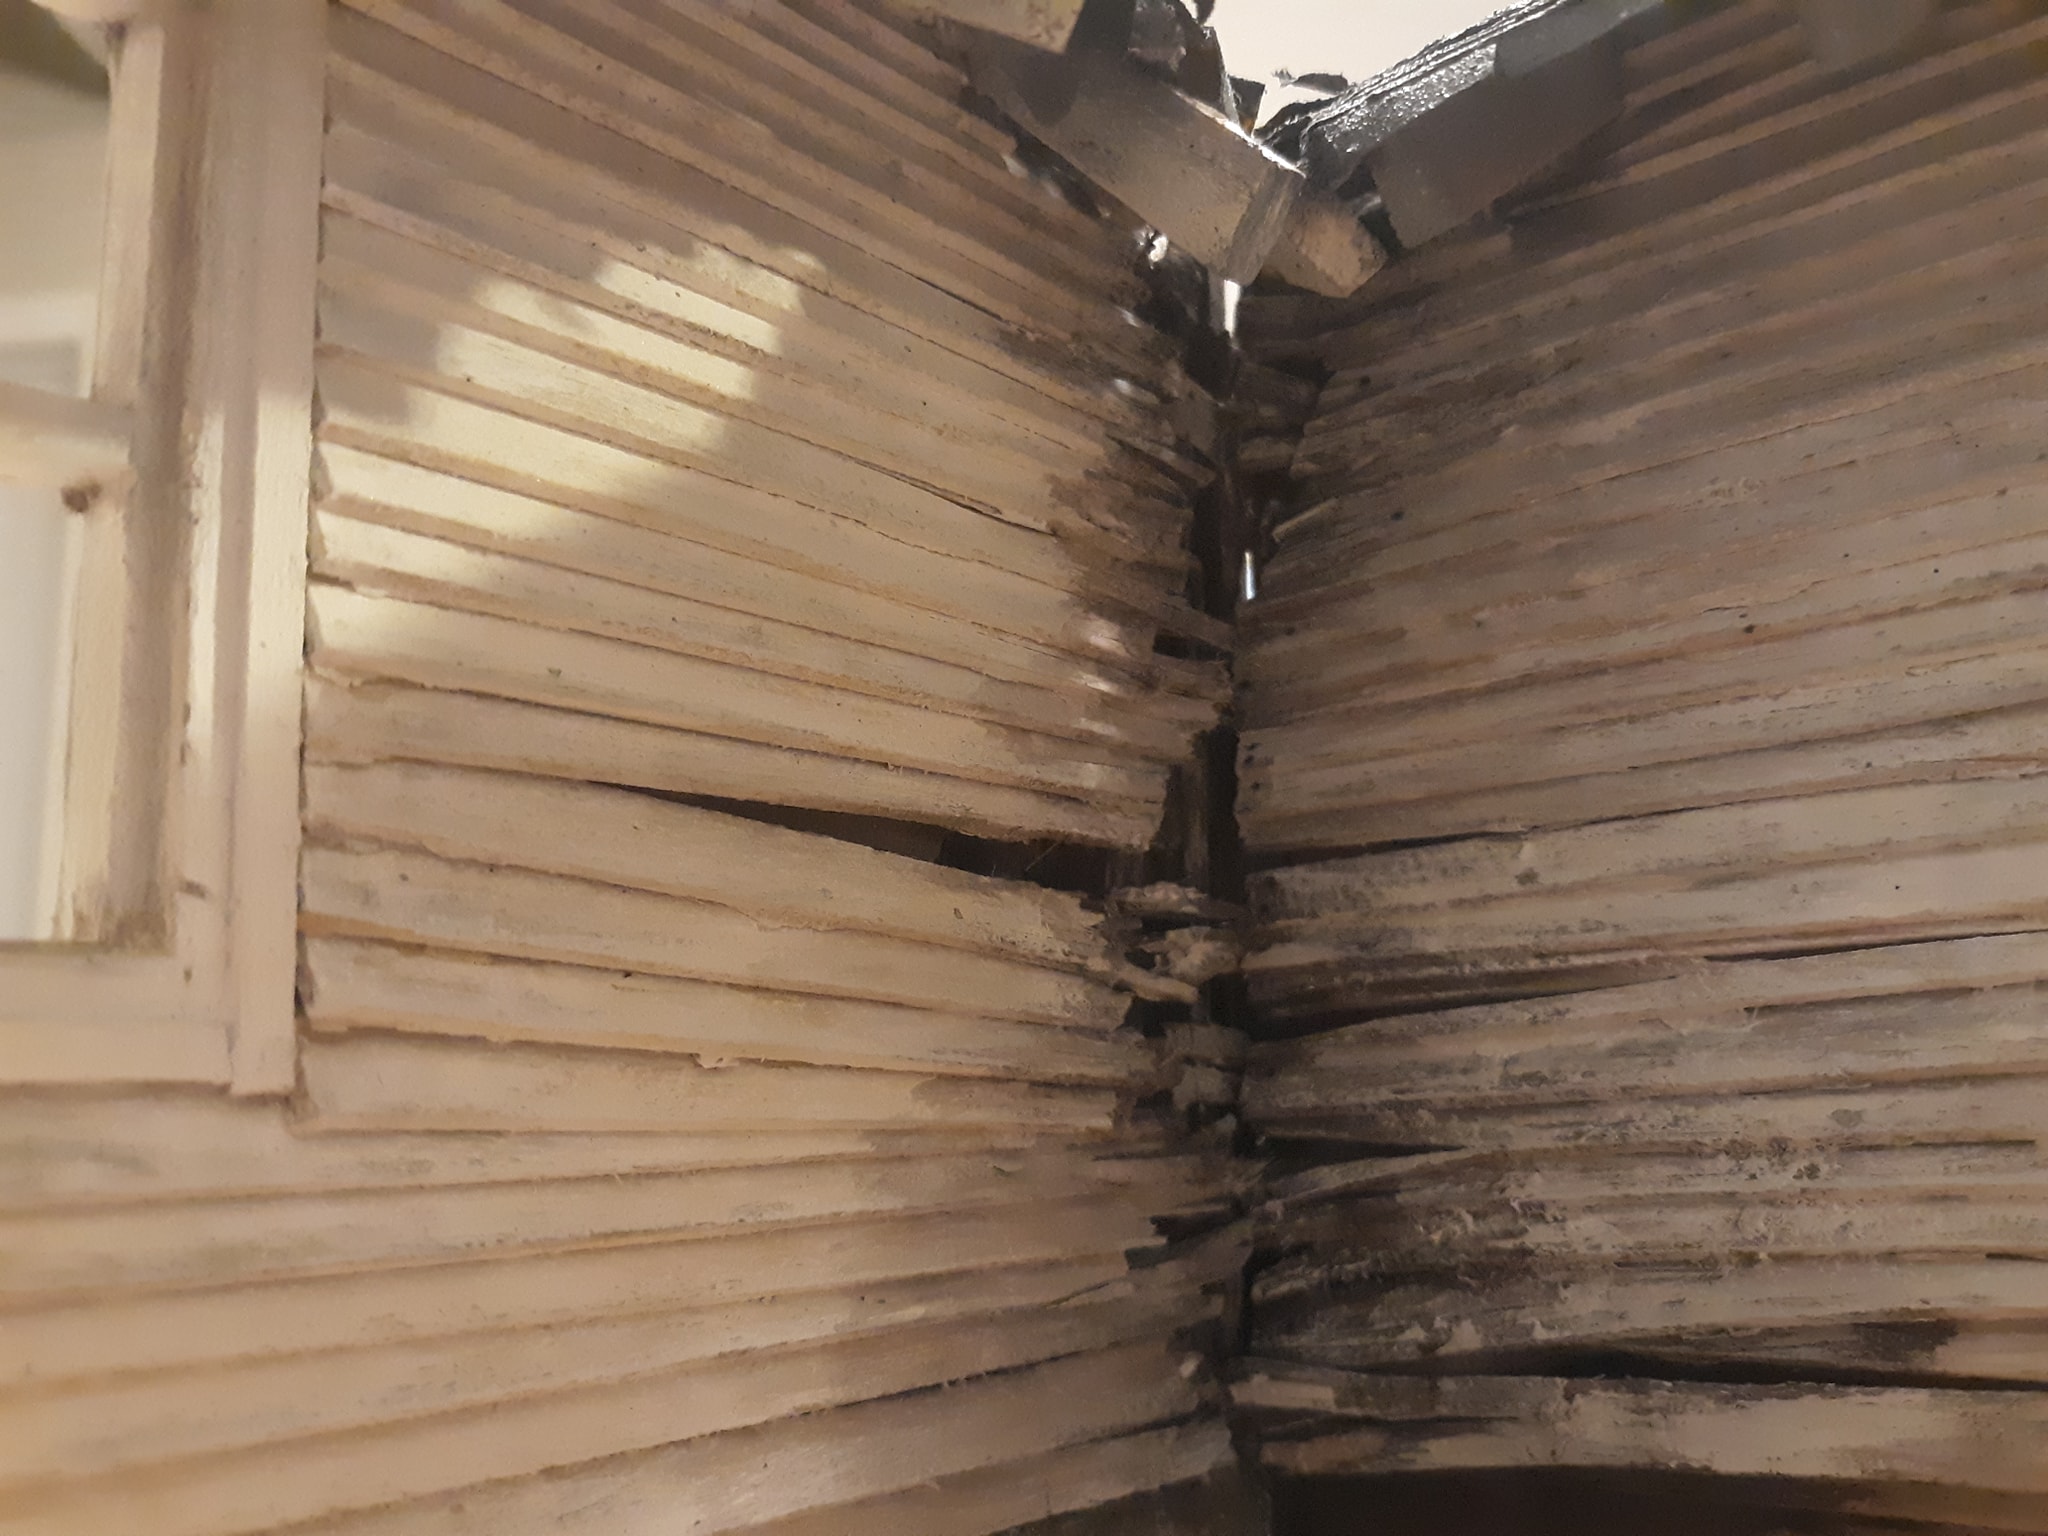
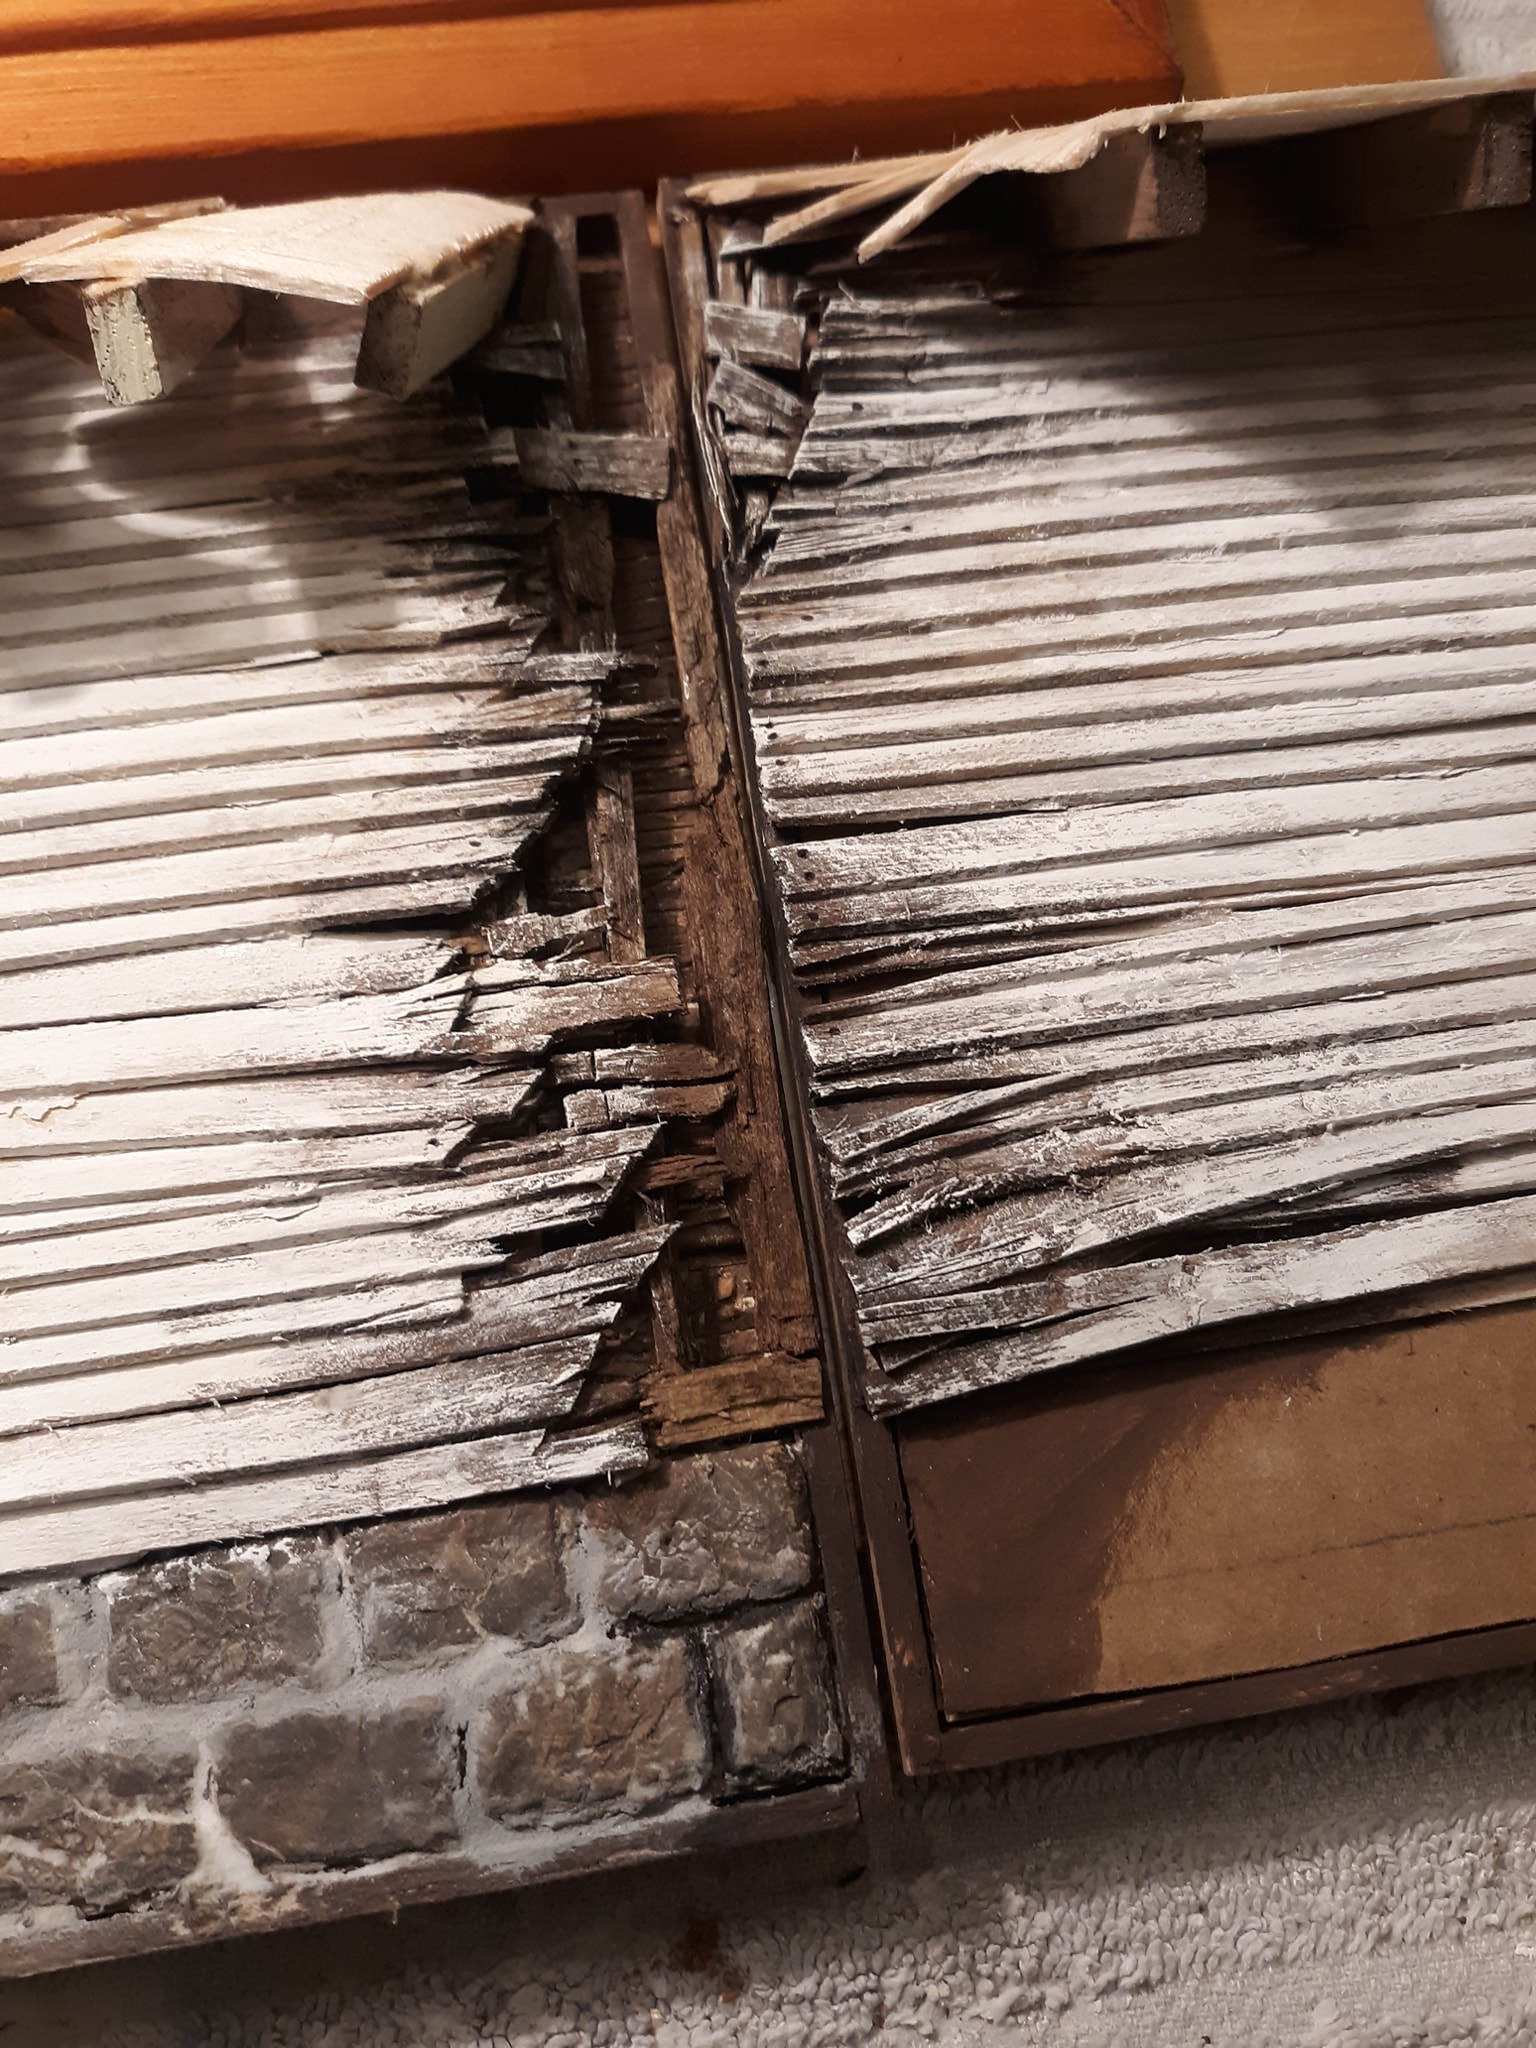
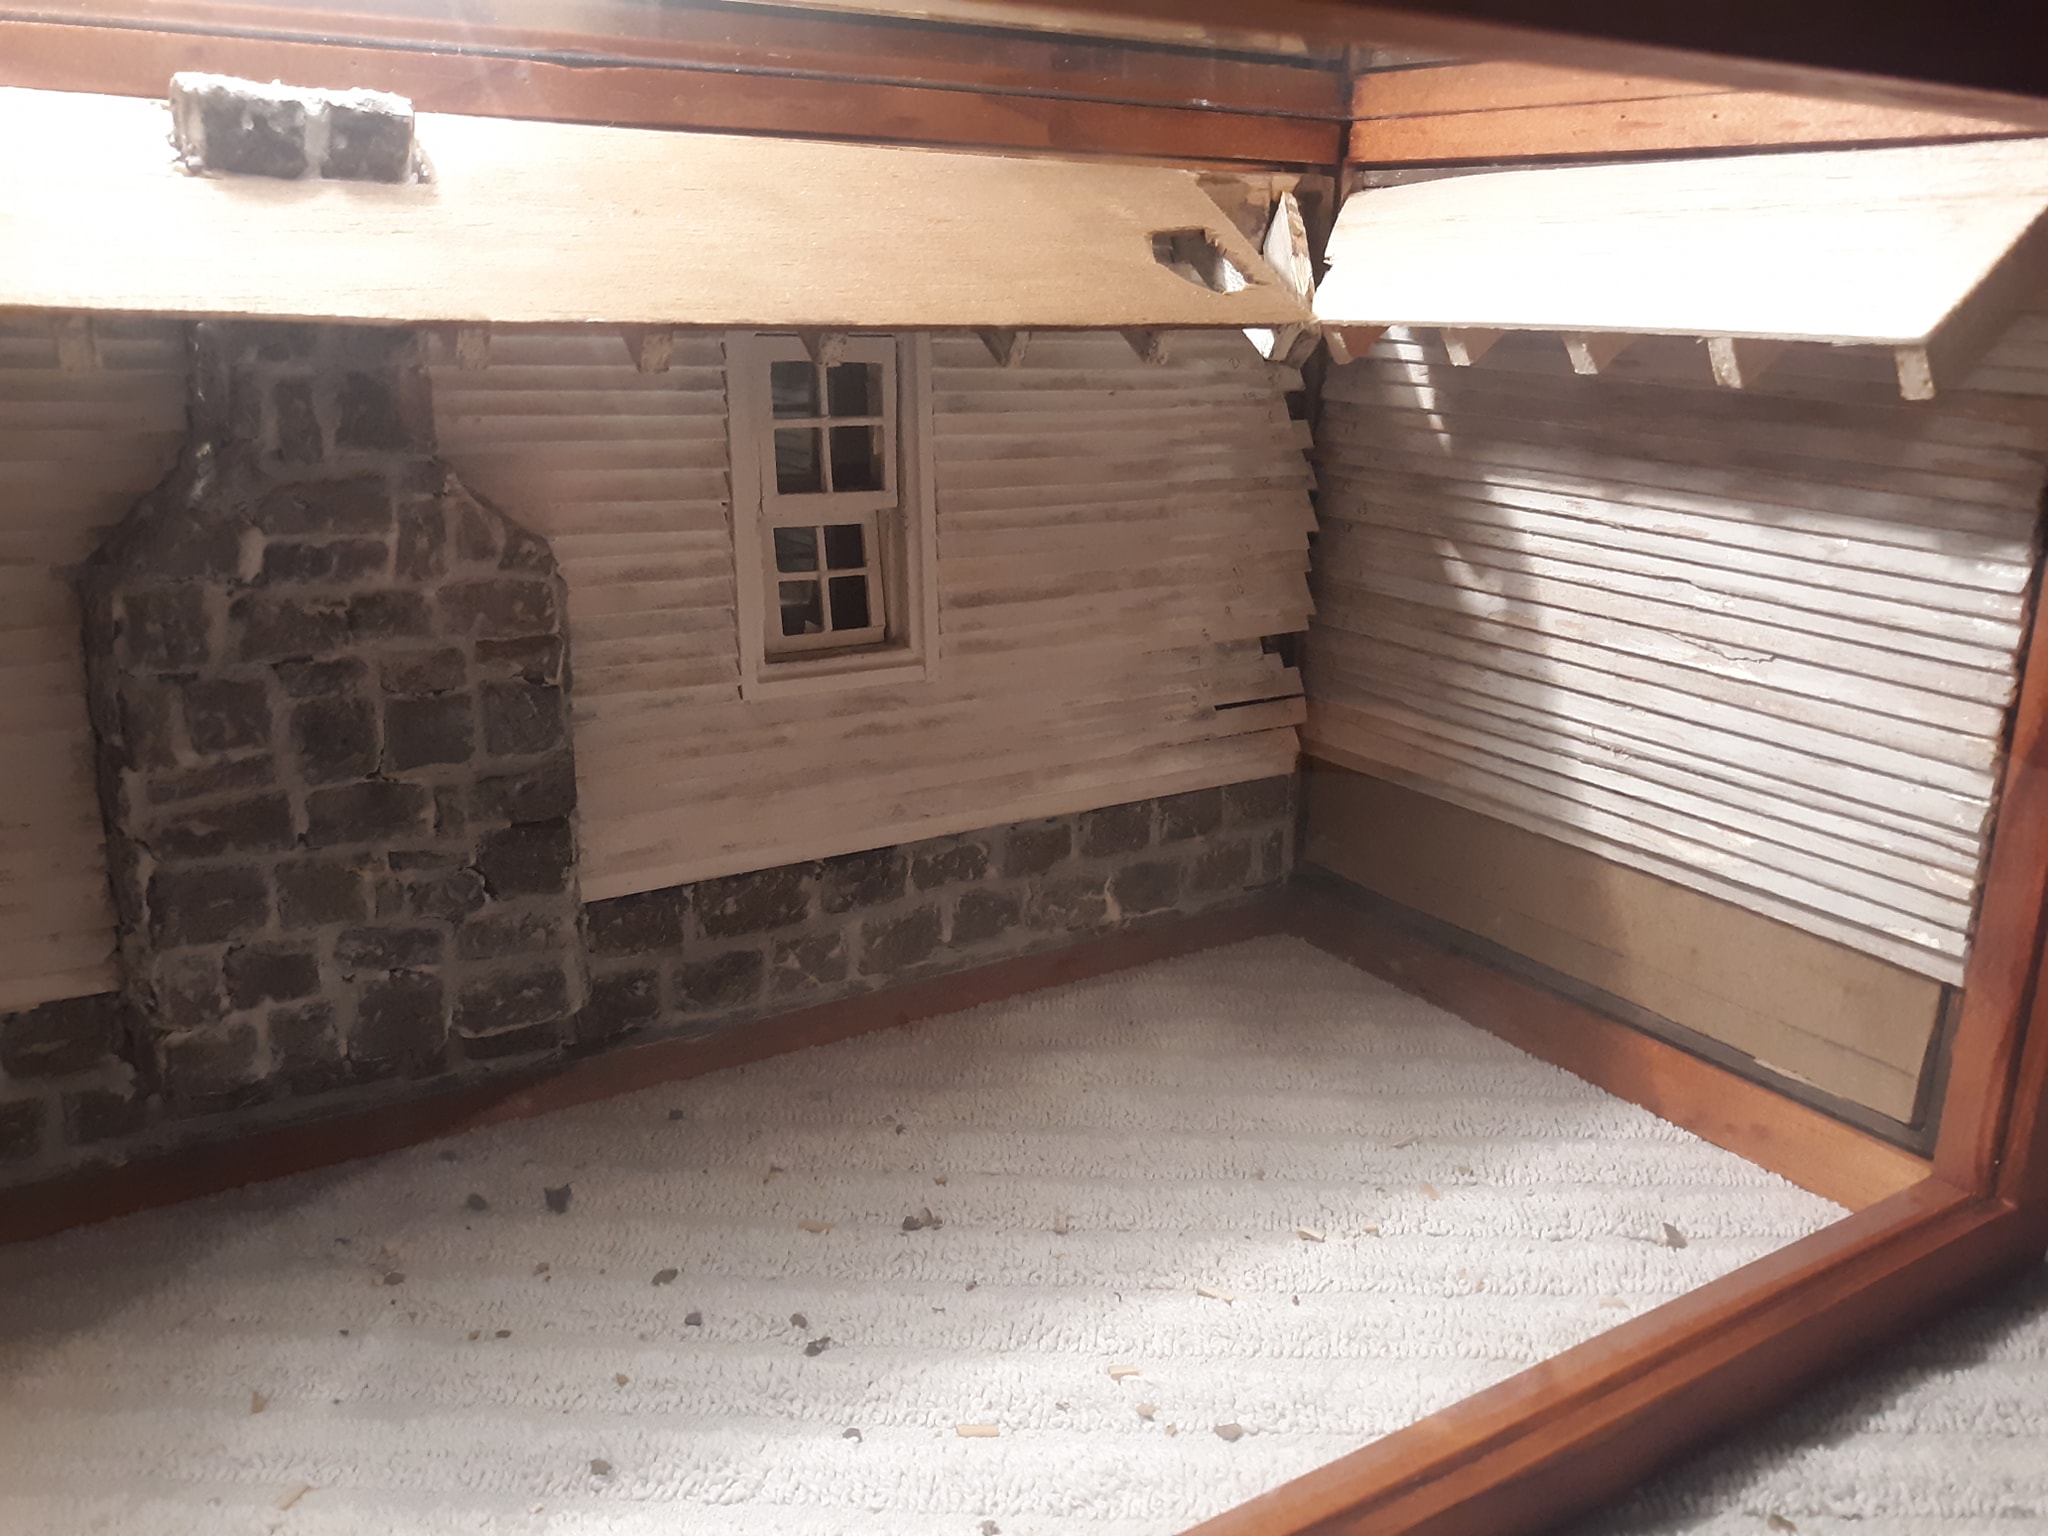
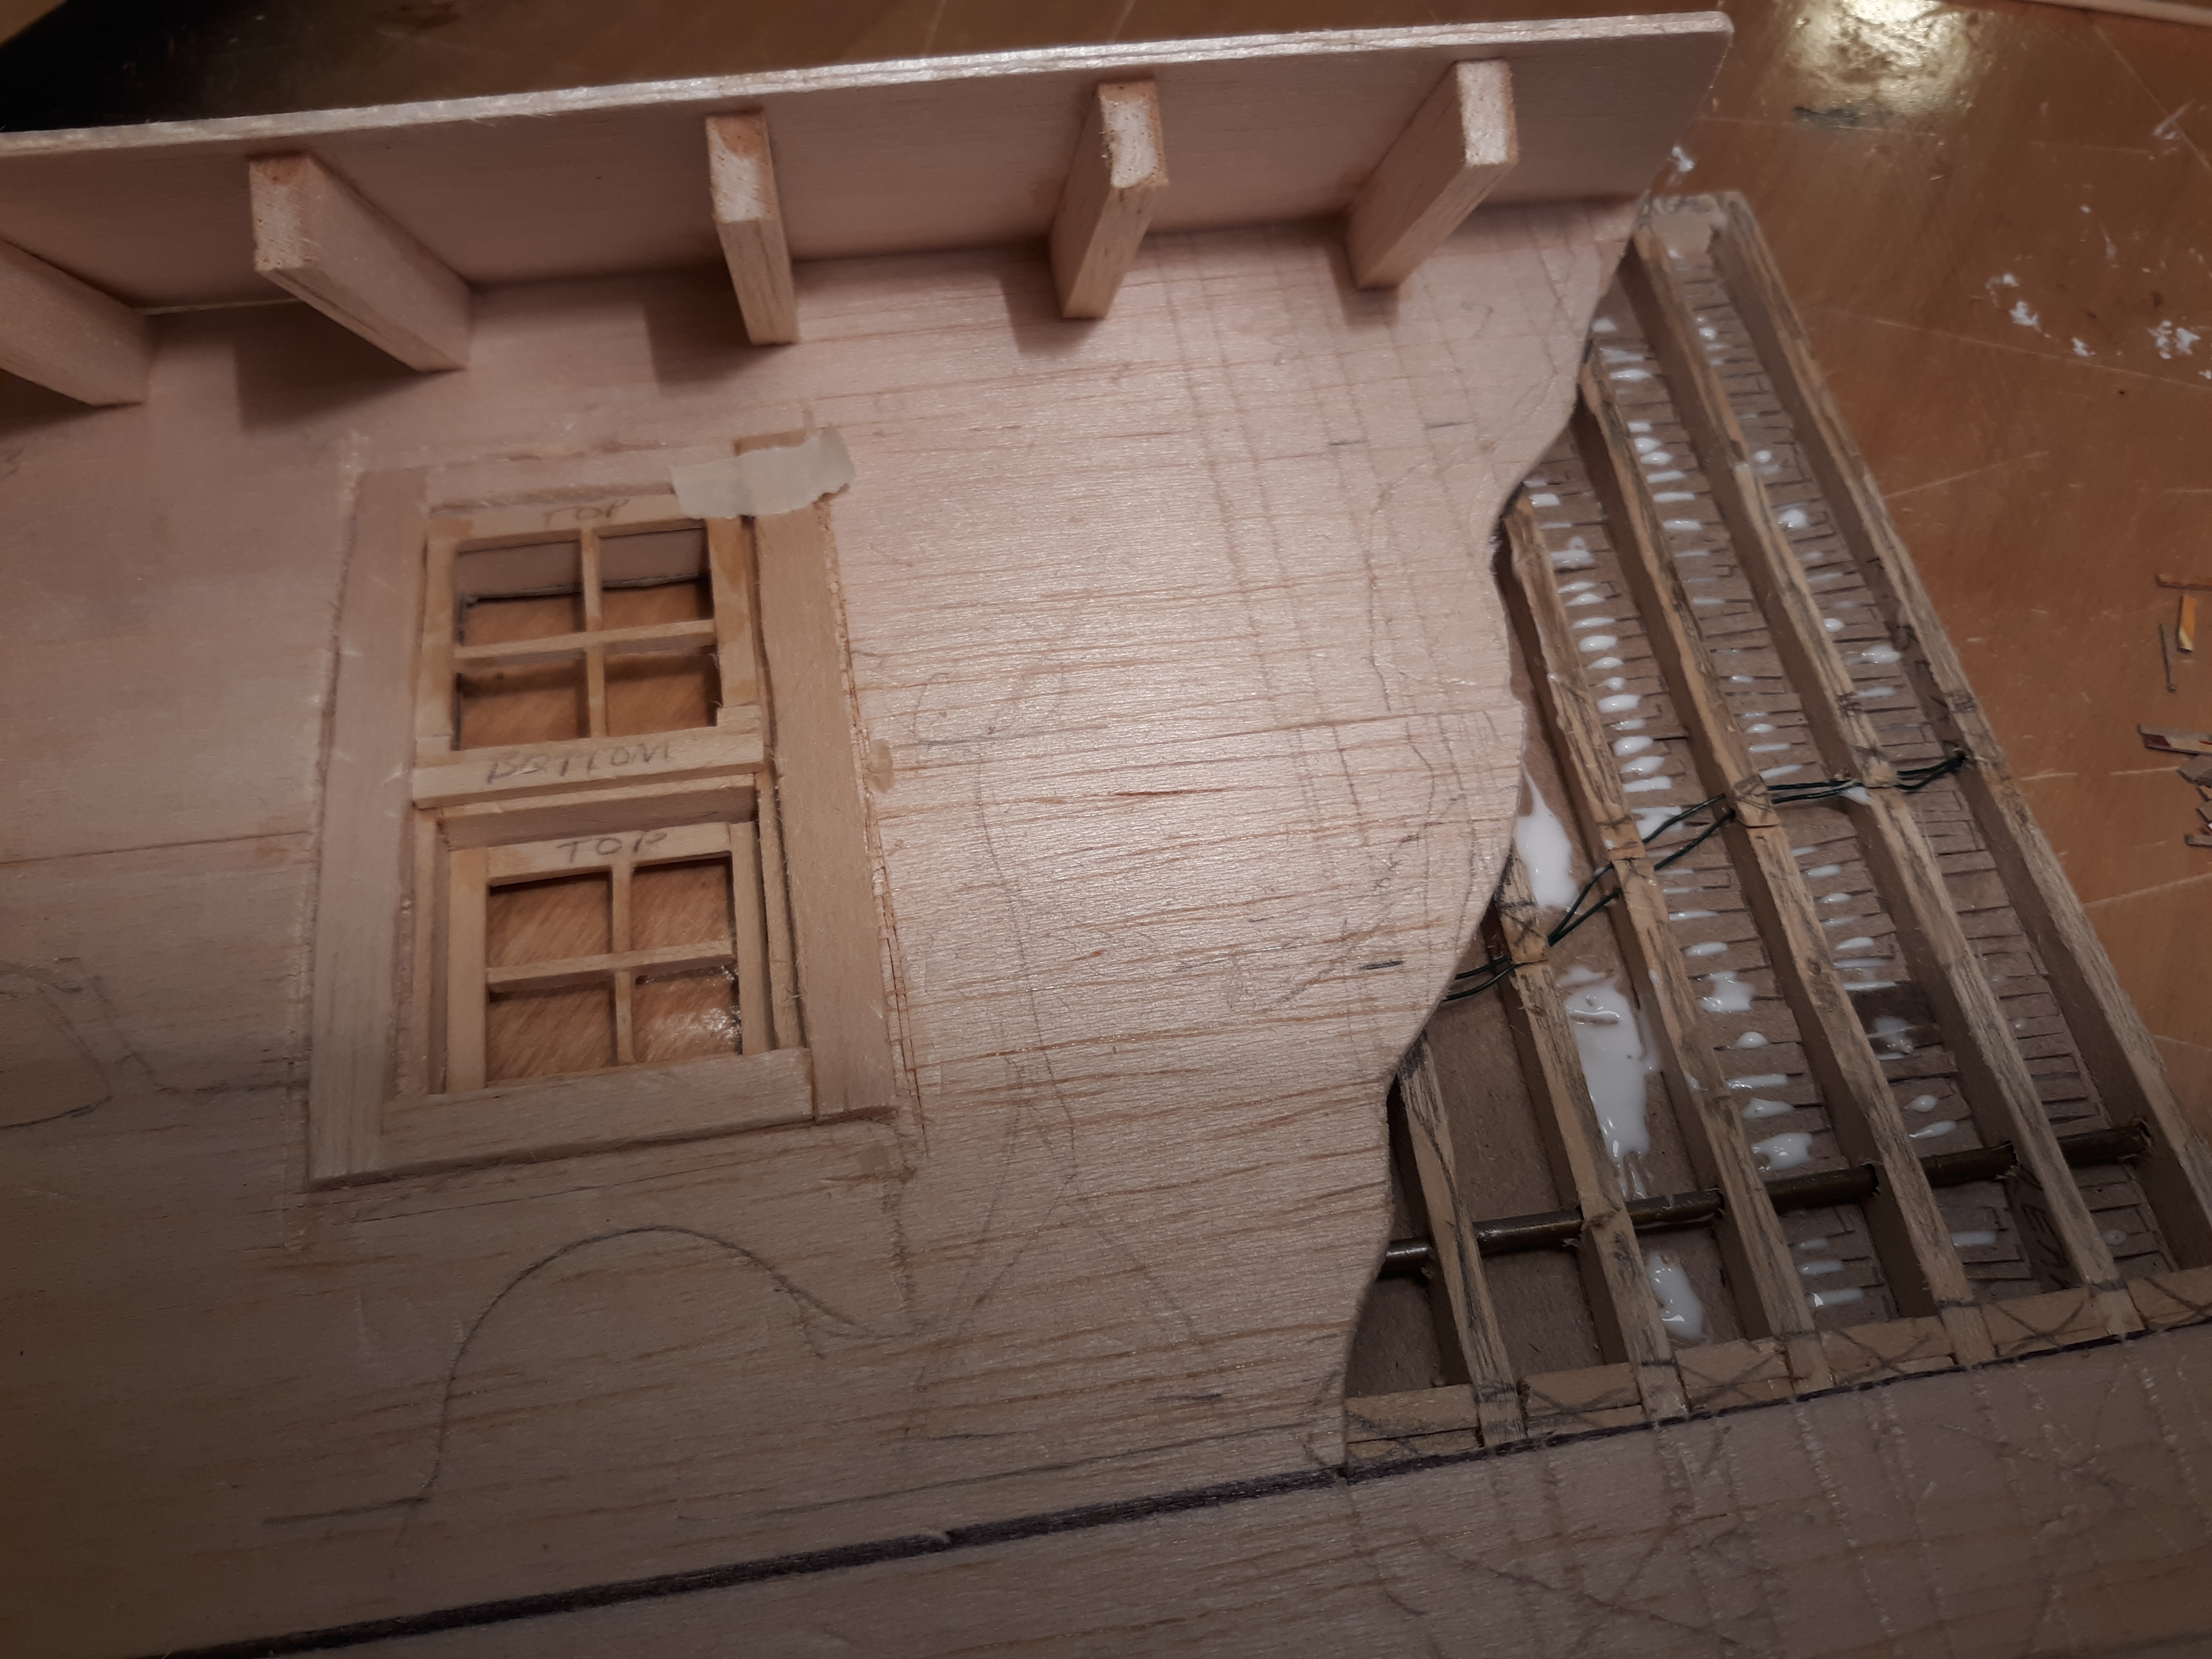
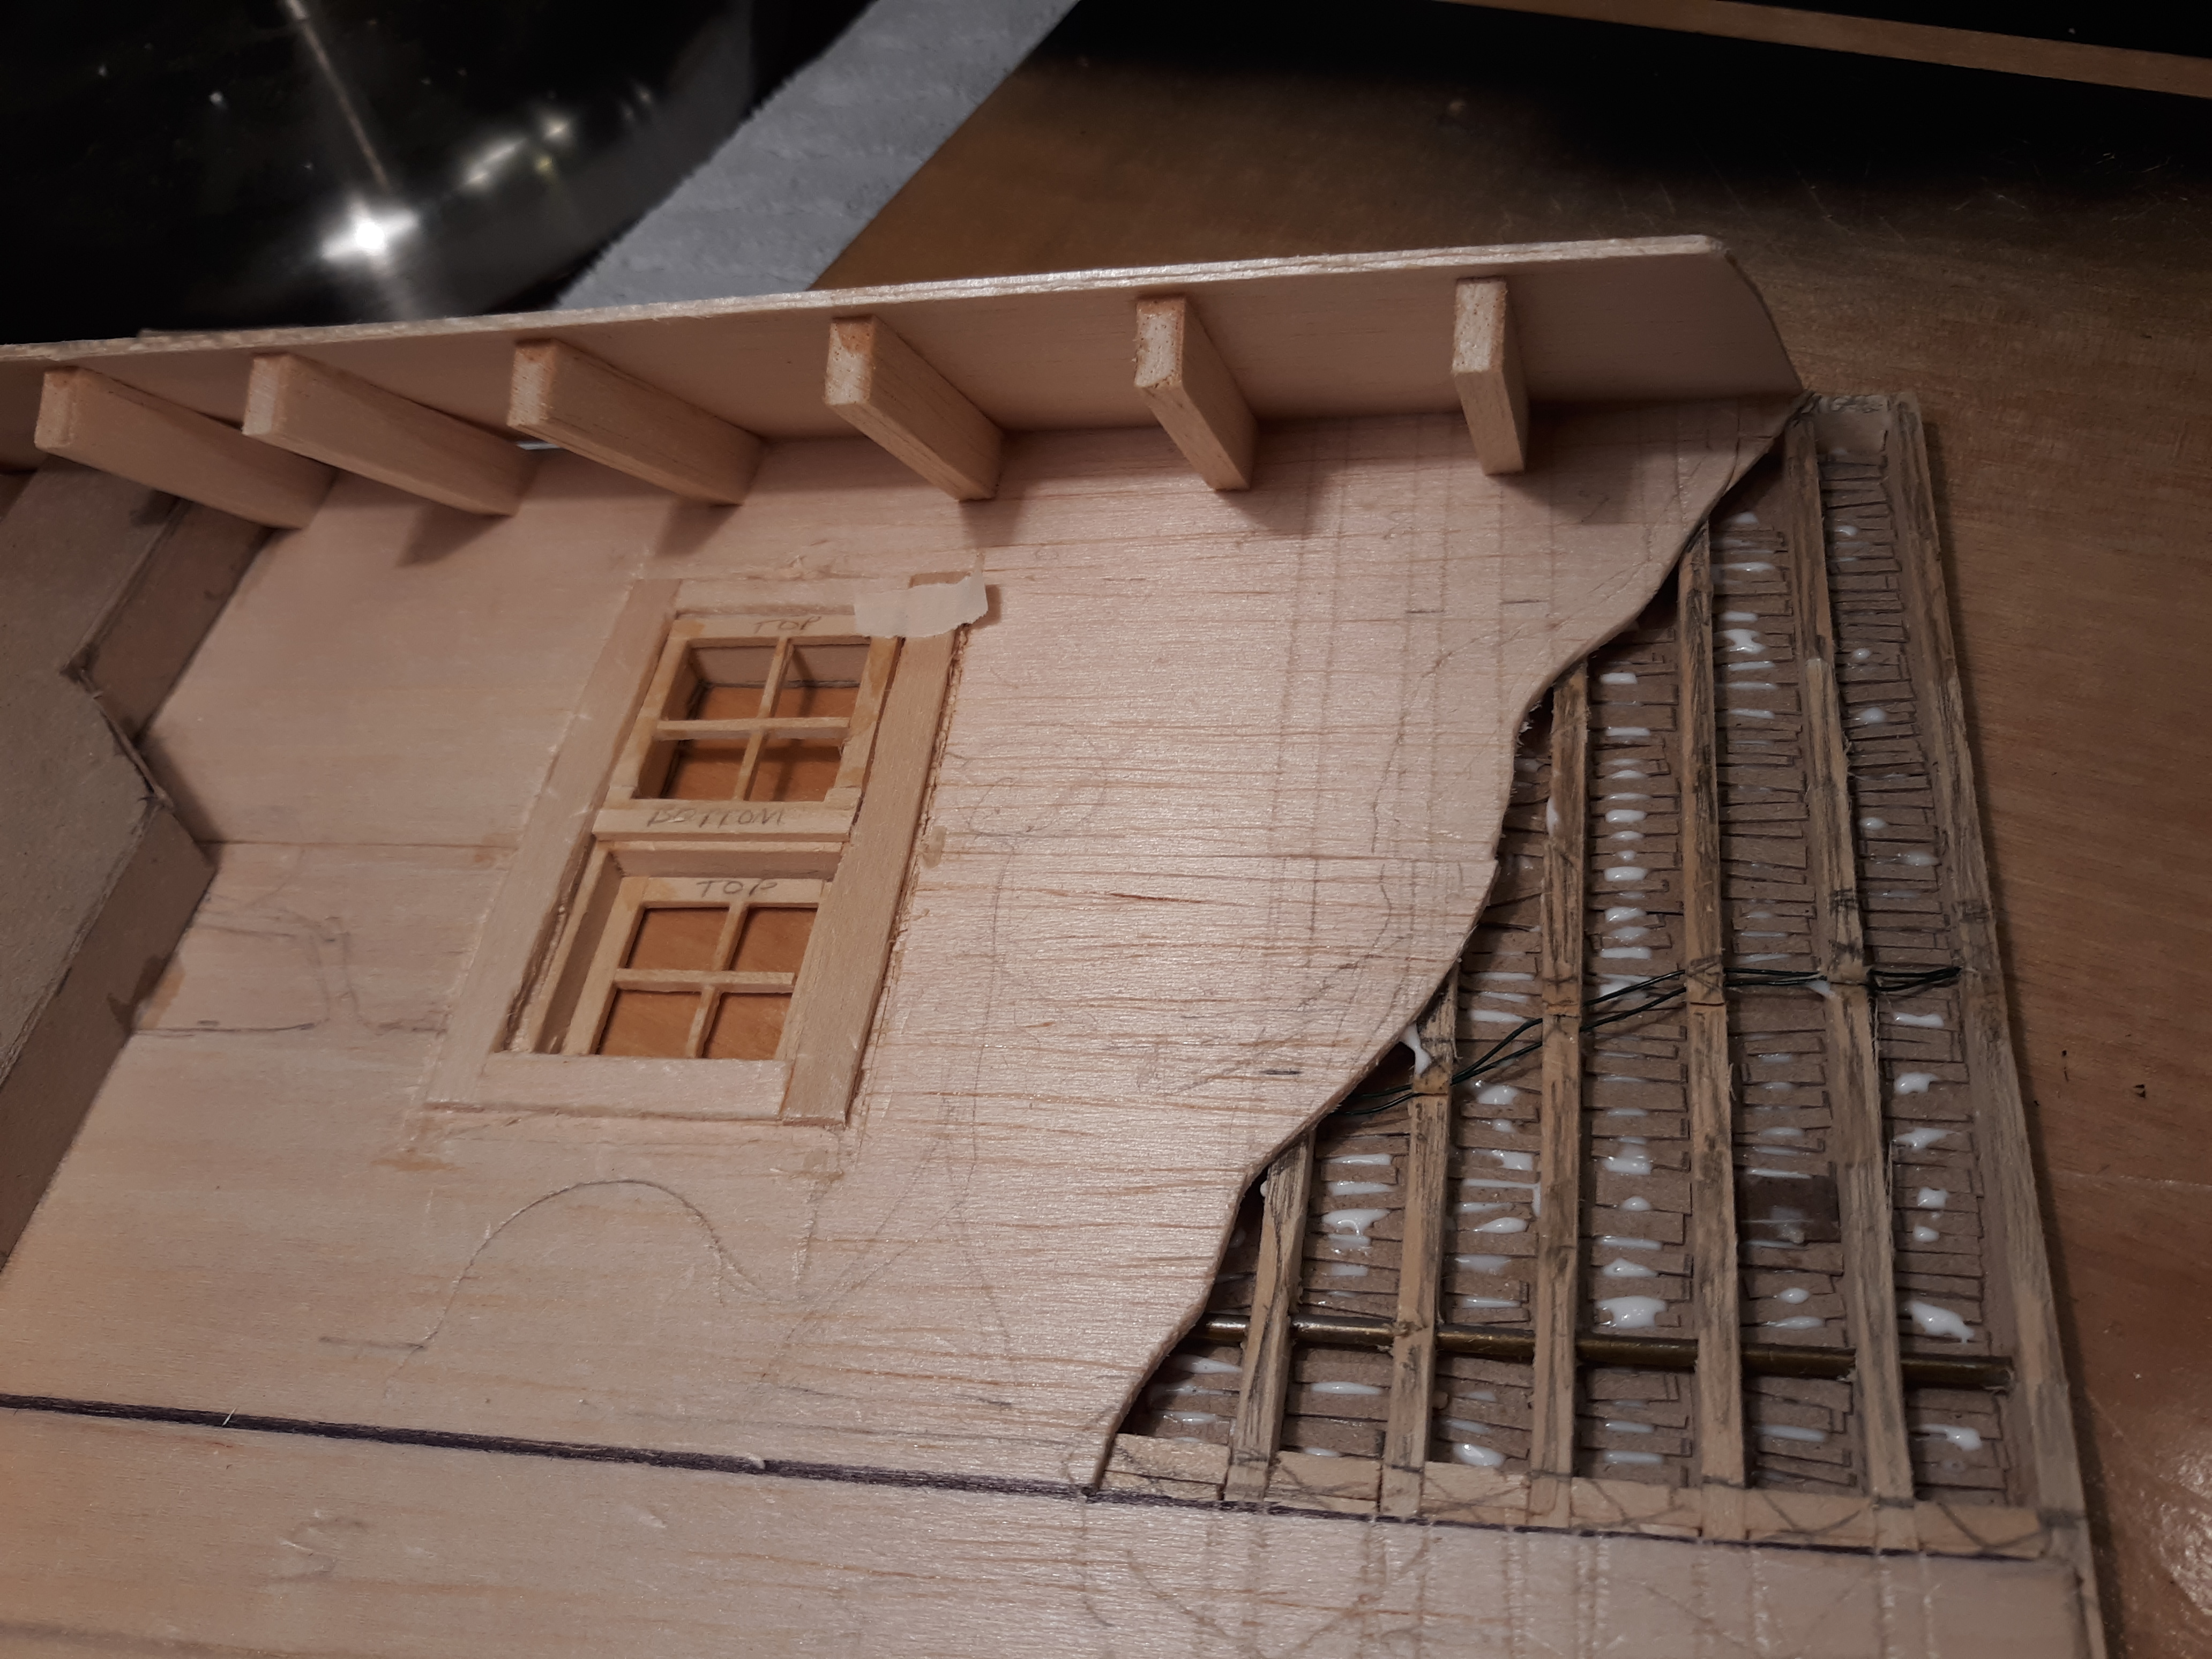
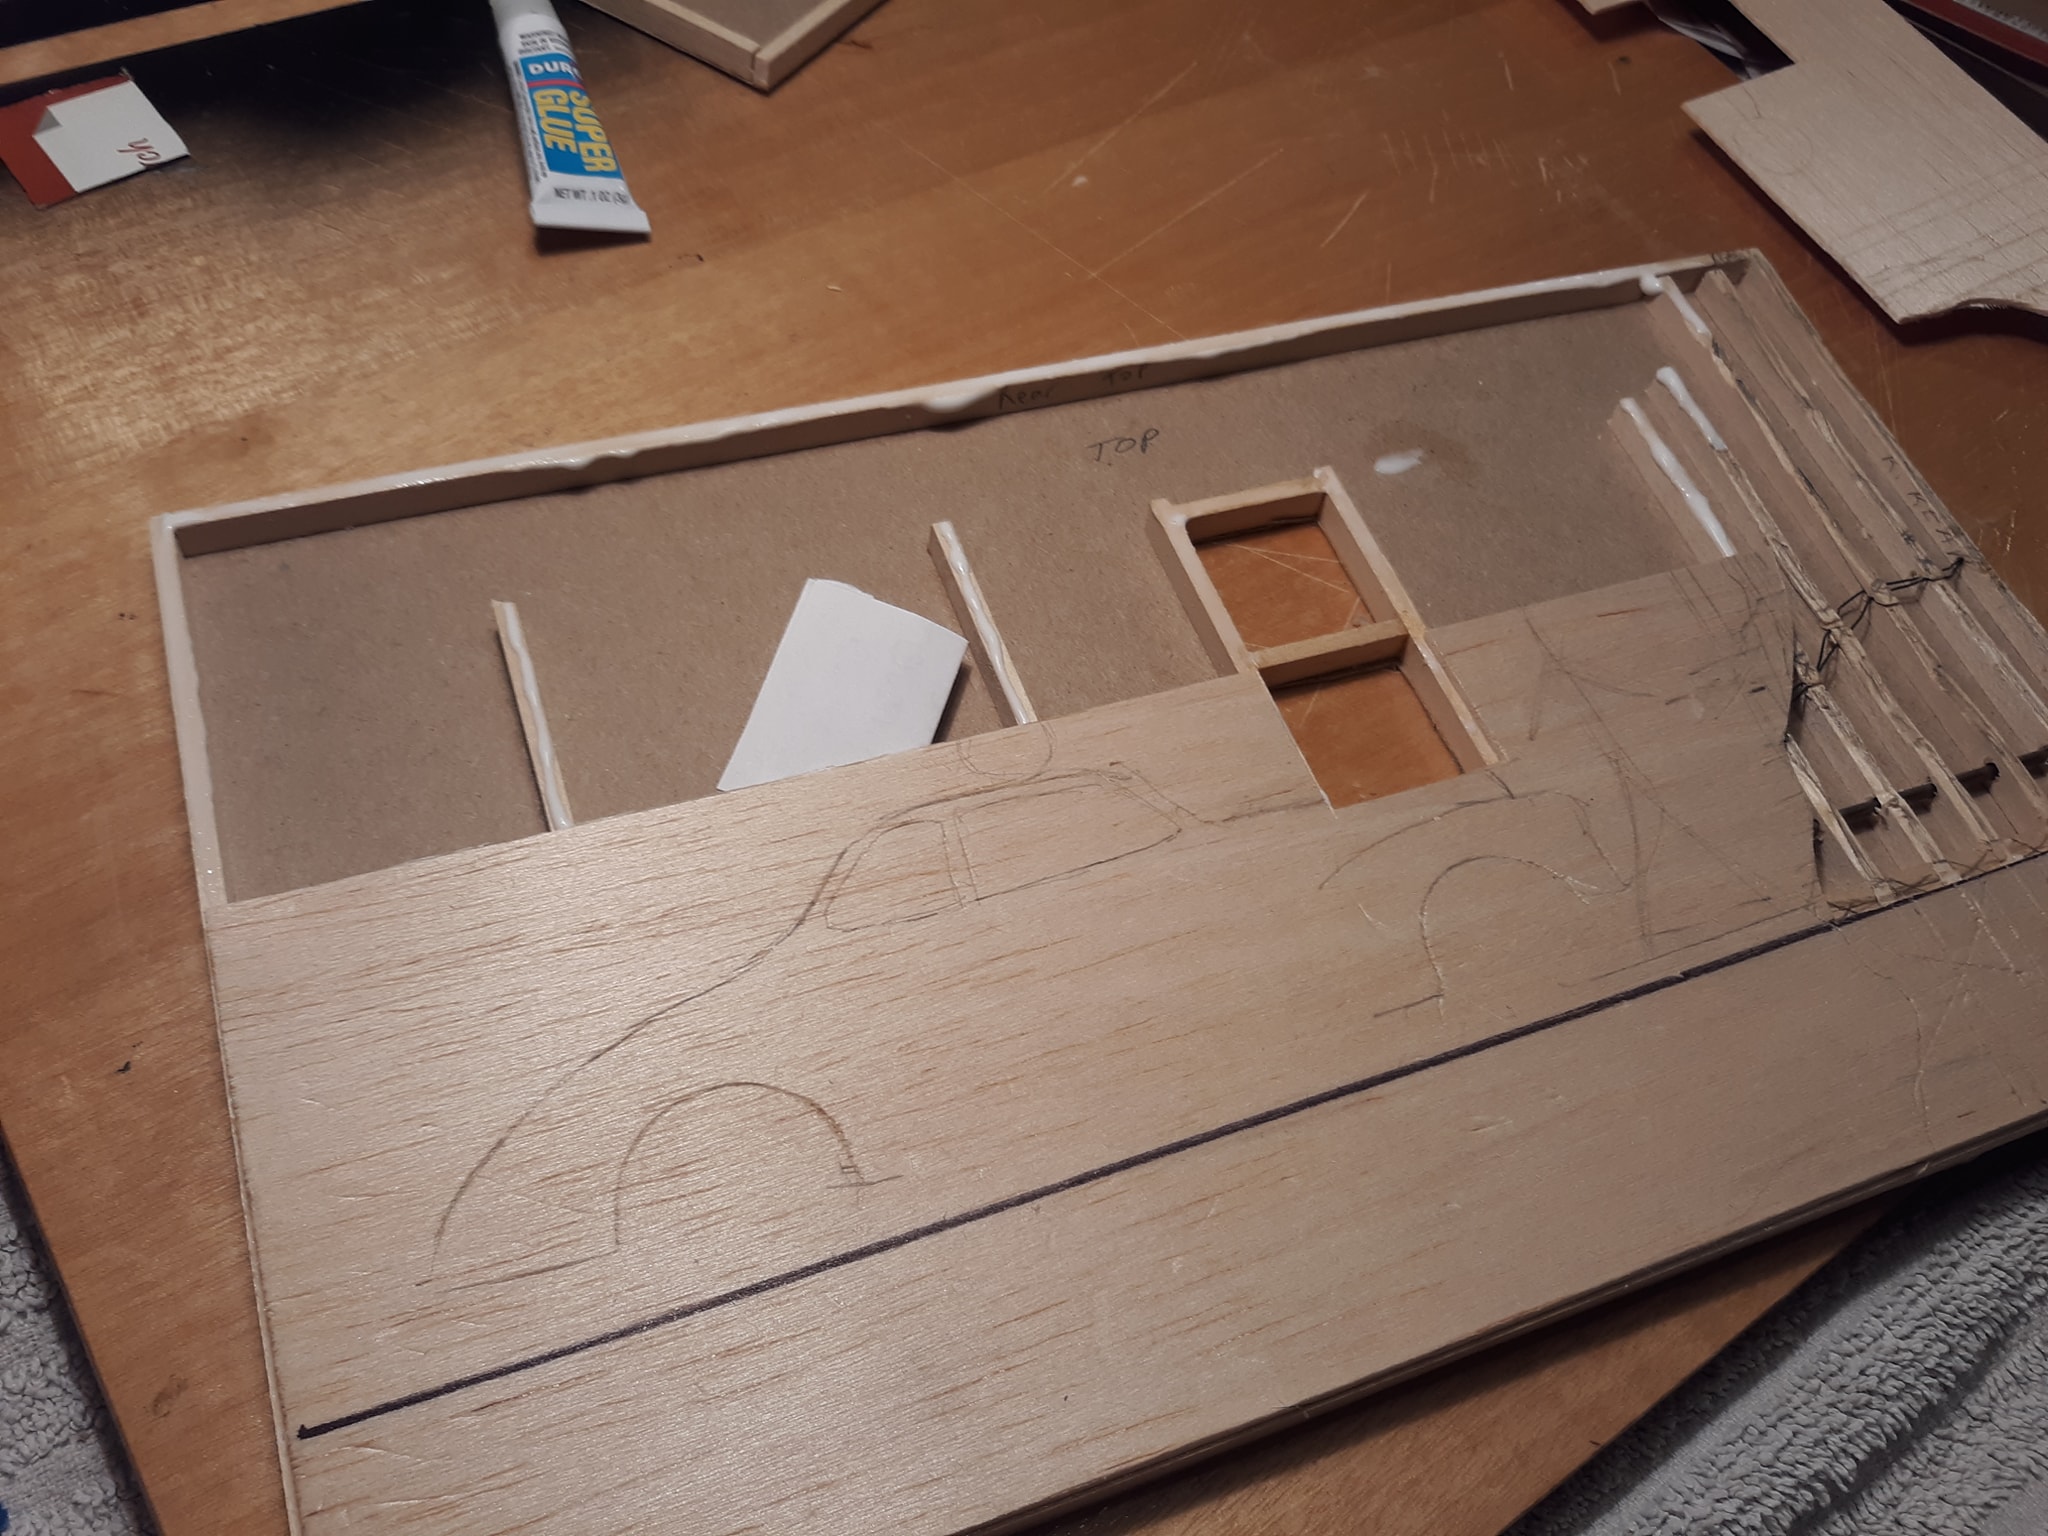
Starting to join the back and side. It's a tight fit since I'm building directly to the back and side walls. Failed roof and corner water damage coming along nicely.
-
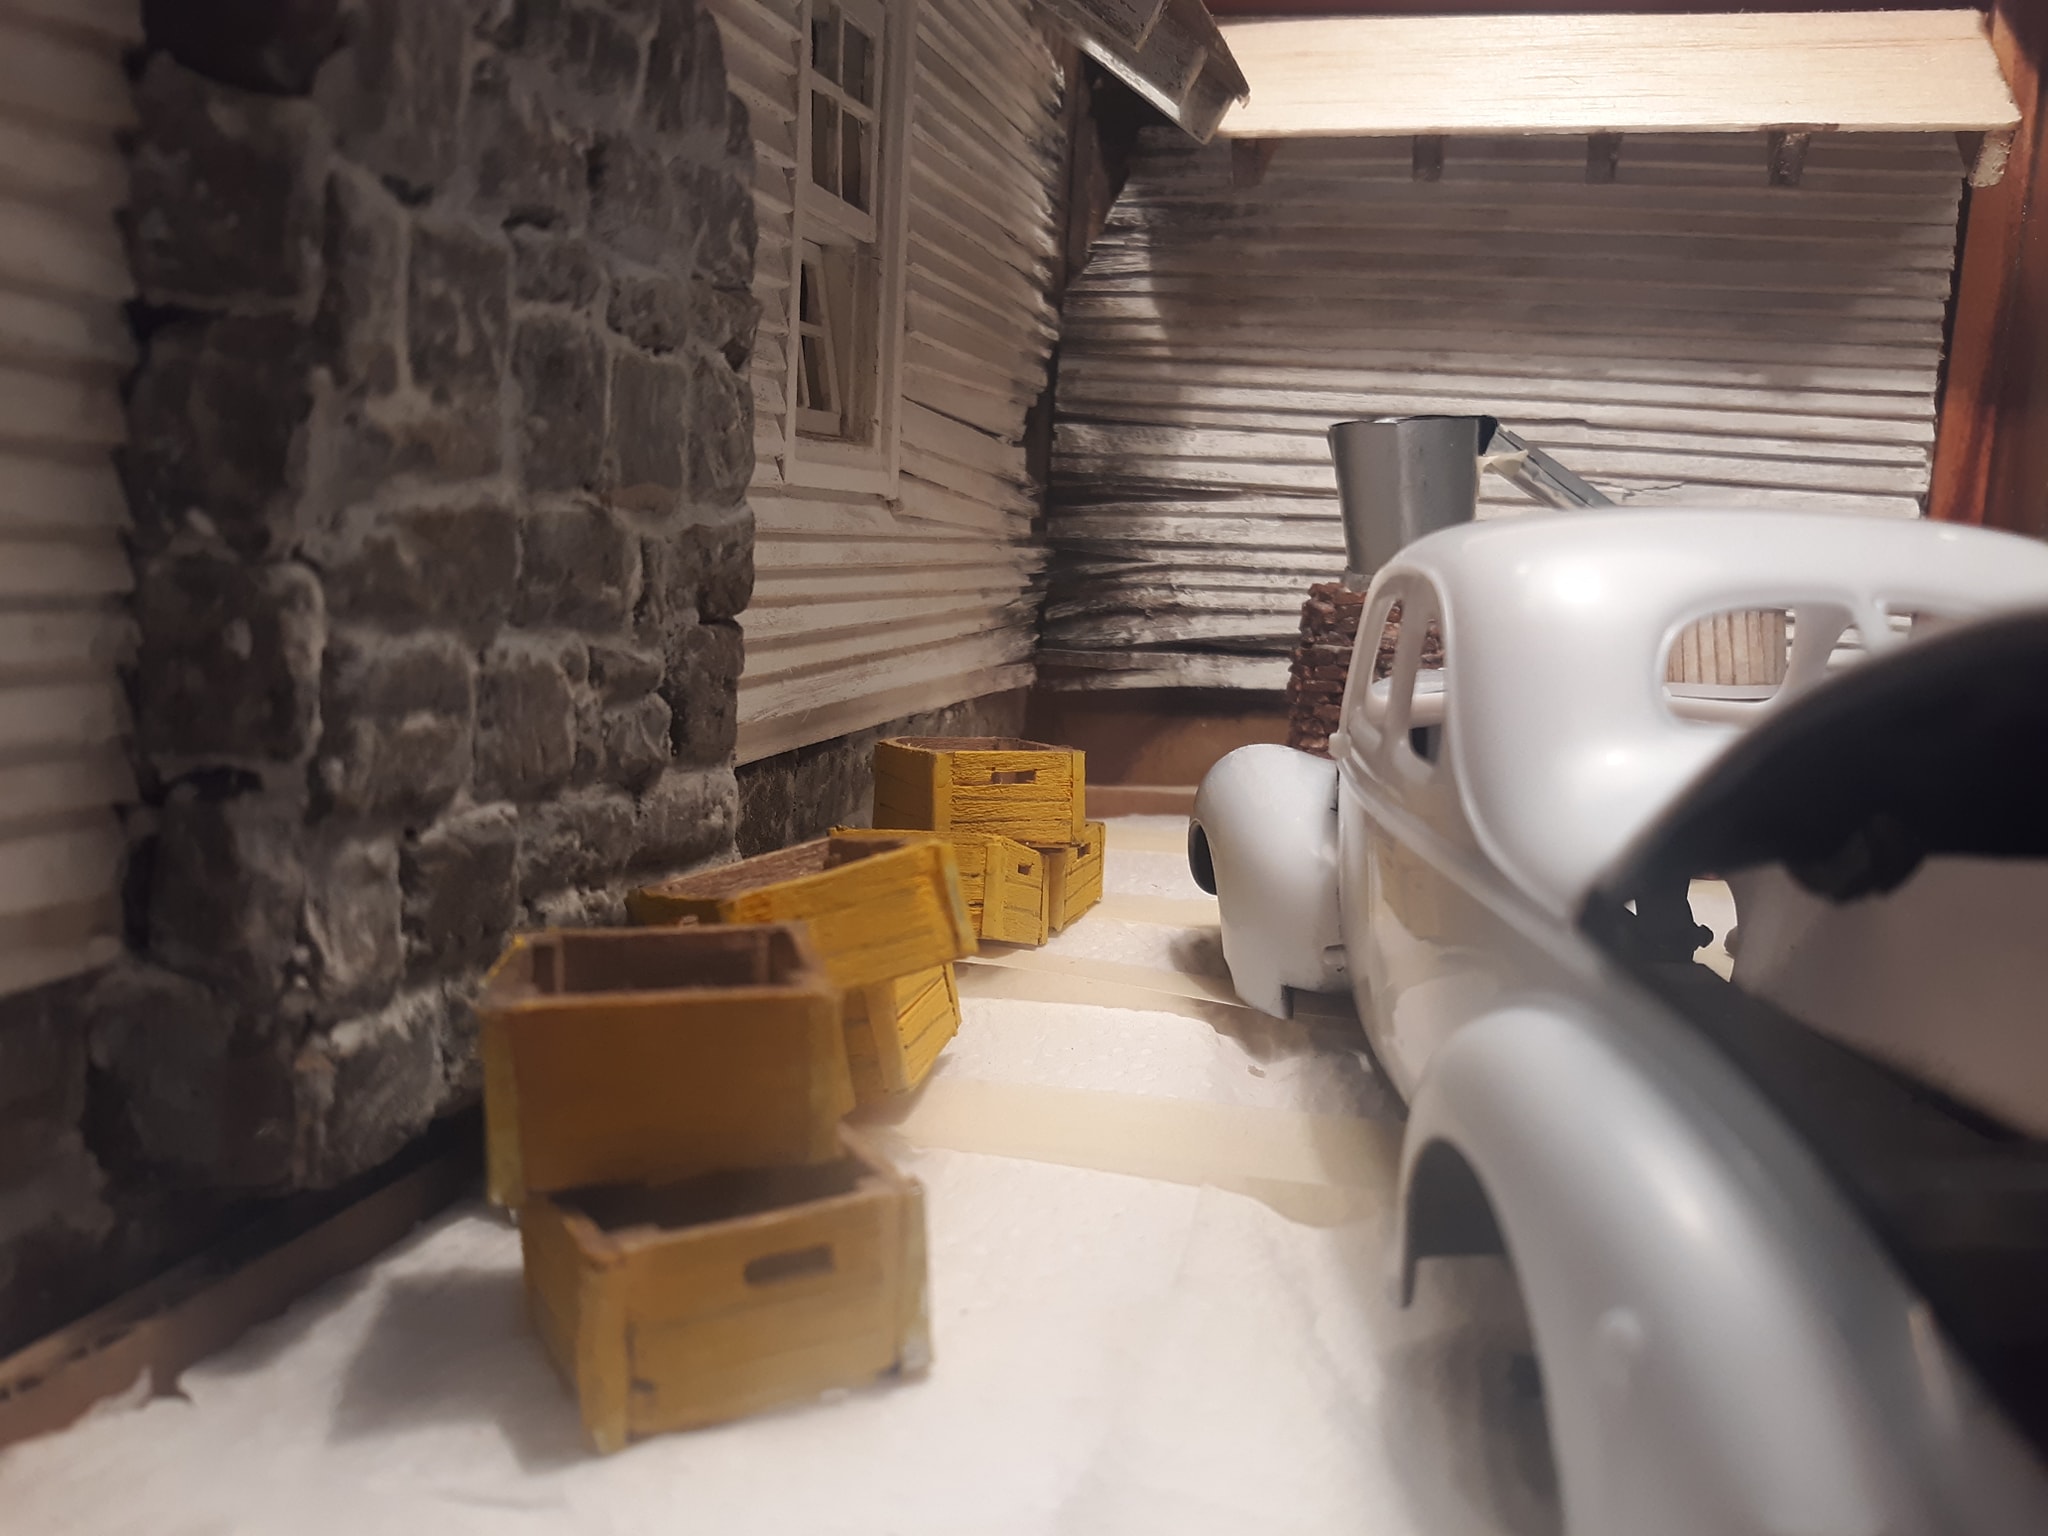
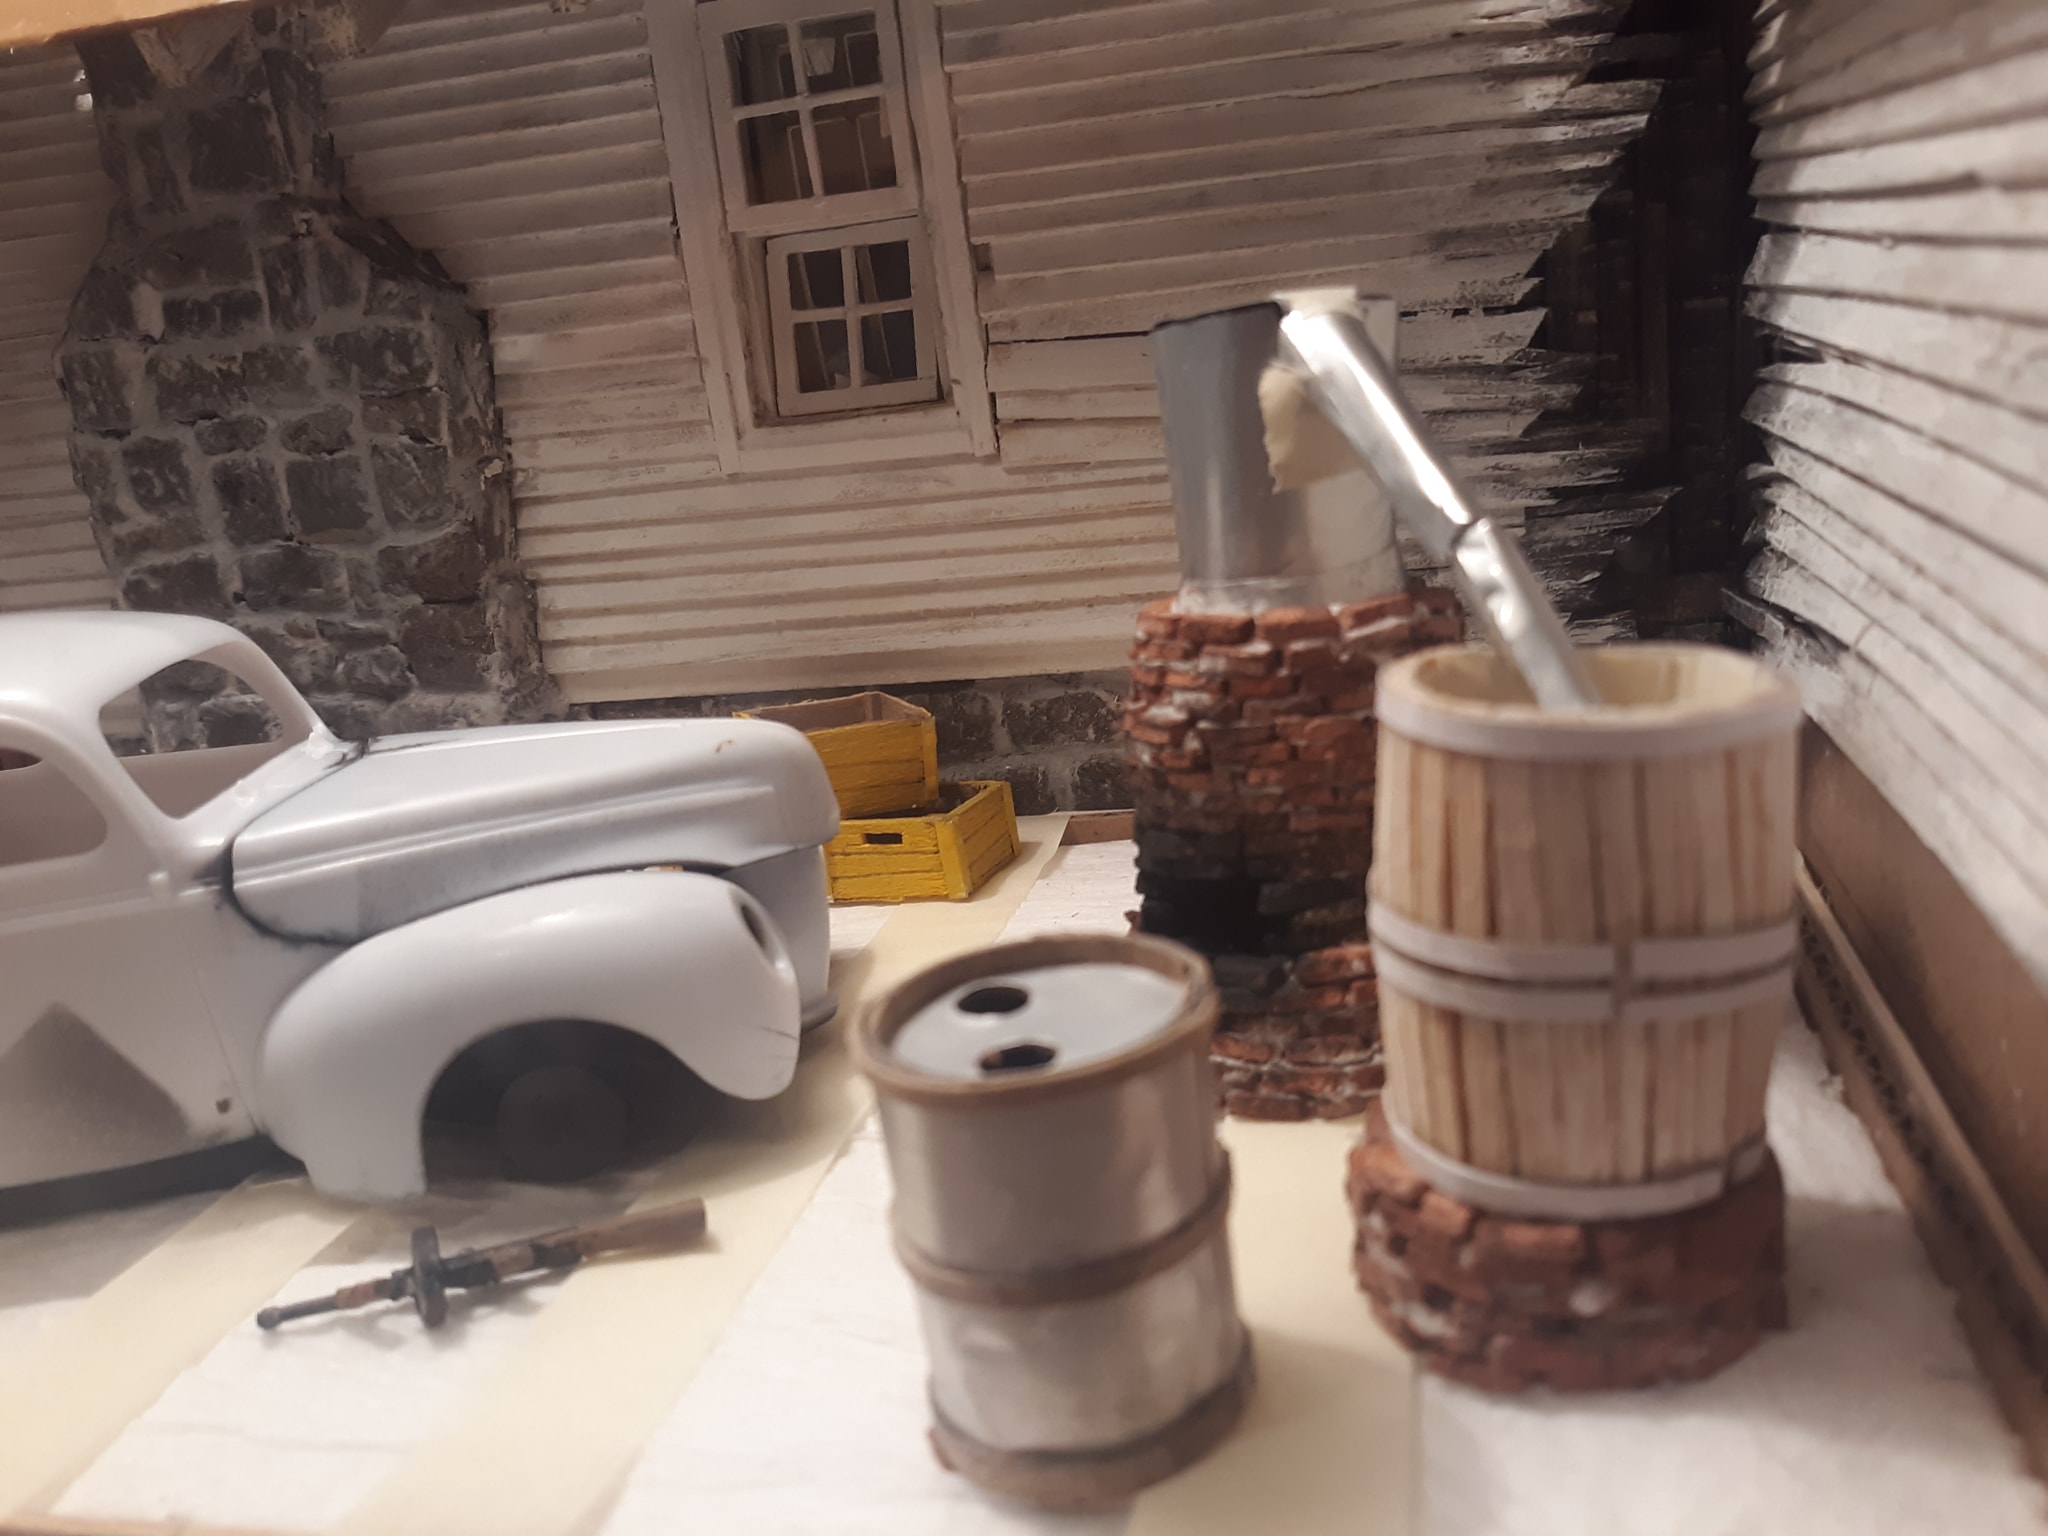
Lots of tiny bricks and stones!
-
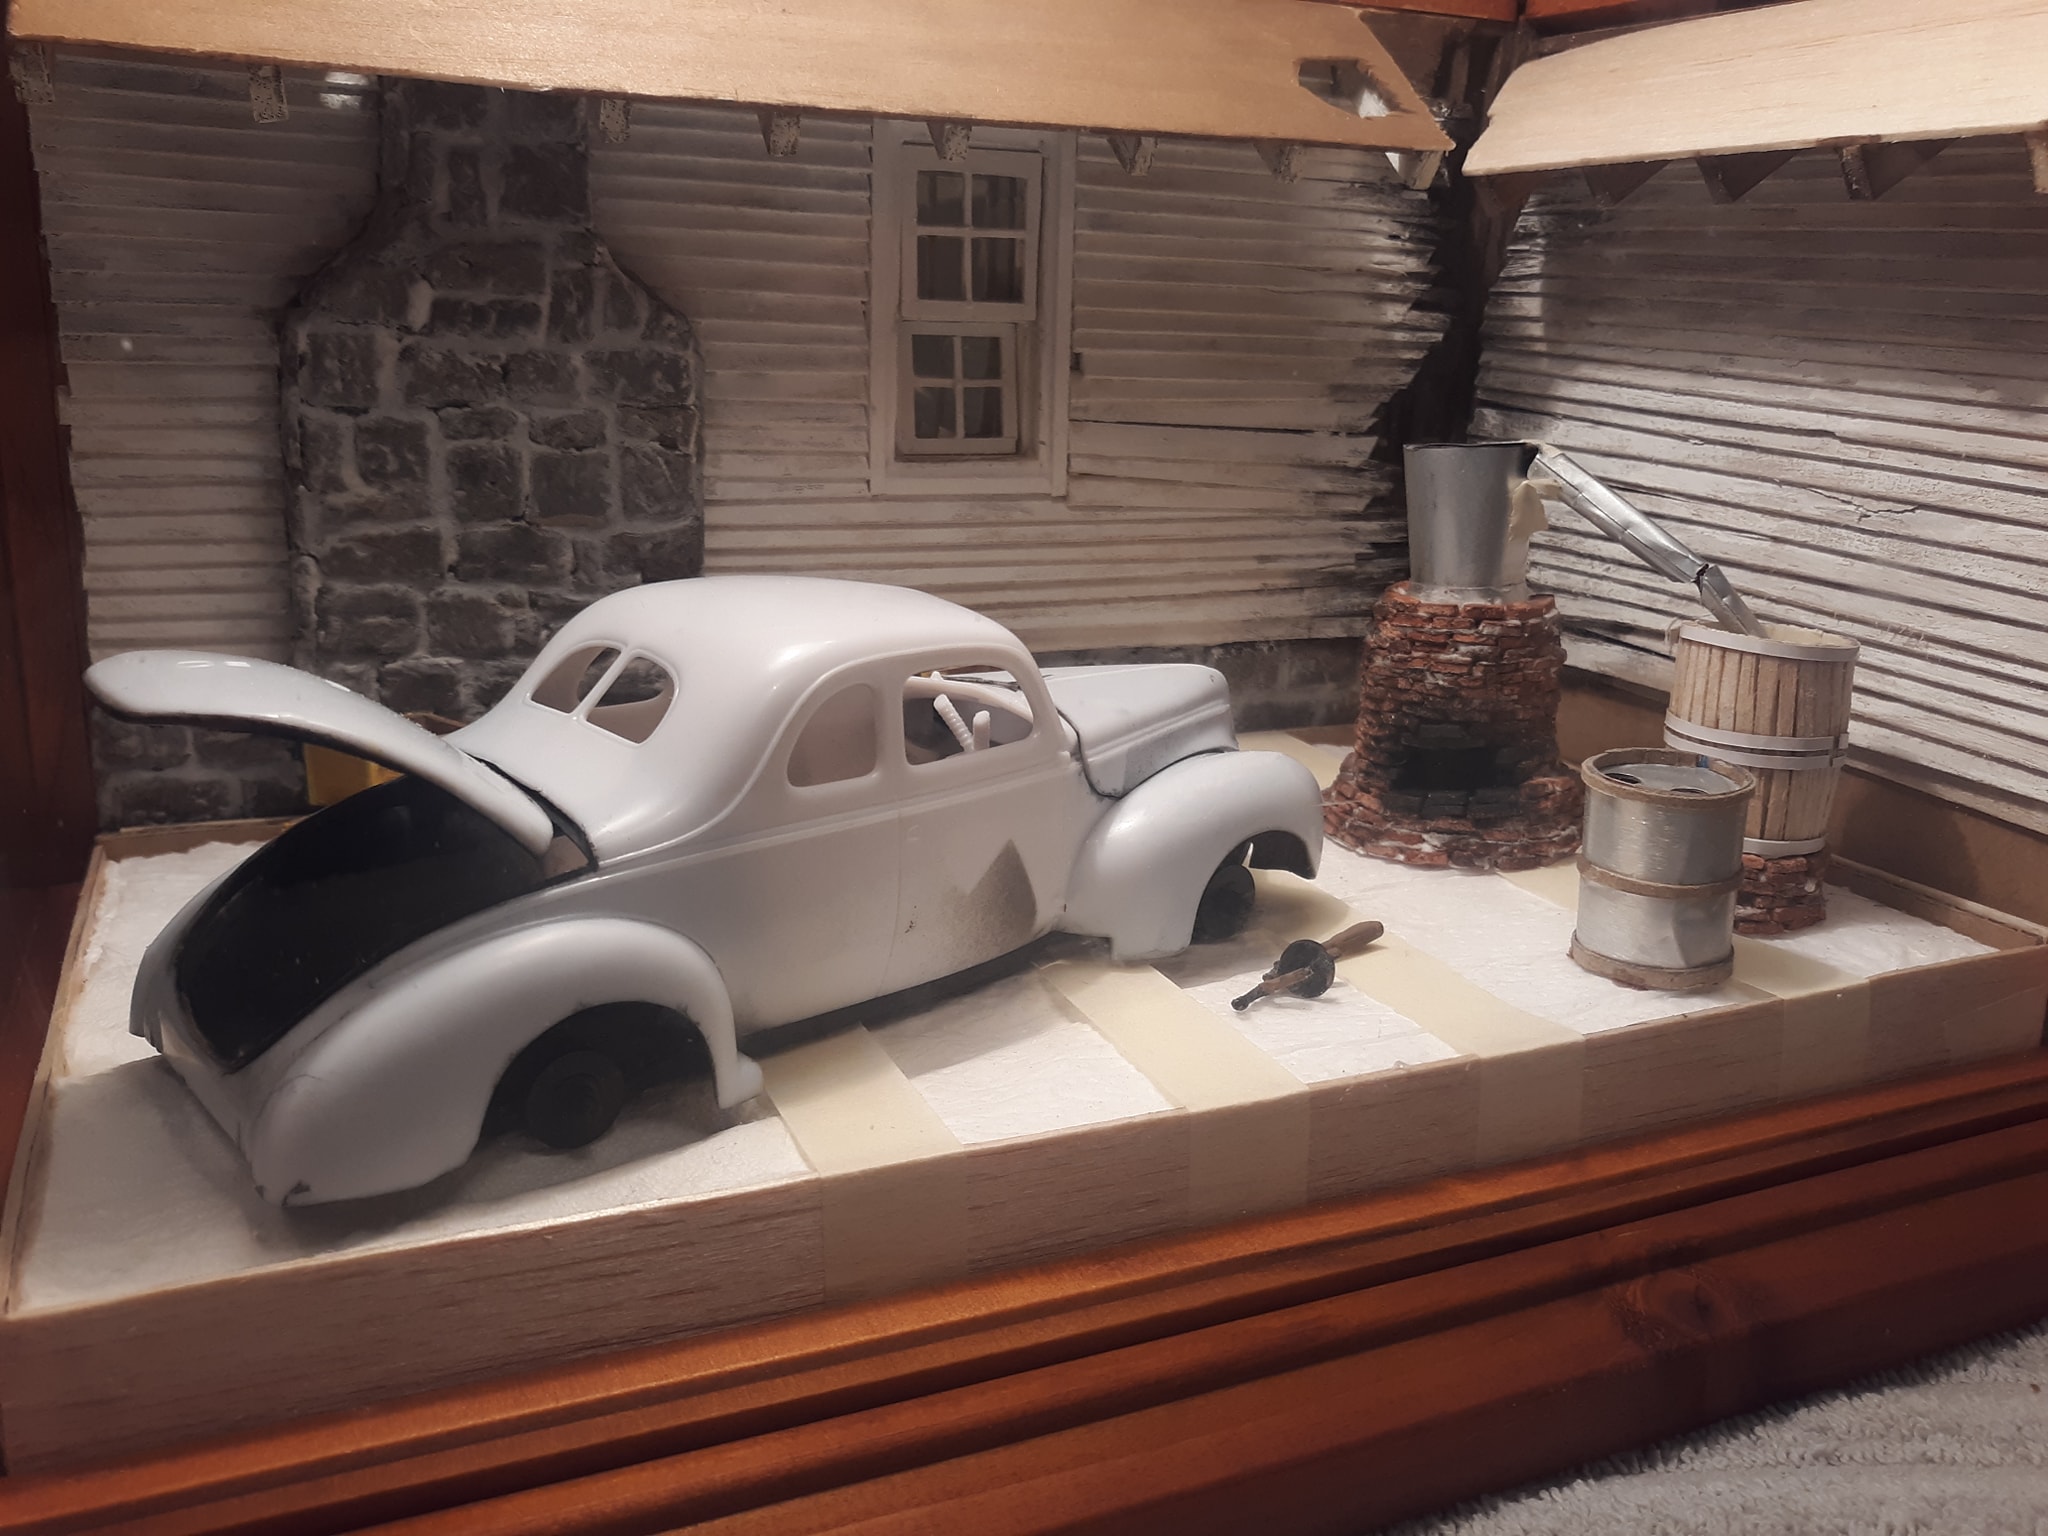
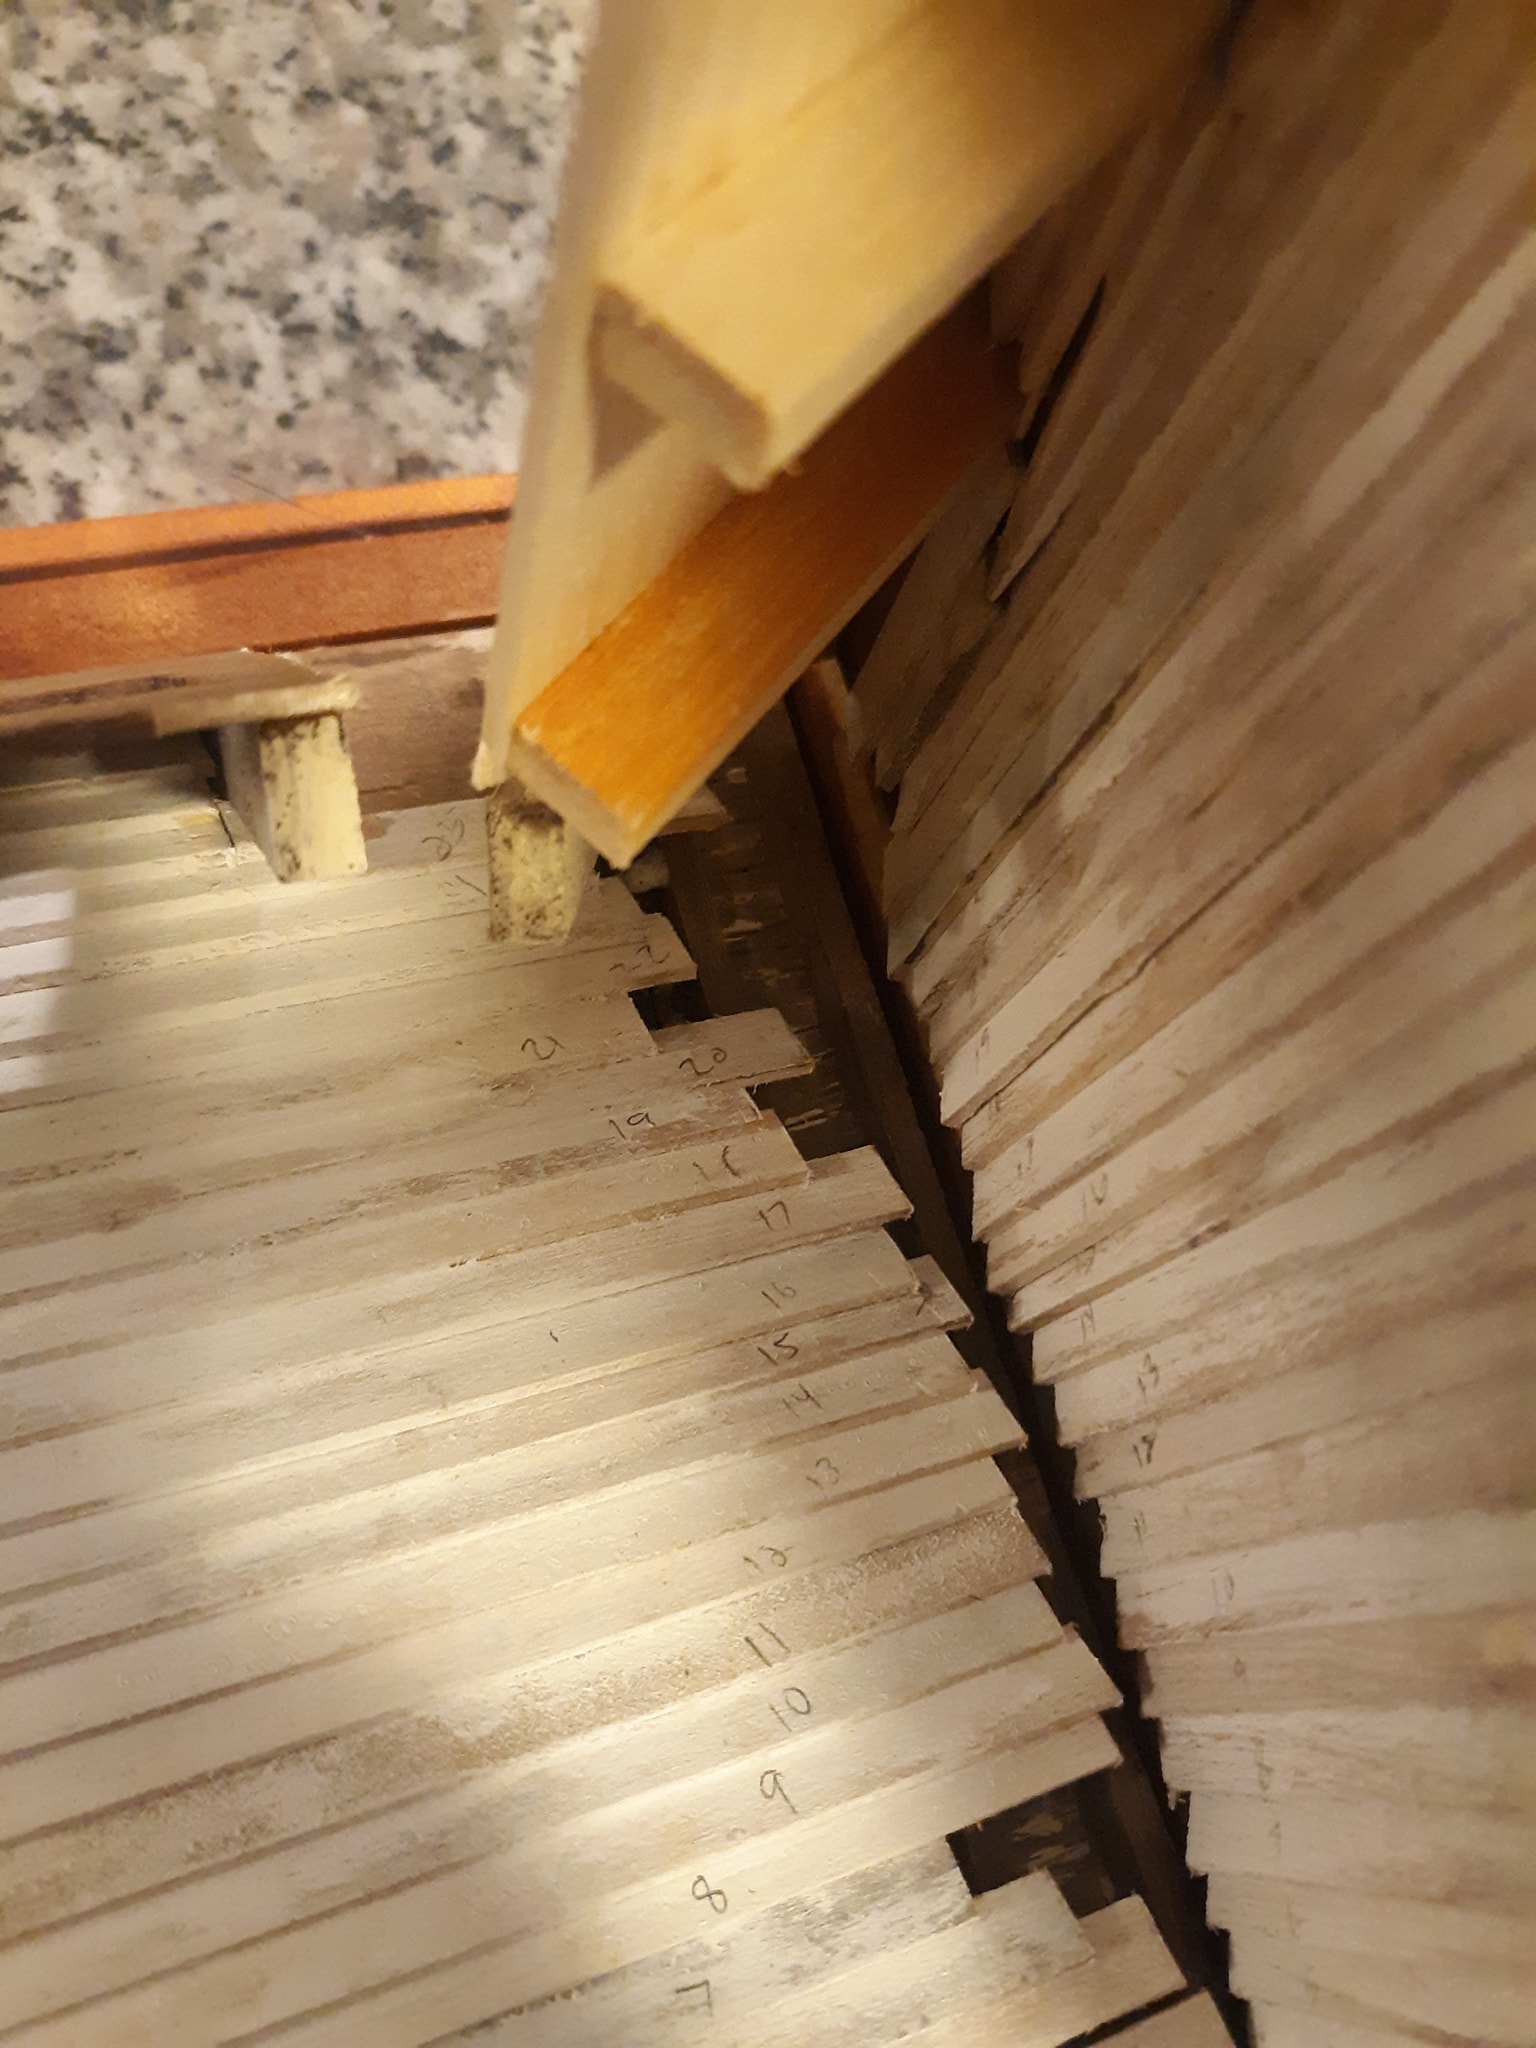
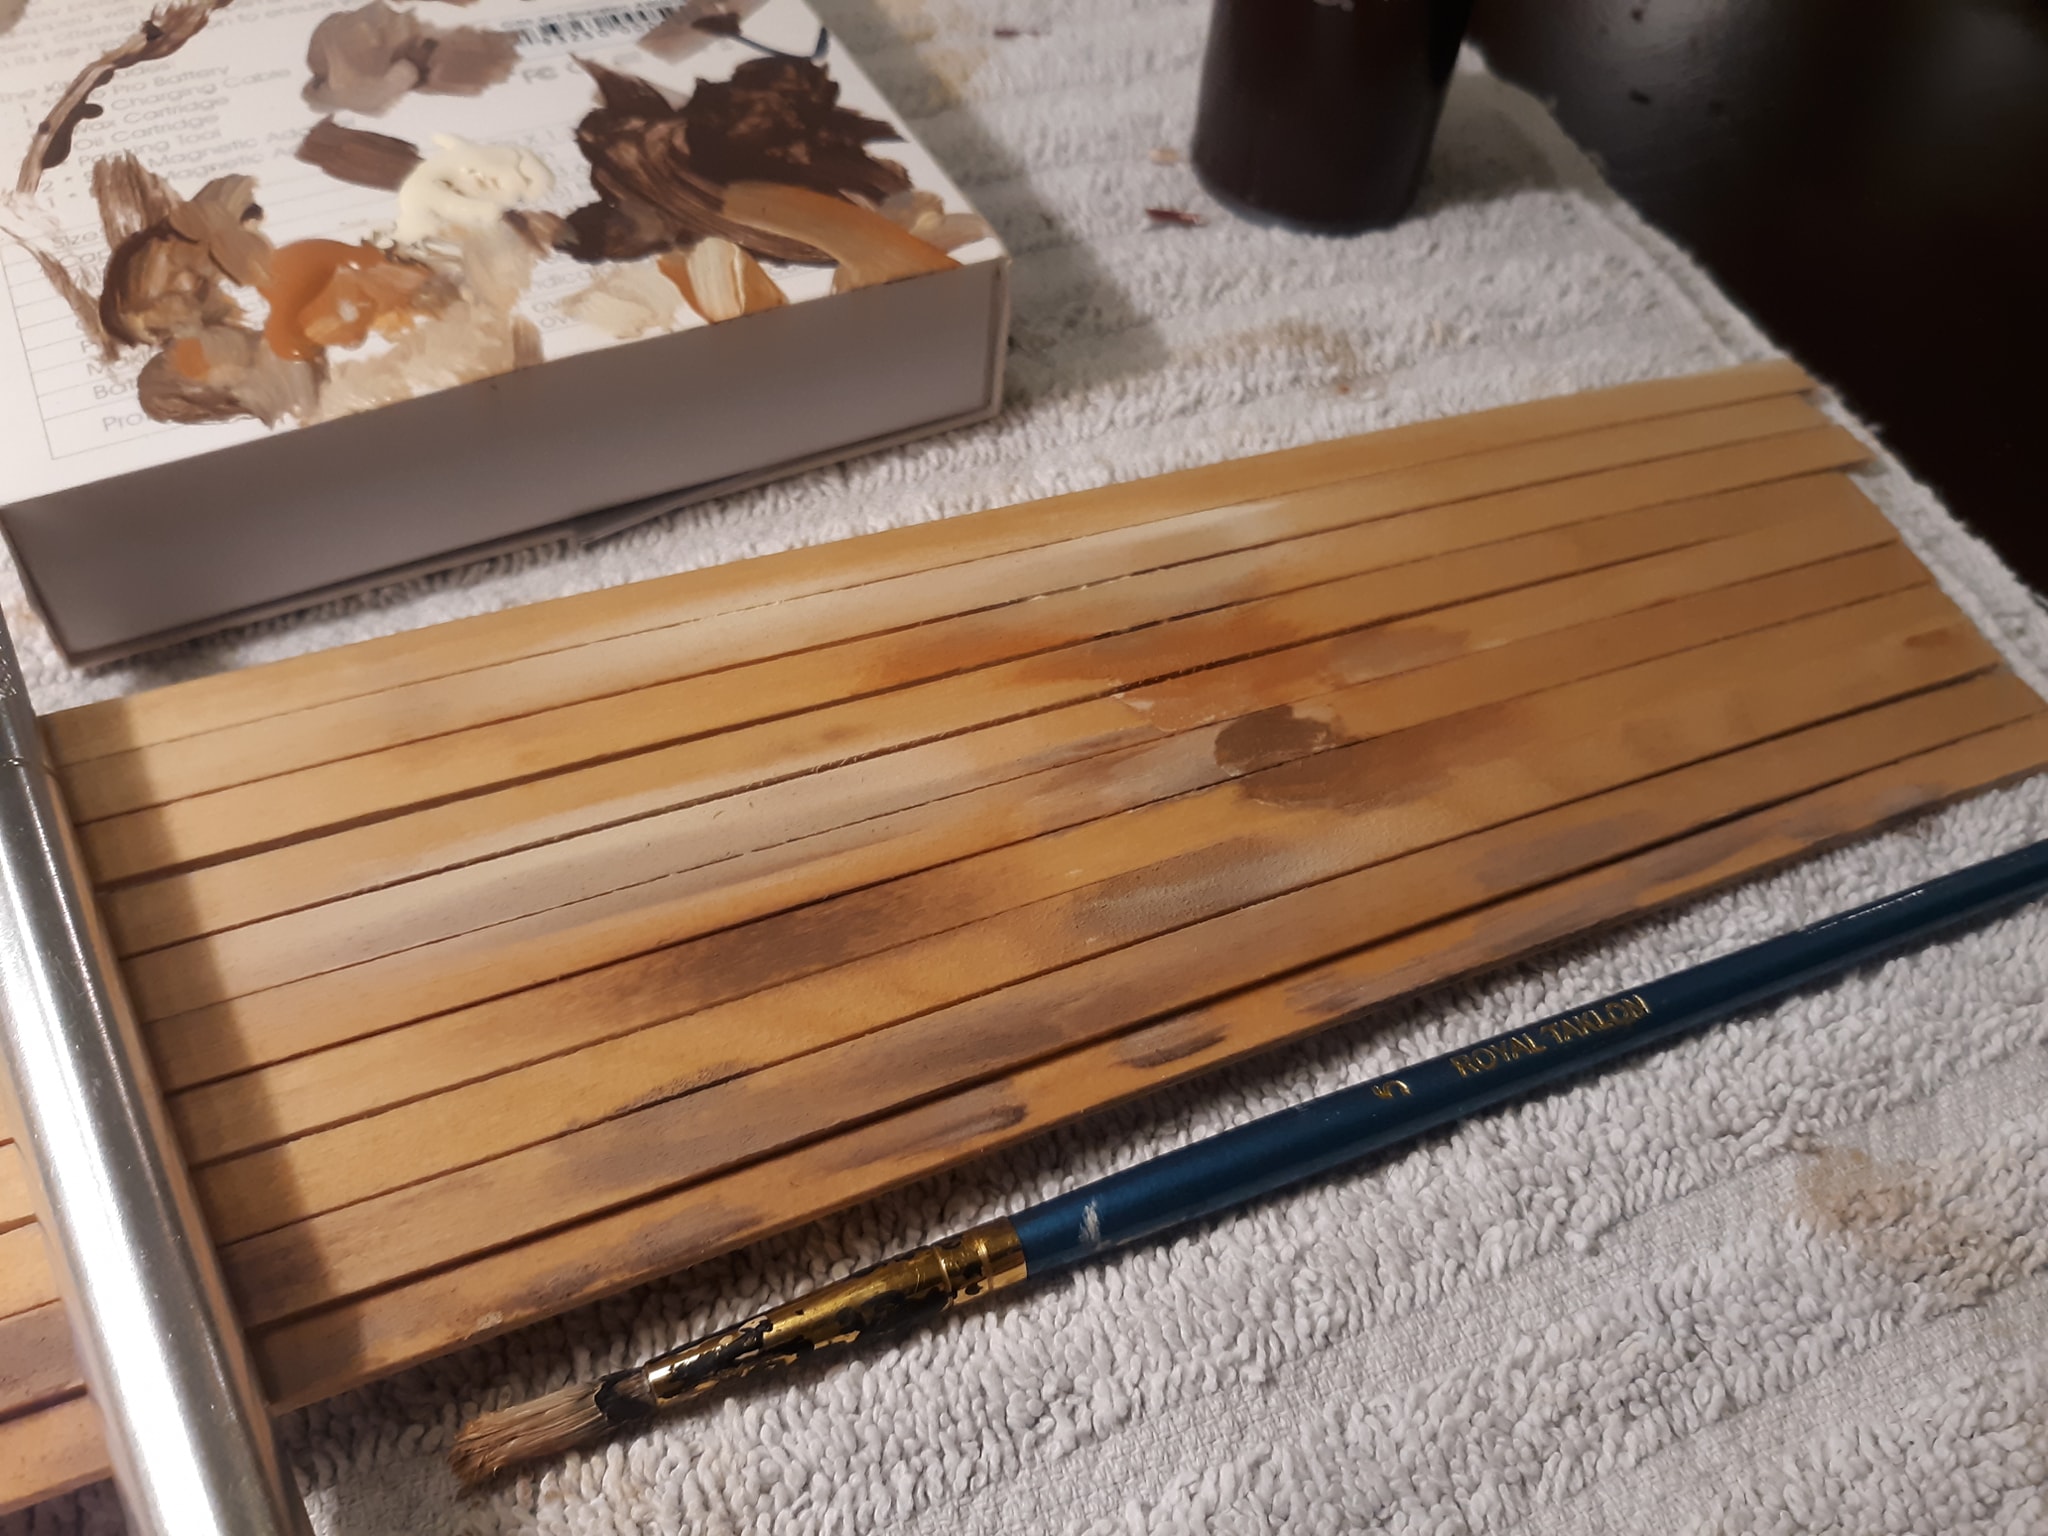
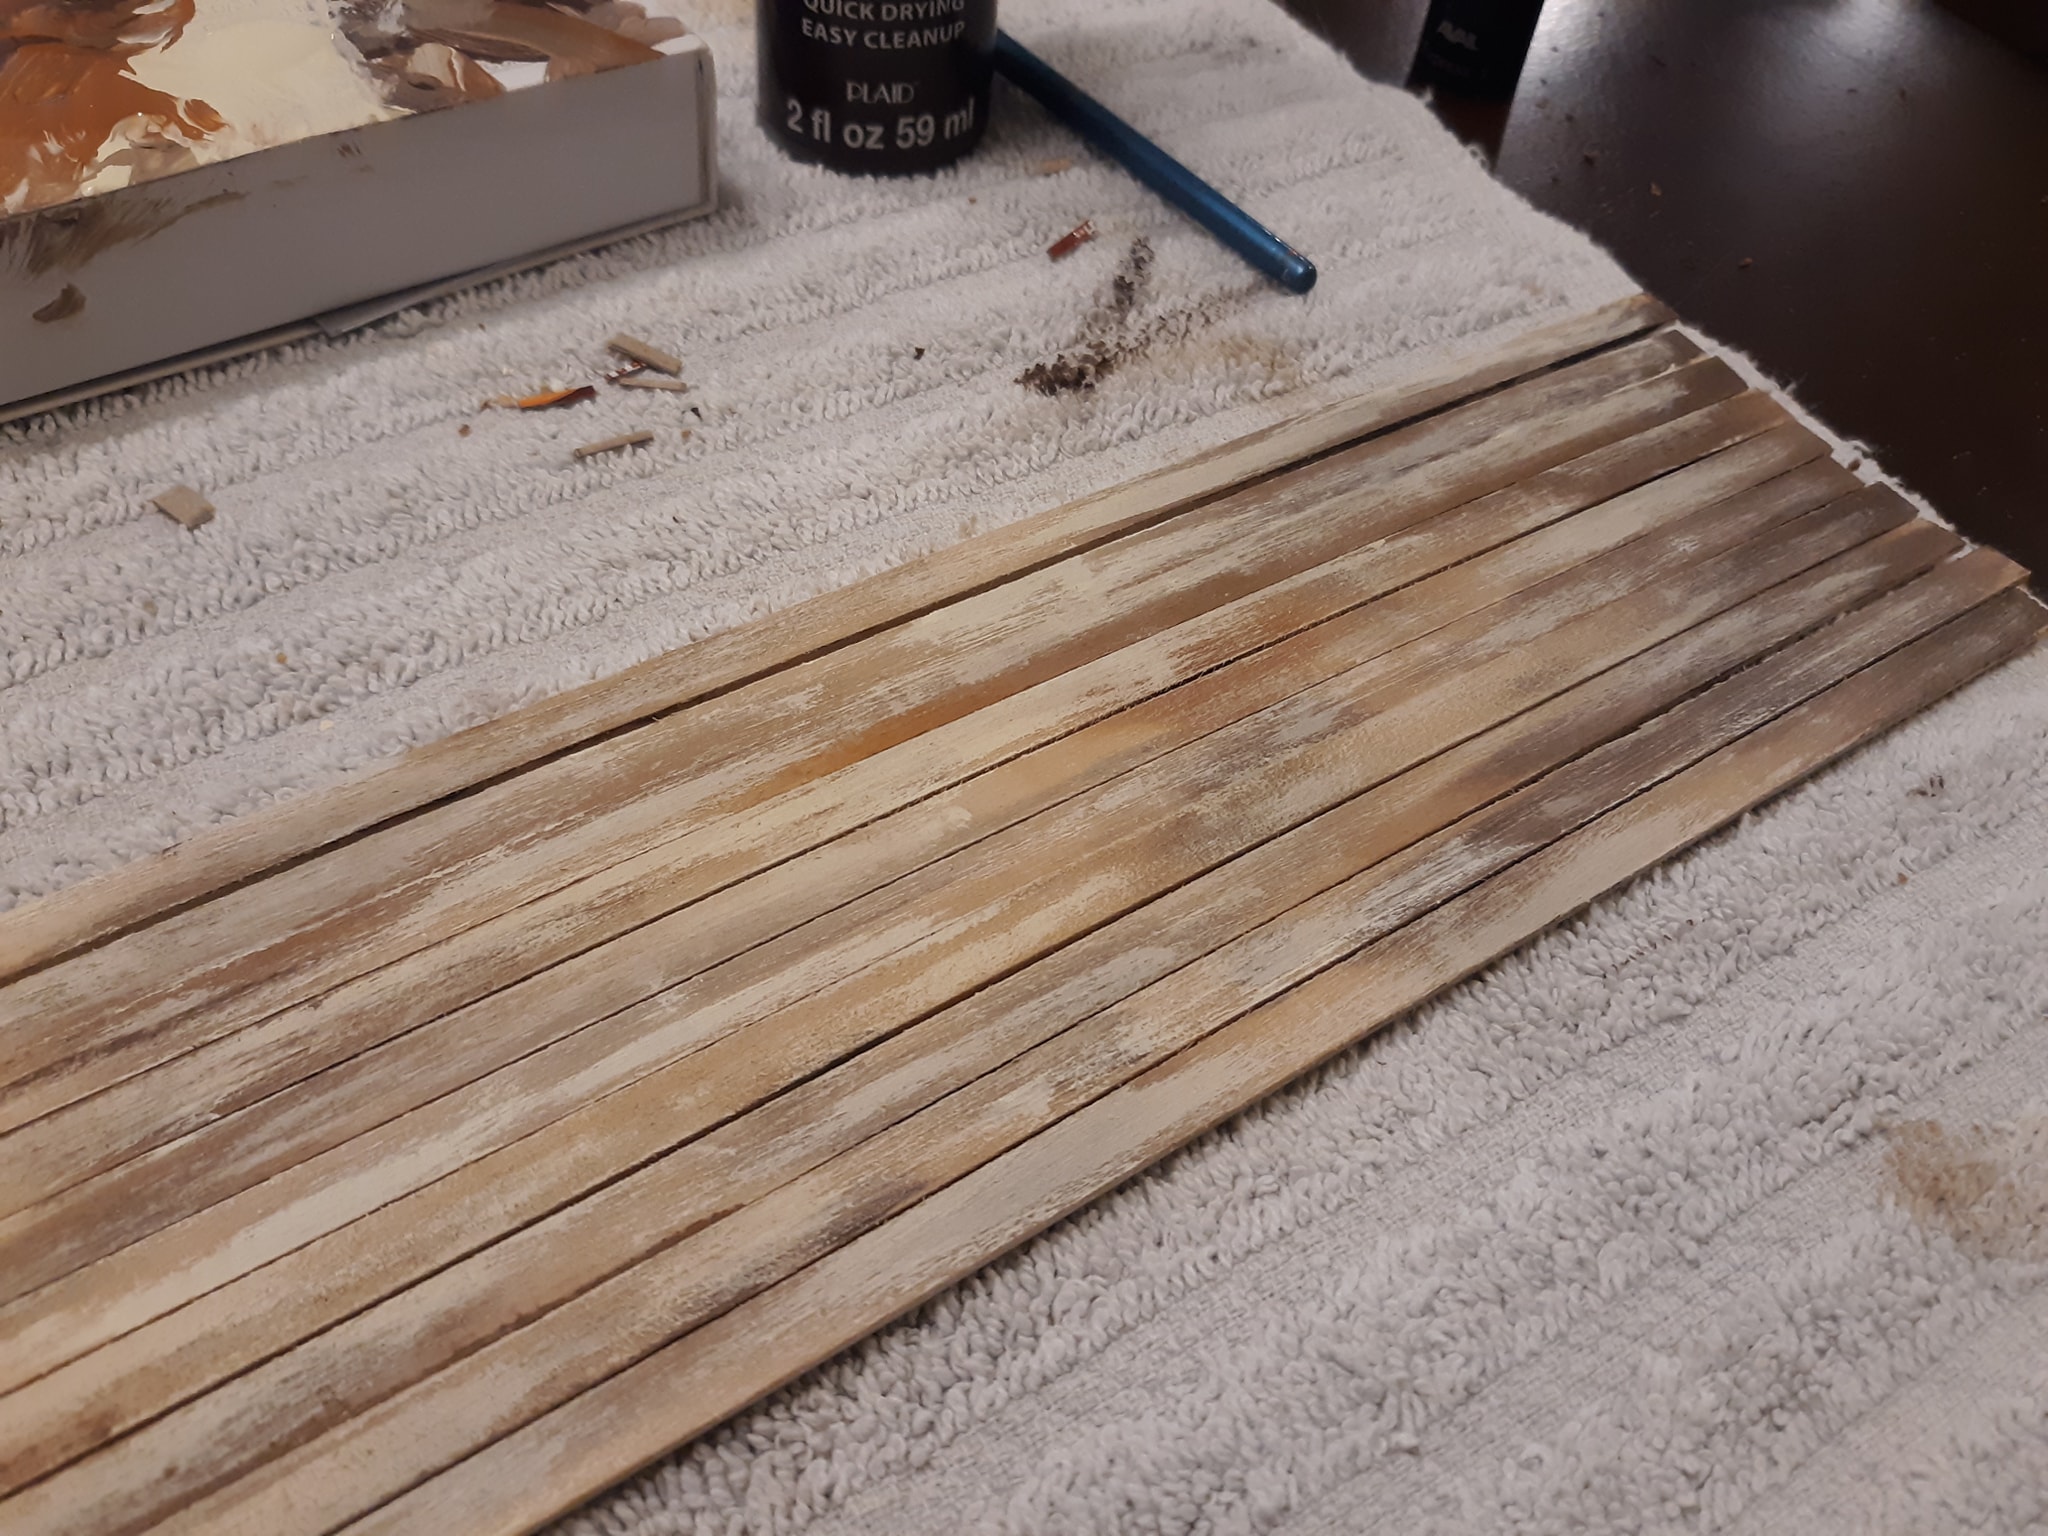
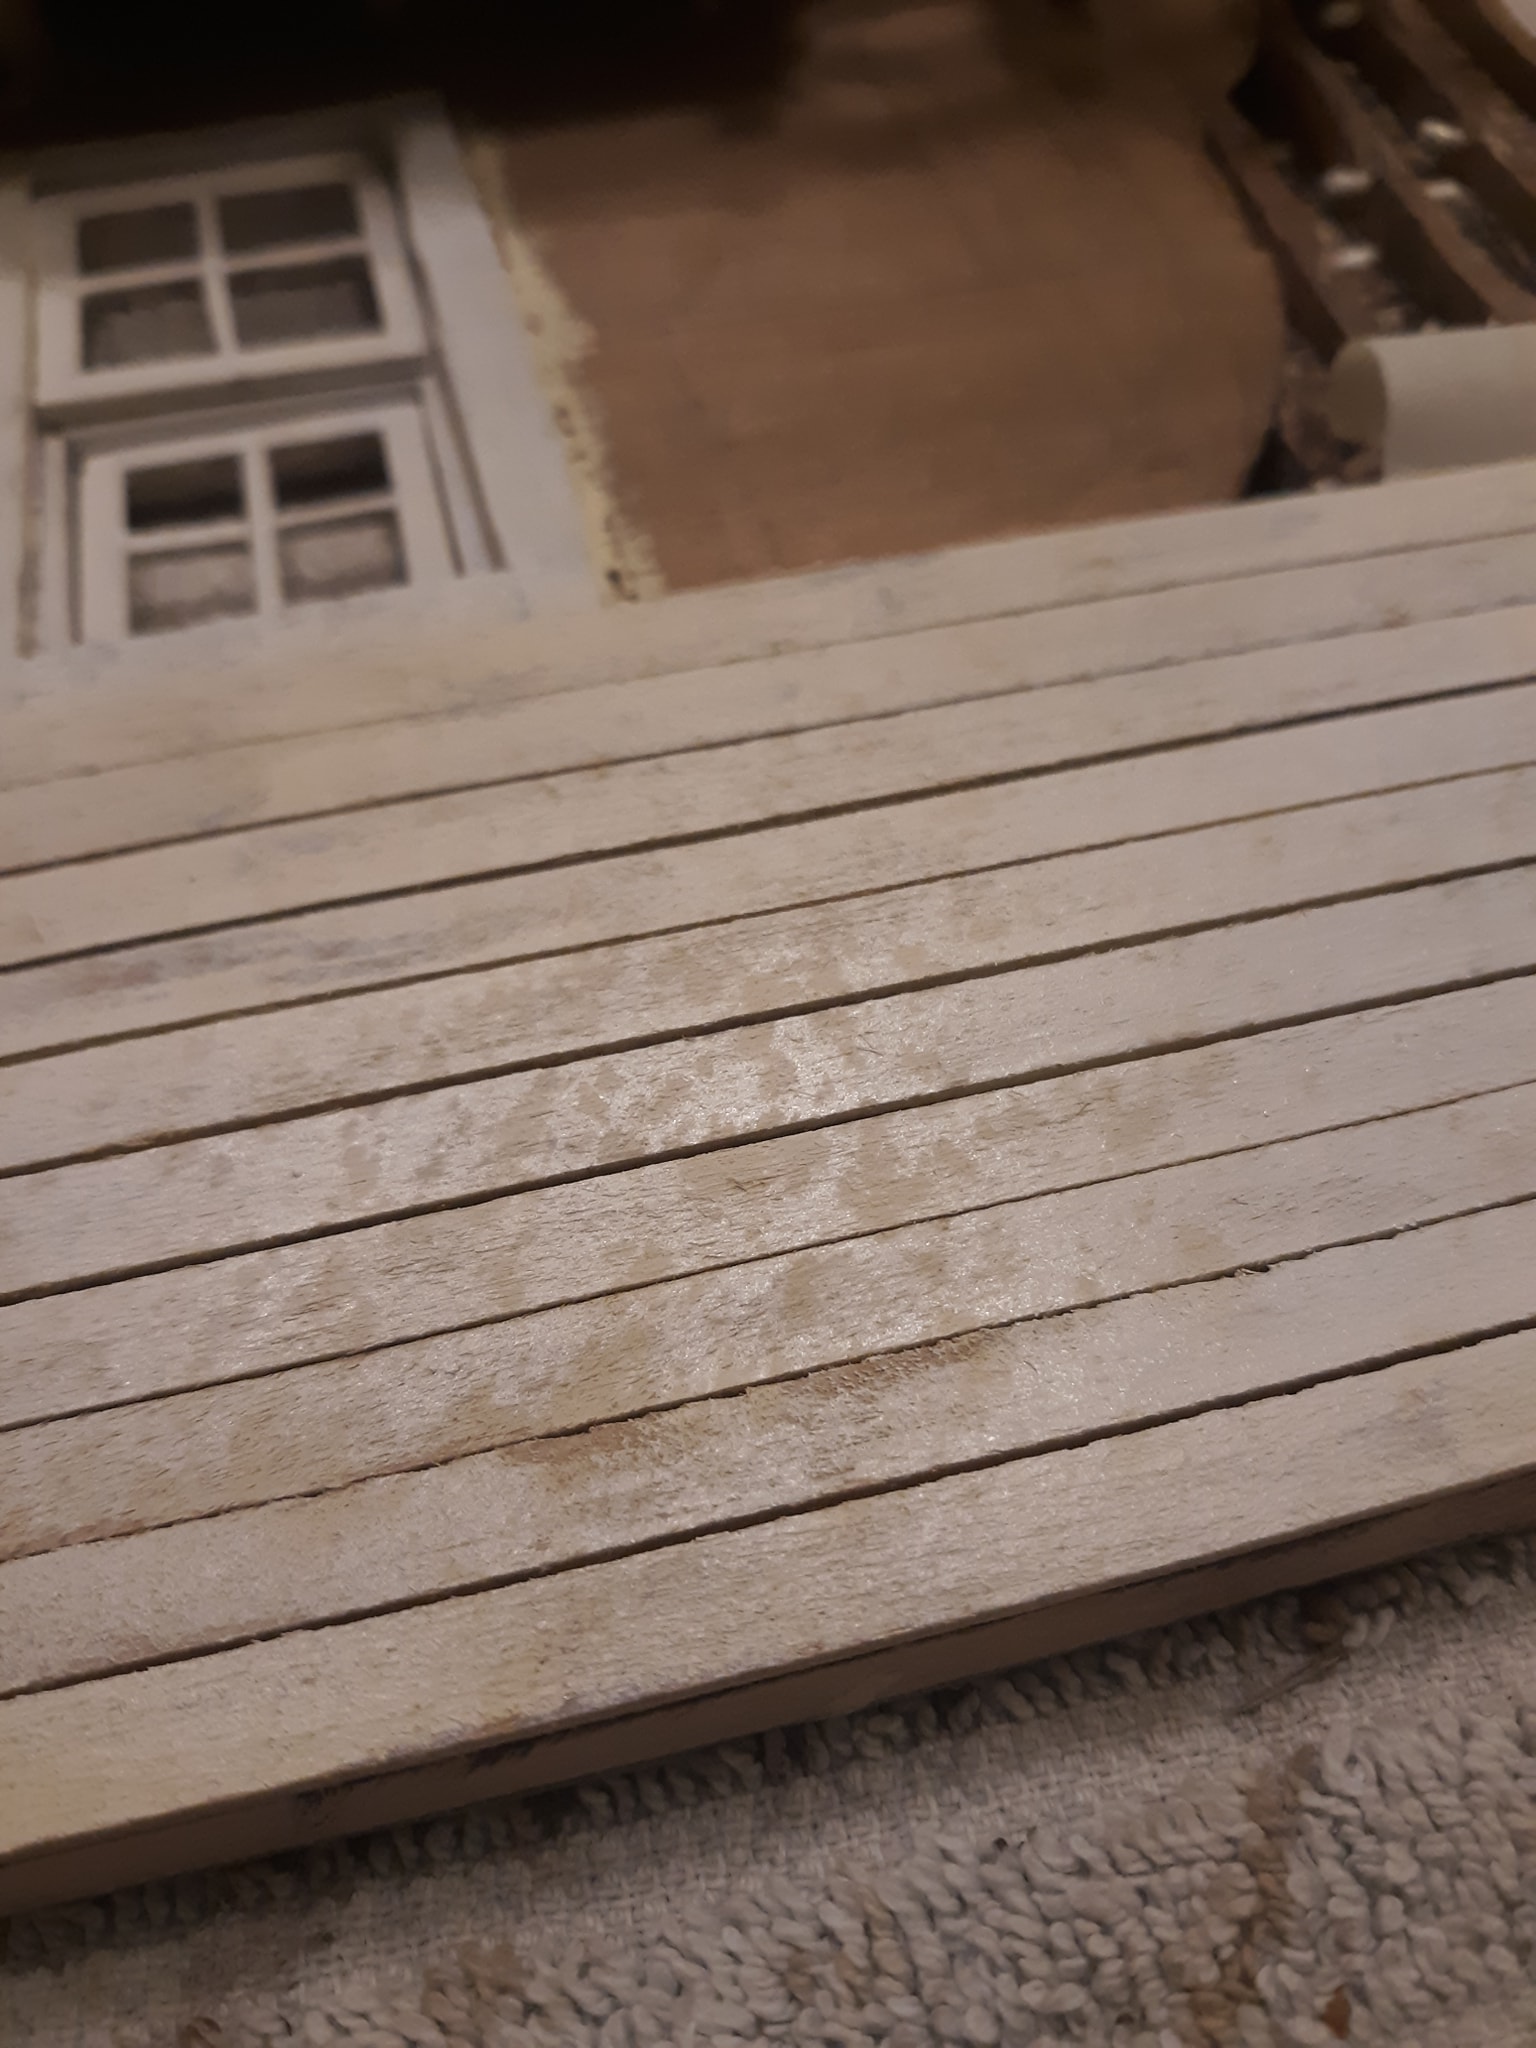
Just stains, acrylic washes and some chalk dry brushing. We now have our house's siding, all the way to the right rear water damage. I was going to do paint chipping instead, but this seemed more realistic for the era I'm going after. I'll do chipped paint on the next one. Salt weathering works so good for this effect.
-
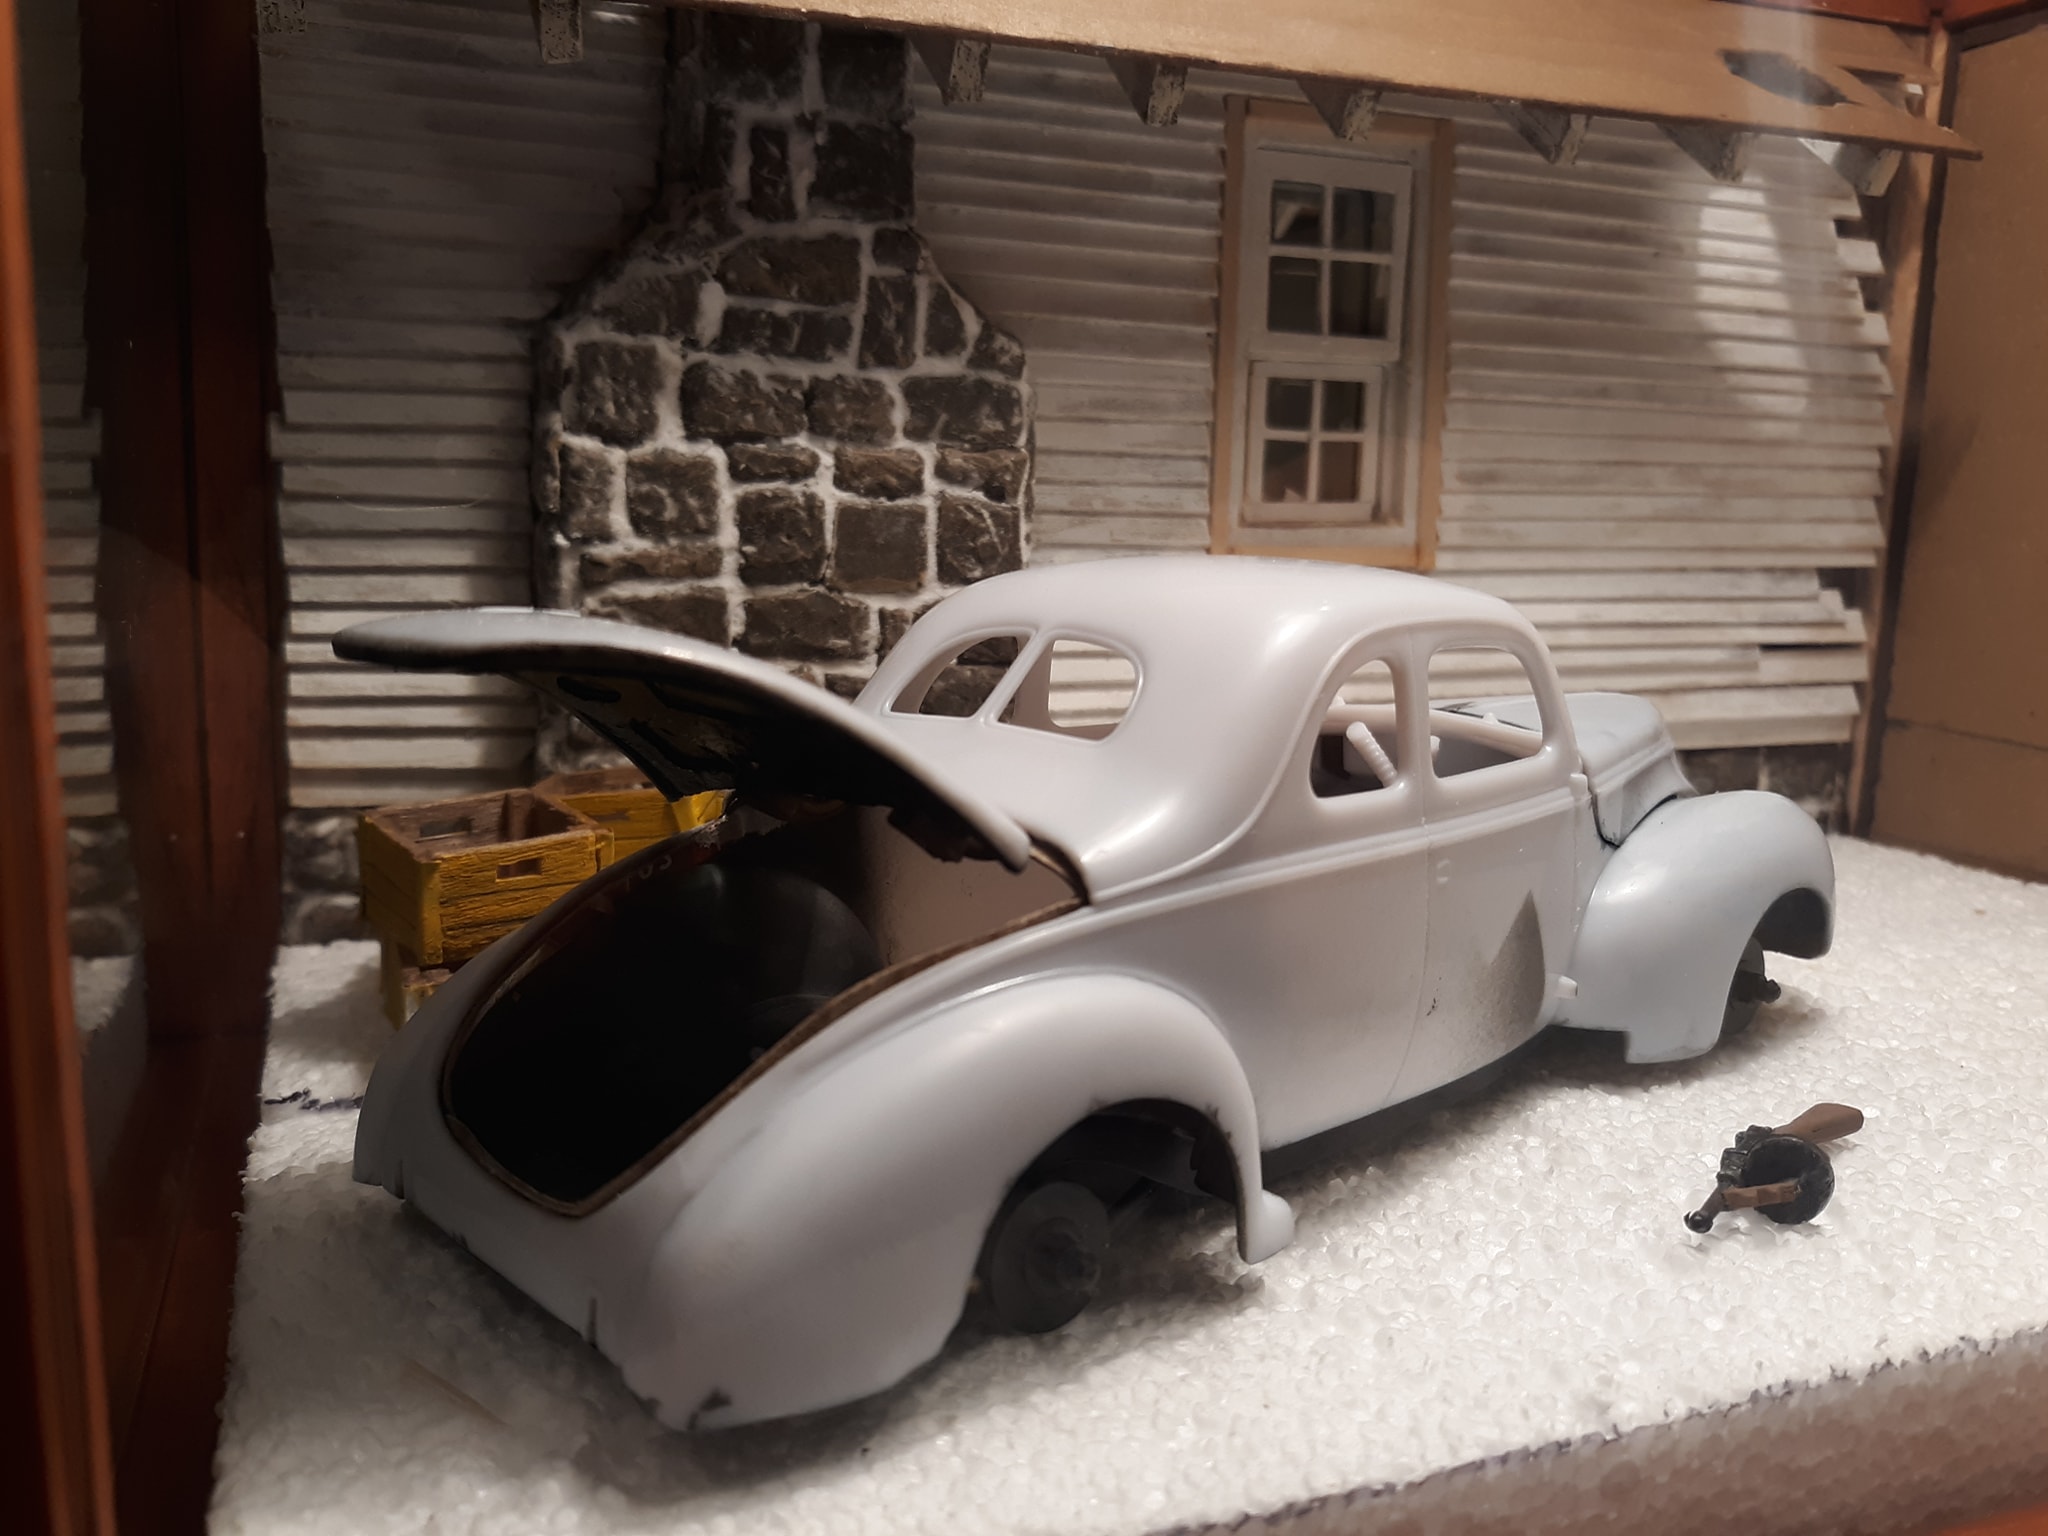
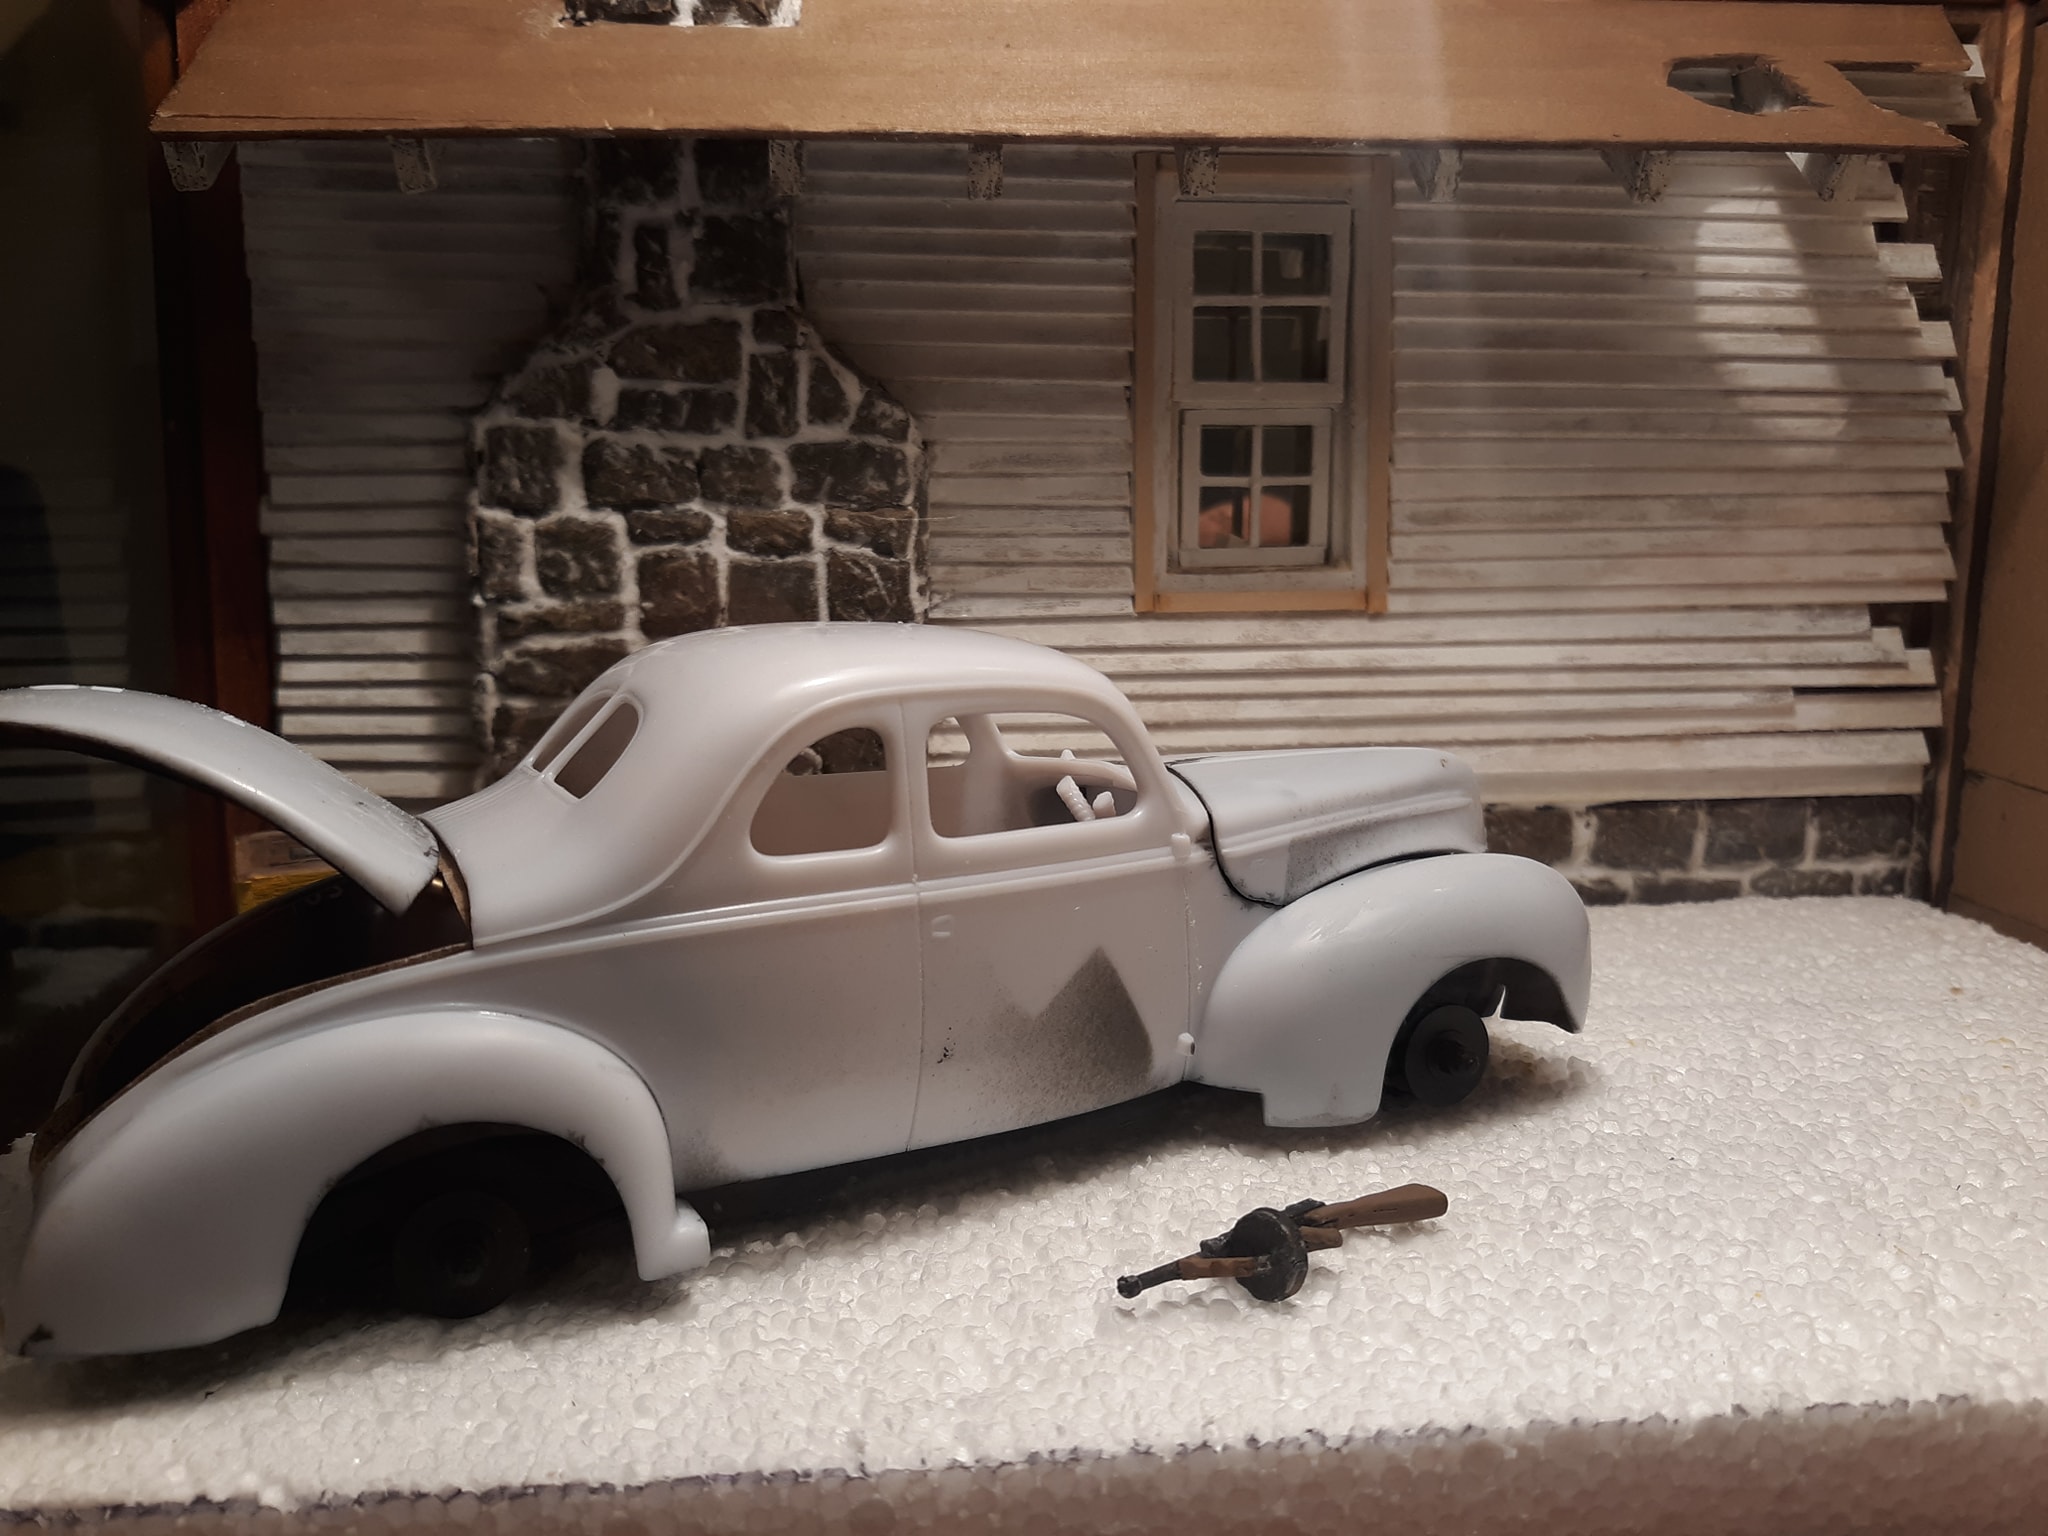
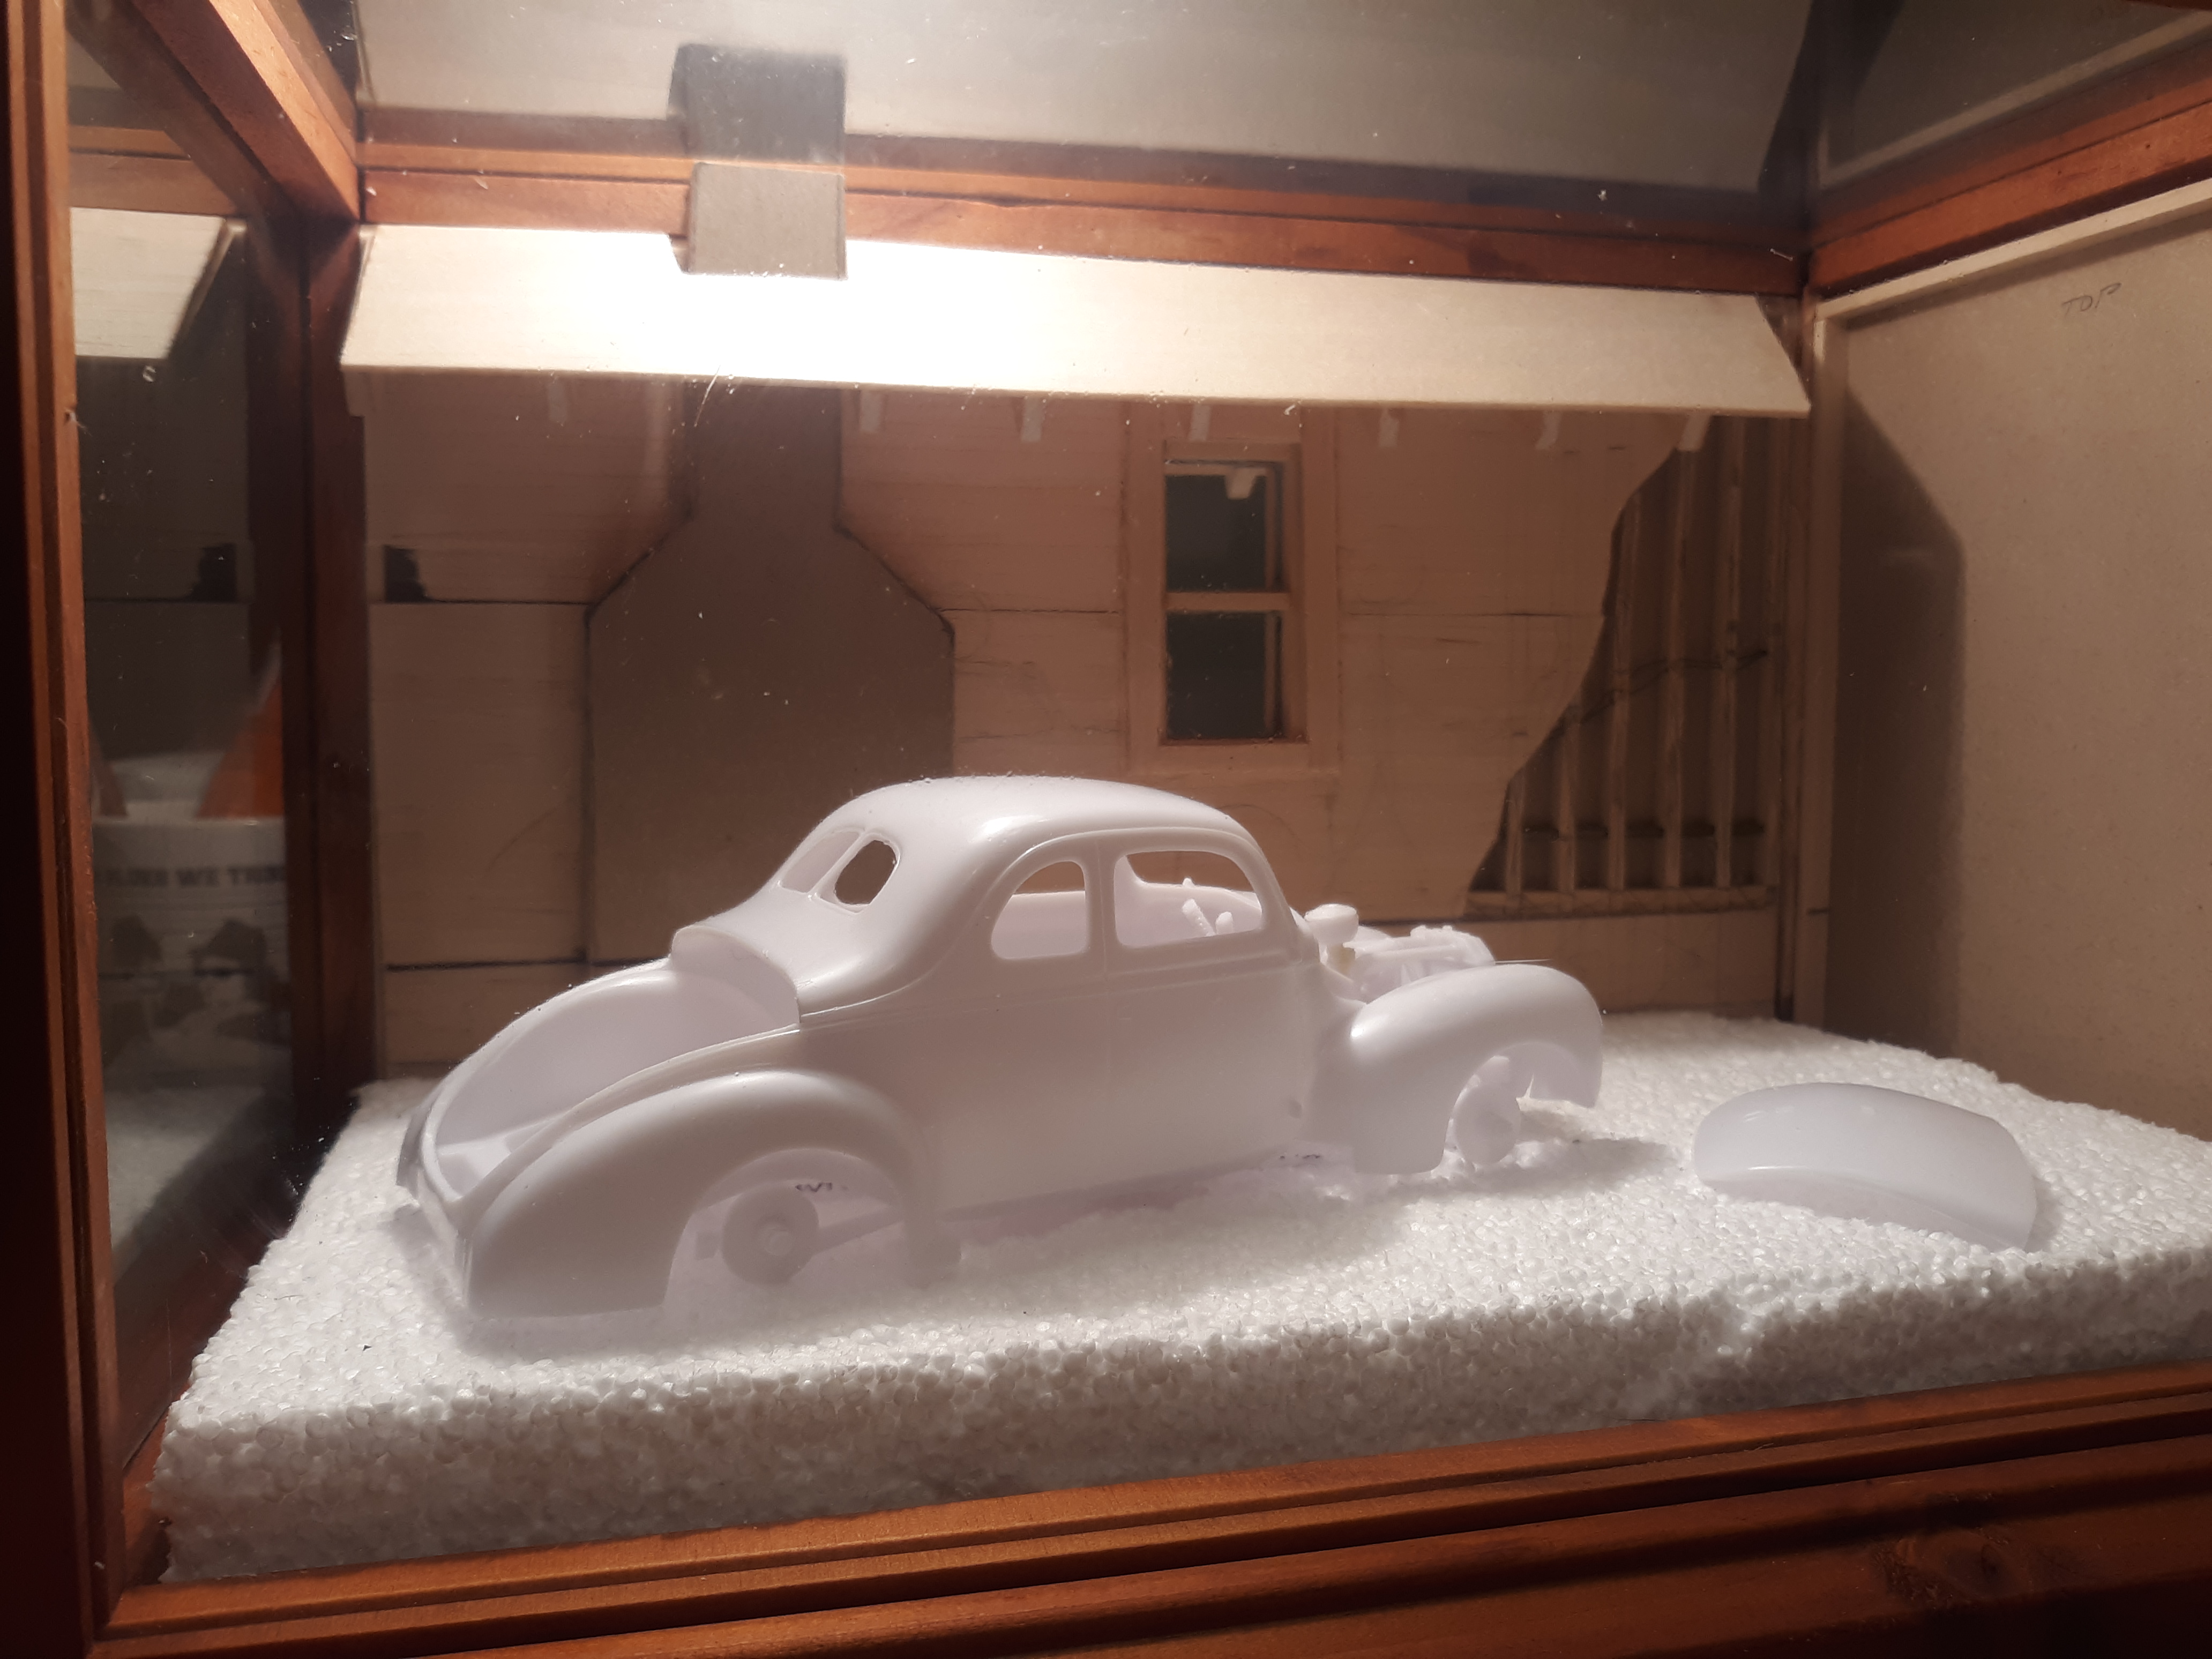
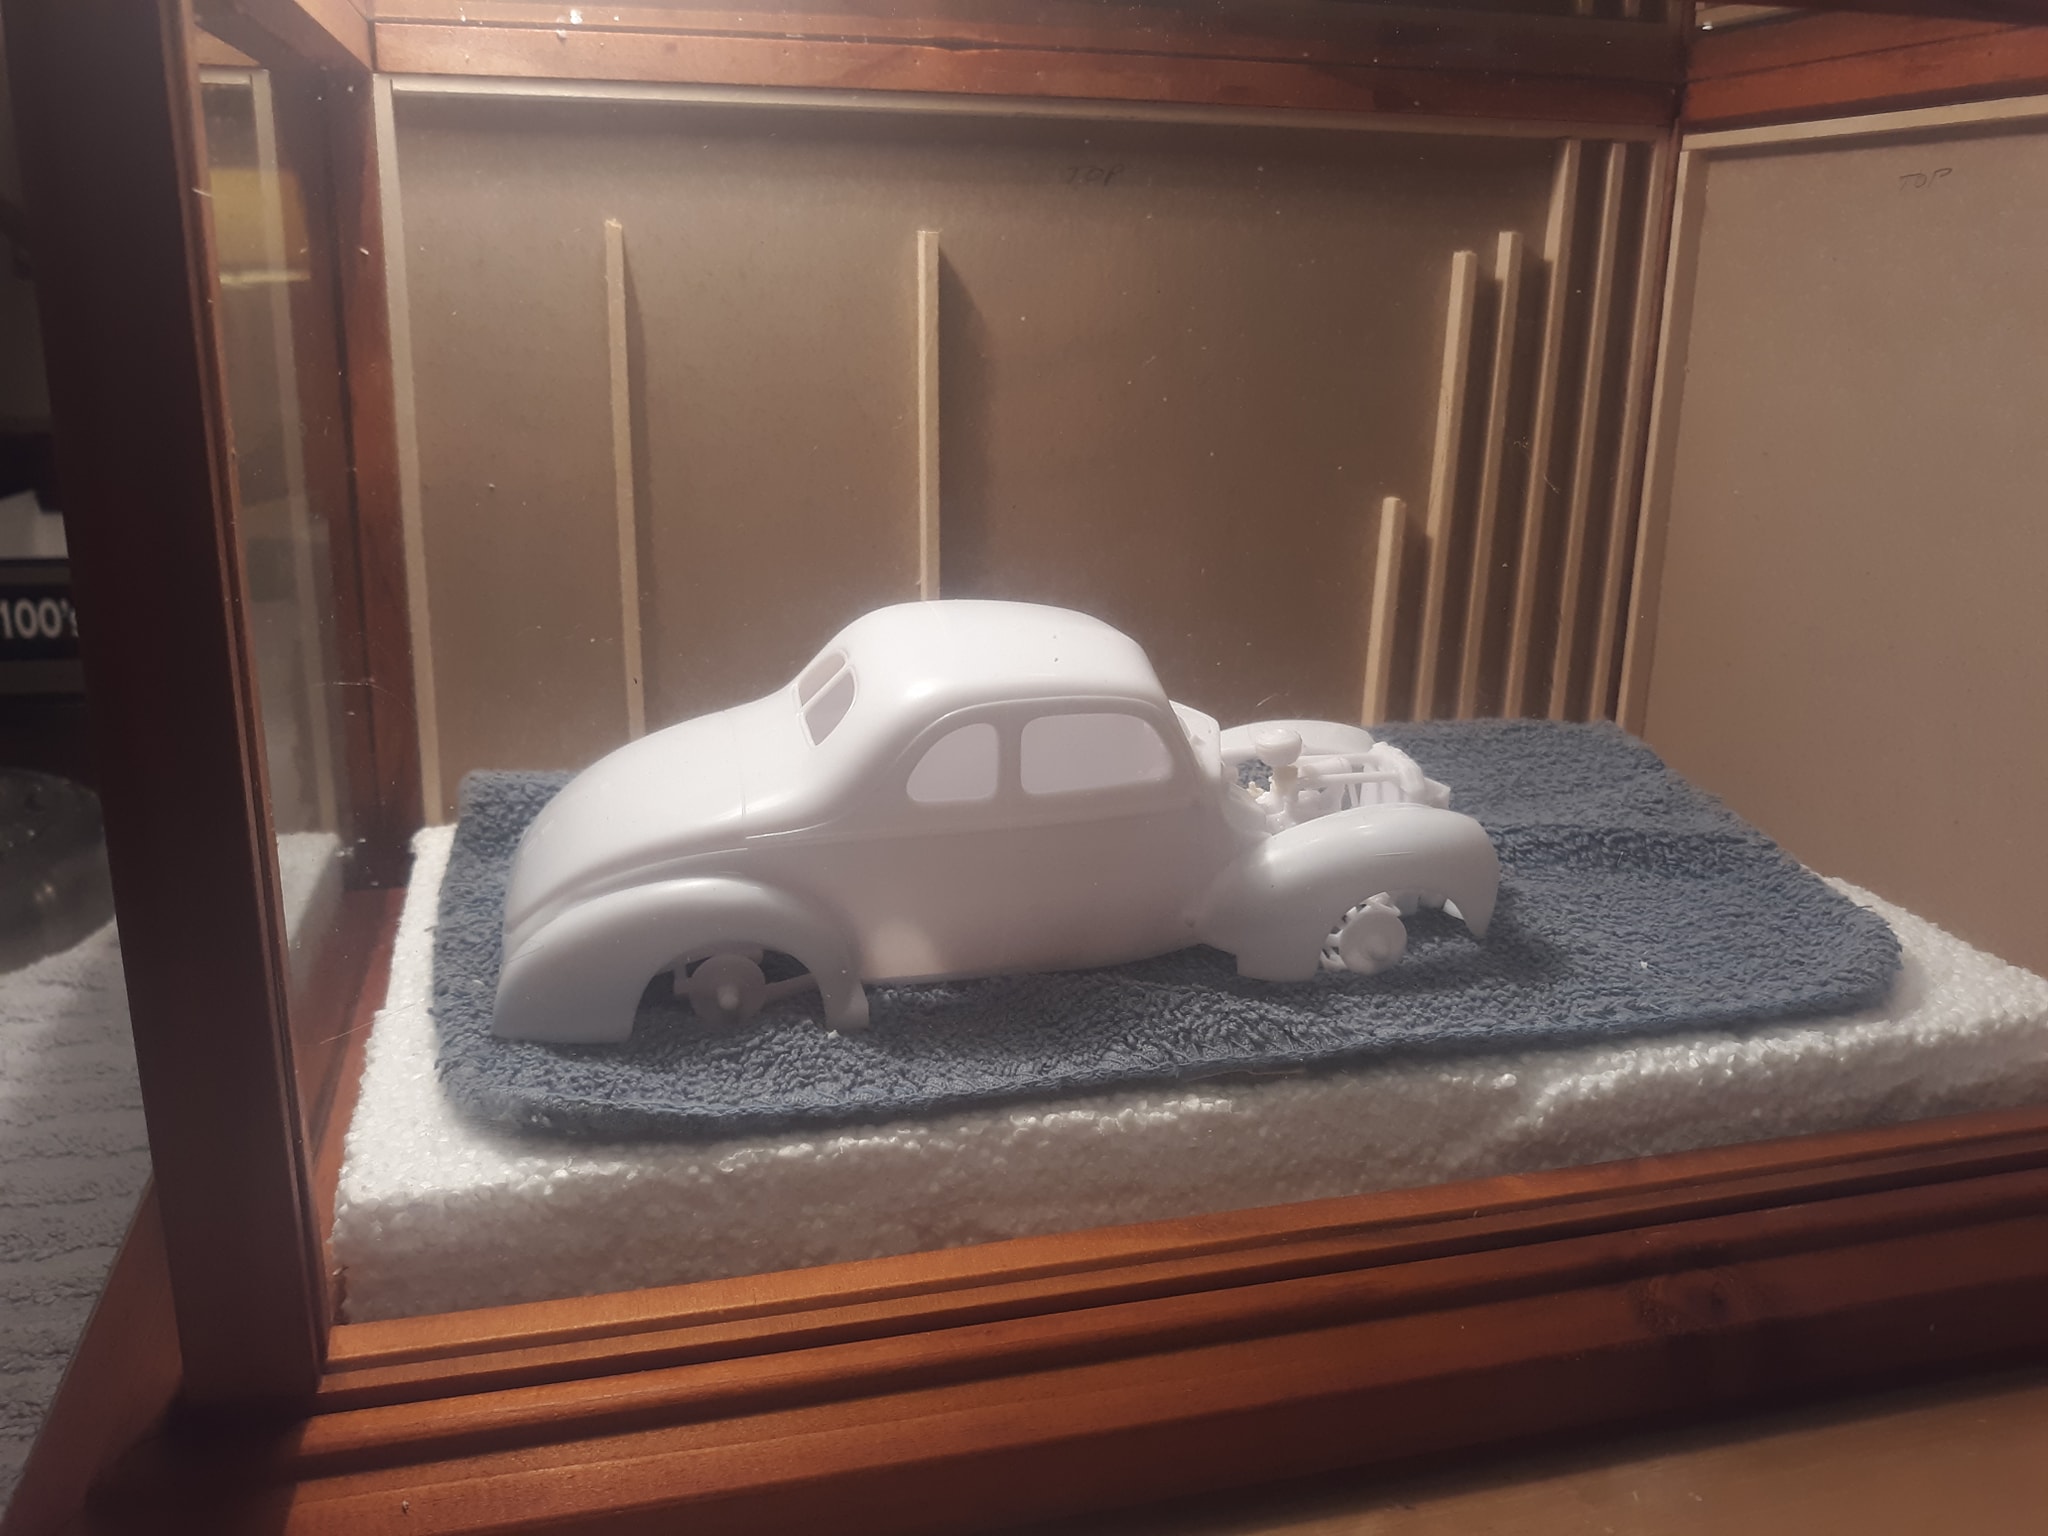
Some shading, some weaponry, and some headlights for the car.
-
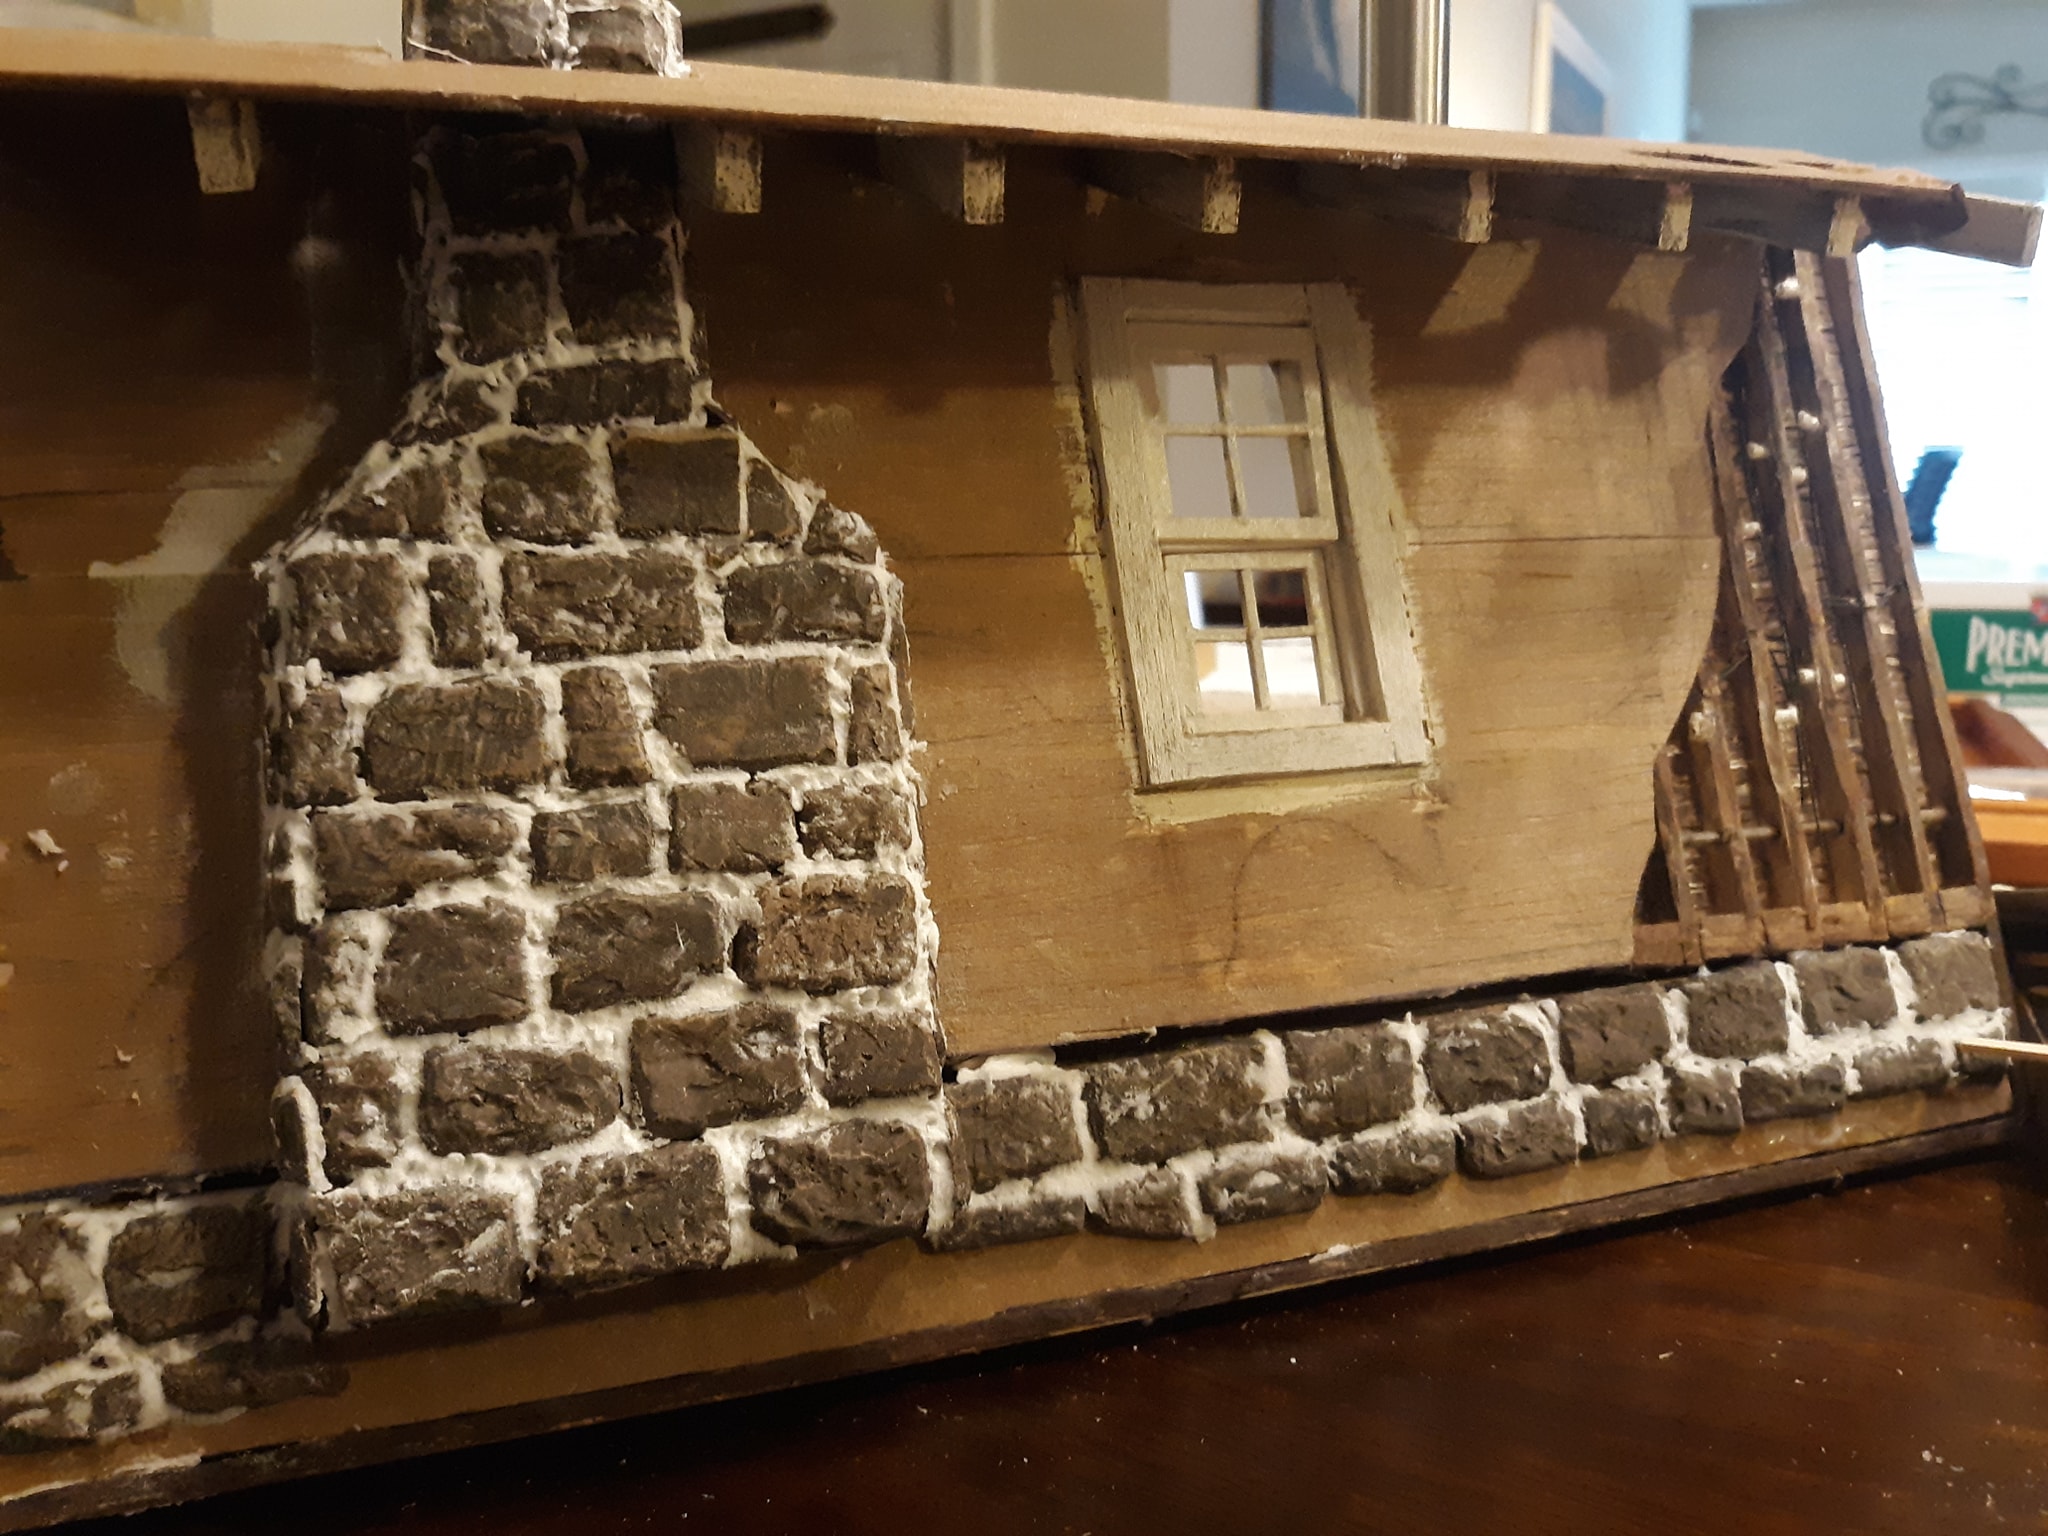
Interior studs, pipes, insulators, wiring, and lath and plaster interior walls.
-
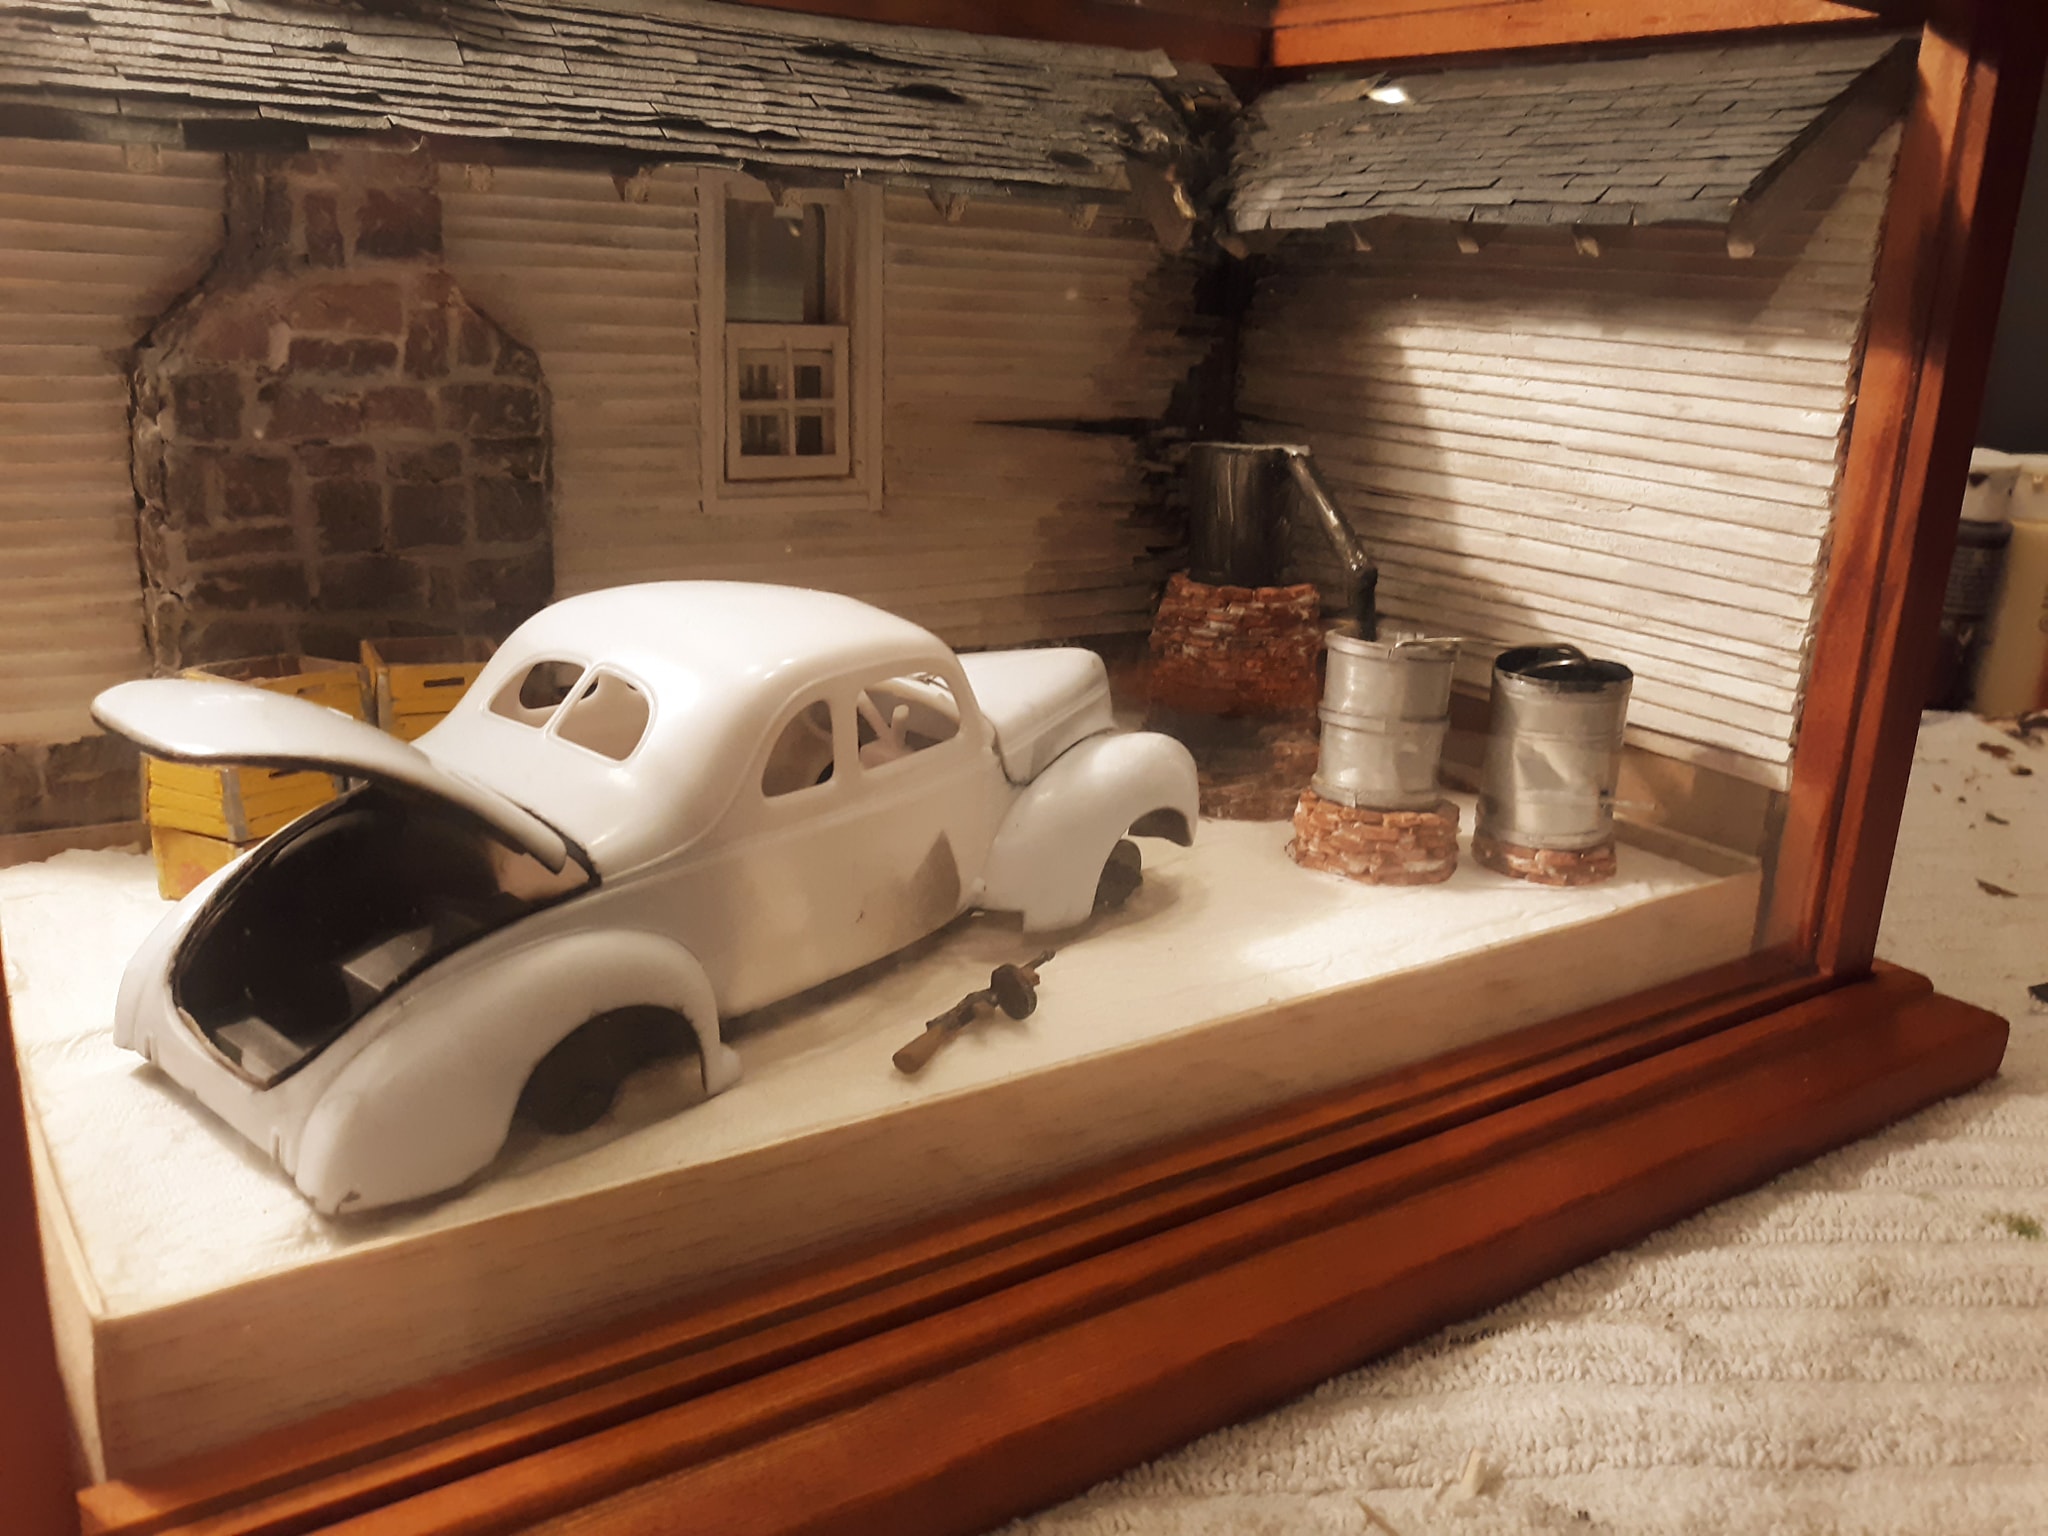
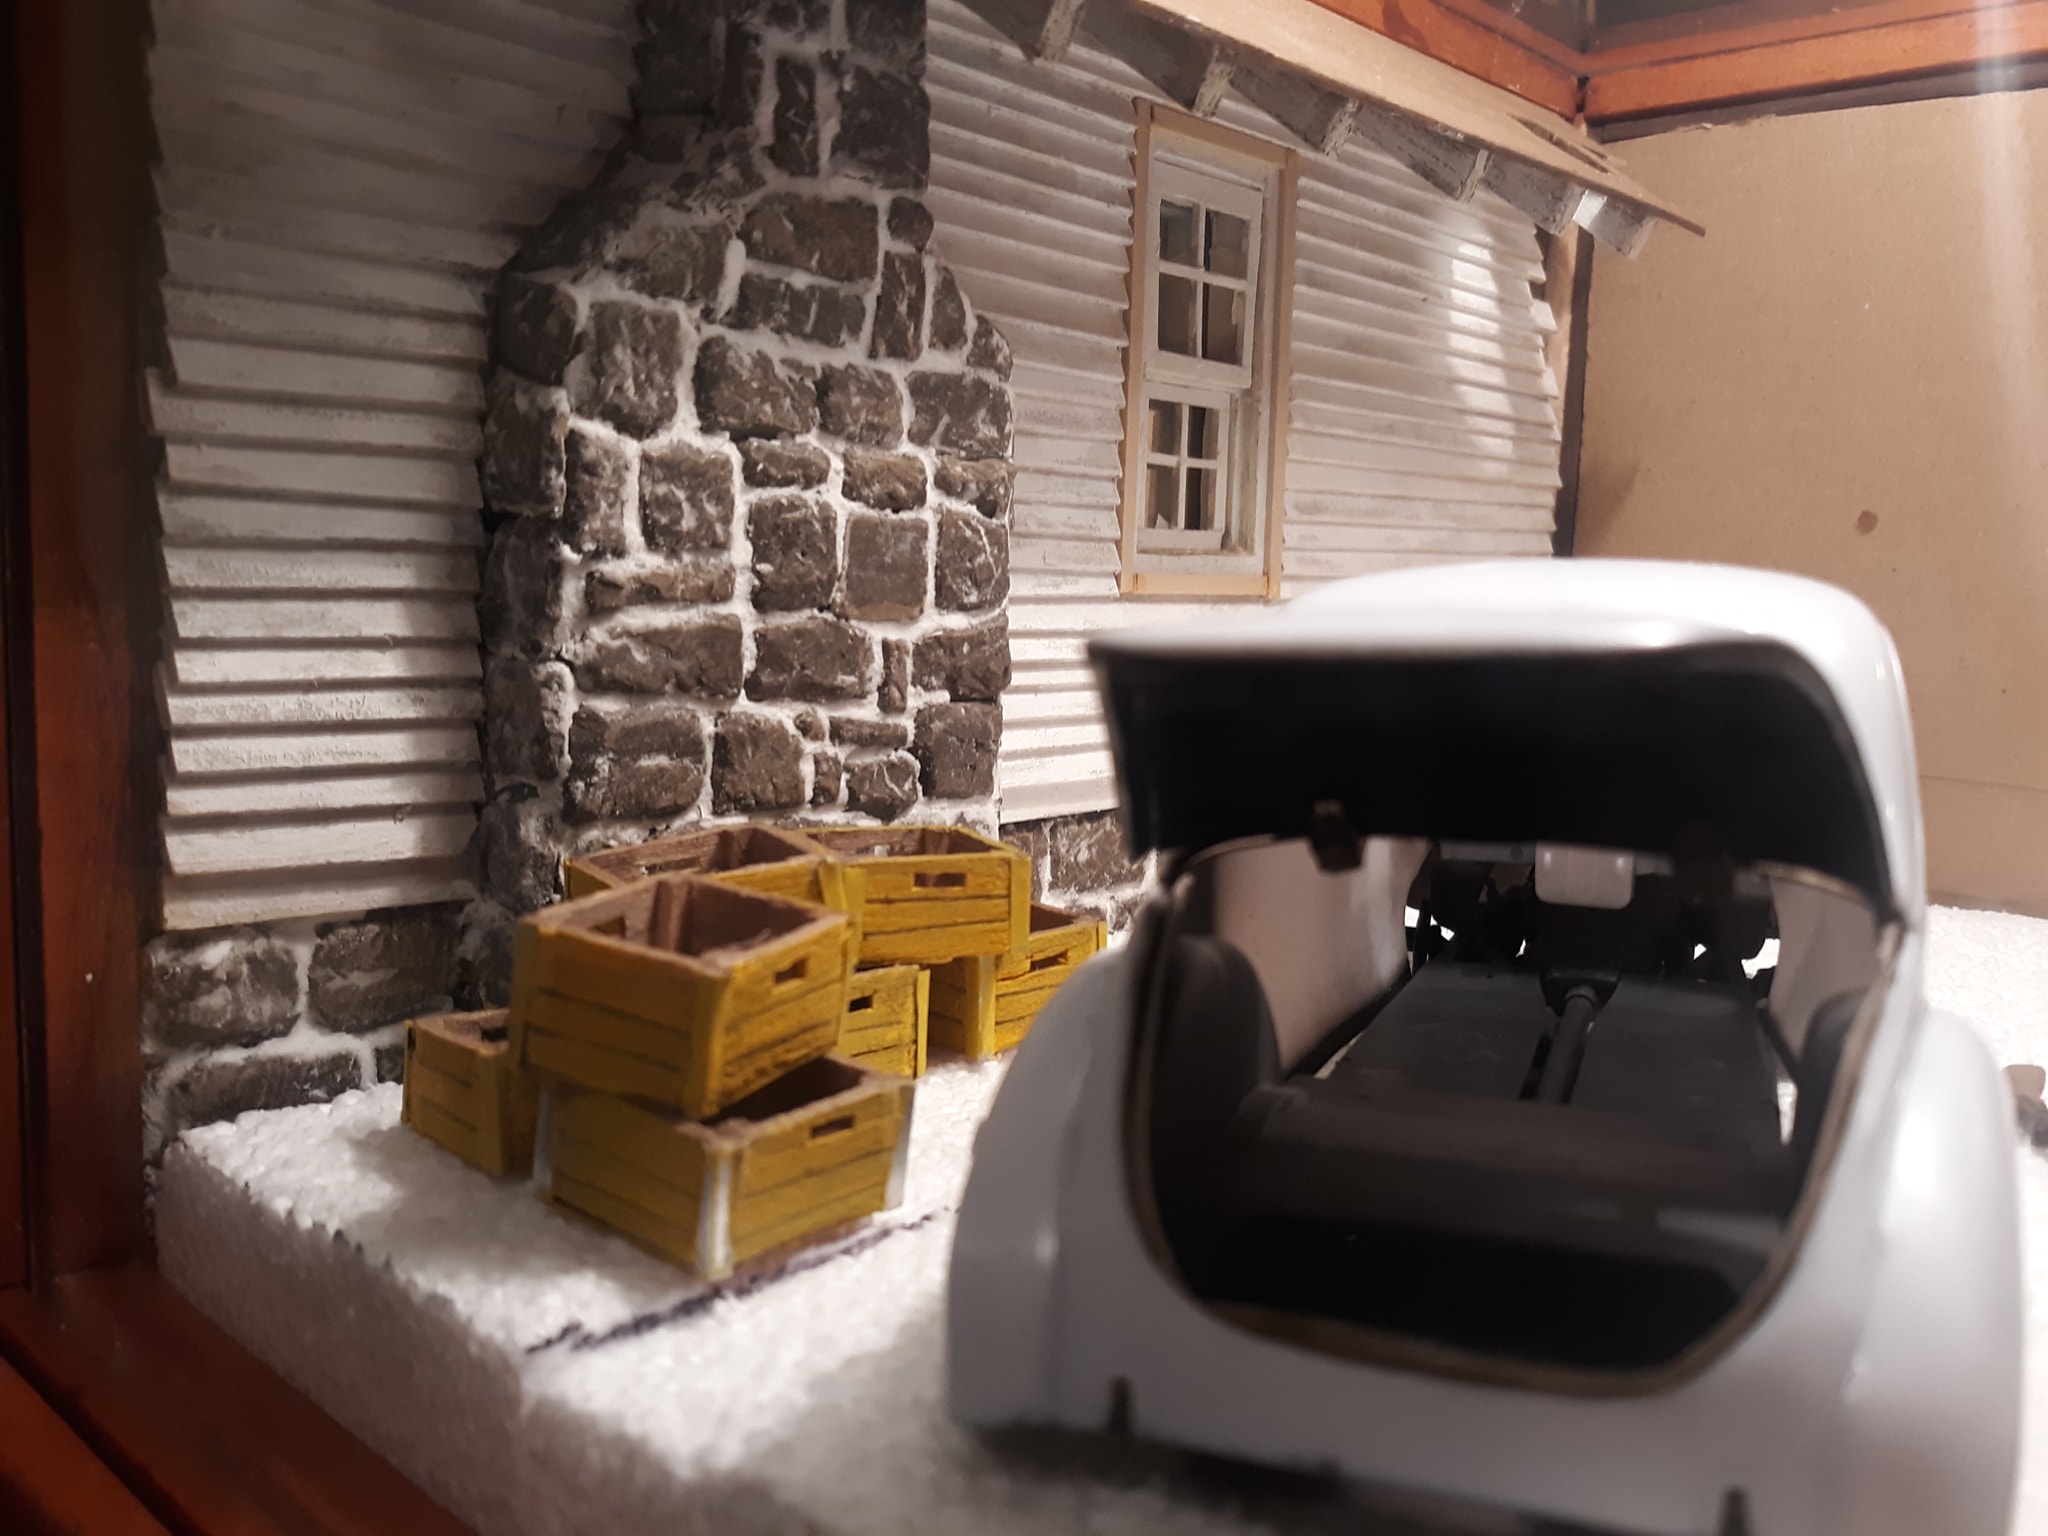
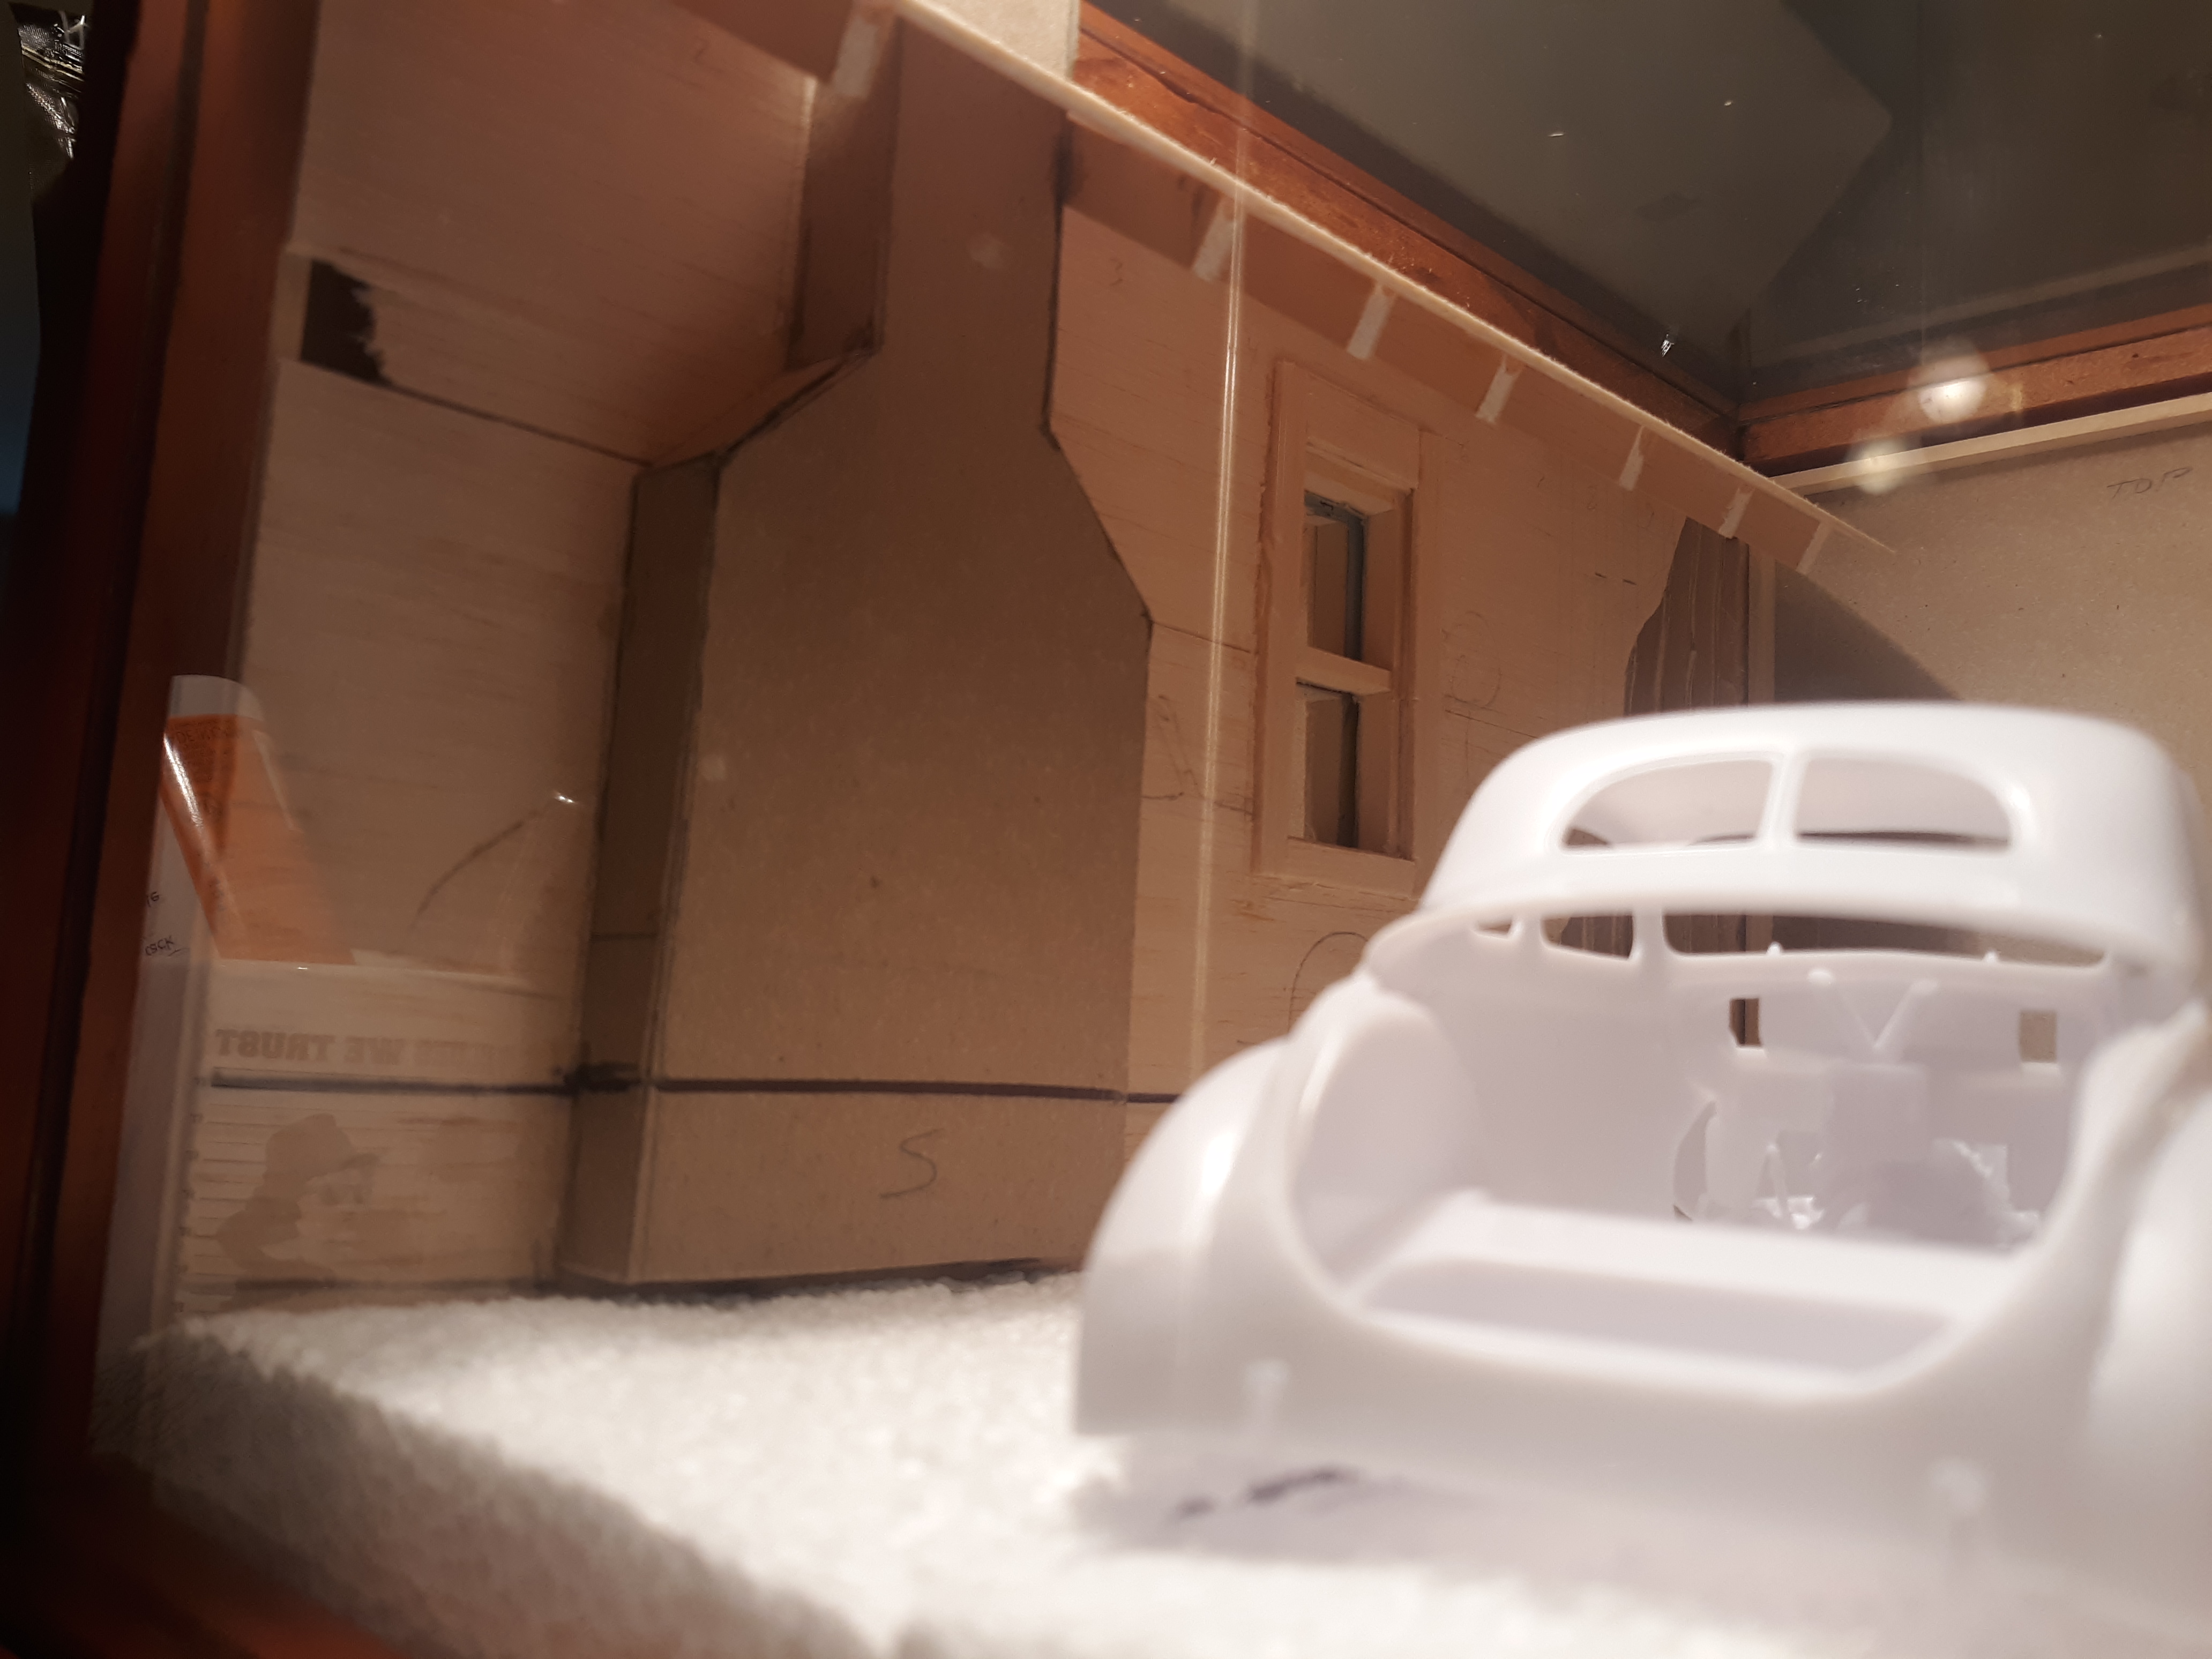
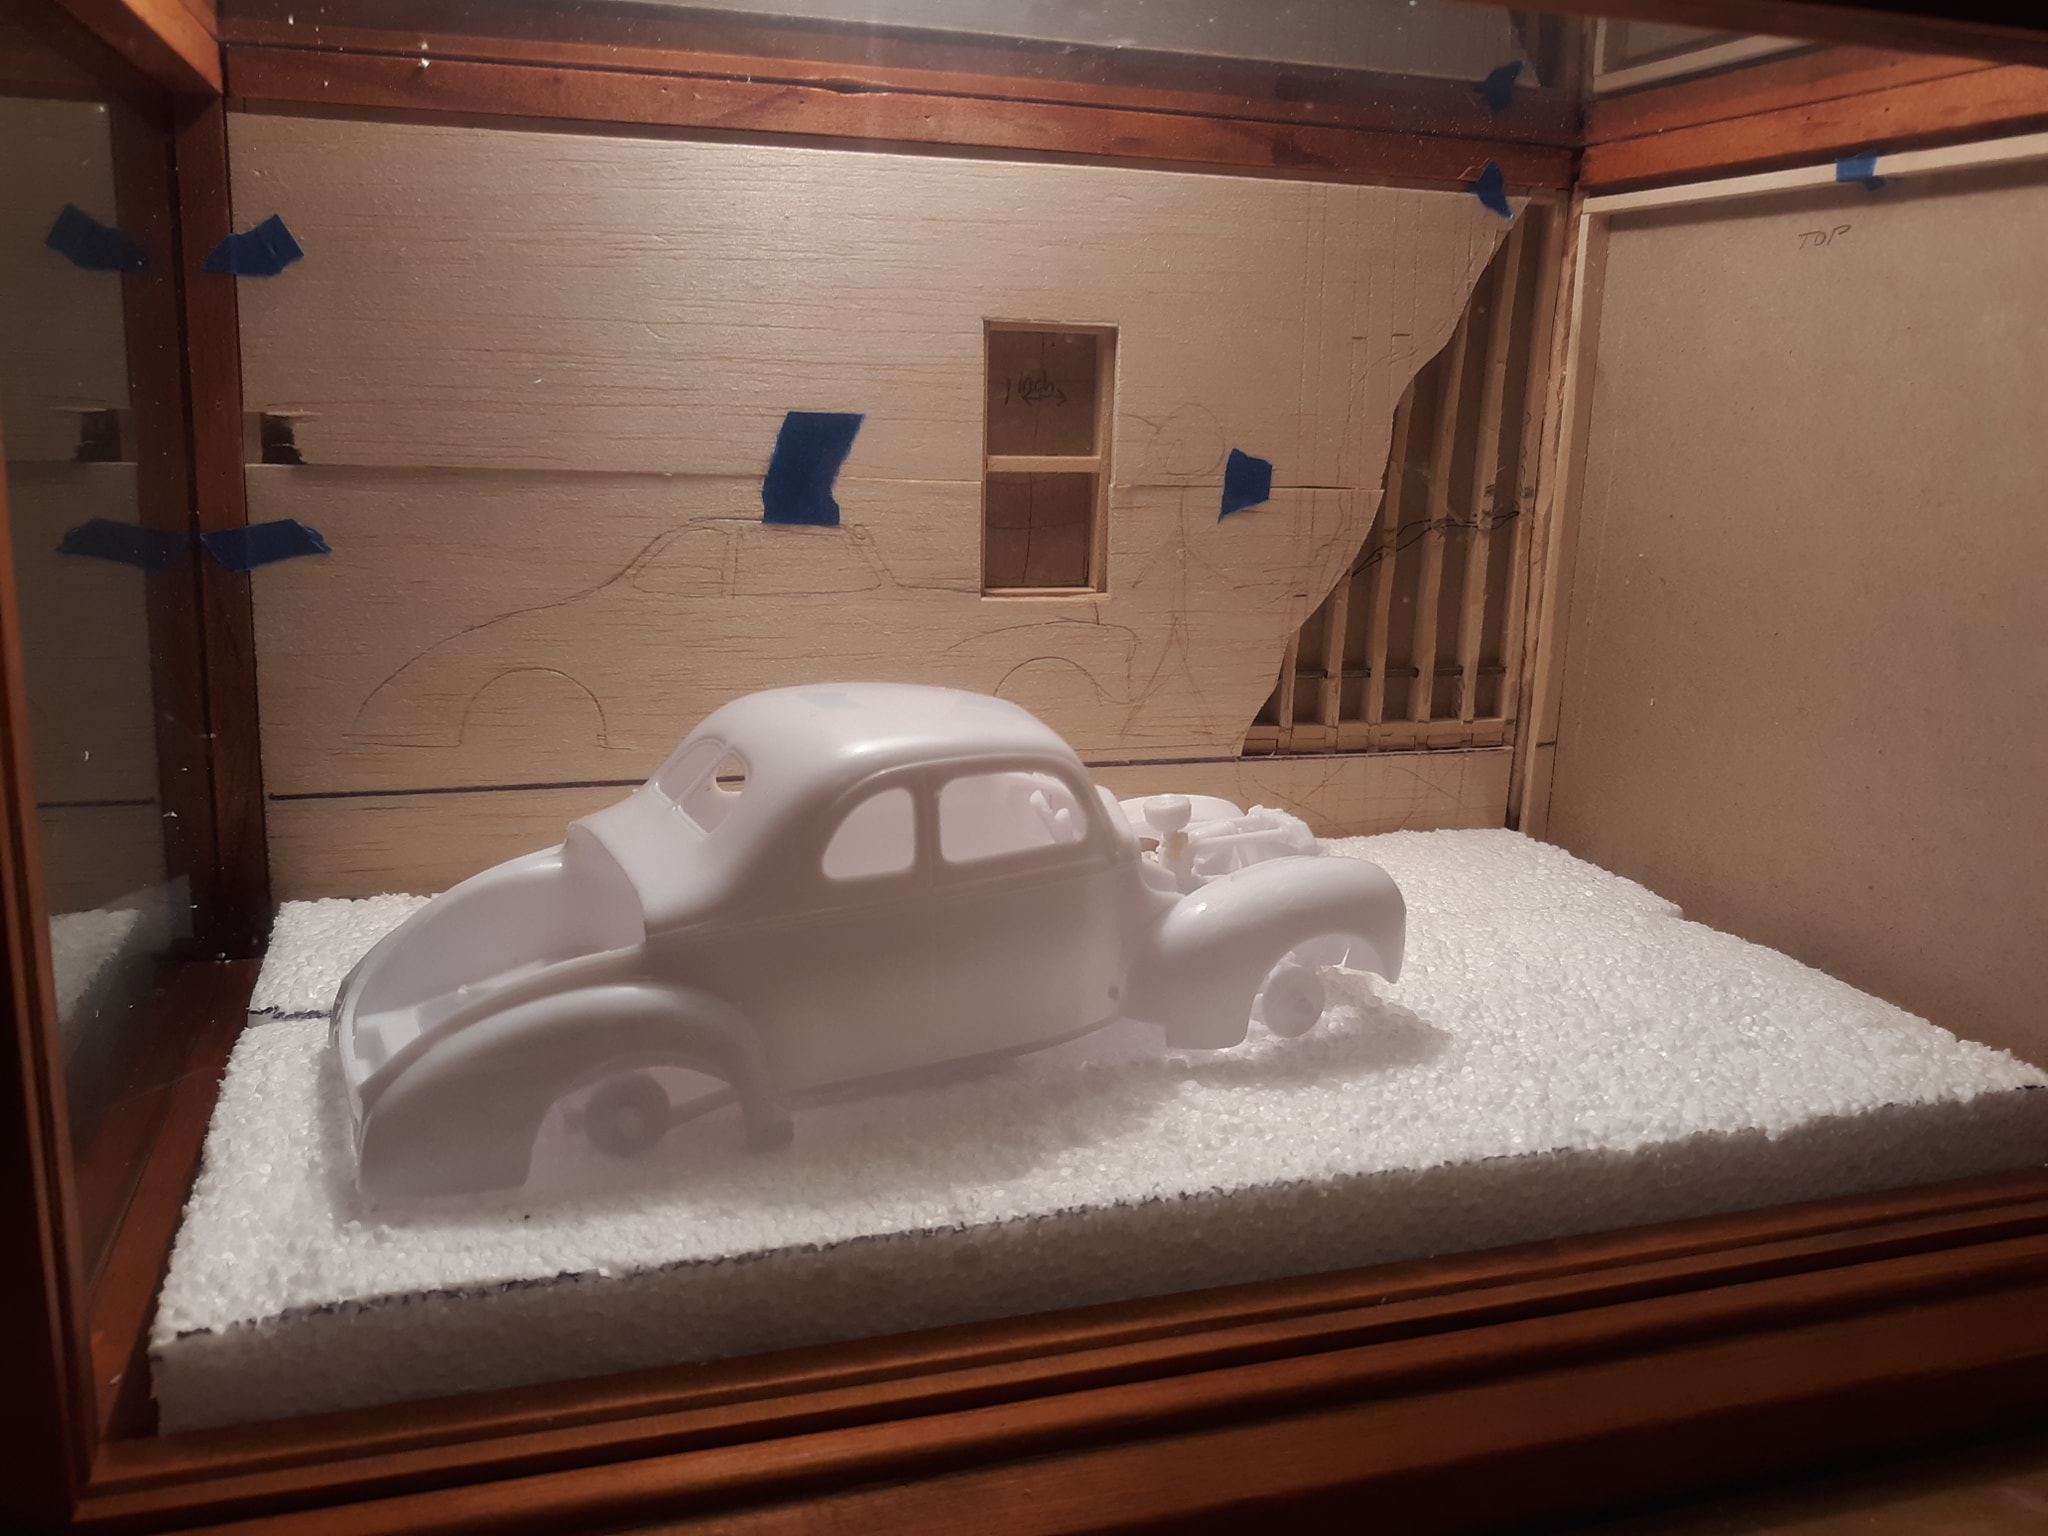
The roof overhang begins. The trunk cut open on the car as well. Next to her older sister M1.
-
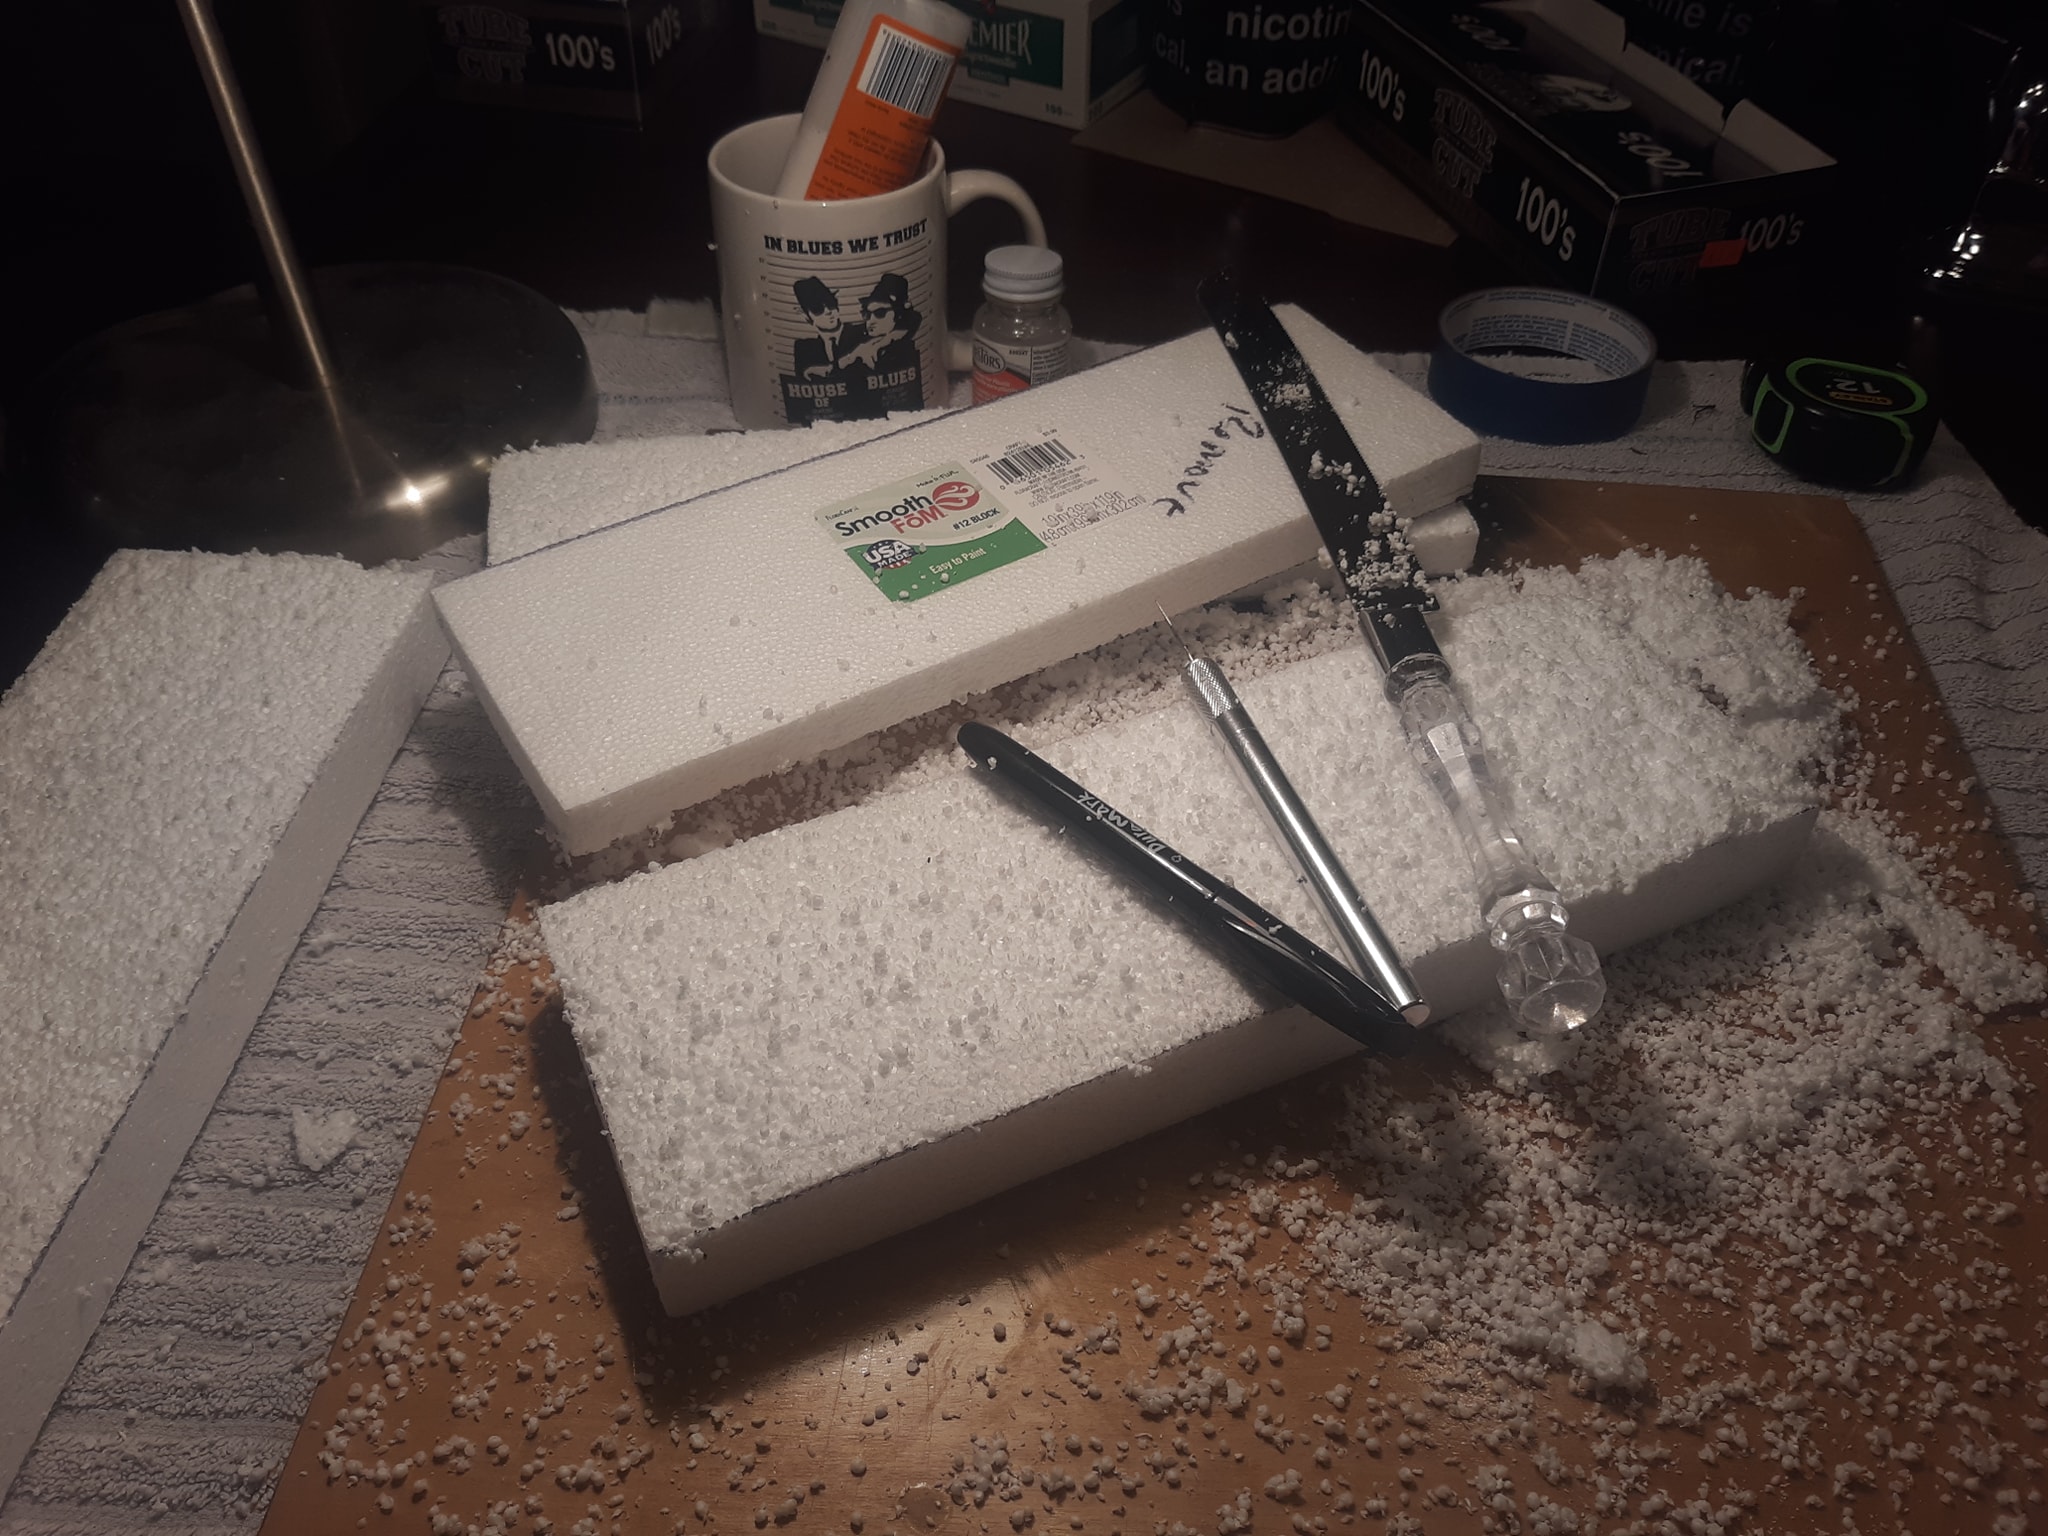
We have the beginnings of walls! We have a base now after a couple hours of the messiest material to work with, a vacuum, and the shriek of squeaking styrofoam. (The cloth is just for a color difference so I can see it). This build will slow a bit now as I await some goodies from an excellent model railroad business in Canada. Well, that's it. The backdrop is now sealed up. I left a time capsule note in the wall in the hope that someone, someday, may find it somehow and think of the person in the past who built this. The attempt of creation of a new idea I learned about a few months ago: convincing liminal space. "The word “liminal” comes from the Latin root, limen, which means “threshold.” The liminal space is the “crossing over” space – a space where you have left something behind, yet you are not yet fully in something else."
-
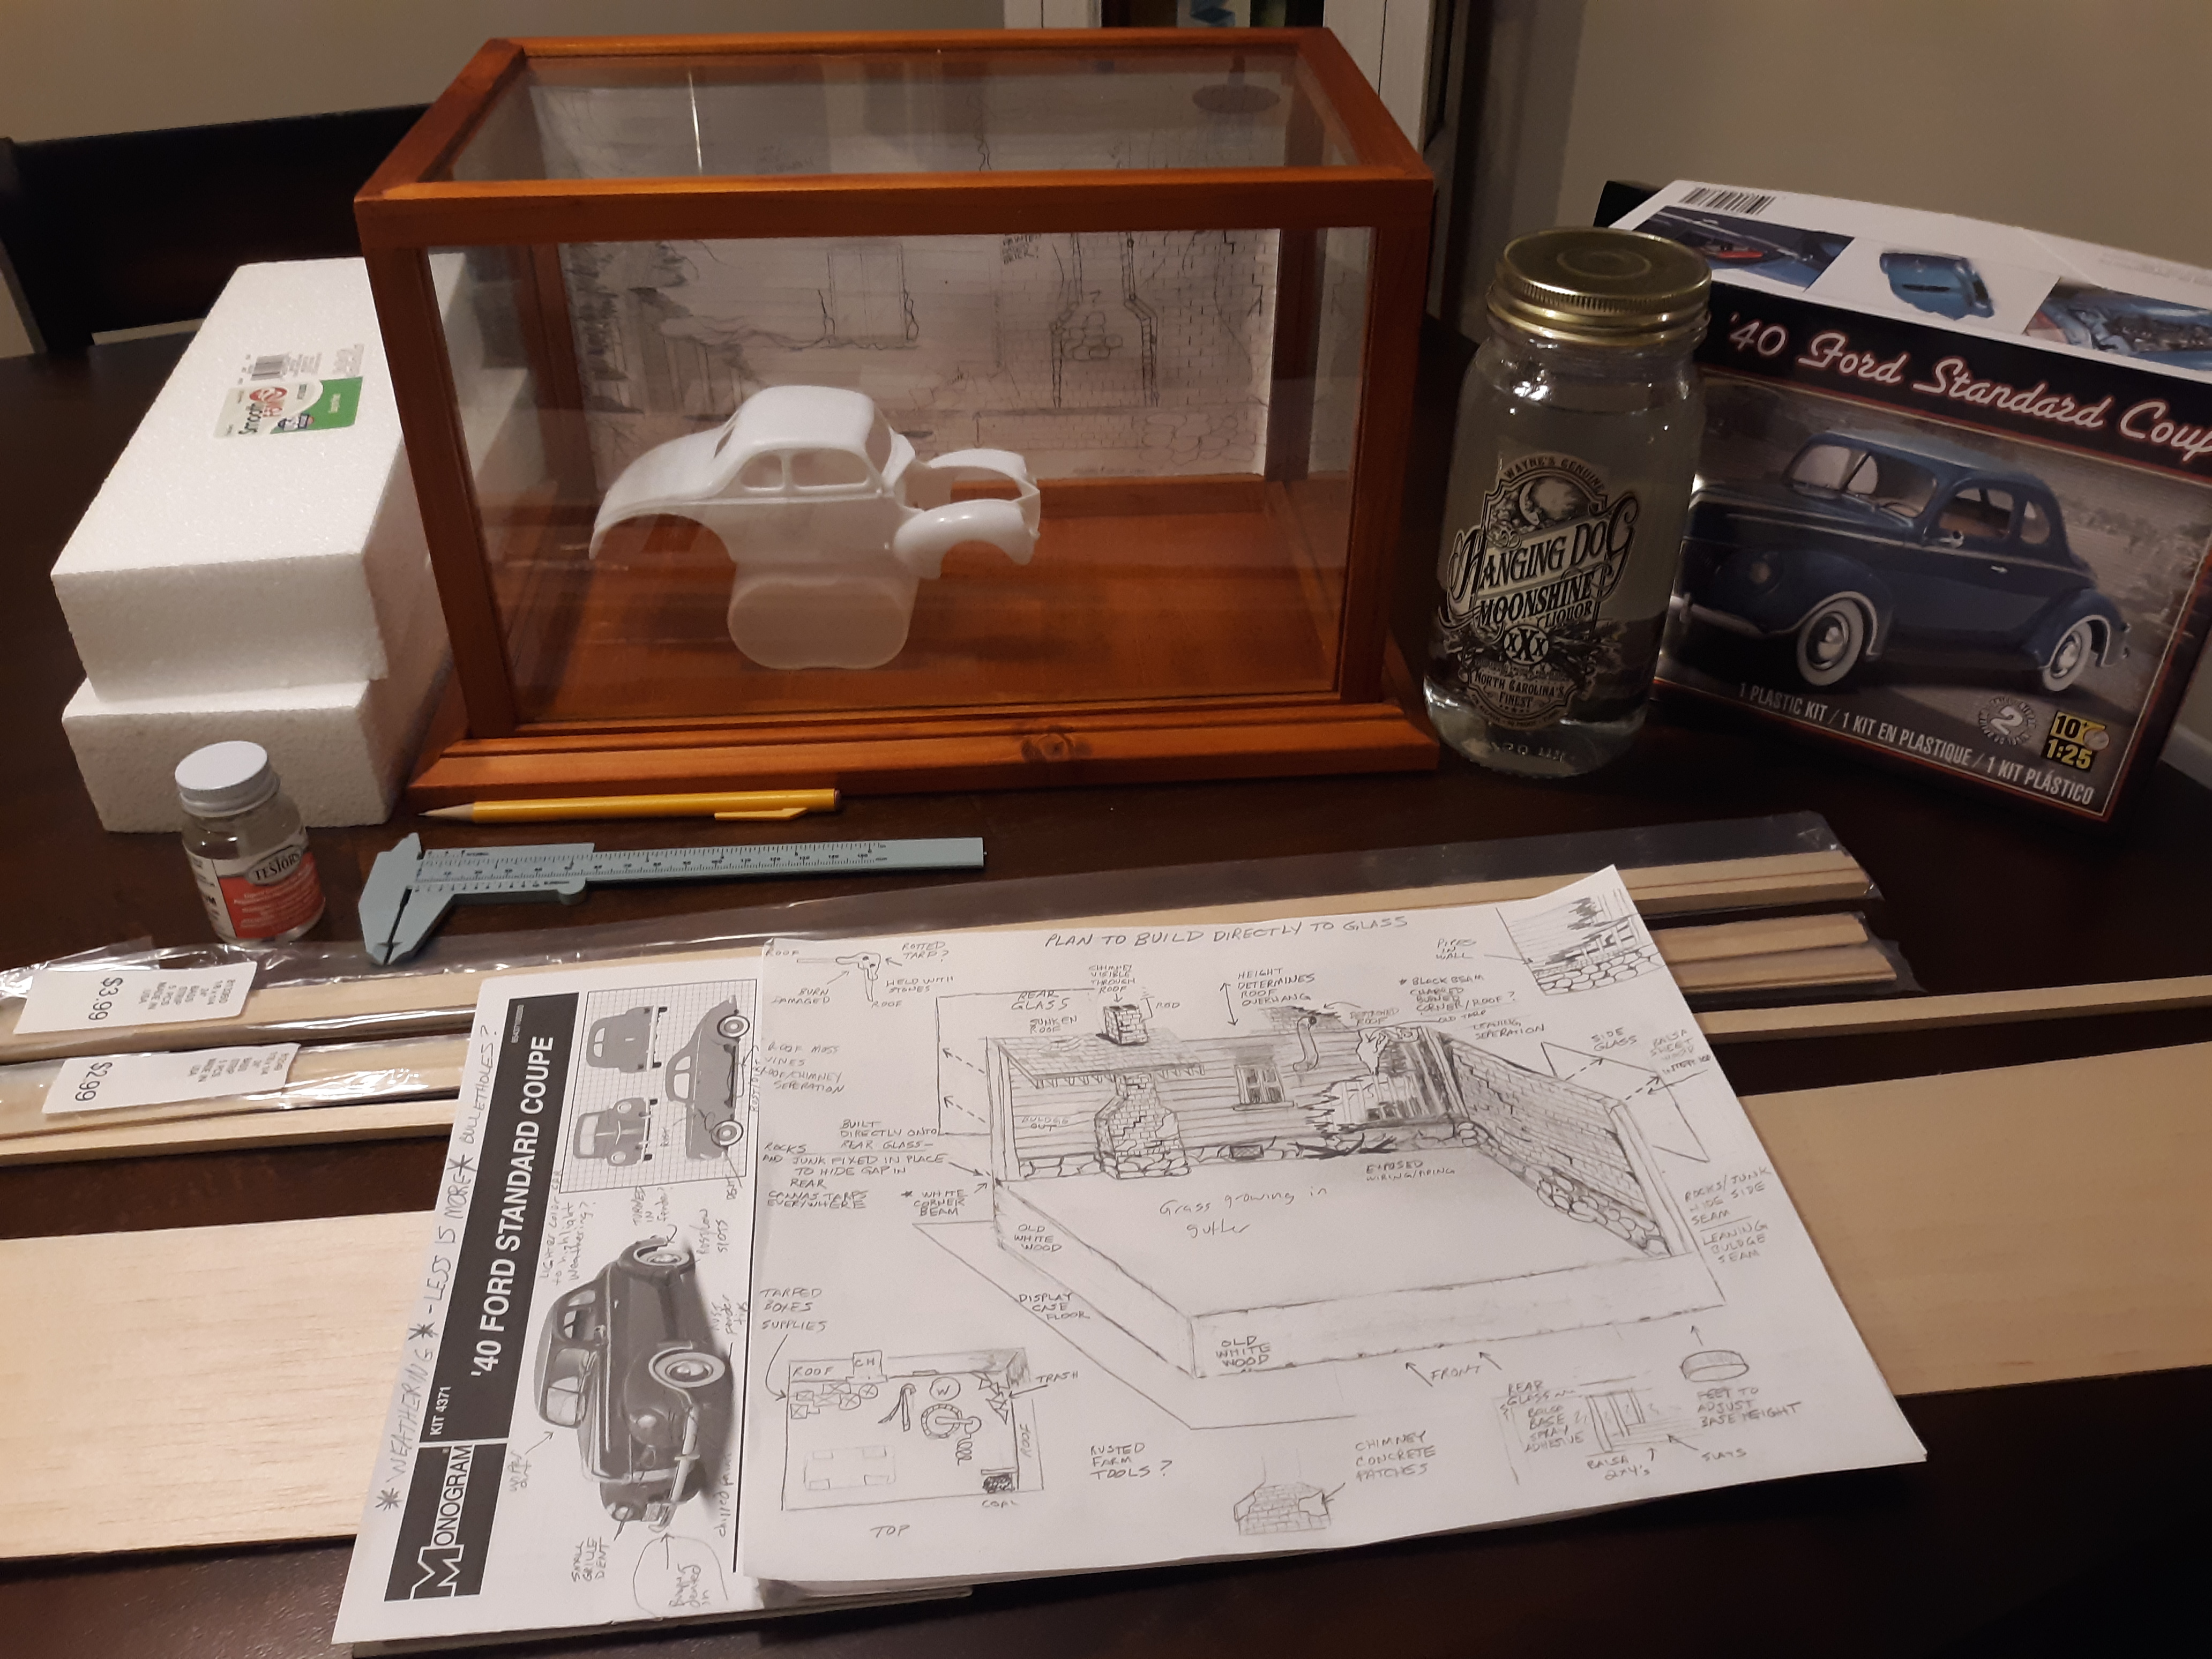
Sorry folks, I somehow screwed up my original thread on this so I'll give it anther go. Moonshine 2 has begun! I bought a Mason of Hanging Dog moonshine as the beverage of choice for this build (I enjoyed Junior Johnson's Midnight Moon on the first diorama), and there will definitely be frustrating moments as we go that will require nice, icy cold 'shine lemonade breaks. So far I've got 7 pages of idea plans but not all will make it to the finished model. I plan to build this in 4 main pieces: backdrop, side, base (with still), and car. Each one a separate small scene in itself. Then, if I've planned it right, it will all seamlessly join together. The backdrop and side will be built into the case itself rather than a stand-alone structure like I did on M1. This also frees up a lot of space in the case! This is Moonshine Number One. My plan was to build a shine operation different than this one in many respects. The beginning pile.
-
Delete.
-
Gentlemen, good day. I am taking a hard look at Model Factory Hiro's 1/12 K670 Ferrari SF71H. I see it comes with white metal parts. I am familiar with die cast zinc rot, but I have never worked with white metal parts on a model. I am wondering what this white metal is made of. I would hate to pay $600 for a kit to have to later worry if the white metal parts may be/are subject to zinc rot. I've found the general concensus to be that it is pewter, similar to fantasy figures, but cannot confirm this. Anyone have any input on this? What has been your experience? Any info/advice welcomed. Thanks in advance! SR
-
Hi all. I have a 1/18 Vettel F1 diecast. I want to lightly "race scuff" the tires to remove the seam and the shine from them, but don't want to remove the trie/wheel. Normally with models I do this before assembly with sandpaper. Is there a better way to do this here other than carefully by hand? I want to keep the edge between the surface and sidewall clean and neat. Any advice appreciated. Best, SR
-
Glue Bomb Rescues and Survivor Restorations of 2018
SawgrassRaven replied to Snake45's topic in Model Cars
-
Very nice! This was one of the first real kits I ever built. I wasn't a fraction this nice.
-
Yep. That's exactly the procedure I had in mind. Best, Jason
-
Excellent advice gentlemen, particularly the part about allowing space for the primer and paint; that hadn't occured to me. Thank you!