
.jpg.b9265433dc8c3b550370b1d0e4e4d2fc.jpg)
MarkJ
-
Posts
4,752 -
Joined
-
Last visited
Content Type
Profiles
Forums
Events
Gallery
Posts posted by MarkJ
-
-
19 minutes ago, steveracer said:
It is a round tire model.
Thanks, Steve, for saying that the tires will be round. I'm trying very hard to get them as round as I can and making 4 of them look the same will really be a challenge. I'm hoping the first wheel will be passable so I can continue on .
-
23 minutes ago, Pierre Rivard said:
Has wire wheels. We're down to just a few hundred possibilities...
Thanks, Pierre for putting in your thoughts and being right about the wheels, but like you said, there are hundreds of possibilities, but you have narrowed it down a lot.
-
14 hours ago, LDO said:
??

Very close Lee but keep on trying.
-
14 hours ago, Anglia105E said:
Excellent result Mark, and a fascinating story of the actual race that Mario Andretti won that day . . .
Your home made decals could easily pass for boxed manufactured decals, and they were well worth the hard work that you clearly put in.
You had to make several difficult decisions along the way during this build, such as the engine, the closed hood and the front suspension. All good in the end !
David J. Watson
Thank you so much, David. I really appreciate the kind words about the build and you stopping by during the wip for support. It means a lot. It's been fun watching your progress with the Rolls and your 'keep to it' attitude that's making it a very successful build.
-
5 hours ago, stitchdup said:
a 2012 sellotape dispenser chopper?
Close but no cigar, Les and Sid I haven't got a clue what you are talking about. The model I'm trying to make I've only seen as a partial build diecast that you have to finish yourself but its thousands of dollars to purchase one so not going down that path. I probably just gave it away with that comment. Oh well back to work.
-
2 hours ago, Anglia105E said:
Some tricky work going on there with mounting the wheels Mark, and I can see that you have done your absolute best with the paint polishing. Old decals can be a really difficult challenge to apply effectively . . . This model will display nicely when it's done I'm sure. I do like the blue and the gold together.
David W.
Thanks, David. She is done and sitting with the others comfortably on the shelf with the middle eye level spot until the next build is done. I just started the next one so that will be a long time from now. Finished photos are in the nascar under glass section. The decals were not that old but homemade which makes them a bear to get lined up just right. thanks again for your comments about the build.
-
Man am I ever late to the party. So glad to see that your back in the saddle, Pierre and you're working your usual magic again. Can't wait for the next update,
-
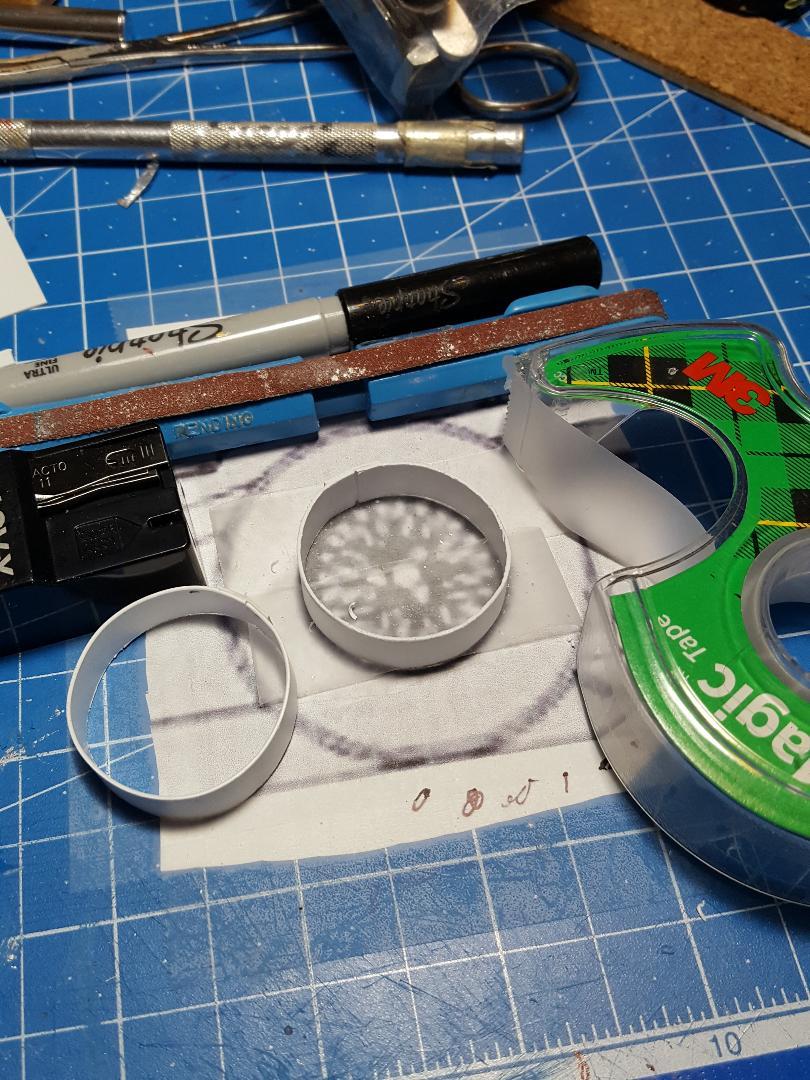
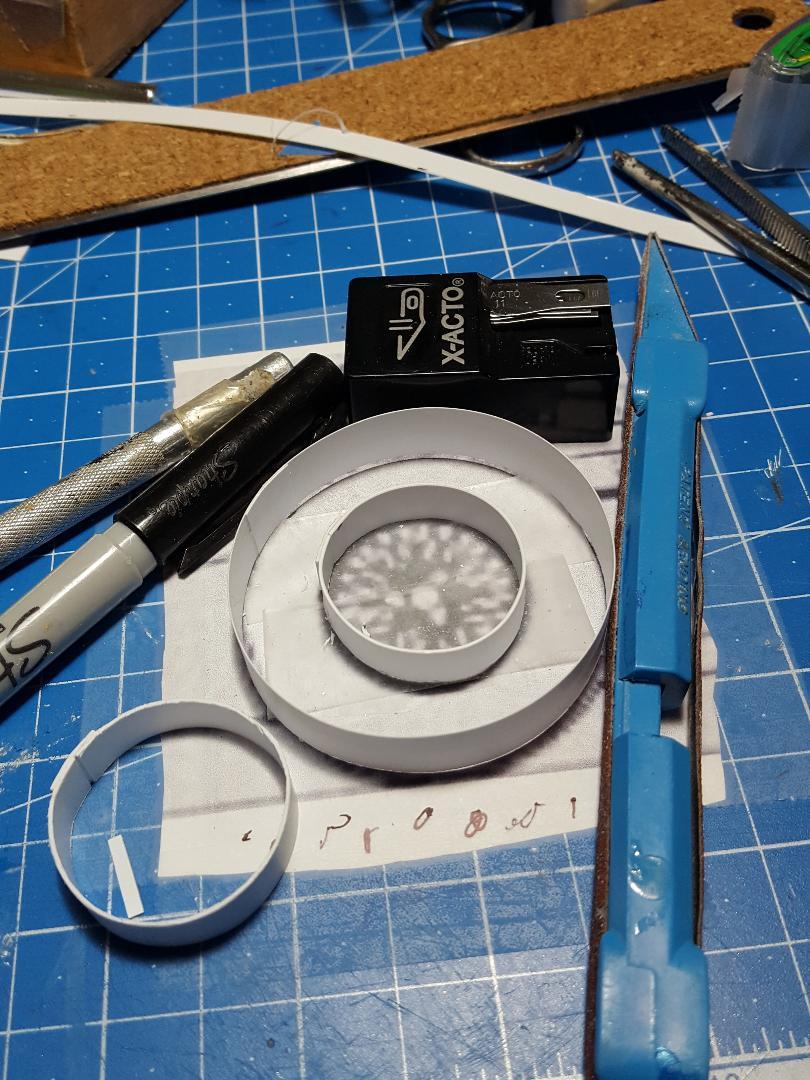
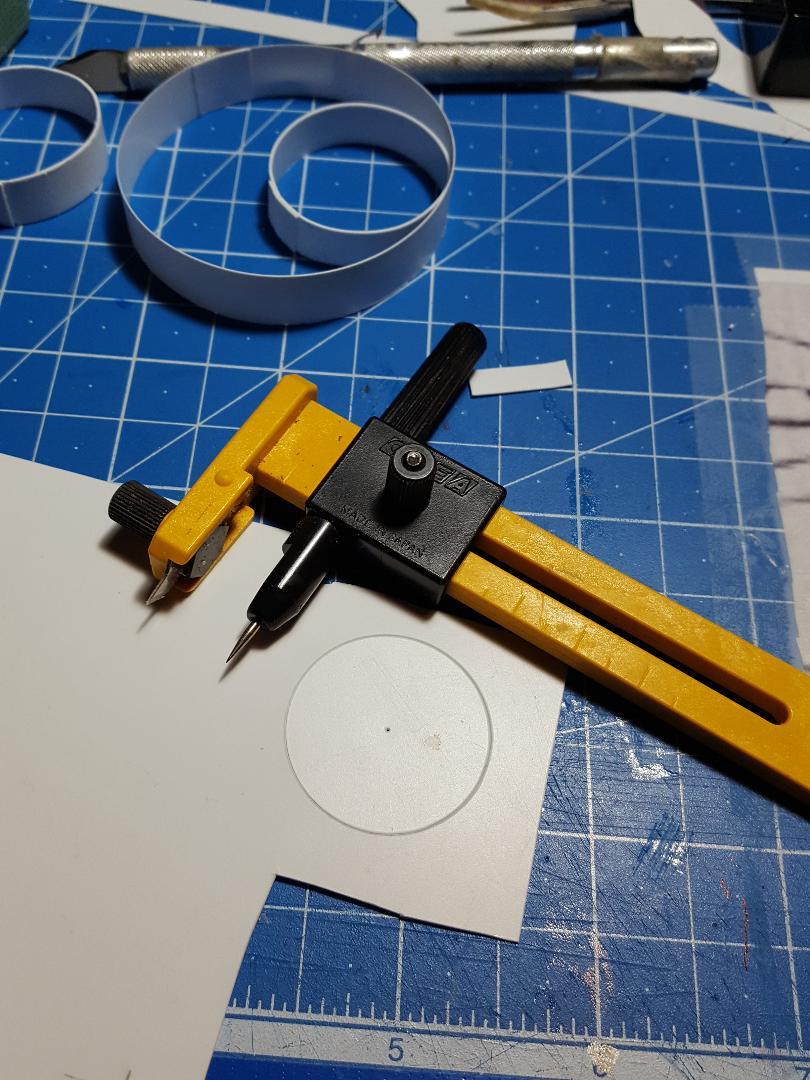
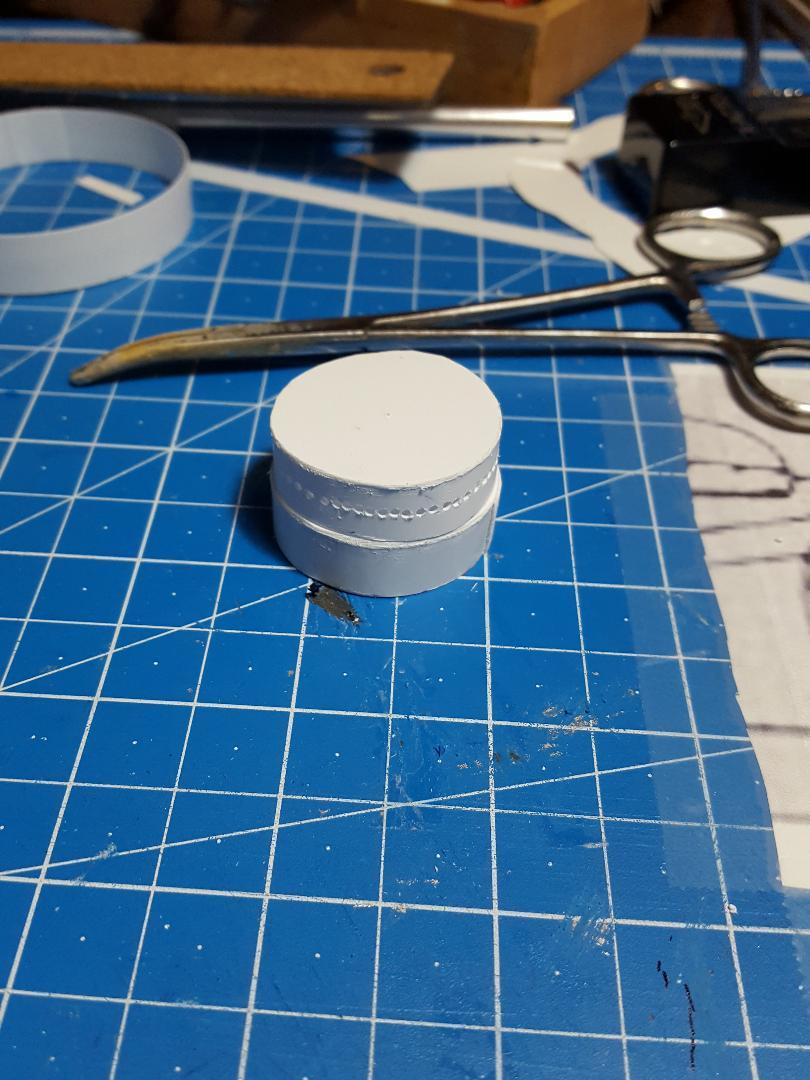
I decided to try to build a model with no kit and only using styrene and household products. First one to guess what it is gets nothing but the satisfaction of figuring it out first. I first searched for a kit and could find nothing, and I don't want to purchase a 3d printer or even learn how to use it. I will use 2d schematics and hope that they are correct and ref photos. I will make it 1/12 scale or very close to it, but it doesn't really matter. I chose this scale because making stuff is always easier if its bigger and the finished model should be about 13.5 inches long so it will fit in a 15-inch-long clear plastic display case. I will try to build the tires and wheels first and if I cannot for some reason I will give up on this idea and go to my stash and pick out a kit to build. Without the tires and wheels the body, engine, and other things won't be necessary. Wip pictures will be your clues to what it is and no "well I think it might be this type of car". The guesses have to include year model and full name of the vehicle. Now that you have got off the floor scoffing at my idea check out the first clues below.

-
4 hours ago, kensar said:
A really nice build of a historically significant car. Well done. I like it.
Thank you, Ken. I appreciate the kind words about the build. Your flawless work is very inspiring and enjoyable to view.
-
1 hour ago, bbowser said:
Really well done! I followed the WIP and appreciate the work you put into this. I agree with the hood shut approach especially on stock cars, its all about the livery.
Absolutely right, Bruce. There's really not that much going on under the hood on these vintage cars. But to get the correct look it takes a lot of time and effort. It's really all about the paint and decals on these babies. Thanks for visiting the wip and making the supportive comments you do about the builds.
-
2 hours ago, Jim N said:
Great work Mark! I always enjoy seeing your builds.
Thank you, Jim. I appreciate your kind words about the build.
-
7 hours ago, Anglia105E said:
Thank you Mark . . . It was mainly as a result of useful suggestions by yourself and John Rourke and also Les Budge that brought me to this point. Without the use of the hollow punch set of hole cutters I would not have achieved this result effectively . . . This is why the MCM Forums are so important for us as model builders.
David
So true. I could not agree with you more.
Mark J
-
David, I believe you have figured this out very well and like you said just a tiny bit of touch up is all that remains to be done on the wheels.
Mark J
-
10 hours ago, gami8630 said:
What a wonderful piece of work.
I've also seen your WIP on other sites, and it's been very helpful in many ways.Thanks, Yoshimi. I am a big fan of your work and use your wips as well for reference material. Your recent number 21 Fairlane was very helpful in doing this build. Thanks for your kind words about the build.
-
13 hours ago, PappyD340 said:
Very nice build!
Thanks, Larry. I appreciate your reply.
-
5 hours ago, bytownshaker said:
Mario had 12 F1 wins including 1 Championship, 52 Indy car wins including 1 Indy 500 and 4 Championships, 1 24 hours of Daytona win and 3 12 hours of Sebring wins plus the 1 Daytona 500 win. I'd say that's a impressive career
I totally agree with you Edgar. That is one heck of a resume for sure. Thanks for dropping by and sharing that with us.
-
 2
2
-
-
2 hours ago, steveracer said:
Nice build! One of my favorite stock cars and my favorite driver, the legendary Mario!
You picked a great one in Mario. I'd say he's top 5 on the all-time driver list. Thanks for stopping by, Steve.
-
3 hours ago, Michael F said:
WOW Mark, a real Winner.
Was worth the waiting👍👍
Thank you Michael. I really appreciate you weighing in on the build. That's the best part of modeling. The feeling of community it gives all of us.
-
5 hours ago, Rattlecan Dan said:
Now that's what I'm talking about! Great build, with a strong finish.
Thanks, Donato. another one of my wip group who always had a way of keeping my interest in the build going. I really appreciate it sir.
-
1 hour ago, Mike 1017 said:
A Great build of a Historic NASCAR Legend
Thank you, Michael. Your comment is very gratifying.
-
1 hour ago, Kevinjr26 said:
Mark great job! your attention to detail is what blows this subject out of the water. 👍
Thank you so much Kevin for being there just about every day checking in on the build. It's much appreciated. Actually, most of the detail is hidden inside the 3 shut windows so to see what there actually is, you would have to check out the wip. Thanks again for your thoughts on the build.
-
1
-
 1
1
-
-
Thanks, Tony. I'm with you on the hood shut at this time in my building capabilities. Shelfer is the way to go for me now and glad I can still somewhat do that. You did notice the term Bucket list I assume. Thanks again for the kind words about the build.
-
1 hour ago, lucky 130 said:
While he did those things, people seem to think he is an icon, he didn't do much else, the F1 championship was not what they call a dominate year. I just dont understand his royal statis. Not in the same league as the Unsers, A J. or even Jimmy Clark. Just sayin. Oh by the way, if team orders were to have Lorenzen win the race and were not complied with, that would have been a big no no.
That's the point. They were complied with, and Mario still won the race. There are plenty of drivers who I don't think deserve the accolades they received like Jimmy Johnson , Mark Martin and the Busch brothers . Everybody has their own opinions. Thanks again for weighing in on the build.
-
8 hours ago, Volzfan59 said:
This is another in a long line of absolutely beautiful cars Mark. The paint, decals……the whole package. Well done buddy!
Thank you so much, Steve for your constant attention to the build. I really appreciated you always checking in and giving support when I was almost ready to throw it in the box and work on it later. Luckily, I have always finished every build I have started. Hopefully that can continue.
Guess what it is.
in WIP: Other Racing: Road Racing, Land Speed Racers
Posted
Mark, I need to google that to see what it is, but you are about 30 years off. Thanks for contributing to this quiz and wishing that I can continue. So far, I'm still sort of on track.