

Codi
-
Posts
2,680 -
Joined
-
Last visited
Content Type
Profiles
Forums
Events
Gallery
Posts posted by Codi
-
-
SAAAWWWEEETTT! I always admire your ability to engrave and achieve such results. This will be an epic engine for an outstanding car! Cheers, Tim
-
 1
1
-
-
Dennis, (dino246gt) I hope your medical issues are behind you and it's a wonderful looking car you've brought back to your bench. Handsome car! Cheers, Tim
-
1
-
-
Hi Francis, to be honest, I learned by seeing how Dave Sherman did his cars from scratch. My drawings are of stone age quality compared to his moon shot way of doing things but they do work for me. This chassis has been challenging since I'm trying to replicate a Hardy mid-70's pro stock. Seems by mid-70's the boxed frame rails were a thing of the past and tube chassis were the norm. He was adamant that ladder bars were the way to go even though some teams were realizing a lot of success with 4 links. He also consistently placed his shocks in front of the axle and the angles / positioning were different from other chassis builders. He utilized a lot of double rail chassis construction during this period especially with any car that had a less than 100" wheelbase. I've got the drawings done and have started the process of experimentation on how I'm going to fabricate it, then when proofed out, making it! This was a big step to say the least. Thanks as always!
Paul, I appreciate your comment and agree completely that it does make things easier. Much of what I make I have to create the drawings themselves to be able to make something. Though not as complex as today's pro mod chassis, with out anything to go by in terms of period correct drawings I had to create my own. I truly believe that when I get this one made it'll be the most accurate representation of that time of what Mr. Hardy was making.
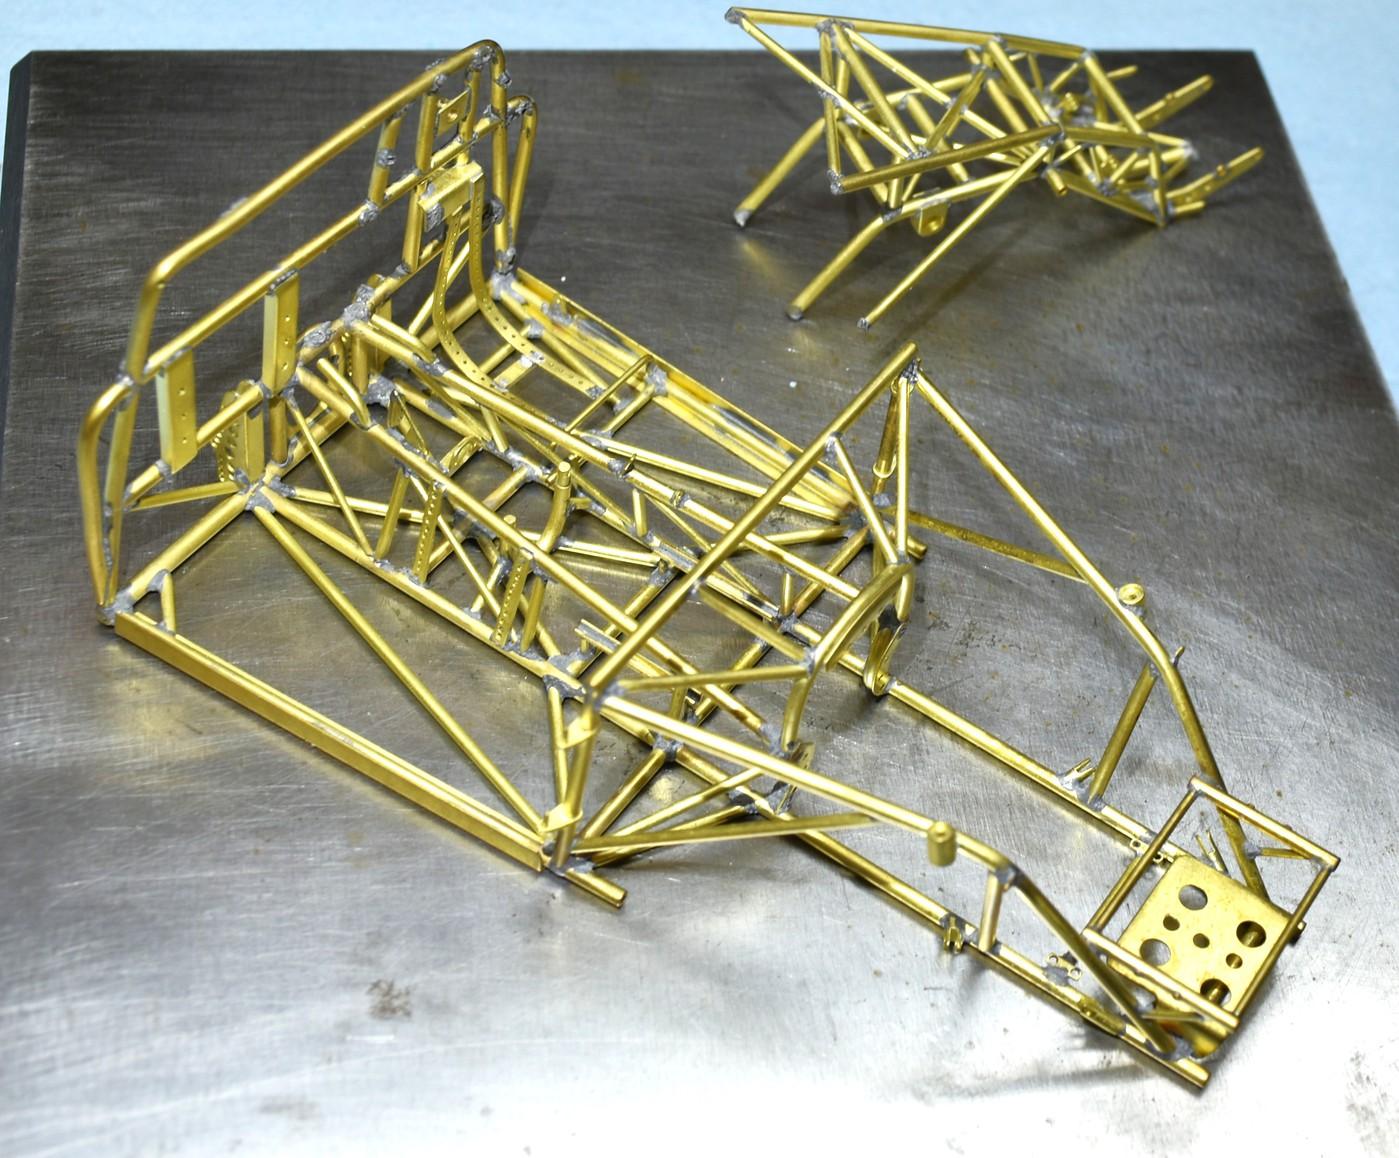
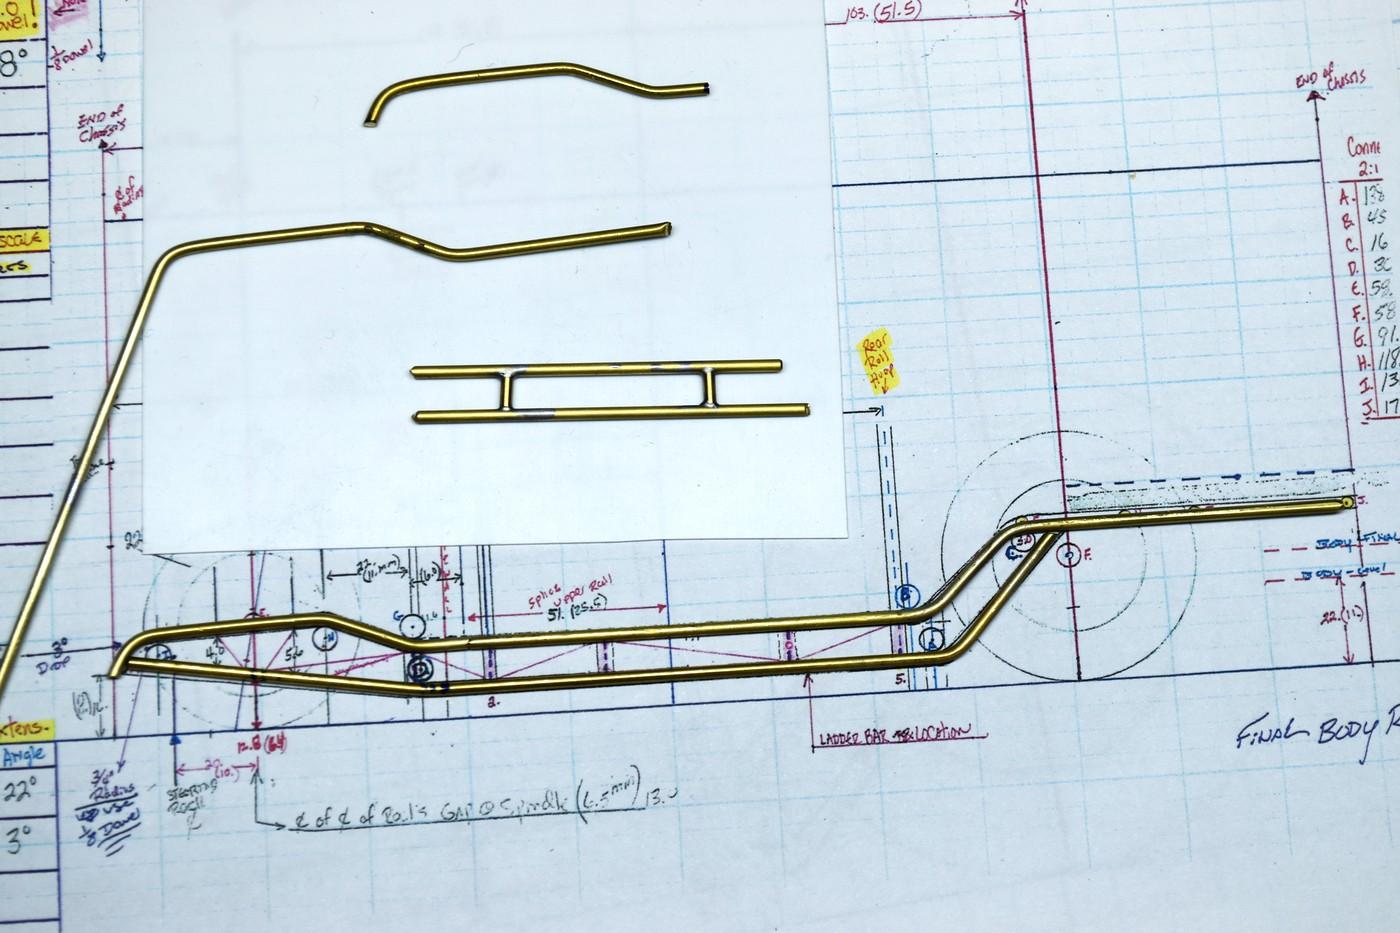
So.....years ago (sure seems like it) I had the Henry J Pro Mod that met an untimely end when it hit the floor. 18 months of non-stop fabbing all gone. Some asked me to post pics but I just boxed it up and shelved it. To start this chassis I brought it out and pirated some bits and pieces that might be of use on this car. You can see the rear tree was broken off but you can't see the other damage such as the bent main roll hoop, that made it pointless to try to repair. The 2nd pic today is some of the early proofing of accuracy and method on how I'm going to make it. The brass rails were actually fabbed to an earlier set of prints and the final set of prints reflect some tweaks. Now to get on with it. Cheers to All!! Tim

-
5
-
-
Congratulations to the powers that be of the forum and for the new direction. Building upon the forum's success can only ensure it's long term future! Cheers, Tim
-
1
-
-
Hi Charlie, nice to see your newest posts and progress. I can just see you now.......one step away from our crazy world of 1/25th scale. tee-hee Hope you're well doing personally too! cheers, tim
-
"Famous" Francis.......more like "infamous" at this point......making headway though and the 2 pics I'm posting today gives an idea of what I've been doing for so long on this build.
Randy, thank you sir.....keep those beautiful pics of YOUR masterpiece coming please. cheers, to you both, tim
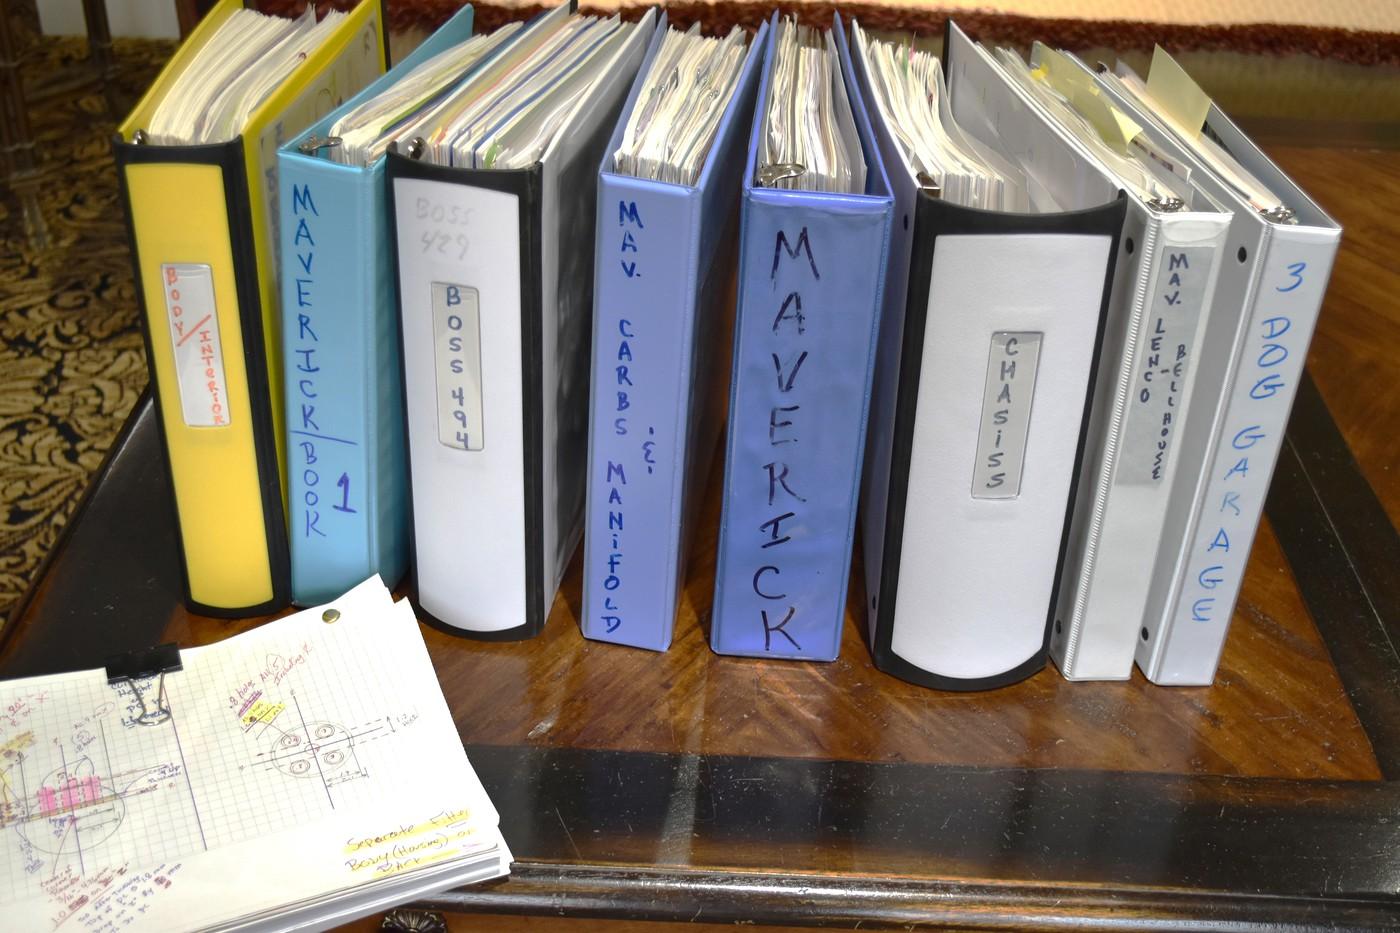
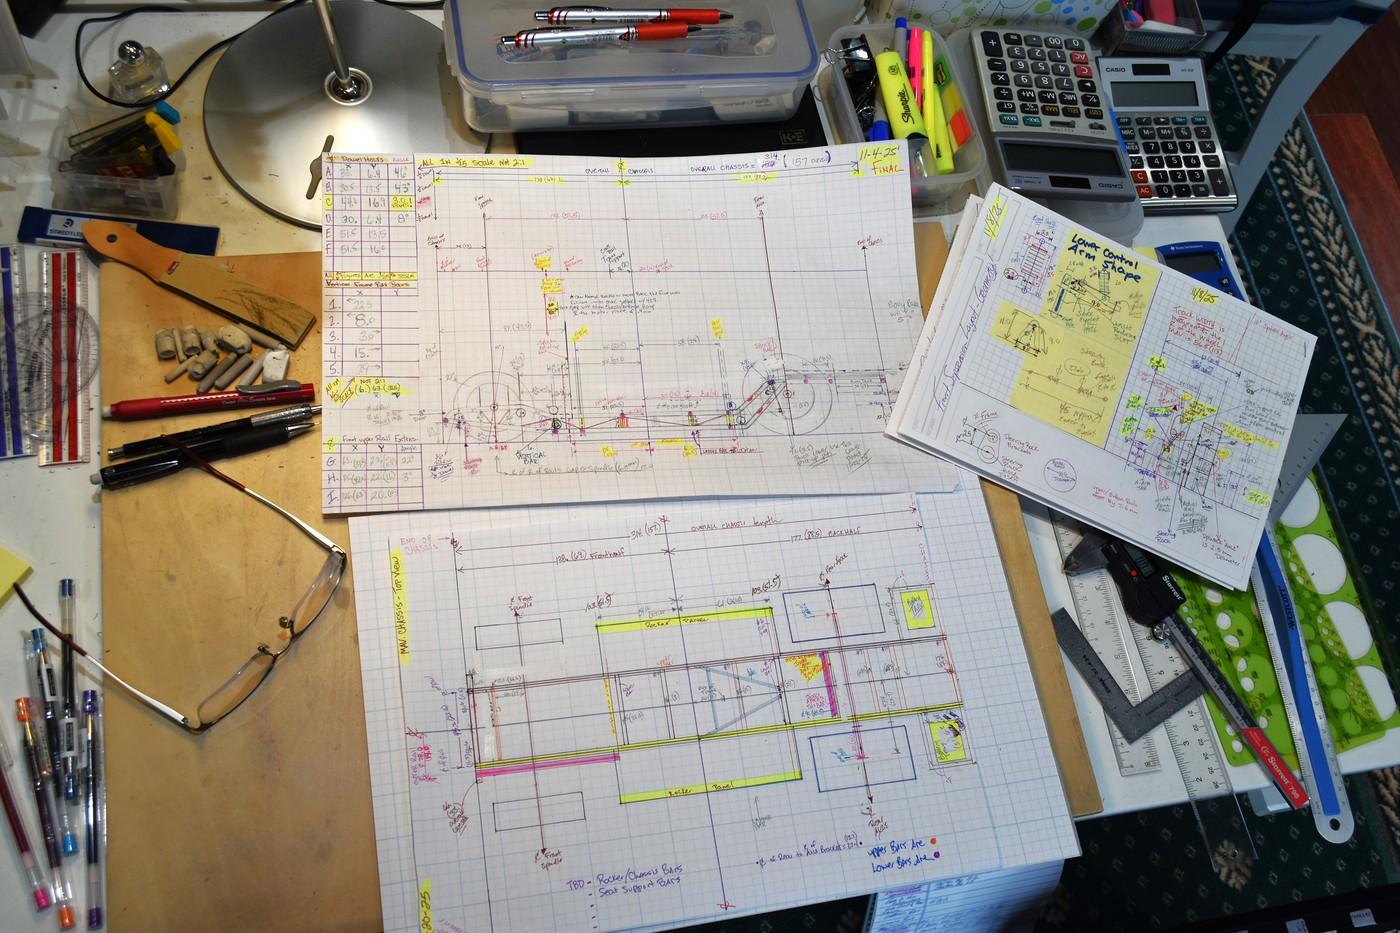
So, started this build years ago with many of life's interruptions along the way. When I'm scratch-building a car, I've gotten to enjoy the research aspects as well as the rest of it. These 2 pics should give an idea of what I've accumulated and created (many of the pieces are scratch-built and or machined as well and accurate drawings are quite necessary). There are so many pics and then blueprints I've created for this car and the chassis is now drawn up as well. Next week I'll clear the decks and begin the fab process finally. Even though I've made quite a few pieces for this car to date, I've still lots of little ones to go. Hope you have the patience to continue to follow along. Cheers, Tim
Many of the binders are stacks of drawings inside of them as well........
-
4
-
-
So Randy, it’s been 10 minutes and I’m STILL waiting for another update. 😁. All kidding aside as this is why I always look forward towards your posts. That’s inspirational for sure! Cheers, Tim
-
Hello Francis......I knew sooner or later we'd hear from you and like everyone else, I can't wait to see your updates. Having Randy back and sharing his pics and you back at your bench it would appear Christmas is going to come early this year. Cheers sir, Tim
-
 1
1
-
-
Randy.........GRRRRRRRR........all I can think of is just imagine what he'd be cranking out if he just ignored life and all the distractions and just sat down for 1 year EVERY single day...WOW that's a sweet update. Granted, I've no room to speak and your posts are always some of the best that there are. Thanks for posting and sharing the goodness. Cheers, Tim
-
1
-
-
Mark, no better words could be said. He would have celebrated a recent birth date if he were still with us. He was a friend I'm proud to say besides being my mentor. His work stands the test of time and he'll certainly be missed. I personally appreciate the fact you brought his thread back up to remember him by. He was a good man. Respectfully, Tim
-
Whoa Chris. That looks so fantastic. enlarged the pics of course to stare at the goodness and must say that your assembly skills are some of the best around. Not a dust bunny, glue thread, orange peel or (insert) to be found. Perfection. What paints are you using btw? That black on the roof is as deep as a pool of oil. Peugeot would be proud! Cheers, tim
-
Hi Ian, I must say that the corvette has some serious "swoop" to it. I like the subtle body mods too it as well. Nice! cheers, tim
-
Dave......thanks sir! Your mini charger is one I remember well as a kid......great subject and be sure to post more. cheers, tim
Paul.., I'm well into the weeds now on the drawings for it. 3 different sets to get to 1. These 70's Don Hardy chassis involve a bit more than I thought but I'm getting there. Thanks too for the compliment! I'll have to share a pic of my first drawing just to give an idea. cheers, tim
-
Super-clean Dennis. Very nice. cheers, tim
-
1
-
-
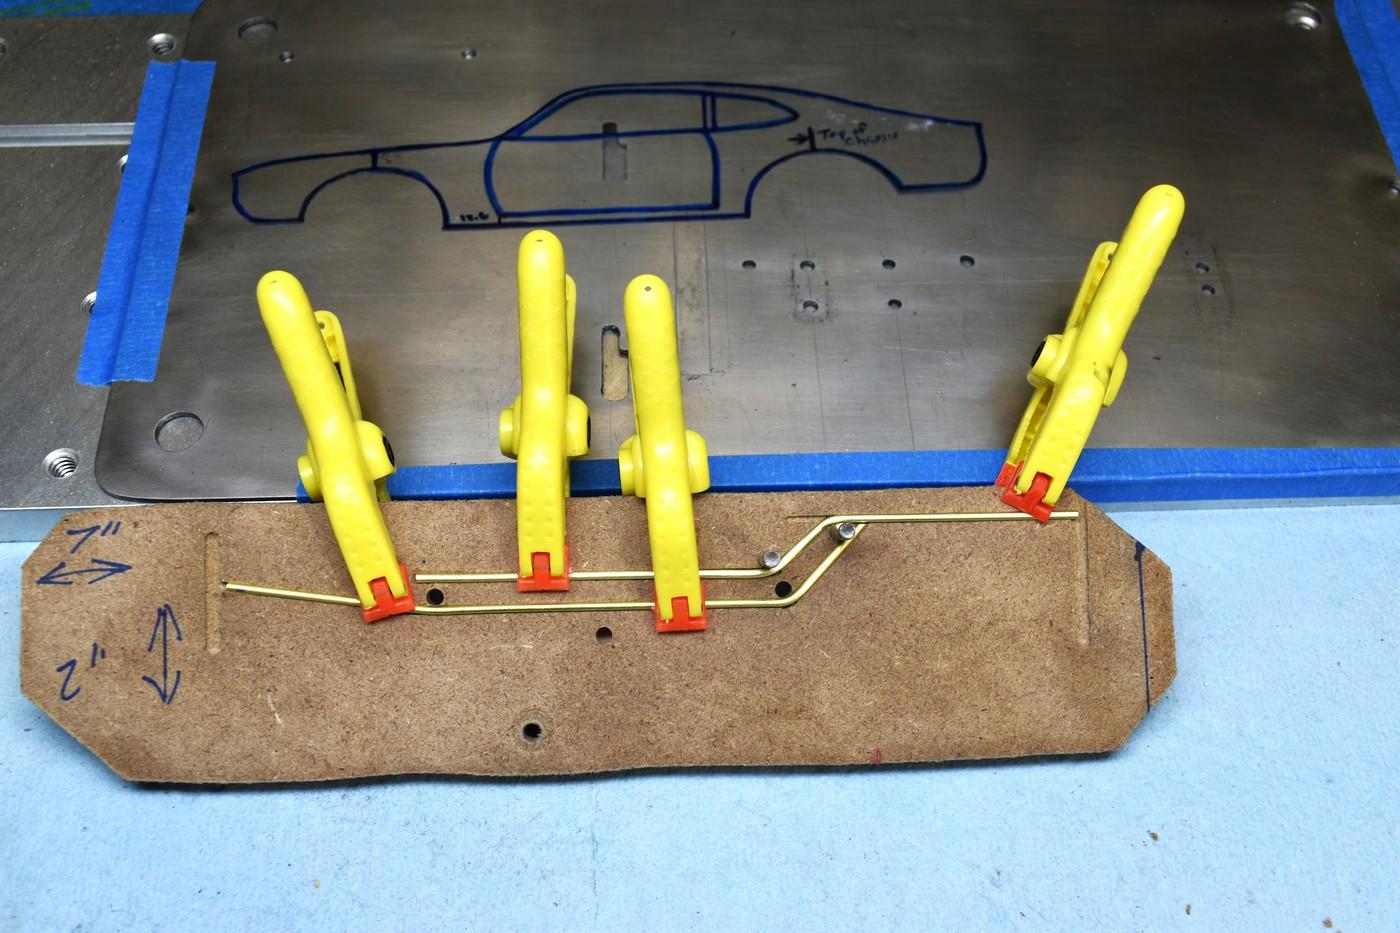
Good morning everyone,
Finally getting onto the chassis......did some proofing out of things yesterday based upon my drawings and the pics of the chassis I took earlier this year. Found a couple errors but now I can refine the final drawing and start to fab it. I'm going to use the same method I used to make the chassis as I did my Bantam for reasons of accuracy. Hope everyone else is doing well the sun is shining upon you! cheers, tim
-
7
-
-
Bruce, and that's on an SP3 Daytona correct? Sheesh is all I can say........the last time Ferrari were "right" was the last year Schumacher was still part of the F1 team. Boy am I dating myself now or what? (rhetorical) cheers, tim
-
1
-
-
Charlie,
Now you're just showin' off.......... 😀
Cheers, Tim
-
Hi Charlie,
Sorry it's been a while........quick thoughts........like the bottom of the chassis and what you're doing with the exhausts.......the re-sized cage looks much better and it was worth your efforts and lastly........a fractal vise...........I want one! We tool junkies just have to have tools like that now be sure to show us some pics of it in use too...........
Cheers, Tim
-
Dirk,
So nice to see you back here and posting. I've always enjoyed your creations and this will be no exception. Thanks too for the "nod".....cheers, tim
-
1
-
-
Some one is having some fun now! The bits you've chosen for your car progress to date are nice to see........nice job Steve....cheers, tim
-
I wasn't familiar with this car of Wally's until your thread but I'm glad you did start one and your car is looking great. Good luck as you make progress. cheers, tim
-
1
-
-
Joe, the tracks really bring the detail to life on the model. Can't wait to see them weathered as well but again, great choice and addition to your efforts here. cheers, tim
-
 1
1
-
-
Great subject matter Bruce.......have you ever been to the National Air & Space museum at the Dulles airport? If not, well worth the trip. cheers, tim
-
I always enjoy these types of thought provoking threads. I have to say that Bills (Ace) views and Steve's as well are more in line with my own. I'm personally in awe of those that can create their own CAD files and print out master pieces AND detail them to the degree that someone such as Bill Cunningham can. An arrow in the quiver is what I've always said and if you have that skill set as part of your expertise, you're one talented individual. Ace's idea of maybe having an "expert" category at any model show is intriguing but I'm not sure who makes the determination as to who says it's "expert" or not.......is it the judges or is it the model entrant themselves? I'd personally make it the entrants option/decision as I think most that would enter such a category aren't concerned about winning but competing.....that way everyone else has a shot too at their given category of earning a place/trophy perhaps.
I also like Steve's idea of a dedicated 3D category (90%+ ? 3D printed being the requirement perhaps?) I also wouldn't have an issue of any dedicated 3D crafted model being part of the "expert" category. So Bill Cunninghams models could be entered in the expert category as an example. My point, there are those at a certain level of capability that are just going to stand out no matter the medium......it would be fun, just my opinion, to compete against others of a similar skill set. It gives everyone something to possibly strive for and to one day compete against in such a category. In closing, I'm a realist too and there WILL be those that won't be satisfied regardless and I can see wherein it might open up a can of worms and the complaining will commence. More open discussion and thought might bring some future contest to consider the best of the ideas shared on this thread and give it a shot. Cheers everyone, tim
-
1
-
Frantic Ford , Lil John Lombardo Mustang
in WIP: Drag Racing Models
Posted
Roger, your body mods and the body in paint really shows your vision for this car. Great job! cheers, tim