

Codi
-
Posts
2,651 -
Joined
-
Last visited
Content Type
Profiles
Forums
Events
Gallery
Posts posted by Codi
-
-
Chris, thank you sir.......can't wait to see your next MFH project btw.....cheers, tim
Brian, many little parts went into making it I'll admit. I'm figuring I have about 25 to 30 hours total in machining and fabbing the entire thing. It is done though! yeah
Daniel, thank you for the sentiments. My High School 50th ann. reunion is this weekend and I've never made one....this was to be my first but of course I'll miss it now........UGH!!
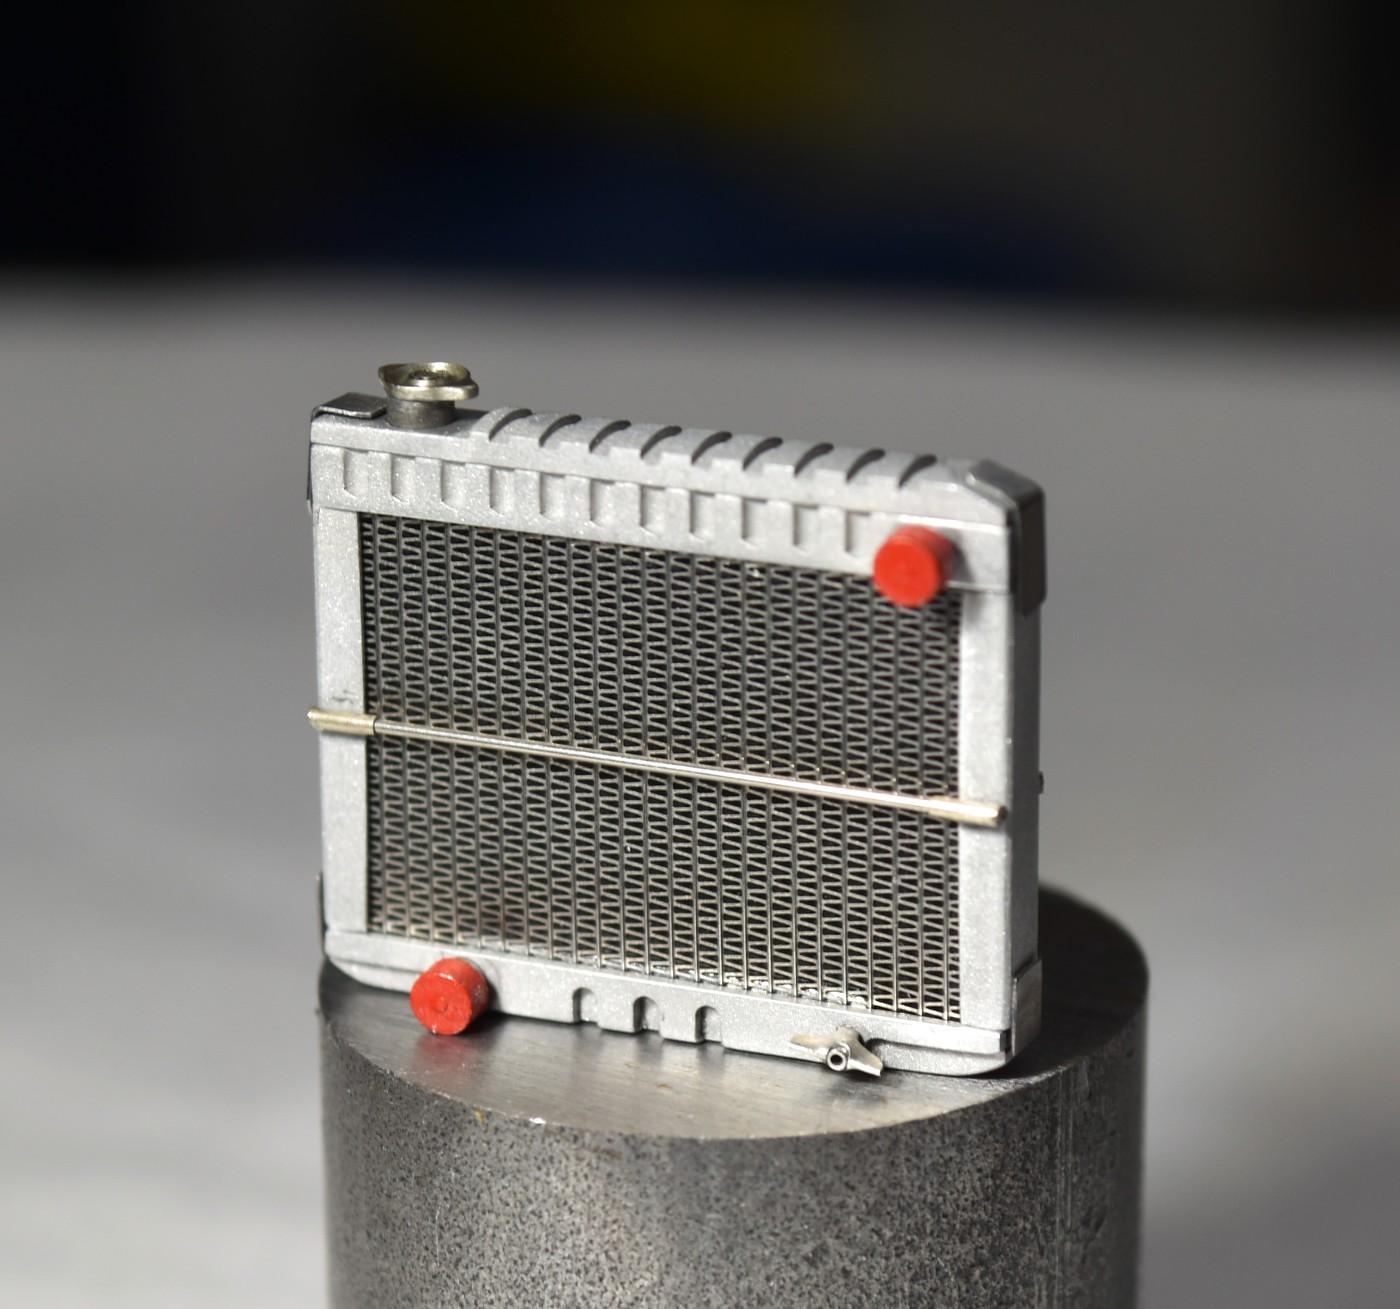
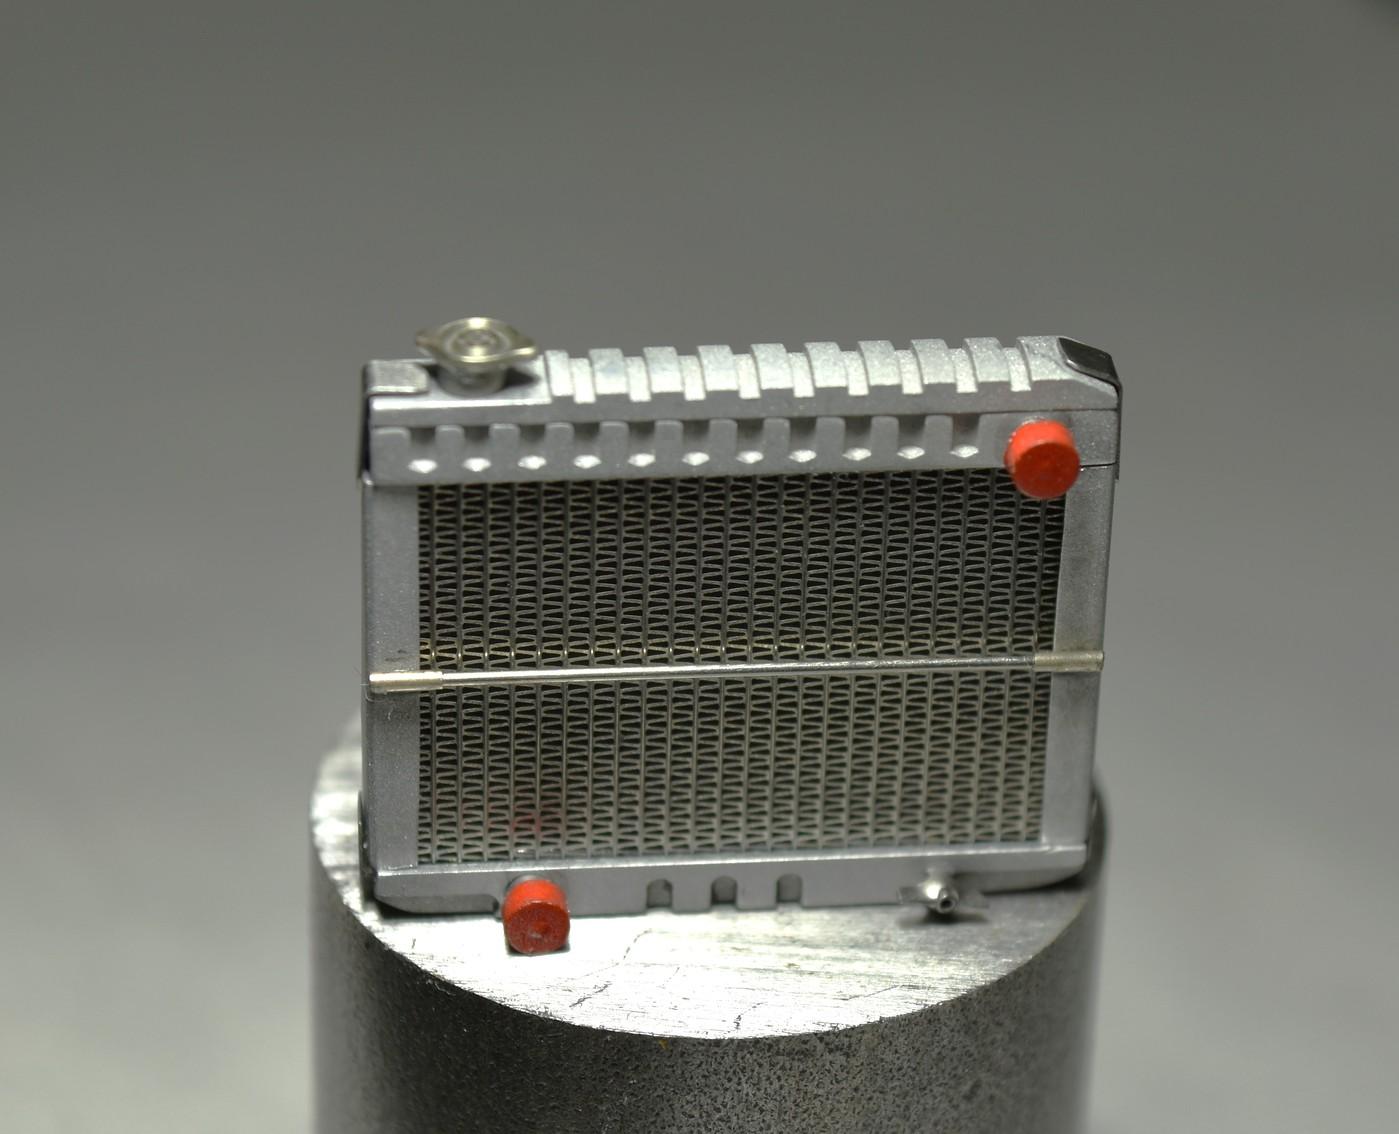
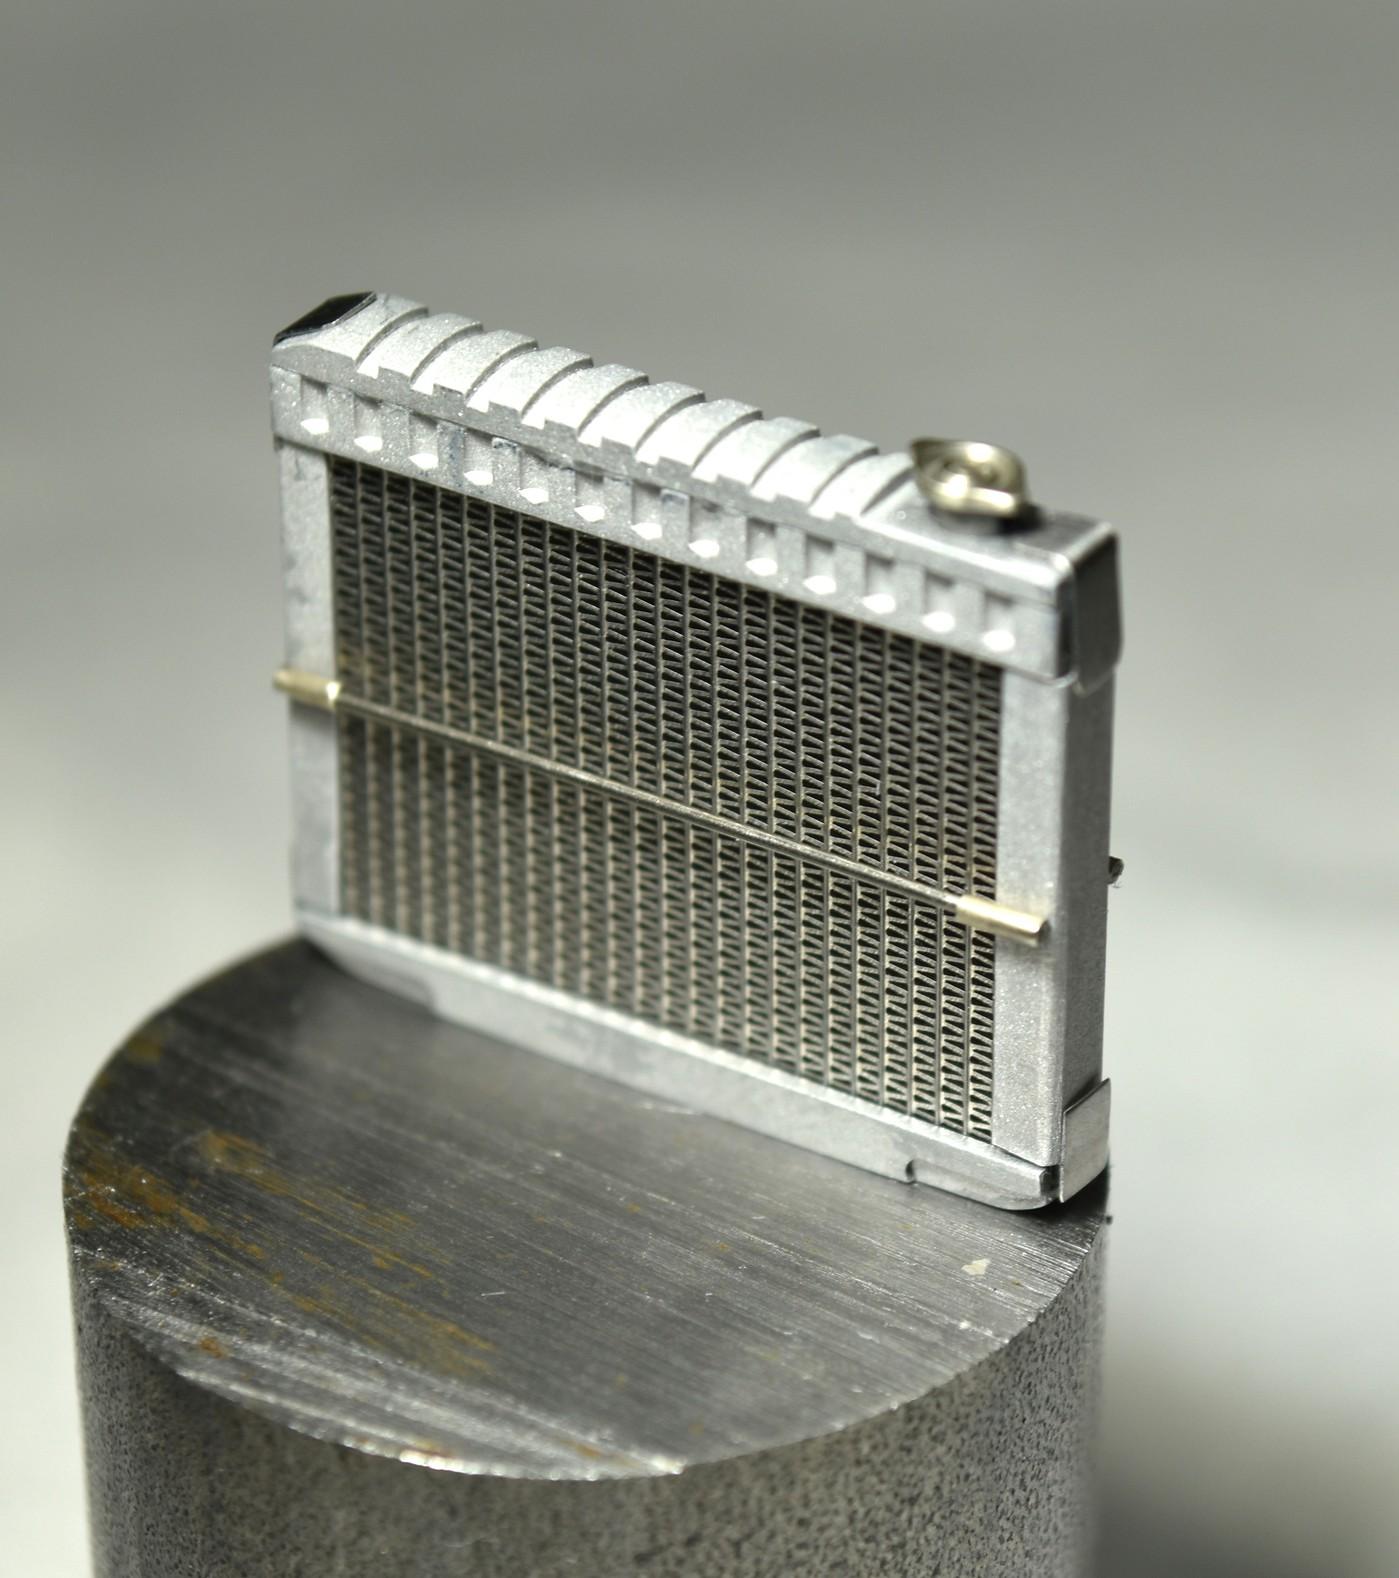
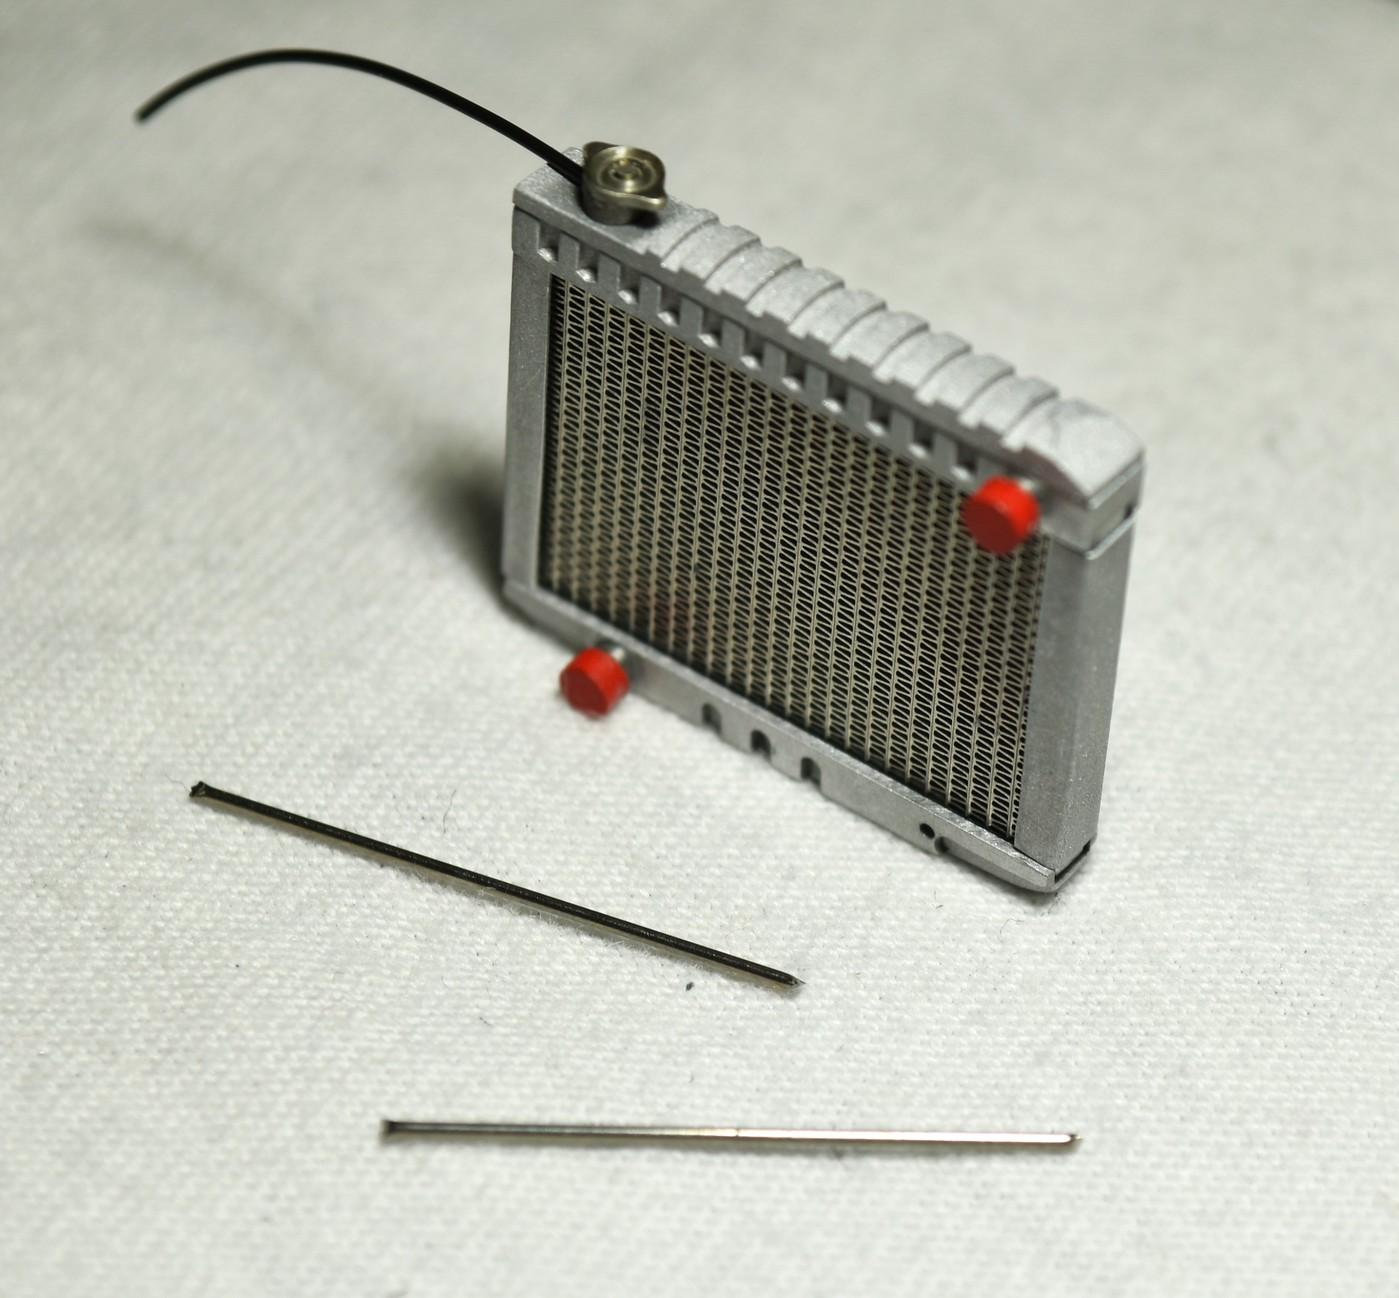
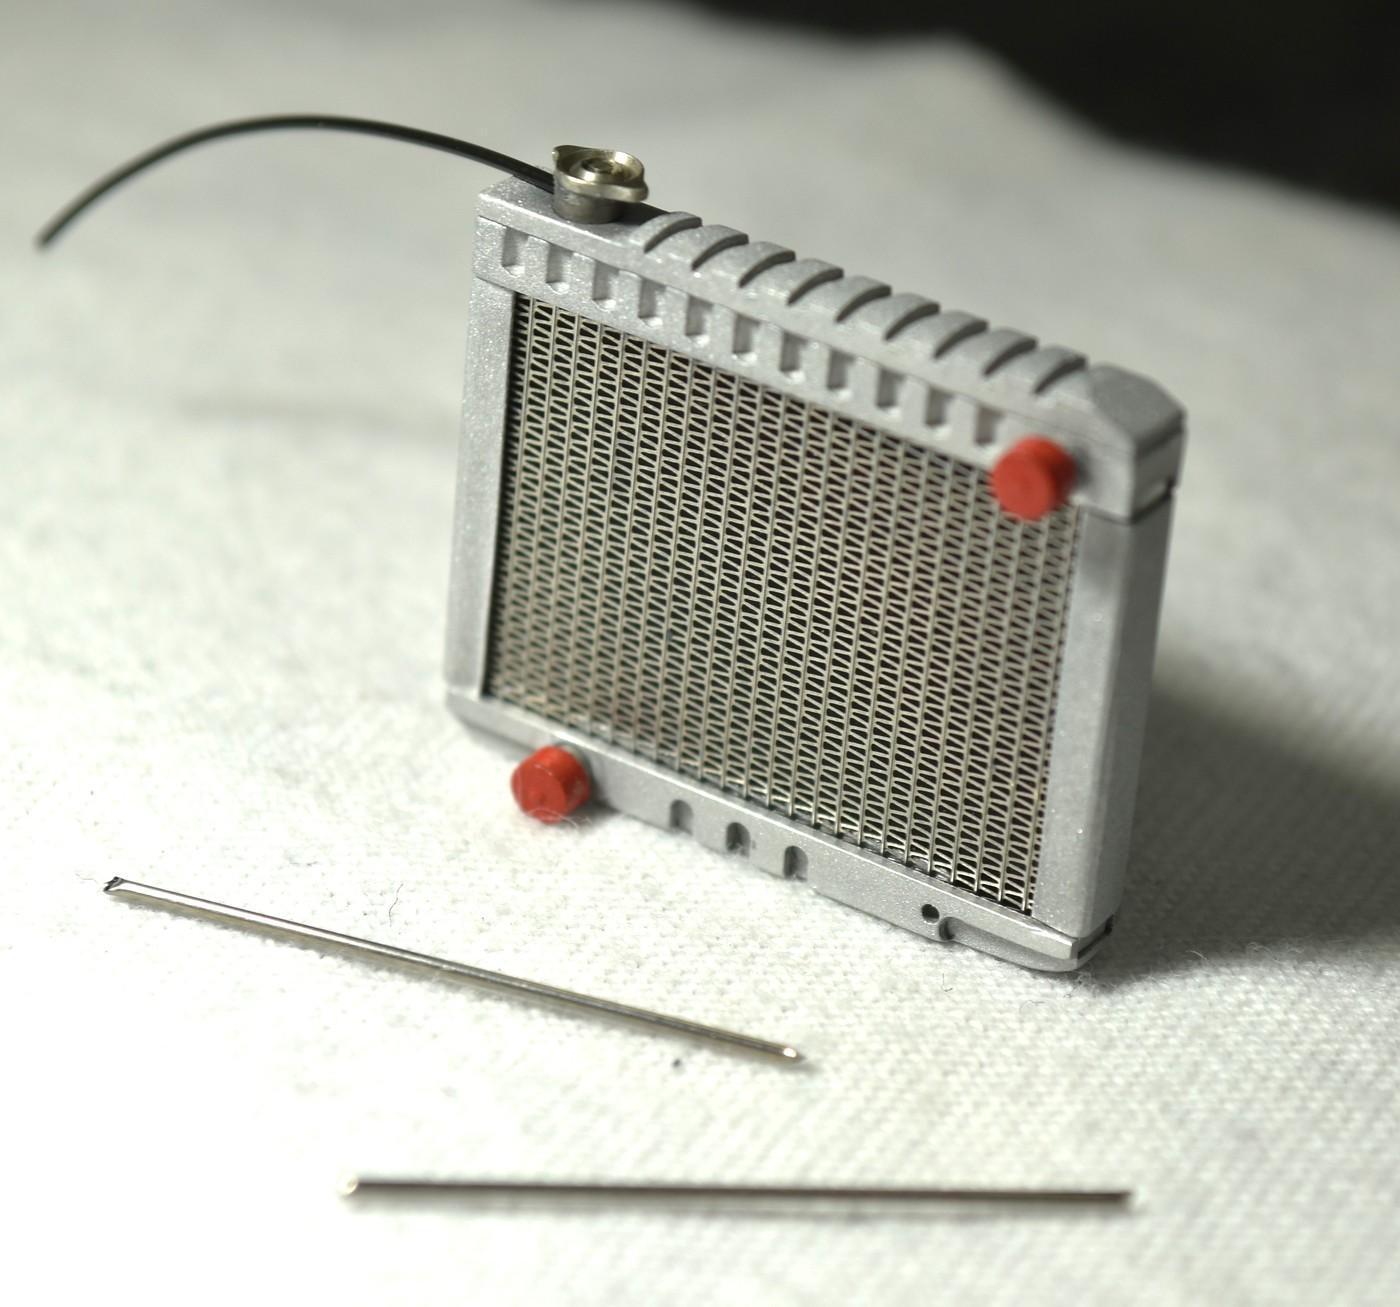
The radiator is finished. I'm going to clean up the shop and bench space and grab all of my notes /pics from the last 3 years in all of my research and begin drawing up the chassis so I can get that started. That's a big task for me but if all goes well I'll have the chassis started / done by Christmas...IF.........3 finished pics, 1 is of the back of it. That darn "petcock" was a bugger to fab but I finally came up with a way of making one. All in all, I'm pleased with it. Cheers everyone and enjoy your weekend! tim

-
 6
6
-
-
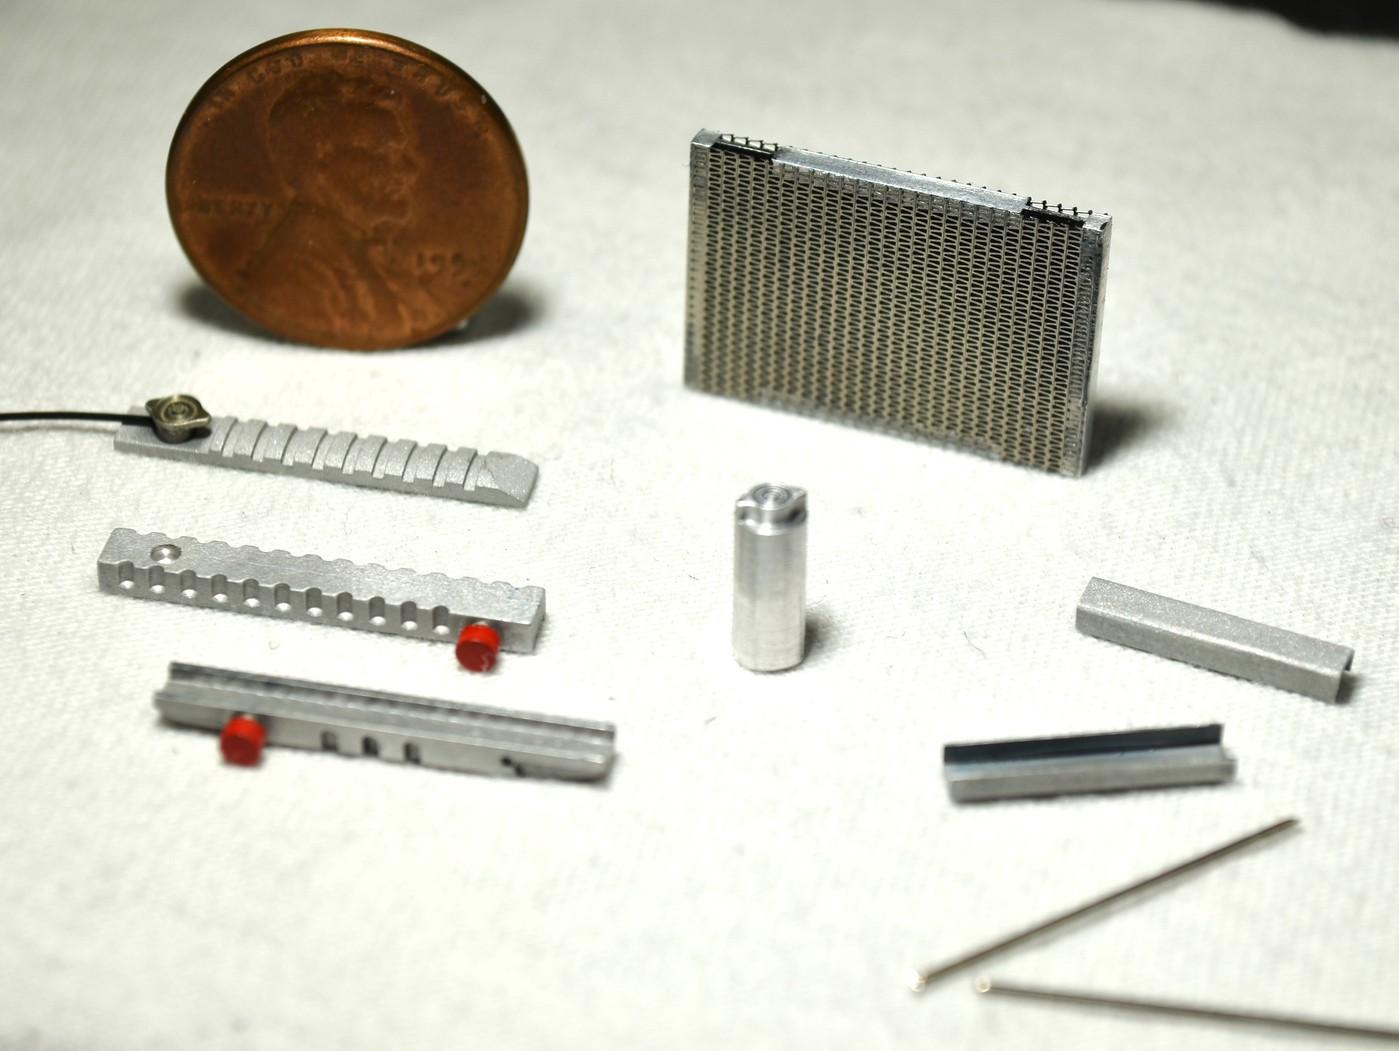
Hi Randy & Jason......so glad to see both your checking it out still. Progress has been steady even though yesterday I tested pos. for covid again...just livin' the dream! After a couple days from the bench I had to drag myself back because I really want to finish the radiator.
Pic's today show it basically all fabbed and mocked-up. Pic 1 shows some of the components before assembly. The others give an idea of what she'll look like. I still have to add 2 horizontal braces, a pet-cock for the drain and a couple tiny weld lines and or braces along the sides top and bottom. I did media blast it as the real rad's were stamped & welded alum. but none were shiny per se so I went with this finish to be closer to the actual and the radiator cap I machined out of nickel/silver just for a bit of contrast and because I like the color of the metal. Cheers!! tim
-
6
-
-
Everything looks so good Ian. Even down to the seat belts..they're perfect! Now the fun part when all the goodies you made for her get installed........can't wait! cheers, tim
-
Thanks Brian, I still have some patience left even though my daughter my say otherwise. cheers sir, tim
Dave, SOOO nice to hear from you! As always your comments are most welcome and appreciated. I've got to give you a call soon and get caught up.....been too long. cheers, tim
John, as a wise woman at the pharmacist told me not long ago..."getting old ain't for sissies". Seriously though, the ailments are something we all go through and I'm blessed that mine are not serious. More annoying than anything I suppose. Thank you for the compliment and glad to have you following along. cheers, tim
pics coming soon, radiator is taking shape and is almost done!
-
That paint is simply striking how that turned out. That'll put a smile on anyone's face. cheers, tim
-
Now that's imaginative Daniel. I love finding those types of things for a build and putting them to use. Looks really good on the car.
cheers, tim
-
Ian,
I've no idea how anyone does more than one build at a time but you manage quite well. You've done a lot on this Vette in such a short period of time no less. Nice work. cheers, tim
-
You had me at Pro Stock Ian. This will be fun to watch! cheers, tim
-
Thanks Henry for the shared comment......making progress this week, which feels good all by itself. cheers
Francis, thanks sir.......see my other post on your thread! cheers too
A couple quick mock-ups, nothing is near done yet, I've got detailing to do, frame to make, radiator car and the radiator "core" itself. I just wanted to see what I've got so far and I'm happy with it so far. I think it'll add to the build. cheers to all that follow along! tim
these pics show the top and bottom just resting on a pc. of plastic...be kind
-
2
-
-
Darn, I thought I'd be the first to welcome you back Francis.......but hey, it's just nice to hear from you again. Certainly your plate has been VERY full and has been shared, you're a good man for all that you do for others. We'll smile when you come back and post your updates, but again, it's nice to hear from you again. cheers, tim
-
1
-
-
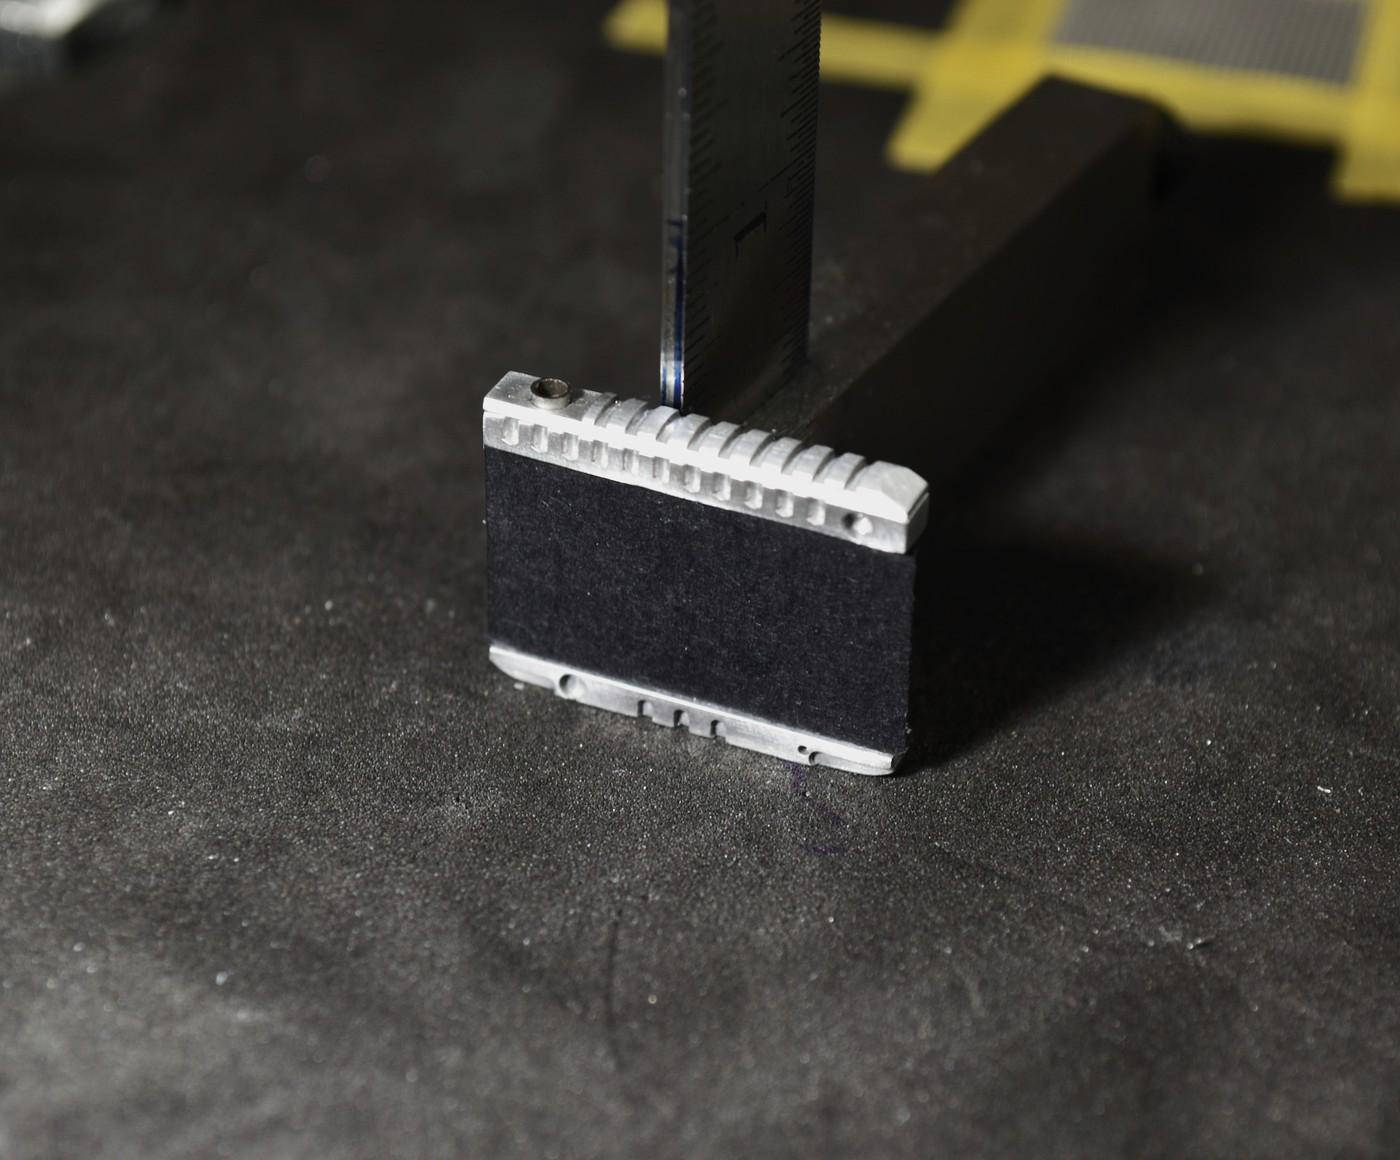
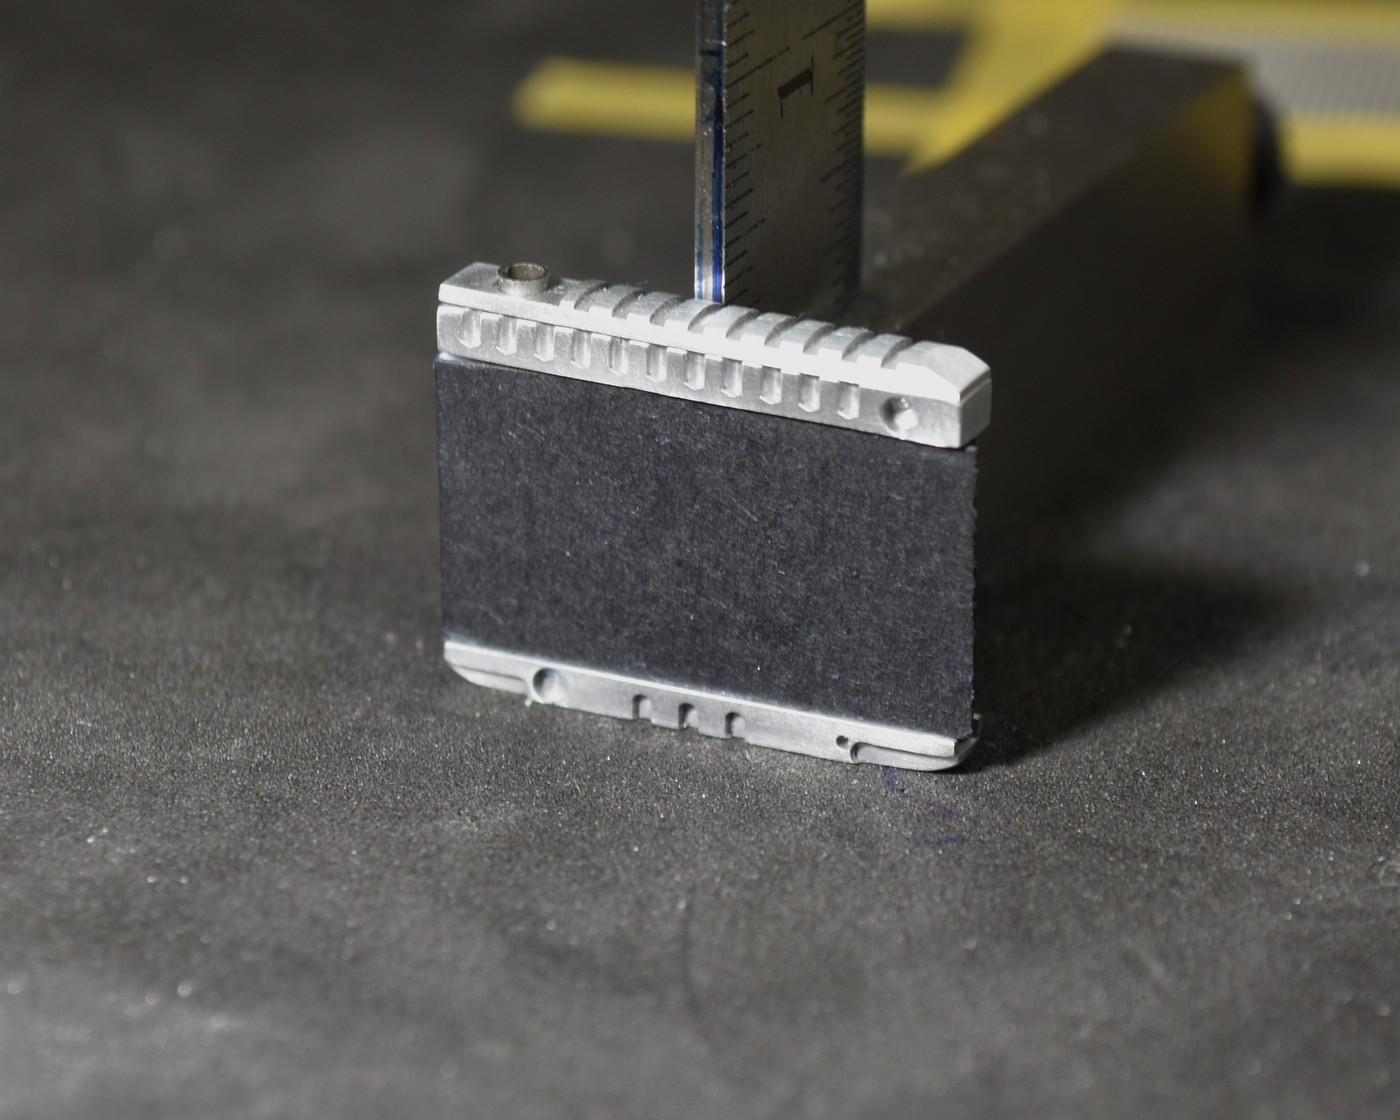
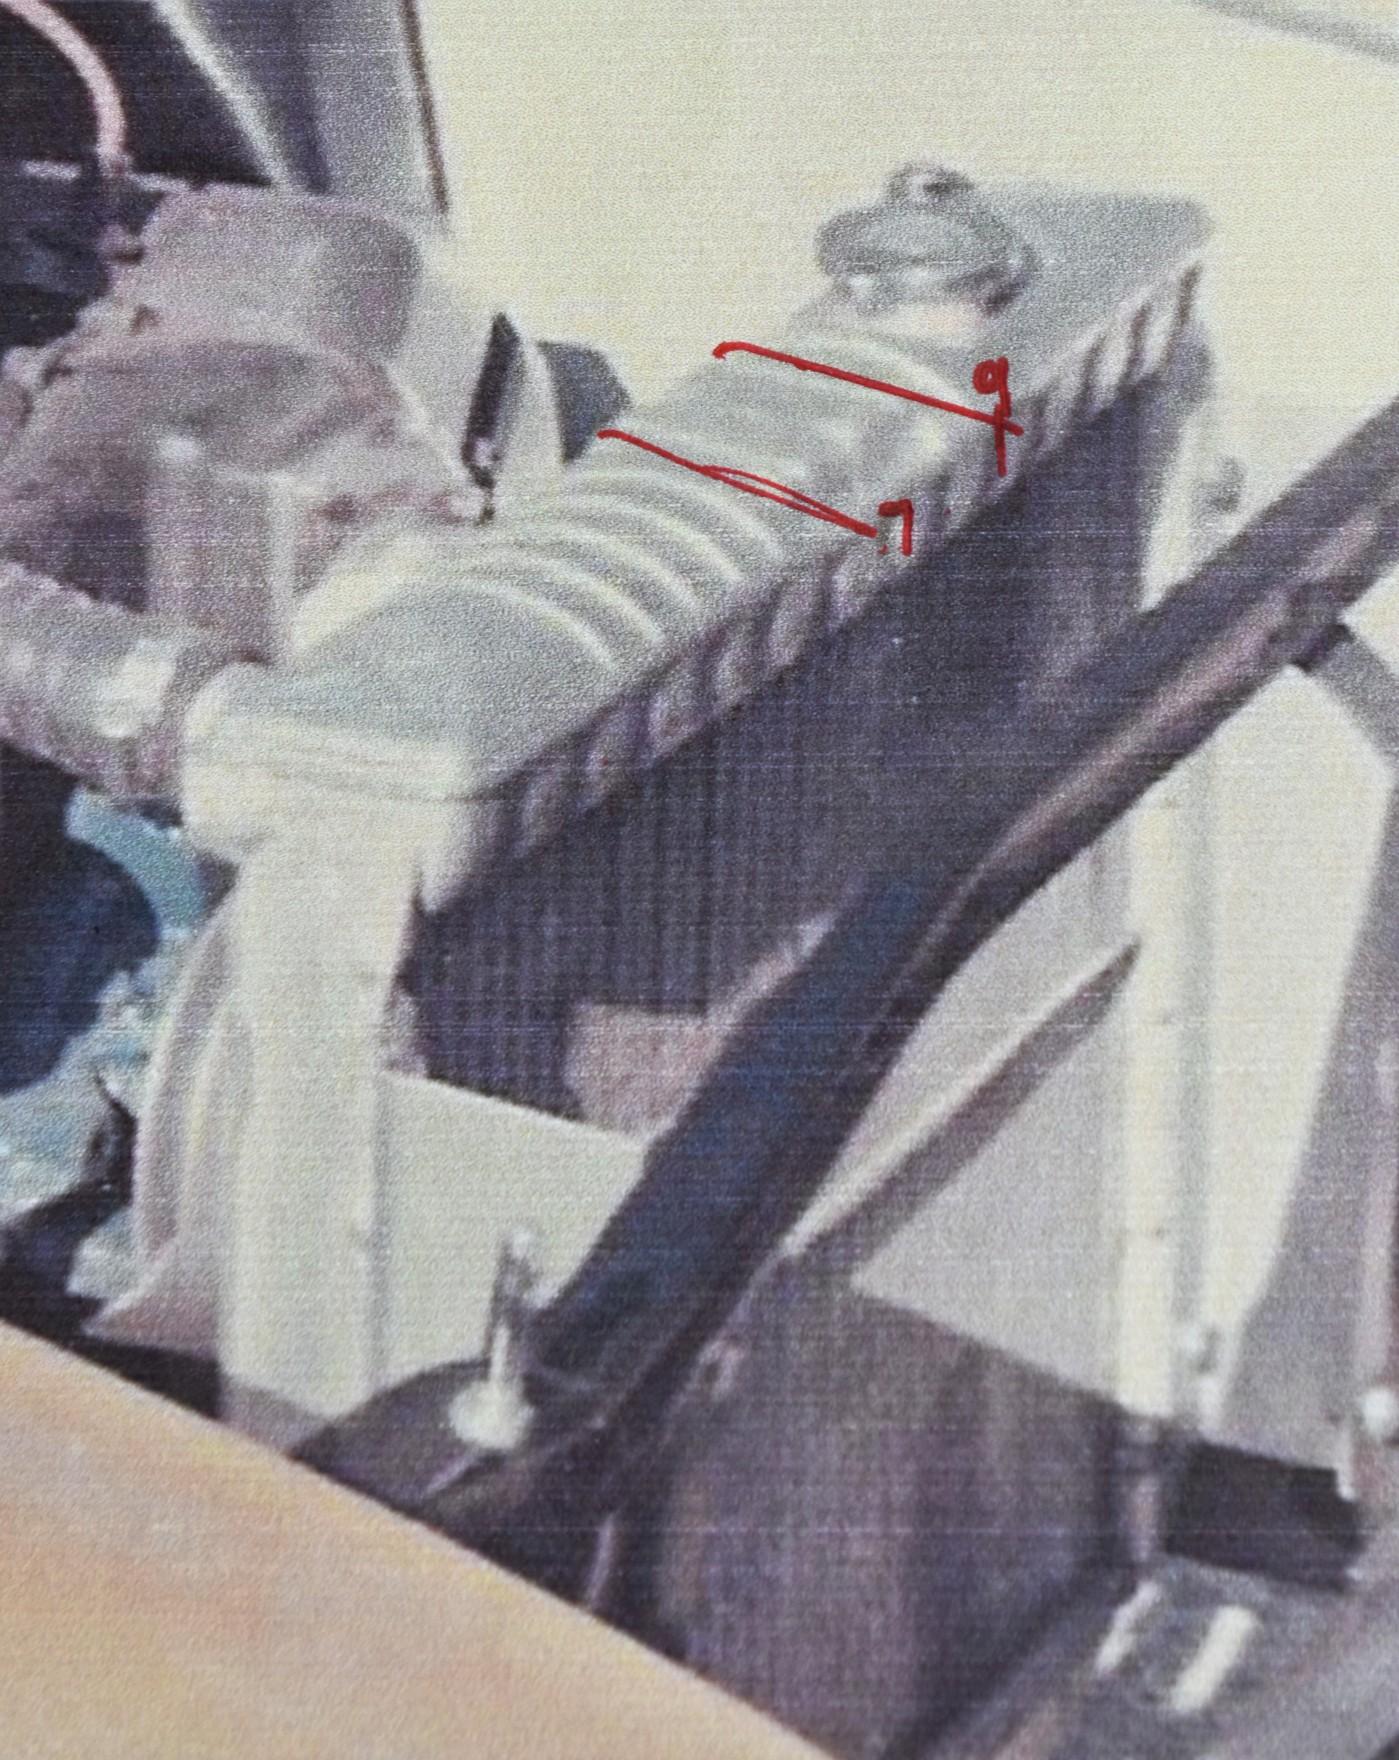
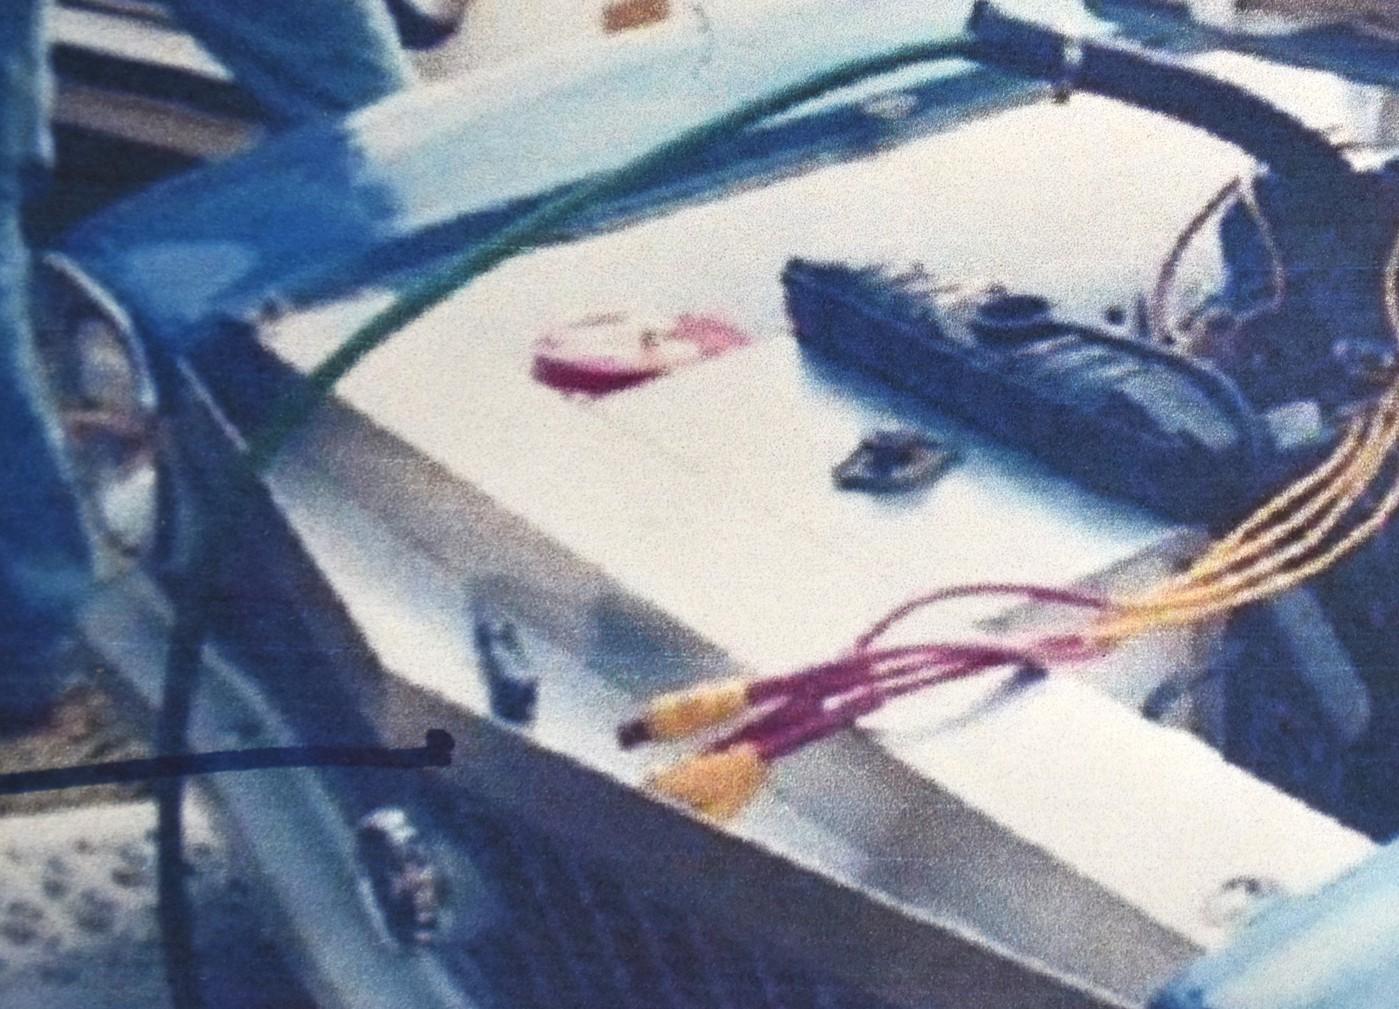
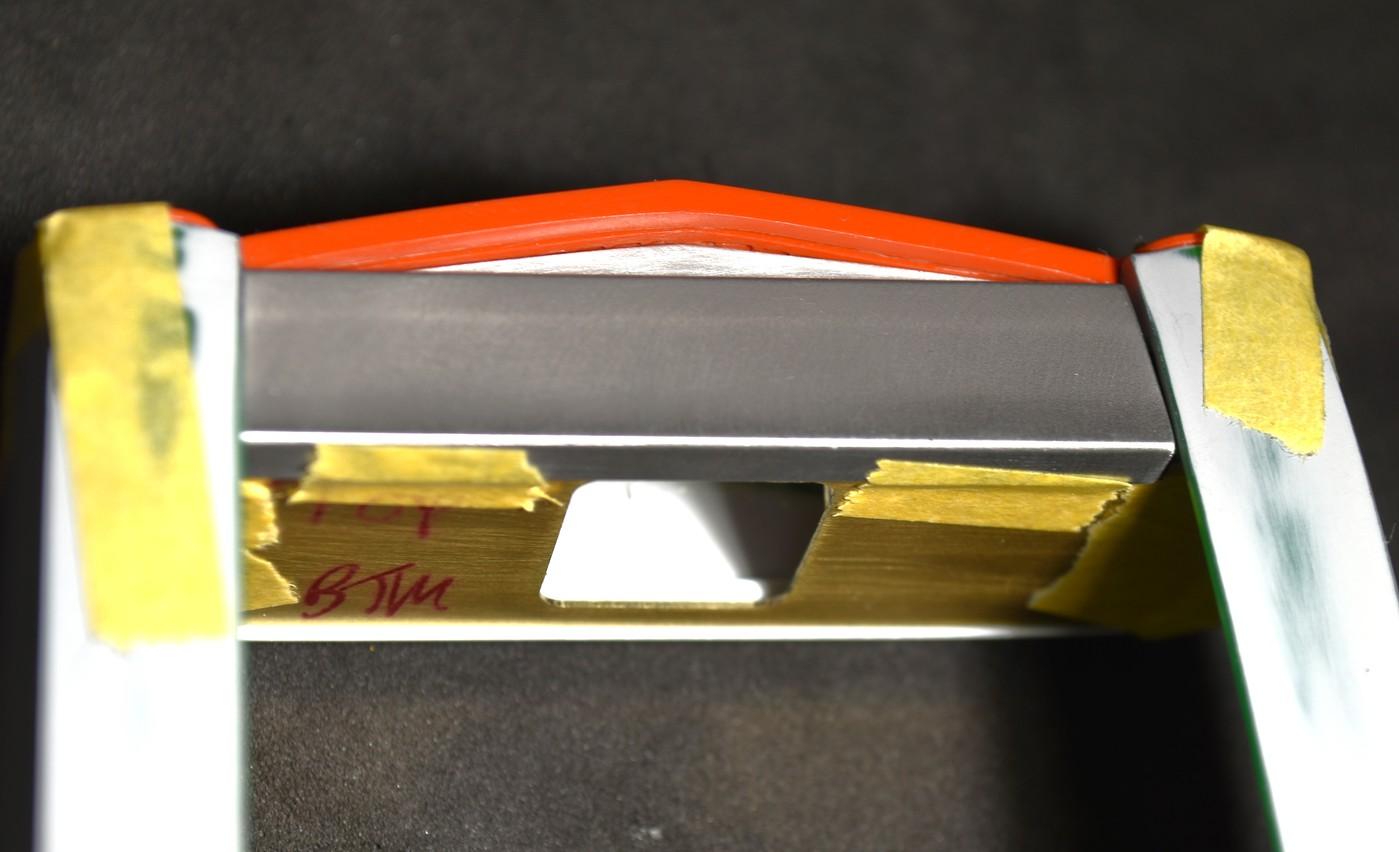
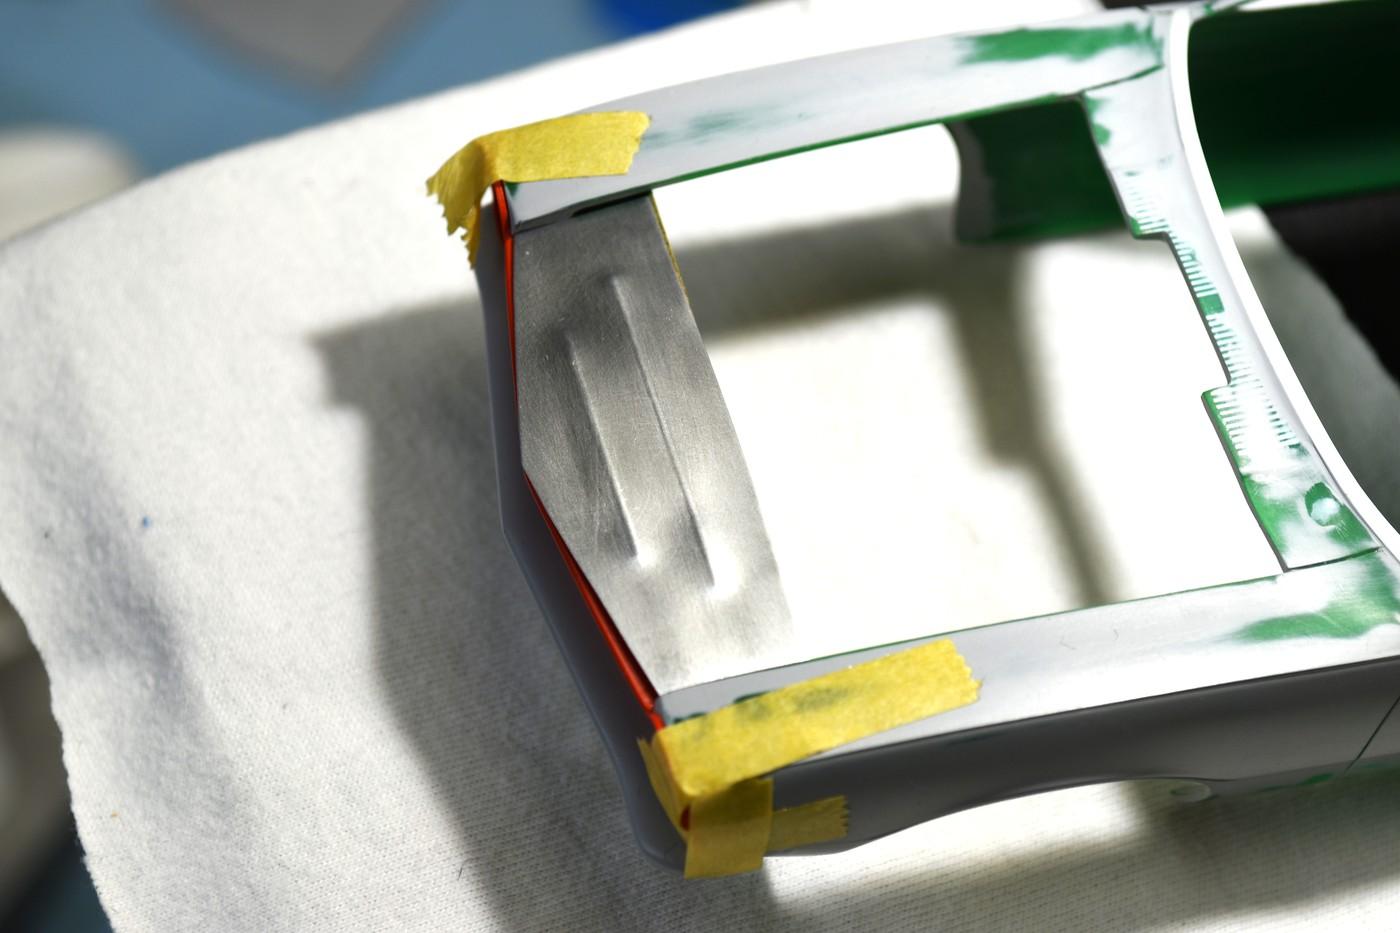
Hi everyone, started the radiator the top portion is of 2 parts of which I still have to corner round the base of it...I wanted an aluminum similar to the one in the pics, Ford had them and were used by various Pro Stock teams but they were rare. Teams were required to use "stock" radiators at the time, they didn't say they couldn't be modified, which from the pics it's obvious that teams were altering them. Lots more to do yet before this is finished....... cheers, tim
-
3
-
-
Today I used Caswell's plating system to chrome plate the bulkheads. It's hit or miss when doing it and if I were to do more of it, I'd invest in a better system. For those interested in the process, I covered it fairly well in my previous Bantam thread. 3 pics, brightly polished and clean pieces before & after the plating and with them in place on the car. Next I'll draw up the radiator and get started on that. cheers everyone! tim
-
8
-
-
Dinner's done and so is my daughter's tennis match (she won, yeah!).....I wanted to take a moment to respond Brian & Paul's questions.
Brian, if it's brass to brass, solder typically. Aluminum to others, I'm using Loctite in 3 different viscosity levels depending on the task at hand...thin, regular gel and the max gel....sometimes when really trying to secure something more permanent or of different materials, say metal to plastic, I'll use 1 of 4 different Devcon brand 2 part glues. More time allowed to set-up a piece, dries clear and has proven quite strong & reliable.
Paul, I could try to explain it but if you go to my "Bantam" thread and go to pages 50 & 51 it will explain in more detail exactly what I did and materials used. One of the most imp. "tools" I found was a drywall sanding trowel. At least I think that's what it's called. It had just the right density & "give" when using the pen to make the bead roll itself. Bit of trial and error but when you find the right tools it's easy. Brad Norgaard was kind enough to send me samples of the printers plate that I used. .26mm thickness.
Hope this helps! cheers, tim
-
1
-
-
Morning Mike, I cut em out on my mill. cheers, tim
-
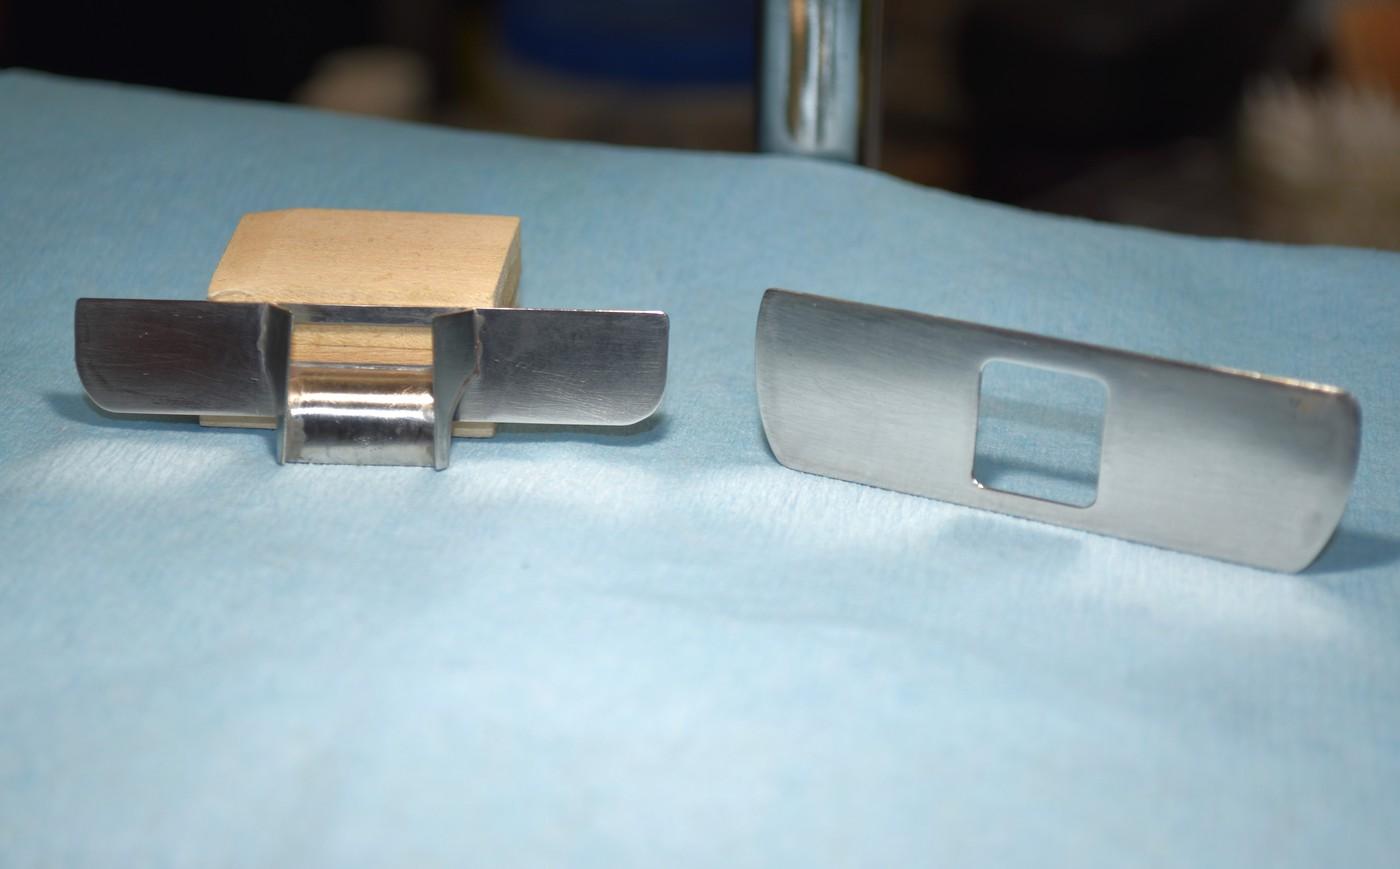
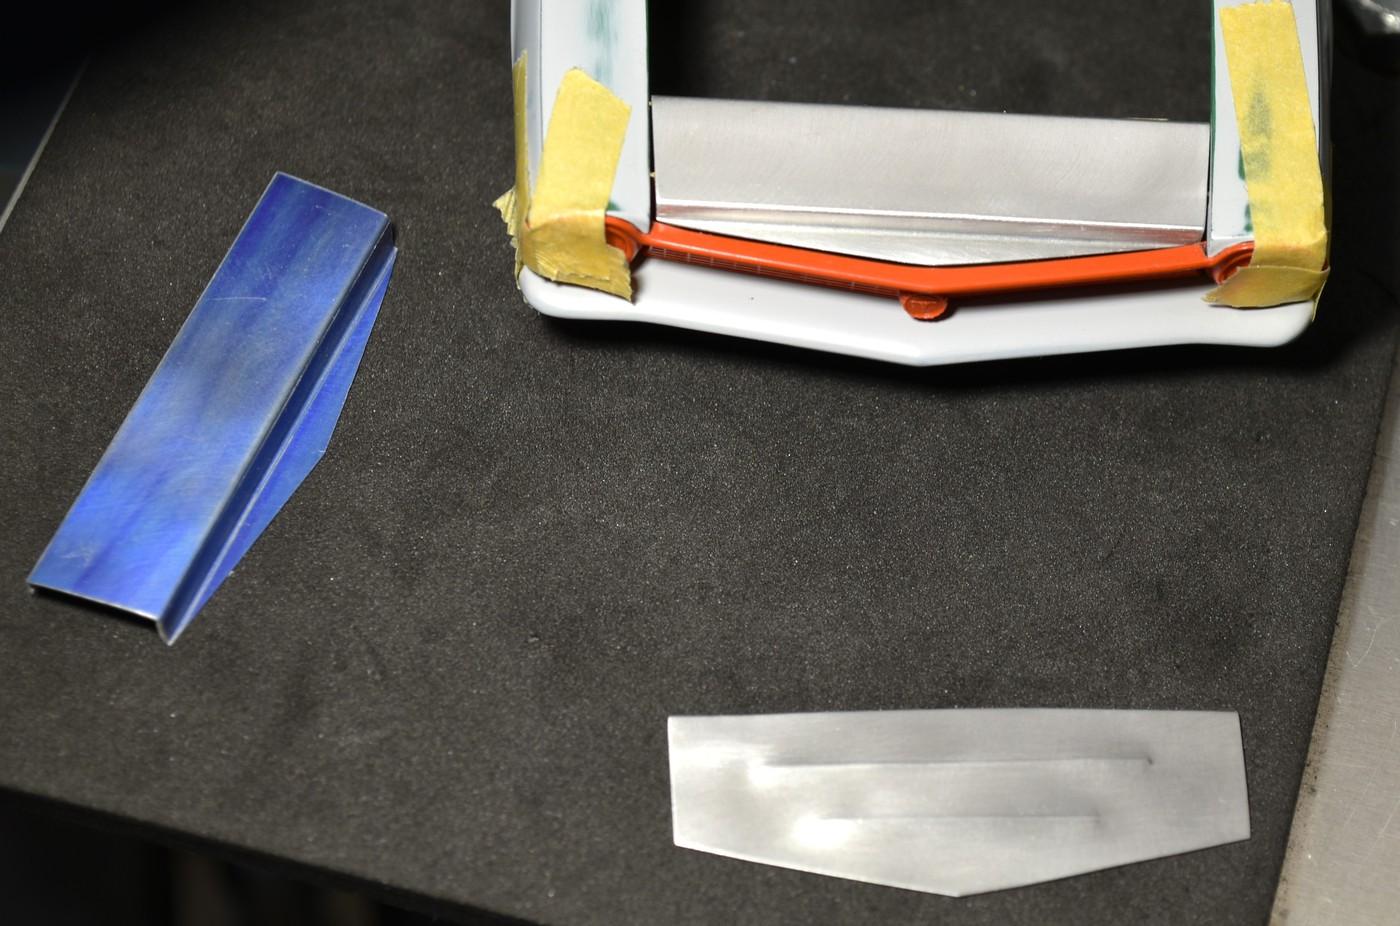
Hi, welp, it didn't look right to my eye. I'm posting a pic of what I'm striving for and I re-worked the top piece to reflect that. I'll tweek the bulkheads a little and then I'm going to fab a radiator up with a pretty nice looking top portion. Thanks for your patience. cheers, tim (Seats and the Lenco are after the radiator.......)
The mock-up pic shows the original in the foreground, the first attempt in blue....
-
2
-
-
That is absolutely exquisite Martin. Congrats on how it turned out, concept & execution. cheers, tim
-
 1
1
-
-
Yes Chris, yes you are. Windscreen & mirrors only things left? I'll say it again, I love this build. Congrats to you!!! tim
-
1
-
-
If you're looking for ideas Chris, MY birthday is in July. ? That's a show winner right there.
-
1
-
-
Hey Daniel, I admit it was a "contorted" mind meld that brought that one around. Thankfully it worked even if it took 2 tries. Thanx
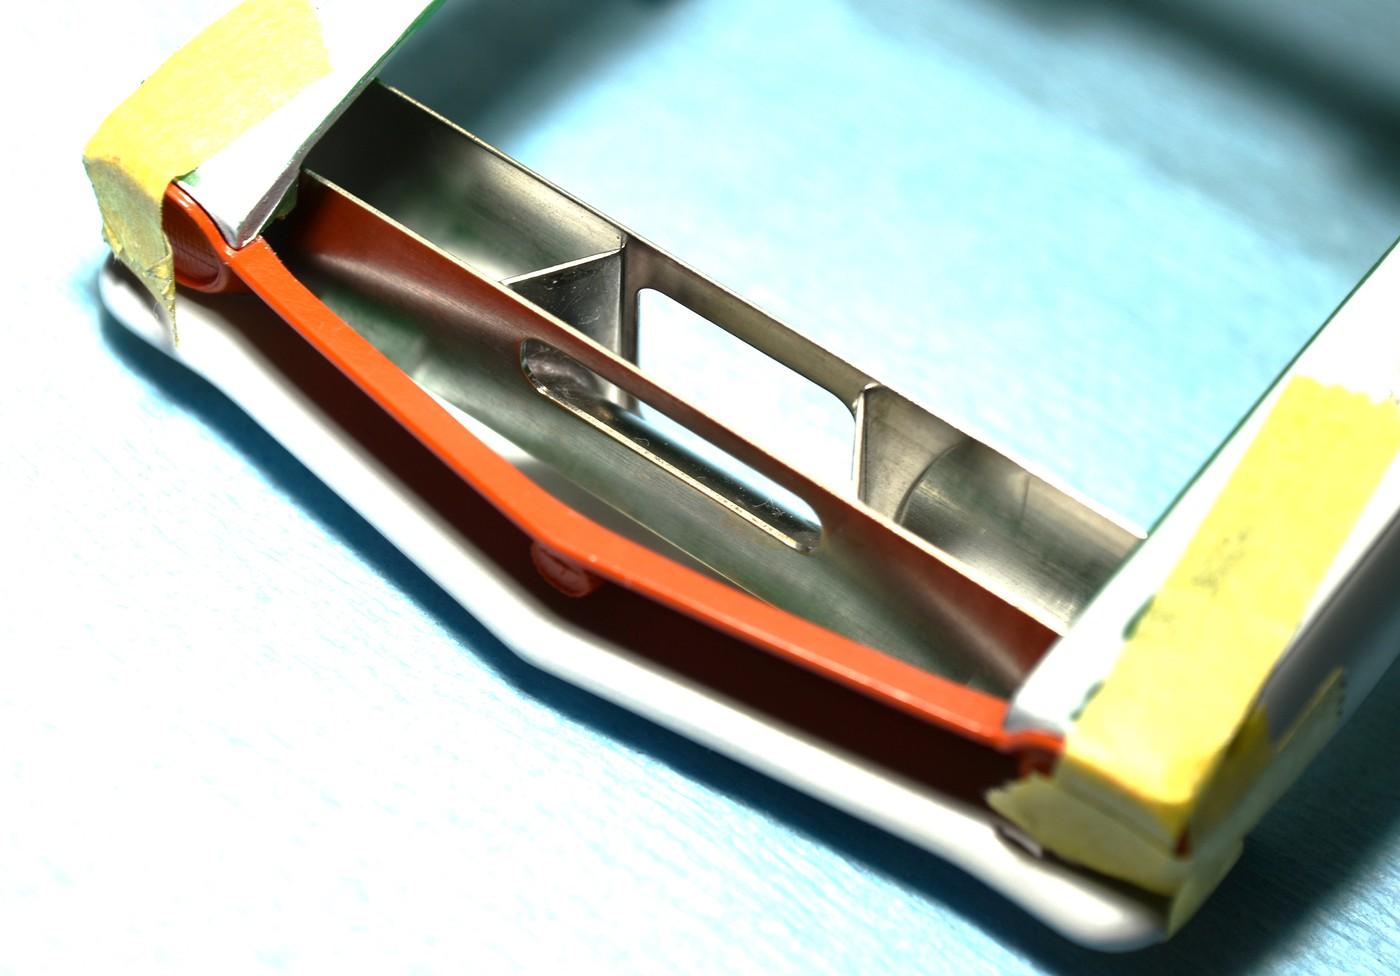
Today a couple pics of the bead rolled top aluminum bulkhead panel (that's a mouthful to describe this piece. Have to add the dzus fasteners at some point and the front clip will be mostly complete other than removing it from the body. Soon! Cheers all, tim
-
2
-
-
Anybody hear from Francis? Just curious as I thought I'd skip the Where's Waldo thread and hopefully he posts some news on this beaut soon. cheers, tim
-
Of all your builds Chris, this one is top 3 in my book, not just for the great job you've done but the subject matter as well. Kudos! tim
-
1
-
-
Always one of my favorite stops on the forum Charlie. You never disappoint. I check out the steering wheel, then you pop the front suspension in there with pics and then you close it with the pic of the front fenders/grille......what's not to like right? Keep her going Charlie! cheers, tim
-
Francis, come out come out wherever you are...........seriously though, I'm only repeating what others have said. cheers, tim
-
1
-
-
Ian, that's gotta be satisfying seeing that monster poking thru the hood like that......and it's oh so snug but perfect. I had to go back a few pages to get caught up but the chassis work is sharp as well. Nice build! cheers, tim


Maverick Pro Stock/Match Racer
in WIP: Drag Racing Models
Posted
I wanted to respond and also to answer the questions that were asked.
Robert, yes, it can be time consuming as you know especially when working worth small end mills etc. I don't mind the time involved to be honest....only when I have to do a part over.....
Rich, thanks for the sentiment and for also peeking in on the build.
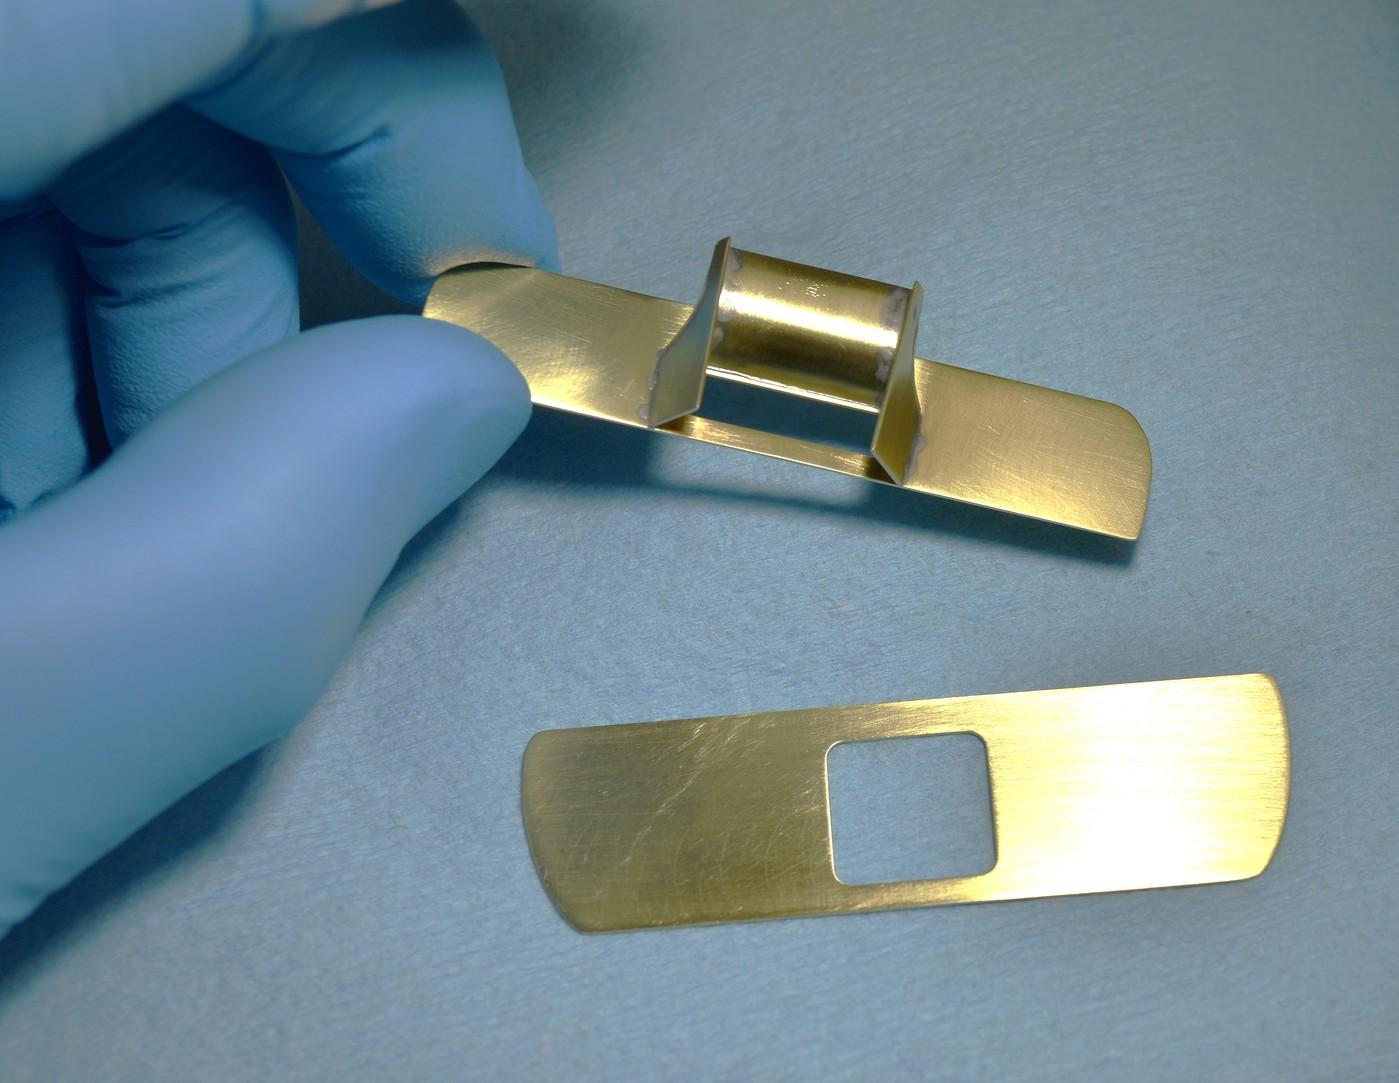
Daniel.....the petcock....I found a thin piece of photo etch in my parts bin that was part of a leaf spring kit or something like that. It had a fold line down the middle of it....I drilled a hole in the center of the fold line....placed a piece of stainless steel tube in it and then folded it slightly to form a V.....put a small drop of loctite thin glue on either side and used my photo etch pliers to squeeze each end as tight as I could up to the the tubing in the center. After I was certain the glue had dried i used my hand piece that spins up to 25k rpm with a jewelers .27mm cutoff disc to carefully shape it to the size desired and cut it off the steel tube. Was simple to do just took me some creativity to find something & method to make it. That's one of reasons I like to scratch-build though.
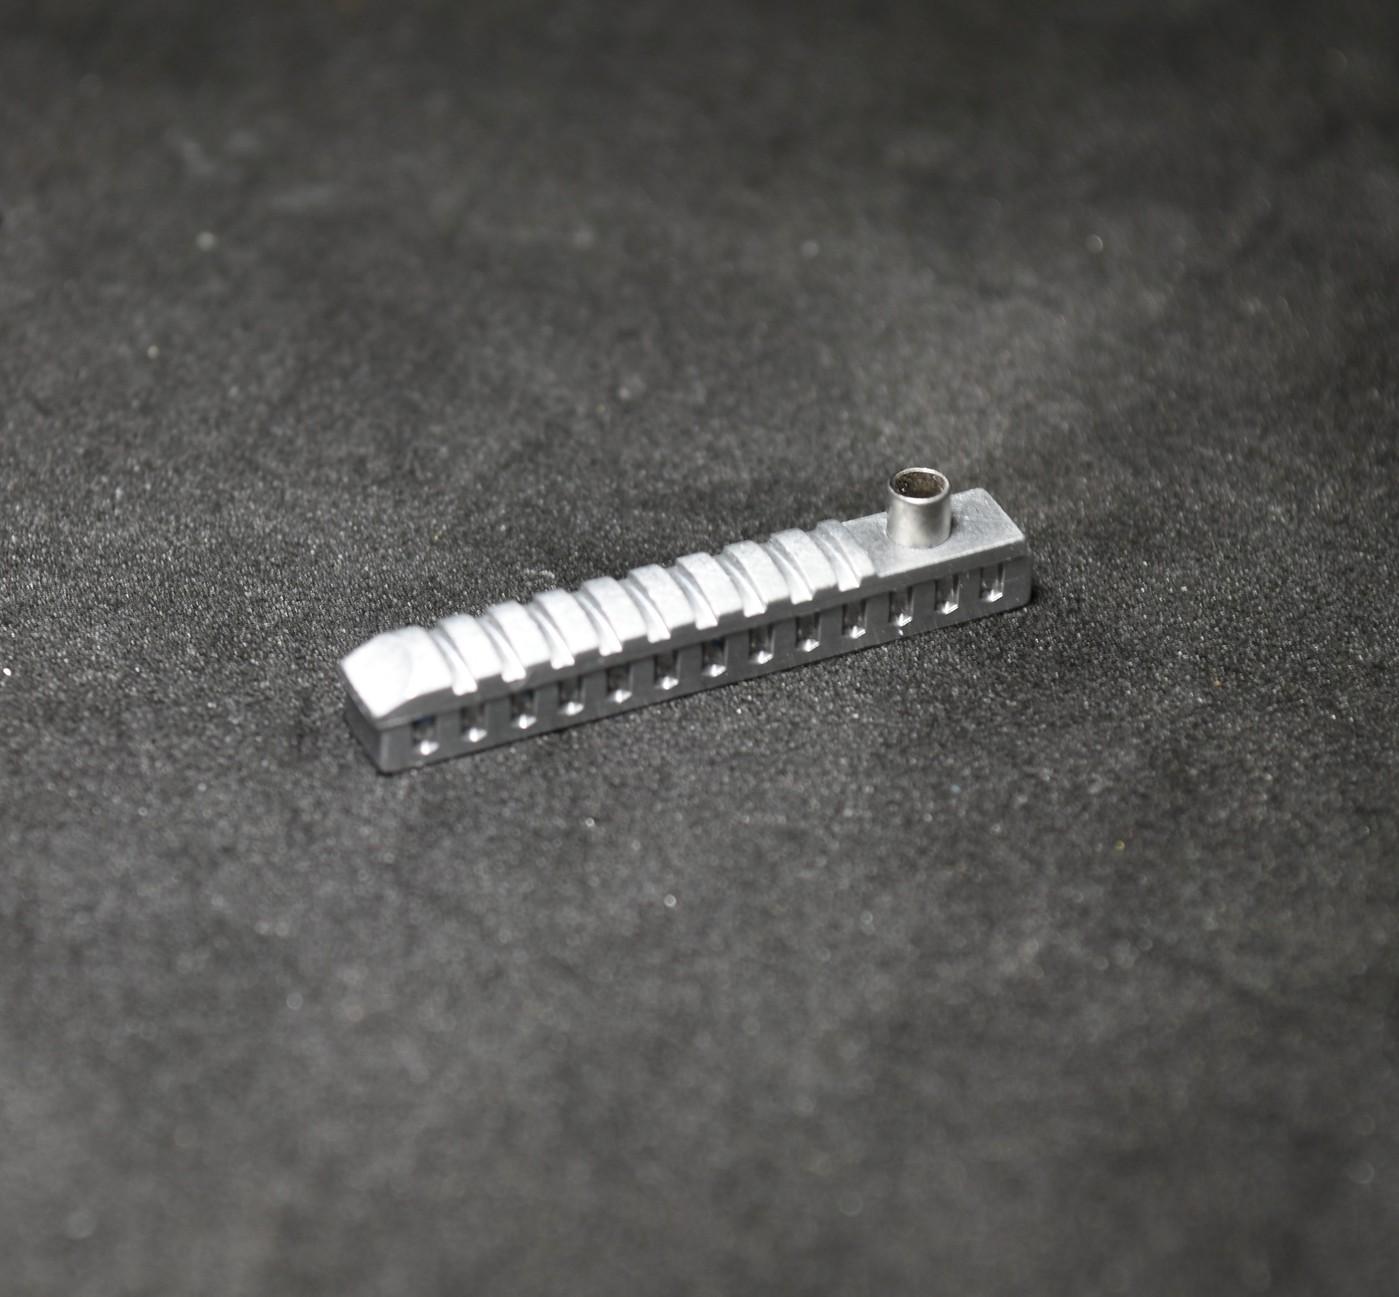
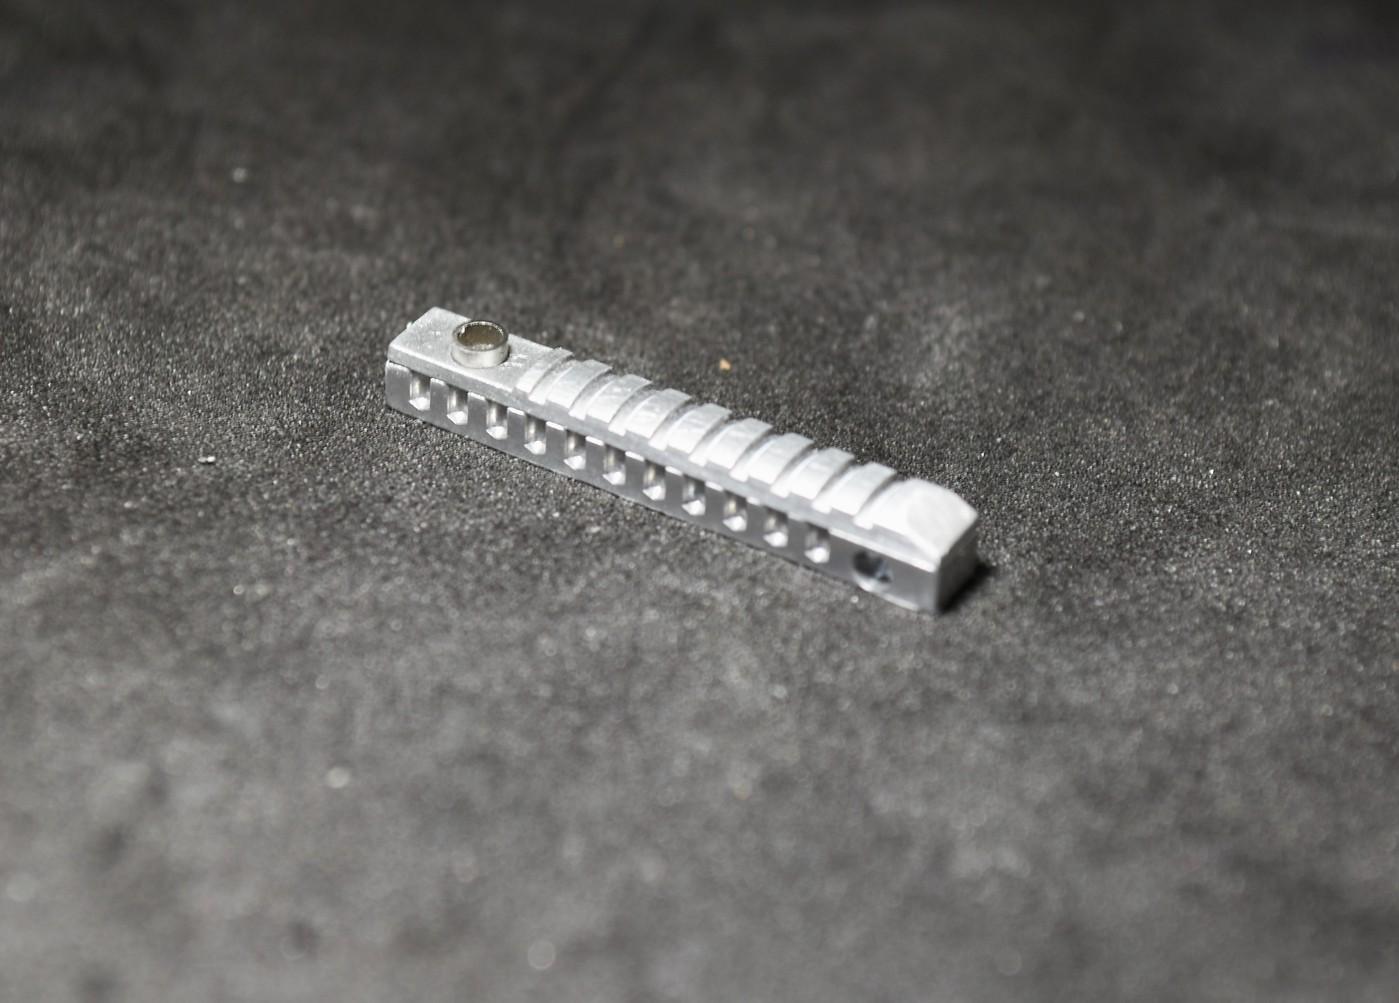
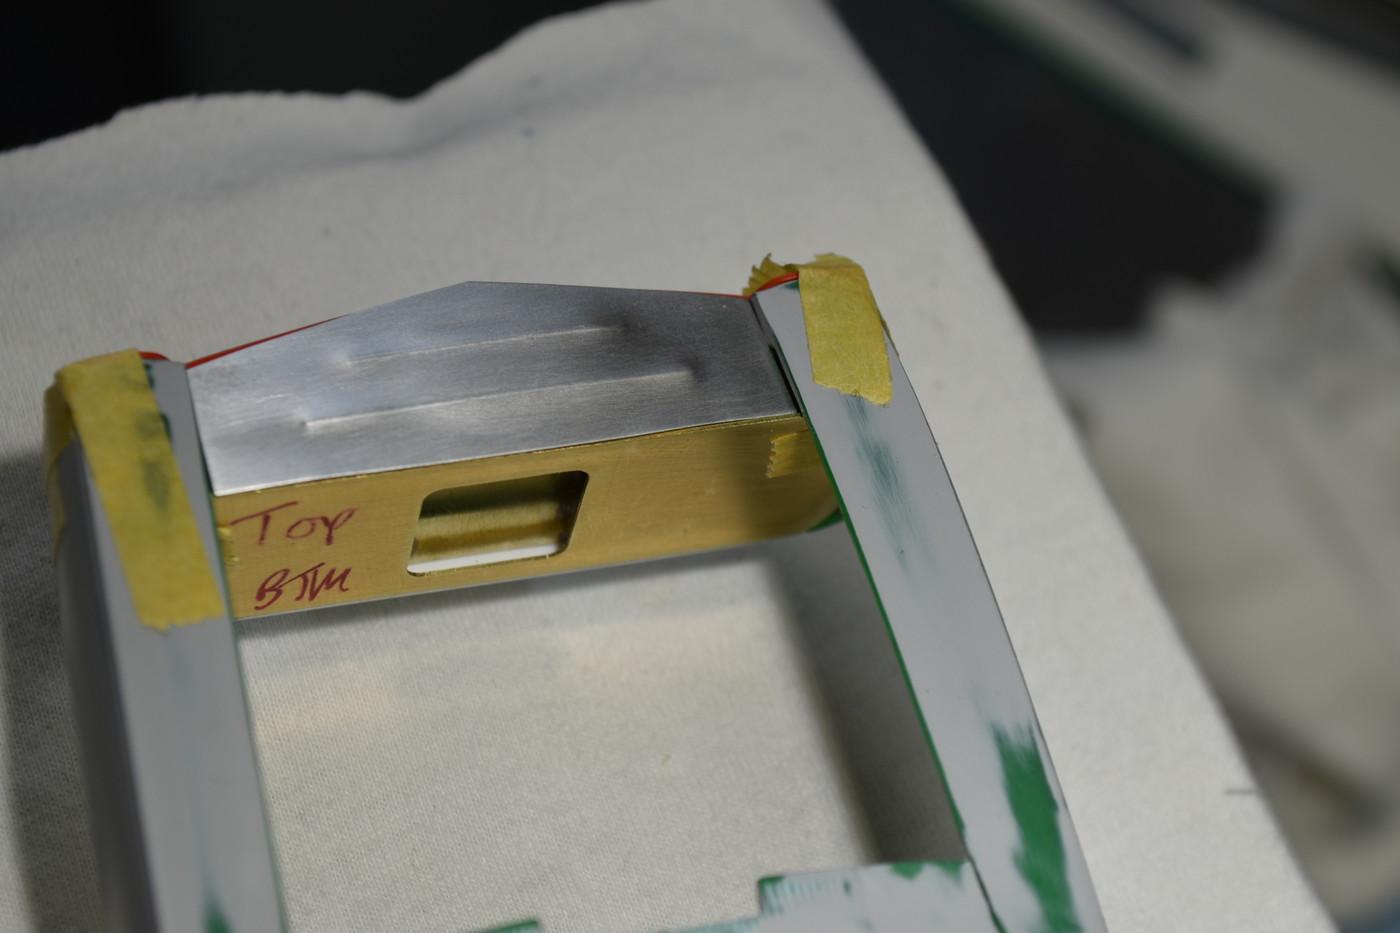
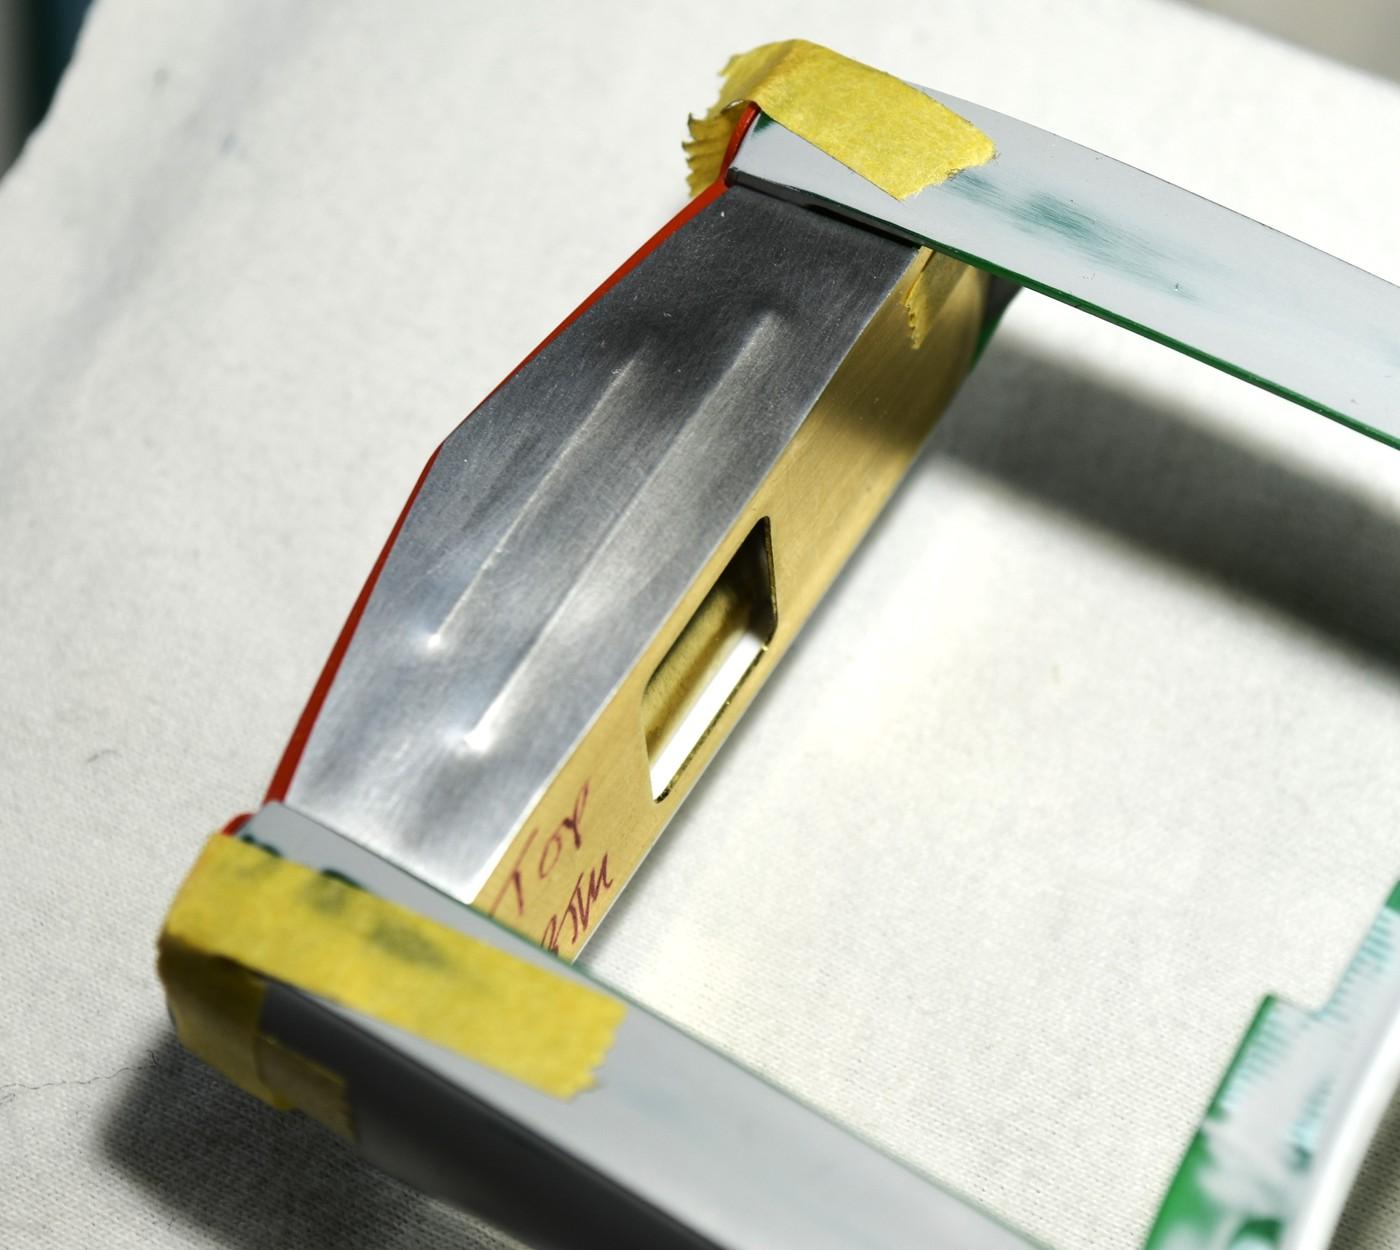
Mike....I wanted to make the top portion as one but after considering many options, the simplest and best was to make it into 2 parts and put them together. Each started as part of an 8.0mm alum. rod that I setup in my rotary vice that was set at 90 degrees. I've included a pic of the set up to give a better idea of what I'm describing. Then following my drawings I cut the pieces using the following end mill: 1/8" - 2.0MM - .8MM & - .6MM and cut them off using a jewelers diamond cut-off wheel (.27mm thin). My mill has the 10k. rpm pulley kit which has proven invaluable when using these tiny end mills and drill bits. I'll spin the teeny ones at 8K+ RPM......still have to go slow though. ------ Radiator cap, took a piece of 1/8" nickel/silver rod and on the rotary I cut in the sides to the angle I drew up and then used a .27MM (.0100) end mill to cut the 2 circular grooves on the top. Parted it off and glued it to the rod that was inserted in the radiator base. That was actually simple & quick to make.
Hope this helps.......I really have to get better with more pics along the way like Francis & Charlie to share "how" I make something. I appreciate when others share their methods and I'm a bit lax in that regard.