

Codi
-
Posts
2,651 -
Joined
-
Last visited
Content Type
Profiles
Forums
Events
Gallery
Posts posted by Codi
-
-
Just a suggestion for you Dwayne. Maybe select a simple hot rod chassis (an early Ford would be a great starting point) and make a smaller scale brass (1/24 or 1/25th scale) chassis to "cut your teeth" as they say. You won't have to buy much in the of equipment or material and it would be a great way to try your hand at it. if your happy with the results then step up to whatever you're comfortable with. Just an idea. Cheers
-
Happy Birthday Chris............what's it like to be 39 now?
 Cheers, Tim
 -
John - Thanks dude but you have nothing to blush about. What are your working on now btw and where do I find it?
Joe - Best of luck with your move and can't wait to see you back on the bench soon. I KNEW you'd pick out my ultra trick clamp
I actually shortened them and rounded the tips as they're much easier to get into tight spaces. They make great heat sinks too! Michael - I swear to you I'm not obsessive compulsive. I swear. Just fussy shall we say. And thanks for noticing. I haven't cleaned the joints up yet as I have a particular build process going on back there right now. But soon.
Ray, Leonard, Dave & John.....greatly appreciated guys. Hope you keep following along.
I wanted to ask if anyone knows someone that makes custom decals. I'm putting Braille Li batteries (twin 16v) in the back end of the car but there are no aftermarket decals of this particular brand. I need to make or have them made. I've never done them and the artwork for the particular battery I'm using is hard to come by. I've scoured the web but haven't found anything yet. I did buy a decal making kit from MicroMark but it's of no use without the proper image(s) of course. Any inisghts or suggestions would be appreciated. Cheers to all, Tim
-
Excellent chop even if it was your first one Michael. Sharp looking car and I'm curious to your final engine choice. Cheers, Tim
-
Nice save Kevin. I'm enjoying your Flak gun build under the "All the Rest" section. If you've not seen it guys, you should peek in on it. Pretty cool. Cheers, Tim
-
Thanks Randy.....and I'm looking forward to your next updates on your GT-40. Cheers Tim
-
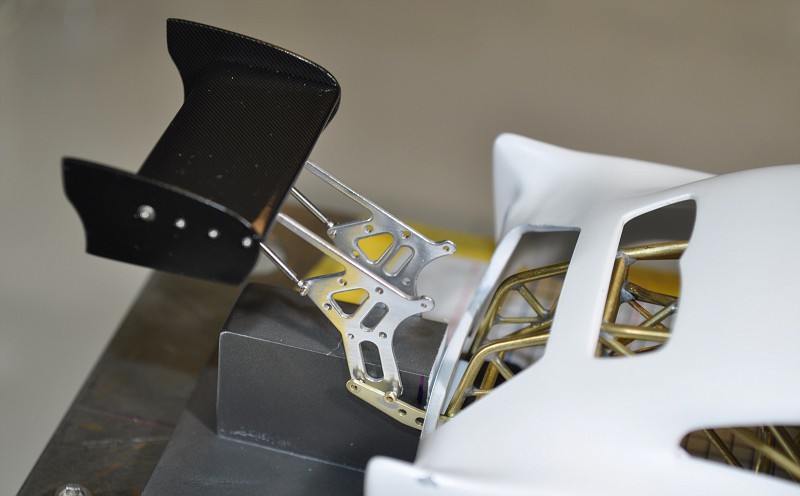
1/2 a day to make the twin brackets to affix the wing to the chassis. I had to remake the twin trees as one fell apart (careless on my part) while soldering it on. UGH! Anyways, the small brass brackets will be on the inside of the chassis, not the outside as you see them. The wing strut will then be secured on the outside of the little bracket. The little bracket was a challenge as it had to clear the body, mate to the chassis and have the proper angle for the wing. Comments welcome. Cheers, Tim
-
Coming along nicely Leonard. Cheers, Tim
-
Nice looking stance on that Nova Tyrone. You nail that each and every time and will surely be a sharp looking build. Cheers, Tim
-
True eye candy Brad
-
Now that turned out perfectly. Enjoyed the pics and how to as well. ? Cheers Tim
-
This is fun, I'll chime in too and step over to the Comp1839 side of the discussion (note I didn't say argument) To do it in brass, you'll get a level of satisfaction that is a tick above the same in plastic, with the reasoning and knowledge that not everyone CAN do it. It WILL be more time consuming but if you're building for your own personal satisfaction, then take the leap and try it in brass. if it becomes too overwhelming, then you can always do it in plastic right? I build to learn new things and like the challenge that comes with it. Hopefully you'll find the reward and satisfaction in that too.
Cheers, Tim -
Don't suppose you want to share your method Kevin? I understand if you'd prefer to keep that to yourself. It looks PERFECT! Tim
-
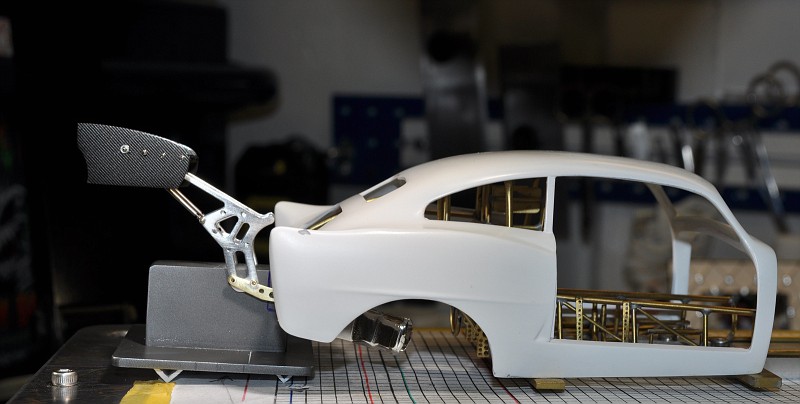
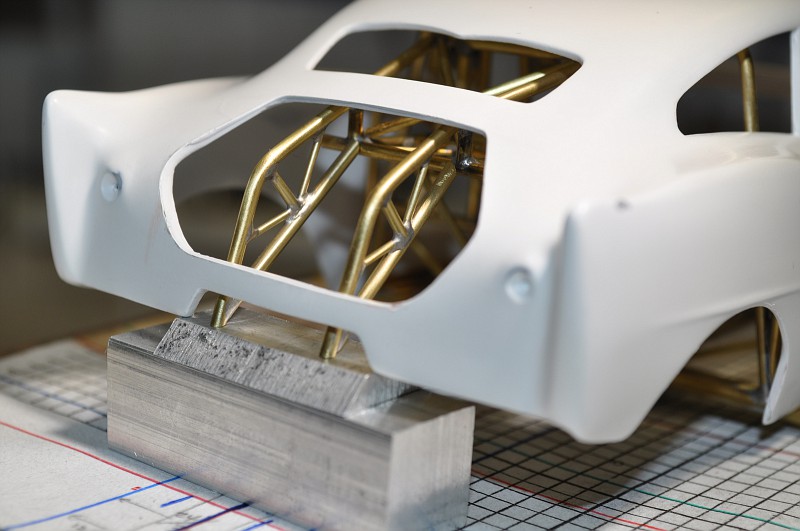
Thanks so much fellas. Hope to get some work done on it today and have it attached to the frame by tomorrow along with some additional bracing. Then I'll make the brackets for the wing and chutes. I'm anxious to mock it up with the body in place and the wing & wheelie bars attached to the chassis.
Clayton - I use a 250 watt, American Beauty resistance soldering setup. Somewhere on this thread, I think I shared the model number. There are pros and cons of doing brass v. plastic, it's just what suits you and what you want to achieve. I say jump into the pool, the waters fine!
-
Chris, thanks for sharing your methodology when it comes to your fabrication processes. I've got to sharpen my computer skills to do some of the things you've presented, but just like learning any new skill, it would help me to be a better modeler. I like that back window and had planned to use it on a future build. Can't wait to see how it looks on your build. Cheers, Tim
-
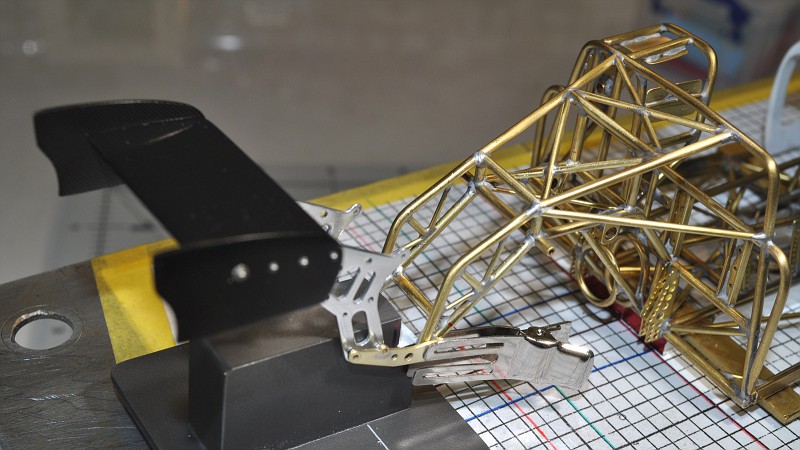
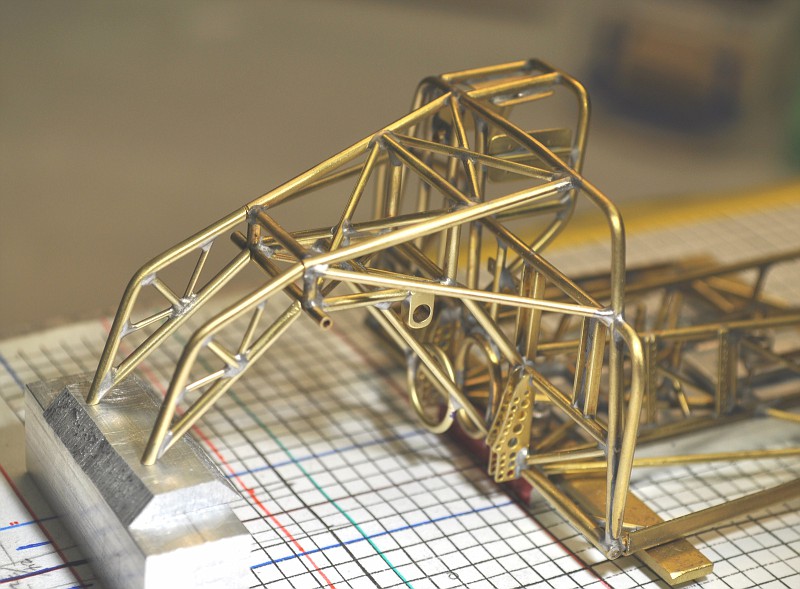
Started the rear "tree" of the chassis. I have to thread the chute / wheelie bars and wing struts through the whole thing and make sure the trunk lid clears of course. Cheers, Tim
-
Kevin, that last pic REALLY shows the level of detail you've added to this piece. A few hundred modifications and additions and the next thing you know, it looks real when all are put together. You should be smiling at that pic and make it your screen saver for inspiration as you move ahead to completion. Super job! Tim
-
Bruce, so good to see you back at it on this build. Love the new posts and progress. Your tire weathering skills are simply perfection. I swear I had to take 3 looks at em' to discern that they weren't the real thing. The best weathering of a tire I've ever seen, at least in our hobby. And the intake screens are of a similar quality. Now I remember WHY i always look forward to your posts. Cheers, Tim
-
Very good progress Joe. I always enjoyed hacking and shaping and bondo, but only up to a point. It's the really fun & creative side of the hobby I guess. But bondo, sand, primer, bondo, sand, primer, bondo, sand, primer, bondo, sand, primer, bondo, sand, primer, bondo, sand, primer, bondo, sand, primer....gets a little old at some point. Can't wait to see it when you're past that stage. Cheers dude!
-
Ray, yup, I must admit, it was worth it afterall, just needed a few days for my memory to dim over the aggravation they caused me.
Henry, you're quite welcome.
Dave - Nope, I have no need for the old one, BUT, i do save certain parts as you never know when it might come in handy in some way on another build, right? But I most assuredly appreciate your sense of humor!
-
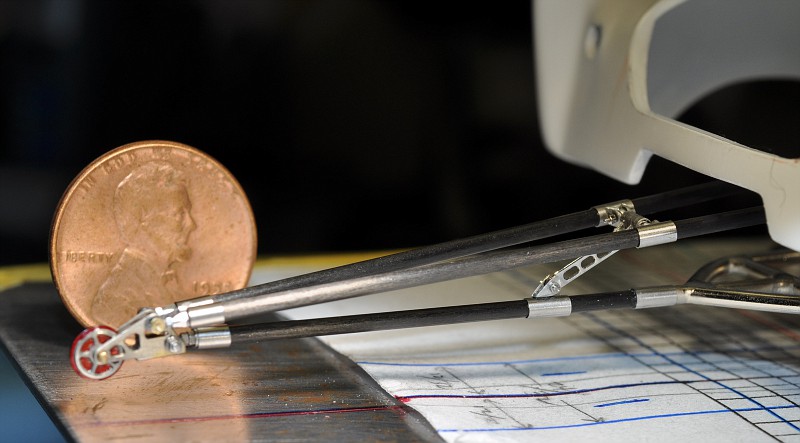
Paul, i bought mine from RCFOAM.COM - They have an excellent assortment. The problem you'll run into is I build for accuracy as much as is feasible and the smallest tube they offer is 1.8mm which scales to 1.8". Real 1:1 wheelie bars are 1.6" in diameter. The difference doesn't sound like much but on the car you'll see it. Just compare the pic of the 2 sizes I made as the 1st was only .3mm smaller than the second but it looks downright skinny next to the proper size. They offer 1.5 and 1.6mm ROD which I used but had to drill out, but it is a real PITA to do so as it easily splinters. That's what took me so long to make these and made it a bit frustrating. IF and when they ever offer 1/16" CF tube, they'll sell a bunch of it just for wheelie bars alone.
That or you're going to see at the shows a bunch of cars with oversized wheelie bars. Hope this helps. I might not have enjoyed making them but I DO like the result. The look of the real CF bars on the car just can't be beat IMO. Cheers
-
Appreciated fellas, they were frustrating to make.
The hands good now Joe, a little sore and swollen at times, but a couple more weeks and I'm expecting no problems at all. Thanks for asking.
Scott (futurattraction) no meaning on the penny date. I was born in 56' though. I would like to thank and acknowledge Scott for his products as well. I used 5 of his PE nickel brackets on the wheelie bar assembly in addition to the 2 brackets I used from dirtmodeler (they were brass btw). We're fortunate as builders to have suppliers such as these guys to provide these types of products. It would make scratch building far more time consuming if we had to make such mundane items too. NOT meant to demean what they they offer of course as they provide a VALUABLE service/product. It's just that I'd rather spend MY efforts and creative juices making different parts for the build. So I'll take one last moment to thank in no particular order, RB Motion - Scale Hardware - DirtModeler - Futurattraction - BNA Models (of Australia) and M.A.S. (machined aluminum specialties) ....if I've not mentioned someone that I've used on this build, my sincerest apologies in advance. Cheers to all of you guys! Tim
-
And if anything will show a flaw, it's Alclad. Shows how good your prep really was Chris. Cheers, Tim
-
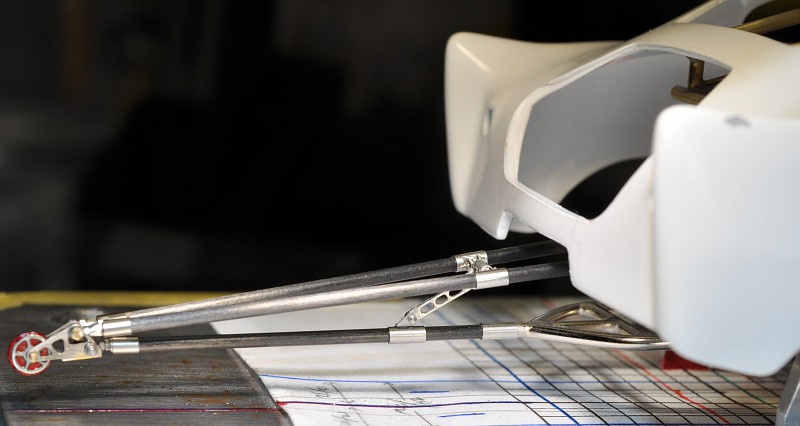
Hi, I finally got the dirtmodeler chrome bracket on that I received recently and think it thoroughly completes the wheelie bar. Comments welcome. Cheers
Now it's time to move on to complete the back end of the frame.
 Cheers, Tim
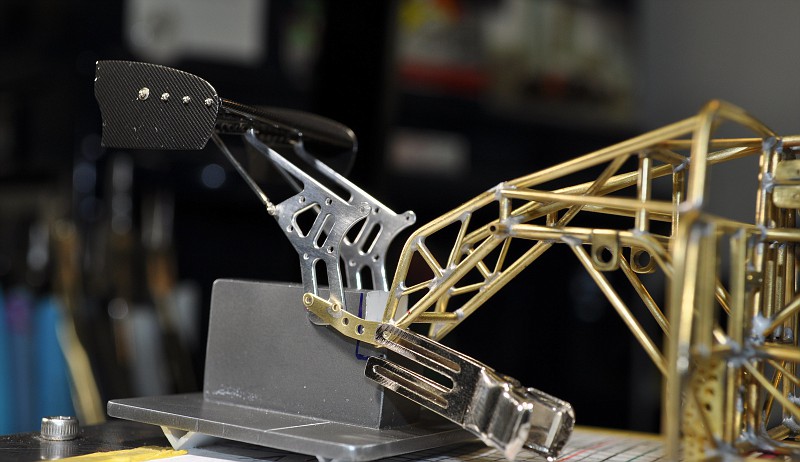
 Cheers, Tim

1:8 scratch deuce
in WIP: Model Cars
Posted
Now this is getting more interesting by the minute. Keep us posted on your progress Ray. Definitely something I'll have to try some day in the future. Cheers, Tim