
truckabilly
-
Posts
789 -
Joined
-
Last visited
Content Type
Profiles
Forums
Events
Gallery
Posts posted by truckabilly
-
-
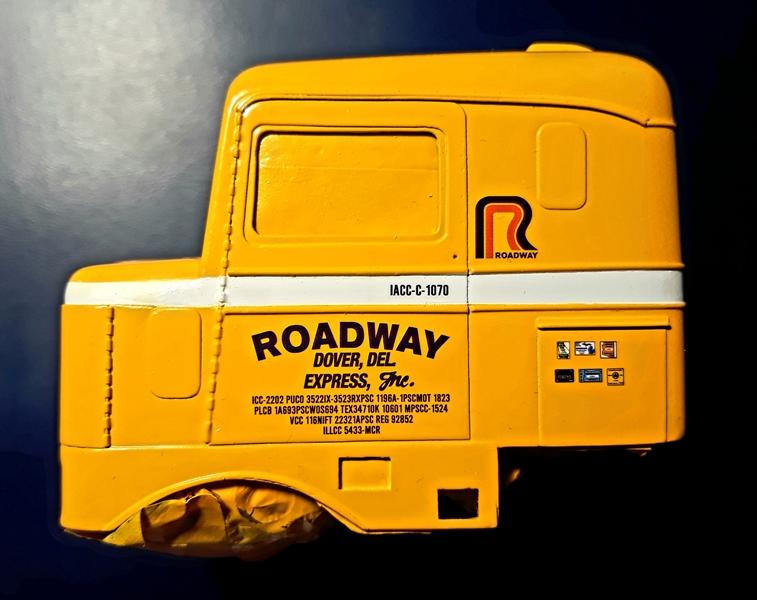
This is my rendition of KW Challenge mixer by AMT. I replaced the wheels by 1/24 scale front spiders and 2 hole buds for rears. The kit front spiders have sink marks near the nuts. That´s no go for me. I chose the front power take off, modified the bumper, went with a single breather and smoke stack. Inspired by a photo from Tim Ahlborn I ran the oil tubing through the fuel tank. I also replaced the dual headlights by single PE lenses. The kit dual lenses just didn´t fit the rims very well. I always add hoses and wires to my models. Tried some weathering and grime.

Thanks for looking
Jarda
-
 15
15
-
-
Been a while since I posted anything here. I hope I don´t mess up anything.
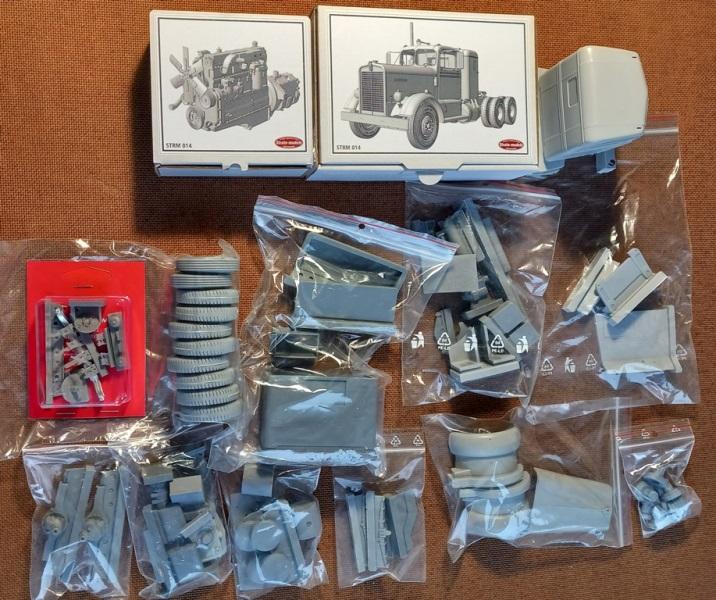
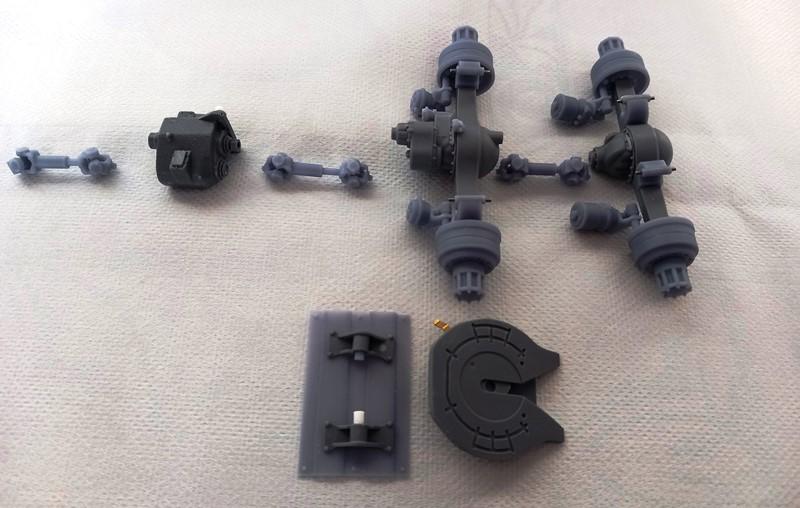
I started to work on KW Narrow Nose model in 1/25 scale. It´s a limited series of 20 kits I believe. Got one of them. The kit contains a complete model of the truck. No donnor kit is needed. There are PE parts in the box as well as resin and 3D printed parts. Plus a clear sheet for windows, vinyl hoses, painted PE dash board and water slide decals.
So far I cemented the parts into sub-assemlies that I will paint later.
Thanks for looking
Jarda
-
4
-
-
Looks very nice
-
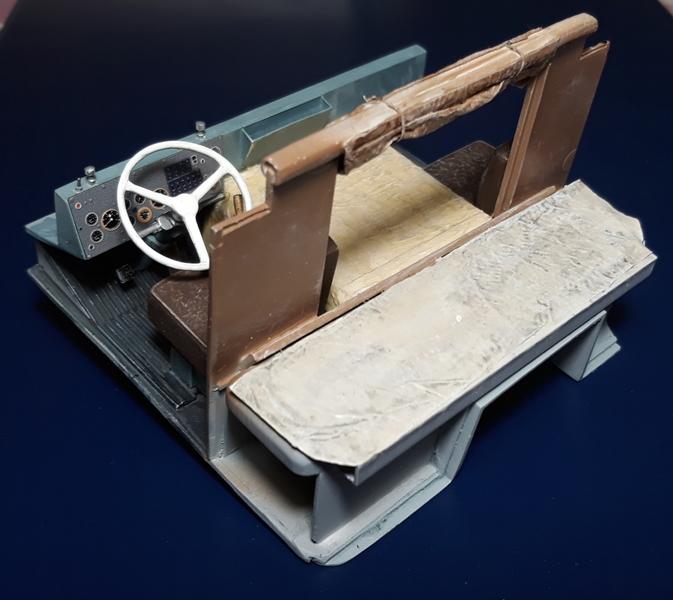
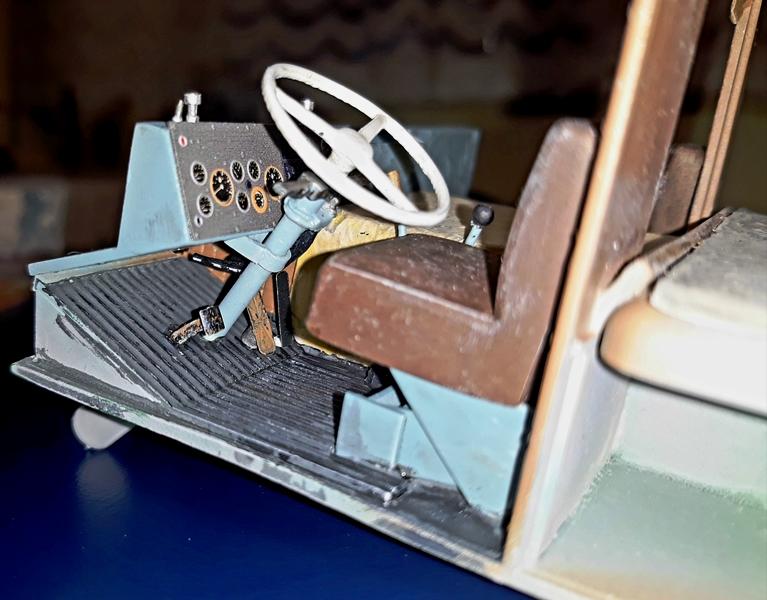
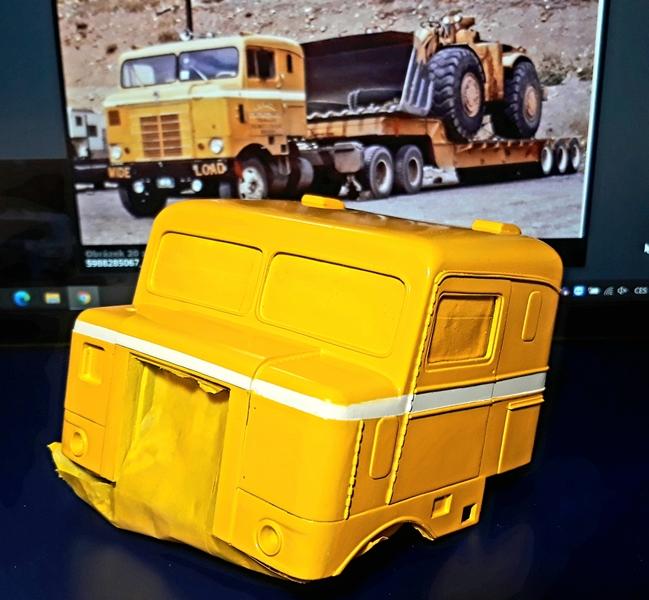
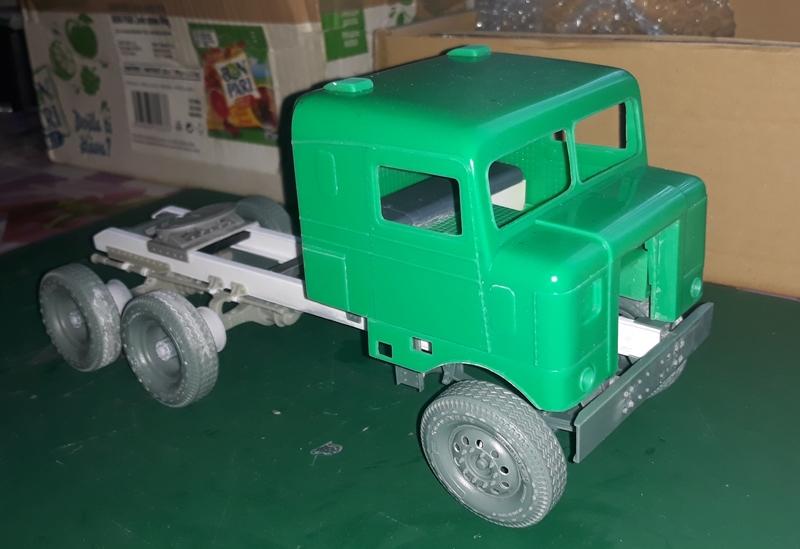
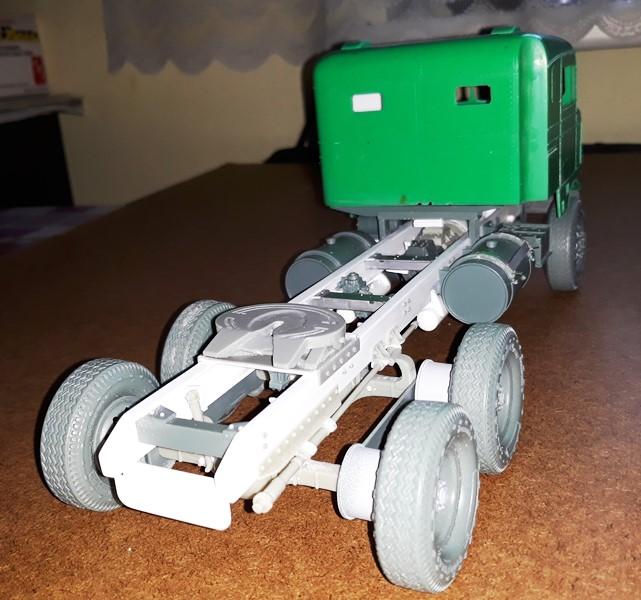
Well, took me a time again. But here´s how I went on with this ole COE. I painted and weathered the major assemlies.
I wanted some simple paint scheme on the cab. The notbook in the background shows my inspiration for the build. I even have the AMT´s low boy.
My favourite feature on the notebook picture is the sanders. I had to include them in my build. They are ready for instalation.
To be continued...
-
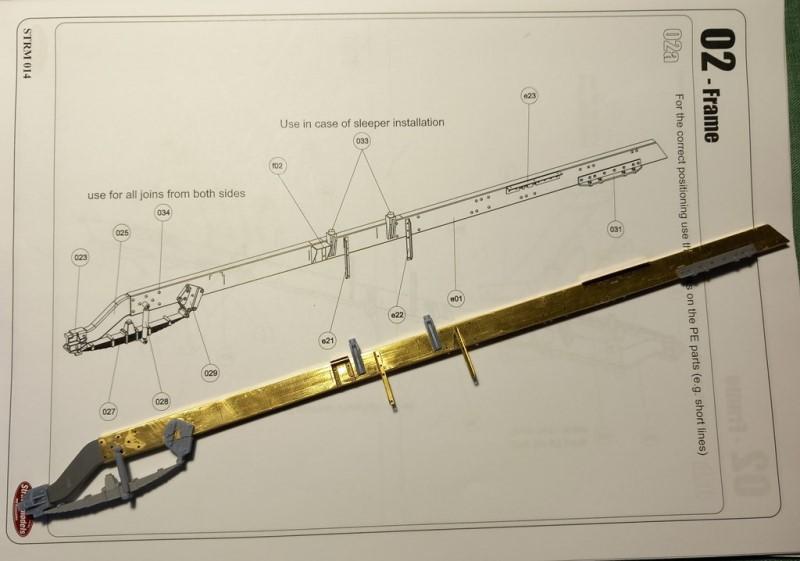
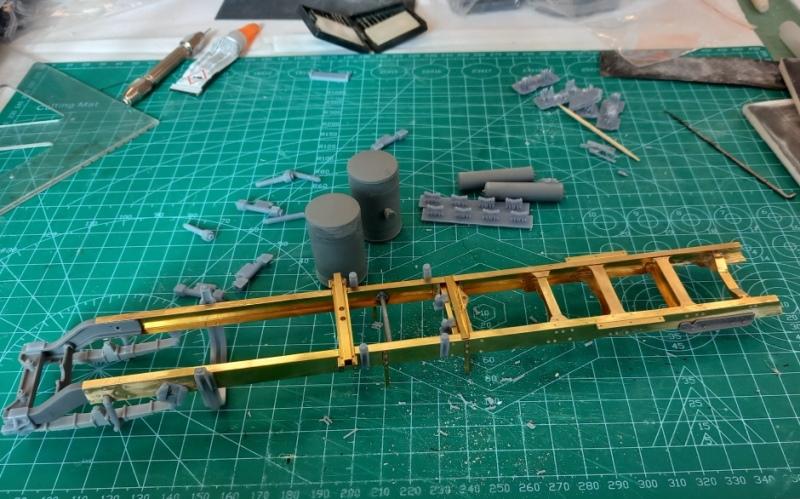
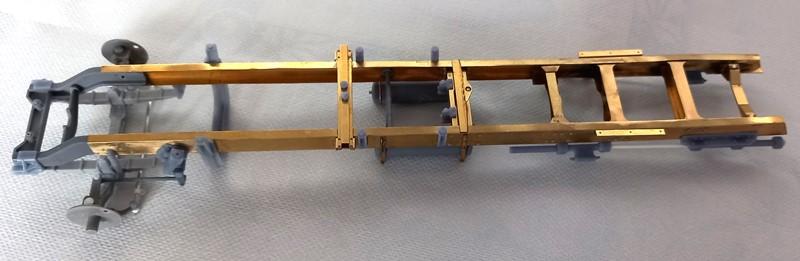
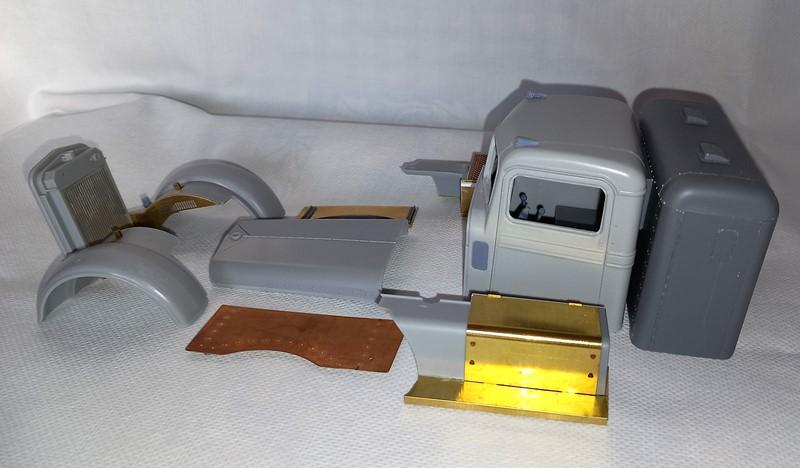
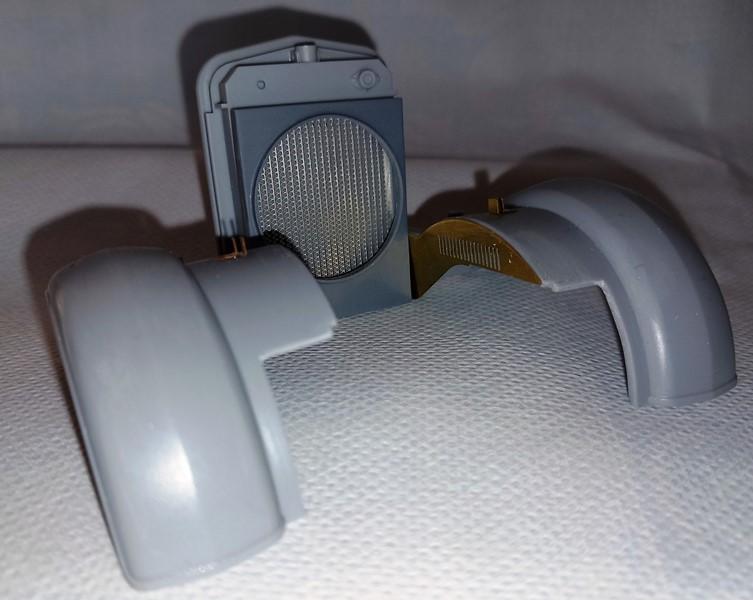
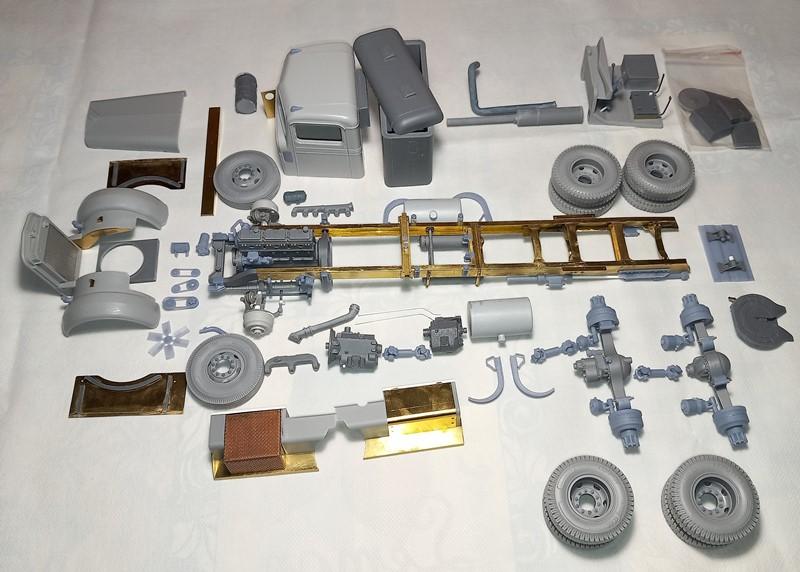
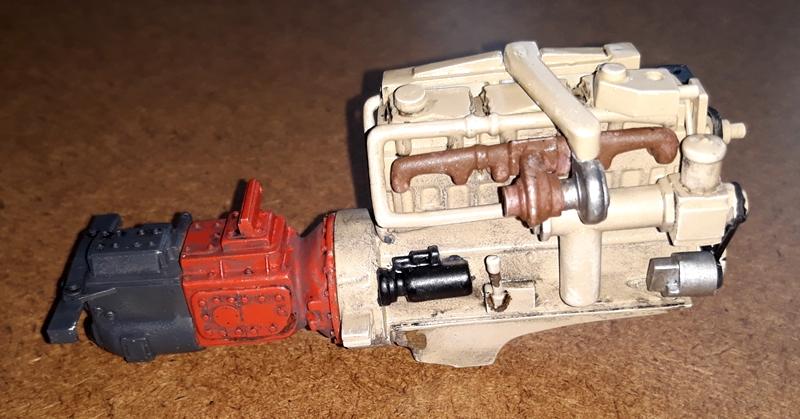
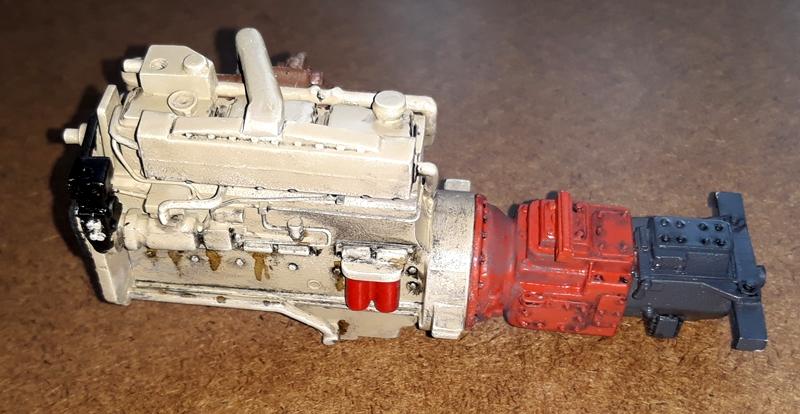
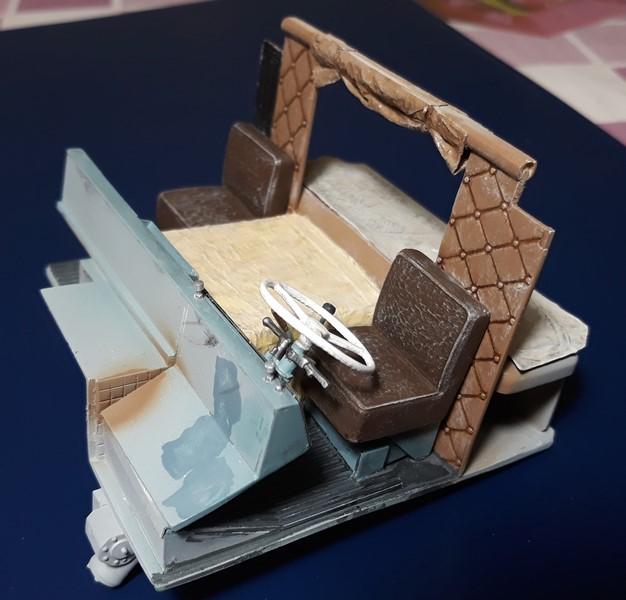
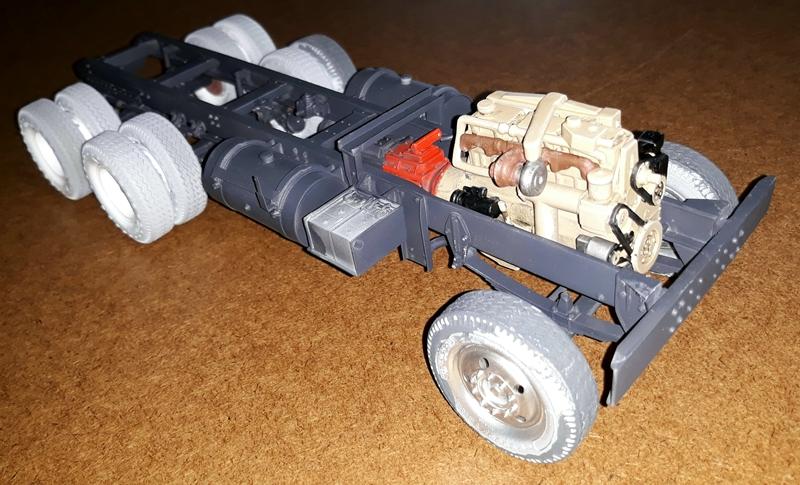
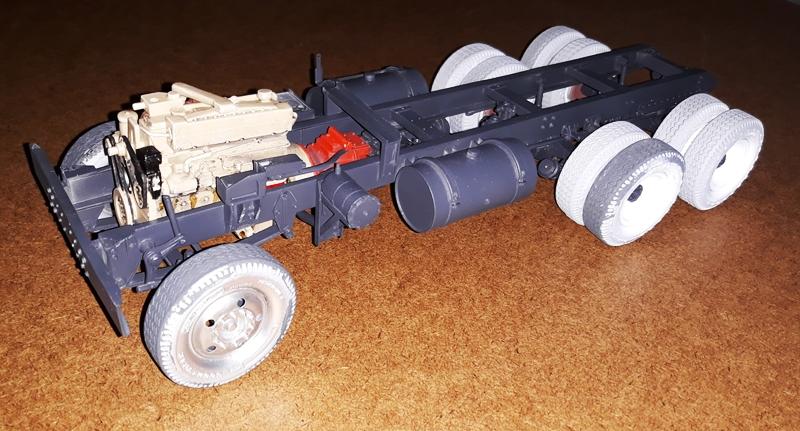
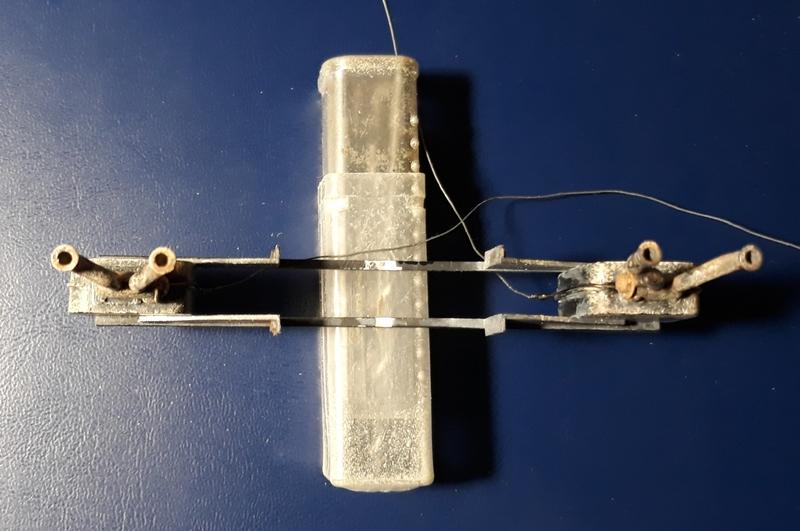
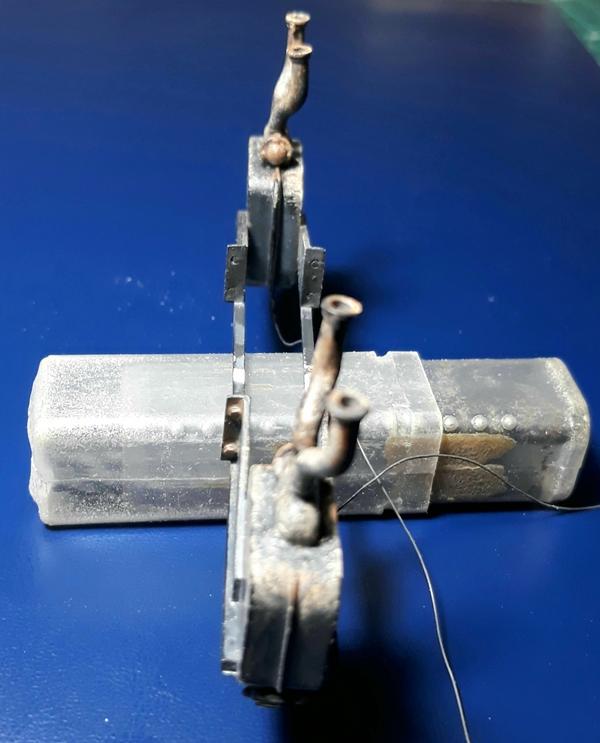
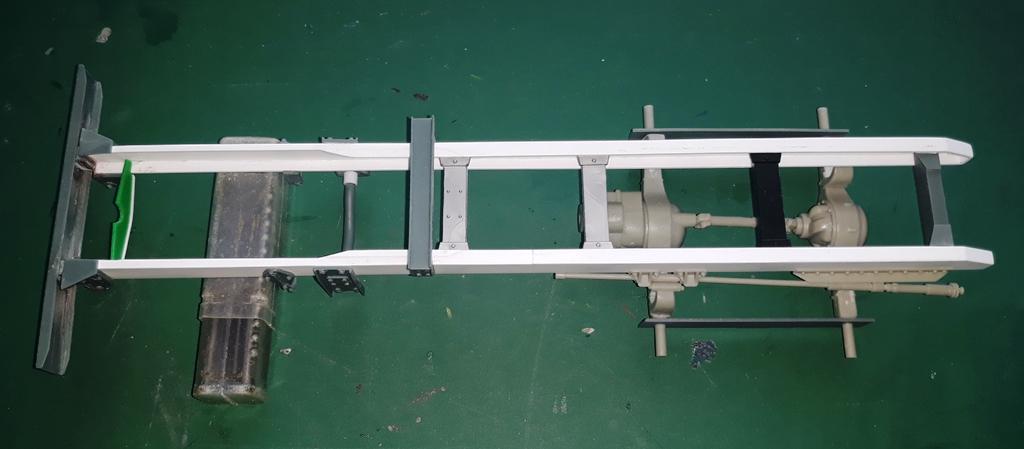
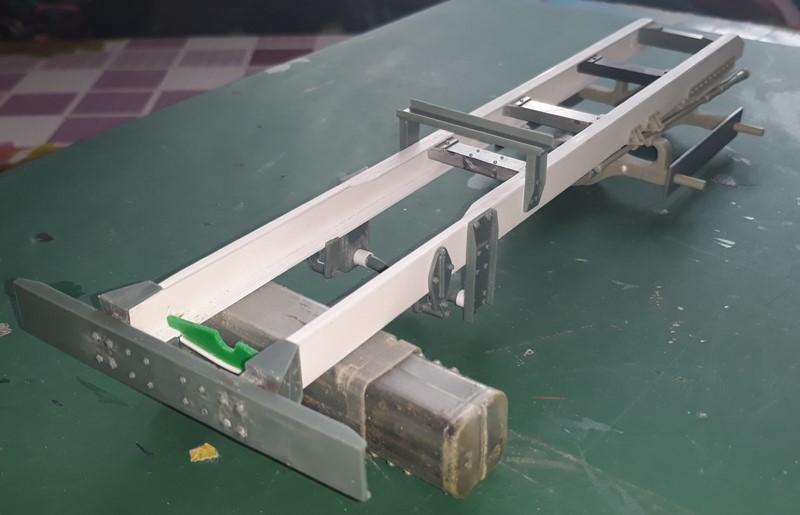
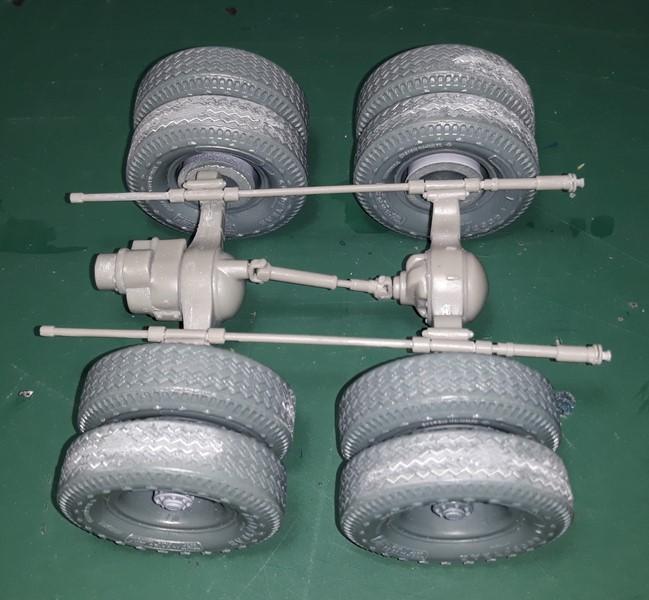
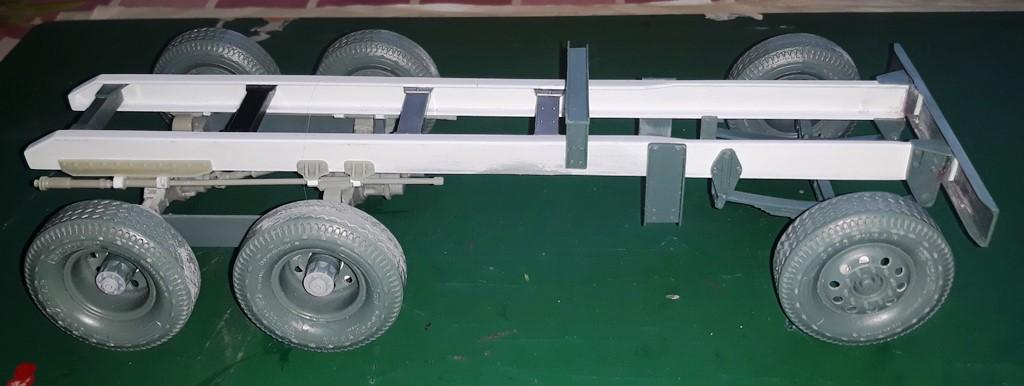
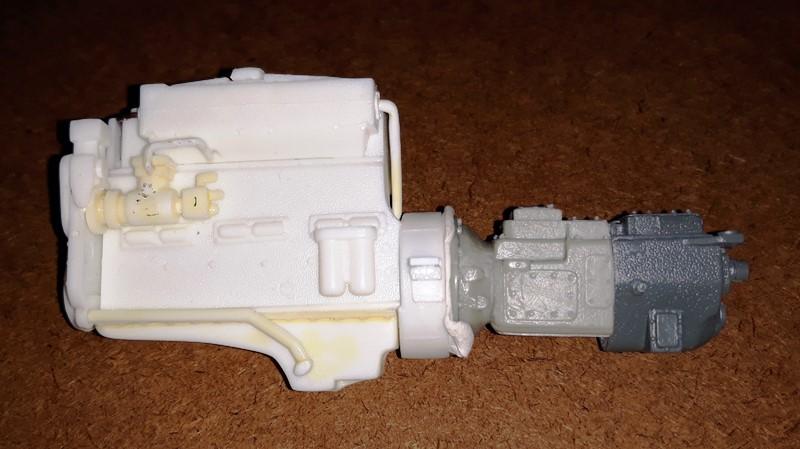
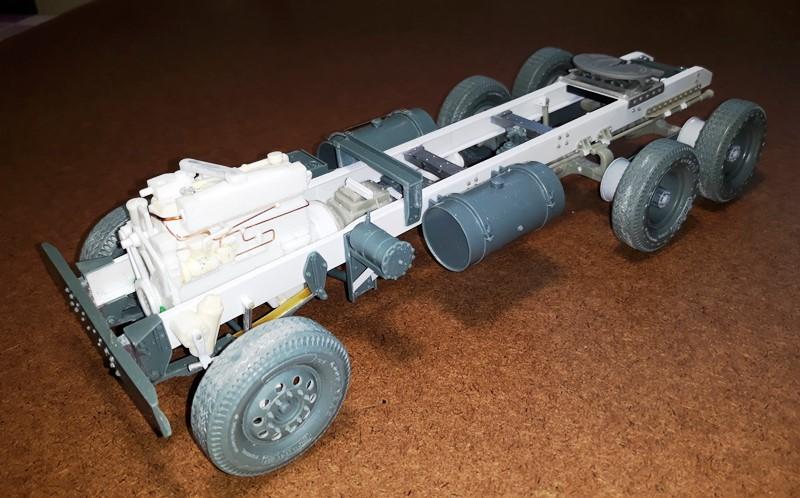
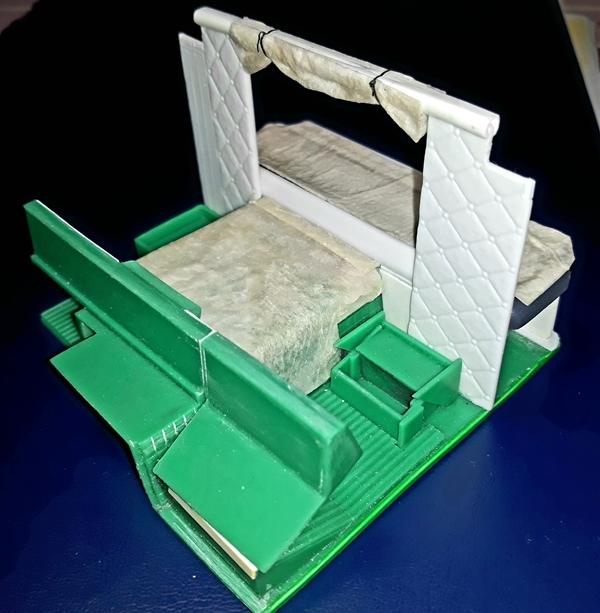
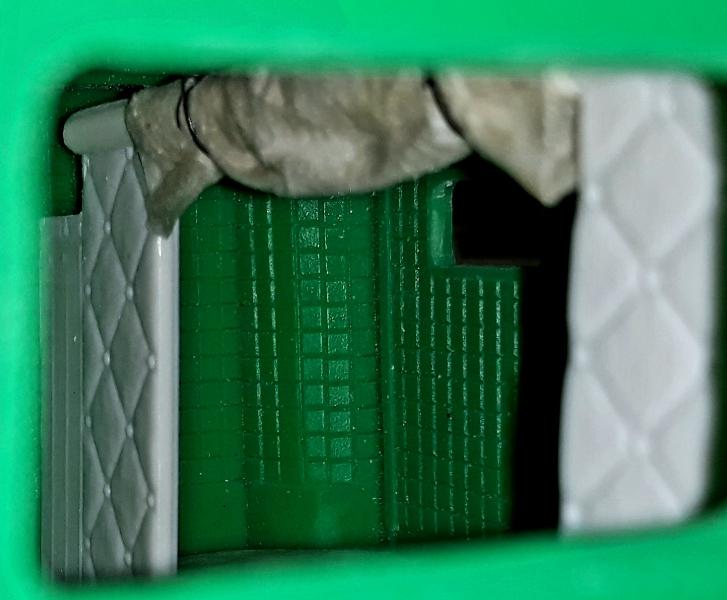
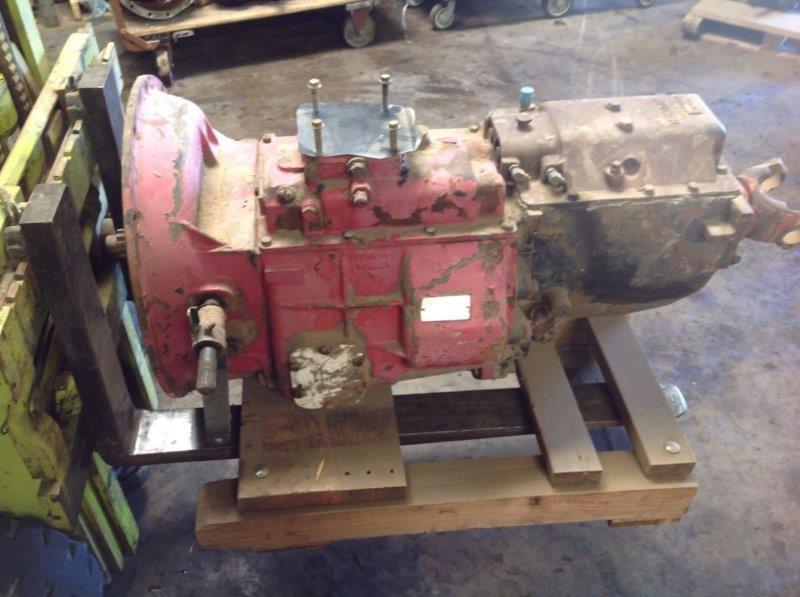
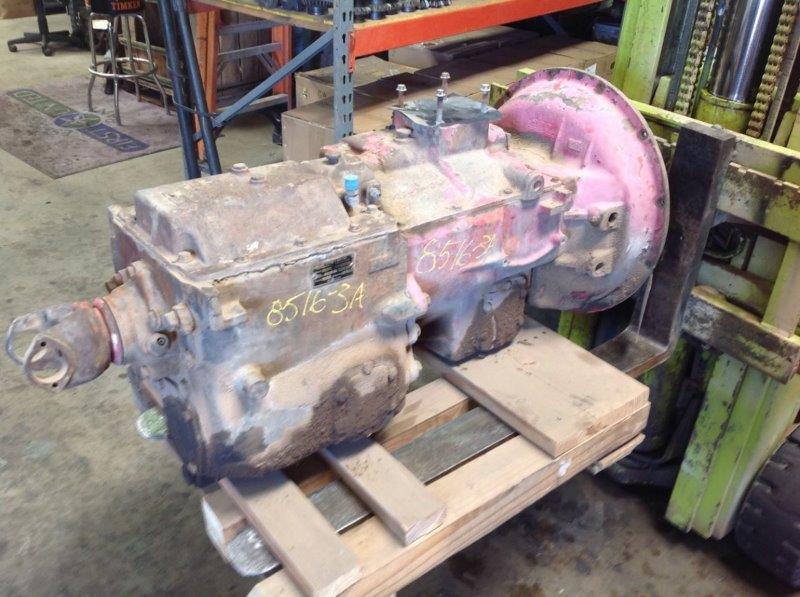
A time ago a friend of mine Pavel Behensky aka Strato Models produced a limited series of Kenworth Bullnose transkit. The kit is no longer available but I started to build it just now. Also of the Strato Models production is the set of wheels, the steer and drive axles, the torsion bar suspension, the main and aux transmission, the 5th wheel and a pair of sanders. I borrowed the Cummins engine from AMT´s K123 kit and modified the transmissions to create a married box. I added a few items in the cab like the bunk, partition walls, the dog house insulation and curtain.
The chassis consists of the scratch built rails, air tanks and Peterbilt kit cross members. I have no particular knowledge of the real truck so the frame is not correct, it is only generic.
Stay tuned, more to come soon
")
Jarda
-
I have a dumb question for you guys. If there is a married box in a COE truck, is it shifted by one stick or two? I can´t see a spot where the linkage to the AUX would enter.
-
Awesome job on the CAT
-
Very nice! I like the realistic look.
-
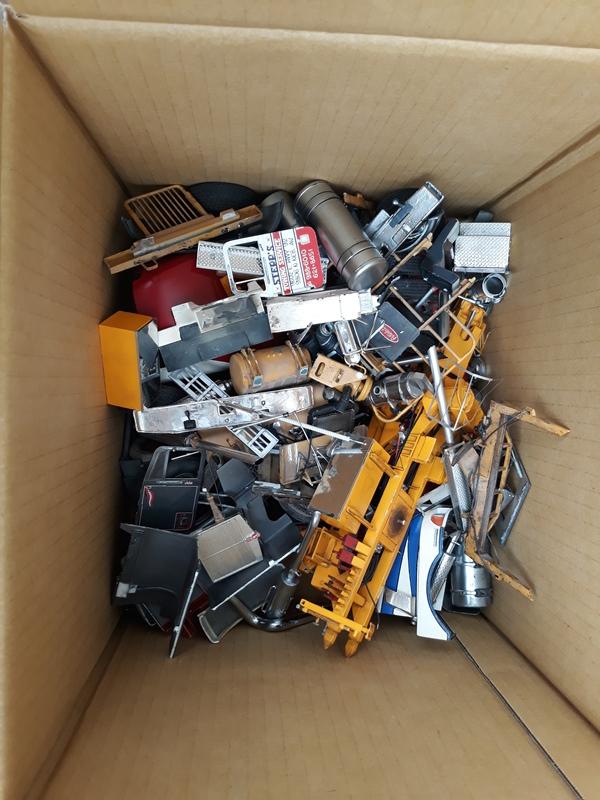
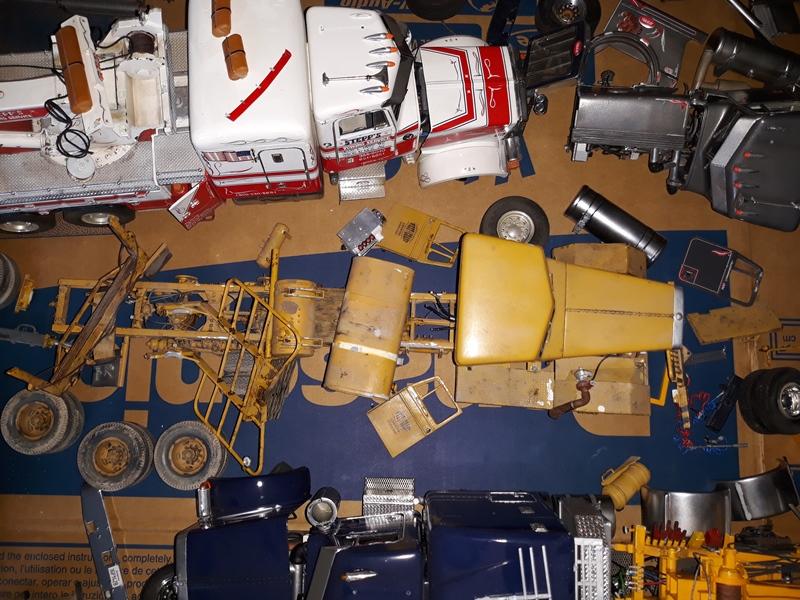
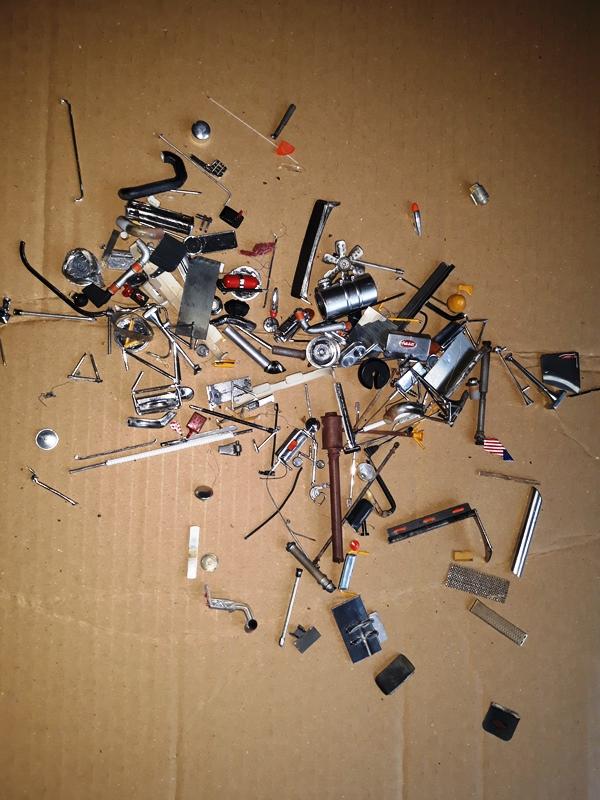
Thanks a lot guys for your words. I sorted out all the tiny parts and assigned them to the model they belong to. Everything is the boxes and plastic bags. And out of sight for the time being.
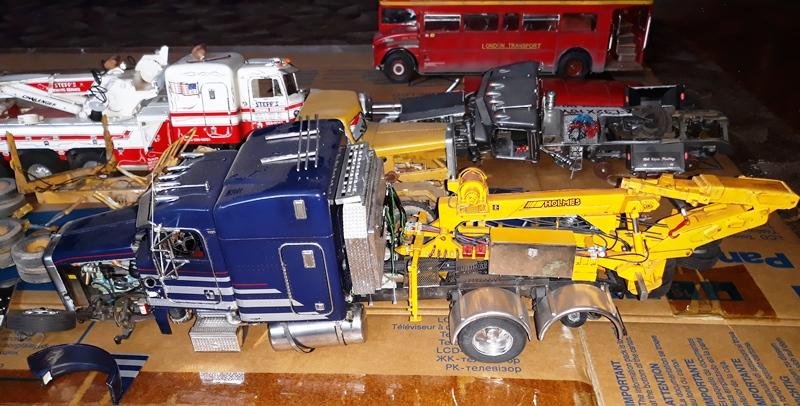
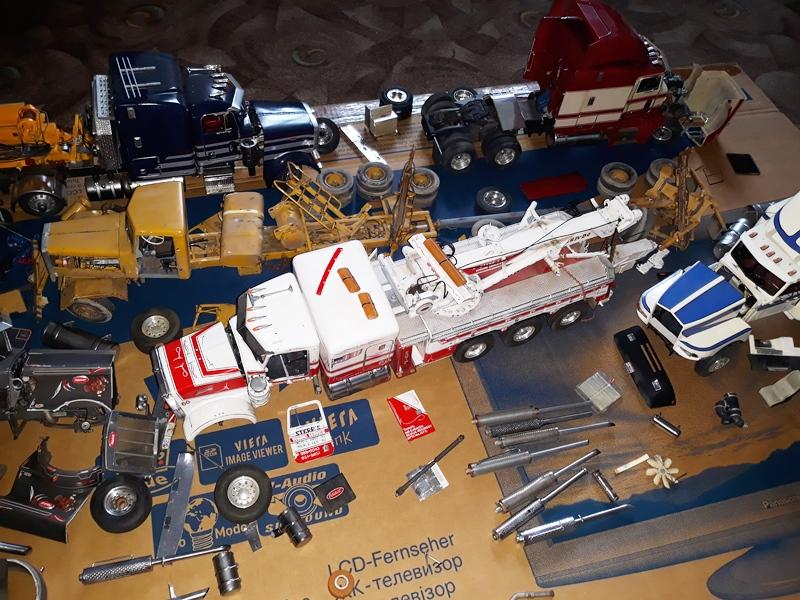
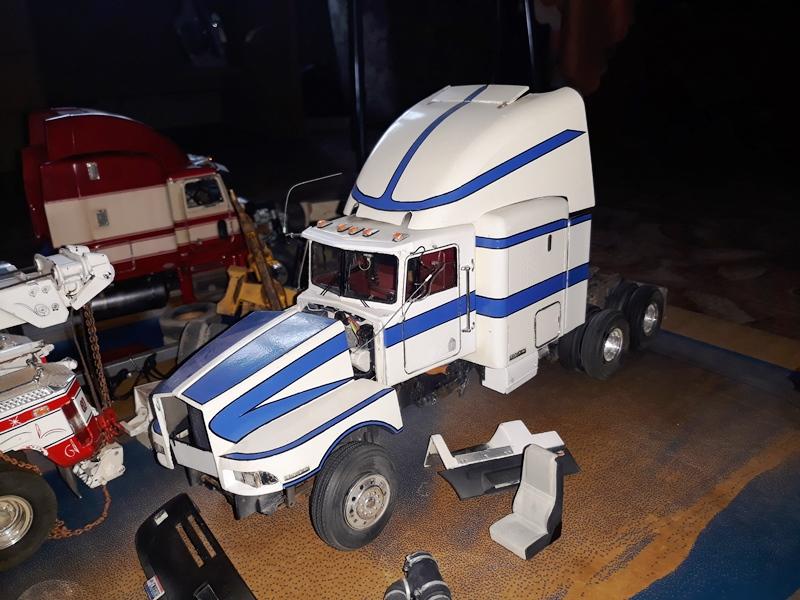
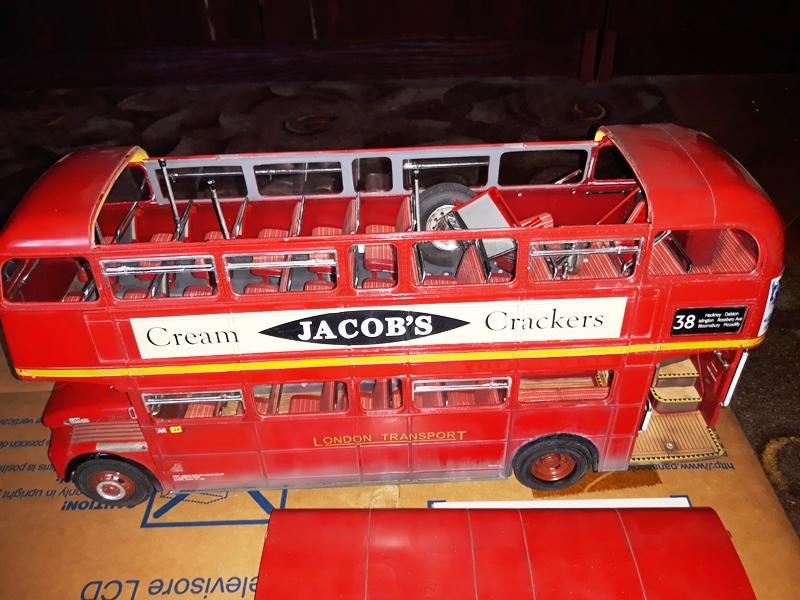
The museum personnel have done tremendous job saving all the tiny pieces from the glass debris. I must really give them credit here. But some parts are missing anyway. Two windows of the London doubledecker bus are gone as well as some light lenses. The Peterbilt 377 lost its bumper and PE grill by CTM. Also some mud flaps are gone. All the mirror brackets are broken into such tiny pieces that it´s out of question to try to put them back together.
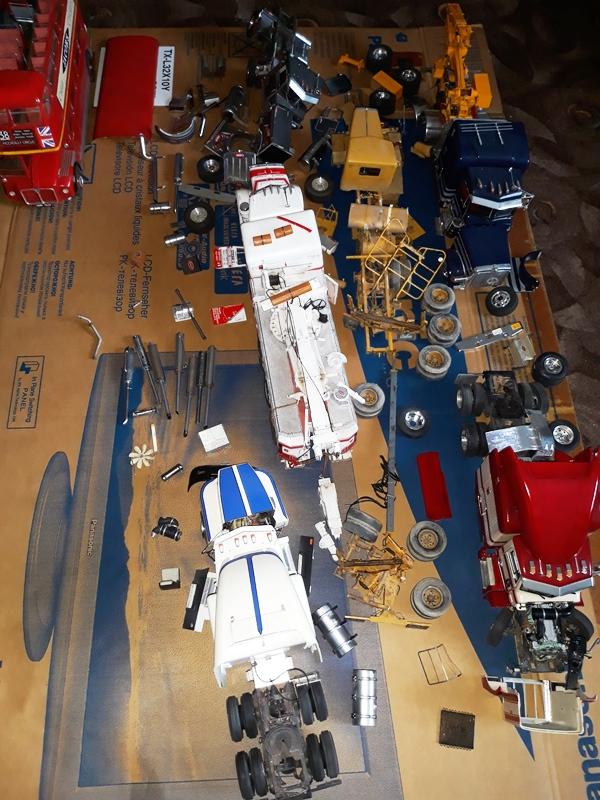
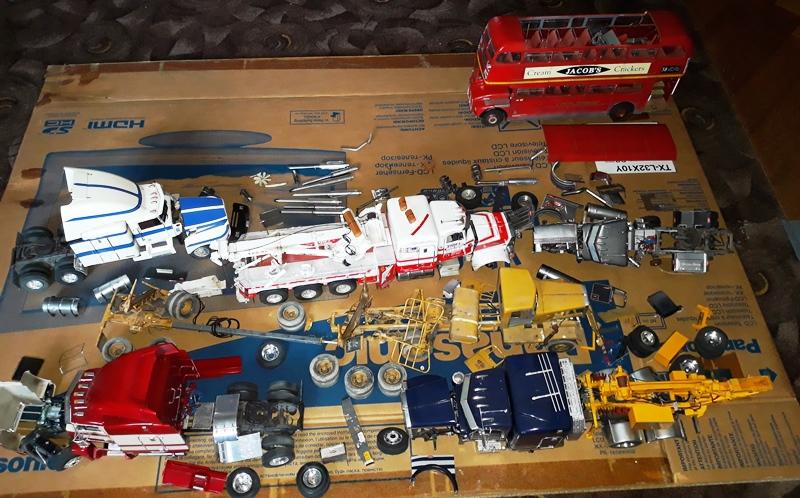
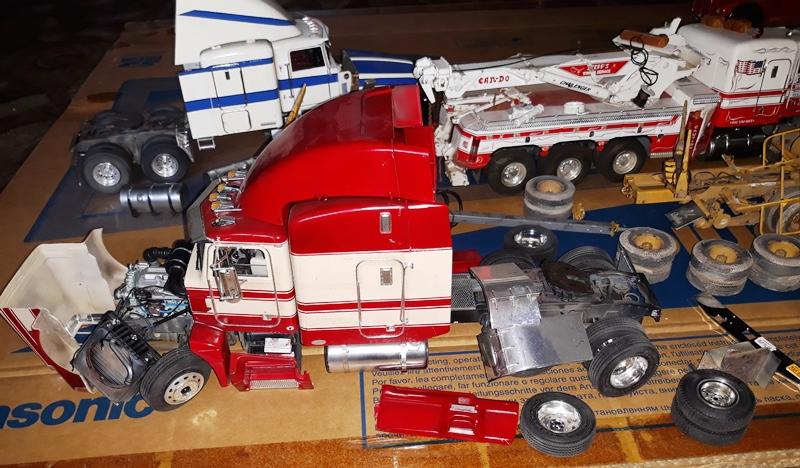
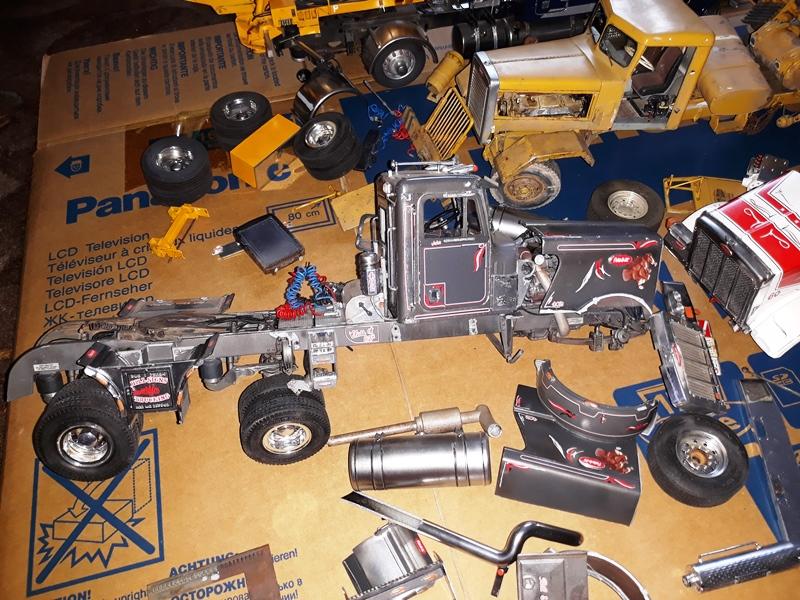
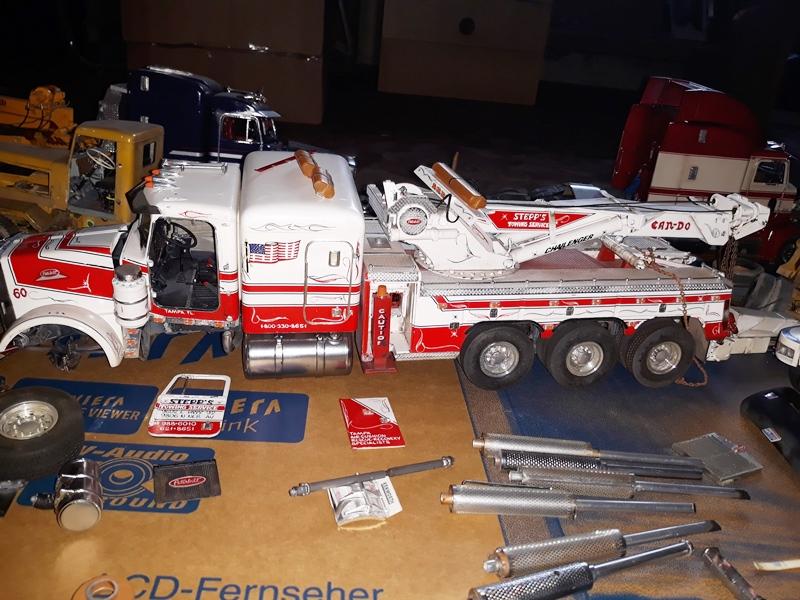
London bus and Kenworth T600 can be fixed relatively easy in a reasonable amount of time. The Can Do wrecker which is hard to find a new, will be fixed no matter what. The Clydes II aka Bill Signs is in such a bad shape that it never pays off to restore it. Unfortunately, the same can be stated about the Peterbilt 351 logger. This model had so many heavy resin parts and everything fell off. Both Peterbilts by Italeri are also… dead.
I mean, everything can be repaired this way or another. But it takes so much time. Time of which I don´t have plenty and other projects are waiting. On the other hand, I am a stubborn kind of guy and I´ll have the idea of repairing the models in my mind settled, till it´s done. So, we´ll see.
As for the bastard, they have him captured on the video but they didn´t find him yet. And to be honest, I don´t really care. Hopefully, the insurance company will provide some compensation and let´s roll on. Life is too short for letting those bastards occupy my mind till I get my little revenge. No.
Thanks again to all of you, guys. You´ll find me at my workbench.
-
-
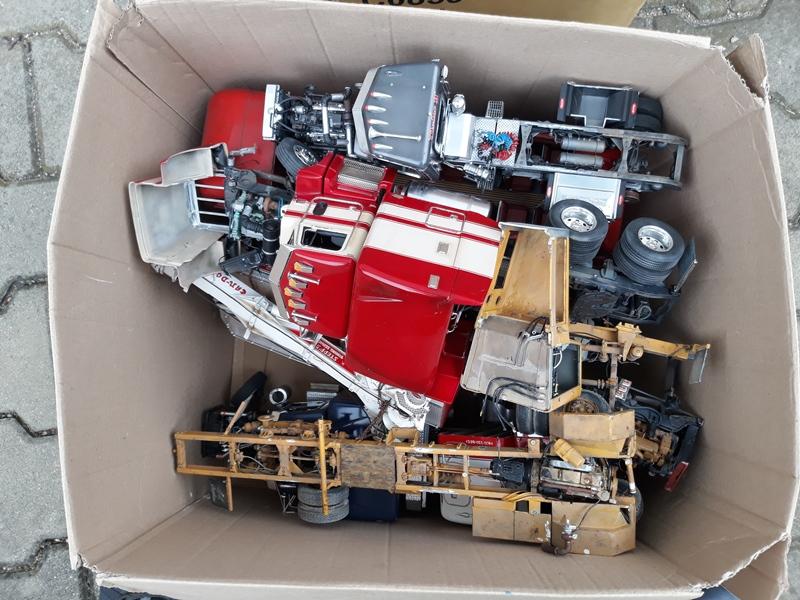
Hi, guys. This is a tough one. I had some of my best builds on a permanent display in the local technical museum. Unfortunatelly, a burglar broke in and the glass case with my truck models stood in his way. He destroyed the glass gate and tried to push the display case off his way. But it fell on the ground and in the heap of glass fragments were the rermains of my spilled models.
The museum has an insurance and I will get some compensation. But most likely it won´t cover the time and work spent on them. At first glance they look repairable. But it´s gonna take a lot of time again.

-
This looks great!
-
I am bringing a bad news, I´m afraid. Pavel Behensky aka Stratomodels has announced his withdrawal from the big rig transkit "business" on his FB site. He says that it brings too many problems, it´s time and money consuming and he is tired of it all. Some projects won´t be finished, including the GMC Crackerbox and local Tatra 815.
With Pavel you never know, but for the time being he concentrates on Czechoslovakian aircraft models.
-
Just a question. I was told that the AMT kit headlights are too small and that they should be slightly bigger. True or false? What do you guys think?
-
I finally found the pics of my version. It´s not accurate but at least a bit closer to reality. You can see the comparison between the kit part and mine.
-
I have never built the 352 but I have built the 359 which shares the chassis parts with the 352.
1) The part is very simplified and doesn´t look realistic at all. I have scratchbuilt my own part. If I can suggest, take a look at a picture of a real height control valve set up in a truck and either scratchbuild the thing on your own or don´t use it at all. Just my opinion.
2) If a pin of any part makes the part fit wrong I just cut it off. If you think that the pin position is OK, then insert a piece of plastic in the gap.
-
Very nice rig. Awesome!
-
Nice work! Can´t wait to see it done.
-
-
This is a very interesting subject. And nice work so far. The engine modification looks geat.
-
-
Very realistic! Awesome.
-
Nice old piece of iron. Mack looks always good. A worn off work horse or bright shiny show truck, it´s always great.
-
D
Good old Seddon Atkinson. I like that. Never seen one though. Yours looks just fine.


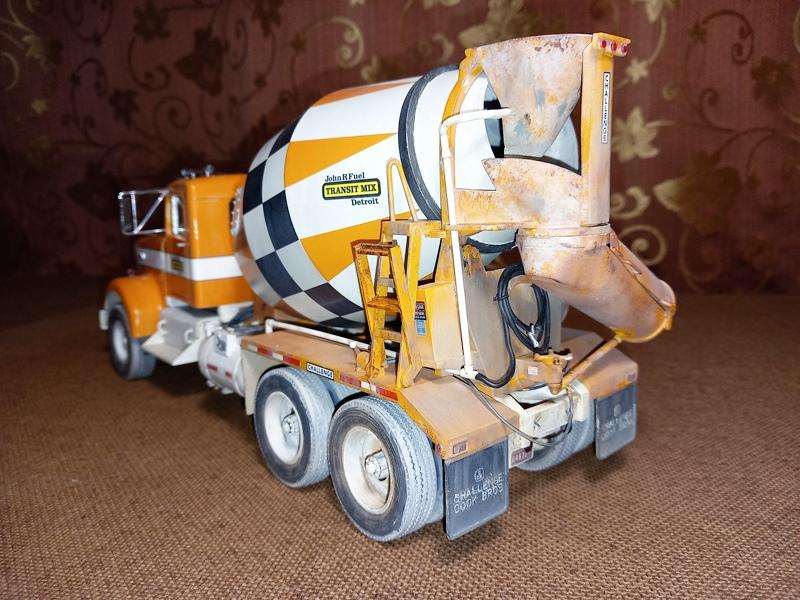


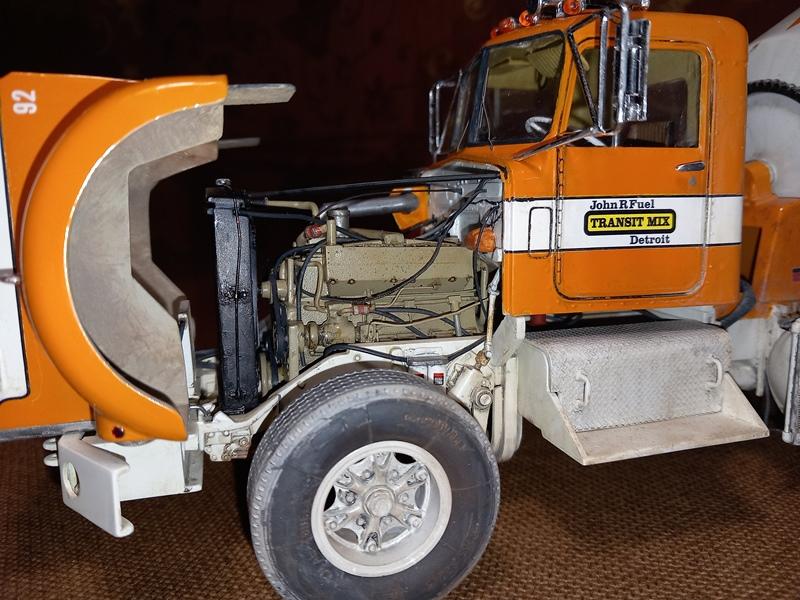

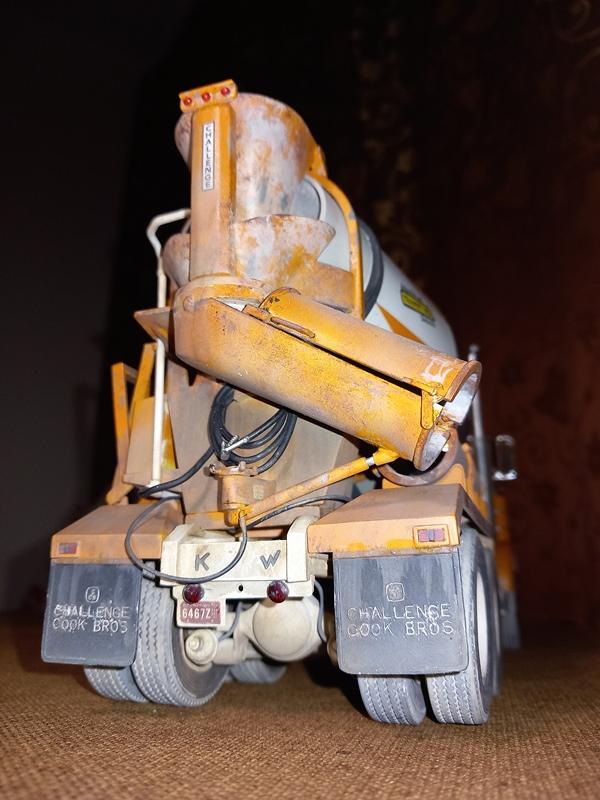
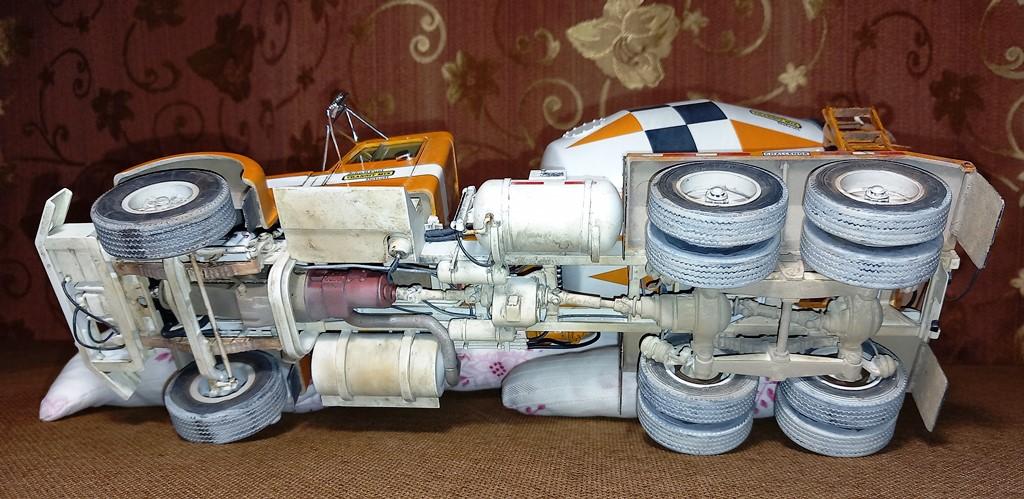


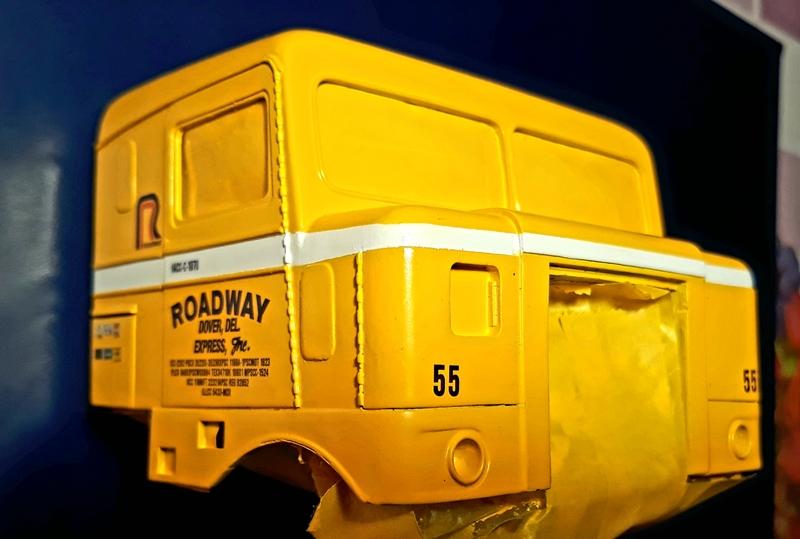


AMT Kenworth Challenge mixer 1/25
in Model Trucks: Big Rigs and Heavy Equipment
Posted
Thank you. Attaching mirrors is never easy. In this case I am not even sure if I used kit parts or Evergreen round channels. I think it´s kit parts. I use instatnt glue for quick drying. Only a small drop on tip of the bracket. I think I attached the main part to the cab first. Then the other two angled struts.