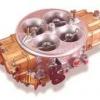
samm1970 Posted December 16, 2009 Posted December 16, 2009 This is the same kit I was ranting about a few weeks ago.Once I got past the lack of chrome,the kit was a fun build.The chin spoiler is M.I.A. and will be added once found.Other than the model sitting a bit higher in the front than I like,no build issues w/ it at all, practically fell together. The model has the following parts that we're either scratchbuilt, borrowed or modified: Valve Covers, modified kit issue Intake Manifold was from the old Monogram 1969 Z28 kit Carb is a modifed carb from the Revell Baldwin Motion 1970 Chevelle kit Distributor is from Detail Master Headers are modified from the AMT 1966 Chevy II kit Flex Fan is from the Revell 1967 Pro Street Chevelle kit Lakewood style traction bars are scratchbuilt Centerline Convo Pro's are from the Revell 1969 Nova SS kit Tires are from the Lime Green / White AMT 1957 Corvette kit Steering Wheel is from the Monogram 1970 Boss 429 Mustang kit Thank's for looking, Sam
Murphy's Law Posted December 16, 2009 Posted December 16, 2009 (edited) Awesome paint color. Whole kit looks really good! Edited December 16, 2009 by Murphy's Law
Jason Vandergriff Posted December 16, 2009 Posted December 16, 2009 Nice work Ive got one on the bench to finish. I loike how you told us what kits the parts are from.
vizio93 Posted December 16, 2009 Posted December 16, 2009 Nice job man !!! I've got one in my stash i've got to build. Love the color
Guest Posted December 17, 2009 Posted December 17, 2009 That is sweet. I personally prefer Cragar 5 spokes, otherwise great build. Love the color, what is it? Are the guages decals?
samm1970 Posted December 17, 2009 Author Posted December 17, 2009 Thank's guys for all the nice comments and input,it's much appreciated. To answer a few questions and comments: I have some pipes and mufflers made up,they're missing in action w/ the chin spoiler, if not found soon it may get a set of HEMI mufflers from the AMT '70 Super Bee... The emblems are the kit decals, I did something a lil different for the grill, I gave the decal a coat of Future,the split the paper back to thin it,carefully trimmed it out and glued it in place w/ Elmers Gel School Glue(it dries fast and crystal clear and excess peels off easy)giving it a very nice 3D effect. The Gauges were a real pain in the A$$, but once started no turning back.I drilled each one out,then carefully trimmed out the gauge decals individually.Glued them one at a time from behind, waited a day and using an eye dropper I filled the gauges w/ a drop of future.I did a total of five drops each to get the look of a plastic gauge cover.I waited about 30 mins between drops.It actually came out pretty good and was very low dollar. The Color was an actual color for a 1970 Camaro, it's Testors MM One shot laquer, and I used the same clear. I also used BMF on all the trim, and used black embossing powder for the carpet. I was kinda bummed about the stance,and then my wife made me feel a 100 times better.We we're watching PINKS All Out and there was yellow 70 Camaro that stretched the front end up on a 10.88 pass and she said "that looks like your green model". Wifes are priceless!!!!! Sam
Salvo Posted December 18, 2009 Posted December 18, 2009 Looks real nice! I like the engine treatment a lot! Looks just like the "Fastest Street Cars" that were all over the Hot Rod magazine articles in the '90's!
Recommended Posts
Create an account or sign in to comment
You need to be a member in order to leave a comment
Create an account
Sign up for a new account in our community. It's easy!
Register a new accountSign in
Already have an account? Sign in here.
Sign In Now