

maysula
-
Posts
169 -
Joined
-
Last visited
Content Type
Profiles
Forums
Events
Gallery
Posts posted by maysula
-
-
23 minutes ago, Rich Chernosky said:
True inspiration for me Thomas. I have this kit and been dying to start it. I bought this for my Martini collection so that is how it will be. Your chassis work is amazing and i will follow the rest with great interest. Thanks for posting it
Thanks Rich and all of you ?
The Per Eklund decals is now on it´s way so I have started to prepair the bodyparts for camel yellow. some more modifications on the front bumper is also made.
more later ?
-
Hi
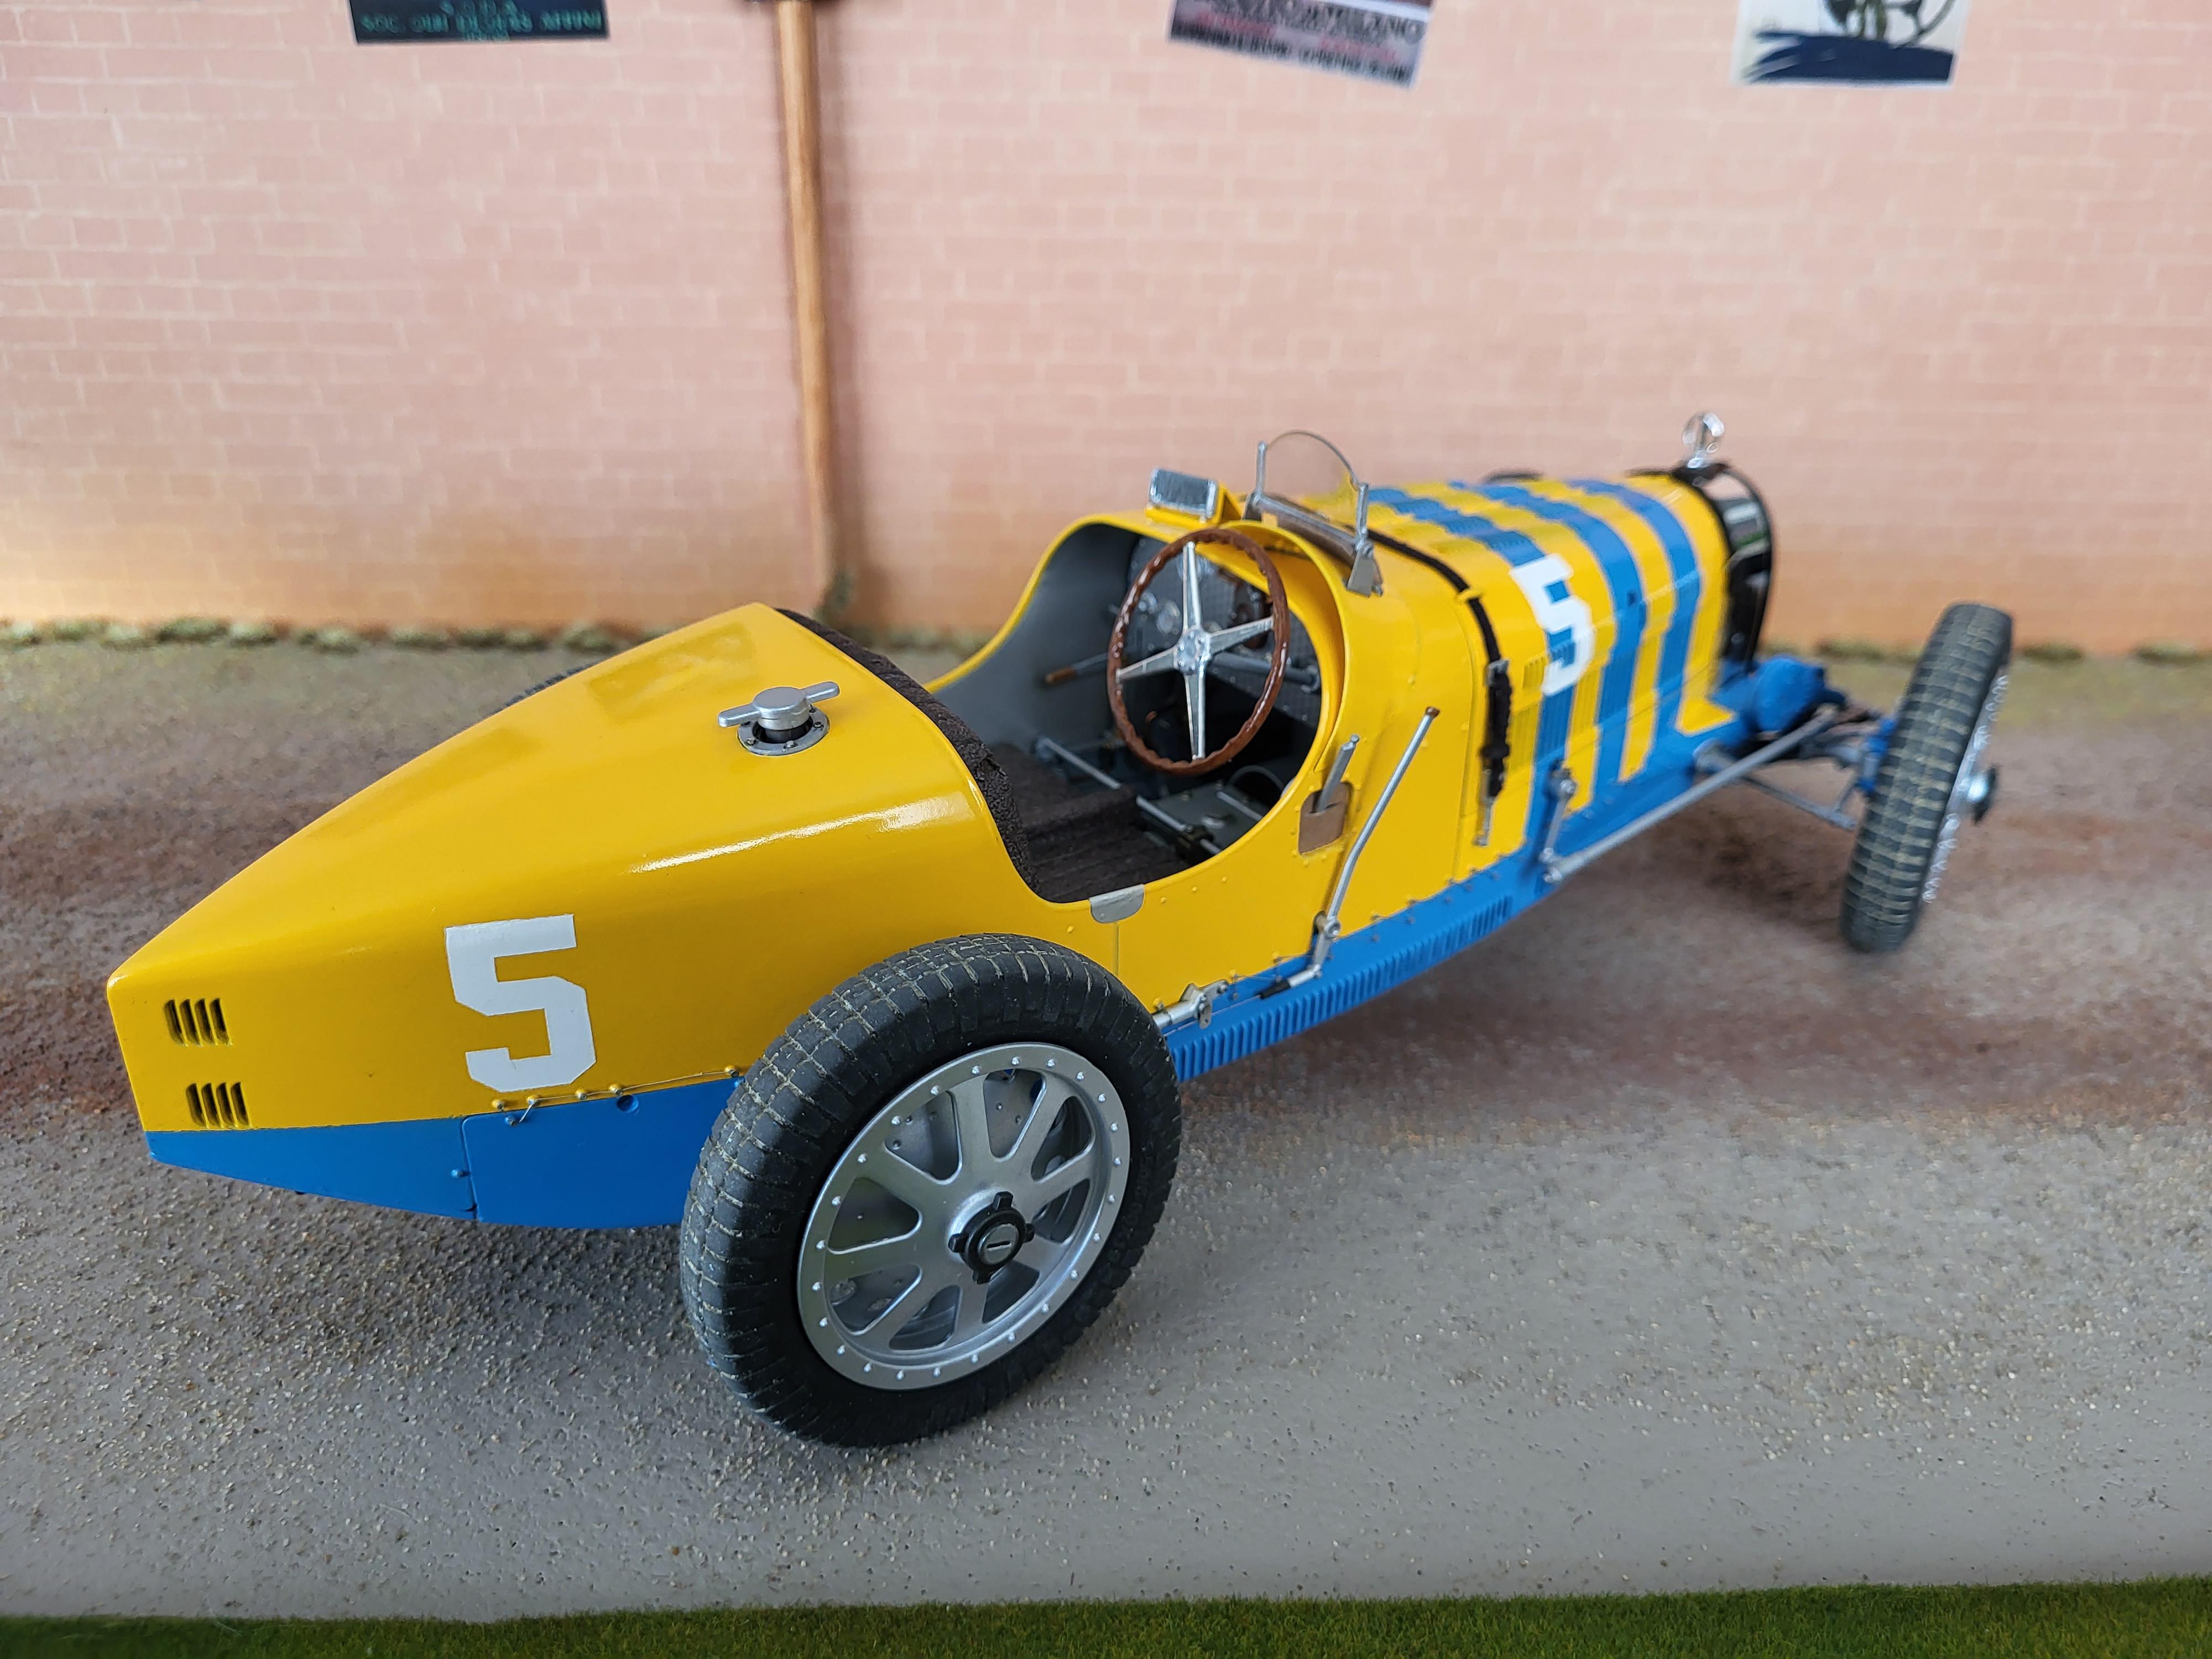
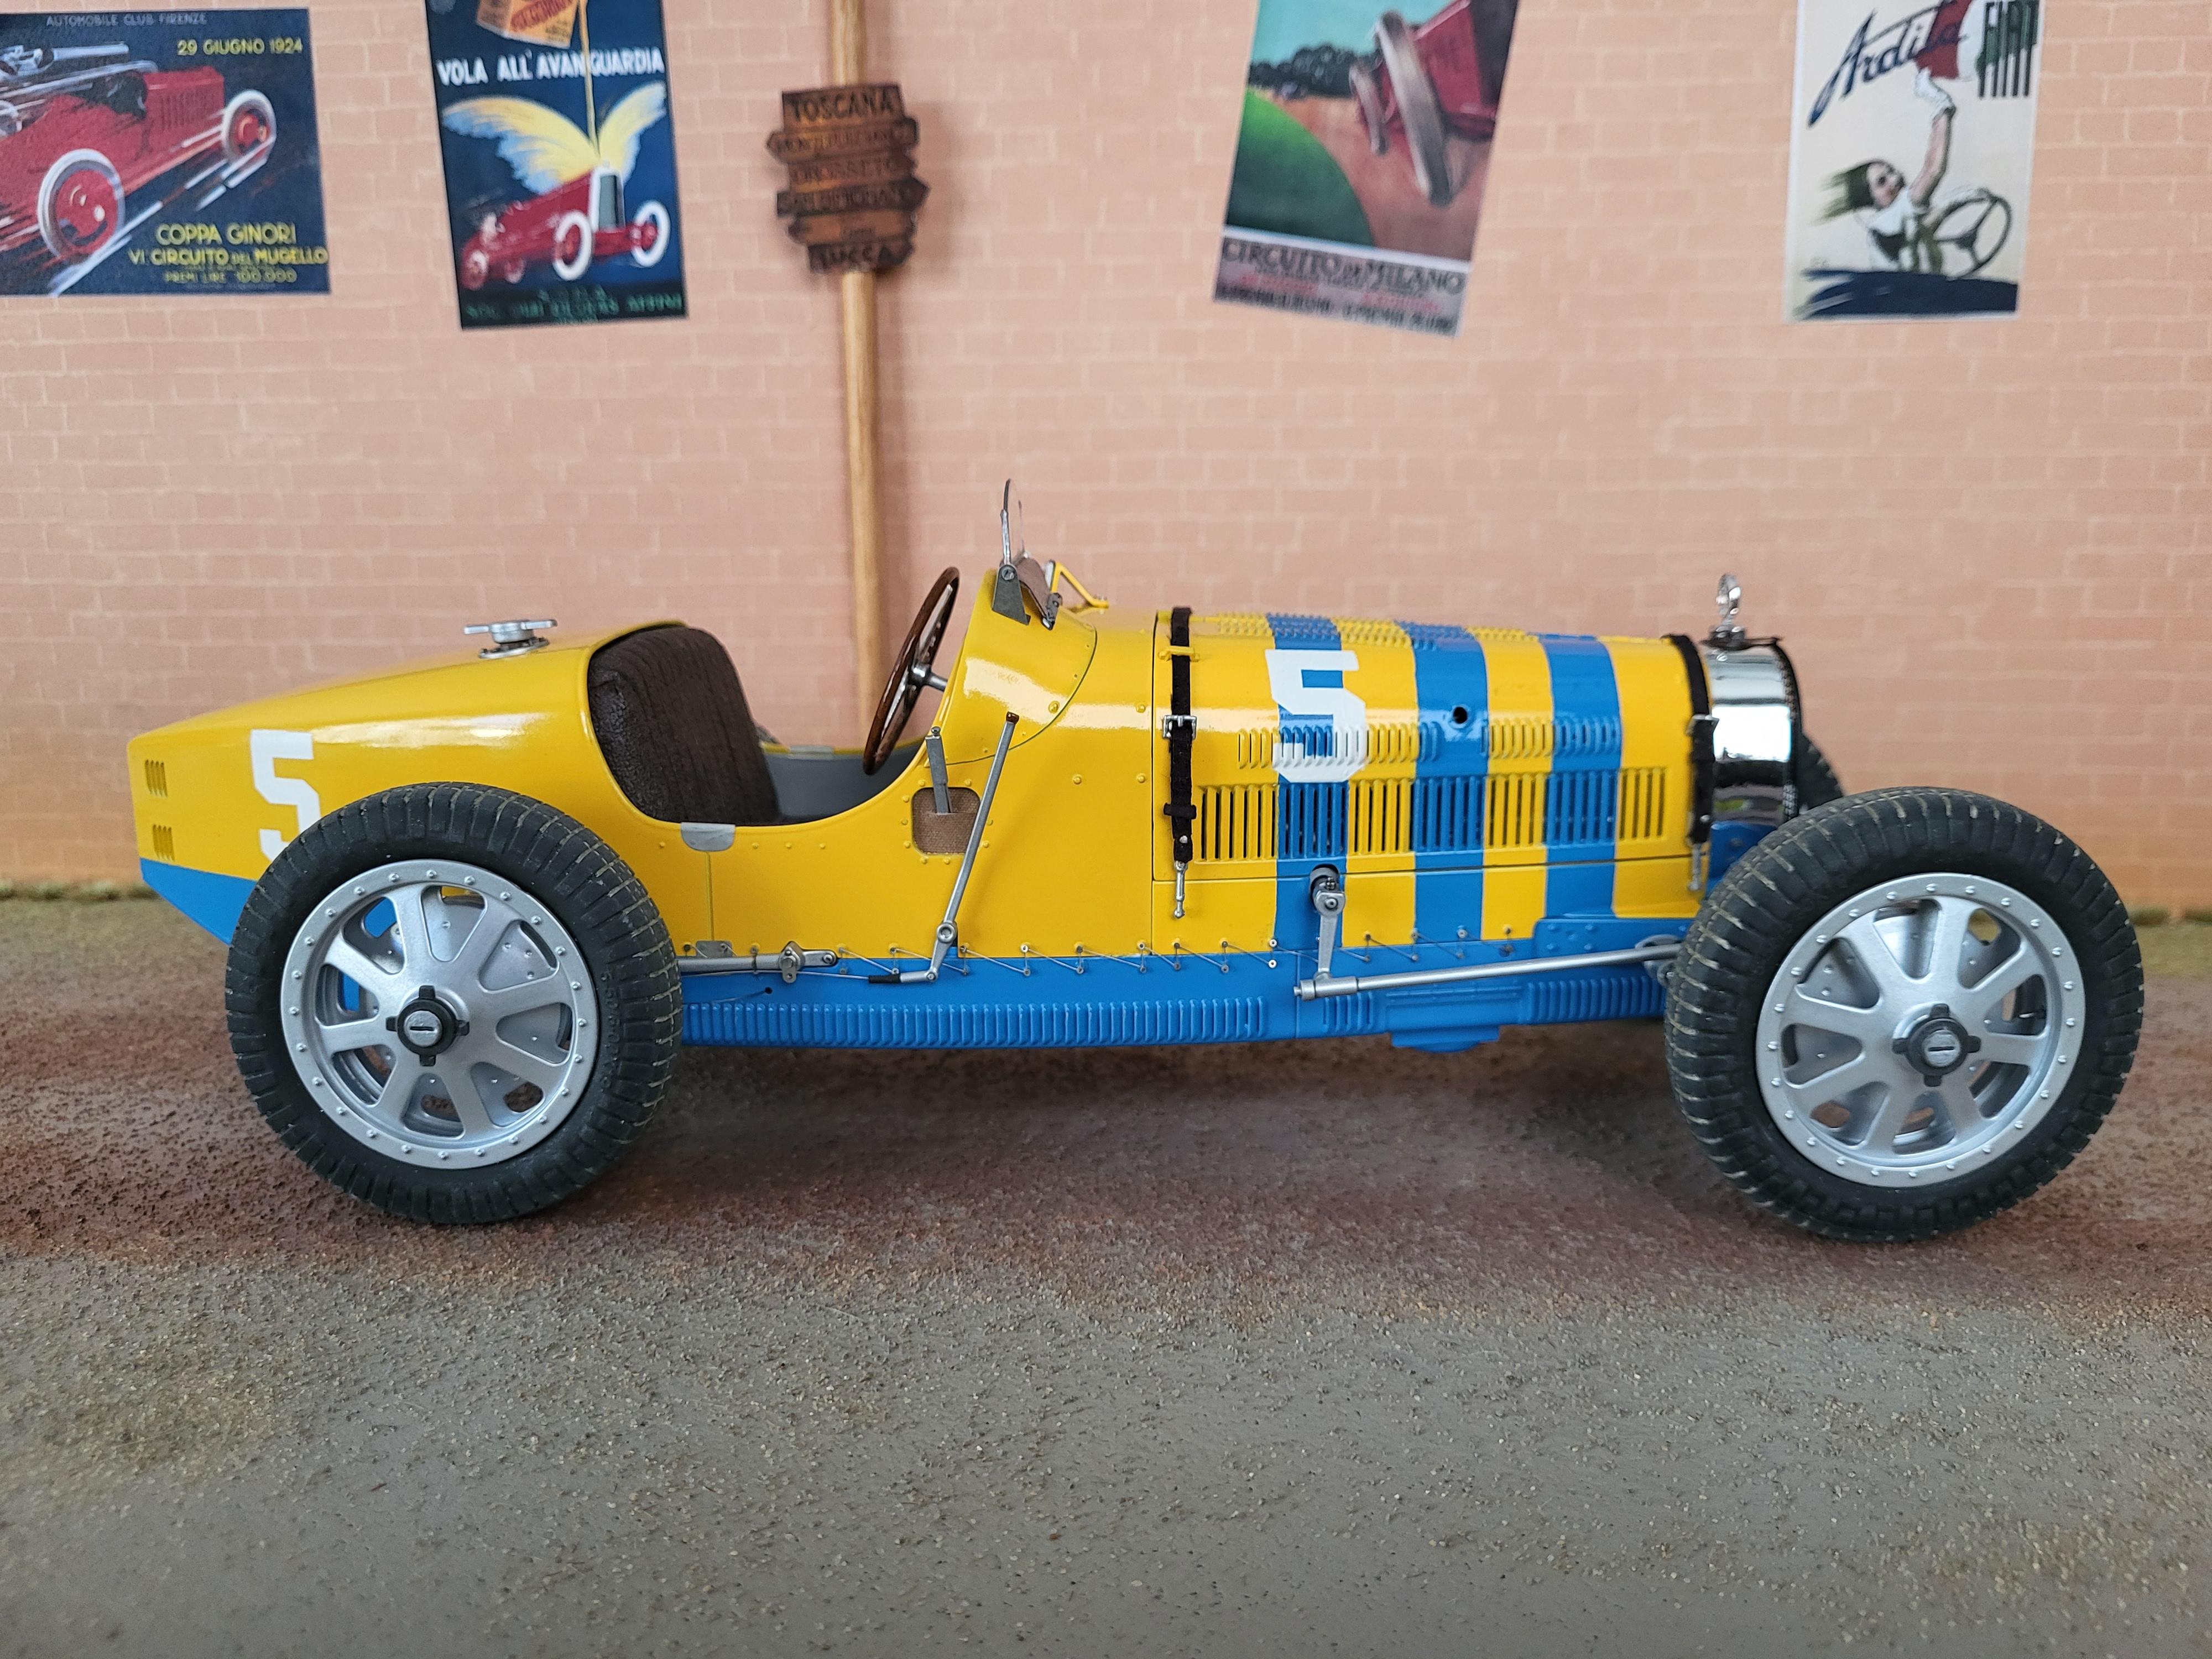
This is my Swedish version of the Bugatti, in that era cars raced in nation colors.
Body painted with spraycan Tamiya TS-10 french blue and TS-47 chrome yellow and Tamiya clear.
I also have a WIP on this build.
http://www.modelcarsmag.com/forums/topic/177412-italeri-bugatti-35b-112/
Very nice kit ! I will do another version later.
Thomas

-
 4
4
-
-
1 hour ago, gordinir8 said:
They are not for sale but if you can print them I can send you the STL file. Problem that I have now is that the guy that print those 8 pieces for me tried to print a bunch of 140 but I'm not satisfied with the results so I'm looking for someone with a better printer. On the other hand there is a company called "anobtainium" is about to release a detail set for this model and will include fasteners also.
Thanks for that info Thomas ?
-
1
-
-
On 1/10/2023 at 11:32 AM, gordinir8 said:
You are talking for almost 240 tiny PE parts that has to be assembled and glued together!!...no sir, not for my nerves. Believe it or not I am not gentle with those little 3D nuts and haven't broke one, while turning the "wire" around it it's not an easy task, it's not just a turn around, it is almost different in any screw if you want to do it correct. I think PE will fail. 3D parts look fragile but are quite strong. I have designed mine to 1.2mm slightly bigger than real but in my opinion they look scale on the model. Italeri rivets are 1mm
Hi Tomas, your 3D fasteners is very interesting! Is it for sale ? I tried to fix this wire on my build but not satisfied at all, but I have one more kit to do later so your fasteners looks very tempting ?
-
Hi
I got help with makin 3D printed gravel tires, looks so much better than slicks on a winter rallycar ?
Tack för tipset Anton !
Thomas
-
2
-
-
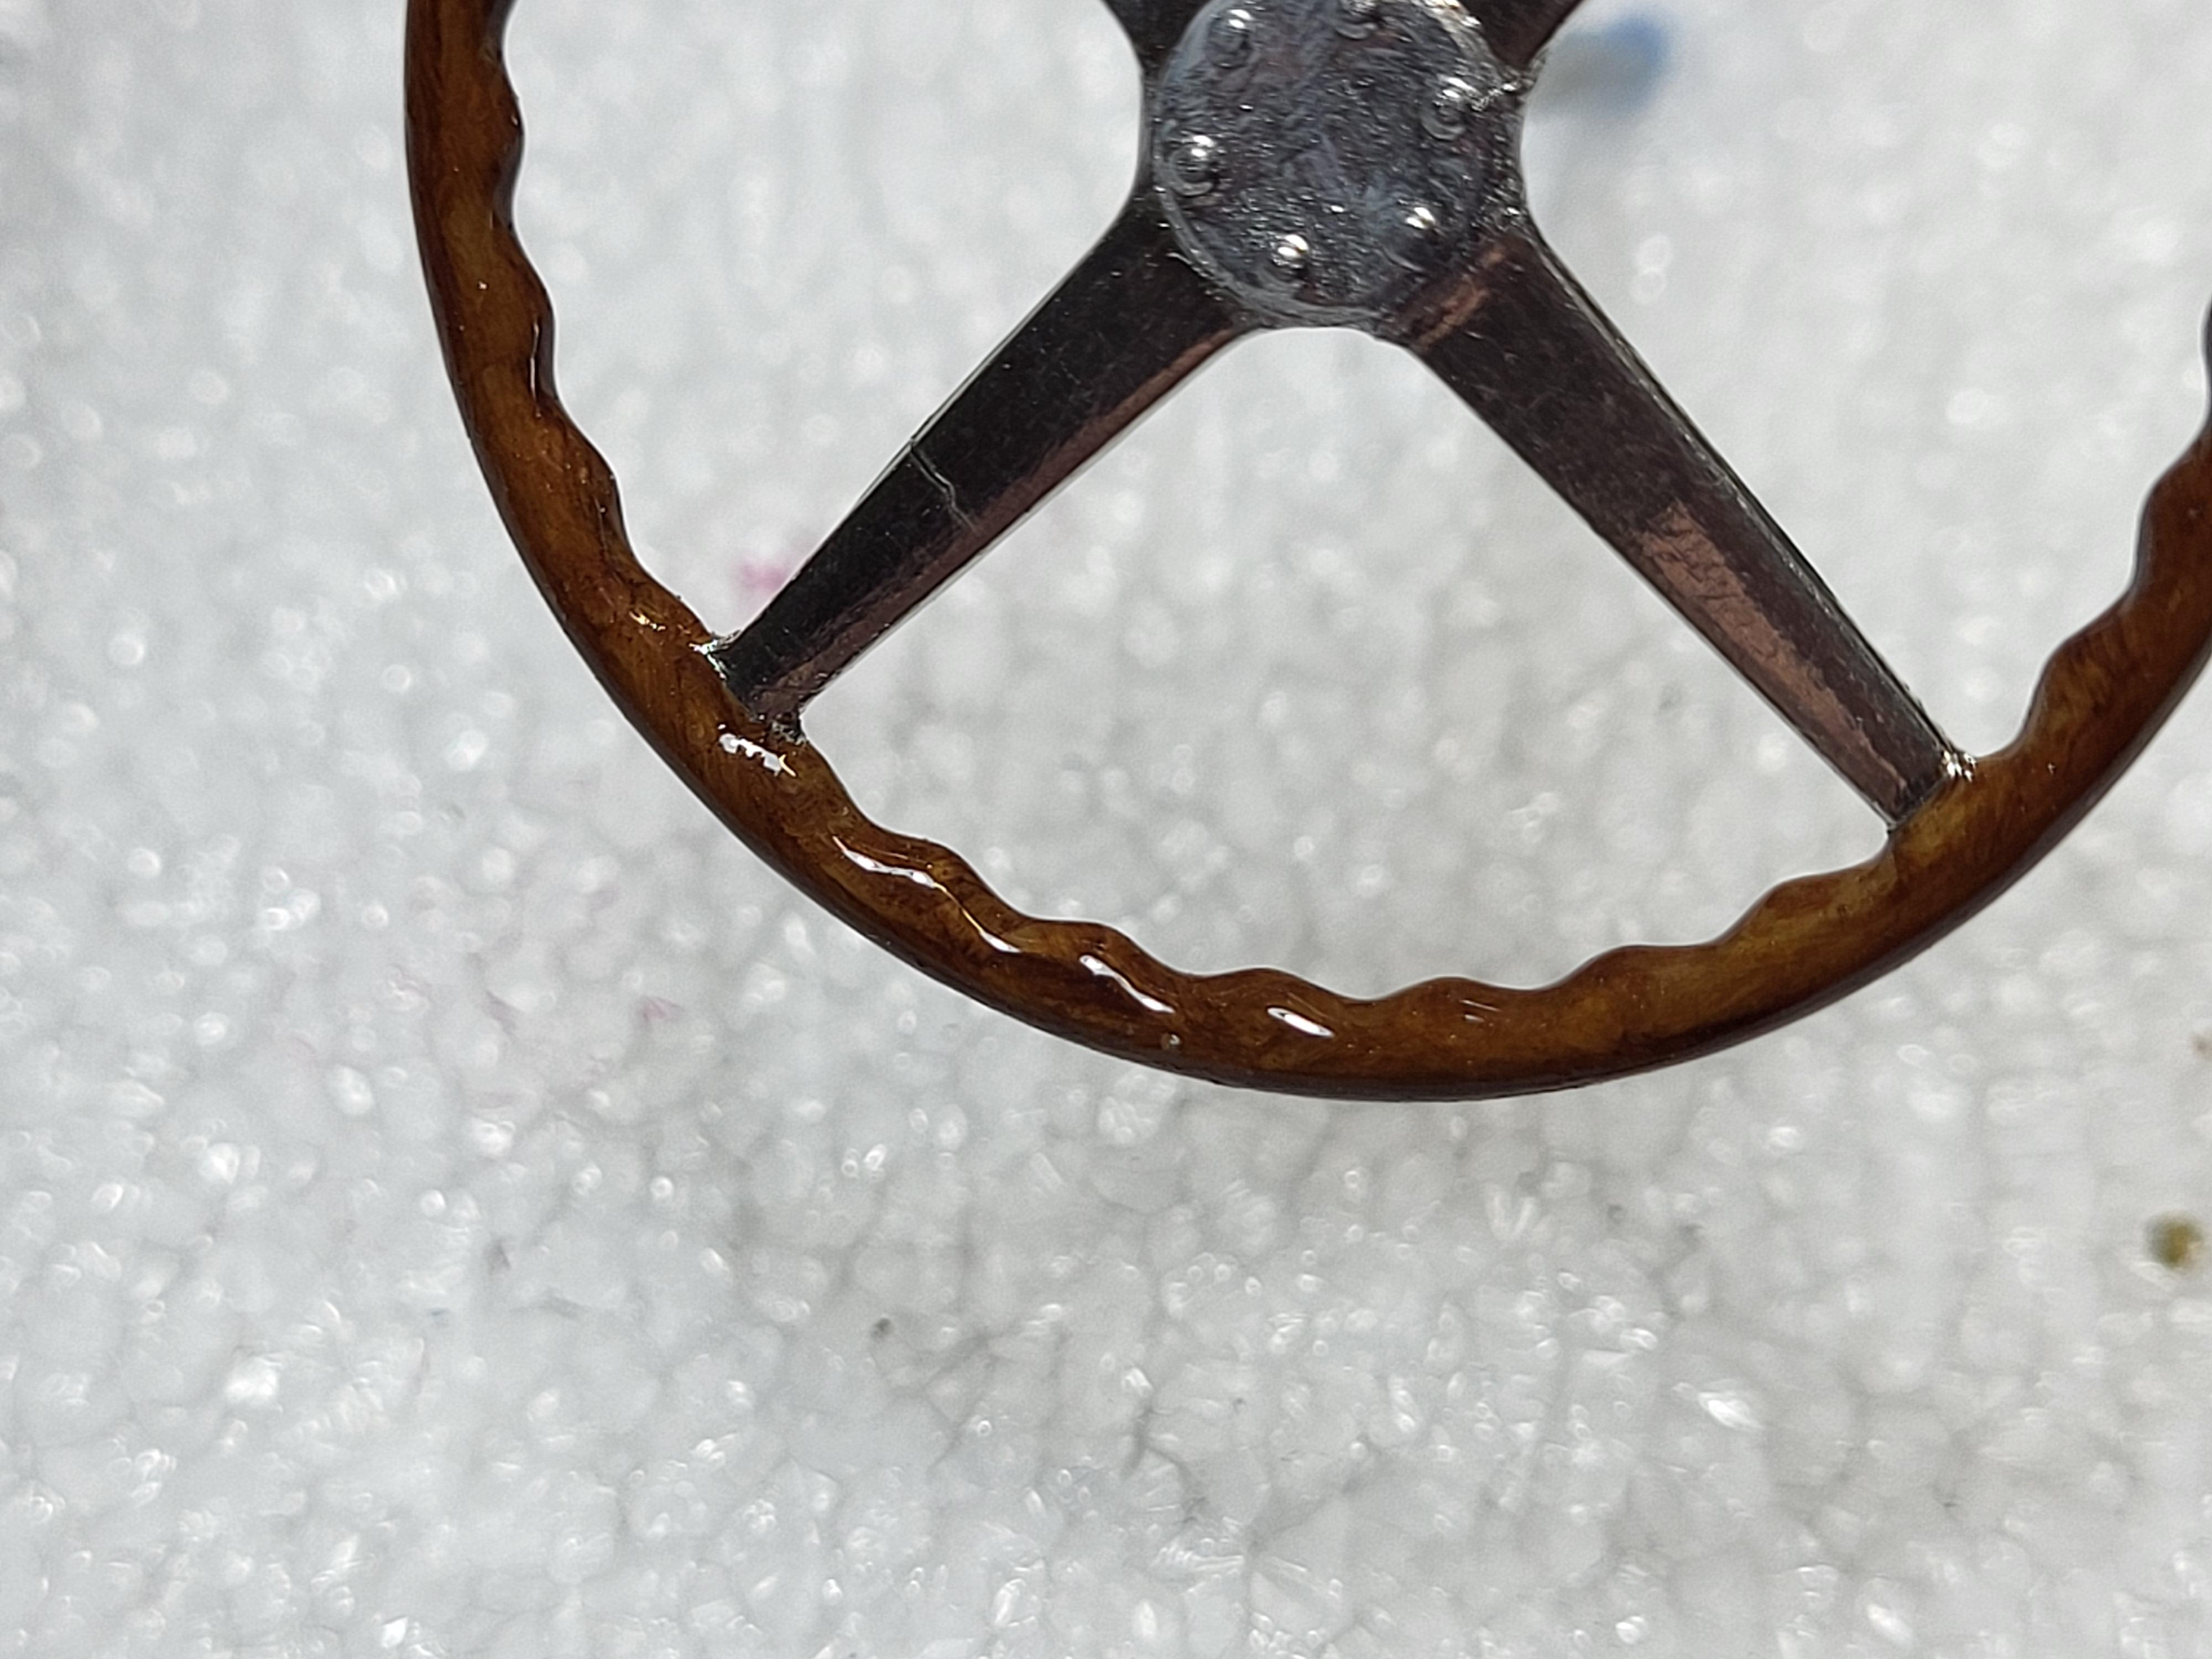
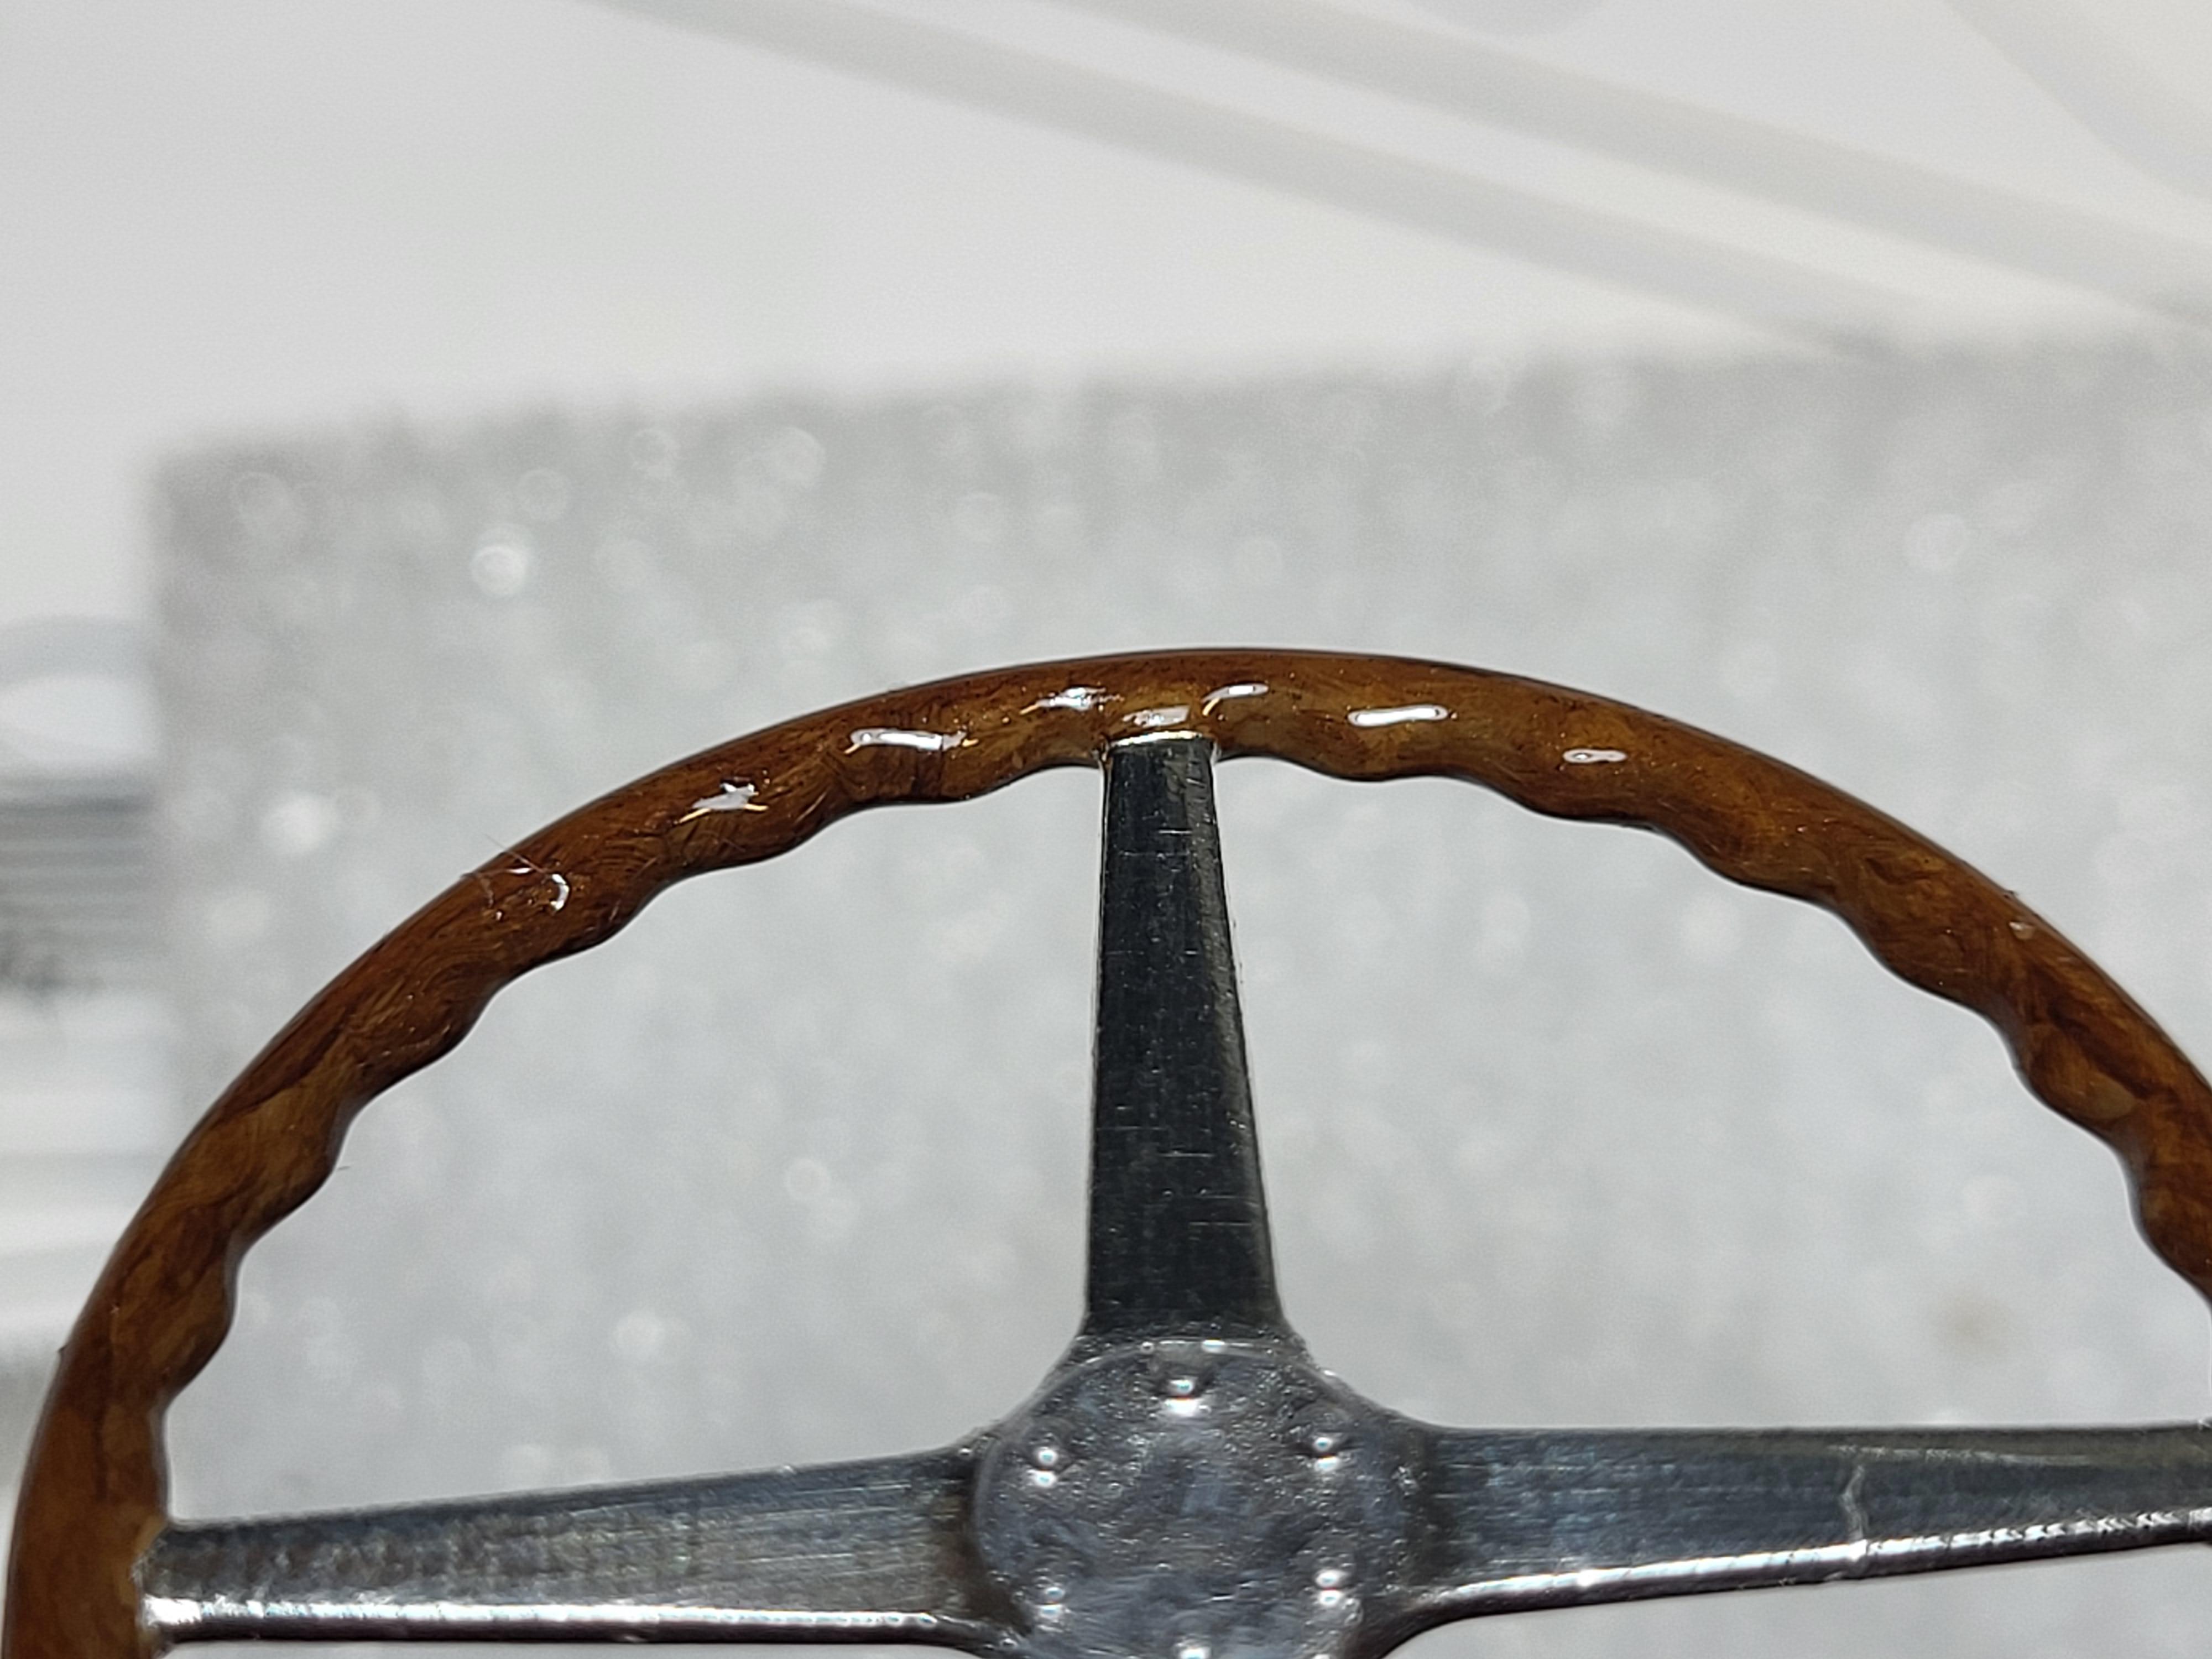
Hi.
S**t happens ? When overspraying the main bodypart with clear I dropped it to the floor ! After I calmed down and the bodys varnish had cured I sanded it down and used fullprimer to fill in the small scratches.. didn´t work at all?
So I put the part in brakefluid for a few hours, and then the paintjob started all over again. I have painted the steering wheel with artistspaint and then Humbrol clear, added some more nuts and screws on some parts. The seat has a got
an old wallcovering with a leather surface.
More later
Thomas

-
2
-
-
38 minutes ago, Pierre Rivard said:
It is a gorgeous build Thomas. Glad the thread resurfaced so I could see it. Your 1/12 builds are always a joy to watch with the beautiful finishes and well crafted detailing.
Thanks Pierre ! I´m glad you like them ?
-
5 minutes ago, Mattilacken said:
Hallå! Han kan även skriva ut dem åt dig om du ger han måtten, han säljer även på tradera under Ghostman 3D parts eller nått sånt.
Found him ? Waiting for answer now
-
12 minutes ago, Mattilacken said:
Nice work there! super detailed! I know its "easier" in big scale but it also needs more detail than a 1/24 scale.
Do you have a set of studed rallye tires made for it? I belive Ghost_33 might have a 3D file for a good set if not.
Hejsan ? Have no studtires, I´ll contact him ! thanks ?
-
3 hours ago, jaymcminn said:
I've got to ask... how did you do the Kevlar front floor panels? I tried bending the PE kit parts into shape but it didn't go well. If Italeri was going to make them in PE metal, I don't see why they couldn't do them in brass which would be more easily formed to the complex curve of the floor pan. At this point on mine I'm thinking about using styrene sheet and filler to replicate them directly on the floor pan using the shape of the Kevlar decal as a template.
Hi. You can use styrene sheet instead, I had that in my mind but I pressed the etched panel a few times to the floor and finally I thought it looked ok. I added a footrest to the left on the drivers side, not provided in the kit as you know.
-
13 hours ago, gordinir8 said:
Hi there, I have made my own 3D printed fasteners and did a trial yesterday in a piece of plastic, I used very thin fishing line 0.13mm instead of wire and the look very scale. I am posting this for ref only since I am not a seller or have any relation with modelling products
Looks fantastic! The wire will be tricky for me...
-
7 hours ago, Bugatti Fan said:
Looking good Thomss.
I believe that Nick of Unobtainium is making 3D printed panel wire fasteners for this kit, and some other pieces are in development.
Thanks Noel ? Do Nick have a website for this ?
-
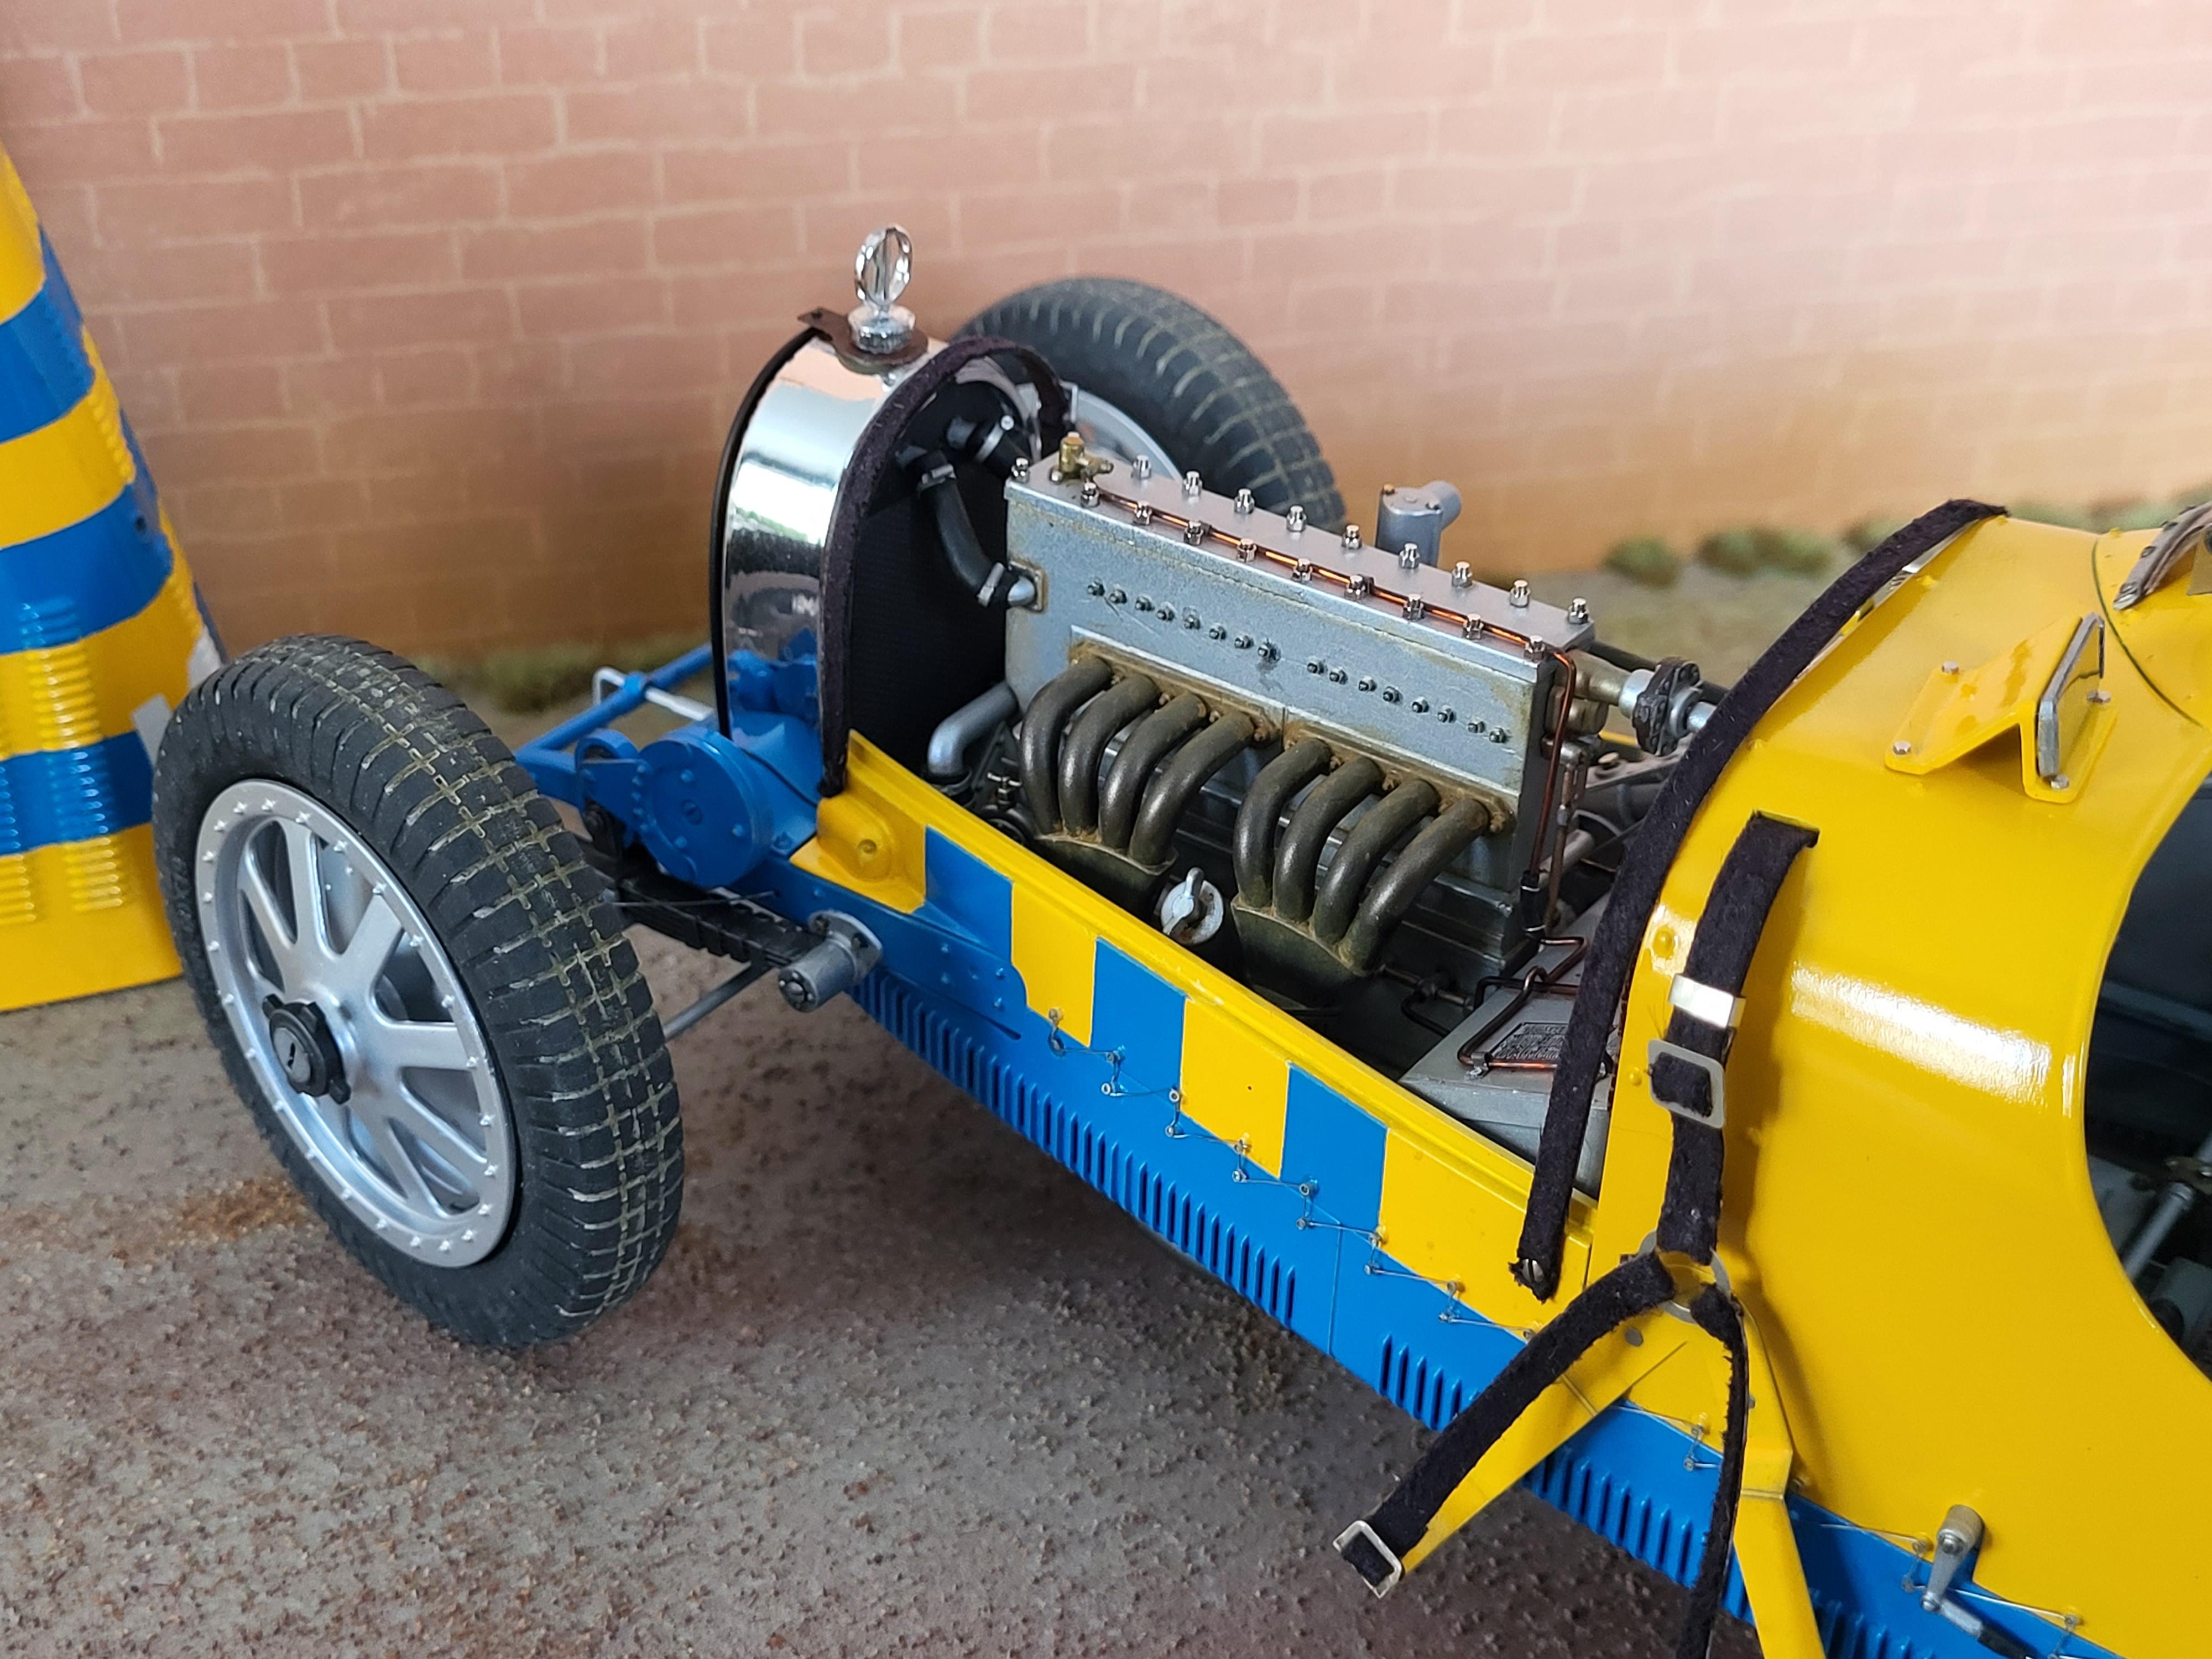
Hi
I have put this kit on hold for a while , Reji decals is releasing a decalset for Per Eklunds car from the Swedish Rally in 1989.
So just now I have the body parts left to do, I will not paint them before I know I will get the decals.
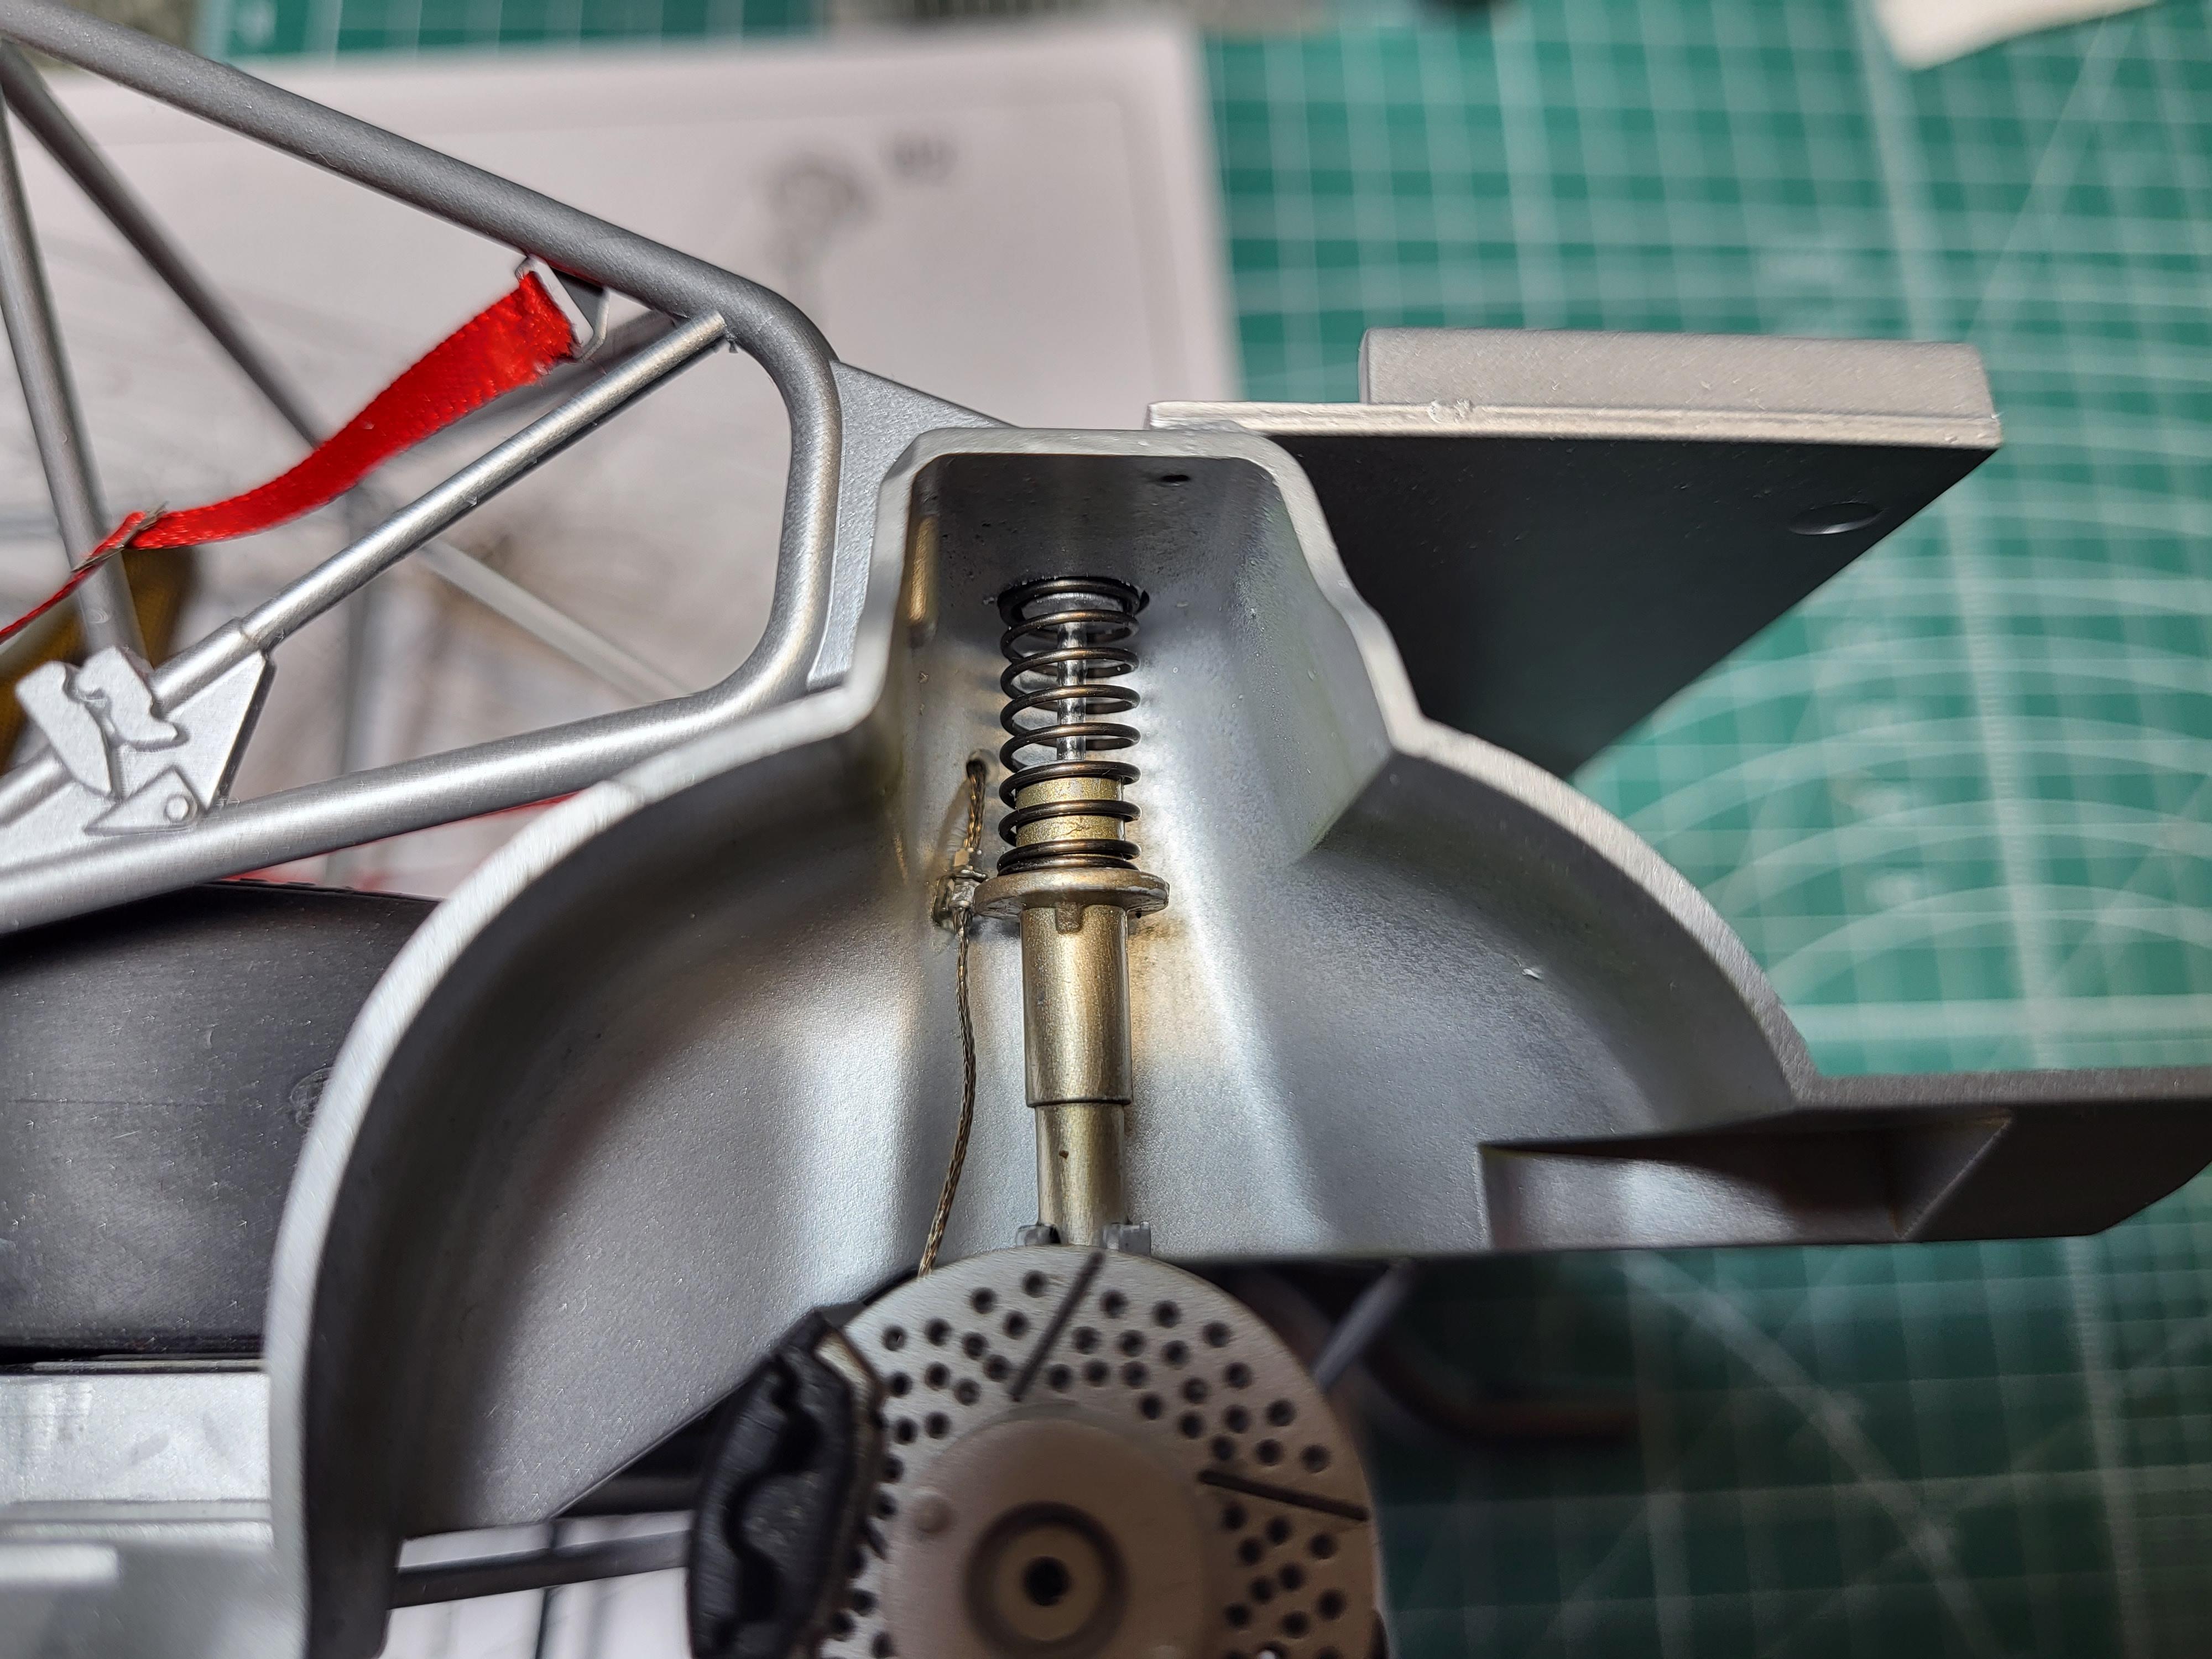
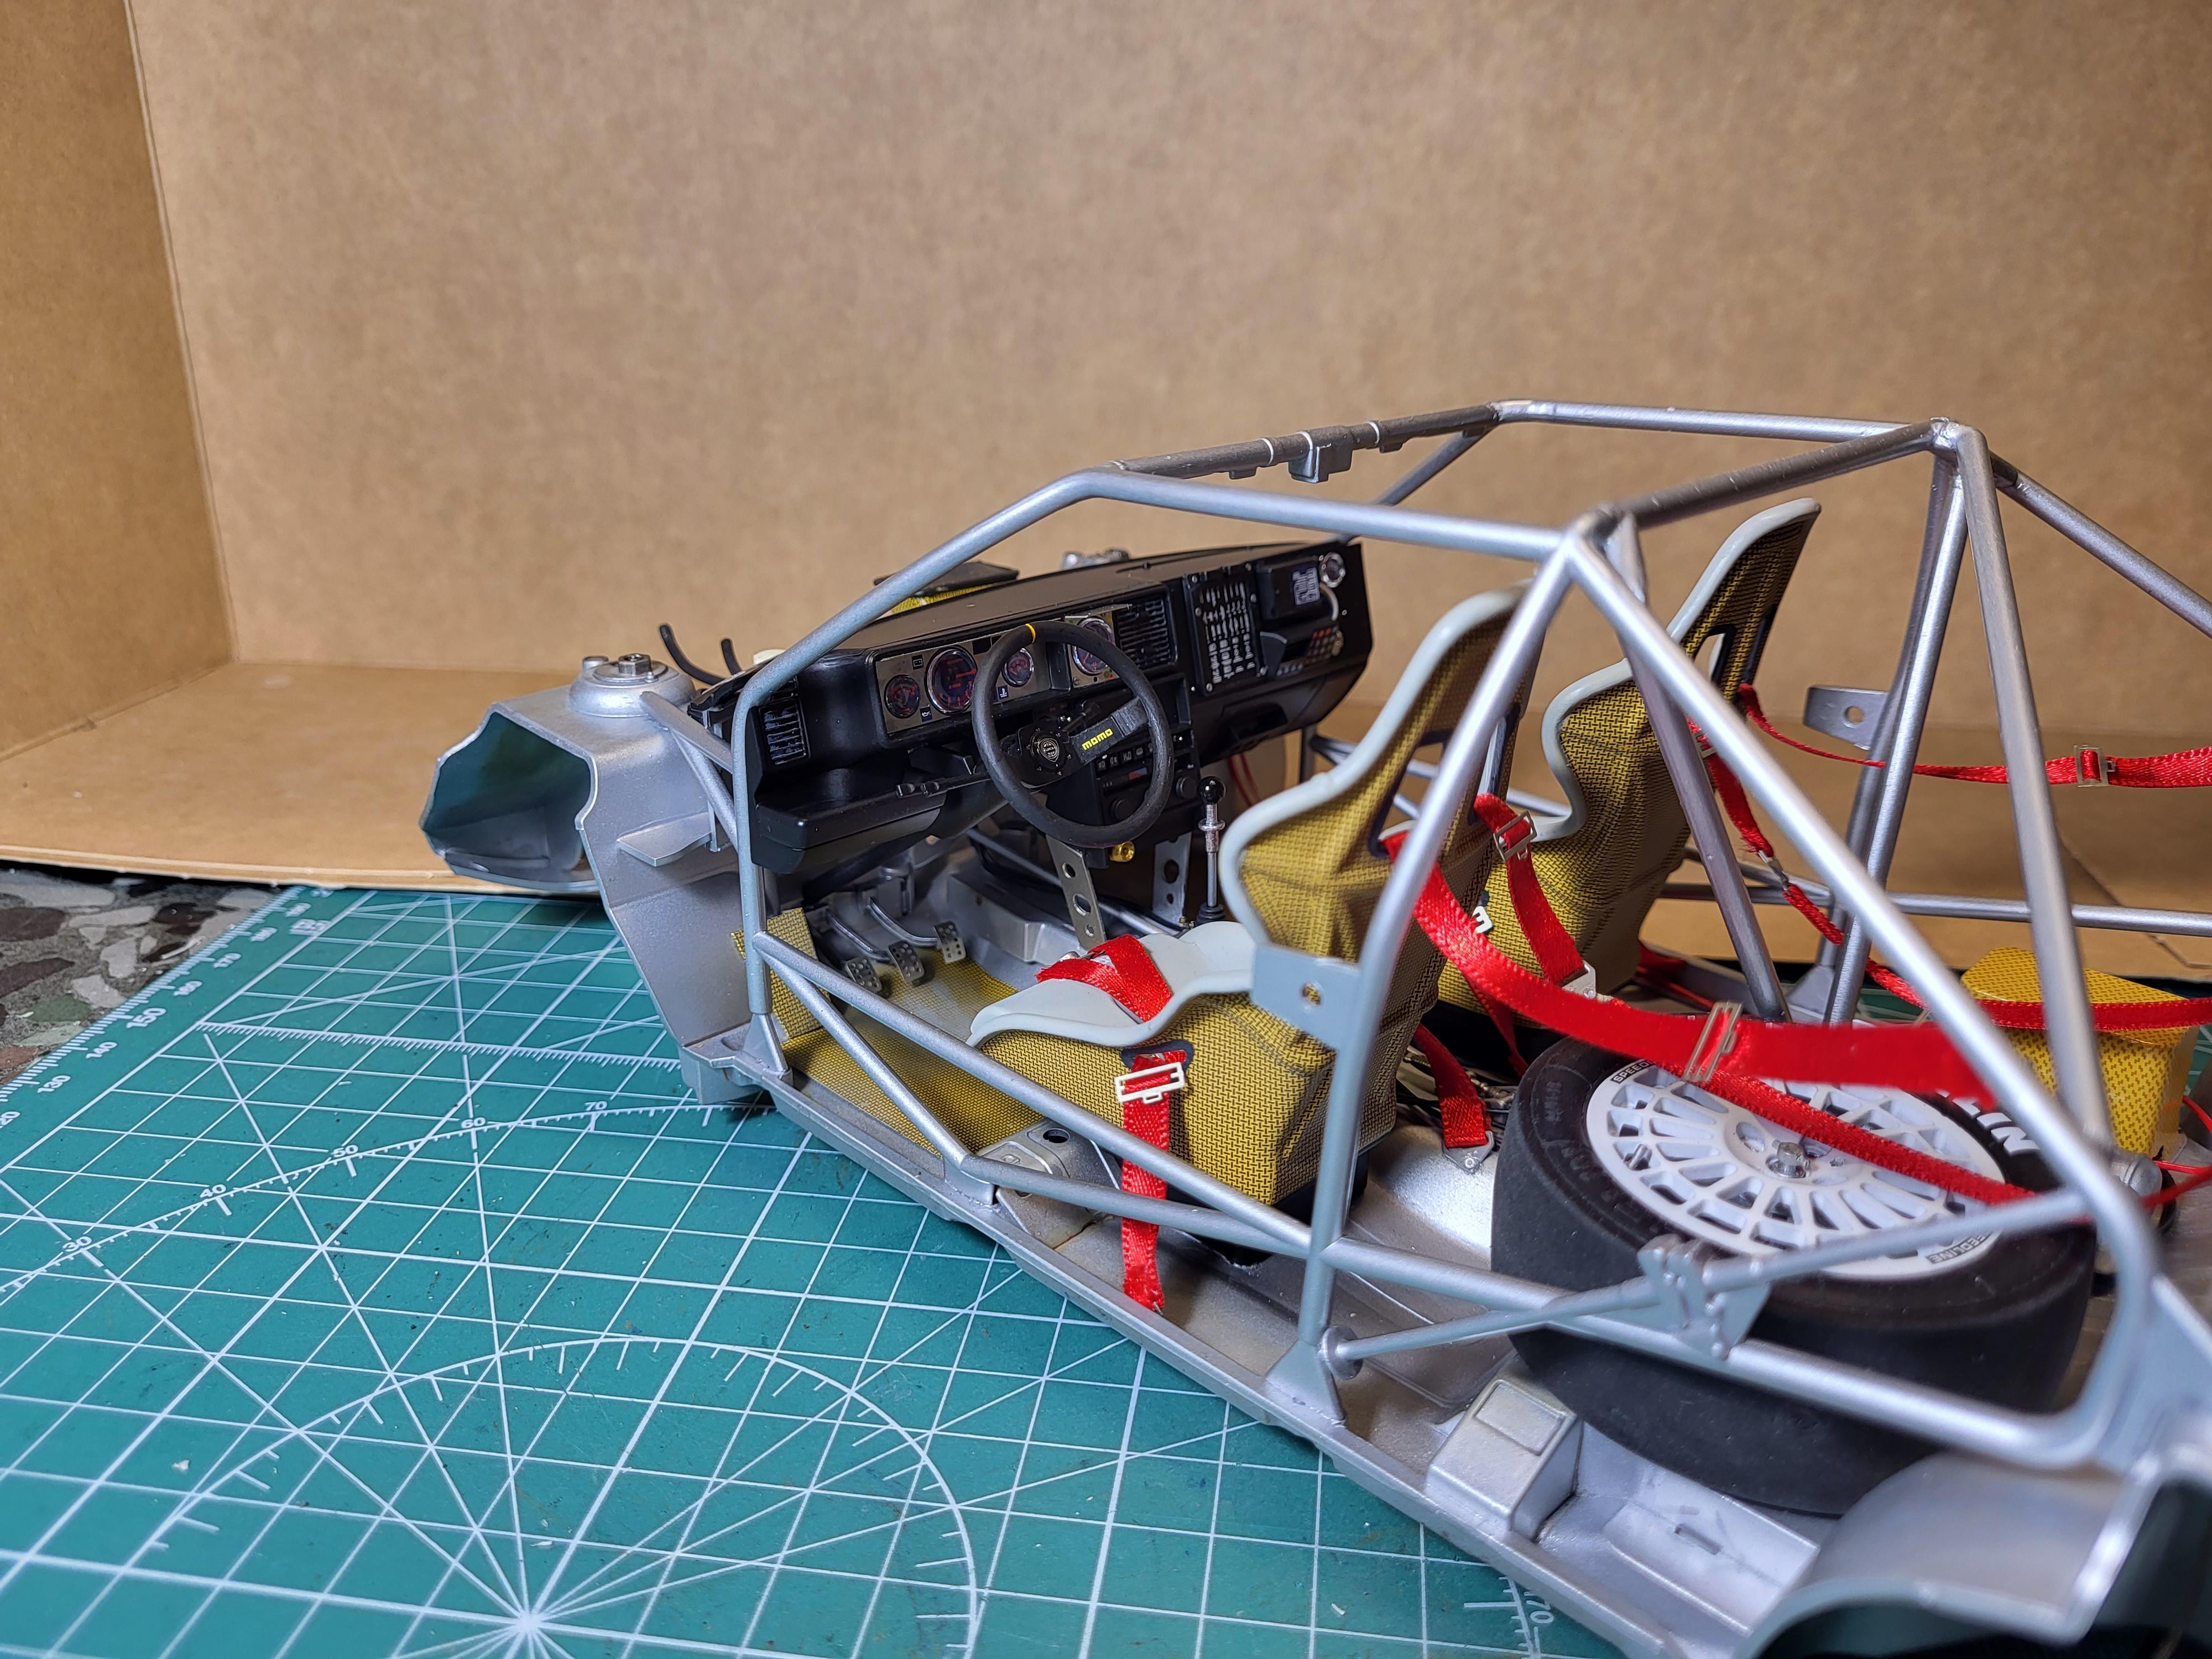
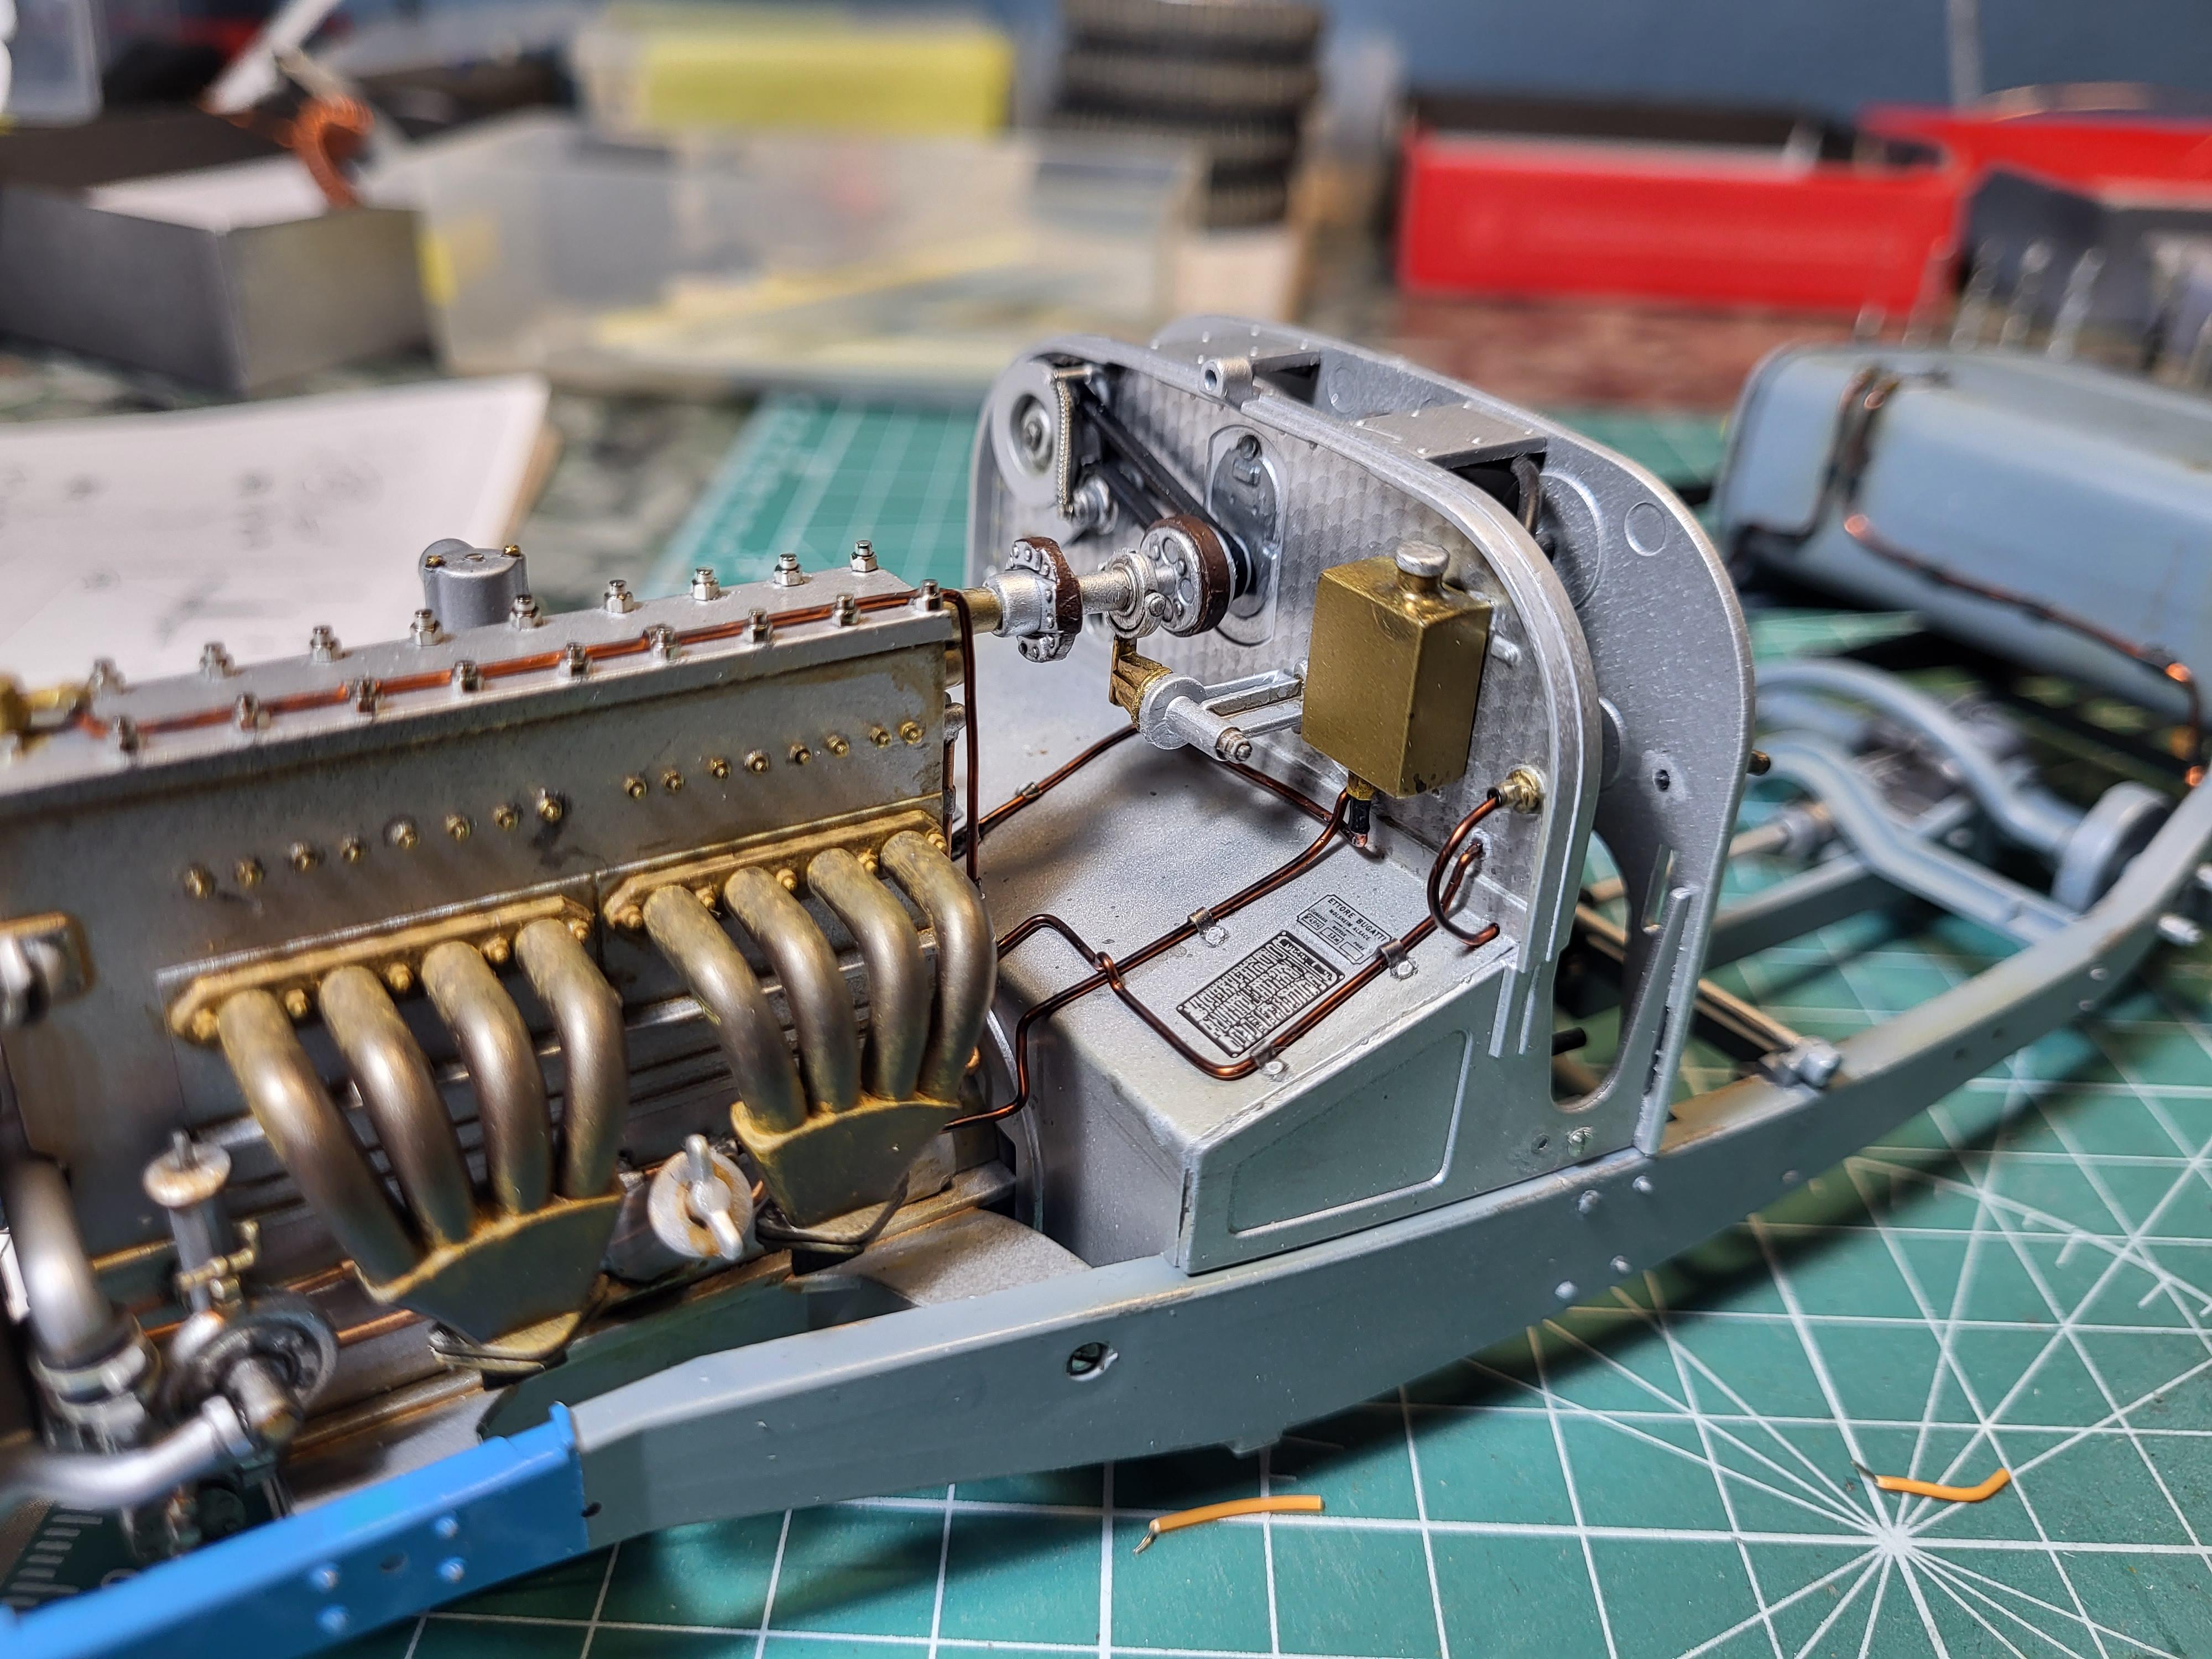
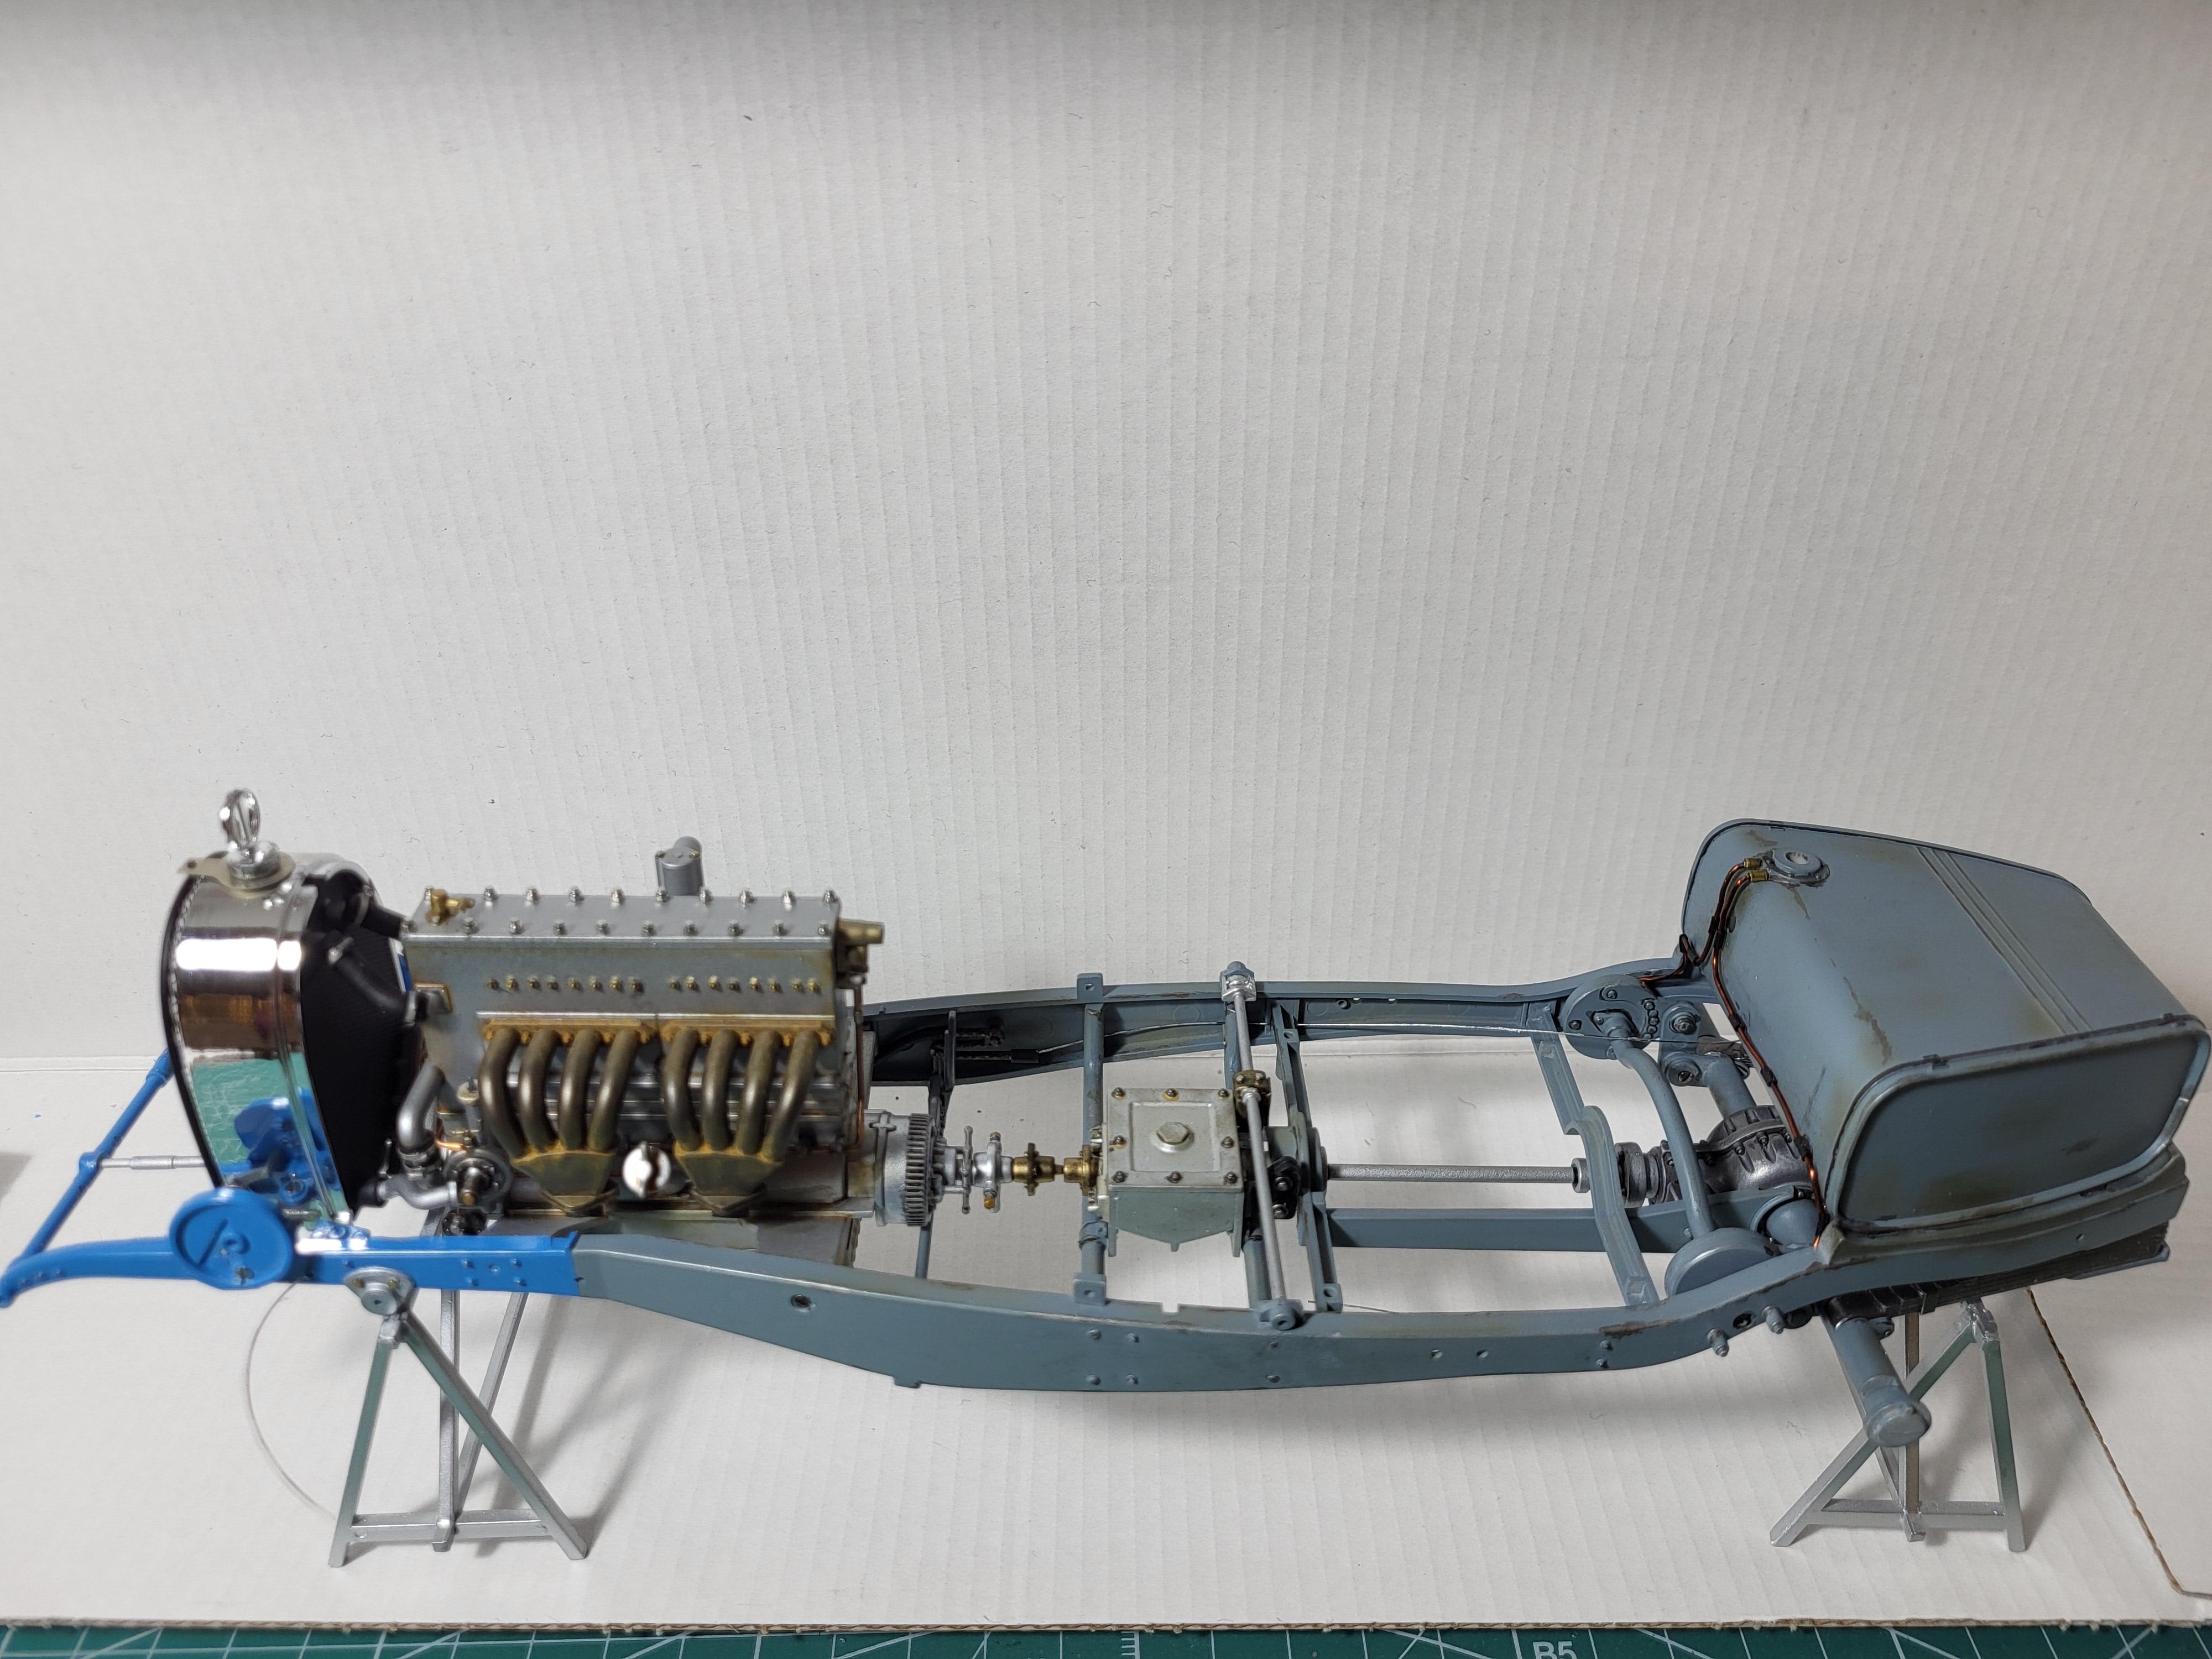
I have replaced bolts to metal in some places, also added wires, braided lines, rivets , hoseclamps . I also modified the oilcooler with braided lines.
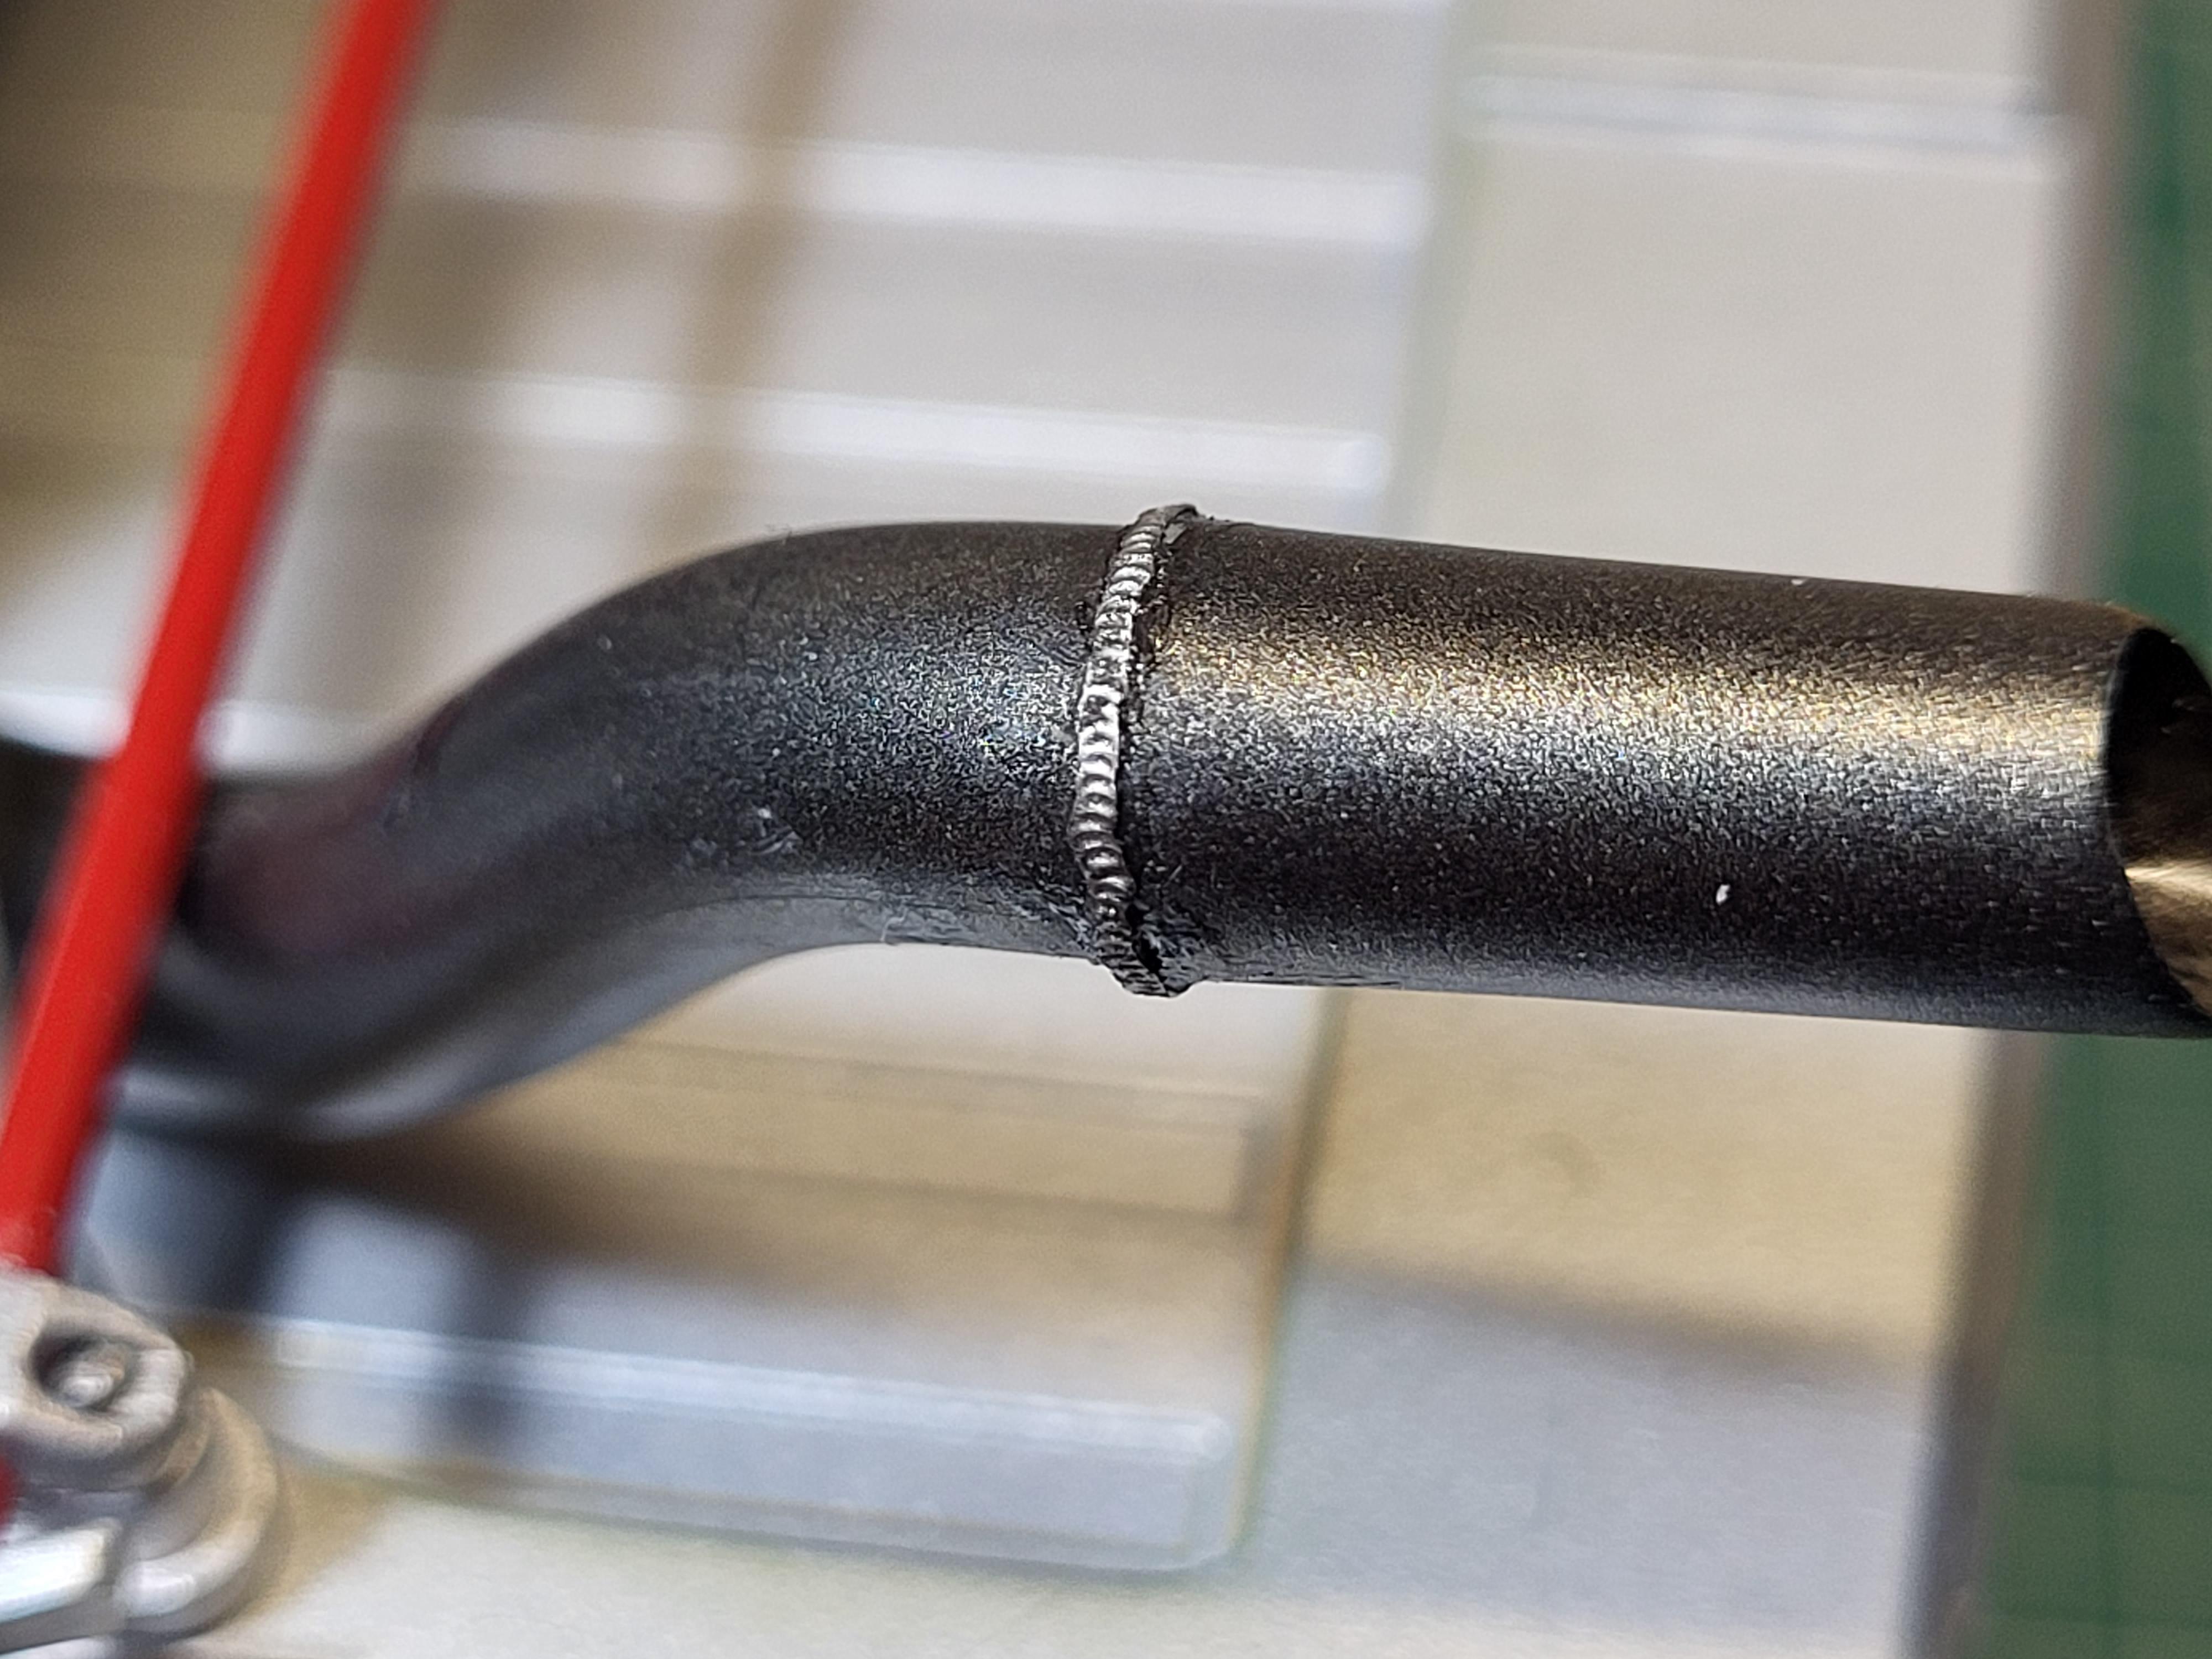
Replaced the dash suports to the floor, also used photoetched welded lines on the exhaust. Replaced the seatbelts to a little narrower kind , the kits belts look
to big/broad to me.
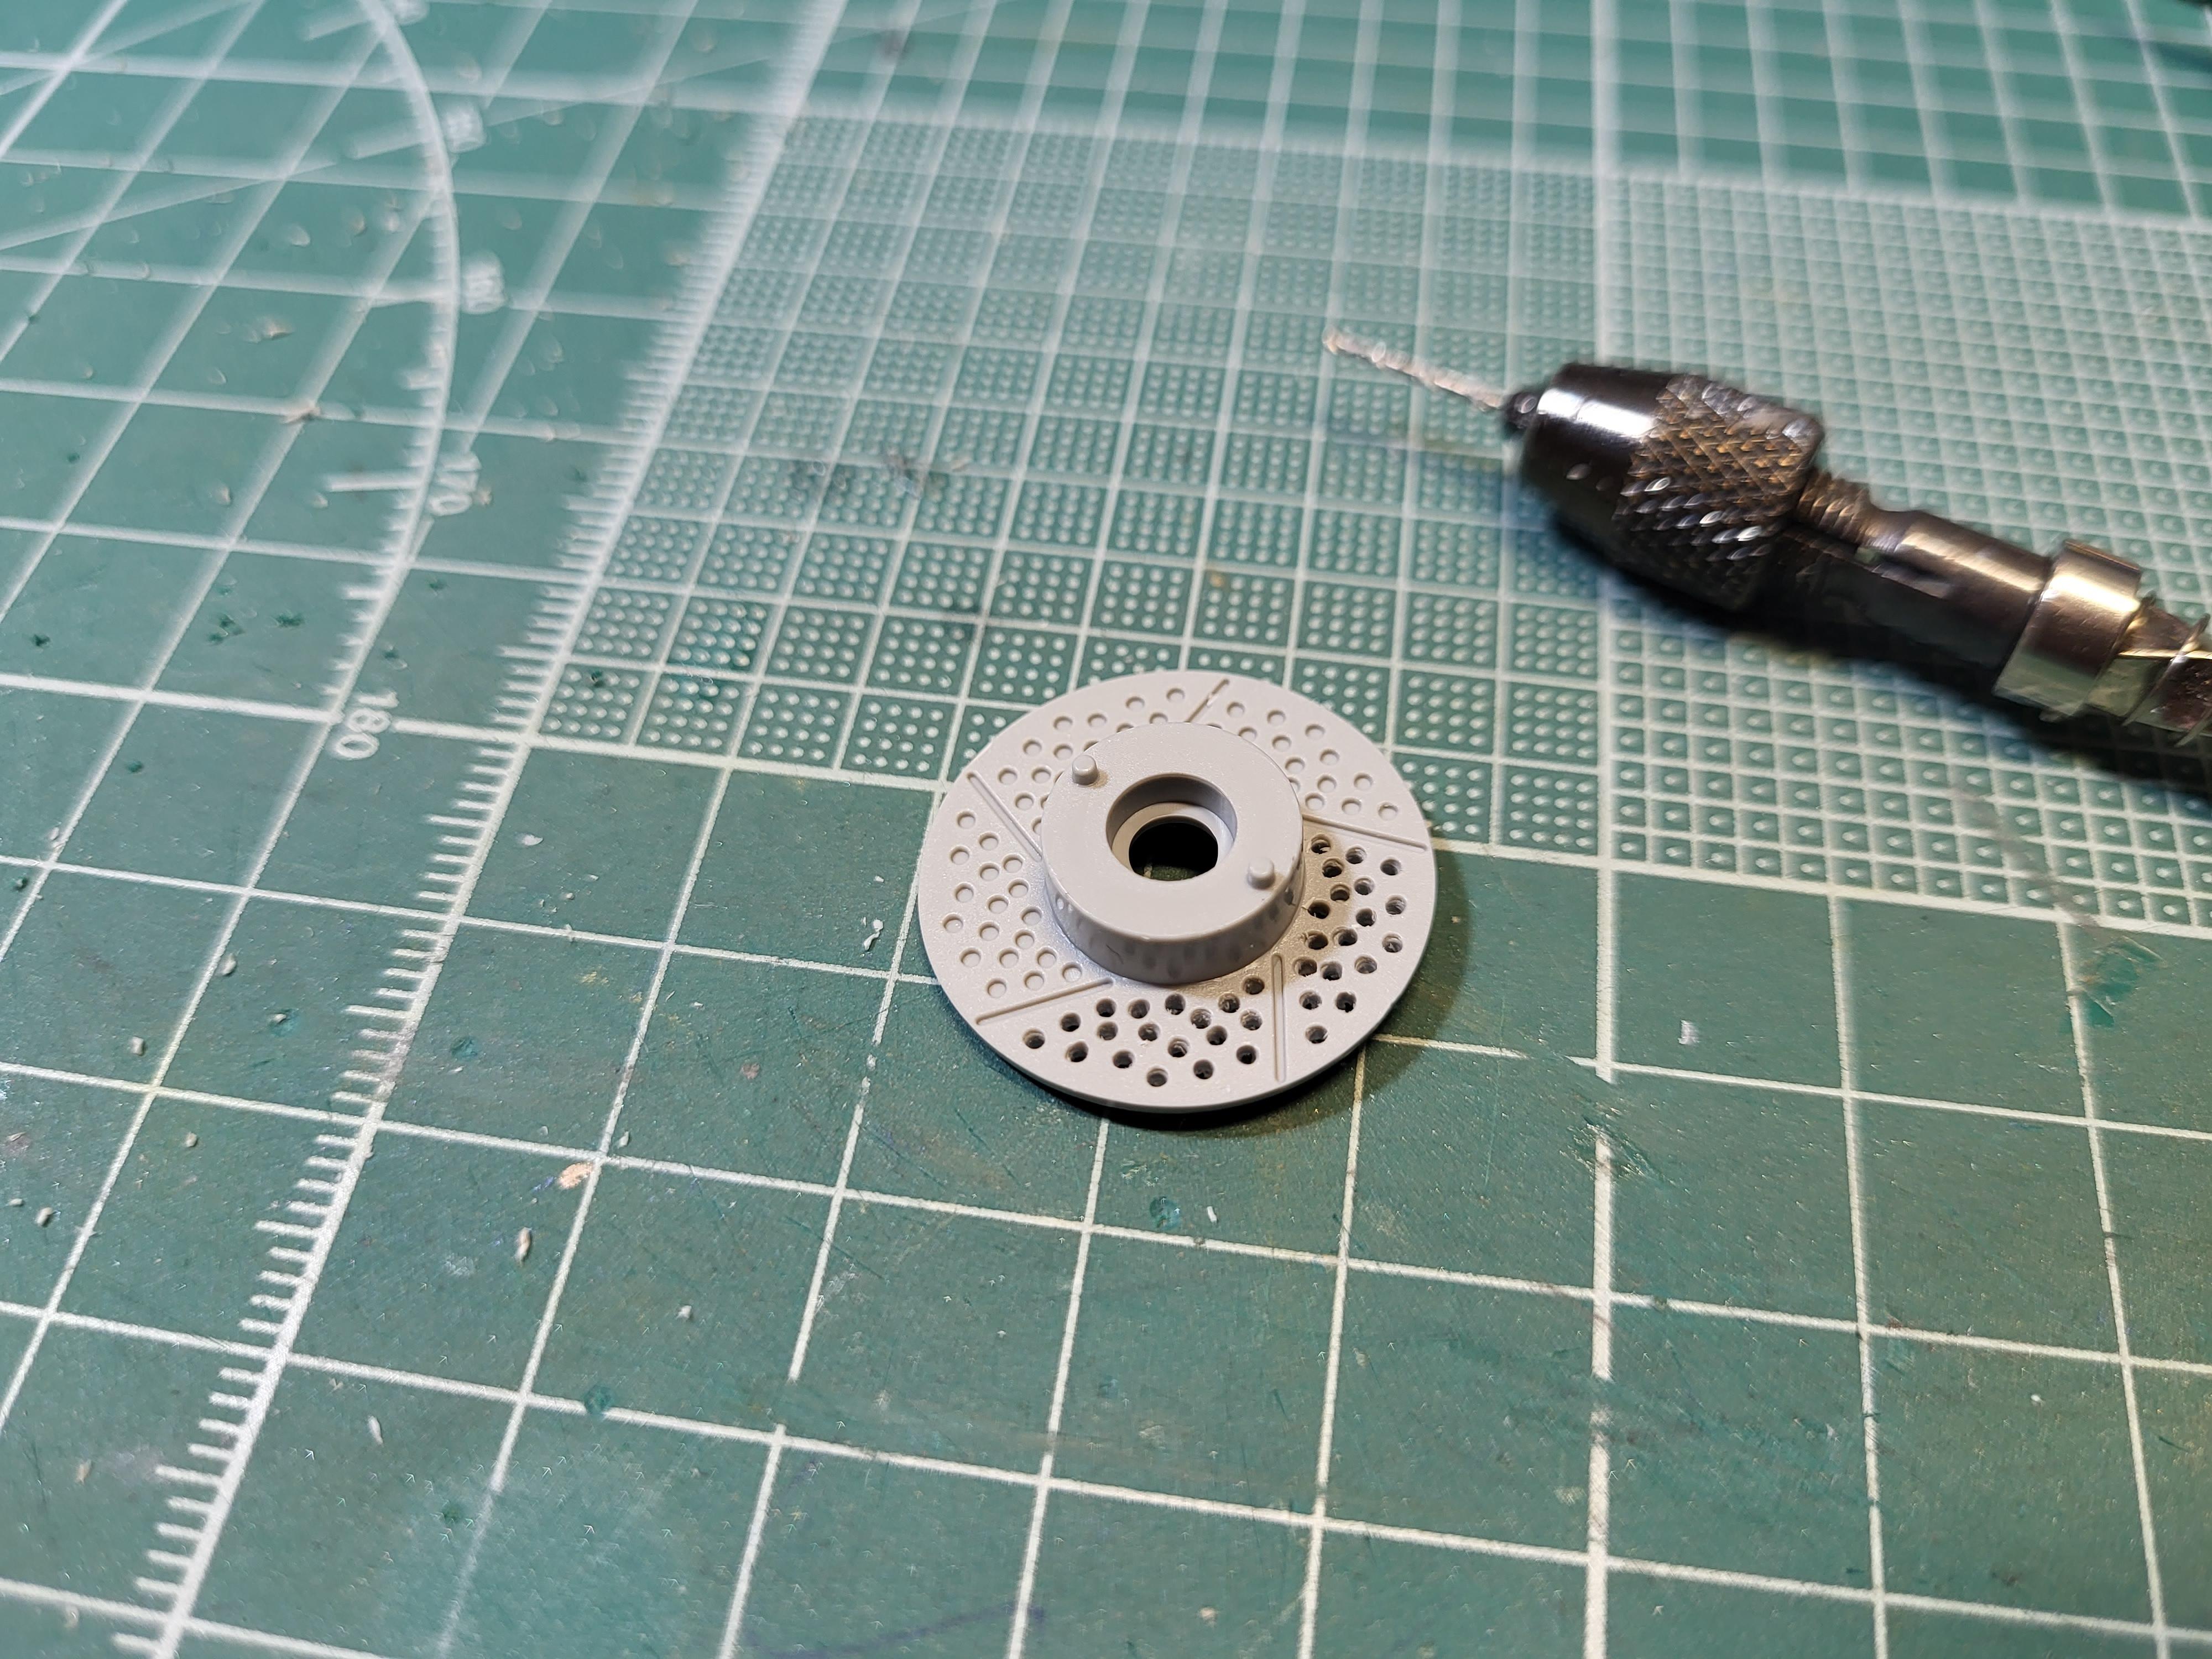
The kit itself is very good, enjoy building it. But one problem is that the screws and nuts for the wheels didn´t match !? Another builder I know had the same problem. I contacted Italeri about this.
Thomas
-
2
-
-
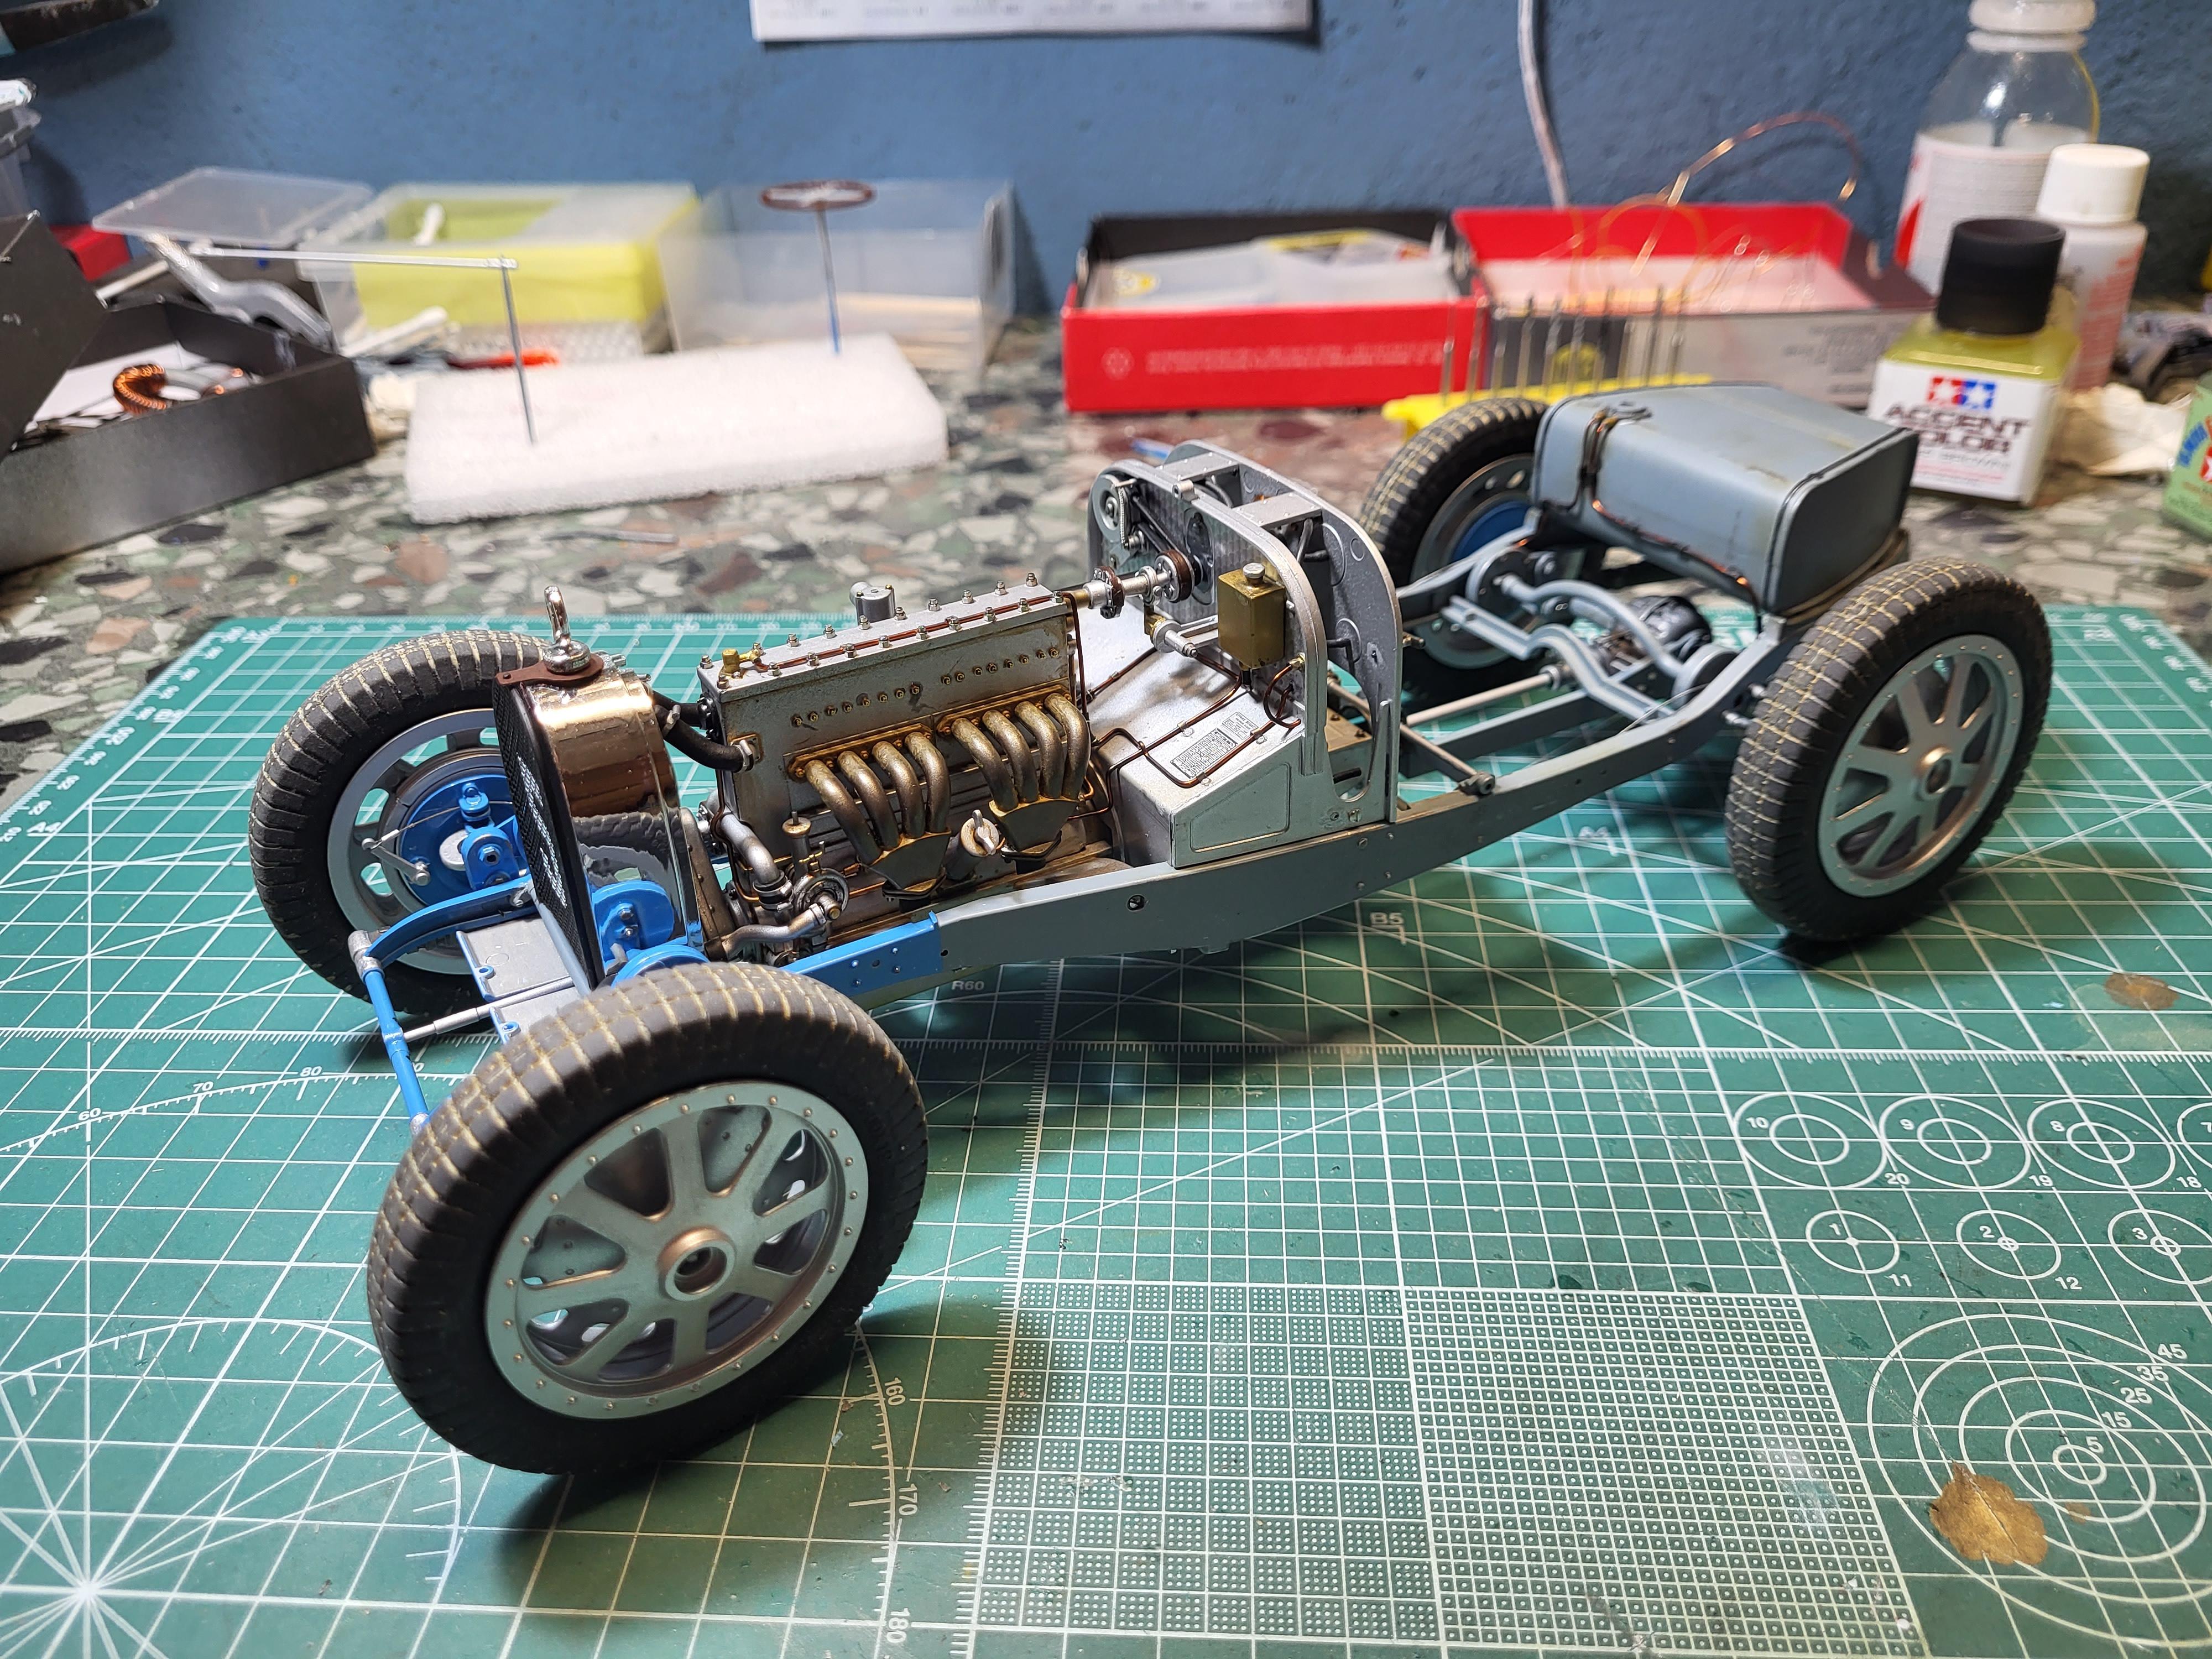
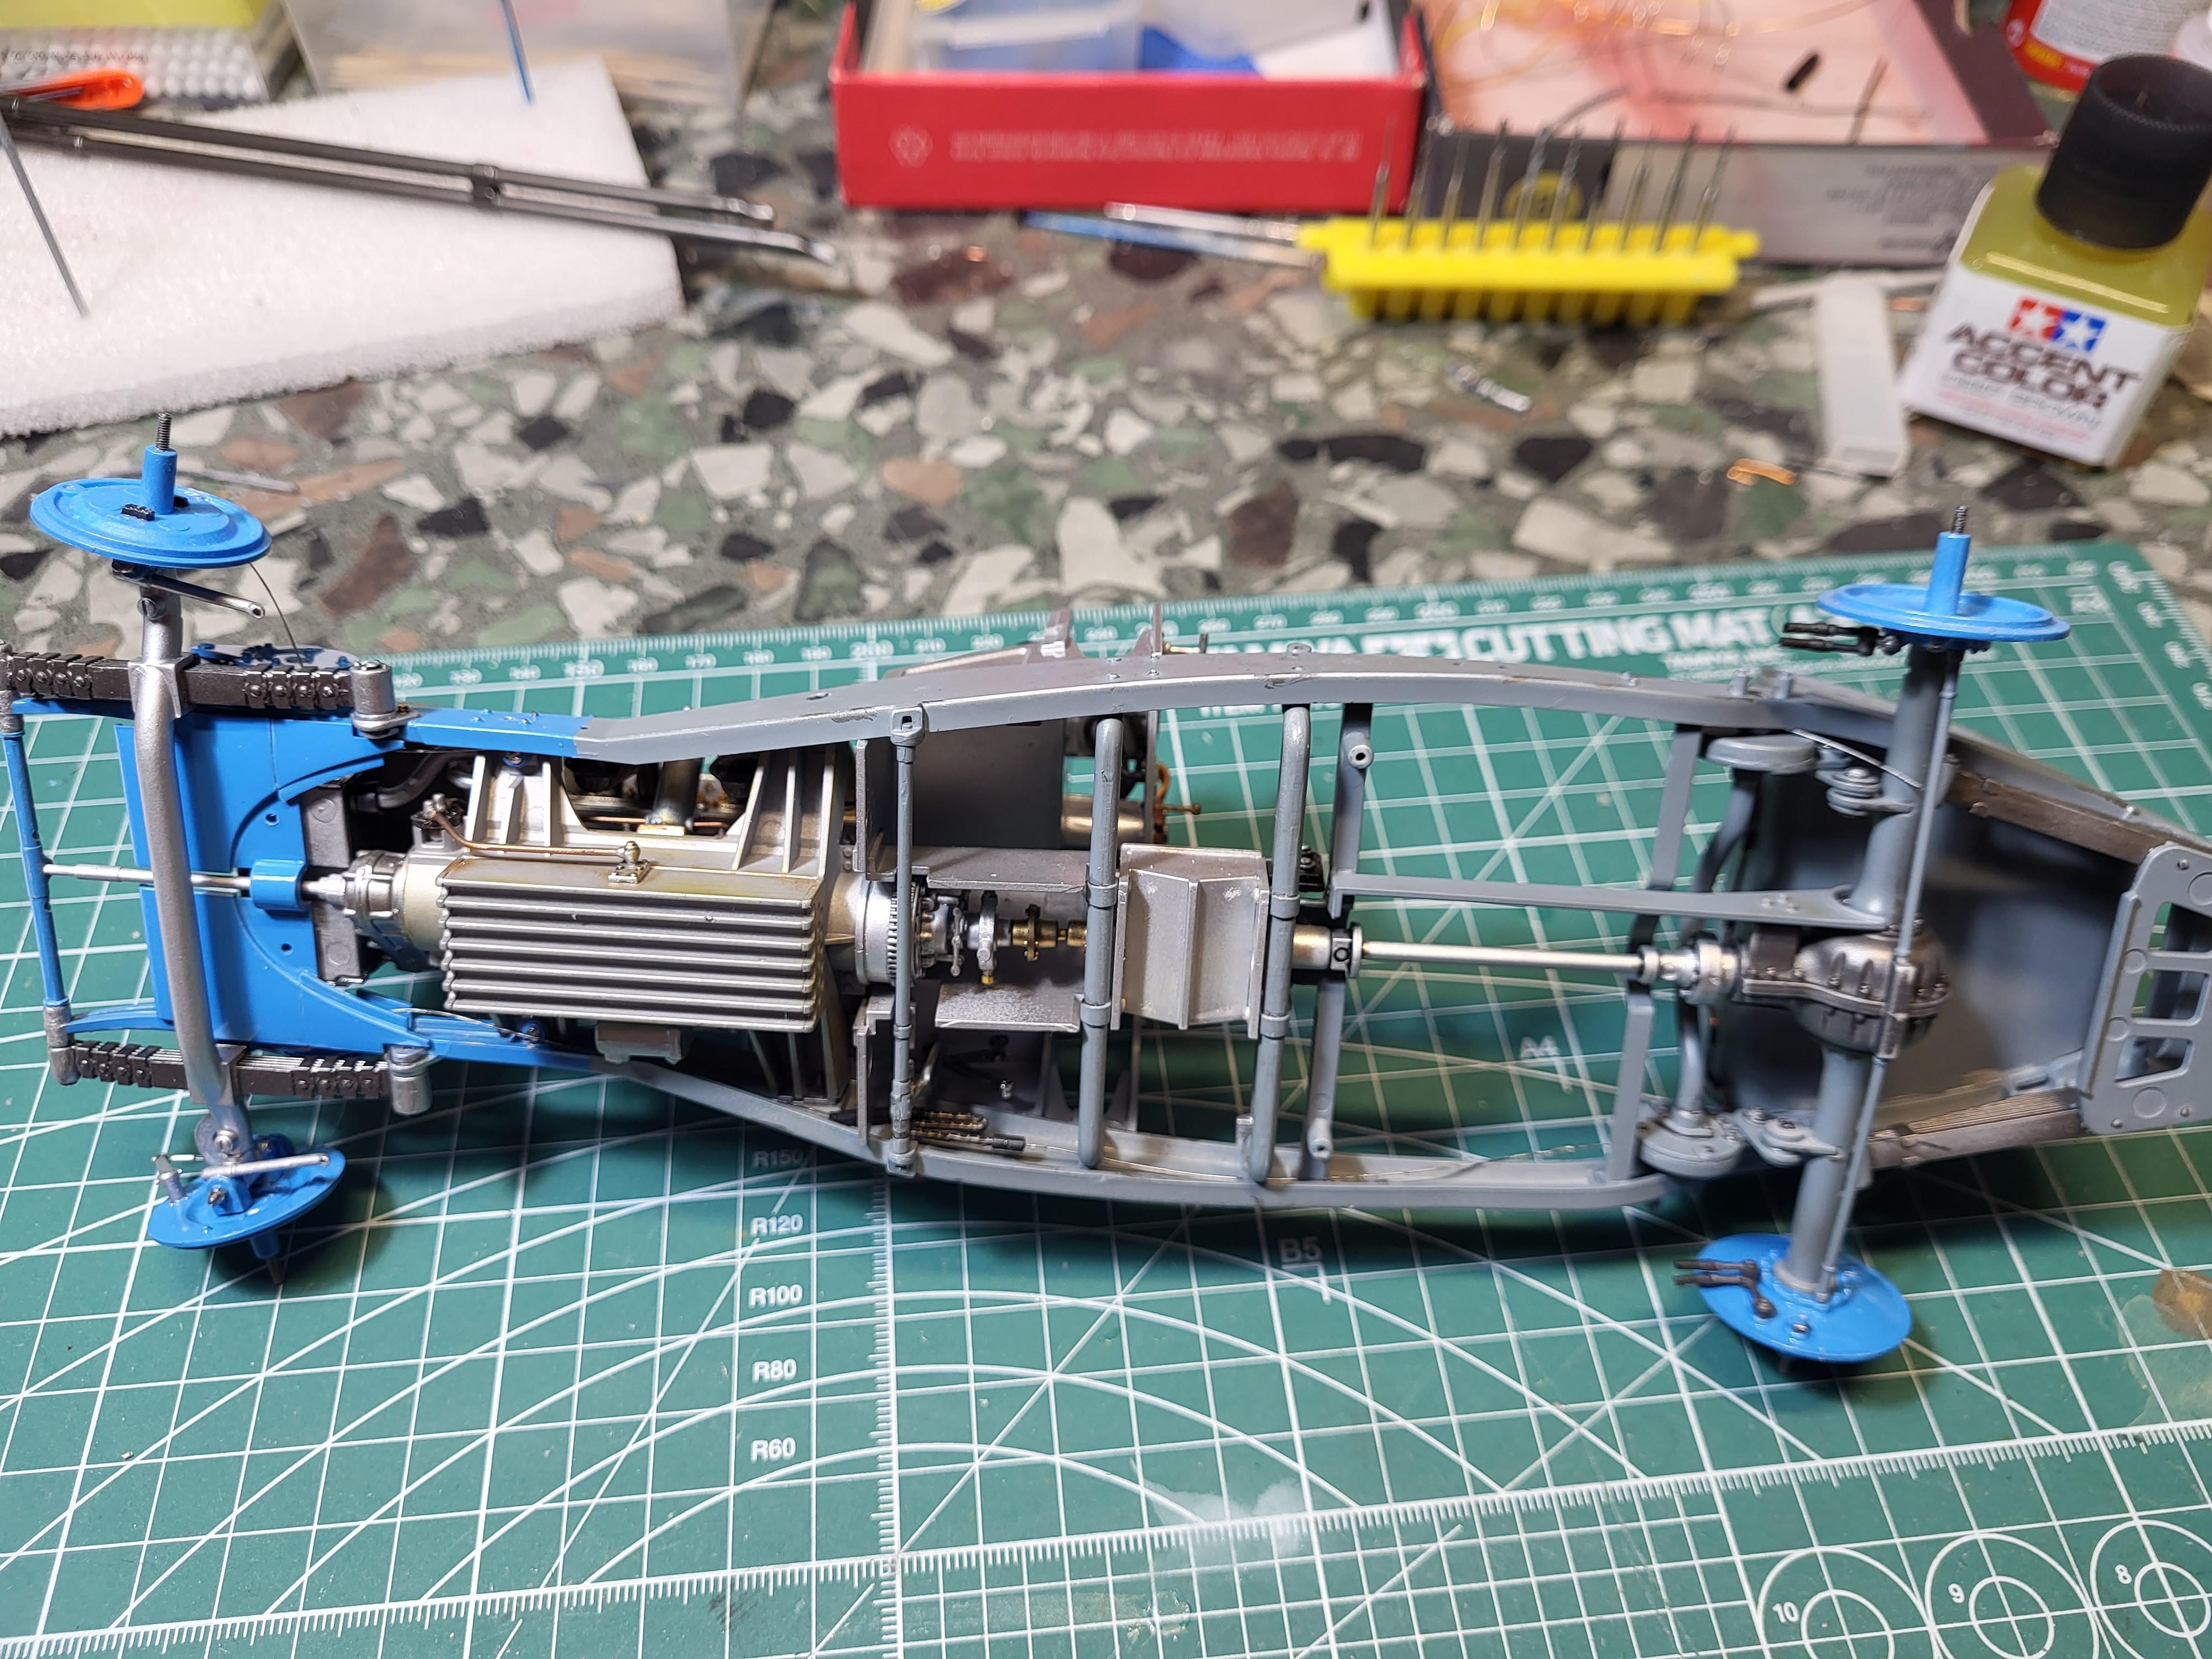
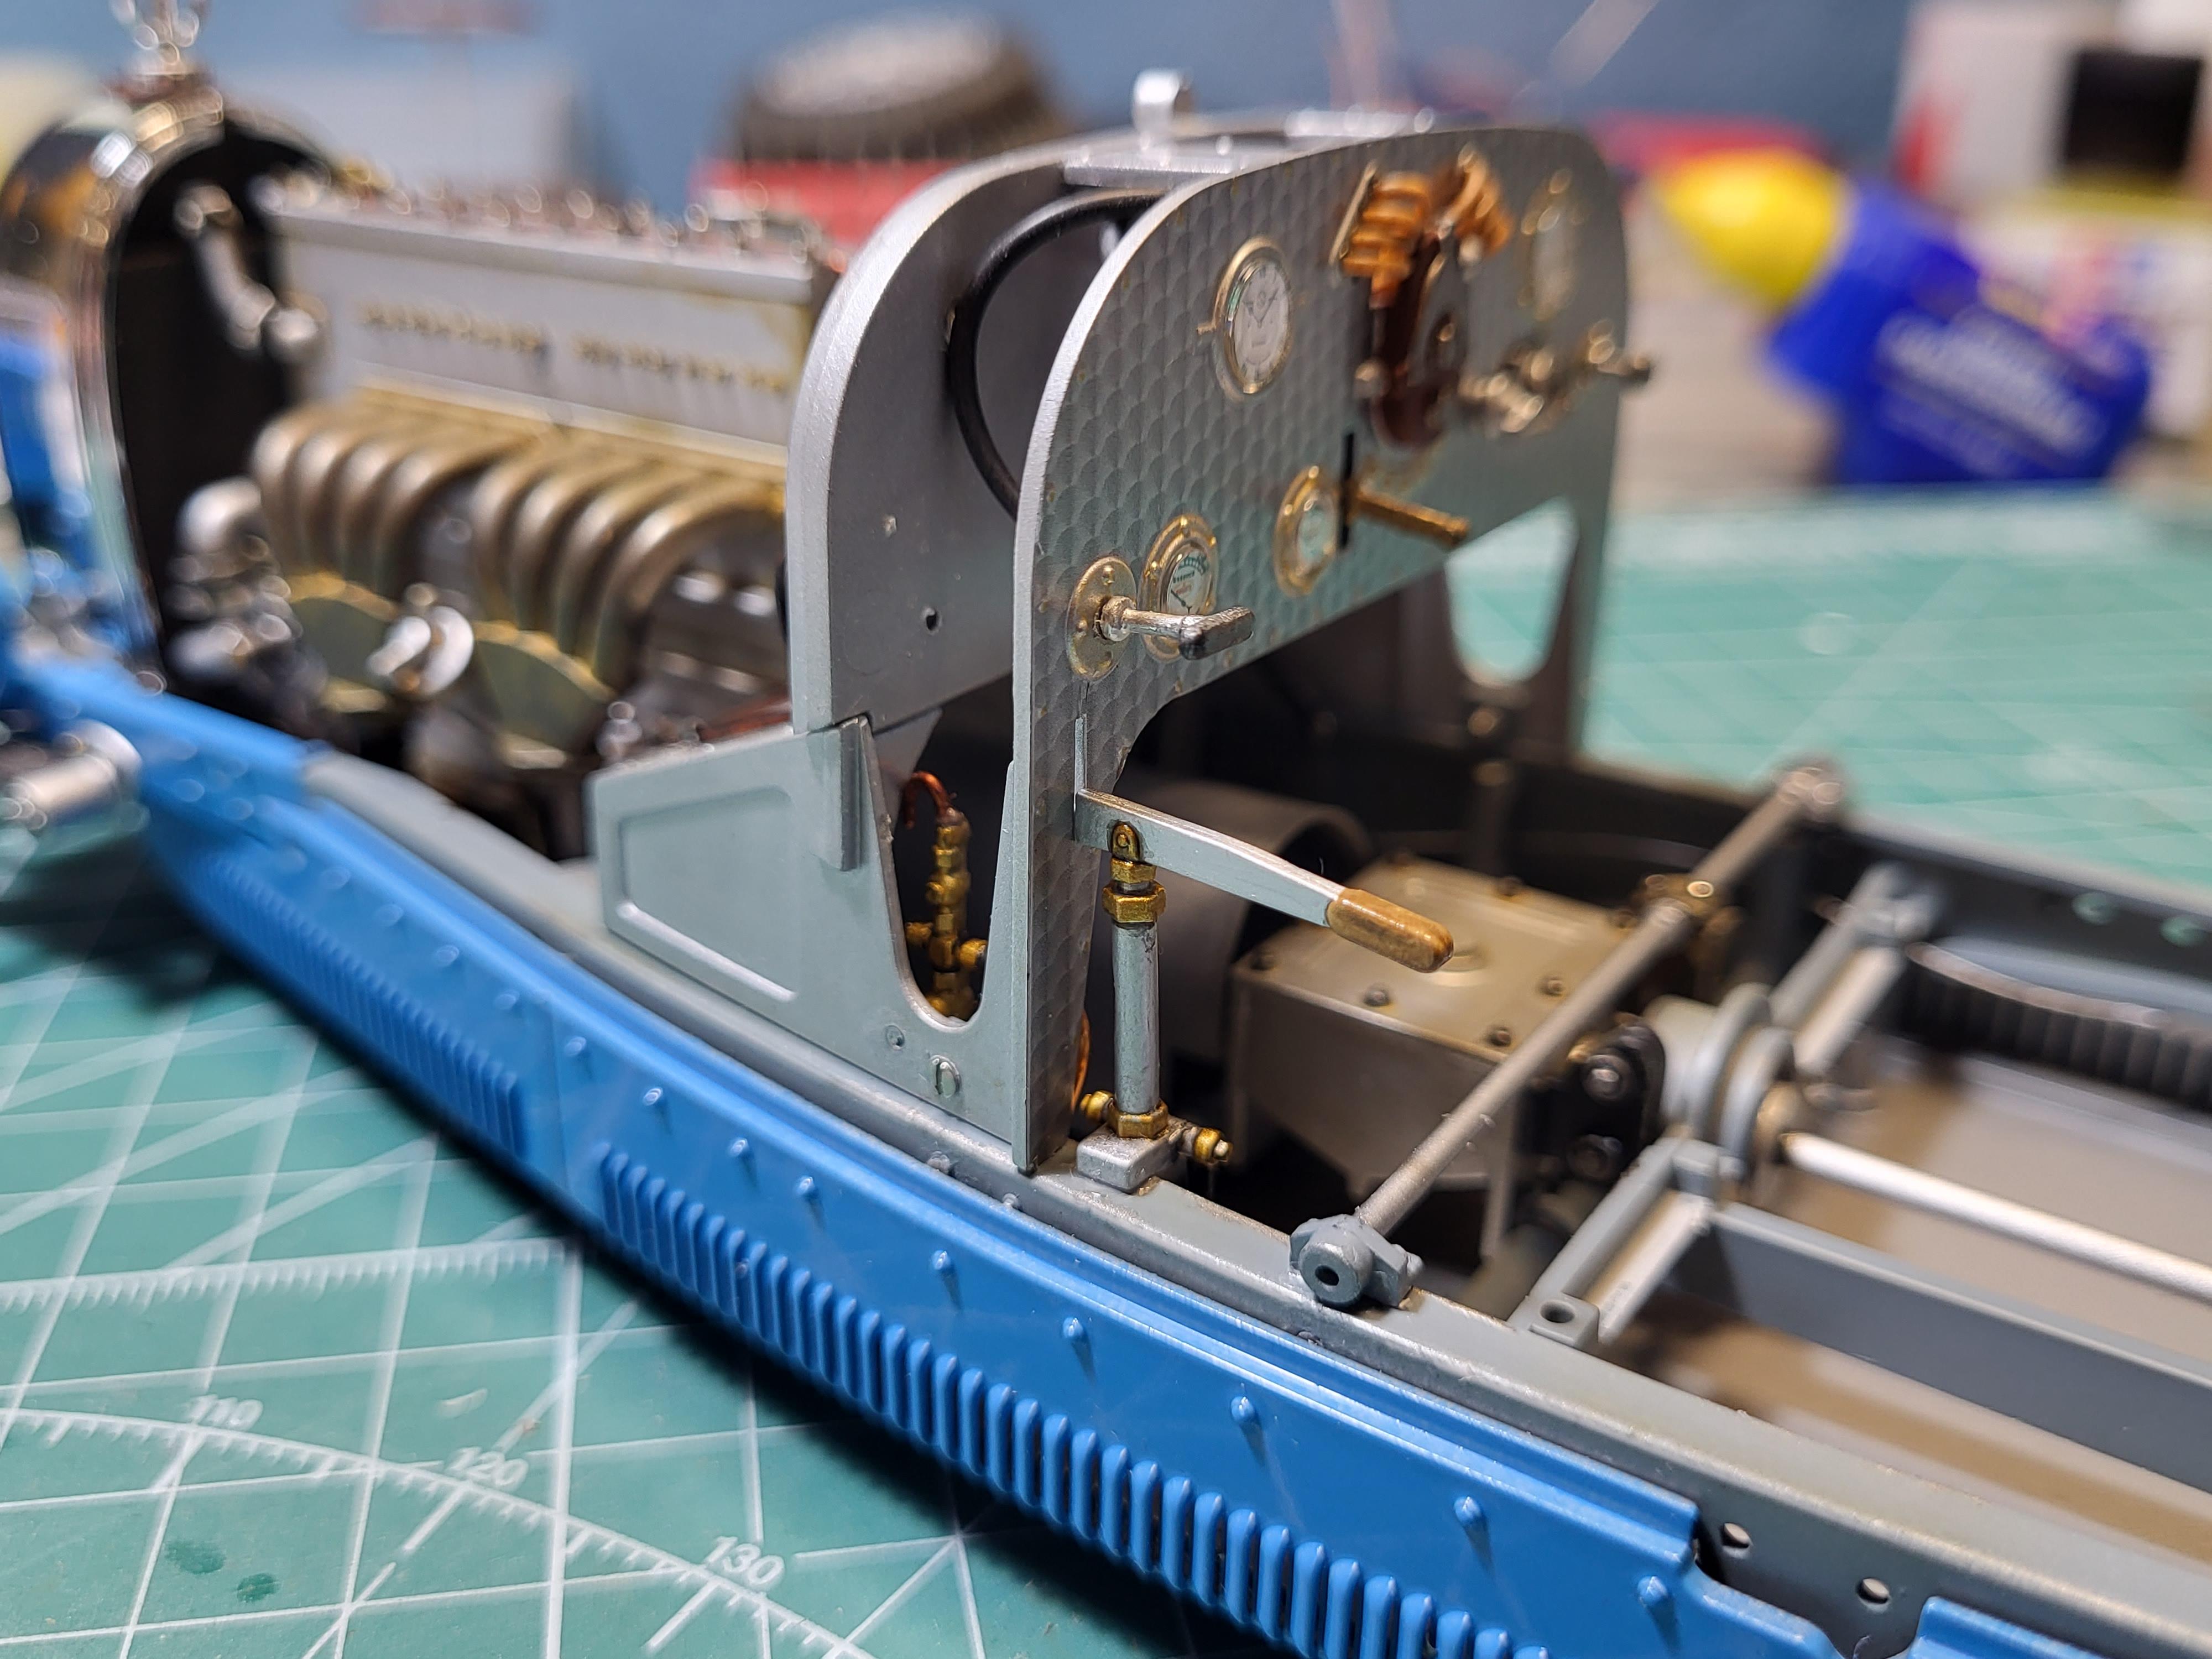
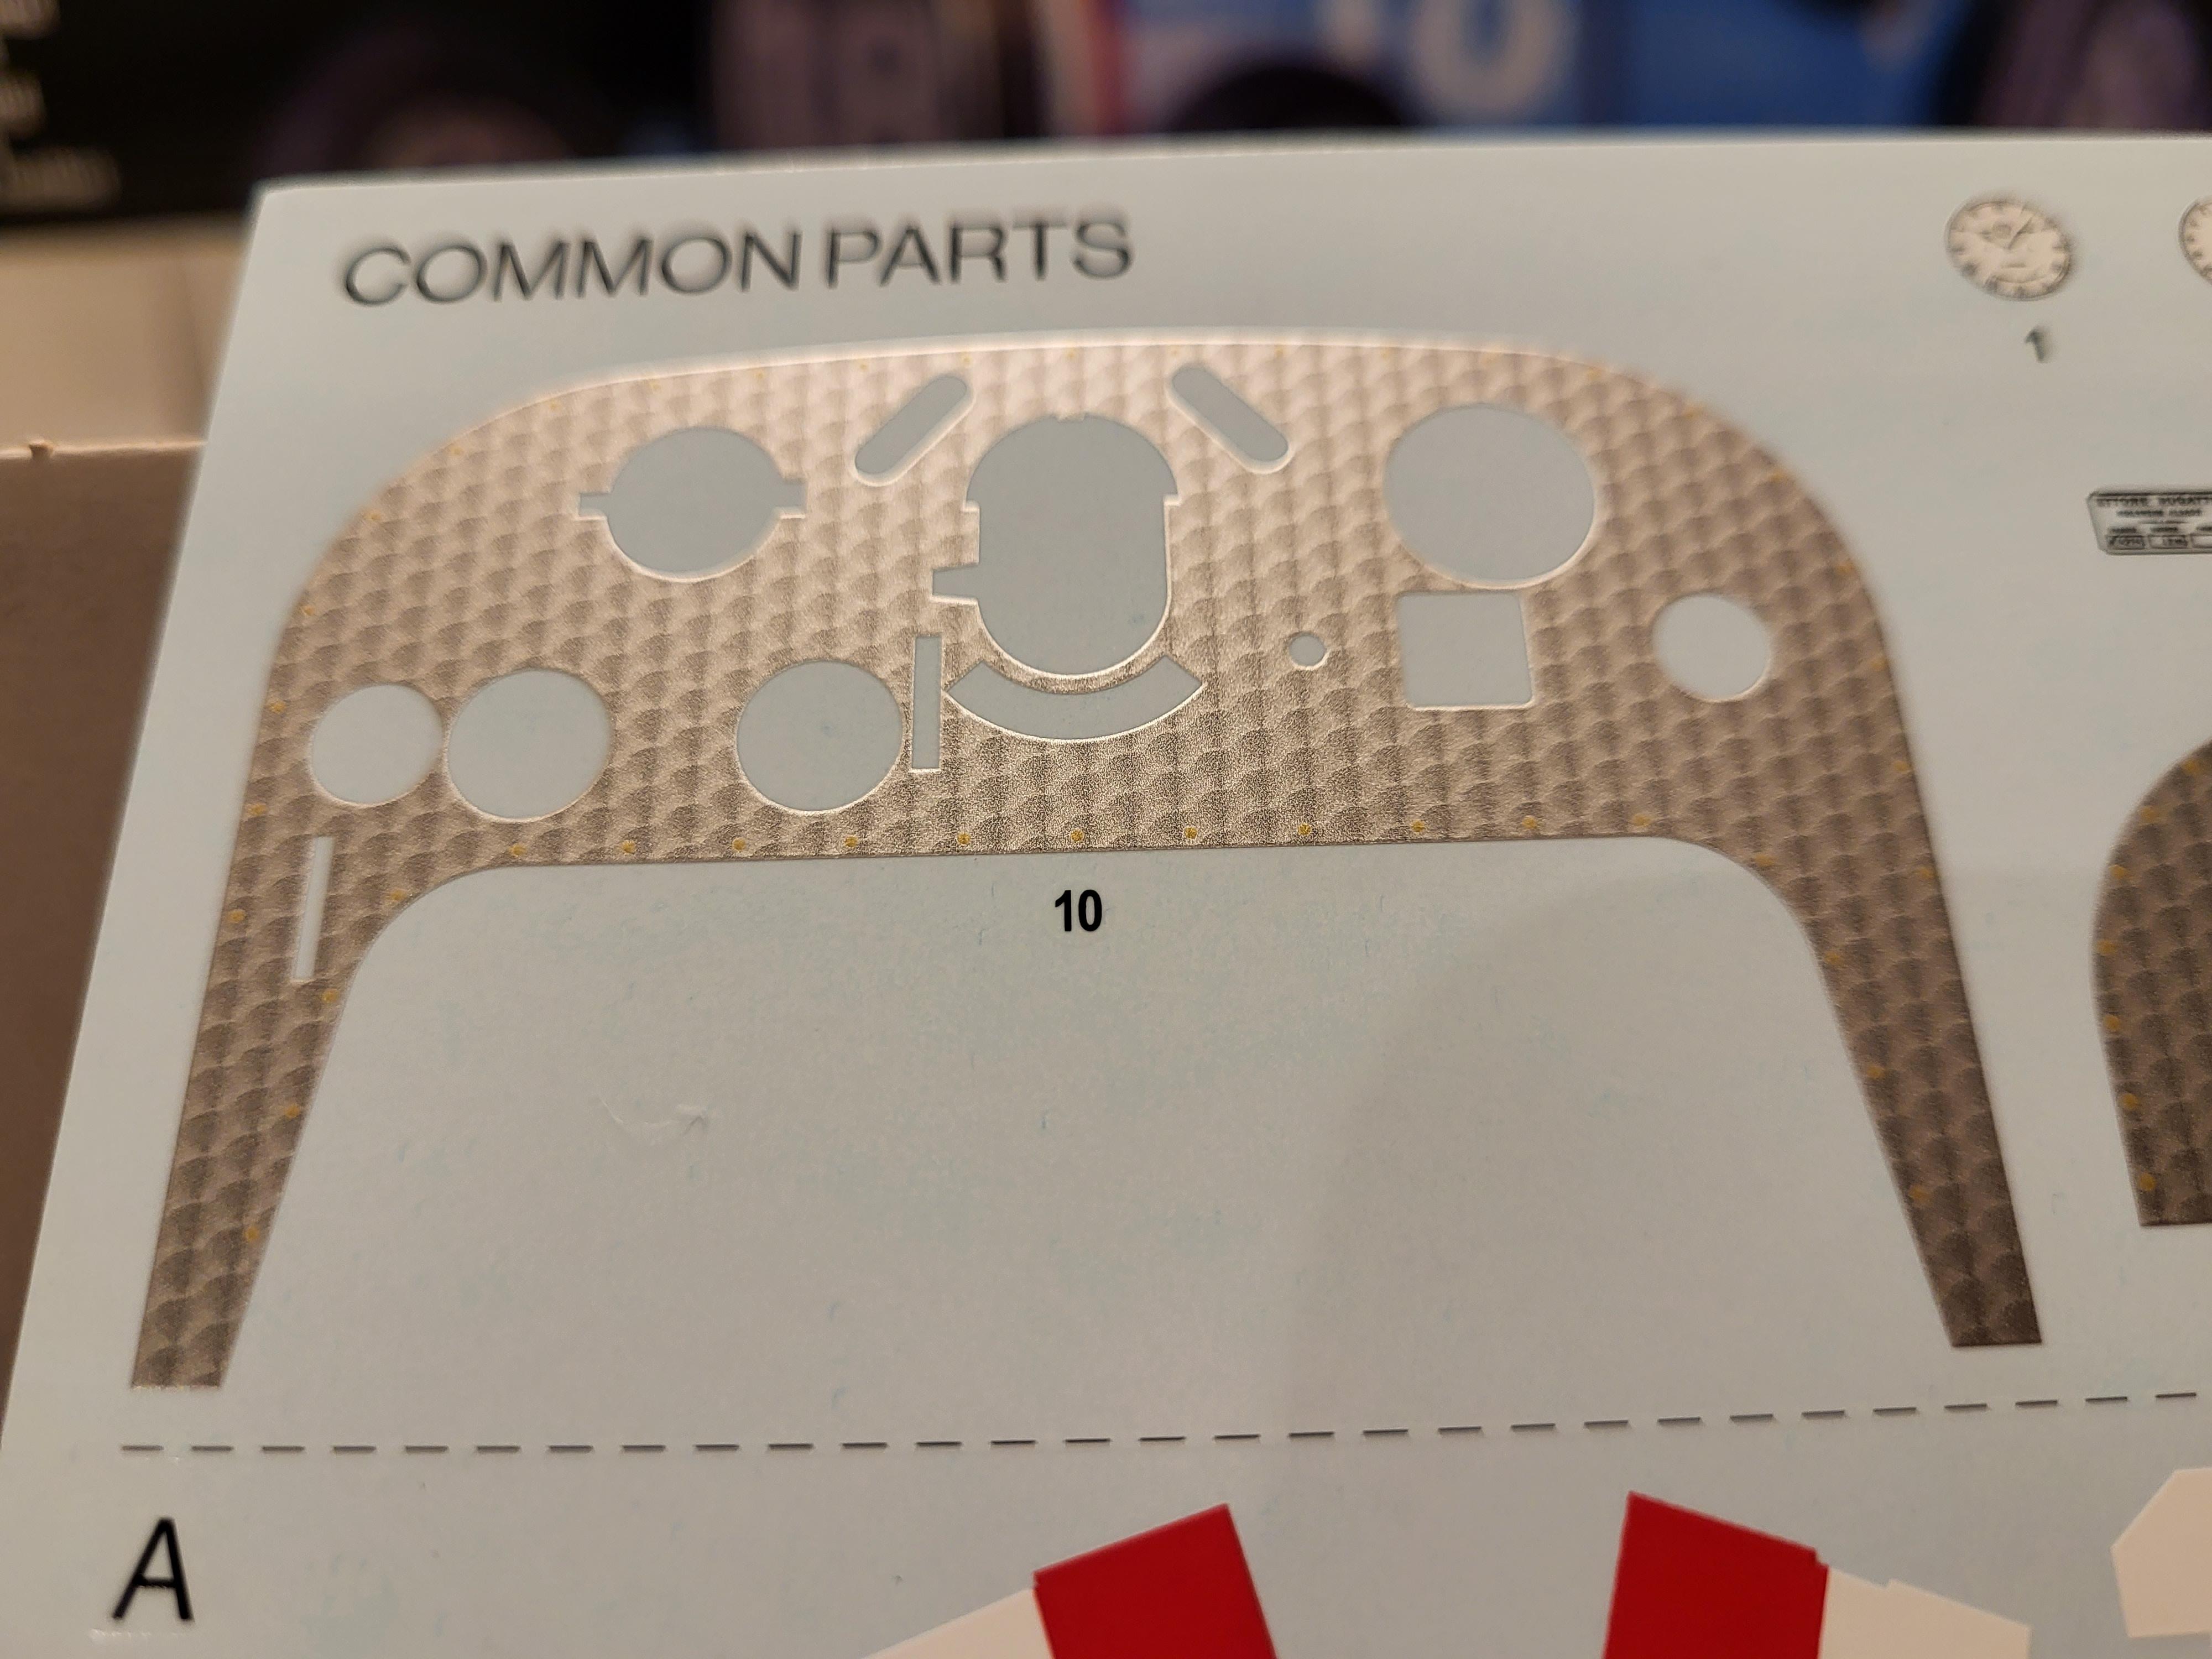
Hi
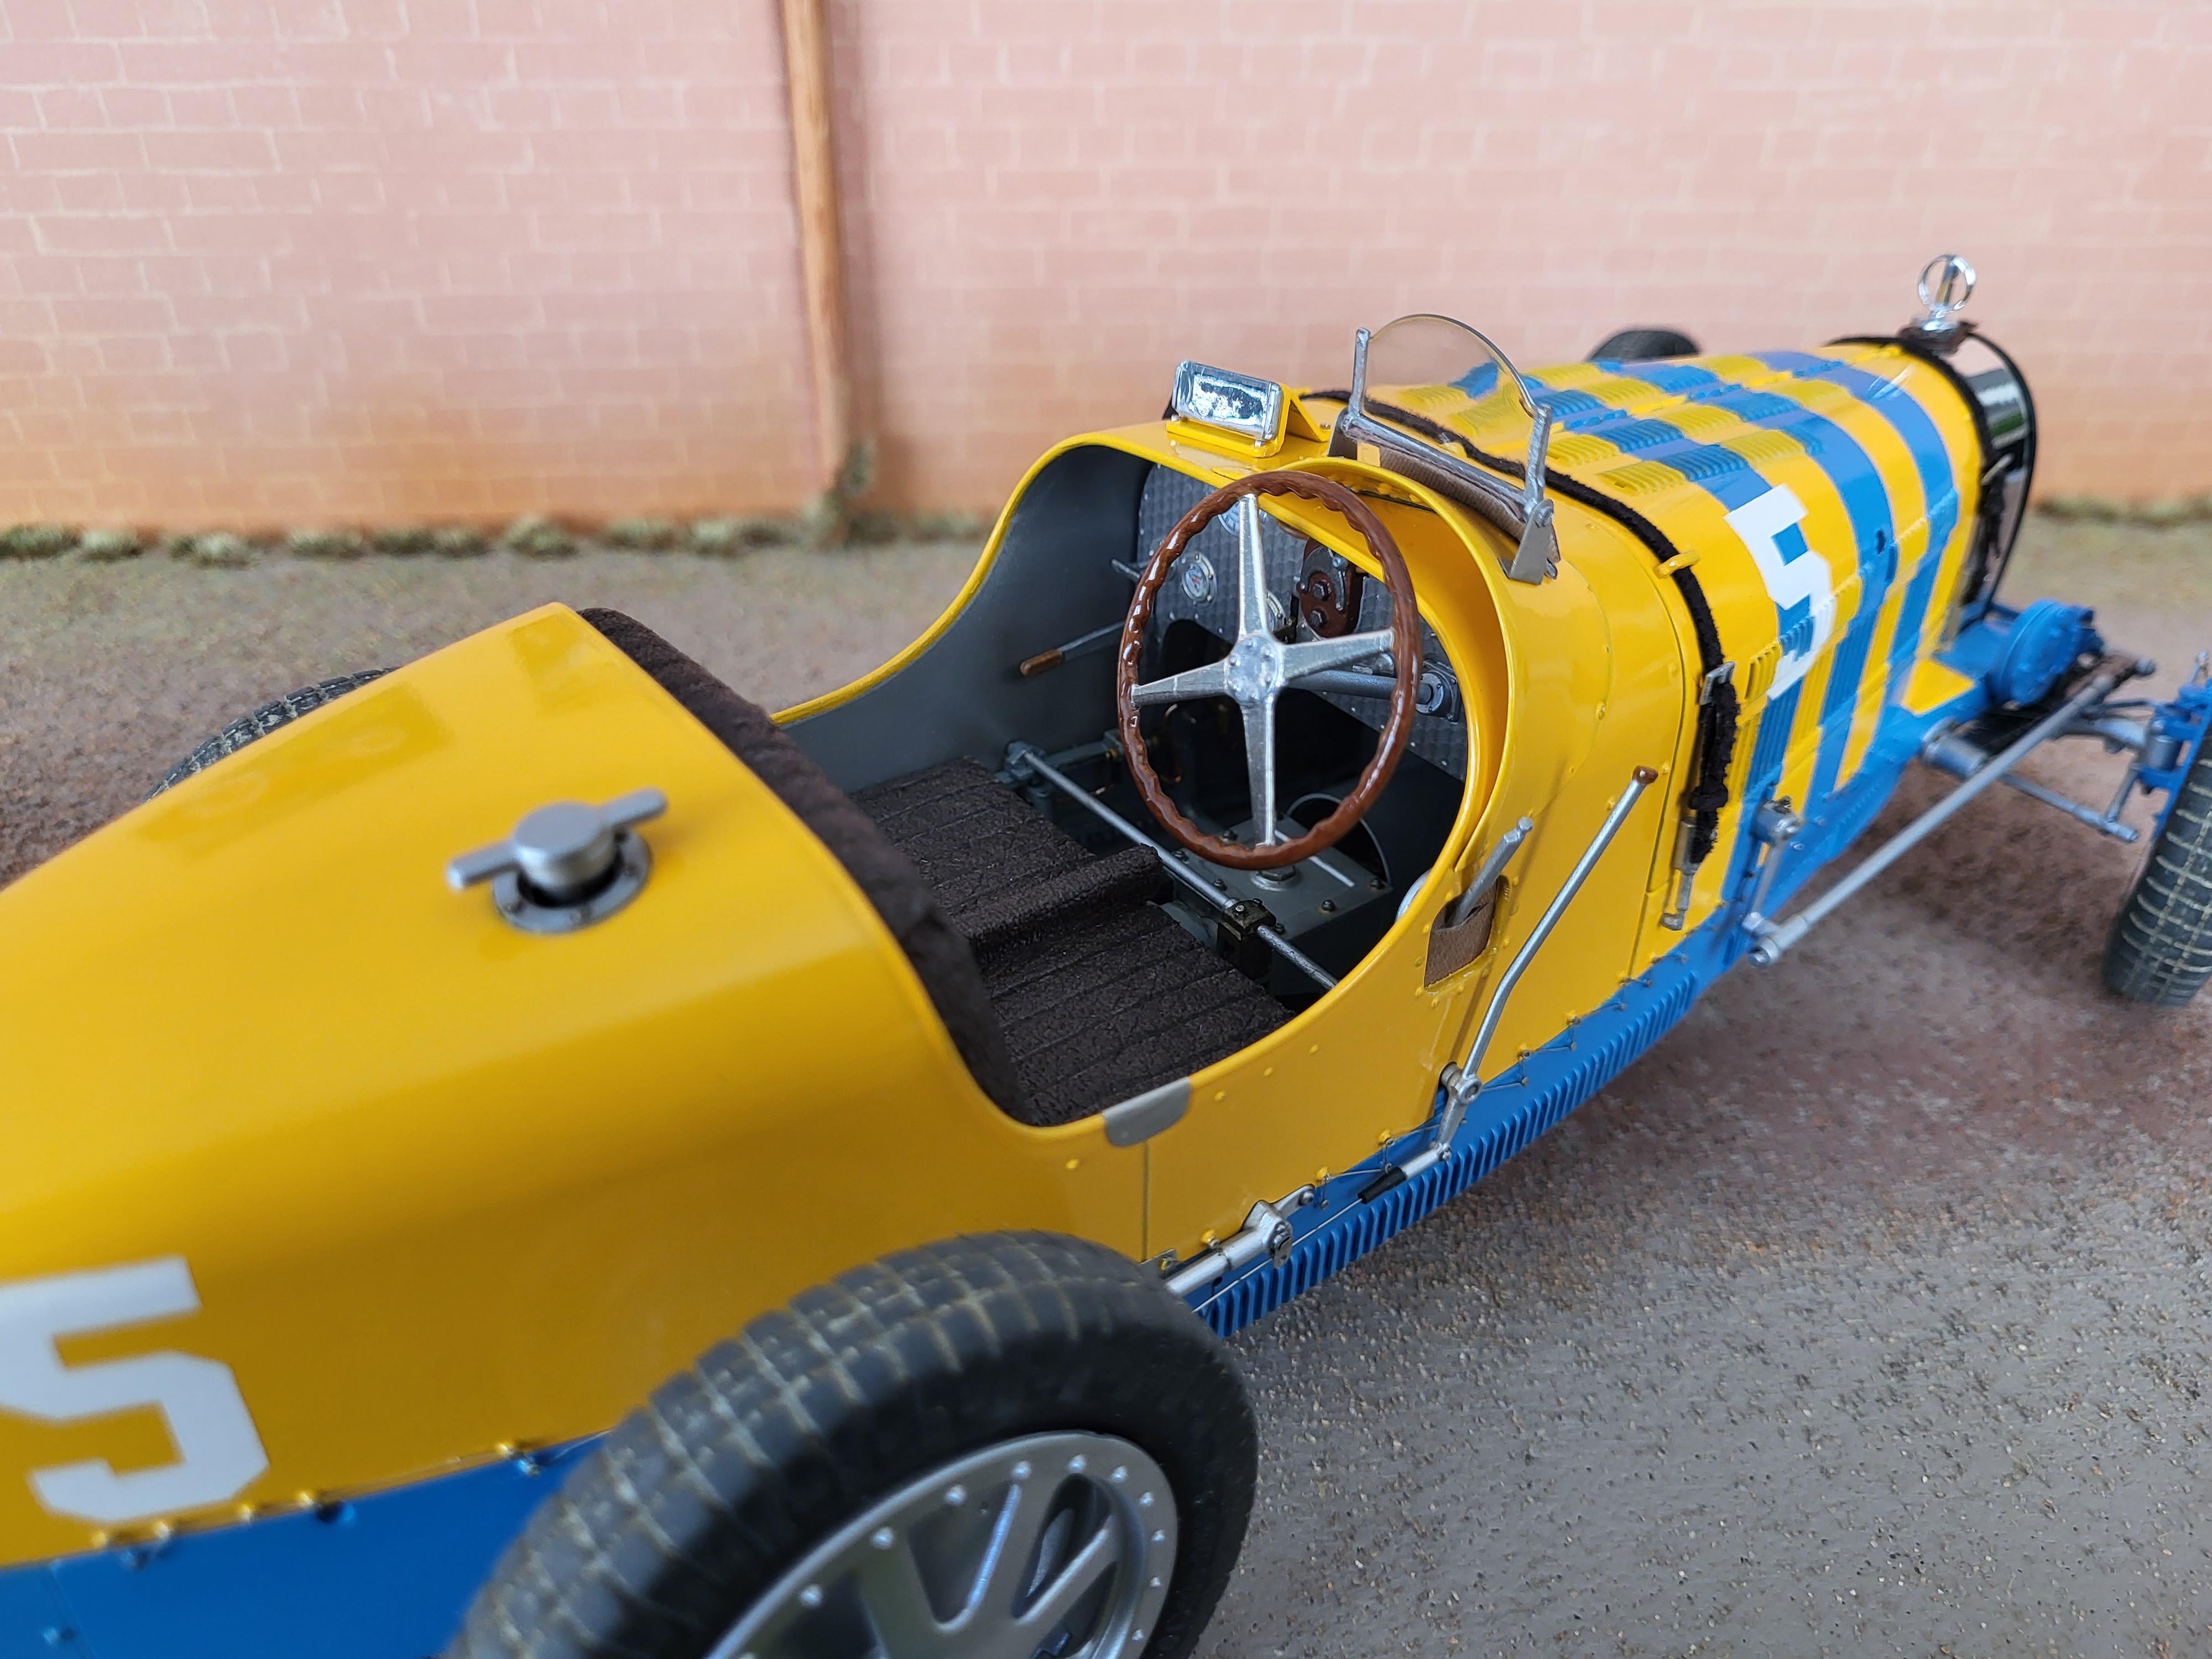
A little update on the Bugatti. The dash is now in place and the bulkhead/torpedowall, don´t know the real name for it in English ? I hope you know what I mean.
Added some copperwire and made some supports for them, replaced a plastic spring to a real one. replaced bolts and screws to metal.
More later
Thomas
-
2
-
-
9 hours ago, absmiami said:
have a look at this Bugatti 59 ...
I shot this at a wonderful Bugatti meeting at Tremblant 10 years ago ...
the part that slips over the radiator cap and secures the top of the stone screen is leather
its the same for the 35s ...
Italeri spit the bit on this detail - the kit part appears to be photo-etched
if its not too late - hope its not - see if you can correct this ...
Hi, I belive you are right about this, I had no idea it was in leather, found more pictures and it seems its not metal anyway, I will try to paint it, if it looks like c**p I have to live with it ? ?
-
1 hour ago, absmiami said:
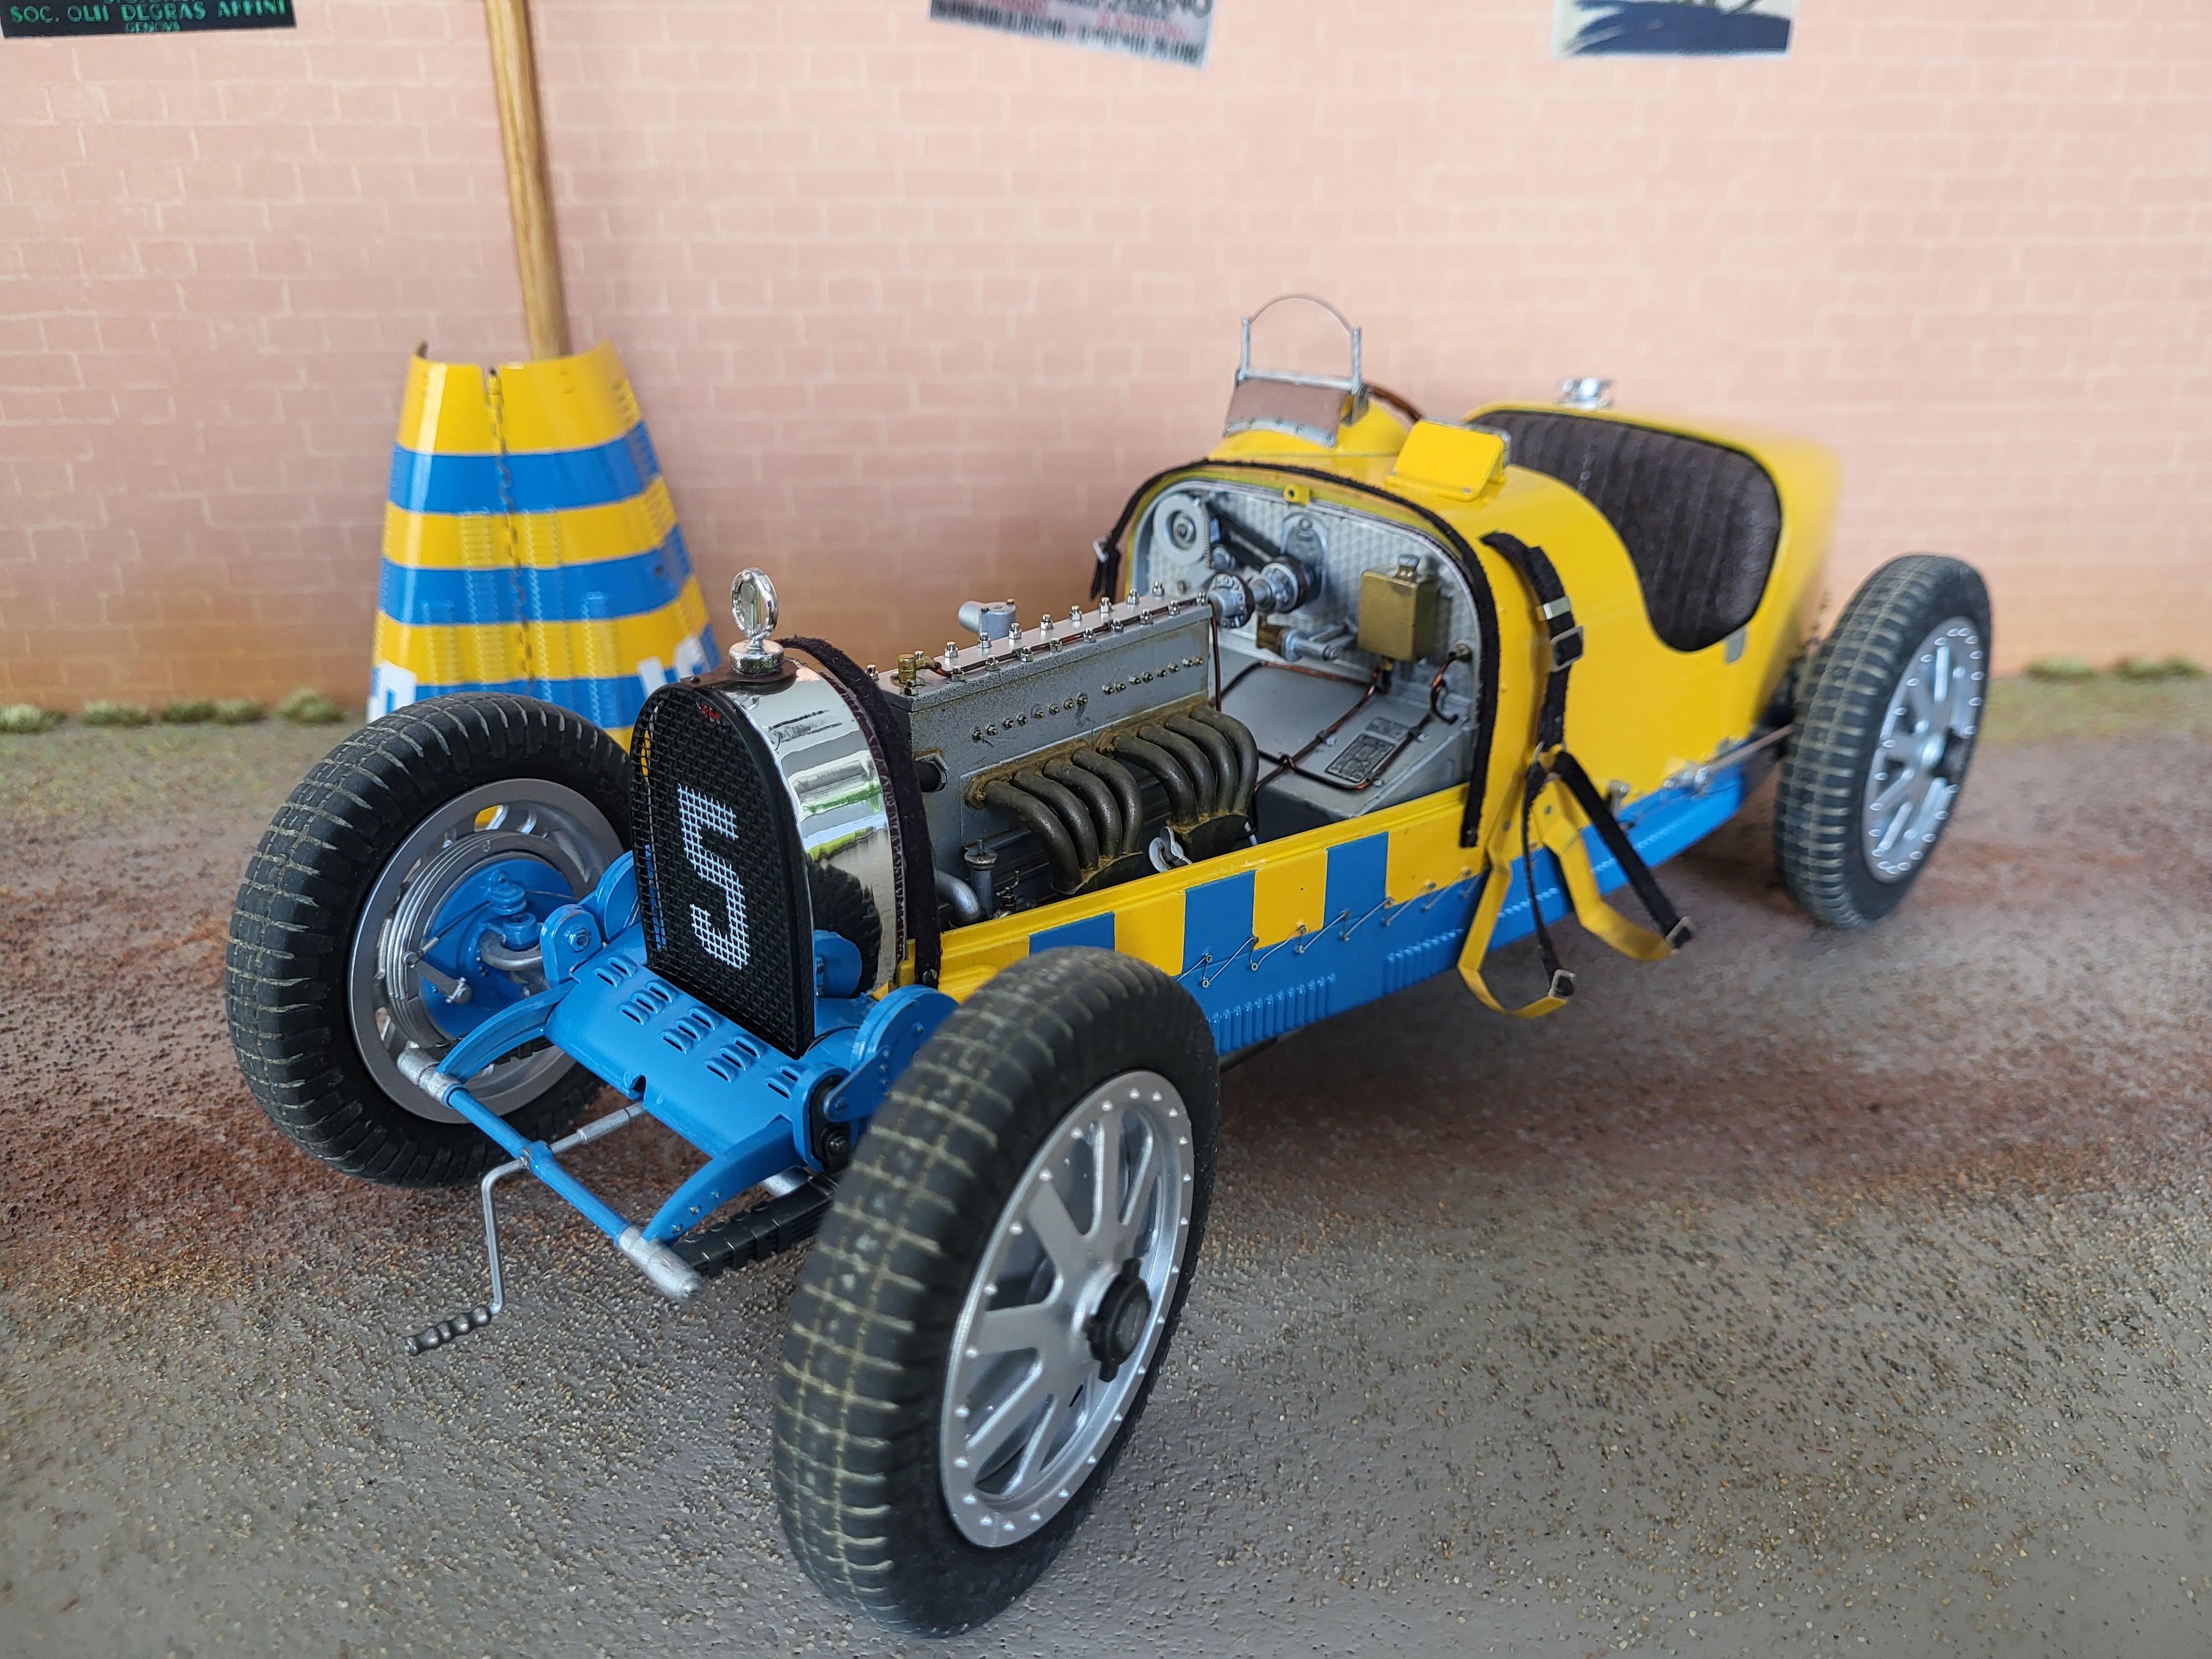
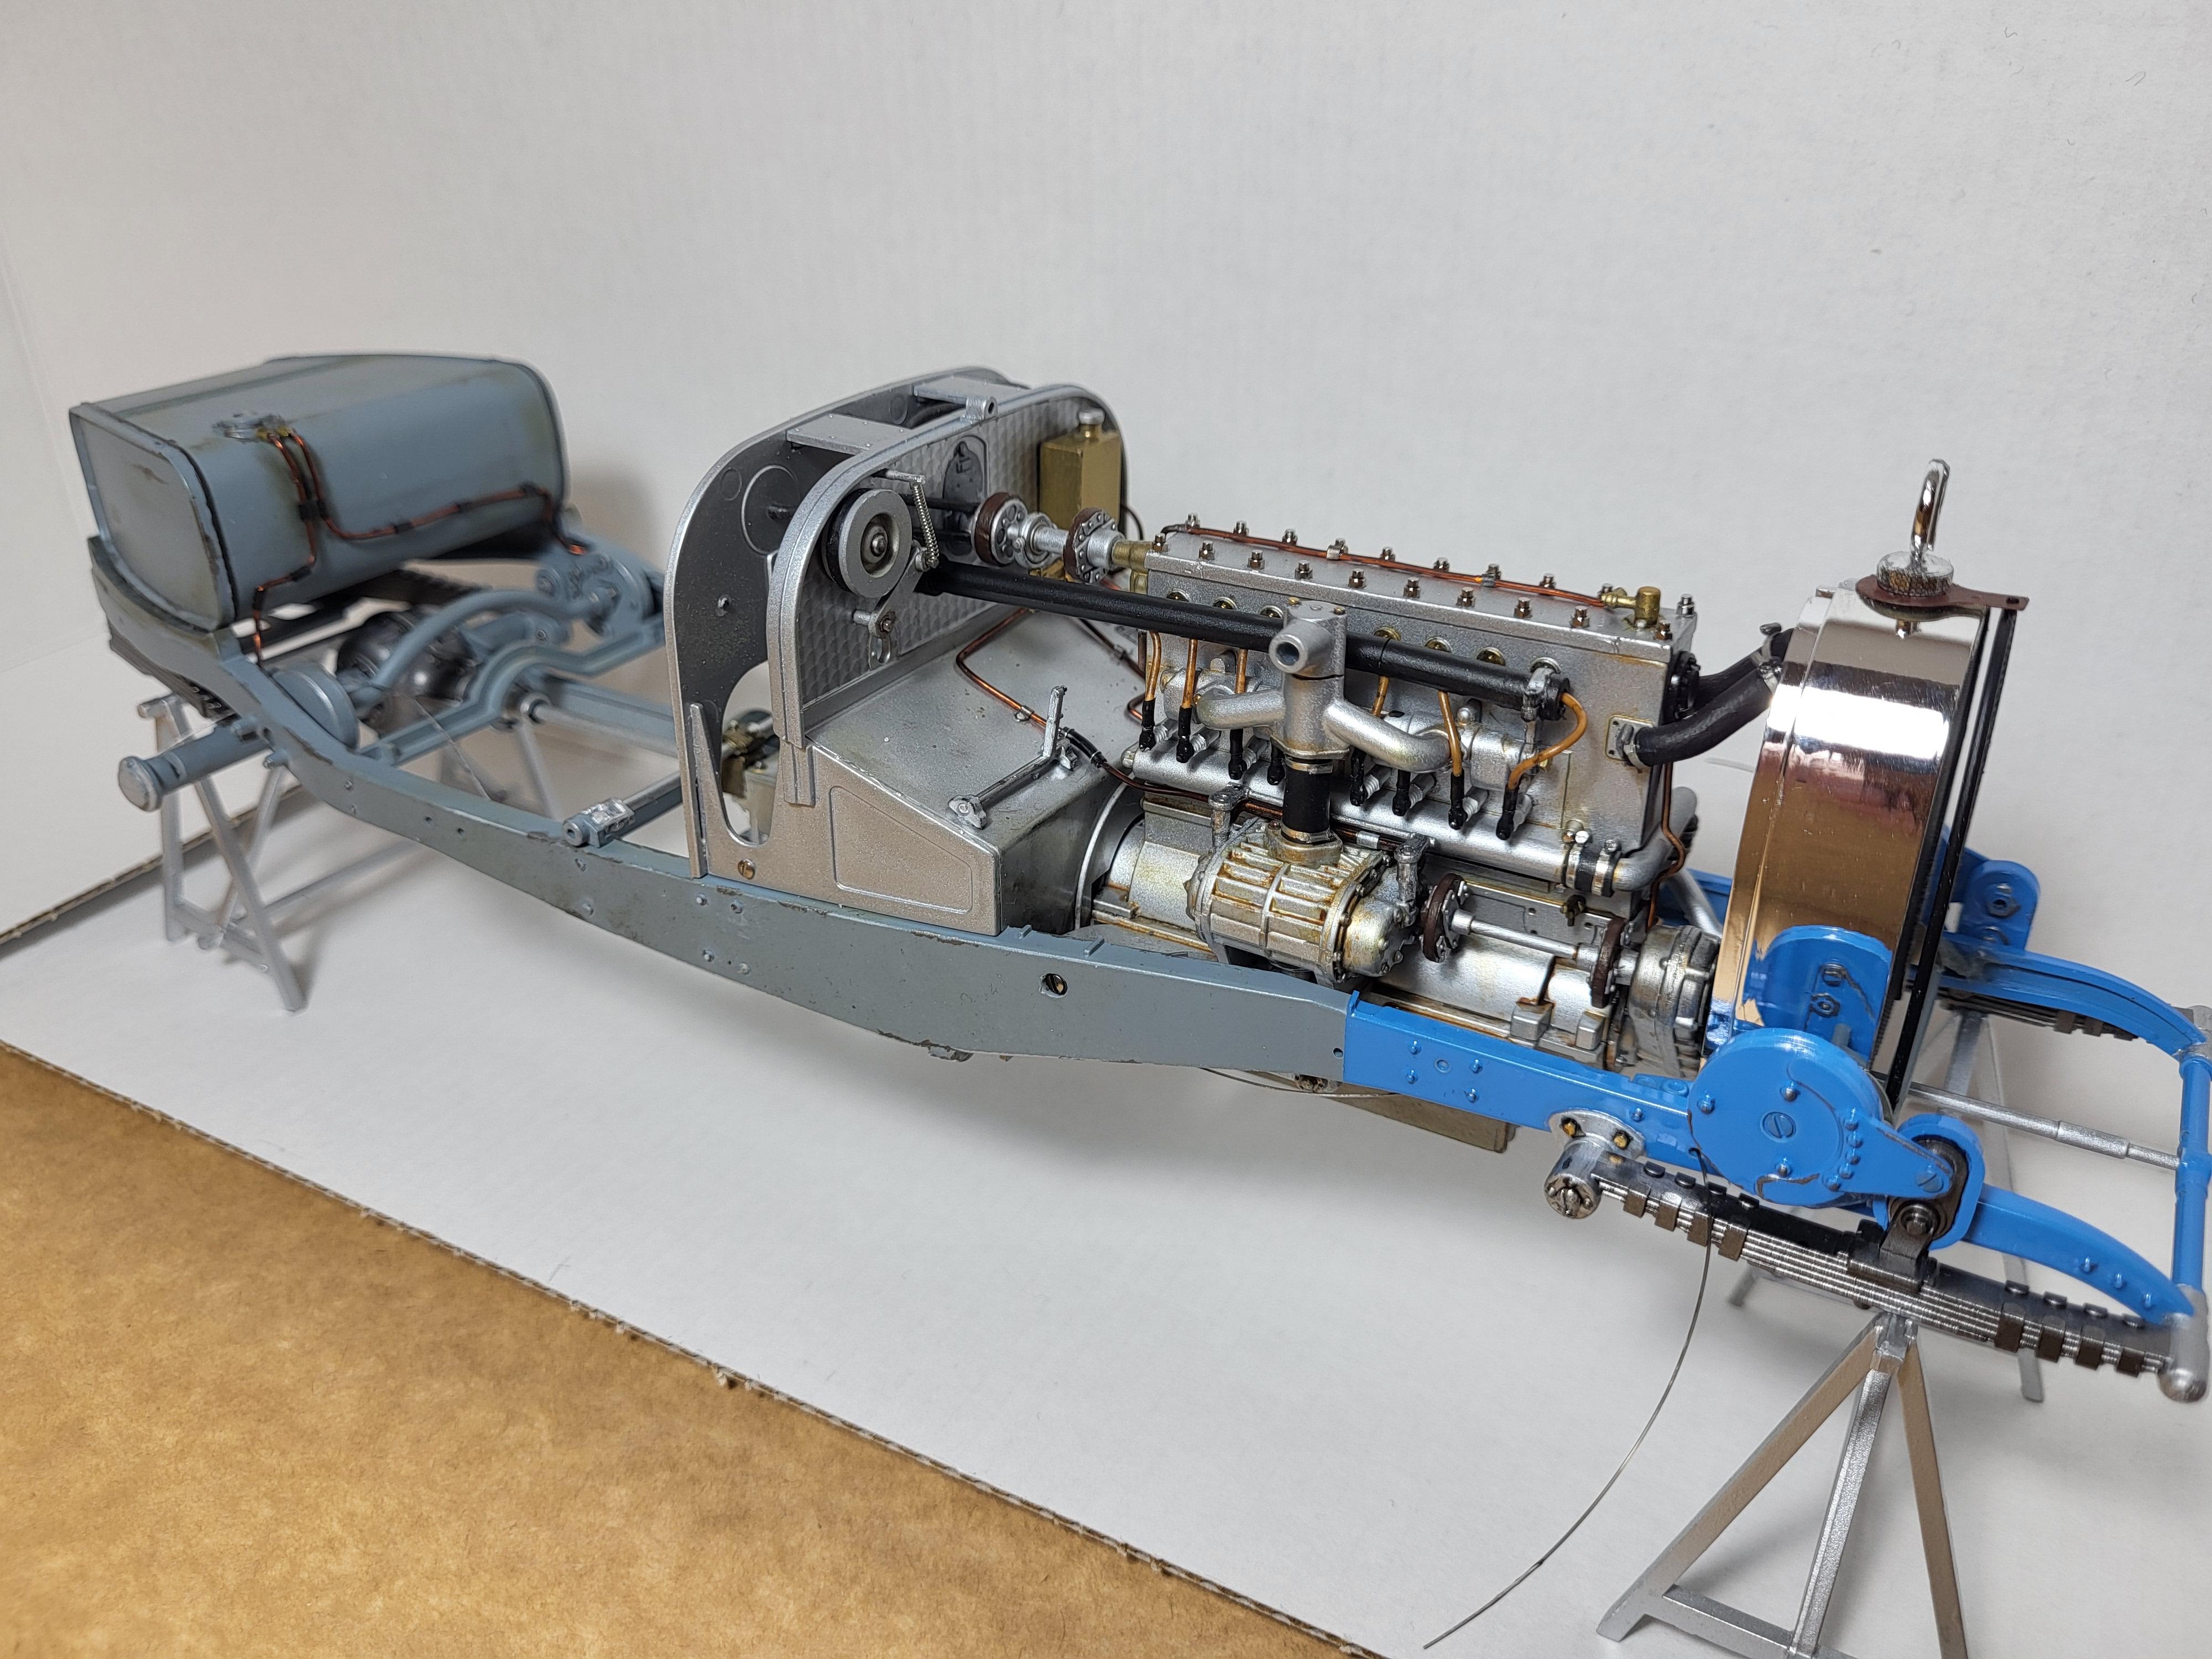
Nice finish on the exhaust manifold - did you use a paint additive to acheive the heat stained finish ?
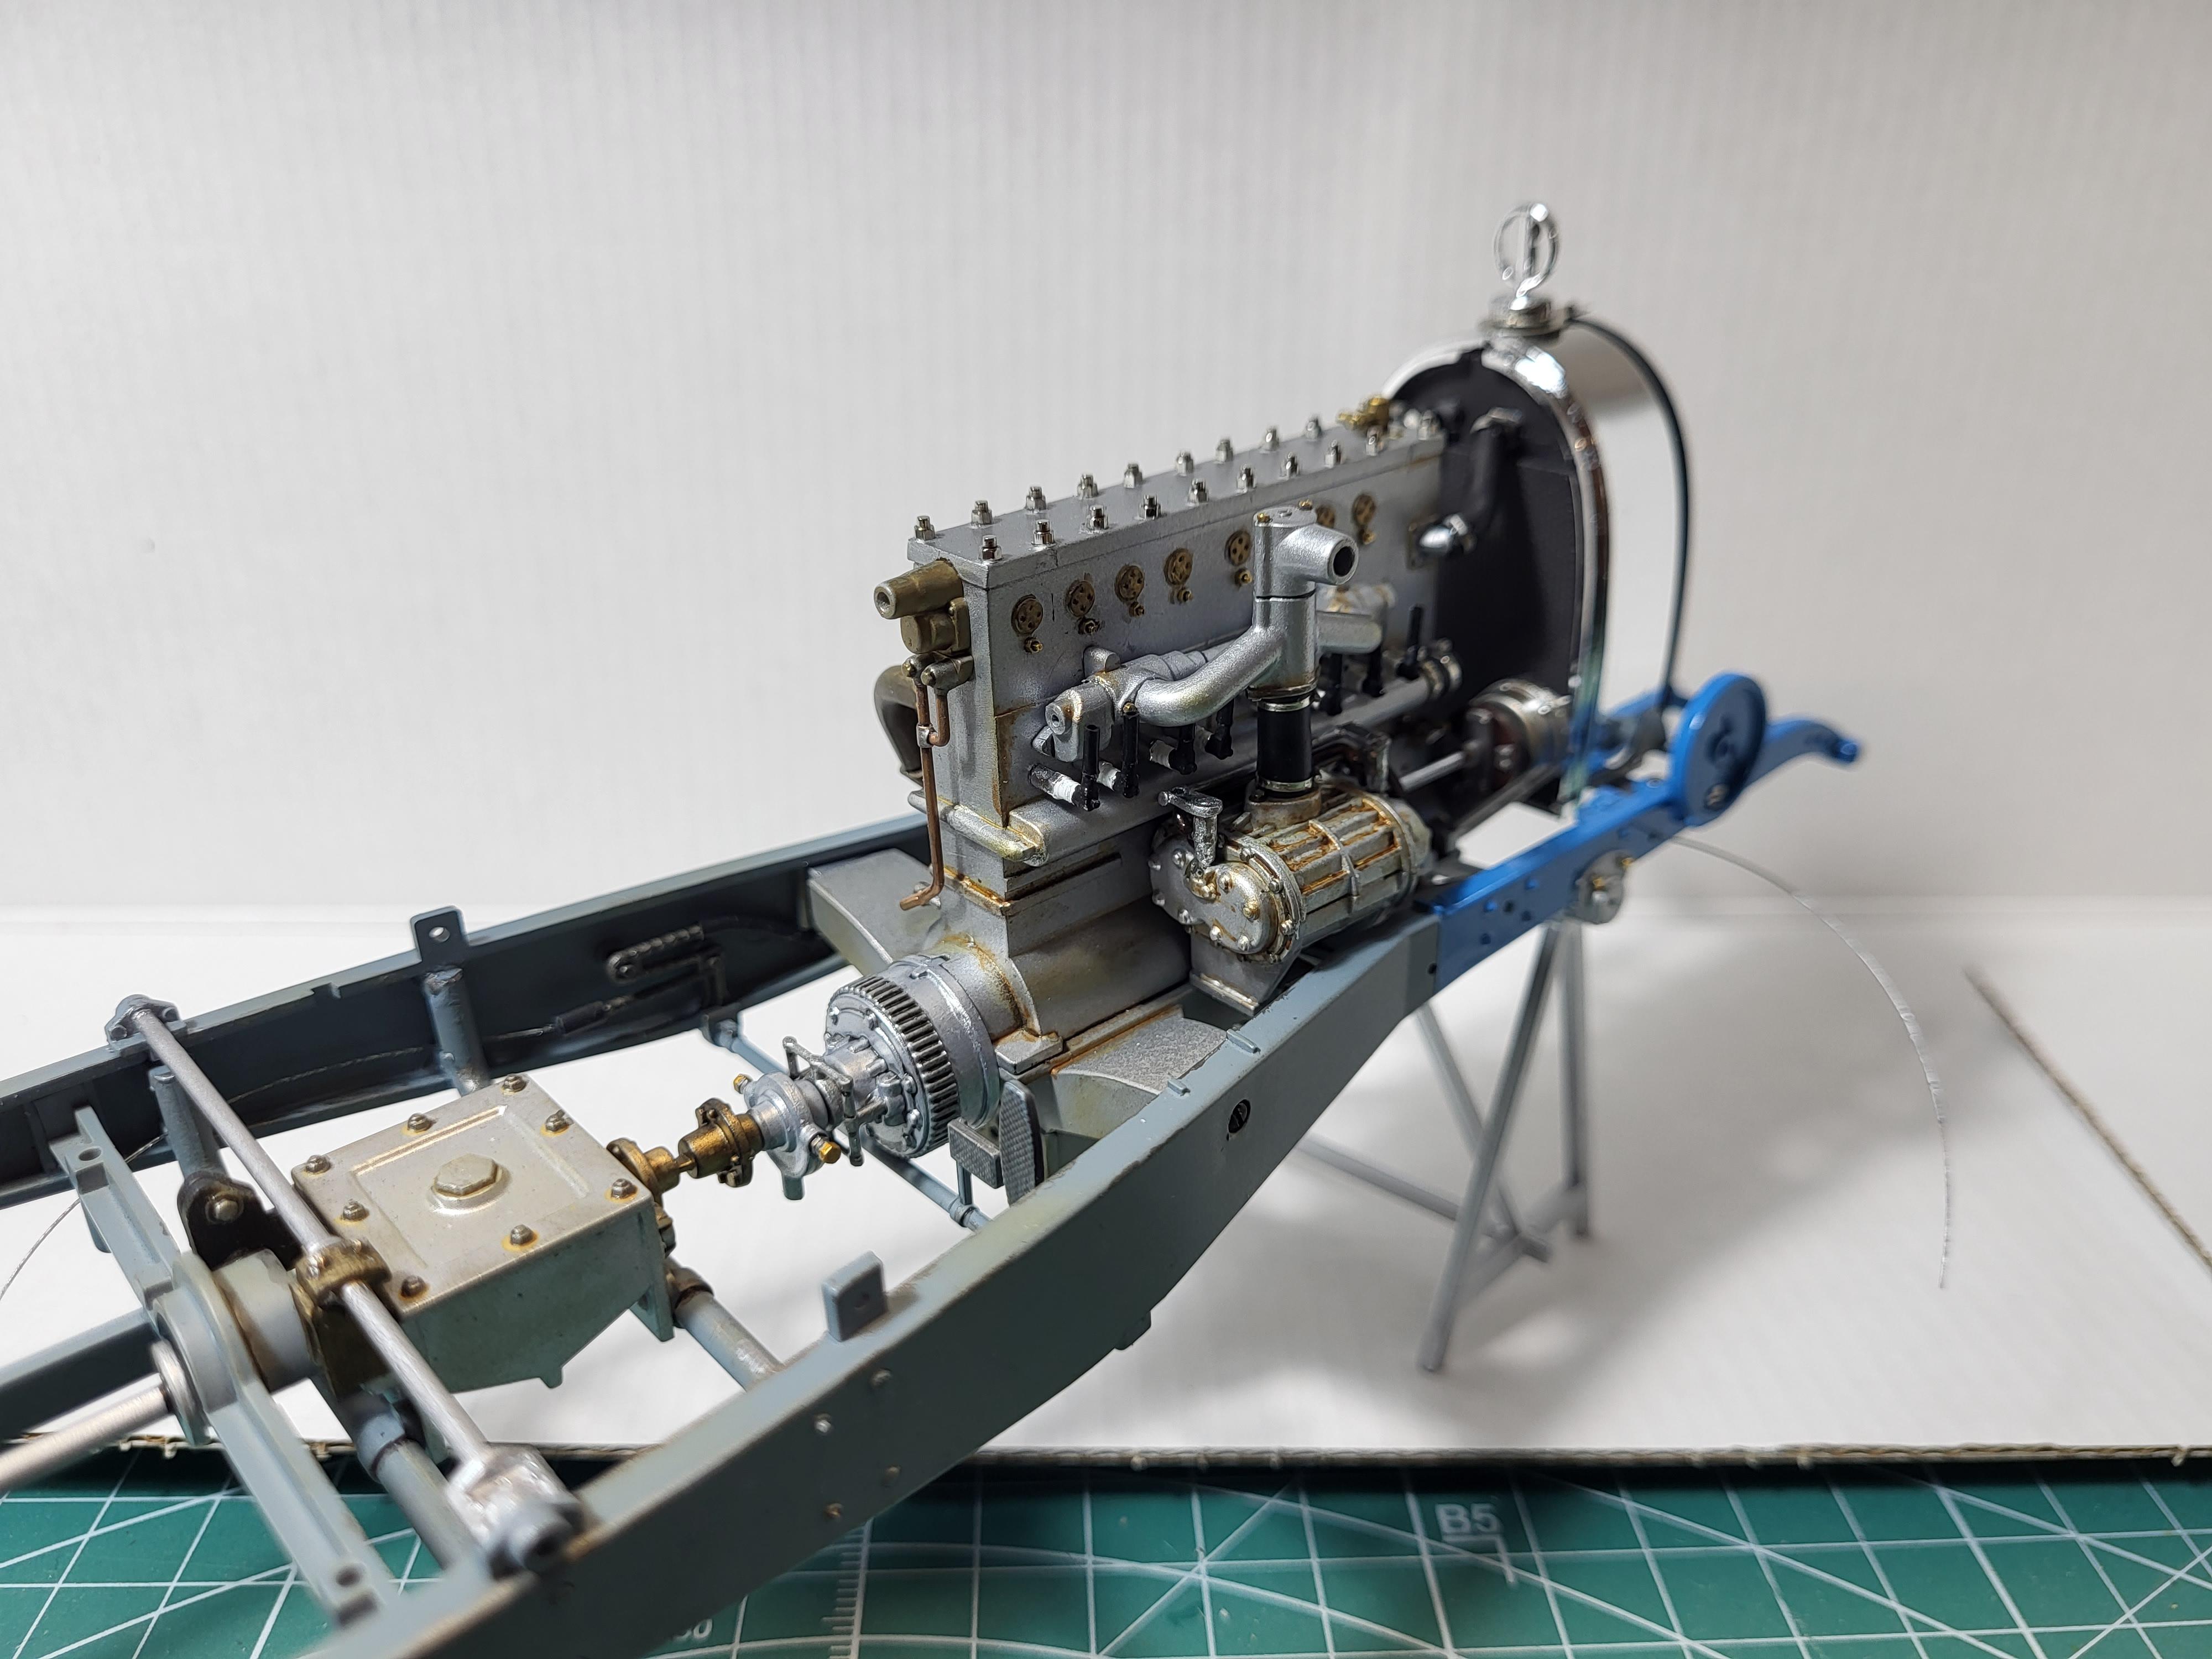
Hi, I use Tamiyas weatheringsets, two kinds of rust colors there.
-
11 hours ago, absmiami said:
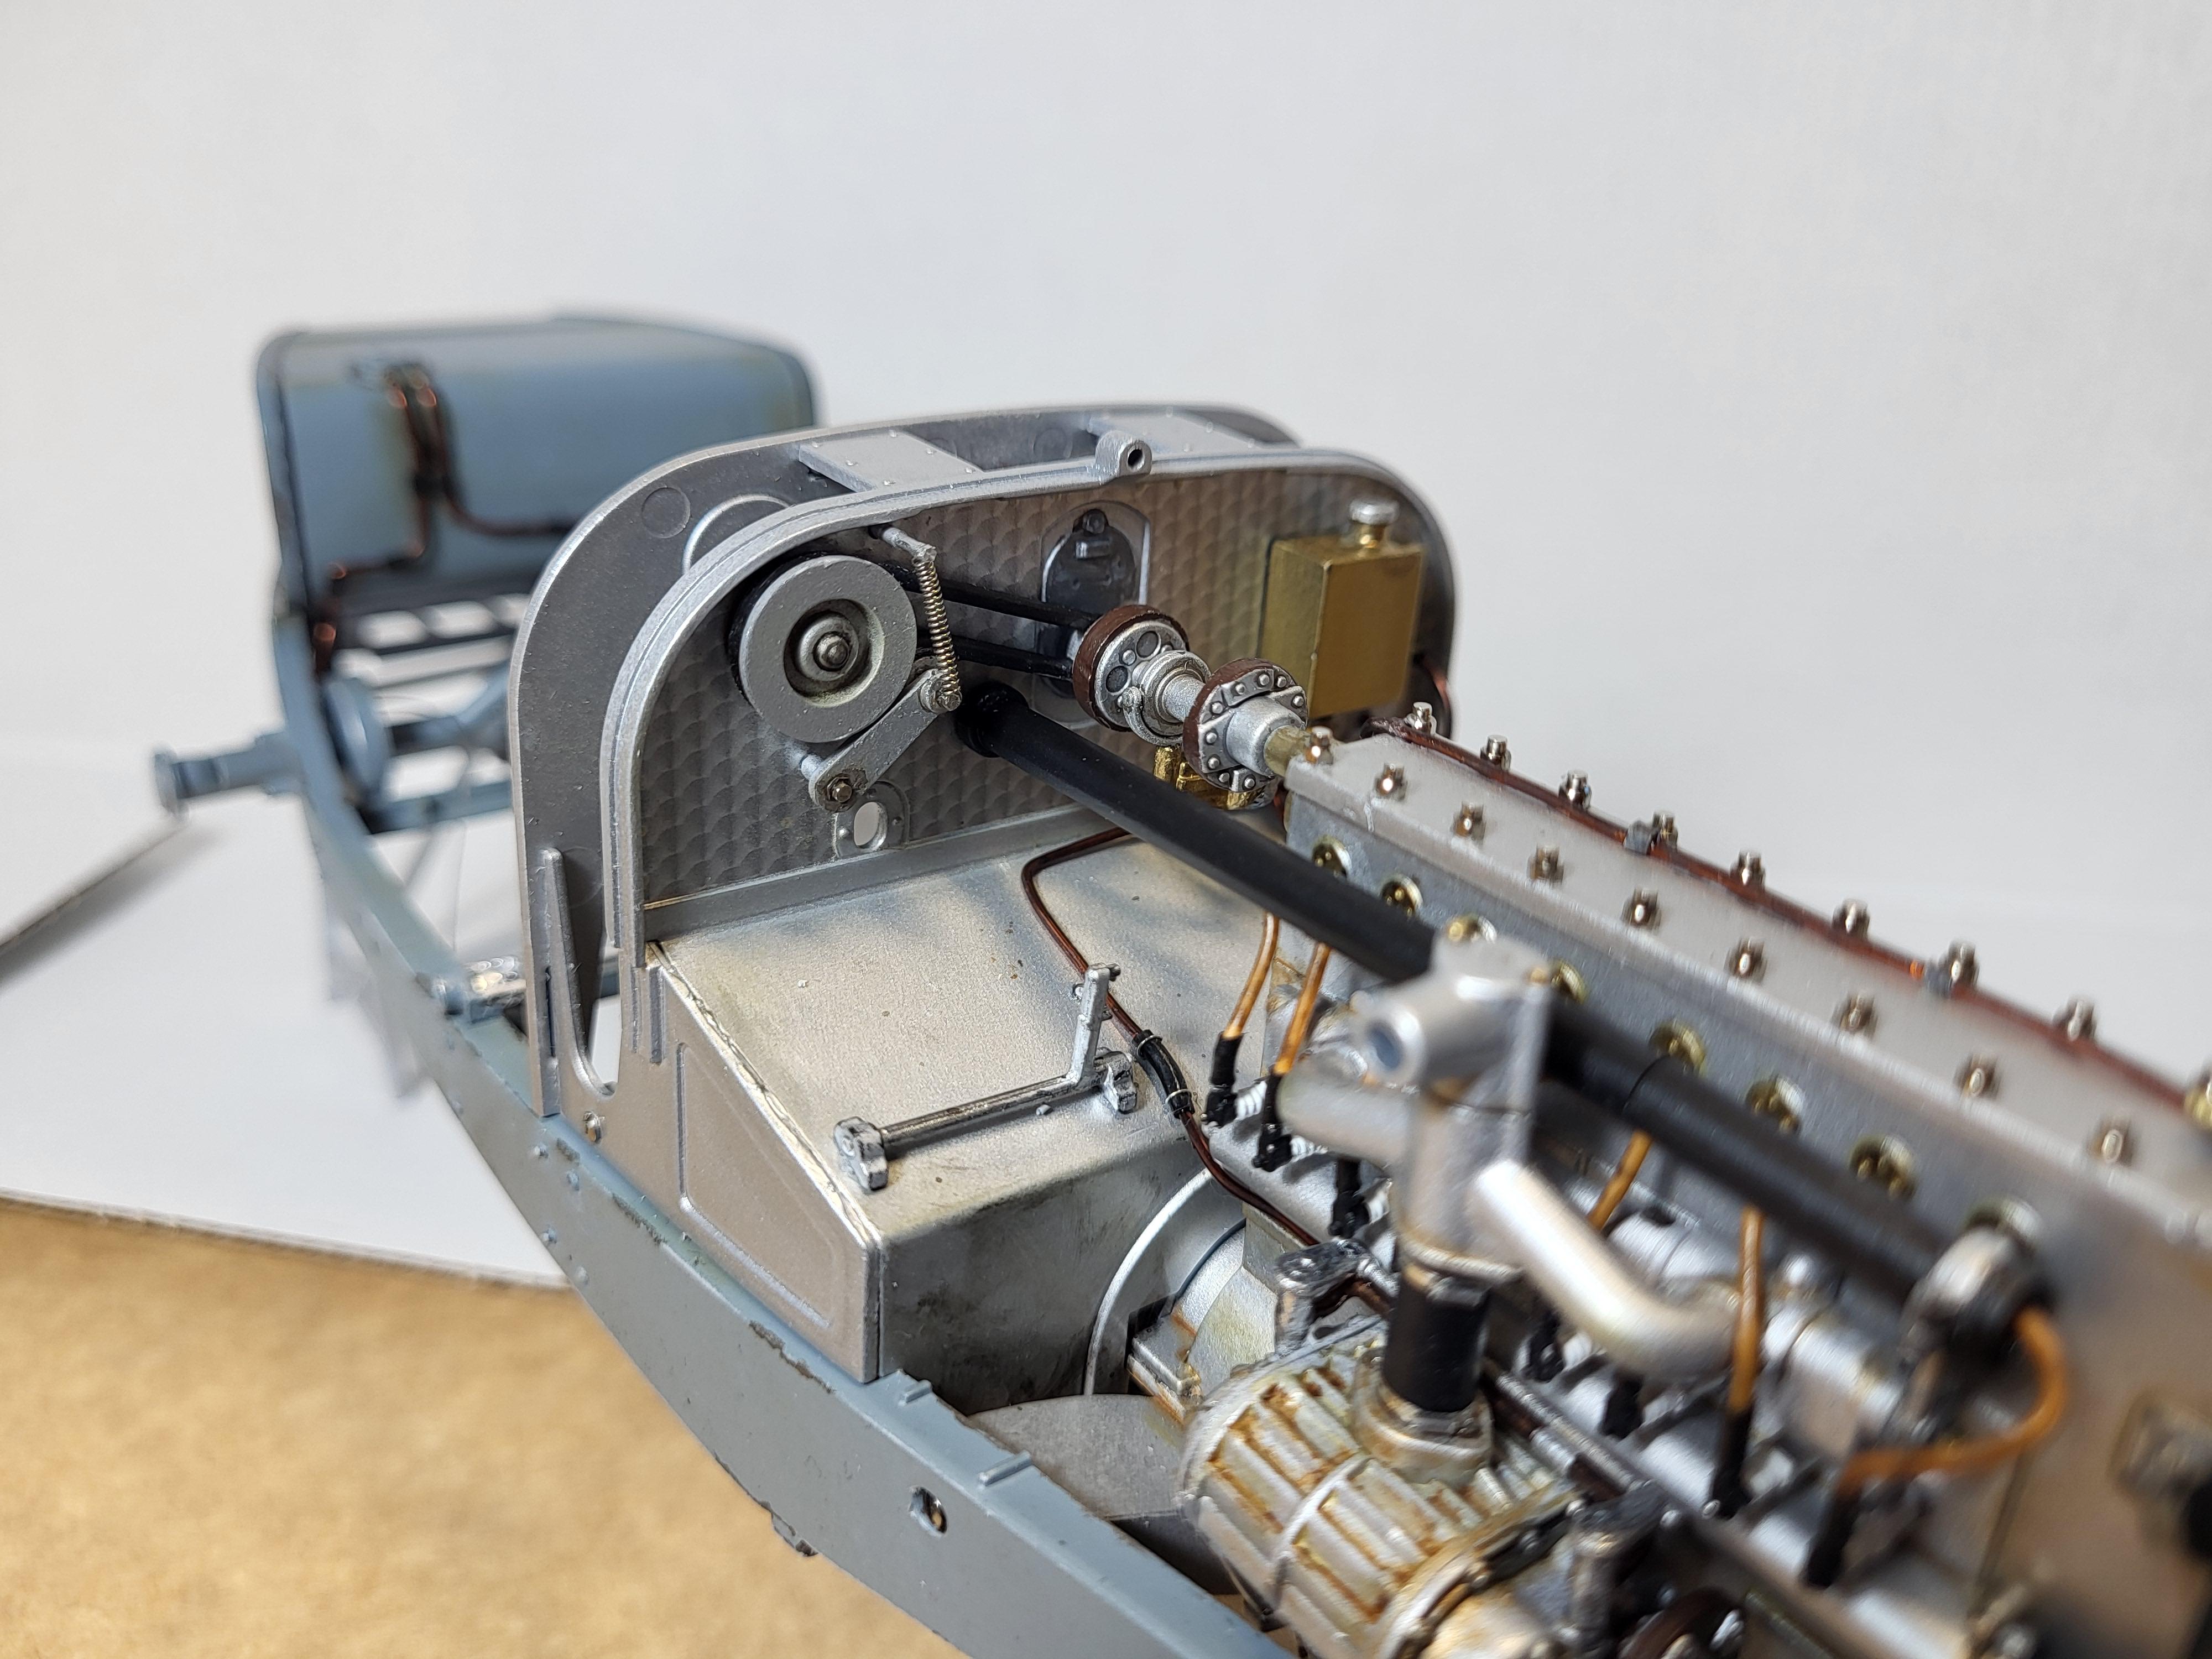
Thanks for the thread - the kit has not - to my knowledge- made it to these shores yet …. This is the first Bugatti kit - south of MFH - to feature the brake cables in the driving compartment - very nice - did you add the fuel lines ??
The fuel lines from the gastank is by me, there are very good refs of the car on the net , mainly from restored ones . So I try to build it in a way that I belive is right, but some artistic freedom is useful on these old cars ? .
No major problems on the kit so far, working on the dash just now and I like the look of it.
-
9 hours ago, Funkychiken said:
Looks like a great kit, and your build is coming along nicely.
I like the oil stain look you have given the engine, I'm guessing it's just clear yellow wash?
Thanks ? I used Tamiya panel line yellow/brown and also dilutet artist oilcolors
-
1
-
-
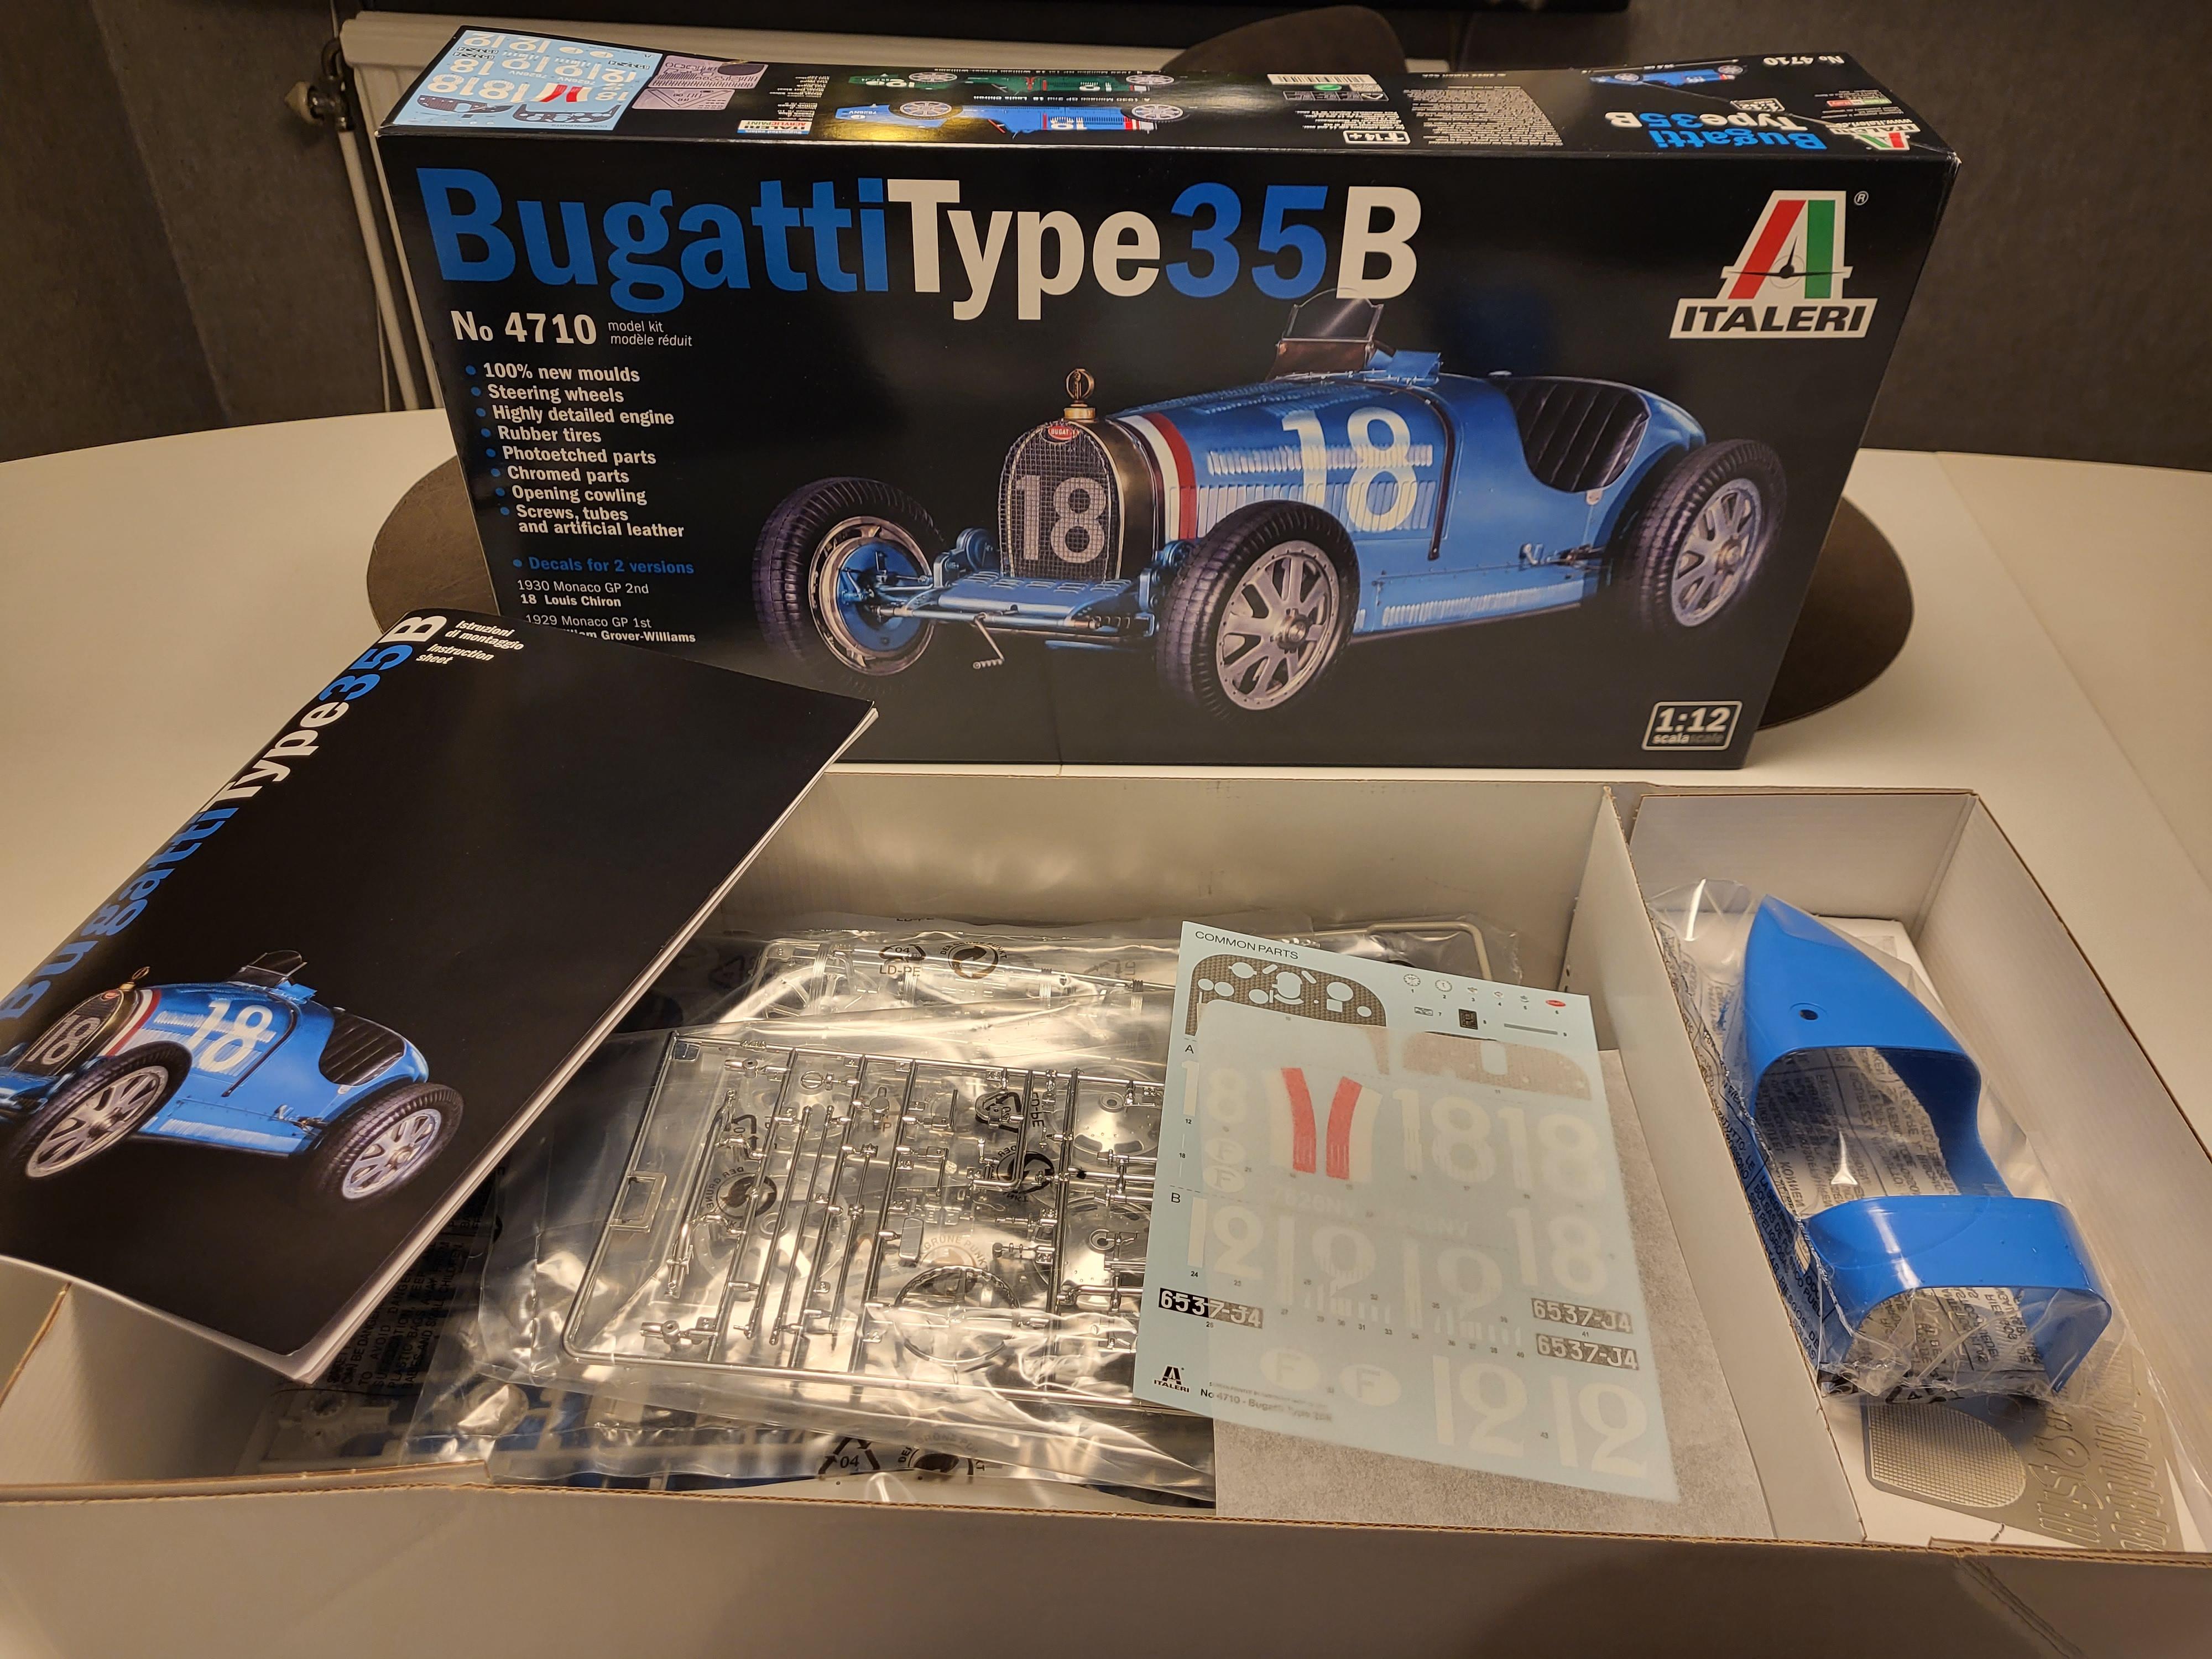
Hi
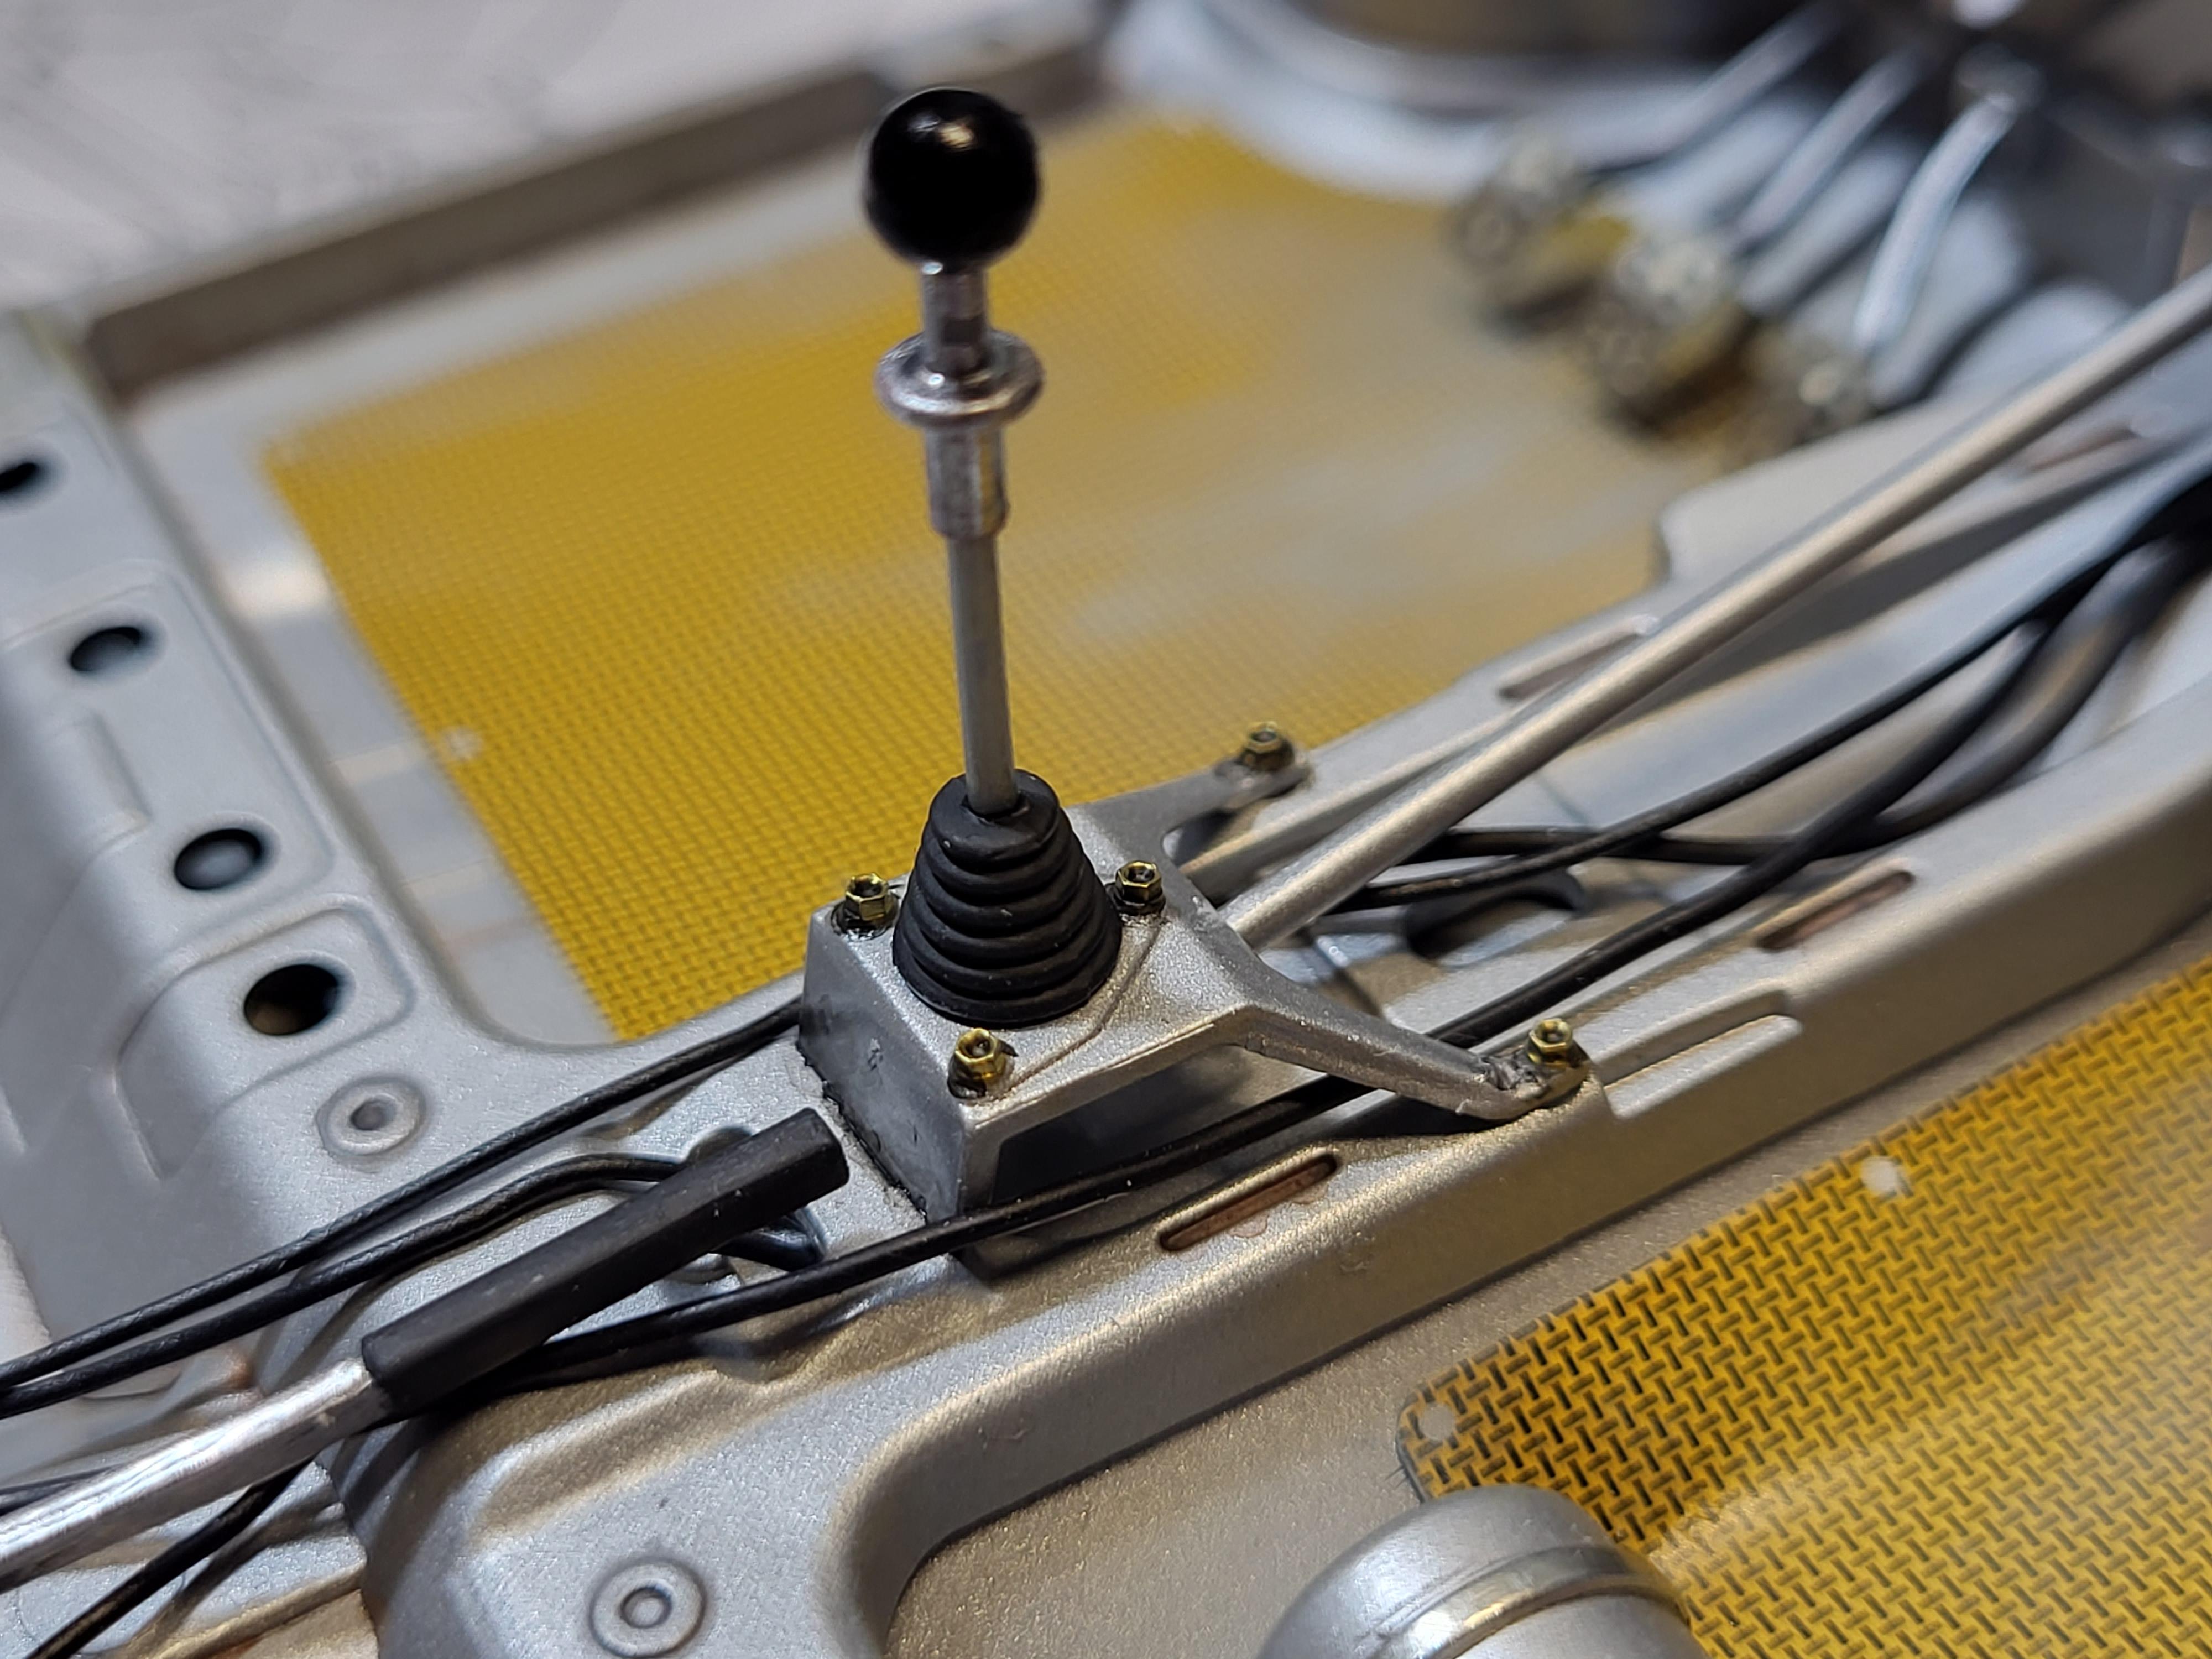
I´m working on the new Bugatti from Italeri. So far the chassi and engine is nearly finished. I have replaced a lot of hex bolts with metal ones mainly on the engine. Added some lines and other stuff too.
Nice kit , so far no problems ?
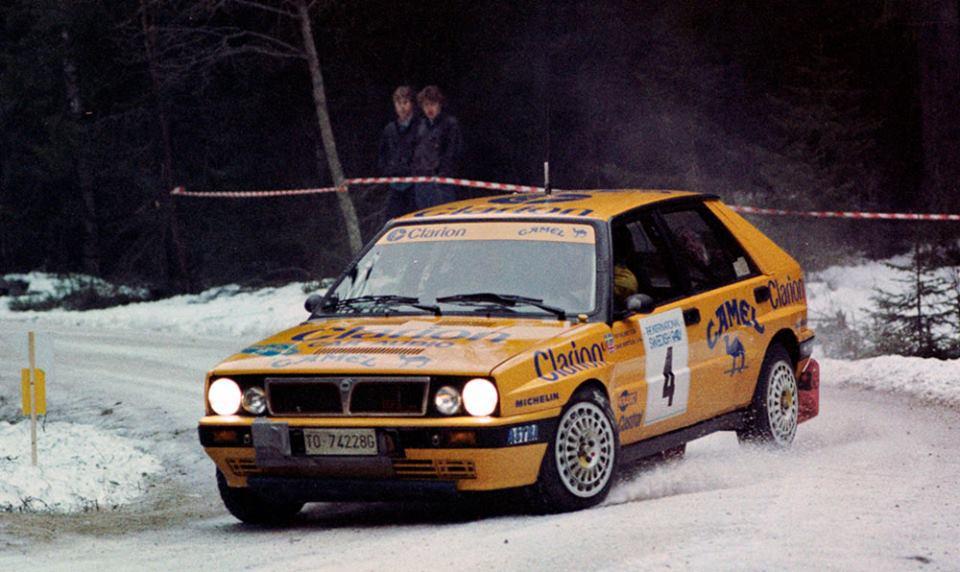
I´m will do a Swedish version in blue and yellow, in that era they raced their cars in national colors.
More later
Thomas
-
3
-
-
3 hours ago, jaymcminn said:
Is that the new Italeri? Mine is on the way, can't wait to see the benchmark you set!
Yes it´s the new Bugatti 35 in 1/12. So far so good ?
-
On my way ? Thanks!
-
Great work Tomasz!!! And the display is as usual awesome ? looks real !!
-
1
-
-
Like this alot! You spent much time on all your detailing, you must be proud ? Good Work !!
-
2 hours ago, absmiami said:
Excellent engine bay finish
one tiny criticism - no sidewall detail on the tires …
but thats on the kit maker - not on the builder …
Thanks all ? Andrew you are right about that, maybe the maker can fix that, he maybe will correct the grills shape too. A novice doesn´t notice, but it,s not 100% correct now, I didn´t thought about it before it was pointed out to me


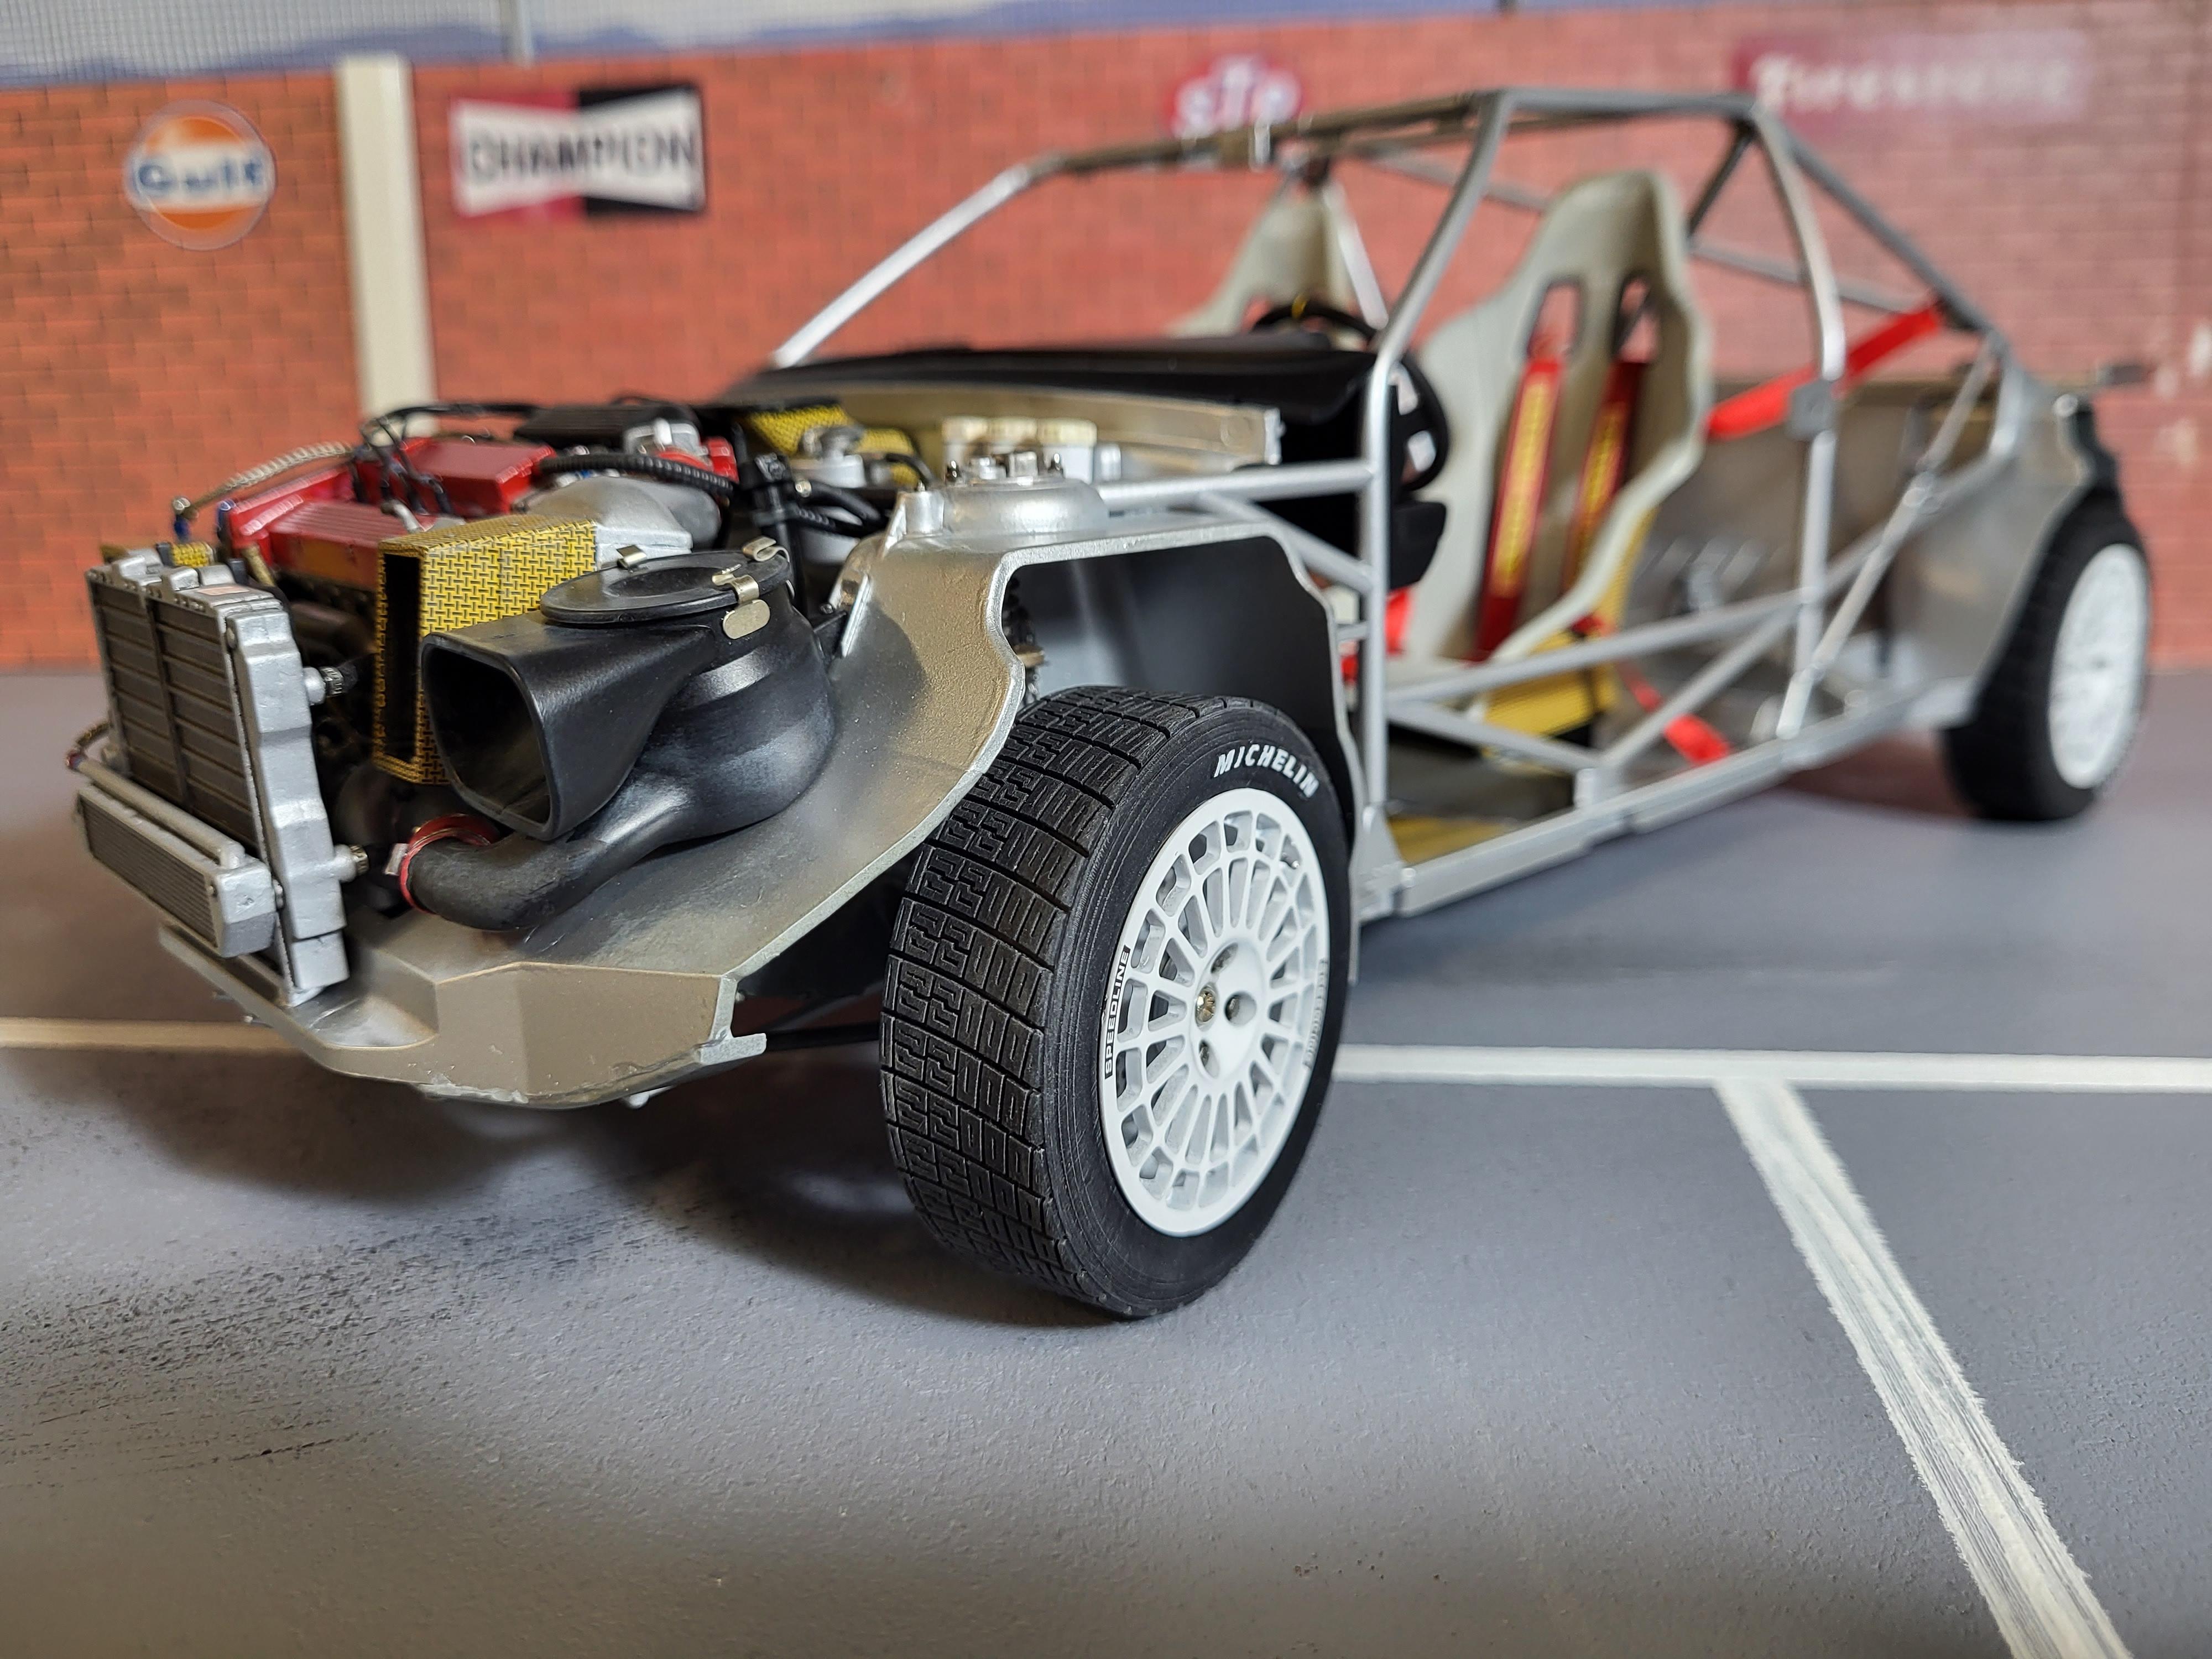
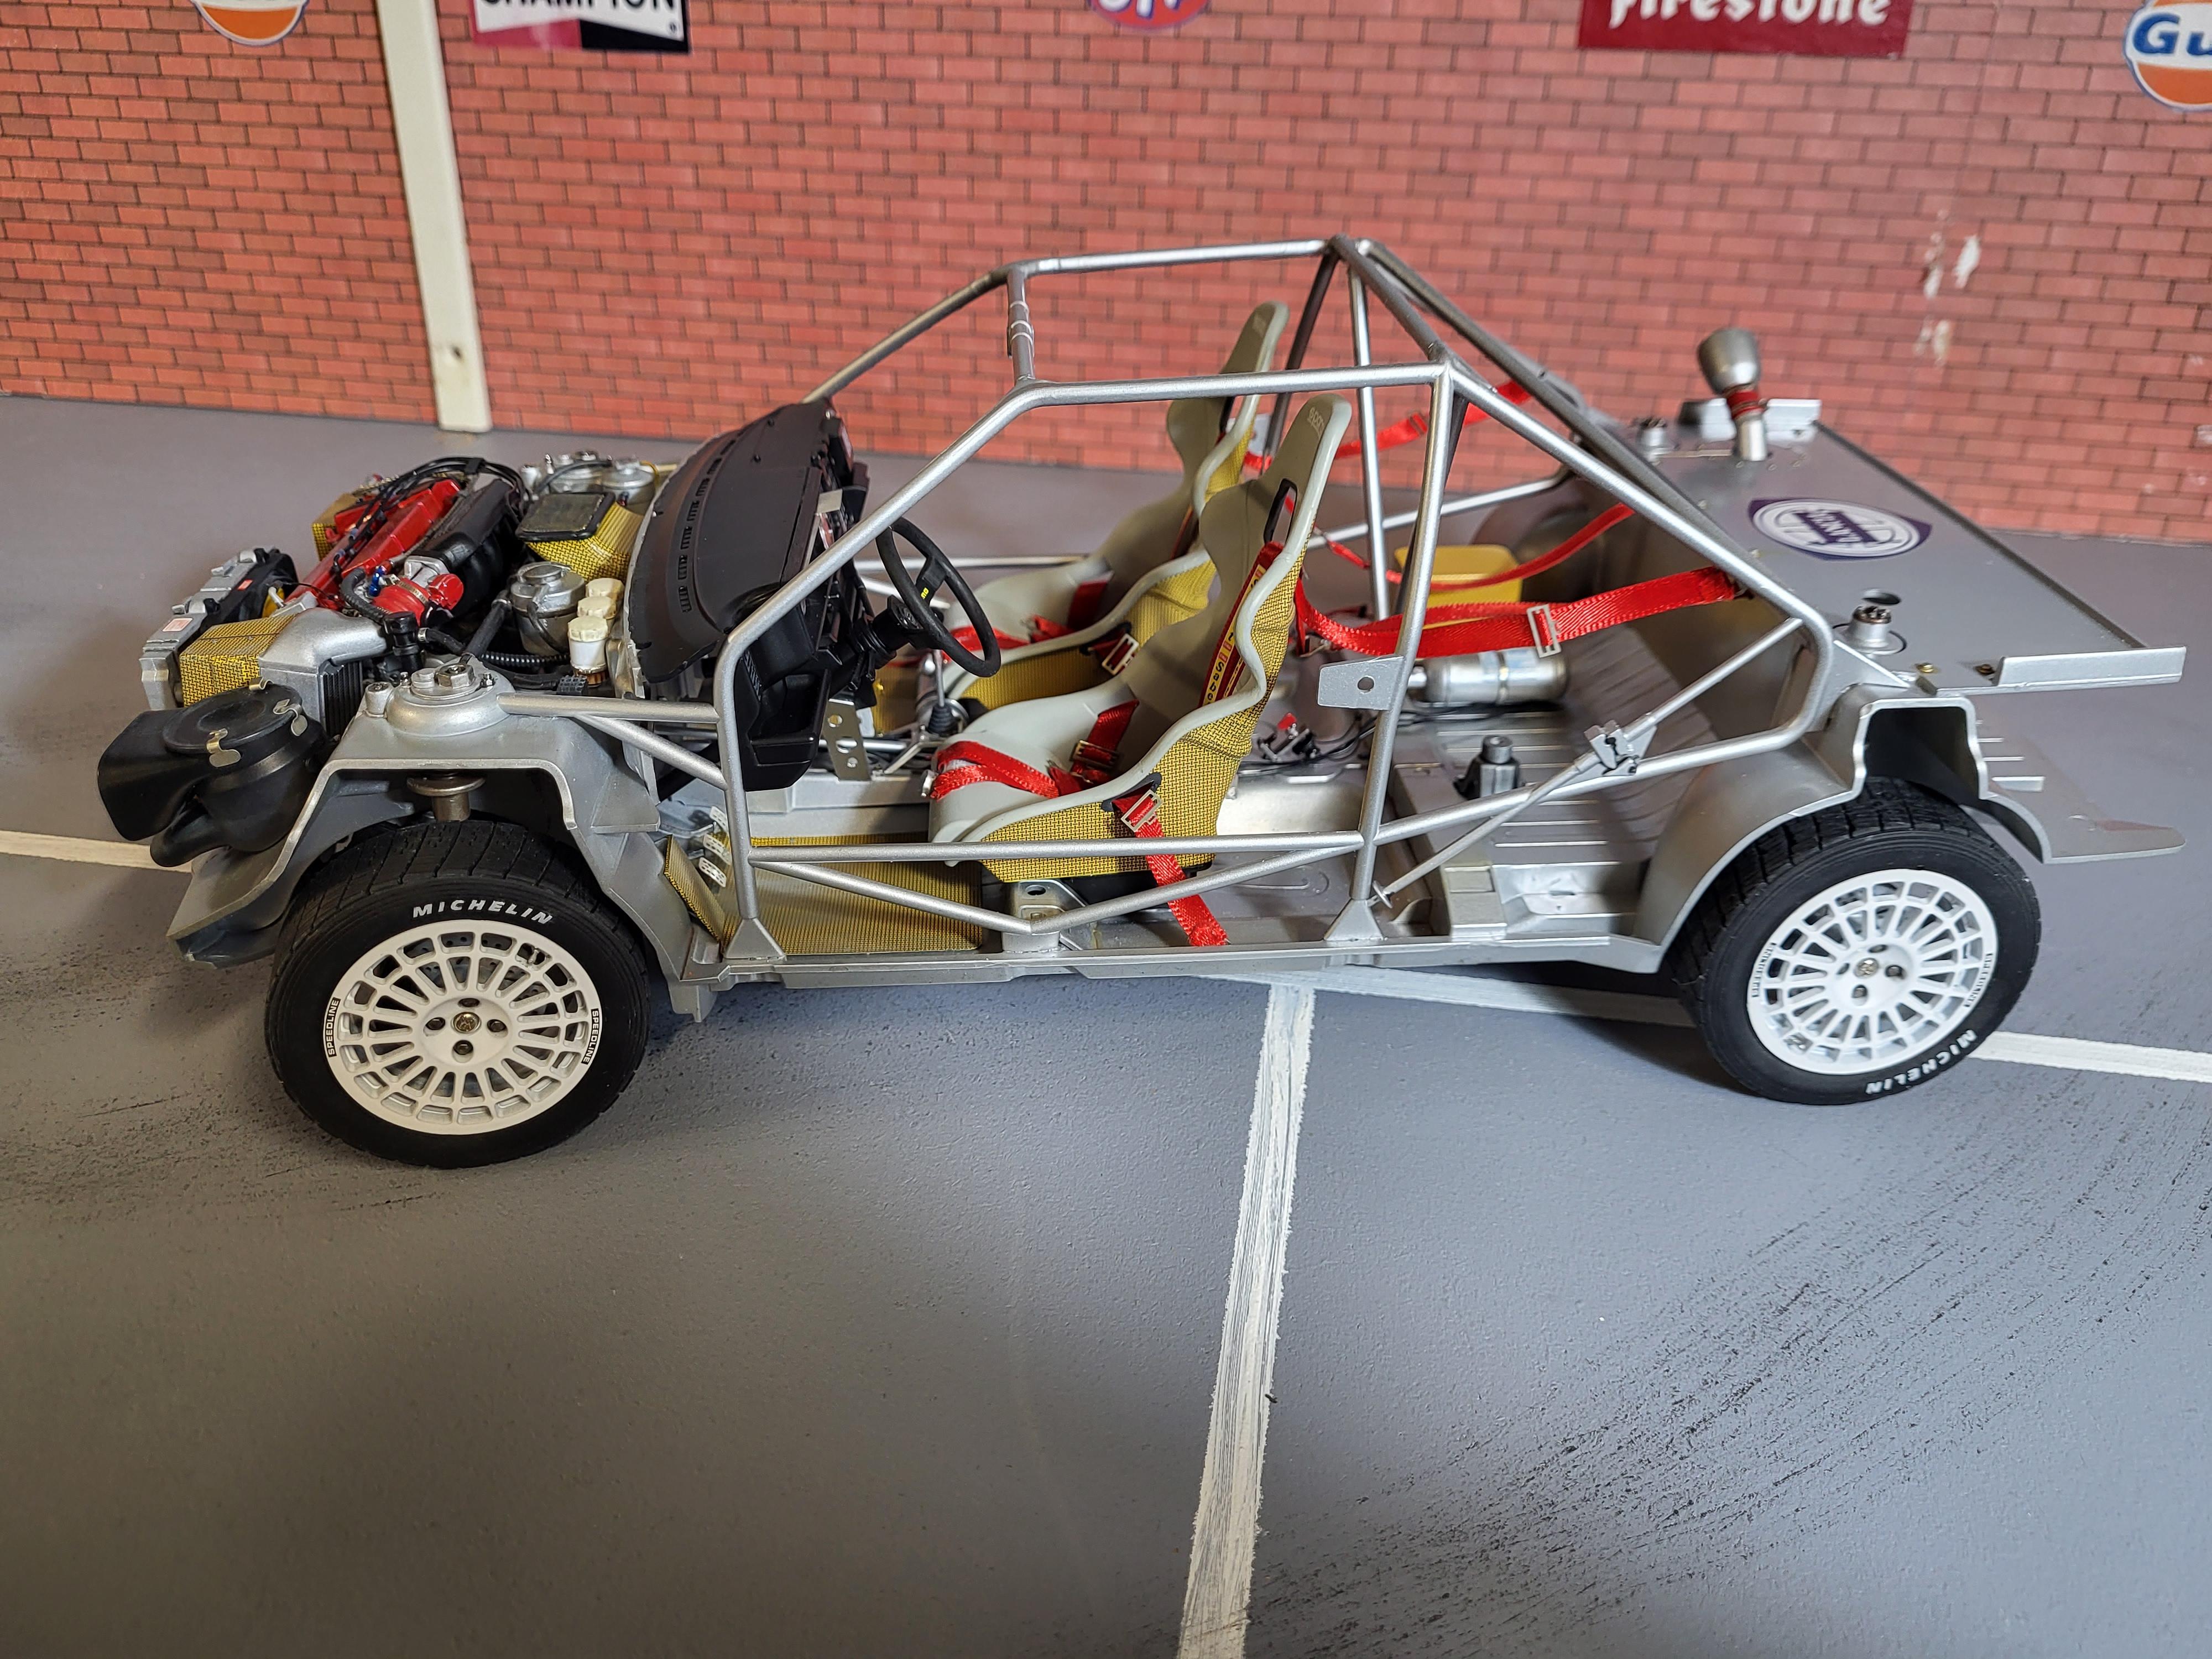


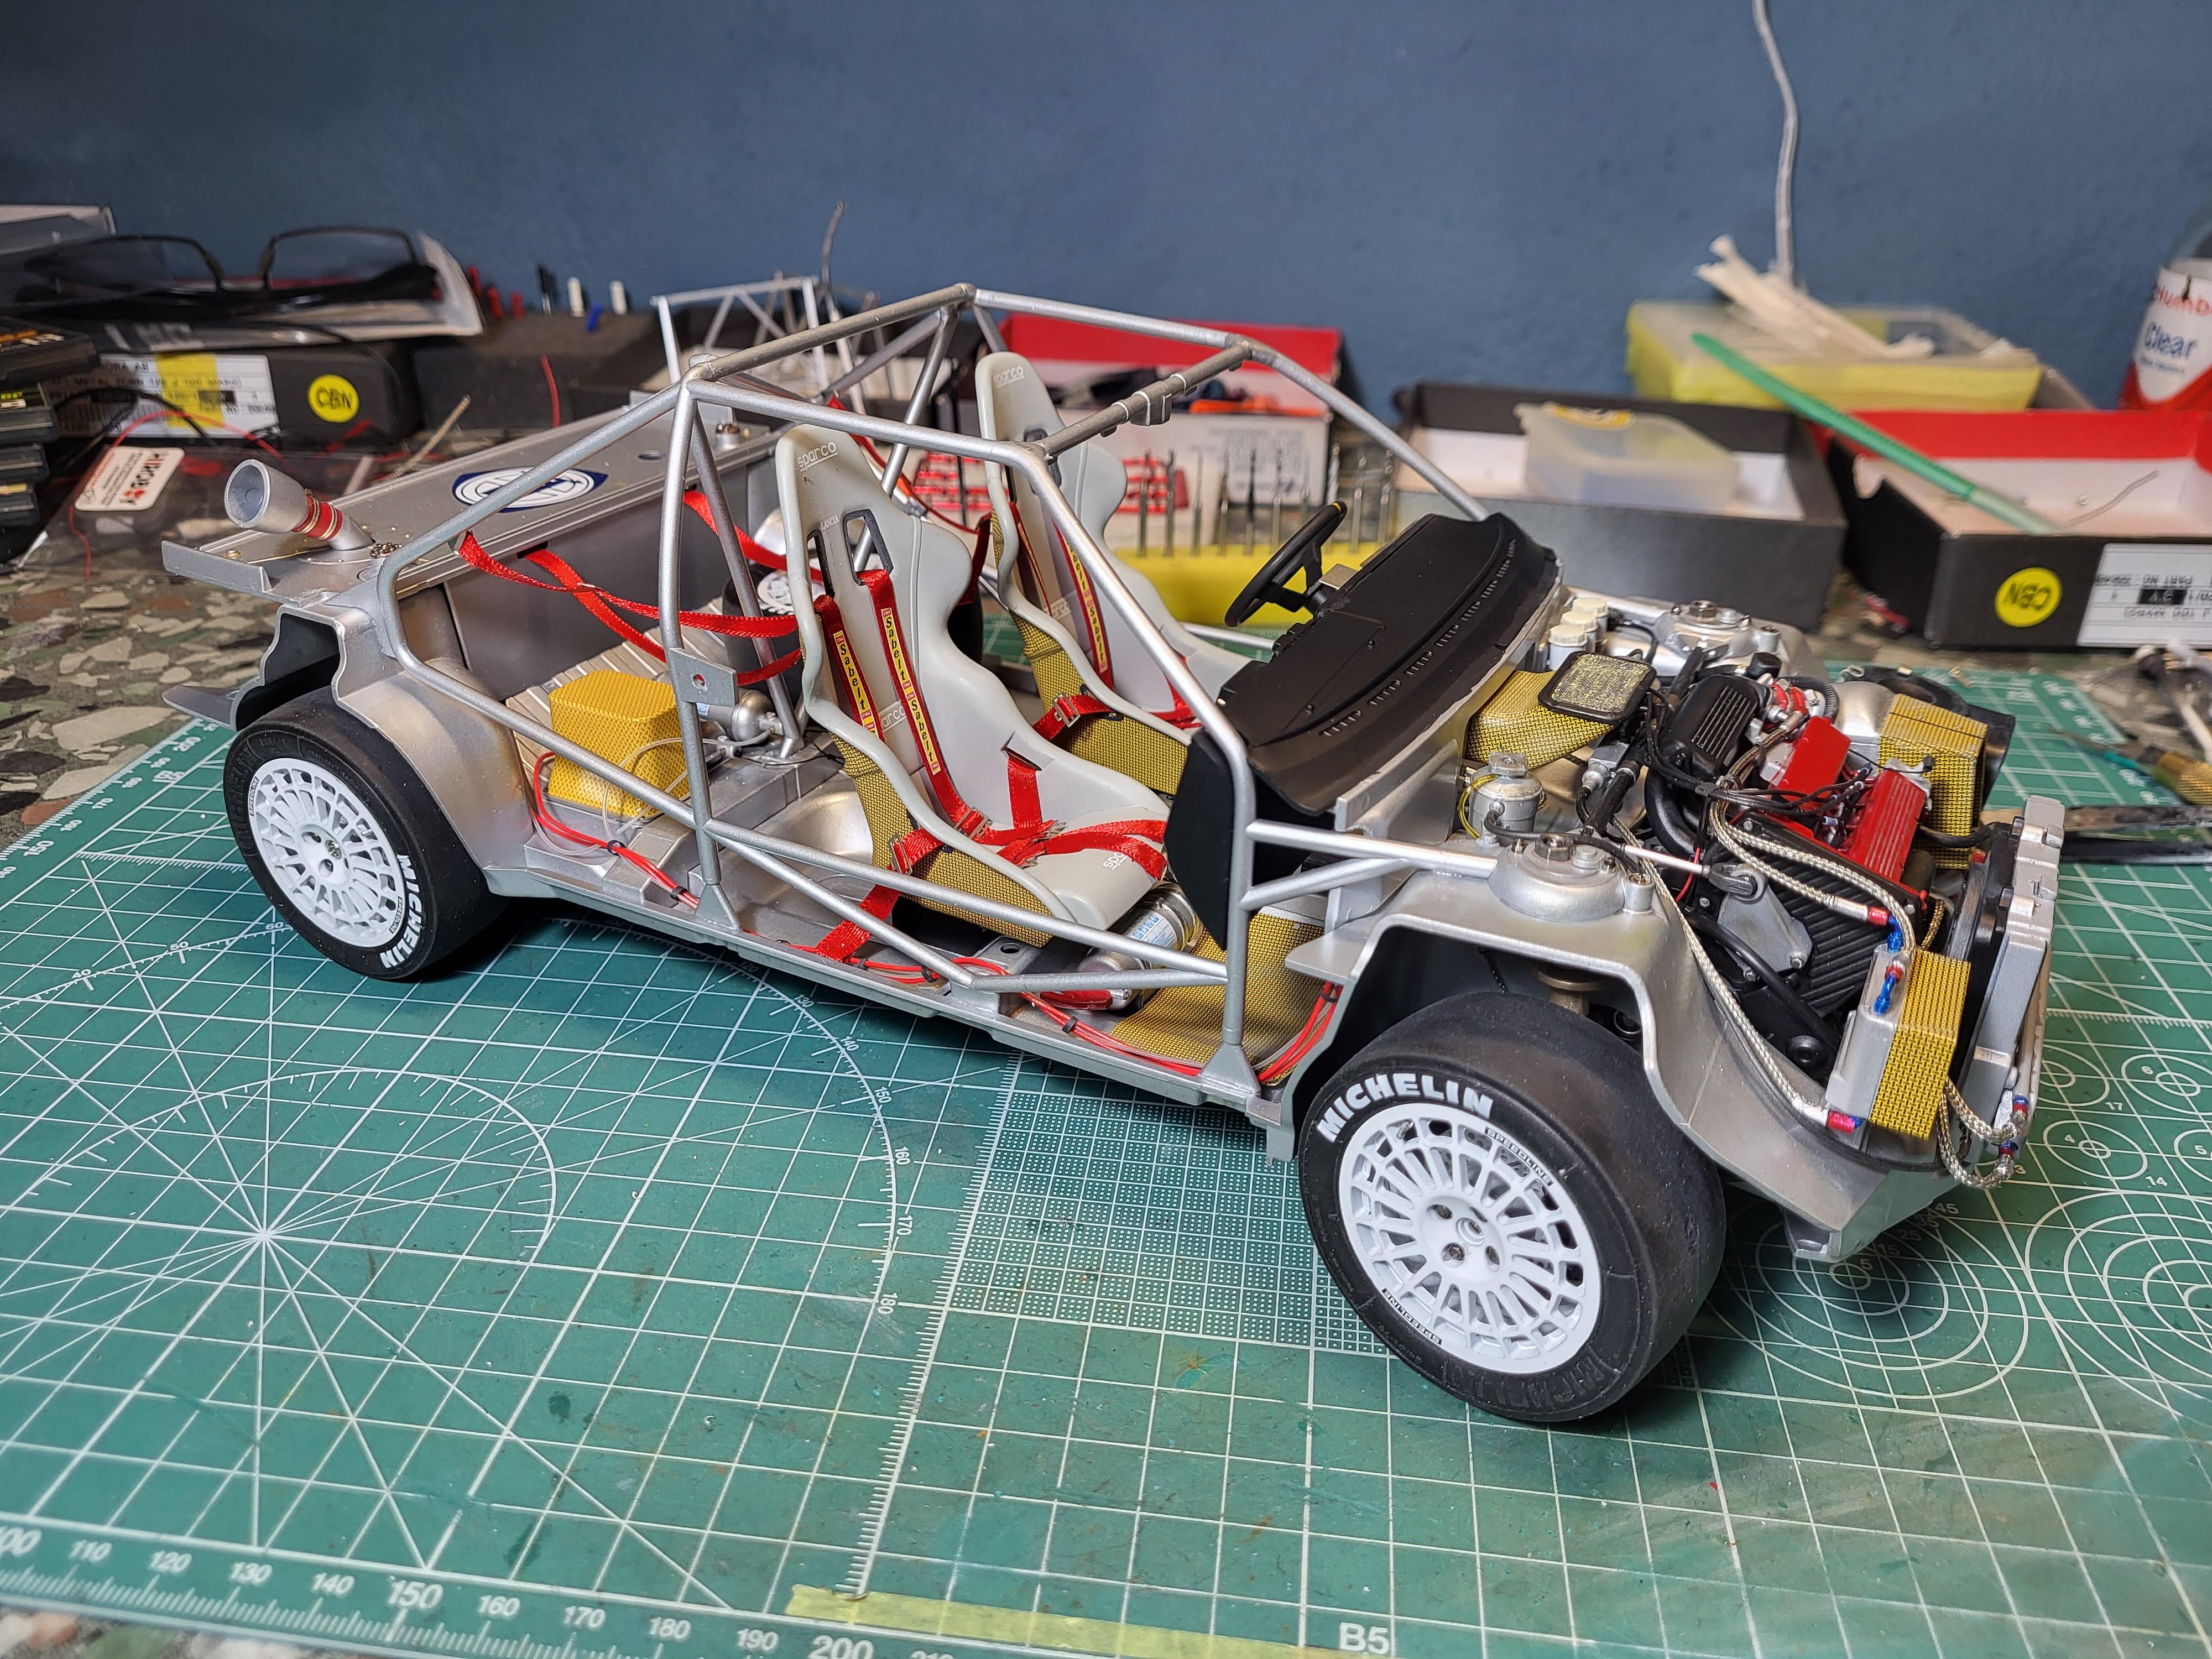


Italeri 1/12 Lancia Delta HF
in WIP: Other Racing: Road Racing, Land Speed Racers
Posted
Nice to this version Marcus ! I´m bulding this too. I can see that you didn´t use the resin hood from the Reji decals set. My hood was to "small" so I had to glue plasticcard on the sides and the back.
but the fit is long way from perfect. Yes, it´s a very nice kit, no major problems , only my set of nuts and bolts for the wheels didn´t match.
Thomas