

HJK
-
Posts
138 -
Joined
-
Last visited
Content Type
Profiles
Forums
Events
Gallery
Posts posted by HJK
-
-
Andrew, You can also use the old rubber tube from a bicycle which doesn't hold the air anymore. You can cut the size you like. It's also good for the rubber flaps behind the rear wheels of trucks and pickups. And you can also cut it into rubber rings to use them on frames while the glue hardens. Well, and lots of other things you might think of. Take care, Juergen
-
Hi Richard
This truly a rich source of information about this special and famous vehicle. Thanks for sharing. Stay safe, Juergen.
-
Hi Robert, I reckon you're looking for these. And to Miles, there are no decals in this kit. Take care and stay safe, Juergen

-
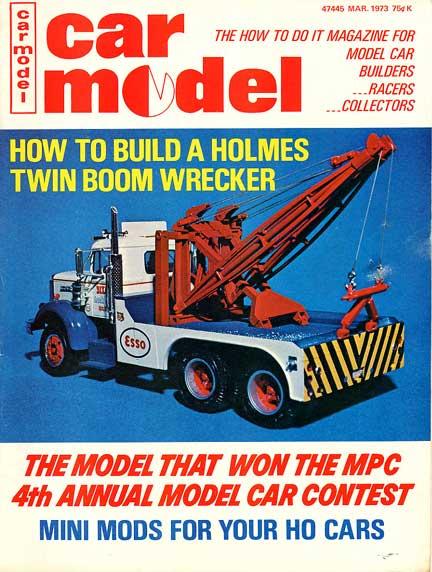
Hi Pat,
The two-part article was indeed printed in the 1973 March and April issues.
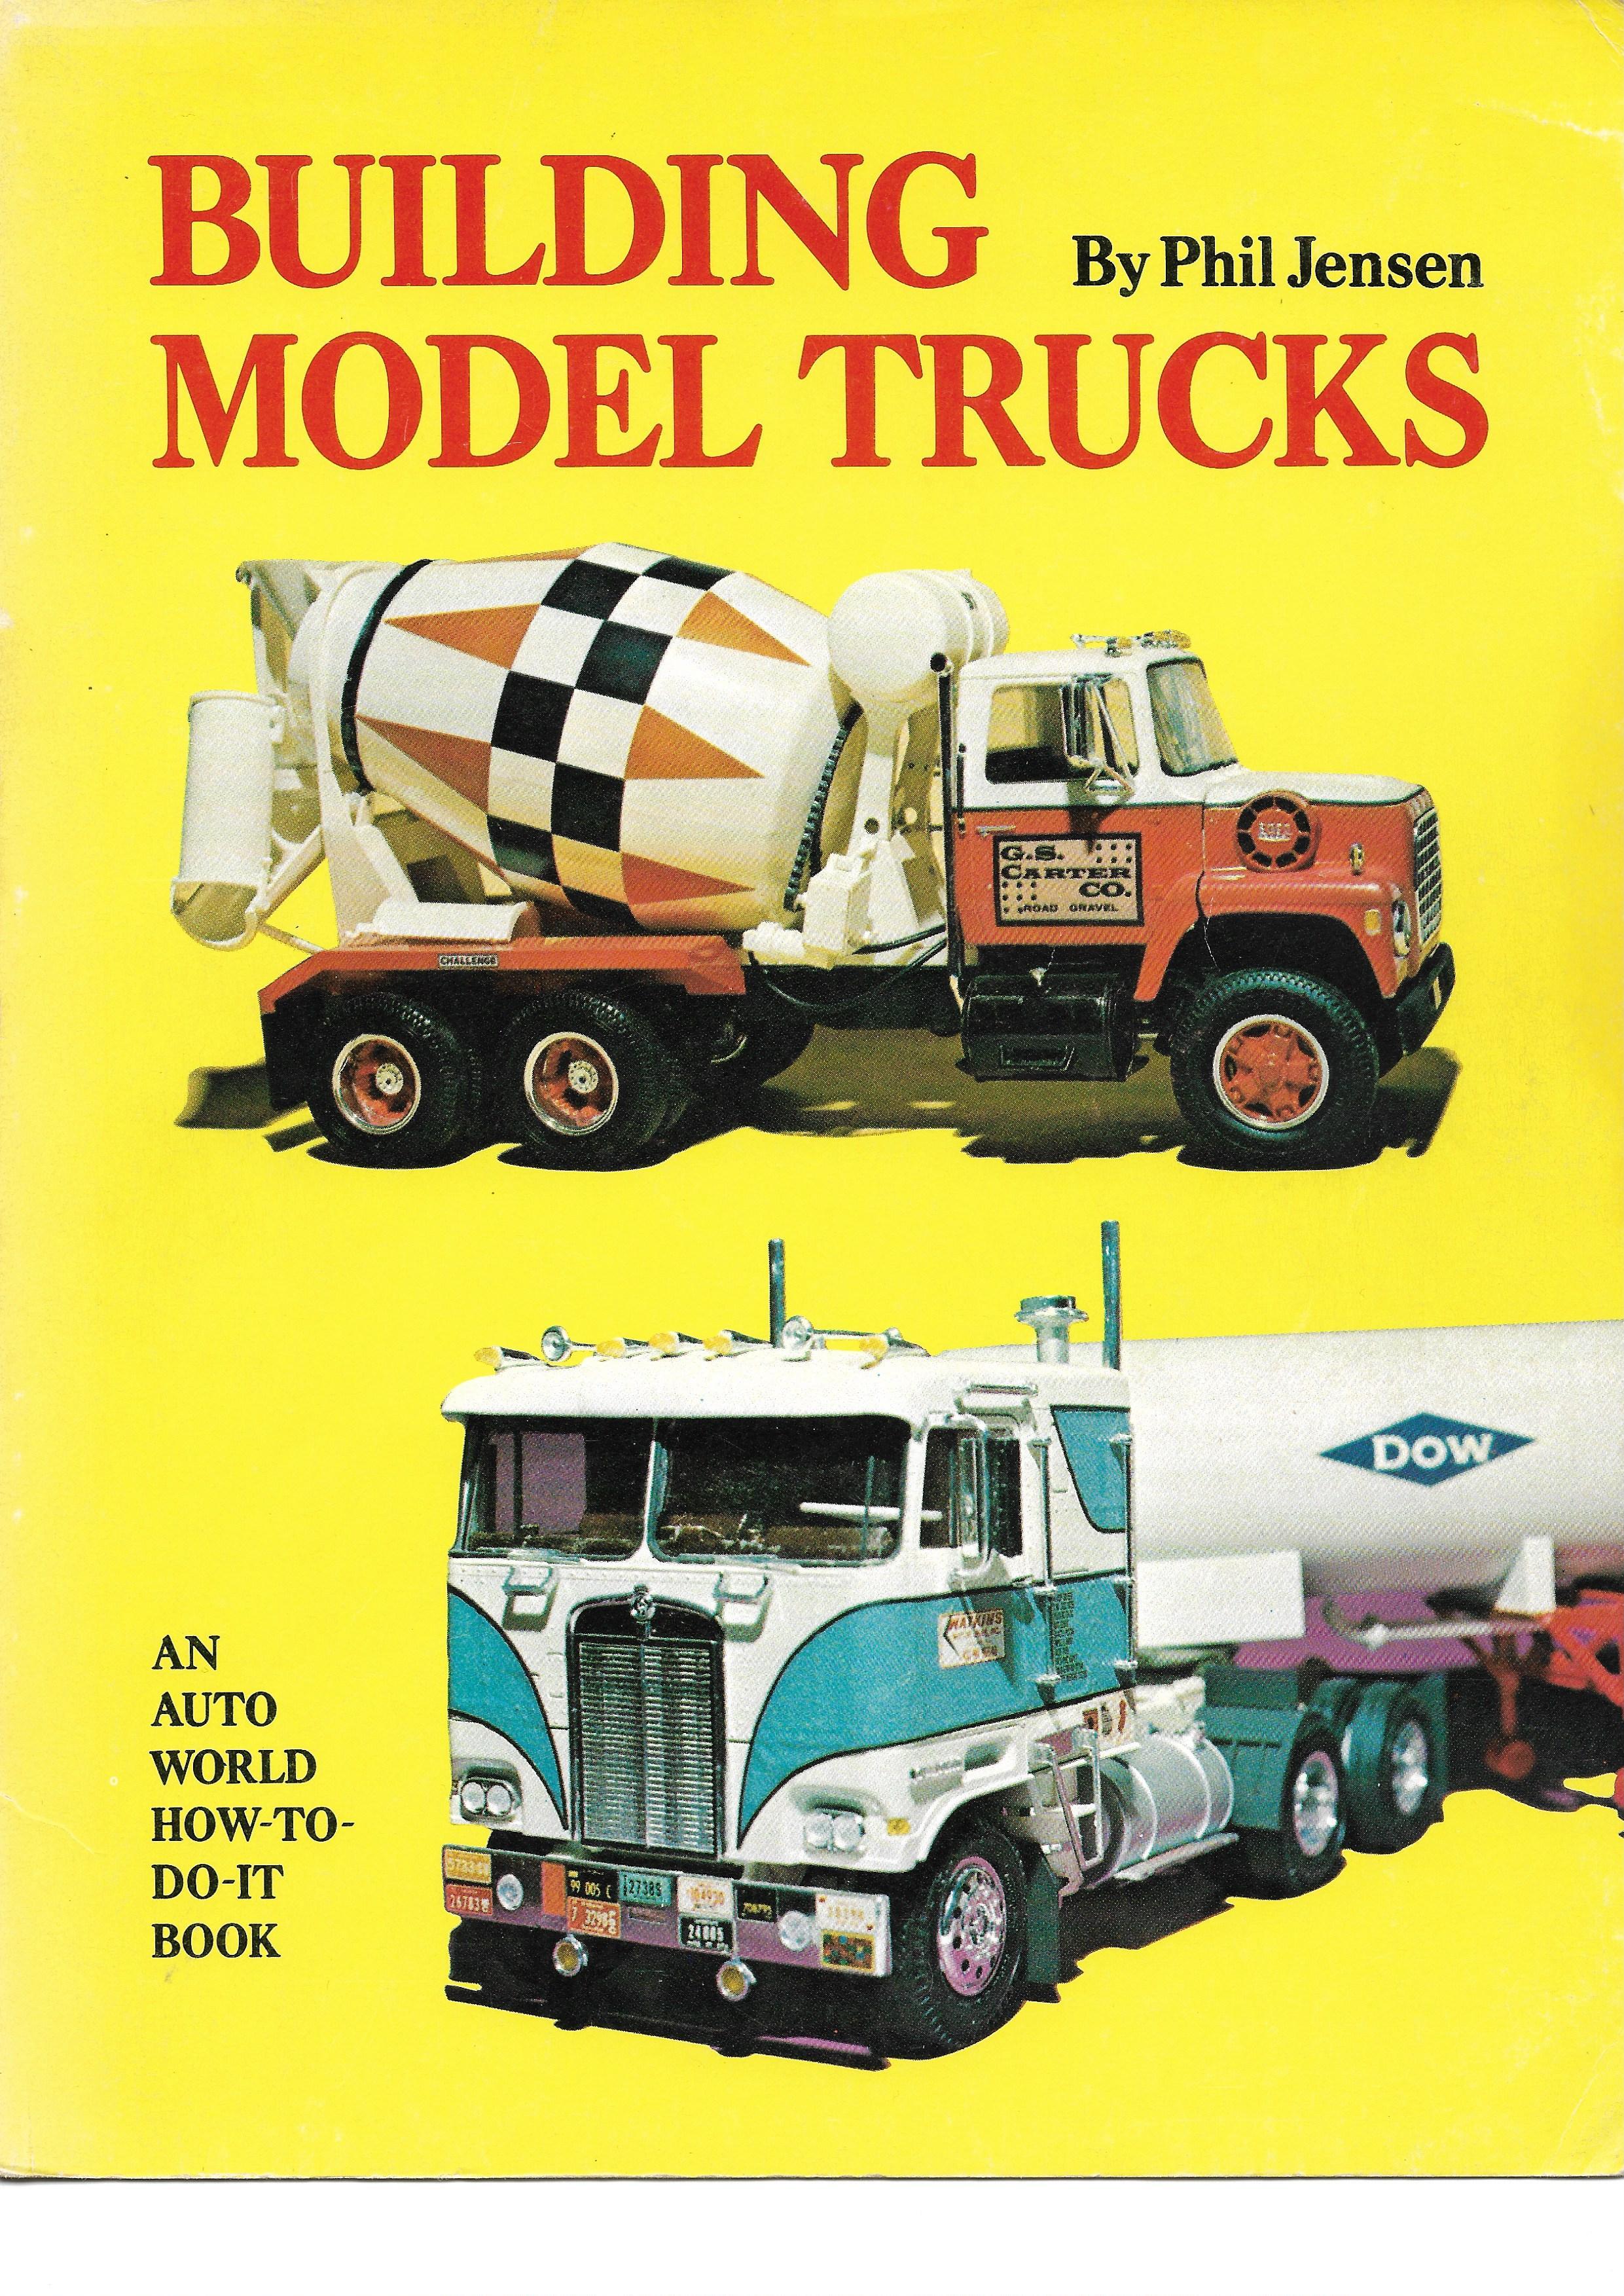
I know that Phil Jensen wrote a book called 'Building Model Trucks. It was published in 1973 by the Auto World Library.
I don't know whether you can still buy it.
Take care, Juergen
-
Hi,
Well, Joe, as I'm not a native speaker of your language I'm not a 100 % sure whether the word 'in......sane' is the right description for the work Simon is doing but it certainly has a touch of insanity
 (I hope Simon knows what I mean!). But in every aspect this spaceship looks gorgeous. It's hard to take my eyes off it.
All of you take care and stay safe. Juergen
-
Goodday Mate, hope you're still good. It's always fun to look at your work, There's so much detail to see. Each time I have to stare at the pictures trying to gather all the little things you put into this project. BTW, the photos are a bit spooky in a way because of the black space-like background. Did you switch on a kind of illumination from inside the spaceship or is it the white parts reflecting a flashlight? Well, either way it looks great. Take care and stay safe, Juergen. PS: Please convey my best respects to your wife, no more hounding!
I believe she's a good one!!! Until next time. Juergen
-
Hi Dax, grodudulle77 is absolutely right. Your weathering is gorgeous. Way above my ability. I really like these steampunk things but I lack the imagination what parts I can use to put such a project together. Did you do a more detailed description in the WIP section? And to be honest, I don't know where the side mirrors came from. And yes, you can be proud of how the whole roof and of course the visor turned out. Take care and stay safe, Juergen
-
Simon,
Yeah, JT is right, your work is unbelievable. Did you track the number of all these tiny parts you installed to the surface of this thing? The look suggests it must be thousands. It's also the amount of creativity, endurance and patience you put into this project that amazes me. I still lack the right words to describe my awe.
Thanks for your update. Take care and stay safe, mate. Juergen
-
Hi Claude,
The food truck looks marvelous! I sit in front of the computer drooling along the thread and longing for a pizza. I can even smell it. And I can hear the rustling of the autumn leaves in the wind. Really neat. Take care, Juergen
-
On 11/18/2020 at 2:13 PM, Claude Thibodeau said:
Hi Juergen!
Thanks for the comnments.
To your point about the paint, still, it's simply Testor"s Wet Look clear (spray can), not sanded but vigourously hand-rubbed with Farecla No, 6 compound.
I am saddened that Testor's pulled out this product. To me, it was most effective, mostly due to its perfect viscosity. Tamya's TS 13 is fine, but lays out much thinner, and evaporates over many more days. You are often faced with surprising "gloss reduction" a few weeks later. Therefore, you have to wait for final polishing, at least in my experience. I tried to stack-up on Wet Look as much as I could, but it is hard to come by nowadays. If you can get some, do it!
Will Revell's new spray clear bring good news? I'm still waiting for my first can soon. We'll see...
CT
Claude, Thanks very much for your answer and the info about the paints you used. I'm surprised that you didn't have to sand but thoroughly rubbed the surface.
But that did the job. It really looks gorgeous. Juergen
-
Hi Claude,
Francis is definitely right. Your paint job is fantastic. Especially the big surface of the roof is shiningly spotless. Way above my abilities. I's always a joy to see what a bag of styrene and lots of imagination can create. Take care, Juergen
-
Hi Simon
Thank you very much for your extensive and detailed answer. Yes, I agree and act in same manner as you regarding the wearing of masks and the keeping of social distances. I hope for the best that it helps here as well and as you said there are interesting times ahead.
Thanks for your update. I'm excited to see the outcome of all that. Take care, Juergen
-
Simon
I searched a bit on the net regarding the Death Star and its trench and found lots of images and also the site of fantasyflightgames.com. You probably know this site but in case not you can click on community>miniatures>X-wing>X-wing painting and modification and there are some people also building 3D models of the Death Star and the trench. I now know a little more about these space vehicles and have an image of them when I read these expressions. Anyway, your model building is way above my ability and so I'm sitting here with awe following your thread.
It's good to hear that you were successful to fight the virus. Allow me just one more question: Did you only have this 3 month lockdown in Melbourne or was it valid for all other big cities in Australia or maybe the whole of Australia? I'm asking this because in Germany we are reluctant to do so and hobble from one 3 week lockdown to another 4 week lockdown and experience lots of new cases after a couple of months after each lockdown. So your method seem to be better than ours. Take care, Juergen
-
Hi Simon,
Thanks very much for your answer. I again read your thread on this destroyer and again I could spend quite an amount of time to look at all the details on your tiles and panels. With every look I discover something new. As David G. put it there are a lot of greebles (this word was new for me
") ) on this project. I really enjoy your build. I'm by no means an expert of these spaceships. So would you please tell me where this trench will be located on the destroyer in the end? As I said I'm sitting guard in front of the computer and wait for your next update. BTW, I heard that you had a complete lockdown for nearly two months in Melbourne, it that correct? Would you say it was the right measure to fight this bloody virus? Take care and stay safe, Juergen
) on this project. I really enjoy your build. I'm by no means an expert of these spaceships. So would you please tell me where this trench will be located on the destroyer in the end? As I said I'm sitting guard in front of the computer and wait for your next update. BTW, I heard that you had a complete lockdown for nearly two months in Melbourne, it that correct? Would you say it was the right measure to fight this bloody virus? Take care and stay safe, Juergen
-
Simon, I've just found this thread of yours and I'm completely flabbergasted. This is really, really and I mean really gorgeous detail work. I can't find the proper words for it because I'm just a guy with a low level of the English language, I'm not a native speaker so I lack the words to describe the impression your model makes on me. I'm simply blown away. Maybe you allow me to ask some (silly?) questions? What are the kind of panels you are making the service trench from? Did you make all the details of piping and gadgets and whatever it is yourself or is it something you can buy (I hope so for you, at least)? Well mate, keep up the stunning work. I'll be following closely now, I promise. Take care, Juergen
-
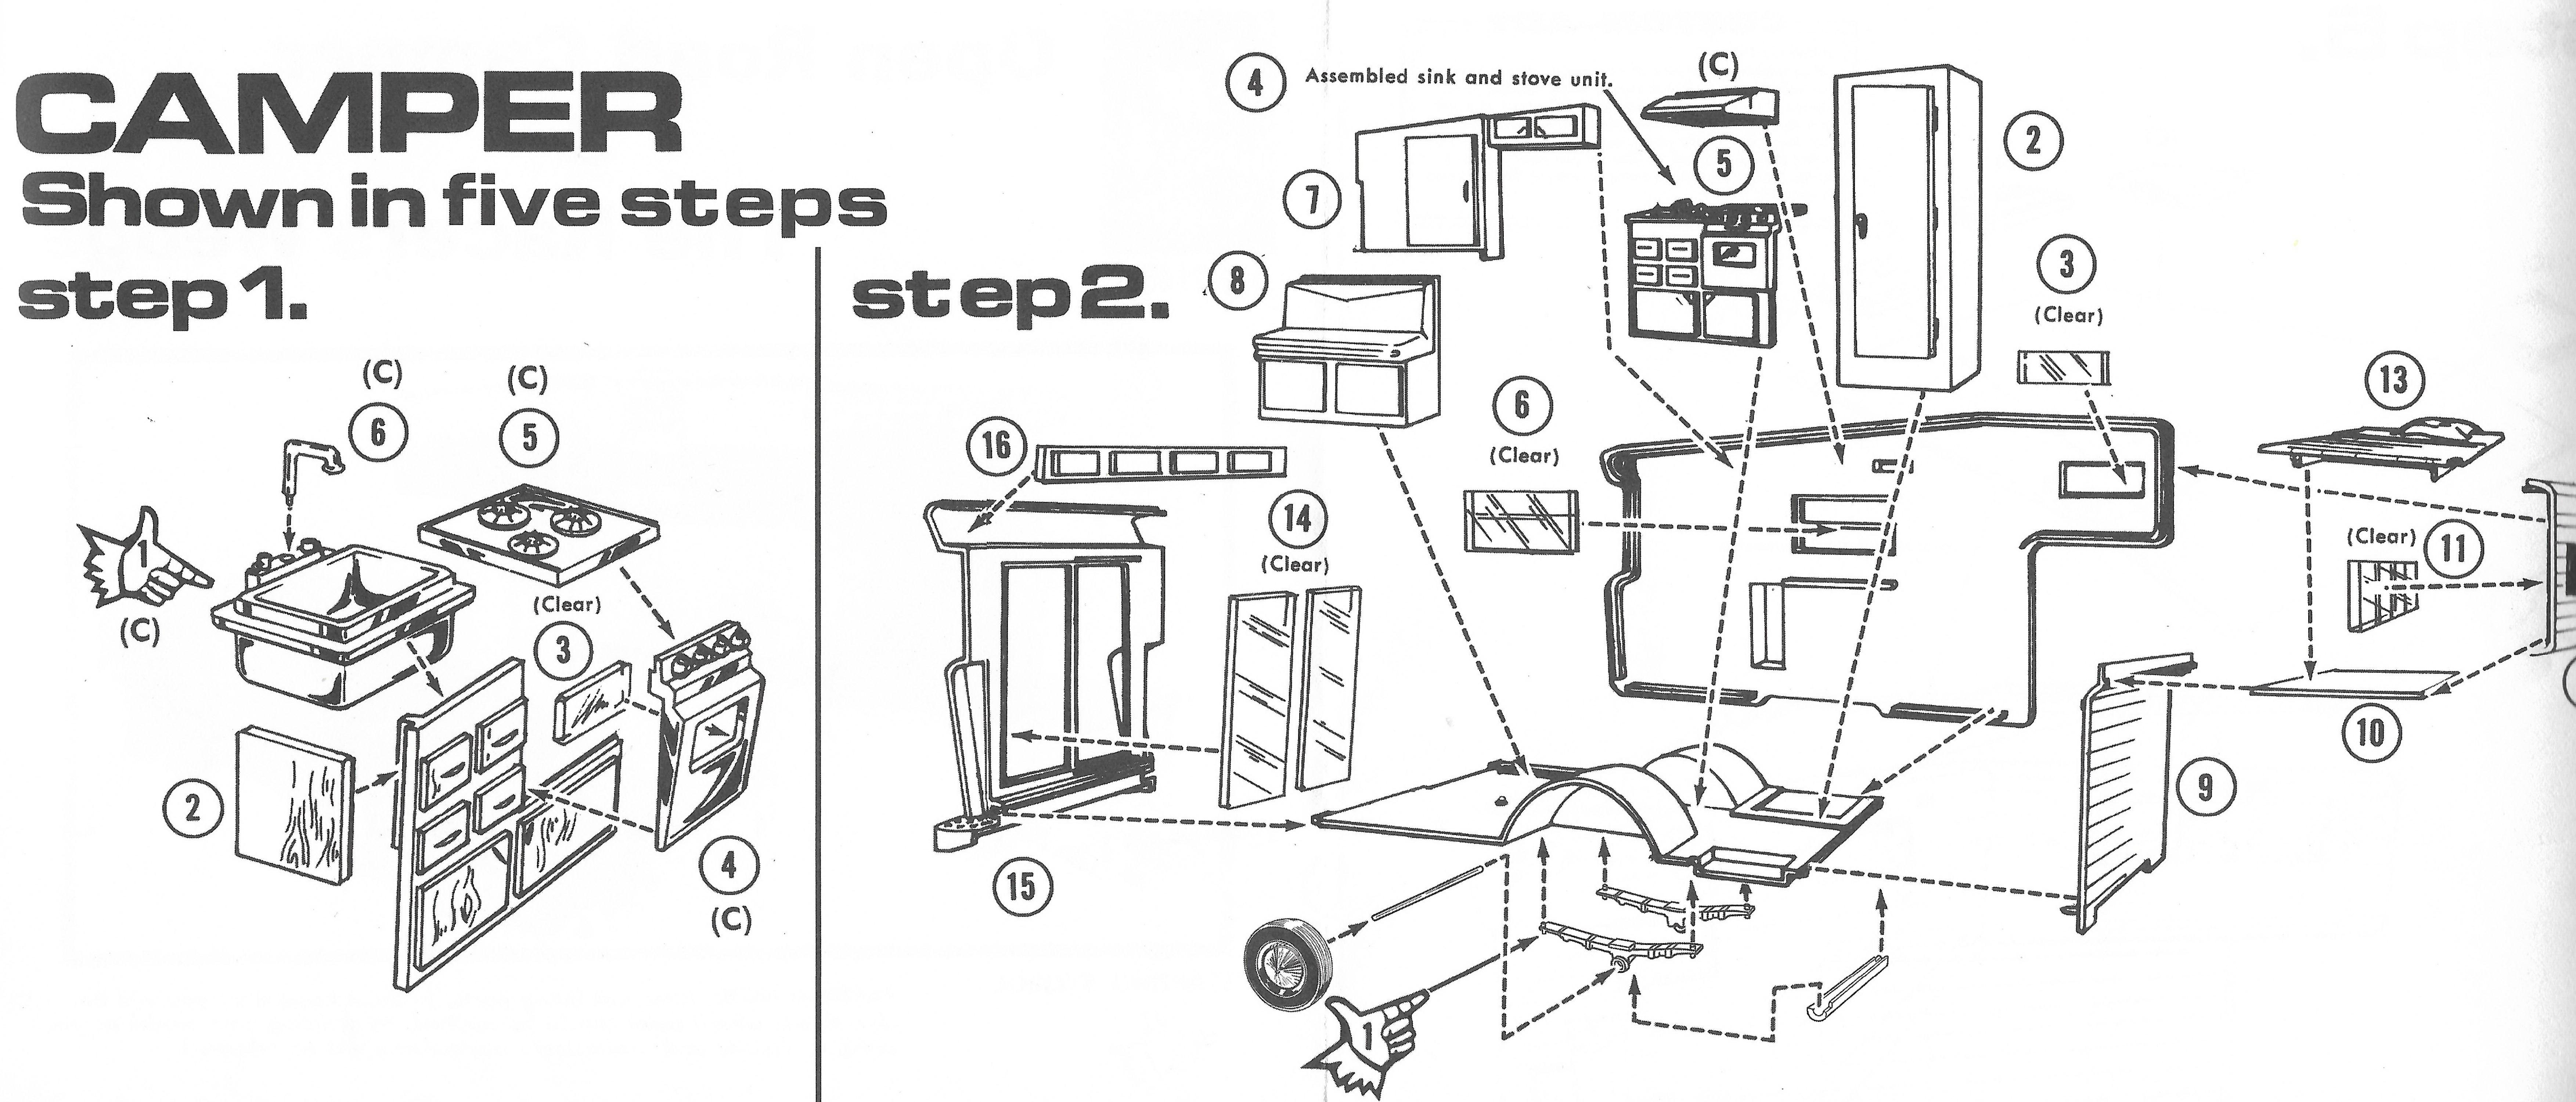
Peter, I'm not a 100 % sure but these symbols might indicate where other parts should be installed (glued), e.g. radiator or heater hoses. Check the following pages of the instruction. Maybe you'll find the same symbols there as an information where the parts should be connected to. Hope it helps. Take care, Juergen
-
Brian, Thanks a lot for sharing this link. It contains really great reference photos. I really like the old Ford F models and this tow truck for sure is a sweet one. Did you visit the Car Museum in St. Louis? Two years ago I visited St. Louis but didn't know that there is such a Car Museum. Maybe next time. Juergen
-
Brian, Thanks very much for sharing this info. Especially for people in Europe and more so in Germany it's always difficult to get charts with the shown dimensions. But if you want to replicate a model of these vehicles you're in desperate need of this figures. Thanks again and take care. Juergen
-
Geoff, thanks very much for the info. Juergen
-
Hi Michael, Thanks very much for your answer and the pictures. Sounds good, looks good, so it seems to be worth the money. Thanks again, take care, Juergen.
-
Hi M.W., Can you please tell a bit about the quality of the resin parts? Thickness of cab walls, smoothness of surfaces, any bubbles and the like?
How about your experiences of trading with the supplier? Was it easy to trade with them? Did all go smoothly regarding the payment? How did they pack the parts?
Thanks, Juergen
-
I used photos from a German tractor museum for reference material, it was never meant to be a model that represented a working vehicle
Hi Geoff, Would you please tell me which tractor museum it was and where it is located? Thanks very much.
-
Jordan, Thanks for your explanation.
-
Andy, The underside of the truck looks great. Nice detail and just a bit of weathering. I'd probably go for the brown wheels and the ring. Please forgive me the dumb question but is it beadlock or bedlock ring and what are they for? Thanks, Juergen


BRBO 2021 - Mack LT
in WIP: Model Trucks: Big Rigs and Heavy Equipment
Posted
Hi m.w., Interesting project. I'd like to ask a couple of questions. Which 3D-CAD program do you use to design the battery mounts? Do you print the parts yourself with your own 3D printer? What kind of printer do you employ? Looking forward to your next update. Take care, Juergen