Field_Artillery63
-
Posts
74 -
Joined
-
Last visited
Content Type
Profiles
Forums
Events
Gallery
Everything posted by Field_Artillery63
-
Hey guys I need some help. If I airbrush model master top clear coat on my metallic green chevy truck. Will it remove scratches from my windshield and make it clear?
-

Progress on the 65 chevy
Field_Artillery63 replied to Field_Artillery63's topic in General Automotive Talk (Trucks and Cars)
Thanks Earl. -
Progress on the 65 chevy
Field_Artillery63 replied to Field_Artillery63's topic in General Automotive Talk (Trucks and Cars)
Lol. Testors gunmetal, testors flat sea blue, and testors gloss green and thinner. Ratio wise I have no idea! Just mixed until satisfied lol -
Progress on the 65 chevy
Field_Artillery63 replied to Field_Artillery63's topic in General Automotive Talk (Trucks and Cars)
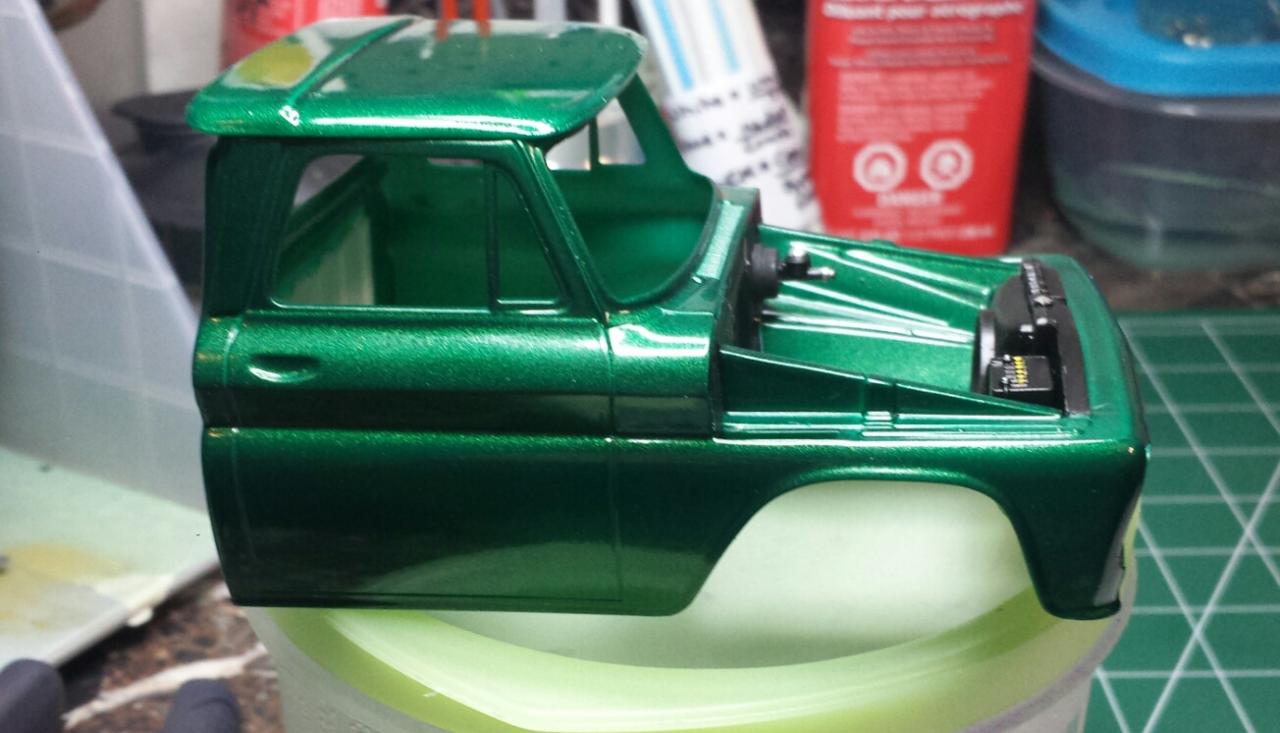
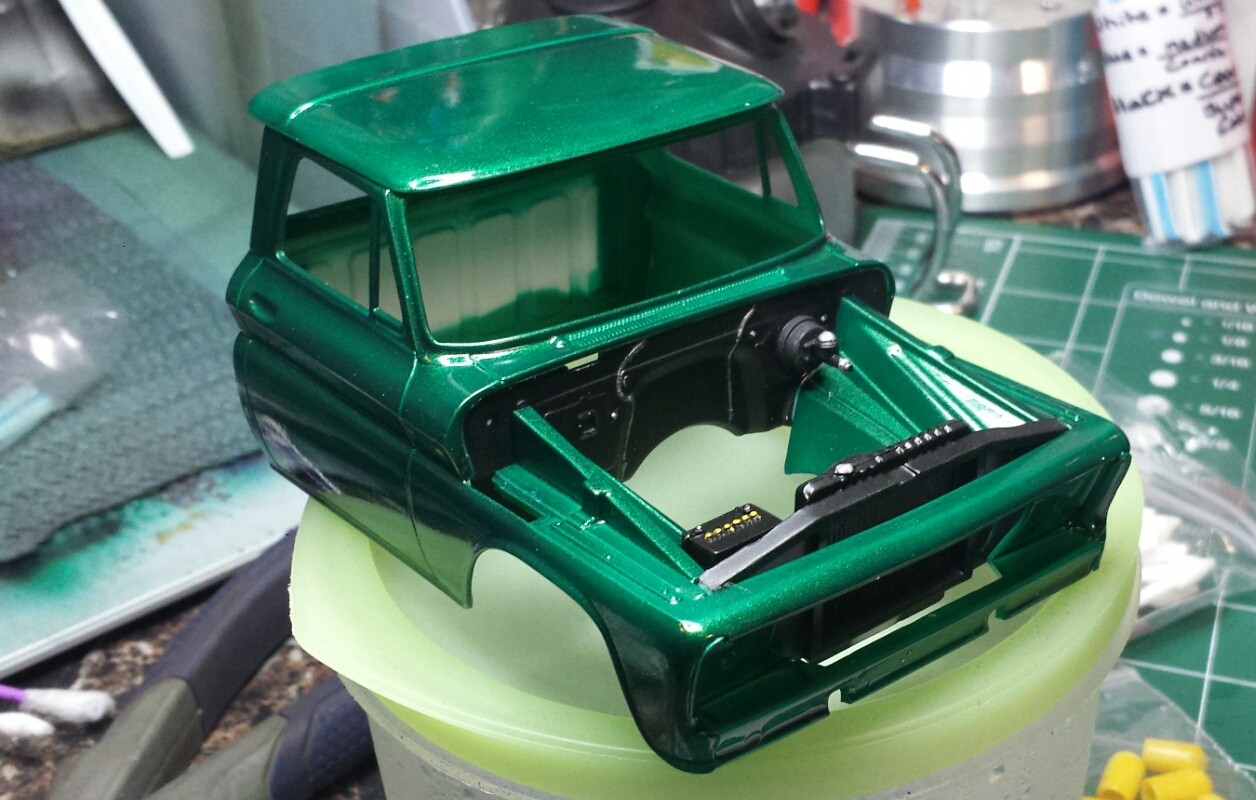
The body paint is a green metal flake by Testors. It was a pain to mix to the right ratio. I nailed the purple metal flake on my hemi cuda though. This is only my second build in 12 years. This was the first I did a couple months ago.
-
Progress on the 65 chevy
Field_Artillery63 replied to Field_Artillery63's topic in General Automotive Talk (Trucks and Cars)
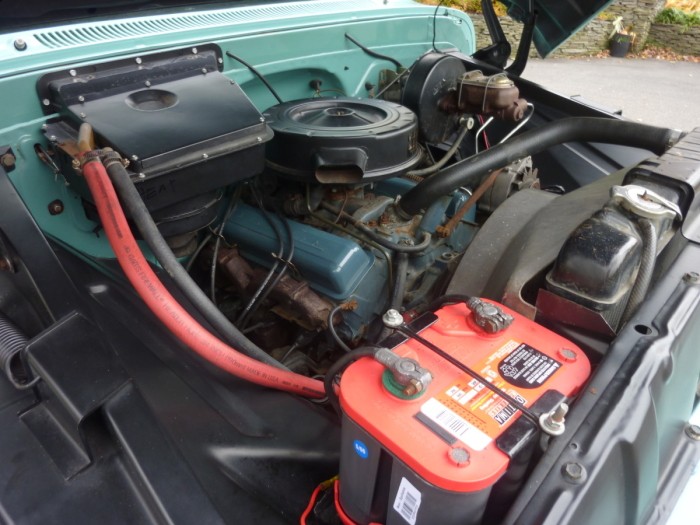
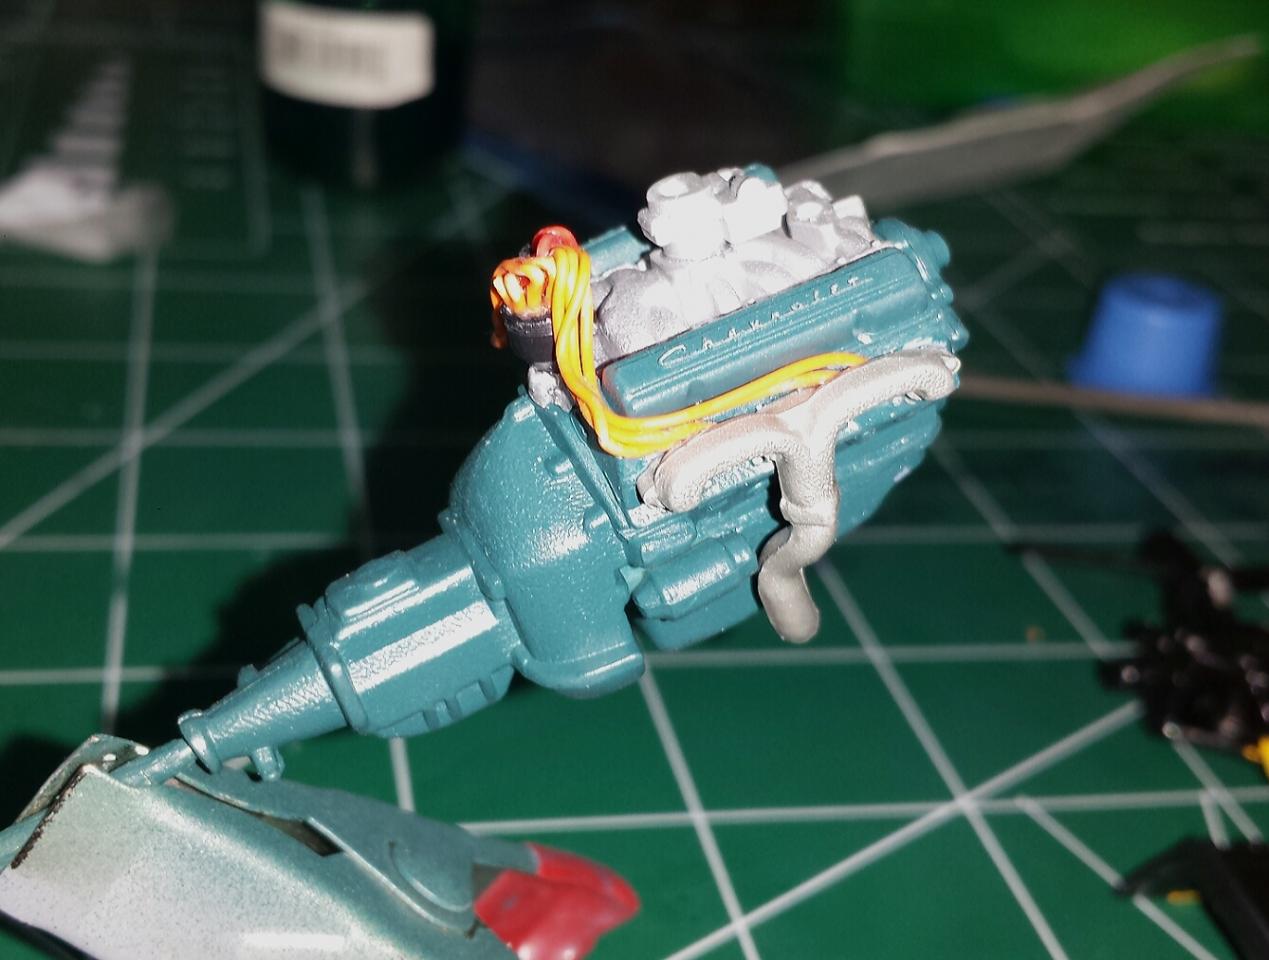
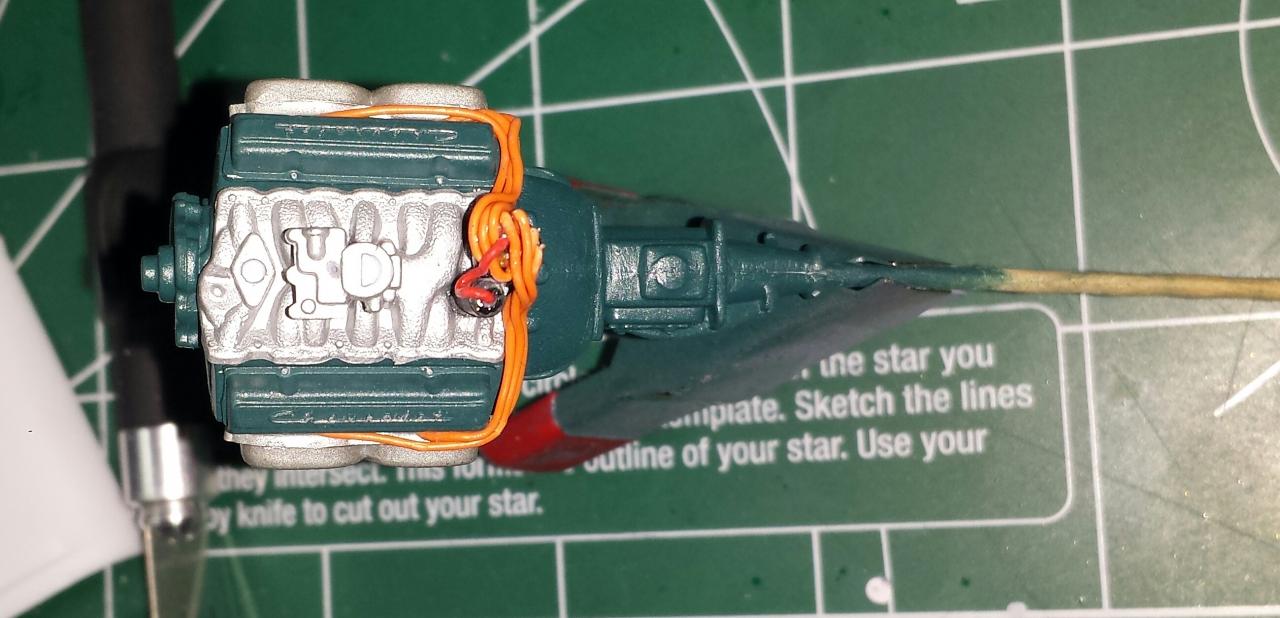
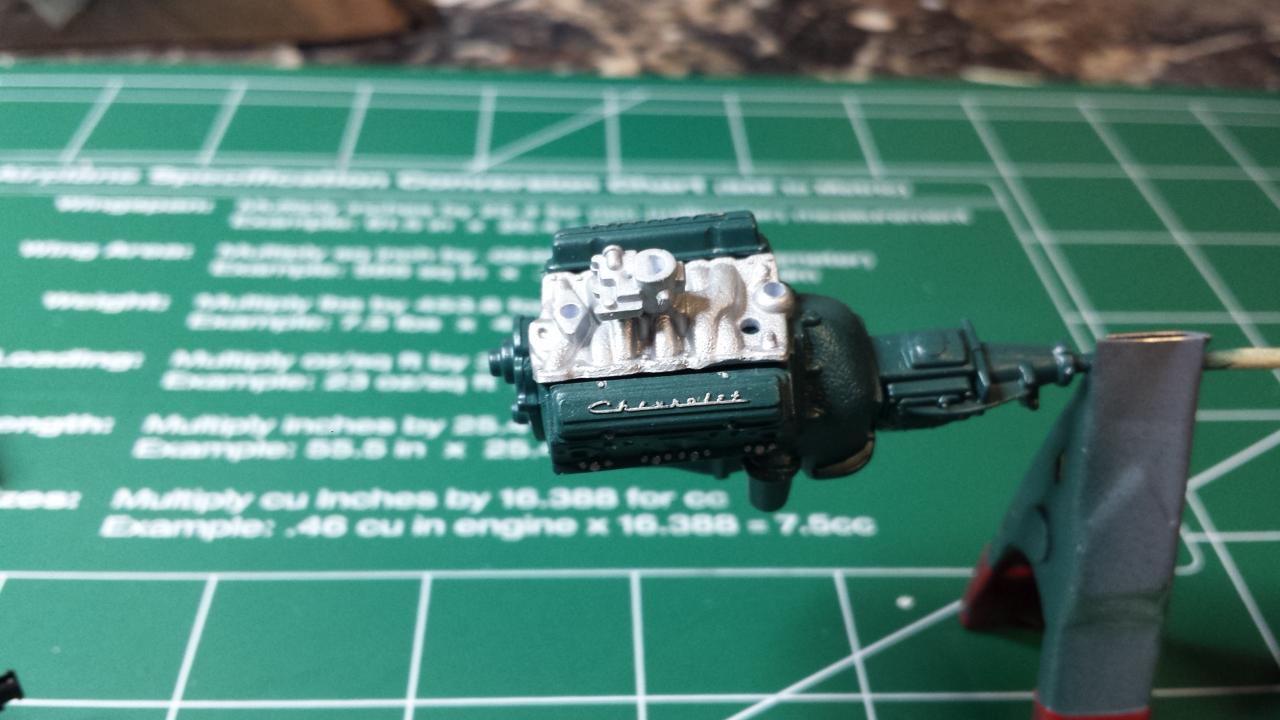
I mixed three different paints to try and achieve the original engine color. Came out pretty good.
-
Progress on the 65 chevy
Field_Artillery63 replied to Field_Artillery63's topic in General Automotive Talk (Trucks and Cars)
Thanks Jeff. -
Progress on the 65 chevy
Field_Artillery63 replied to Field_Artillery63's topic in General Automotive Talk (Trucks and Cars)
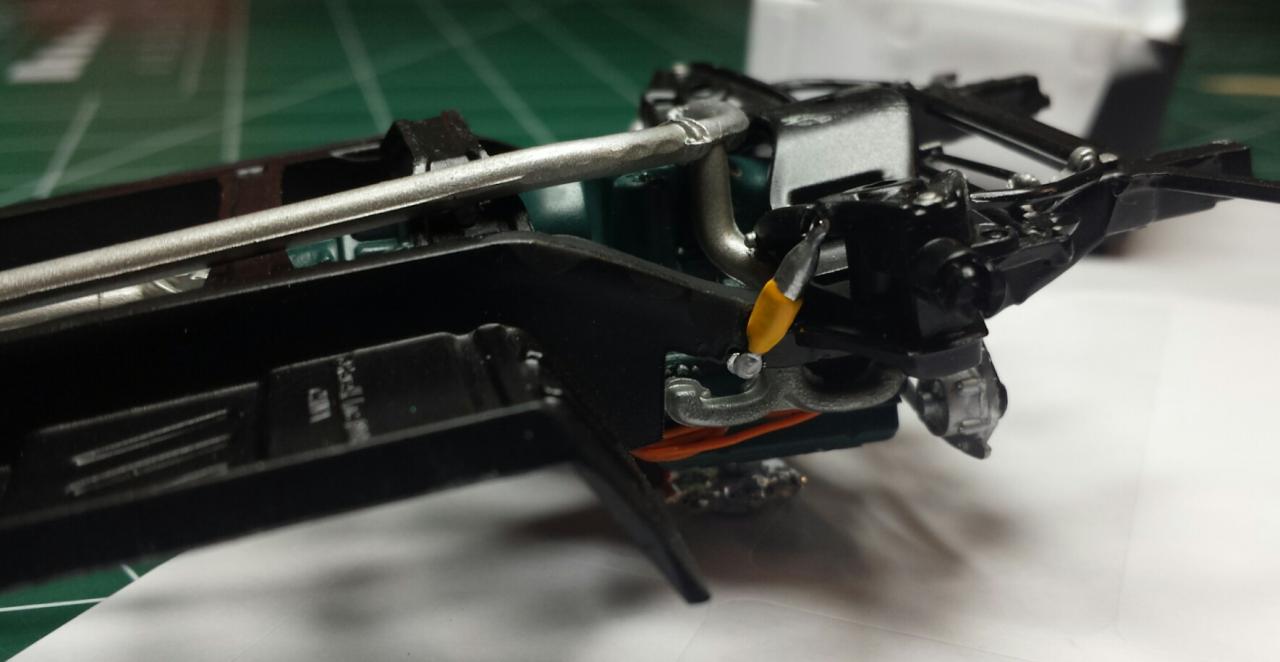
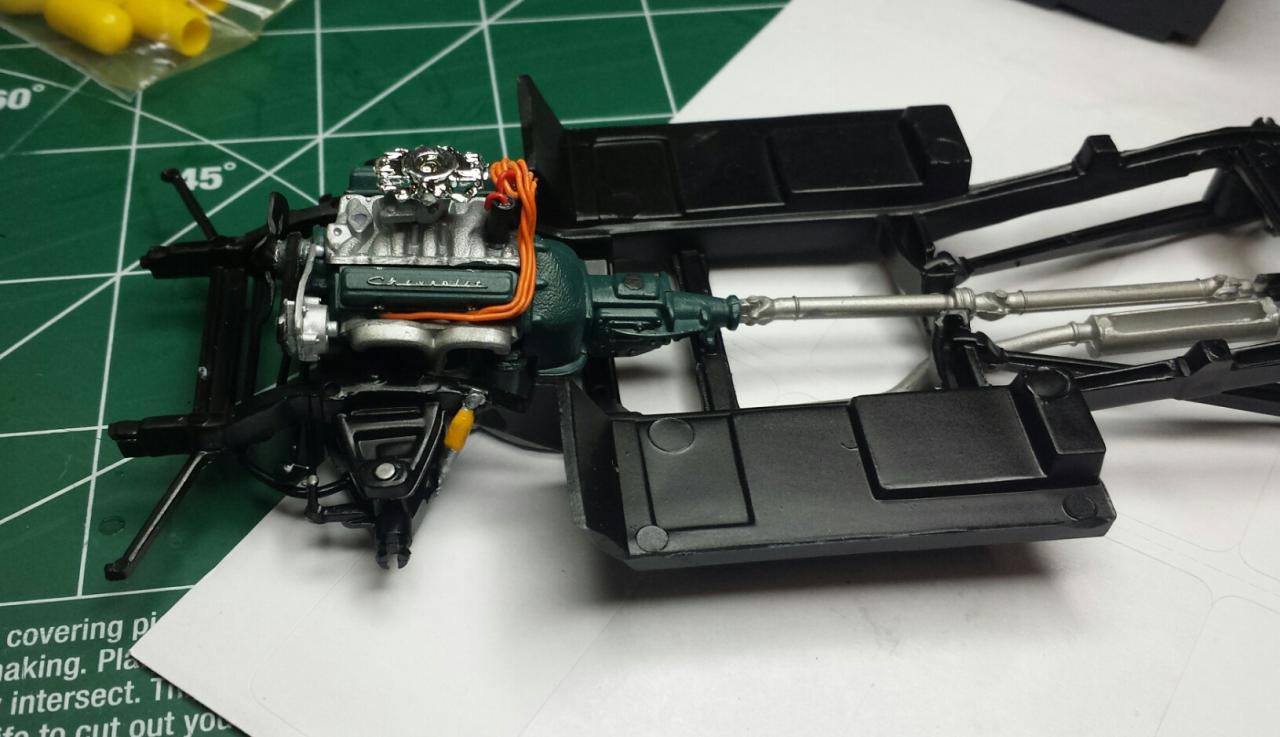
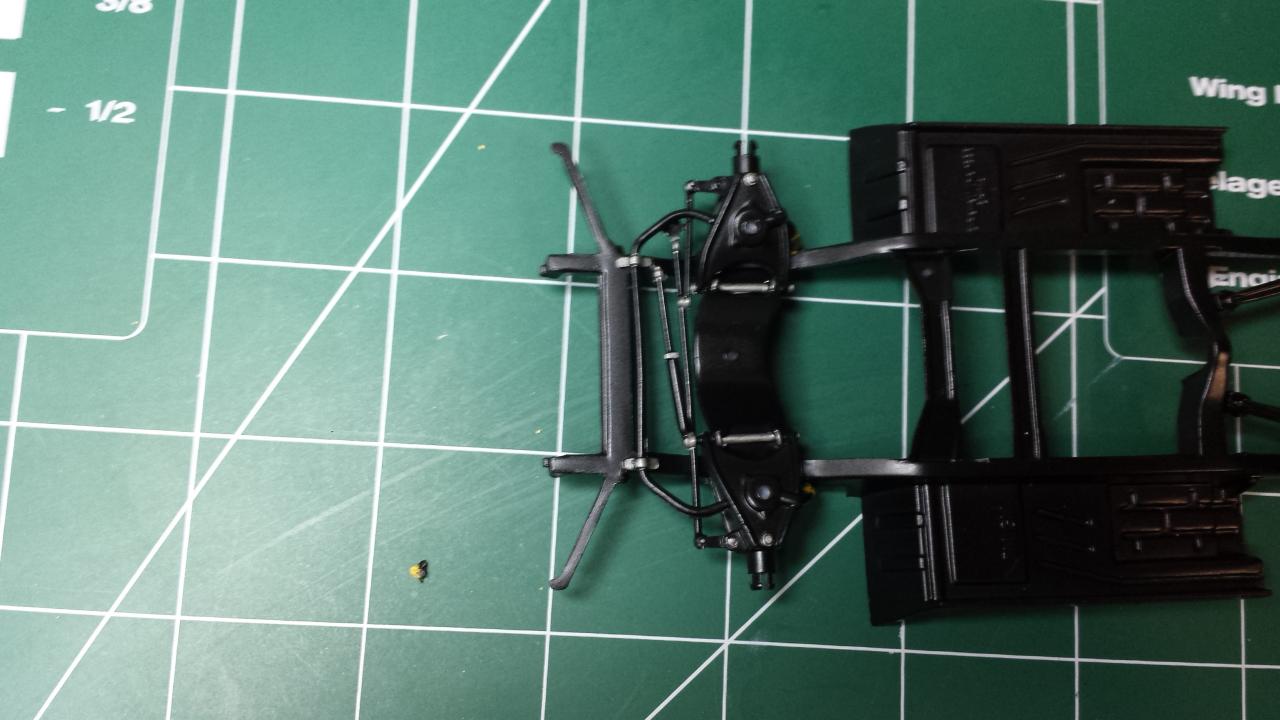
Complete chassis and front suspension area.
-
Progress on the 65 chevy
Field_Artillery63 replied to Field_Artillery63's topic in General Automotive Talk (Trucks and Cars)
Top view and shocks.
-
Progress on the 65 chevy
Field_Artillery63 replied to Field_Artillery63's topic in General Automotive Talk (Trucks and Cars)
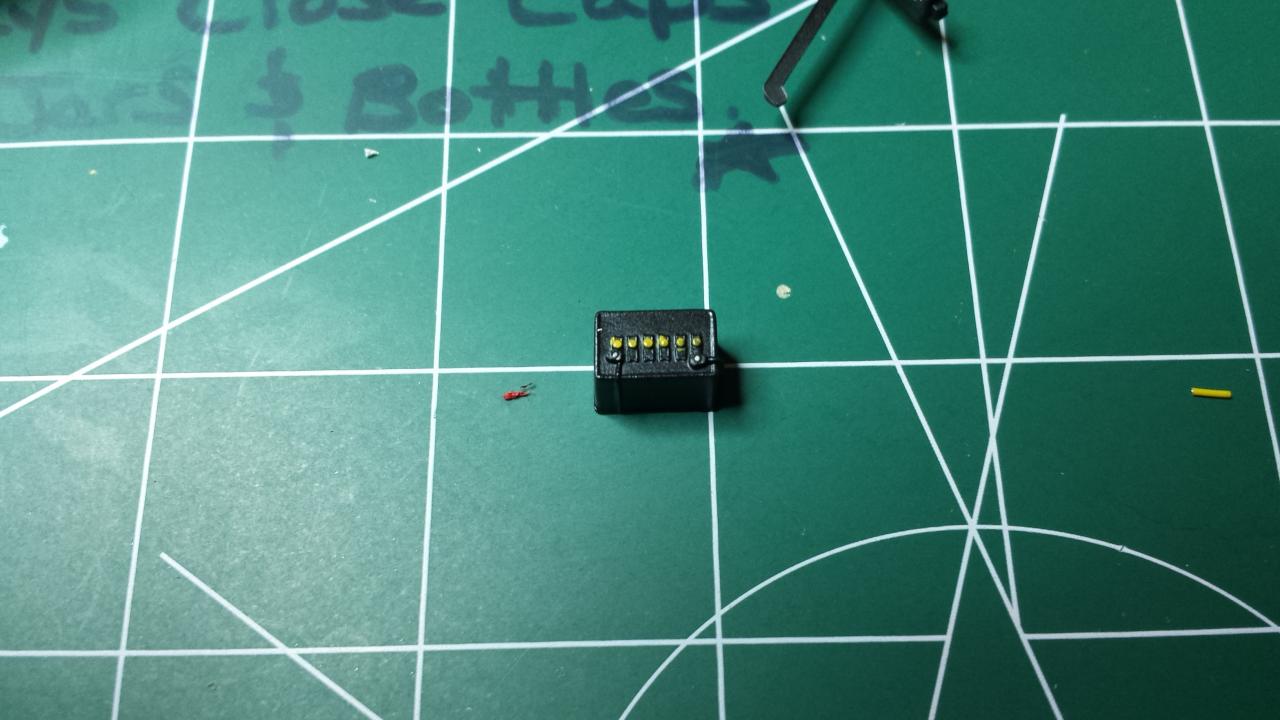
First time wiring the engine.
-
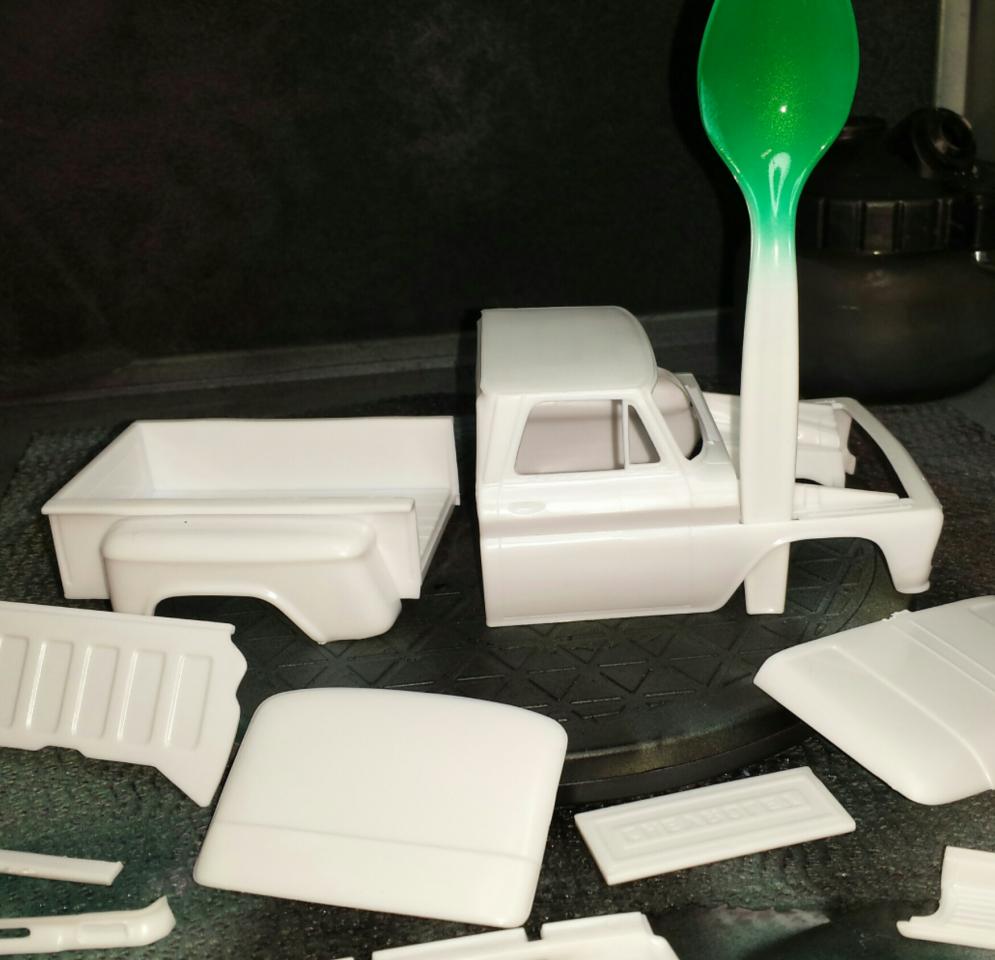
My progress on the 65 chevy. Bed of truck isn't shown because it fell into my spray booth filter with wet paint...ahhhh. so need to sand it down and repaint....talk about a mess...
-
Was originally going with the yellow spark plug wire but when I went to put them onto the engine, realized I cut them entirely to short. Like 1/4 inch to short lol. So switched to Orange. I think the orange looks better on this color engine..
-
And the son is the color I'm going with for the body. A metallic green I mixed up with some other additives.
-
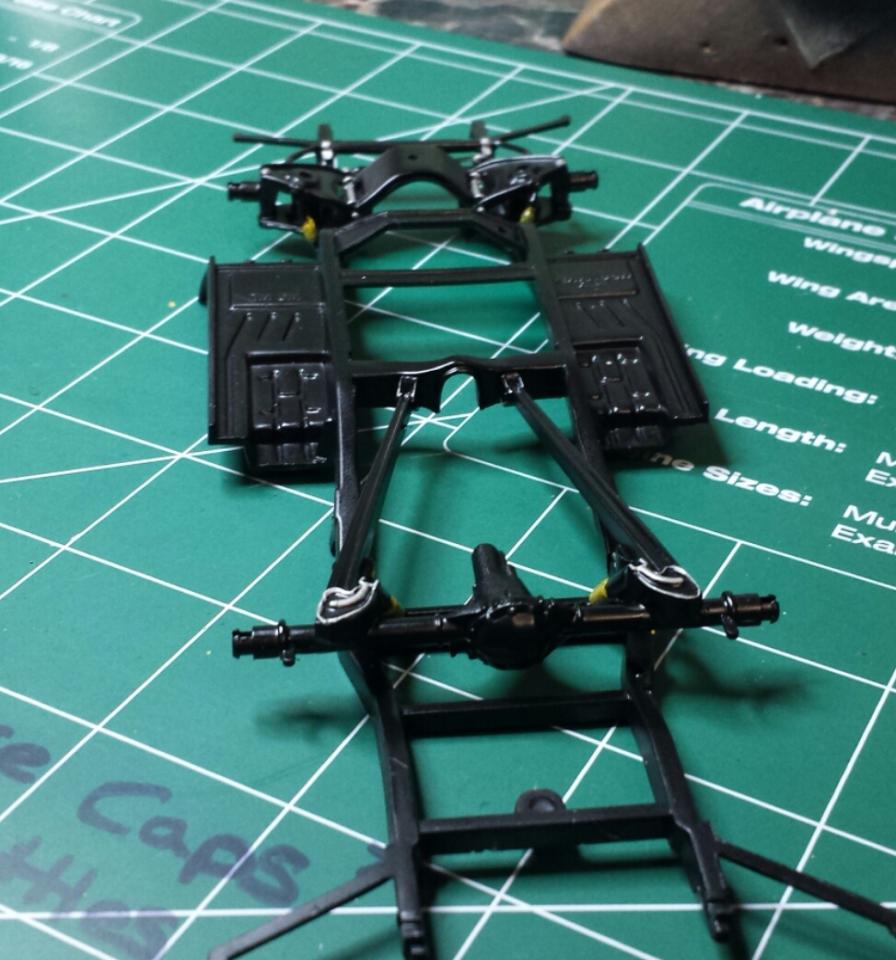
The chassis
-
Ok guys so here is some updated work. Been really busy with the work life so haven't had much time to work on my models. First time wiring my engine, learned some tricks in the process that'd definitely be used on the next one.
-
No clear coat either. Just one coat.
-
Here was the final product guys. Started on a 65 chevy truck since then.
-
Thanks Carl
-
Here's the WIP.
-
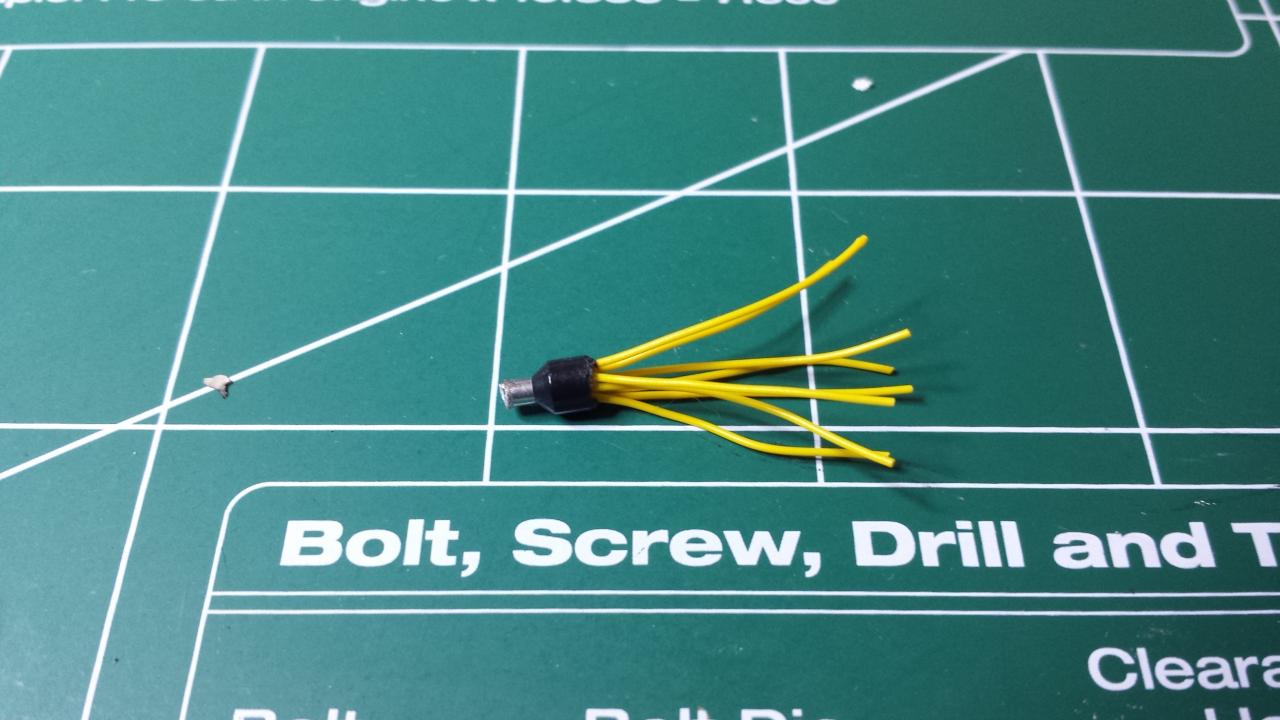
Going to throw some pictures up tomorrow, painted and detailed the chassis with suspensions and paint shock housings yellow and shafts chrome silver. Wired my distributor cap I got from crazyjim. Think it'll hold. Put crazy glue in them put the 8 wires around. Letting it dry. Also drilled holes for the wires beneath the valve covers where the manifolds go. Only thing that concerns me is the wires being in the way of the manifolds, so might have to do some trimming. Stay tuned guys. Pictures coming tomorrow
-
Thanks Bill, thanks Carl. I didn't get much done last Night, was coping pieces of wood for a friend, 300 total pieces yesterday with a miter box saw and managed to chop my index finger to the bone. Lol so was a bit preoccupied cleaning up the wound and bandageing it. But more progress soon to come.
-
Done for the night, Blair thanks for the tip on the detail work, was able to get the script looking good!!! Much appreciated.
-
Well Bill I think I matched the Color pretty good, I used gloss green, flat sea blue, gunmetal, and gloss white and I came out with this. Not bad for 1 whole minute of mixing colors lol.
-
The seams are noticeable if you look closely but only because the putty is a different color than the styrene. To the touch, my finger glides pretty smoothly over the area so painting will be the way to tell for sure.
-
Ok so prepped the engine, puttied, sanded, filed. Looks pretty good I must say, I brought the shop vac into the hobby room and put it under the work bench, the vacuum attachments I got from Lowe's for cleaning my real car worked awesome for clean up, of the workbench, and putting it on the actual engine itself and sucking up all the dust and putty remains.
-
Hey chip, didn't wait over night lol I was too eager, but I sanded down and cleaned it up, it was dry, crumbly like a over baked cookie so I suppose that it's dry enough right? Bill I was just about to start painting until you showed me this, I have allot of colors but I don't know what I can use to match it. I have a teal?? Think that would work??