

Tinky
-
Posts
63 -
Joined
-
Last visited
Content Type
Profiles
Forums
Events
Gallery
Posts posted by Tinky
-
-
Cool, I like the thinking outside the box.
^^^ exactly what I was thinking, keep it up, there's something new to learn with every build. I did a build on this kit a while back, look up "two builds two breeds" I have love for this car, I drive one everyday.
Keep up the good work!
Thank you Leslie, Ryan, and Jonathan for your kind and motivating comments! I looked up your kit Ryan, and have to say it is very nice and job well done, I like it!
-
Hello All,
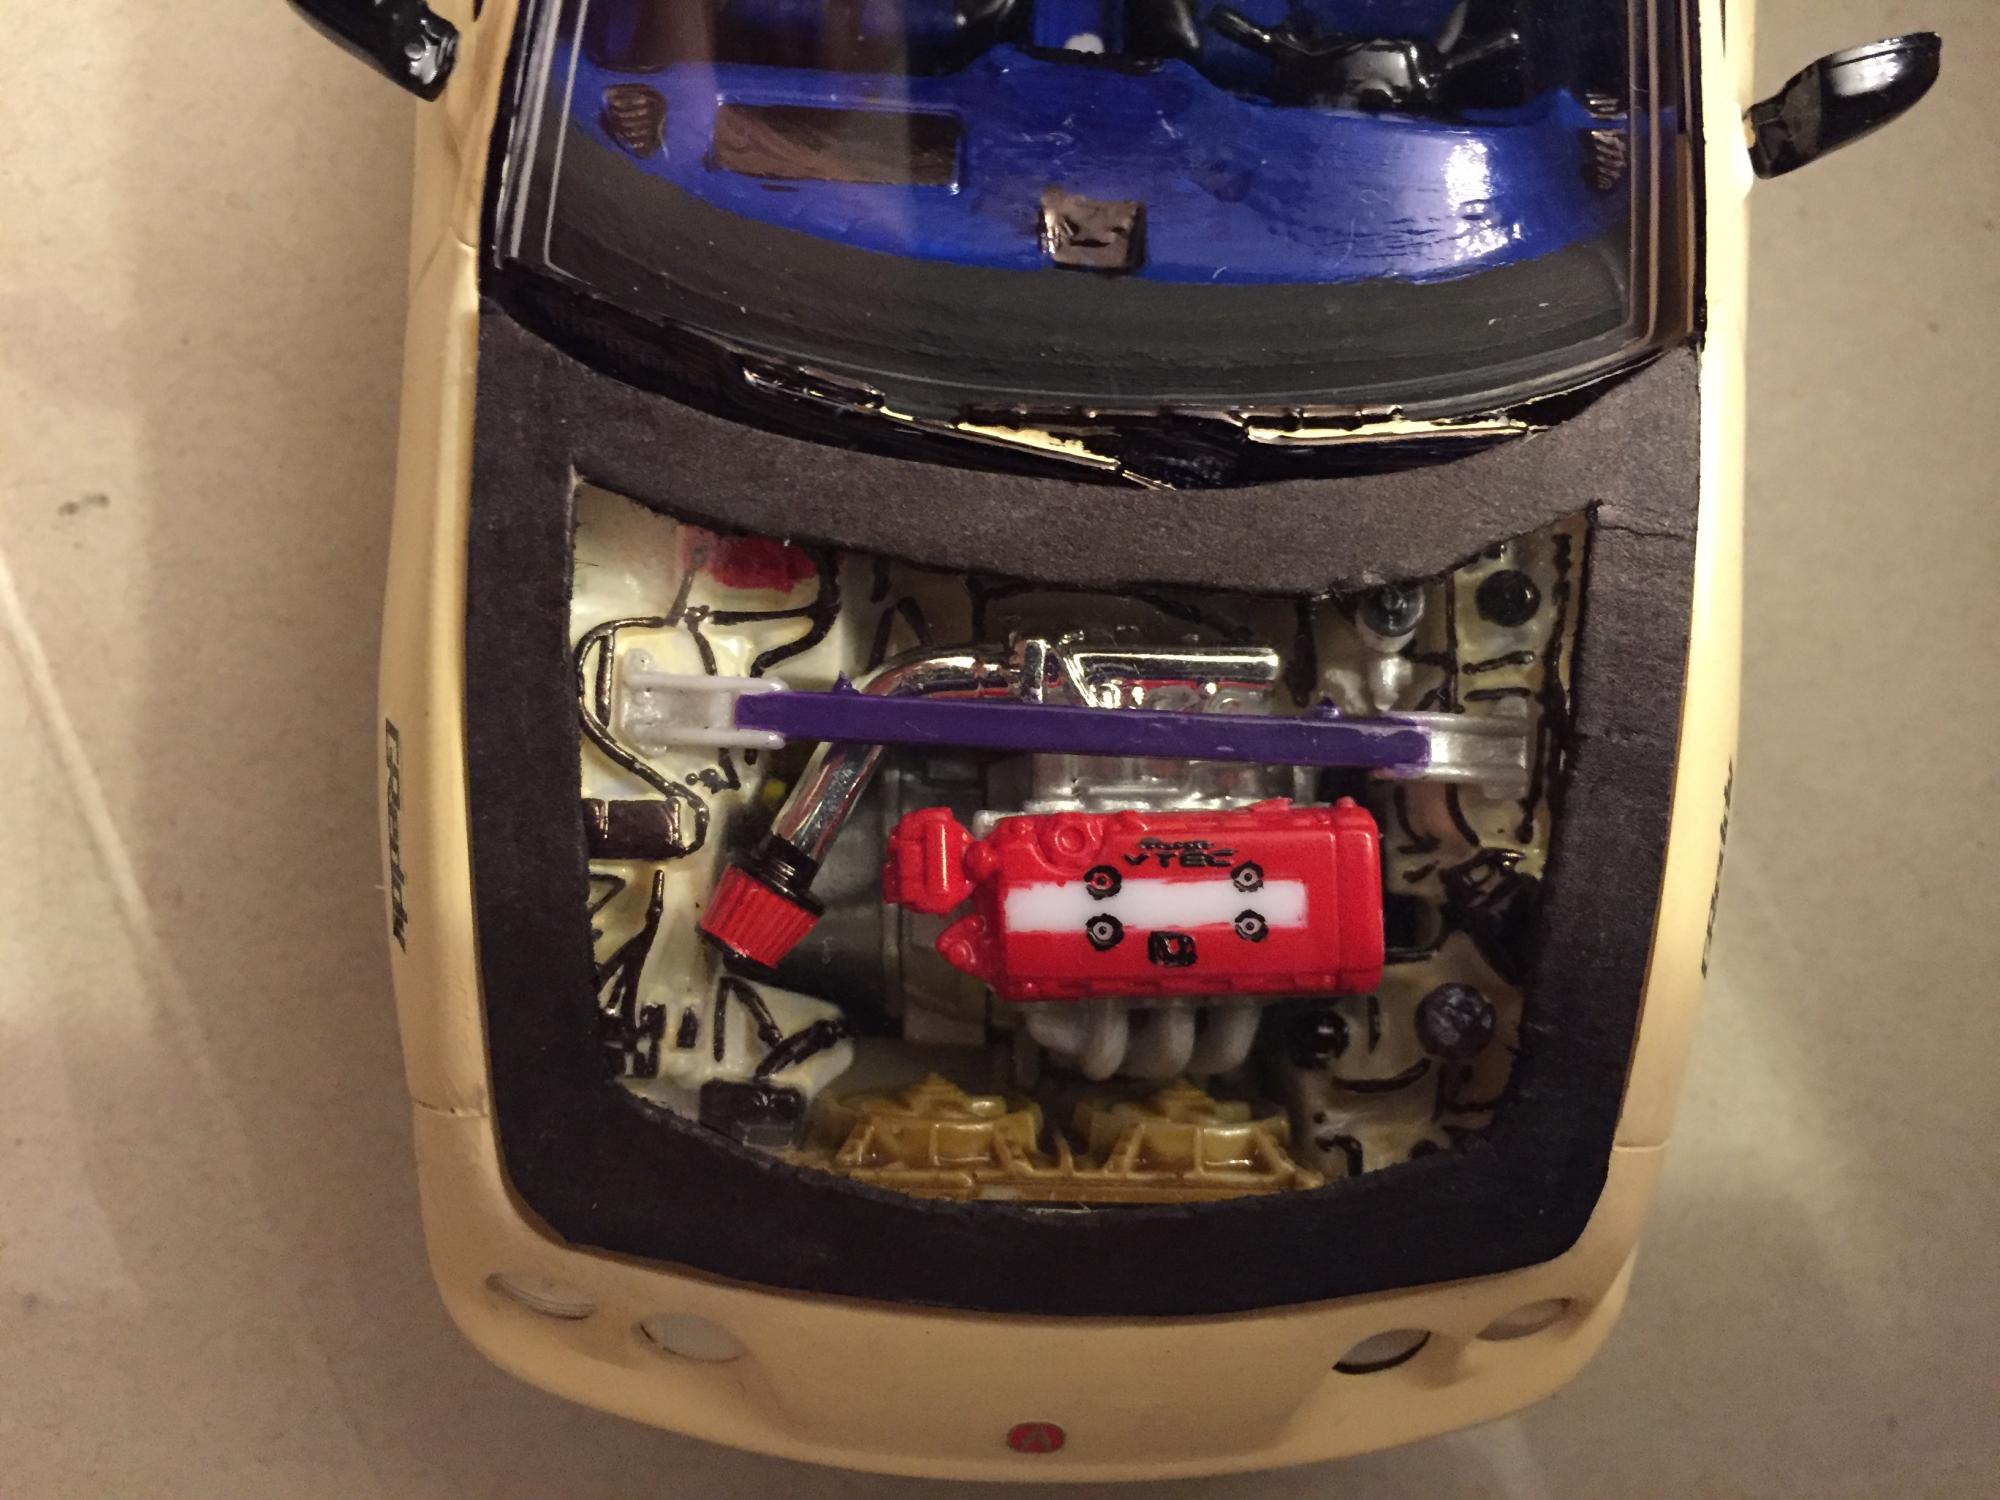
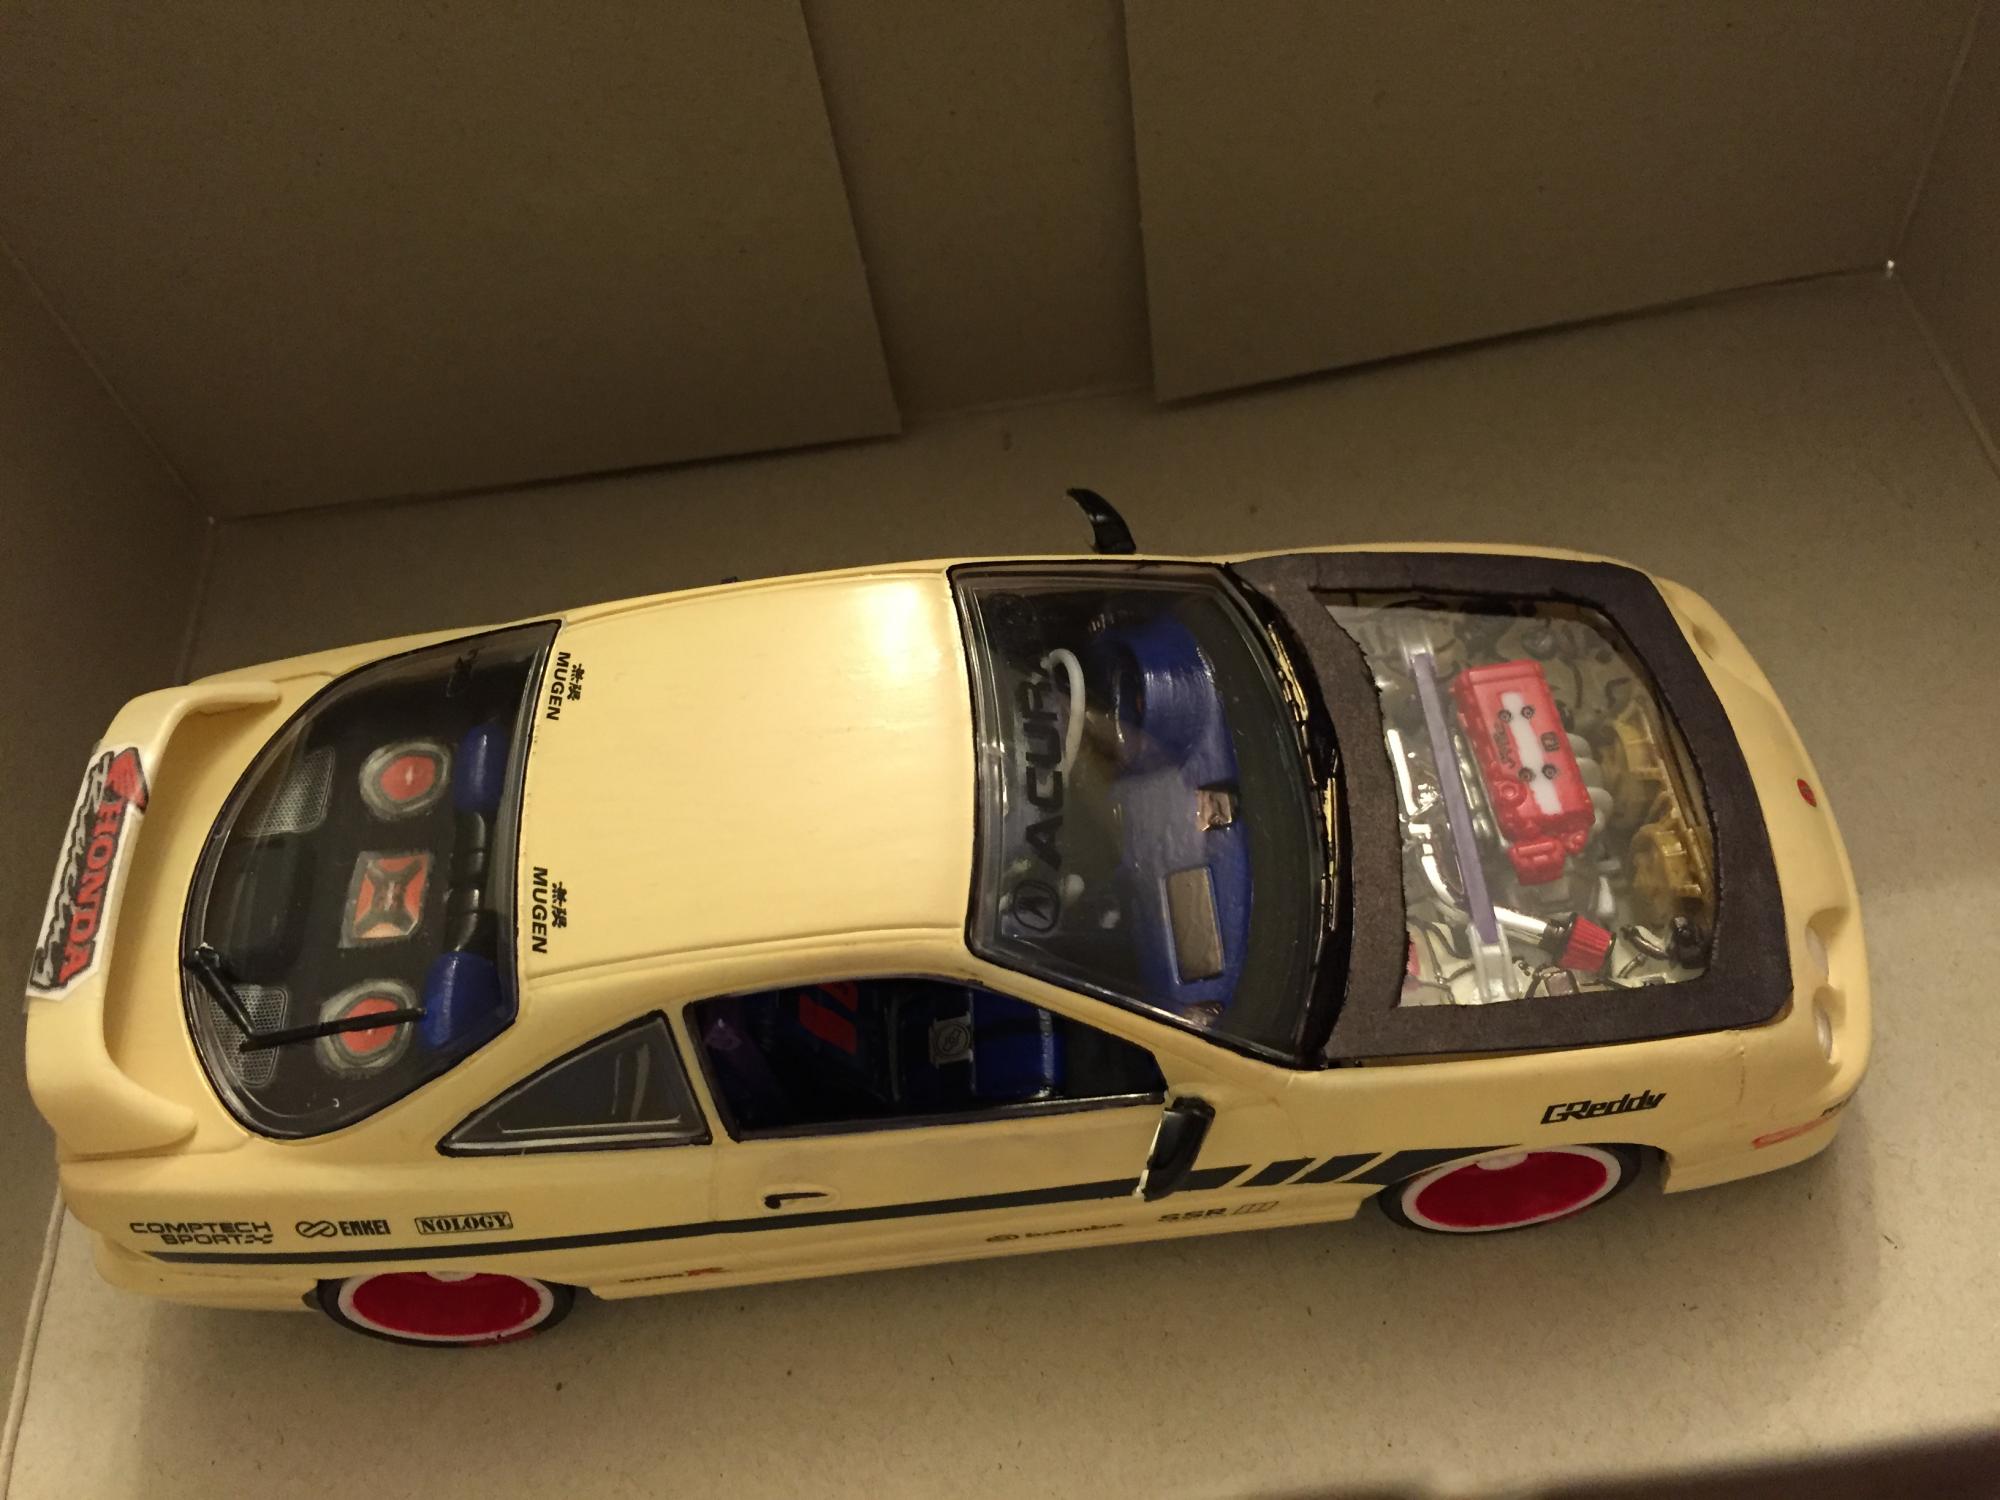
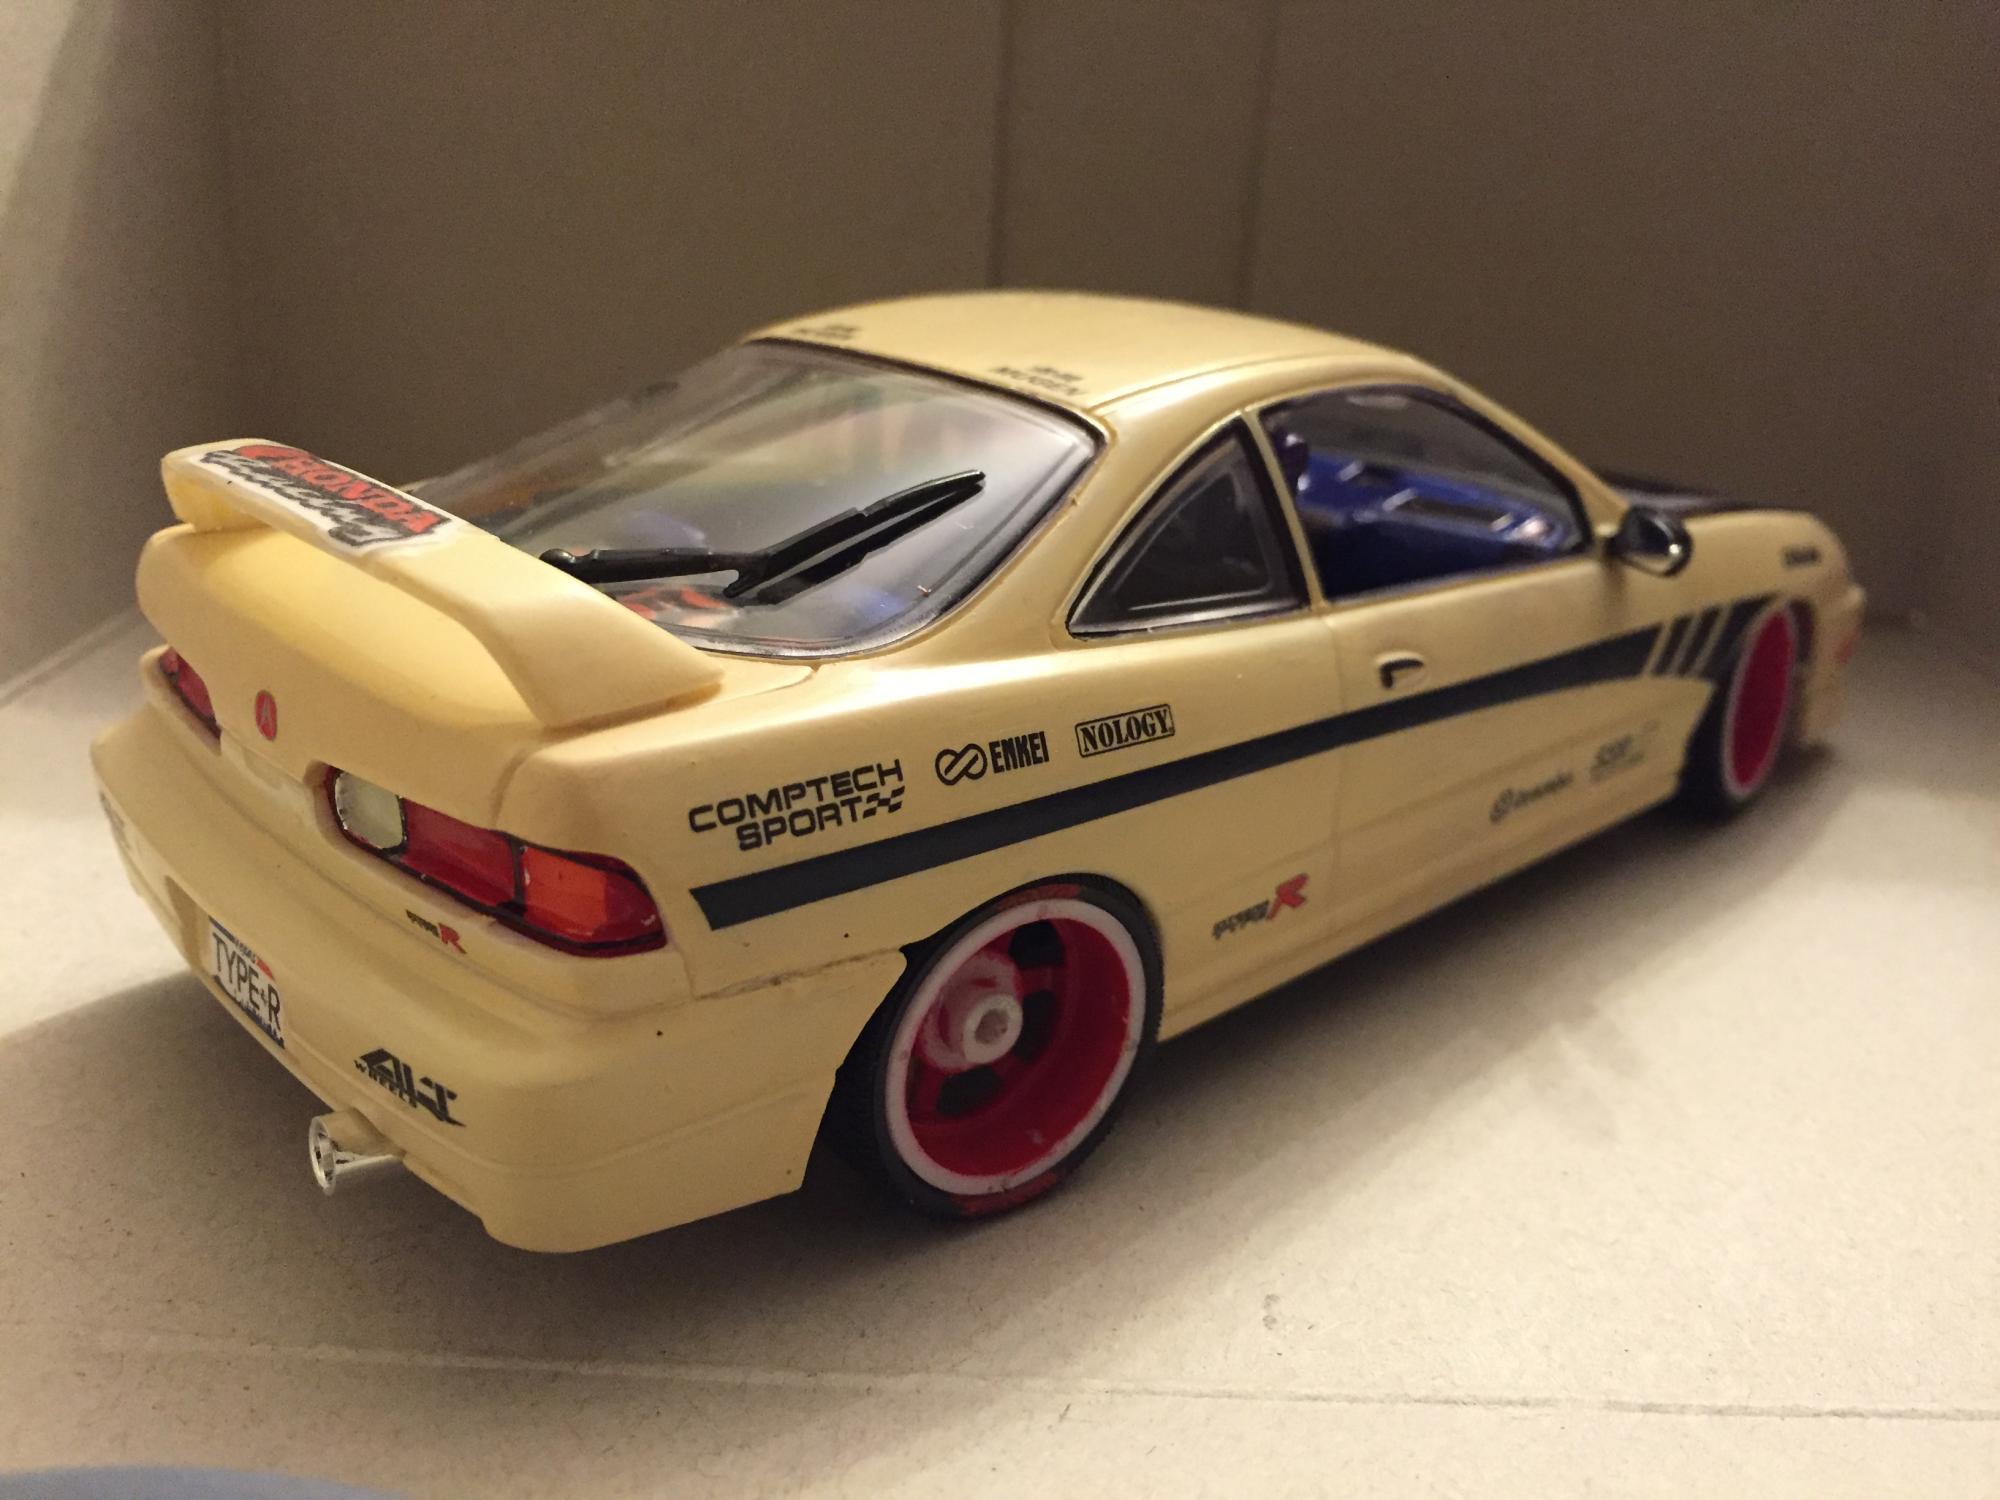
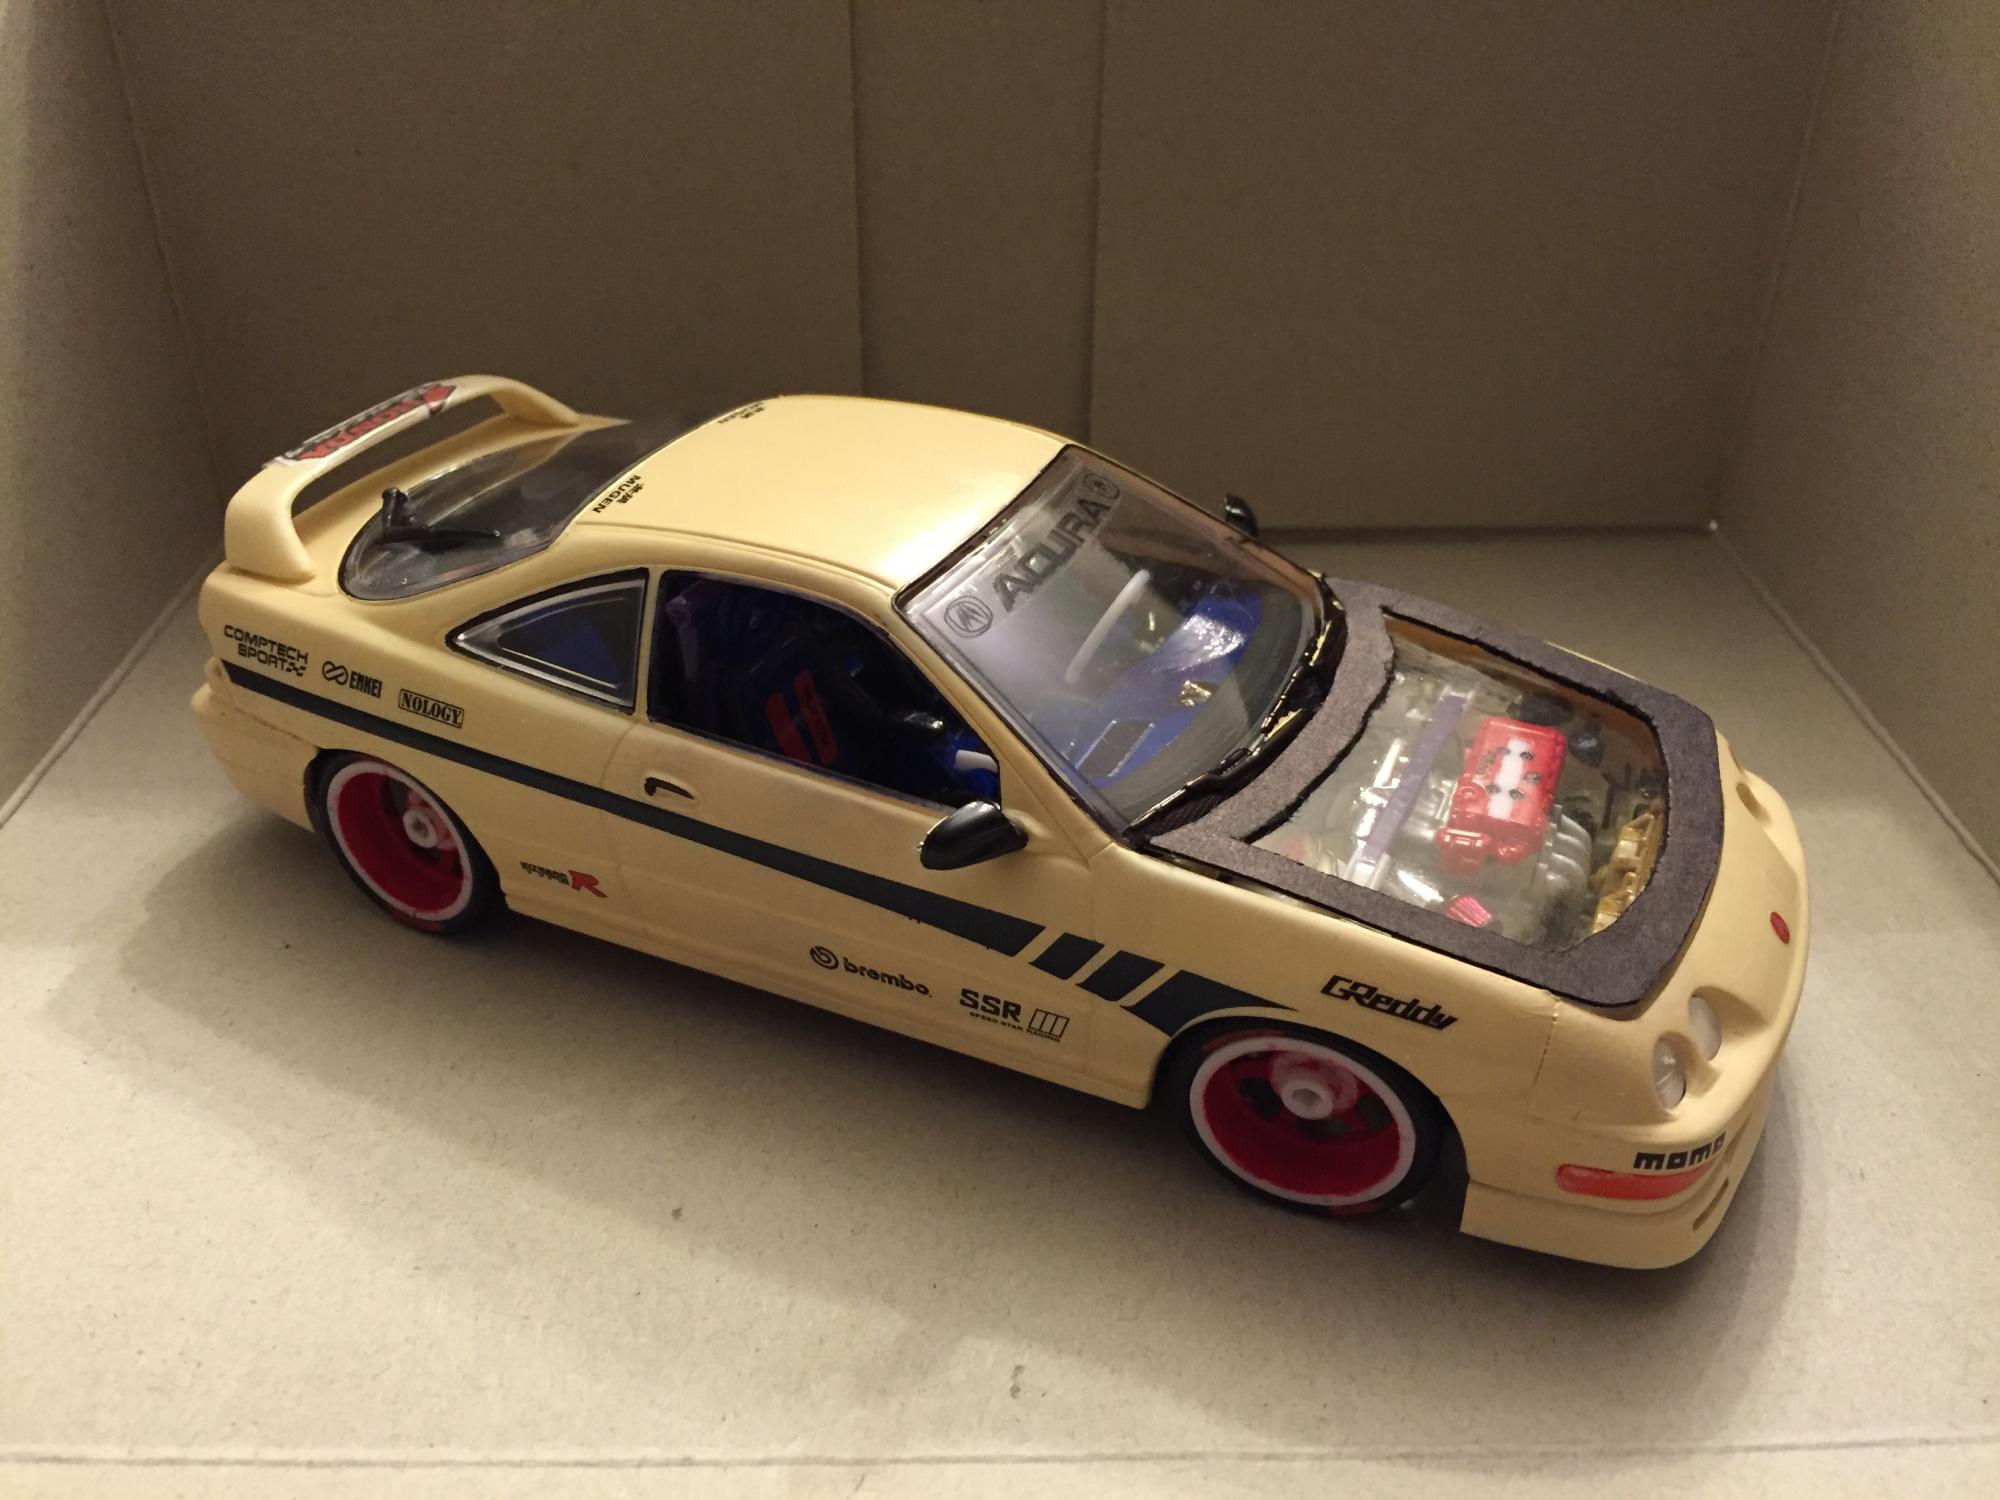
After one and a half months, this build is finally finished. A lot of unexpected life stuff went on during the build, and I used it as a stress reliever to help ease my mind on things. Was going for a Street Tuner style and hopefully did not turn it into a Ricer along the way
 . Extra care was taken to make it look as best as I can at this point. Notable changes include a "glass" see-through hood made out of a clear plastic container and cardboard, reversing the stock rims for a bigger offset (no brakes btw but who needs 'em? ), adding Sony Xplod subwoofers and amplifier to the rear dash, a simple 2-point roll bar, adding a "Honda Racing" logo on the spoiler, and using all 10 different sponsor decals (2 for each).
Thank you for looking.
-
Looking good!
Thanks Stephen, much appreciated!
-
Well done, you should head into the trails now that you have many 4X4's
Thank you Dan! 4x4's are awesome, if only I had more kits of them...
-
Your model collection is growing. And it appears your skill level is improving as well. Nice job on the Datsun.
Be Well
Gator
Thank you very much Gator!
-
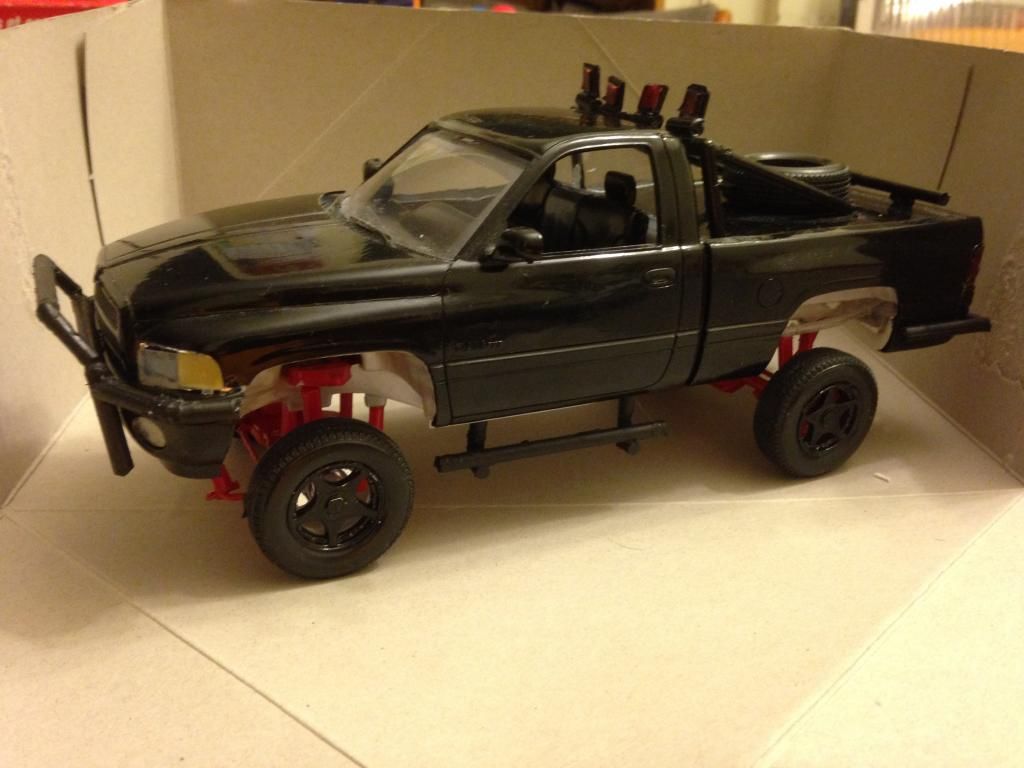
Hi All,
I completed this build yesterday. Kit is from Revell. Only modifications were a toolbox in the bed of the truck and a slight body lift. Fun and simple to put together.
Photos:
Multi-Poster:
Truck Group:
Thank you for looking!
-
Tough looking truck, Tink. I'm noticing a trend here in fortified go-anywhere pickups.
Thanks! That is pretty much what I am going for here, glad you picked up on it. Got one more truck to do in this field, a Datsun 4x4 pick-up, although it won't be as heavily modified as the Ford and GMC (hopefully) as trying to make the mods look decent are really taking a toll on me (the scratch-building seems to never end...), I am thinking of just doing a simple body lift and adding a toolbox for the Datsun (and using the stock tires).
Glad you enjoy it!Sits nice and high
Thank you! I am really happy with the ride height as well, being just right and not too tall that it looks like it will wobble over standing and not too short where the tires will rub the fenders. It actually looks like the way a lot of these Fords are set-up in 1:1, with a nice lift and big tires.
Glad you like it! -
In addition, here are some side-by-side photos with the WreXploration. Surprisingly the Ford is considerably higher even though they have the same amount of lift (1/2 centimeter), which could be caused from tire height and naturally sitting higher (possibly?).
And an updated multi-poster:
Last of all, I took these photos while I was making room to store the SuperTruck. This is my collection of models starting from when I came back to the hobby in March 2014, marking 2 years worth of work:
That is all for now. Thank you everyone for all of your support and comments through the years!
-
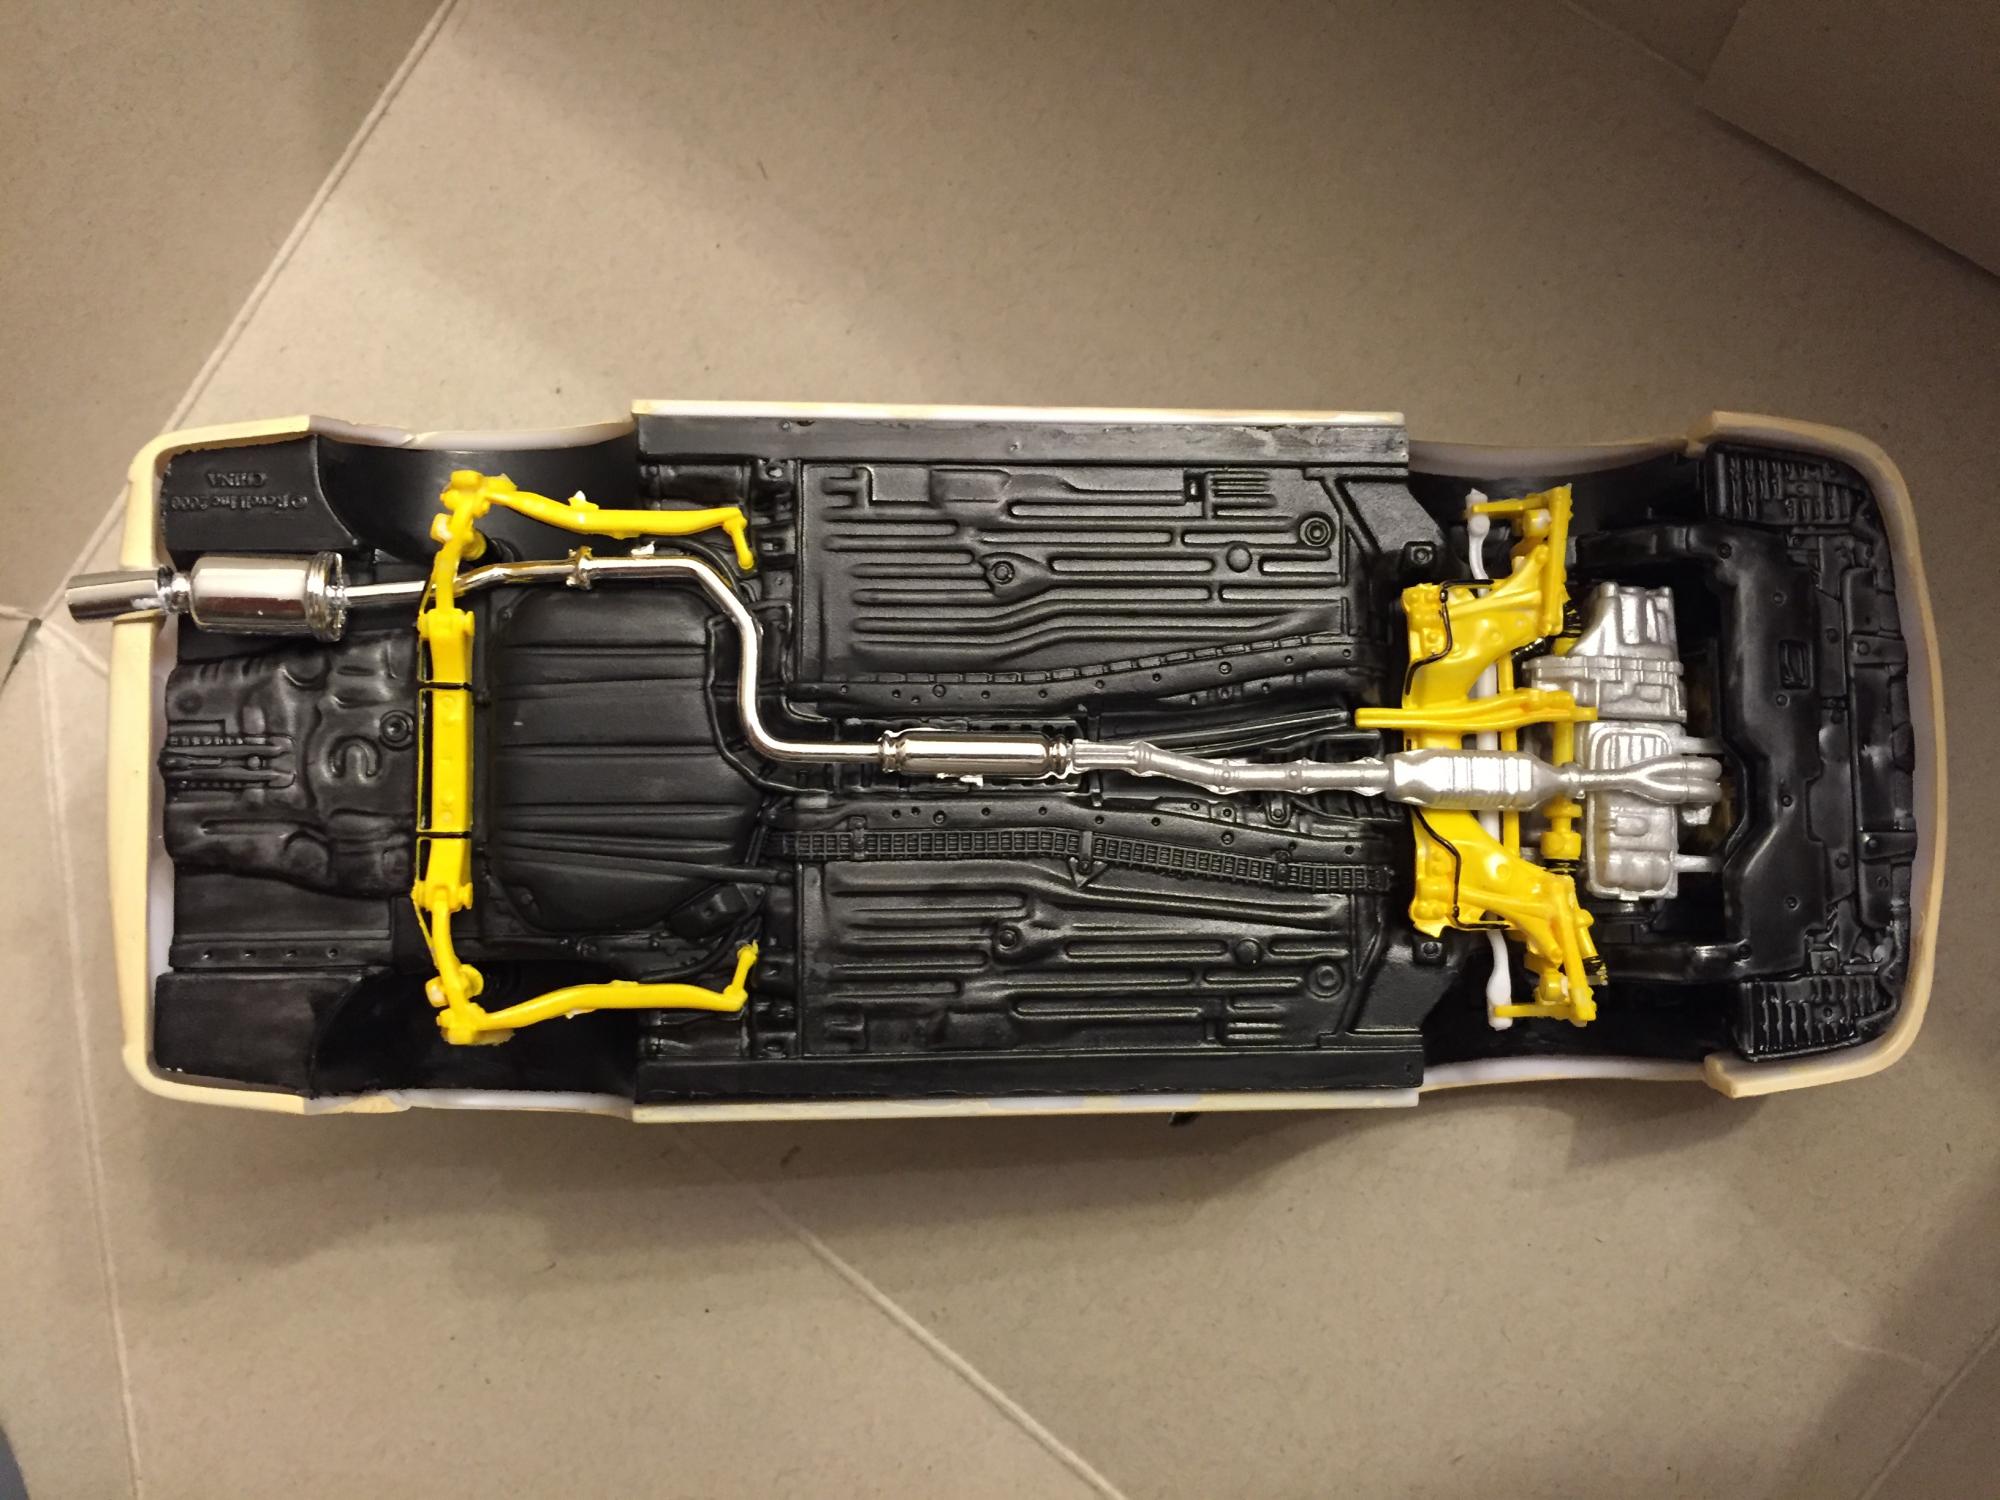
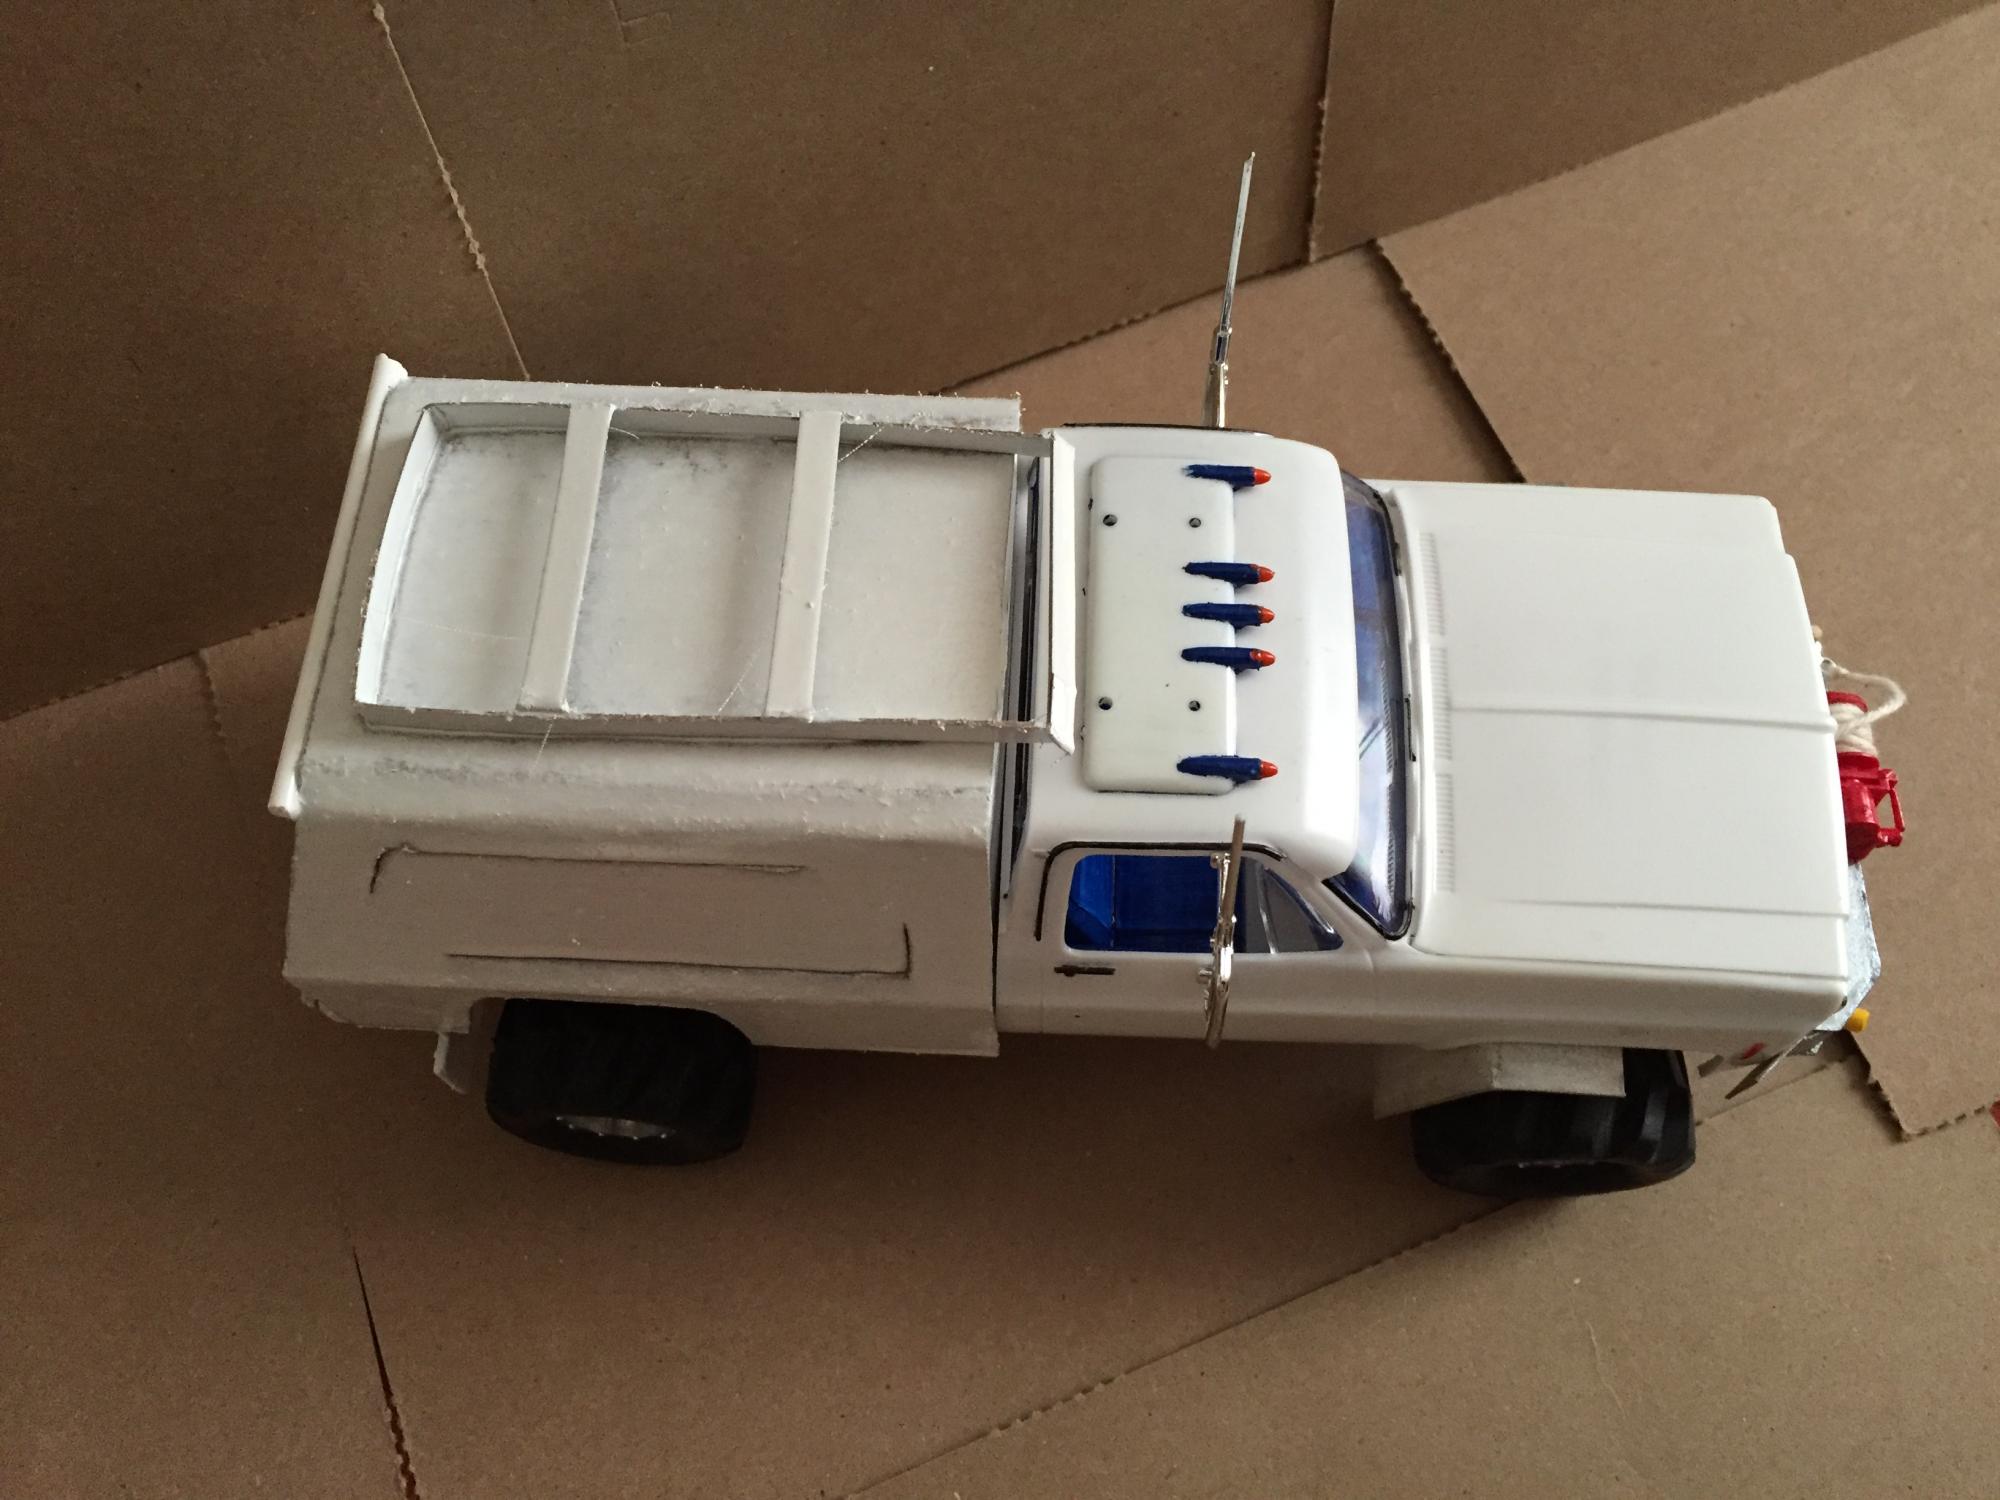
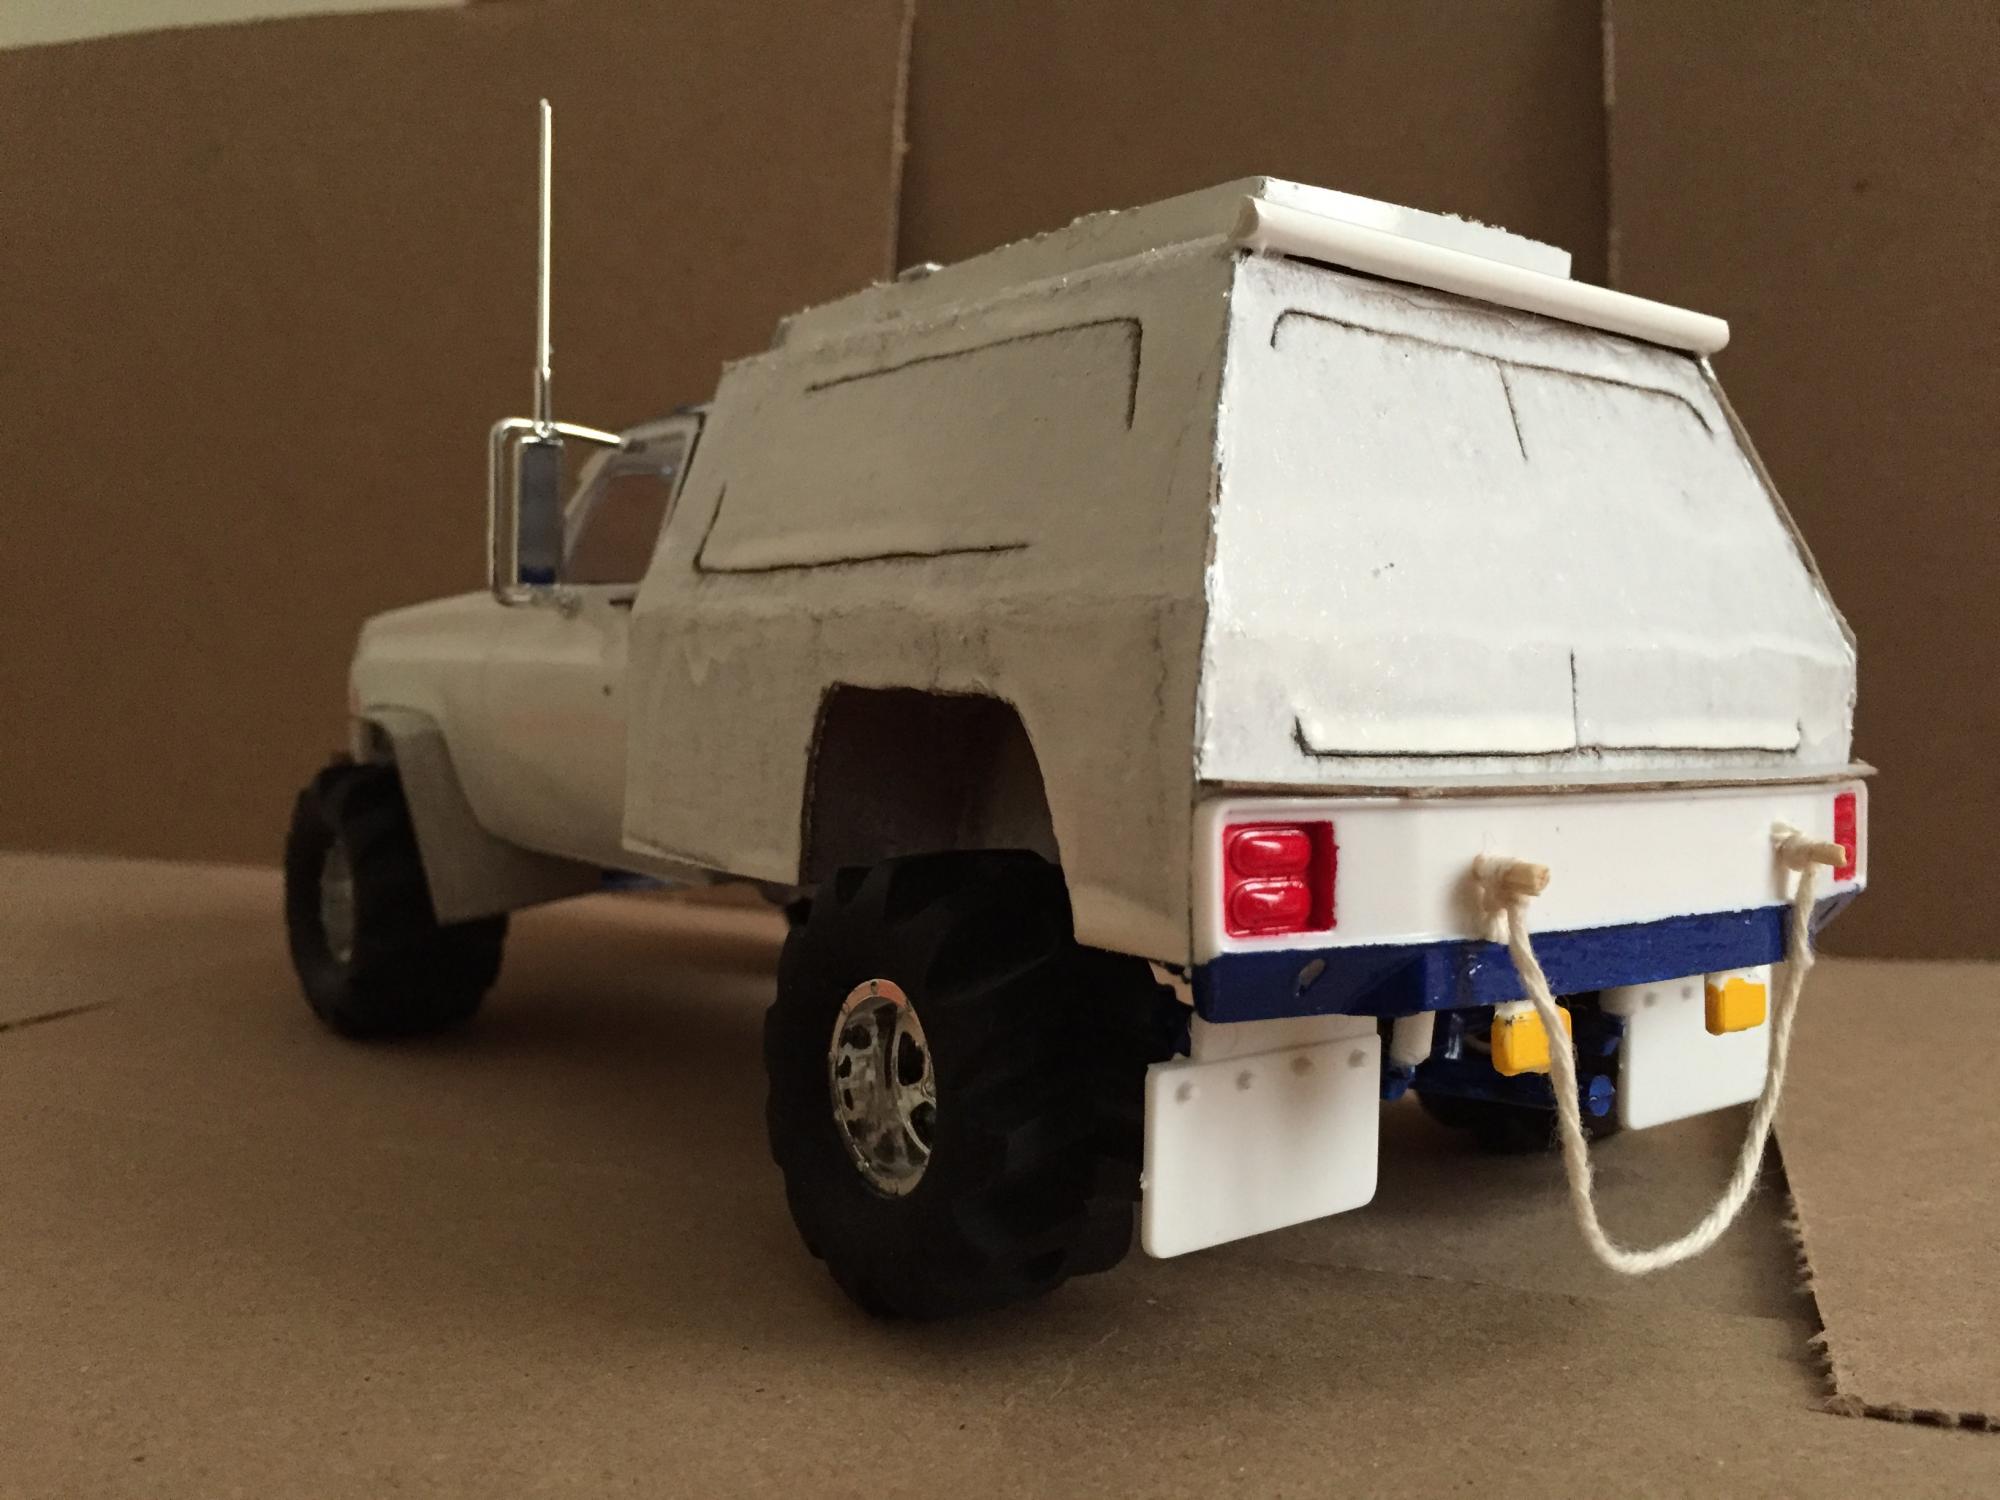
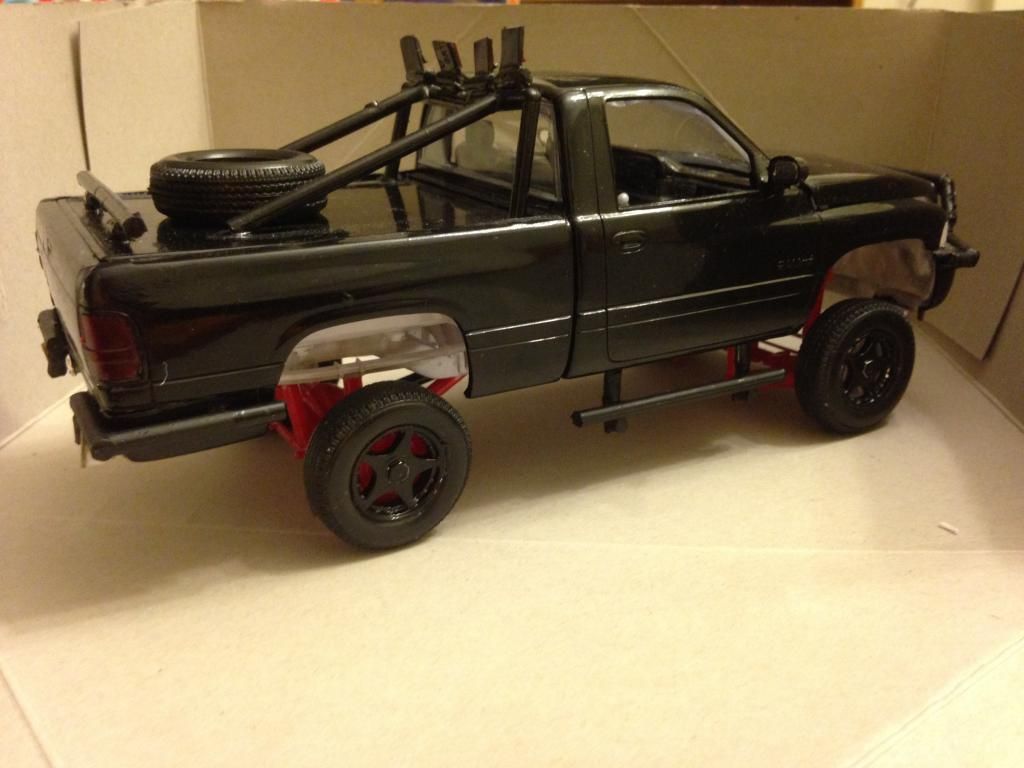
Hi All,
Finished this build yesterday. It is the Firestone SuperStones kit from AMT which I bought on my birthday a few months ago (making it a two-year streak of buying a new kit on my birthday). Overall this was a fairly good kit to put together and was enjoyable yet challenging. The body was painted with Testor's and Sharpie (for the black trim).
Here is the list of modifications:
- Custom Front Push Bumper made from sprue and cardboard. The kit's push bar was incorporated and the built-in fog lights were relocated to the center from the sides. Cotton twine was used to make the rope wrapped around the bumper. A front receiver hitch was made by leaving excess sprue on the main support.
- A lift kit was added by placing 1/2 centimeter long sprue in between the leaf springs and axle in the rear (similar to the WrexploratioN I recently built) and approx. 1-1/2 centimeter long sprue in between the upper A-Arm and axle in the front (with the complete removal of the stock coil springs). Twine was used to cage the axles into the custom suspension.
- Tires were taken from an old toy along with its axles and used on this build as the stock tires looked too small with the lift kit on.
- A large, singular rear mud flap was made from cardboard and coloured with Crayola pencil crayon. The rear hitch receiver was added thanks to a piece of sprue. Sprue is wonderful...
- Custom Box Cap made from sprue and cardboard. The kit's fog light covers were added to the front of the roof rack to make fog lights.
- Lastly, a canoe was scratch-built out of cardboard and Scotch tape.
On to the pictures:
Box Art:
Thanks all for looking and hope you like it!
-
Awesome build! Very shiny!
-
Nice work! That is a wonderful back story, my family has also been heavily impacted from breast cancer making this all the more touching.
-
Very nice work!
-
Nice work, really like the paint colour!
-
Wow, very nice model! I really like those Mopar decals, kinda makes me jealous! Also digging that green paint job, well done!
-
Great imagination with that kit. Nice work.
Thank you!
Hey Tink, Those are great looking !!
Where did you get those wheels and tires at ?
Keep 'em coming
Cheers
Thanks! I got the tires from an old toy that I recently rediscovered. Do not know what it was exactly or who made it as the body was missing and there are no identifiable markings on it. If I remember correctly, if you stuck a battery in it, it would go forward until it hit something and if you flipped the switch it would go backward until it hit something. Here is a picture of it disassembled and without the tires:
-
Thanks all for the wonderful comments!
-
Also made up some posters for all of my builds:
-
Hi All,
Just completed this build. Purchased the kit way back in December 2014 at Hobby Lobby during a United States trip. However I did not start building it until a whole year later in December 2015. I am not really that into tow trucks so I decided from the start that I would scratch build my own box and took some inspiration from the Earth Roamer Xpedition vehicles when designing it, hence the self-named WreXploratioN (a play-on of "Wrecker" and "Xploration" - which would possibly be a smaller version of the Xpedition). Overall this was a fairly enjoyable build that was easy to put together and came out great.
Here are the modifications that were made:
- A custom off-road front bumper was made out of cardboard along with sprue for the yellow fog lights, all of which was painted with Testor's.
-The winch and hook that came with the kit was relocated to the front on top of the bumper and cotton twine was used for the cable. Part of a toothpick holds the hook onto the bumper.
- Custom front fender flares were also made out of cardboard and painted with Crayola pencil crayon.
- A small lift kit was added by placing 1/2 centimeter long pieces of sprue on where the springs attach to the chassis.
- As the stock tires were taken for my Dodge Ram model, I had found an old toy that was broken and used the tires off that.
- A custom box and roof rack was made for the rear portion of the GMC, made out of cardboard as well and spray-painted with Power Fist's Fast-Dry Anti Rust (from Princess Auto). The stock bumper was fitted in, with twine to make the rope and toothpicks to hold it.
- The rear hitch receiver was made by simply leaving on the excess sprue that came on the chassis
- Sharpie was used to darken the trim around the windows and the door handles.
On to the pictures:
Box Art:
Thanks for looking! Have a great rest of the day!
-
Thanks all for the nice replies!
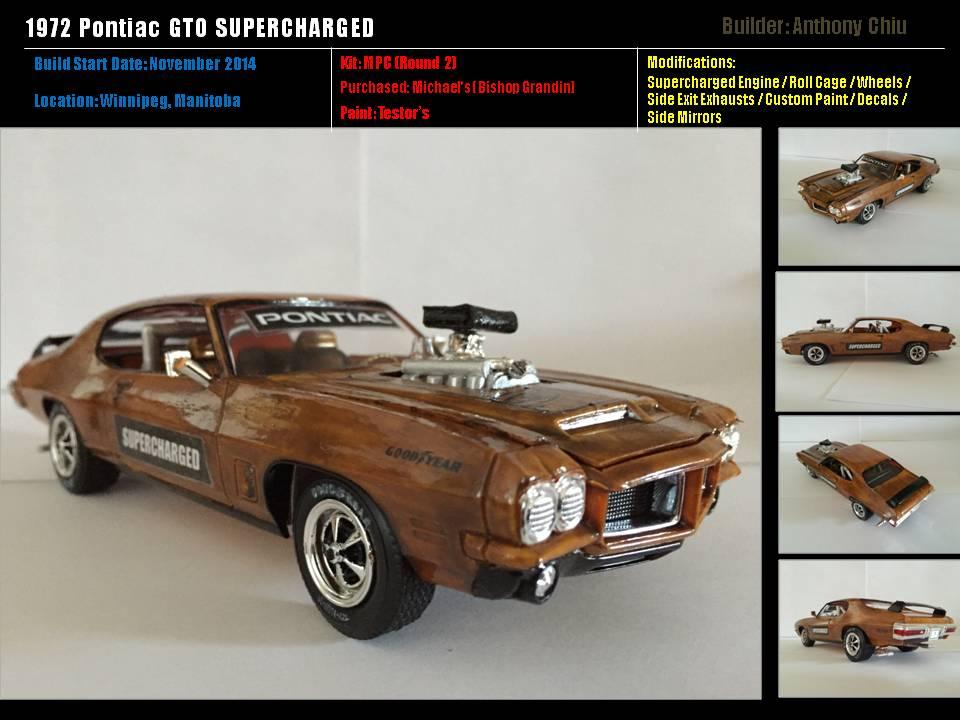
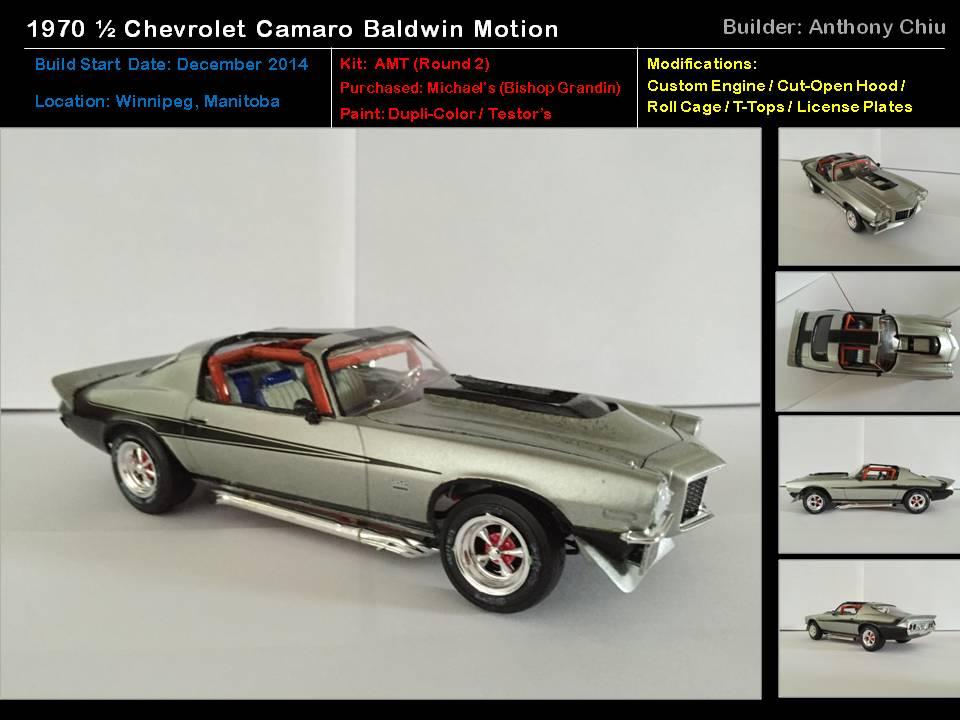
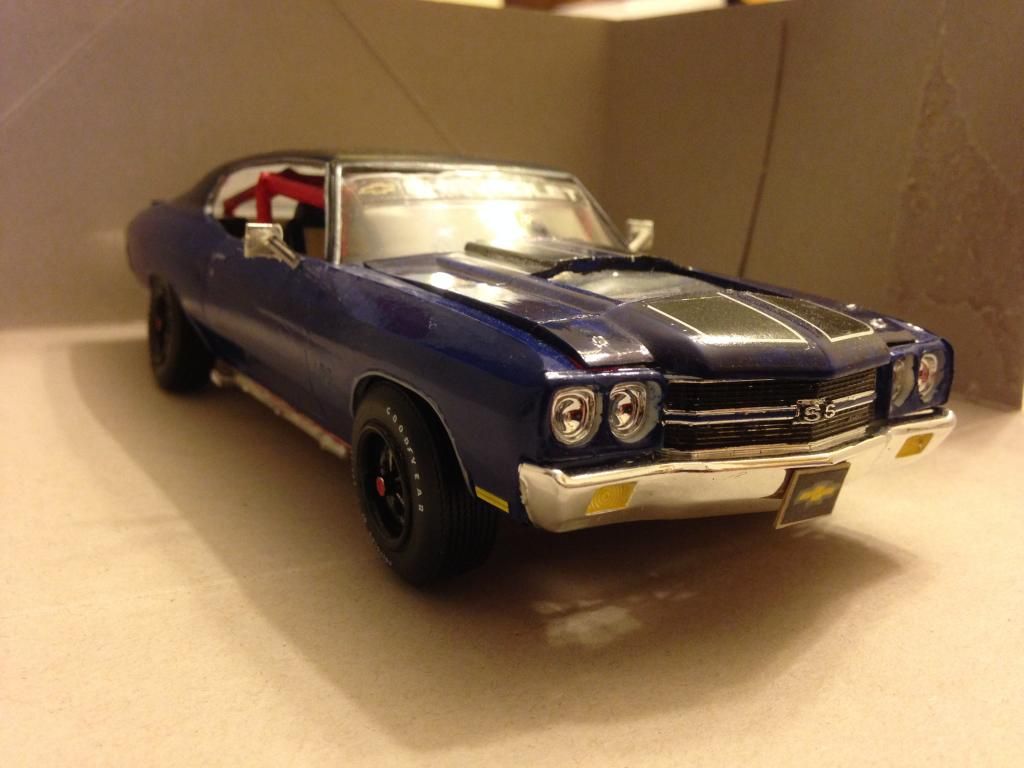
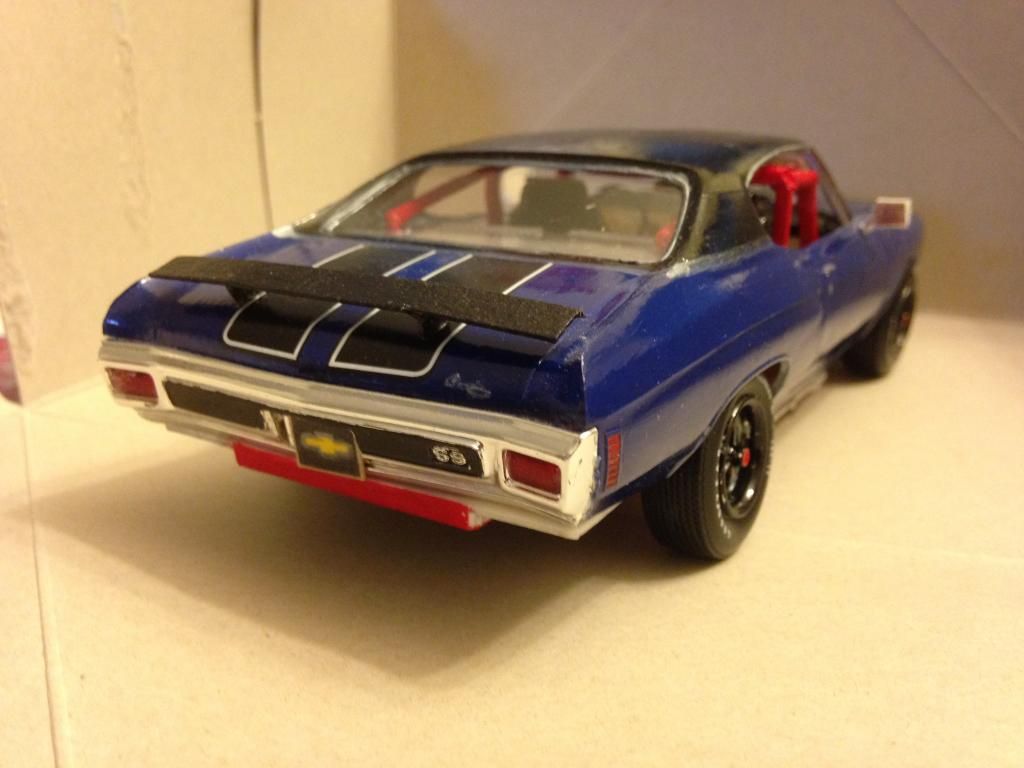
I thought it would be innovative to make mirrors out of sprue and I am glad you liked it. The GTO originally came molded in orange, but I wanted it to be brown/gold like the box art and hand painted it with Testor's acrylic which has worked out well before but as you can see in this case not as much. I first put on a base coat of yellow, then added about 4 - 5 layers of metallic gold and the colour came out very unique-looking; to the eye the body looks like a piece of wood that was stained. After that happened I took a break from building and since coming back have tried to replicate the same colour tone but cannot so decided to leave it as it is, a uniquely yet-oddly coloured body. The Baldwin Motion came molded in dark green but I wanted it to be silver, and from just experiencing what happened to the GTO, I decided to spray paint instead of using a paint brush. Actually did it a couple of weeks ago outside in minus Celsius weather and had light snow coming down but turned out alright after 3 coats.
Glad you all enjoyed it! Diligently working on my next model which should be on here soon.
-
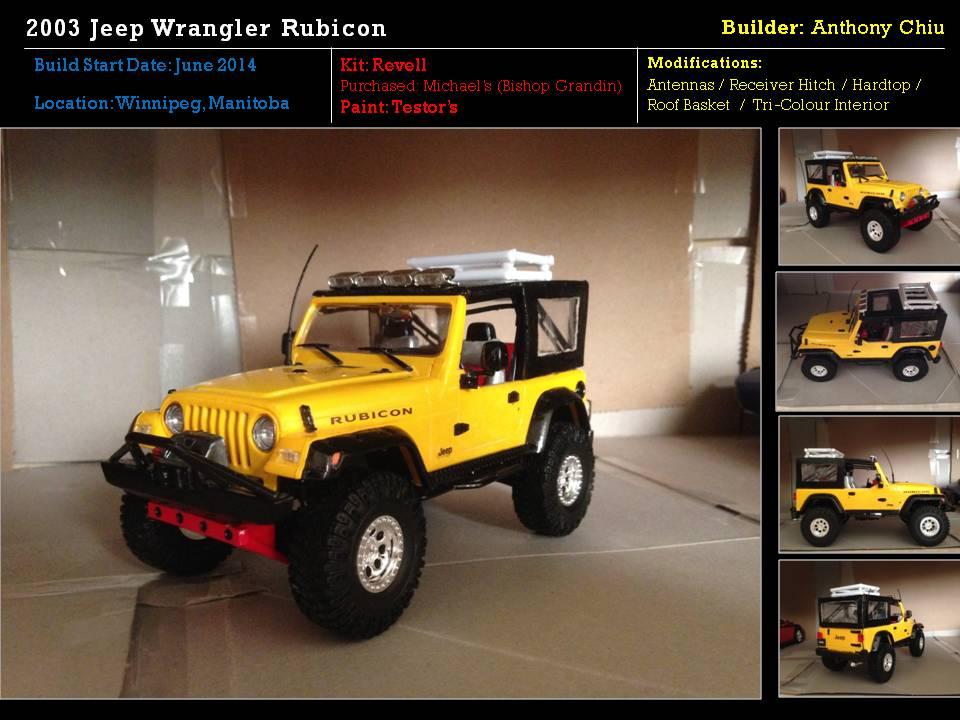
Hi,
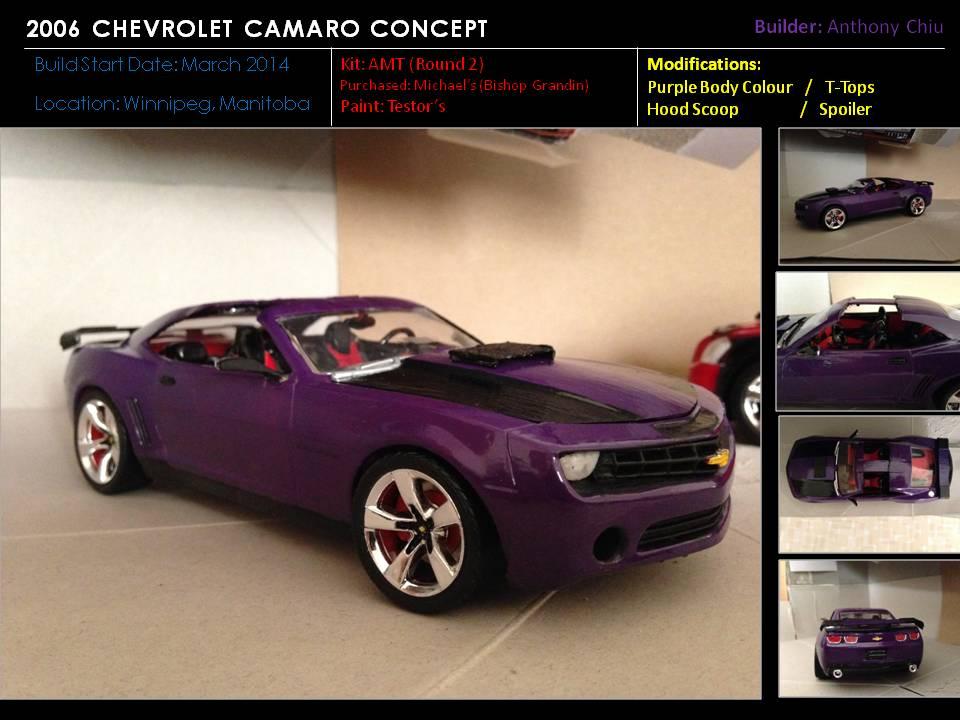
I haven't been on this forum for a very long time. It's been one crazy and wild year, a lot of life-changing events. Anyway, I made about 5 models back in 2014 with 2 unfinished ones. I was not completely happy with the way that they turned out, so I decided to tear them down as much as I could and rebuild them to my satisfaction in 2015. I rebuilt the Camaro Concept, Magnum, and Wrangler through April - June 2015. Just in these past few weeks, when school was finally over for holidays and life was beginning to get back to somewhat normal, I rebuilt the Ram, Chevelle, GTO, and Camaro Baldwin Motion. Even though they were started in 2014, I made some pretty dramatic changes to them in 2015 (such as actually cutting up the roof on the Camaro Concept to make a real T-top), and I hope that is alright. Well, here they are:
Thank you very much, and have a happy holiday.
-
Okay, last post on this thread, I swear.
Light Nite. Added a custom push bar, nerf bars and rear bumper with lights.
Heavy Muscle. Added license plates.
Got a new model kit to play with: MPC 1972 Pontiac GTO. yay!
Thanks for reading!
-
aw, that's a cute little tractor. Good work on the conversion!
-
Nice! A lot of detail. How does the Corvette get in and out?
-
Very cool truck! I like the stance.
 . Extra care was taken to make it look as best as I can at this point. Notable changes include a "glass" see-through hood made out of a clear plastic container and cardboard, reversing the stock rims for a bigger offset (no brakes btw but who needs 'em?
 ") ), adding Sony Xplod subwoofers and amplifier to the rear dash, a simple 2-point roll bar, adding a "Honda Racing" logo on the spoiler, and using all 10 different sponsor decals (2 for each).
), adding Sony Xplod subwoofers and amplifier to the rear dash, a simple 2-point roll bar, adding a "Honda Racing" logo on the spoiler, and using all 10 different sponsor decals (2 for each).


![URL]](http://%5BURL=http://s32.photobucket.com/user/TidyAnt/media/Camaro%202015_zpsnwn0oczz.jpg.html%5D%5BIMG%5Dhttp://i32.photobucket.com/albums/d47/TidyAnt/Camaro%202015_zpsnwn0oczz.jpg%5B/IMG%5D%5B/URL%5D)


Acura Integra Type R
in Model Cars
Posted
Fantastic and clean build Ethan! I also just completed my version of this. Integra power!!!